Forms are the primary way that Lead Gen & CRM receives information regarding a potential lead. This information can then be used to send an email to the lead, initiating the lead-nurturing process.
Learn how to create, edit, and manage your forms.
| Tip: Are you looking for information about Constant Contact’s Email and Digital Marketing product? This article is for Constant Contact’s Lead Gen & CRM product. Head on over to the Email and Digital Marketing articles by clicking here. Not sure what the difference is? Read this article. |
| Administrators | ✓ | |
| Company Managers | ✓ | |
| Marketing Managers | ✓ | |
| Sales Managers | ||
| Salespersons | ||
| Jr. Salespersons |
In addition to Constant Contact forms, Lead Gen & CRM also allows you to create two other types of forms: native or third-party.
Refer to Connecting Native and Third-Party Forms for information on creating these forms.
You can create forms that gather lead information.
To create a Constant Contact form, do the following:
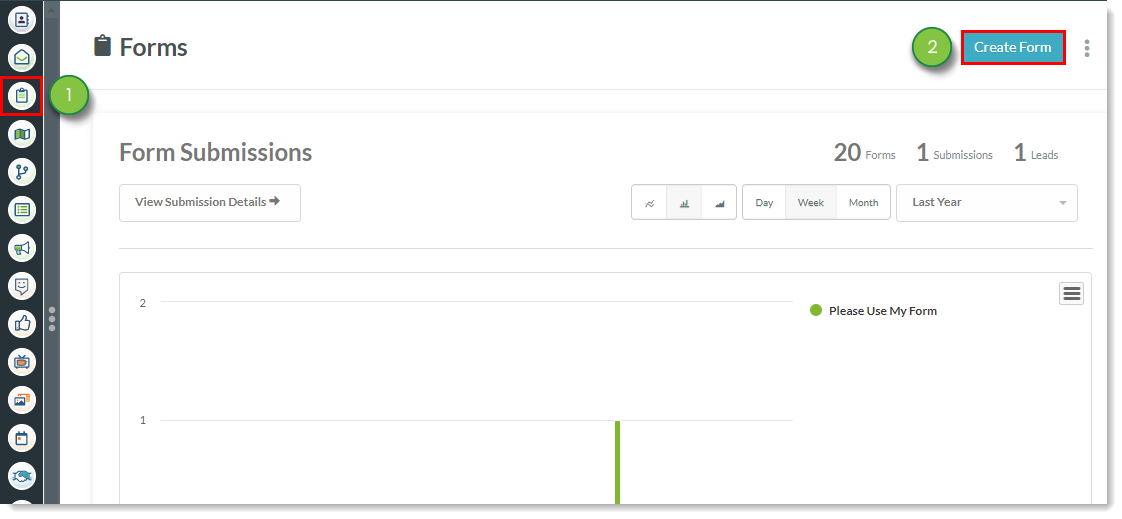

You'll be brought into the Form editor, where you can add fields and format the content.
To host your form, paste an embed code into a webpage. Refer to Form Embed Code Overview for more information on embed codes.
Once you have created and saved a Constant Contact form, you can add field and formatting content.
To add content to your Constant Contact form, create or edit a form:

Refer to the following help articles for information on further customizing form content:
Some form content has additional options available.
These options are nested under the ![]() More Options drop-down menu.
More Options drop-down menu.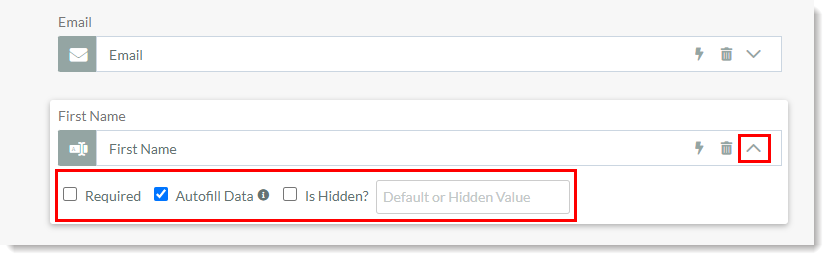
These options are as follows:
| Option | Description | |||
| Required |
Requires that the site visitor fill out this field with applicable information in order to submit the form. | |||
| Autofill Data |
Lets associated fields automatically populate with a visitor's information if they have already filled out that field. | |||
| Is Hidden |
Makes the field invisible to a site visitor who is filling out the form. If you want that field to be hidden on the form and always pass the same value when it is submitted, enter that value in the Default or Hidden Value text field. |
Be aware that these options are only available for select form content:
| Available Content | Unavailable Content | |||||
|
| |||||
|
| |||||
|
Form fields and elements can be arranged in columns. This allows for more interesting design choices and is a way to better group certain kinds of field information.
To place form fields and elements in columns, create or edit a form:
| • Fields • Elements | • Referral Fields • Special Fields |

Form fields and elements will automatically adapt to the column width. They can be moved from one column to another without losing functionality.
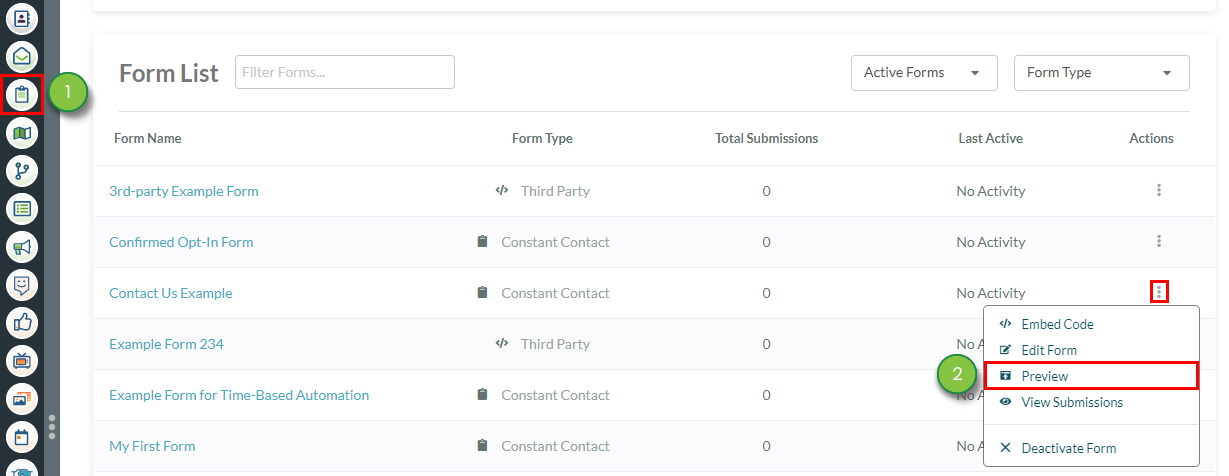
You can edit previously saved forms. To edit an existing form, do the following:

Edit the form as necessary and then click Save Changes.
You can see a preview version of your created form. This is helpful to see how it feels to interact with your form.
To preview forms:
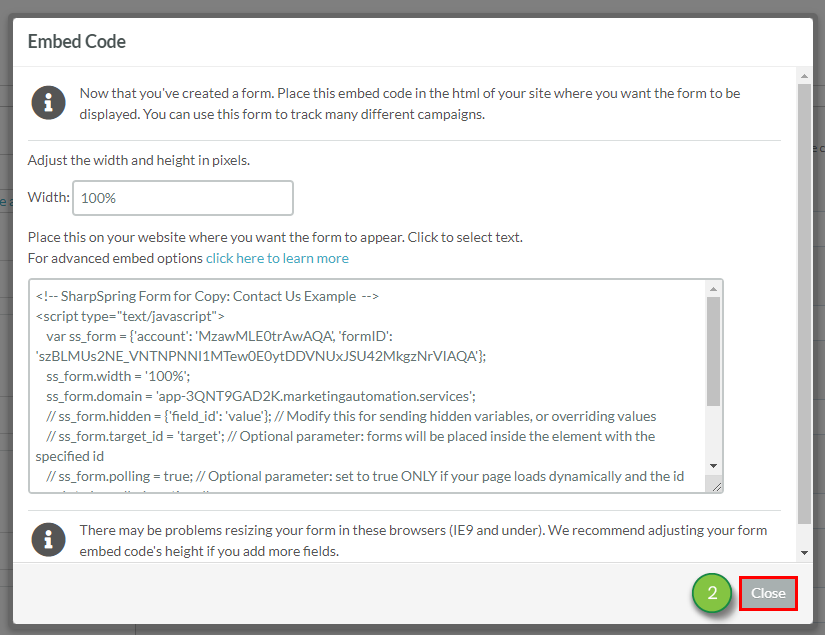
You can obtain your form's embed code. These codes allow you to embed your forms on your site.
To obtain a form's embed code, do the following:
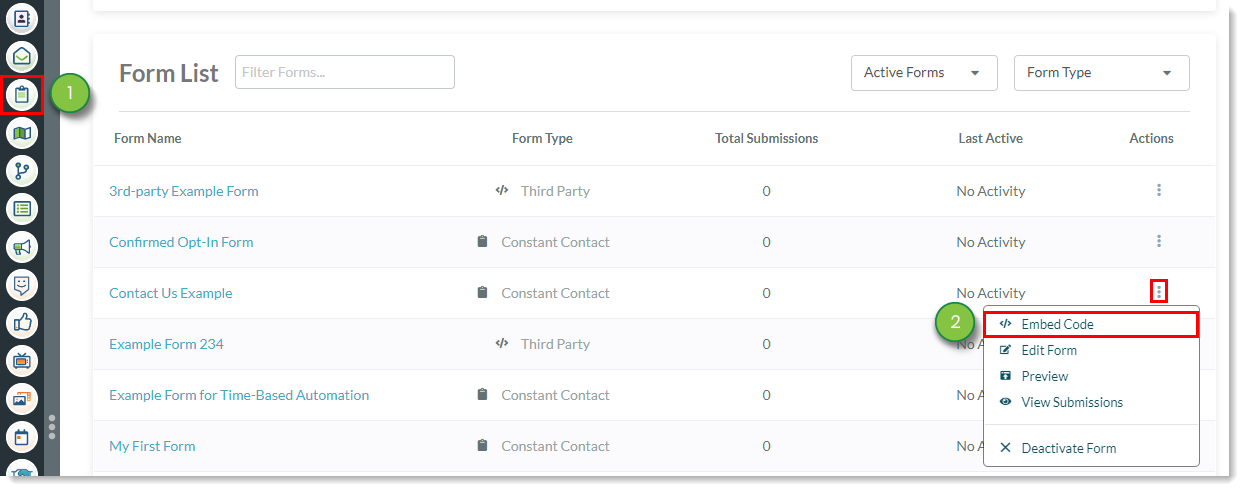
Refer to Using Form Embed Codes for more information on form embed codes.
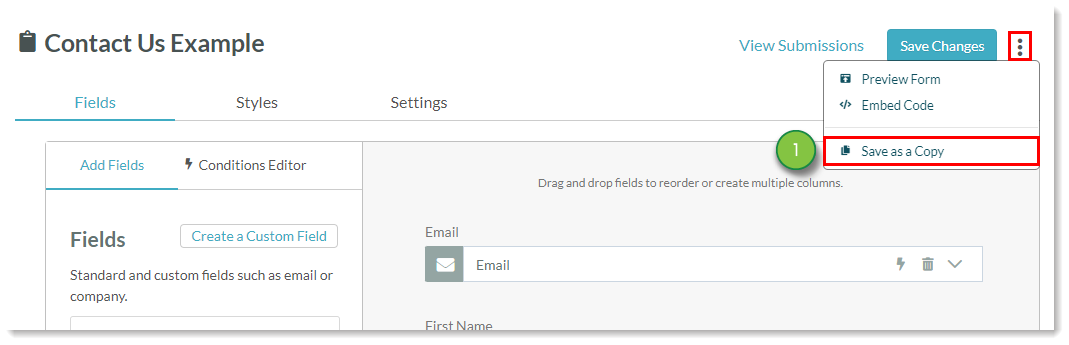
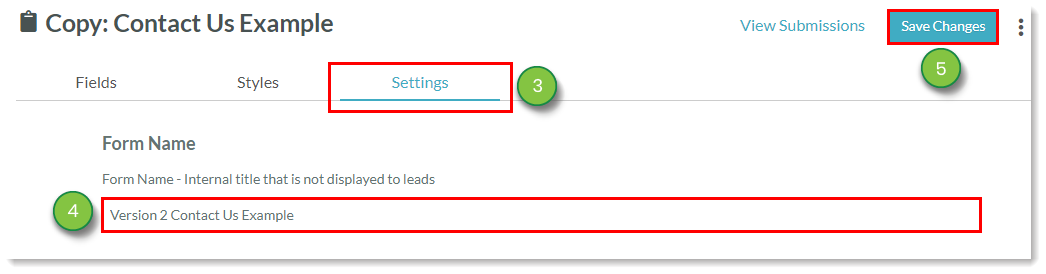
here might be times where you would like to have similar forms with only slight differences. You may also want to have identical forms on different pages to trigger different workflows. In any event, you do not need to recreate a form from scratch—you only need to copy an existing form.
To copy a created form:
While you cannot delete forms outright, you can deactivate them.
To deactivate forms, do the following:
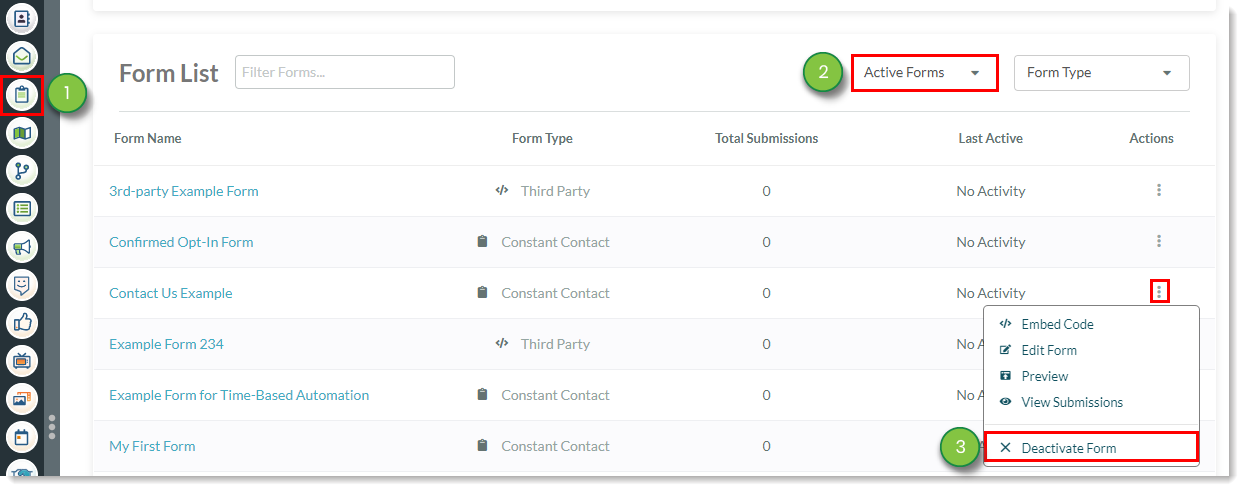
Once deactivated, the form will be moved to the Inactive Forms menu.
You can reactivate previously deactivated forms.
To reactivate a deactivated form, do the following:
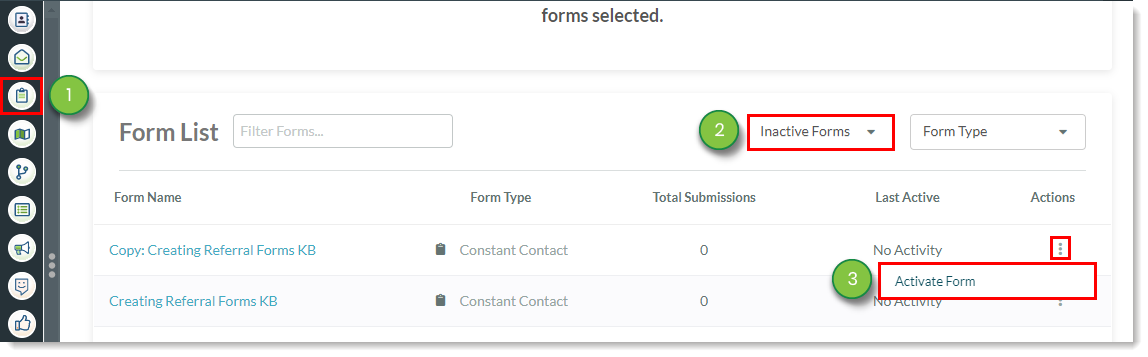
Once reactivated, the form will be moved to the Active Forms menu.
Q: How many fields should my forms contain?
A: Forms should contain a maximum of four or five fields. Listing more fields is usually too much, as too many fields bloat the form in both style and substance.
Q: Can fields show only under certain circumstances?
A: Yes. You can choose how fields show. Some fields can be set to always show or only show if a lead has not filled out that field before.
Q: How do I set autofill features?
A: Check the Autofill Data toggle to fill data automatically. This lets associated fields automatically populate with a visitor's information if they have already filled out that field.
Q: Can I use custom fields in forms?
A: Yes. Utilize the Create Custom Fields link. Custom fields allow you to better customize and specialize forms.
Q: What are the main tracking limitations?
A: You may find that forms with referral fields will not track data. When using referral fields, be aware that the fields do not establish tracking. Referral fields do create a second contact record for that referral. When using referral fields, send an email to that referral stating that they were referred. This encourages the referred visitor to visit your website and/or fill out a form to establish tracking.
Copyright © 2026 · All Rights Reserved · Constant Contact · Privacy Center