Lead Gen & CRM enables you to connect and map your website's native and third-party form data to your Lead Gen & CRM custom fields. The Mapping Tool for Forms can be used to track the existing forms on your website, rather than replacing them with a Lead Gen & CRM form.
| Administrators | ✓ | |
| Company Managers | ||
| Marketing Managers | ||
| Sales Managers | ||
| Salespersons | ||
| Jr. Salespersons |
Before connecting native and third-party forms, be aware that certain third-party form providers will require additional steps. For information on working with individual third-party forms, refer to the following help articles:
To use a Lead Gen & CRM form on your website instead of a native or third-party form, read Lead Gen & CRM Forms Overview.
Native forms are forms that are already on your website. This could be a form that has been coded from scratch by your development team or a WordPress form plugin that you've used to create forms on a WordPress website.
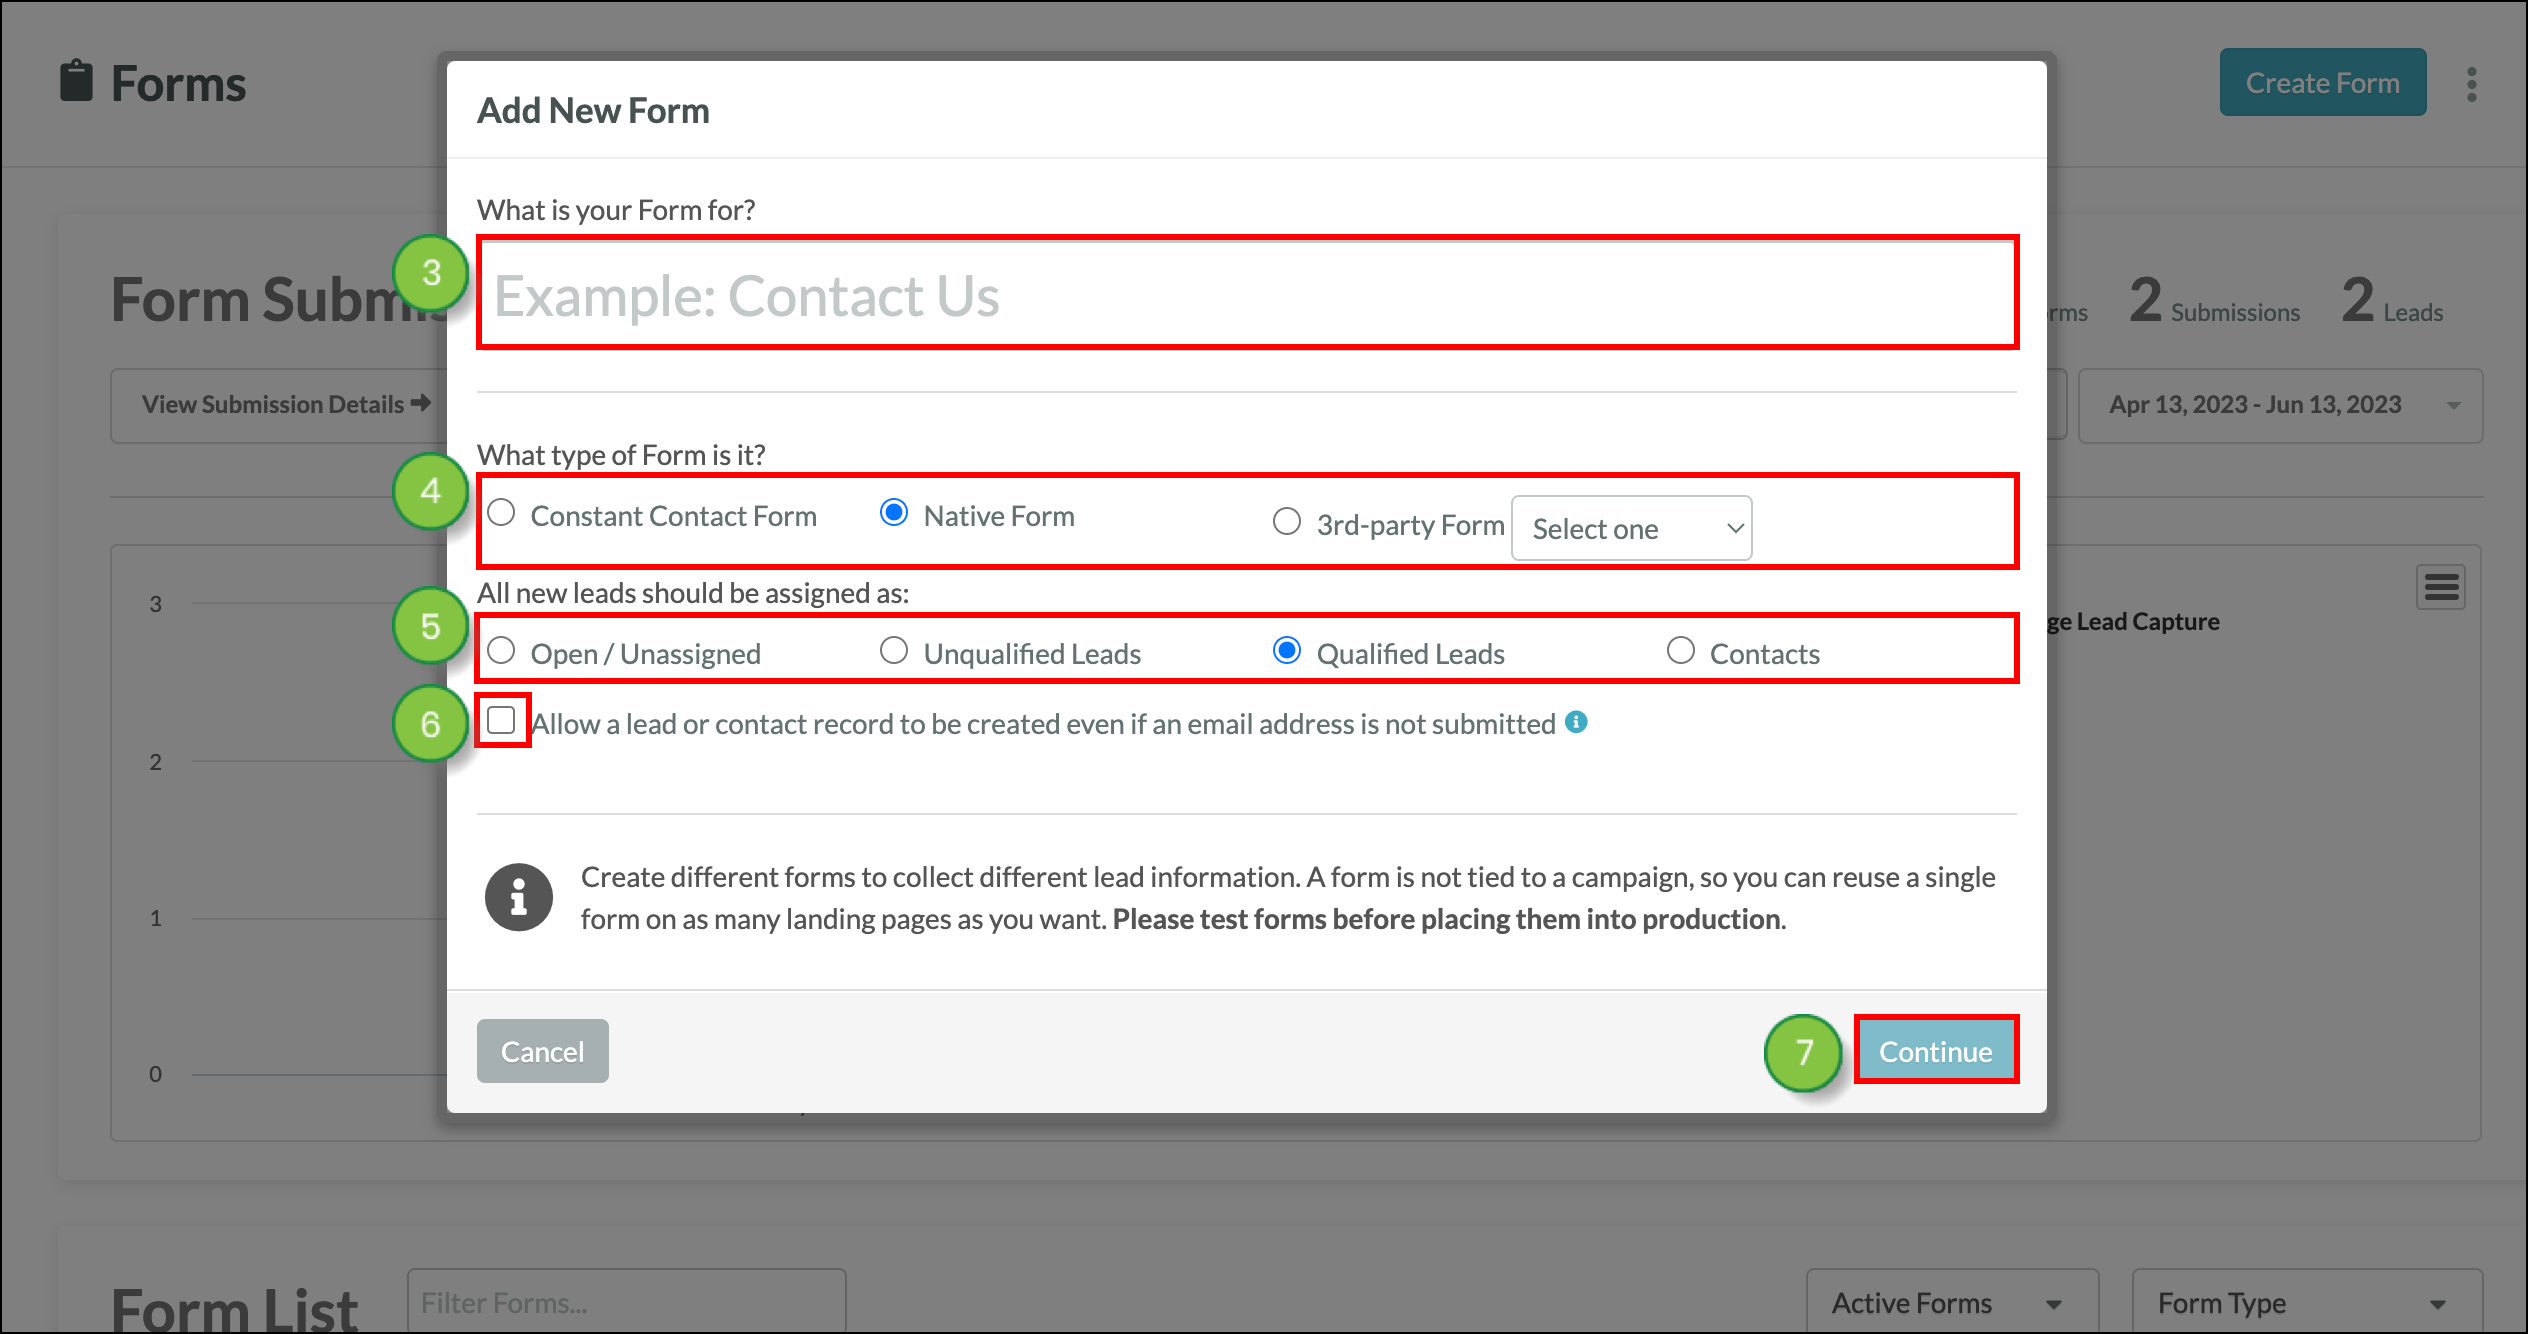
Once you have the form on your website, create a corresponding form in Lead Gen & CRM. Your website's form submissions can be mapped to standard or custom fields in your Lead Gen & CRM instance.
To create a corresponding native form in Lead Gen & CRM, do the following:
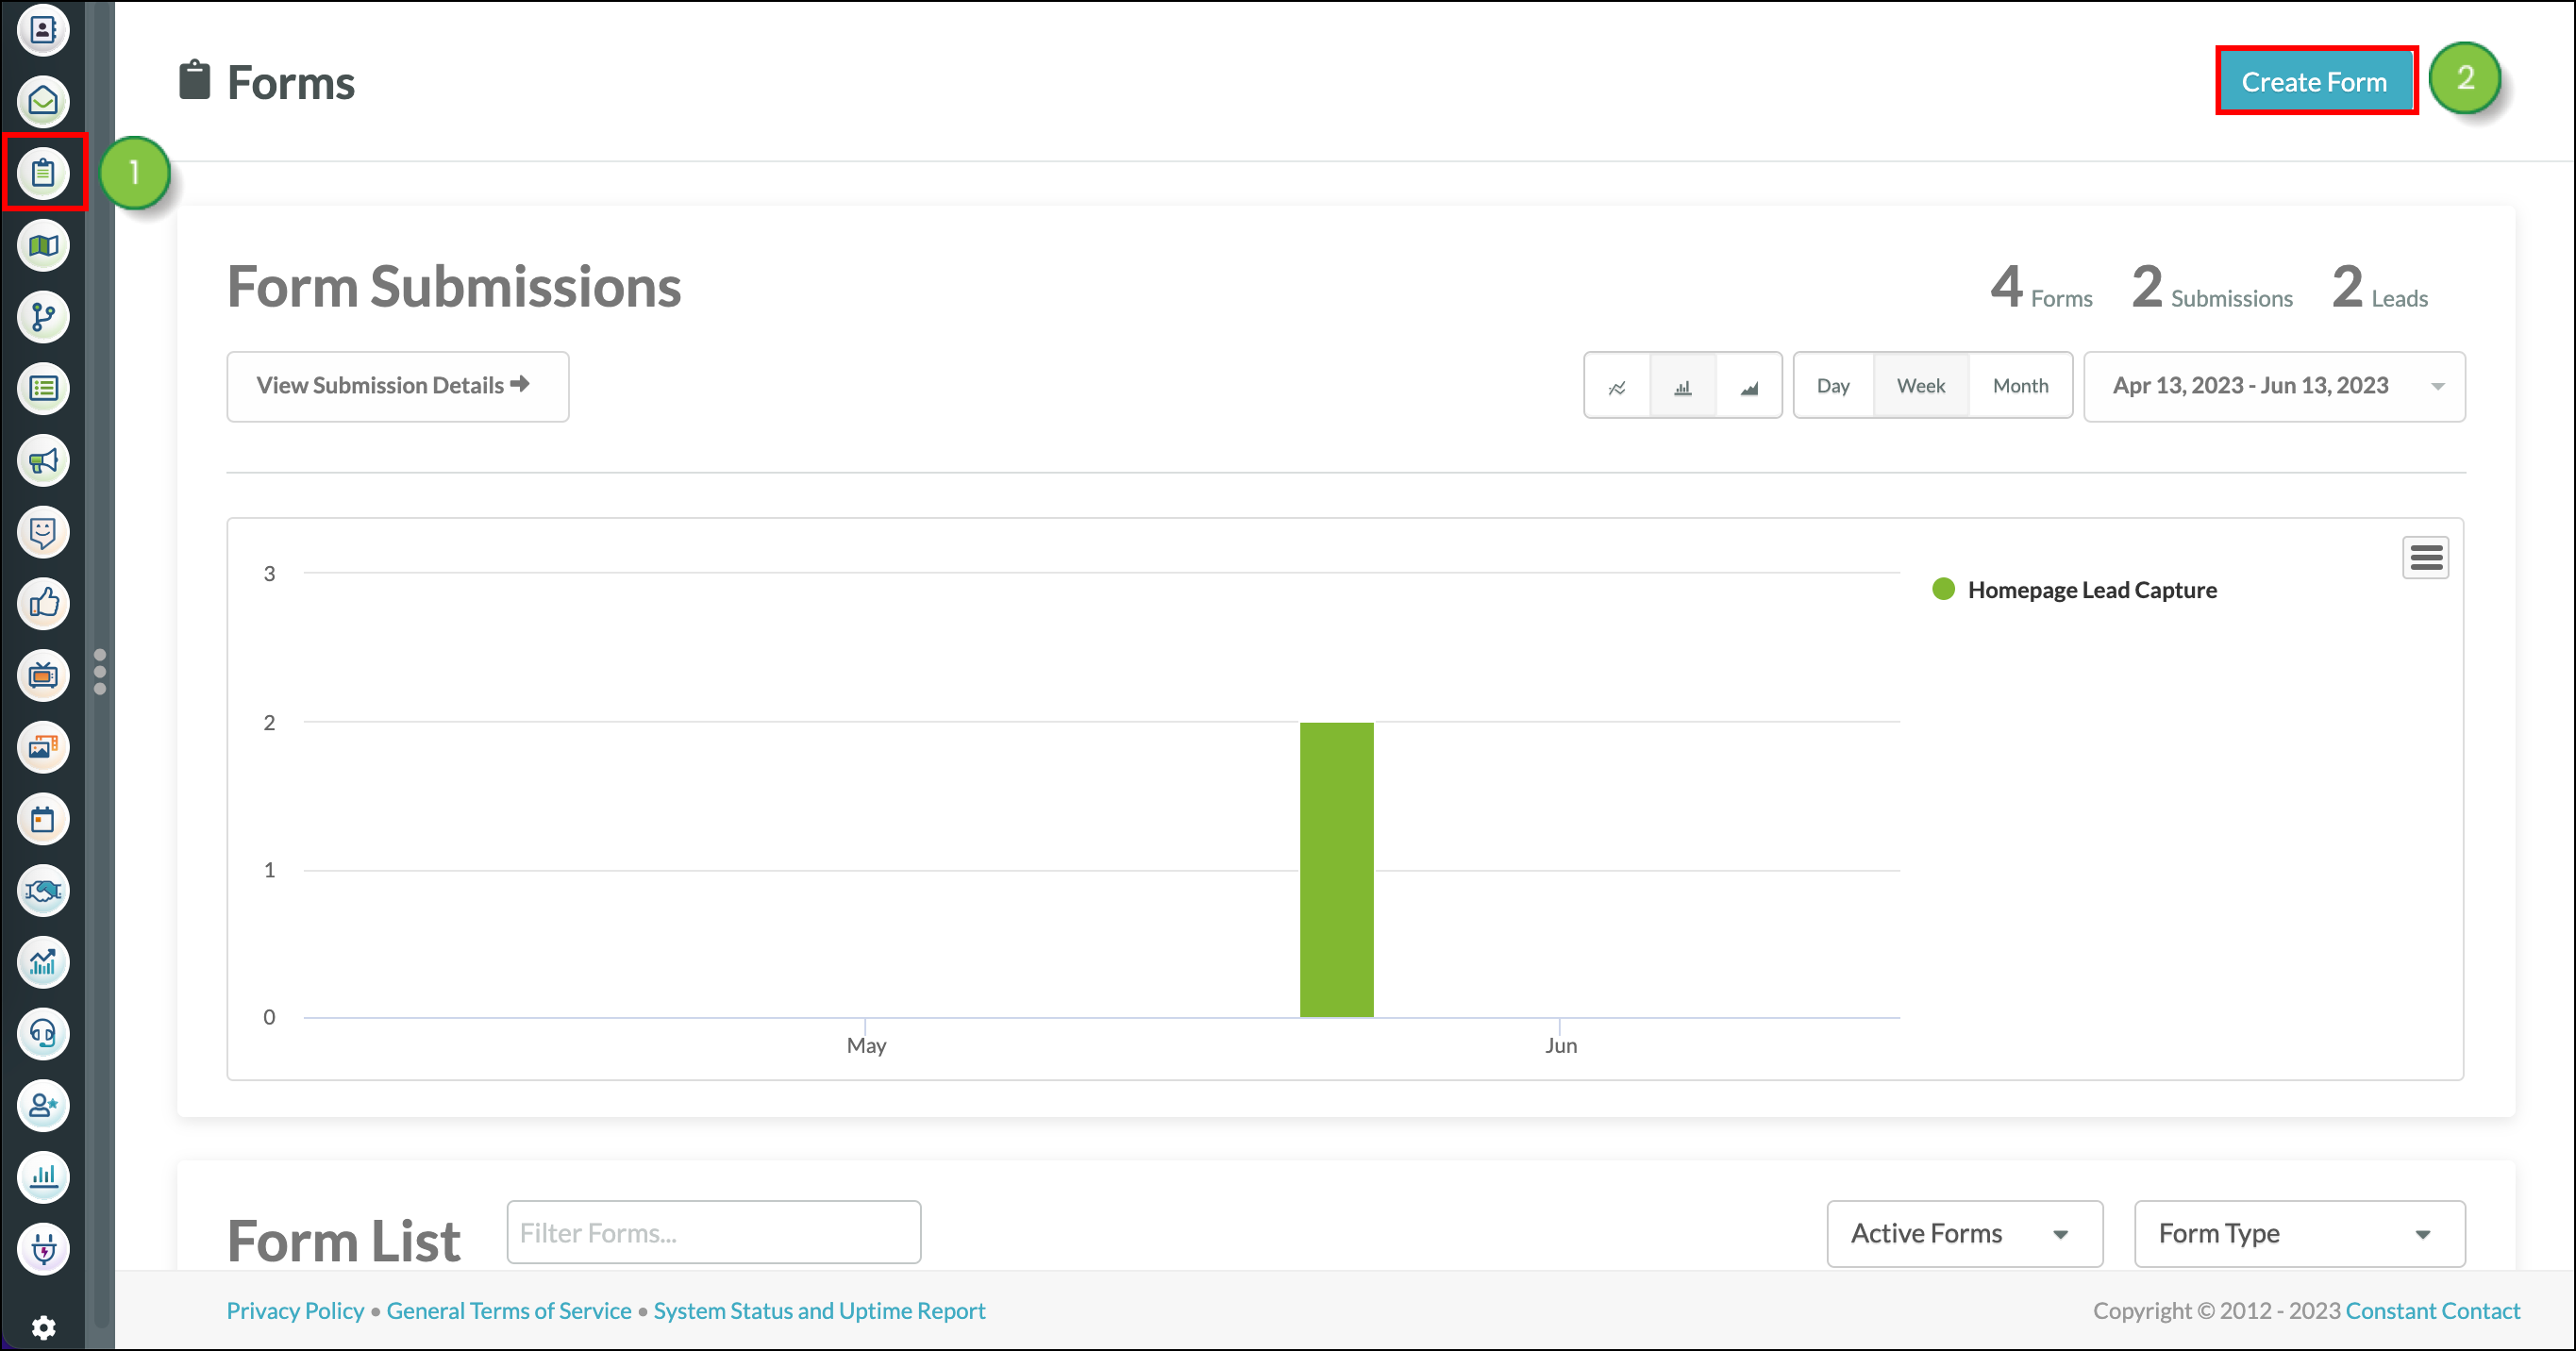
Keep this browser tab open because you'll need to return to this page after you complete the steps below on your website.
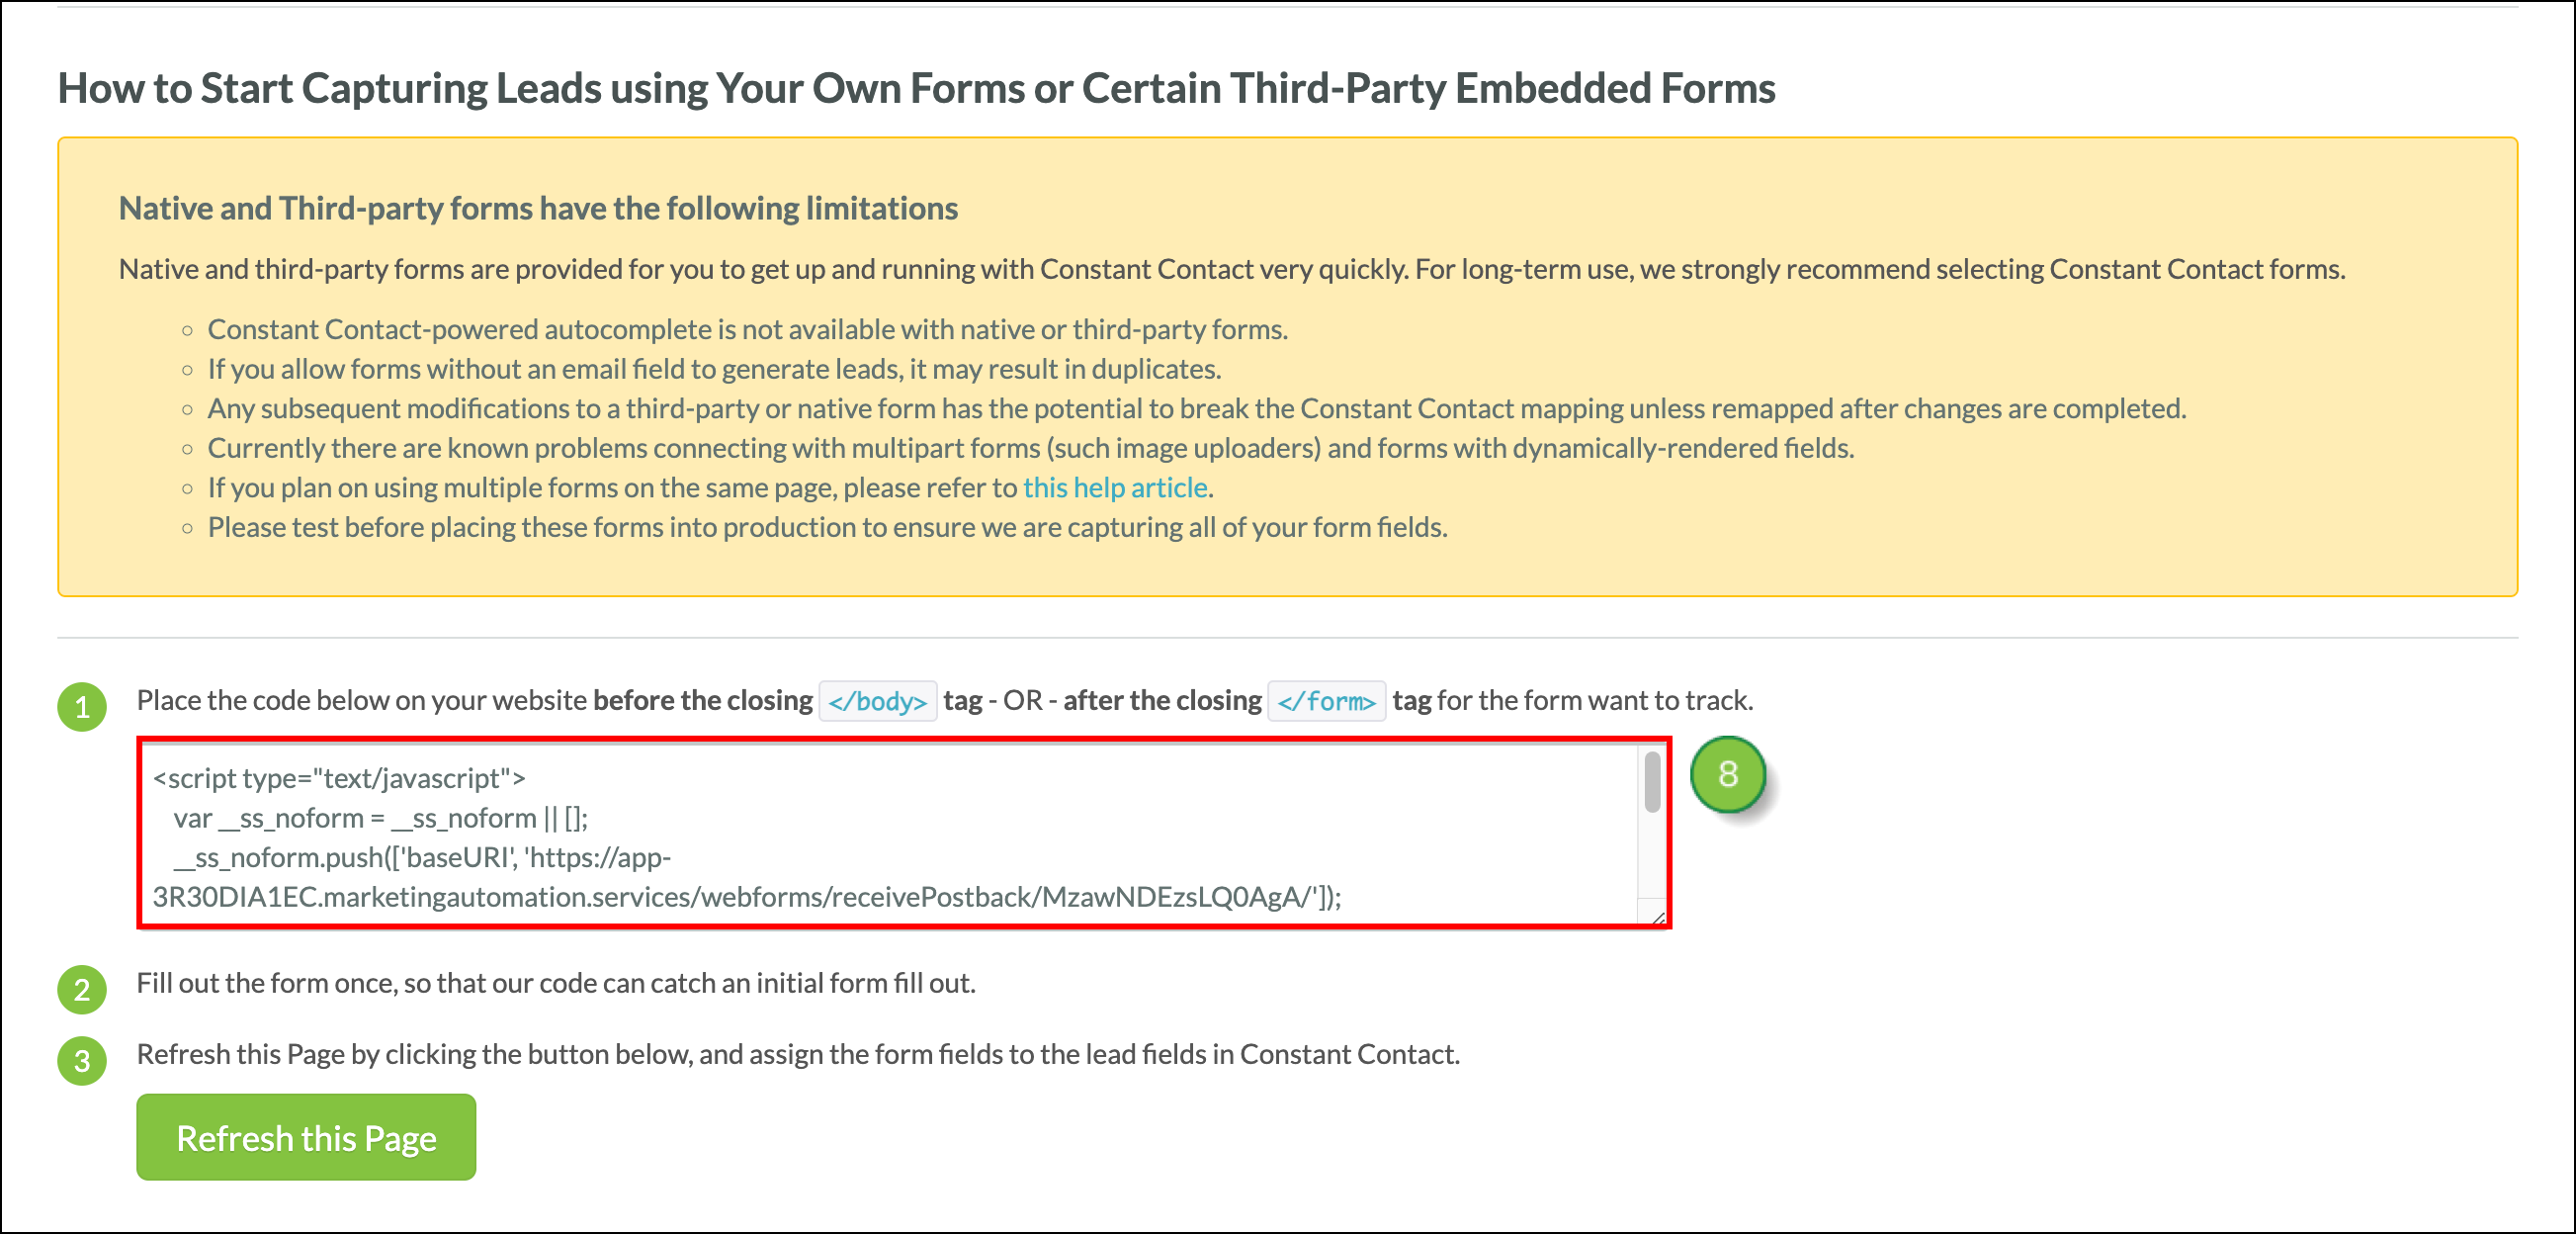
To allow Lead Gen & CRM to read the data coming from your forms, you'll need to insert the code from your corresponding Lead Gen & CRM form into your website.
Place the code on your website before the closing </body> tag or after the closing </form> tag for the form you want to track.
</body> or </form> tags are located.After you've added the code to your website, go to the page where your form is displayed and submit some data. Simply fill out the form.
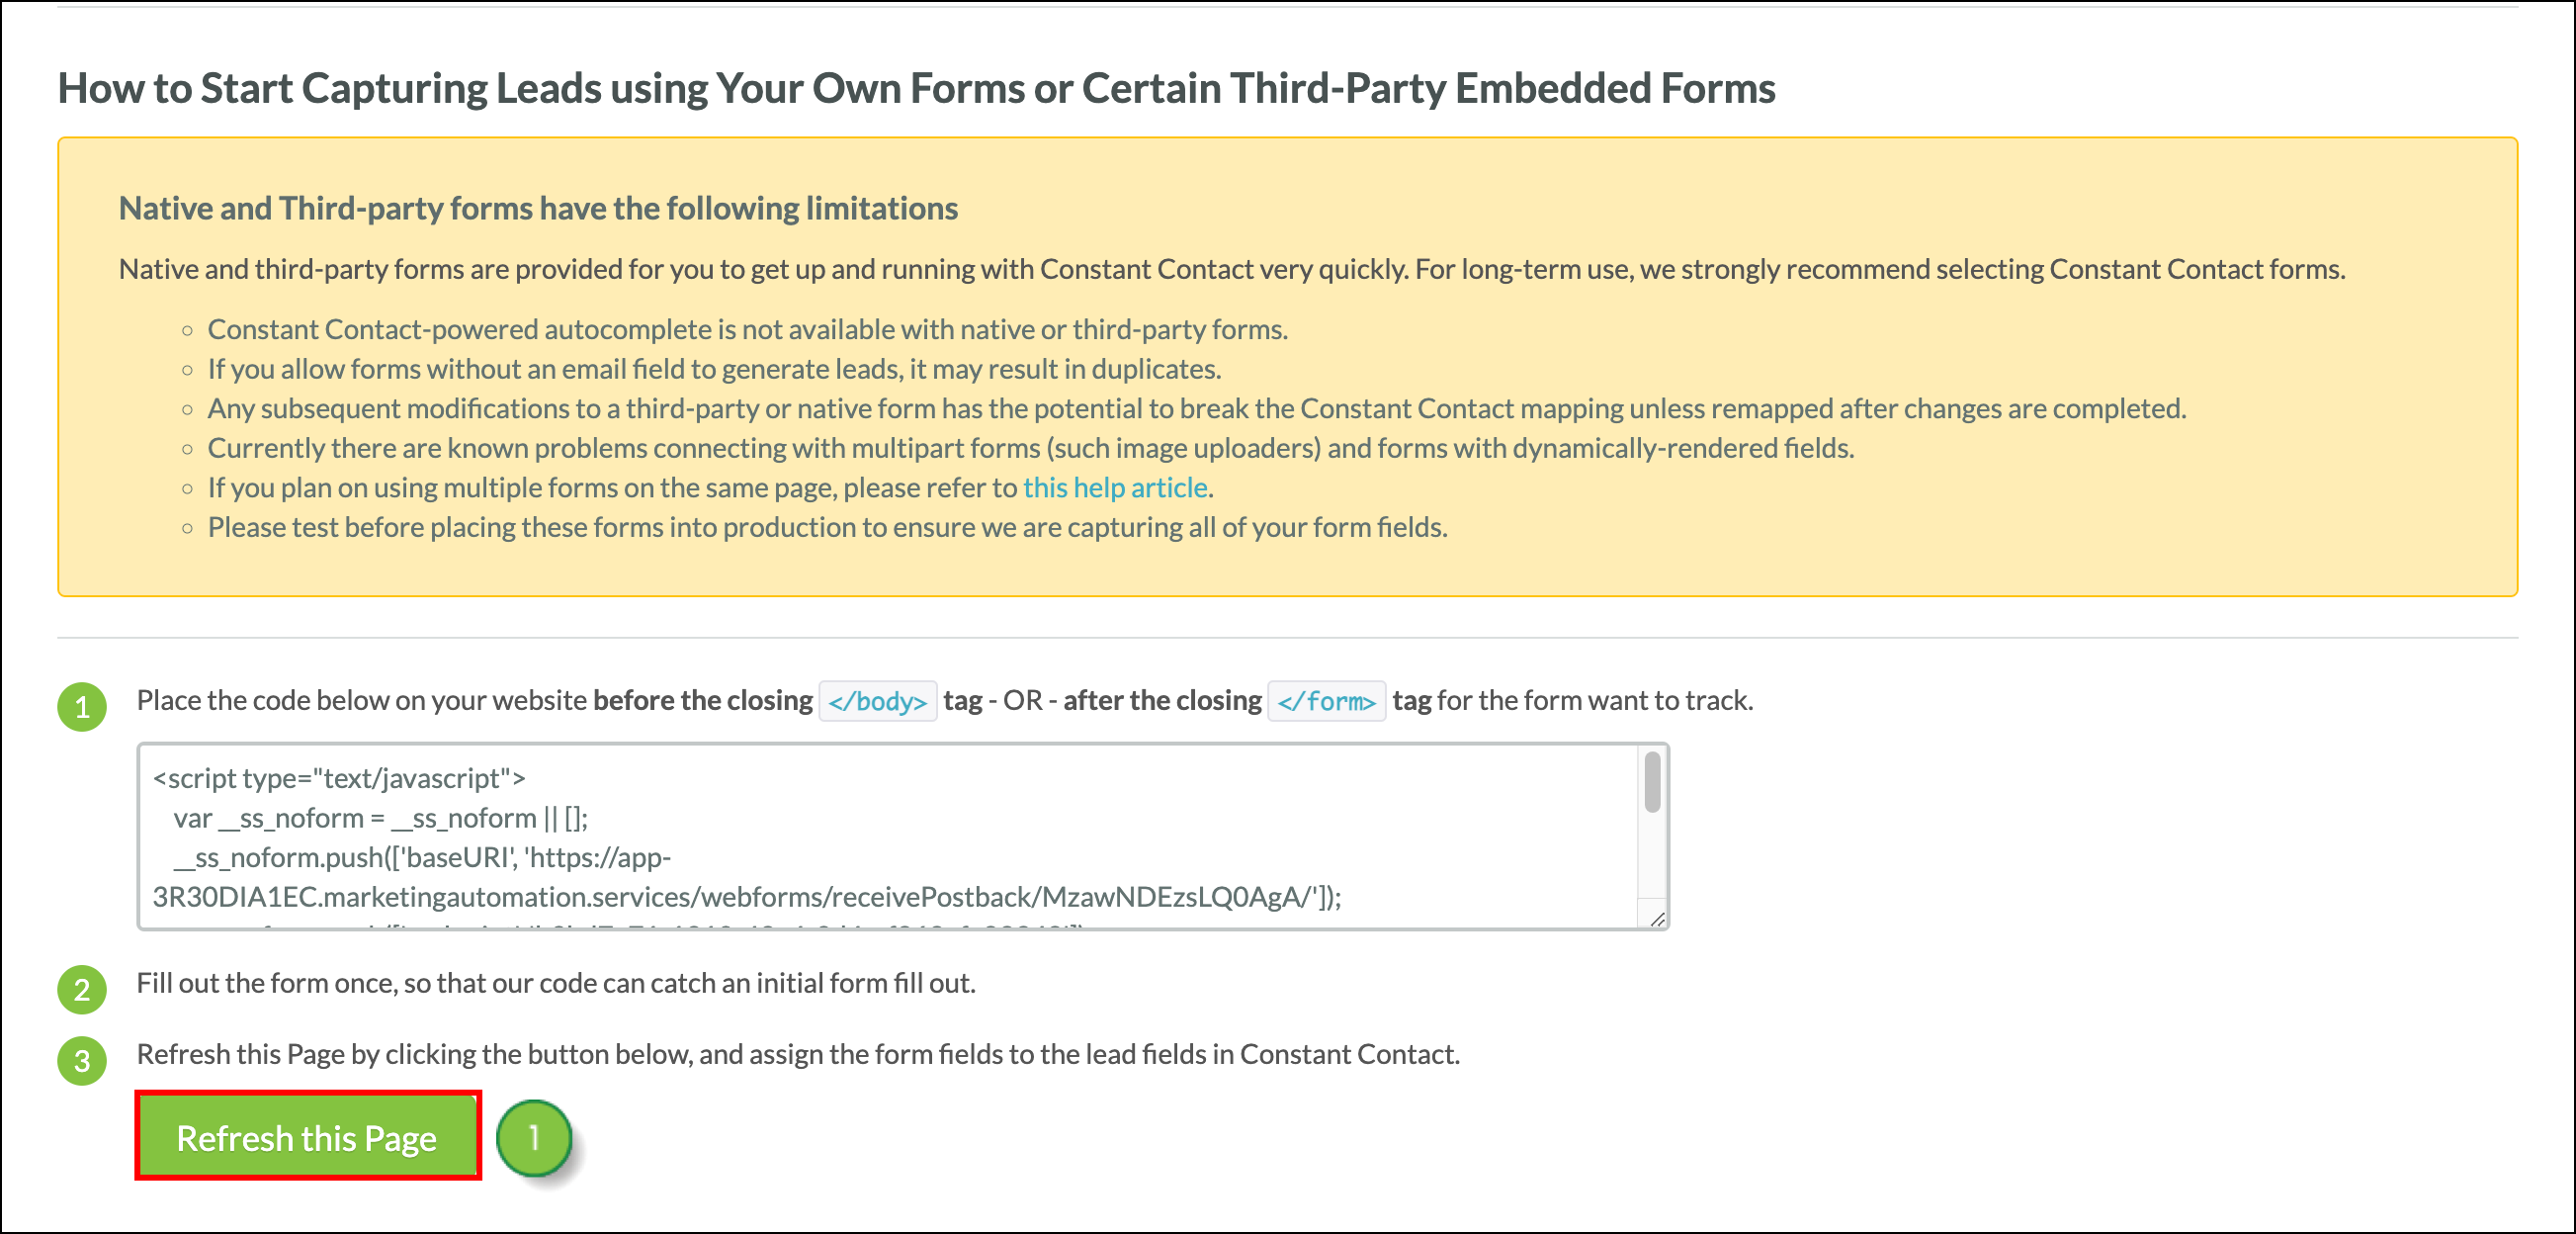
Once the data has been submitted, you'll be able to map the fields in your Lead Gen & CRM instance to the fields in your native or third-party form.
After your code has been added, and some form data submitted, you'll need to map the fields on the native or third-party form to your custom fields. Return to your form in Lead Gen & CRM and complete the following tasks:
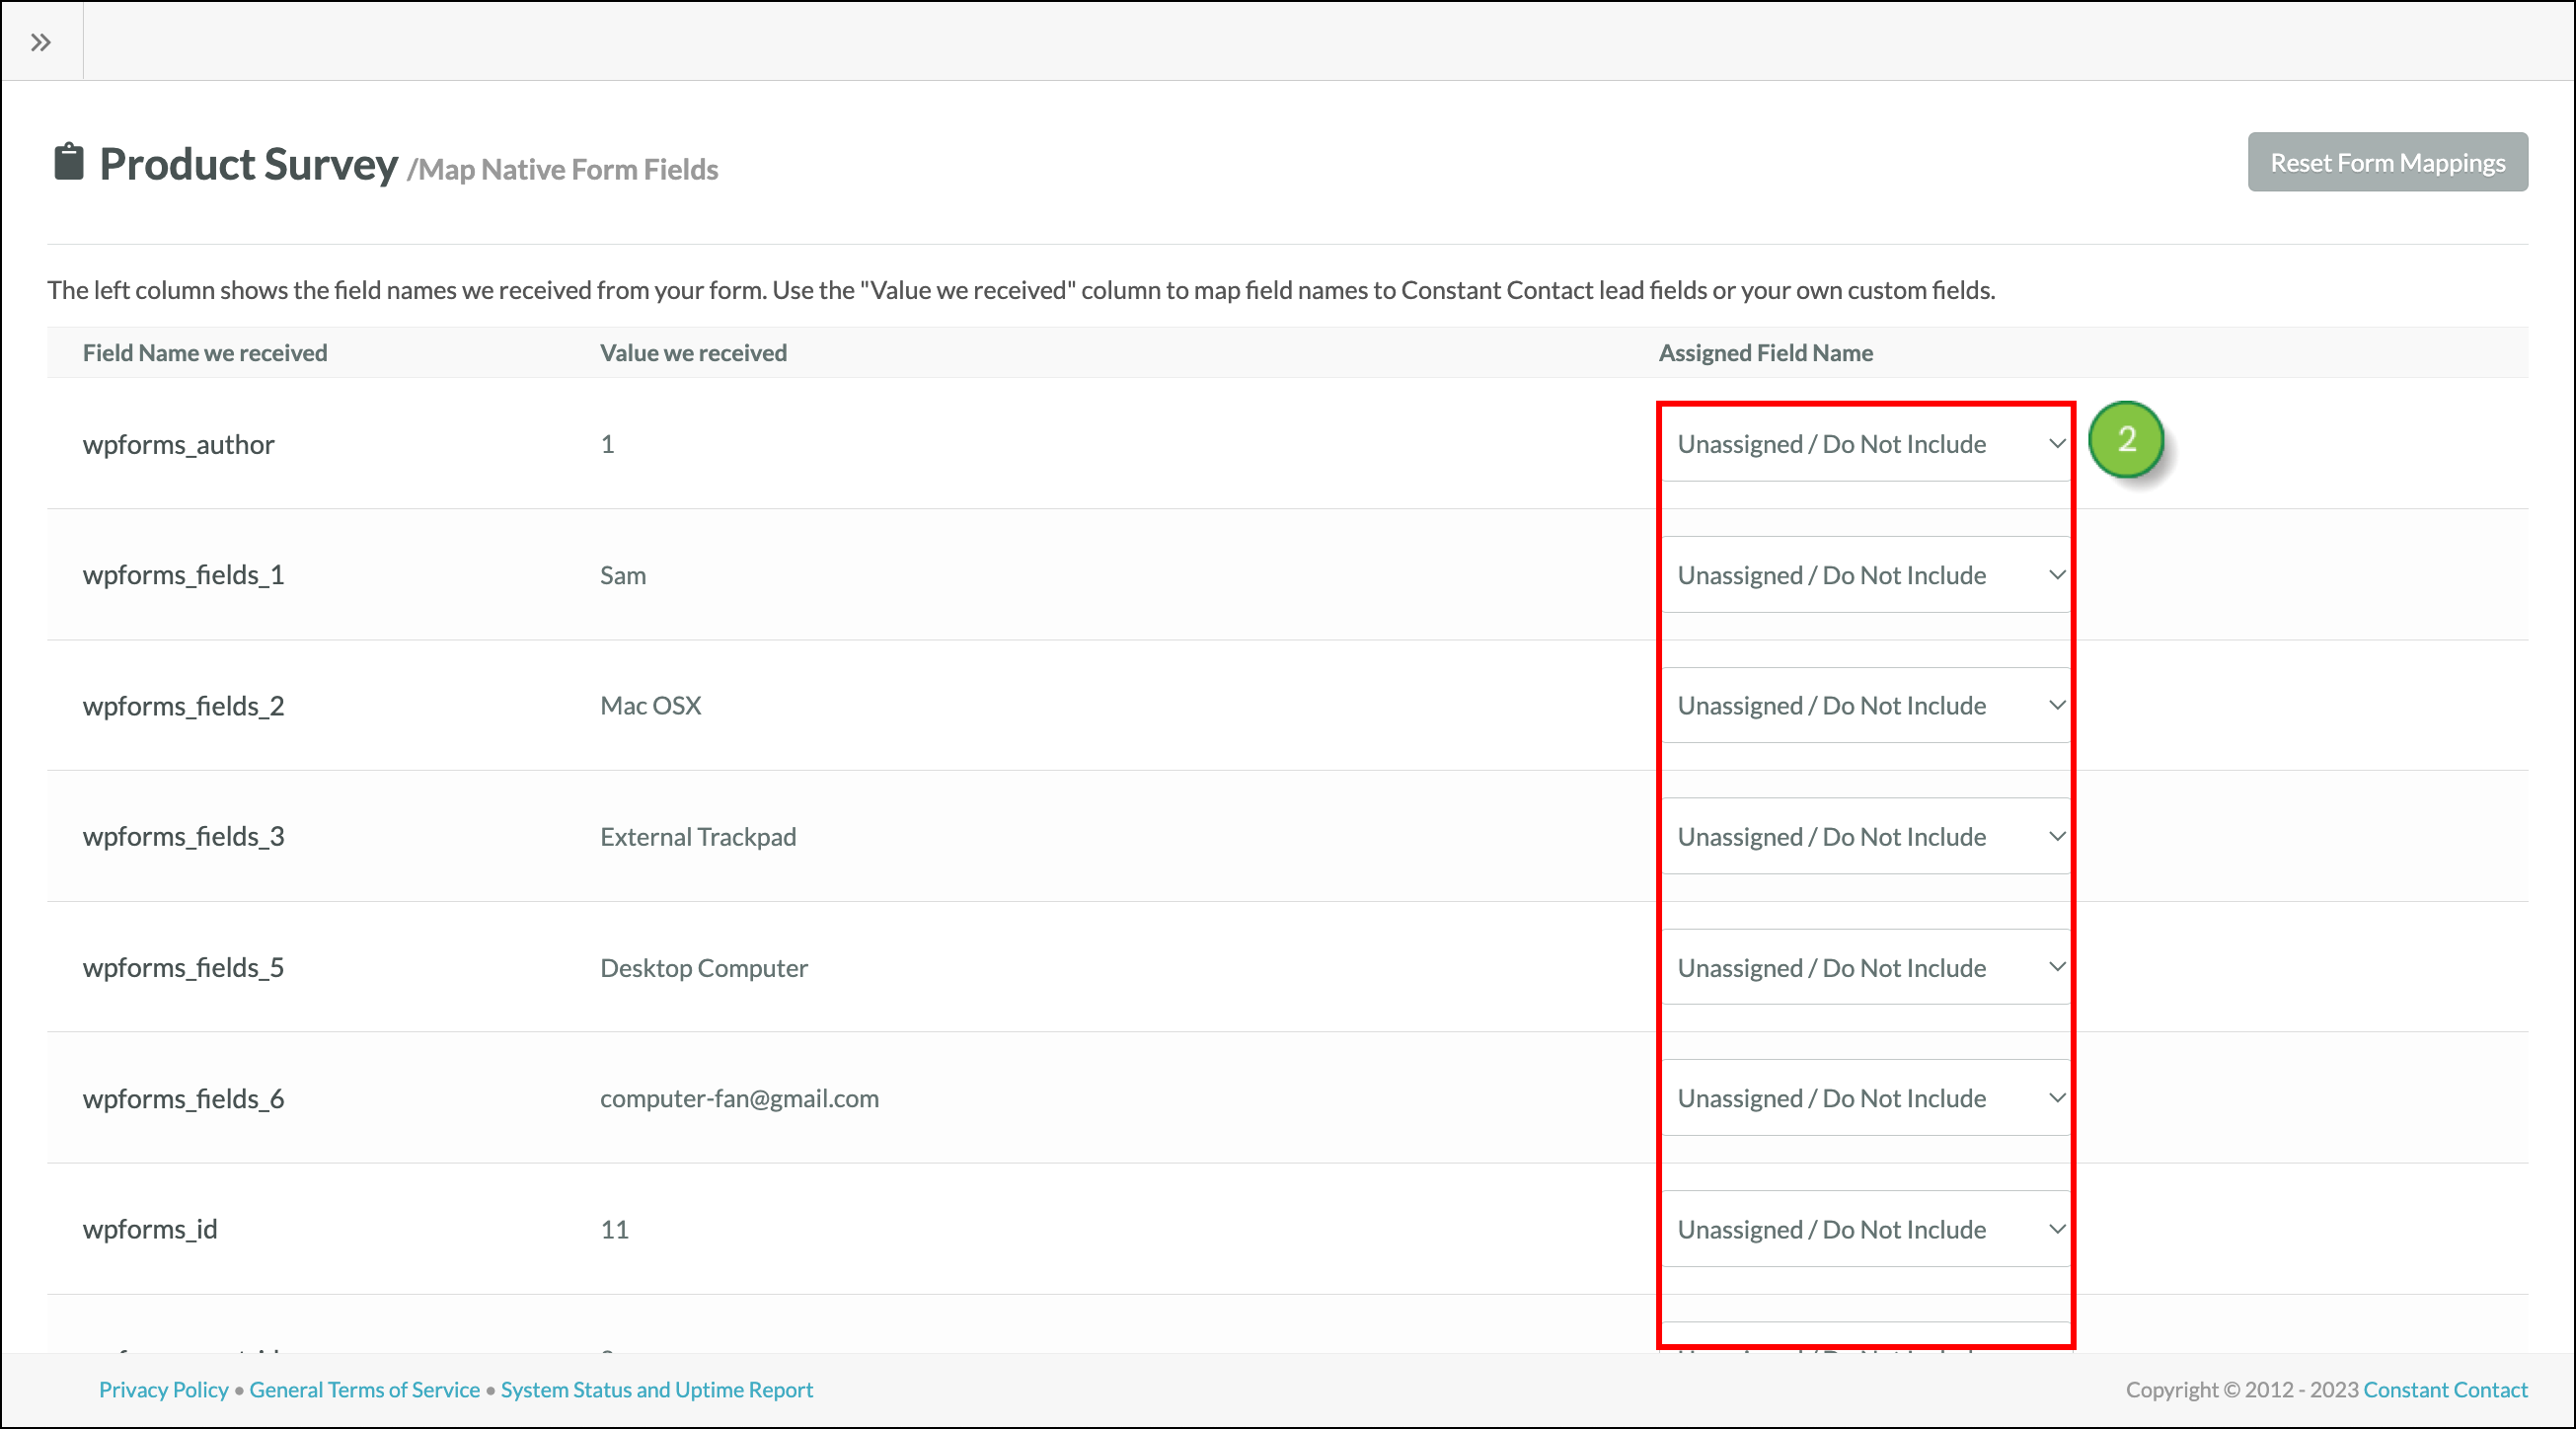
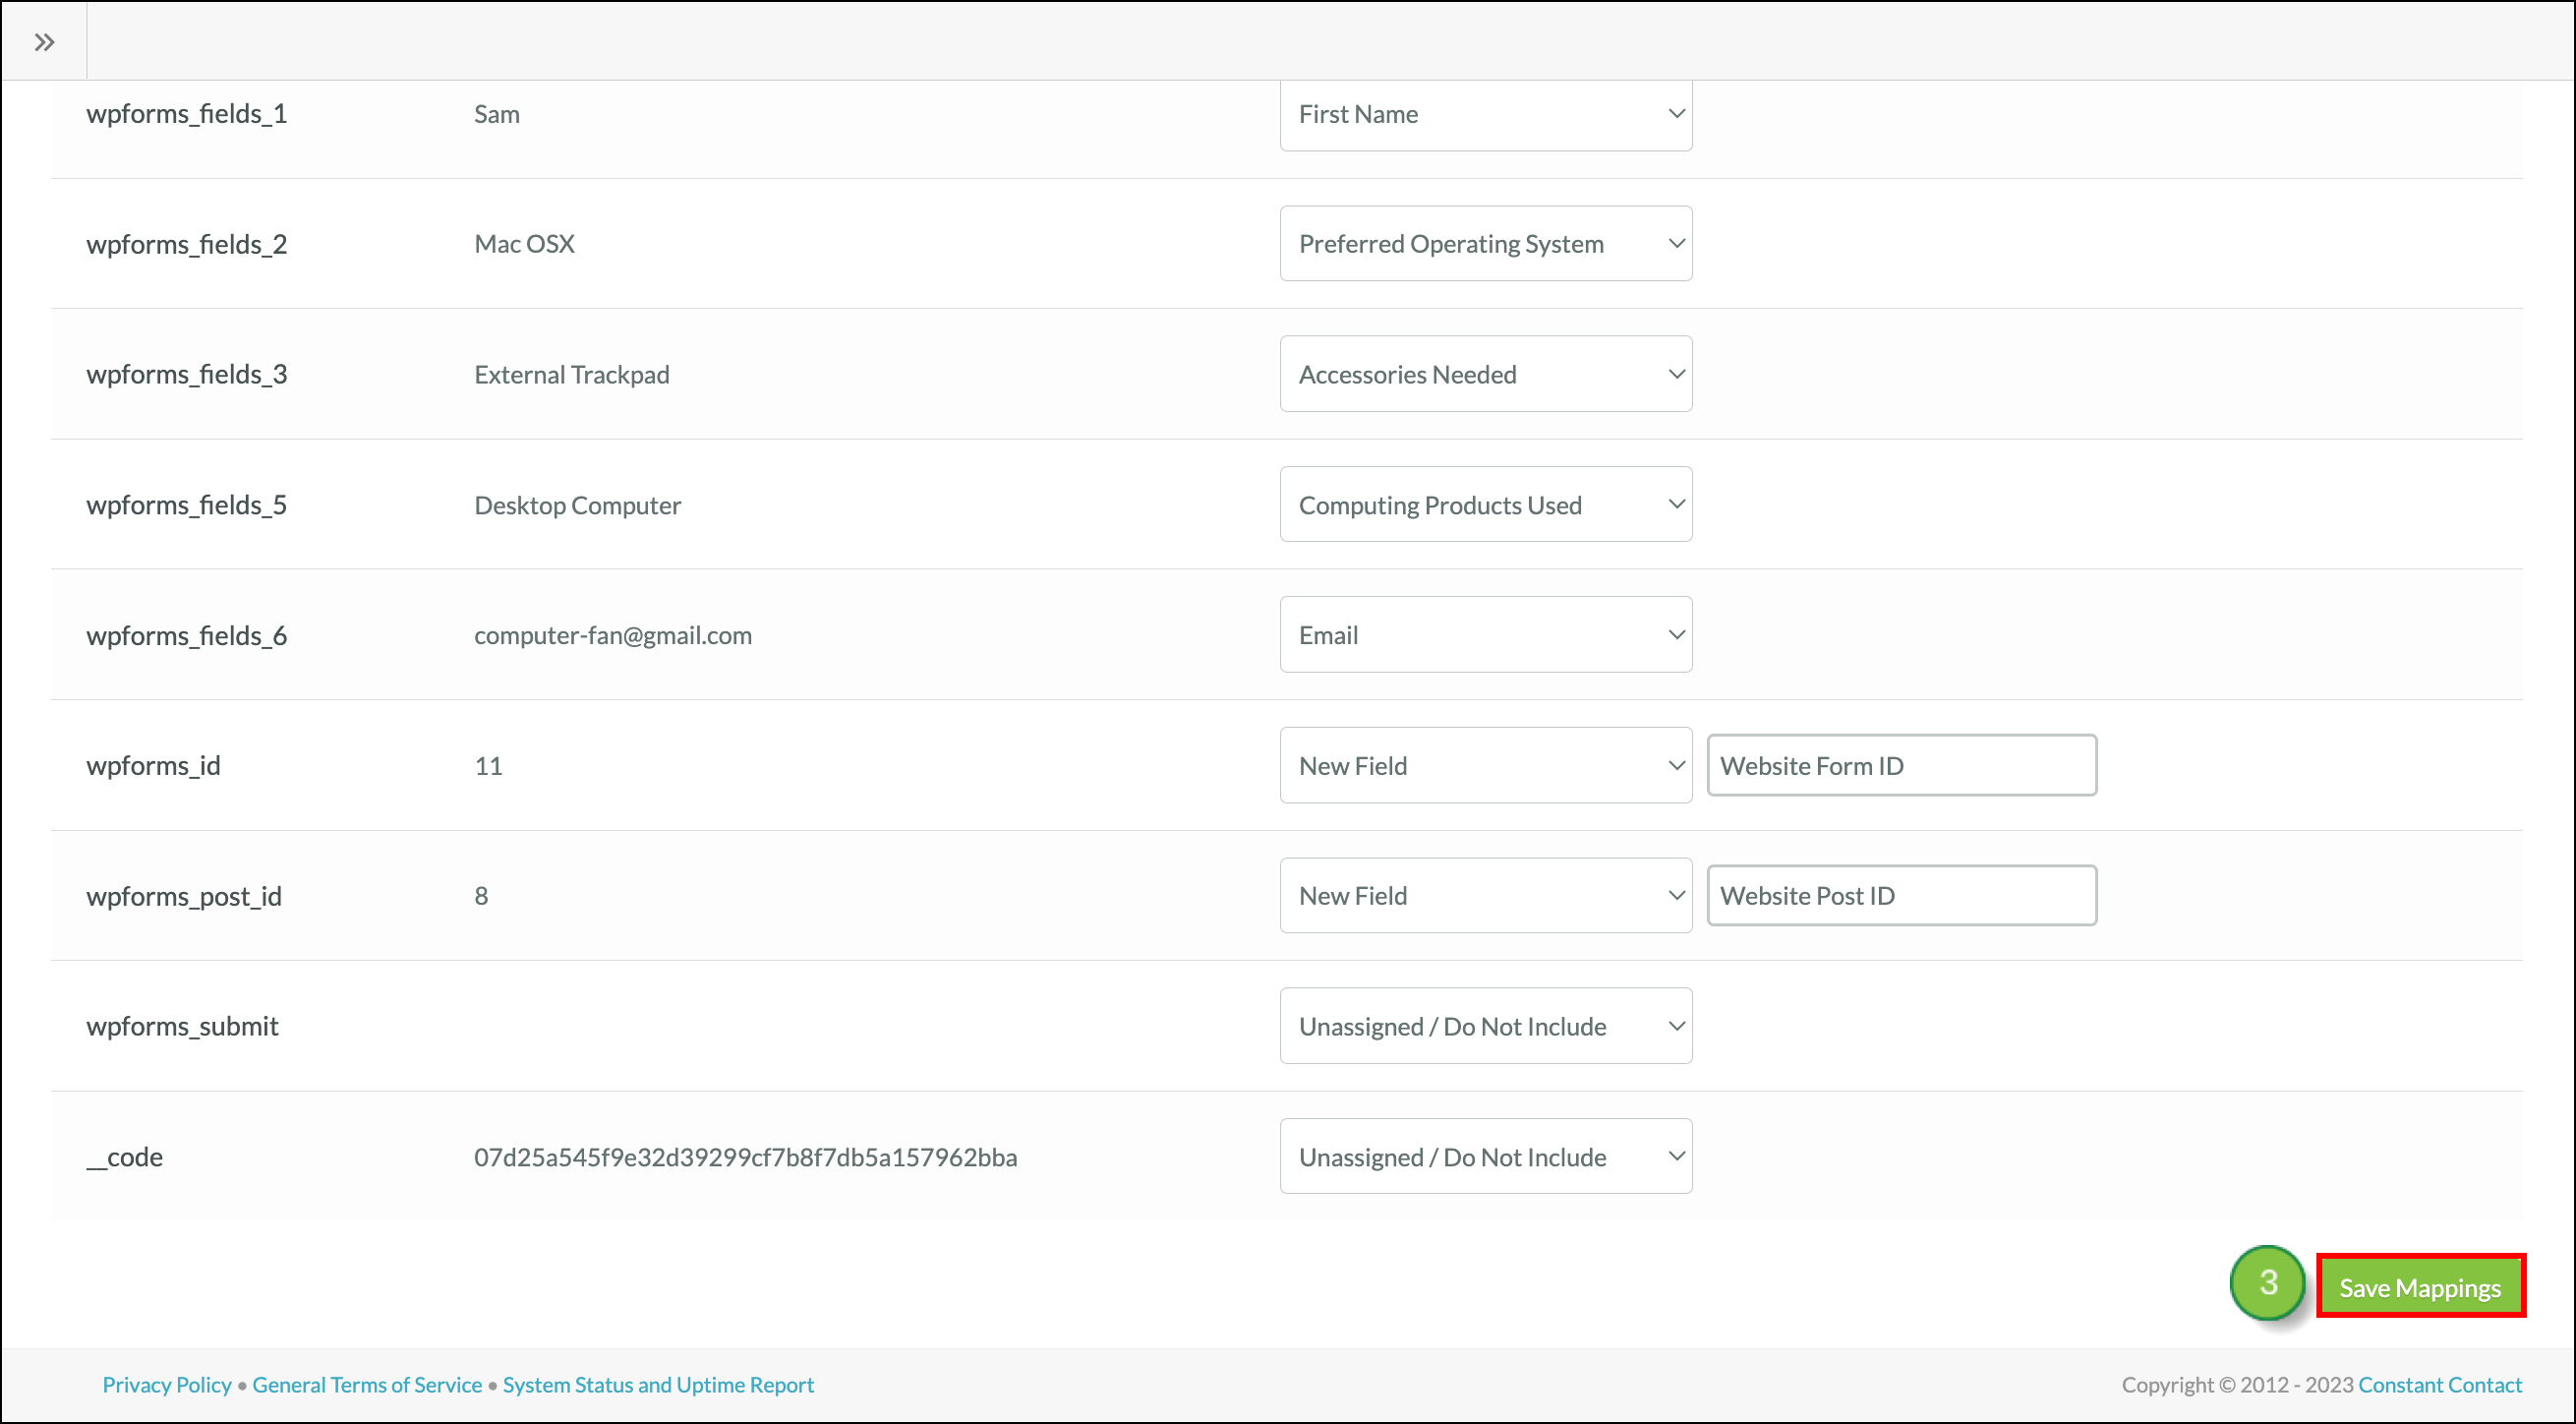
Mapping the fields tells Lead Gen & CRM which of the fields on your website form correspond to the fields in your Lead Gen & CRM form.
If you ever change your native or third-party form, you will need to repeat this mapping process again. Refer to Tracking Native Forms for information on mapping more than one form on a single page.
Manual submission may need to be implemented by your developers for any forms that do not fire a standard submit action when completed, or experience other issues working with Lead Gen & CRM code.
Refer to Adding Manual Submission Options to Native Forms for information on adding manual submission.
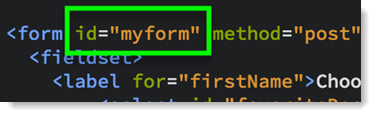
Example native form ID:
Copyright © 2026 · All Rights Reserved · Constant Contact · Privacy Center