Lead Gen & CRM
How can we help you?
Search our help articles, video tutorials, and quickstart guides

You've got this. You've got us. Search our Knowledge Base to quickly find answers to your questions.

Connecting Facebook Lead Ads with Lead Gen & CRM

Article: 000050583
Updated: July 10, 2024

Automatically import leads collected from Facebook Lead Ads into your Lead Gen & CRM account

You can automatically import leads collected from Facebook Lead Ads forms into Lead Gen & CRM. This will allow these leads to be treated like leads collected from Constant Contact forms or Native forms.

Additionally, these leads will show their form submission on the Life of the Lead. They can also be added to a campaign, making them more accessible for automation and lead scoring. 

This article will detail how to use Facebook Lead Ads with Lead Gen & CRM.


Article Contents


Users:
Administrators 
Company Managers 
Marketing Managers 
Sales Managers  
Salespersons  
Jr. Salespersons  


Connecting to Facebook Lead Ads

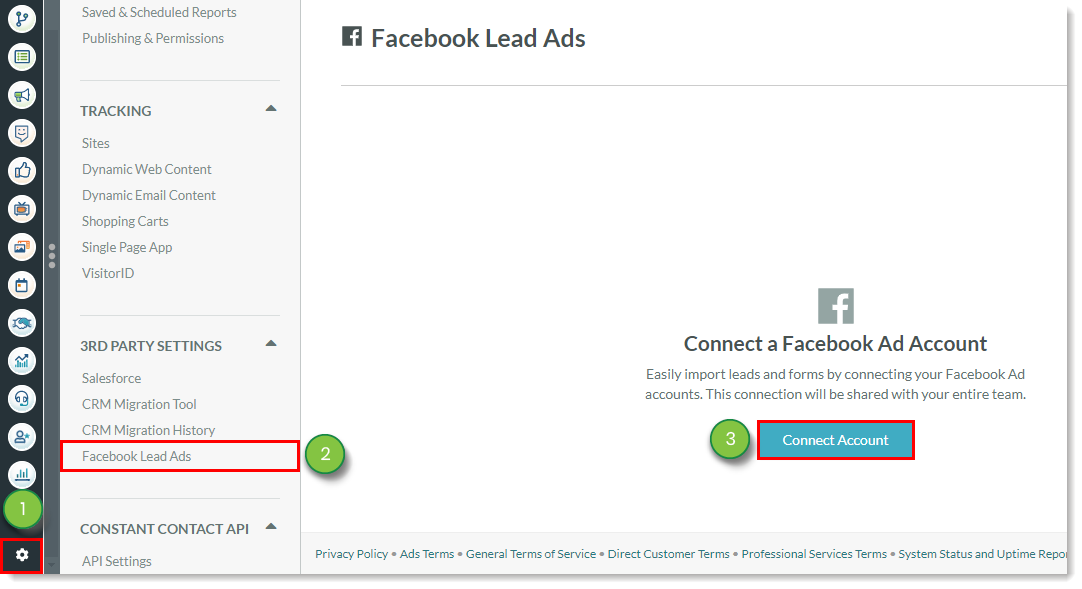
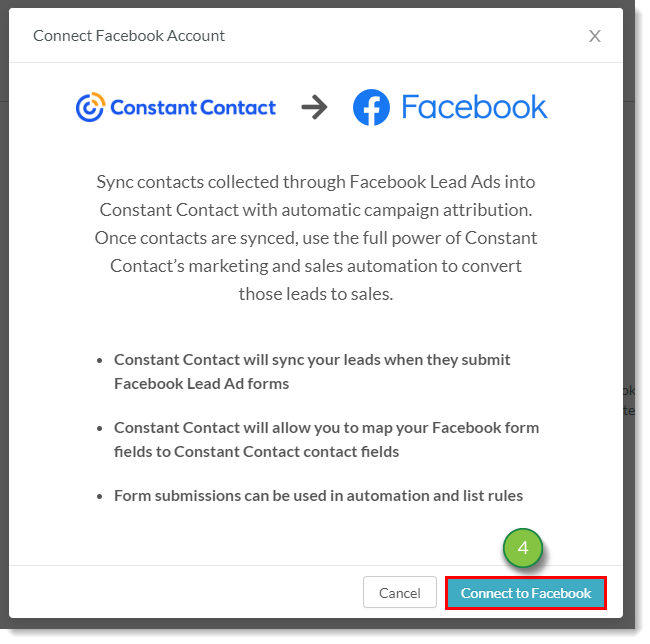
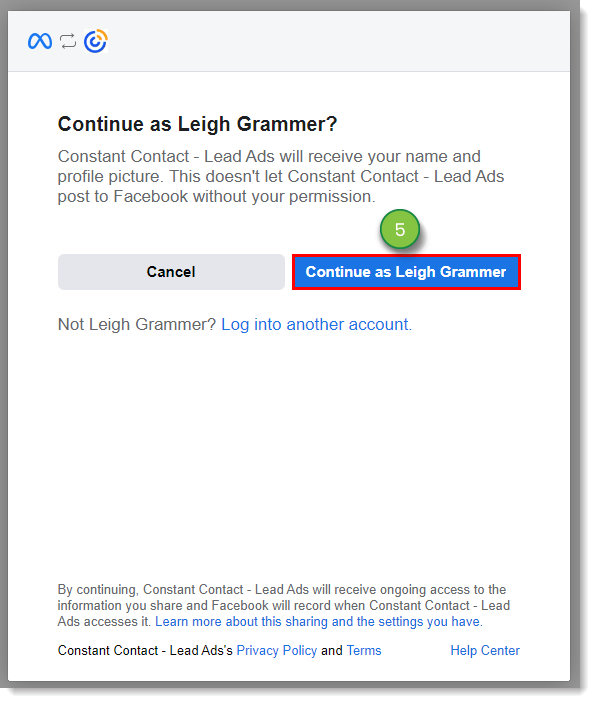
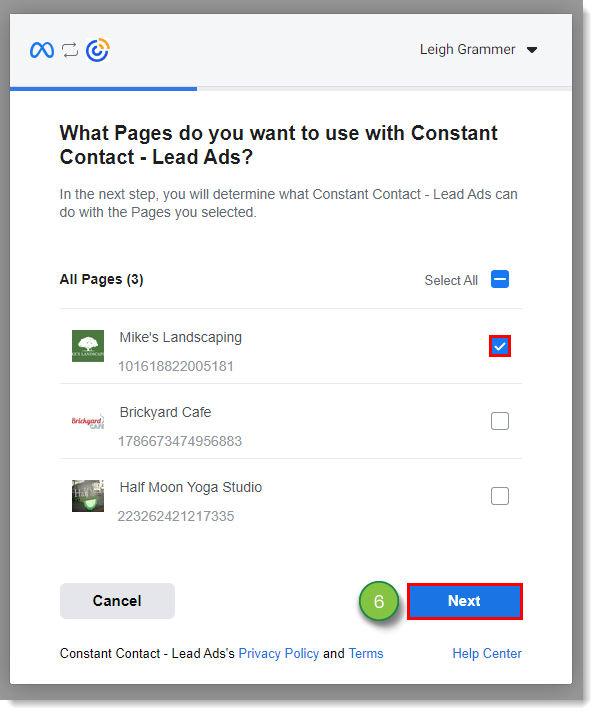
To pull in Facebook Lead Ads information, you will need to connect your Lead Gen & CRM instance with your Facebook Lead Ads account. 

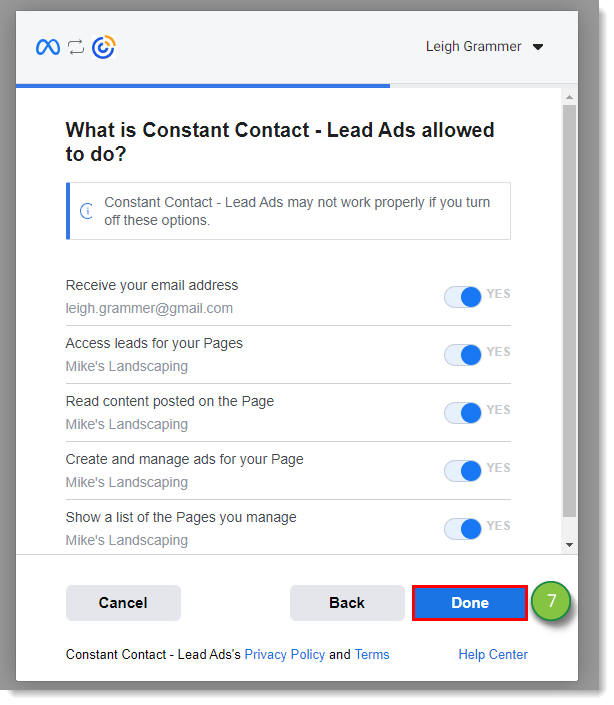
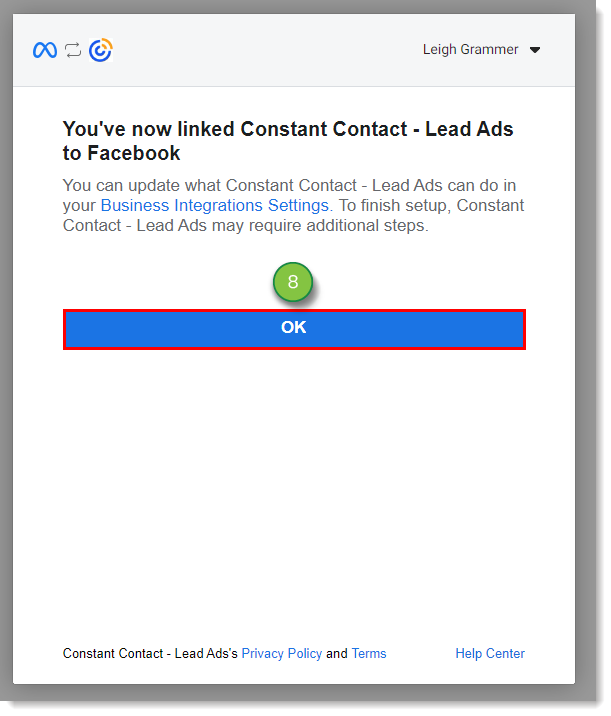
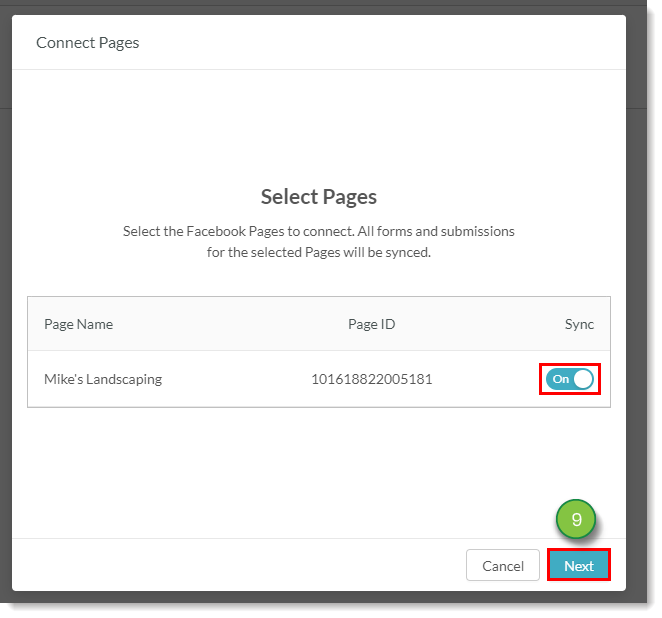
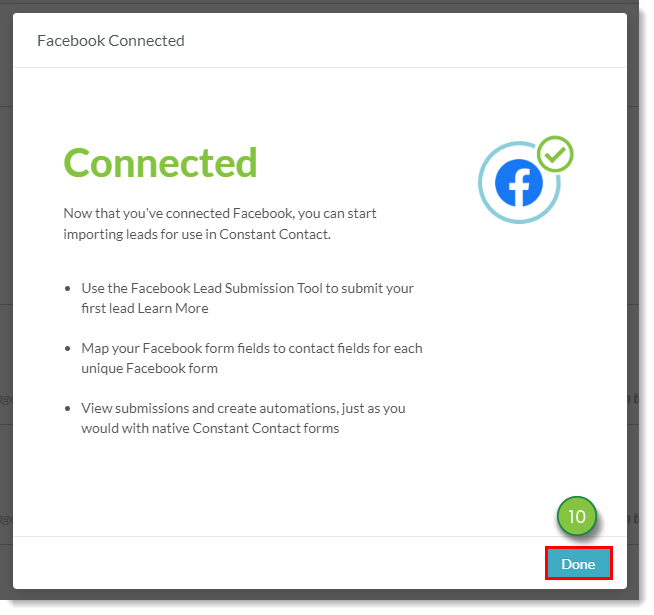
To connect to Facebook Lead Ads:
 

  1. Click Settings in the left toolbar.
  2. Click Facebook Lead Ads, located under Third-Party Settings in the left panel.
  3. Click Connect Account.

    Connect Facebook Lead Ads
     
  4. Click Connect to Facebook.

    Connect To Facebook
  5. Click Continue as.

    Continue As
     
  6. Select which pages to use with Lead Ads and then click Next.

    Select Lead Ads Pages
     
  7. Click Done.

    Lead Ad Permissions
     
  8. Click OK.

    Connected Confirmation
     
  9. Set page toggles to On or Off and click Next.

    Toggle Pages On or Off
     
  10. Click Done.

    Facebook Connected Confirmation
Refer to Facebook's external help documentation for more information on Facebook Lead Ads.


    Understanding Connected Accounts

    The Facebook Lead Ads page, when connected to your Facebook account, will display certain information about your connected account and monitored forms.


    Facebook Lead Ads Connected Page

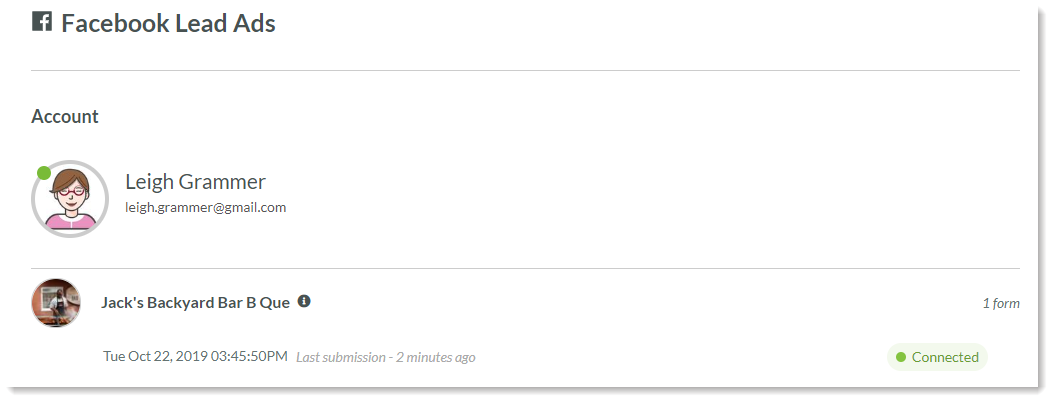
    The displayed information is as follows:

     Information Description 
     

    Facebook profile

     Your Facebook proflie's registered name and email address.


    Page listing

     The name of the listed page.


    Listing description

     The displayed description of the listed page. Only available if the listed page has a description in Facebook.


    Associated forms

     All forms associated with the listed page. 


    Form count

     The number of associated forms that have data or are available for mapping.


    Error messages

     Any known issues with the form, such as incomplete mapping. 


    Creating Form Test Data

    Connected forms will need test data. This is done through Facebook's developer tools.

    To create test data for a page form, do the following:

    1. Click Settings in the top toolbar.
    2. Click Facebook Lead Ads, located under Third-Party Settings in the left panel.
    3. Do either of the following: 
    4. Ensure that the correct page is displayed in the Page drop-down menu.
    5. Select the desired form from the Form drop-down menu.
    6. Click Preview Form.
      Note: Clicking Create Lead only sends the form's email field. Clicking Preview Form sends all of the form's fields, which provides better results when mapping form data in Lead Gen & CRM.
    7. Submit the form.

    Once lead data has been created, it will take up to ten minutes for the new form information to display in Lead Gen & CRM.

    Note: To remove previously created lead data, click Delete Lead.


    Mapping Form Data

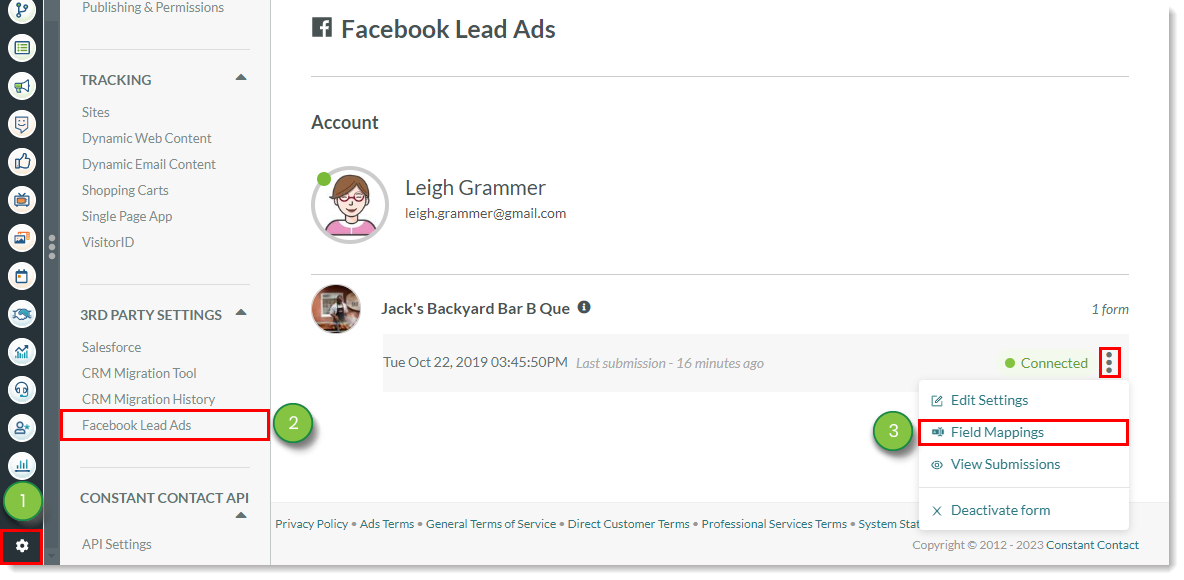
    Once your lead data has been created and your related Facebook forms have populated in Lead Gen & CRM, you can begin mapping form data.

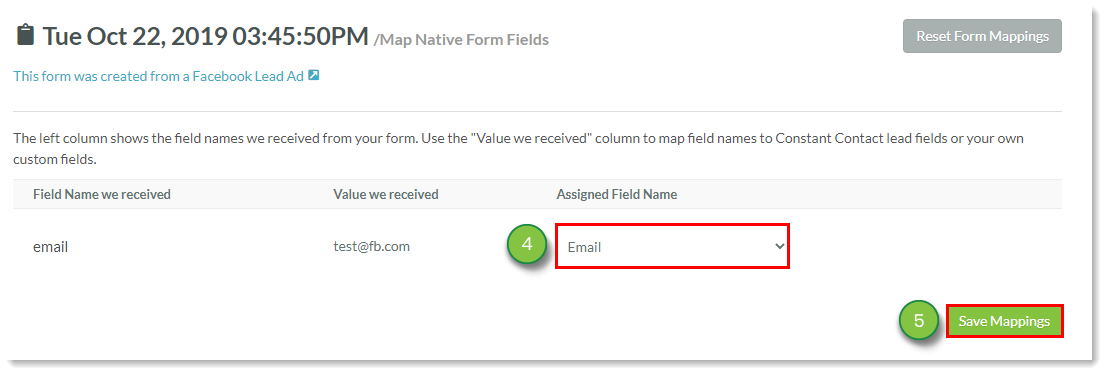
    To map Facebook form fields to Lead Gen & CRM form fields, do the following:

    1. Click Settings in the left toolbar.
    2. Click Facebook Lead Ads, located under Third-Party Settings in the left panel.
    3. Click  12more.png  Options > Field Mappings in the desired form row.

      Facebook Lead Ads Field Mappings
       
    4. Select the appropriate field from the Assigned Field Name drop-down menu.
      Note: When selecting a field, ensure that it is as close to a match as possible to the field in the Field Name we received column.
    5. Repeat as necessary for each field and click Save Mappings.

      Facebook Lead Ads Form Field Mappings
       
    Important: Some, but not all, of the Facebook field names will automatically map. Be sure to map every field, and review those fields already mapped. 

    For more information on mapping forms, refer to Connecting and Mapping Native and Third-Party Forms.


    Form Submission Information

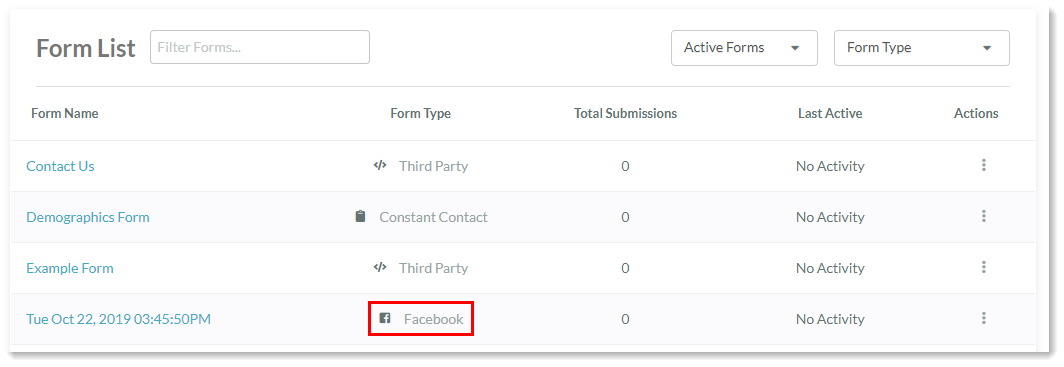
    As with your other native and third-party forms, Facebook Lead Ad forms will appear in the Form Submissions page. 

    Facebook forms will be listed as  facebook2.png  Facebook in the Form Type column.


    Form List Facebook Type

    For more information on form submission data and details, refer to Forms Overview.


    Life of the Lead Information

    Facebook form fills will appear in a lead's Life of the Lead in their respective contact record.

    The Life of the Lead will display the following information for Facebook Lead Ads entries:

    • The date of submission
    • The associated campaign name
    • The ad set name
    • All form fields and values

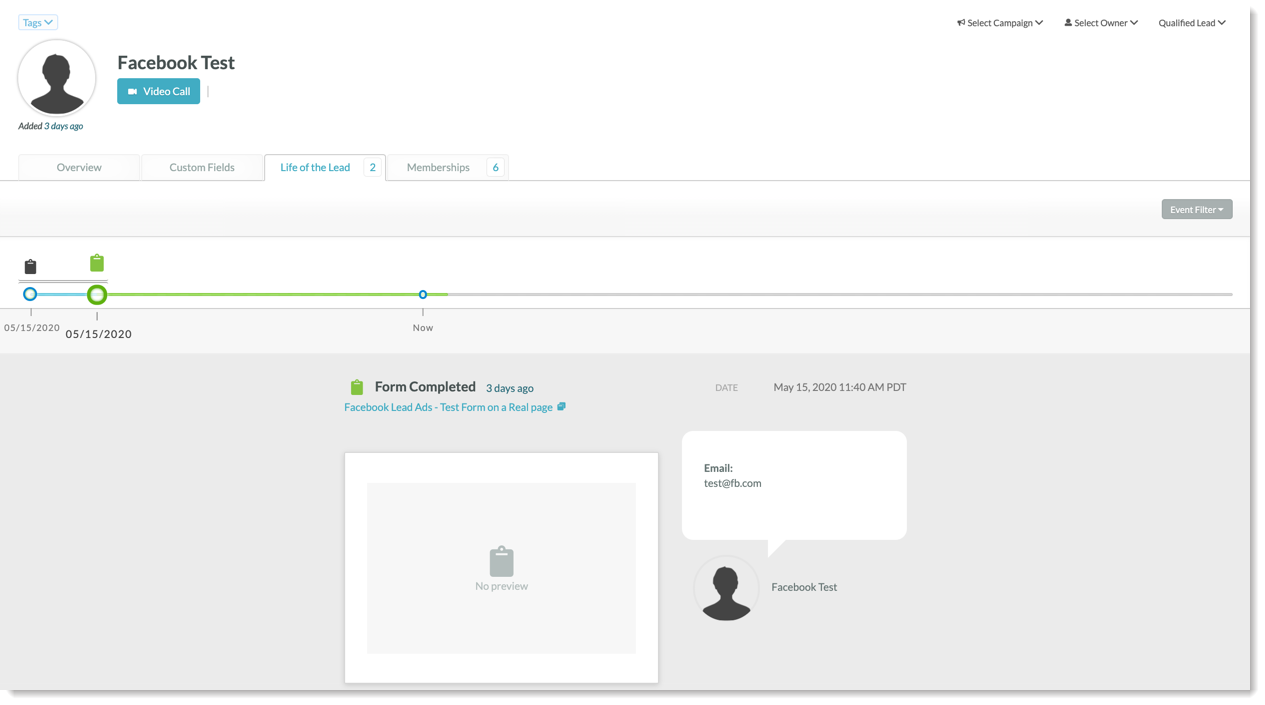
    For more information on the Life of the Lead, refer to Life of the Lead Icons and Overview.


    Activity Feed Entries

    New Facebook lead contacts and form fills will appear in your Activity Feed. As with other Activity Feed entries, the Facebook entries will detail the following:

    • The lead's name
    • The lead's status
    • The lead's current lead score
    • What content the lead interacted with
    • Links to the content
    • The date of interaction


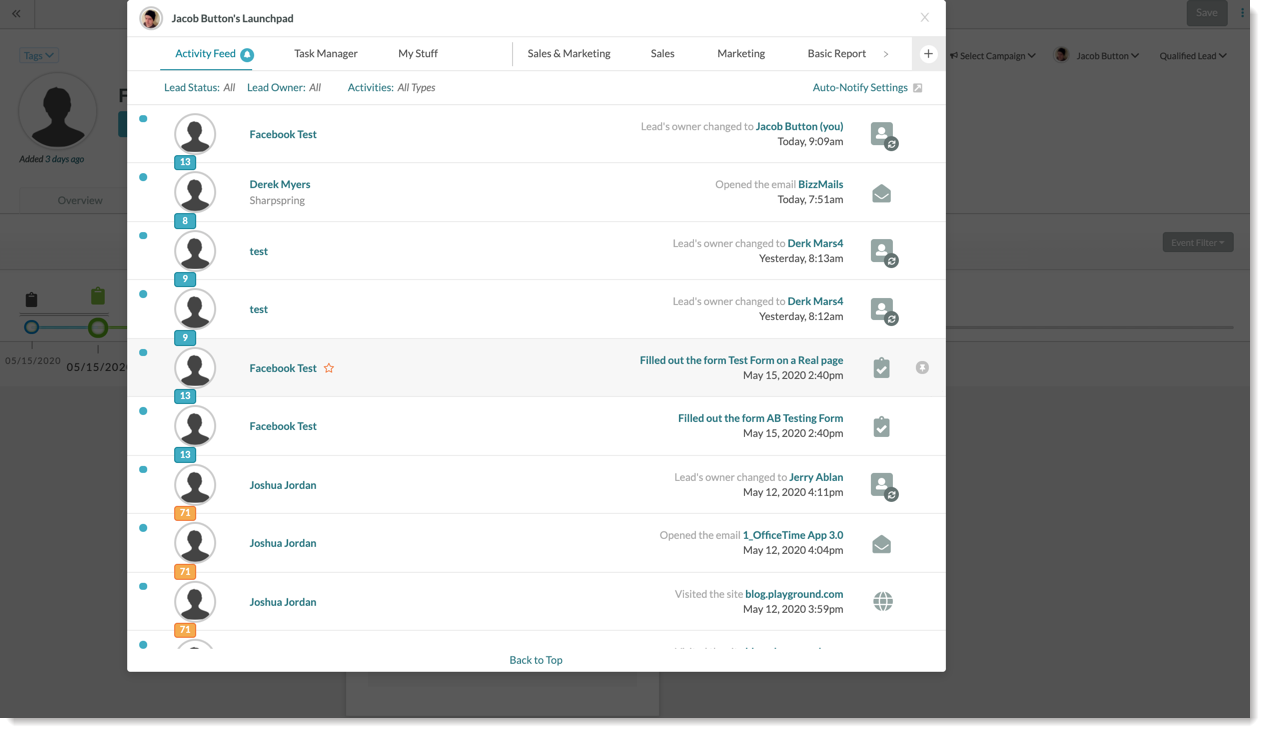
    For Facebook entries, be aware of the following:

    For more information on the Activity Feed, refer to Activity Feed Overview.


    Troubleshooting Connection Errors

    If you're having trouble connecting Facebook Lead Ads to the Lead Gen & CRM platform, complete the following steps:

    Disconnect and reconnect FaceBook Leads Ads

    Remove the Facebook Leads Ads integration from Lead Gen & CRM and reconnect it. 

    1. Click  Settings in the left toolbar.
    2. Under Third-Party Settings in the left panel, click Facebook Lead Ads.
    3. Hover over the  StatusGreen.png  Account Status circle.
    4. Click Disconnect.
    5. Click Disconnect in the modal window that appears.
    6. Refresh the page and click Connect Account to start the connection process over again. 
    Note: Any data from when Facebook Leads Ads was connected will remain visible in Life of the Lead and Reports. During the time while the integration is disconnected submitted data will not be recorded.


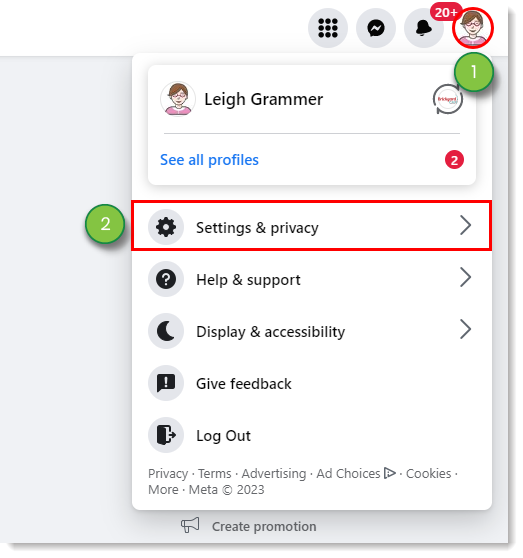
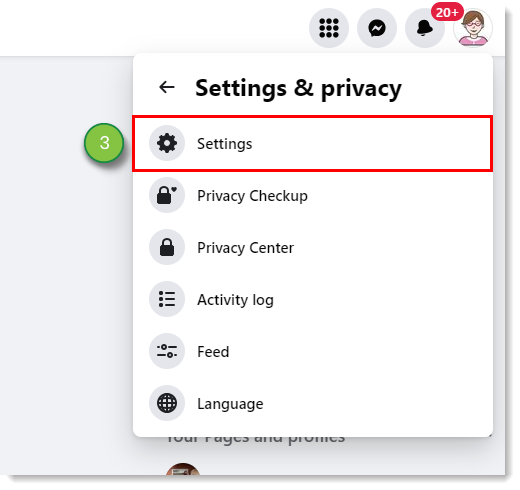
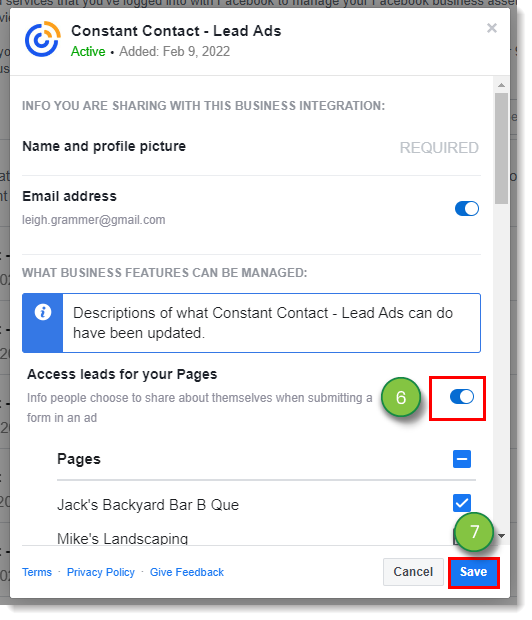
    Check Permission settings and make sure they are all enabled

    If disconnecting and reconnecting the account does not resolve the problem, log into your Facebook account and make sure all of your permission settings for the connection are enabled. 

    1. From your personal Facebook page, click on your avatar in the top right corner of the page. 
    2. Click Settings & Privacy from the drop-down menu.

      Click Avatar


    3. Click Settings. 

      In settings and privacy, click settings


    4. On the left side of the screen, under Settings, click Business Integrations
    5. Click View & Edit next to the Constant Contact Lead Ads integration. 

      Business Integrations View and Edit Lead Ads


    6. Scroll and make sure each of the permissions are enabled.
    7. Click Save

      Click on all permissions
    Important: Your business page is connected to your personal Facebook page. Be sure to check the permissions inside of your personal page. Do not check permissions inside of your business page.
     

    Disconnecting from Facebook Lead Ads

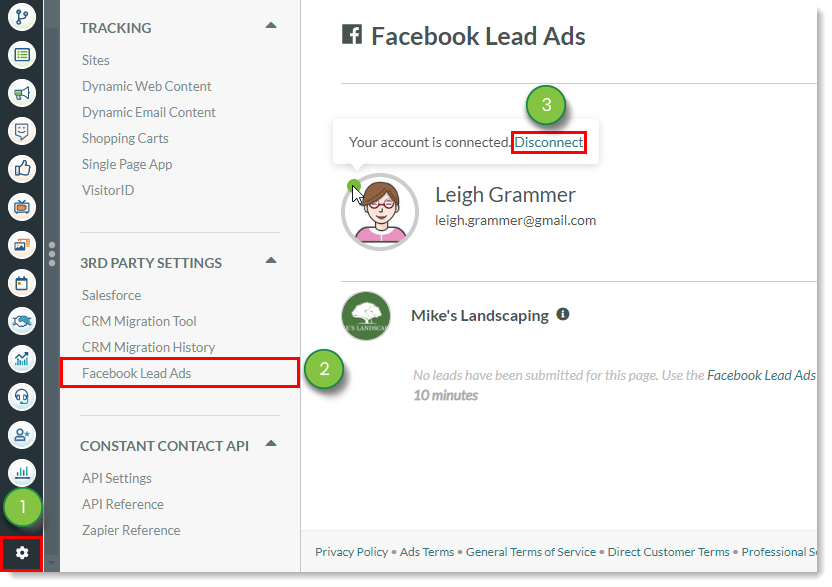
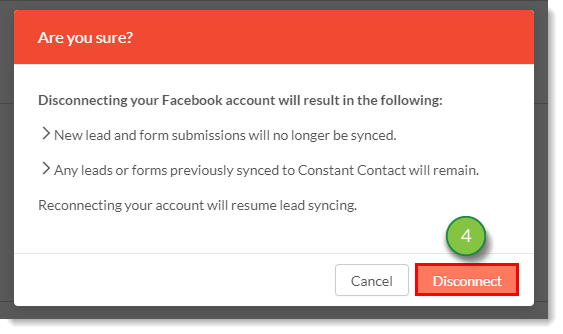
    If you find that you no longer need the Facebook Lead Ads connection, you can disconnect it from Lead Gen & CRM.

    To disconnect Lead Gen & CRM from Facebook Lead Ads, do the following:
     

    1. Click  Settings in the left toolbar.
    2. Click Facebook Lead Ads, located under Third-Party Settings in the left panel.
    3. Hover over the  StatusGreen.png  Account Status circle and click Disconnect.

      Disonnect Facebook Lead Ads
       
    4. Click Disconnect in the modal window that appears.

      Disconnect Confirmation


    Did this article answer your question?


    Constant Contact Logo

    Copyright © 2025 · All Rights Reserved · Constant Contact · Privacy Center