Lead Gen & CRM
How can we help you?
Search our help articles, video tutorials, and quickstart guides

You've got this. You've got us. Search our Knowledge Base to quickly find answers to your questions.

Publishing Facebook Posts in Lead Gen & CRM

Article: 000050462
Updated: August 1, 2026

Schedule, copy, and edit your Facebook posts

Light Bulb IconTip: Are you looking for information about Constant Contact’s Email and Digital Marketing product? This article is for Constant Contact’s Lead Gen & CRM product. Head on over to the Email and Digital Marketing articles by clicking here. Not sure what the difference is? Read this article.


Facebook has recently changed its news feed algorithm to be more focused on a user's friends and family, which means that having an effective social media marketing strategy is more important than ever. In Lead Gen & CRM, you can schedule, copy, and edit your Facebook posts all in one location, so you can execute your social media plan flawlessly.

Once your account is set up, you can create social listening feeds to monitor and track social media activity without leaving Lead Gen & CRM. Learn more about social listening


Article Contents


Users:
Administrators 
Company Managers 
Marketing Managers 
Sales Managers  
Salespersons  
Jr. Salespersons  

Creating Facebook posts

Before you can create Facebook posts from your Lead Gen & CRM account, you'll need to connect your Facebook account to Lead Gen & CRM in Settings. Learn more.

Important: Due to recent policy changes at Facebook, you can no longer publish posts to personal Facebook pages via Lead Gen & CRM or connect group pages. You can, however, still continue to post to public pages that you manage.

To create and publish Facebook posts, do the following:
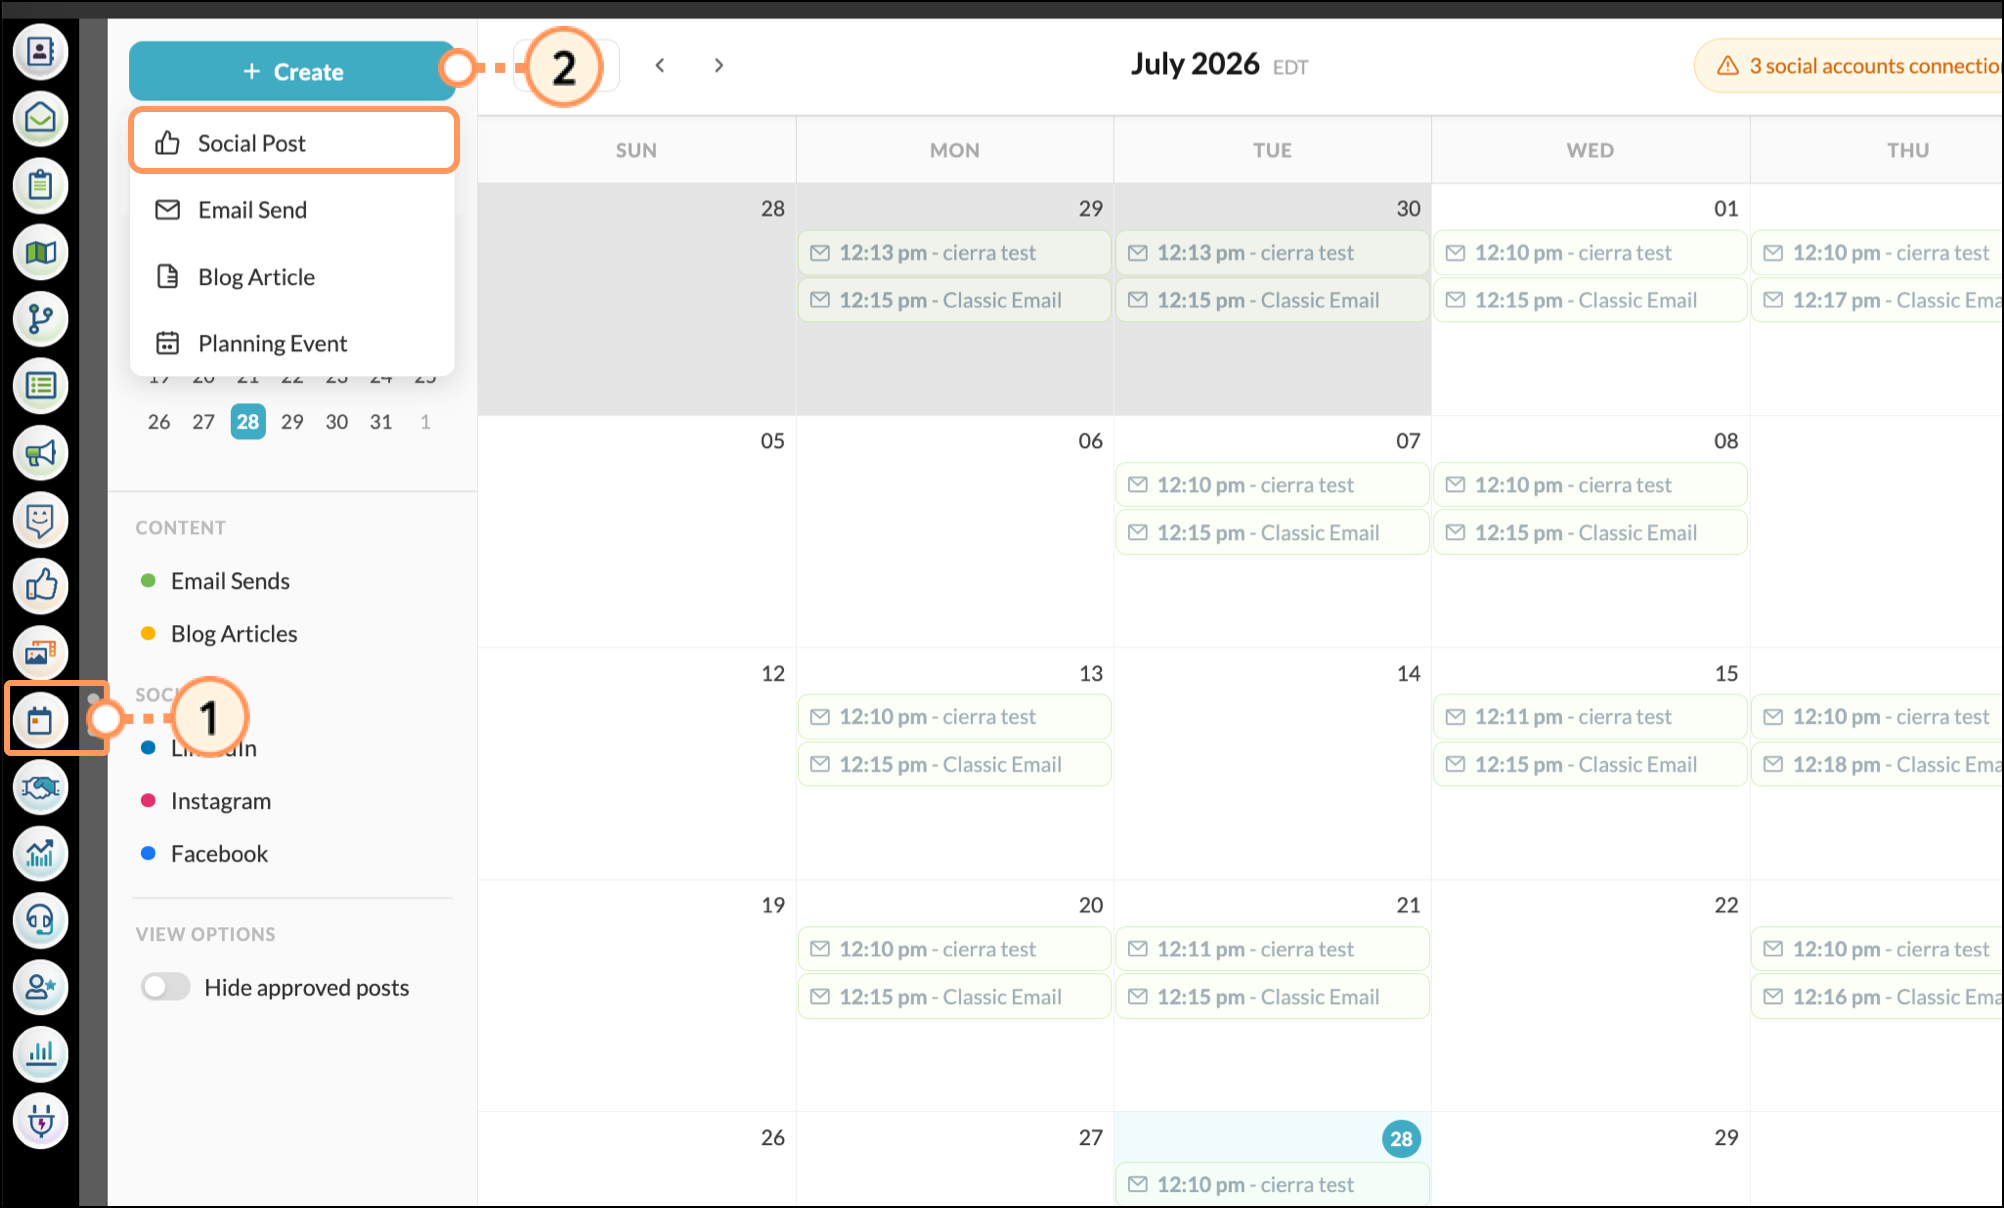
  1. Click Content Calendar in the left toolbar.
  2. Click + Create > Social Post

    Expanded Create menu in the Content Calendar 
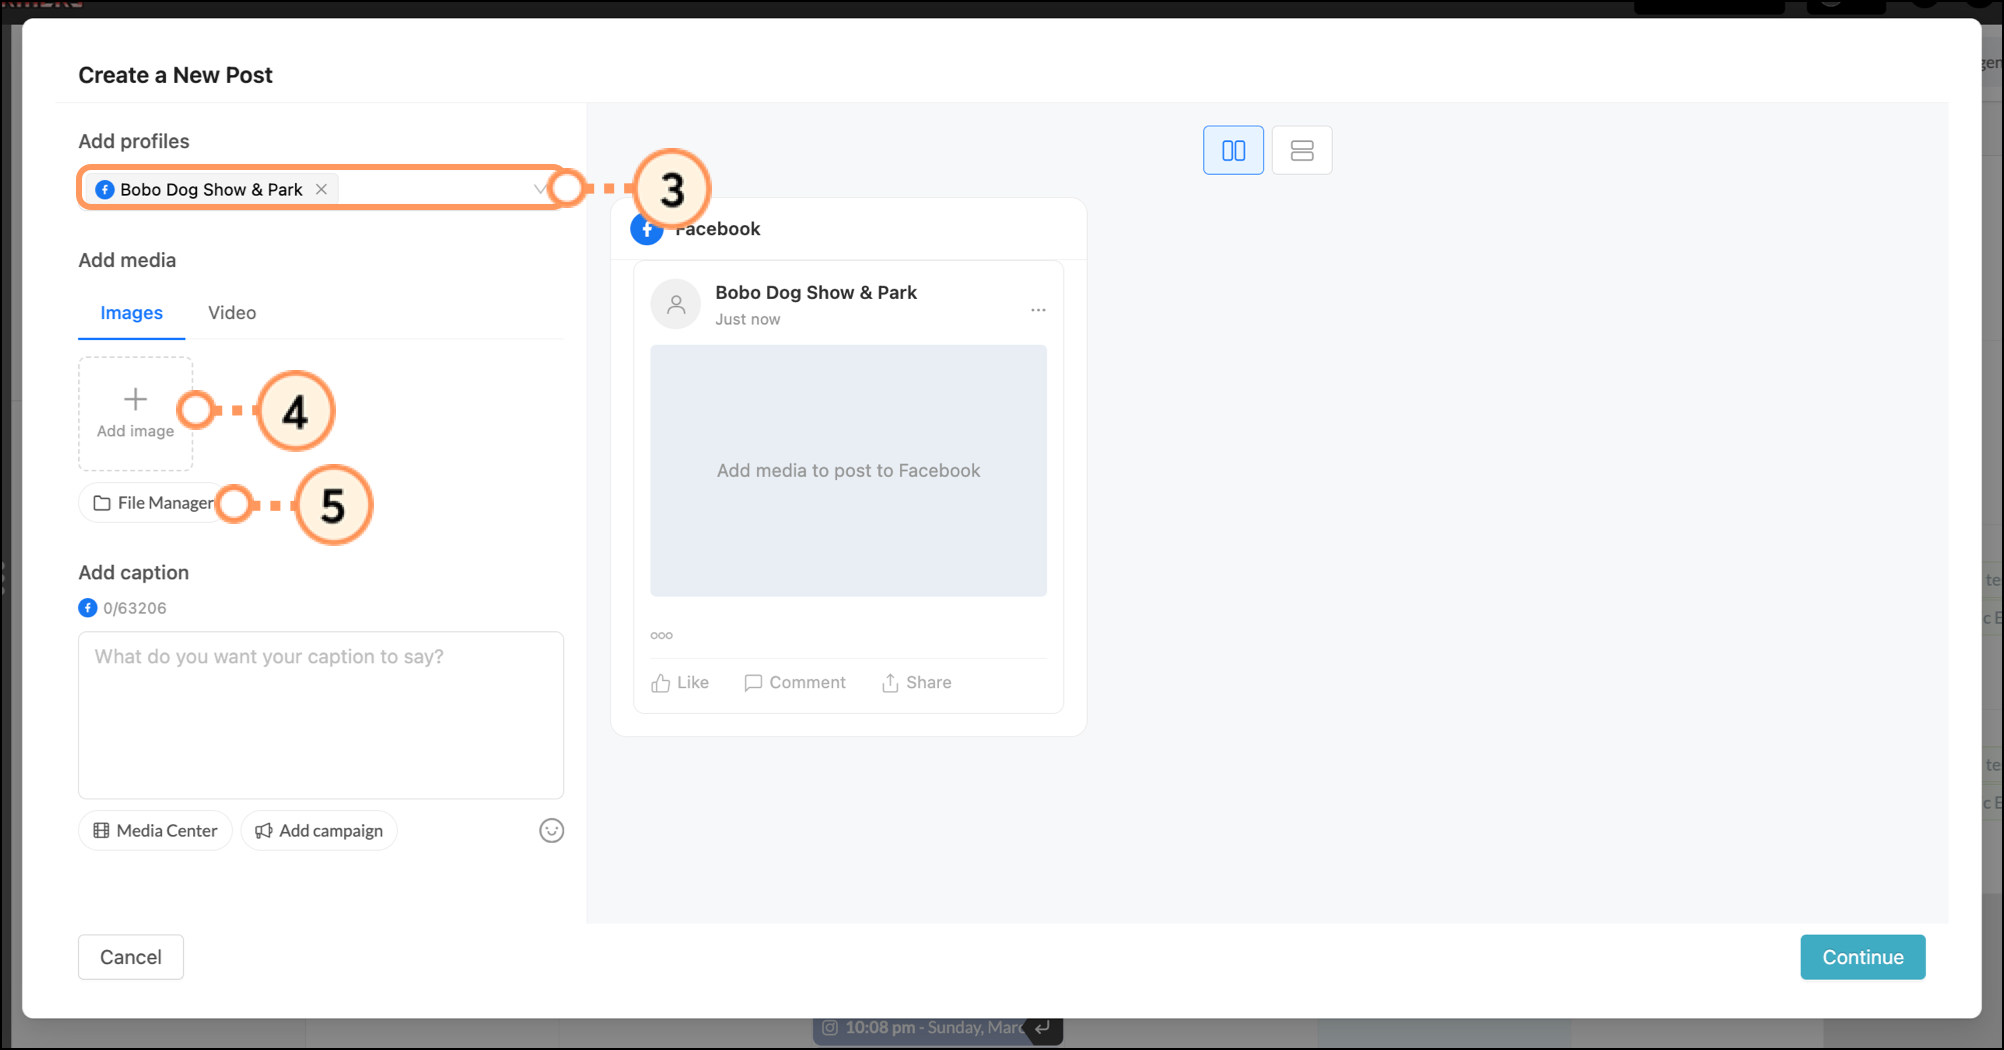
  3. From the Add profiles dropdown, select 1 or many connected social profiles. You can select Instagram, Facebook, and/or LinkedIn profiles as needed. Read more about posting across multiple platforms
  4. Choose the Images and Videos tab as needed and upload the  image.png  Media you want in your post.

    Note: Switching from one tab to another will remove any media you have already uploaded in the other tab.

  5. Optionally, click File Manager to pull media files from your Lead Gen File Manager.

    Create A New Post popup with a Facebook profile selected

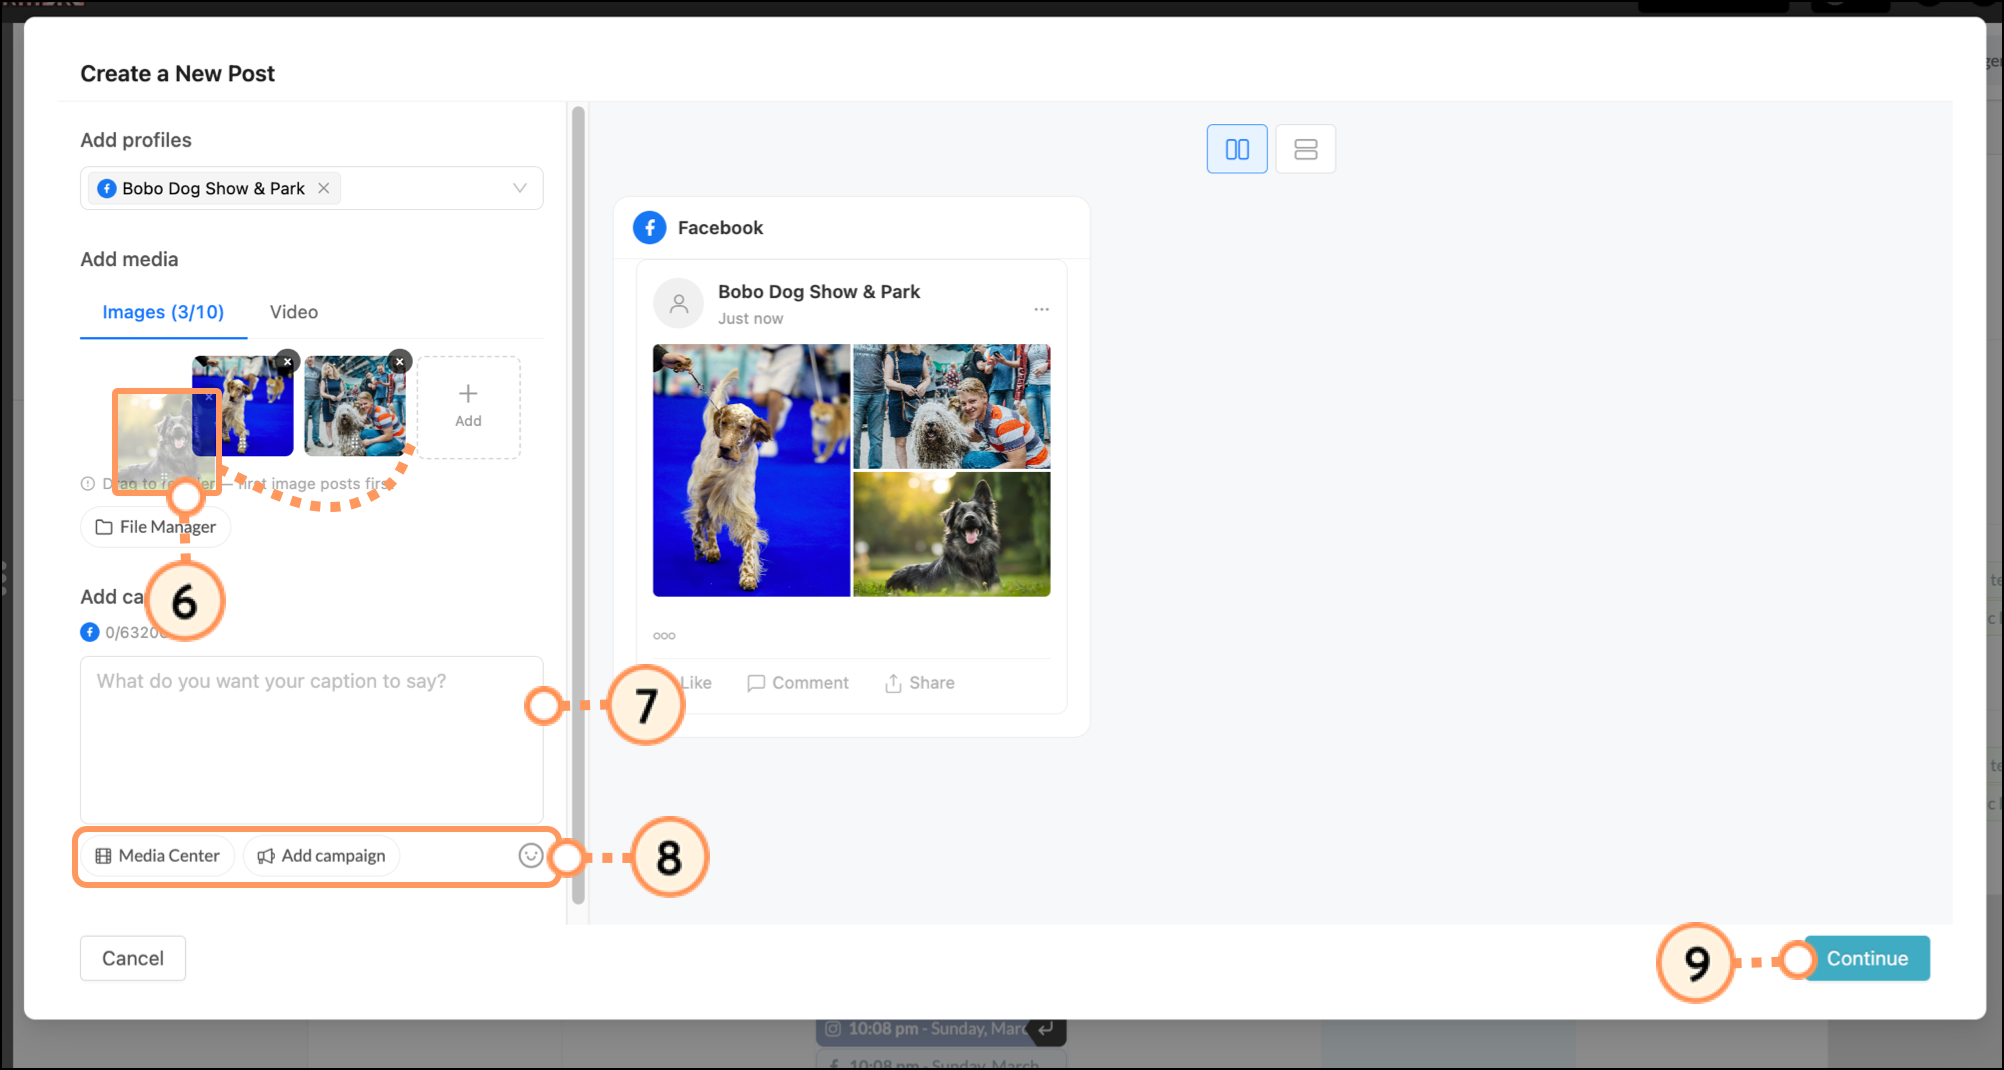
  6. Drag and drop images to re-order them.
  7. Enter message content into the Add caption text box.
  8. Add a Media Center asset, a campaign link, and any number of applicable emojis as needed. 
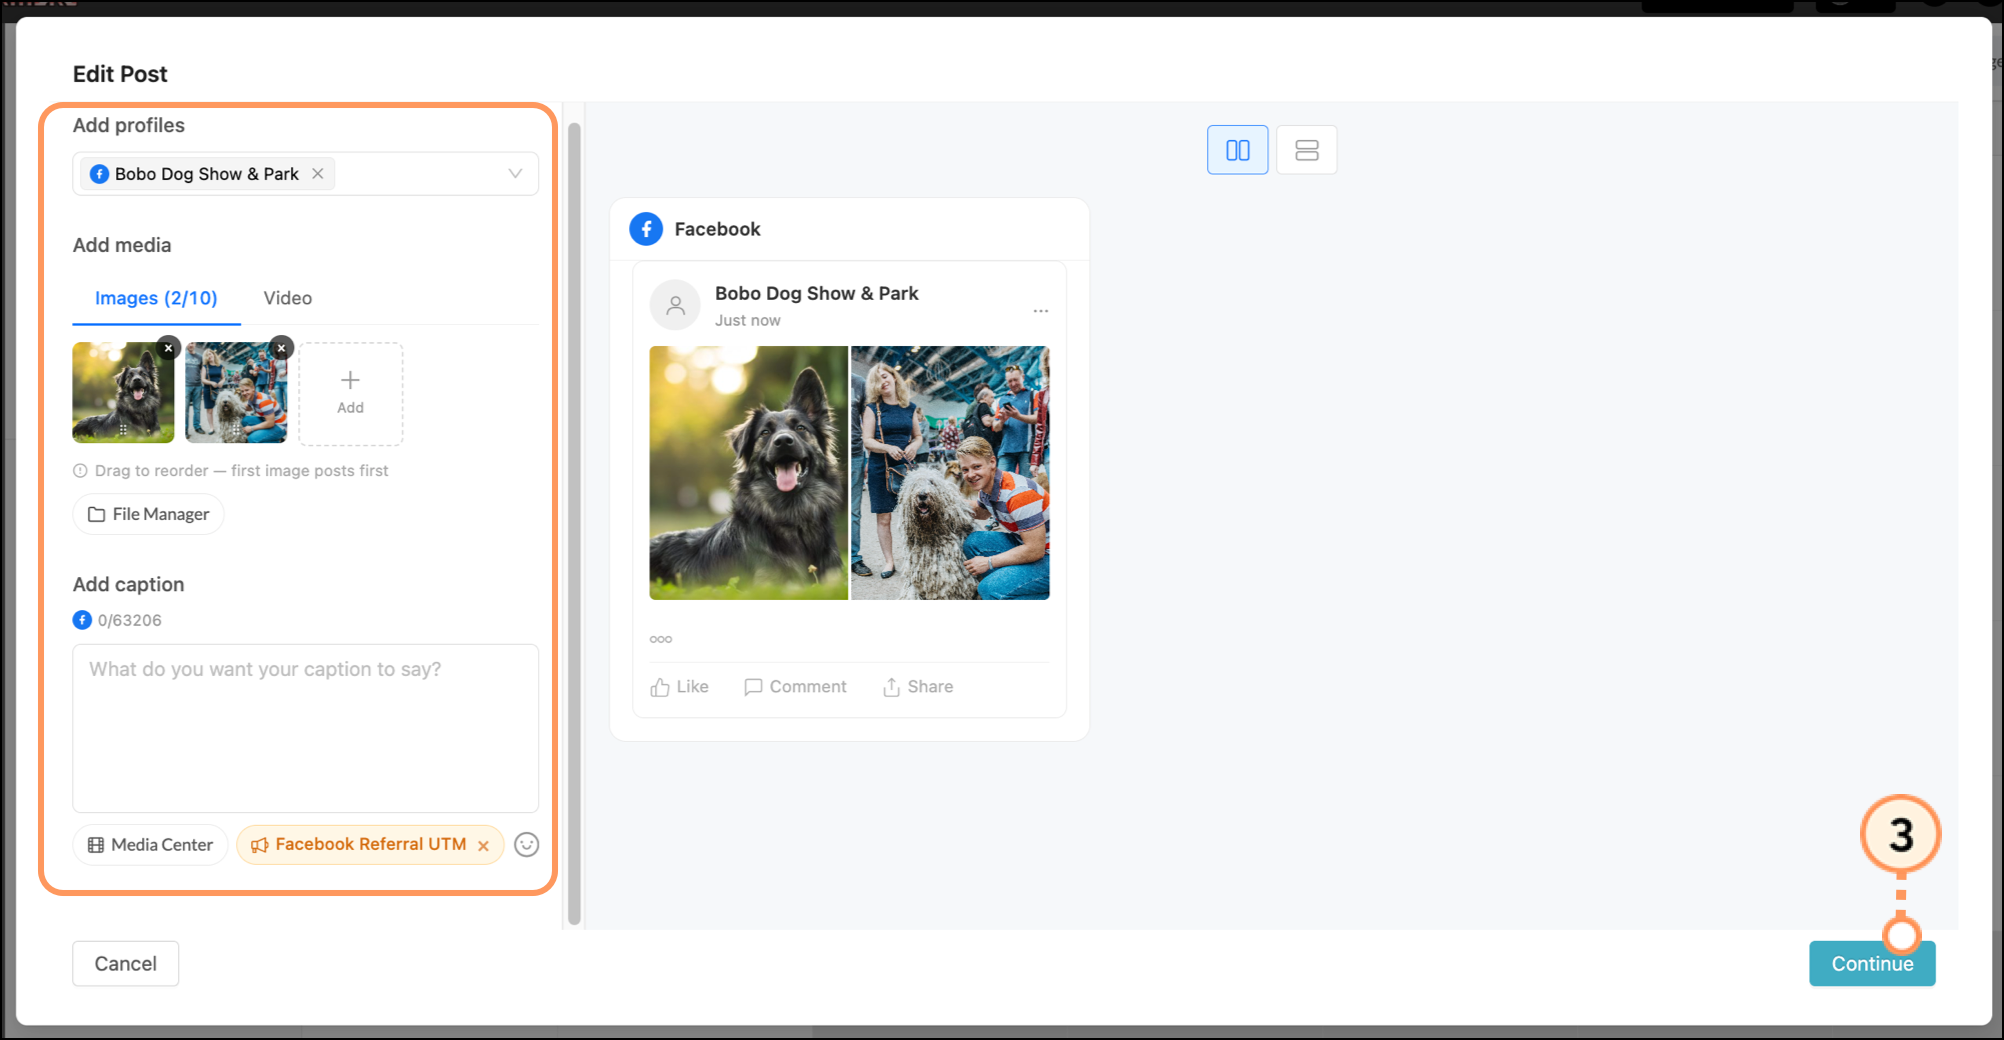
  9. Review your post in the live preview and when ready, click Continue

    Create a New Post pop-up with Facebook post content  
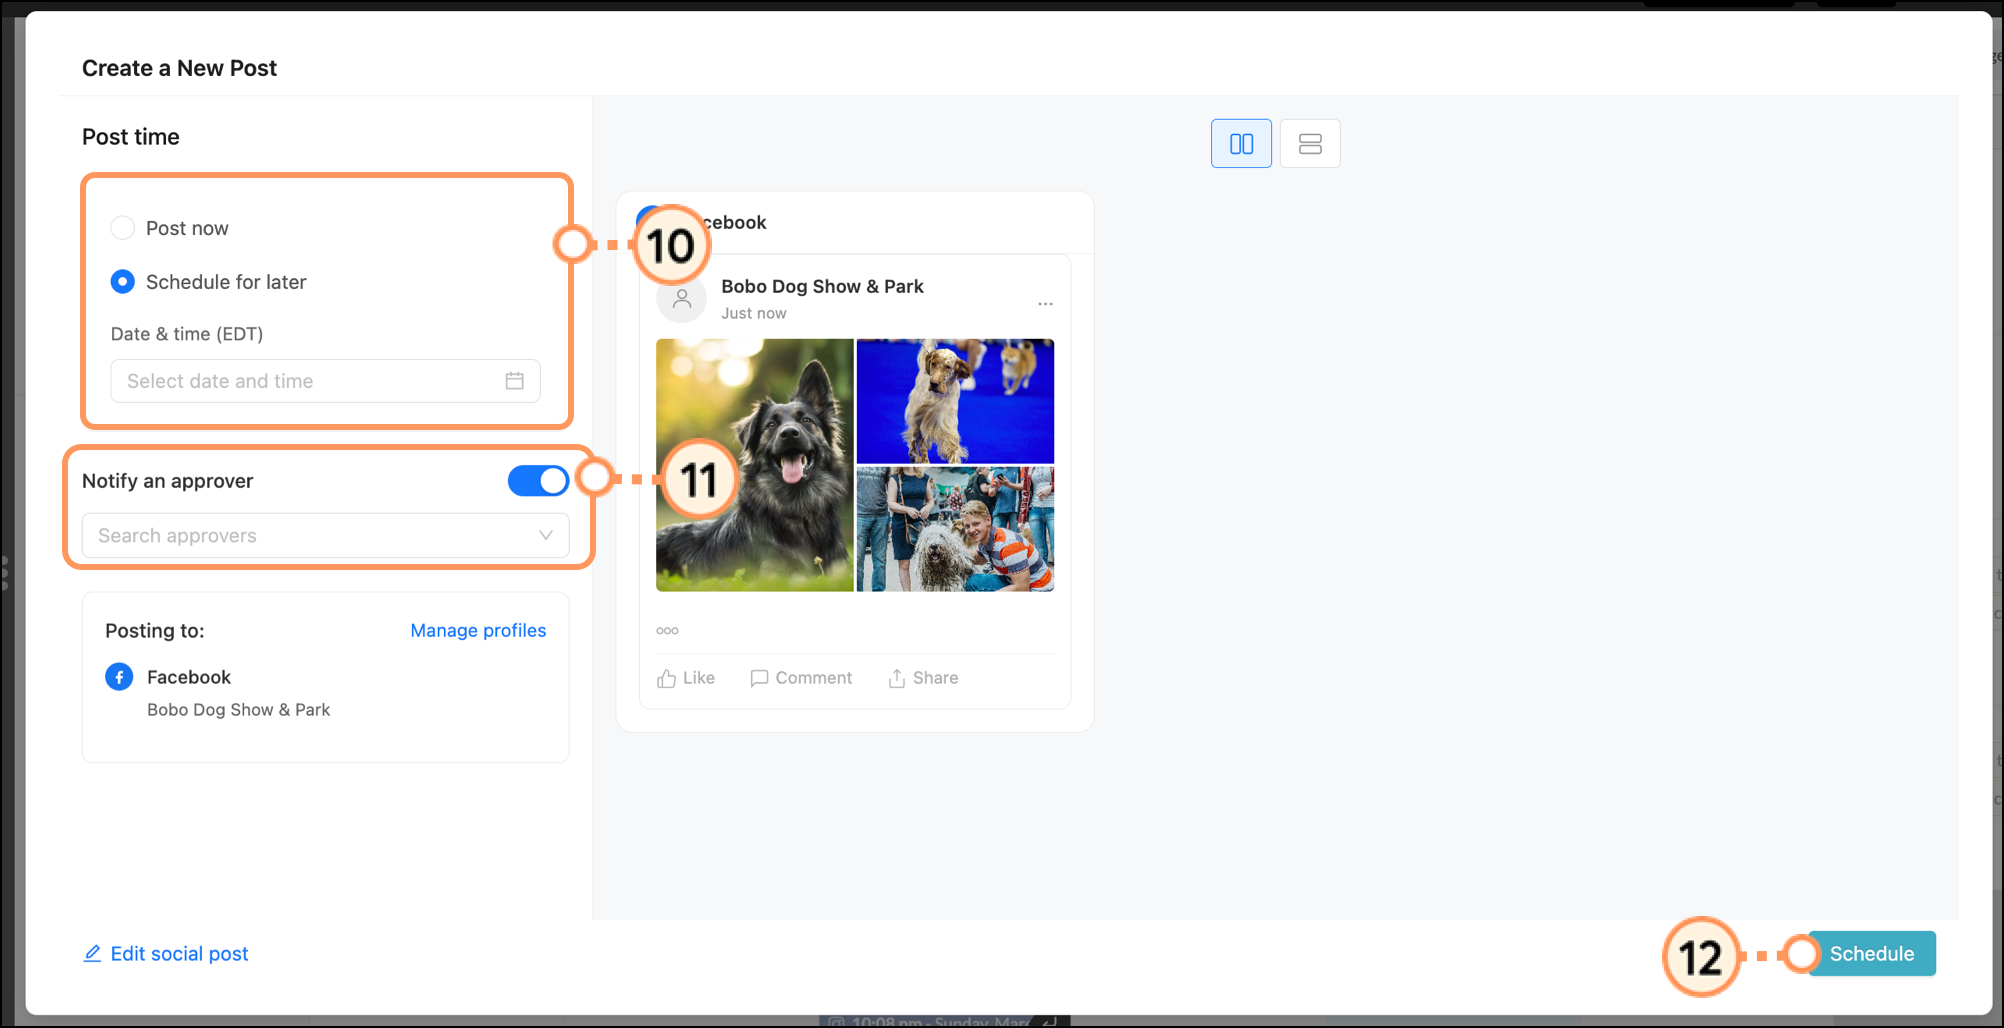
  10. Choose a Post time: 
    • Post now - Schedules the social media post for immediate release.
    • Schedule for later - Schedules the social media post at a chosen date and time. 
  11. Optionally, select the toggle to notify a Lead Gen user for approval and choose the Lead Gen user from the drop-down.
  12. Click Post Now or Schedule

    Create a New Post pop-up schedule options 

To learn more about editing, copying, or deleting a scheduled post, read this


Special Facebook Posting Considerations

When posting to Facebook, be aware of the following:

  • Lead Gen & CRM links in your published posts are there because they need to be. This is due to Lead Gen & CRM's API agreement with Facebook, and it is standard with any social media management tool. If you are posting to a company page, then this link will not be public, as only you can see it. If you post to a personal page, then this link will be public. Both you and your visitors will see the Lead Gen & CRM link.
  • Facebook posts with images are uploaded in a specific way. Lead Gen & CRM first uploads the image to a Facebook album before sharing the image as a post with associated entered text. Though this looks like two separate posts, it is a single live post.
  • There are certain restrictions to post boosting. You can boost your posts made in Lead Gen & CRM—but only if the post is made of just text or metadata. You cannot boost image posts that originate with Lead Gen & CRM.

Posting to multiple platforms at once

If needed, you can duplicate your post across social platforms by selecting as many connected profiles as you'd like.
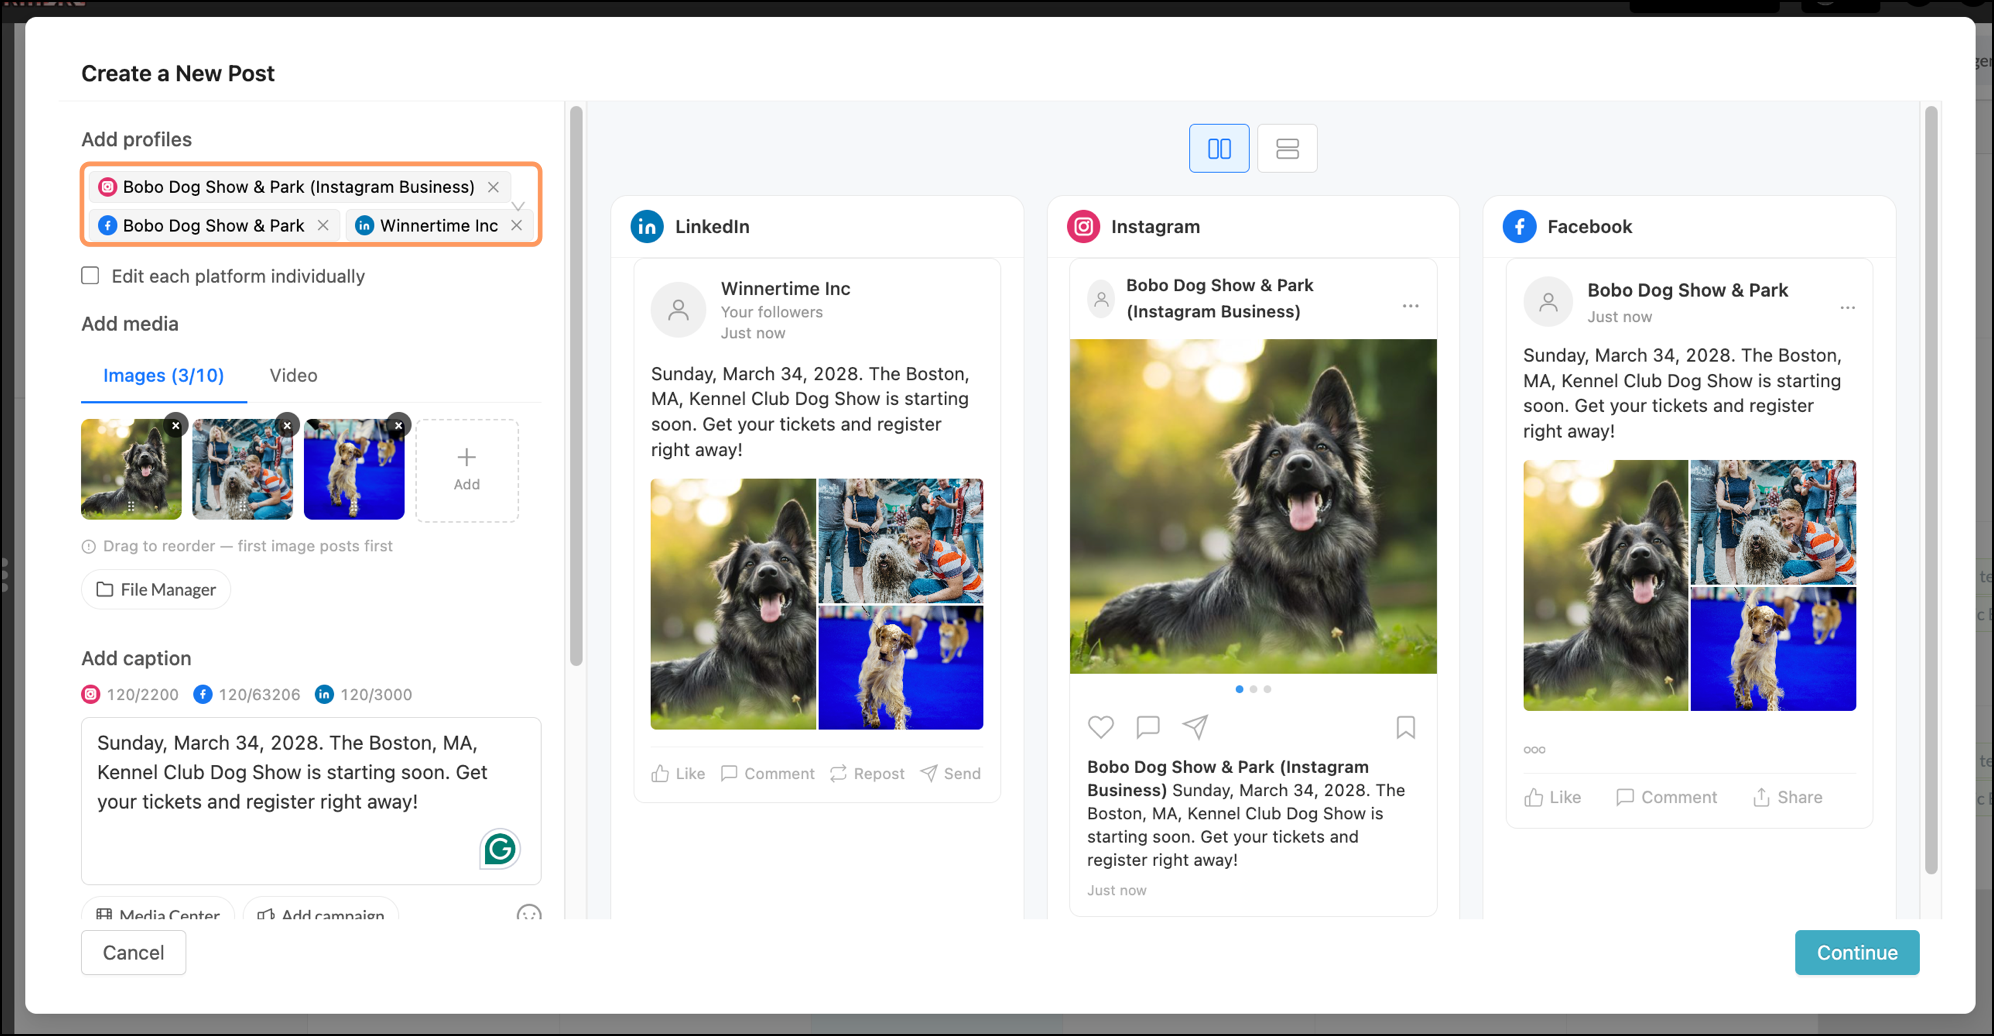
 

Create a new post pop-up with Instagram, Facebook, and LinkedIn social post in progress


Make each post the same, complete with the same set of images and the same caption, or check the box to edit each platform individually. This helps if you want, for example, one set of images and one caption for your Instagram profile(s), a different set of images/caption for your Facebook page(s), and a different set of images/caption for your LinkedIn profile(s). 
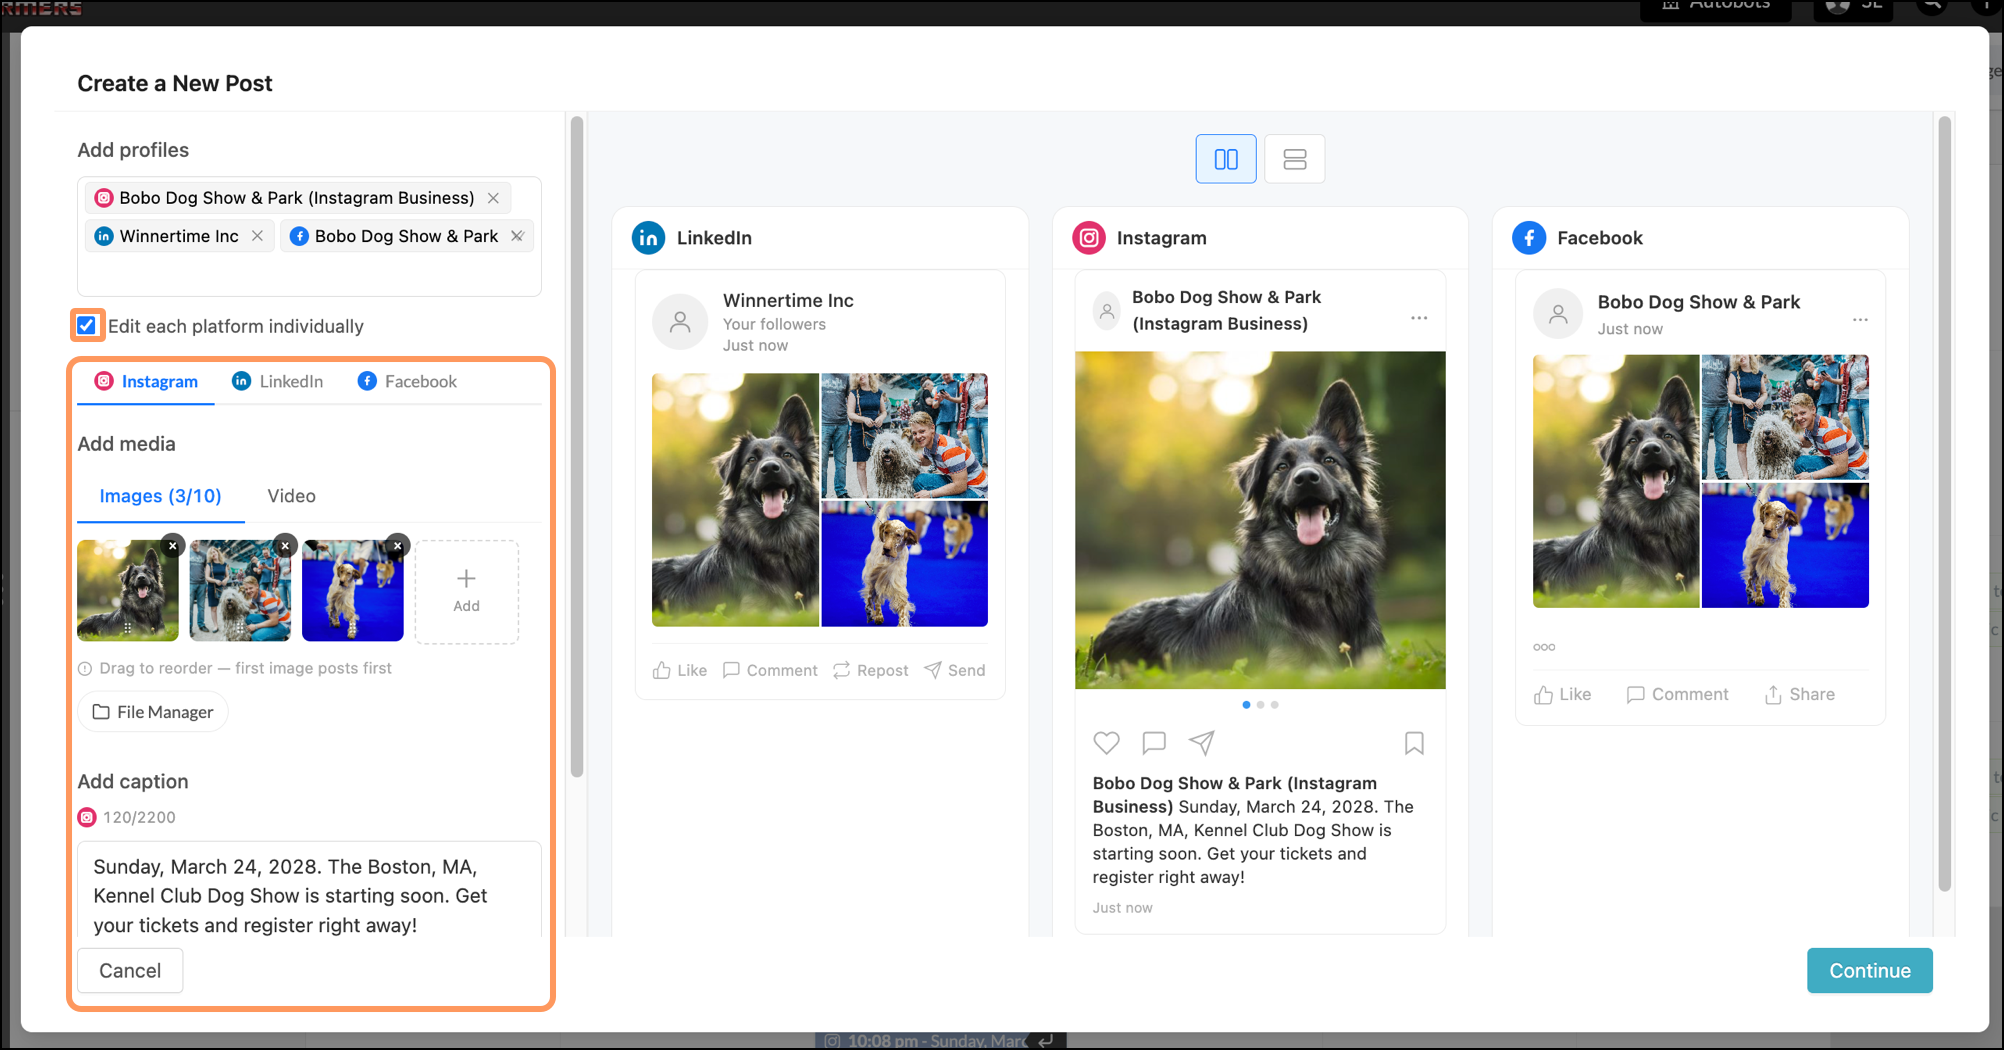
 

Edit each platform individually box checked with Instagram post being edited


Associating Facebook posts with campaigns

When creating a social post, you can link it to a campaign to see which leads are interacting with it. Social Media Tracking must be enabled on a campaign's settings page to add campaign tracking to a social post.

Once the campaign-attributed social post is submitted and published, the link in your post will automatically generate a UTM parameter behind the scenes. These UTM codes cannot be edited. The UTM codes can be viewed once you schedule the post and view it in the Content Calendar.

If you have multiple UTM codes tied to multiple campaigns, then they will be evaluated in the following order:

  1. Google Ads
  2. Social
  3. Custom campaign tracking rules

Associating posts with campaigns requires both a campaign and social posts.


Creating Campaigns with Social Media Tracking

To create a campaign that can be tied to a Facebook post, create or edit a campaign.:
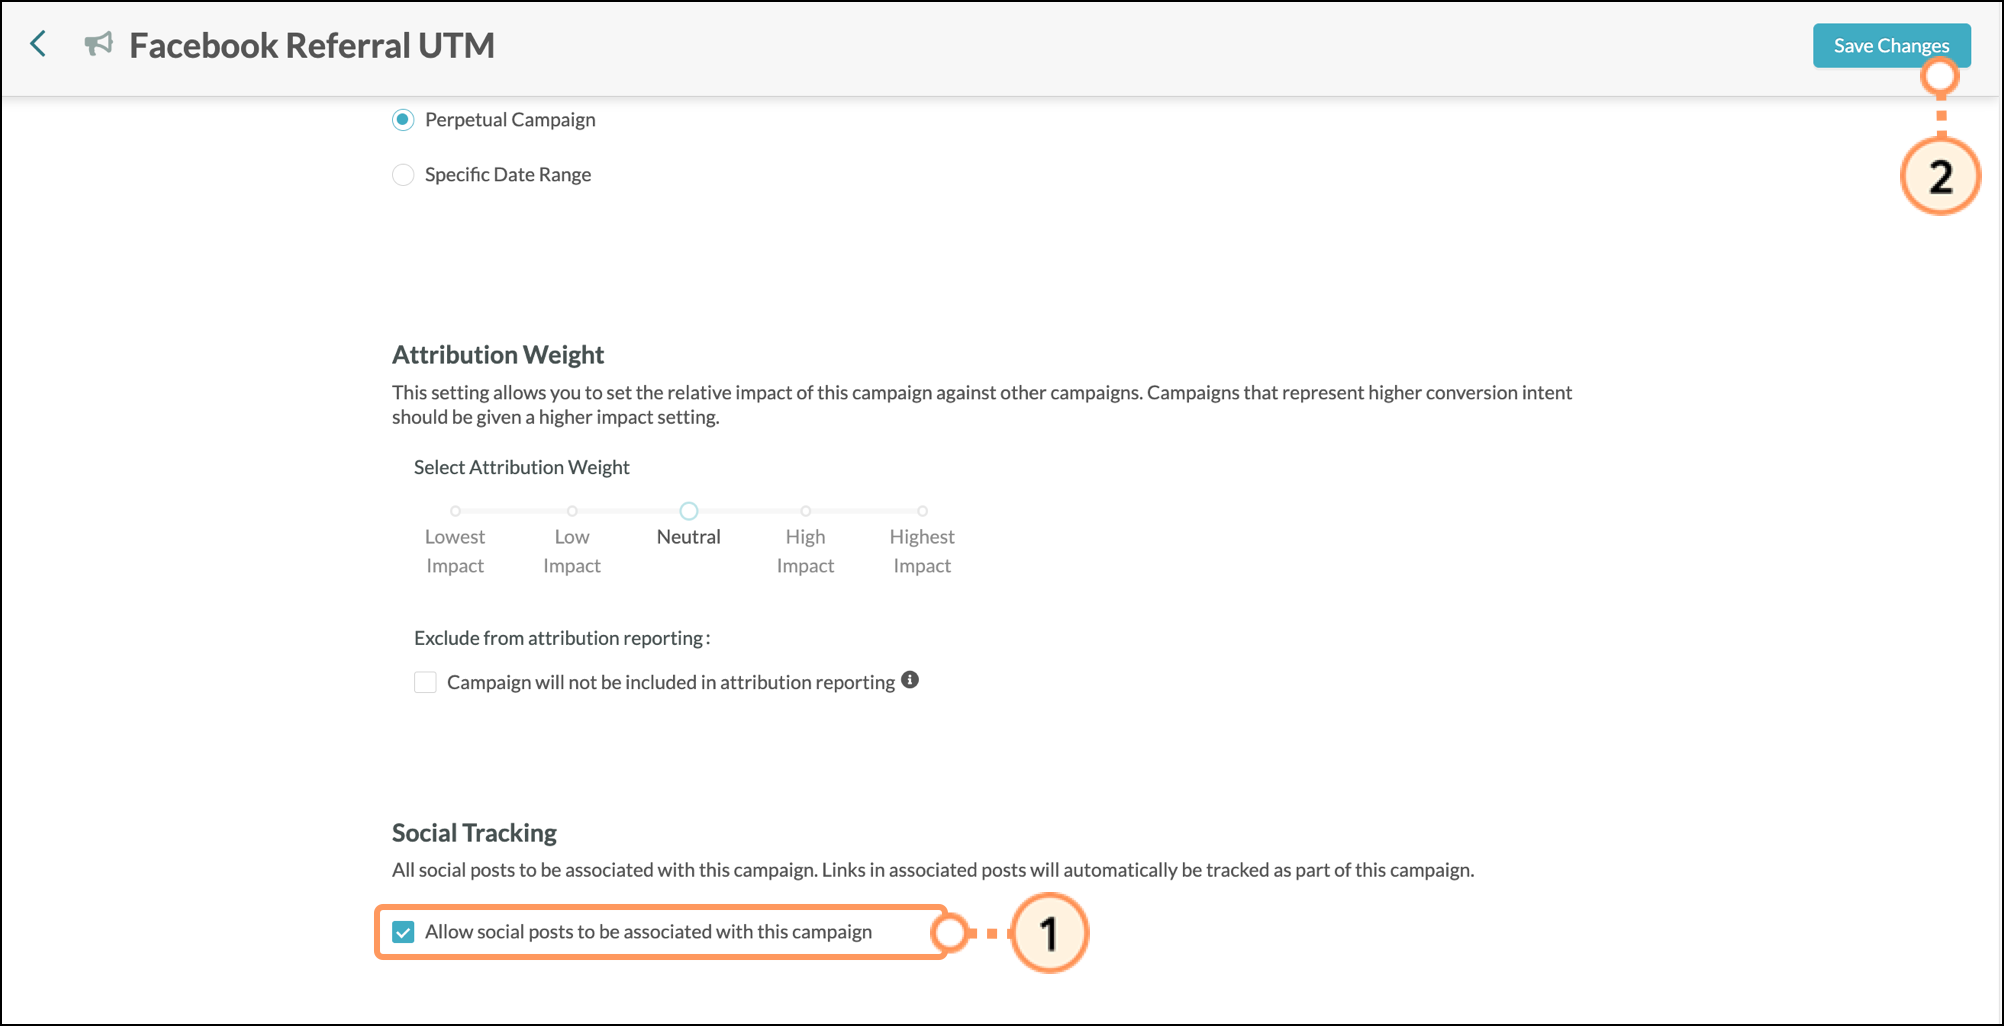
  1. ​​Scroll down and check the Allow social posts to be associated with this campaign checkbox in the Social Tracking section.
  2. Click Save Changes

    Facebook campaign page with Allow social posts to be associated with this campaign checkbox 


Attributing Facebook Posts to a Campaign

To attribute a Facebook post to a campaign, do the following:
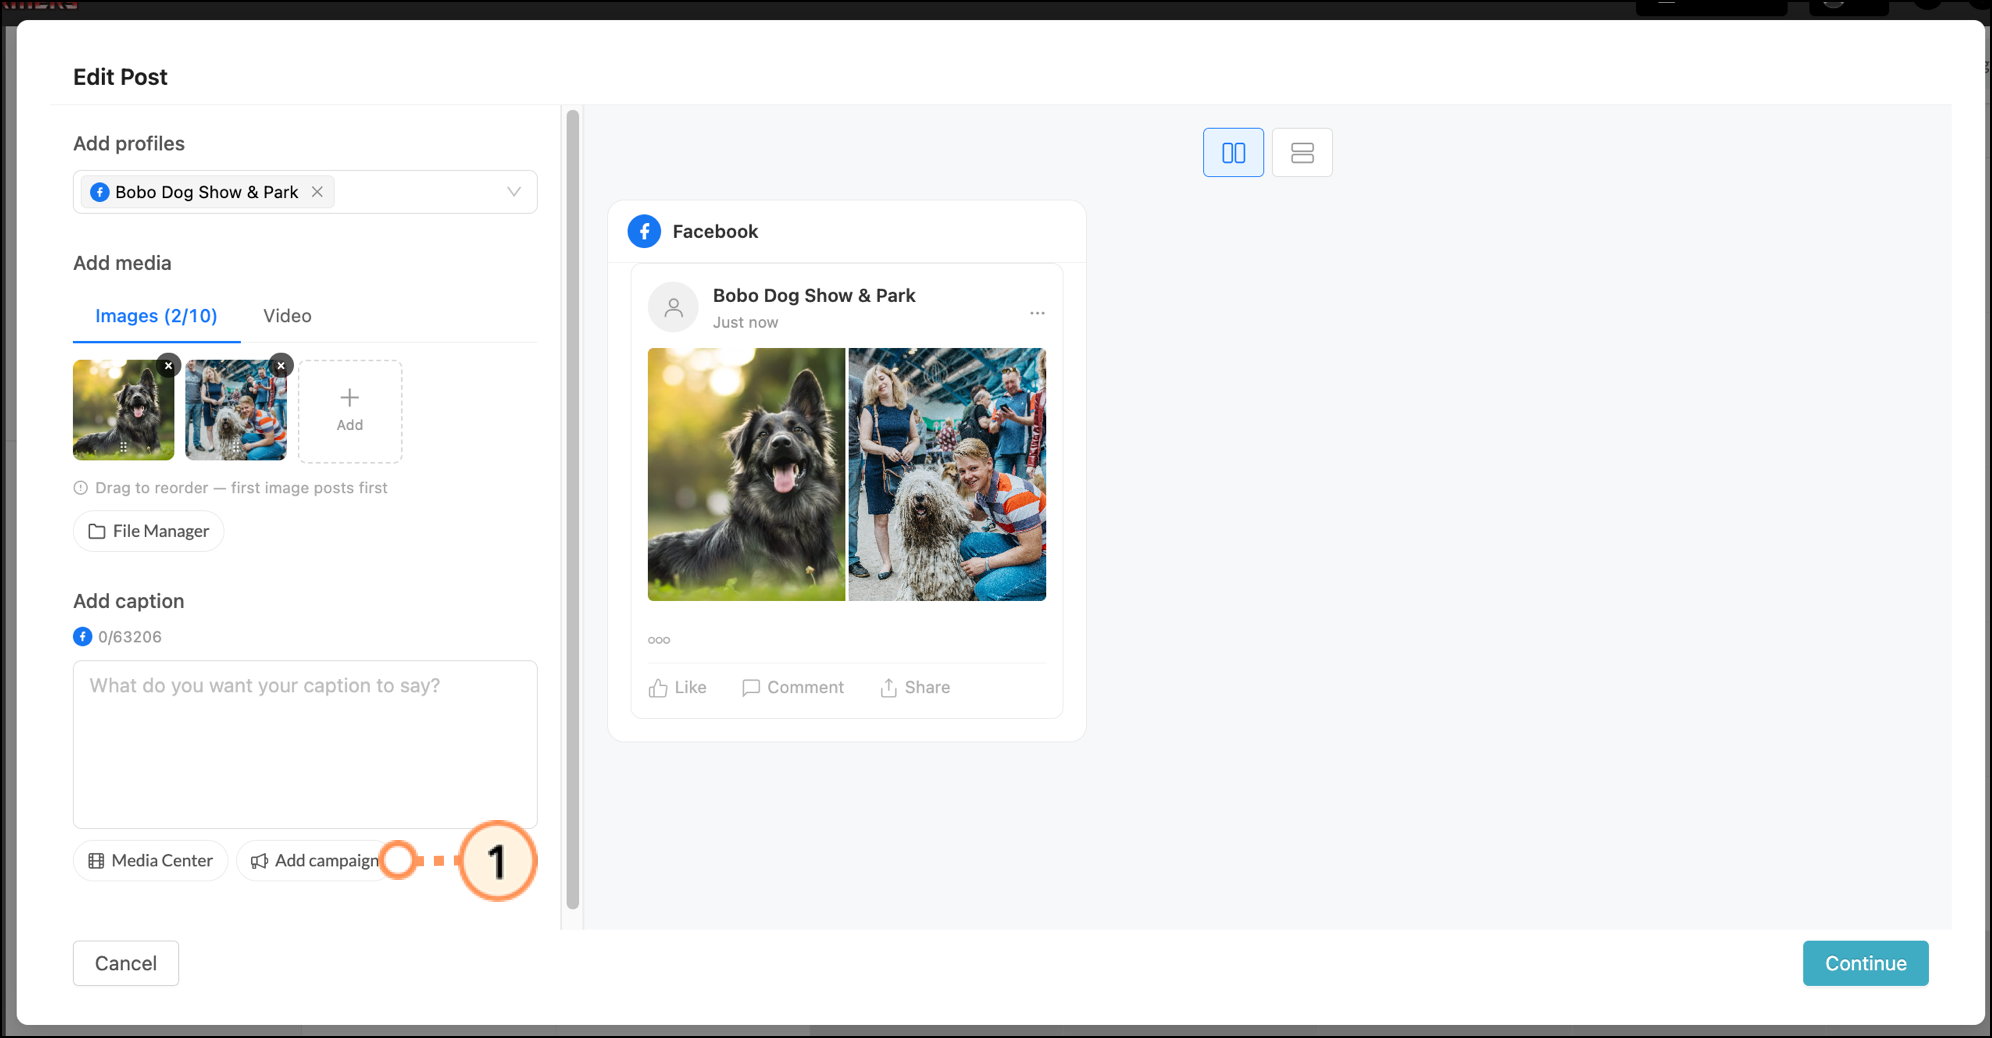
  1. When publishing or editing the social post, click Add campaign

    Edit Post pop-up Add campaign button 
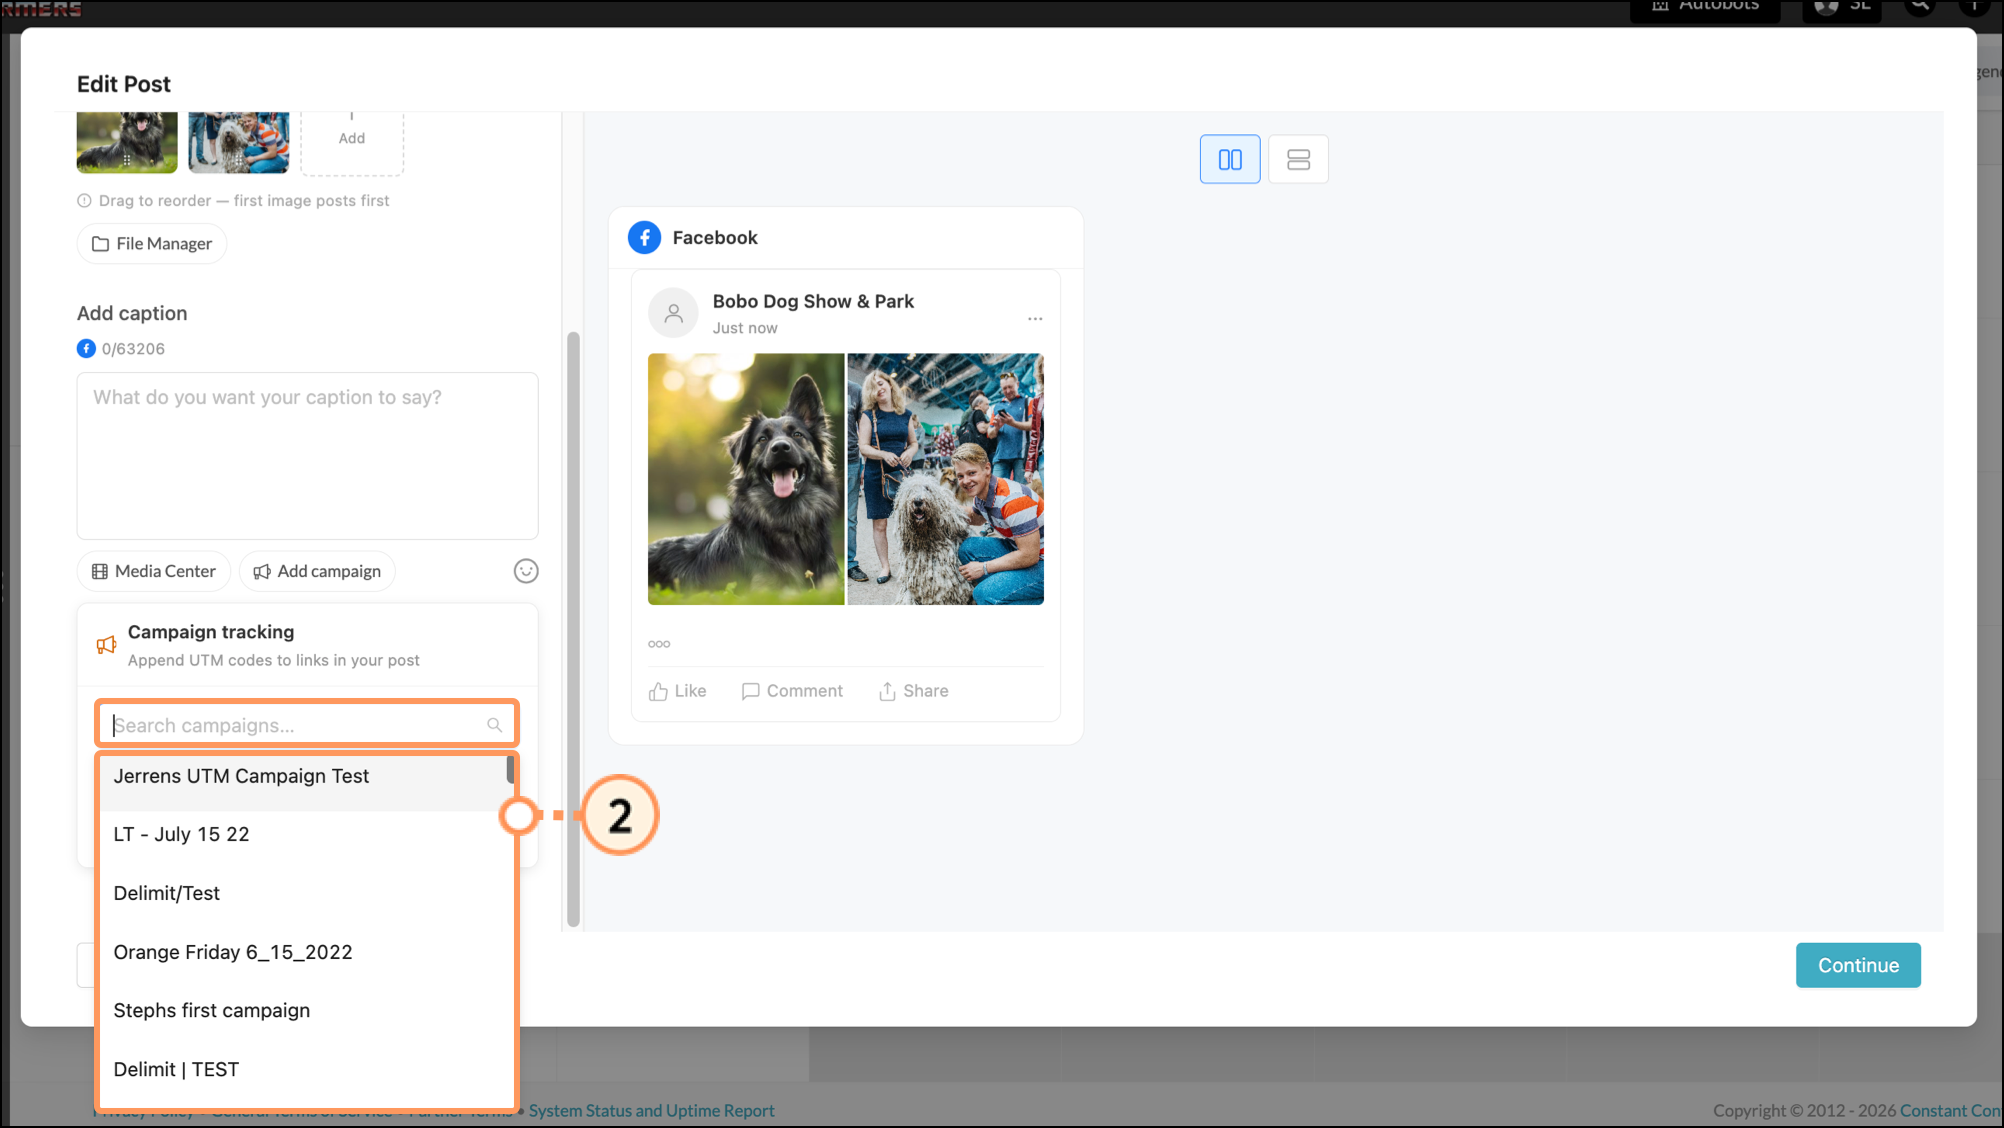
  2. Select the name of your campaign from the dropdown menu.

    Add campaign dropdown 
  3. Continue modifying your post as needed, and then proceed to schedule or post.

    Social post with attached campaign  

Supported file types

Lead Gen & CRM has a set list of supported file types for uploading to the Media Center. However, Facebook, LinkedIn, and Twitter only allow certain file types to be posted. When posting to social media, if you try to upload an unsupported file type or use a Media Center asset that is unsupported by social media platforms, the post fails outright. 

This means that even though you can upload a .ZIP file as a Media Center asset, you cannot post that file to social media.


 Facebook Supported File Types 

       •   .3G2

      •   .GIF        •   .MTS 

       •   .3GP

      •   .JPEG        •   .NSV  

       •   .3GPP 

      •   .M2TS        •   .OGM 

       •   .ASF 

      •   .M4V        •   .OGV 

       •   .AVI  

      •   .MKV        •   .PNG  

       •   .BMP  

      •   .MOD        •   .QT  
       •   .DAT       •   .MOV  

      •   .TIFF  

       •   .DIVX       •   .MP4  

      •   .TOD  

       •   .DV       •   .MPE  

      •   .TS  

       •   .F4V       •   .MPEG  

      •   .VOB  

       •   .FLV       •   .MPEG4 

      •   .WMV  


Did this article answer your question?


Constant Contact Logo

Copyright © 2026 · All Rights Reserved · Constant Contact · Privacy Center