| Administrators | ✓ | |
| Company Managers | ||
| Marketing Managers | ||
| Sales Managers | ||
| Salespersons | ||
| Jr. Salespersons |
Tracking codes are Javascript code snippets. Once added to the HTML of a web page, these code snippets track, collect and send website user activity. This data is sent to a website analytics platform or service. Lead Gen & CRM utilizes its own tracking and analytics services, and it provides ways to utilize Google Analytics.
Tracking codes are generated by Lead Gen & CRM automatically and each code is different for each website. Tracking codes must be installed on the header of the website you want to track. Once you add the tracking code to your website header, that header (and therefore the tracking code) should appear on every webpage within your website.
Once you have added the Lead Gen & CRM tracking code to a website, microsite, blog, or landing page, you will start generating leads within seconds. Lead Gen & CRM allows you to track as many sites as you would like and monitor them in one place.
Tracking in Lead Gen & CRM is cookie-based. Refer to Understanding Cookies for information on cookies and how Lead Gen & CRM uses cookies for tracking.
To begin tracking your website in Lead Gen & CRM, you will first need to add it to Lead Gen & CRM and generate a tracking code.
When creating websites for use with Perfect Audience, you will not need to do anything special. The Lead Gen & CRM site tracking code also includes the Perfect Audience code, so it does not need to be modified for Perfect Audience.
To add your website to Lead Gen & CRM, do the following:
 Options > Add Site.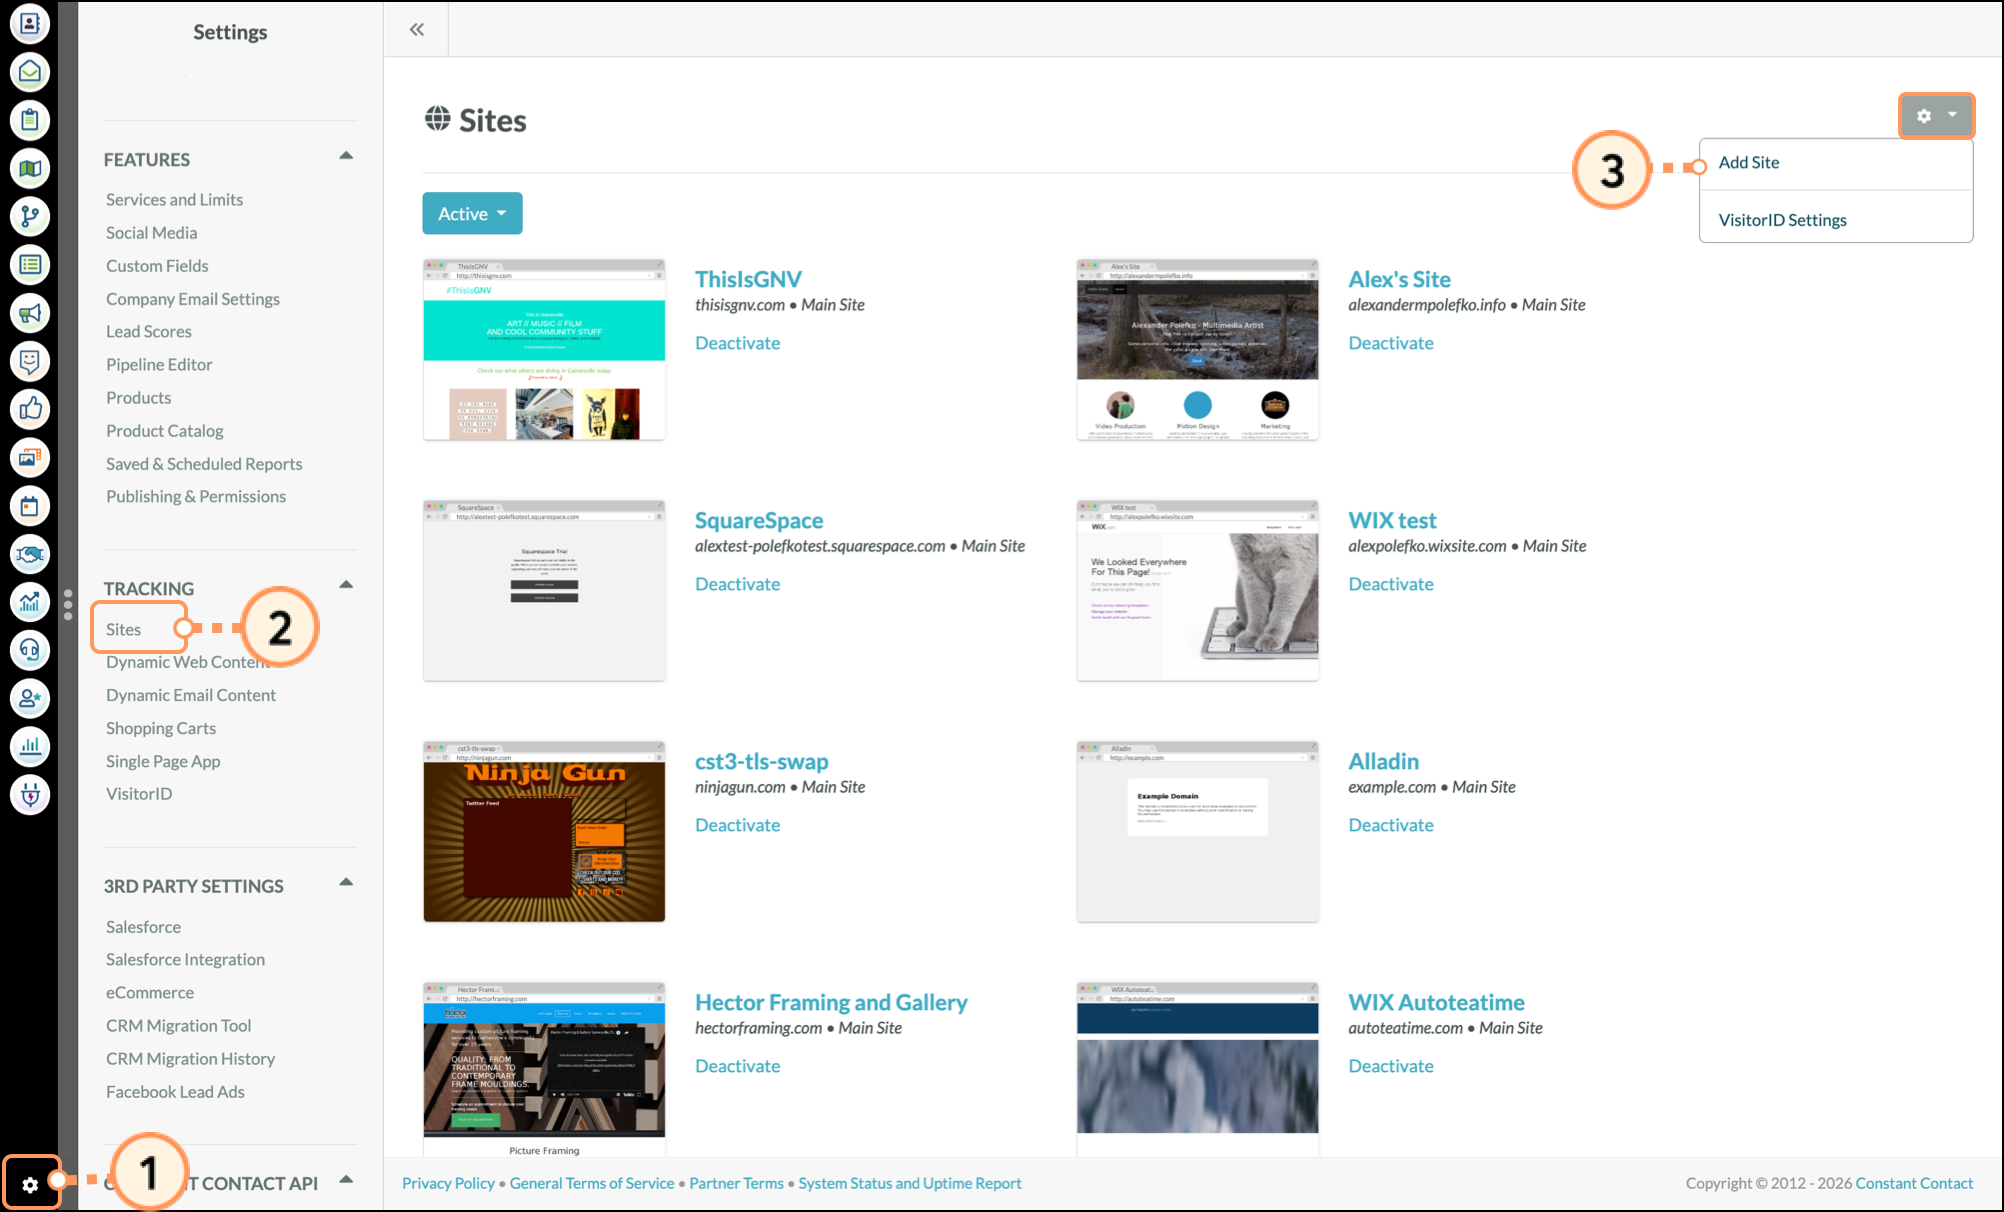
|
|
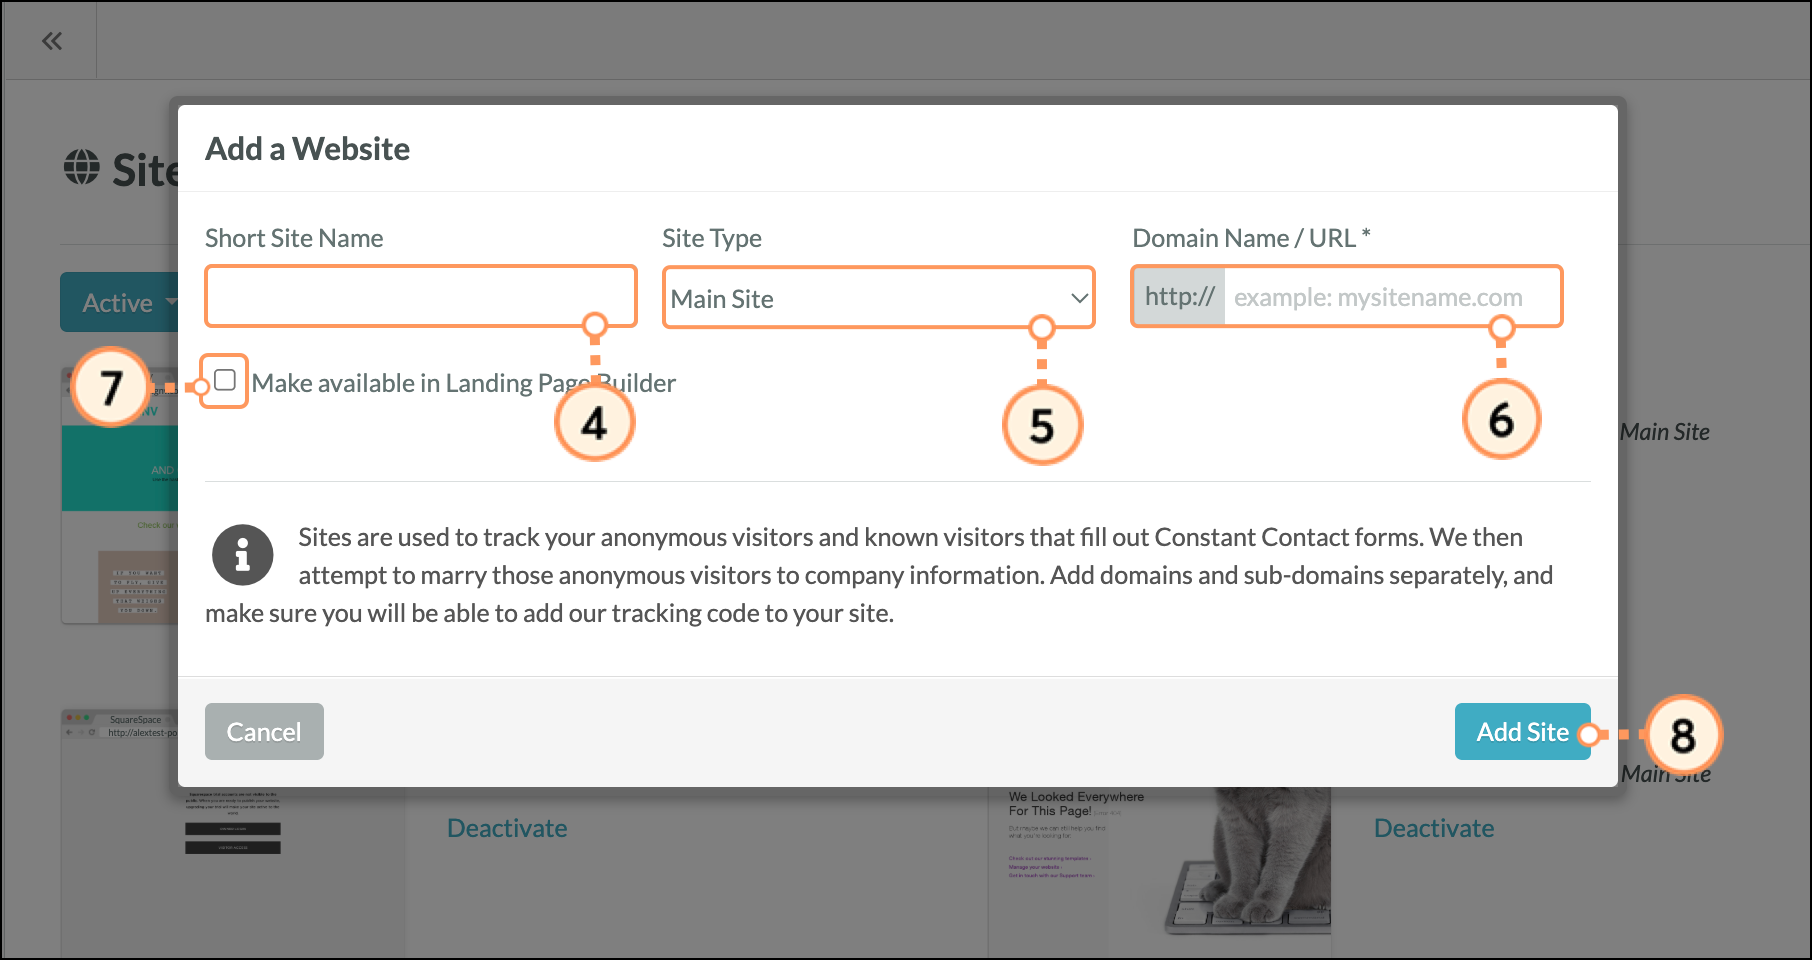
Important: Each domain must have a unique tracking code.
You can deactivate website tracking at any time. To deactivate and disable tracking for a website, do the following:
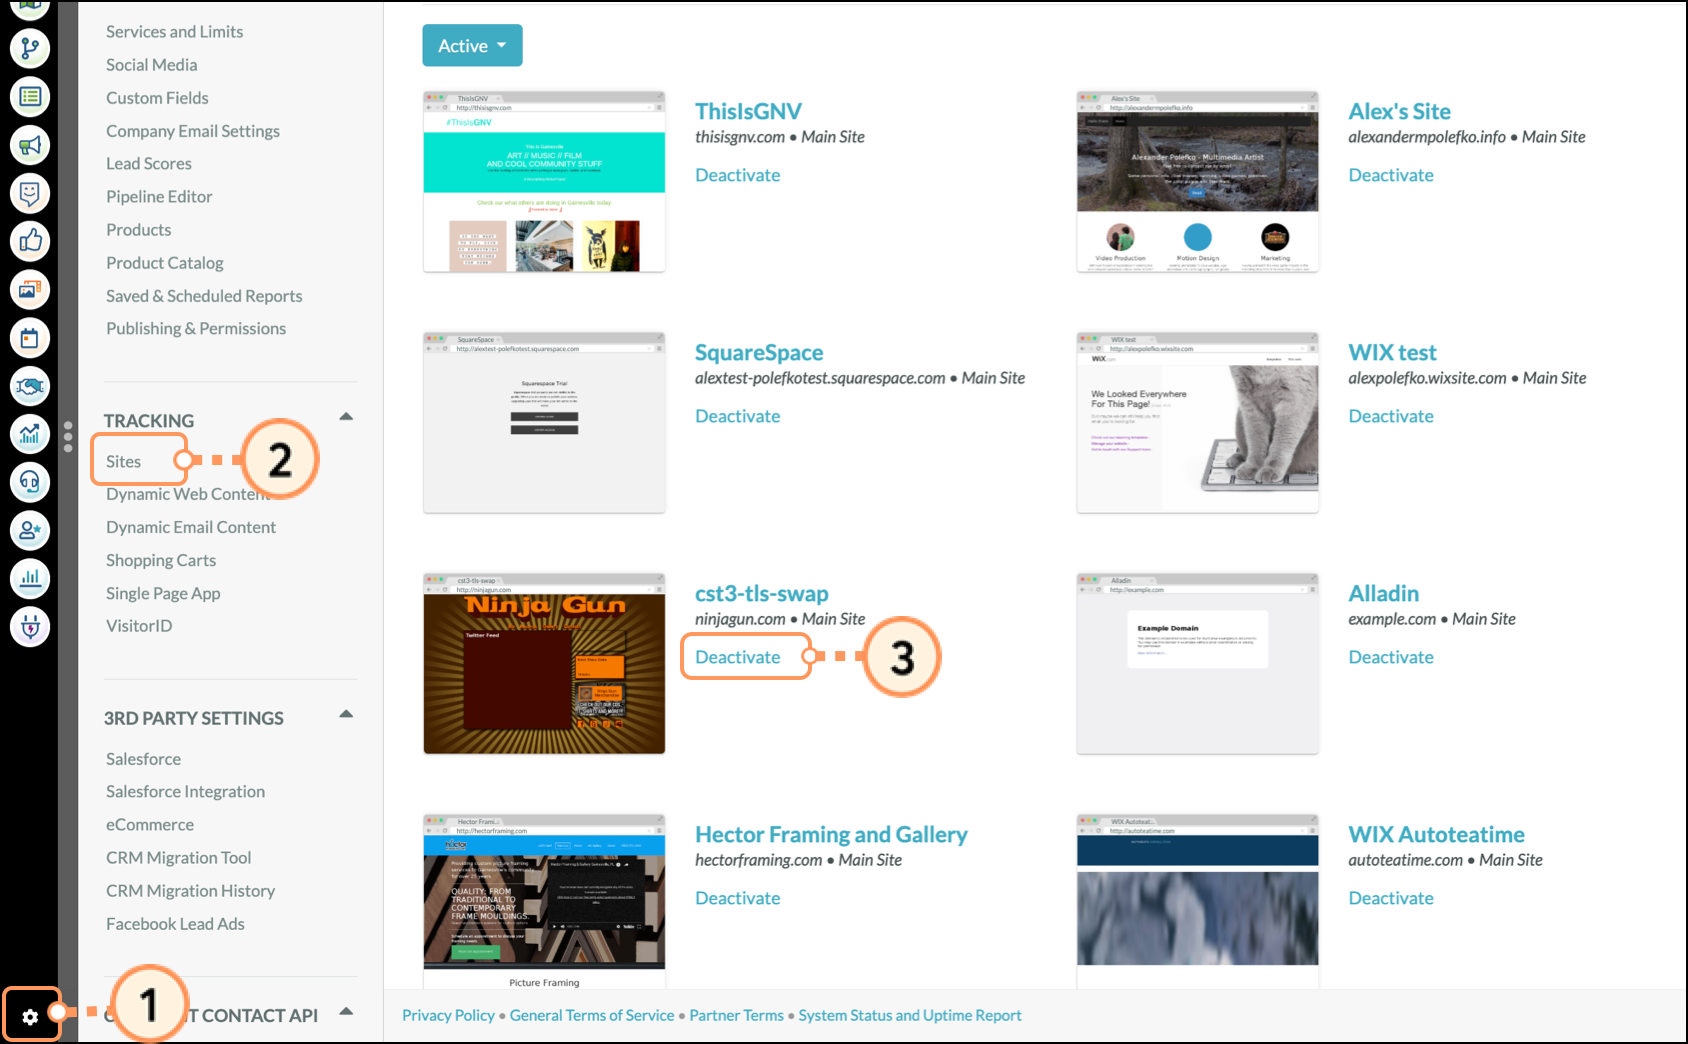
Deactivated sites are not deleted; they are placed in the Inactive Sites list.
You can reactivate tracking for previously deactivated websites. To reactivate a deactivated website, do the following:
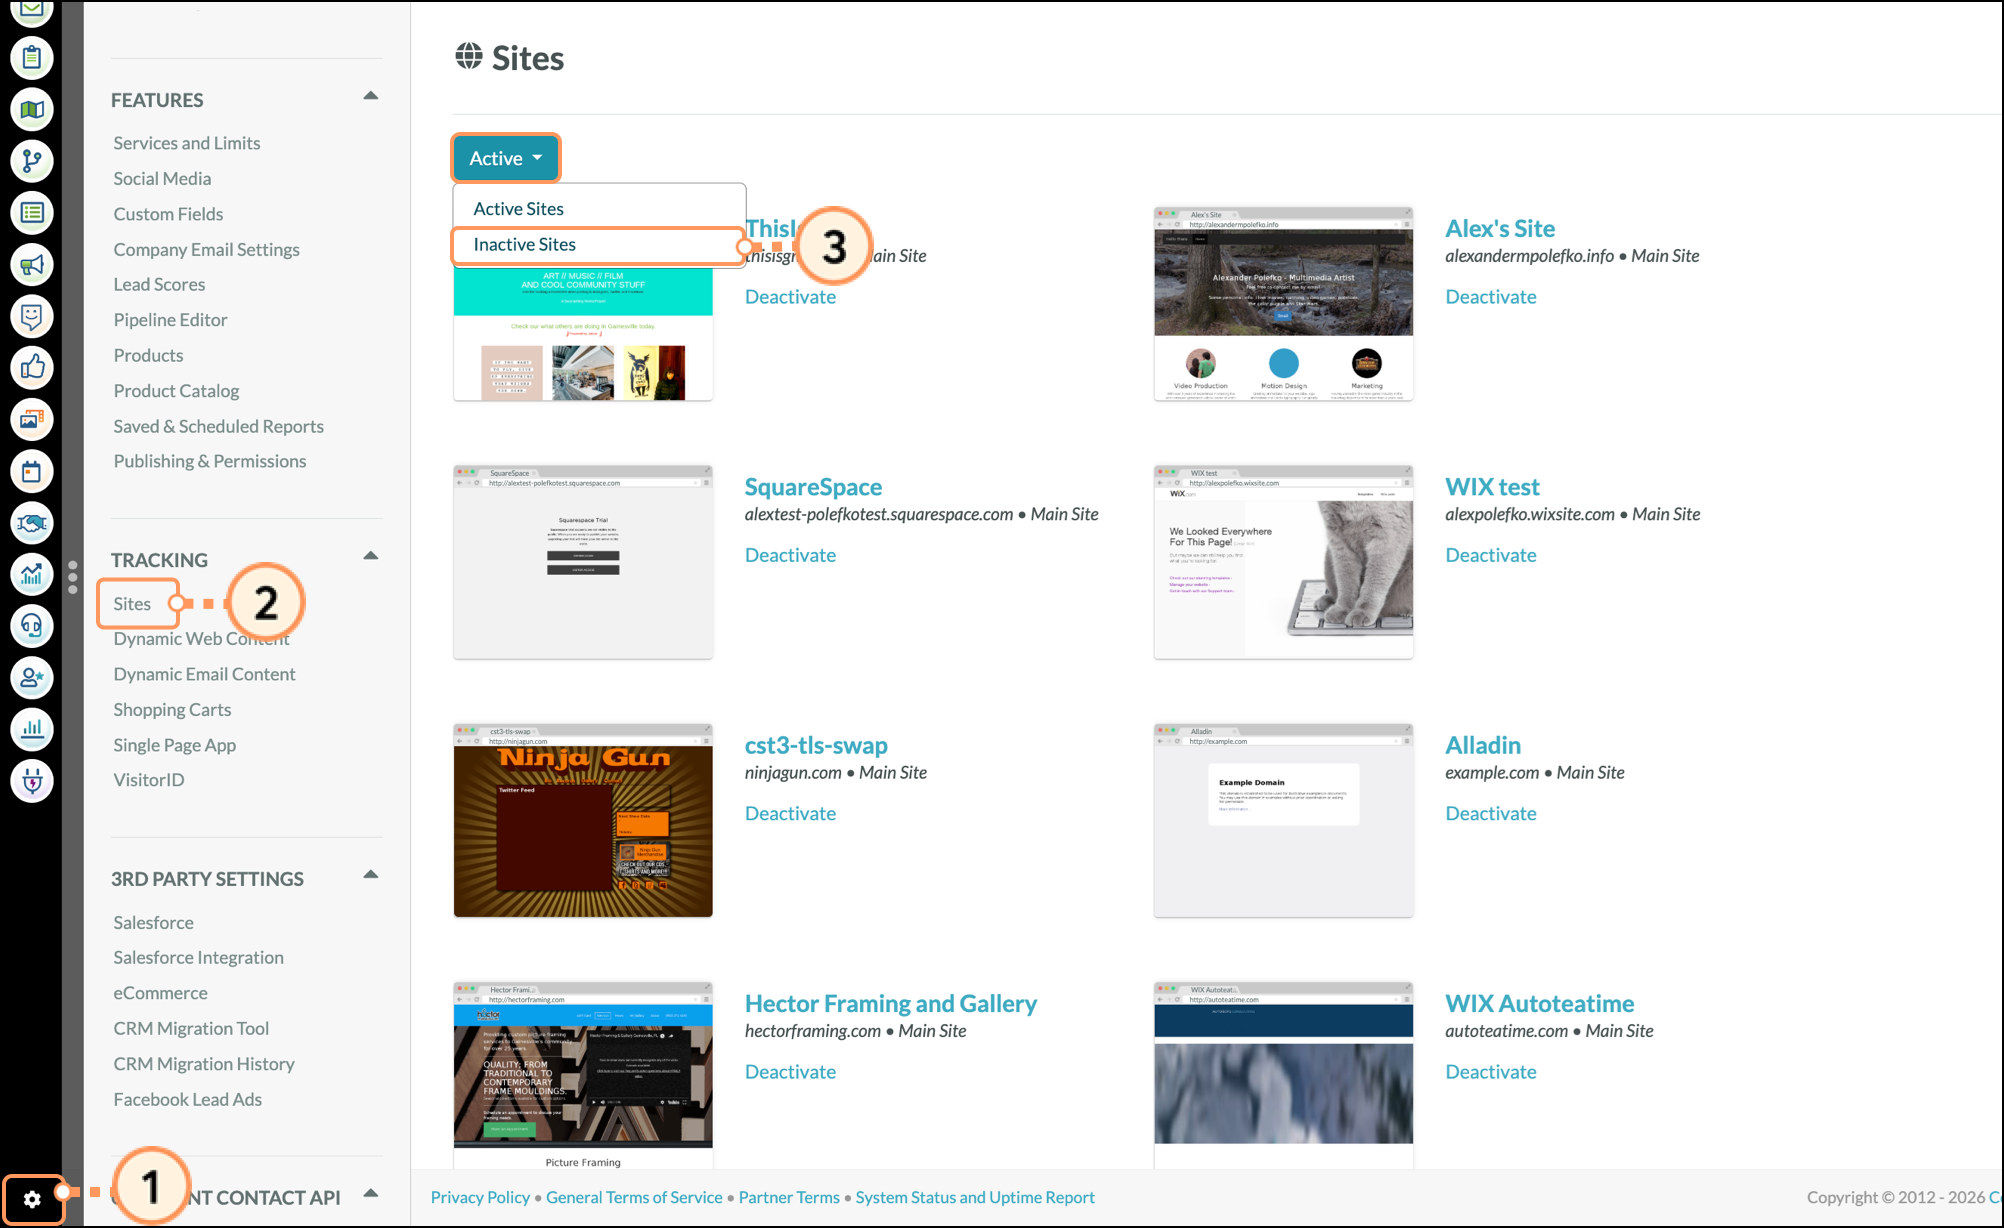
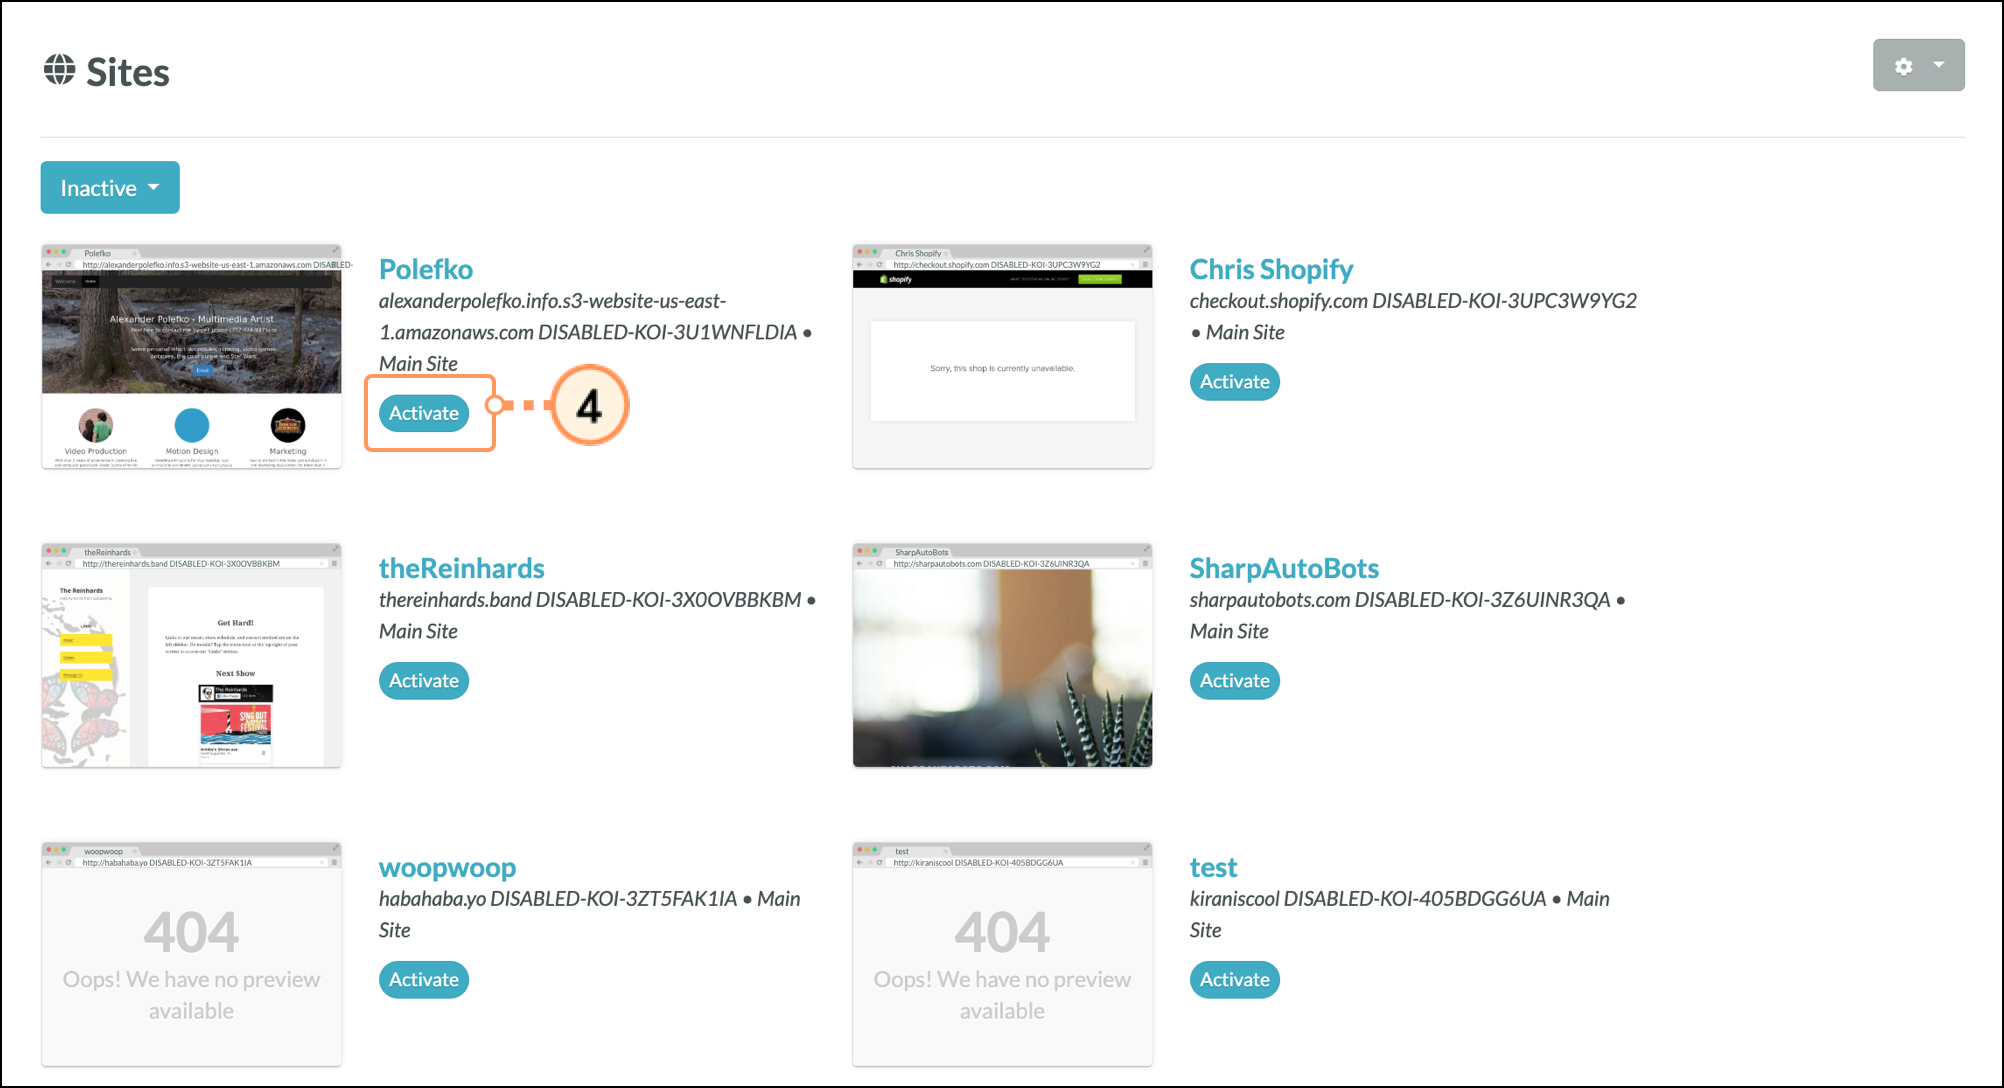
Reactivated websites will be placed in the Active Sites list.
Once you have added a website to Lead Gen & CRM, the website will be assigned a specific tracking code. This tracking code will need to be copied for use on your website. To copy a tracking code in Lead Gen & CRM, do the following:
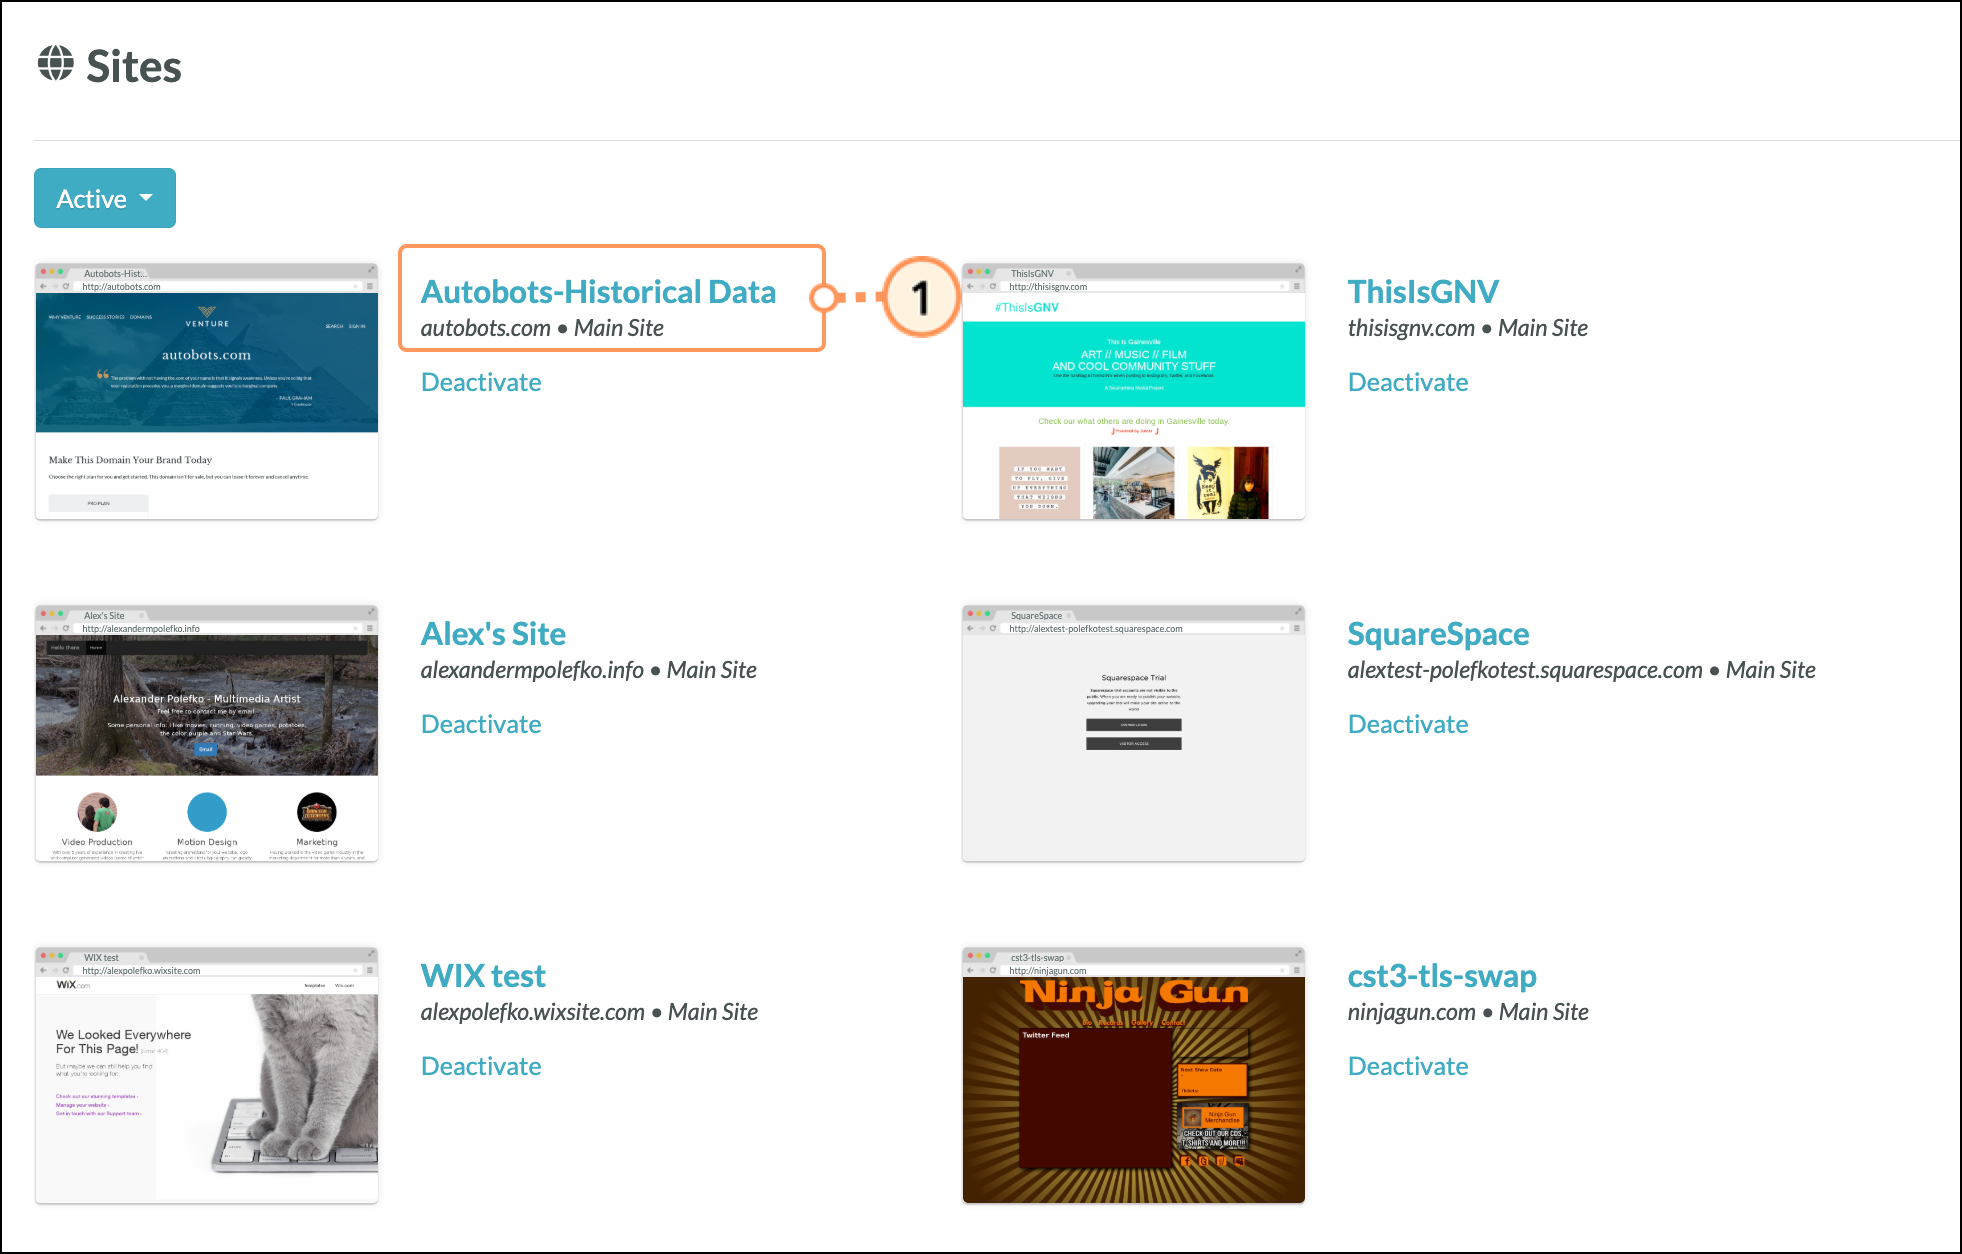
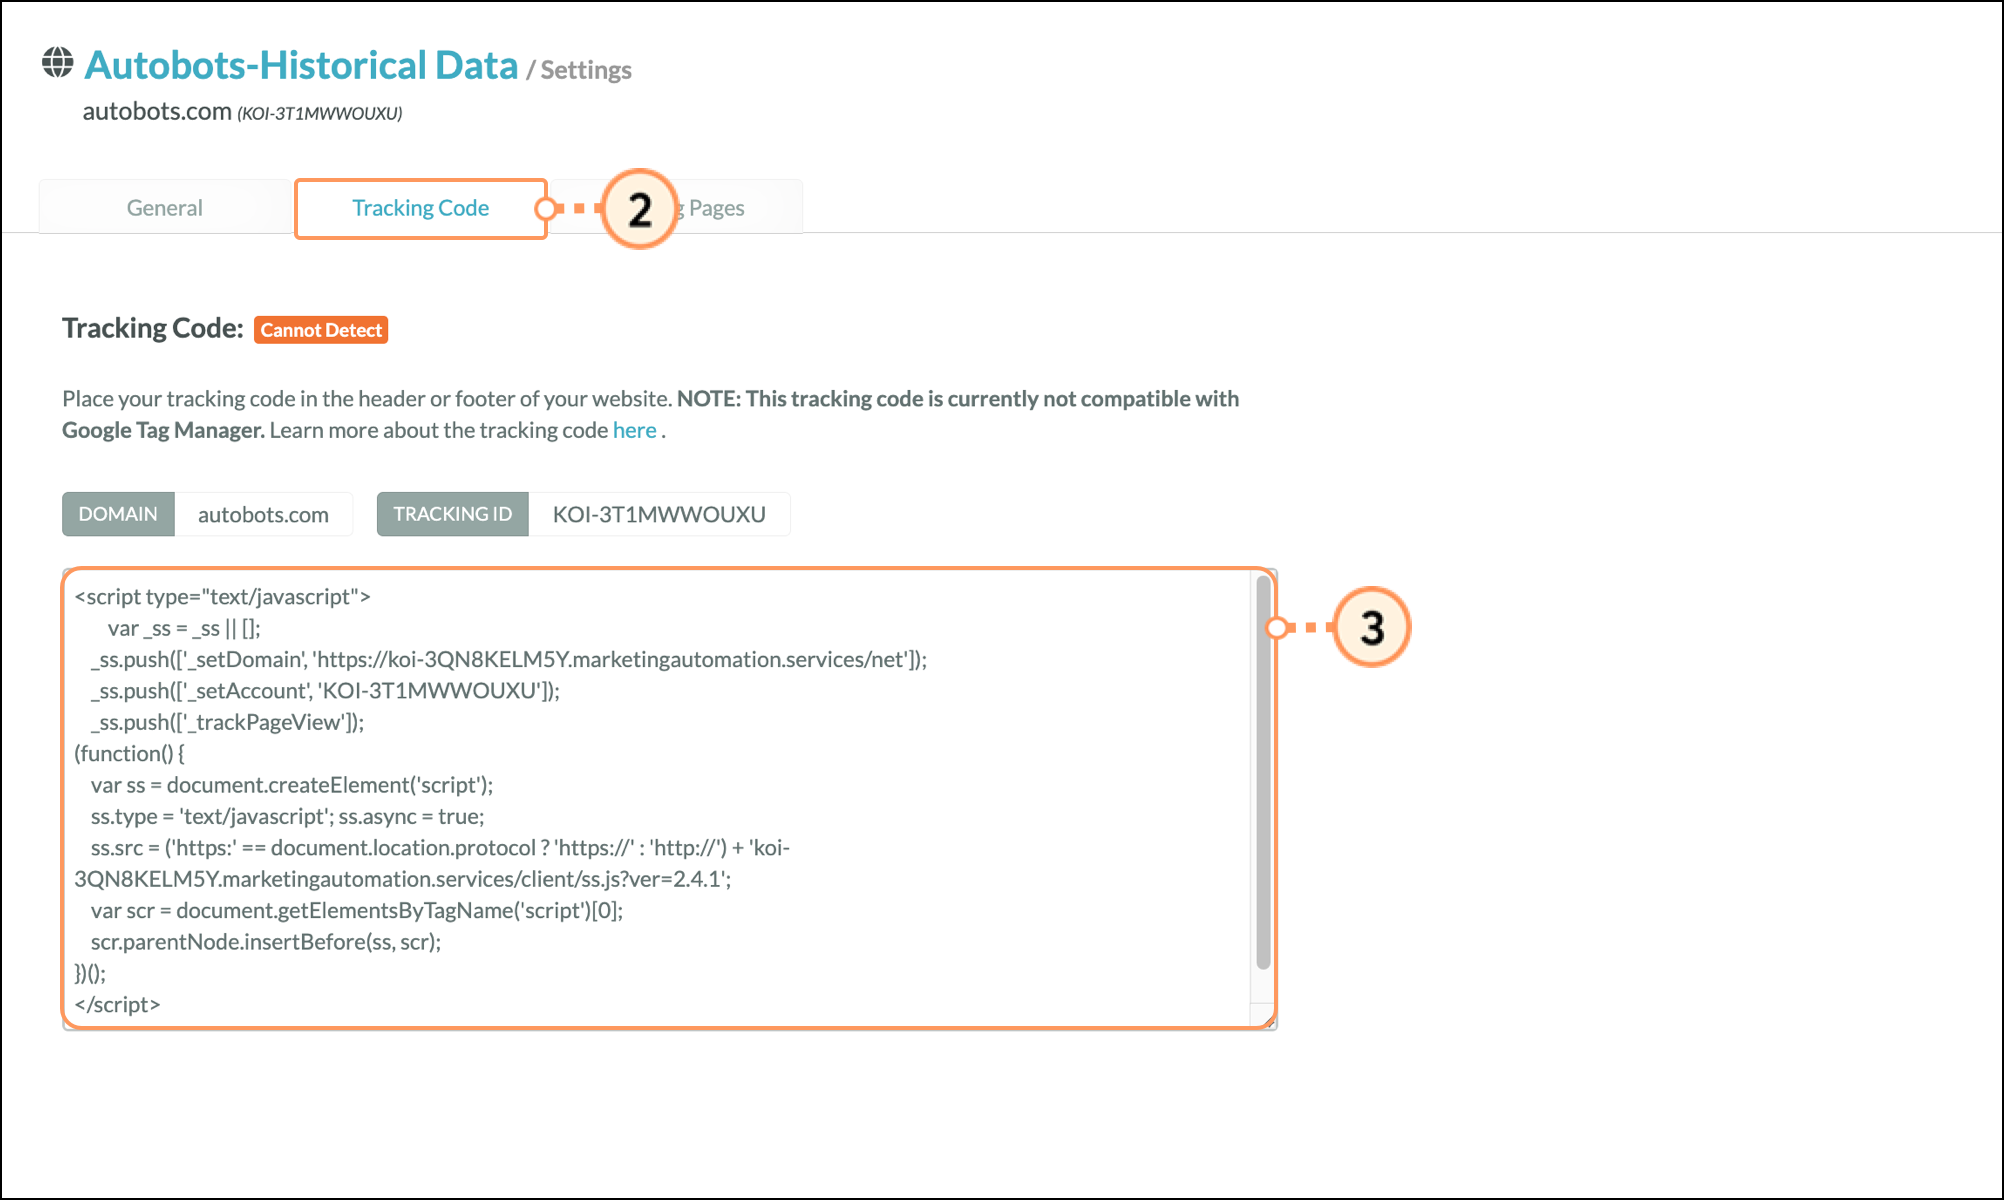
The tracking code will be located under the Domain and Tracking ID information.
Once you have added a site and copied that site's tracking code, you will need to paste the tracking code on your website. While each website is different, the general process is largely the same.
To paste the tracking code on a website, do the following:
</head> tag.Note: Constant Contact offers Professional Services to assist with custom coding.
Once you have properly pasted your code and waited 24 hours, you should see site traffic for this site in your instance under the Site Traffic tab. The orange Pending tag will turn green and say Active once tracking is live.
WordPress is a popular content management system (CMS) that allows you to host web content. You can track WordPress websites.
To place tracking code on a WordPress site, do the following:
</head> tag.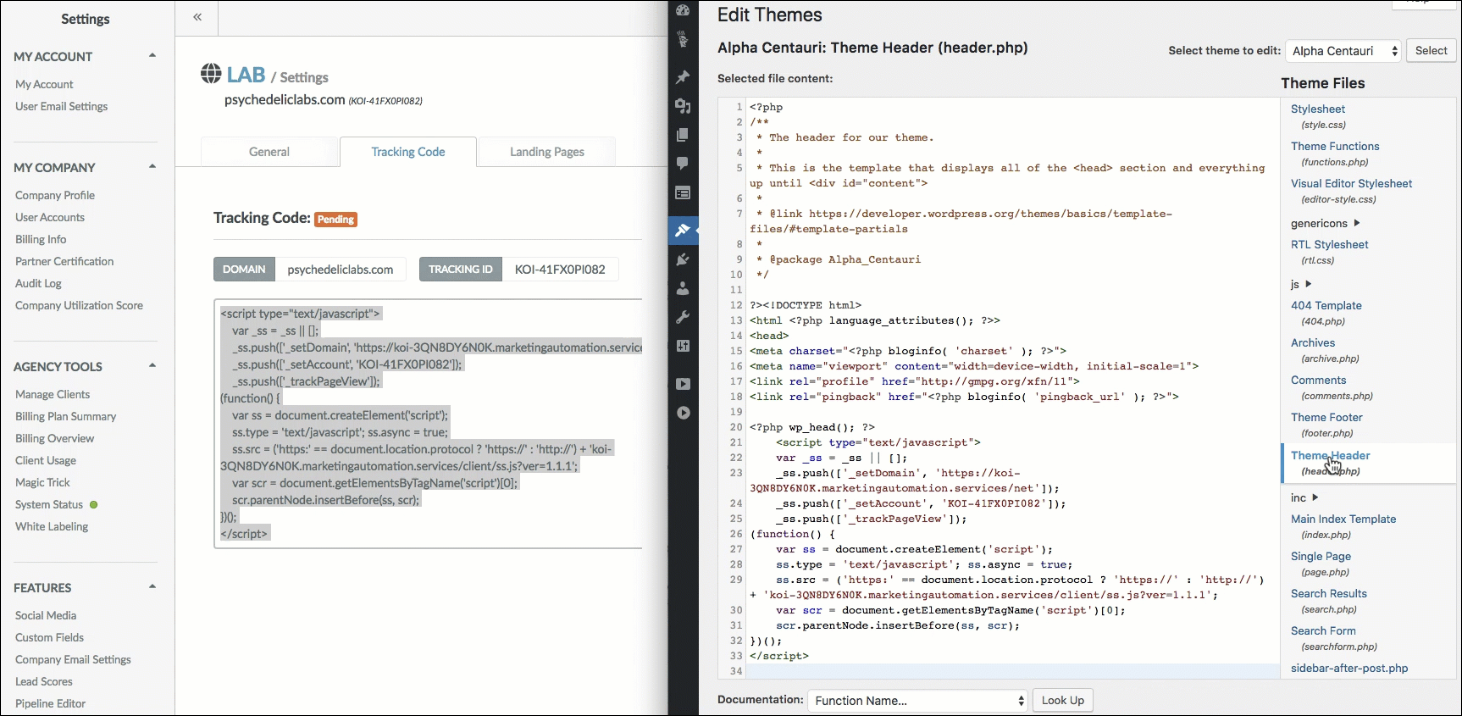
Refer to Adding Tracking Codes to WordPress for more information on tracking WordPress sites.
Certain websites require different tracking methods. A single-page application (SPA) is a web application or website that fits on a single webpage with the goal of providing a more fluid user experience akin to a desktop application.
In order to track events for single-page websites, your webpage must use URLs that use the hashtag appended to the URL. If you are looking to track events on a single page, your website must use anchor tags.
To add tracking code via anchor tags, do the following:
Note: Constant Contact offers Professional Services to assist with custom coding.
<!-- TRACKING CODE GOES HERE -->

<!-- Script Example of Catching URL hash changes -->
<script type='text/javascript'>
    if ("onhashchange" in window) {
        window.onhashchange = function () {
            _ss.push(['_trackPageView']);
        }
    } else {
        var prevHash = window.location.hash;
        window.setInterval(function () {
            if (window.location.hash != prevHash) {
                prevHash = window.location.hash;
                _ss.push(['_trackPageView']);
            }
        }, 100);
    }
</script>
_ss.push(['_trackPageView']) when the URL hash changes, tracking a new page view. Copyright © 2026 · All Rights Reserved · Constant Contact · Privacy Center