| Administrators | ✓ | |
| Company Managers | ✓ | |
| Marketing Managers | ✓ | |
| Sales Managers | ✓ | |
| Salespersons | ✓ | |
| Jr. Salespersons | ✓ |
| Tip: Are you looking for information about Constant Contact’s Email and Digital Marketing product? This article is for Constant Contact’s Lead Gen & CRM product. Head on over to the Email and Digital Marketing articles by clicking here. Not sure what the difference is? Read this article. |
By default, Lead Gen & CRM will display the Contact Manager every time you open the application.
You can access the Contact Manager at any time from any point within the application, however.
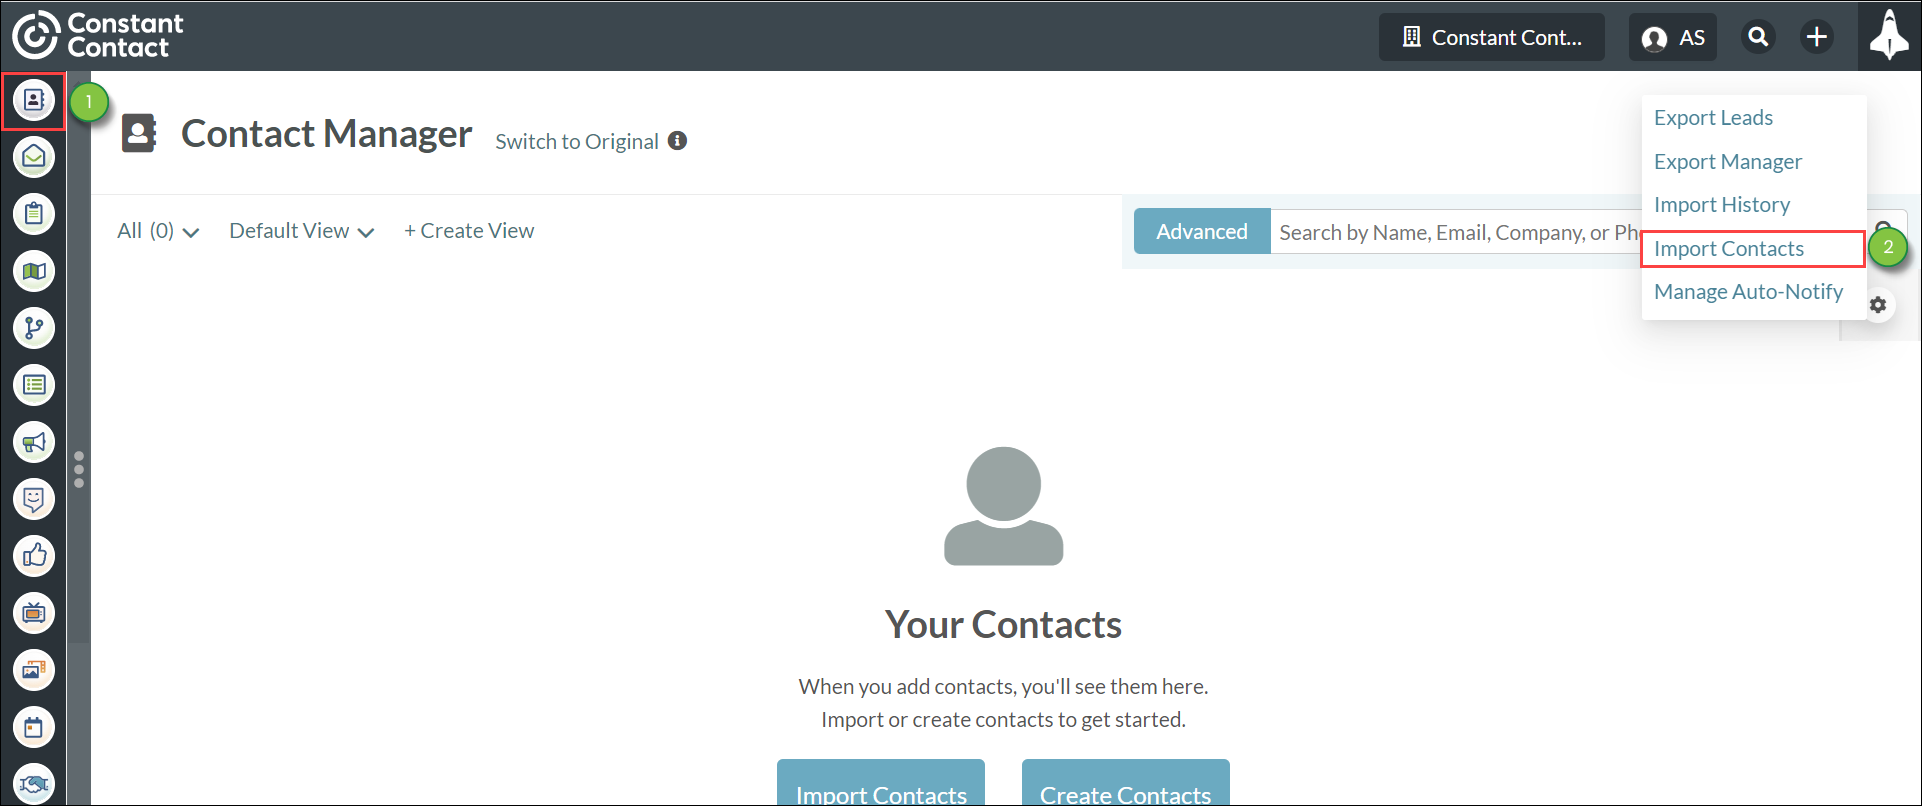
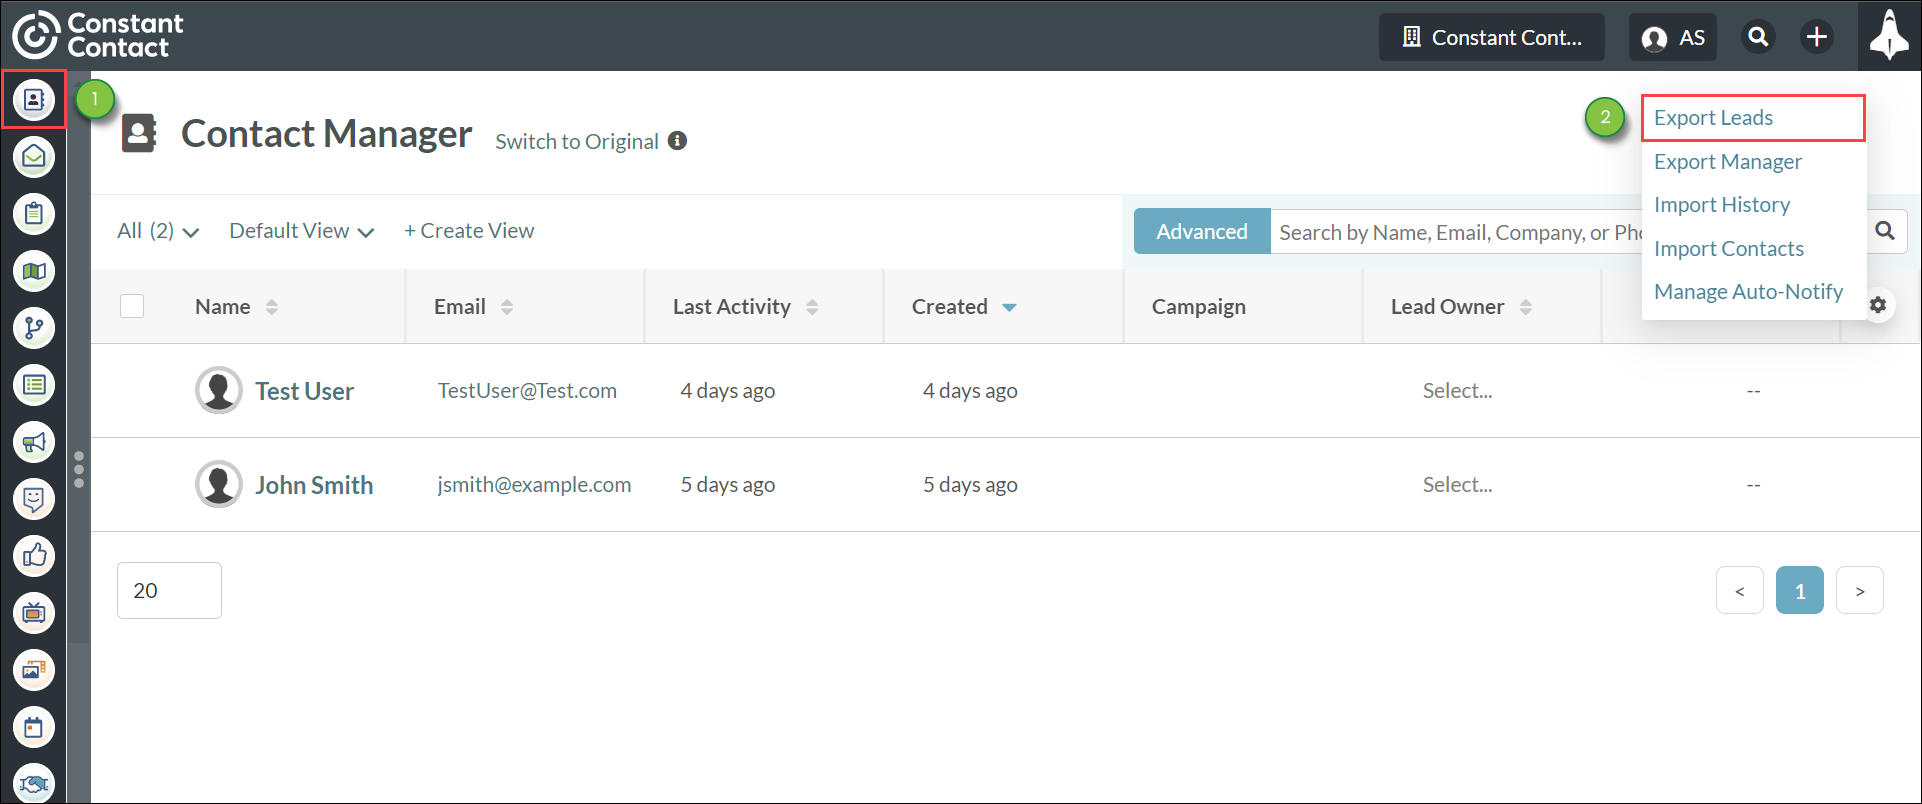
Click Contacts in the left toolbar to access the Contact Manager.
The Contact Manager allows you to search for leads by entering search terms in the Contact Manager search bar.
Broader terms will yield more results. Specific terms will yield fewer results.
The Advanced Search function provides a more complete filtering of search results. Advanced Search is a more direct search tool that allows you to modify your search terms for a more focused result.
Advanced Search has search fields for many different parameters, including the status of the lead, which persona a lead is attached to, and when a contact was added to a specific campaign.
Advanced Search even allows for custom search fields based on the various fields attributed to your contacts.
You can manage contacts directly from the Contact Manager. In the Contact Manager, you can interact with contacts in many ways, like assigning a contact to a campaign, assigning or reassigning a lead owner to a lead, or creating new opportunities for a contact.
Click the ![]() Options menu at the end of a contact's row to access a list of individual management options.
Options menu at the end of a contact's row to access a list of individual management options.
Contacts can be managed as a group as well. Click the checkboxes next to the desired contacts to access a set of bulk editing options.
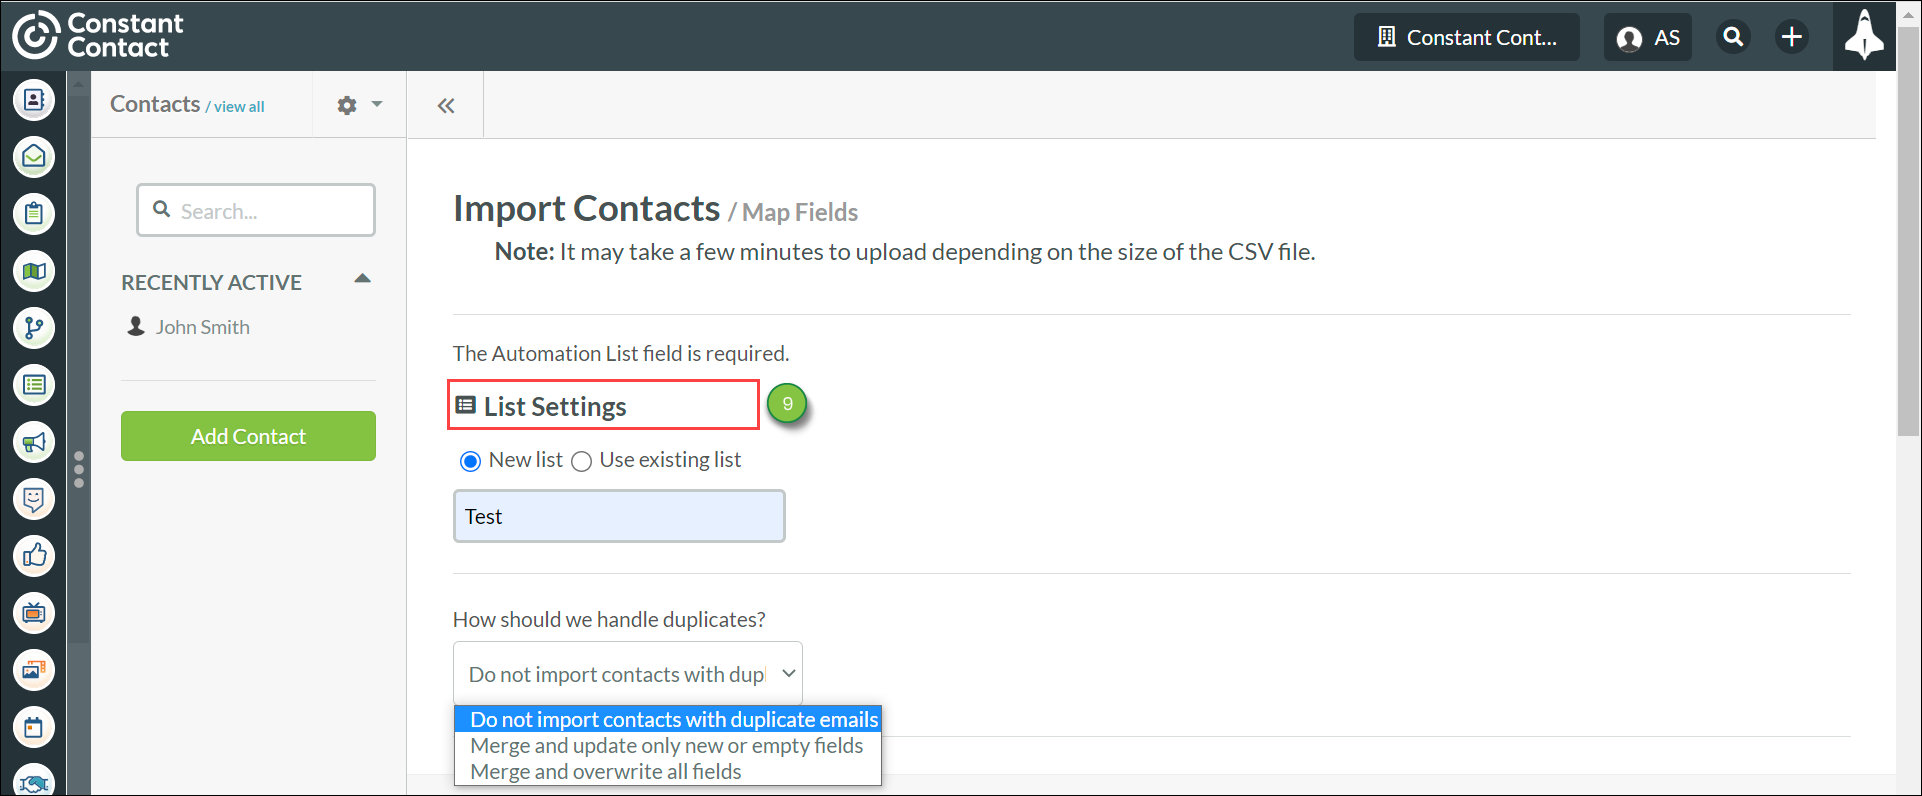
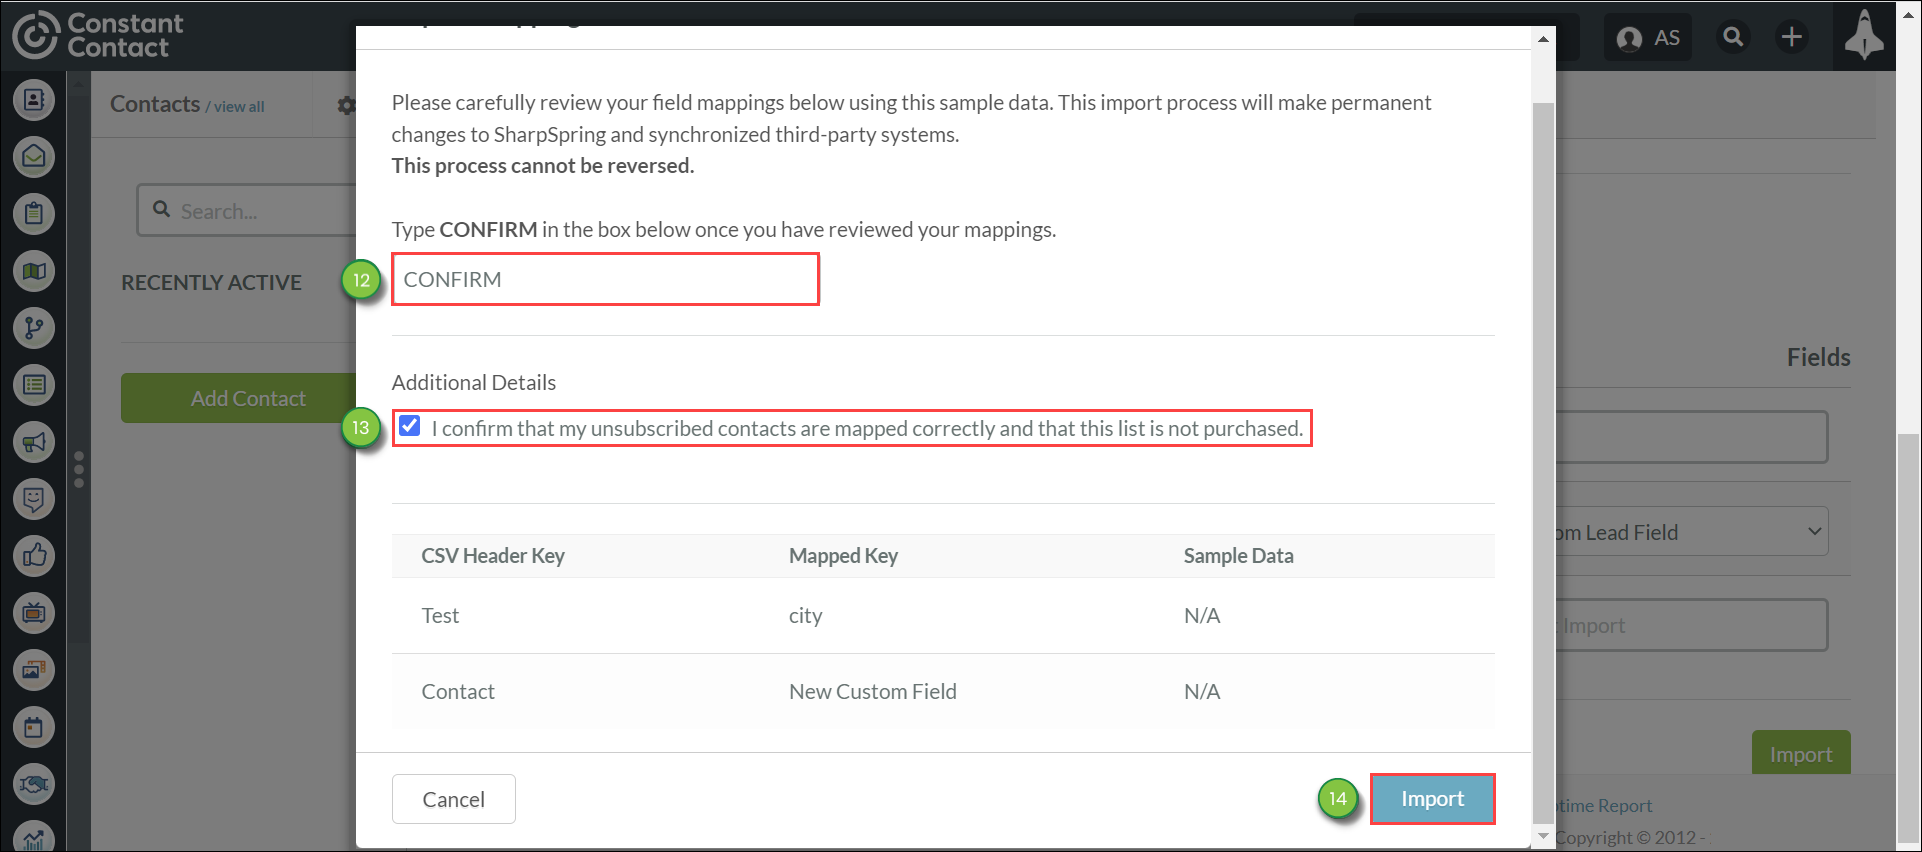
The Contact Manager allows you to import and export contact lists through Comma-Separated Value (.CSV) spreadsheet files, like those from Microsoft Excel or Google Sheets. This allows you to bring in pre-made lists of contacts, or to save your contact lists for other purposes.
To import a contact list from the Contact Manager, do the following:
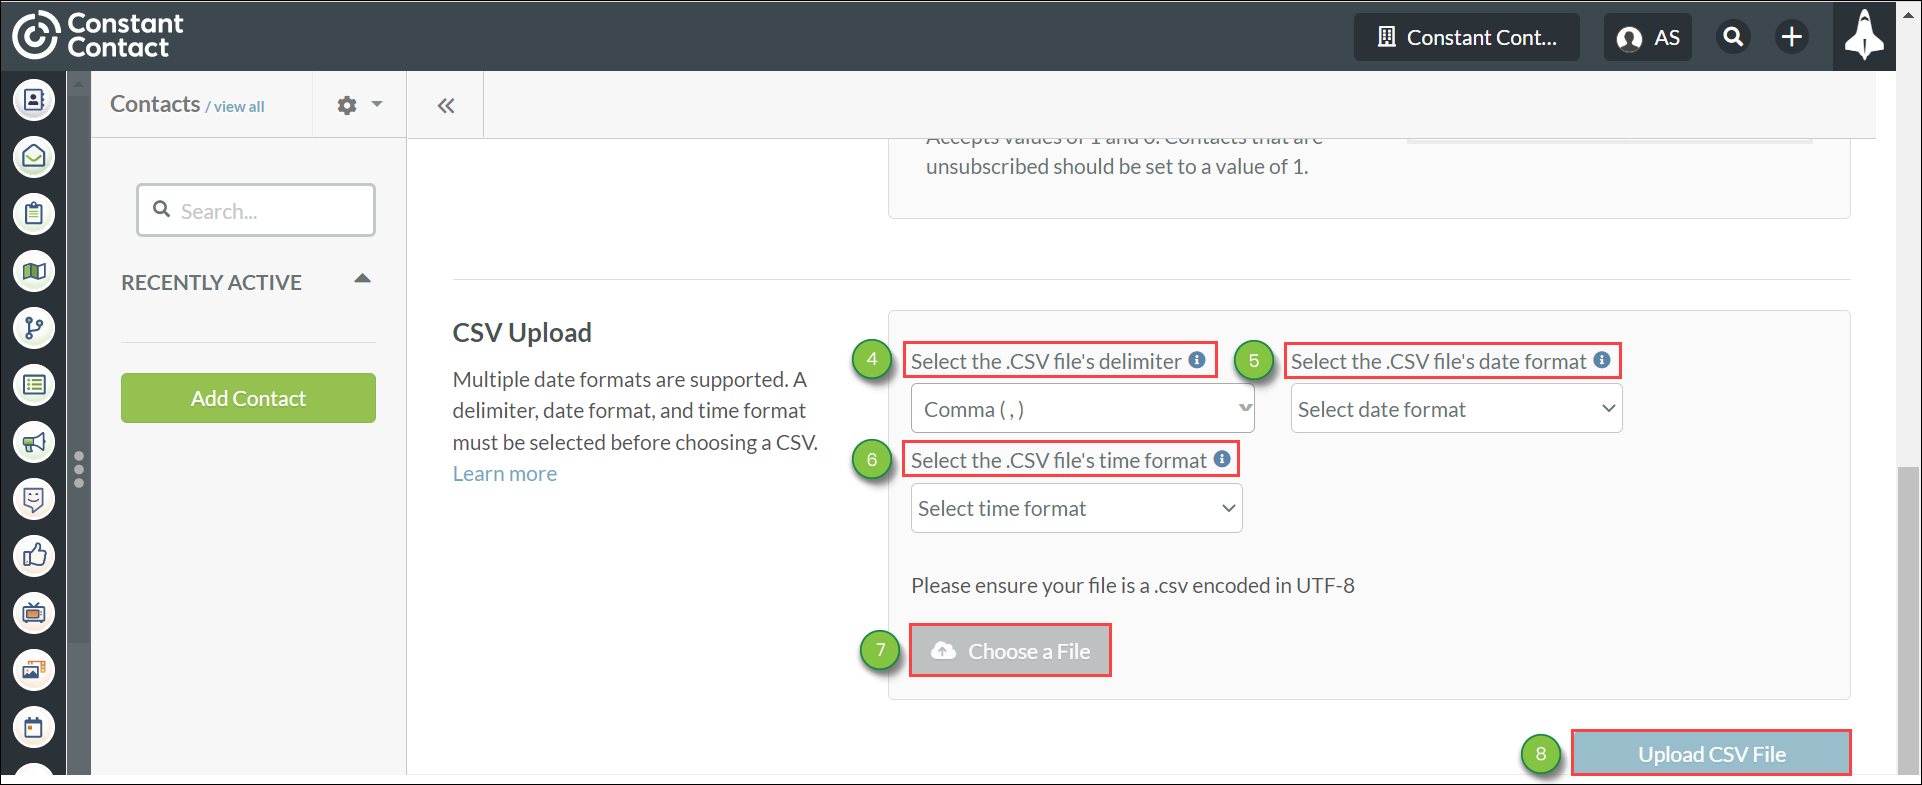

Note: The contact list must be in .CSV format. Spreadsheet files not in .CSV format will not be uploaded.
Import logs are housed in the Import History. Click ![]() Options > Import History to see a list of previous imports.
Options > Import History to see a list of previous imports.
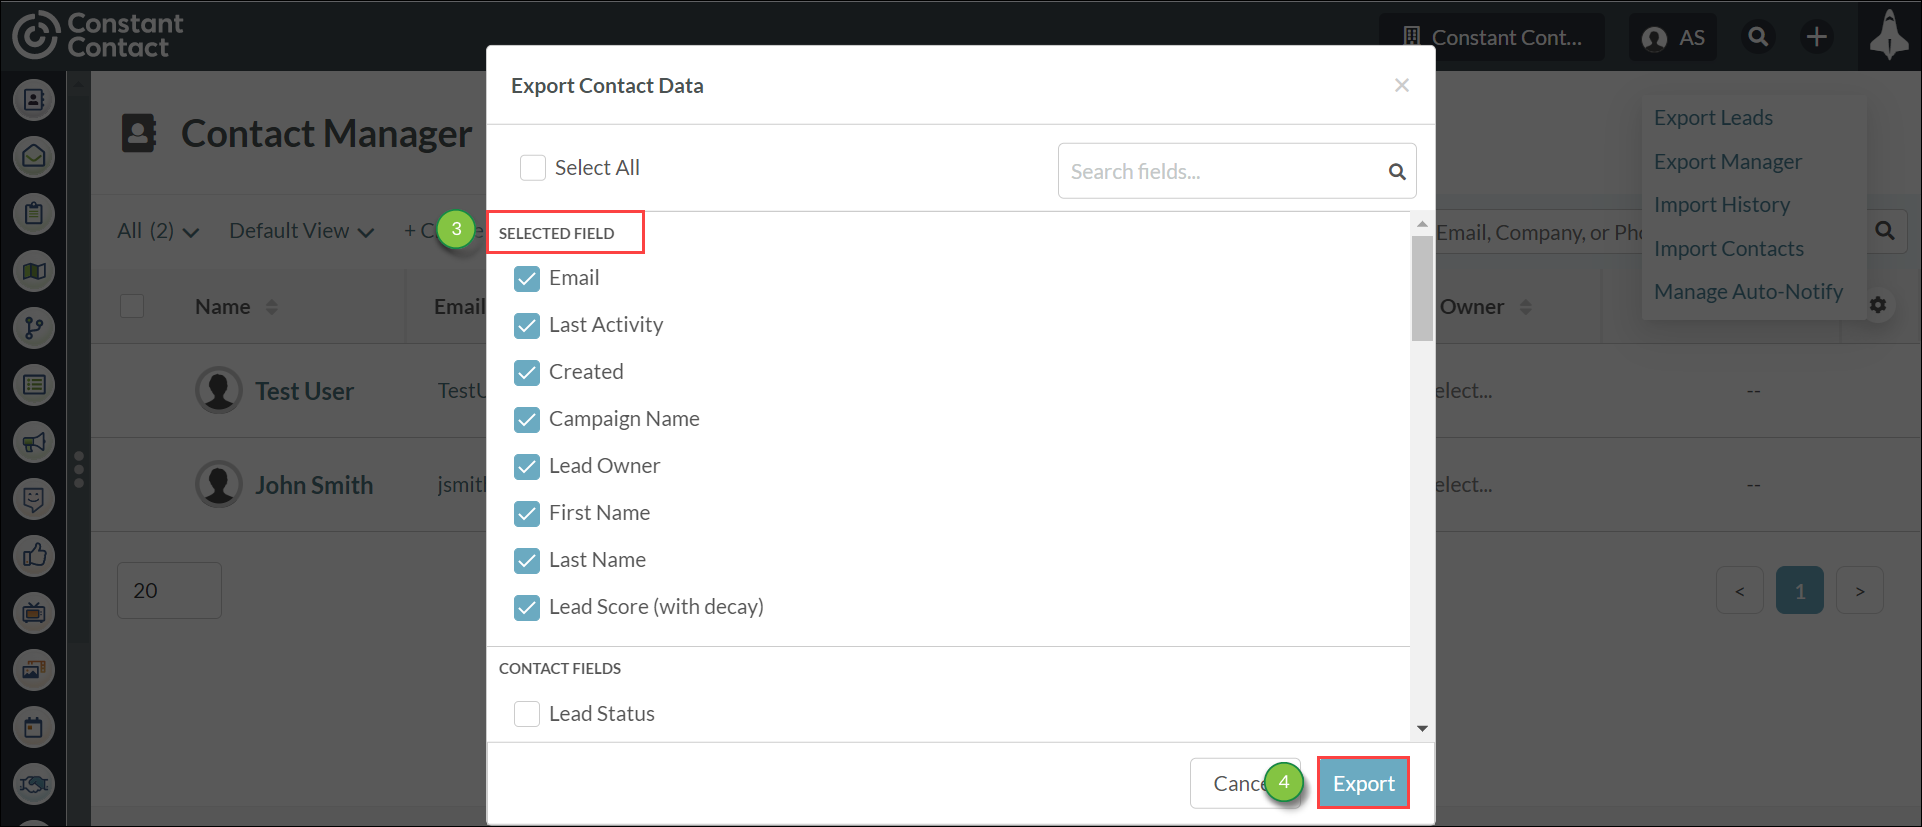
You can export all leads or contacts in Lead Gen & CRM from the Contact Manager.
To export all leads or contacts, do the following:
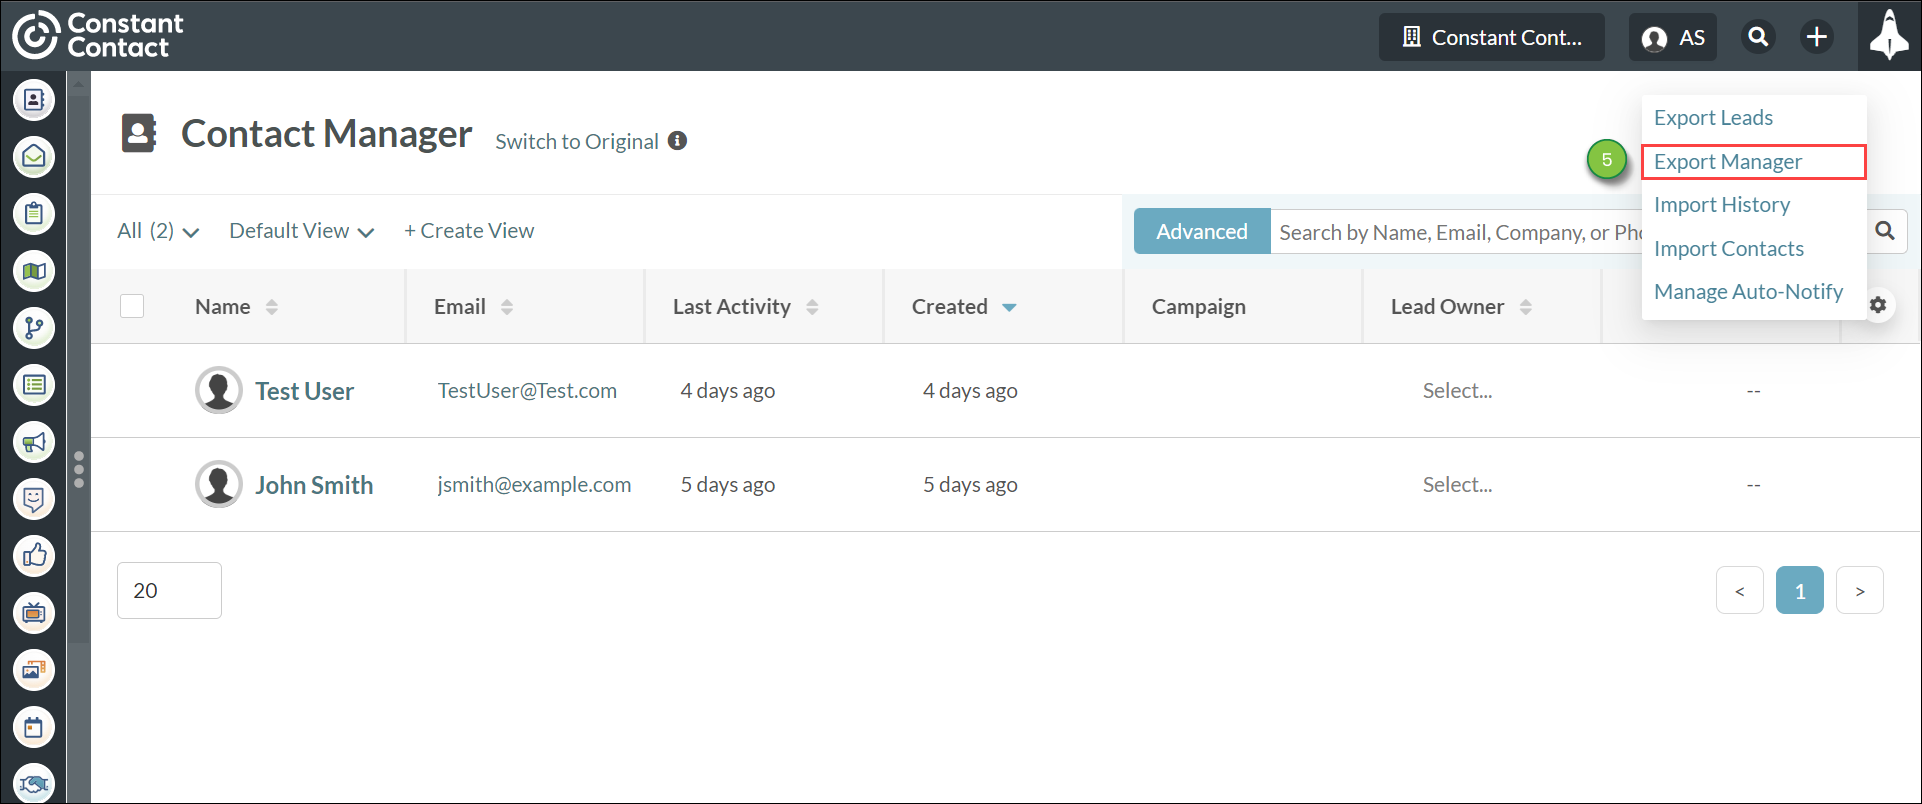
Your file will be downloaded from the Export Manager.
Exporting leads and contacts will not remove or otherwise break their information.
When exporting all leads and contacts, Lead Gen & CRM leaves the data as-is when exporting to a .CSV file.
In addition, exported information should not end up as broken data in the resulting file.
Note: Field selection includes all system fields and those custom fields that are available in the Contact Manager.
Important: Every time you export leads and contacts, the exported file will include Lead Gen & CRM IDs and email addresses. If you unselect every field and export the file, the only information that will appear in the export will be those Lead Gen & CRM IDs and email addresses.
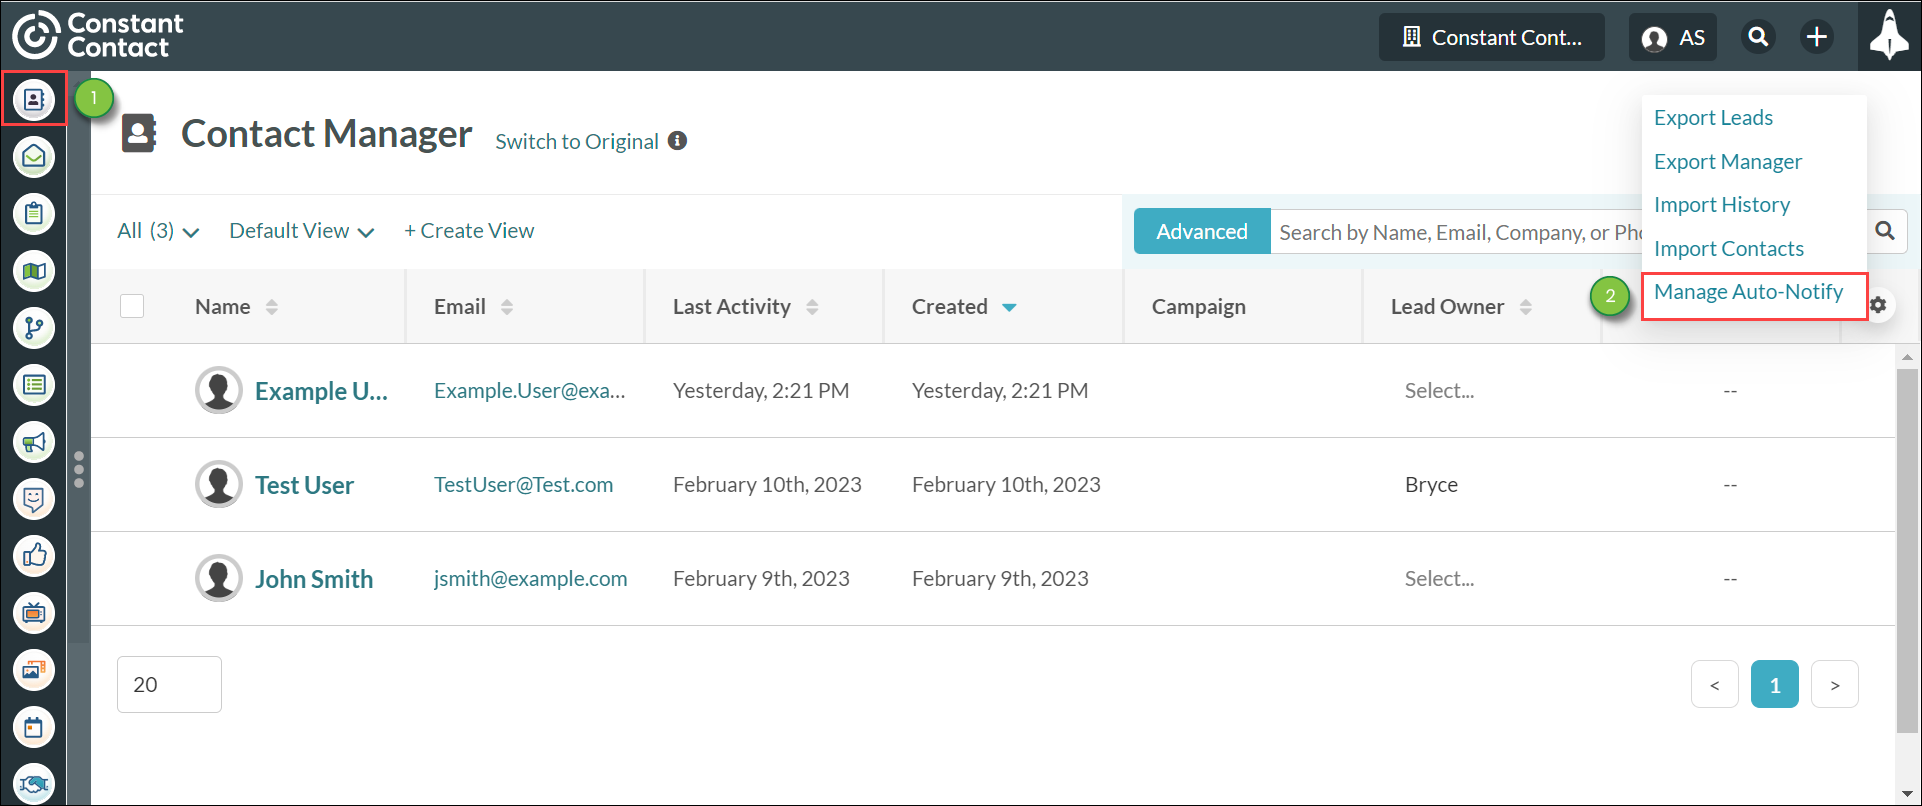
You can view which contacts are set to automatically notify you through email when they return to your website.
To access the auto-notify list and manually select which leads you want to be automatically notified about, do the following:
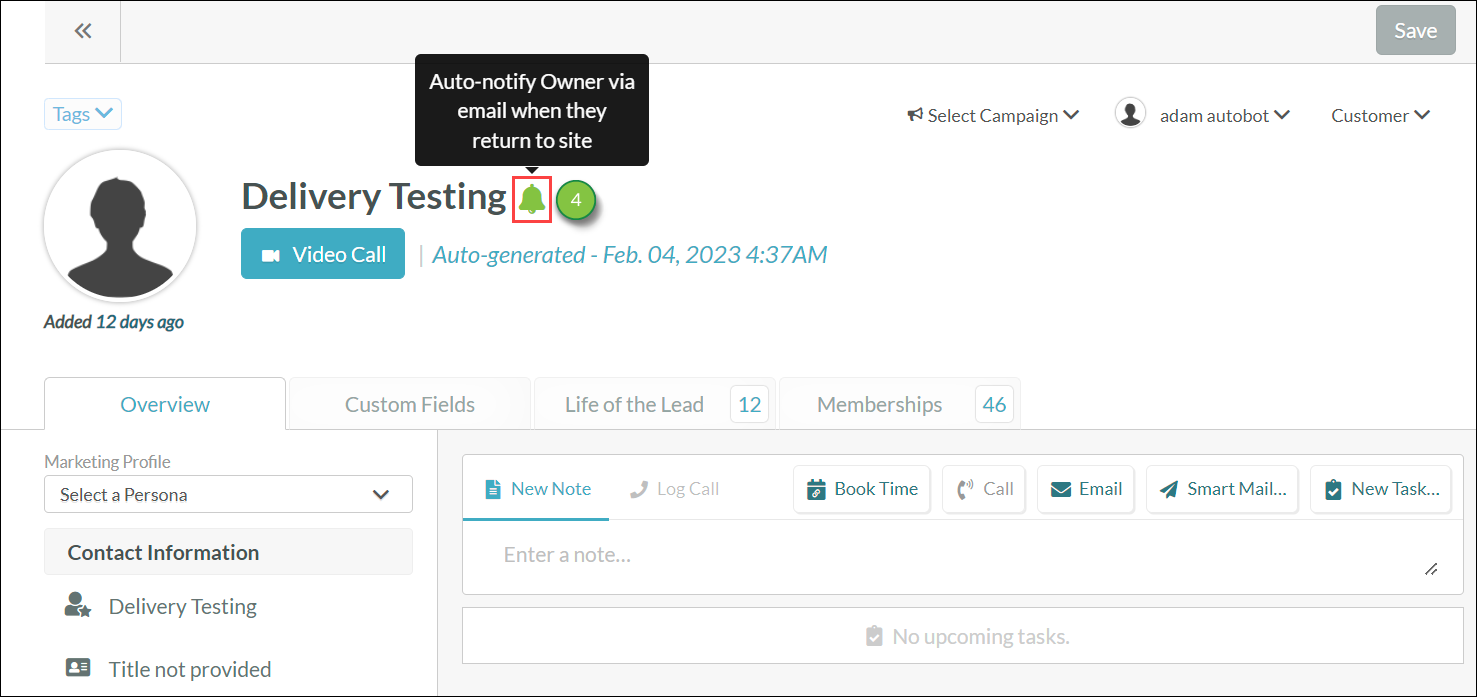
Once set to automatically notify, the icon will light up.
A broad list of auto-notify configuration settings are located in your My Account page.
Important: For a contact list to appear, contacts must be assigned to you as a user. In addition, you must be logged in to a specific user to see those leads assigned to that user. Users cannot see other users' leads.
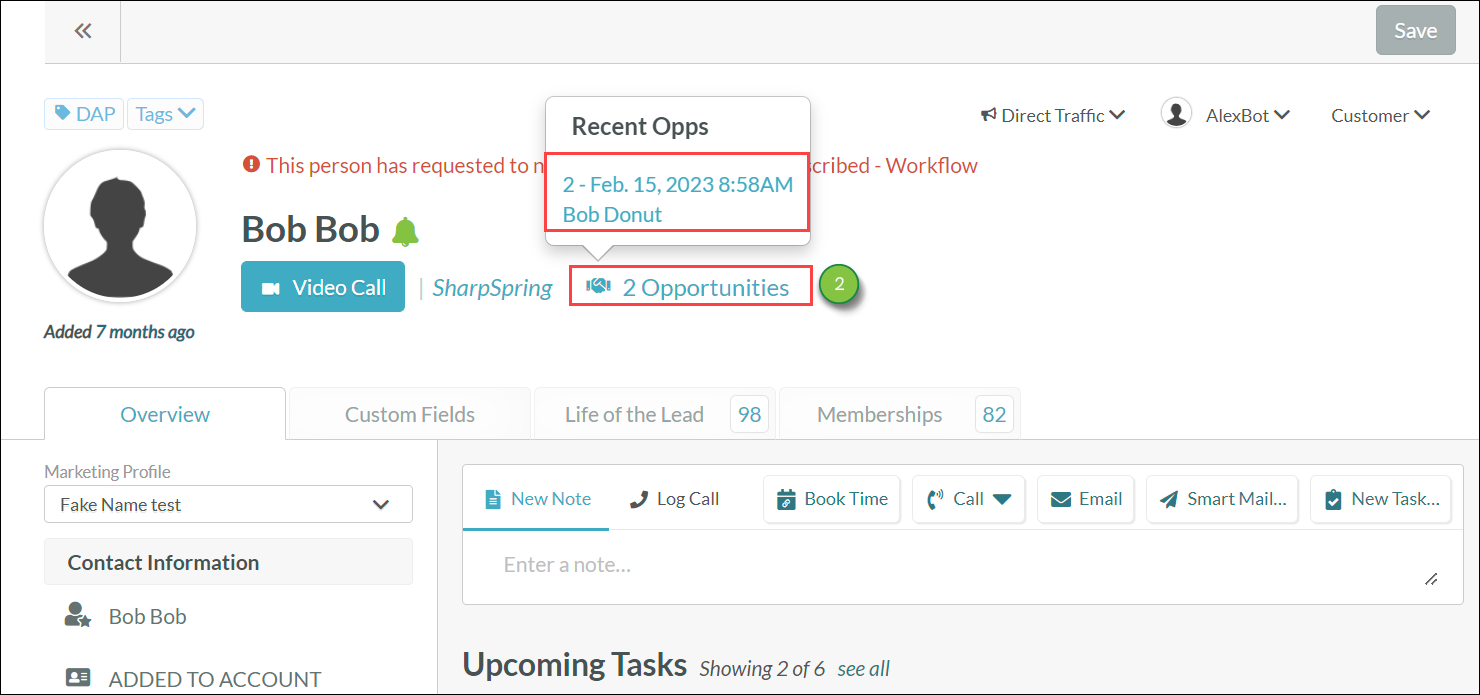
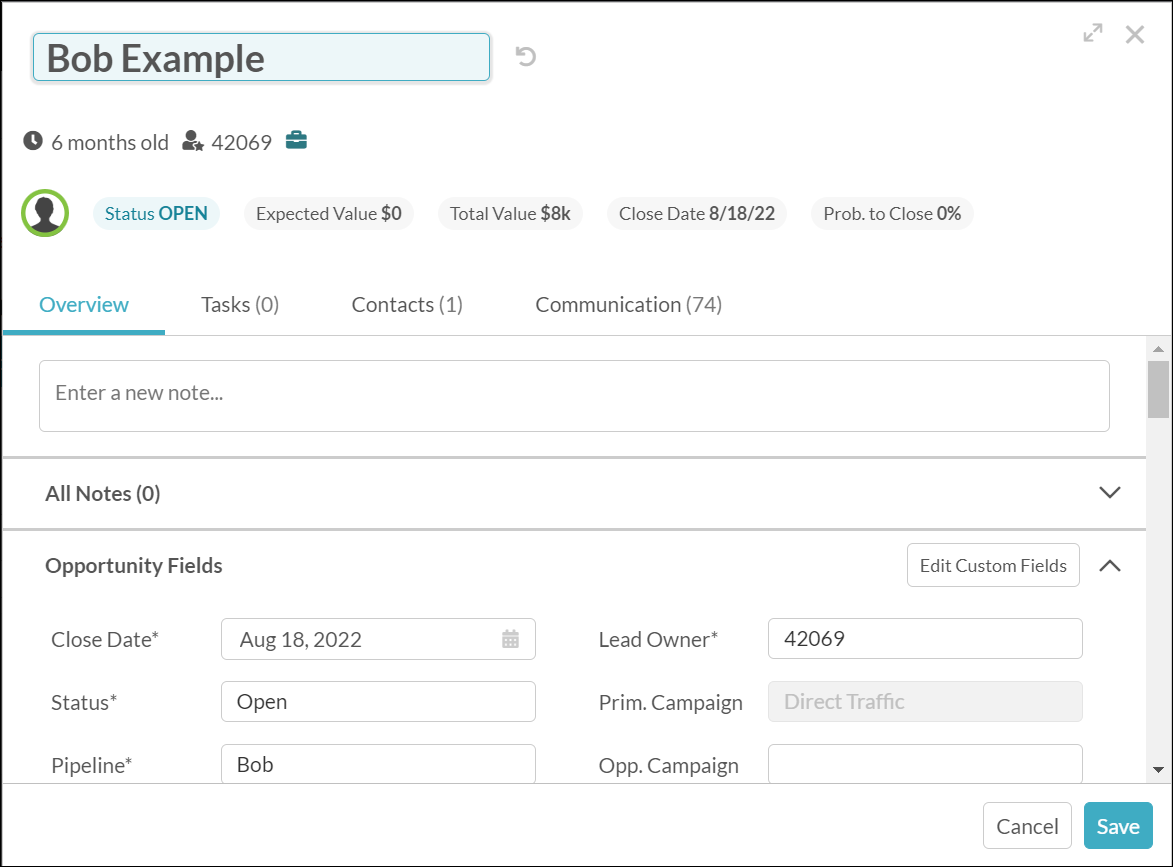
You can access the opportunities associated with your contacts.
To access a contact's opportunities, do the following:
Copyright © 2026 · All Rights Reserved · Constant Contact · Privacy Center