Lead Gen & CRM
How can we help you?
Search our help articles, video tutorials, and quickstart guides

You've got this. You've got us. Search our Knowledge Base to quickly find answers to your questions.

Using Views in the Contact Manager

Article: 000050617
Updated: July 11, 2024

The information displayed in the Contact Manager can be customized to suit your needs. You can save this information in individual viewable displays.


Users:
Administrators 
Company Managers 
Marketing Managers 
Sales Managers 
Salespersons 
Jr. Salespersons 


Creating Views

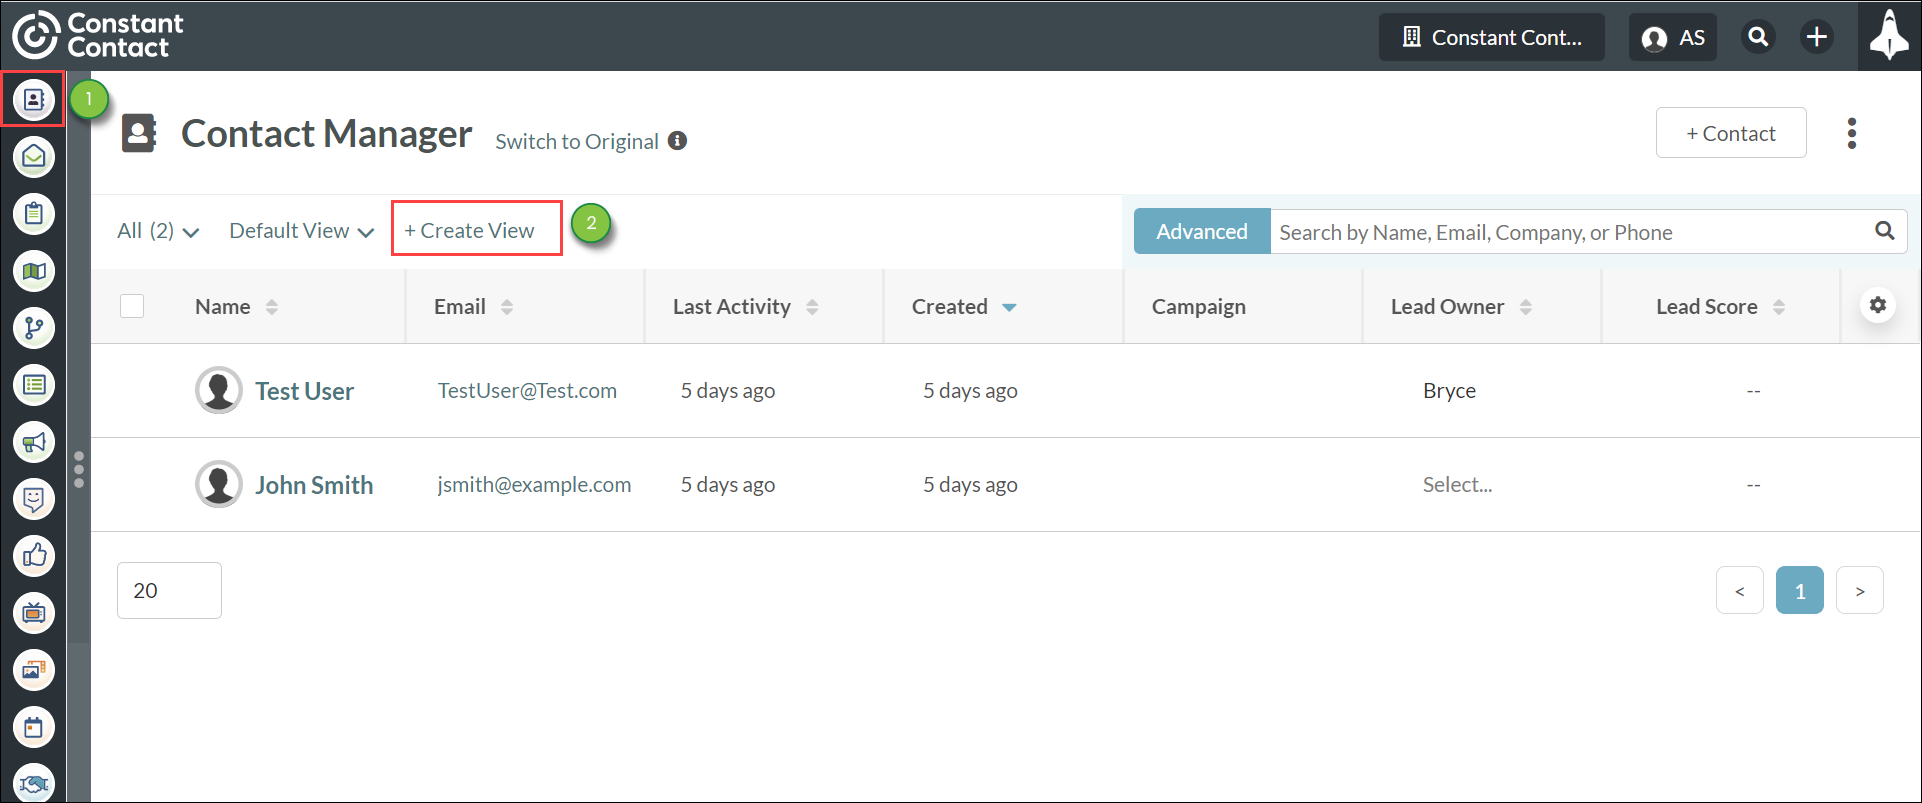
While the Contact Manager comes with a default view and displays information relevant to important system fields, you may find that you want a different view that contains different information. You can create views that cater to your information needs.

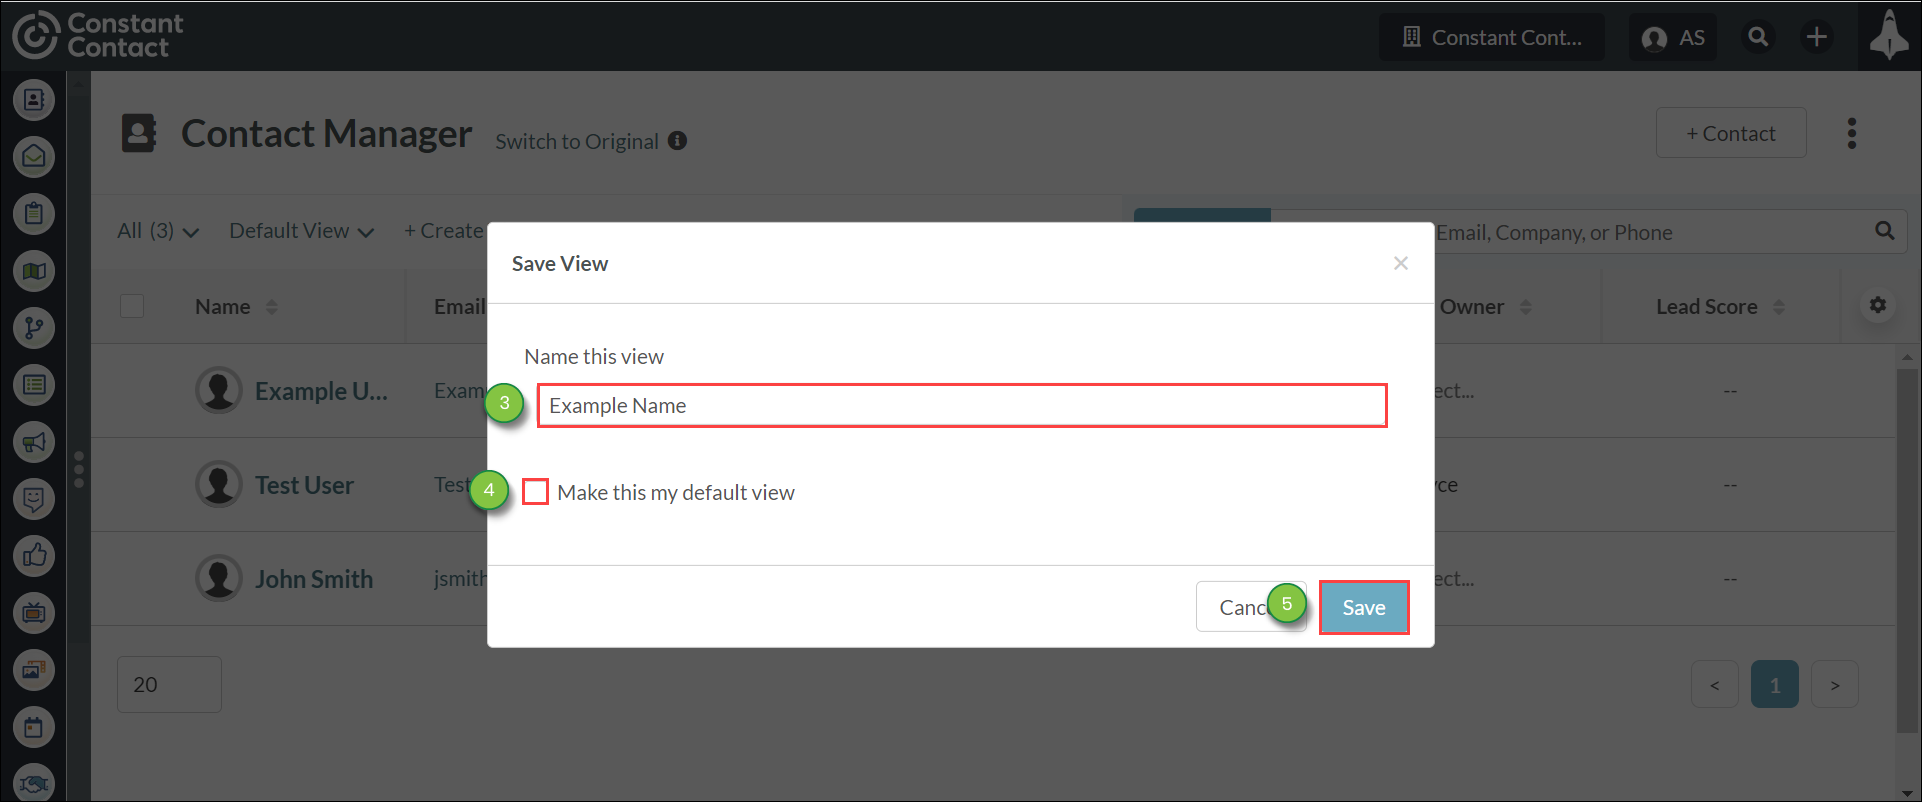
To create a view, do the following:

  1. Click Contacts in the left toolbar.
  2. Click + Create View.

    Using Views in Contact Manager


  3. Enter a name for the view in the Name this view field.
  4. Optionally, click the Make this my default view checkbox.
  5. Click Save.

    Using Views in Contact Manager


Swapping Views

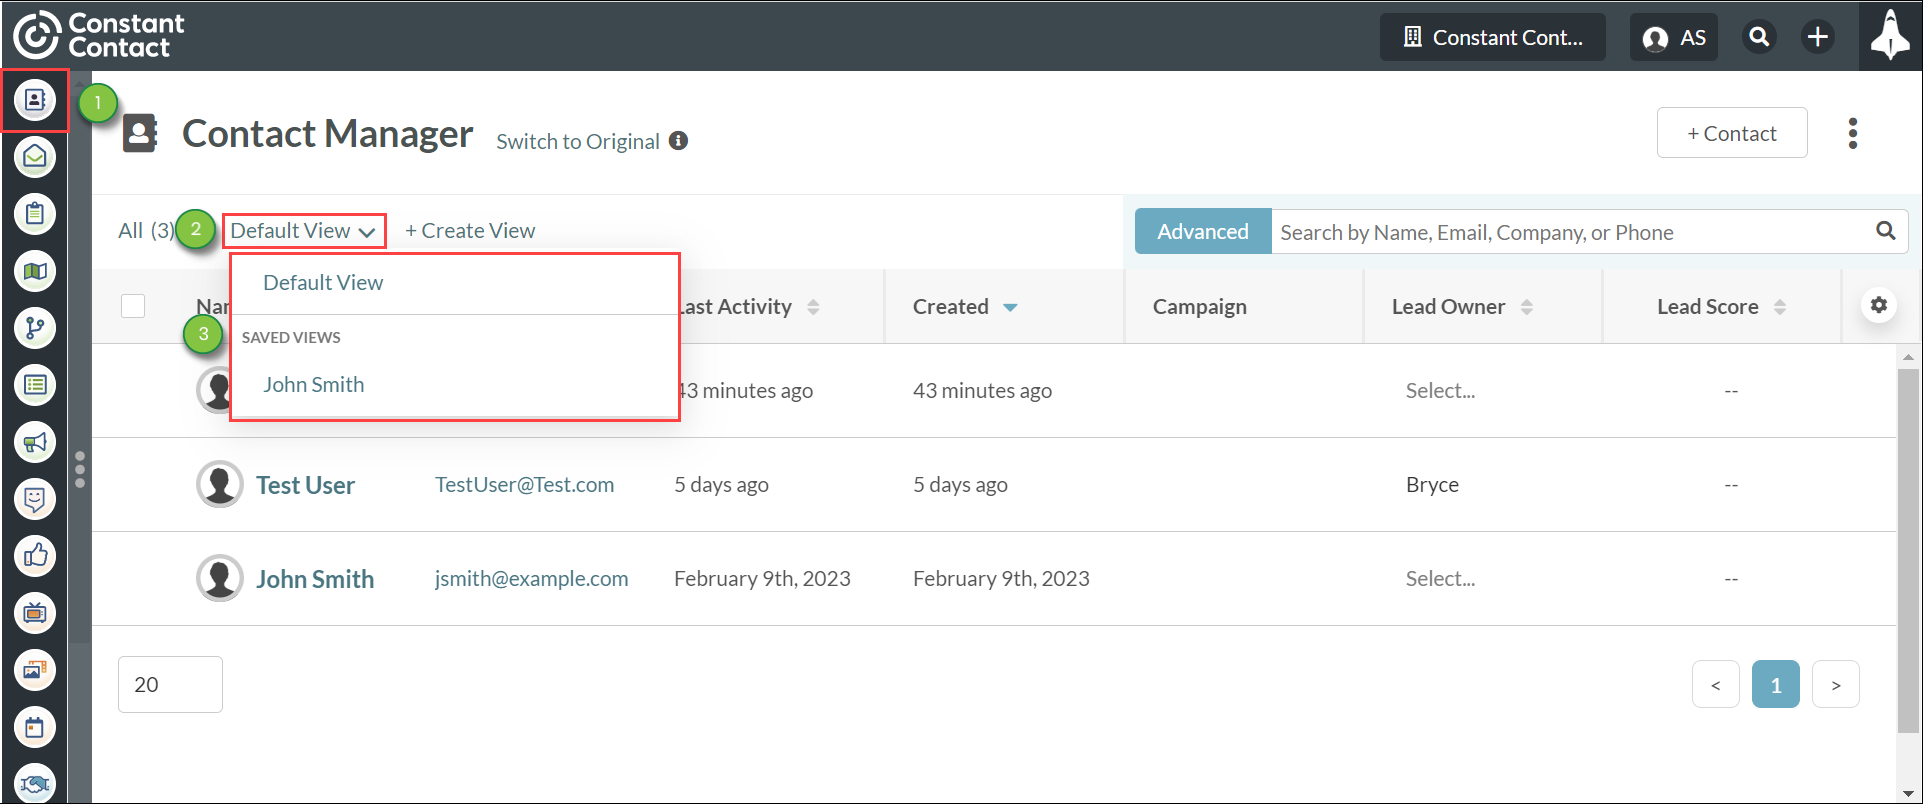
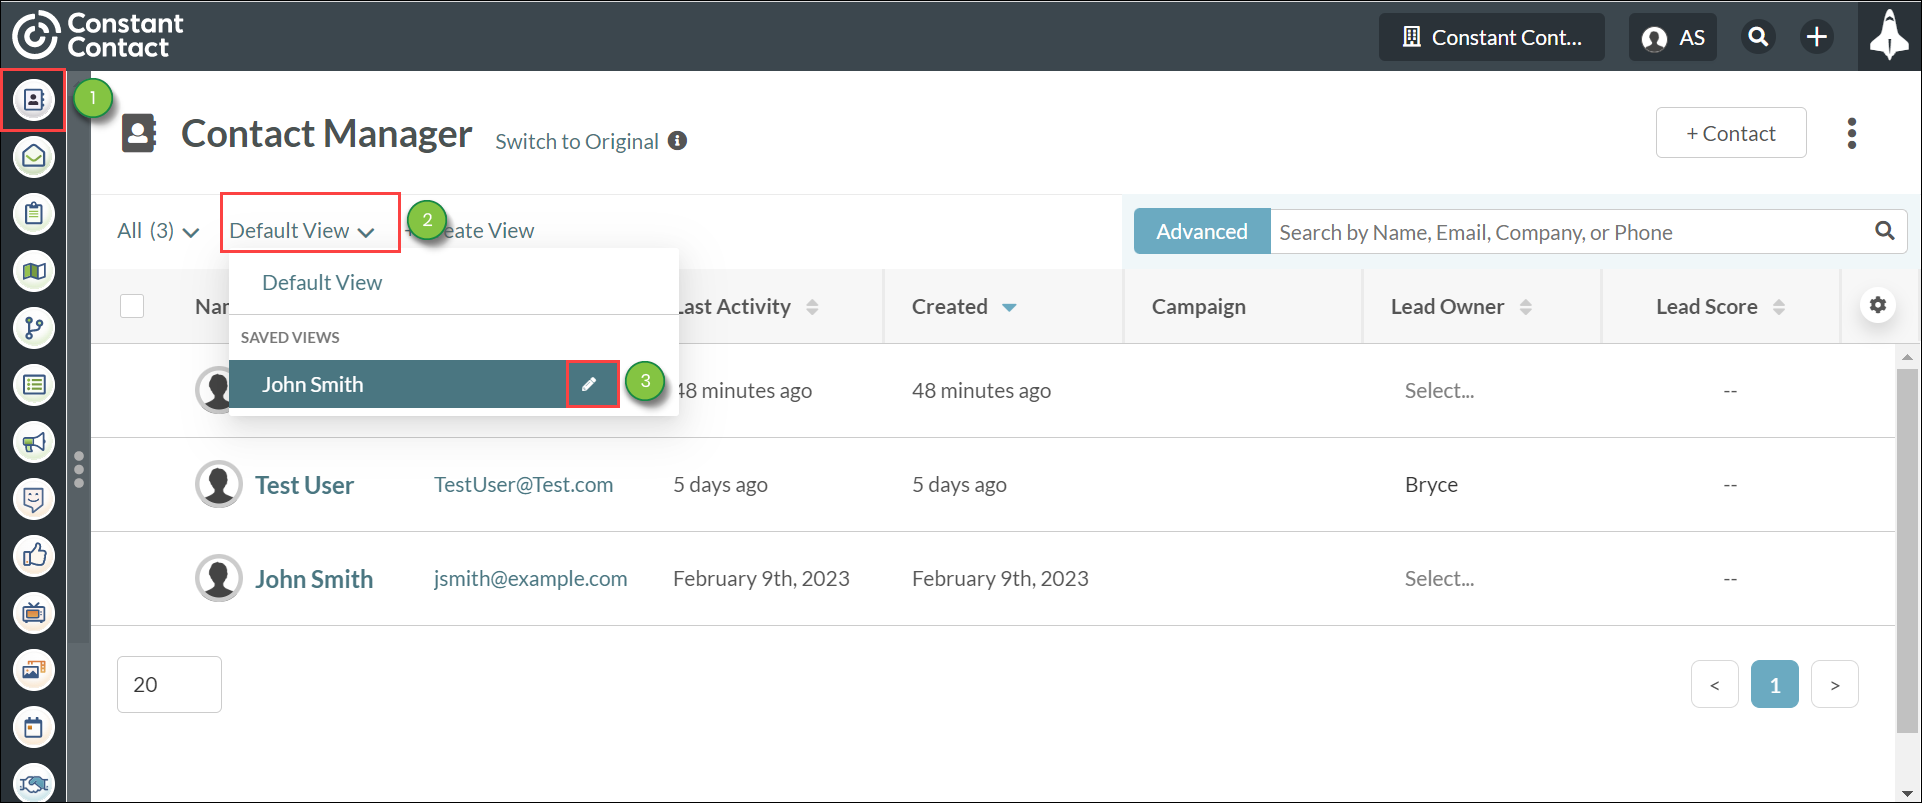
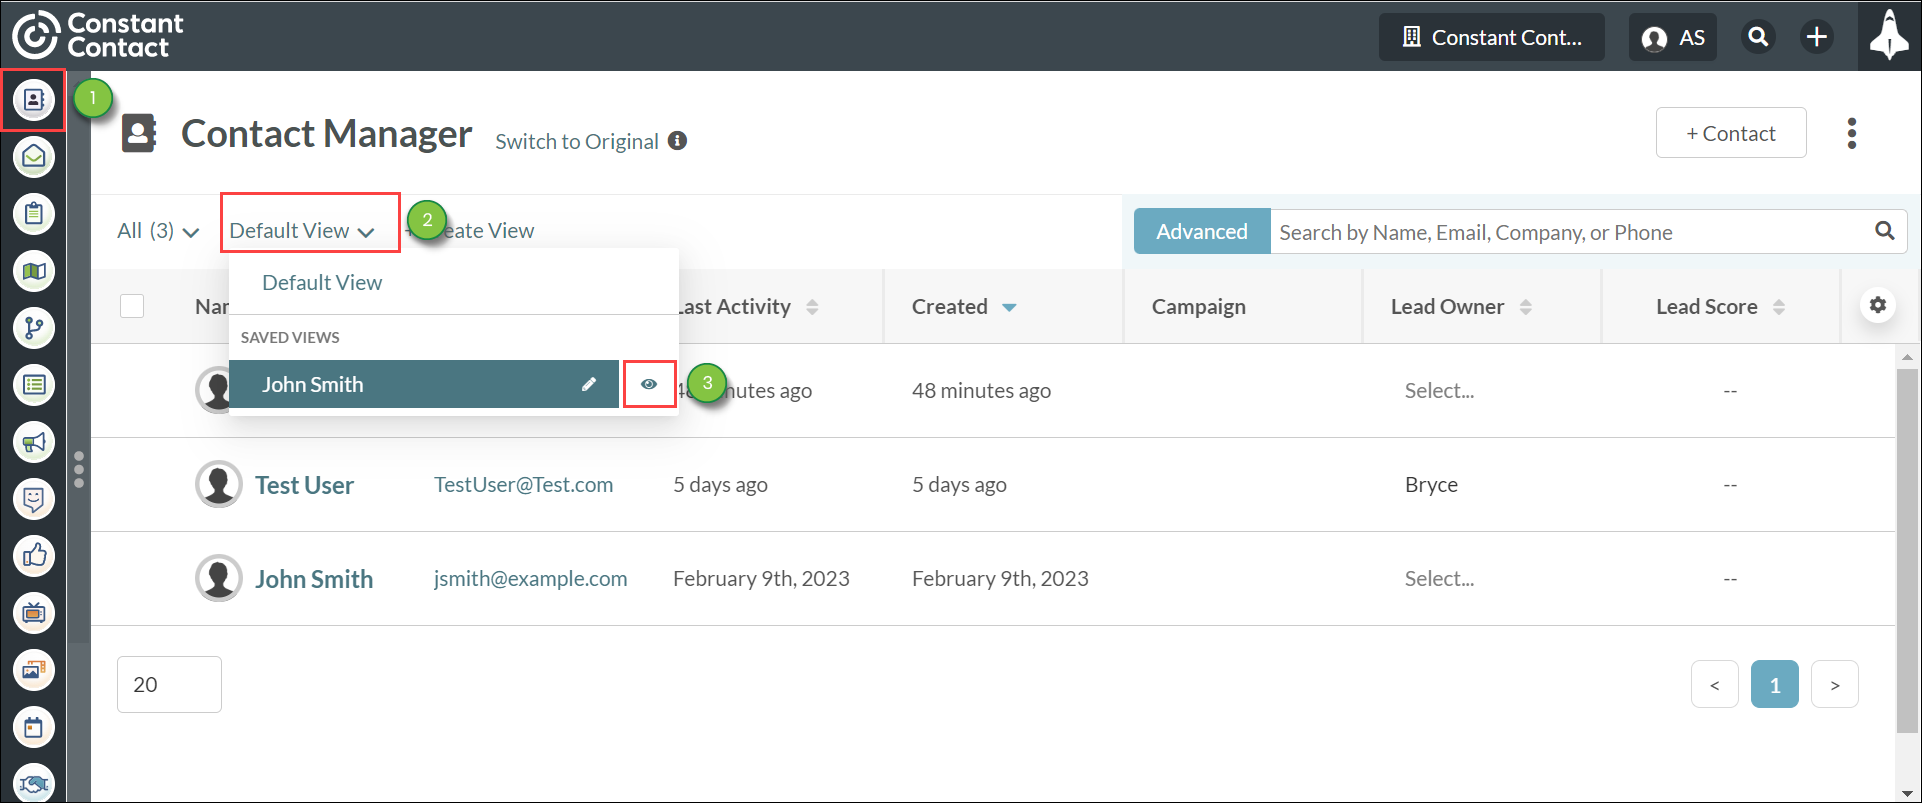
You can swap between the default view and your created views at any time.

To swap between views, do the following:

  1. Click Contacts in the left toolbar.
  2. Click the  arrow-down3.png  View drop-down menu.
  3. Select the desired view.

    Using Views in Contact Manager


Selecting and Sorting Columns

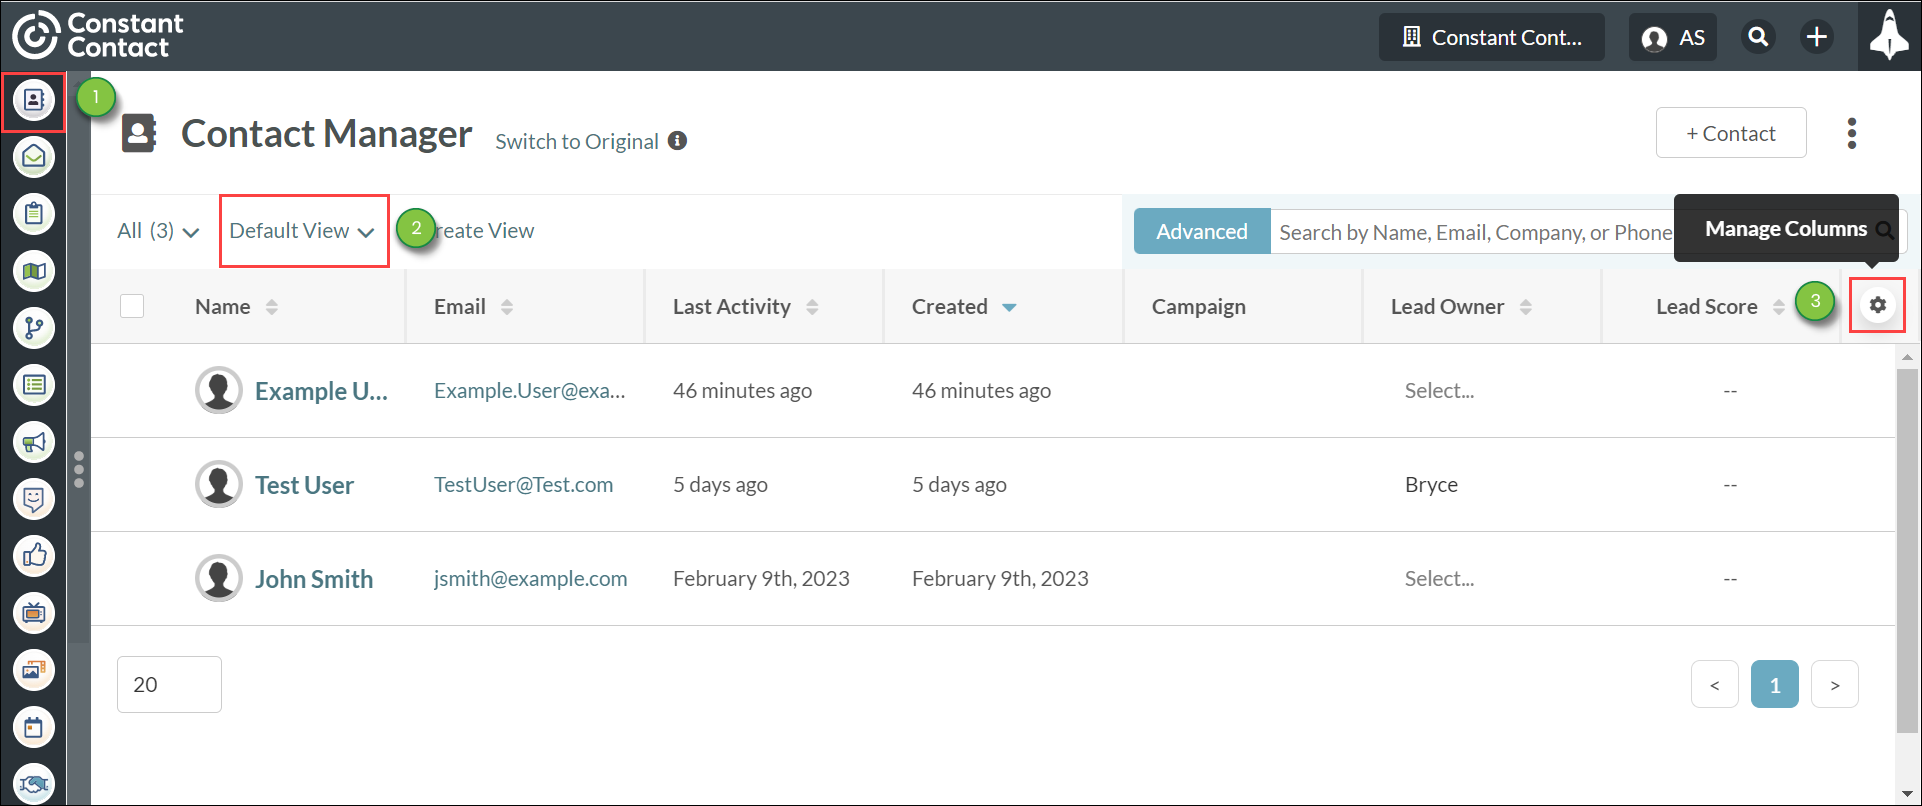
Information in views is displayed in individual columns. The information in these columns comes from available fields, including custom fields. You can choose to display certain columns—or remove them from a view—as you see fit.

To select which columns to display in a view and sort the information:

  1. Click Contacts in the left toolbar.
  2. Click the  arrow-down3.png  View drop-down menu. Select the desired view.
  3. Click  12cog.png  Manage Columns.

    Using Views in Contact Manager


  4. Select or deselect the checkbox next to the desired field. Repeat as necessary.

    Using Views in Contact Manager


  5. Once you have the desired columns selected, click on the desired column you would like to sort the information by.

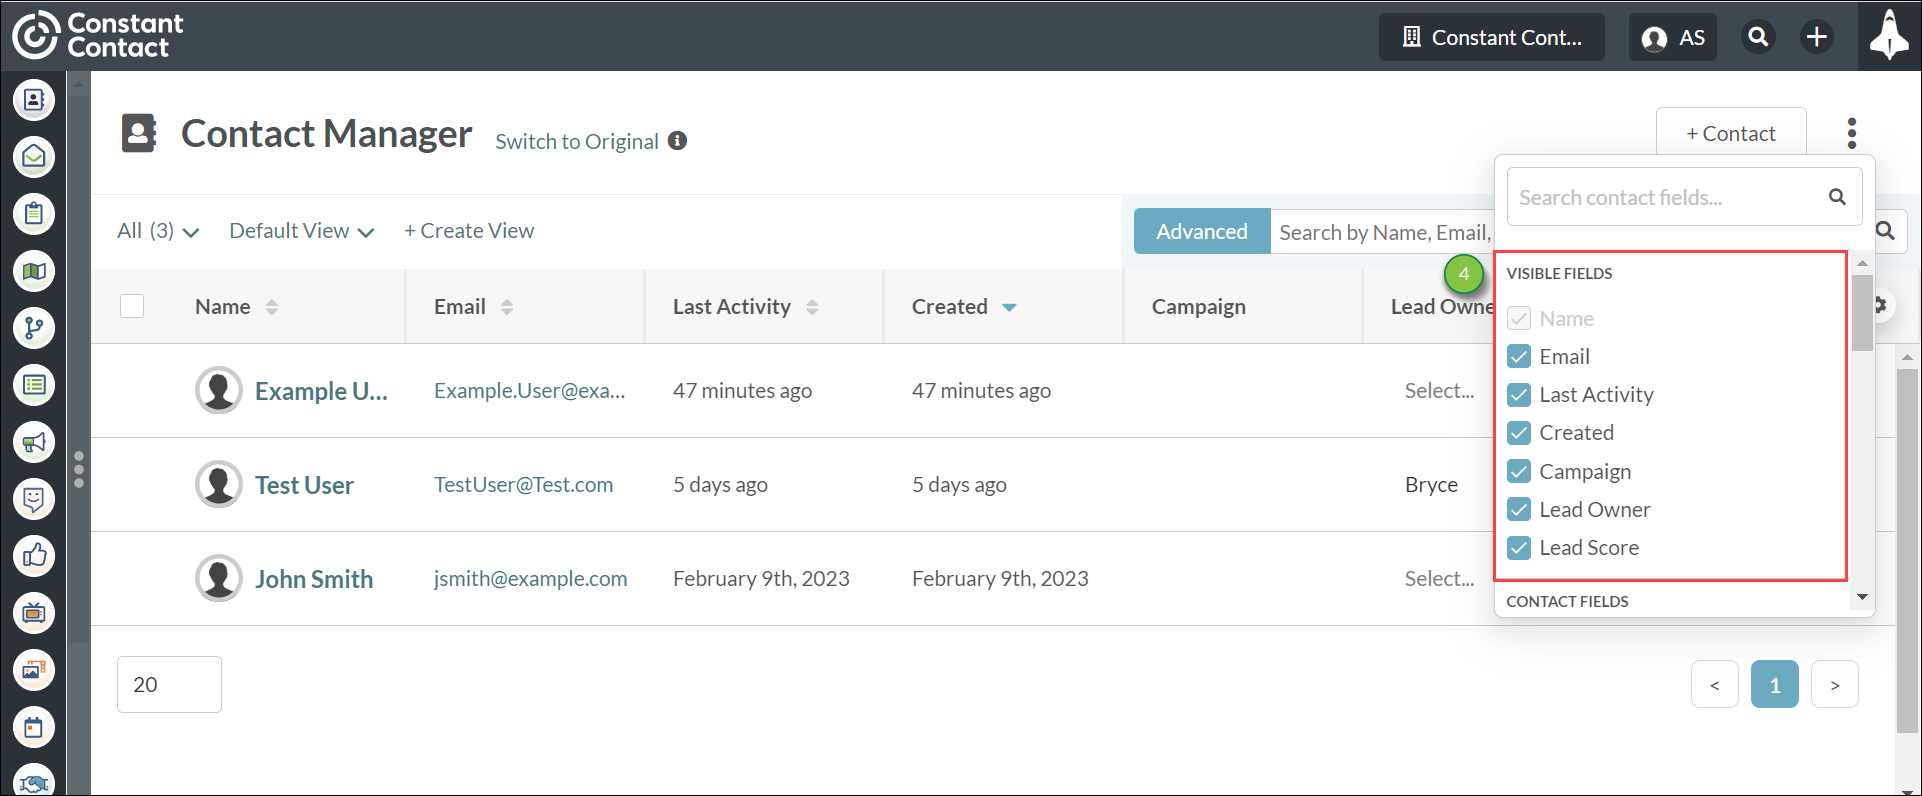
Important: The Name columns are present in all views and cannot be removed. Information can only be sorted by one column at a time. To sort multiple columns of information at once, we recommend exporting a list of leads.

By default, views will display information from the following system fields:

  • Campaign
  • Created
  • Email
  • Last Activity
  • Lead Owner
  • Lead Score


Rearranging Columns

You can rearrange how columns are displayed in views. This is done by dragging-and-dropping the columns in the order that you choose.

To rearrange columns, do the following:

  1. Select the desired view.
  2. Click the desired column.
  3. Drag the column to the desired position. Repeat as necessary.
  4. Click Save.
  5. Select either of the following options:
 Setting Description 
 Create New Saves this view as a new view
 
 Overwrite Overwrites the existing view.


Editing Views

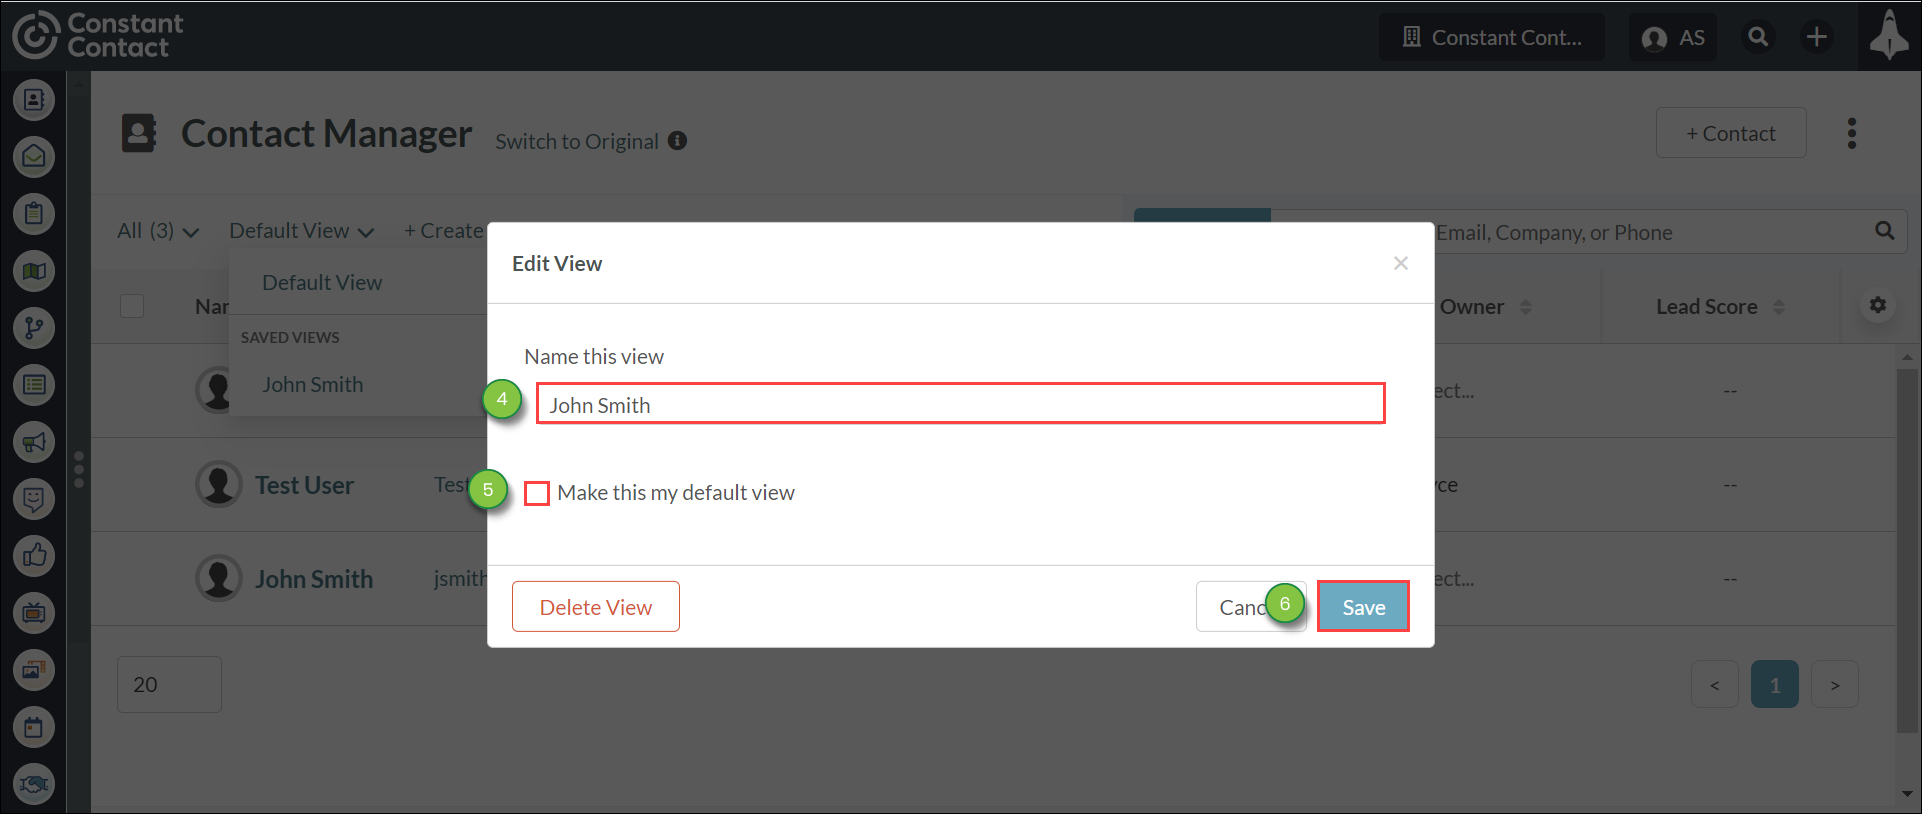
You can edit basic view information at any time.

To edit basic view information, do the following:

  1. Click Contacts in the left toolbar.
  2. Click the  arrow-down3.png  View drop-down menu.
  3. Hover over the desired view. Click  12pencil.png  Edit.

    Using Views in Contact Manager


  4. Enter a name for the view in the Name this view field.
  5. Optionally, click the Make this my default view checkbox.
  6. Click Save.

    Using Views in Contact Manager


Deleting Views

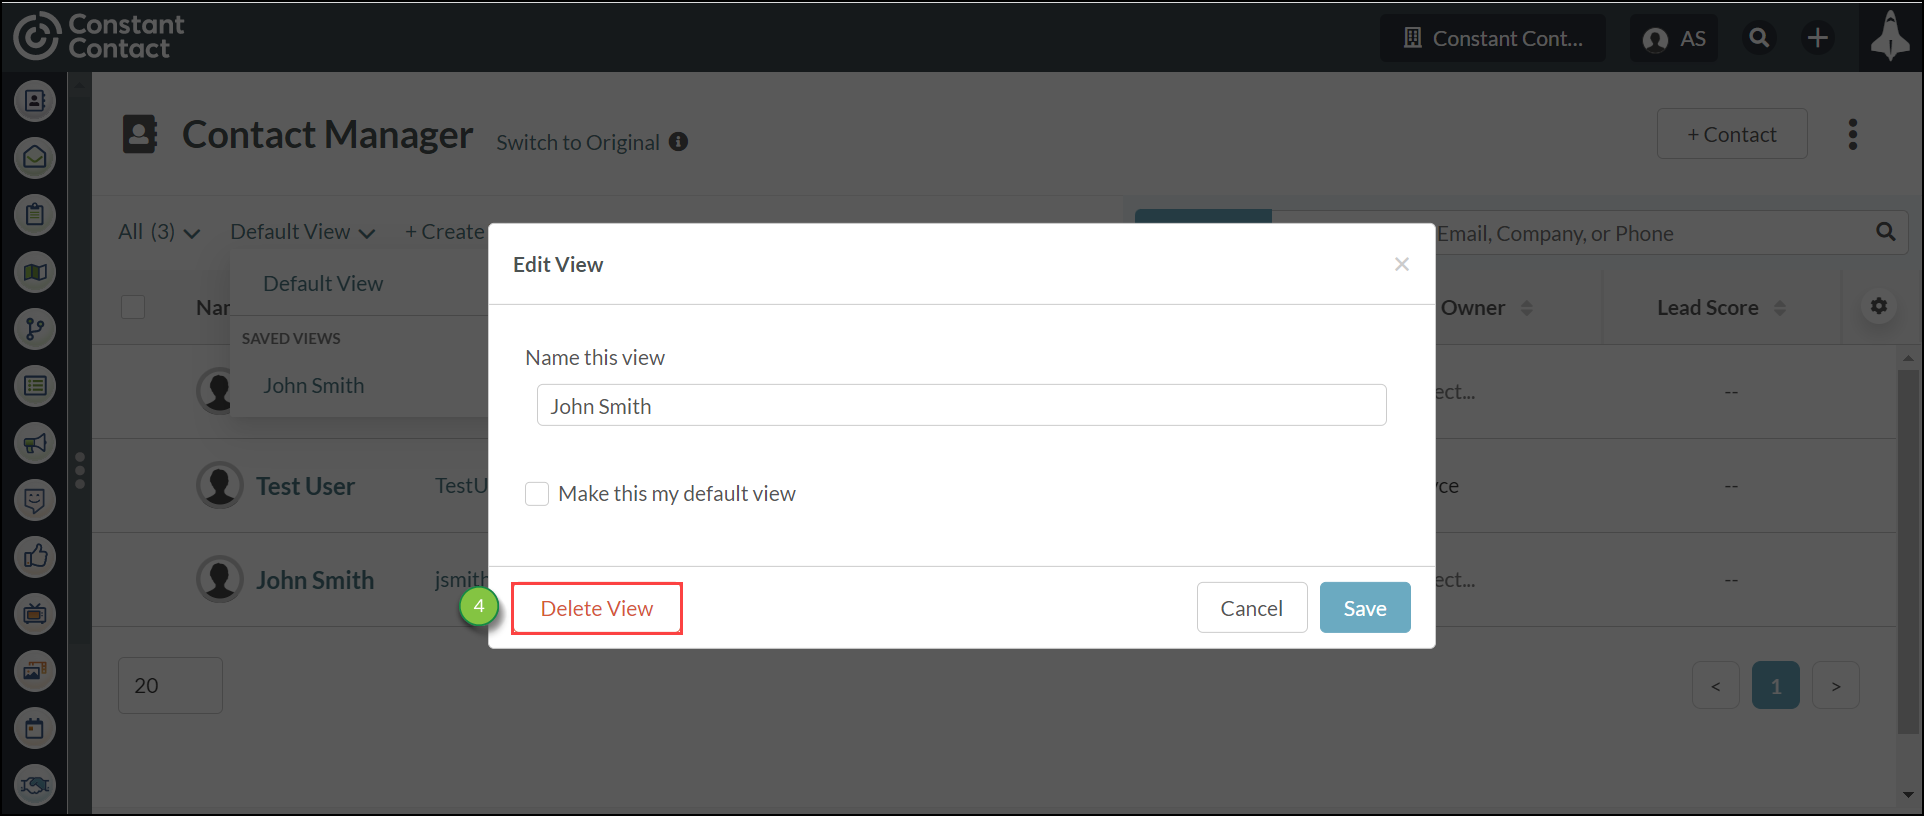
You can delete views you no longer need at any time.

To delete views, do the following:

  1. Click Contacts in the left toolbar.
  2. Click the  arrow-down3.png  View drop-down menu.
  3. Hover over the desired view. Click  12pencil.png  Edit.

    Using Views in Contact Manager


  4. Click Delete View.

    Using Views in Contact Manager


Setting Default Views

You can set a specific view to load when you open the Contact Manager.

To set a specific view as the default view, do the following:

  1. Click Contacts in the left toolbar.
  2. Click the  arrow-down3.png  View drop-down menu.
  3. Hover over the desired view. Click  eye.png   Make this your default view.

    Using Views in Contact Manager


Did this article answer your question?


Constant Contact Logo

Copyright © 2025 · All Rights Reserved · Constant Contact · Privacy Center