This article will detail how to use views in the Account Manager.
| Administrators | ✓ | |
| Company Managers | ✓ | |
| Marketing Managers | ✓ | |
| Sales Managers | ✓ | |
| Salespersons | ✓ | |
| Jr. Salespersons | ✓ |
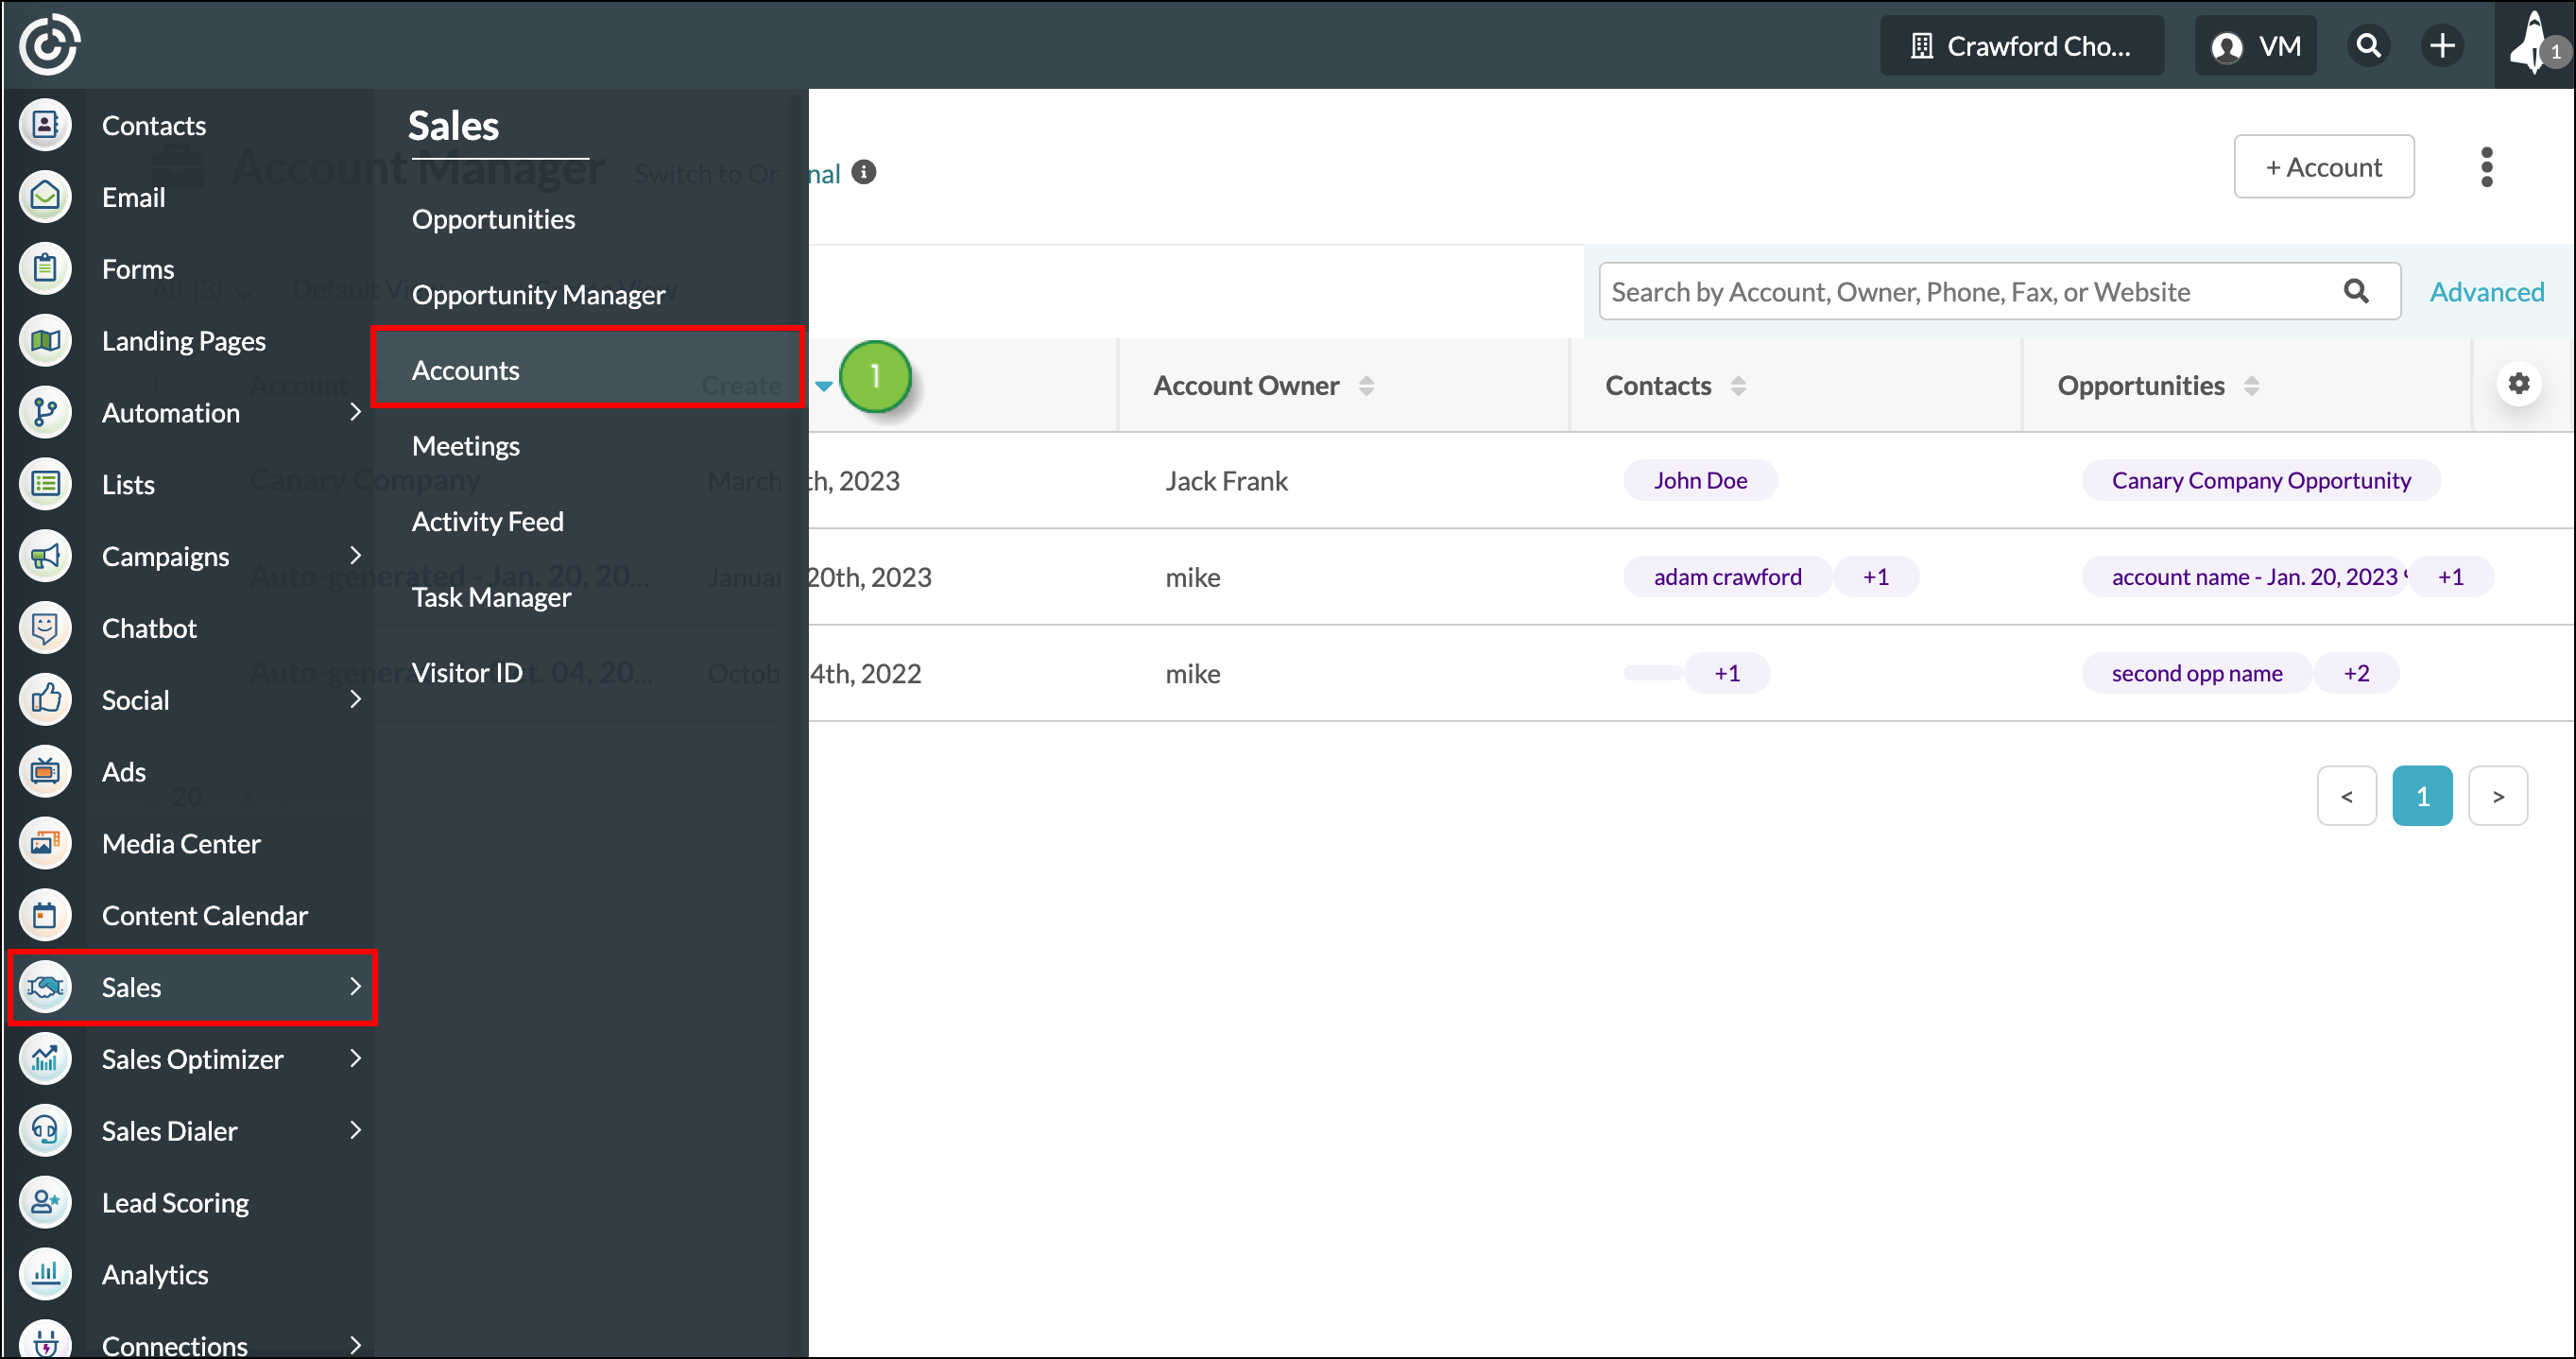
While the Account Manager comes with a default view -- displaying the account name, created date, account owner, associated contacts, and associated opportunities -- you may find that you want a different view that contains different information. Select the columns you want to display and save them as a view.
Searches help to further segment the data in your Account Manager. Create an Advanced Search, and filter by Created Date, Updated Date, Status, Assigned To name, Stage, Value, and more! Select the data you want to filter by in your Advanced search and save that search for future use.
Mix and match views and searches to get the Account Manager you need. To learn more about Advanced searches read Using Advanced Search in the Account Manager.
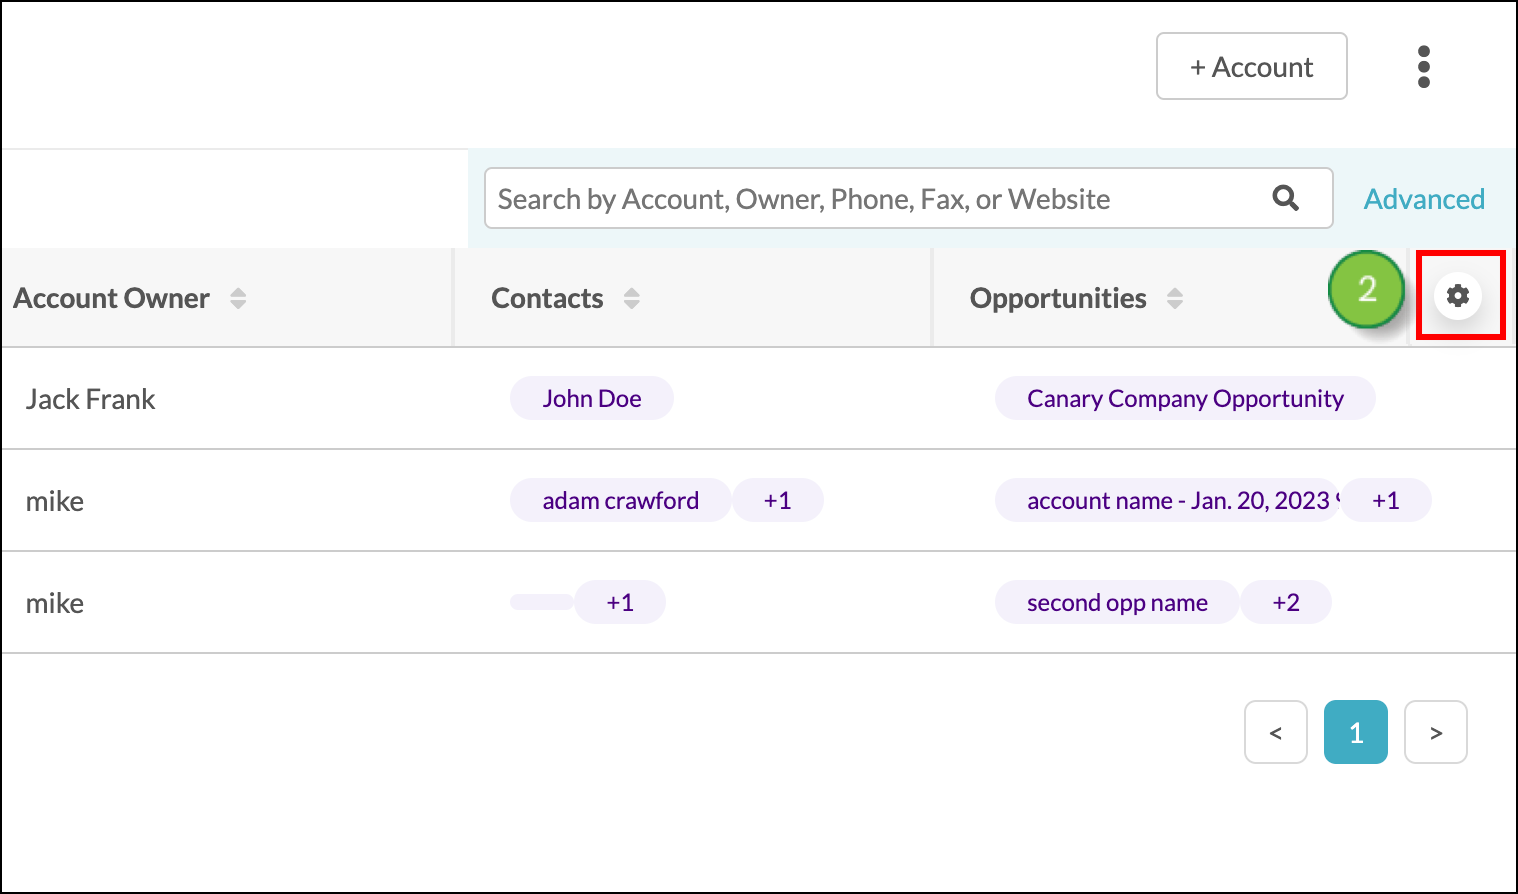
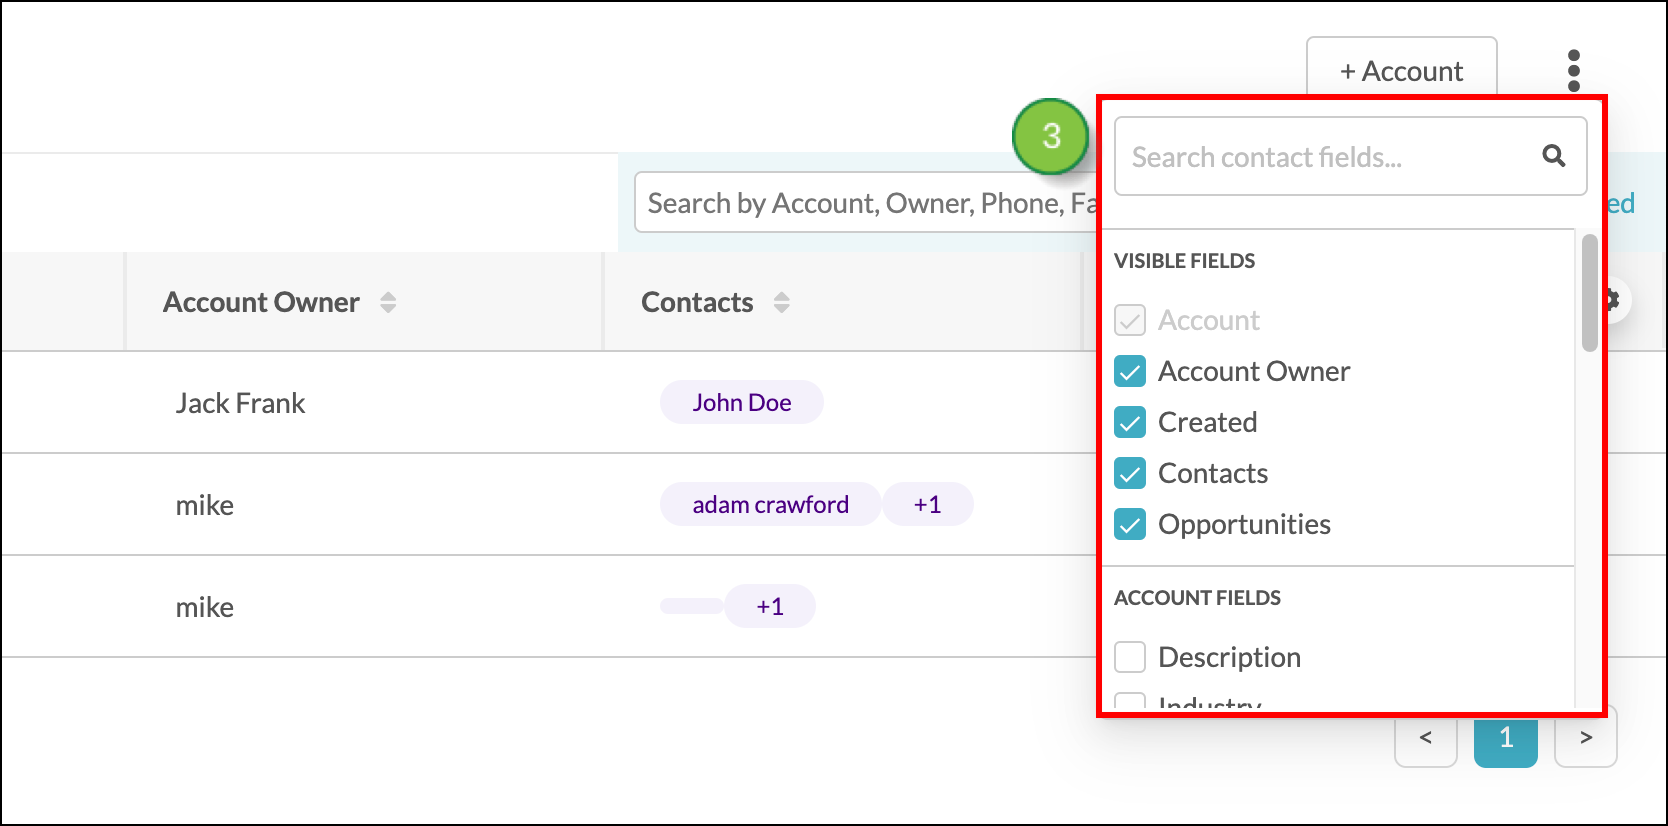
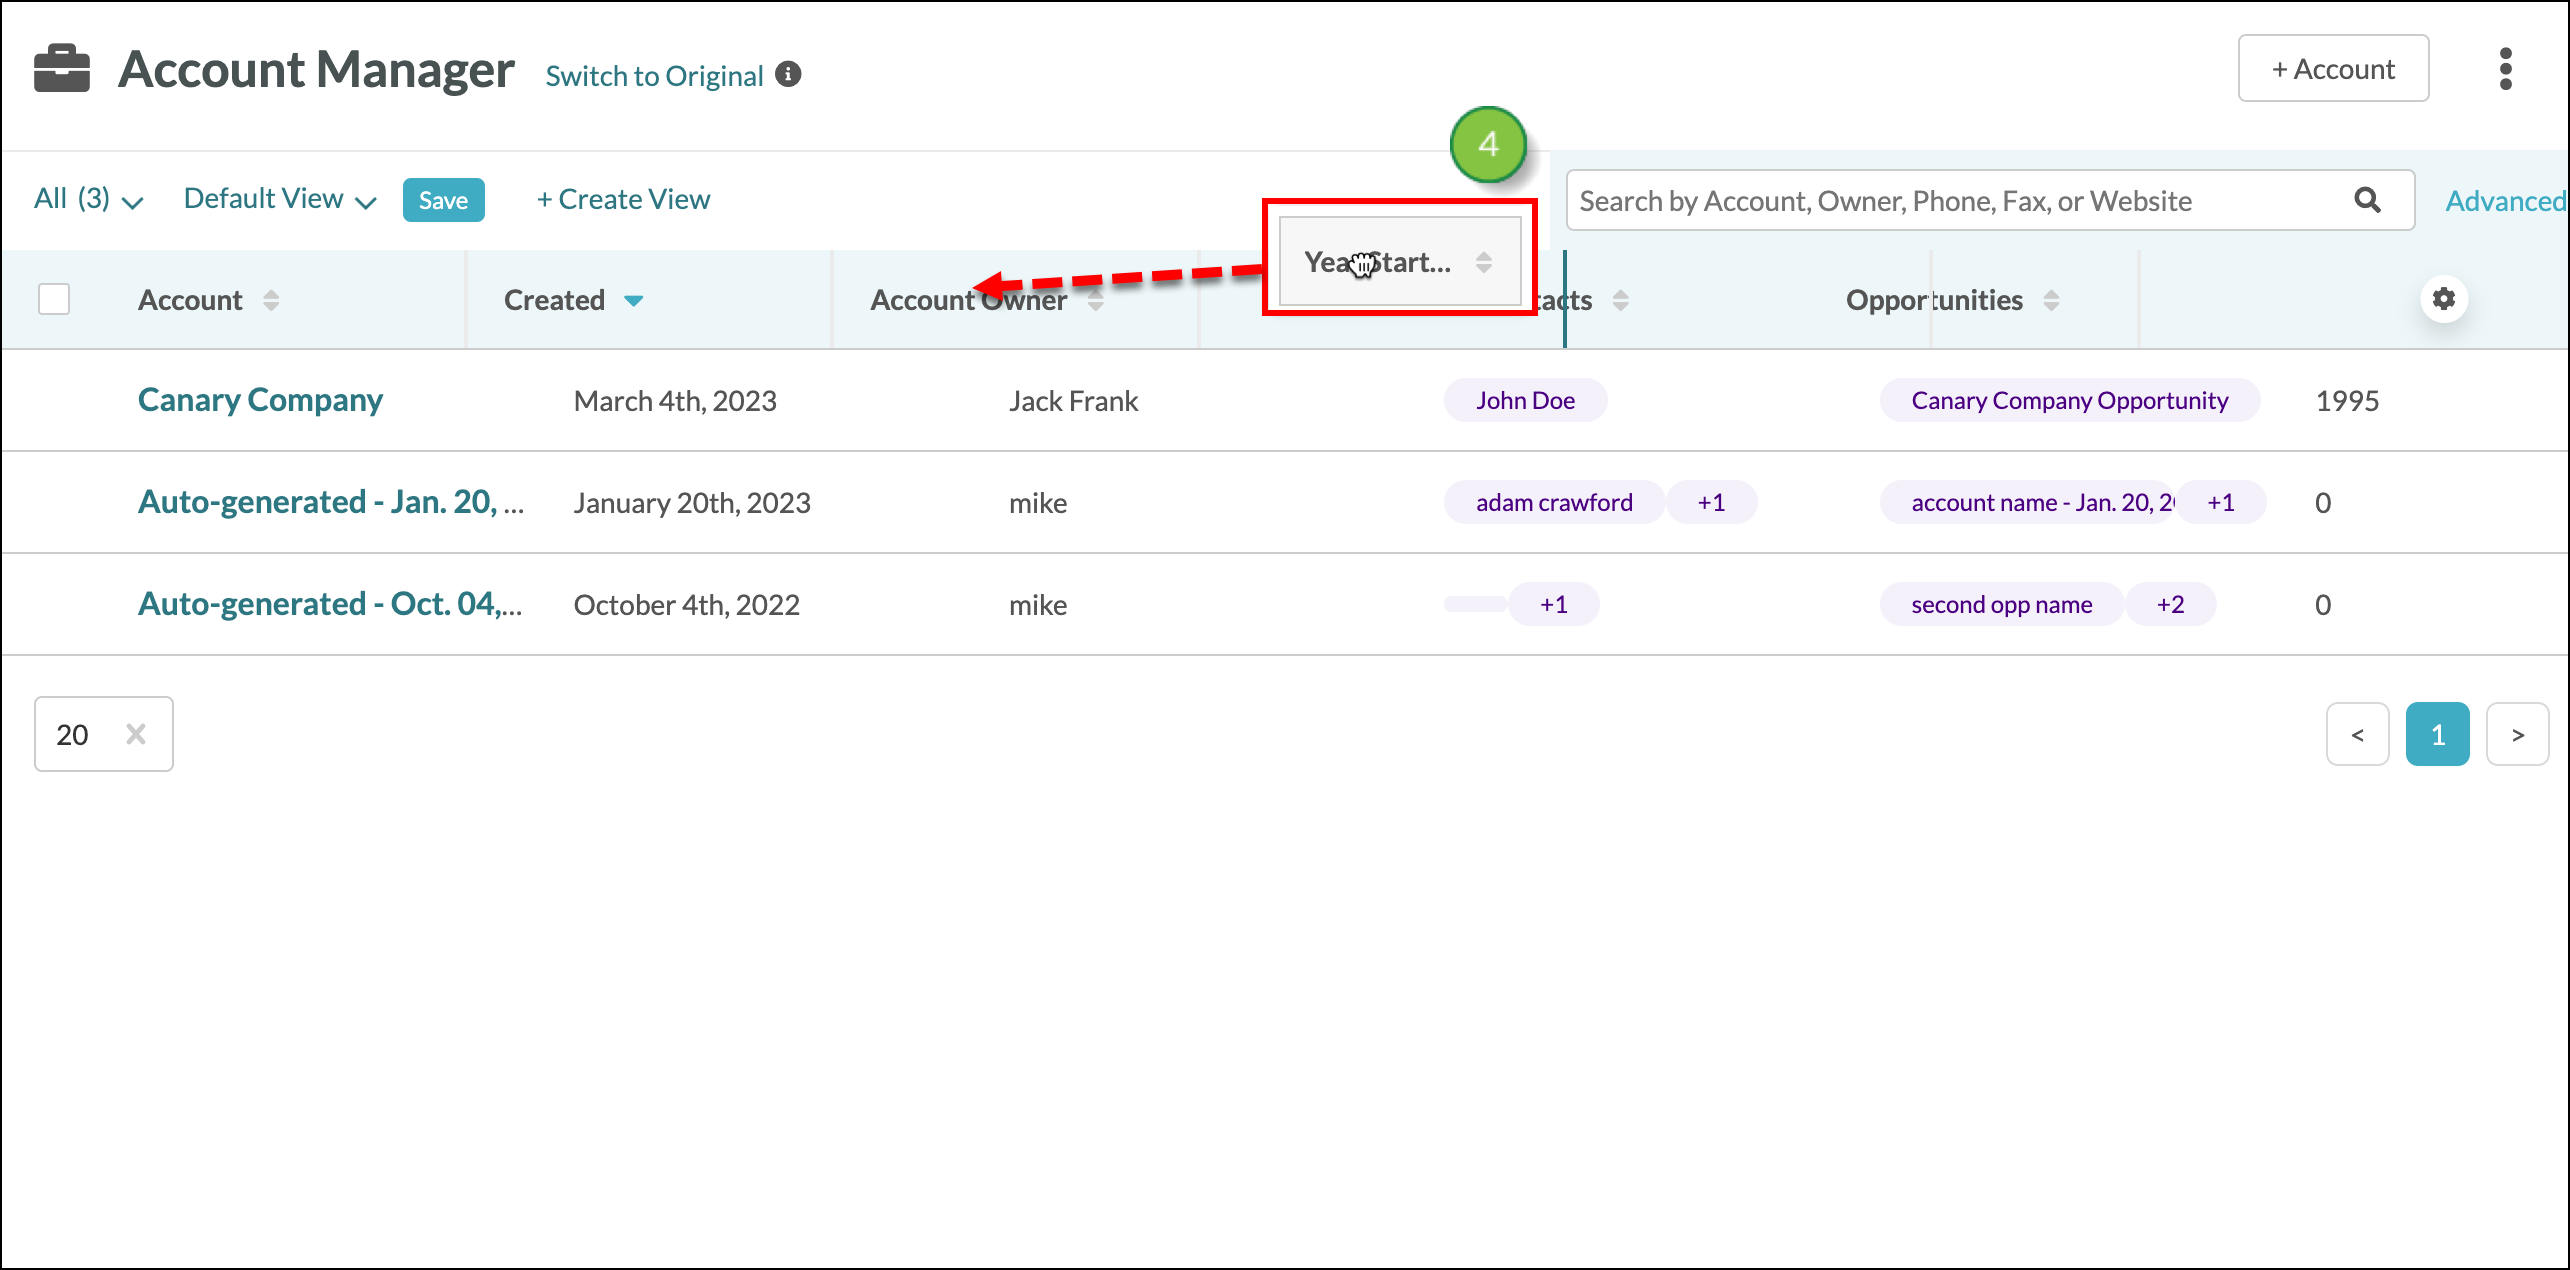
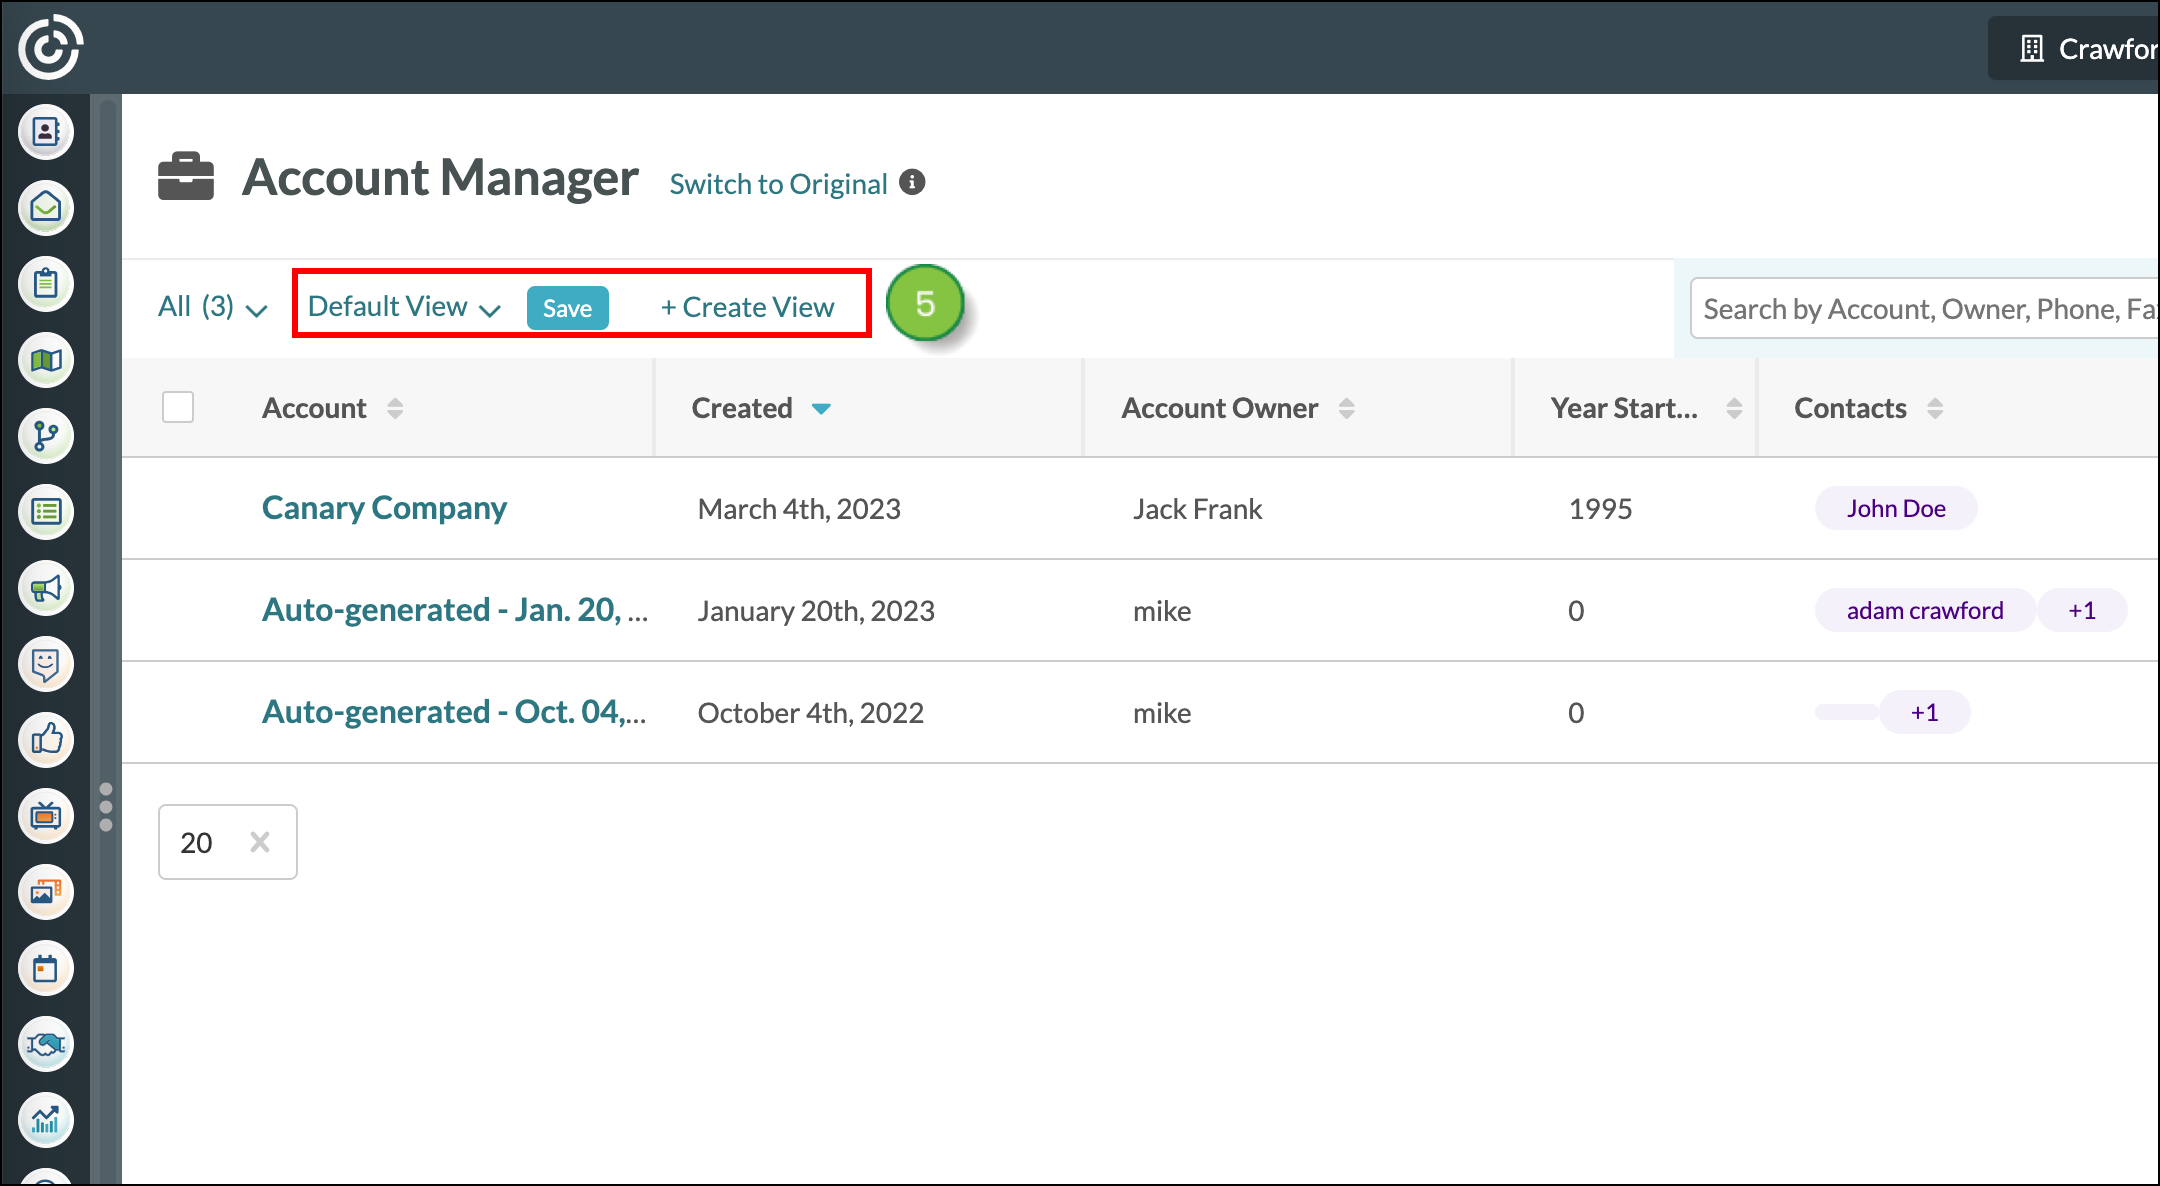
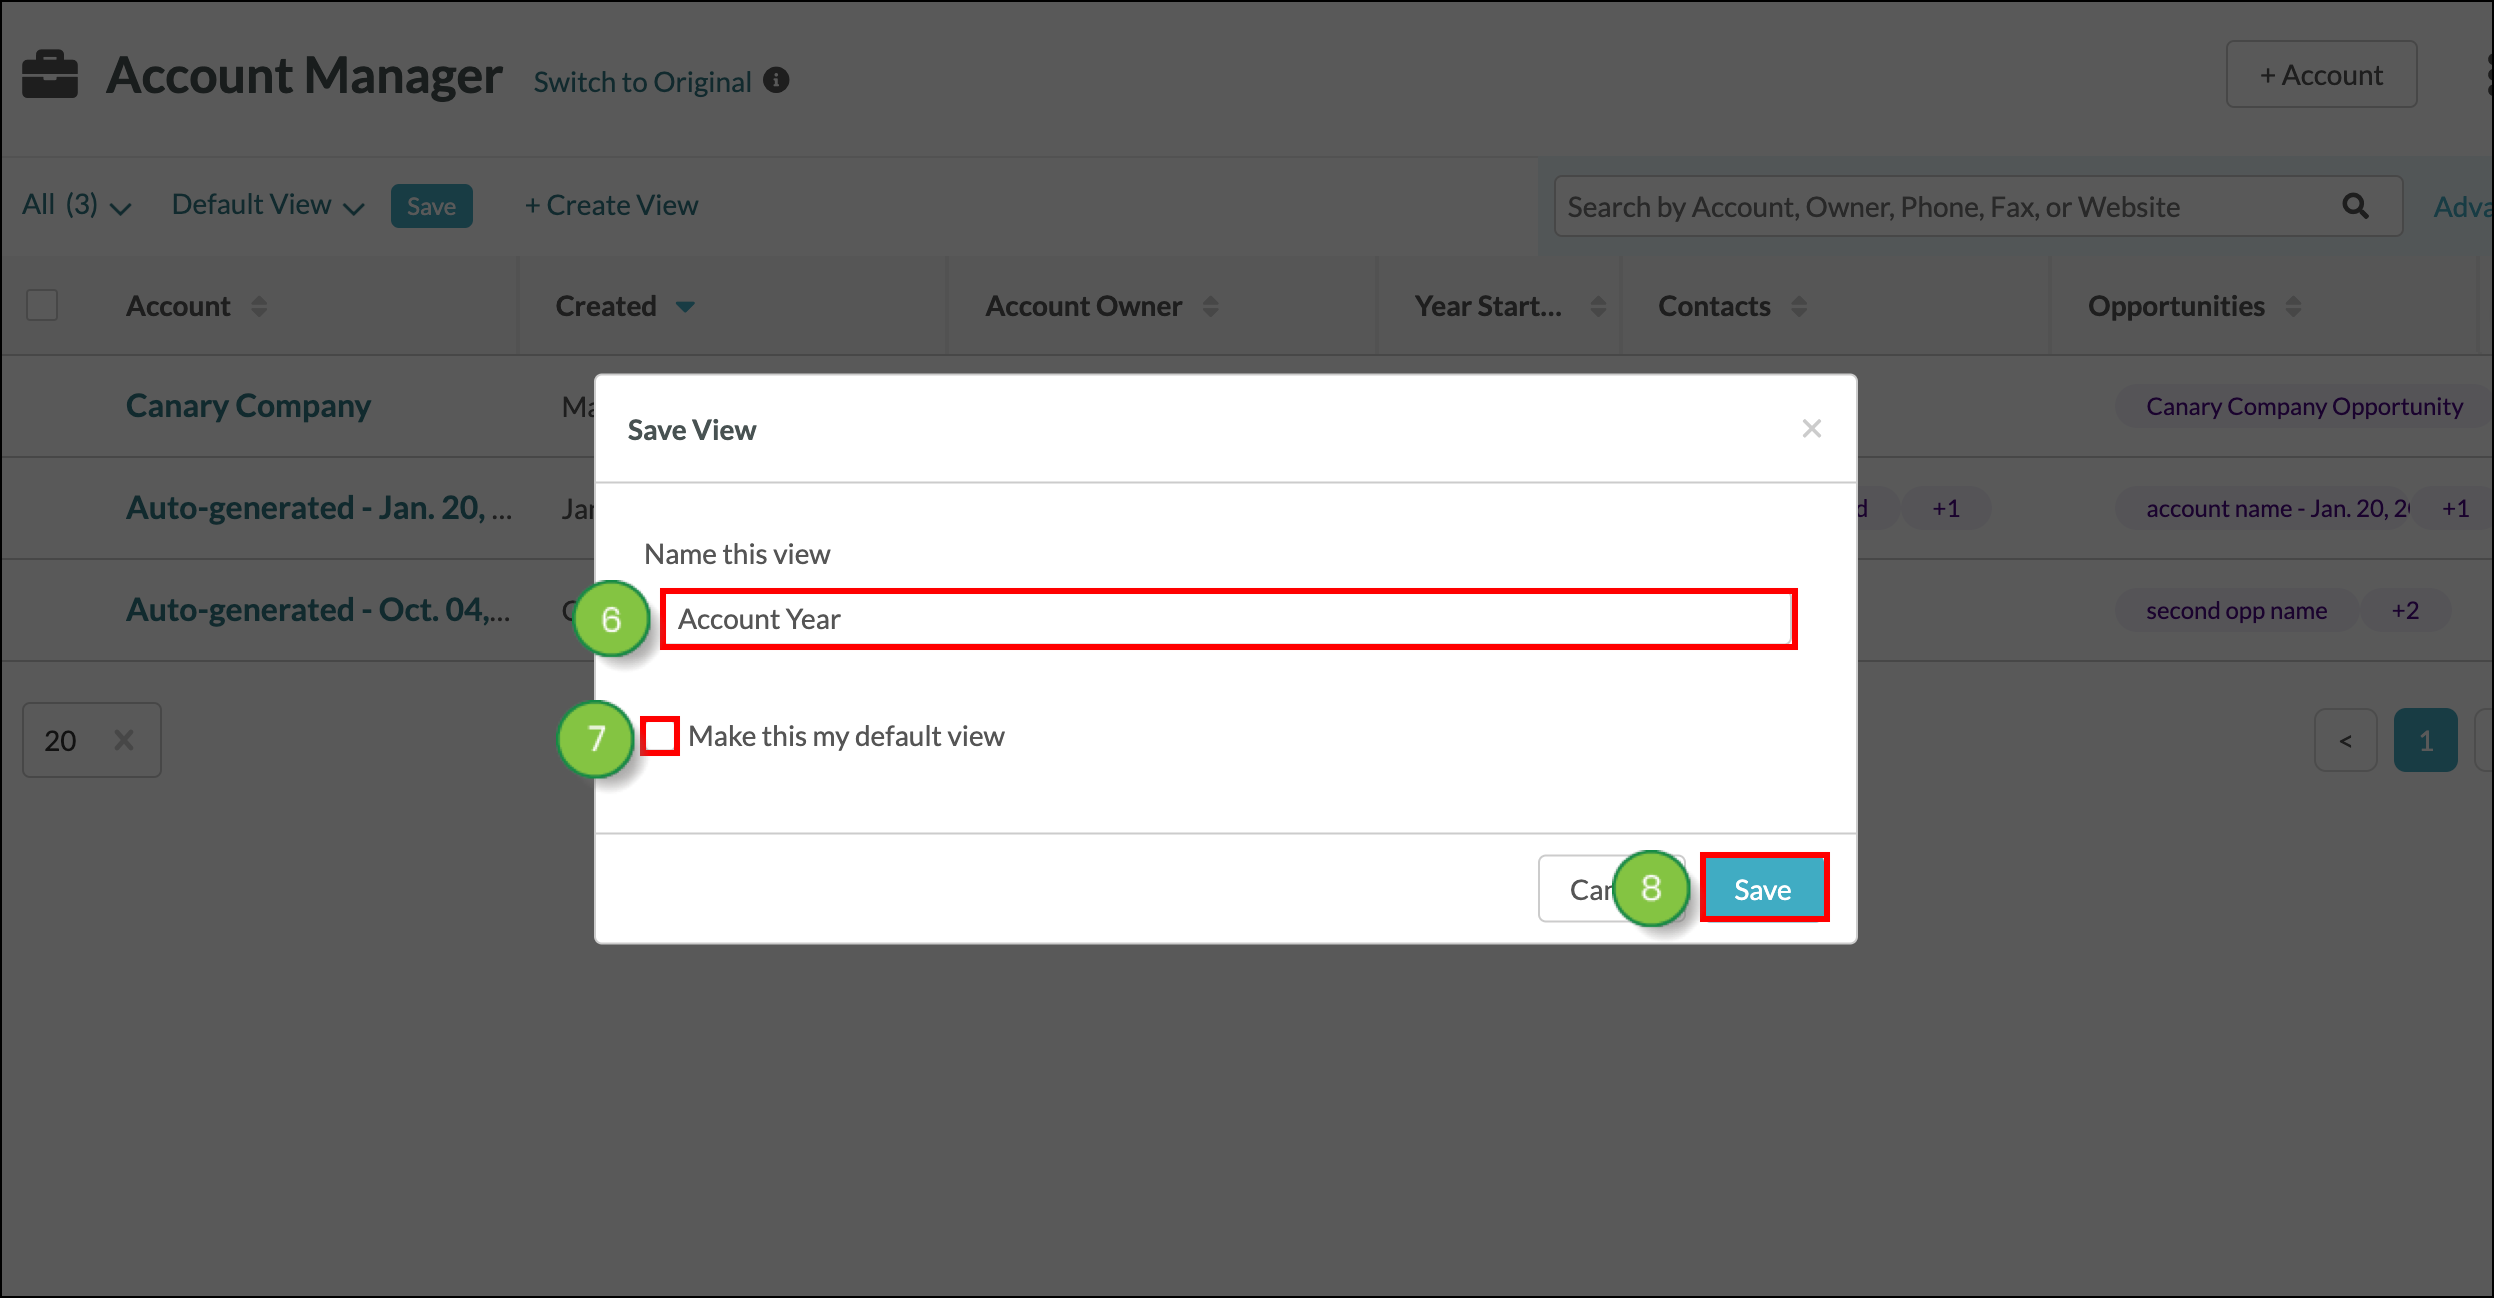
To create a new view, first, make the adjustments you need to the Account Manager table. This can include adding columns, moving column positions, or removing columns. Once the table has the data you need, save it as a view. Do the following:
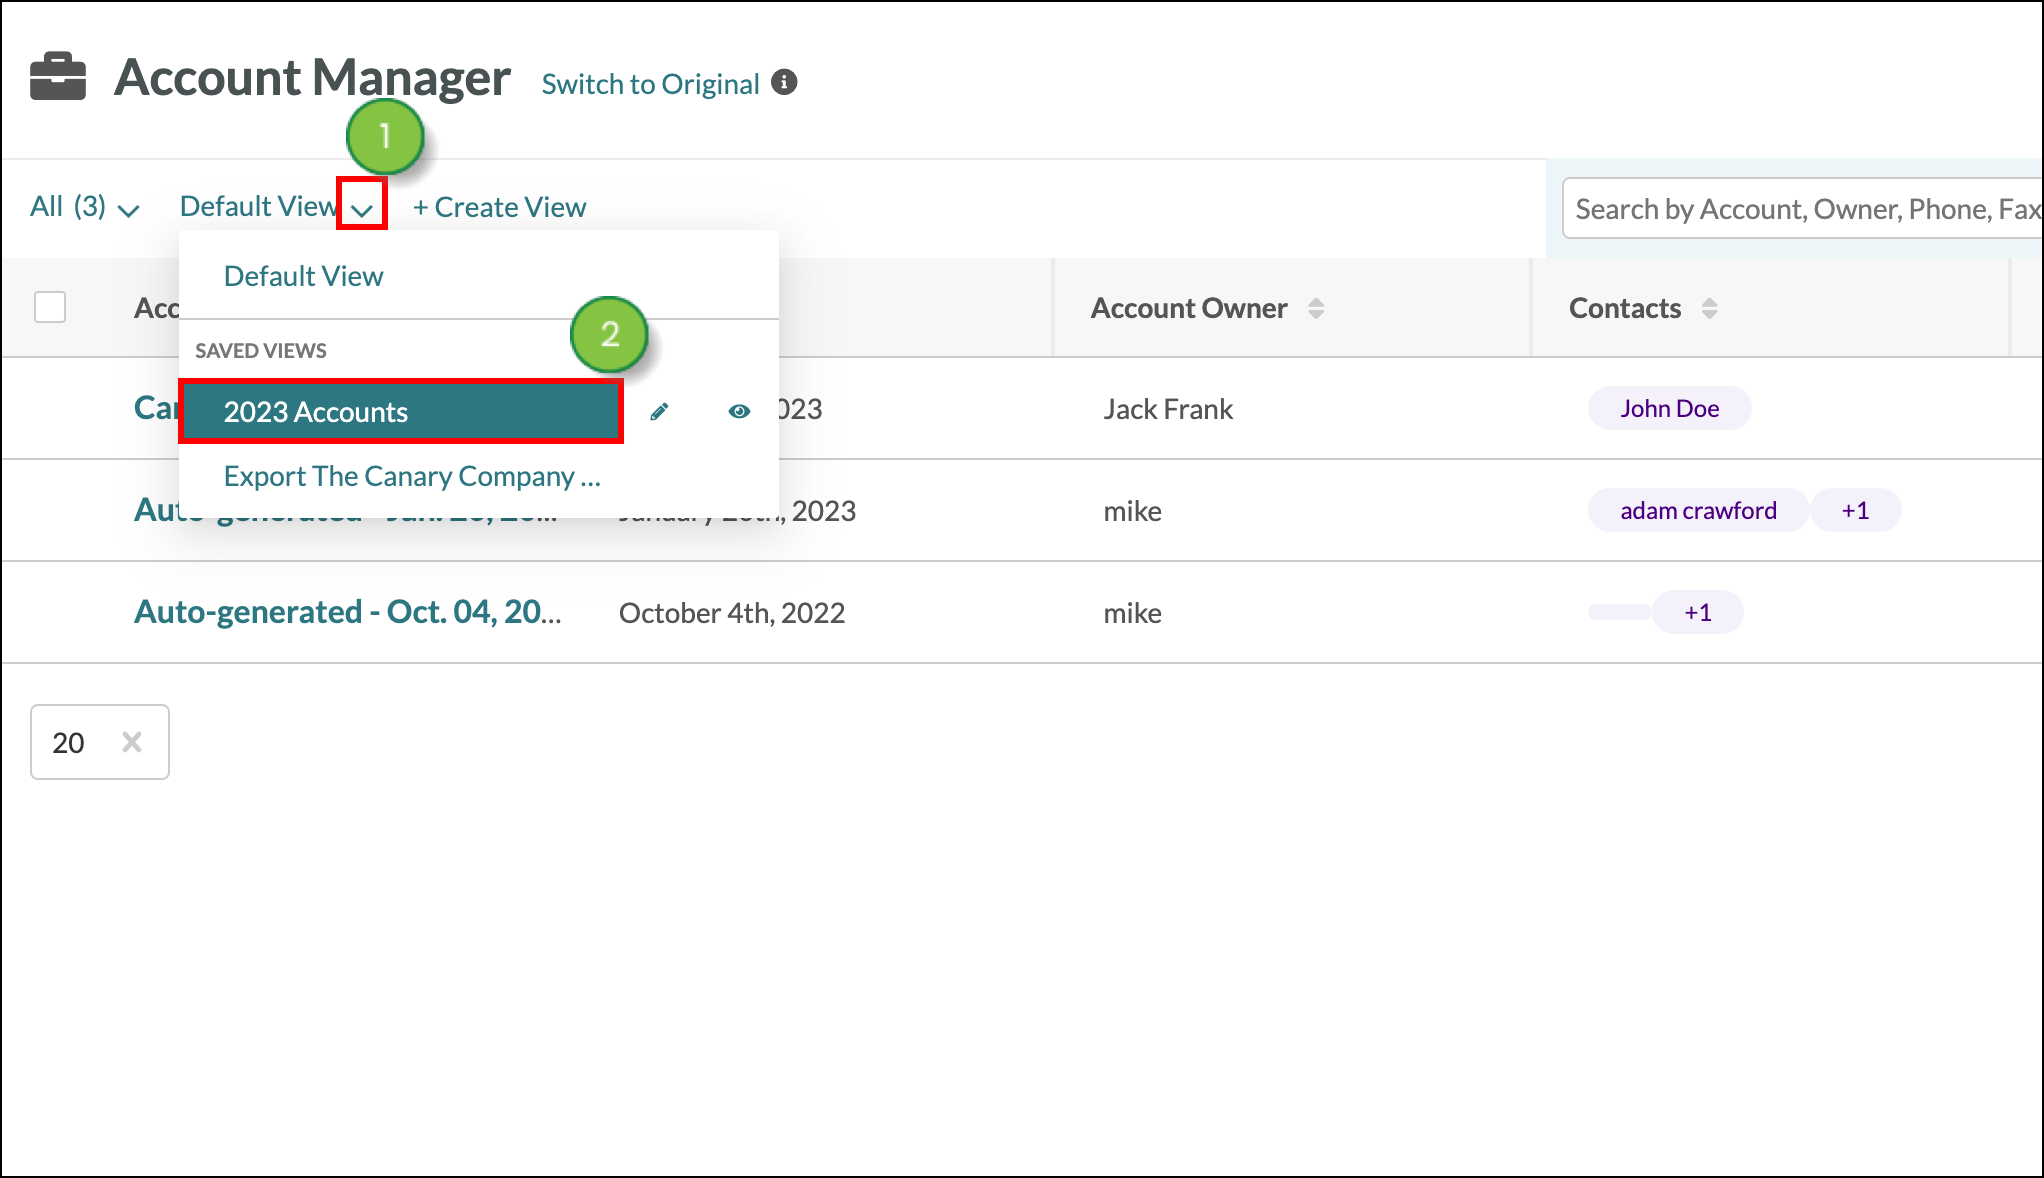
You can swap between the default view and created views at any time. To swap between views, click the ![]() View drop-down menu and choose the view you'd like to switch to.
View drop-down menu and choose the view you'd like to switch to.
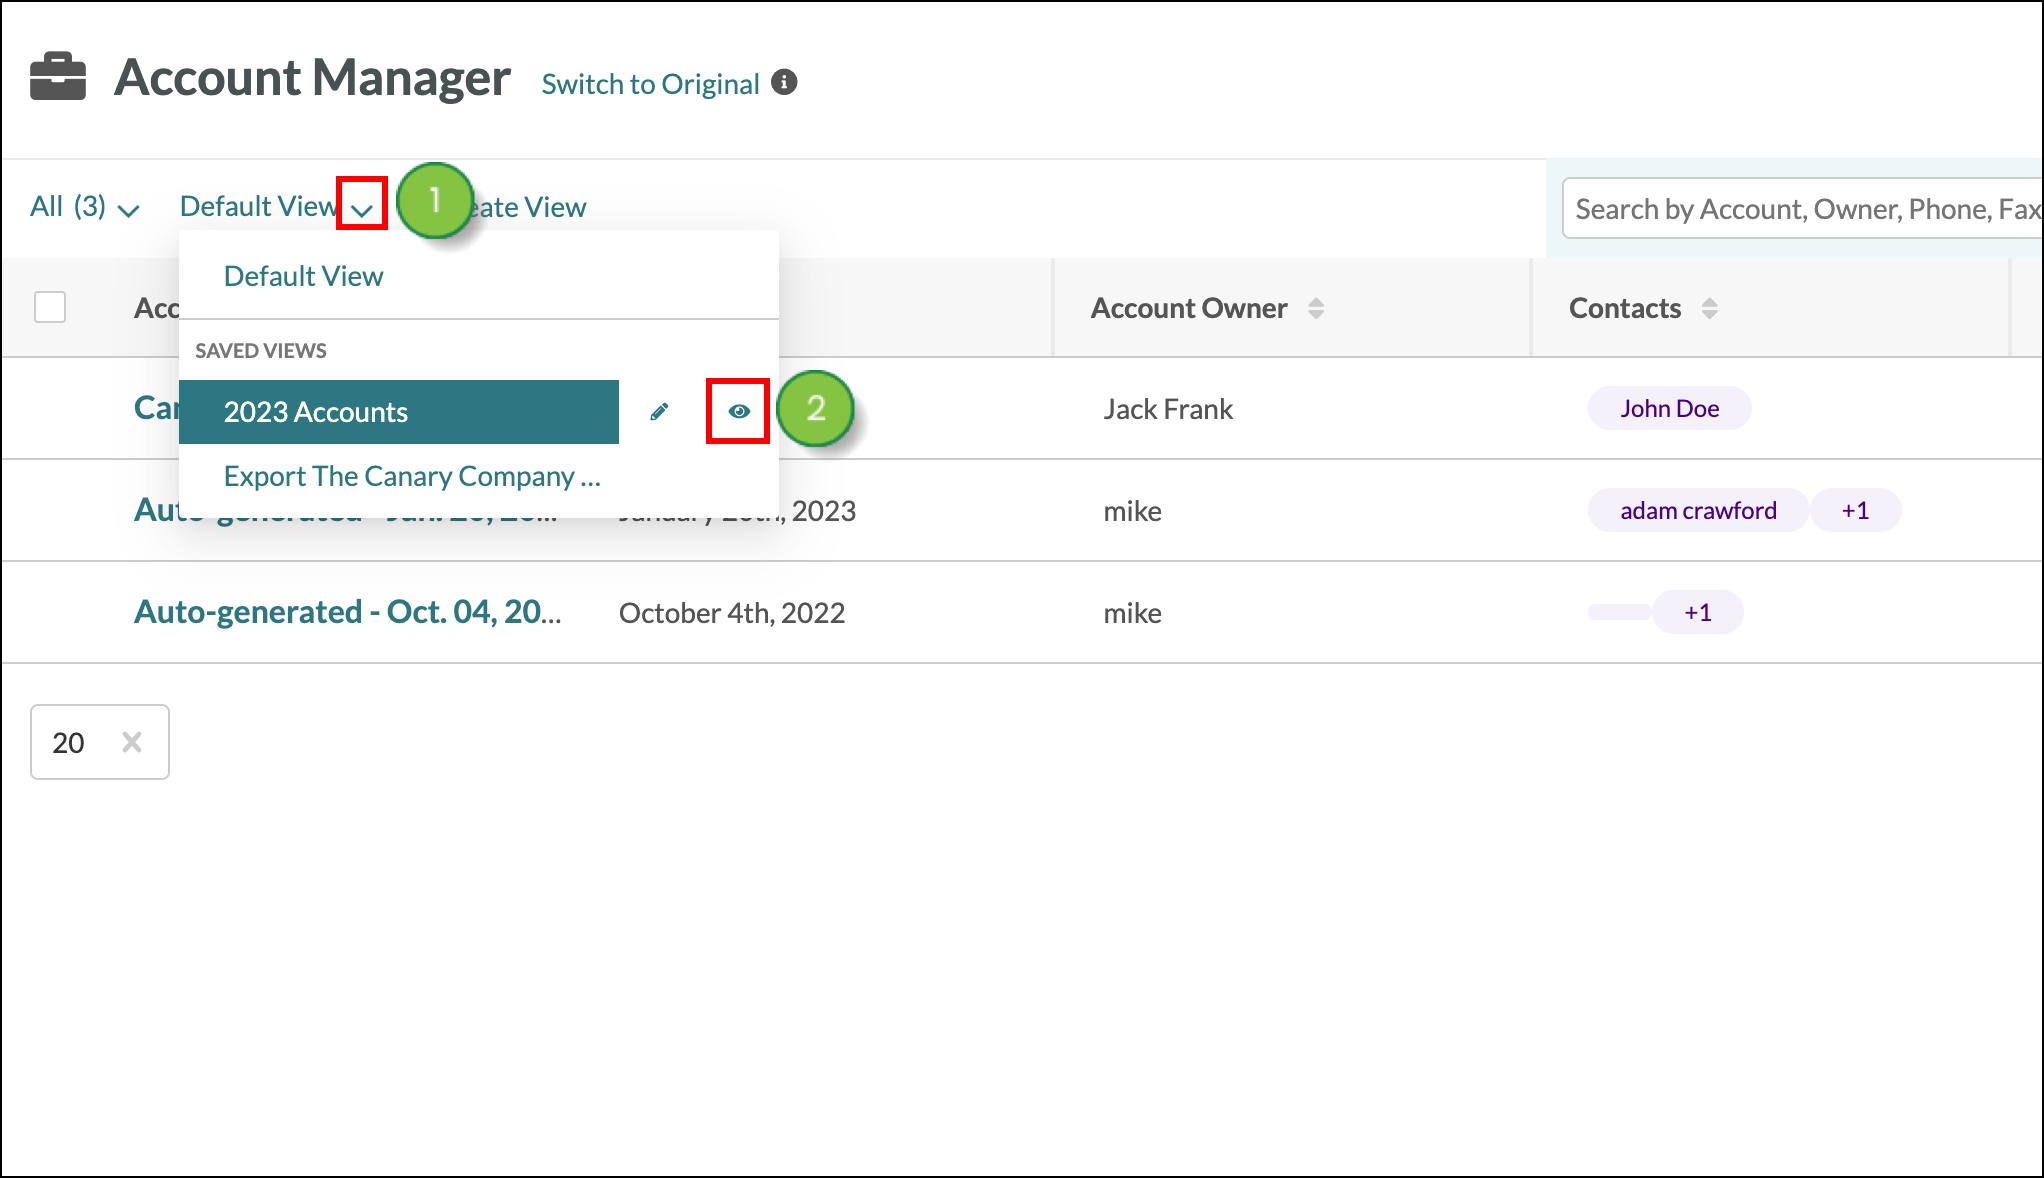
You can set a specific view to load when you open the Account Manager. To set a specific view as the default view, click the ![]() View drop-down menu, hover over the desired view, and click
View drop-down menu, hover over the desired view, and click ![]() Make this your default view.
Make this your default view.
Copyright © 2026 · All Rights Reserved · Constant Contact · Privacy Center