Lead Gen & CRM
How can we help you?
Search our help articles, video tutorials, and quickstart guides

You've got this. You've got us. Search our Knowledge Base to quickly find answers to your questions.

Using Advanced Search in the Account Manager

Article: 000050622
Updated: July 26, 2024

You can create an advanced search to identify leads based on specific profile attributes. Additionally, you can search by information in both system fields and custom fields.

When creating advanced searches, you can create a new search, use a saved or recent advanced search, or set a saved search as the default within the Account Manager.

This article details information on the various methods available in creating an advanced search.


Article Contents


Users:
Administrators 
Company Managers 
Marketing Managers 
Sales Managers 
Salespersons 
Jr. Salespersons 


Creating Advanced Searches

The Advanced Search function provides a more complete filtering of search results than the standard search toolbar. Advanced Search is a more direct search tool that allows you to modify your search terms for a more focused result.

Advanced Search has search fields for many different parameters. Advanced Search even allows for custom search fields based on the various fields attributed to your accounts.

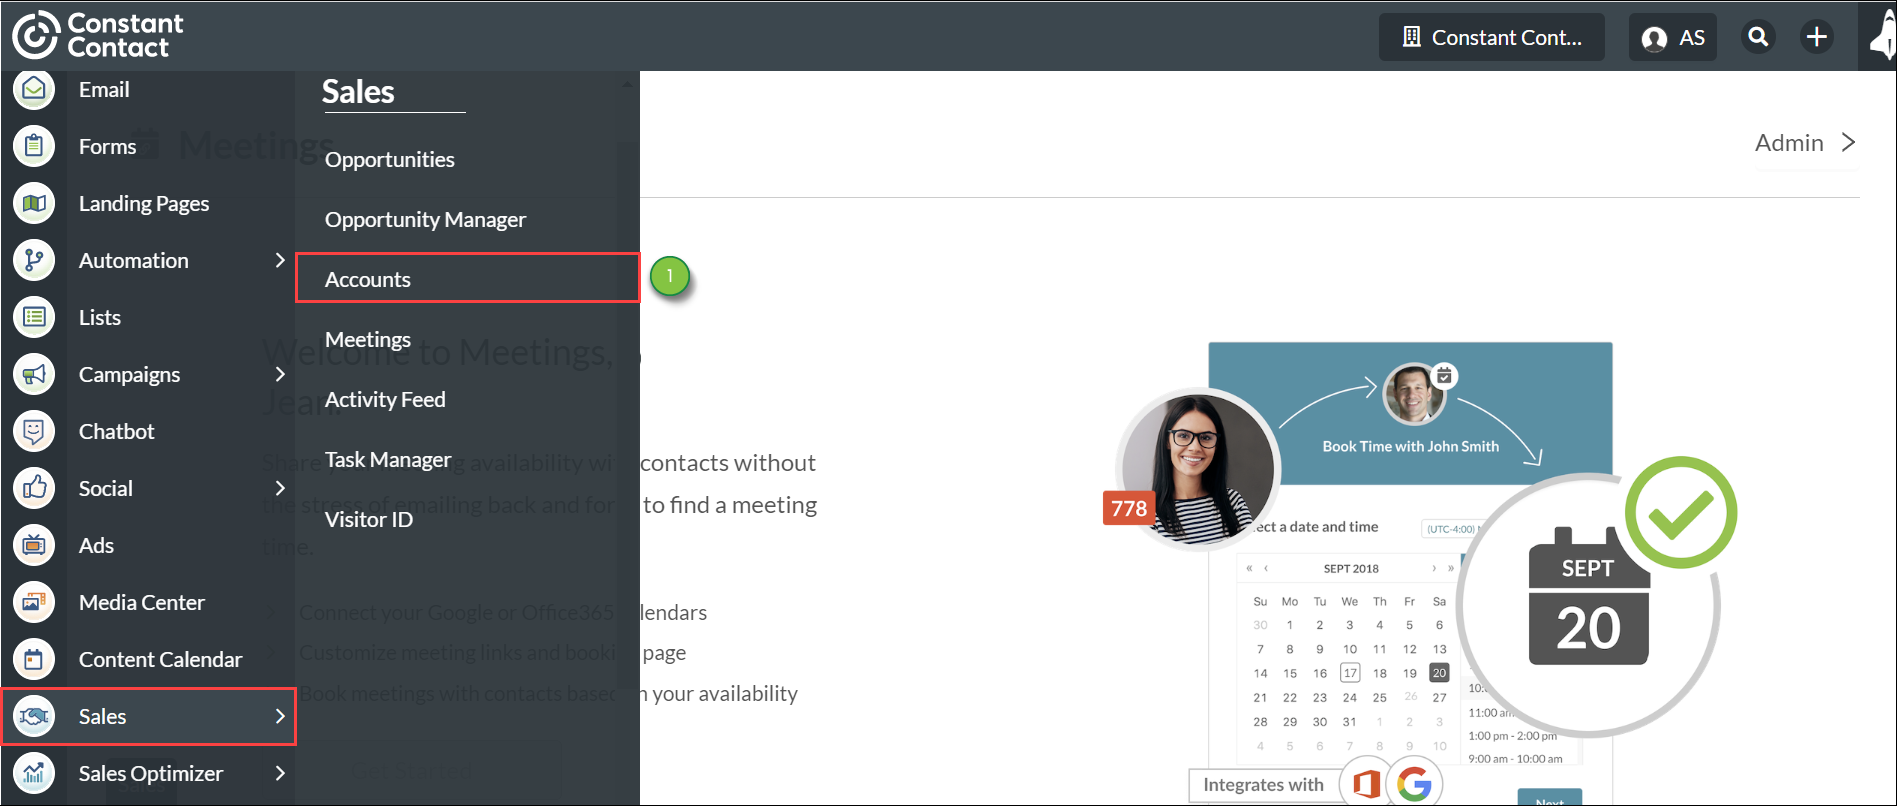
To create an advanced search, do the following:

  1. Click Sales > Accounts in the left toolbar.
  2. Click Advanced.
  3. Select applicable search filters in the Account section.
  4. Optionally, add other system or custom fields.
  5. Enter or configure any necessary options for the desired filters.
  6. Click Search.

Note: Click Reset to clear all search filters.


Adding Fields to Advanced Searches 

There may be times where the default fields in the Advanced Search panel are not relevant to your search. It may be that other fields may contain information that is better suited to your search. You can add or remove system or custom fields to an advanced search as necessary.

To search for system or custom fields, do the following:

  1. Click Sales > Accounts in the left toolbar.
  2. Click Advanced.
  3. Click + Add Fields.
  4. Click the checkboxes for the desired system or custom fields.
  5. Enter or configure any necessary options for the desired fields.
  6. Click Search.

Note: Click Reset to clear all search filters. Click a previously selected checkbox to remove a selected field. 


Saving Advanced Searches

You can save an advanced search for future use. This allows you to pull up an advanced search without needing to enter search parameters.

To save an advanced search, do the following:

  1. Click Sales > Accounts in the left toolbar. ALTTEXT


  2. Click Advanced.
  3. Select applicable search filters in the Account section.
  4. Optionally, add other system or custom fields.
  5. Enter any necessary options for the desired filters.
  6. Click Search.
  7. Click Save.
    Using Advanced Search Account Manager


  8. Enter a name for the advanced search in the Name this search field.
  9. Optionally, click the Make this my default search checkbox. And/or click the Make this search available to all users checkbox.
  10. Click Save.

    Using Advanced Search Account Manager


Note: Click Reset to clear all search filters. 

Important: Be aware that you cannot overwrite an advanced search when attempting to save new parameters. You will need to save the updated search under a new name. 


Using Saved or Recent Advanced Searches

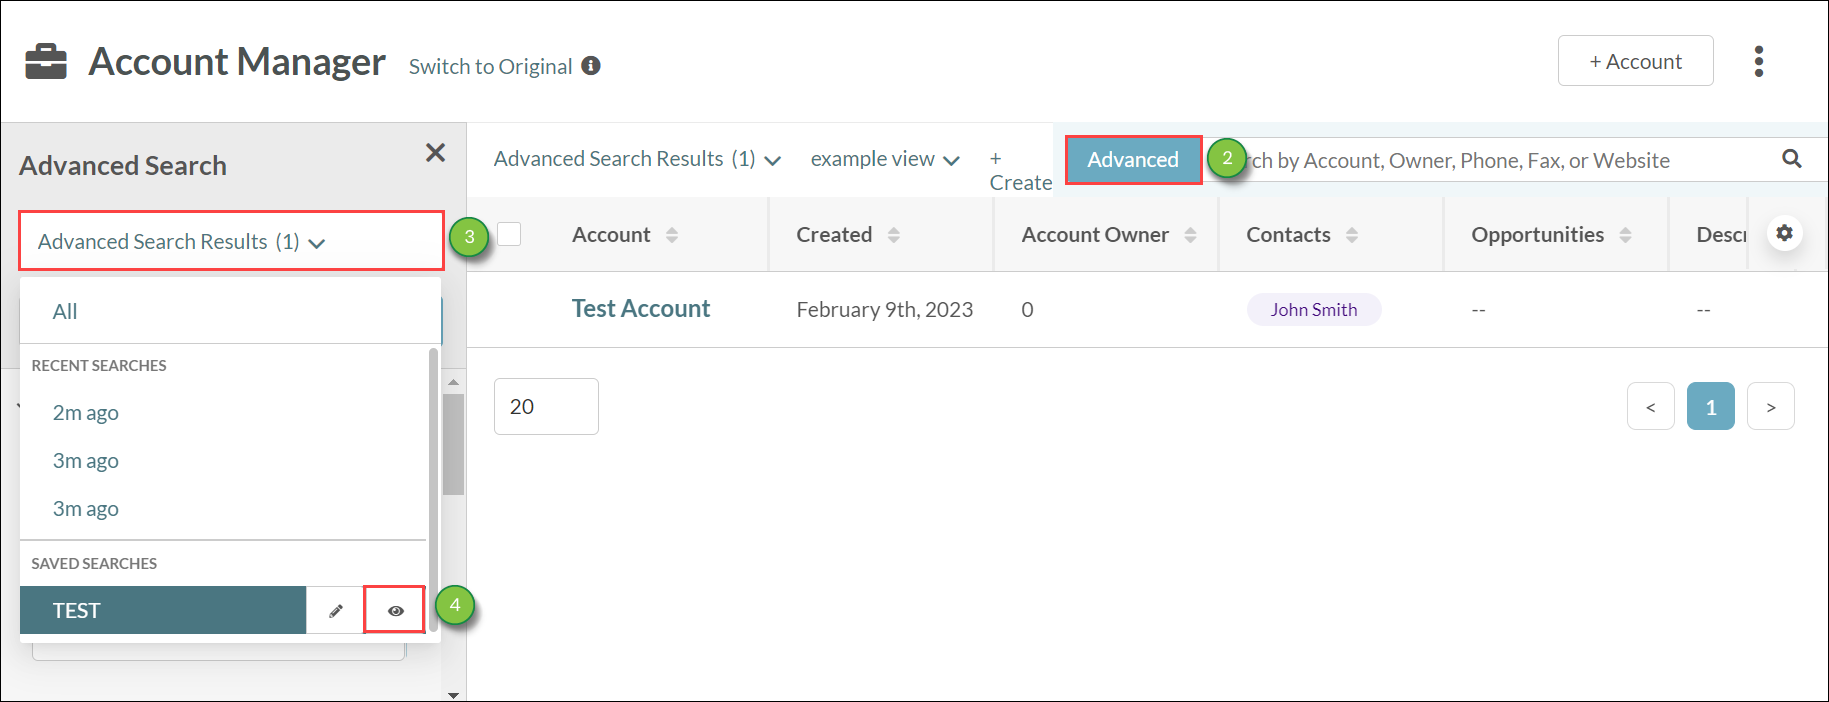
You can open and use a previously saved advanced search.

To use a saved or recent advanced search for another advanced search, do the following:

  1. Click Sales > Accounts in the left toolbar. Using Advanced Search Account Manager


  2. Click Advanced Search.
  3. Click the  arrow-down3.png  Searches drop-down menu.
  4. Select the desired search.Using Advanced Search Account Manager


Note: Your three most recent searches will autosave under Recent Searches


Editing Saved Advanced Searches

You can edit the name and default status of an advanced search as needed.

To edit an advanced search, do the following:

  1. Click Sales > Accounts in the left toolbar. Using Advanced Search Account Manager


  2. Click Advanced.
  3. Click the  arrow-down3.png  Searches drop-down menu.
  4. Hover over the desired search. Click  12pencil.png  Edit.

    Using Advanced Search Account Manager


  5. Enter a name for the advanced search in the Name this search field.
  6. Click Save.

    Using Advanced Search Account Manager


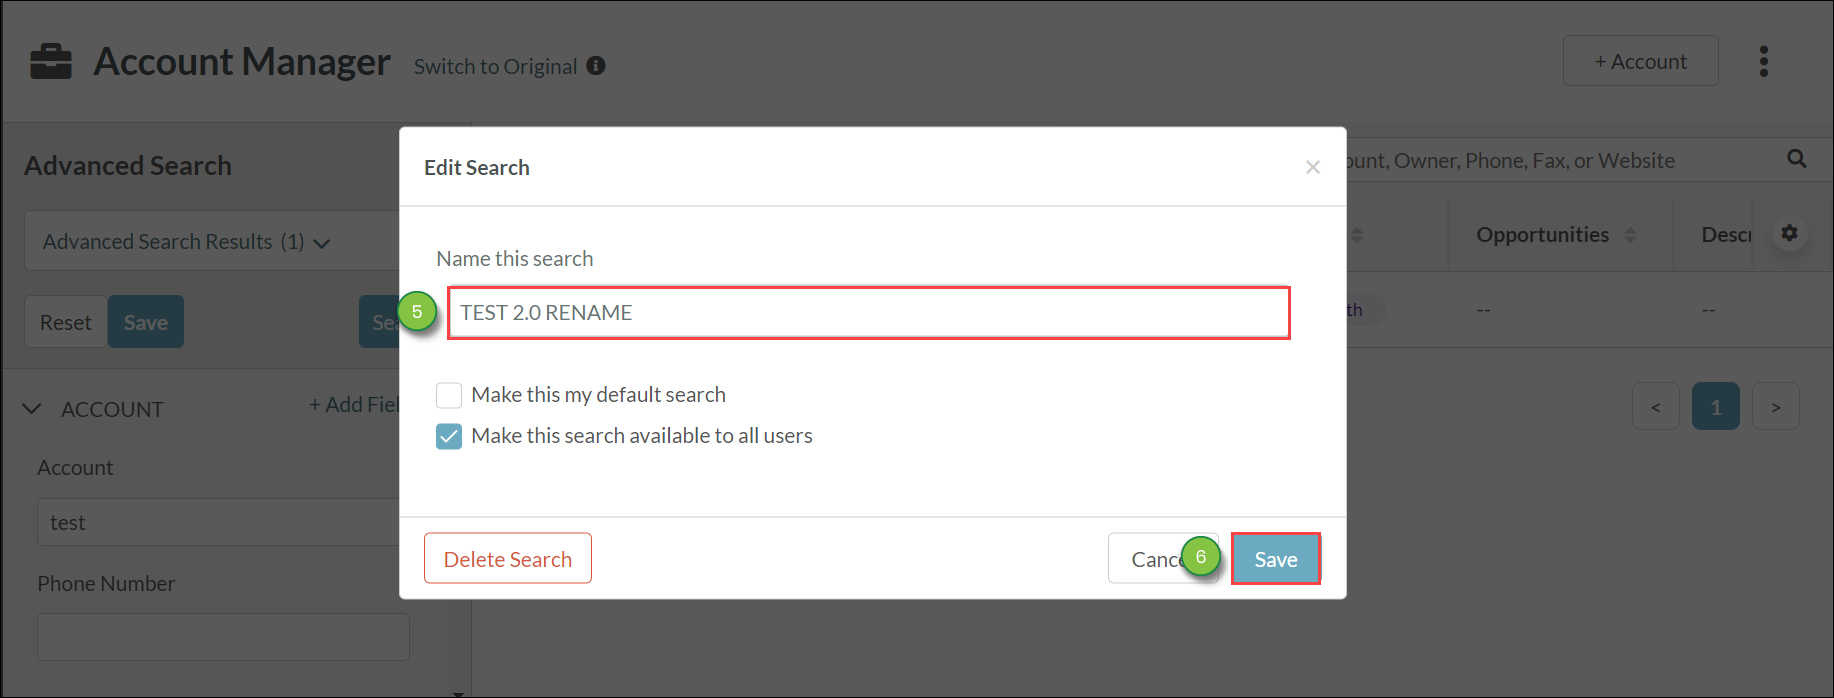
Important: Be aware that this does not change the search parameters, and you will need to save any new parameters as a different advanced search. 


Deleting Saved Advanced Searches

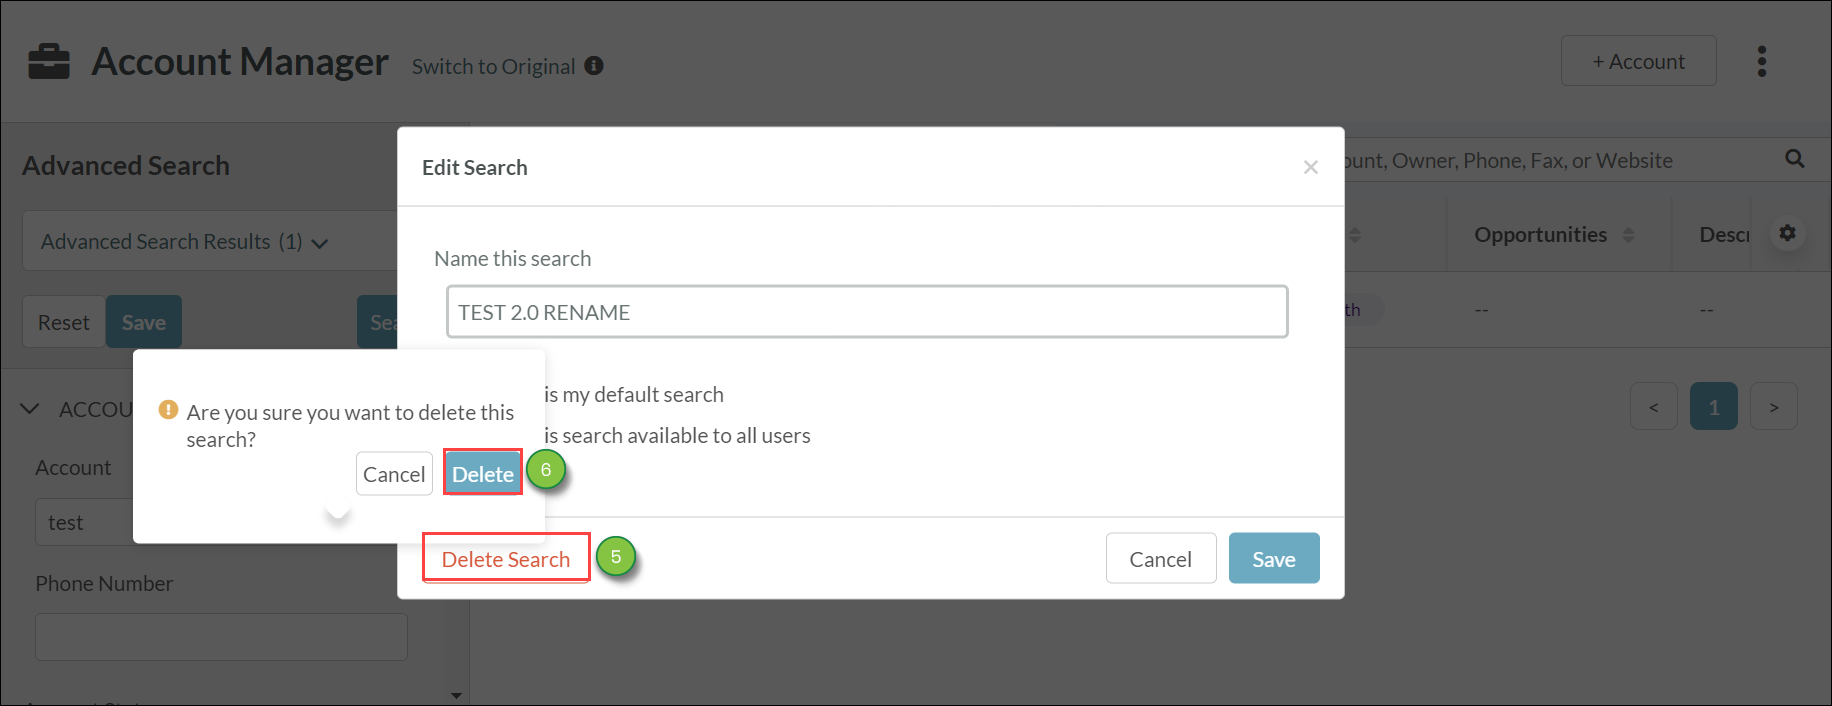
You can delete an advanced search at any time. 

To delete an advanced search, do the following:

  1. Click Sales > Accounts in the left toolbar. Using Advanced Search Account Manager


  2. Click Advanced.
  3. Click the  arrow-down3.png  Searches drop-down menu.
  4. Hover over the desired search. Click  12pencil.png  Edit.Using Advanced Search Account Manager


  5. Click Delete Search.
  6. Click Delete.

    Using Advanced Search Account Manager


Setting Default Saved Advanced Searches

You can set an advanced search to display certain information by default every time you access the Account Manager.

To set or remove a saved search as a default search, do the following:

  1. Click Sales > Accounts in the left toolbar. Using Advanced Search Account Manager


  2. Click Advanced.
  3. Click the  arrow-down3.png  Searches drop-down menu.
  4. Hover over the desired saved search. Click  eye.png  Make this your default search to set the search as default.

    Using Advanced Search Account Manager


Note: Click  eye.png  This is your default search to remove the default status.


Did this article answer your question?


Constant Contact Logo

Copyright © 2025 · All Rights Reserved · Constant Contact · Privacy Center