Forms are a cornerstone of lead generation. To ensure your forms capture the attention of potential leads, it's essential to customize them effectively. Lead Gen & CRM's form editor provides a powerful suite of tools for this purpose. This article will guide you through the Settings tab, where you can configure the core functionality and behavior of your forms.
| Administrators | ✓ | |
| Company Managers | ✓ | |
| Marketing Managers | ✓ | |
| Sales Managers | ||
| Salespersons | ||
| Jr. Salespersons |
| Tip: Are you looking for information about Constant Contact’s Email and Digital Marketing product? This article is for Constant Contact’s Lead Gen & CRM product. Head on over to the Email and Digital Marketing articles by clicking here. Not sure what the difference is? Read this article. |
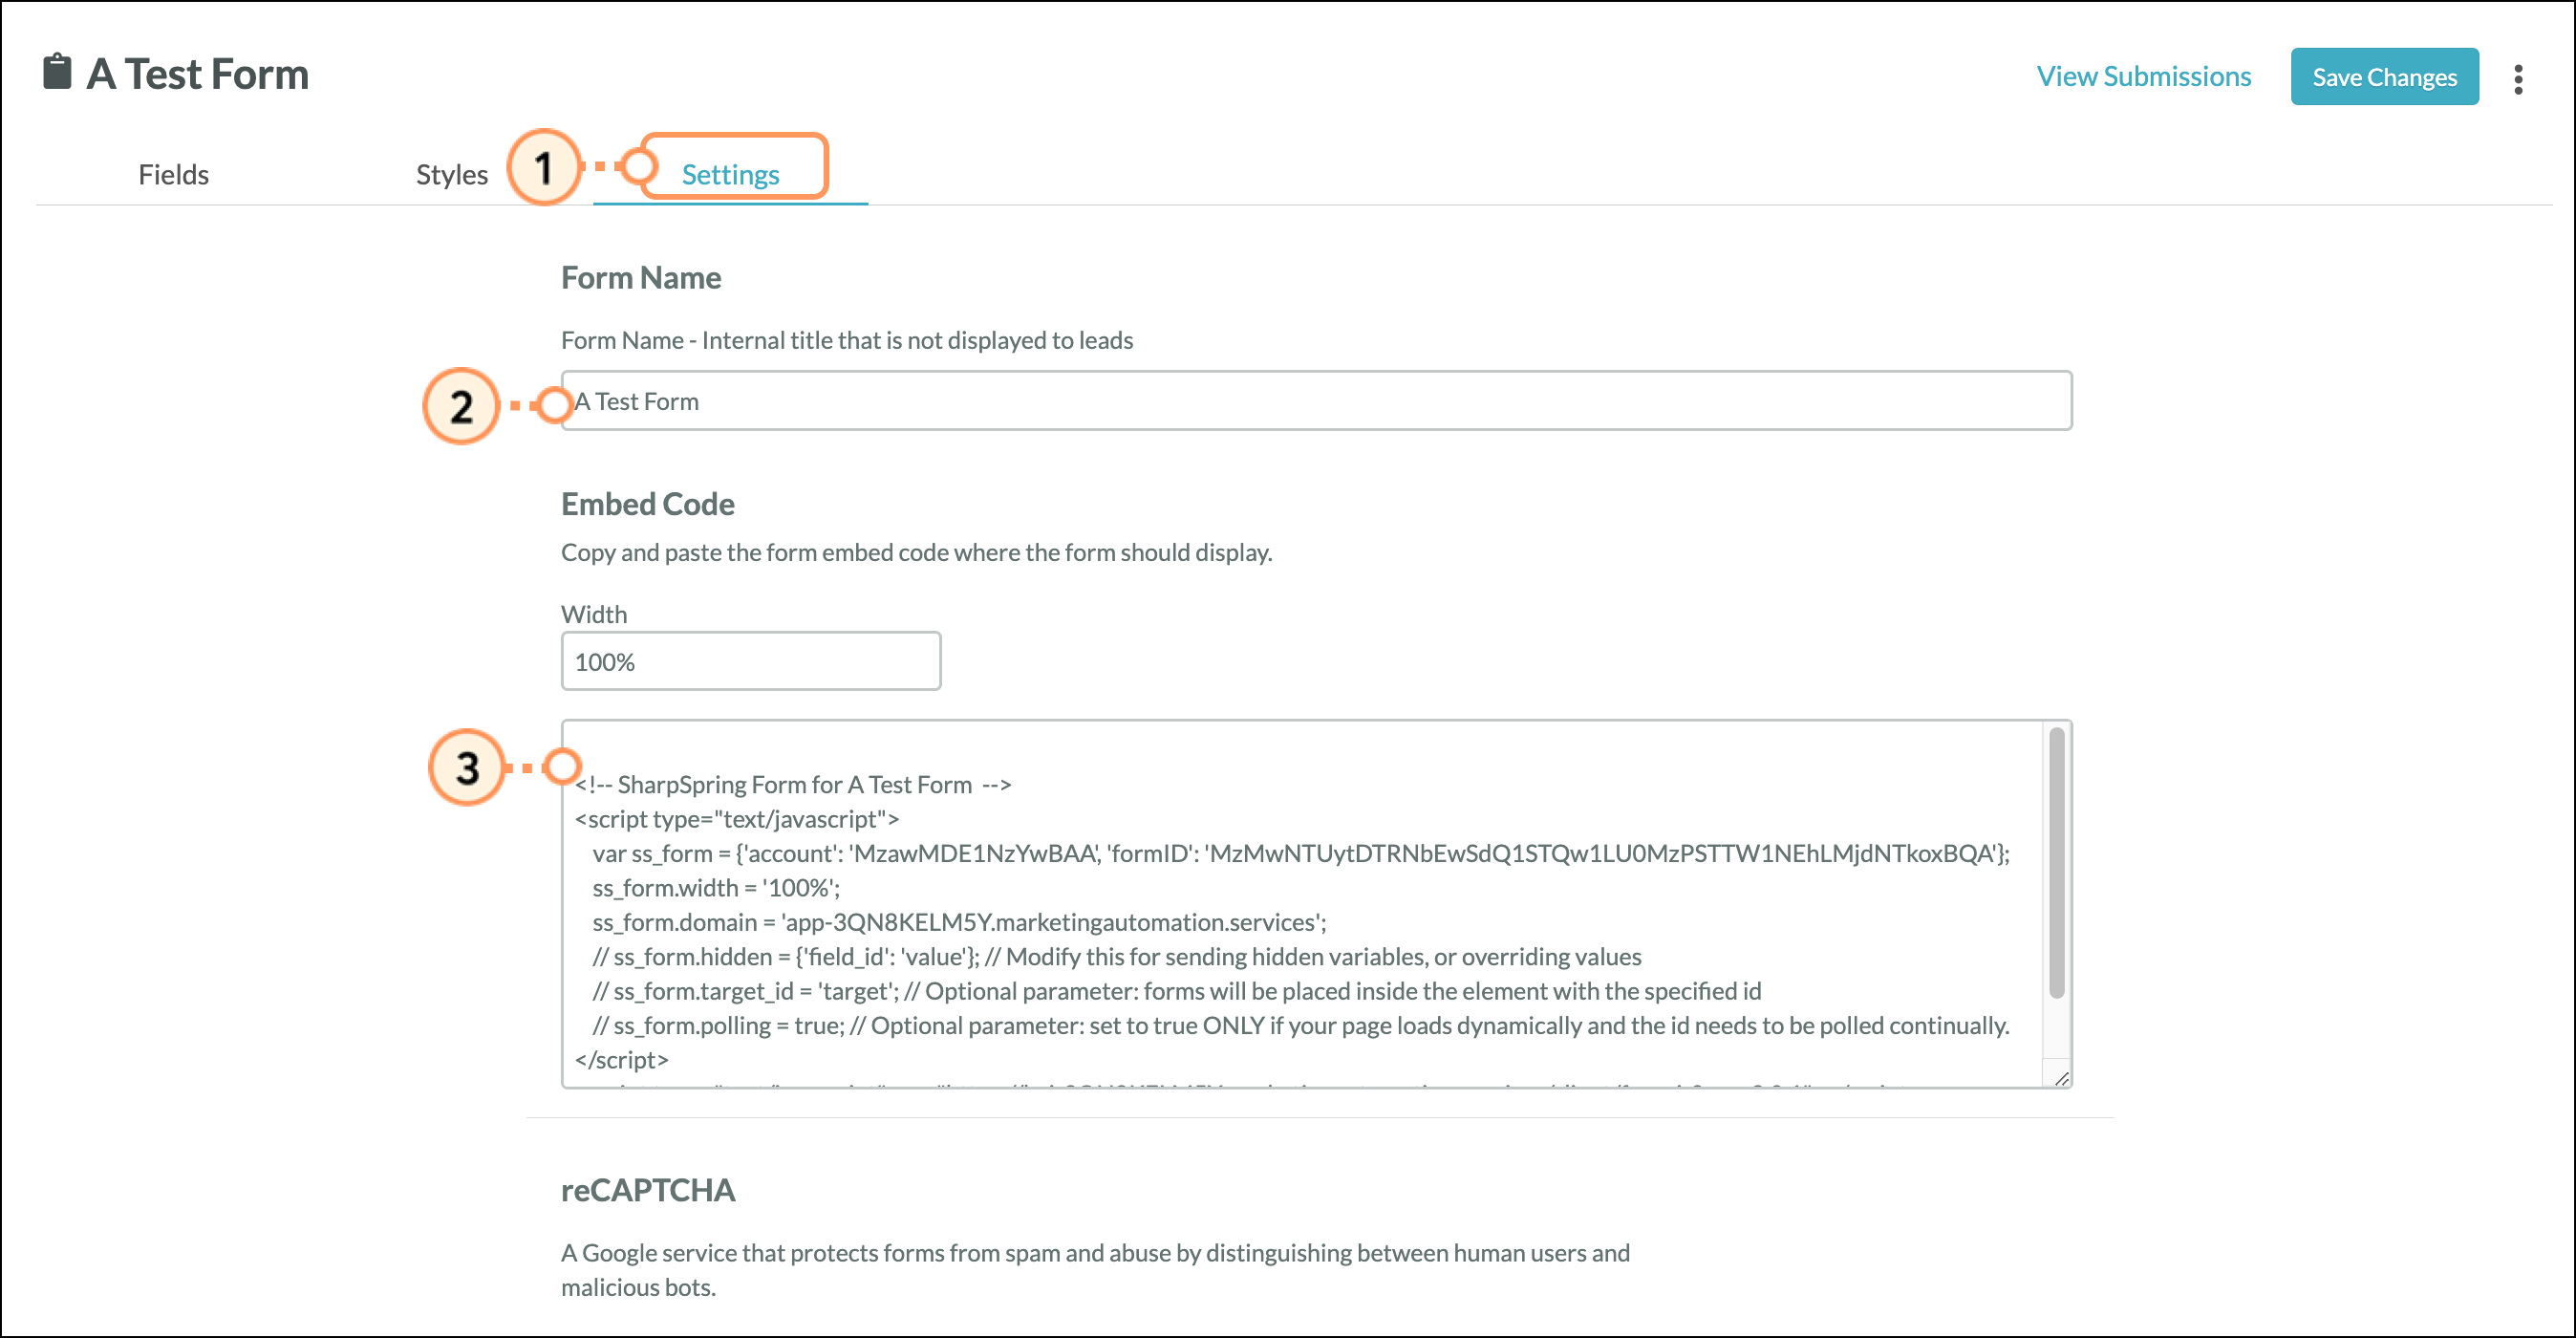
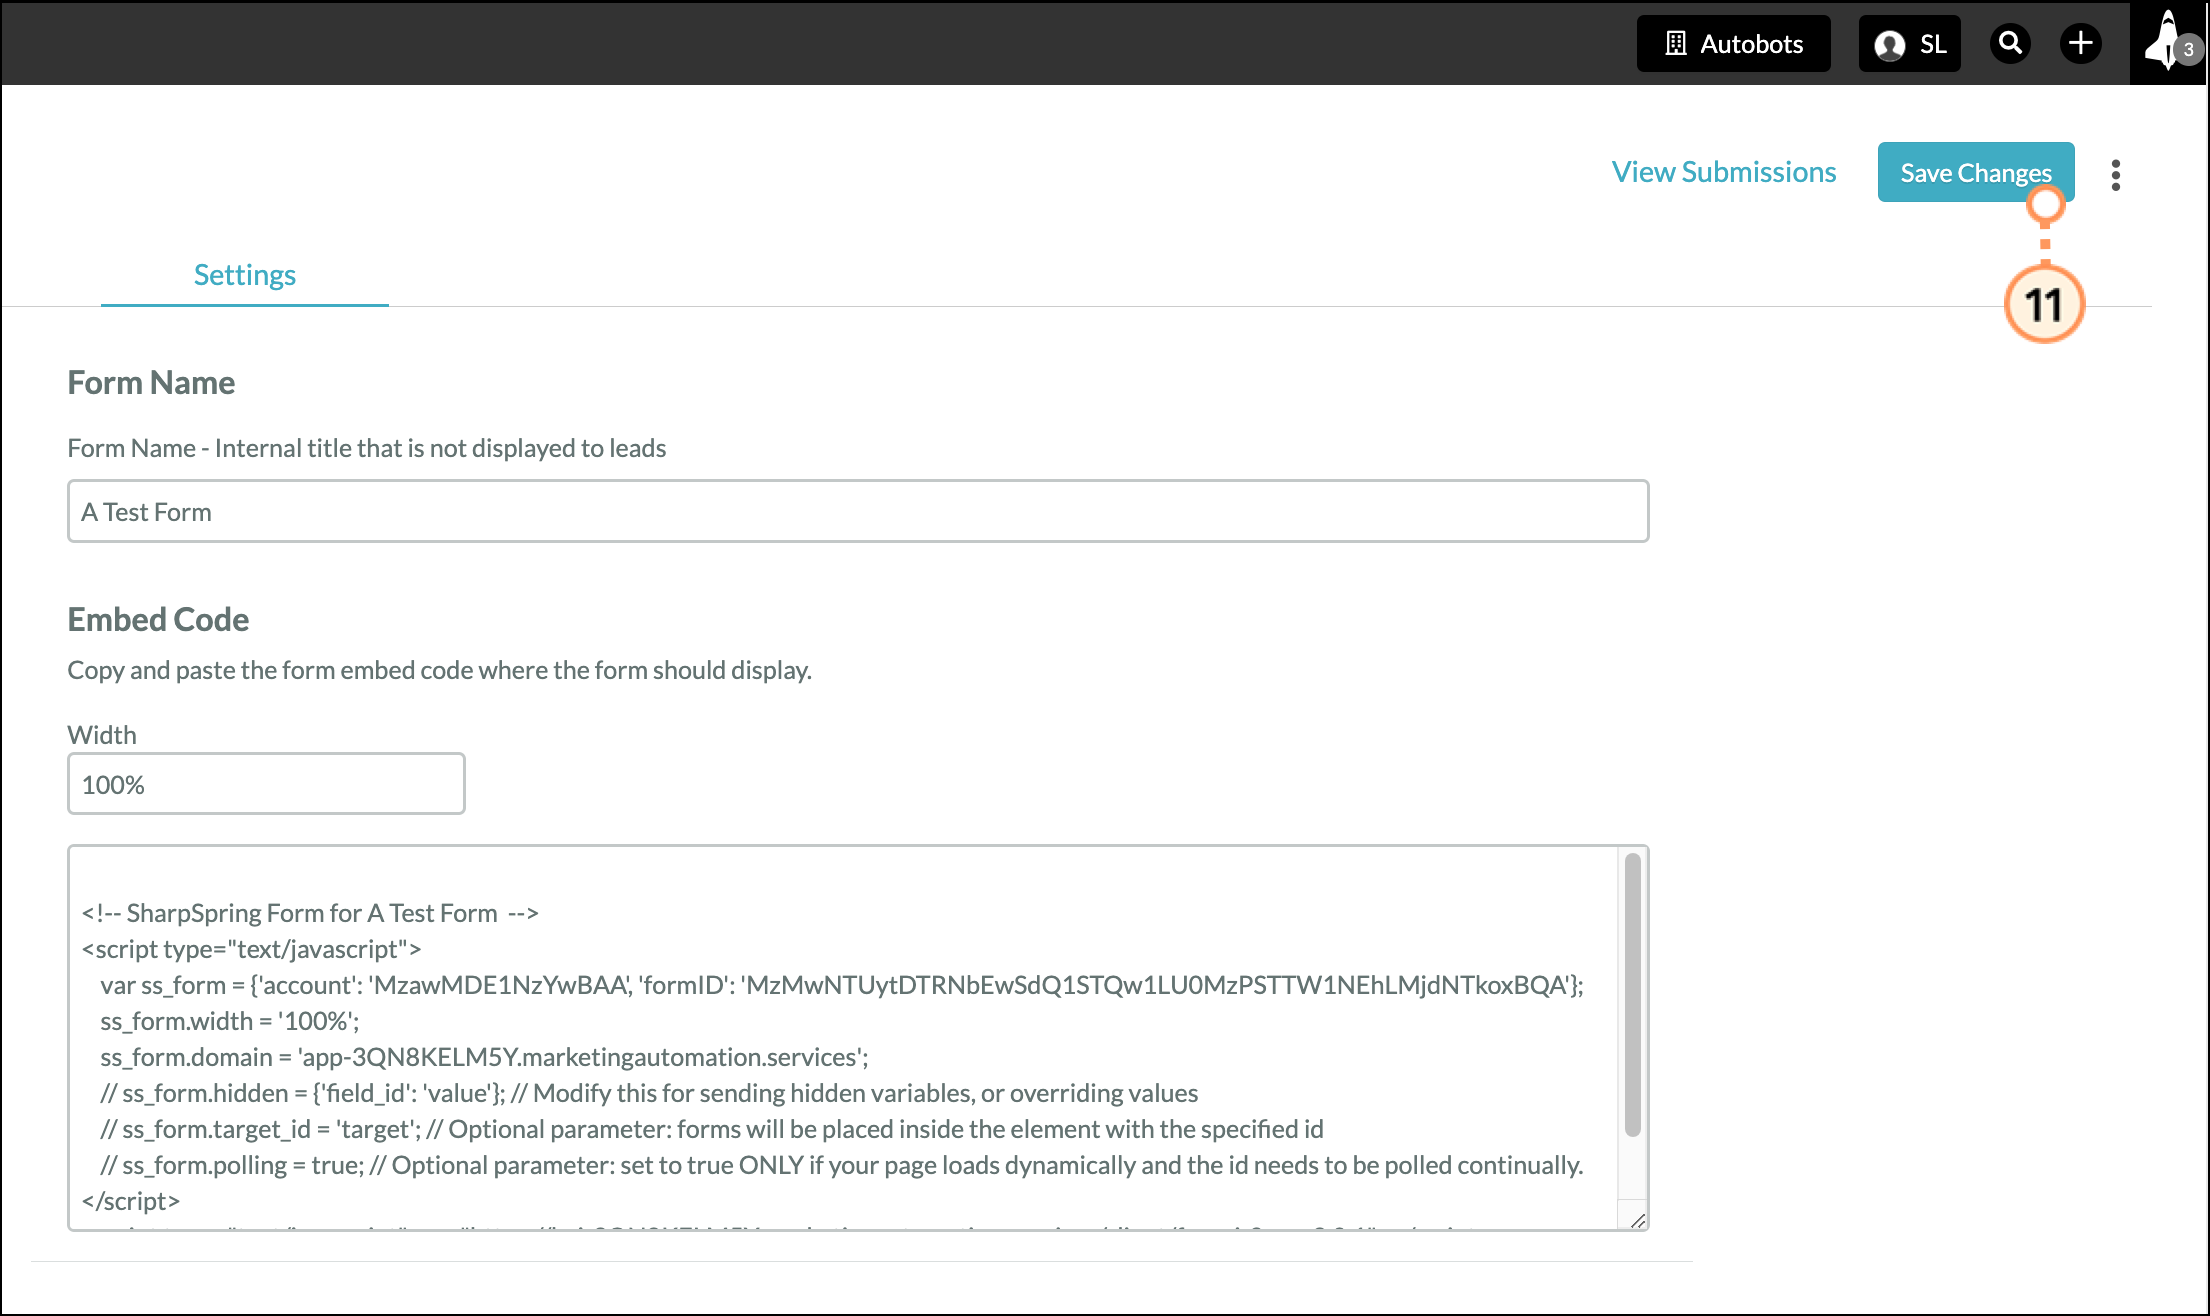
Create or edit a form to modify its Settings. The Settings tab allows you to control your form's name, security features, submission behavior, and more.
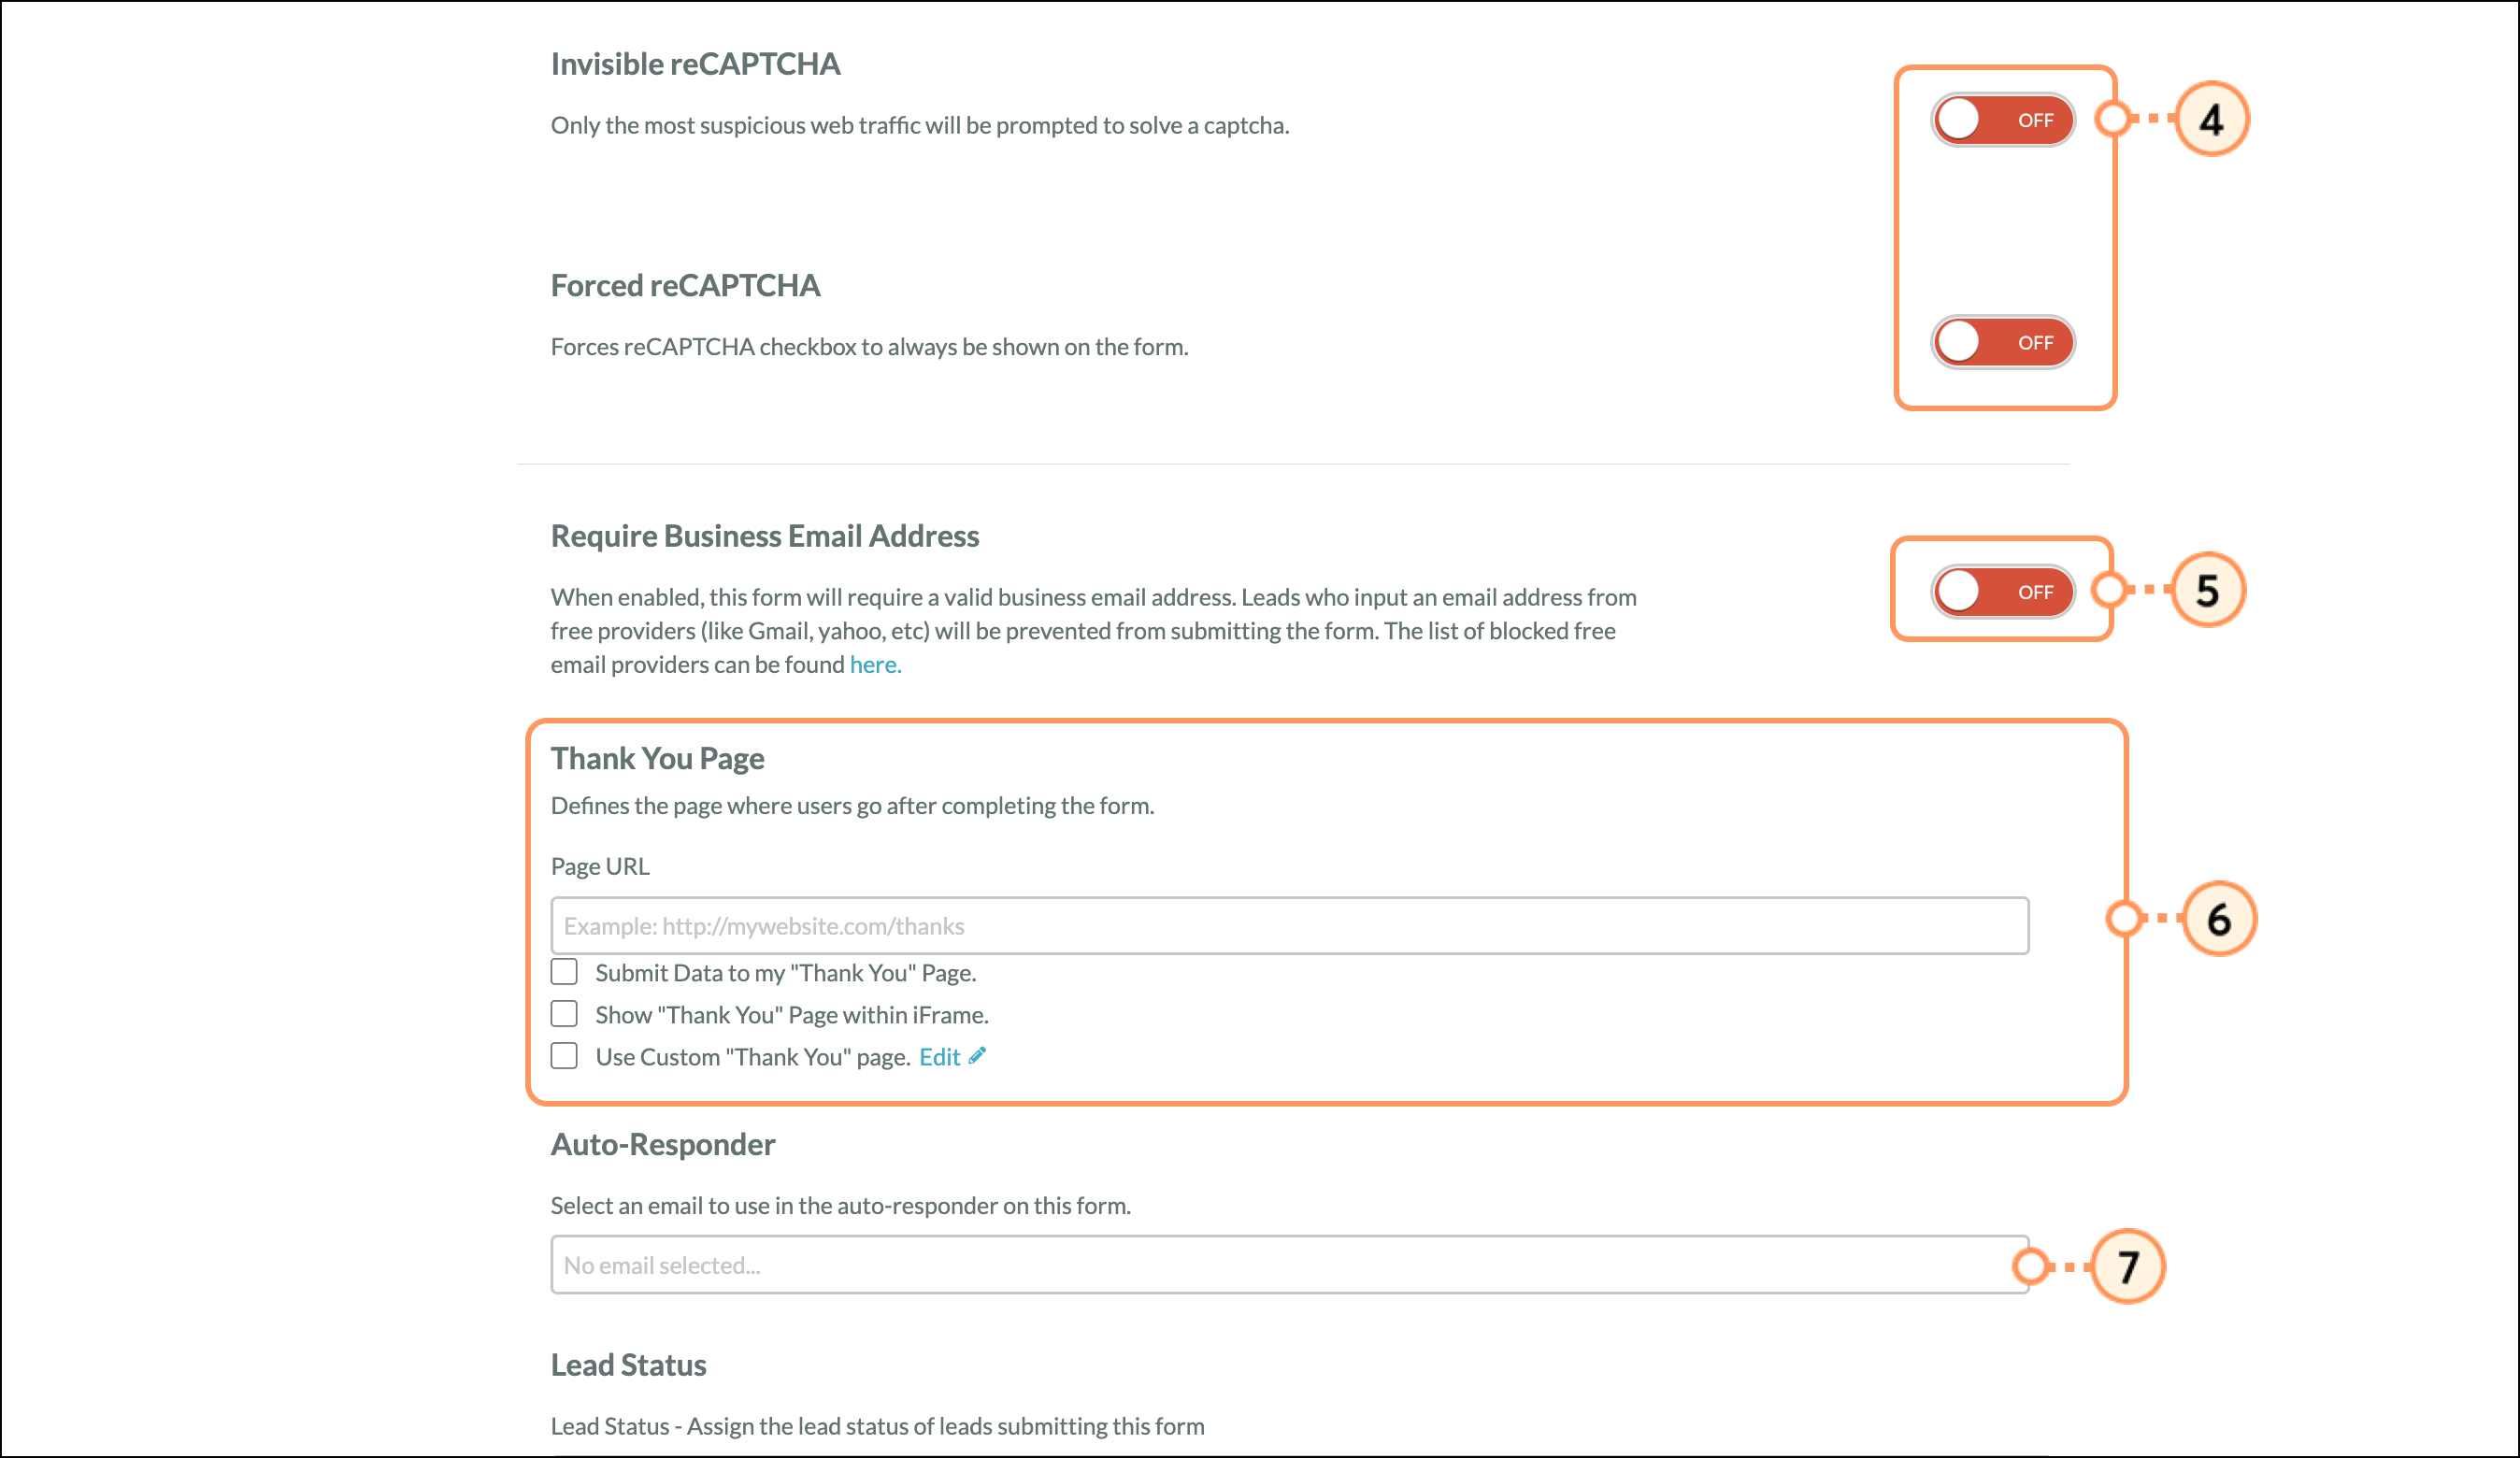
No reCAPTCHA: Leave both toggles off to disable reCAPTCHA. This is not recommended, as it leaves your form vulnerable to spam.
Invisible reCAPTCHA (recommended): This option enables background security checks. It operates invisibly for most users and will only challenge the most suspicious traffic, minimizing user friction while preventing abuse. When using the option, the ‘Forced reCAPTCHA’ toggle will automatically be set to off.
Forced reCAPTCHA: Toggle this option on to require everyone filling out your form to solve a reCAPTCHA challenge before submitting. Use this for forms that experience high volumes of spam, but be aware that it can increase user friction.
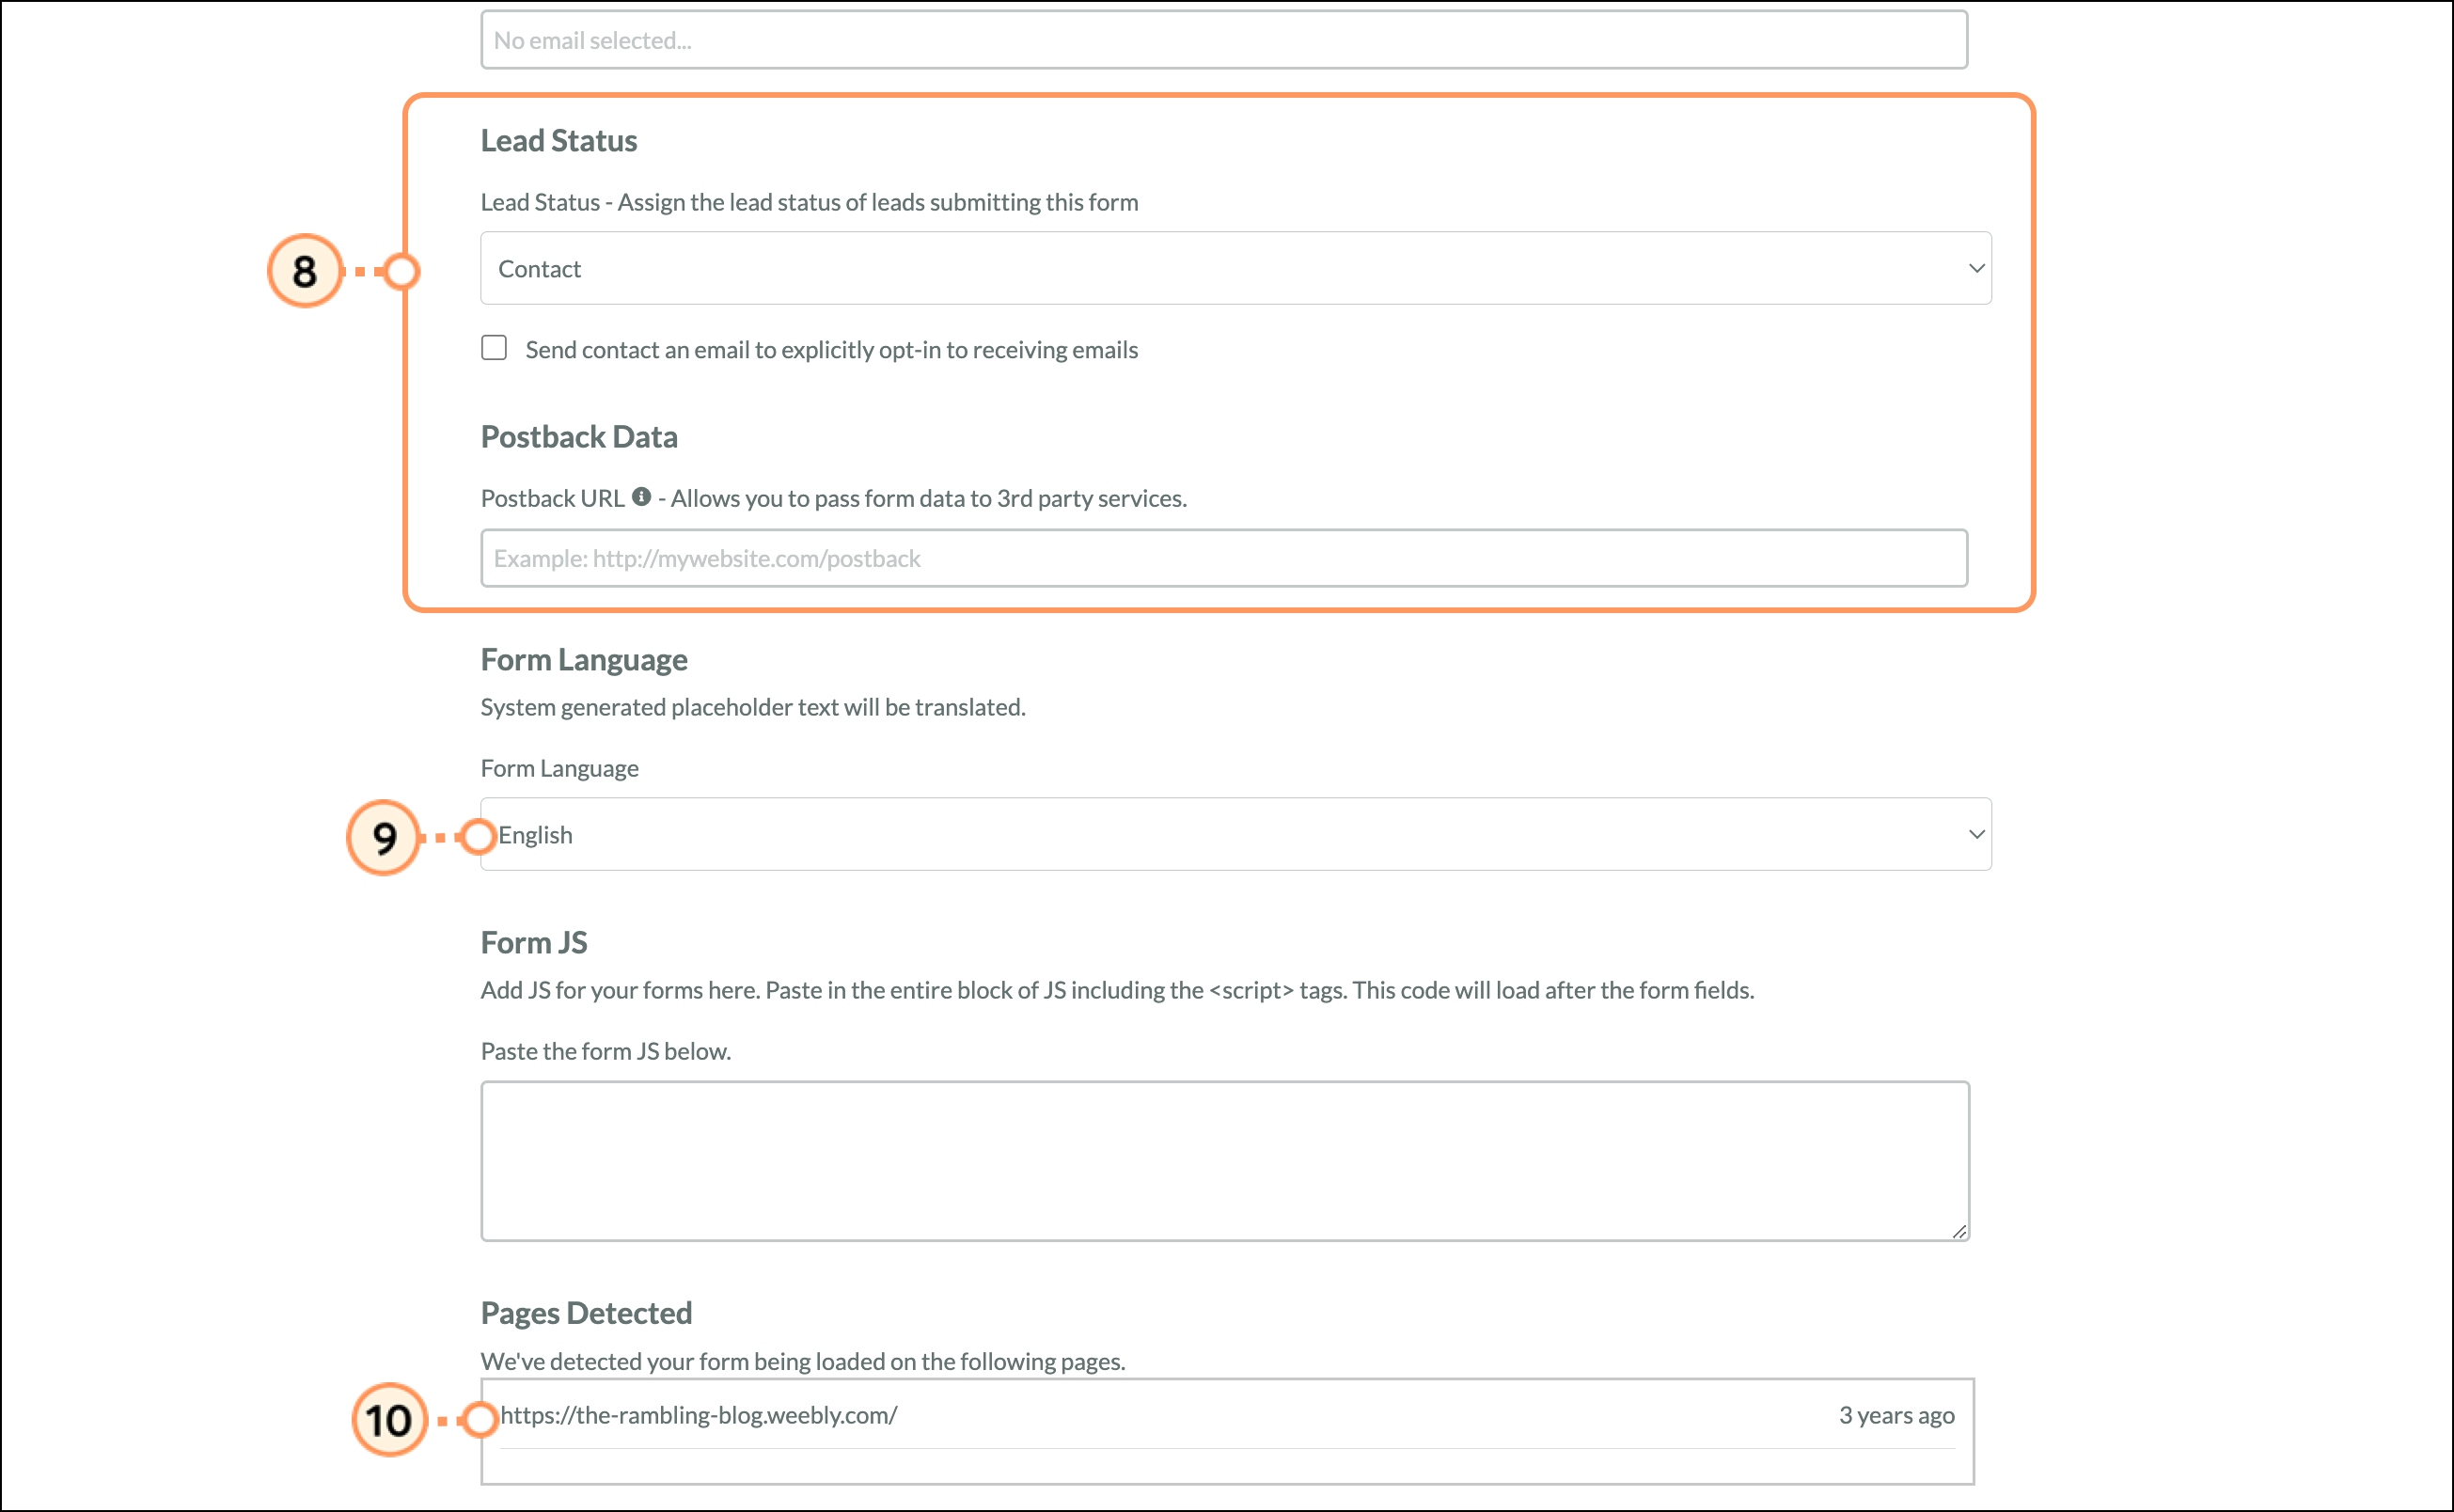
Lead Status - Give visitors who fill out this form a lead status. Check the box labeled 'Send contact an email to explicitly opt-in to receive emails'. This sends a confirmation email that contacts must click to verify their subscription.
Postback Data — If you need to send form data to a third-party service, enter the destination URL in this field.
|
|
Copyright © 2026 · All Rights Reserved · Constant Contact · Privacy Center