Sending a contact’s information to a web address is called a webhook or postback URL. Lead Gen & CRM can add this information into forms.
This article provides information on where a postback URL can be added to a form or visual automations in Lead Gen & CRM.
| Administrators | ✓ | |
| Company Managers | ✓ | |
| Marketing Managers | ✓ | |
| Sales Managers | ||
| Salespersons | ||
| Jr. Salespersons |
Adding a postback URL to Lead Gen & CRM enables you to send form submission data from a form to a third-party service, such as Zapier.
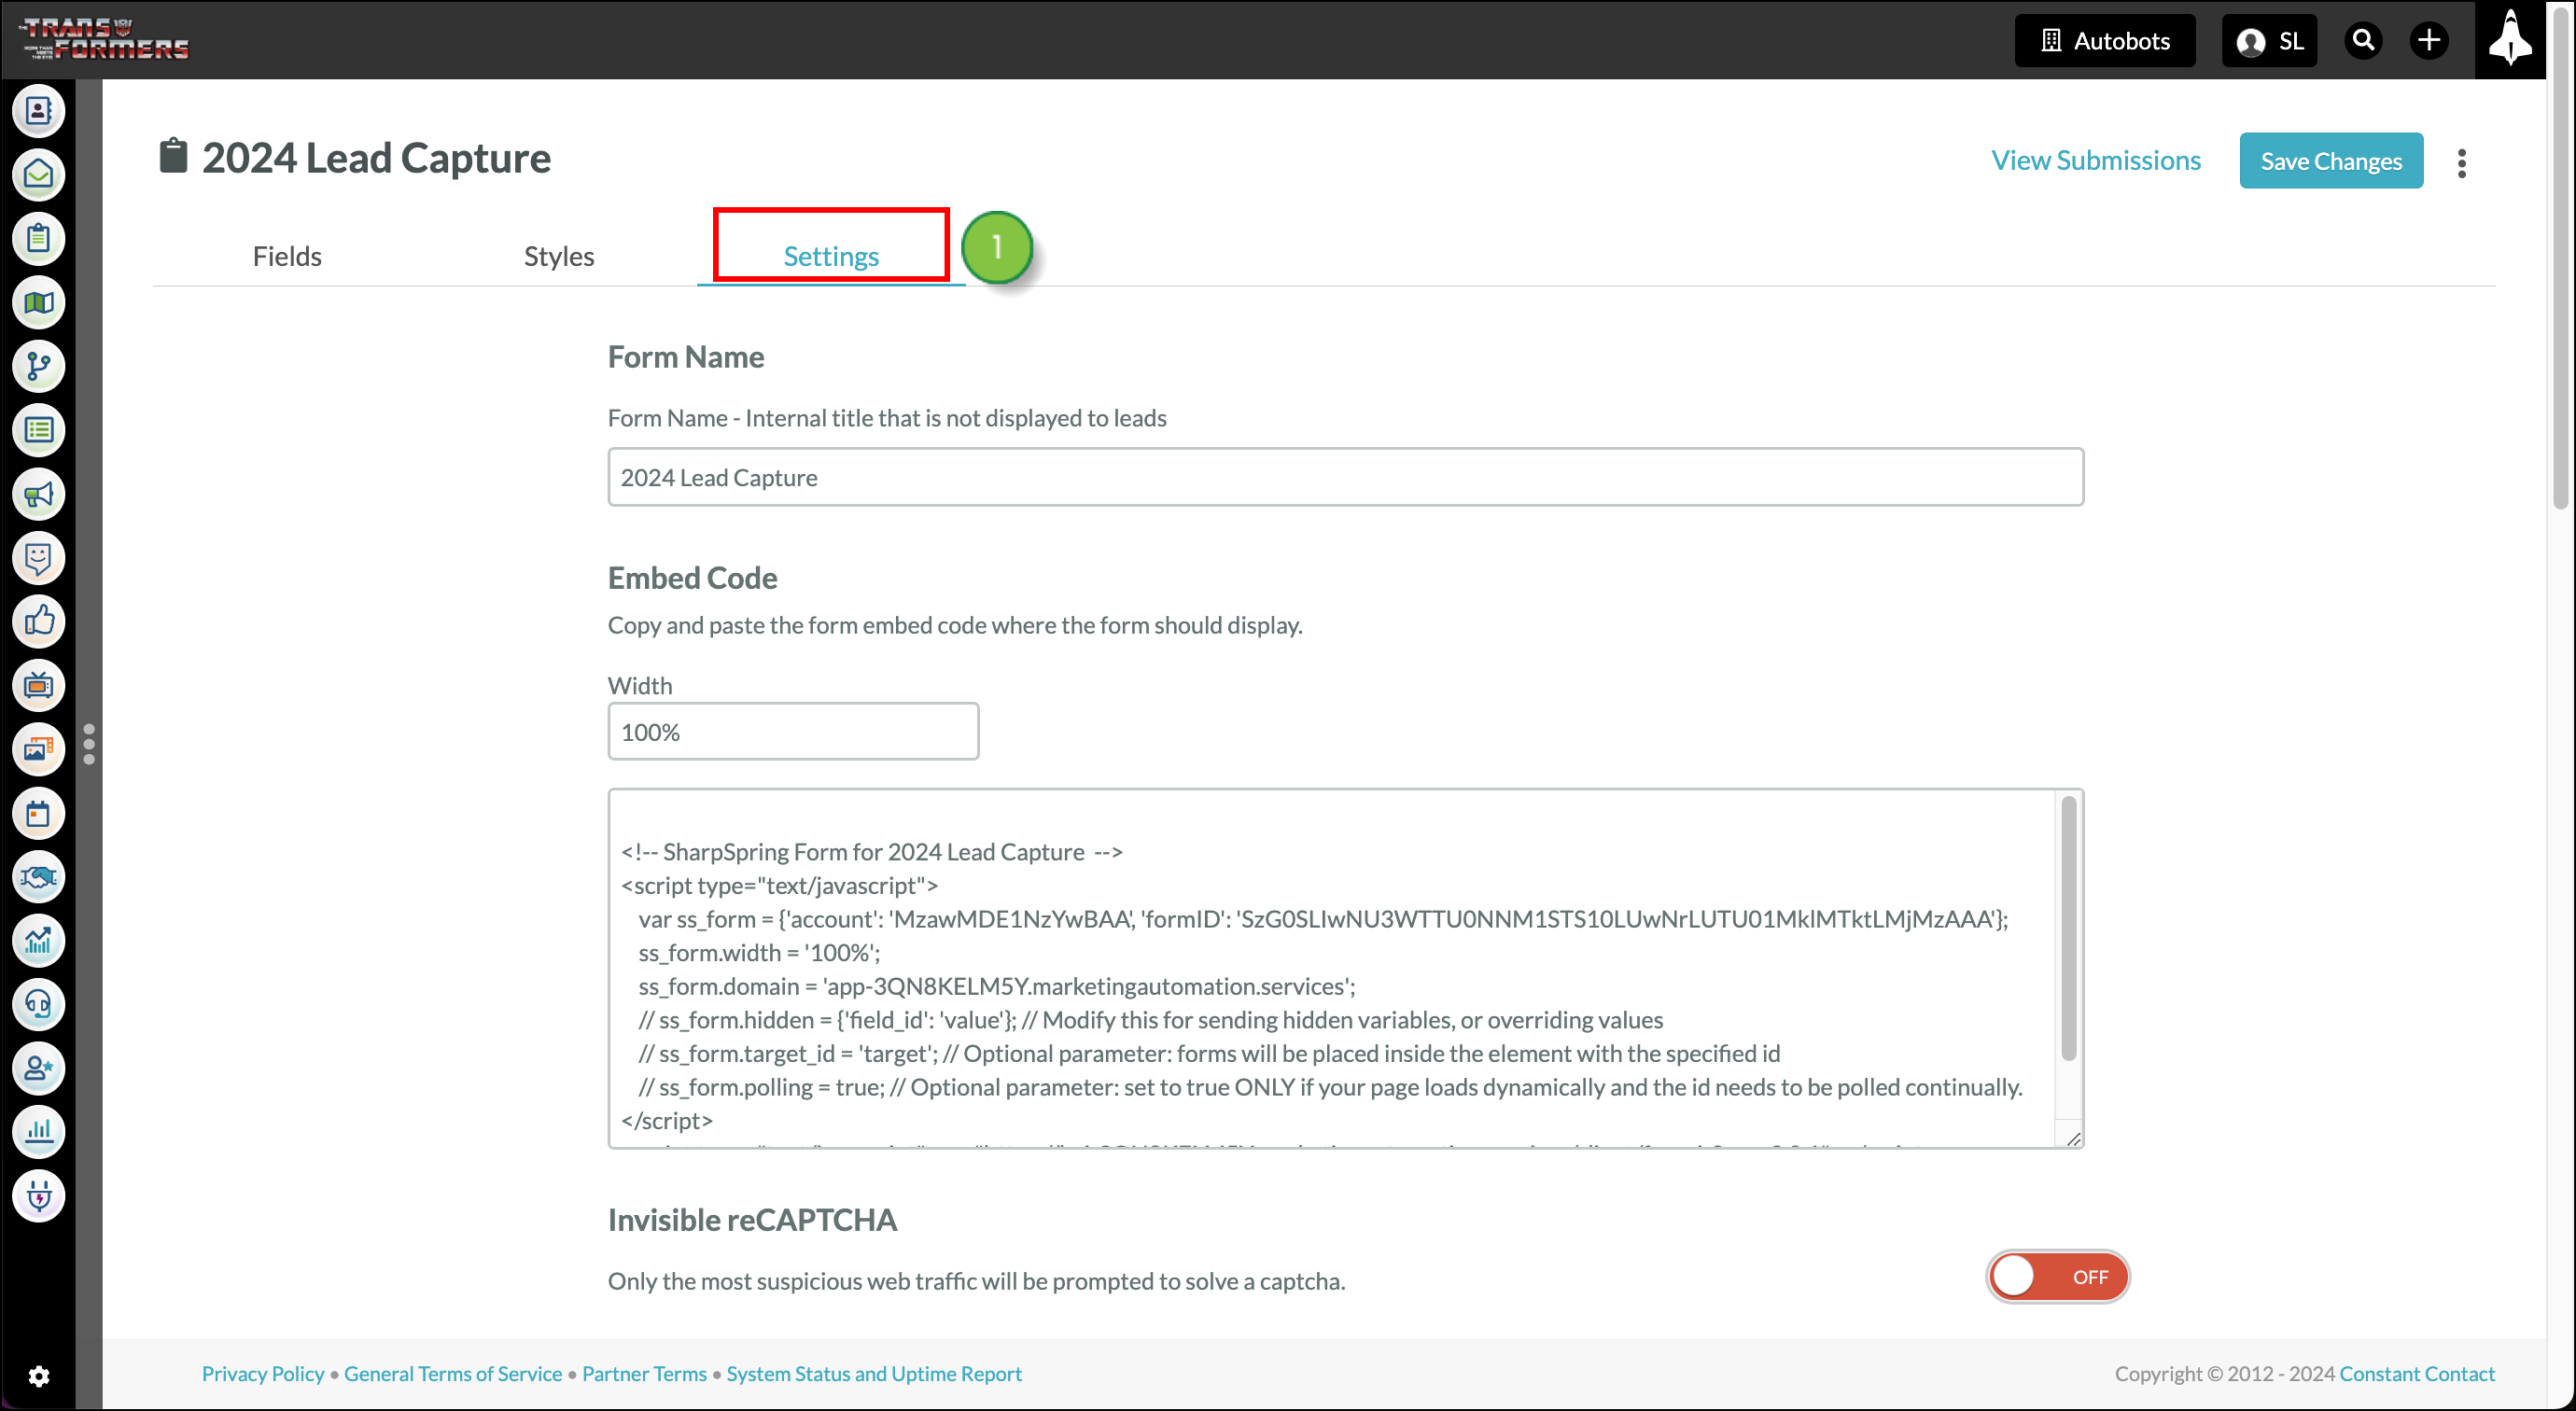
To add a postback URL or webhook to a form in Lead Gen & CRM, create or edit a form:

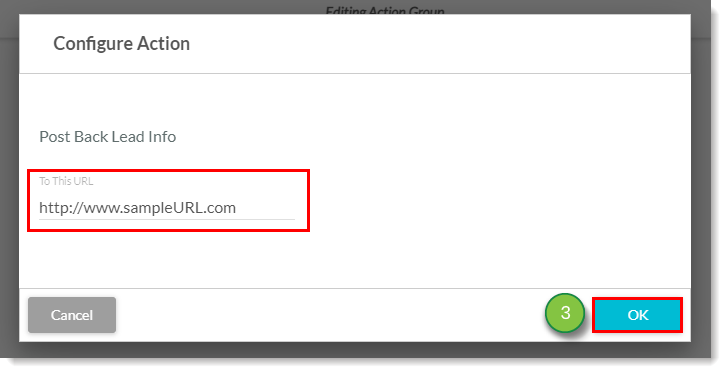
In Lead Gen & CRM, you can post lead information as an action in an automation. Certain CRMs, Lead Gen & CRM included, support webhooks or postback URLs to bring contact information into the system or to update existing contacts. This can be useful to update a lead elsewhere when the lead meets the trigger conditions for an automation in Lead Gen & CRM.
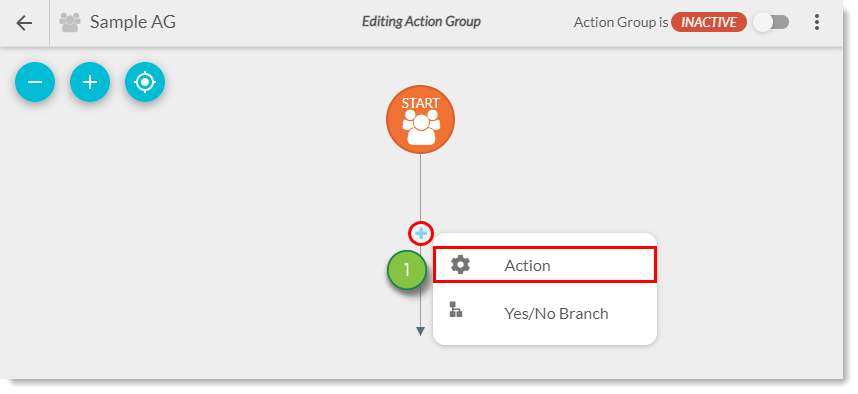
To add lead information to automation in Lead Gen & CRM, create or edit a visual action group:
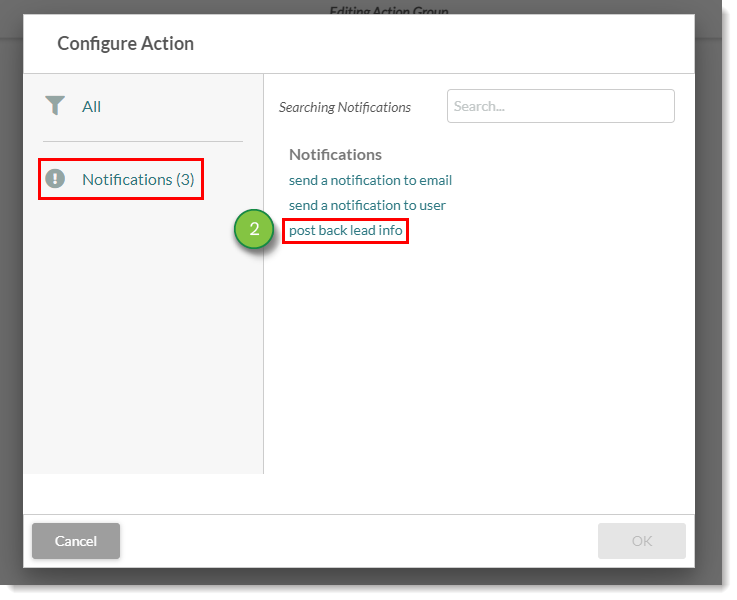

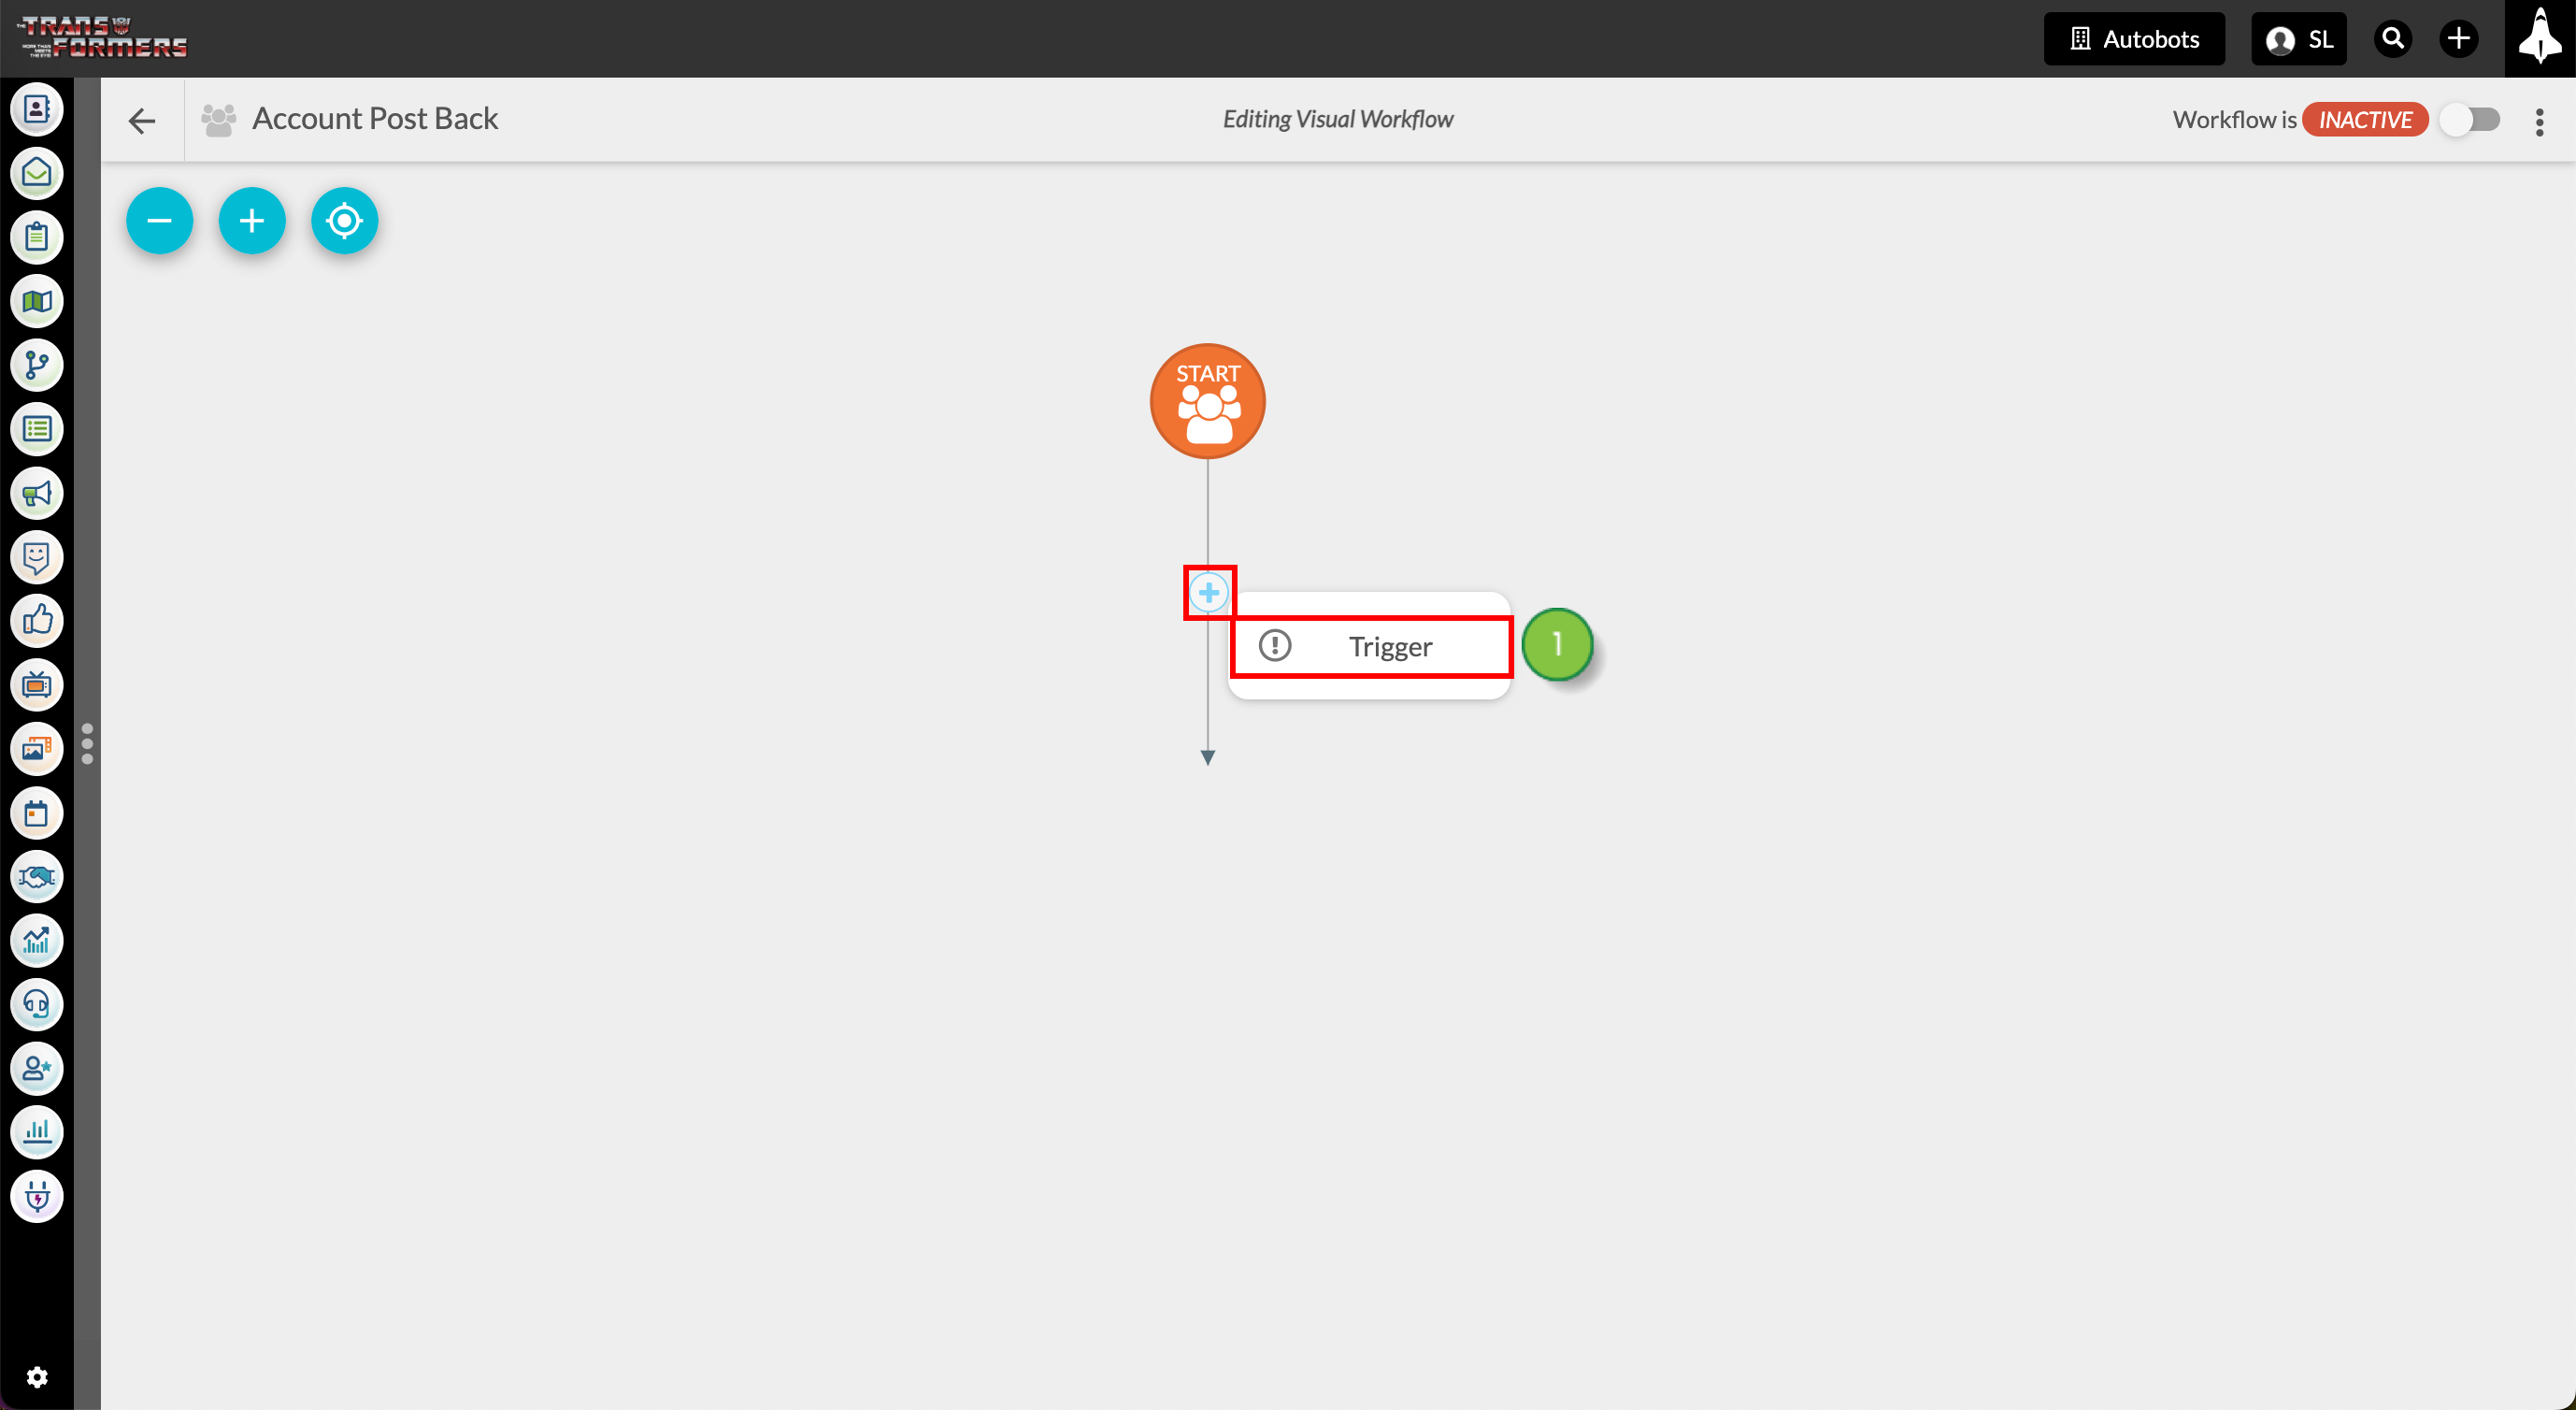
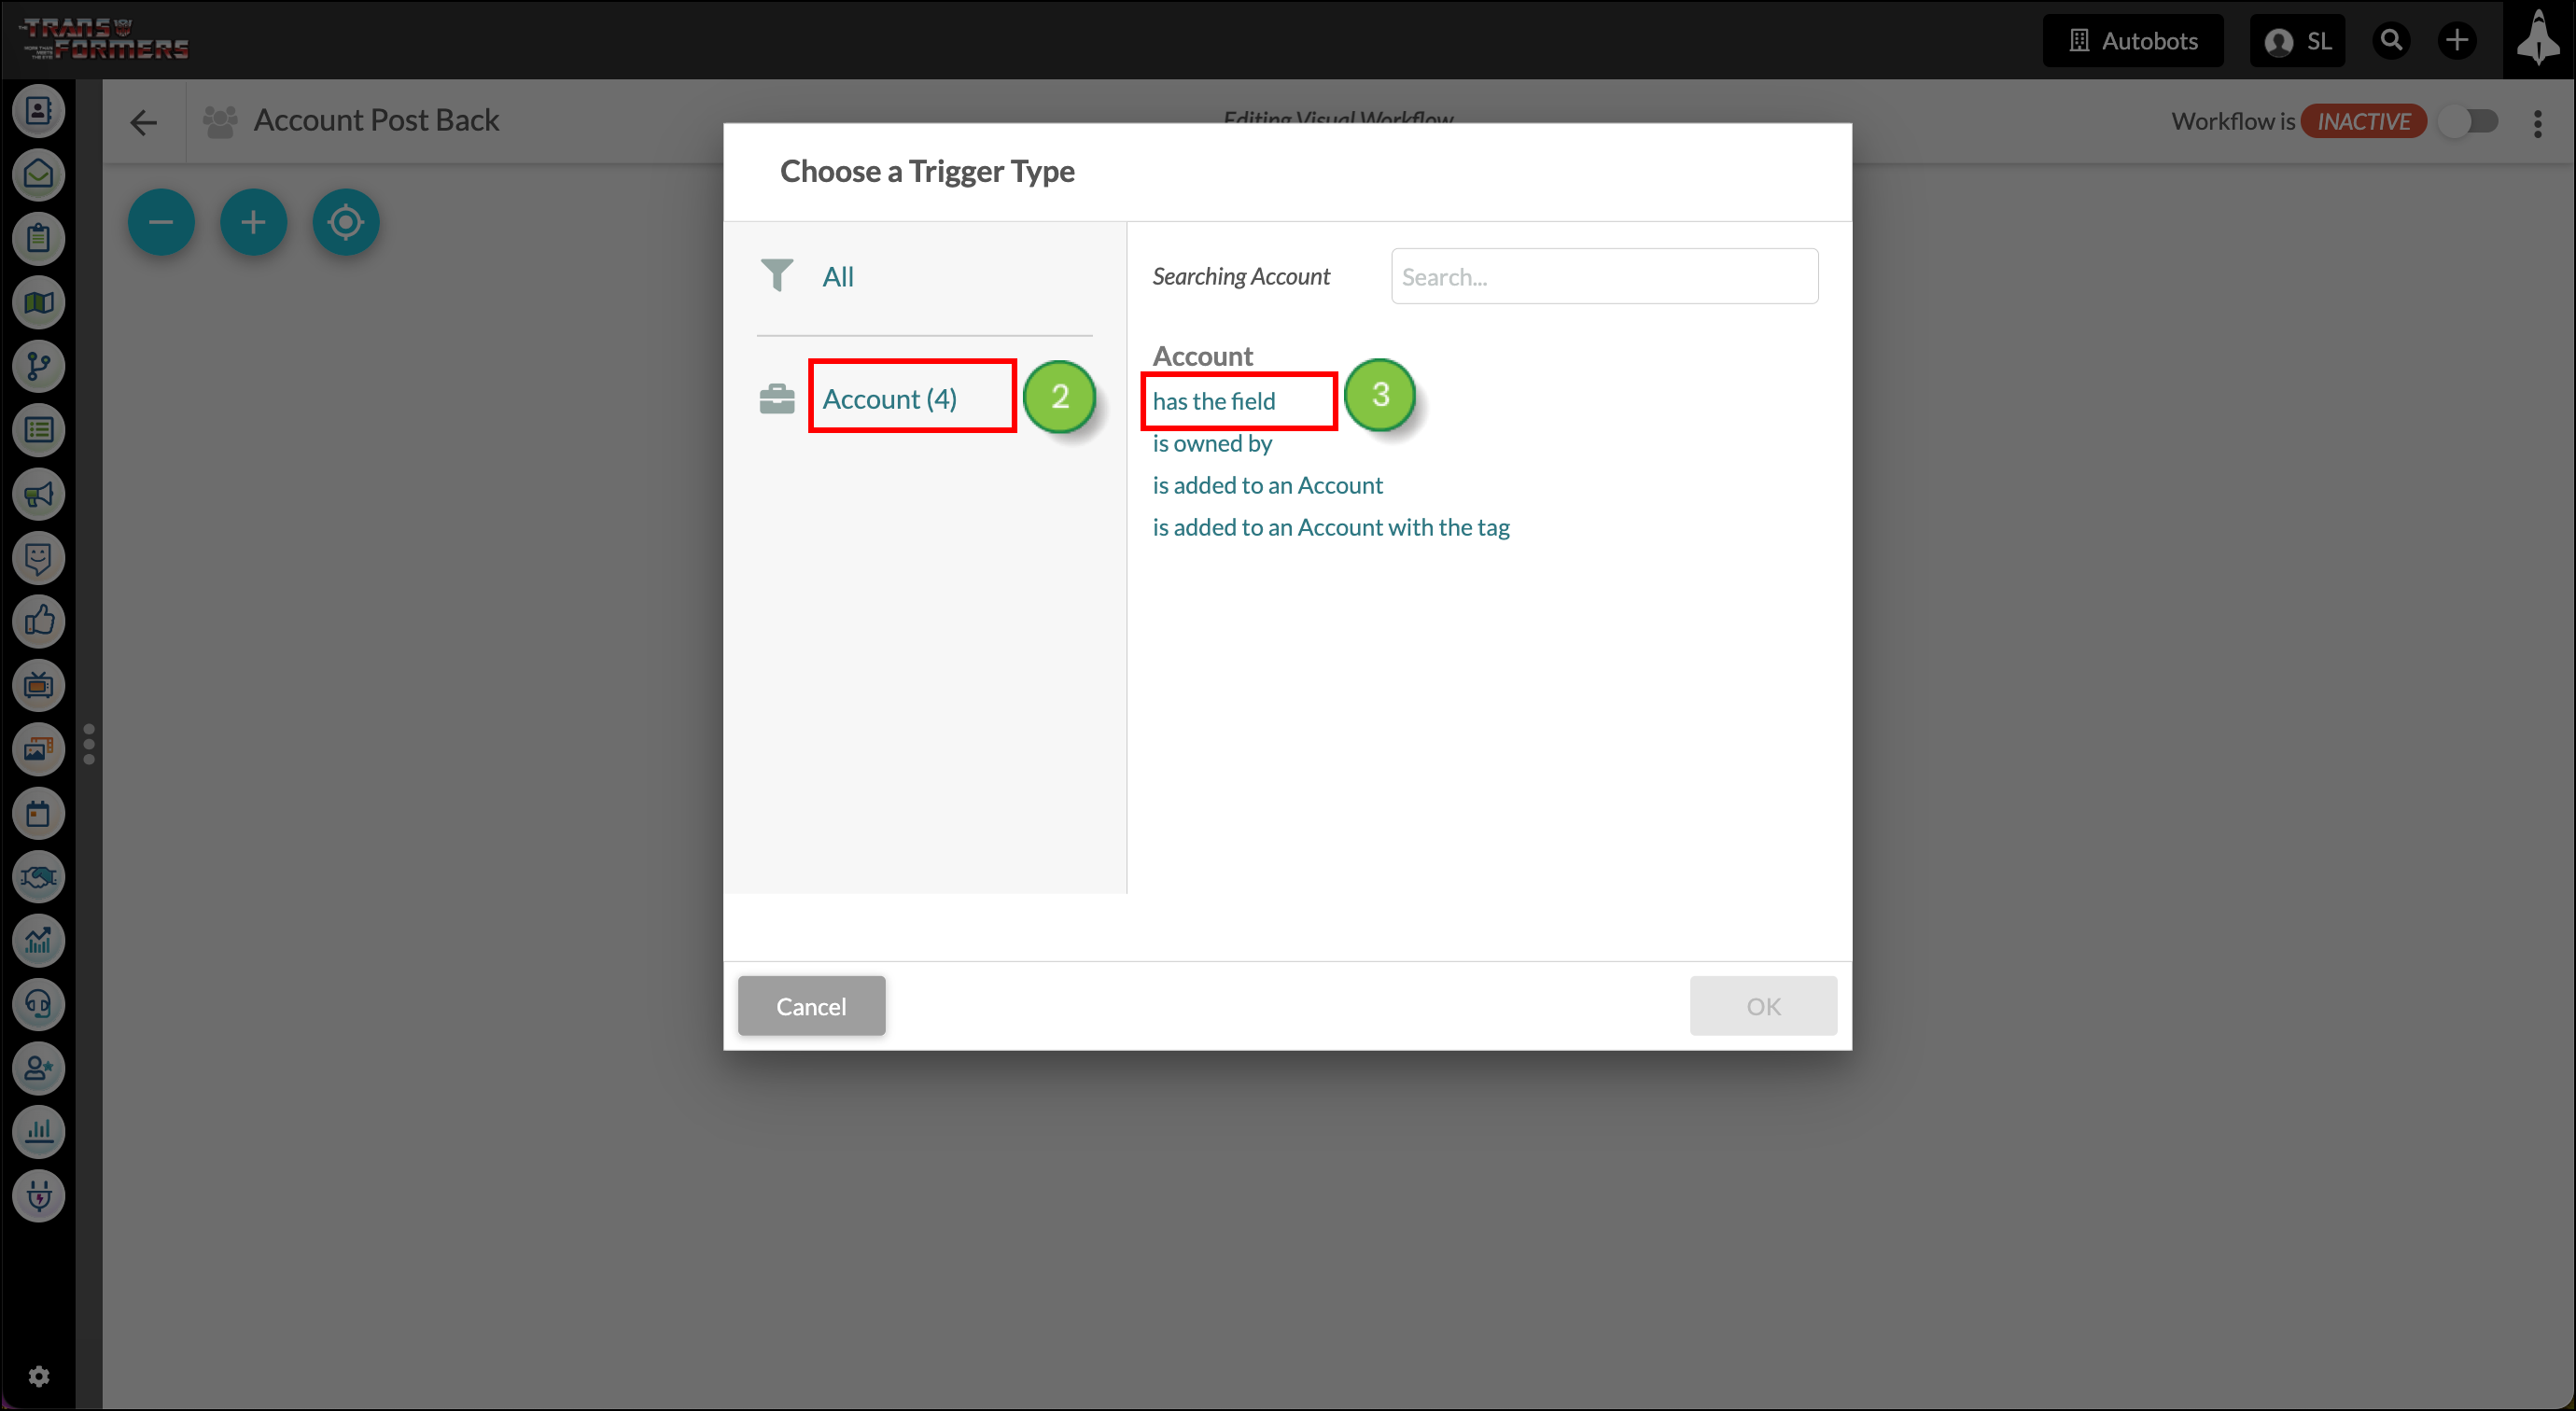
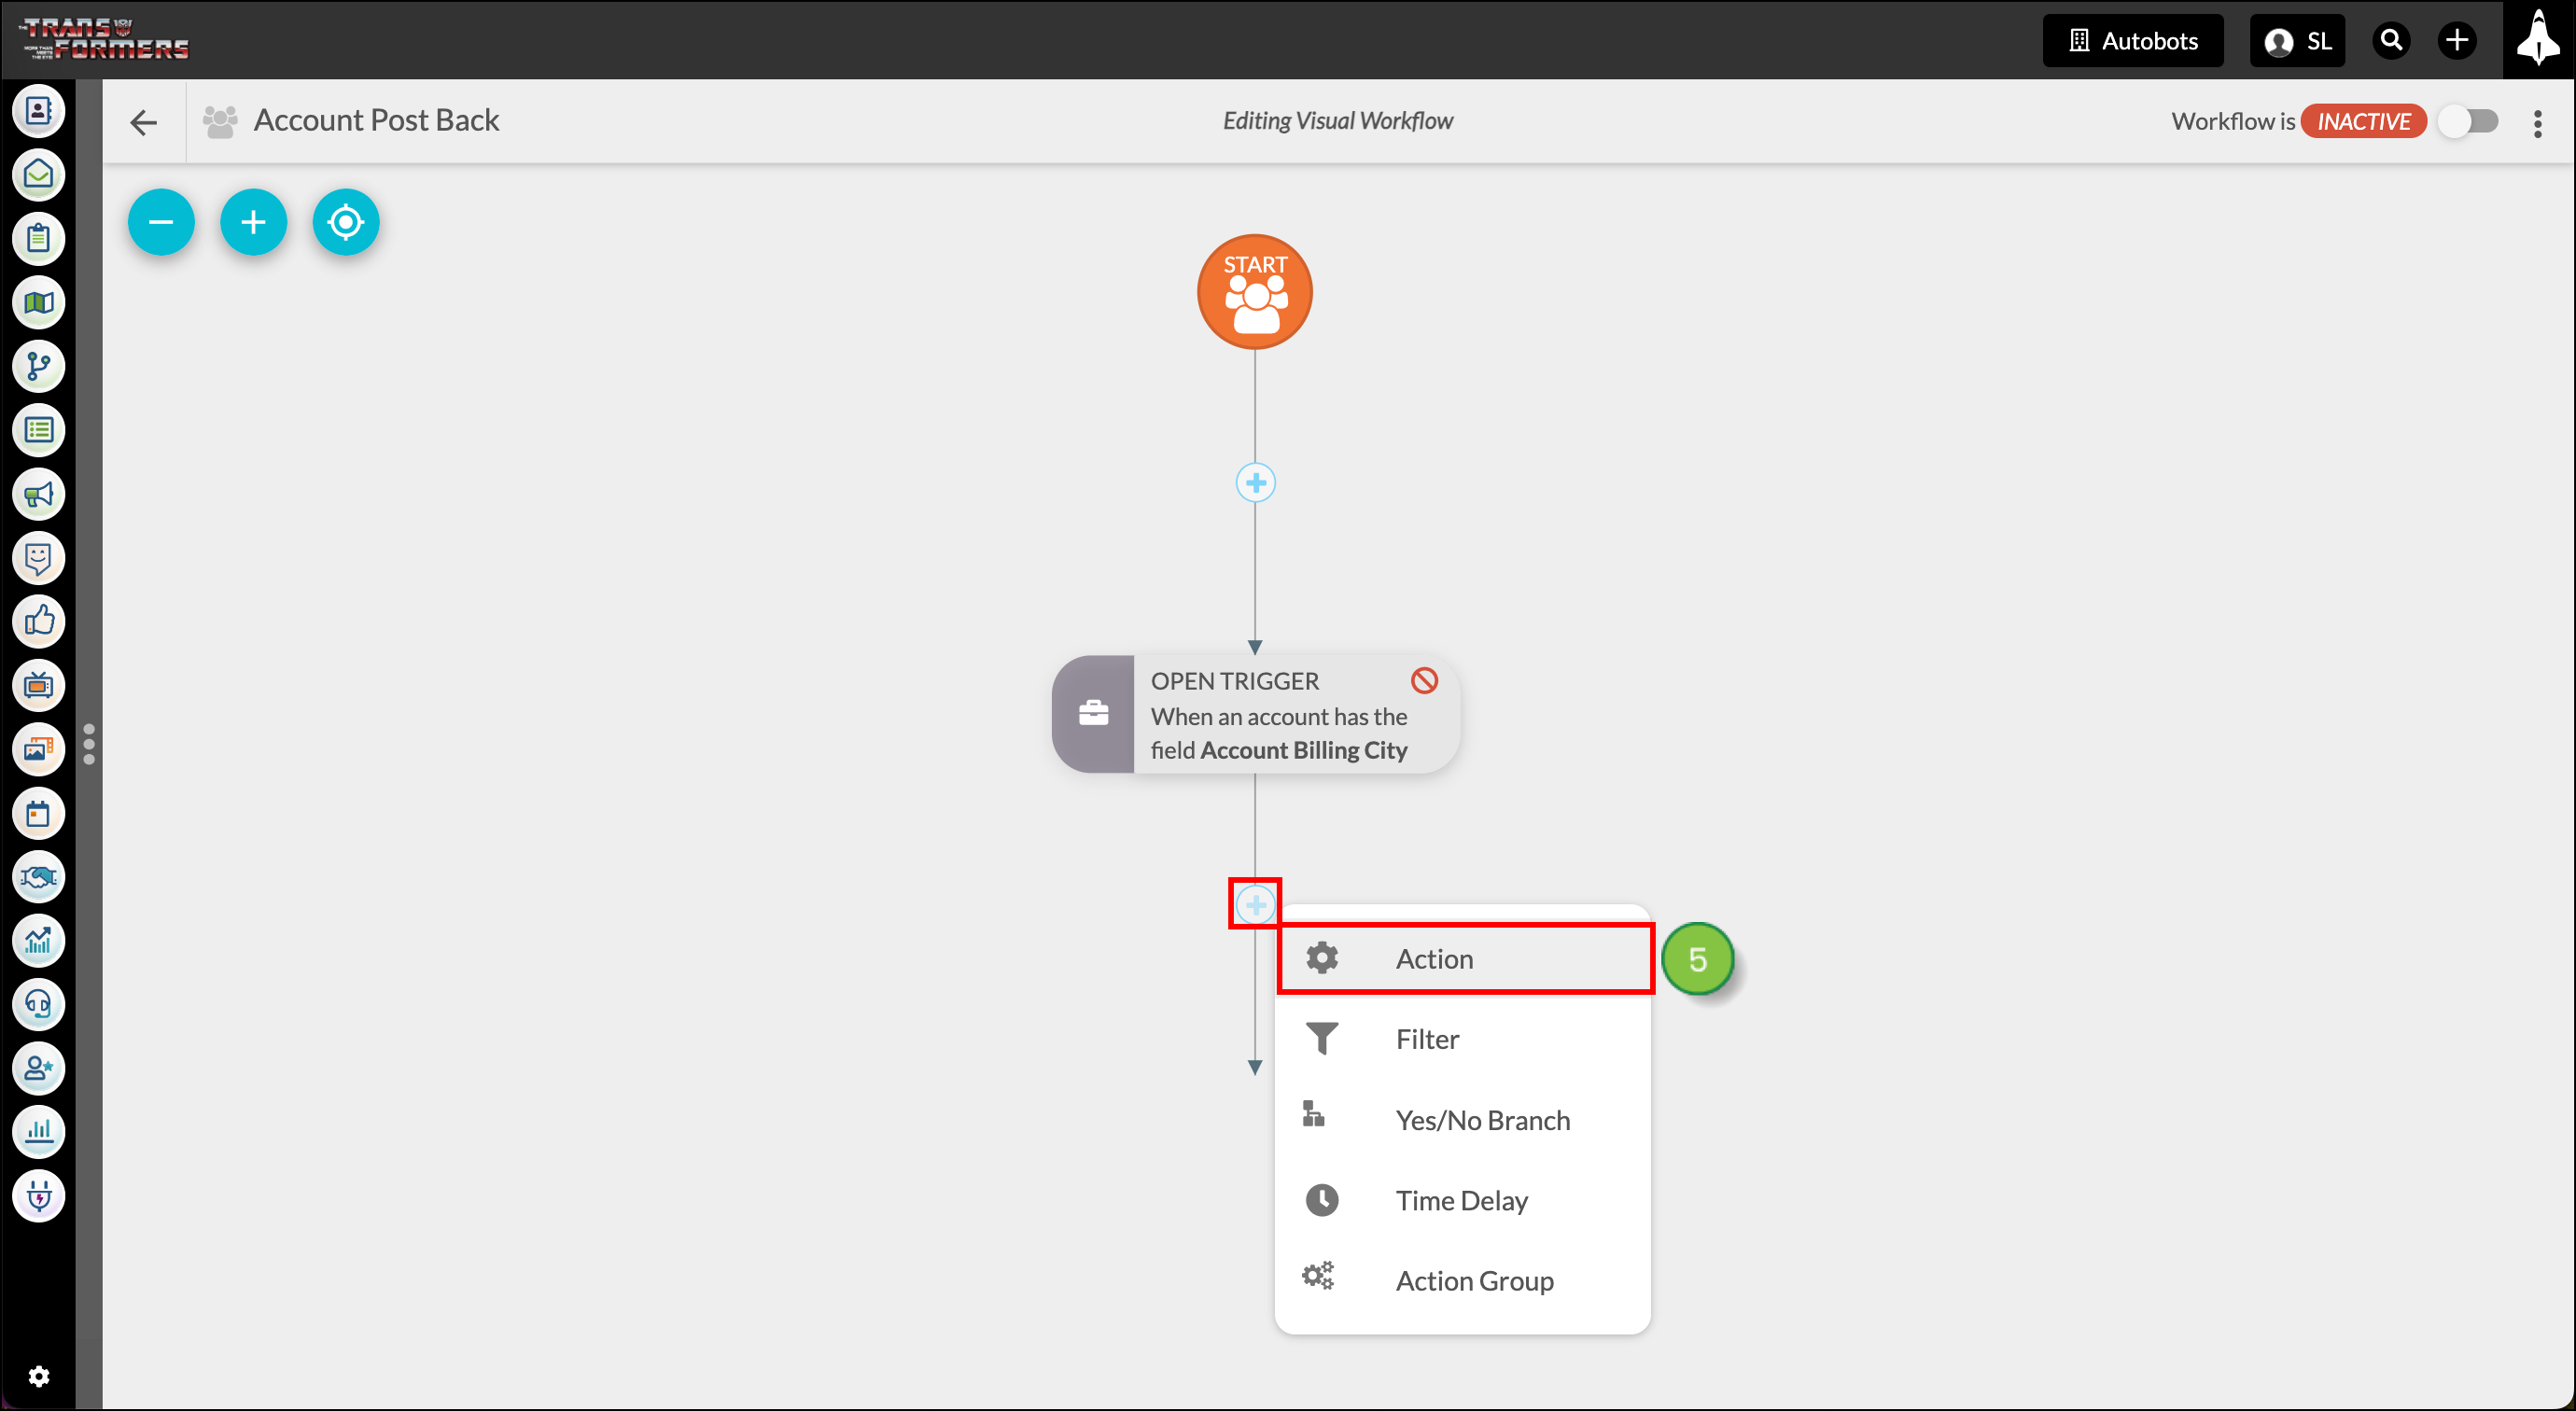
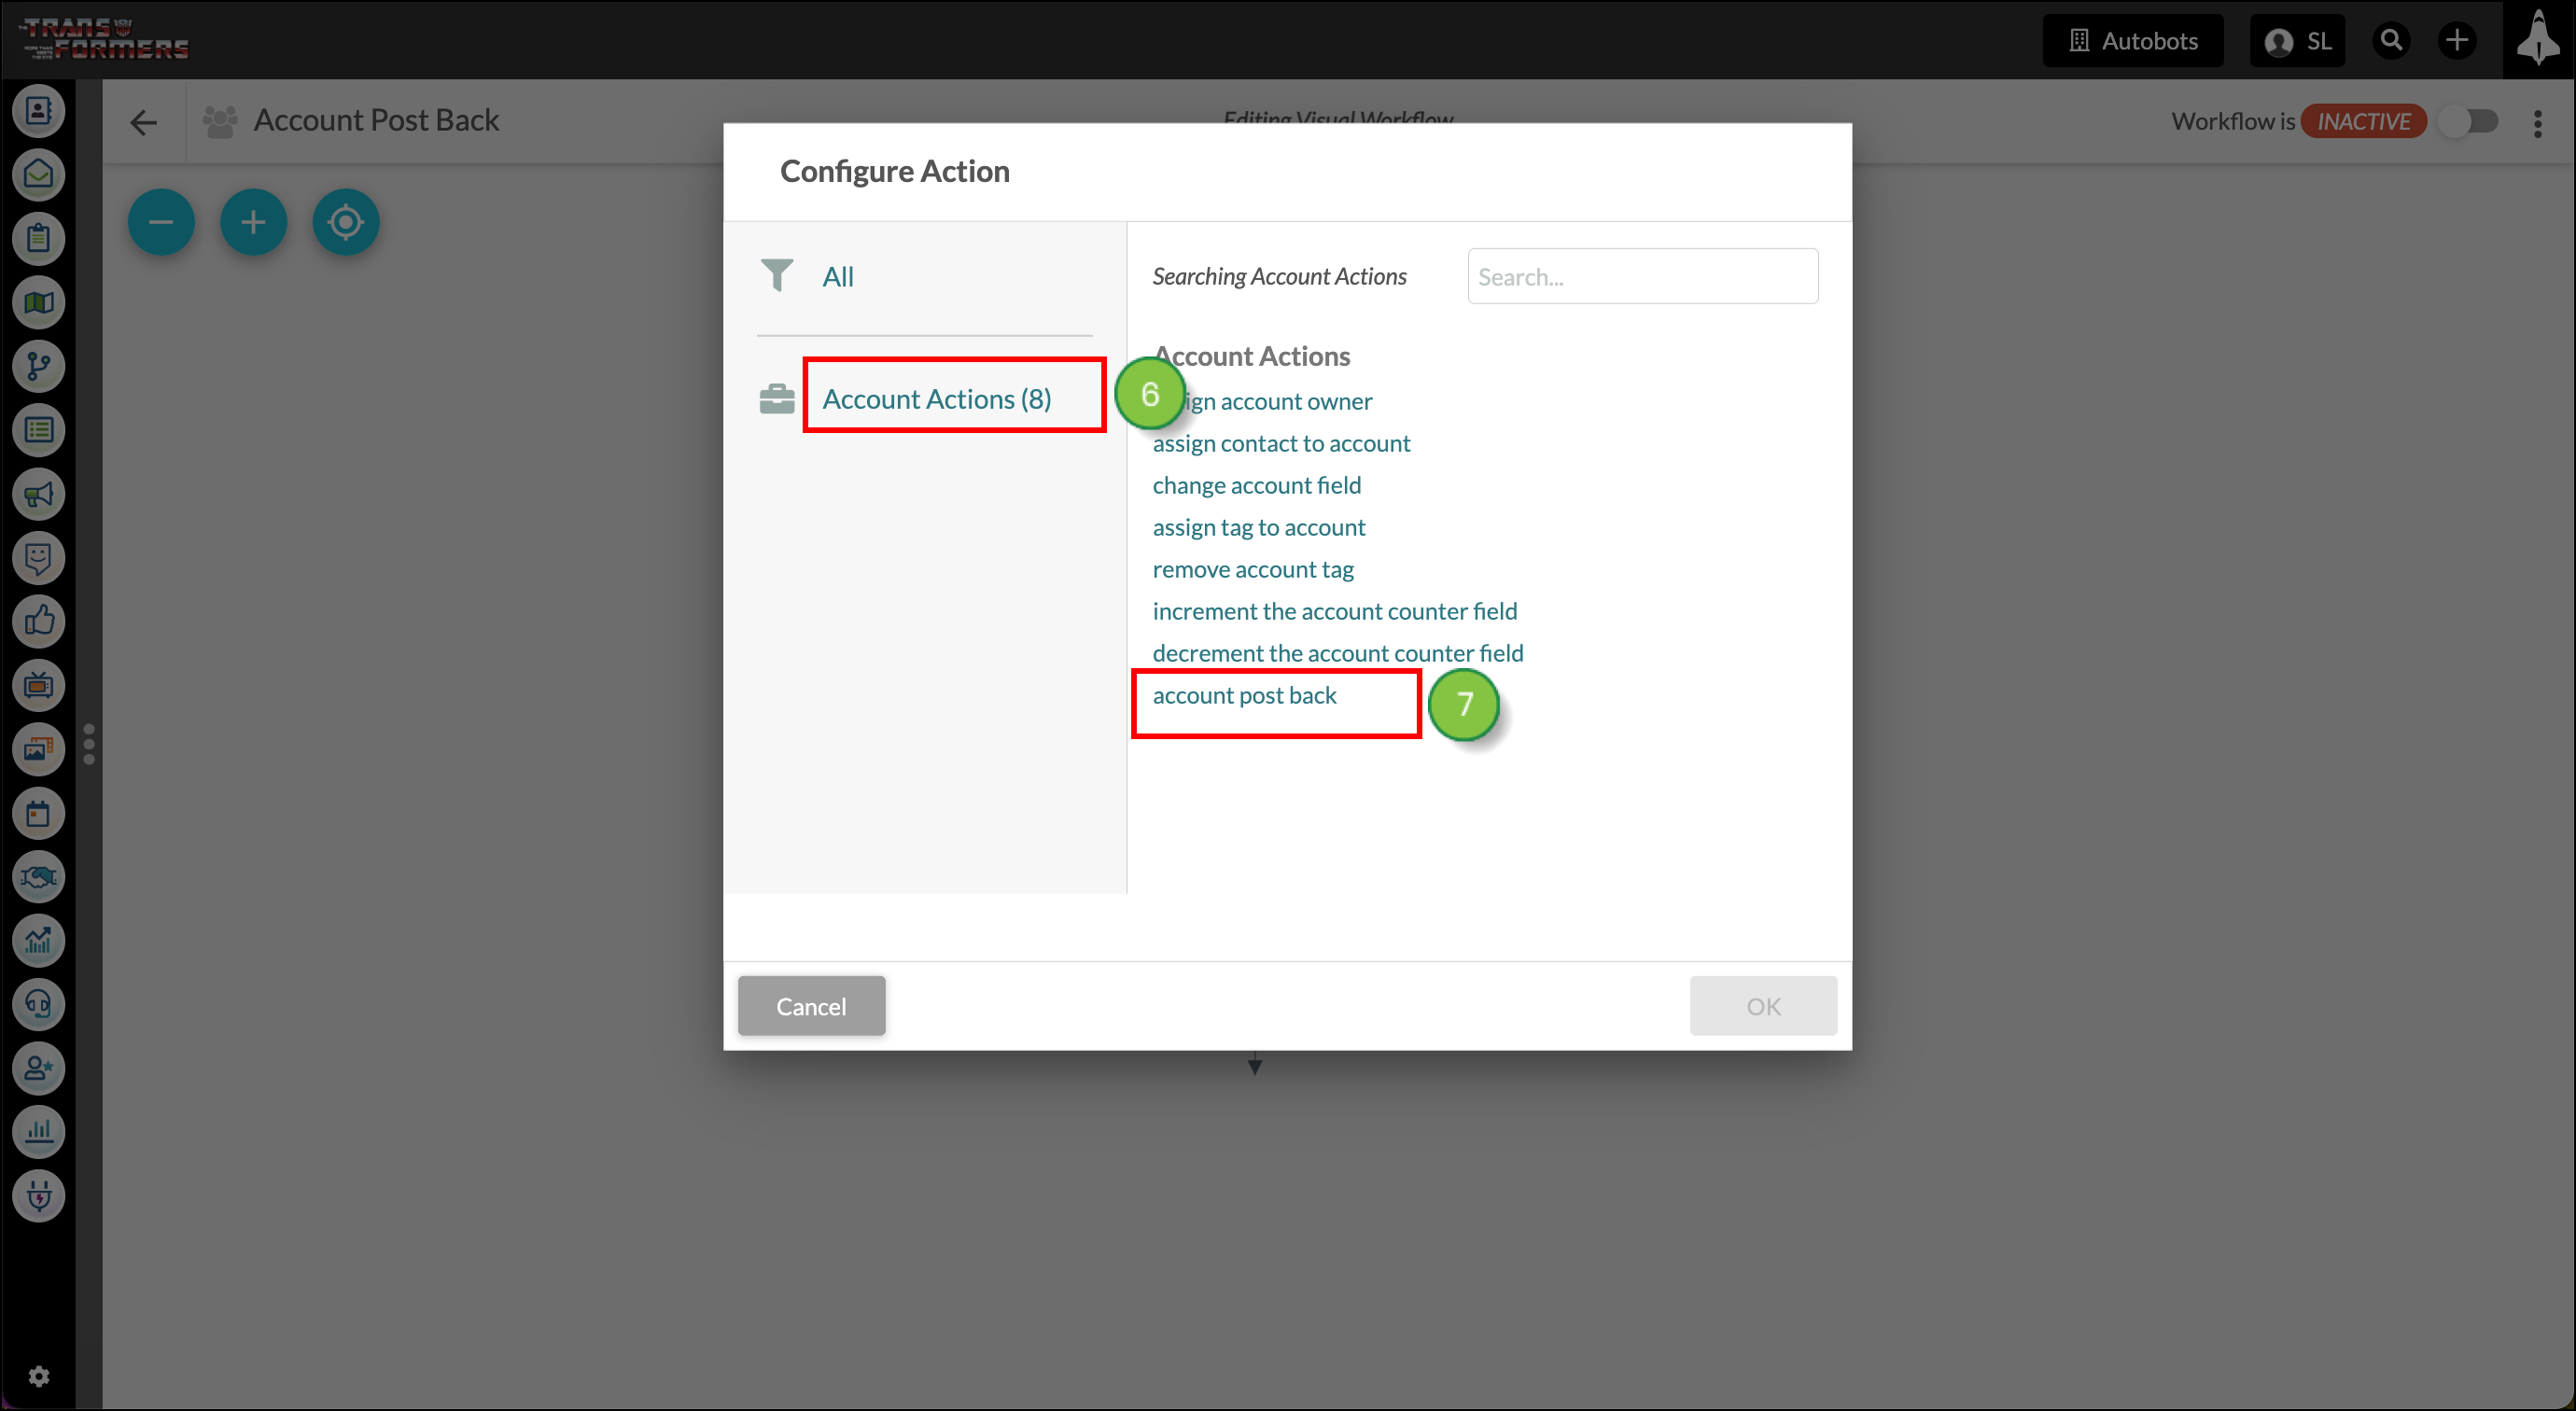
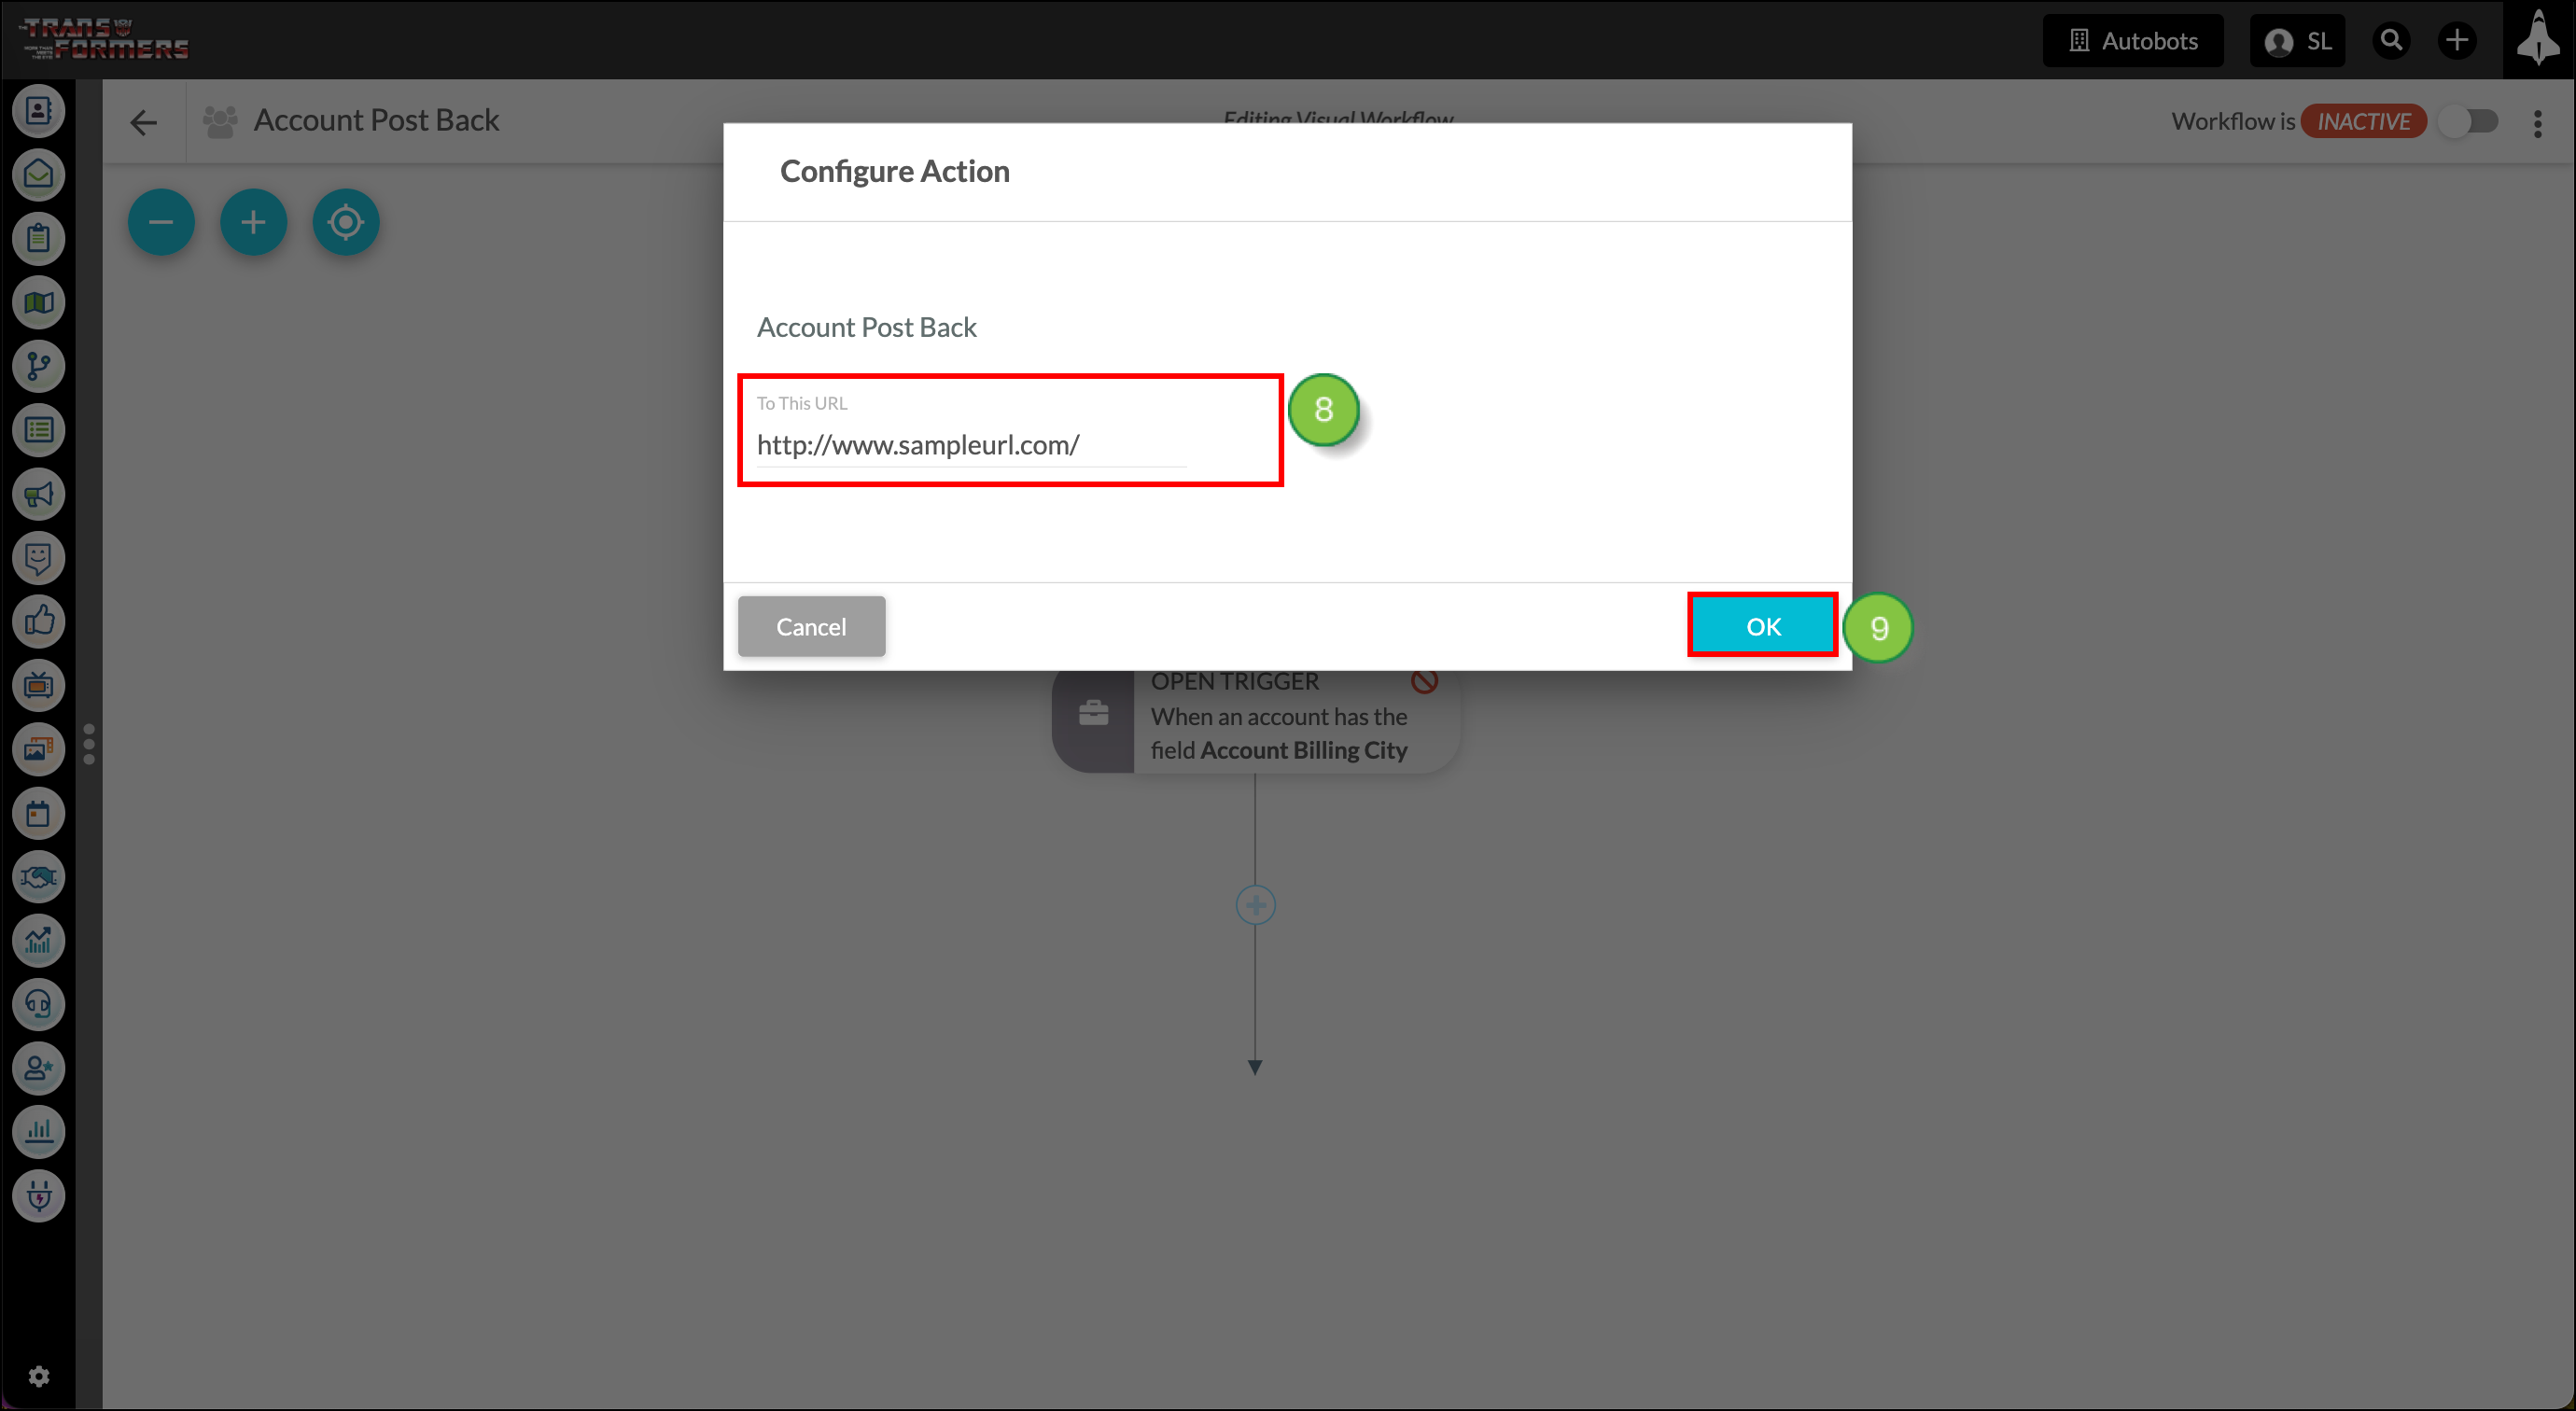
In Lead Gen & CRM, you can post account information as an action in an automation. Certain CRMs, Lead Gen & CRM included, support webhooks or postback URLs to bring account information into the system or to update existing accounts. This can be useful to update an account elsewhere when the accounts meets the trigger conditions for an automation in Lead Gen & CRM.
To add account information to automation in Lead Gen & CRM, create or edit a visual action group:
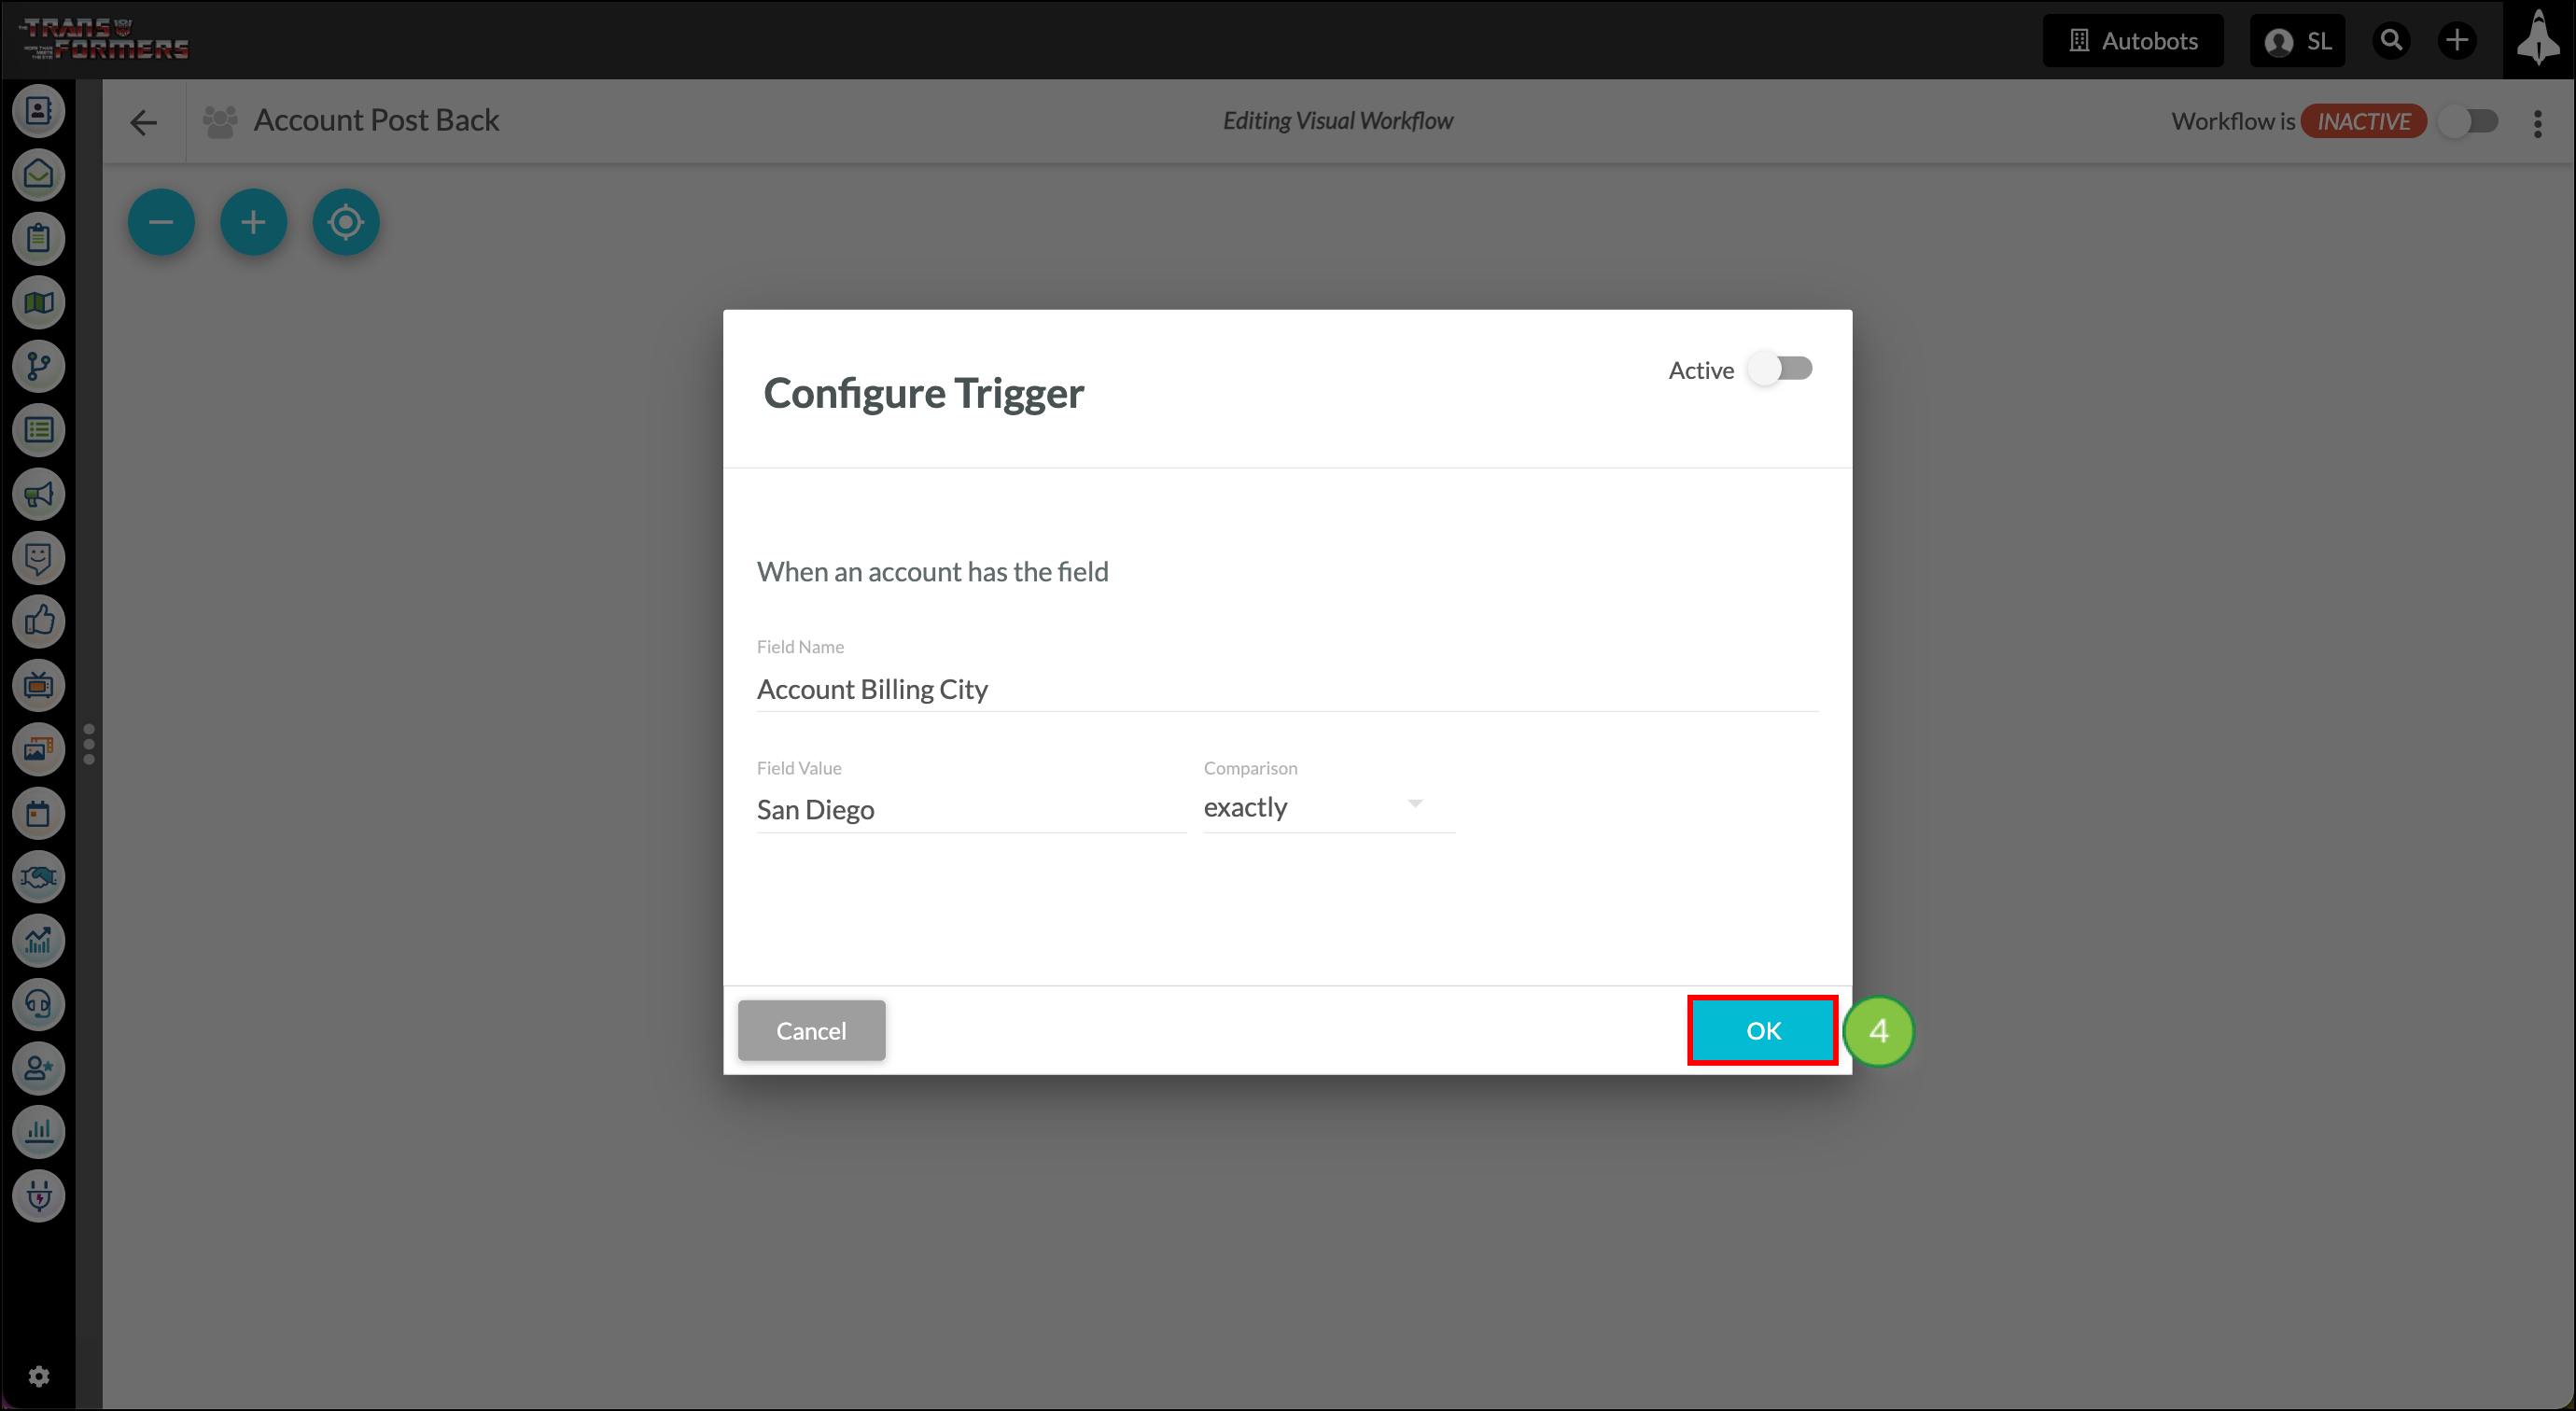
Once you've set all of your triggers and actions, make the workflow Active.
The following is an example of postback data:
--06d2248b6b8bb9e853feac214bfb847c39612cb7b4cf3c691c2cee97710a
Content-Disposition: form-data; name="field_2075573251"
username@emailaddress.com

--06d2248b6b8bb9e853feac214bfb847c39612cb7b4cf3c691c2cee97710a
Content-Disposition: form-data; name="agentreferrer__sb"
https://pages.services/websitename.com/webpage/?ts=1563200133467

--06d2248b6b8bb9e853feac214bfb847c39612cb7b4cf3c691c2cee97710a
Content-Disposition: form-data; name="rf__sb"
https://pages.services/websitename.com/webpage/?ts=1563200133467

--06d2248b6b8bb9e853feac214bfb847c39612cb7b4cf3c691c2cee97710a
Content-Disposition: form-data; name="emailAddress"
username@emailaddress.com

--06d2248b6b8bb9e853feac214bfb847c39612cb7b4cf3c691c2cee97710a
Content-Disposition: form-data; name="field_2075571203"
Namefromfield

--06d2248b6b8bb9e853feac214bfb847c39612cb7b4cf3c691c2cee97710a
Content-Disposition: form-data; name="field_2075572227"
Othernamefromfield

--06d2248b6b8bb9e853feac214bfb847c39612cb7b4cf3c691c2cee97710a
Content-Disposition: form-data; name="trackingid__sb"
201906_5cf687eba9d2da0729724496

--06d2248b6b8bb9e853feac214bfb847c39612cb7b4cf3c691c2cee97710a
Content-Disposition: form-data; name="companyprofileid__sb"
MzawMDG1NDQzAgA

--06d2248b6b8bb9e853feac214bfb847c39612cb7b4cf3c691c2cee97710a
Content-Disposition: form-data; name="g-recaptcha-response"

--06d2248b6b8bb9e853feac214bfb847c39612cb7b4cf3c691c2cee97710a
Content-Disposition: form-data; name="leadID"
646138185731

--06d2248b6b8bb9e853feac214bfb847c39612cb7b4cf3c691c2cee97710a
Content-Disposition: form-data; name="lastName"
Userlastname

--06d2248b6b8bb9e853feac214bfb847c39612cb7b4cf3c691c2cee97710a
Content-Disposition: form-data; name="accountid__sb"
KOI-3W75UWX76Q

--06d2248b6b8bb9e853feac214bfb847c39612cb7b4cf3c691c2cee97710a
Content-Disposition: form-data; name="firstName"
Userfirstname

--06d2248b6b8bb9e853feac214bfb847c39612cb7b4cf3c691c2cee97710a
Content-Disposition: form-data; name="formid__sb"
14fba788-667e-47d0-8f7a-1fda4949fefe

--06d2248b6b8bb9e853feac214bfb847c39612cb7b4cf3c691c2cee97710a
Content-Disposition: form-data; name="css_url"
/includes/css/formlp_light.css

--06d2248b6b8bb9e853feac214bfb847c39612cb7b4cf3c691c2cee97710a
Content-Disposition: form-data; name="submit__sb"

--06d2248b6b8bb9e853feac214bfb847c39612cb7b4cf3c691c2cee97710a--
Copyright © 2026 · All Rights Reserved · Constant Contact · Privacy Center