Lead Gen & CRM
How can we help you?
Search our help articles, video tutorials, and quickstart guides

You've got this. You've got us. Search our Knowledge Base to quickly find answers to your questions.

Adding Merge Variables to Emails

Article: 000050353
Updated: July 26, 2024

You can personalize your messages by using merge variables in Lead Gen & CRM. Personalized communications increase engagement, resulting in improved conversions.

A merge variable can be used to merge information about each recipient into the email, so you can customize each email to make it look like you are sending a personal email to each person on your list.

In this article, you'll learn how to add merge variables to emails.


Article Contents


Users:
Administrators 
Company Managers 
Marketing Managers 
Sales Managers  
Salespersons  
Jr. Salespersons  


Adding Merge Variables

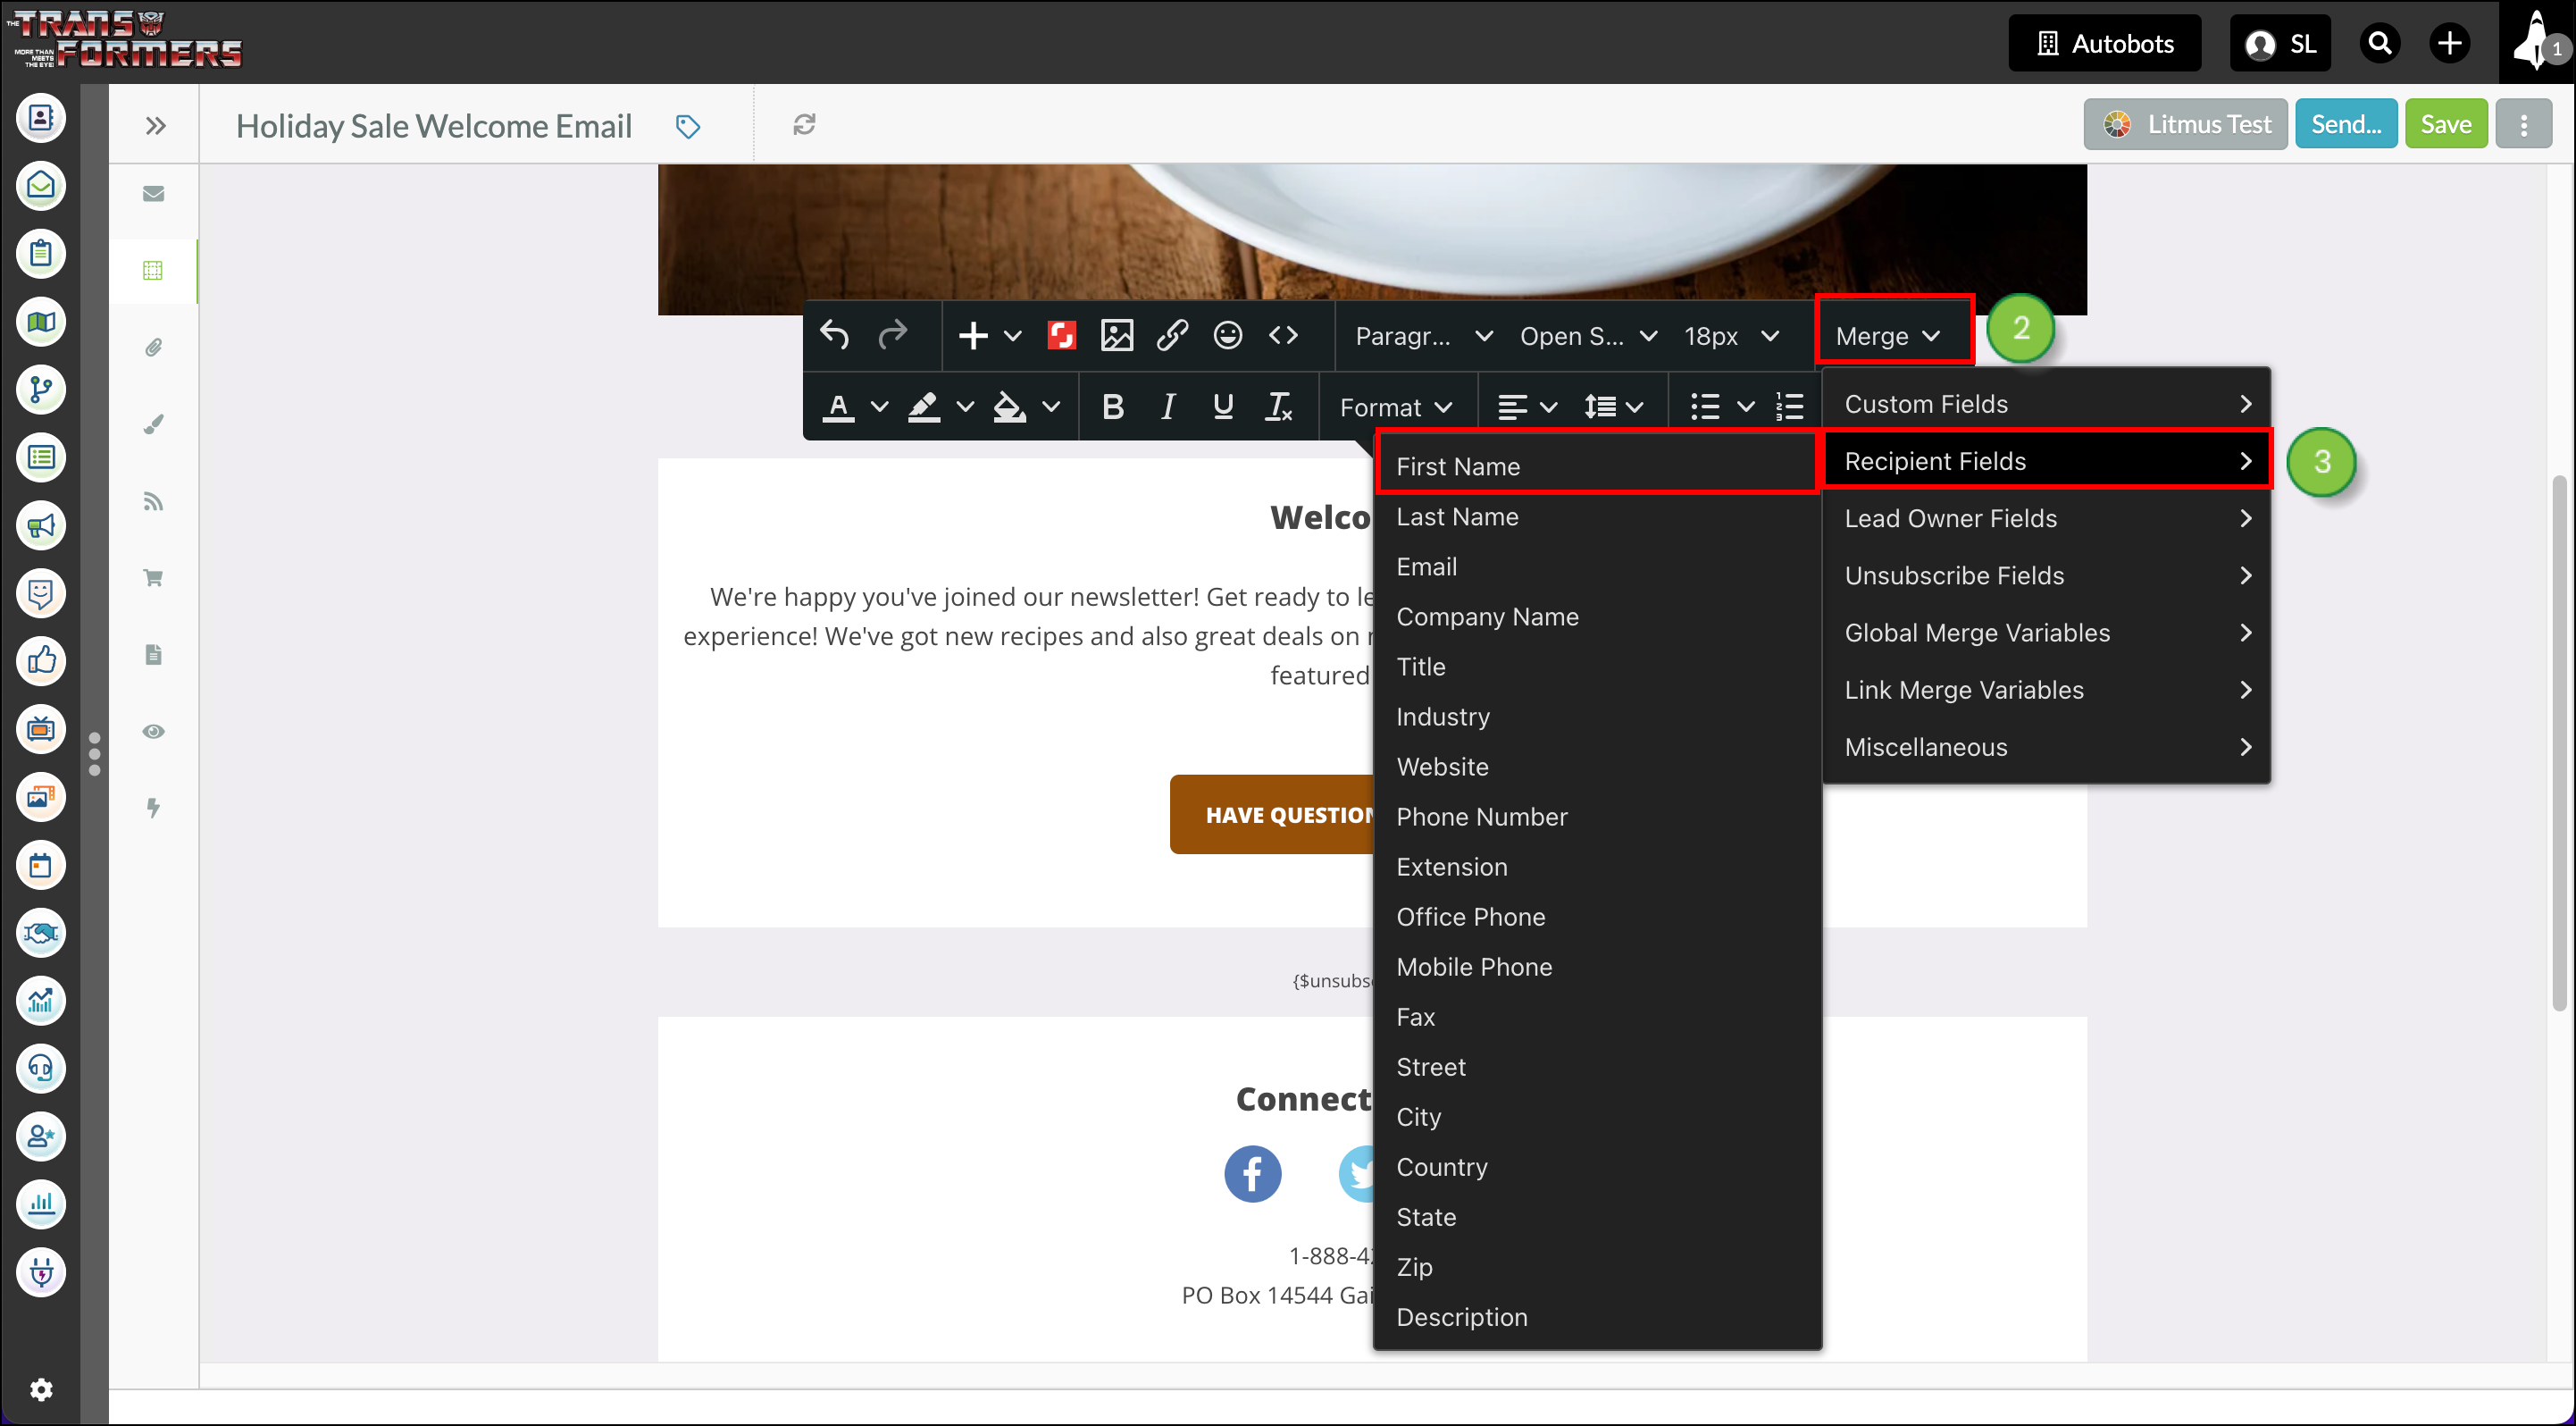
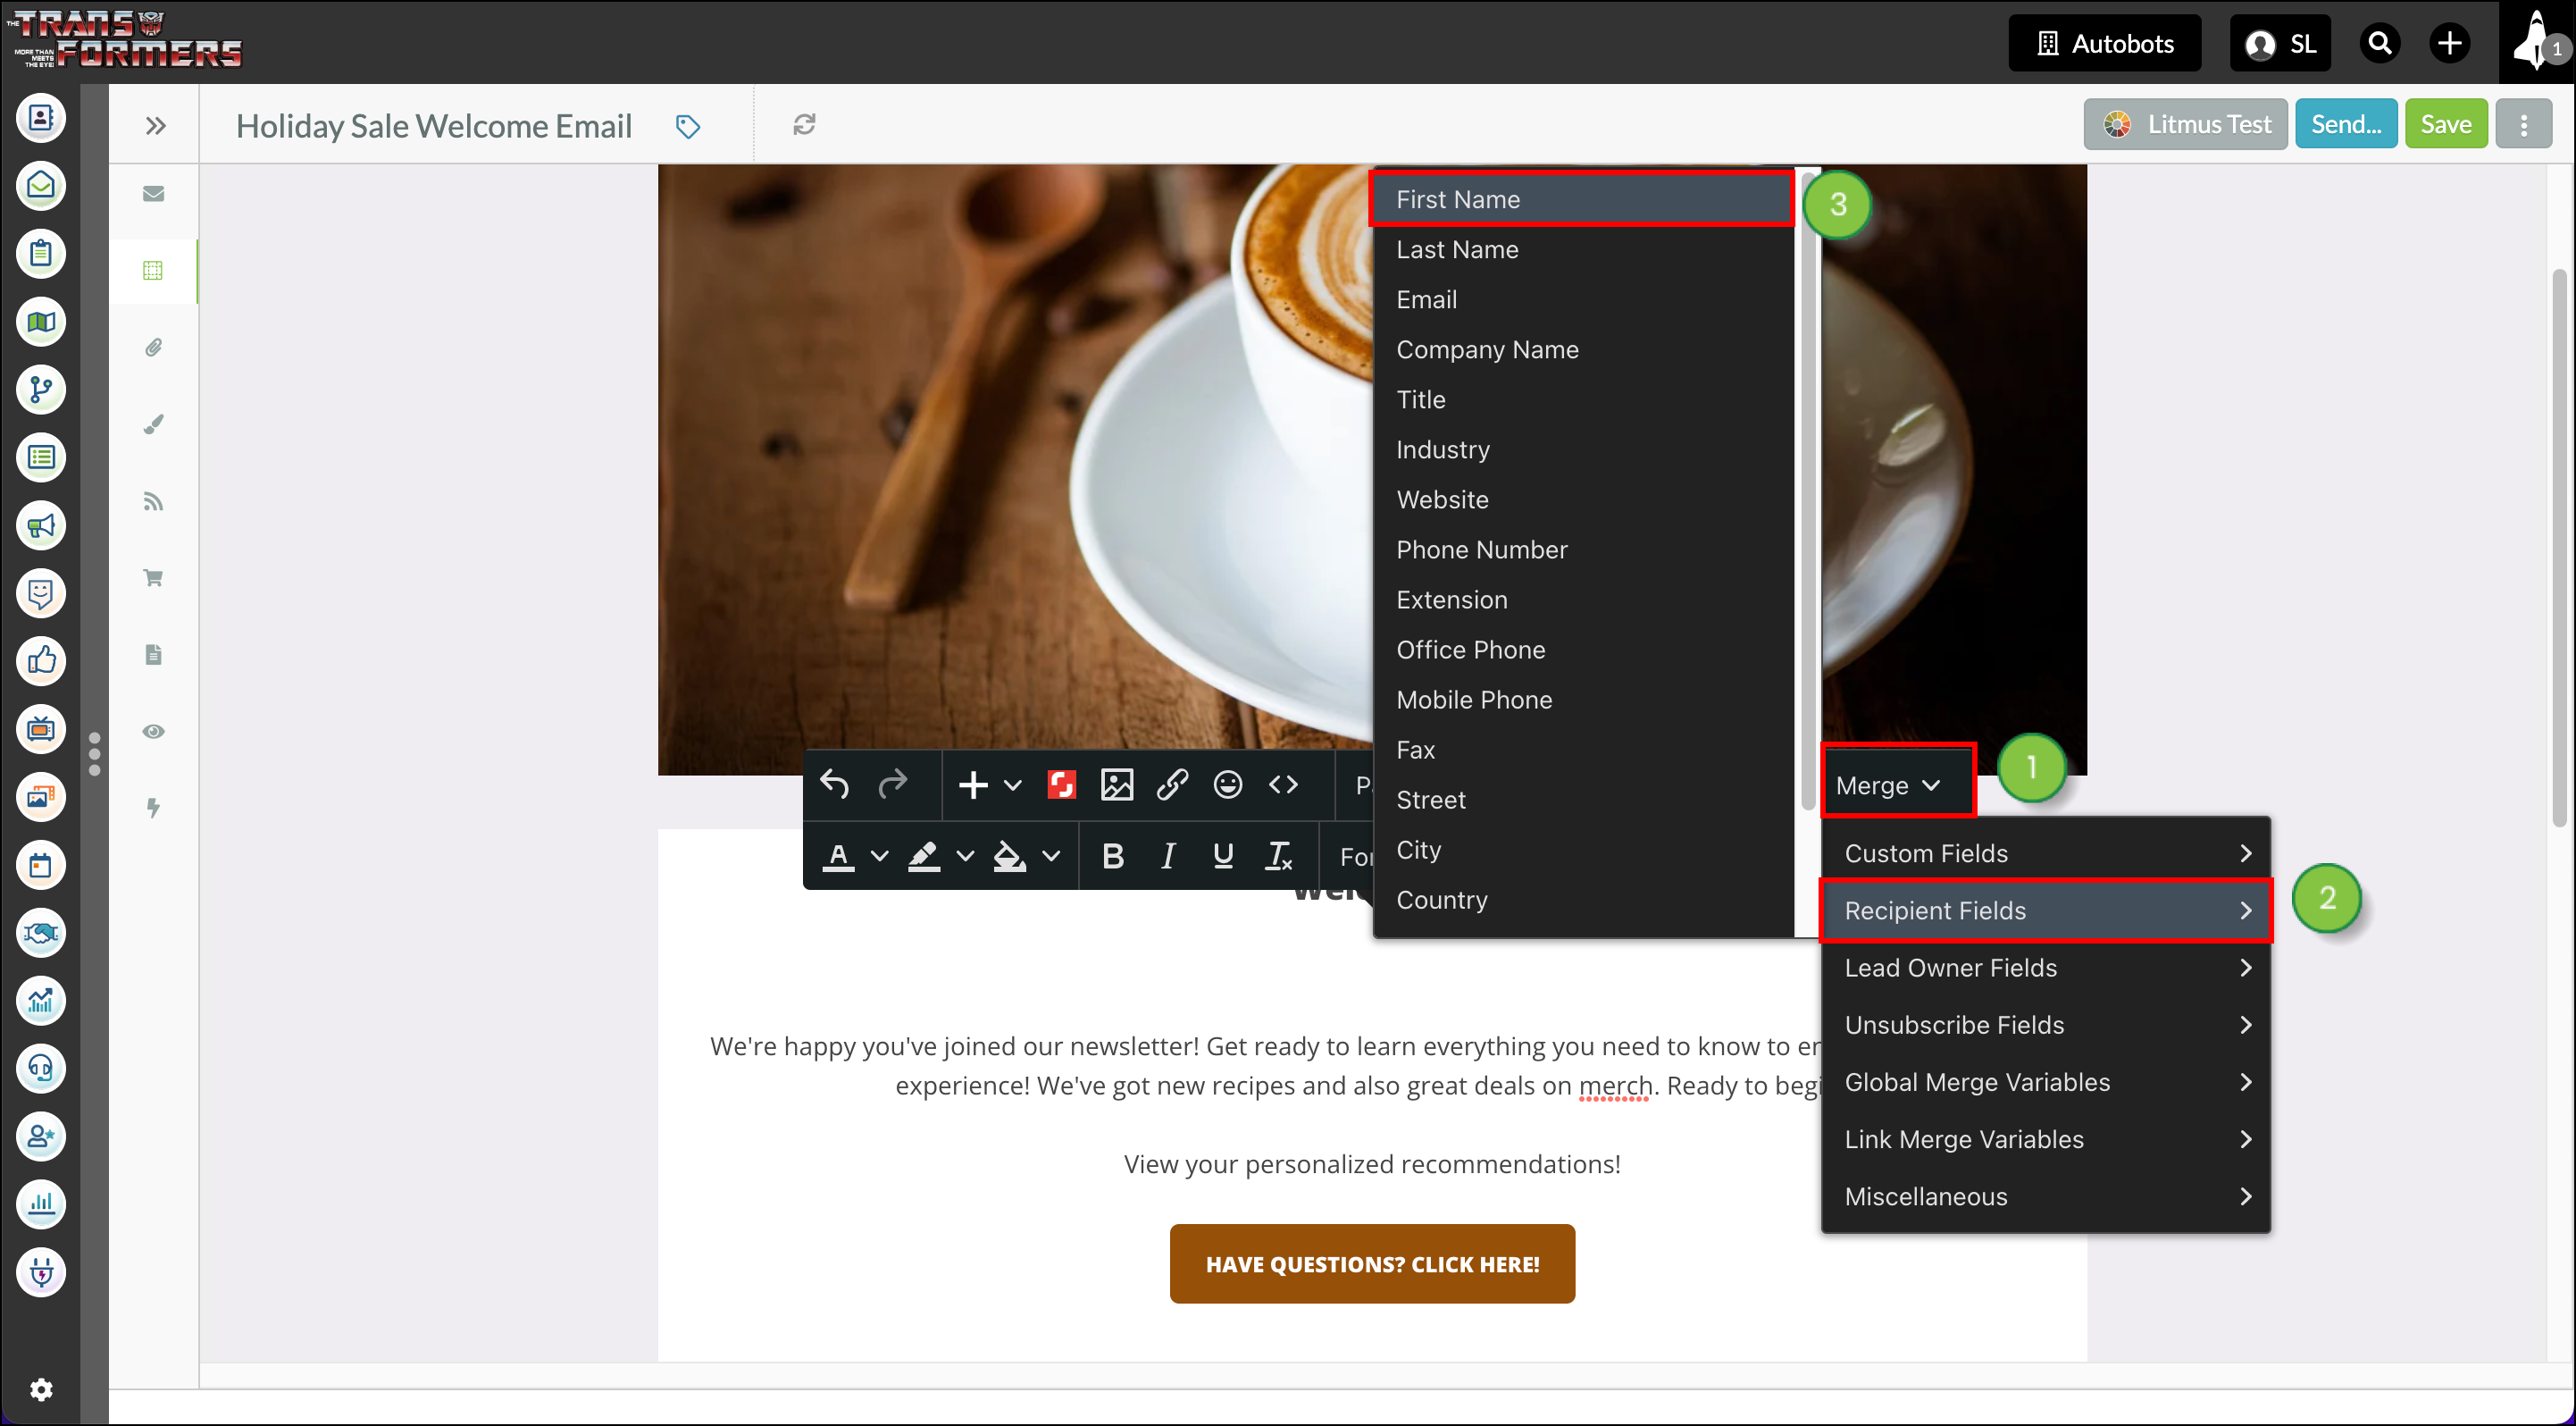
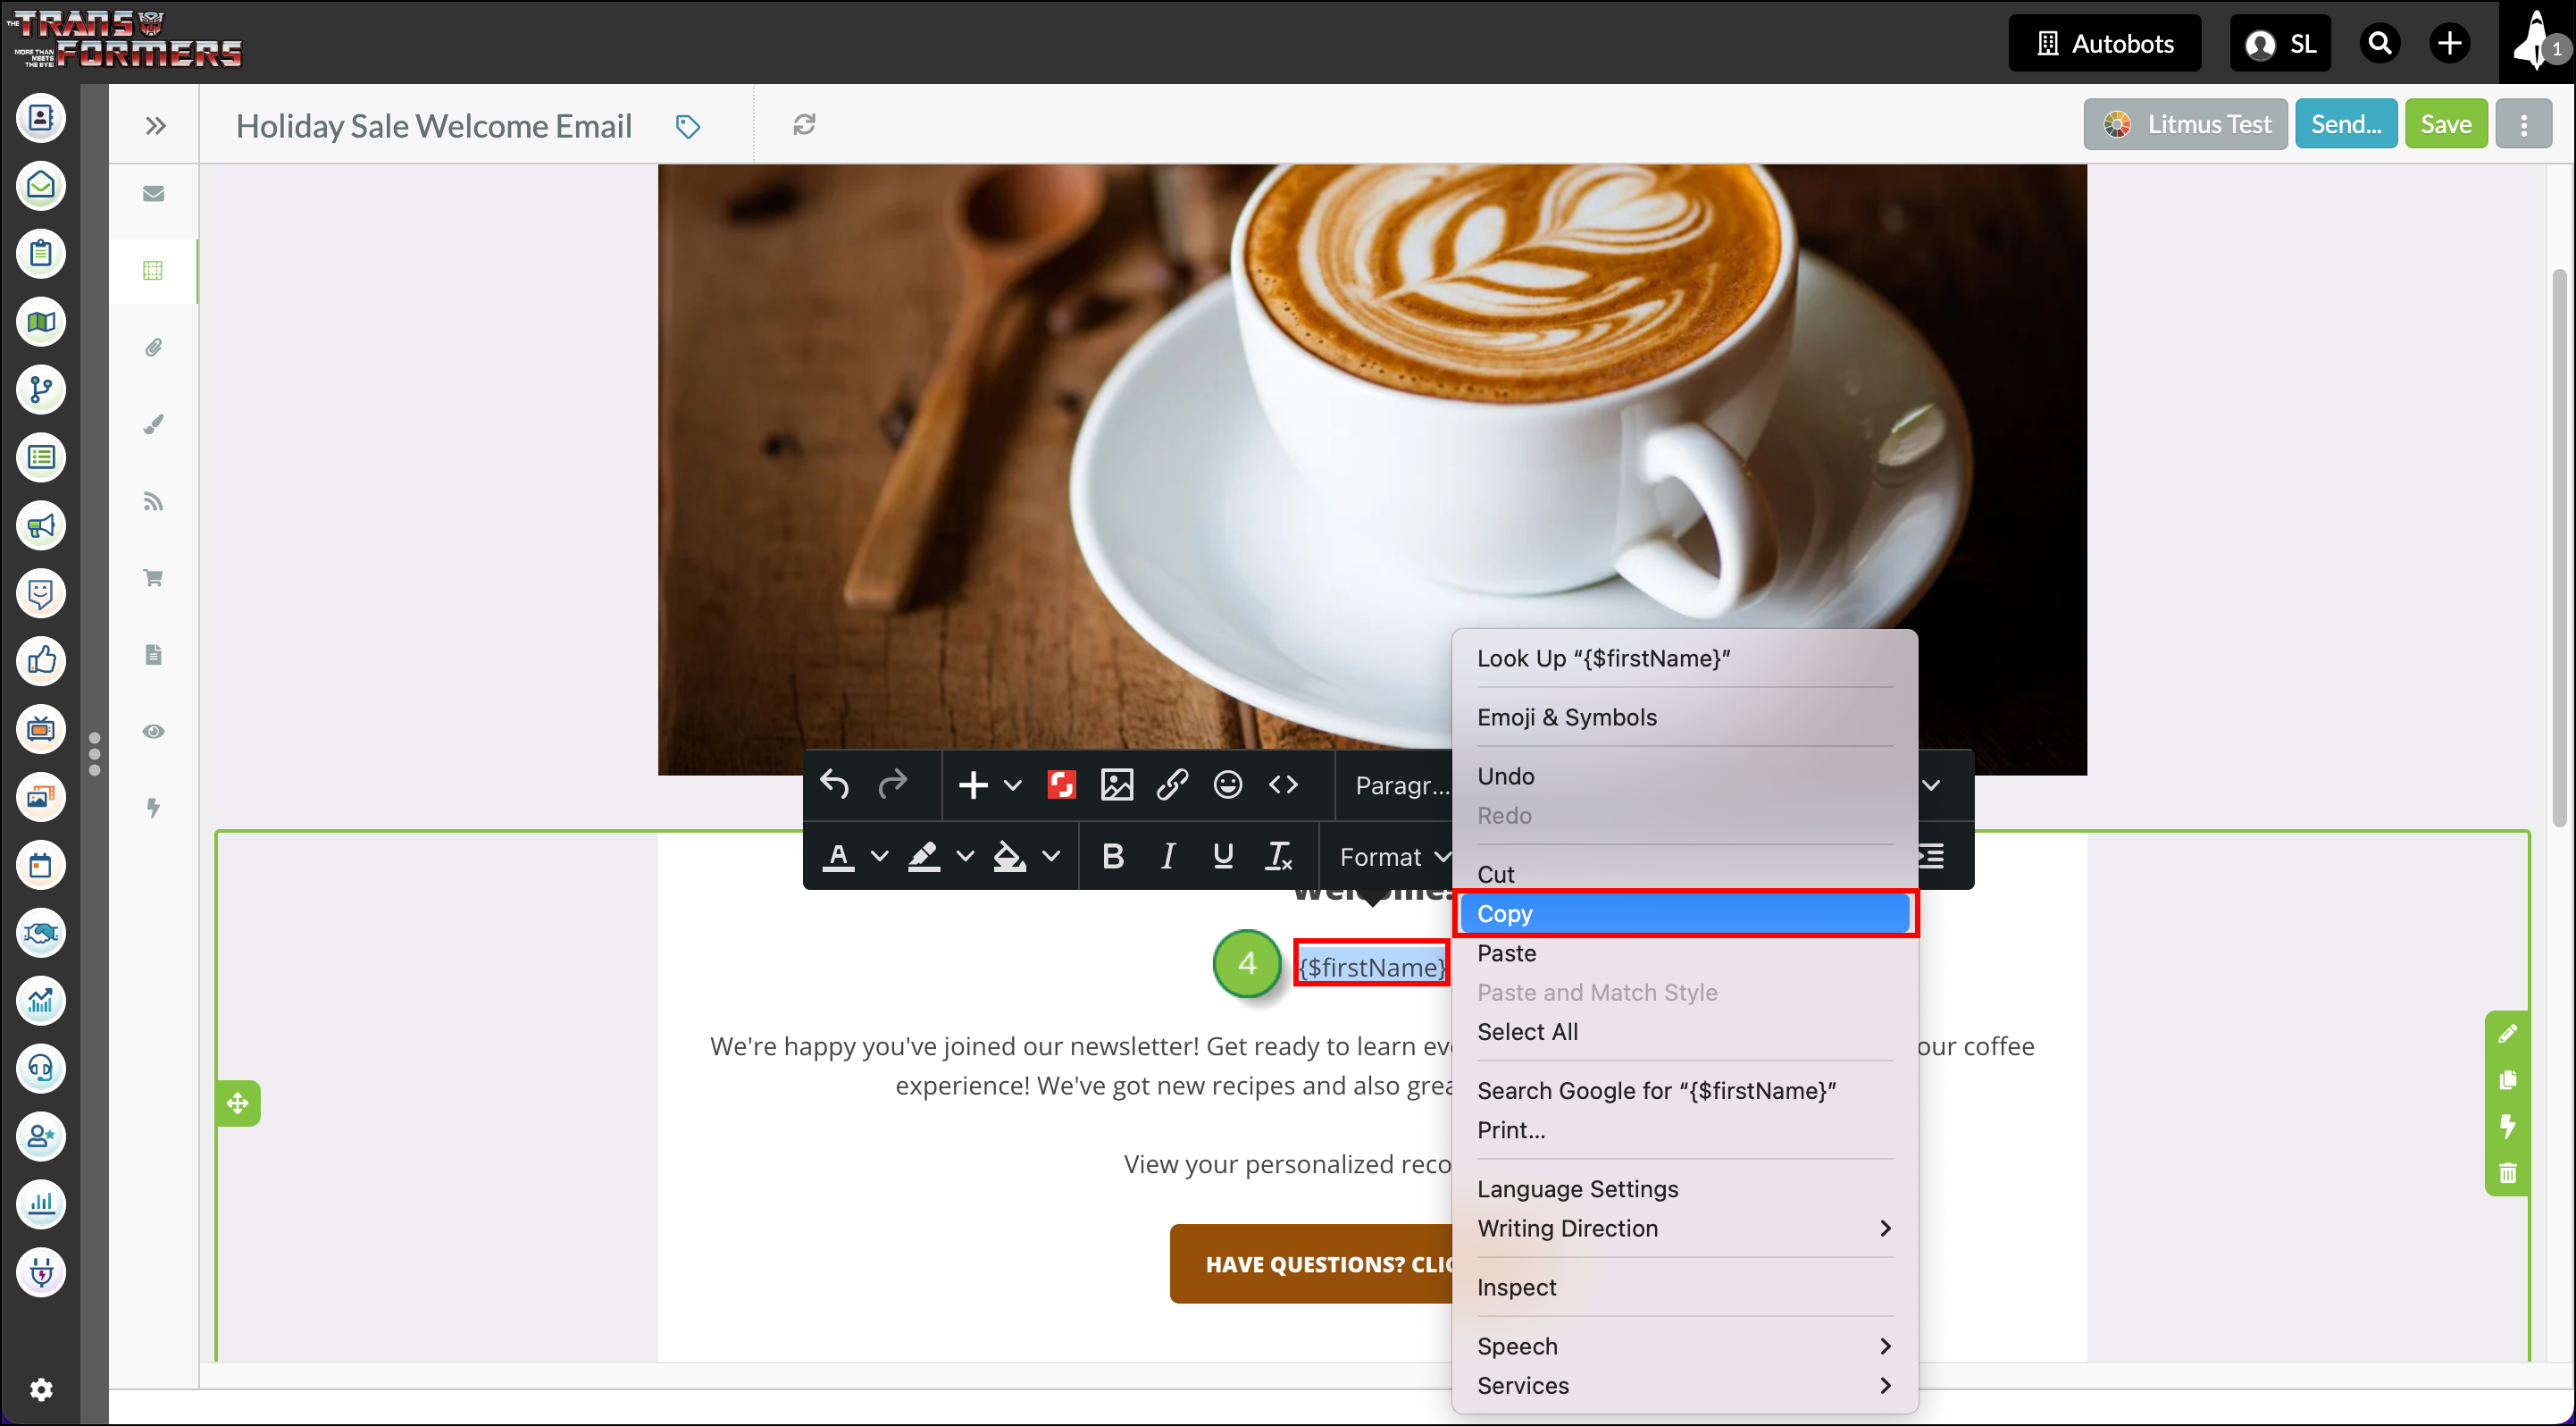
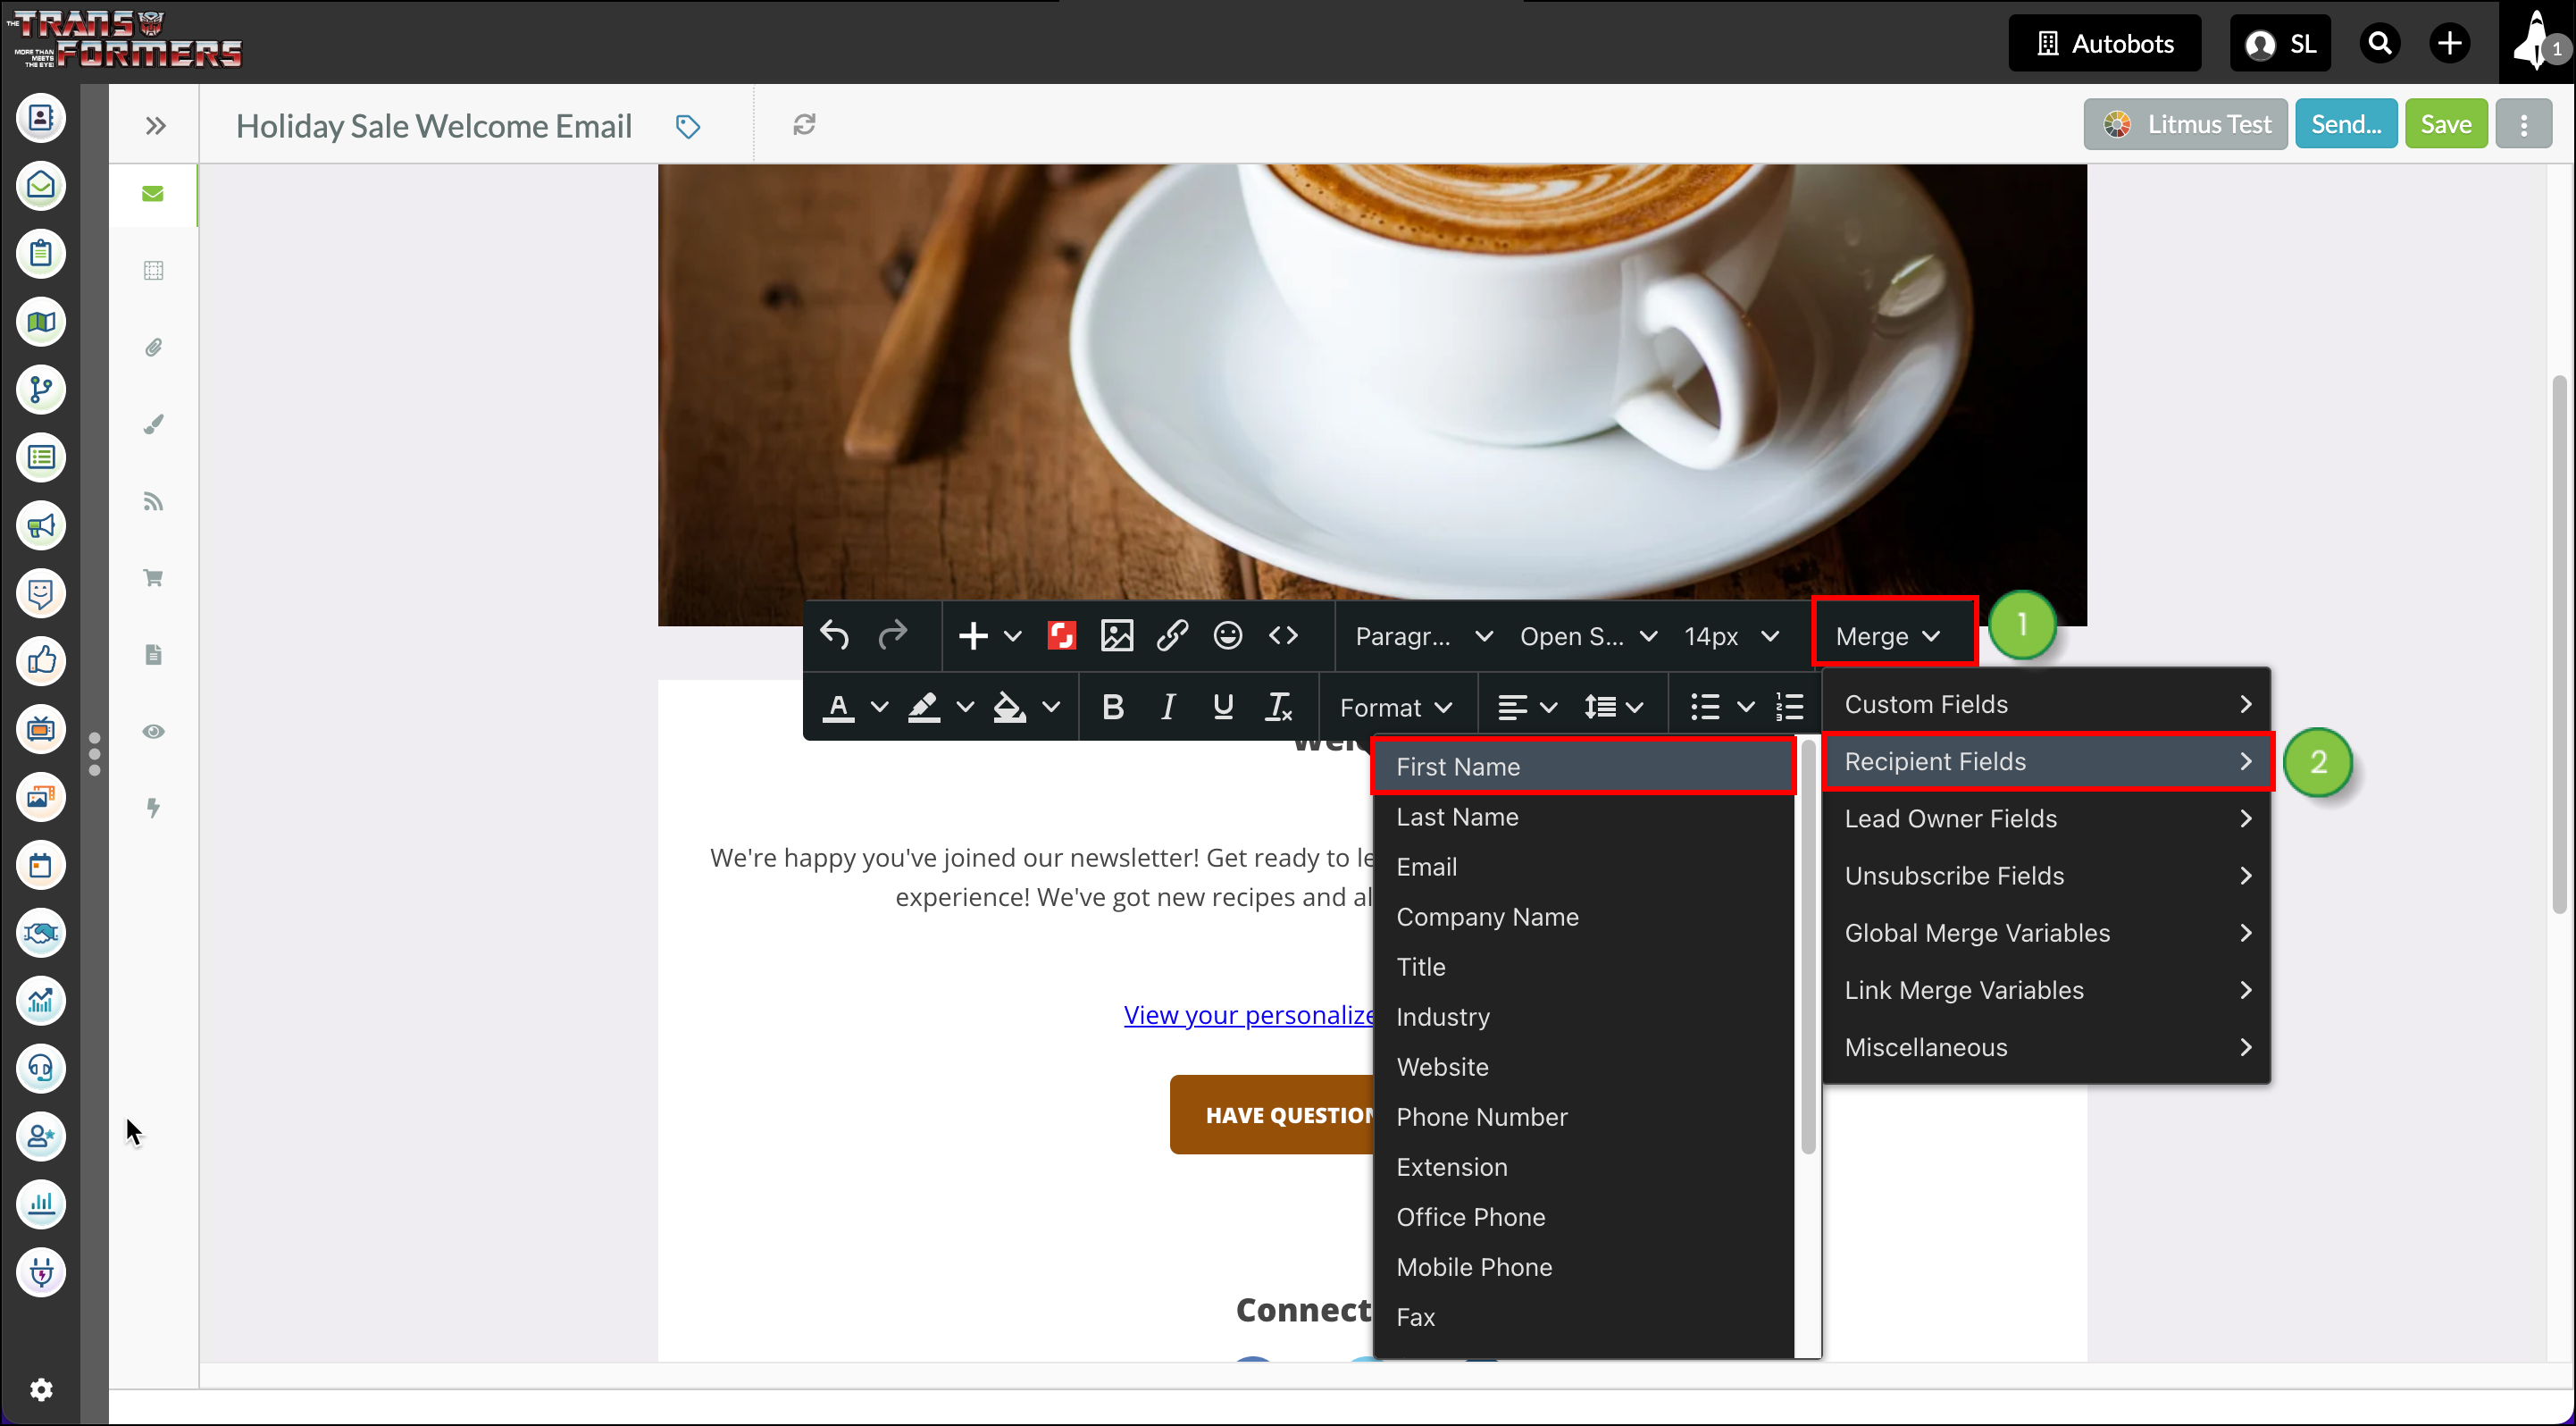
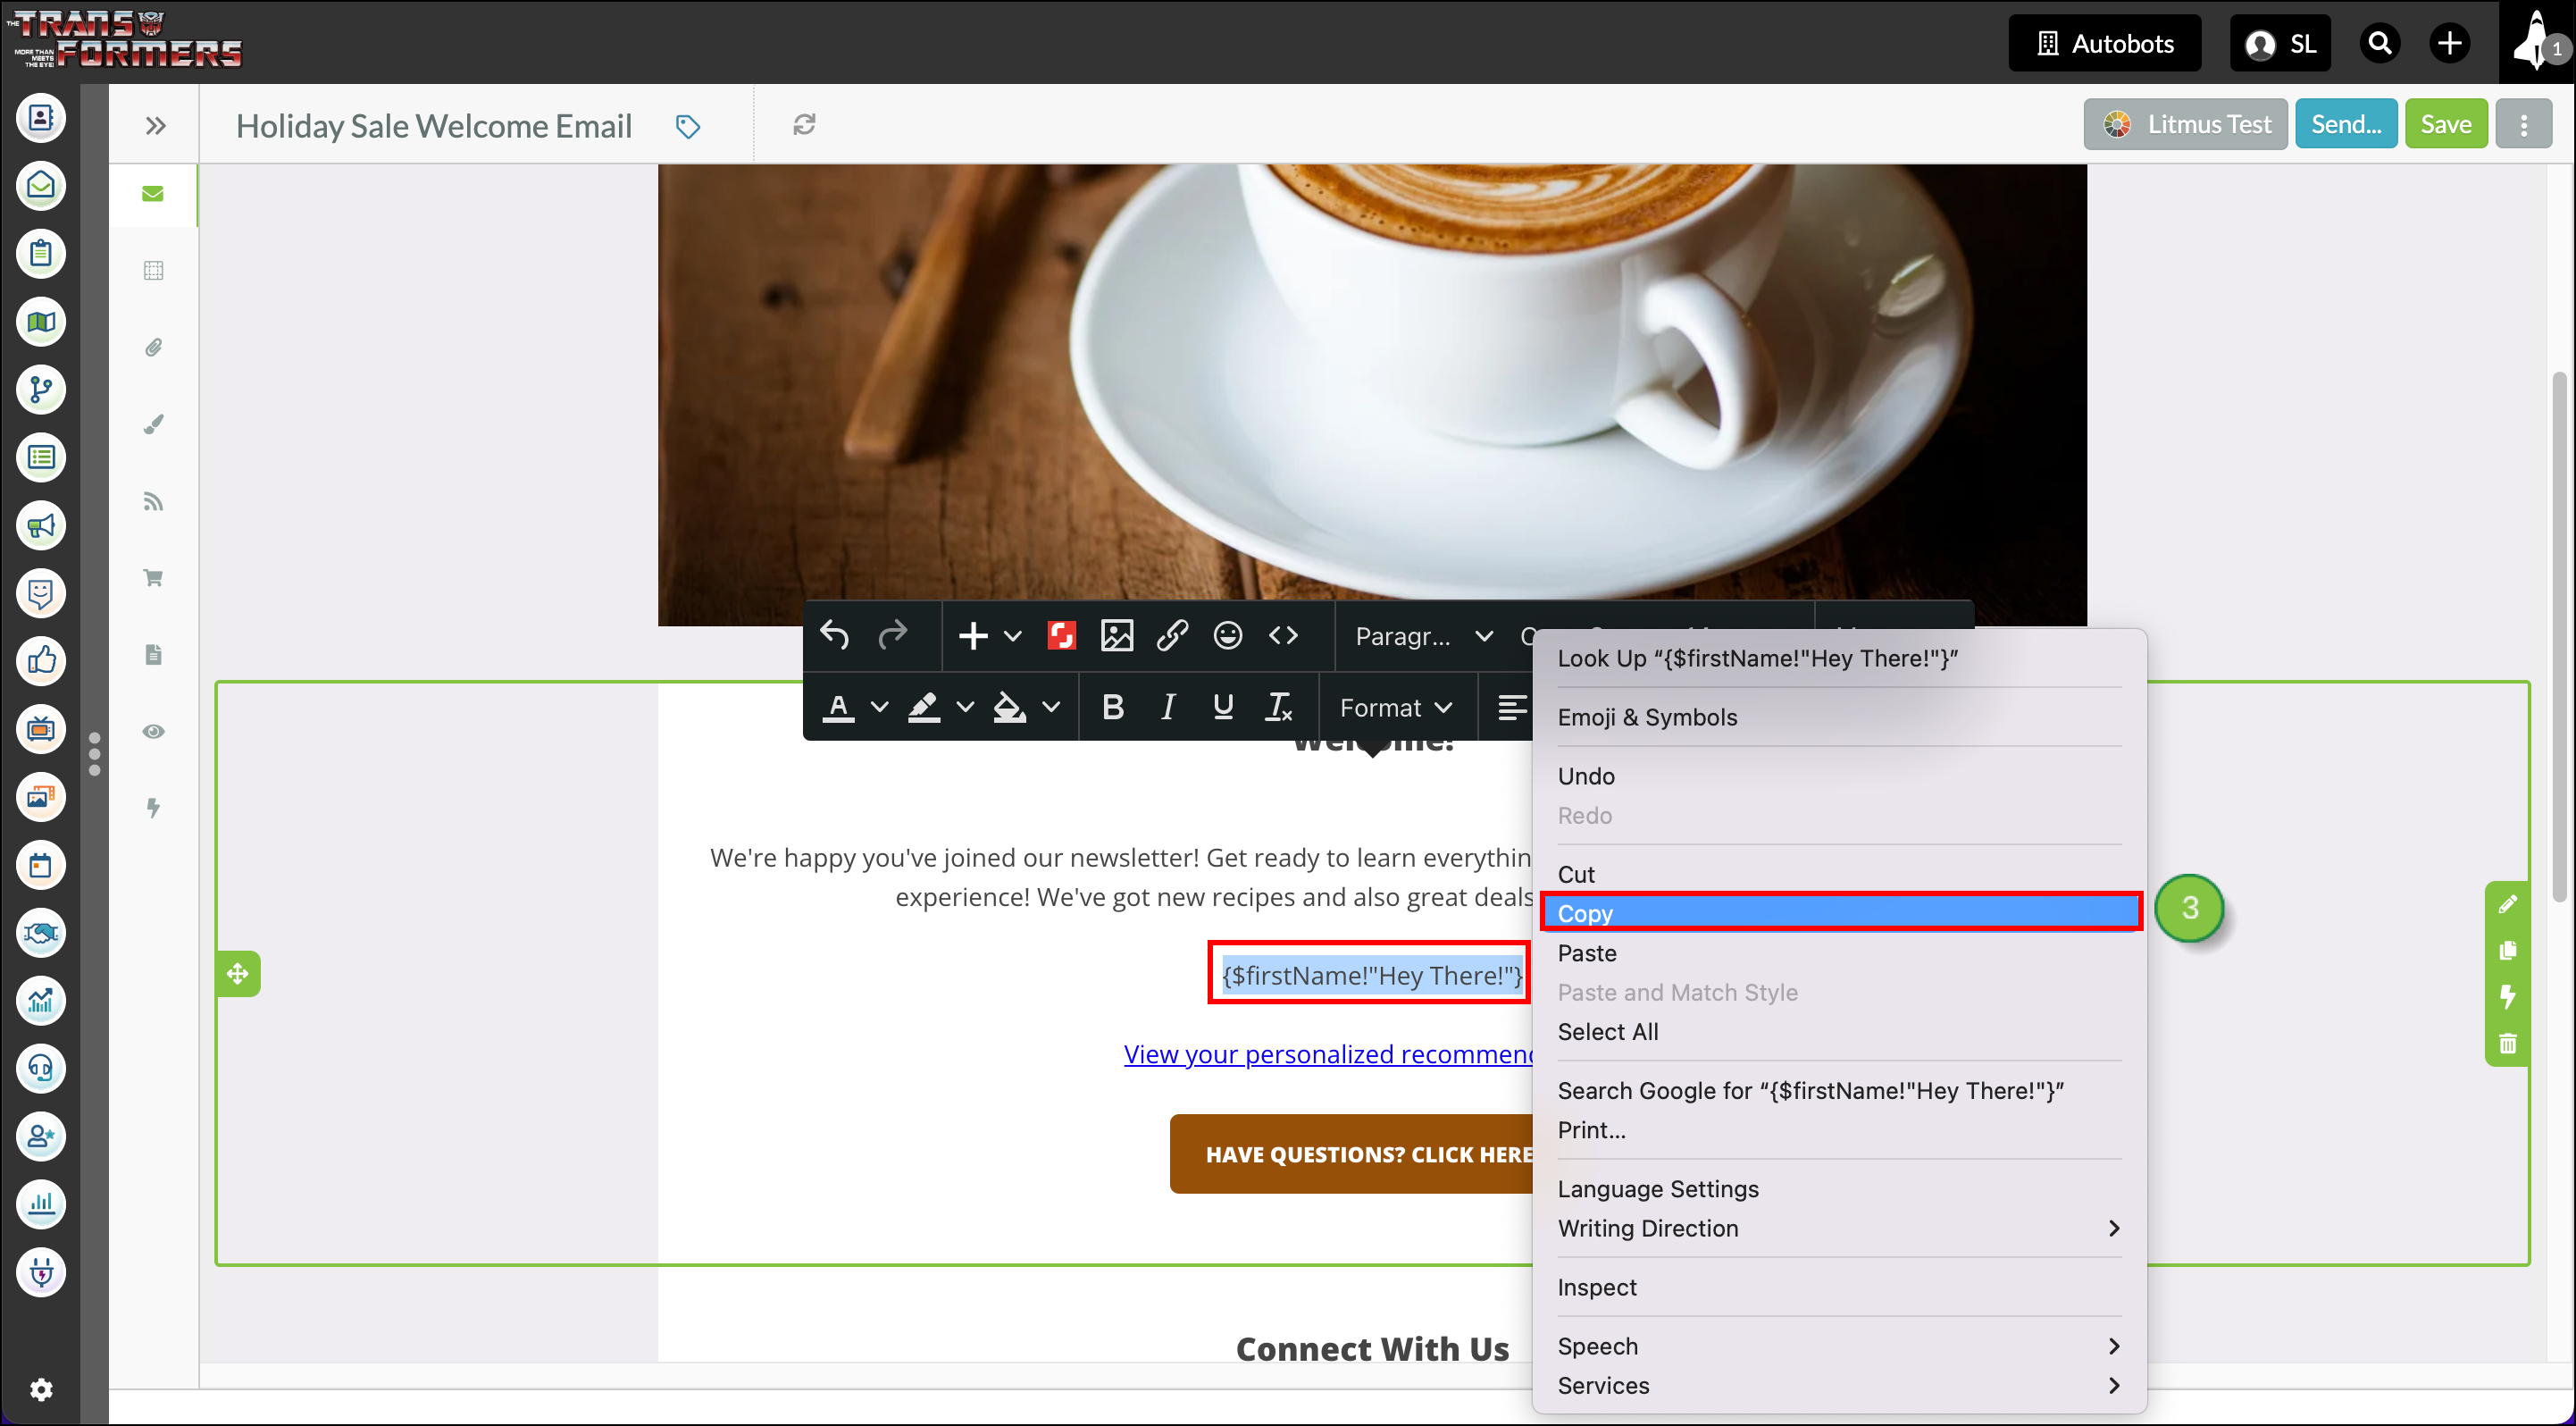
You can add merge variables to emails.

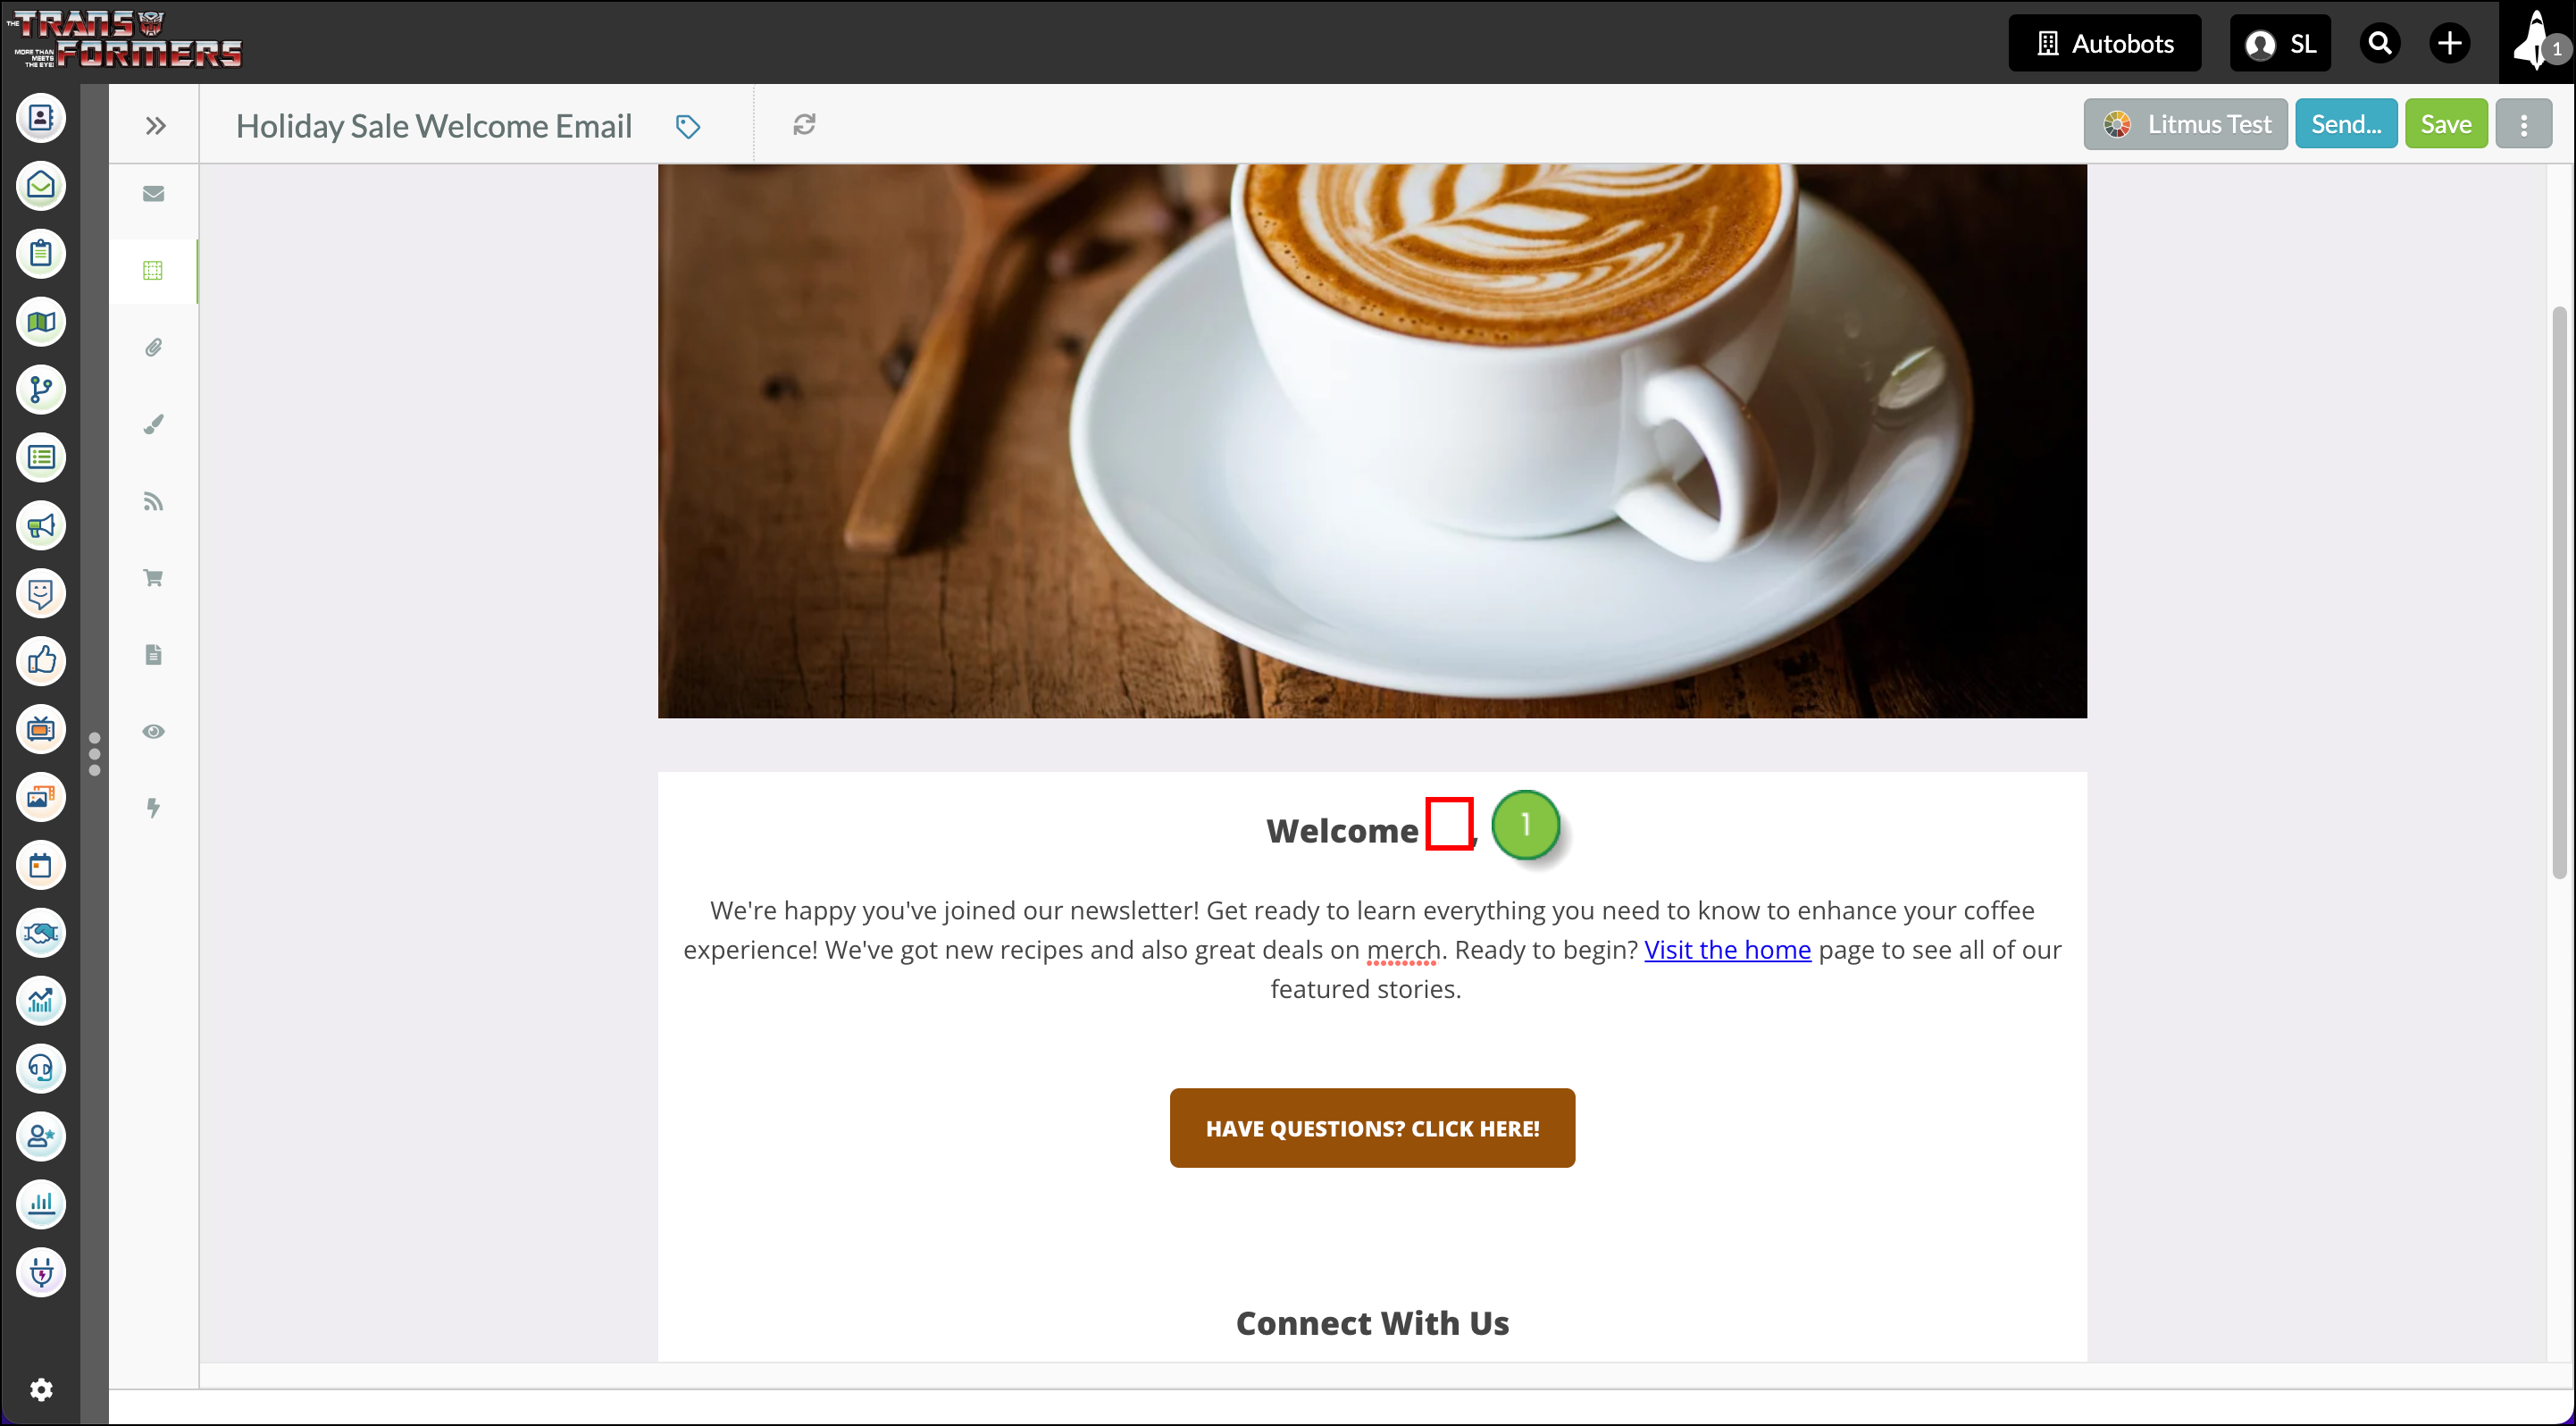
To add merge variables, create or edit an email from the Email tab in the left toolbar. 

  1. Click into the email, where the merge variable should be located. 

    Click in the email


  2. Click the Merge drop-down menu in the Content Editor toolbar that appears.
  3. Select the desired merge variable from the available merge fields.

    Click Merge dropdown and select variable


  4. Enter the placeholder text in the Default (optional) field. If the Lead Gen & CRM platform is unable to pull the recipient's unique data to personalize the email, the default text will appear instead. 
     
    Note: Unsubscribe Fields and Global Merge Variables do not use a default field.
     
    Important: When entering your default text, do not use the following characters in the same lines of an email as merge variables: #, ##, #*, $ Using those characters in the same line will break the merge variable.
     
  5. Click OK.

    Enter default text


  6. Click Save.

    Click Save


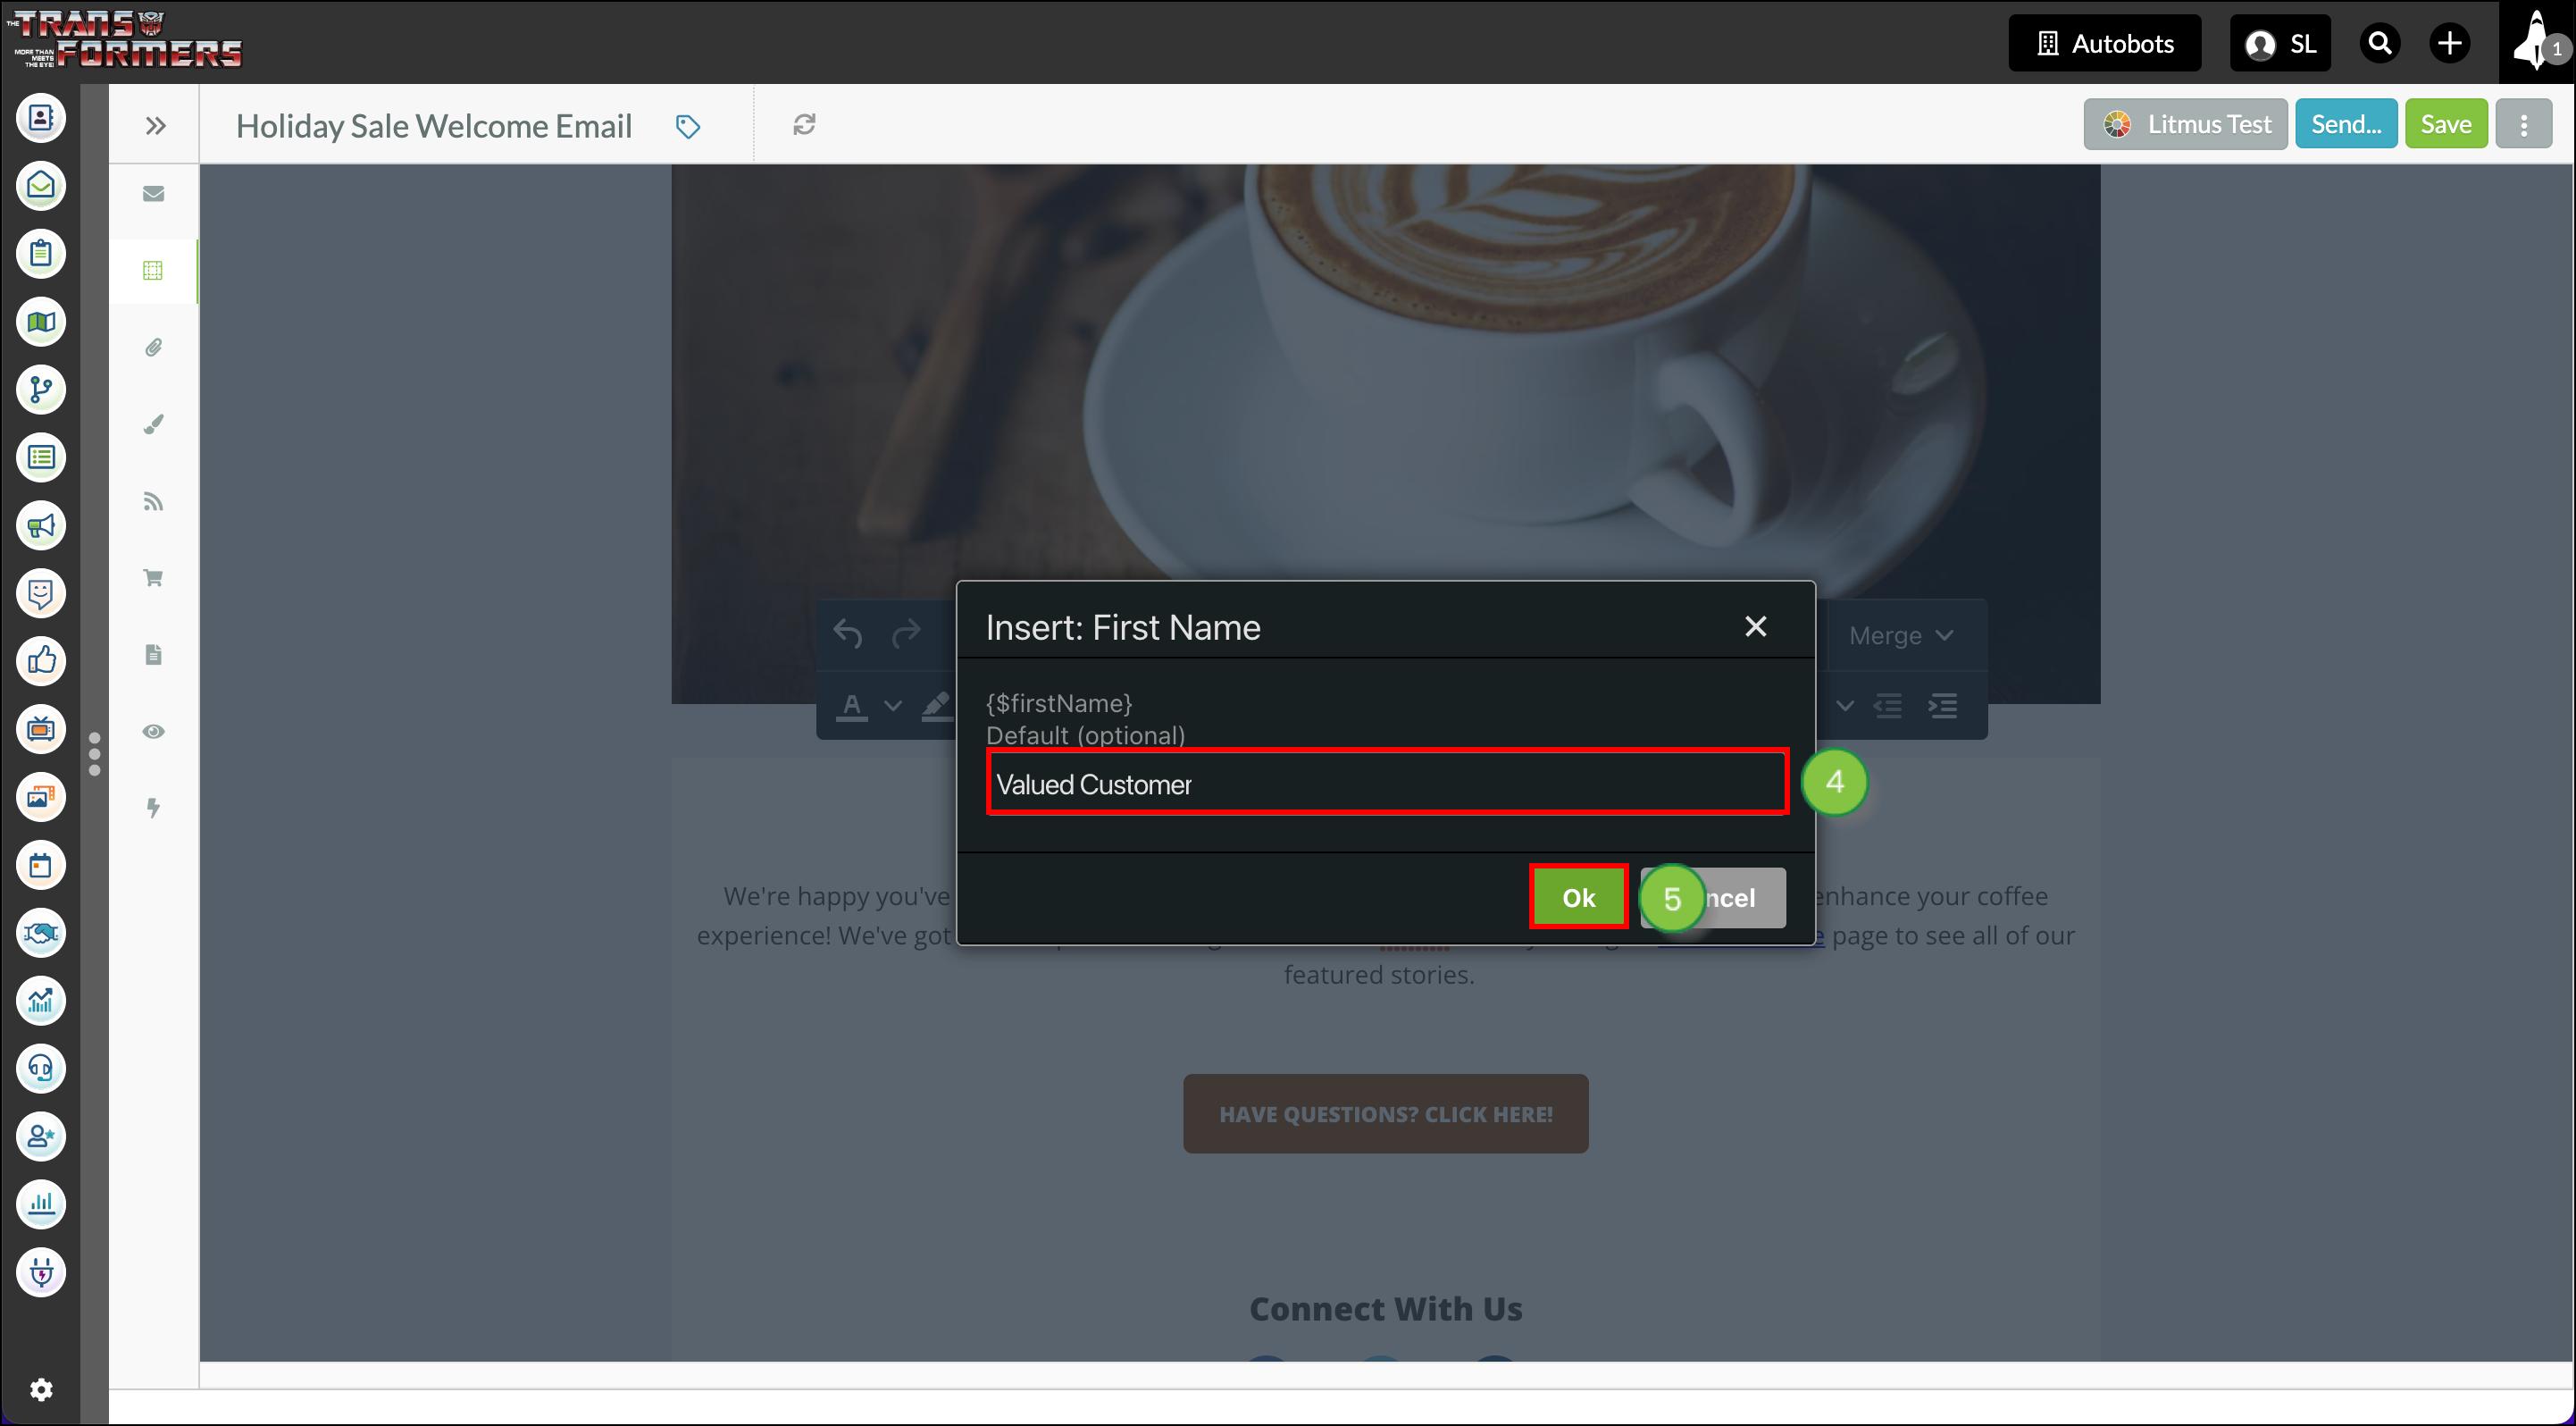
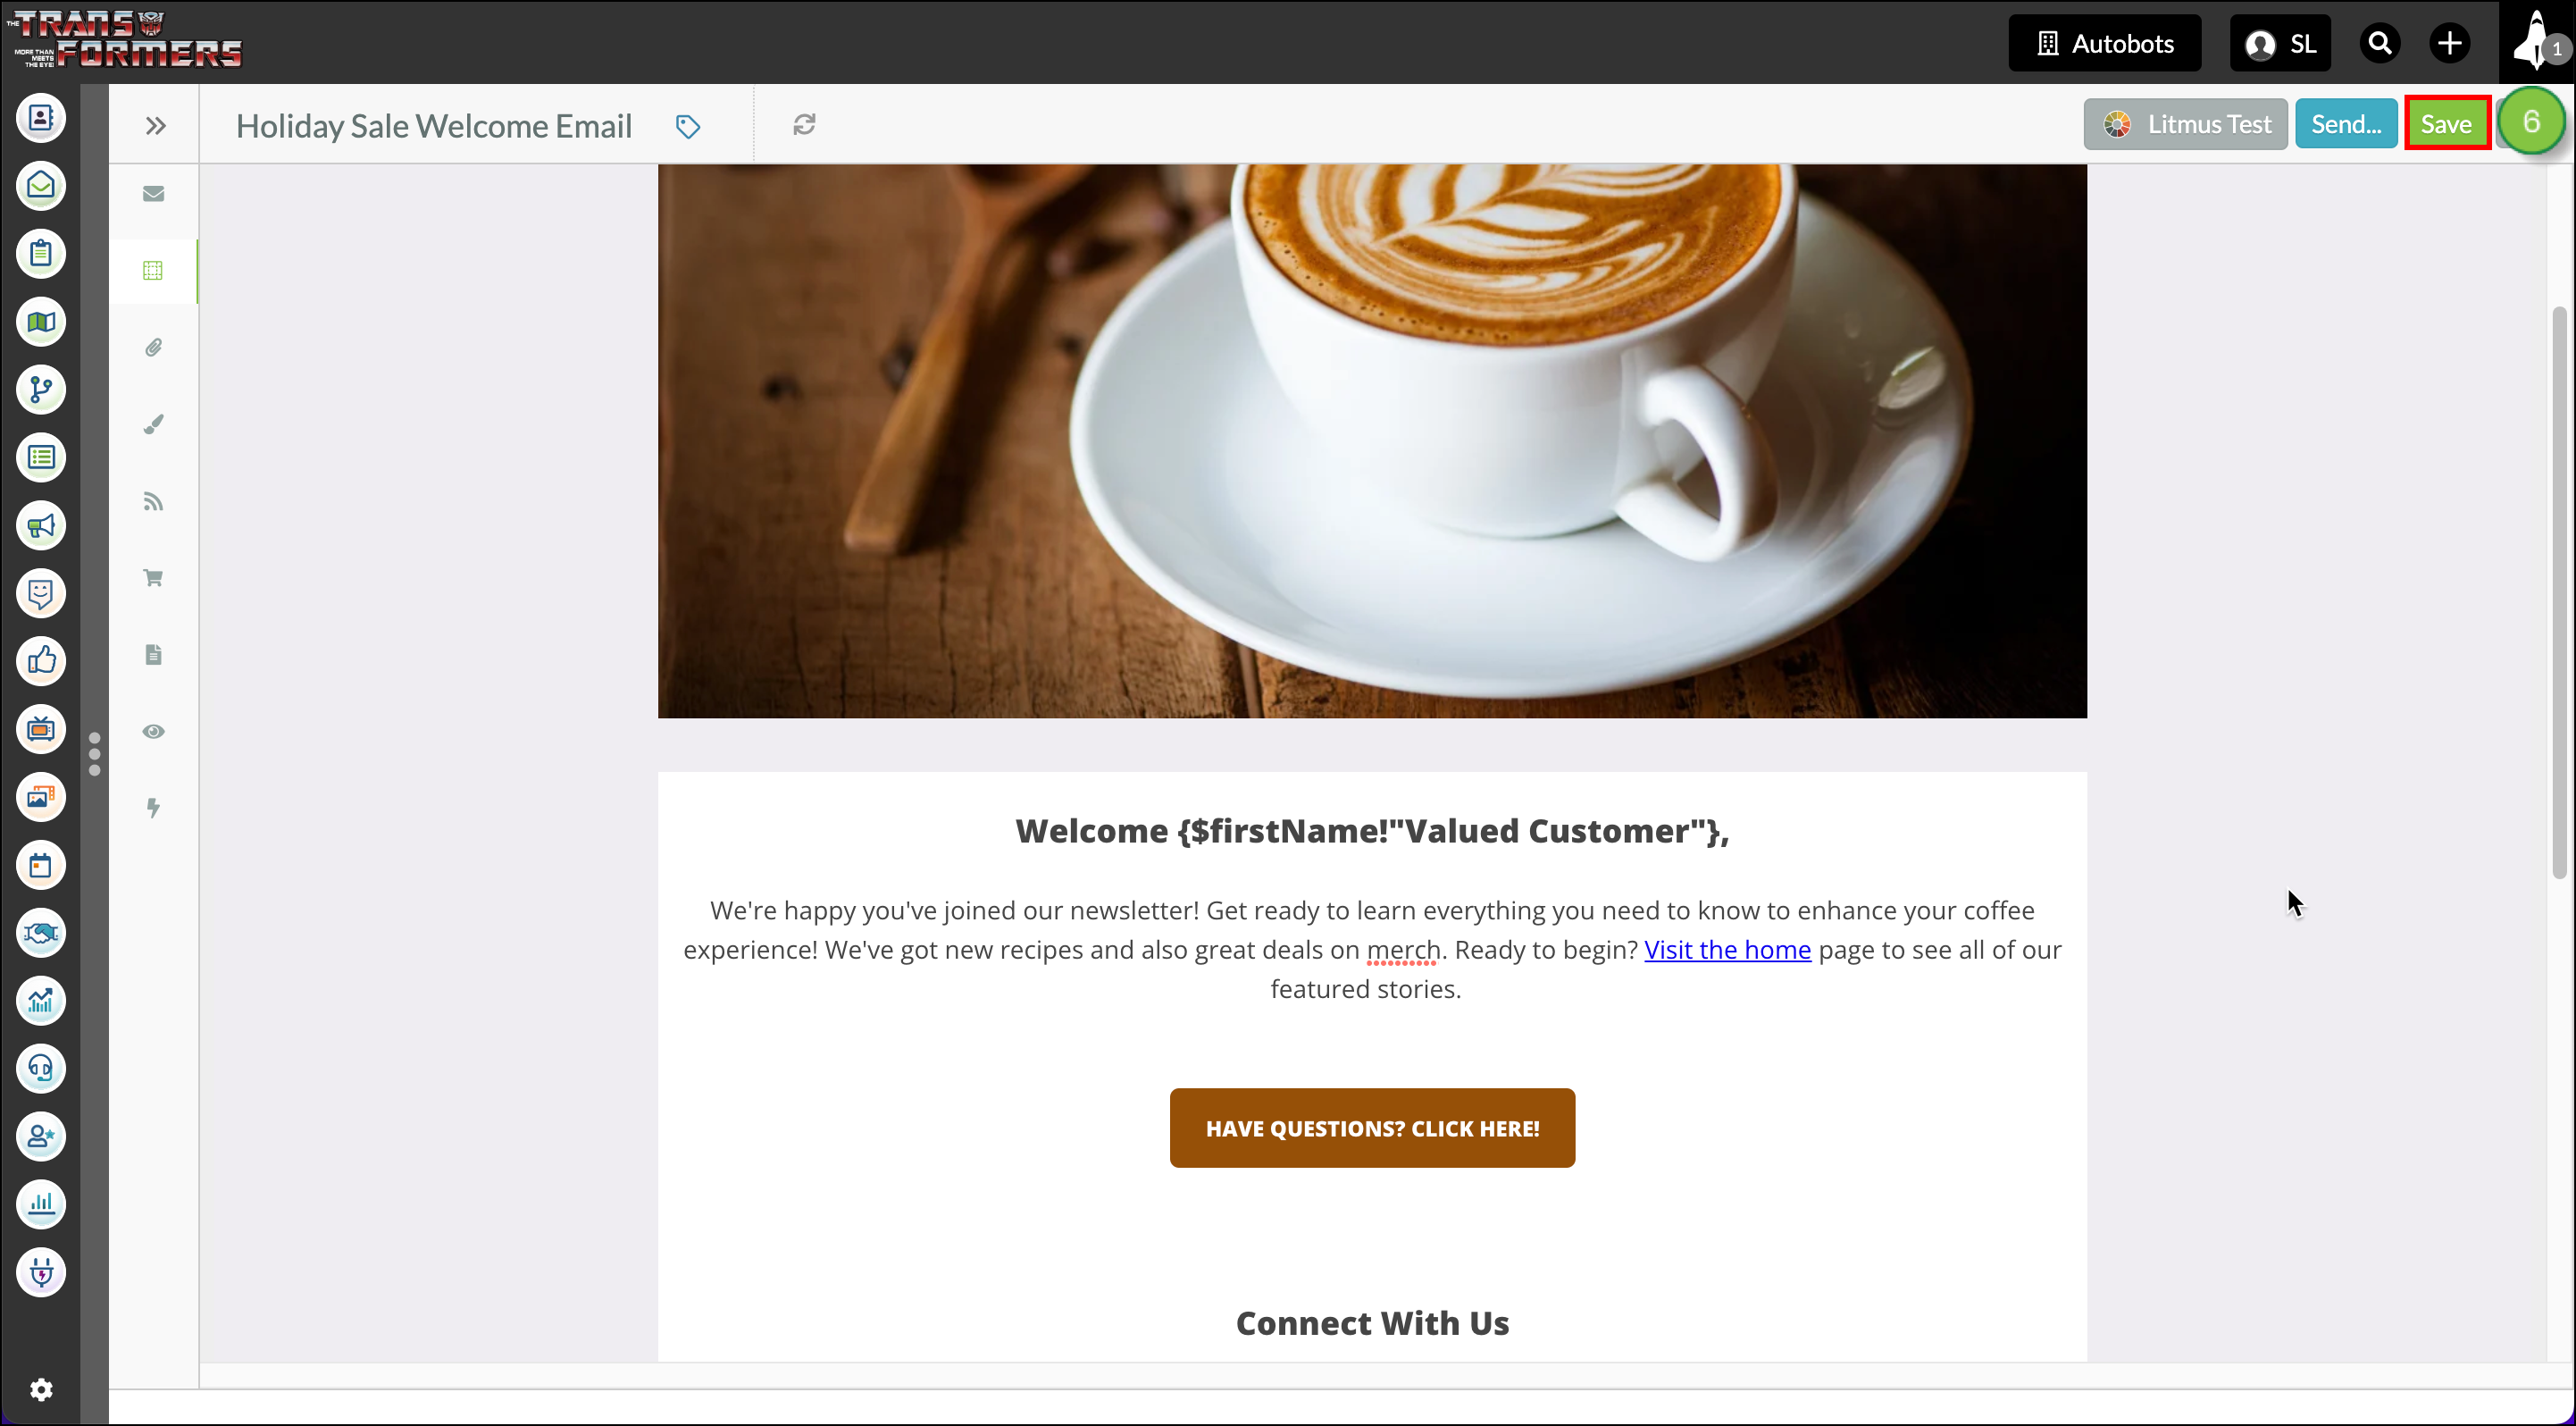
Optionally, after adding a merge variable, you can send the email as a Smart Mail to your own lead record to see how the variables look in the email. Preview emails do not show populated merge variables.

Note: Unsubscribe addresses cannot be edited in emails. They can only be edited in the Company Profile.


Available Merge Fields

The merge fields available for use in emails are as follows

Field Description

Custom
Fields


The available list of created custom fields.

Recipient
Fields


These are fields dealing with a recipient's personal information.

Lead Owner
Fields


Name, phone number, and email information fields for the lead
owner. 

Unsubscribe
Fields


Unsubscribe links.

Link Merge
Variables


View in browser link. 

Global Merge
Variables


Variables that apply across any email, like the From Address.
Miscellaneous


Other assorted fields, including the number of bounces and the
date.


Using Merge Variables for Customized URLs

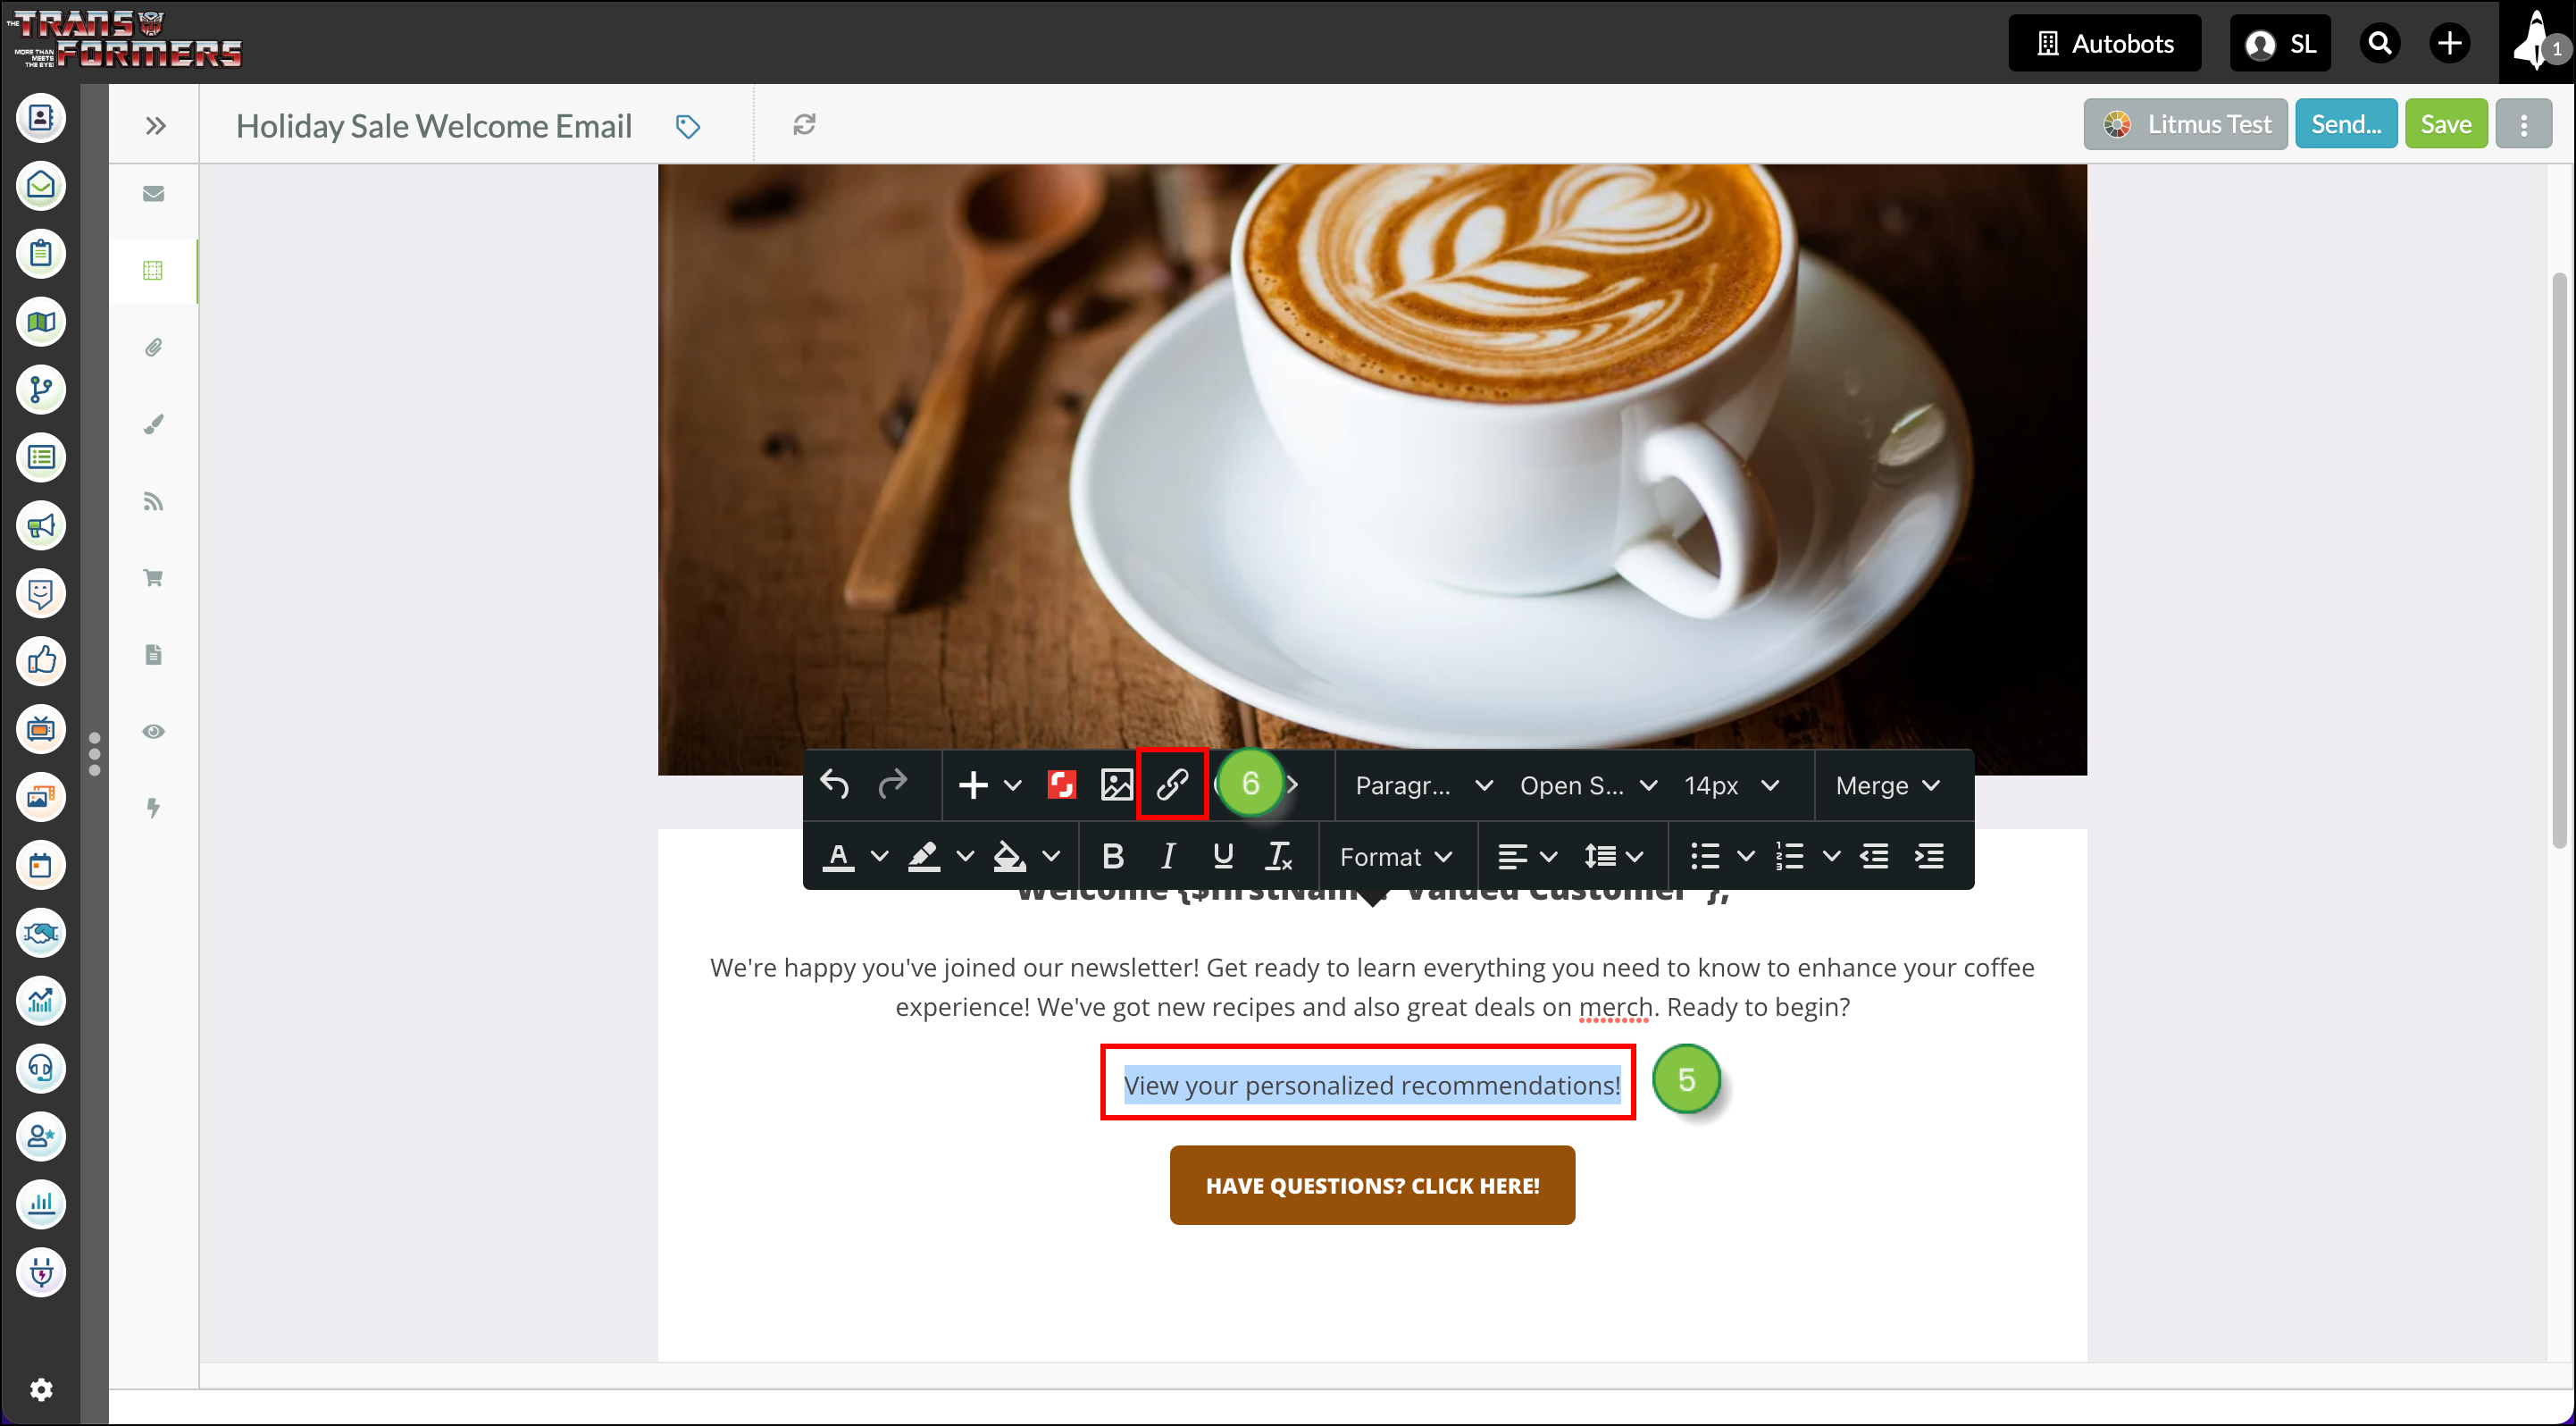
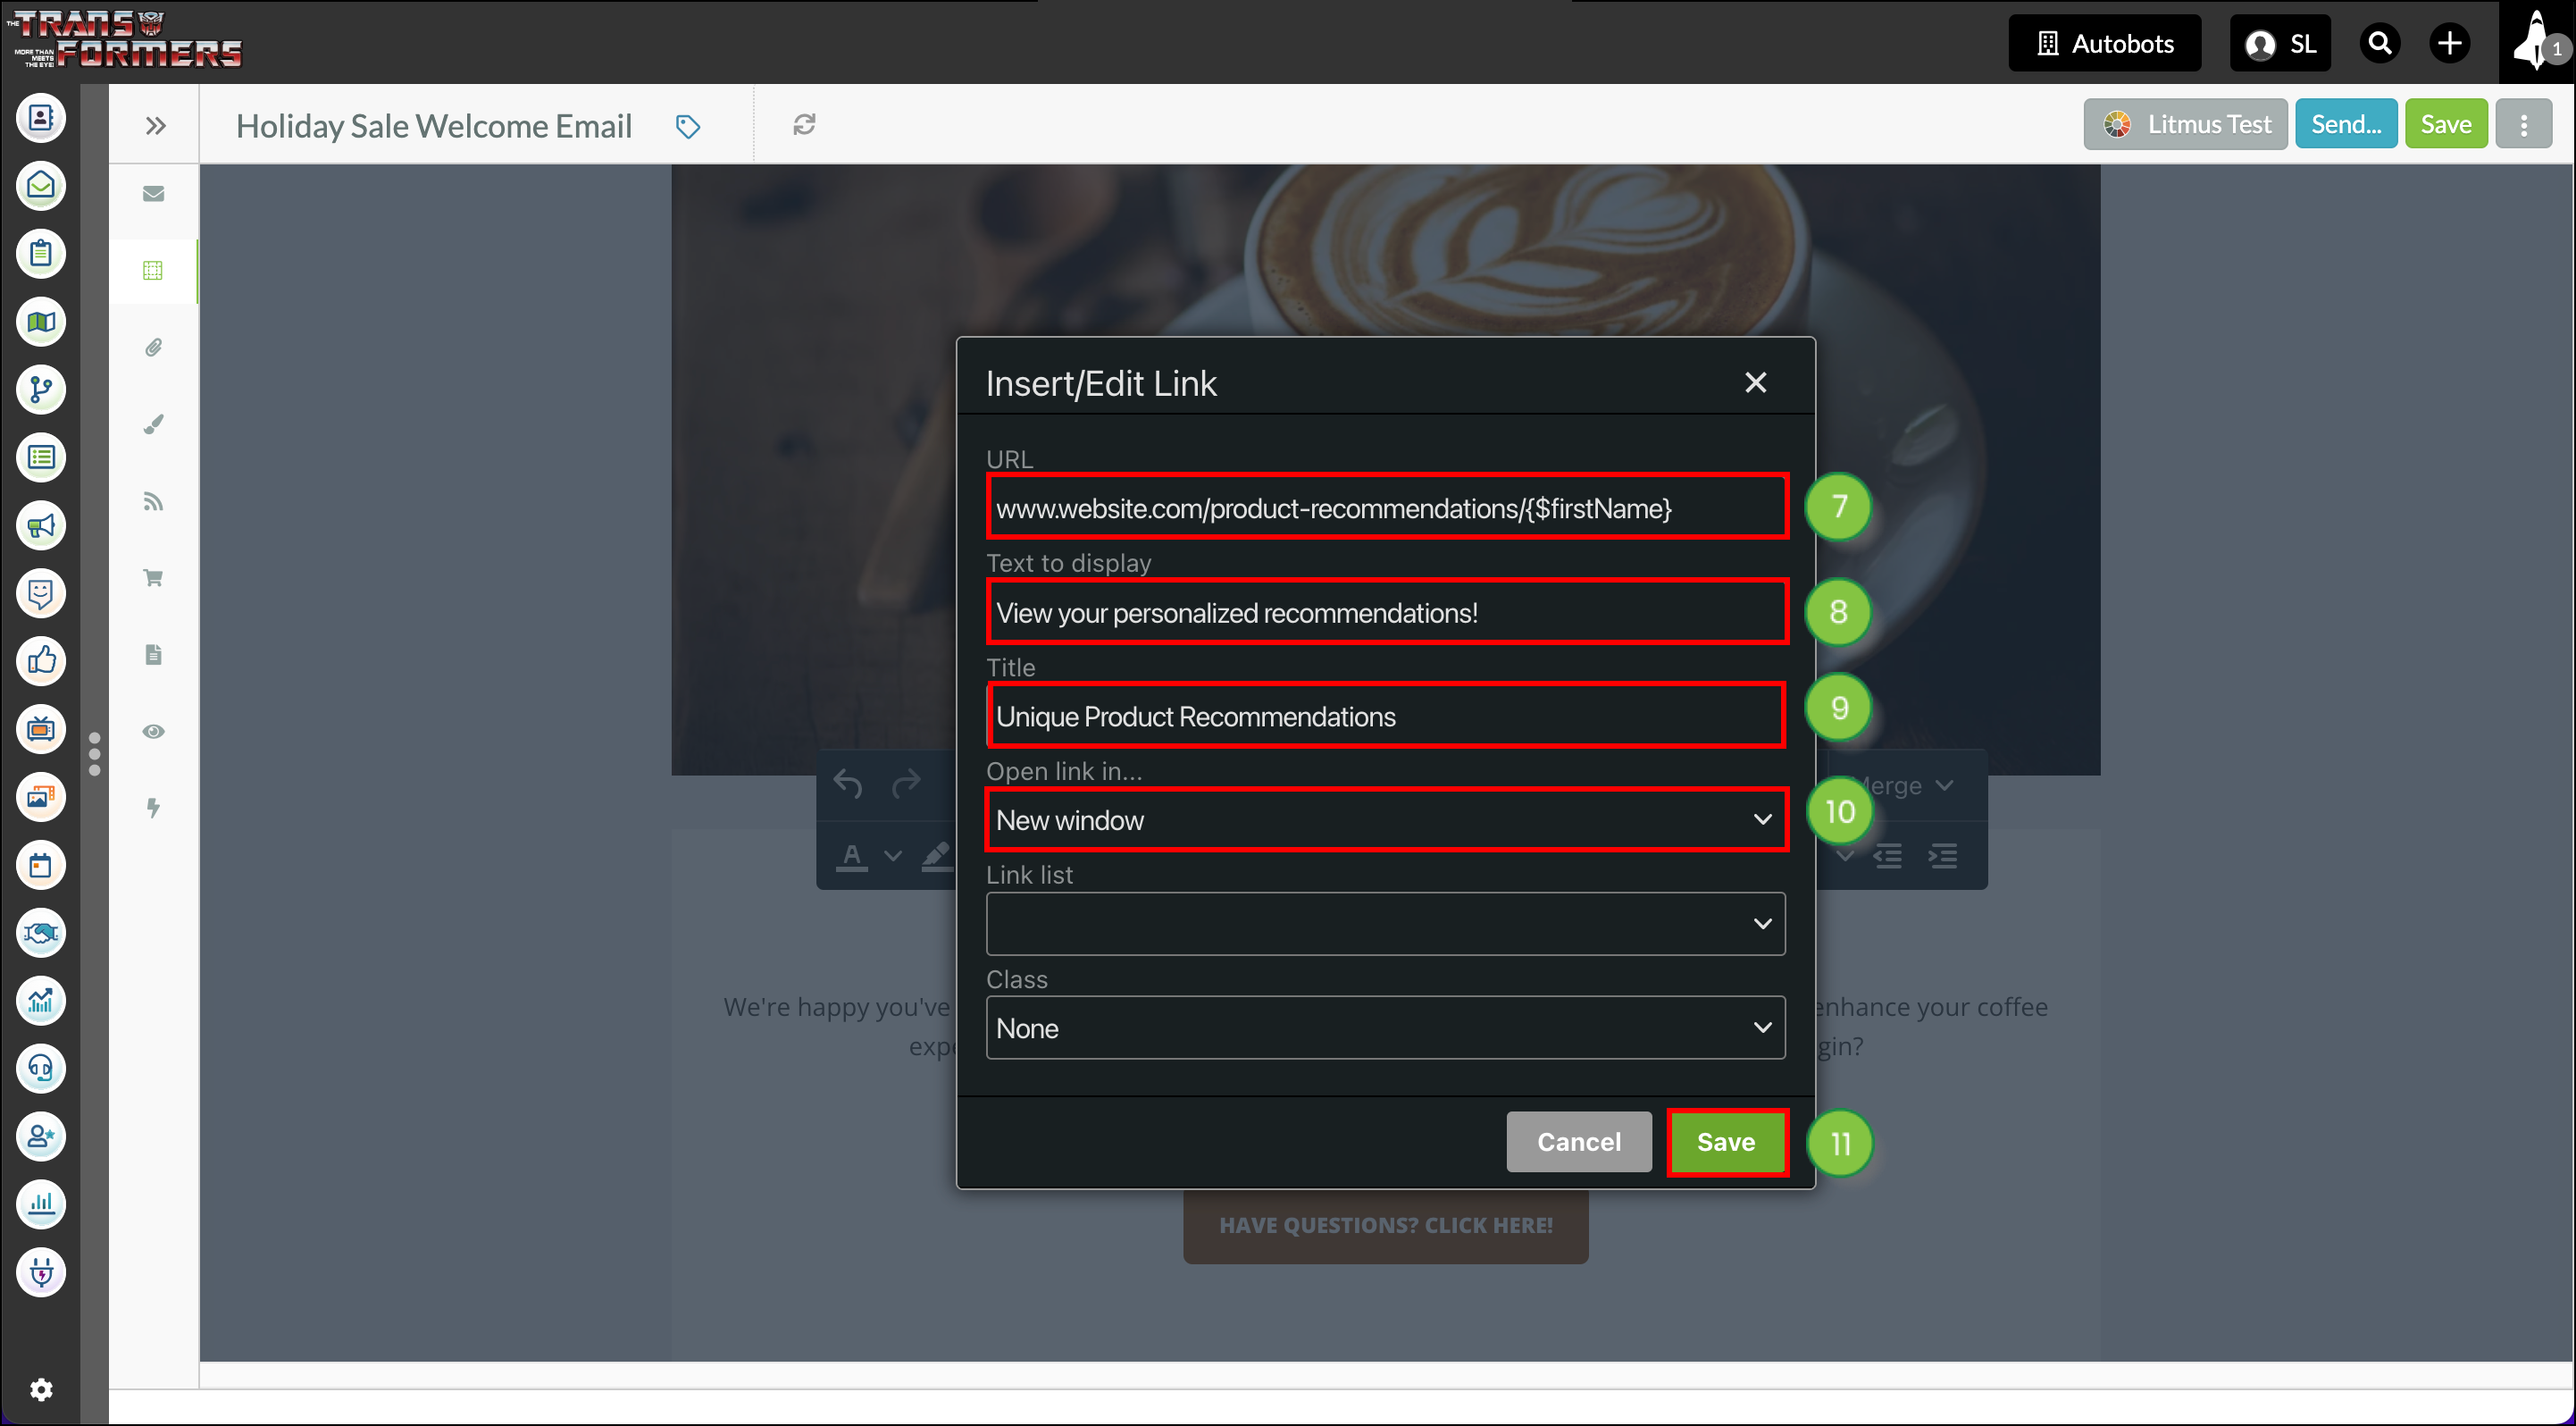
You can create customized URLs by using merge variables in a link, within your email. As an example, if your URL is https://mysite.com, and you want the customized URL to say https://mysite.com/Gregg, then you will want to add https://mysite.com/{$firstName} to the Text to Display box.

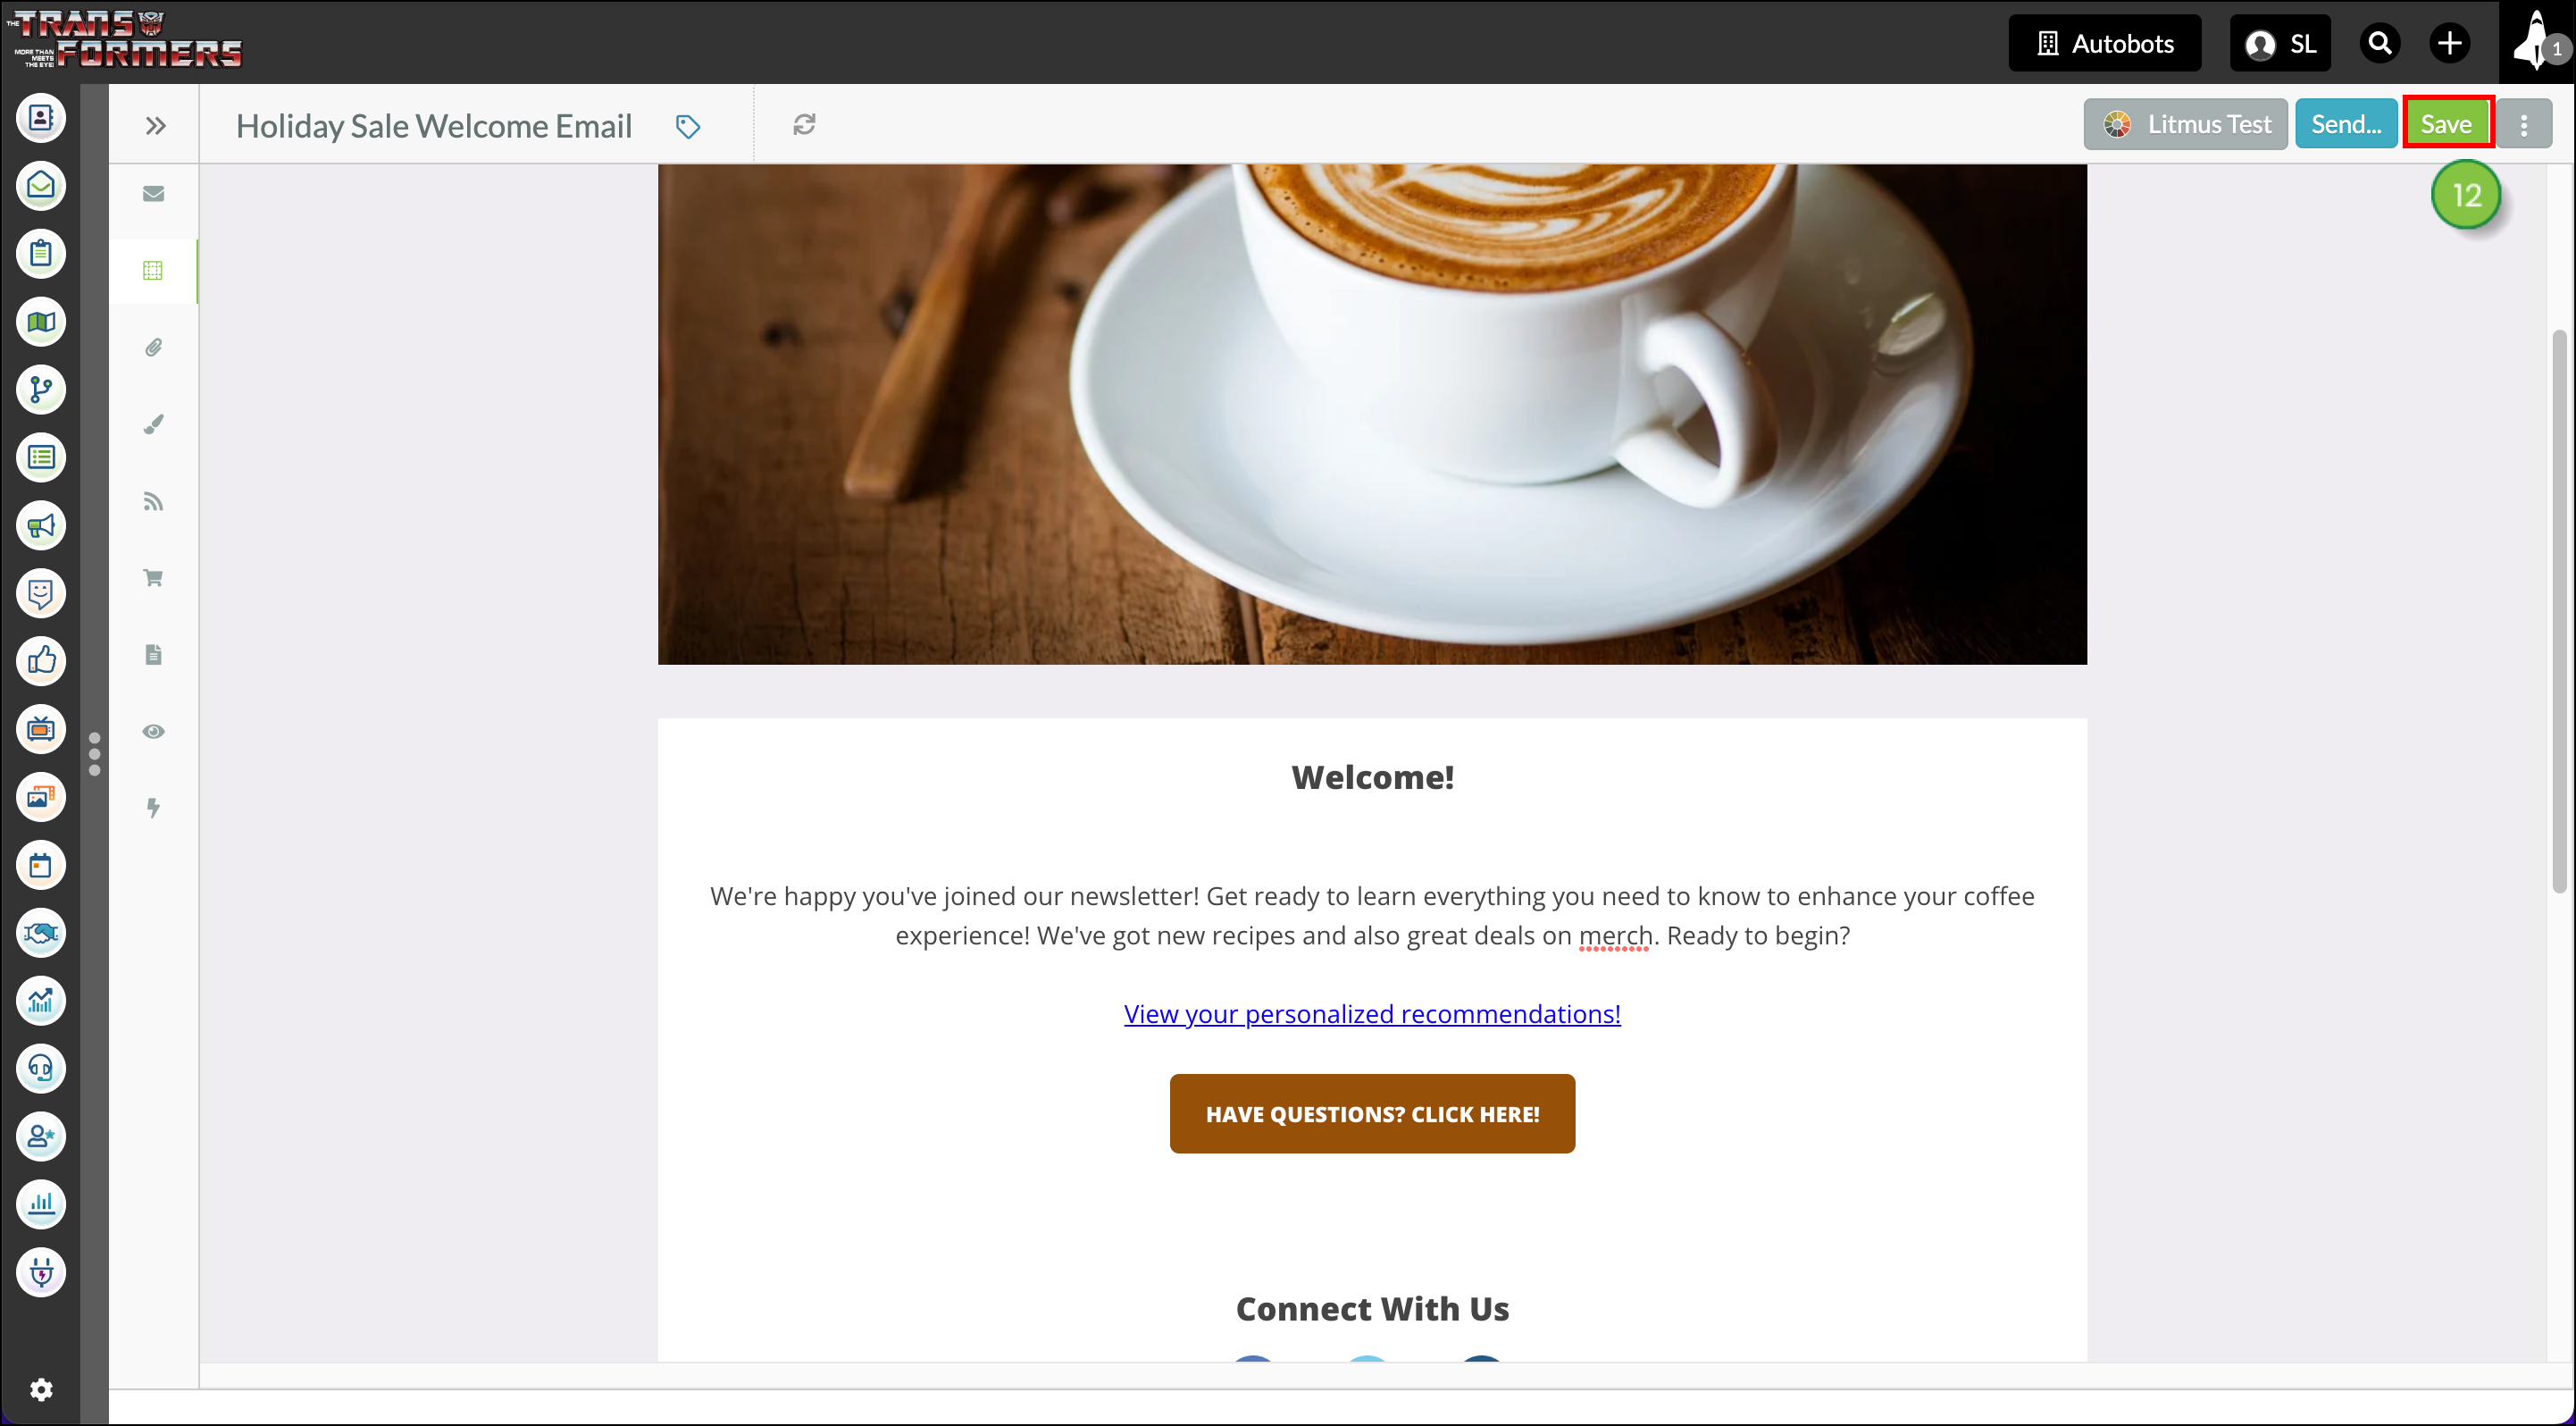
To use merge variables for custom URLs, create or edit an email from the Email page in the left toolbar. 

  1. Click anywhere into the email and click the Merge drop-down menu in the Content Editor toolbar that appears.
  2. Hover over the desired merge categories.
  3. Select the desired merge variable from the available categories.

    Click the merge dropdown menu and get the merge variable you need


  4. Copy the variable code that appears, then, remove it from the email.

    Copy the merge variable


  5. Double-click the text of the email that you would like to turn into a link. 
  6. Click the Link icon in the Content Editor toolbar that appears.

    Click on Link in the toolbar


  7. Enter your desired URL in the URL text box and paste the variable. 
  8. If needed, edit the text to be displayed in the Text to Display box. 
  9. If needed, add a link title. This can help with SEO. 
  10. Decide if the link should open a new window or open the link in the same window. 
  11. Click Save.

    Manage link details and display text


  12. Click Save again.

    Save email


Note: You can see how the links look in the finalized email by sending the email to a test list that includes your email address.


Customizing Unsubscribe Link Text

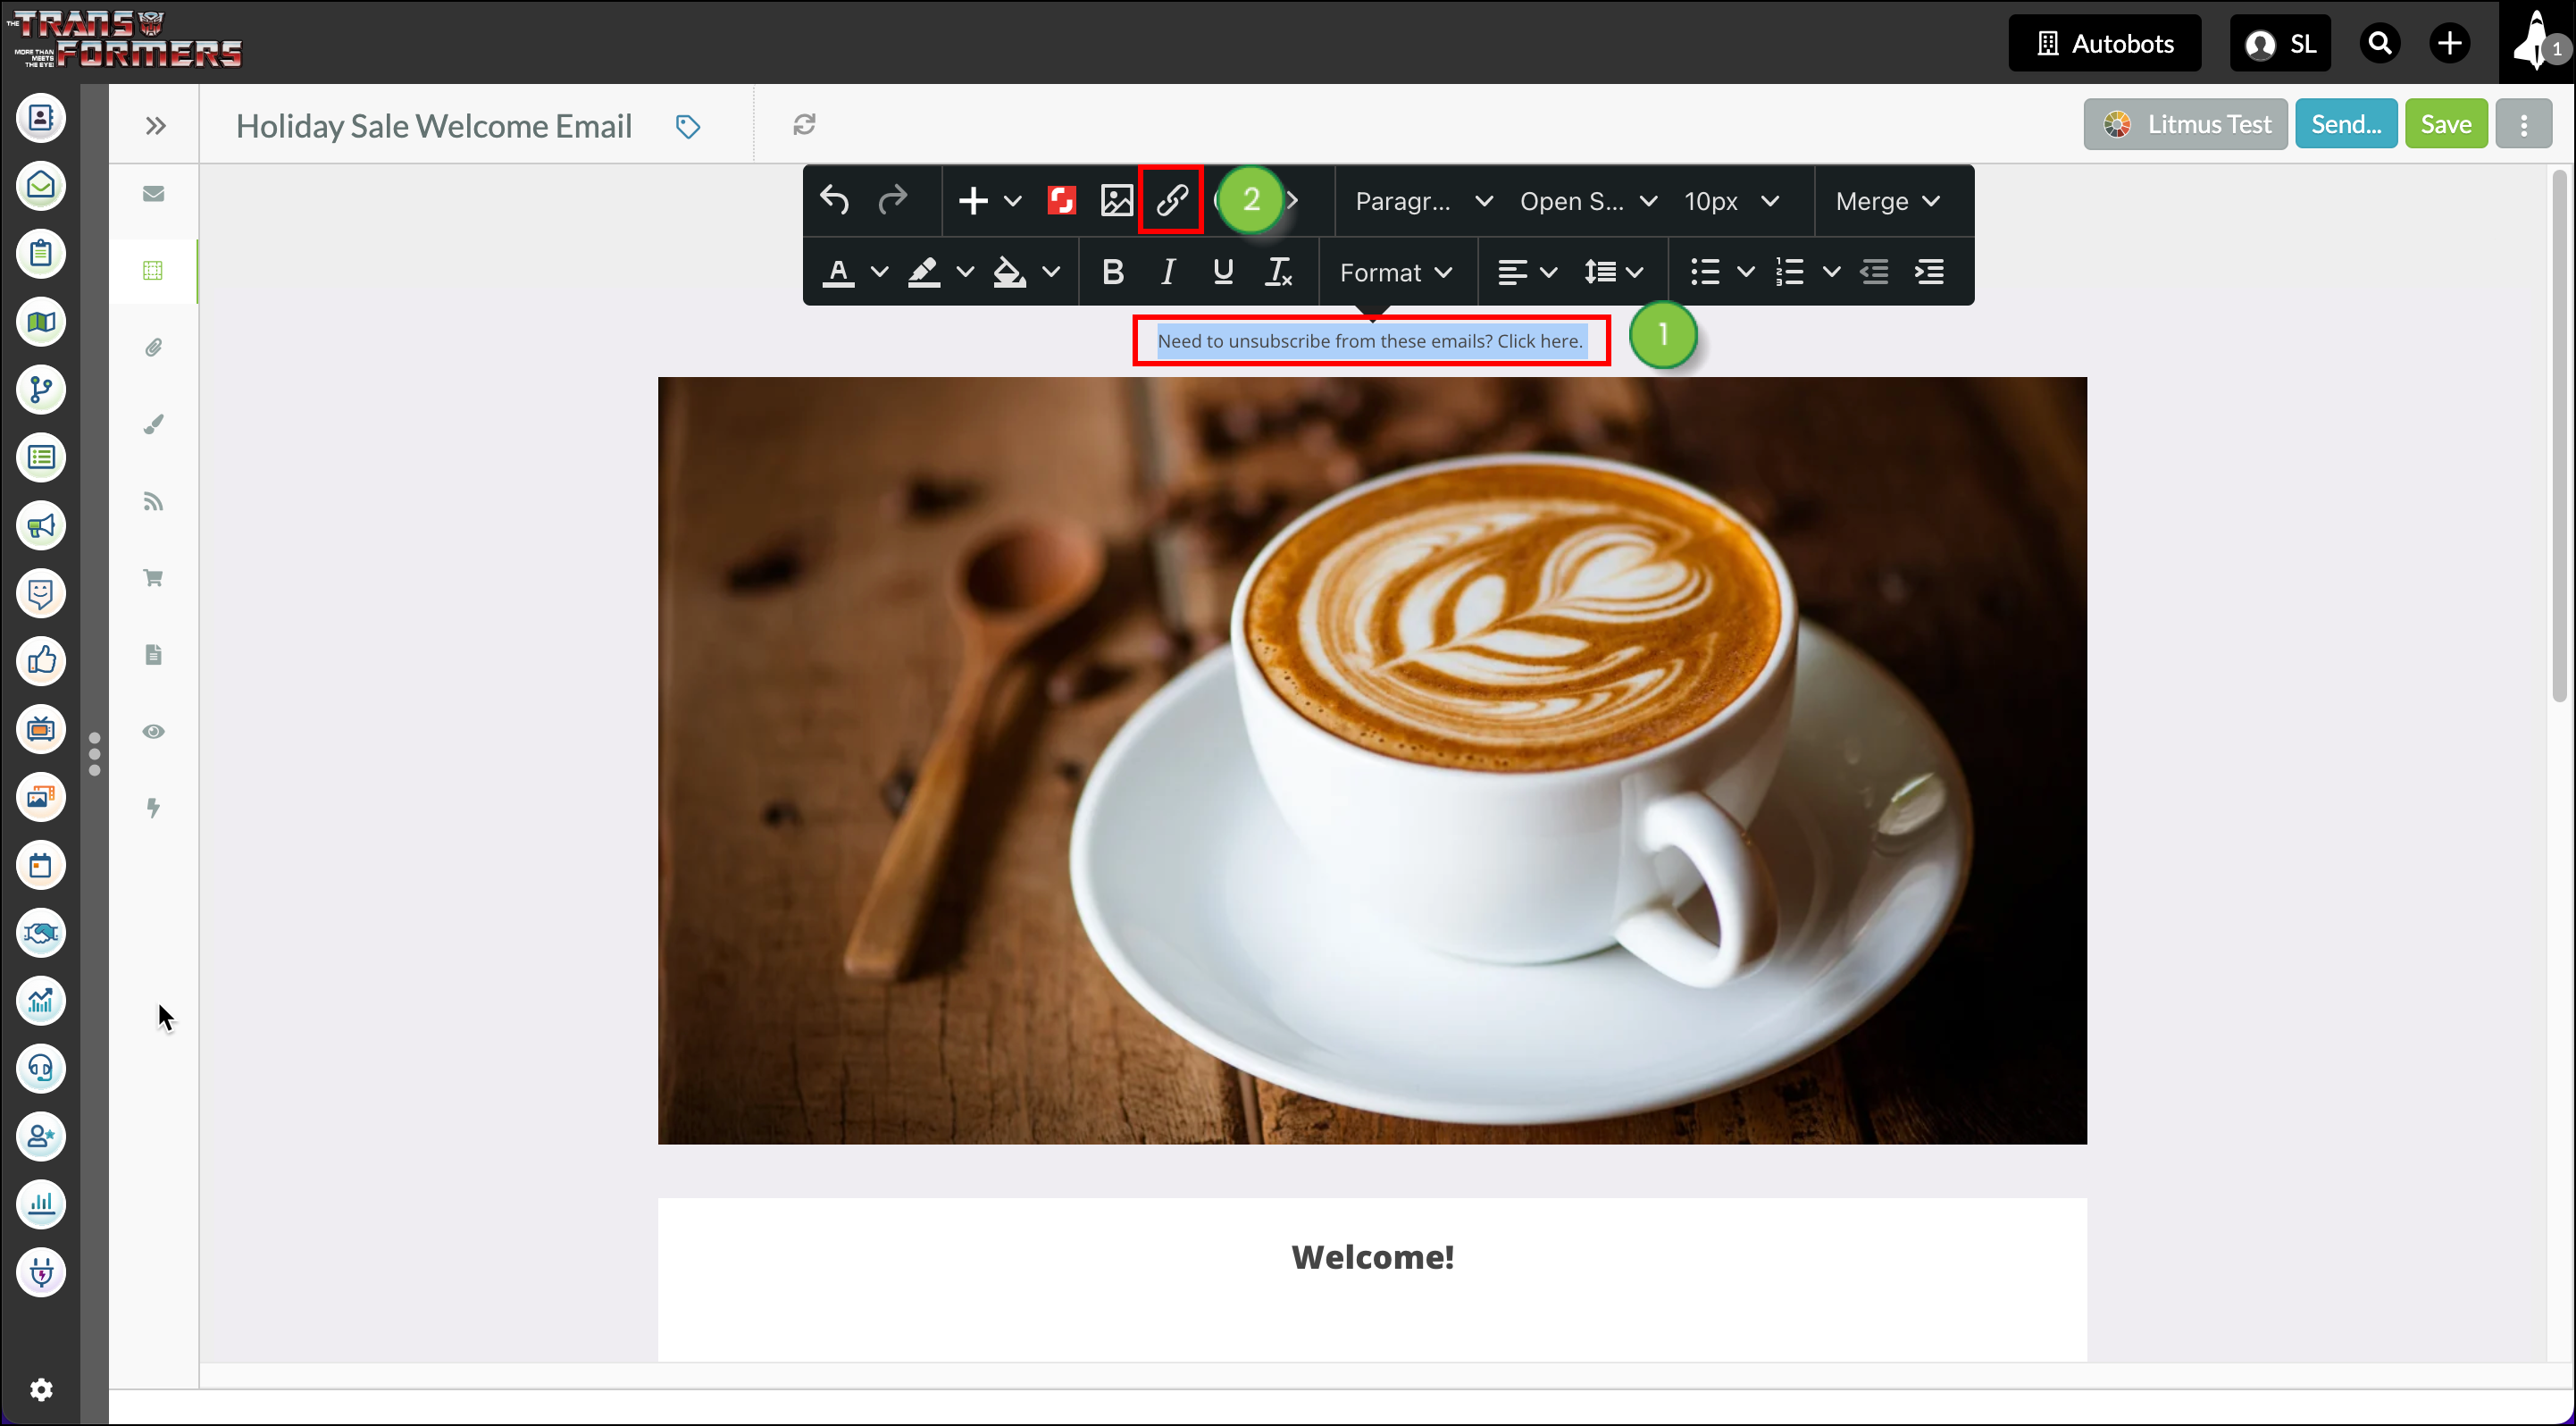
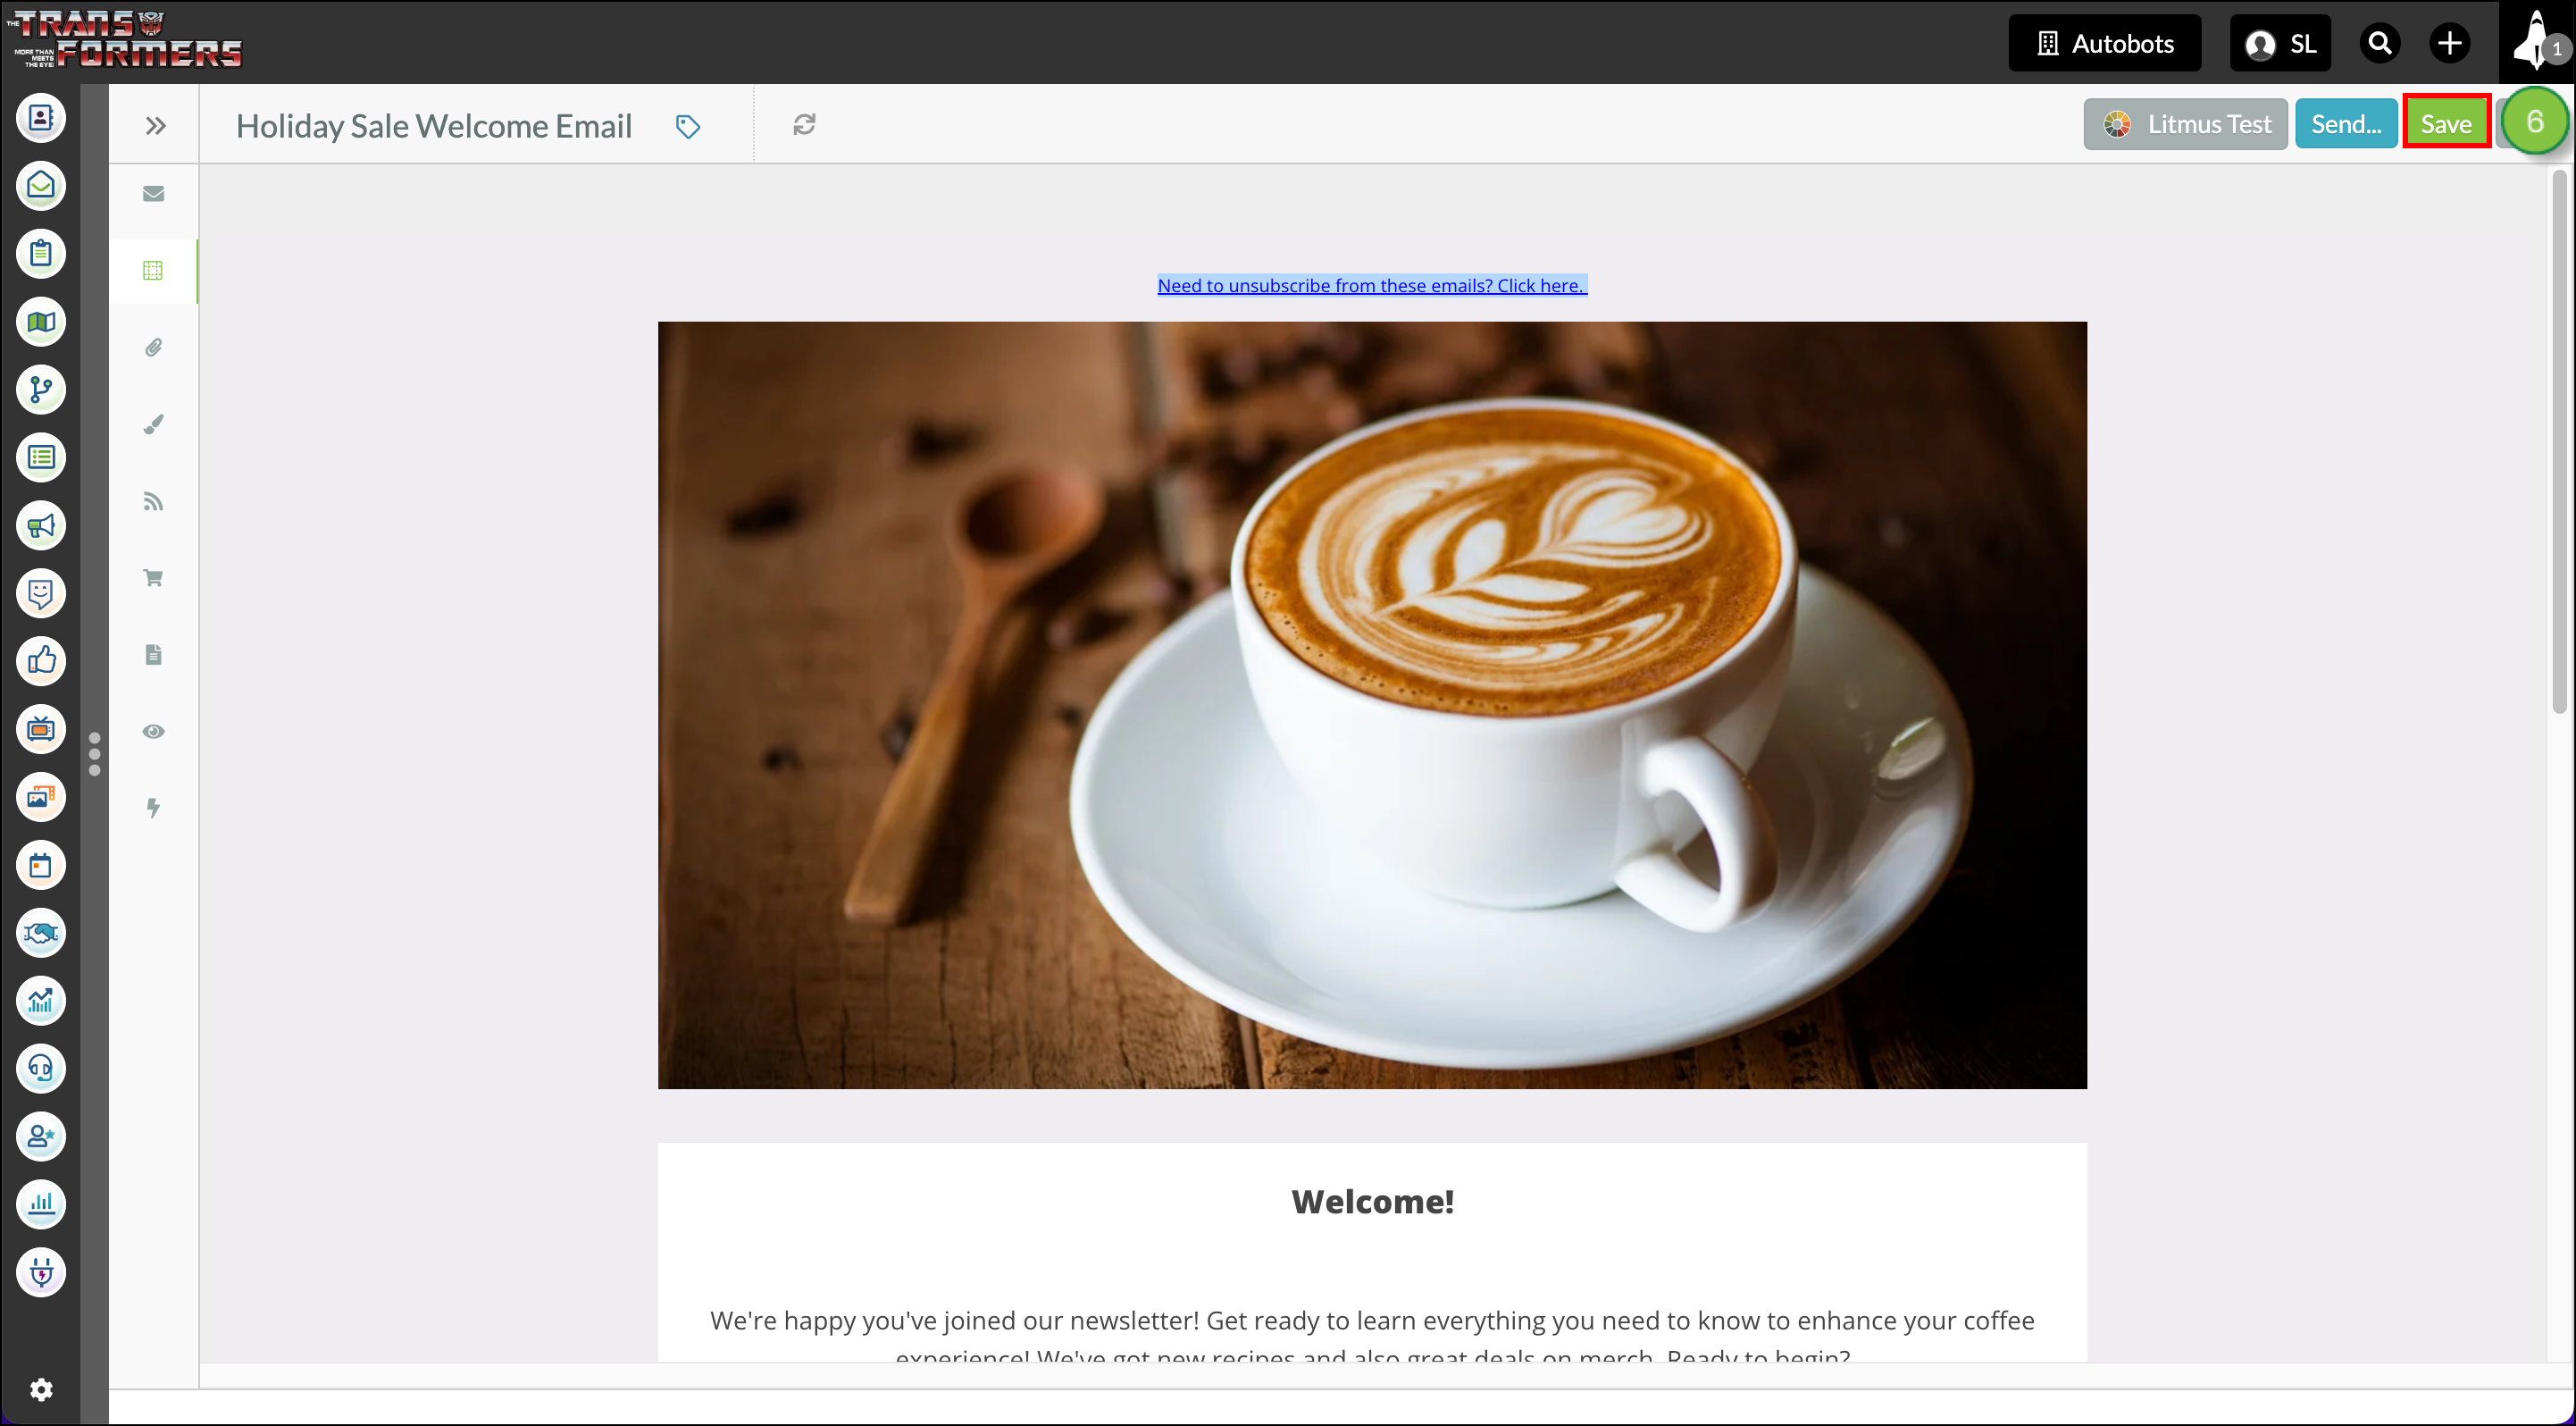
You can customize unsubscribe link text for a more personalized touch.

To customize unsubscribe link text, create or edit an email from the Email page in the left toolbar. 

  1. Click into a text block within the email. 
  2. Click the Link icon in the formatting toolbar.

    Click into the text in the email and click link in the toolbar


  3. Copy and paste {$unsubscribeLink} in the URL field in the modal window that appears. This is the merge variable. 
  4. Make any needed edits to the Text to Display field.
     
    Important: Alterations to unsubscribe links that violate any anti-spam or informed consent law by attempting to obfuscate the unsubscribe option can result in immediate account termination.
  5. Click Save.

    Edit link details


  6. Click Save again.

    Save email


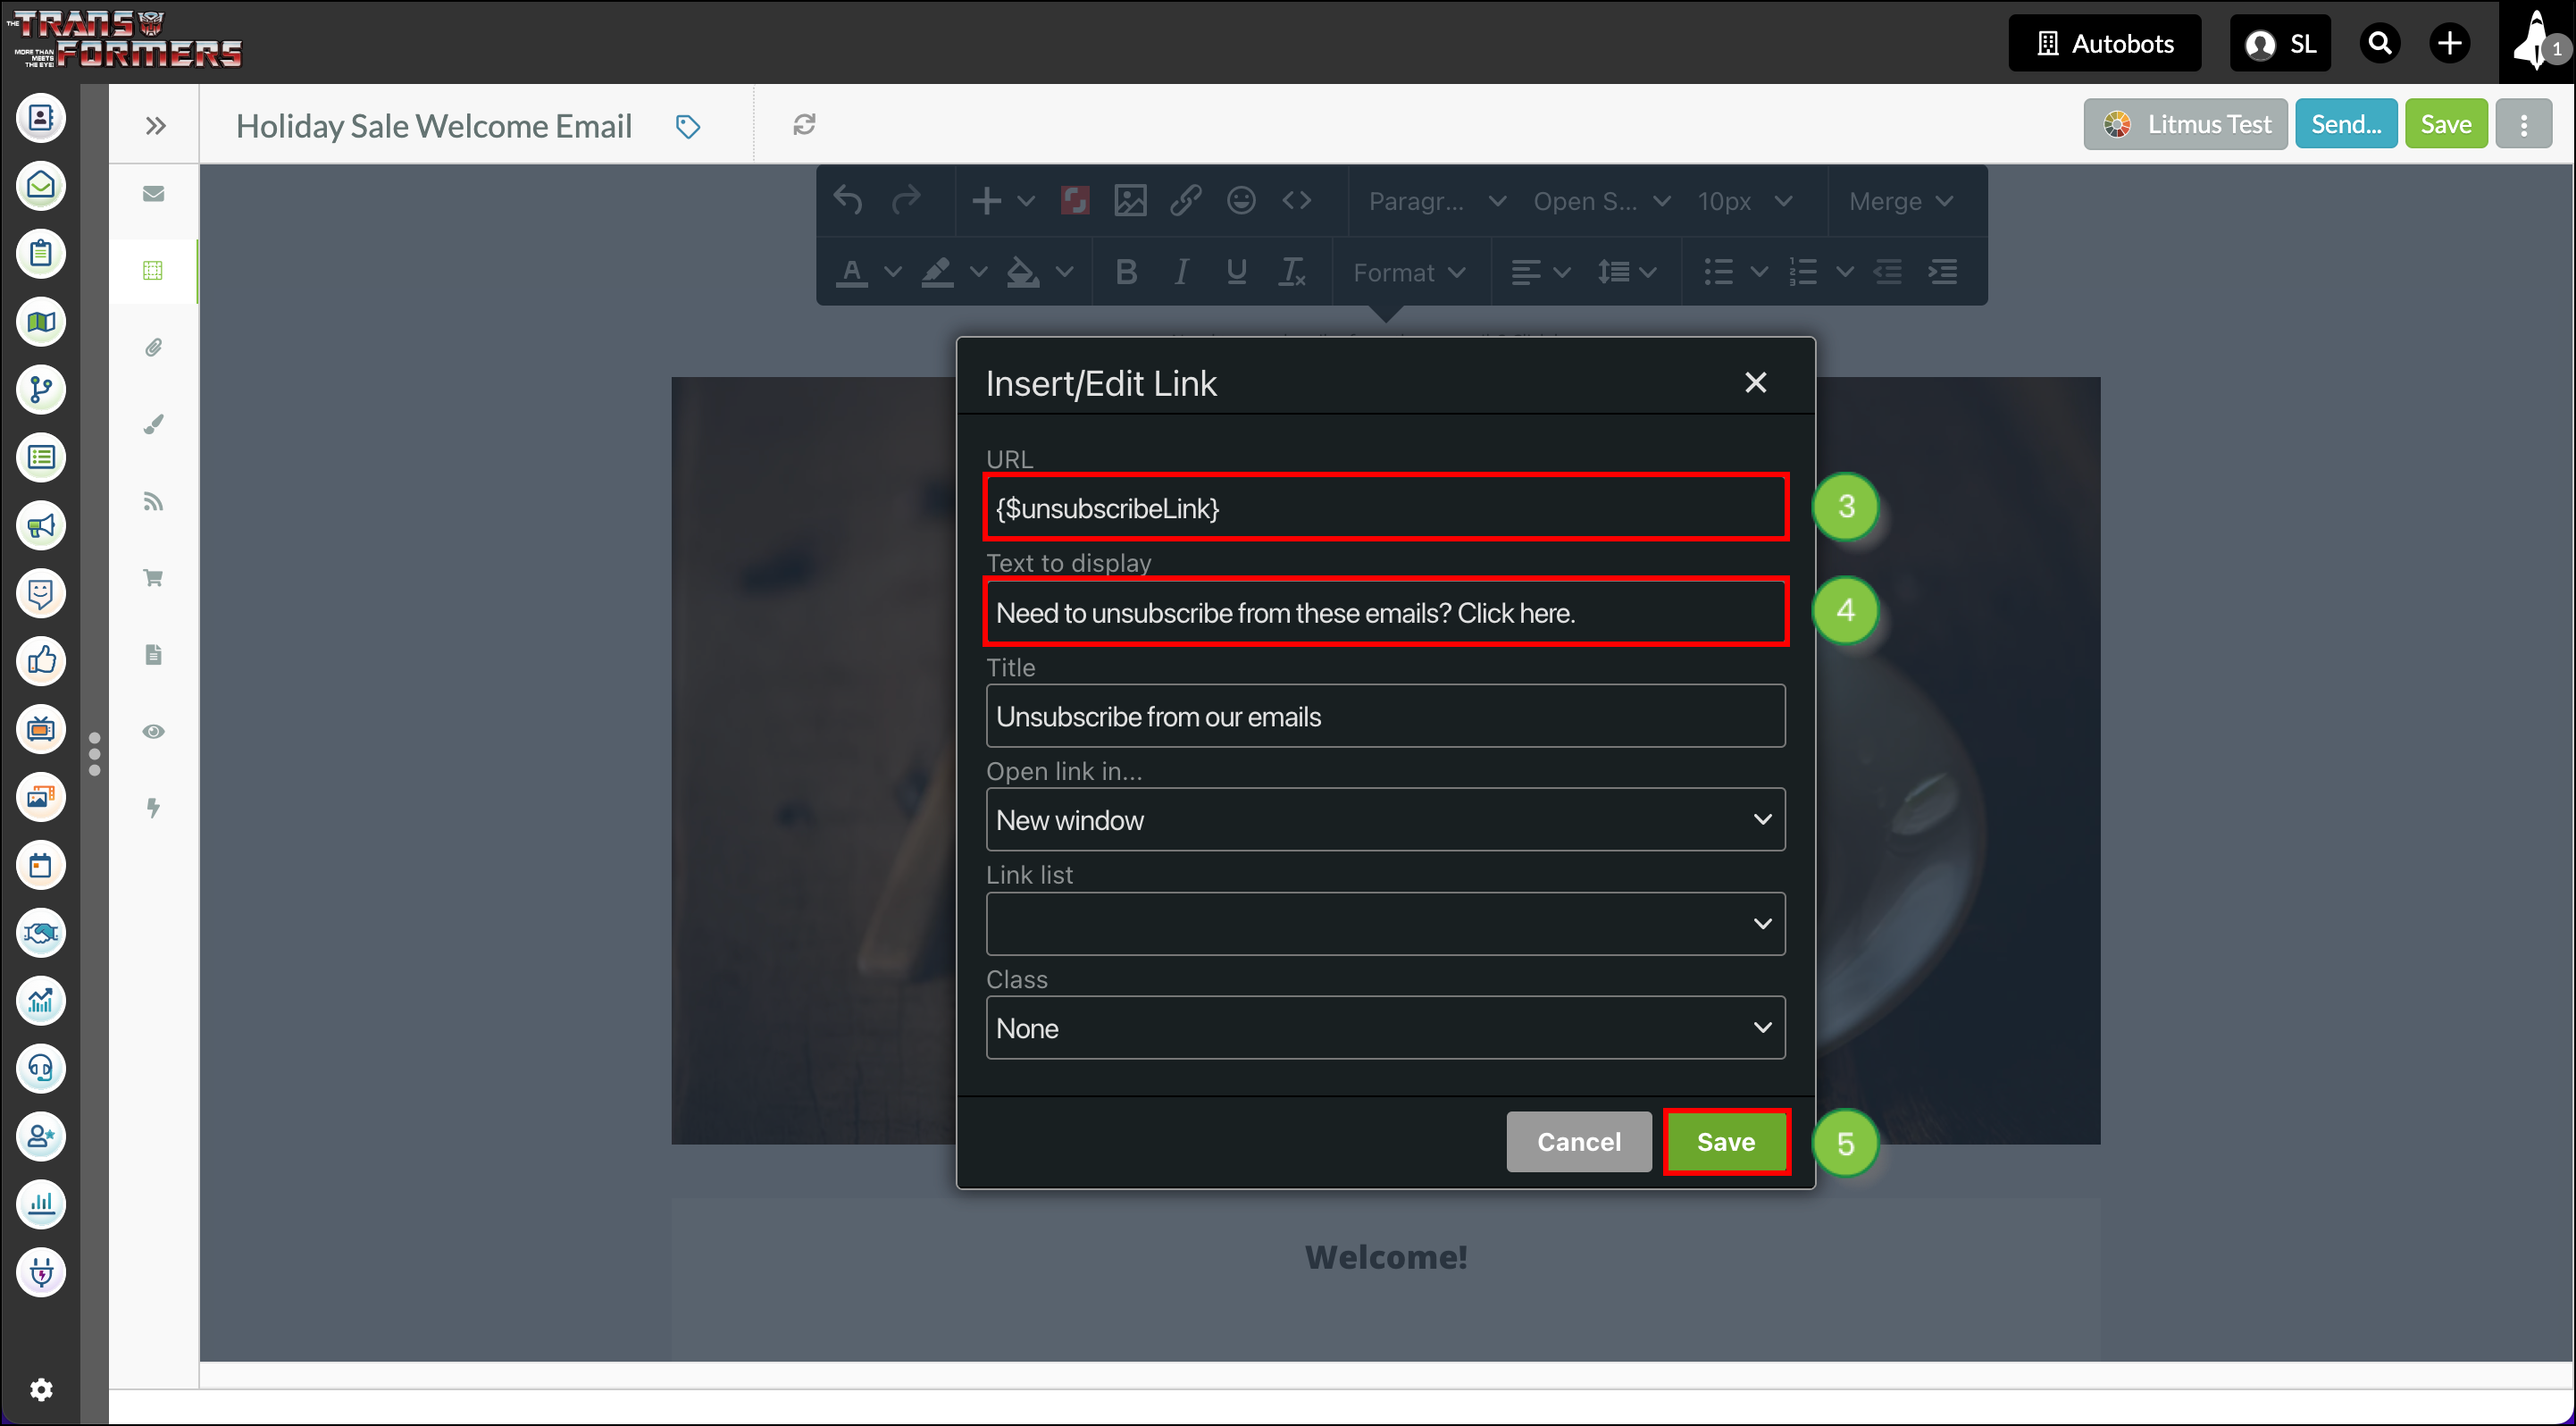
After clicking the unsubscribe link, contacts will be taken to the unsubscribe screen. If you have granular unsubscription configured they will be asked to specify which category of communications they would like to stop receiving and they may also be asked to answer a brief survey on why they are unsubscribing. 

In order for a contact to re-engage and begin receiving emails again, they can fill out a GDPR Consent form that you've created in your Lead Gen & CRM instance, or they can be manually re-subscribed


Adding Merge Variables to Subject Lines

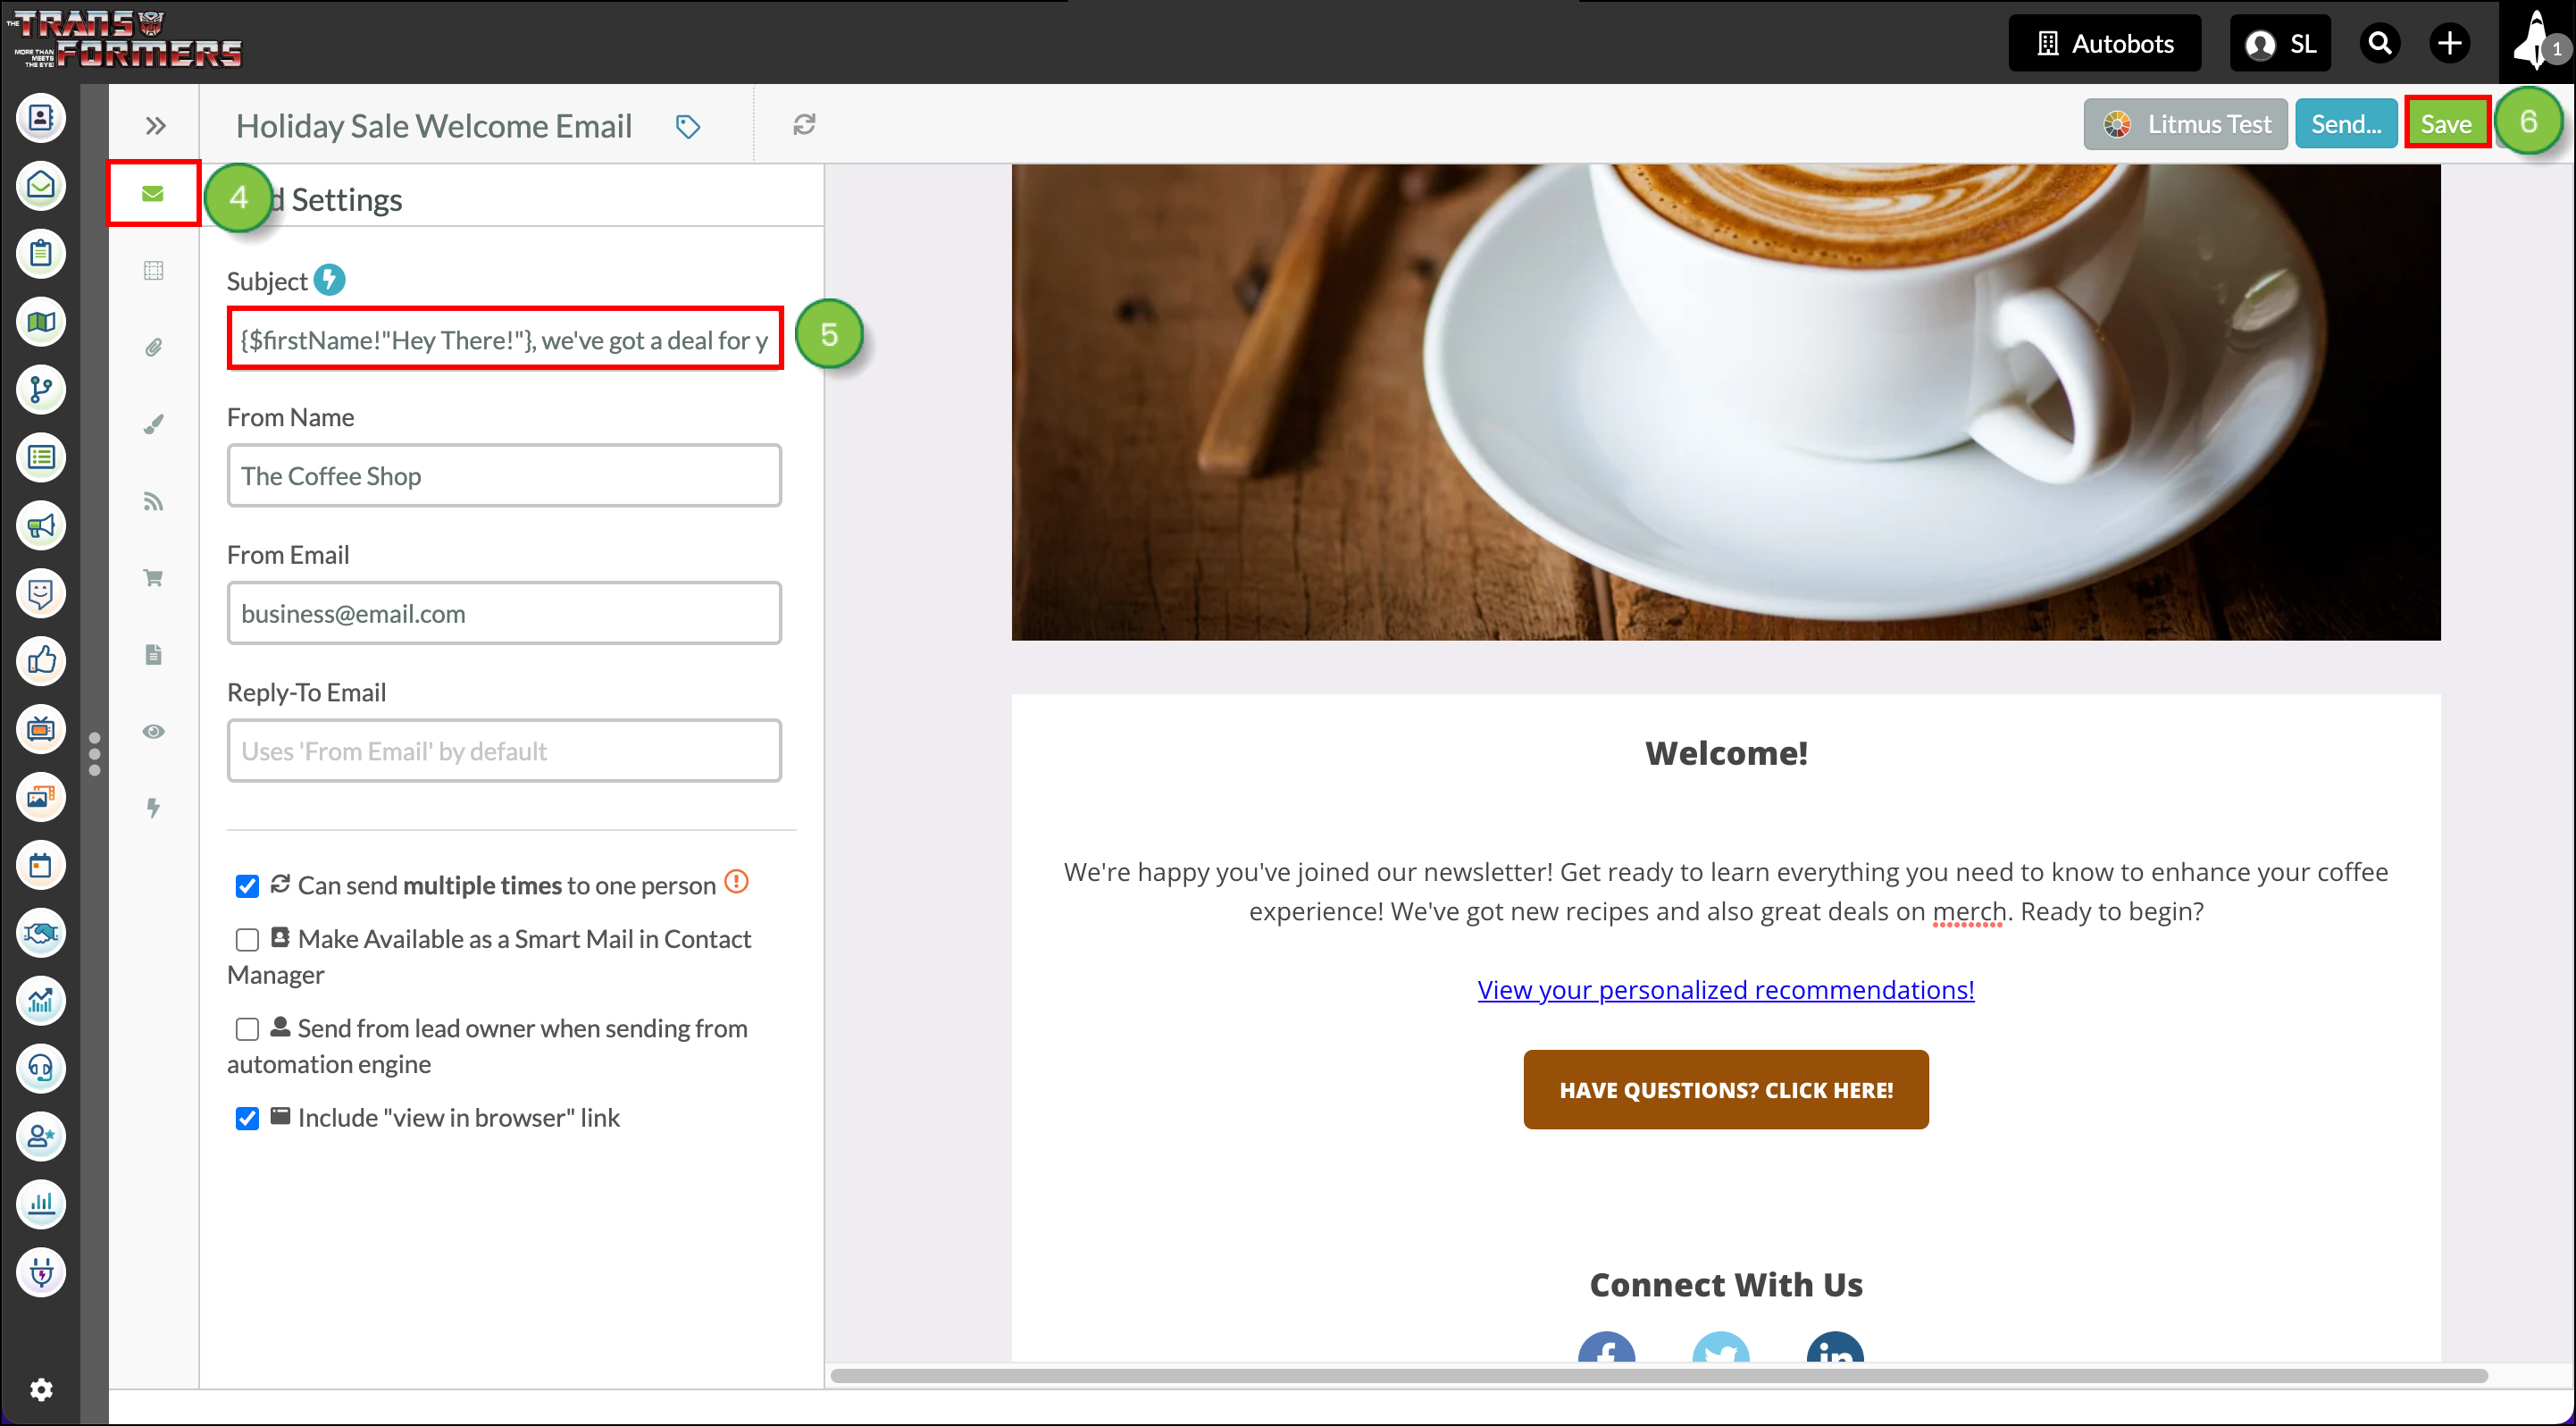
You can add merge variables to email subject lines.

To add merge variables to subject lines create or edit an email from the Email page in the left toolbar. 

  1. Click anywhere into the email and click the Merge drop-down menu in the Content Editor toolbar that appears.
  2. Select the desired merge variable from the available categories.

    Select merge variable from the dropdown


  3. Copy the variable code that appears and then remove it from the email.

    Copy merge variable


  4. Click  Send Settings  Send Settings in the Email Designer panel.
  5. Paste the merge variable into the Subject text box and complete the email subject line as you see fit, around the merge variable.
  6. Click Save.

    Subject line send settings


Did this article answer your question?


Constant Contact Logo

Copyright © 2025 · All Rights Reserved · Constant Contact · Privacy Center