In this article, you'll learn how to add preheader text to simple and designer emails.
| Administrators | ✓ | |
| Company Managers | ✓ | |
| Marketing Managers | ✓ | |
| Sales Managers | ||
| Salespersons | ||
| Jr. Salespersons |
| Tip: Are you looking for information about Constant Contact’s Email and Digital Marketing product? This article is for Constant Contact’s Lead Gen & CRM product. Head on over to the Email and Digital Marketing articles by clicking here. Not sure what the difference is? Read this article. |
Layout blocks are the foundation of emails created in the Lead Gen & CRM platform. Elements can be added into layout blocks.
The Email Designer allows you to drag, drop, and reorder layout blocks into your email to further customize it.
One of the many premade layout blocks available is the preheader layout block. To add preheader layout blocks create or edit an email from the Email page in the left toolbar.
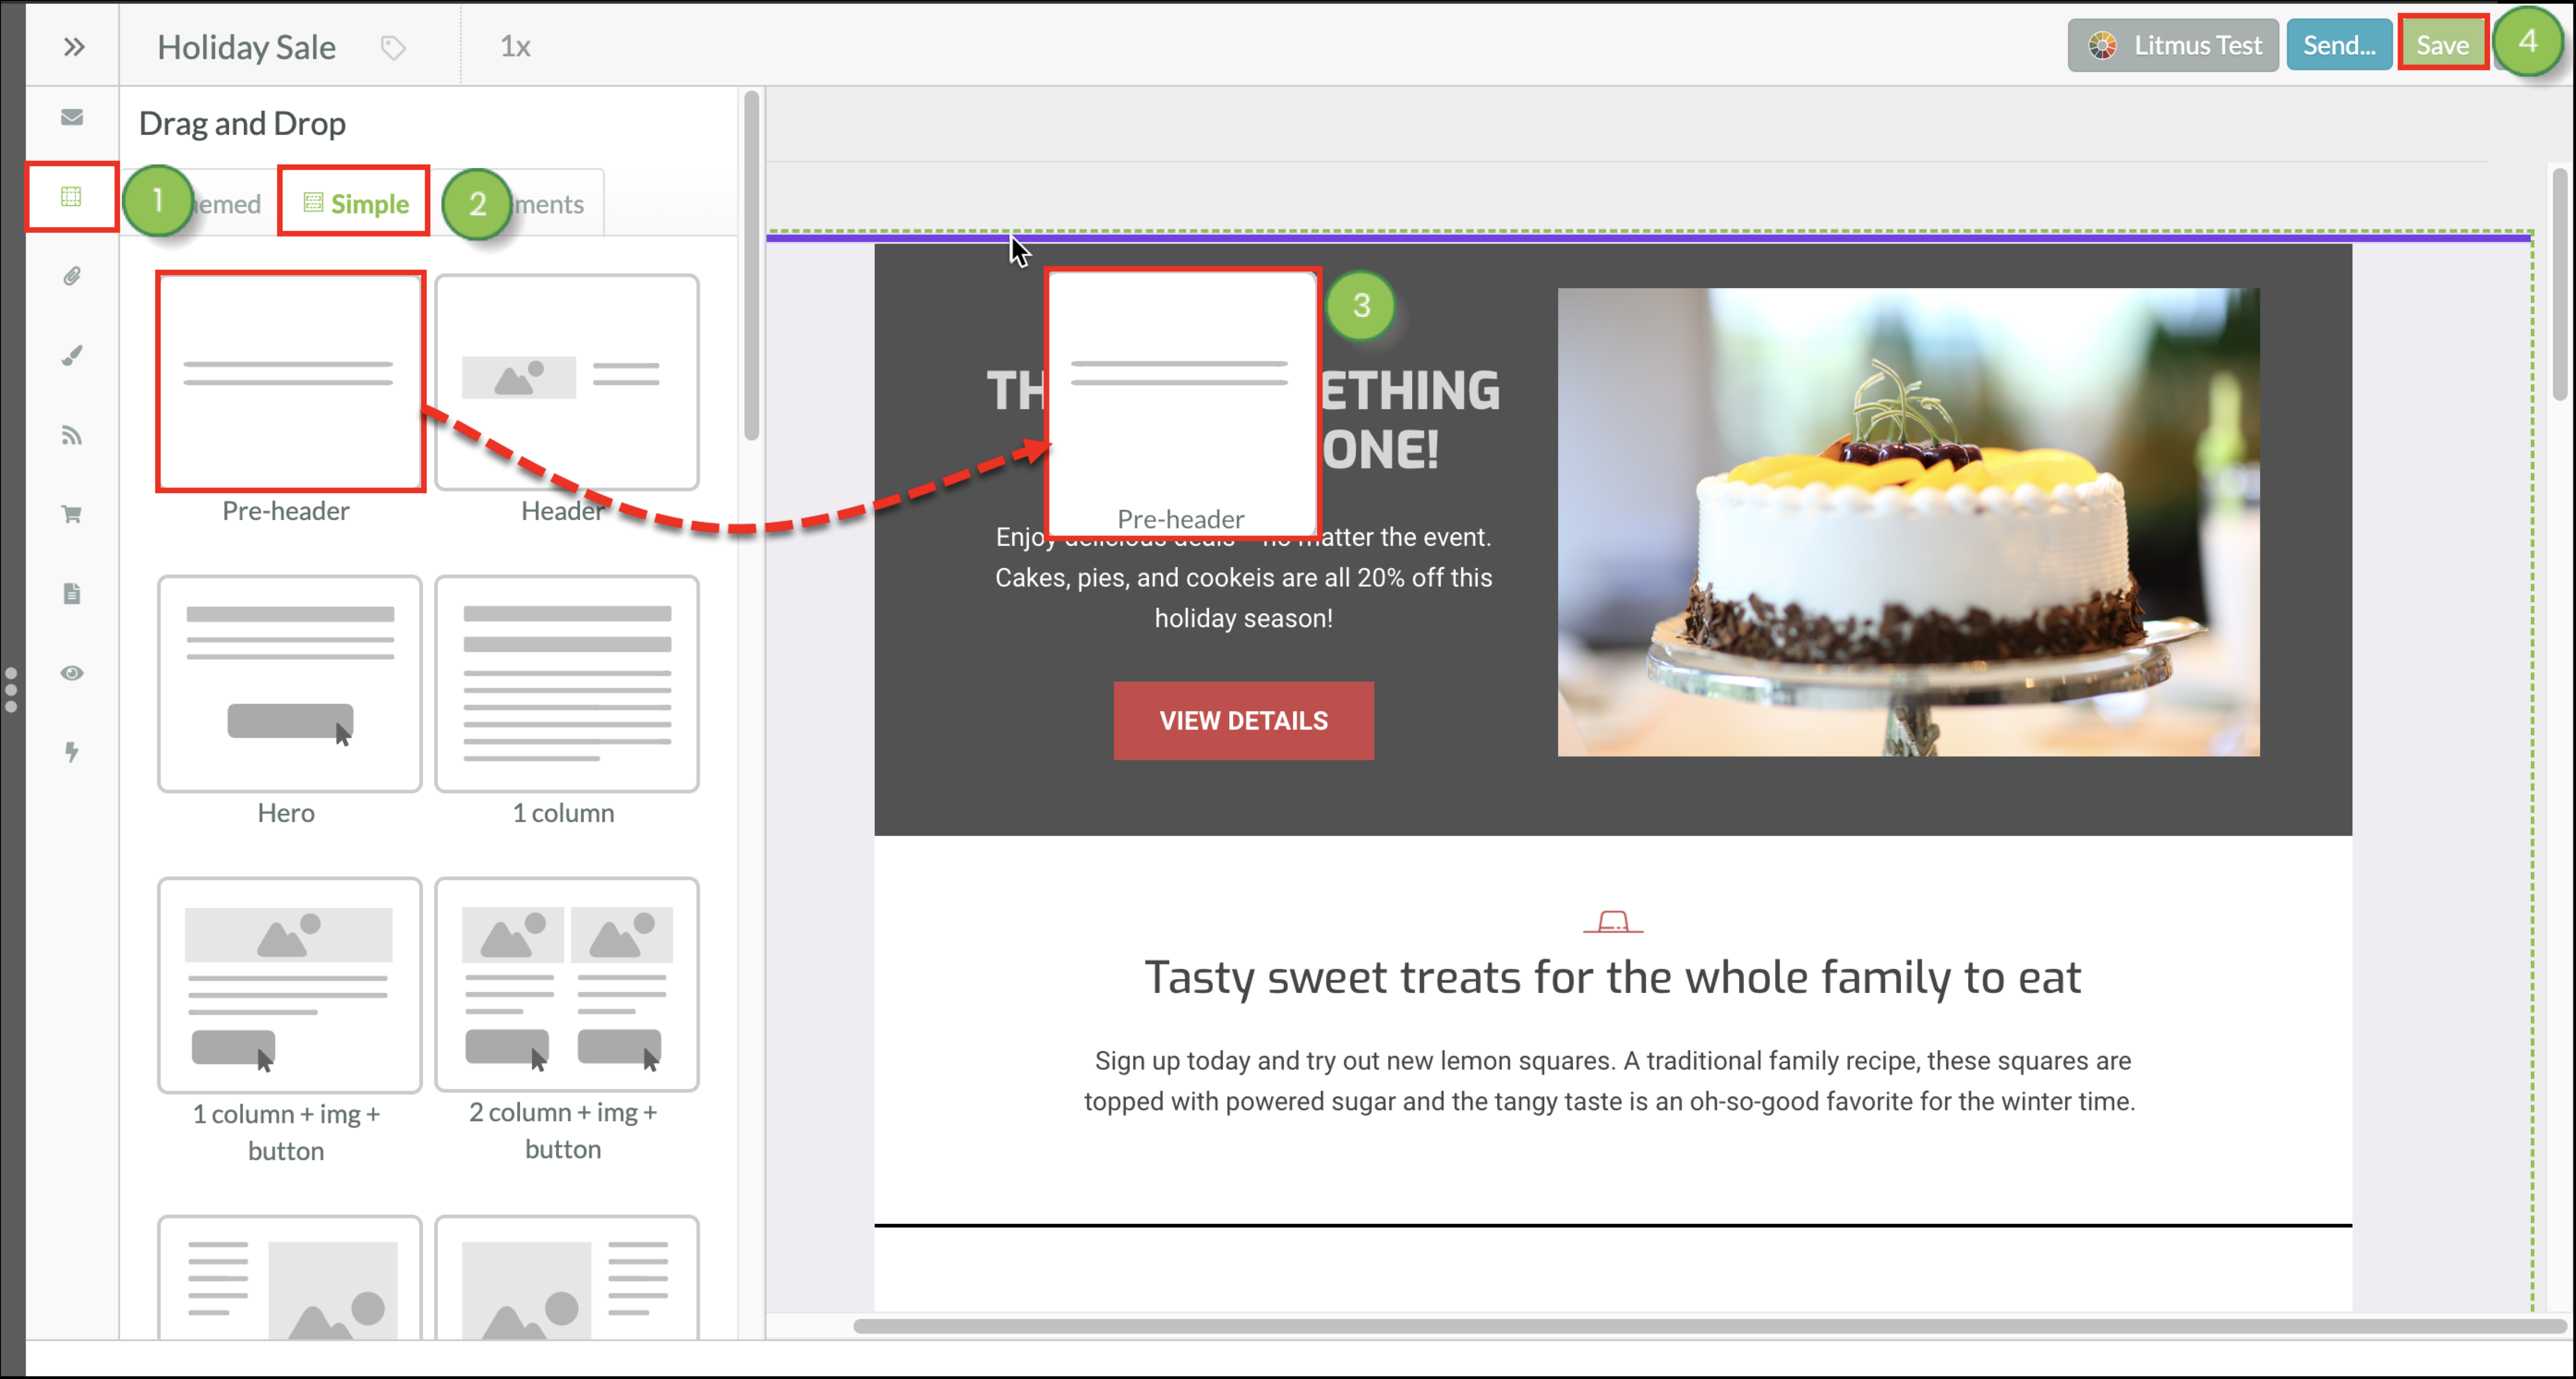
Refer to Using Layout and Element Blocks in Emails for more information on layout blocks.
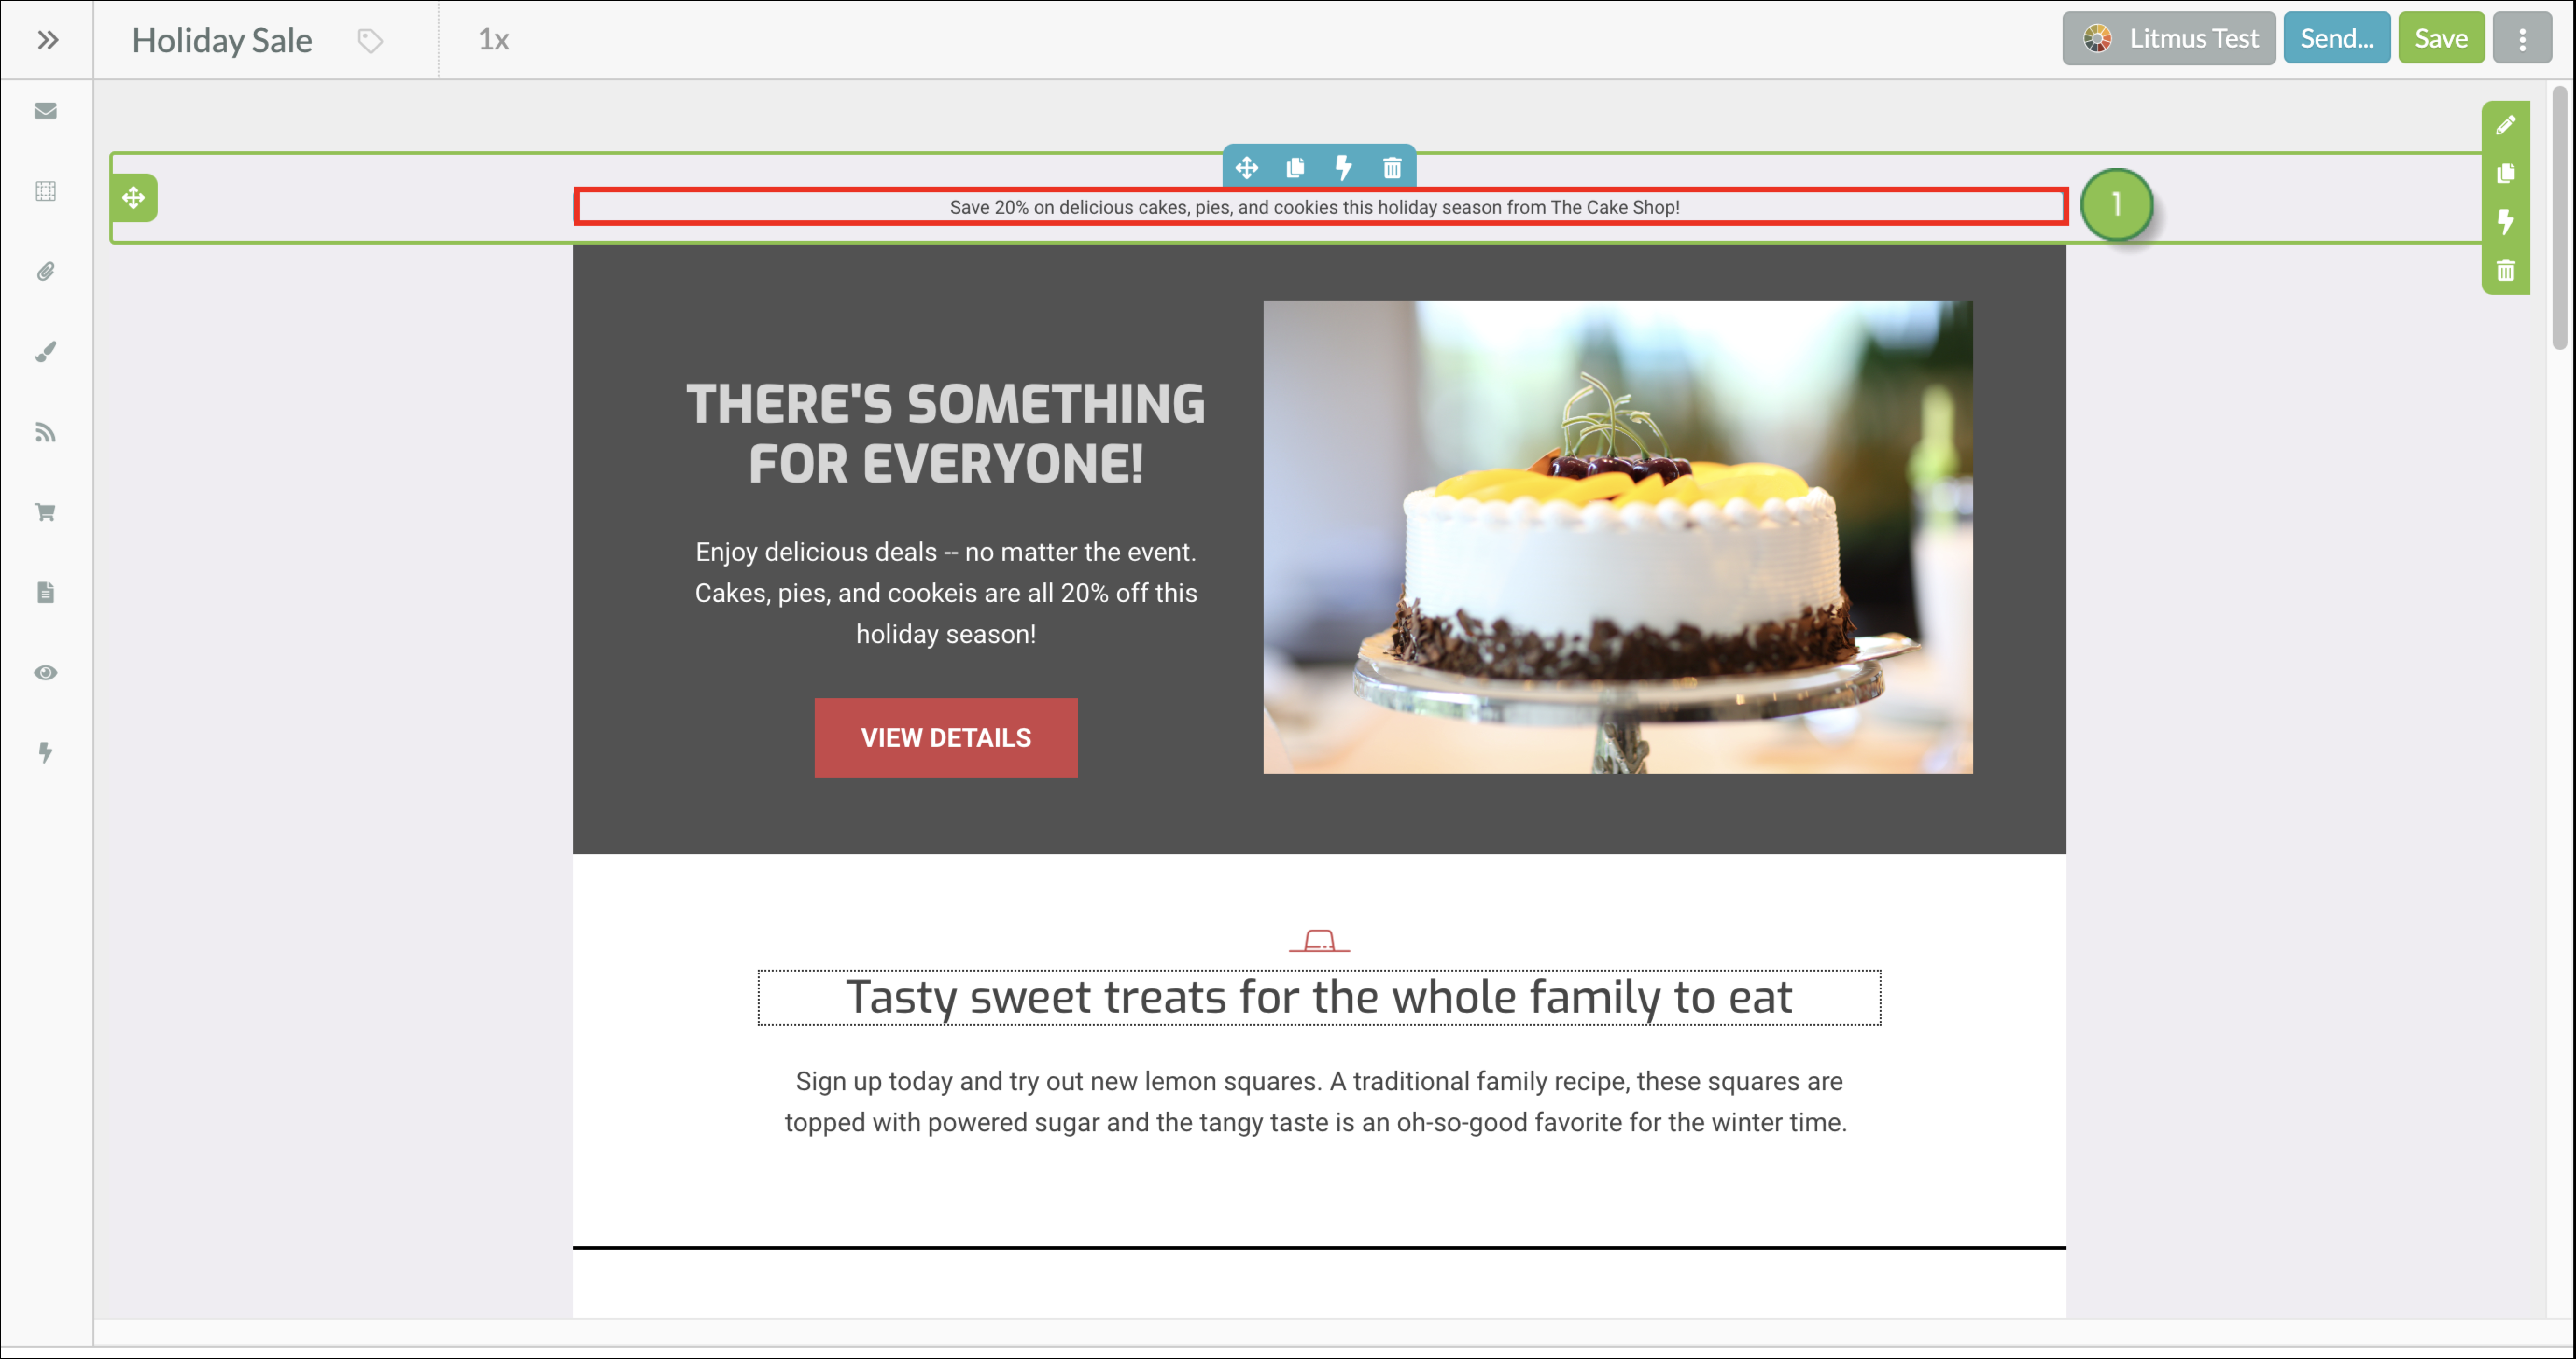
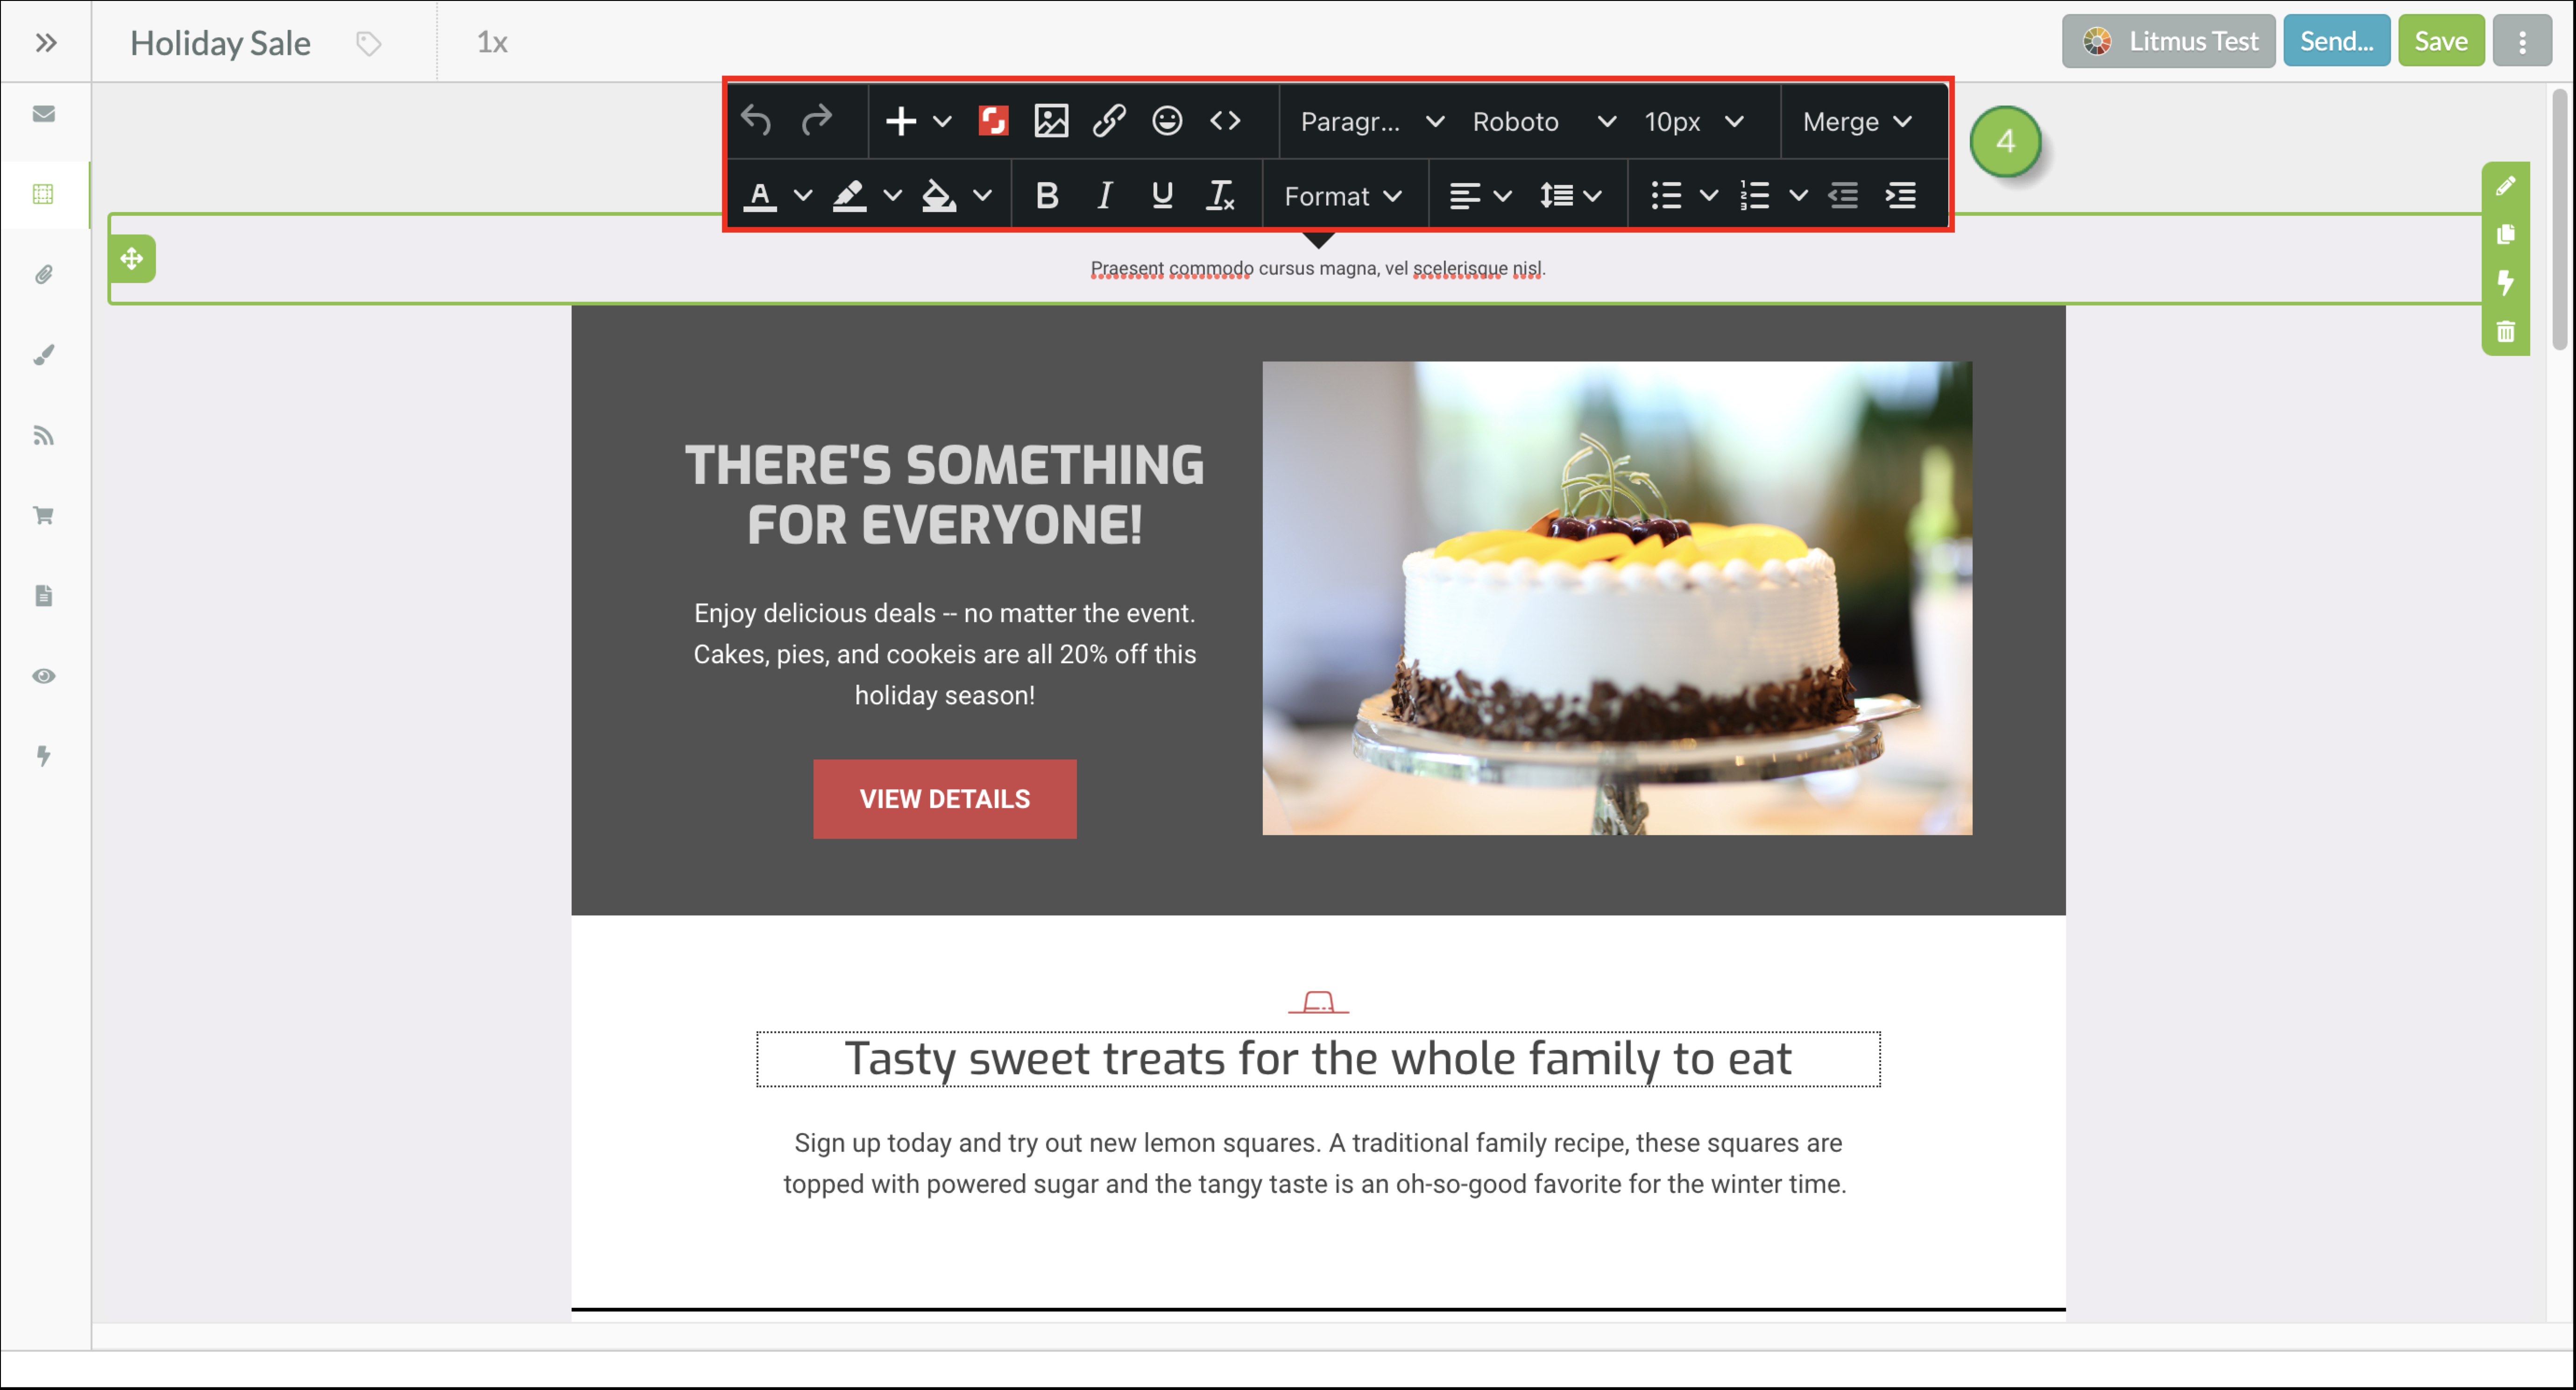
You can edit preheader content from the Email Designer toolbar.
First, you must create or edit an email with a preheader layout block. Begin from the Email page, in the left toolbar.

You can hide preheader content in emails that are viewed in Microsoft Outlook.
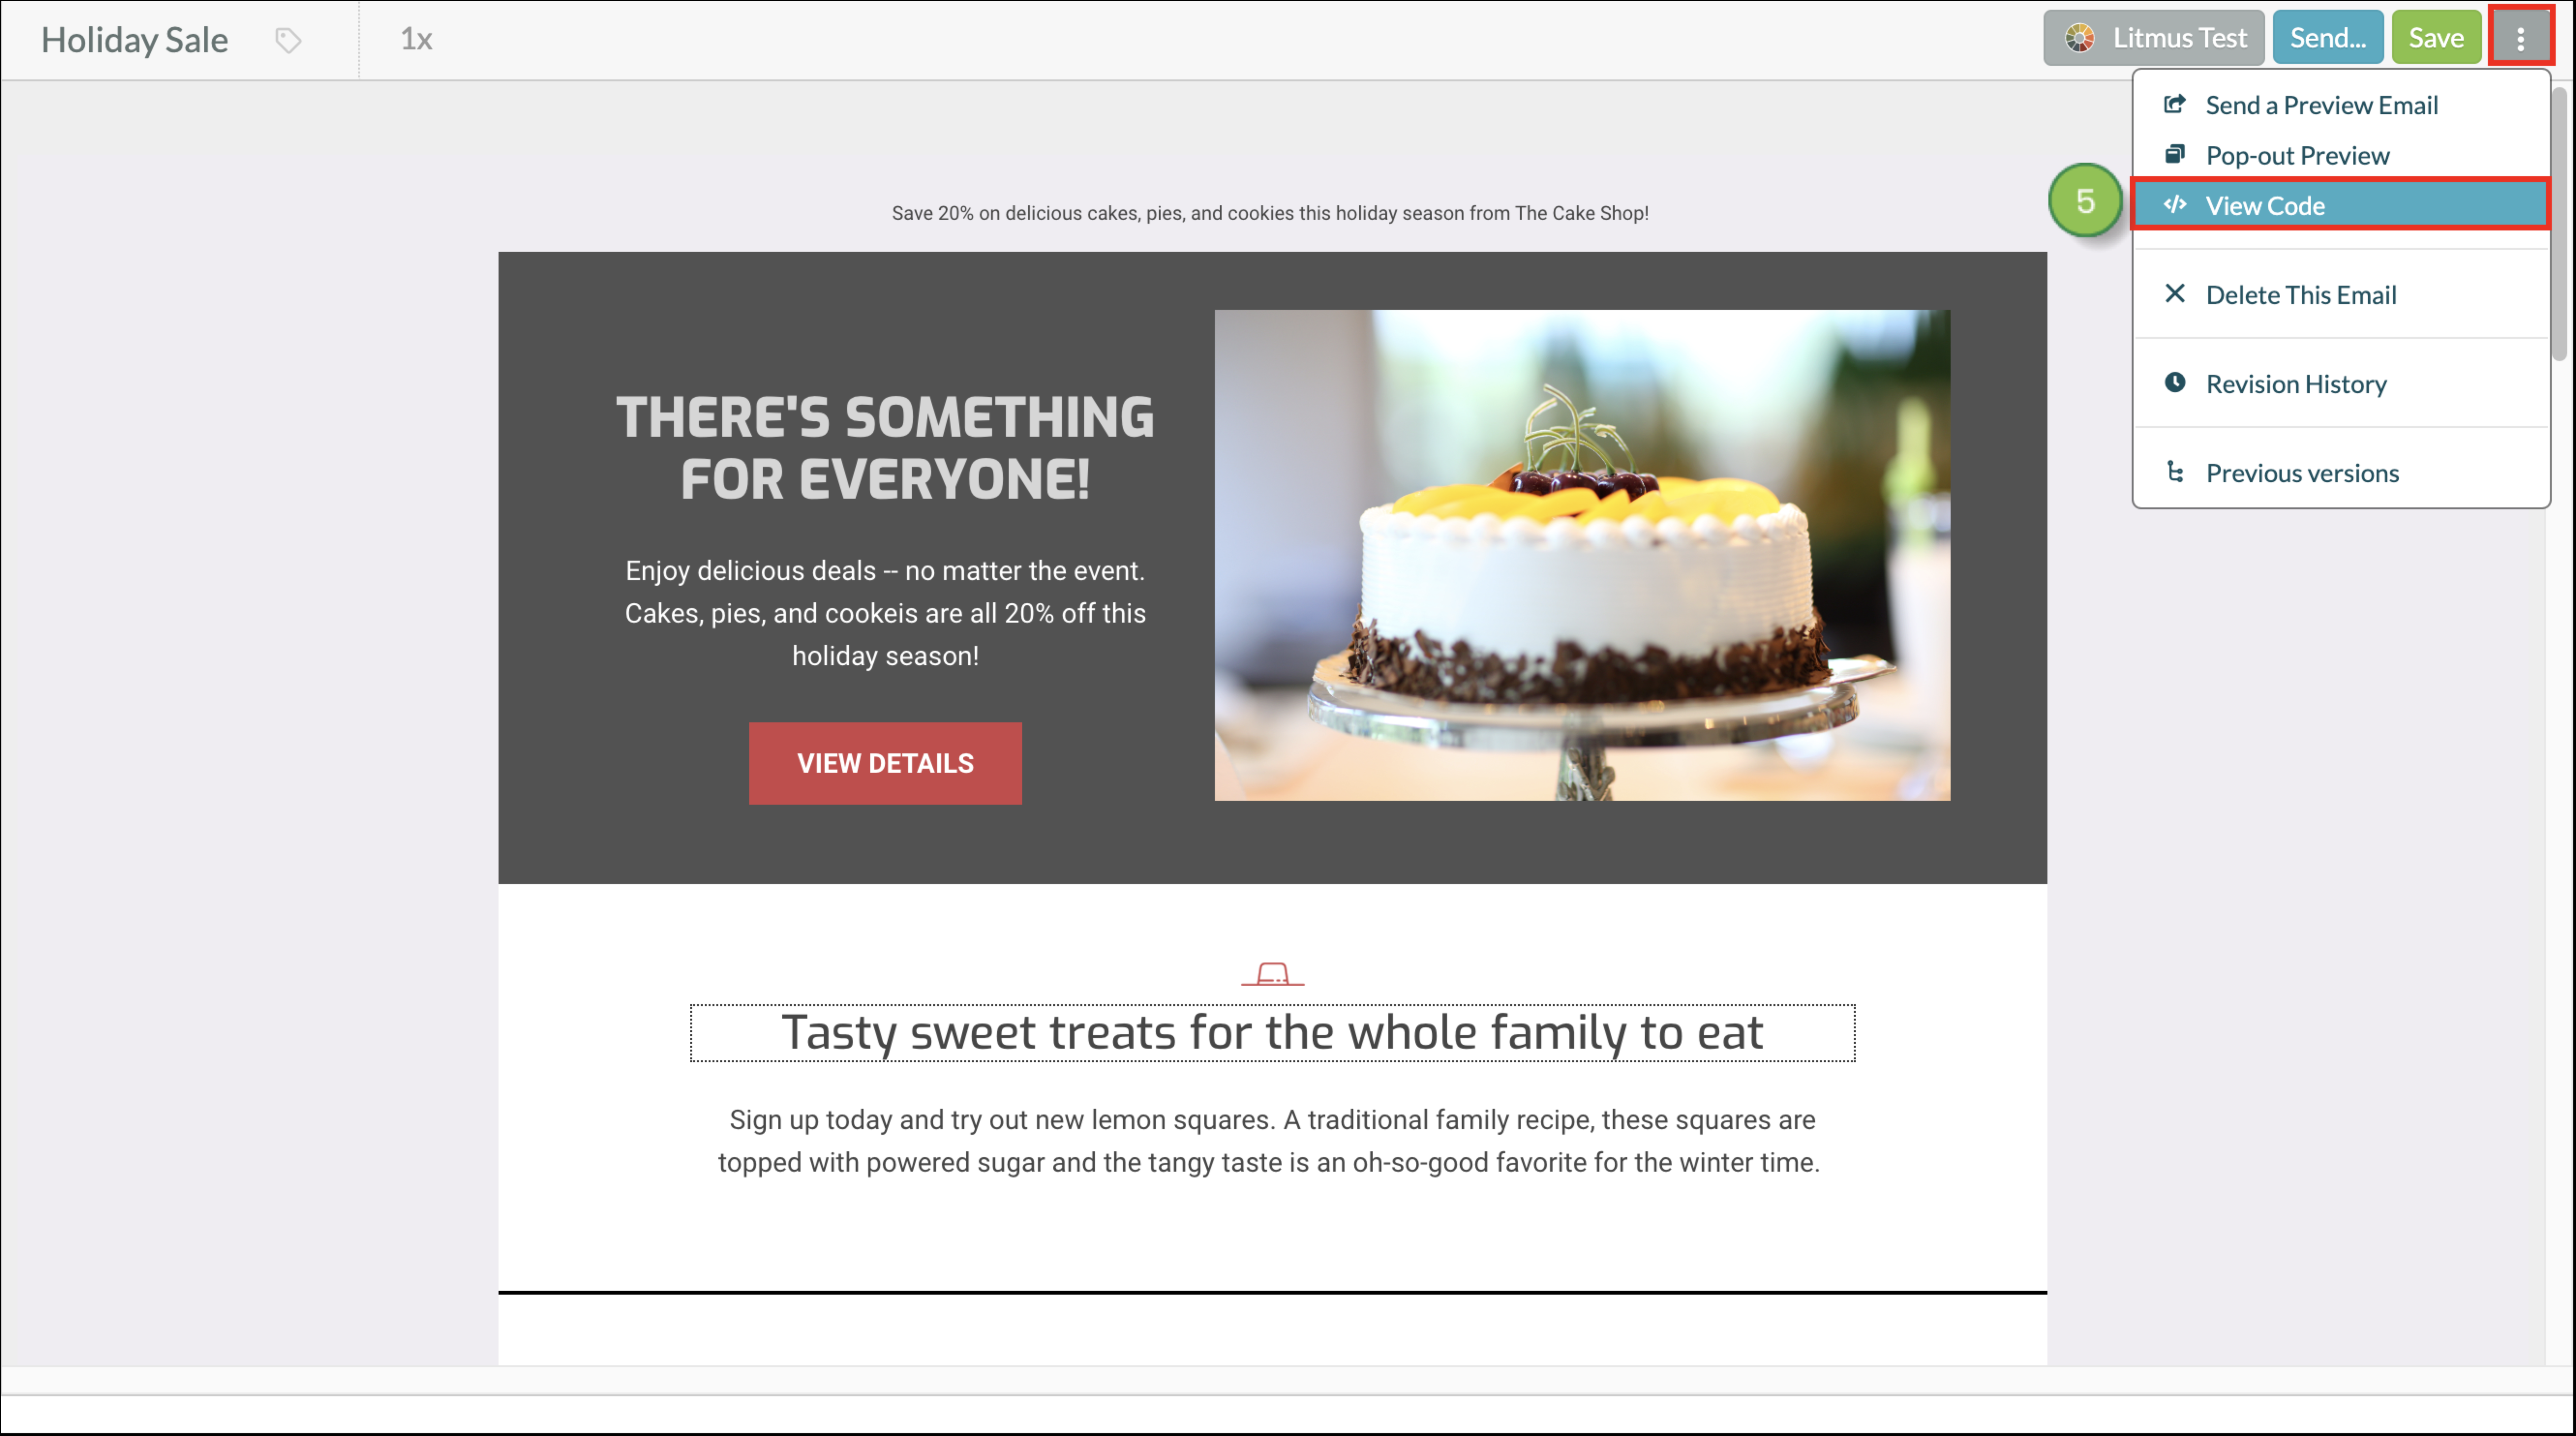
To hide preheader text in simple and designer emails, create or edit an email from the Email page in the left toolbar.

<head> tag, add the following code before the closing </head> tag:<style> .shsp-wireframe-layout-preheader { display: none; } </style>
</head> tag. Lead Gen & CRM offers Professional Services to assist with custom coding.
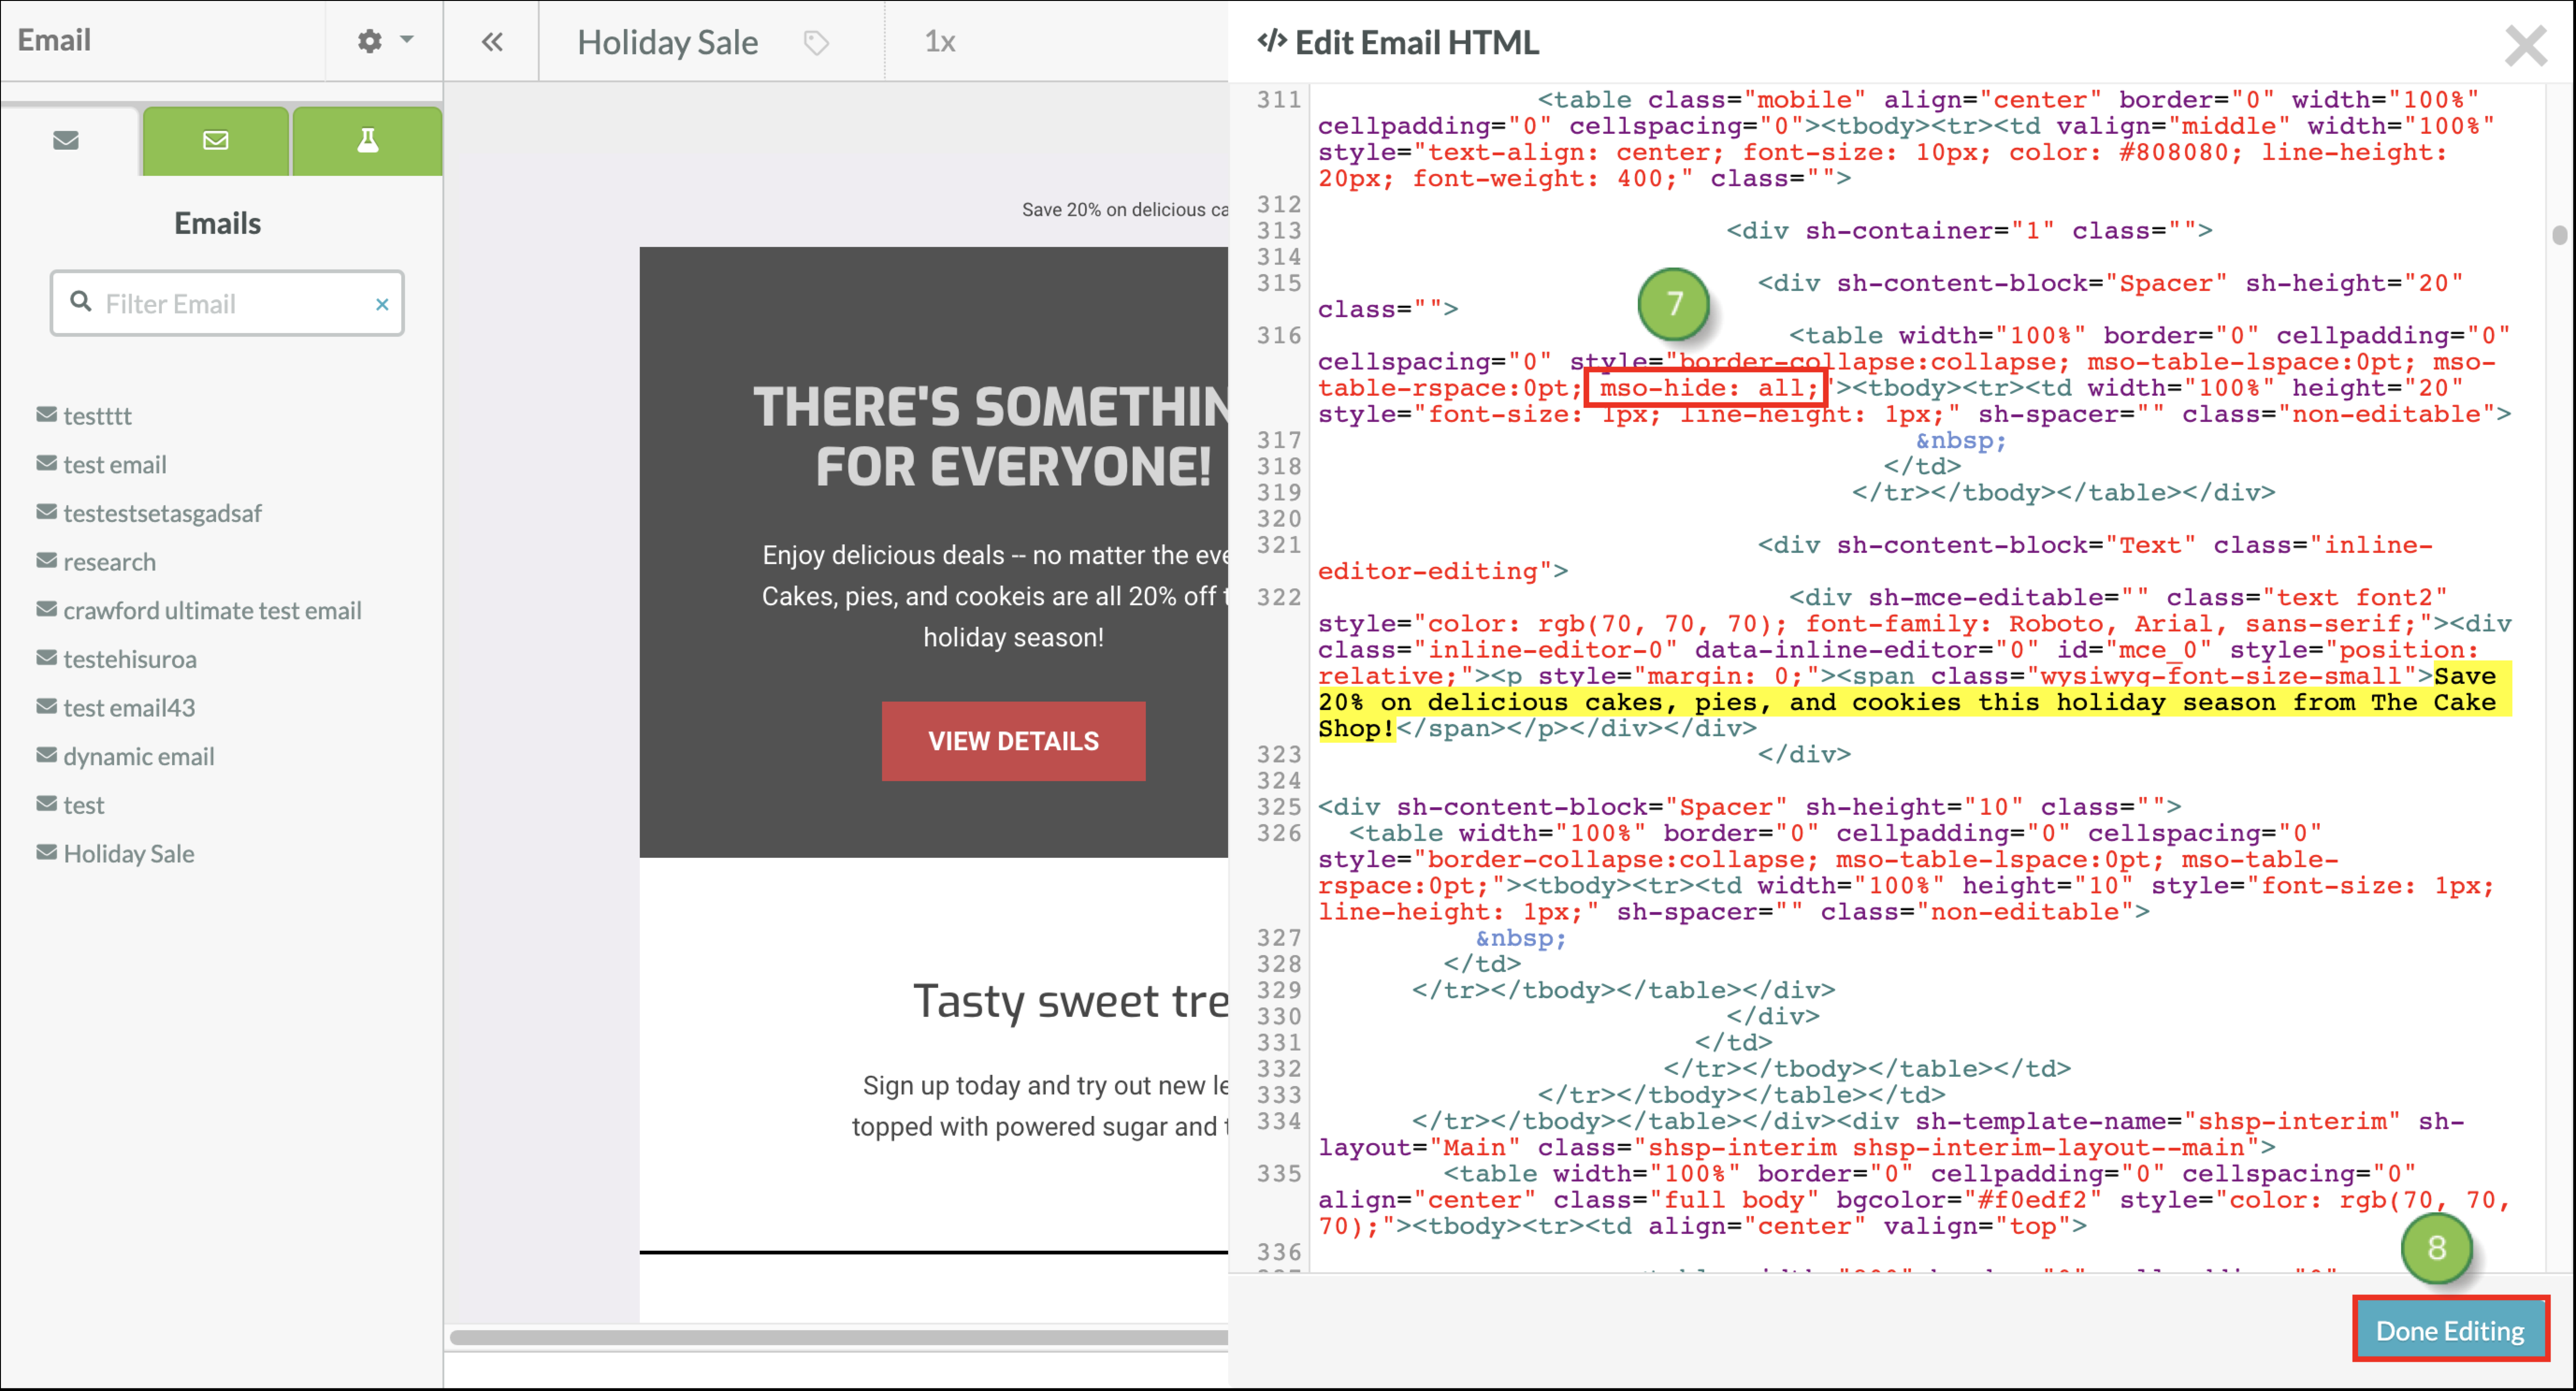
Add the following as a style attribute in the innermost <table> or <td> element that contains the preheader text:style="mso-hide: all;"
Before sending the email to your real contact or lead list, it's a good idea to send the email to a test list to be sure your code is working as expected.
You can add merge variables to preheader text, to personalize it. Here is an example of how your merge variables can look in a preheader.
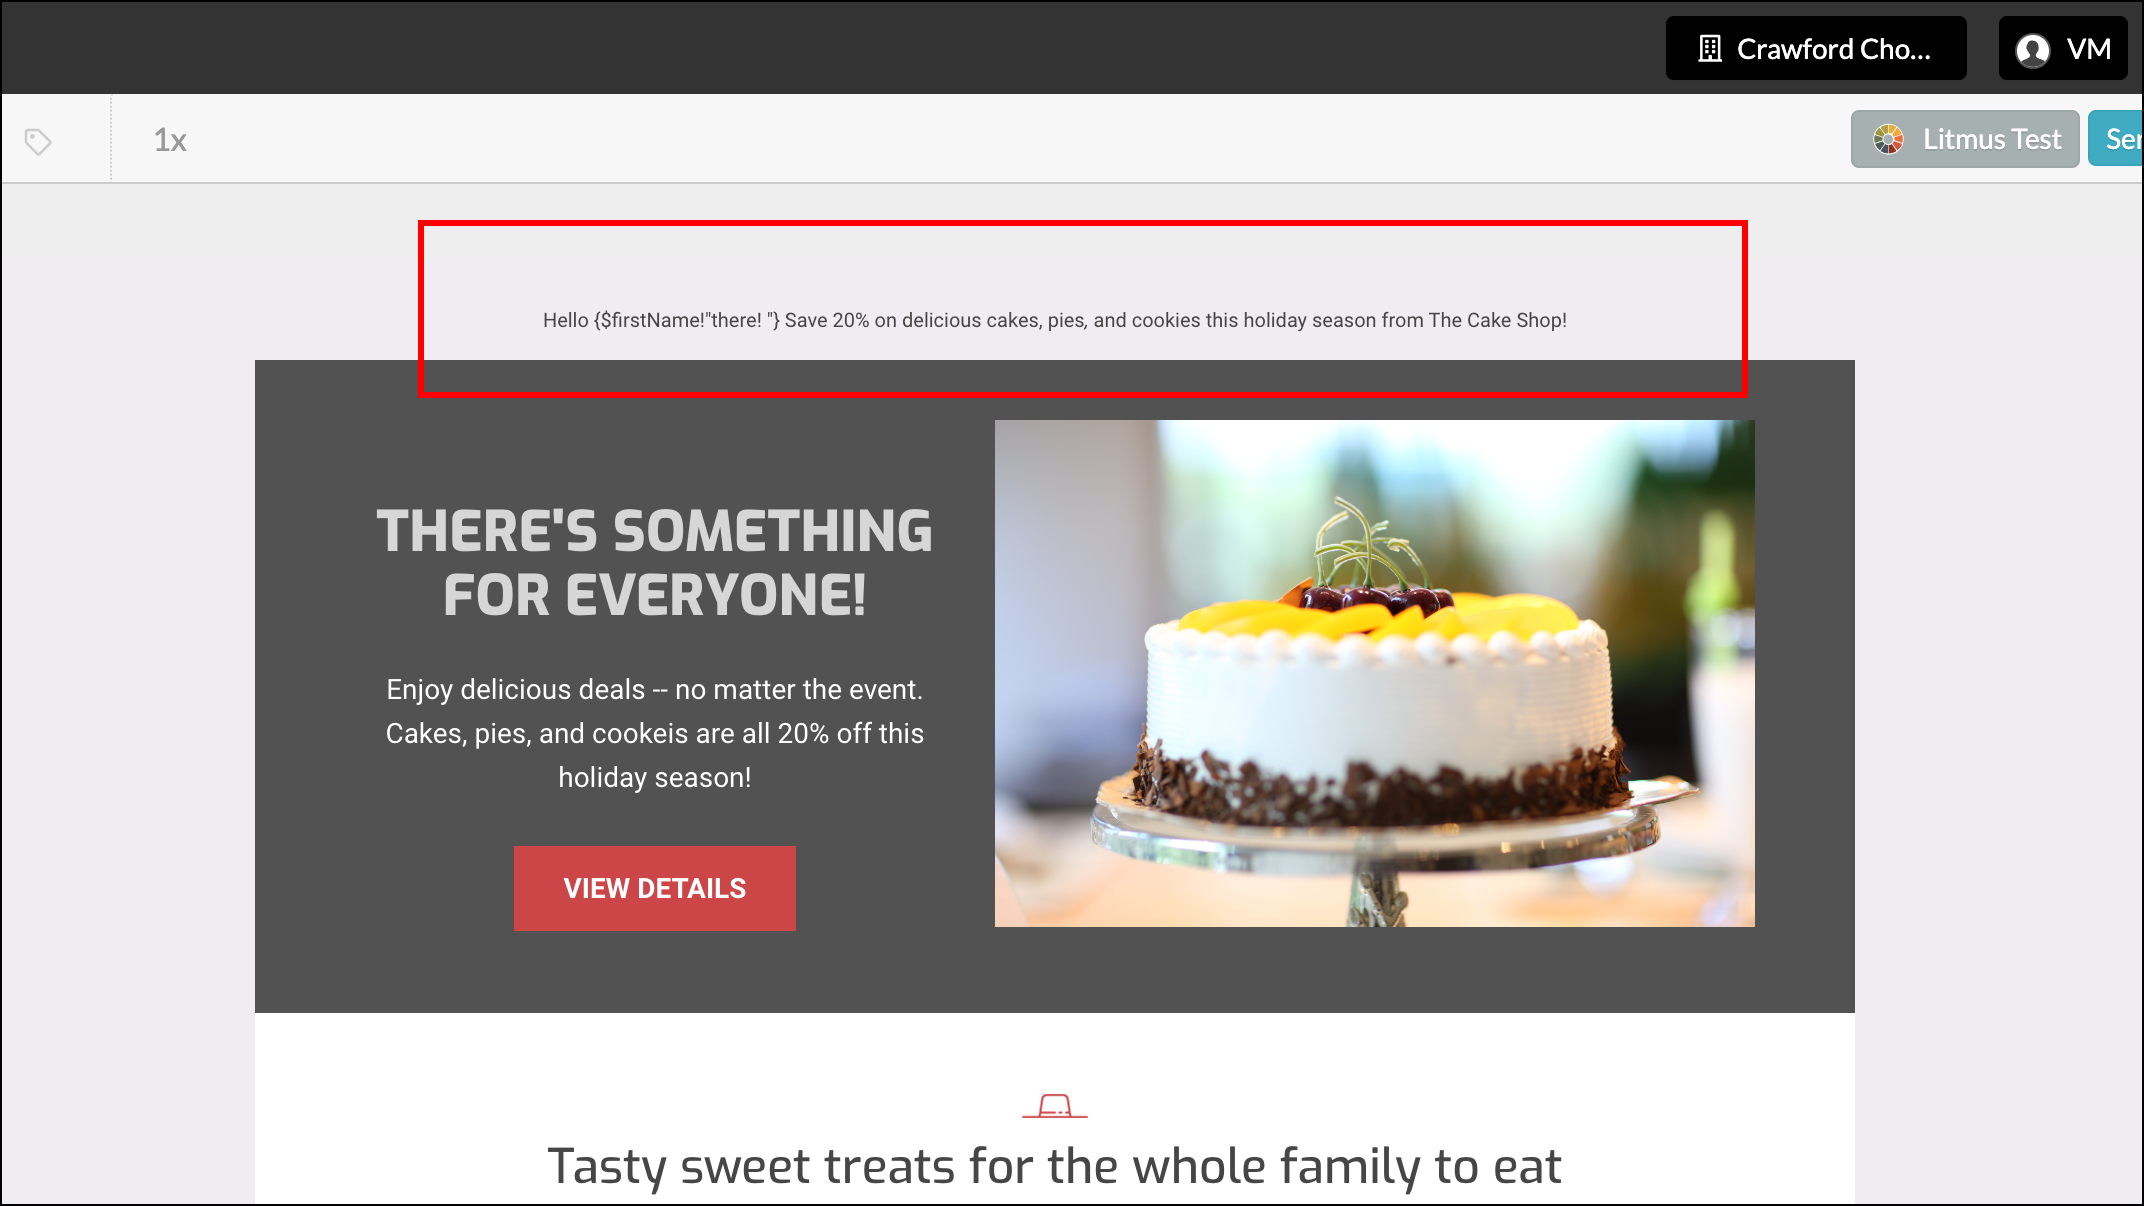
Defaults are handled slightly differently as well. Your merge variable will fill in personalized lead information, like the lead's first name or company name. In the event personalized information isn't available, default text can help to avoid a blank space in the email.
If you are using the same merge variable elsewhere in your email, and a different default is used, that is what will populate the default area of the merge variable in the preheader text.
The .HTML document is parsed top-to-bottom, and when the second use of the same merge variable is noticed, the default value for that merge variable will overwrite what was previously set in the first use of that merge variable.
The following is an example of code without defaults:
<p >{$firstName} check out these awesome deals</p>
or
{$firstName} check out these awesome deals
The following is an example of code with defaults:
<p >{$firstName!"You should"} check out these awesome deals</p>
or
{$firstName!"You should"} check out these awesome deals
Copyright © 2026 · All Rights Reserved · Constant Contact · Privacy Center