Lead Gen & CRM
How can we help you?
Search our help articles, video tutorials, and quickstart guides

You've got this. You've got us. Search our Knowledge Base to quickly find answers to your questions.

Configuring Granular Unsubscription Settings

Article: 000050209
Updated: August 29, 2024

Granular unsubscription provides your leads the option to only unsubscribe from certain types of your emails, enabling you to continue emailing them based on their interests.

 
Users:
Administrators 
Company Managers 
Marketing Managers 
Sales Managers  
Salespersons  
Jr. Salespersons  


Accessing Granular Unsubscription

You will need to access the granular unsubscription settings to configure them.

To access granular unsubscription settings, do the following:

  1. Click Settings in the left toolbar.
  2. Click Company Email Settings, located under Features in the left panel.
  3. Click the Unsubscribe Page tab.

    Click unsubscribe page from Settings


Enabling Unsubscription Categories

You will need to enable and configure the different types of content categories that can be unsubscribed from.

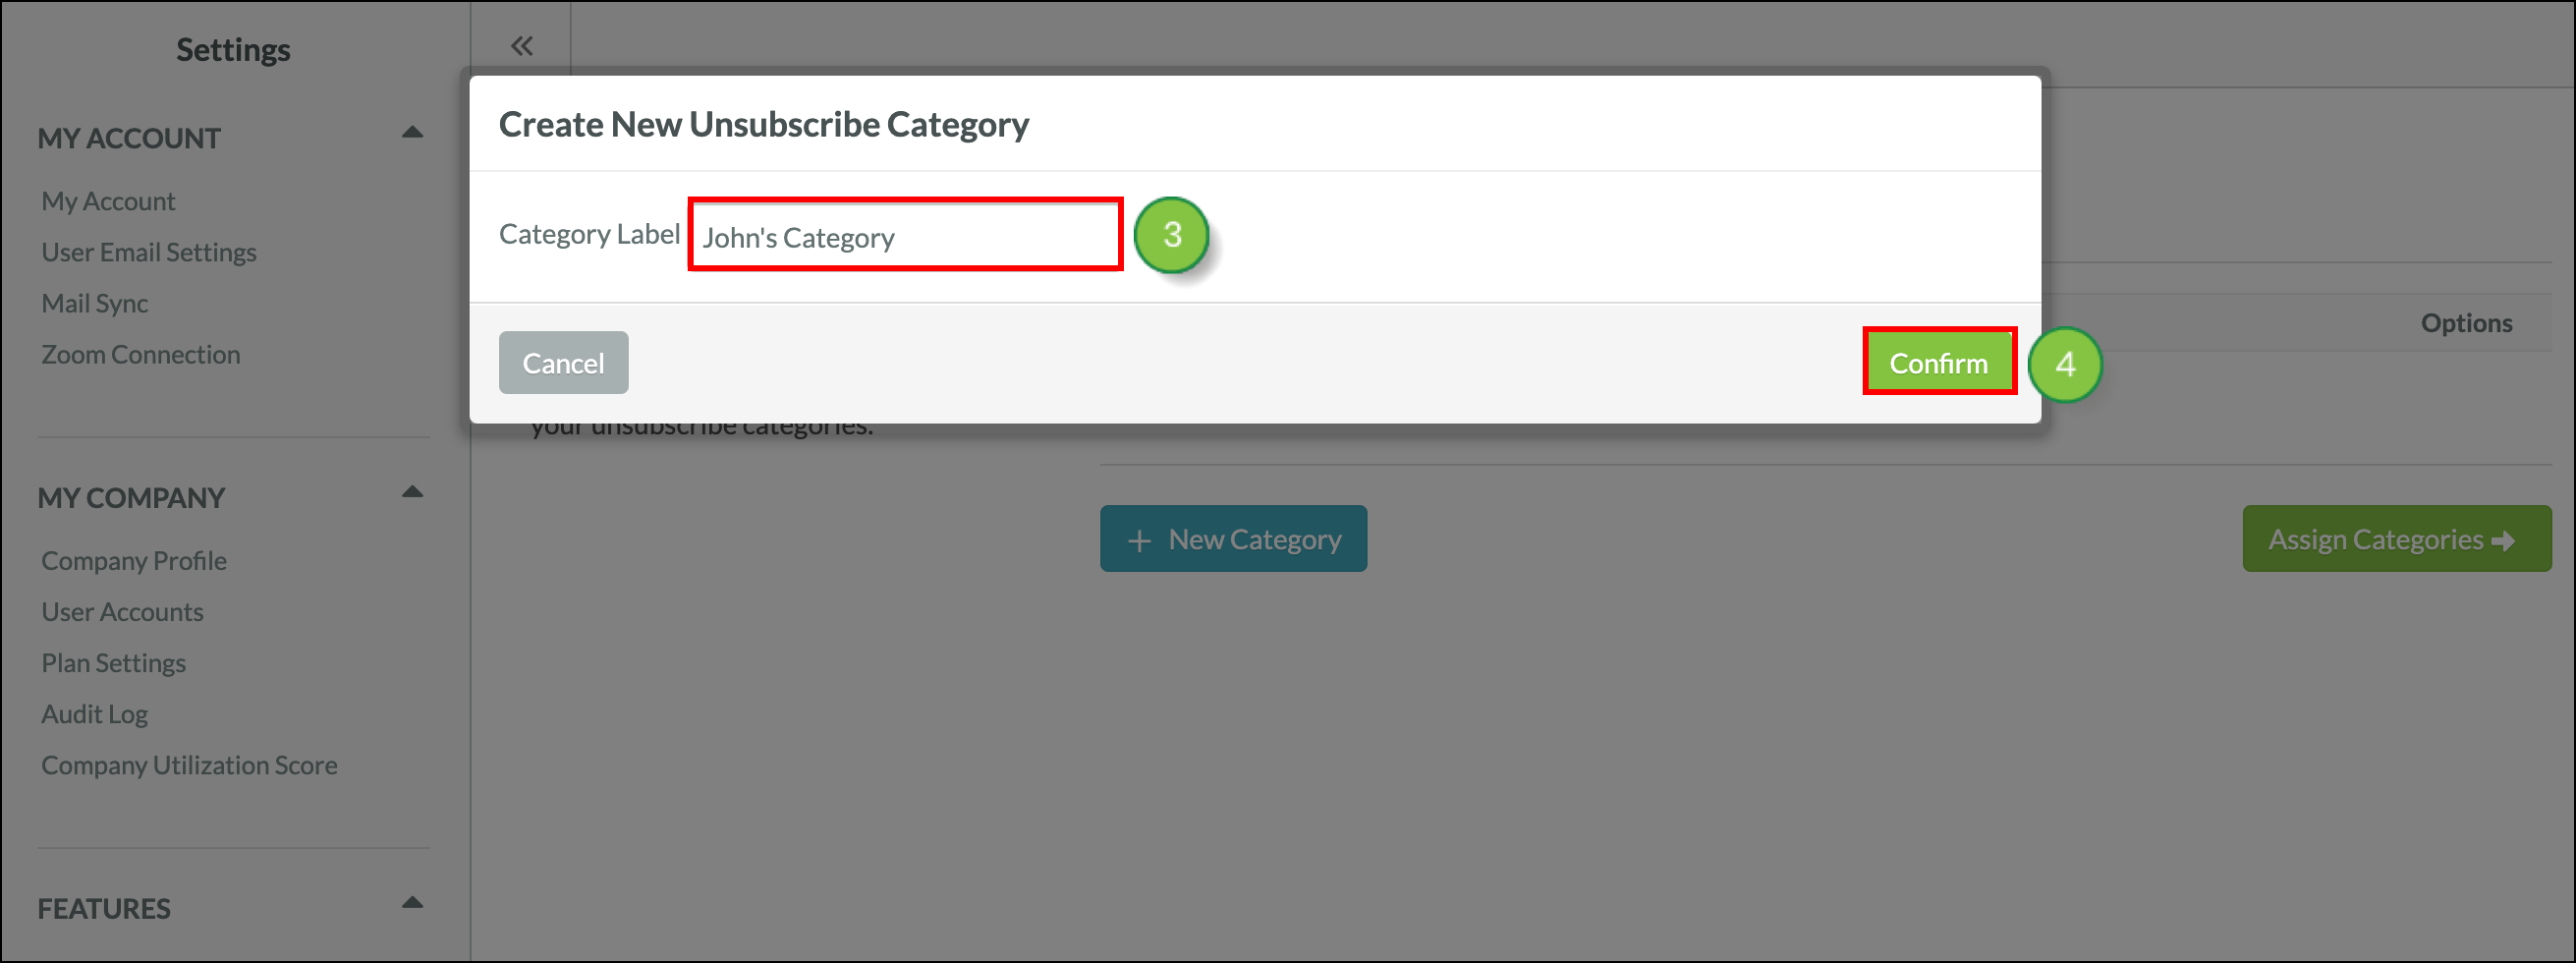
When adding new categories, you will need to add the various types of outbound content your client has available.

To configure unsubscription categories and set emails to these categories, navigate to the granular unsubscription settings page.

  1. Click Enable or Configure.
     
    Note: The Enable button appears the very first time you set up the unsubscription page. If Enable was already clicked in the past, you'll see Configure instead.


    Click Enable


  2. Click New Category.
     
    Note: Granular Unsubscribe Categories will be displayed once an unsubscribe reason has been selected.


    Click New Category


  3. Add a name for the category.
     
    Note: Common examples of category names would include Newsletters, Updates, and Promotions.
  4. Click Confirm.

    Name the category


  5. Create additional categories as necessary.
  6. Click Assign Categories.

    Assign categories


  7. Select the appropriate category for every email.
  8. Click Save.

    Assign categories to emails and save


Important Information Regarding Configuration

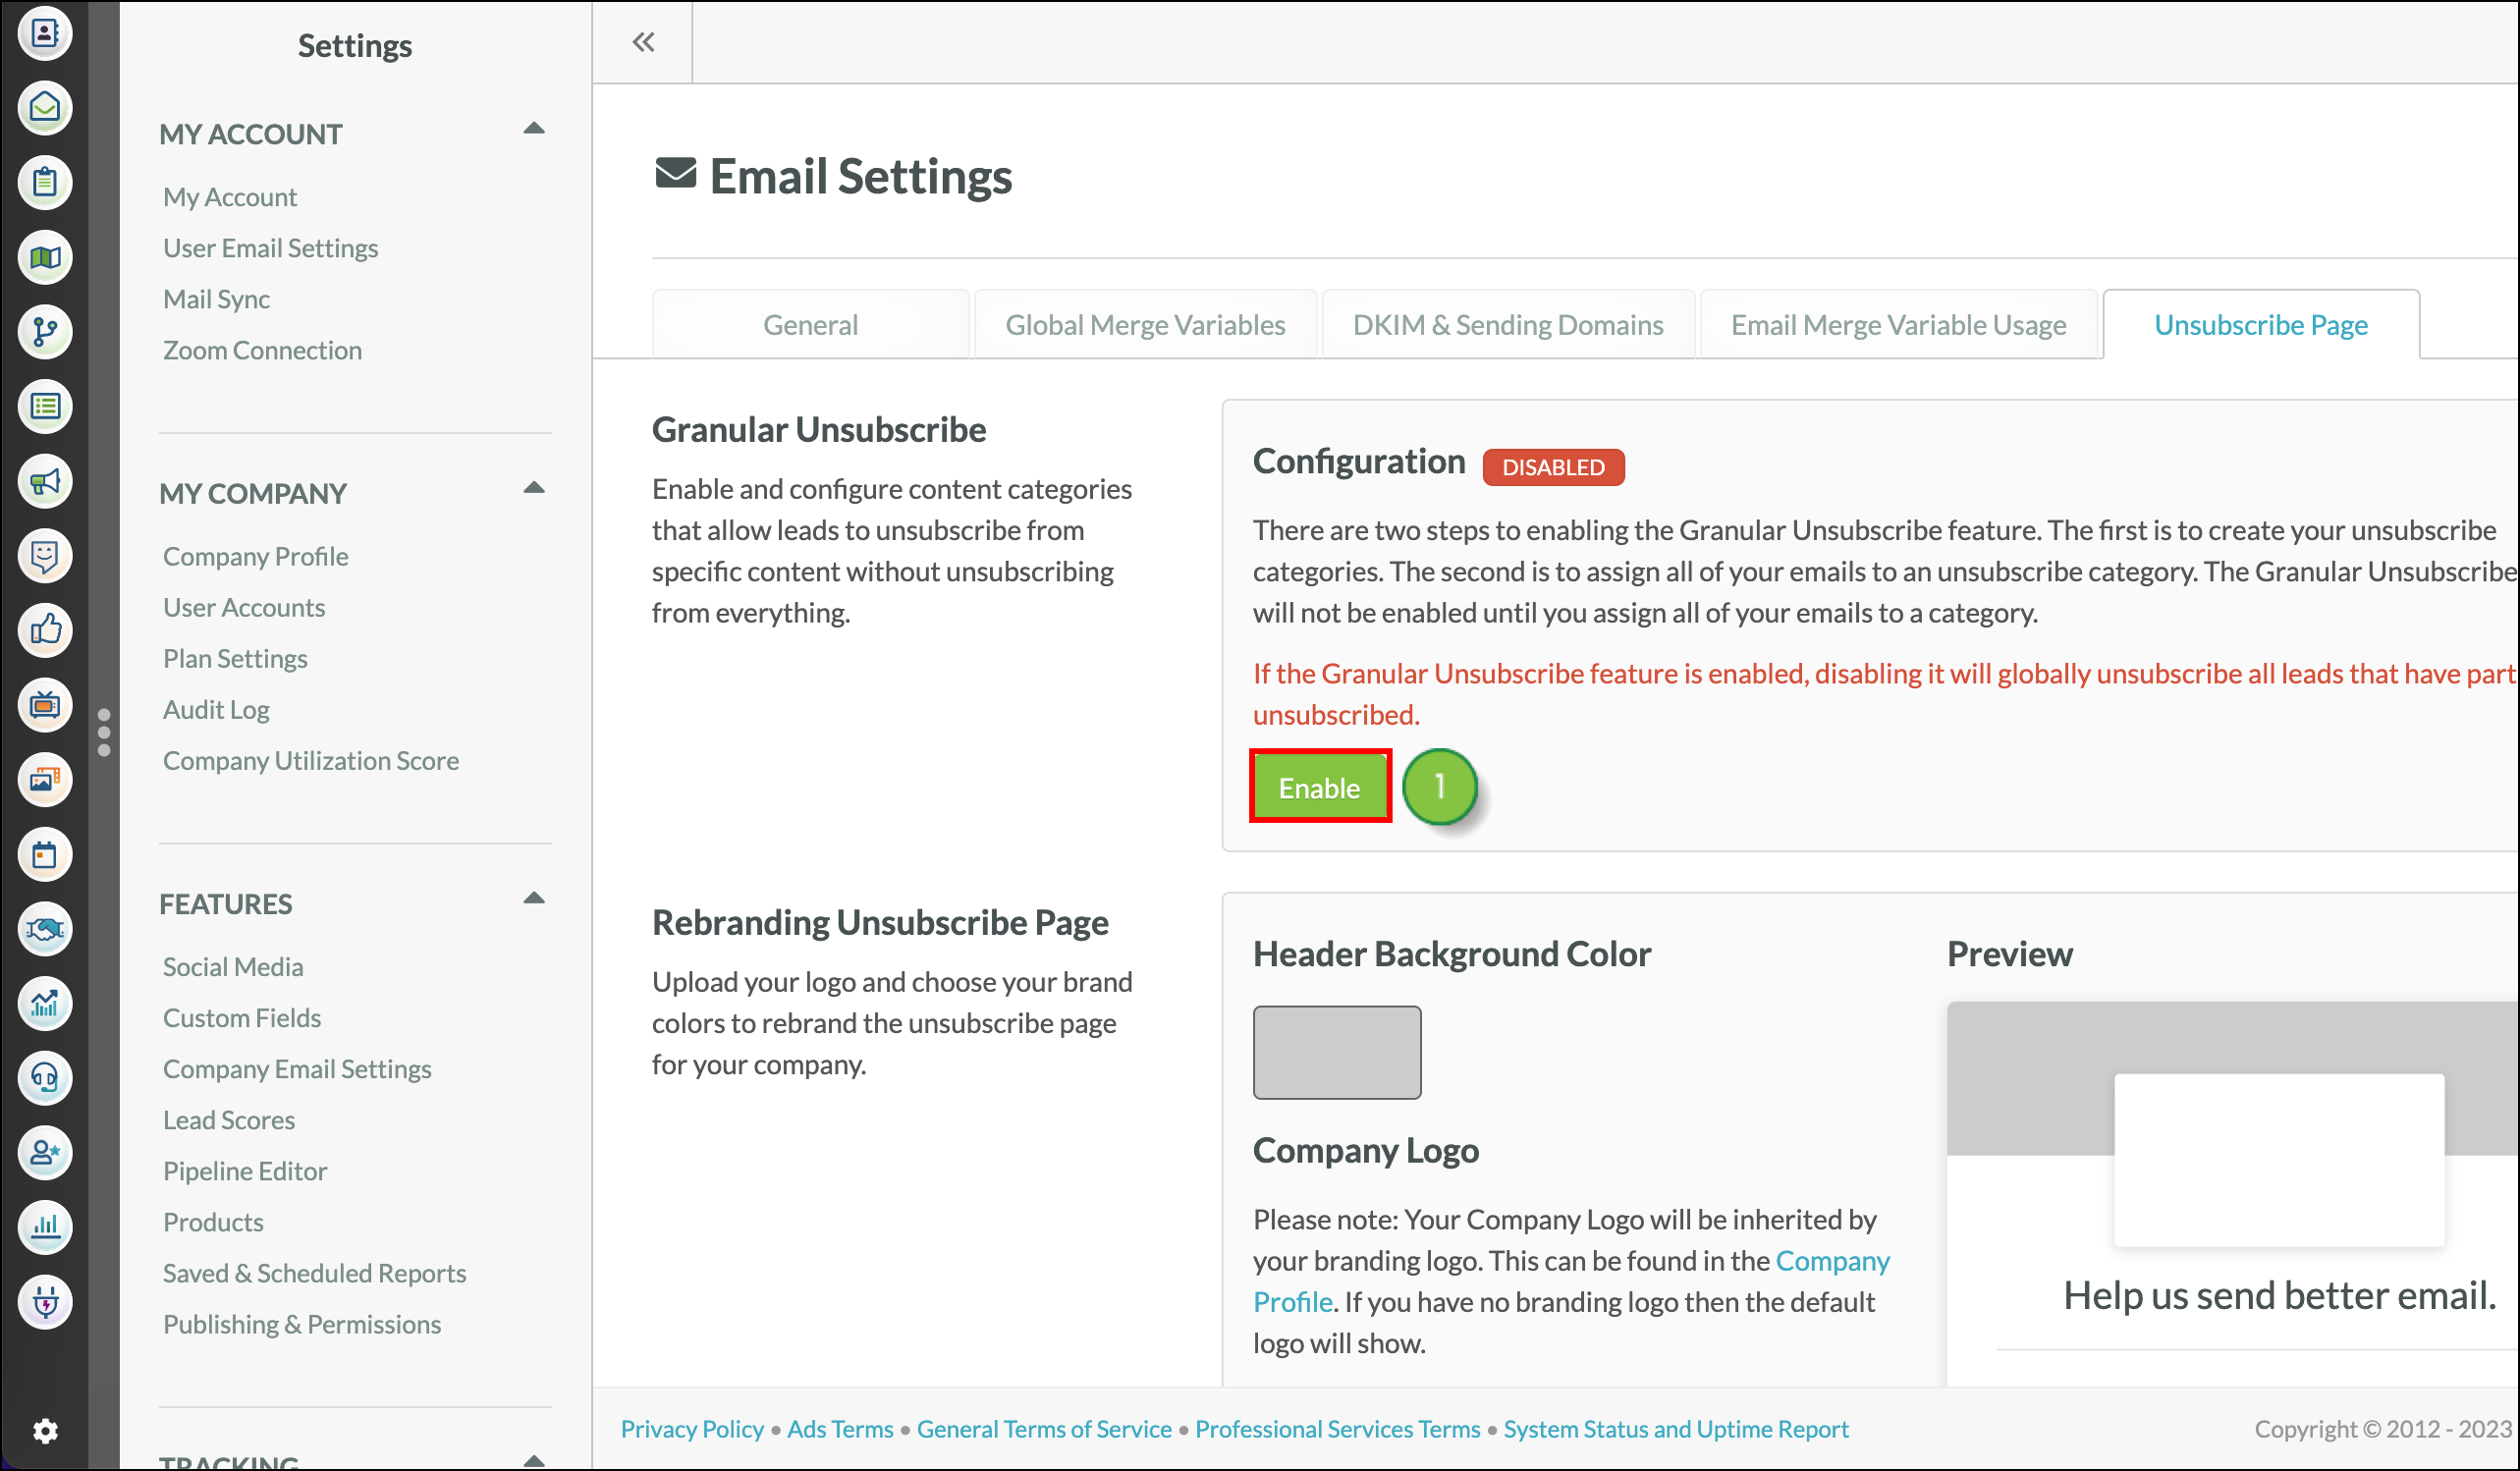
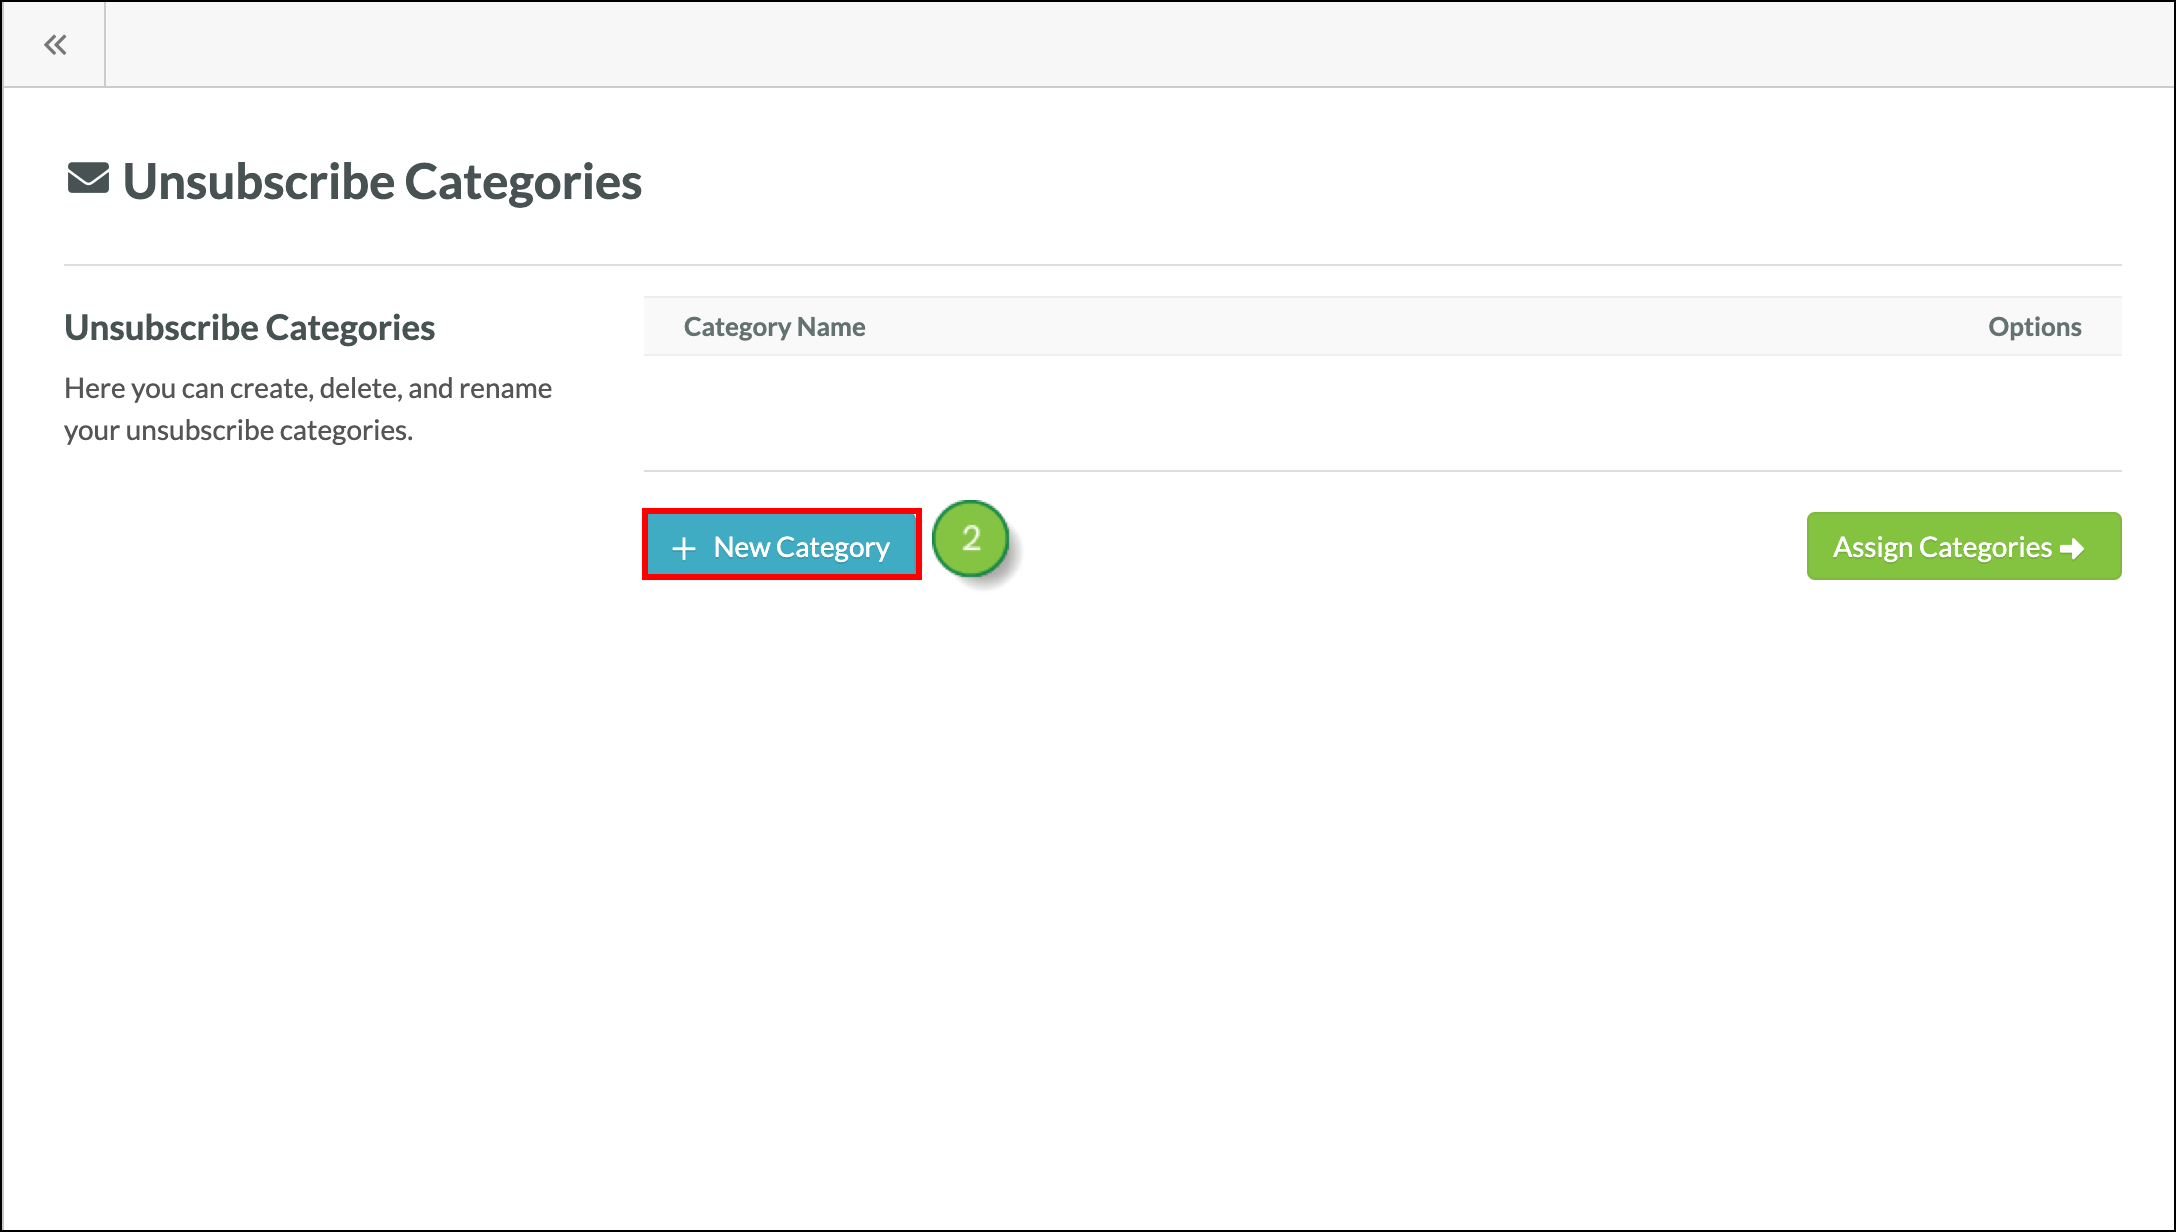
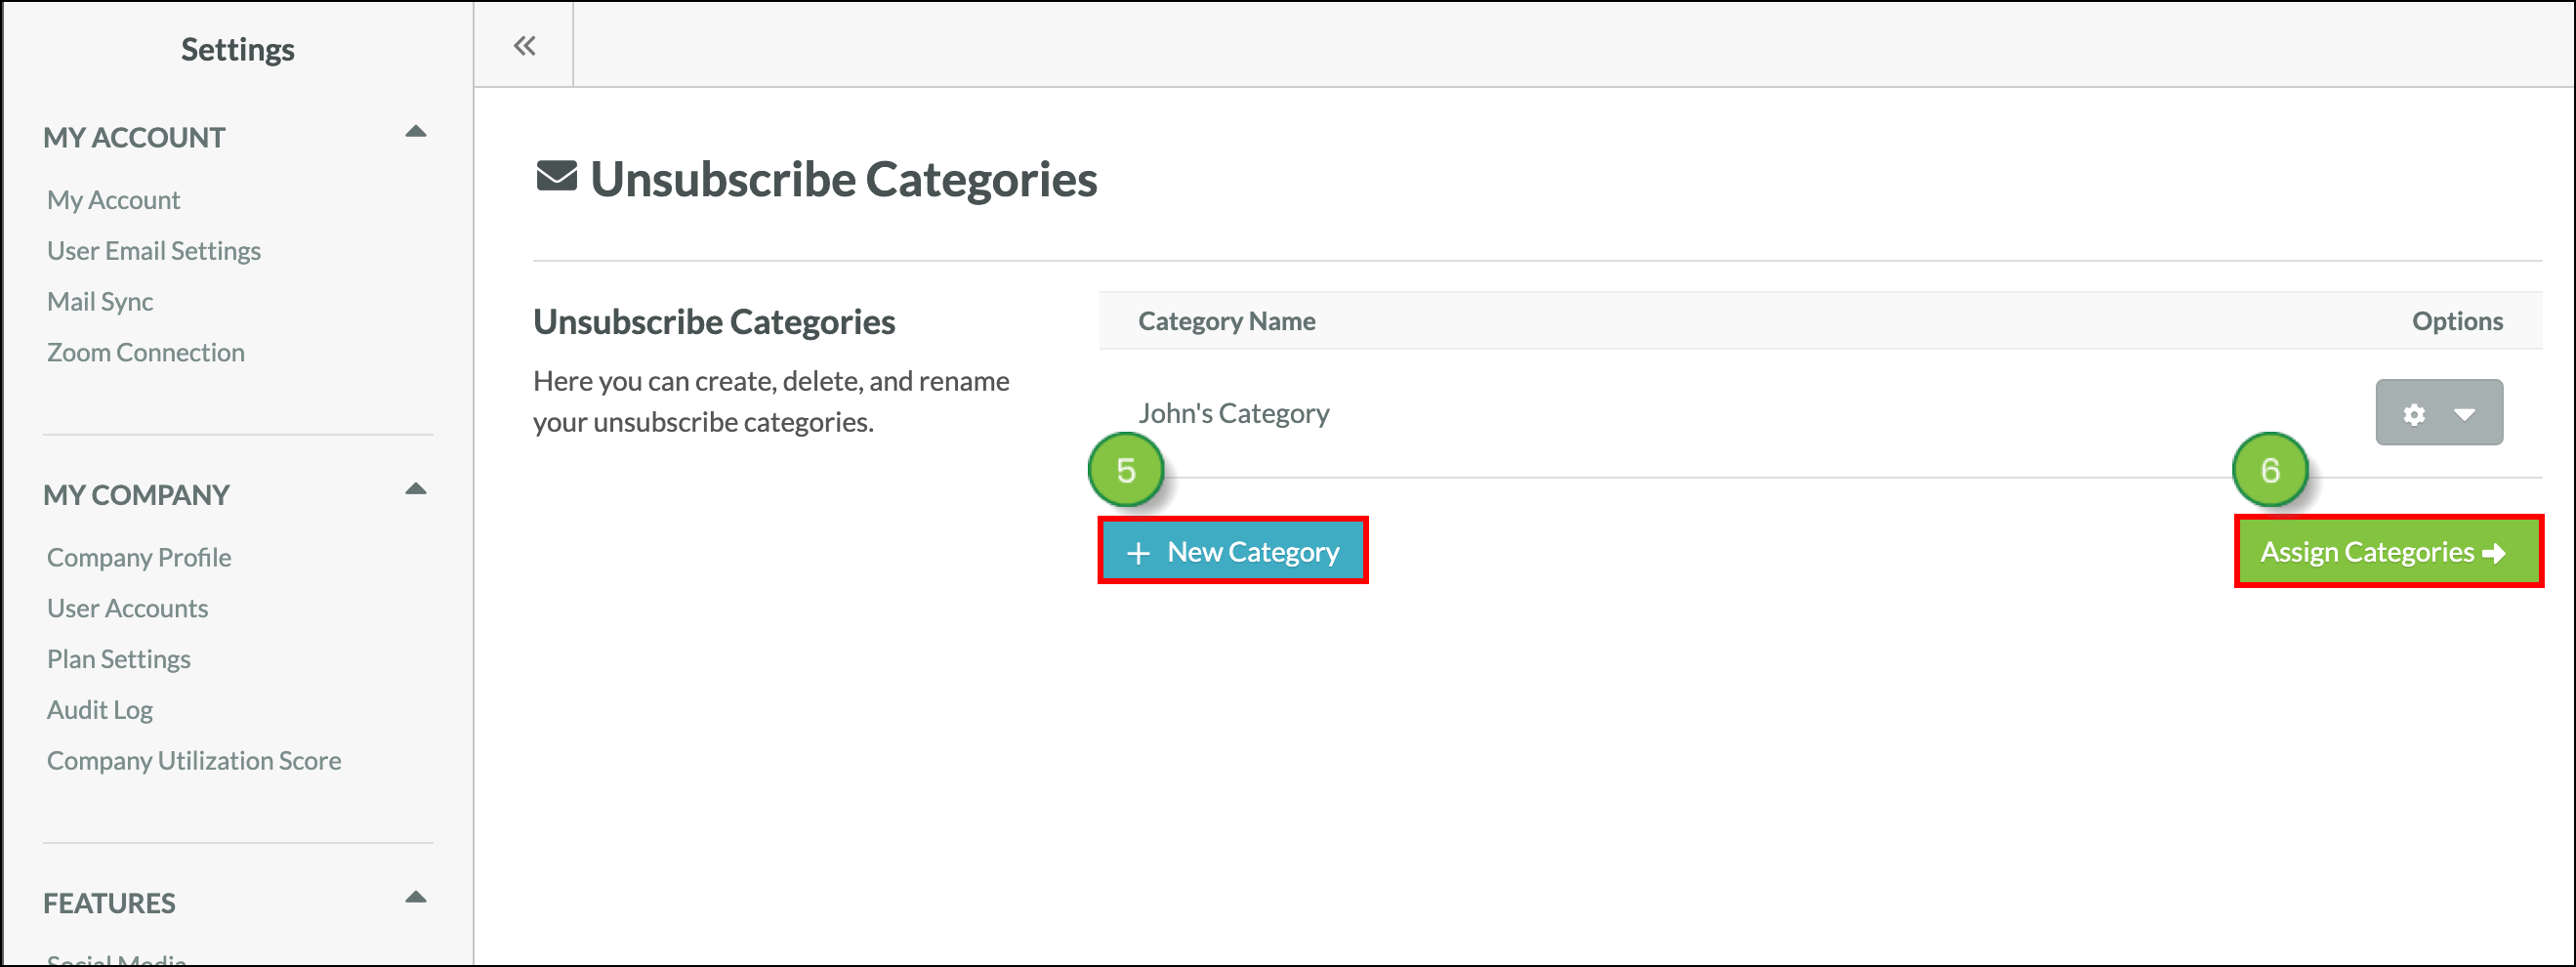
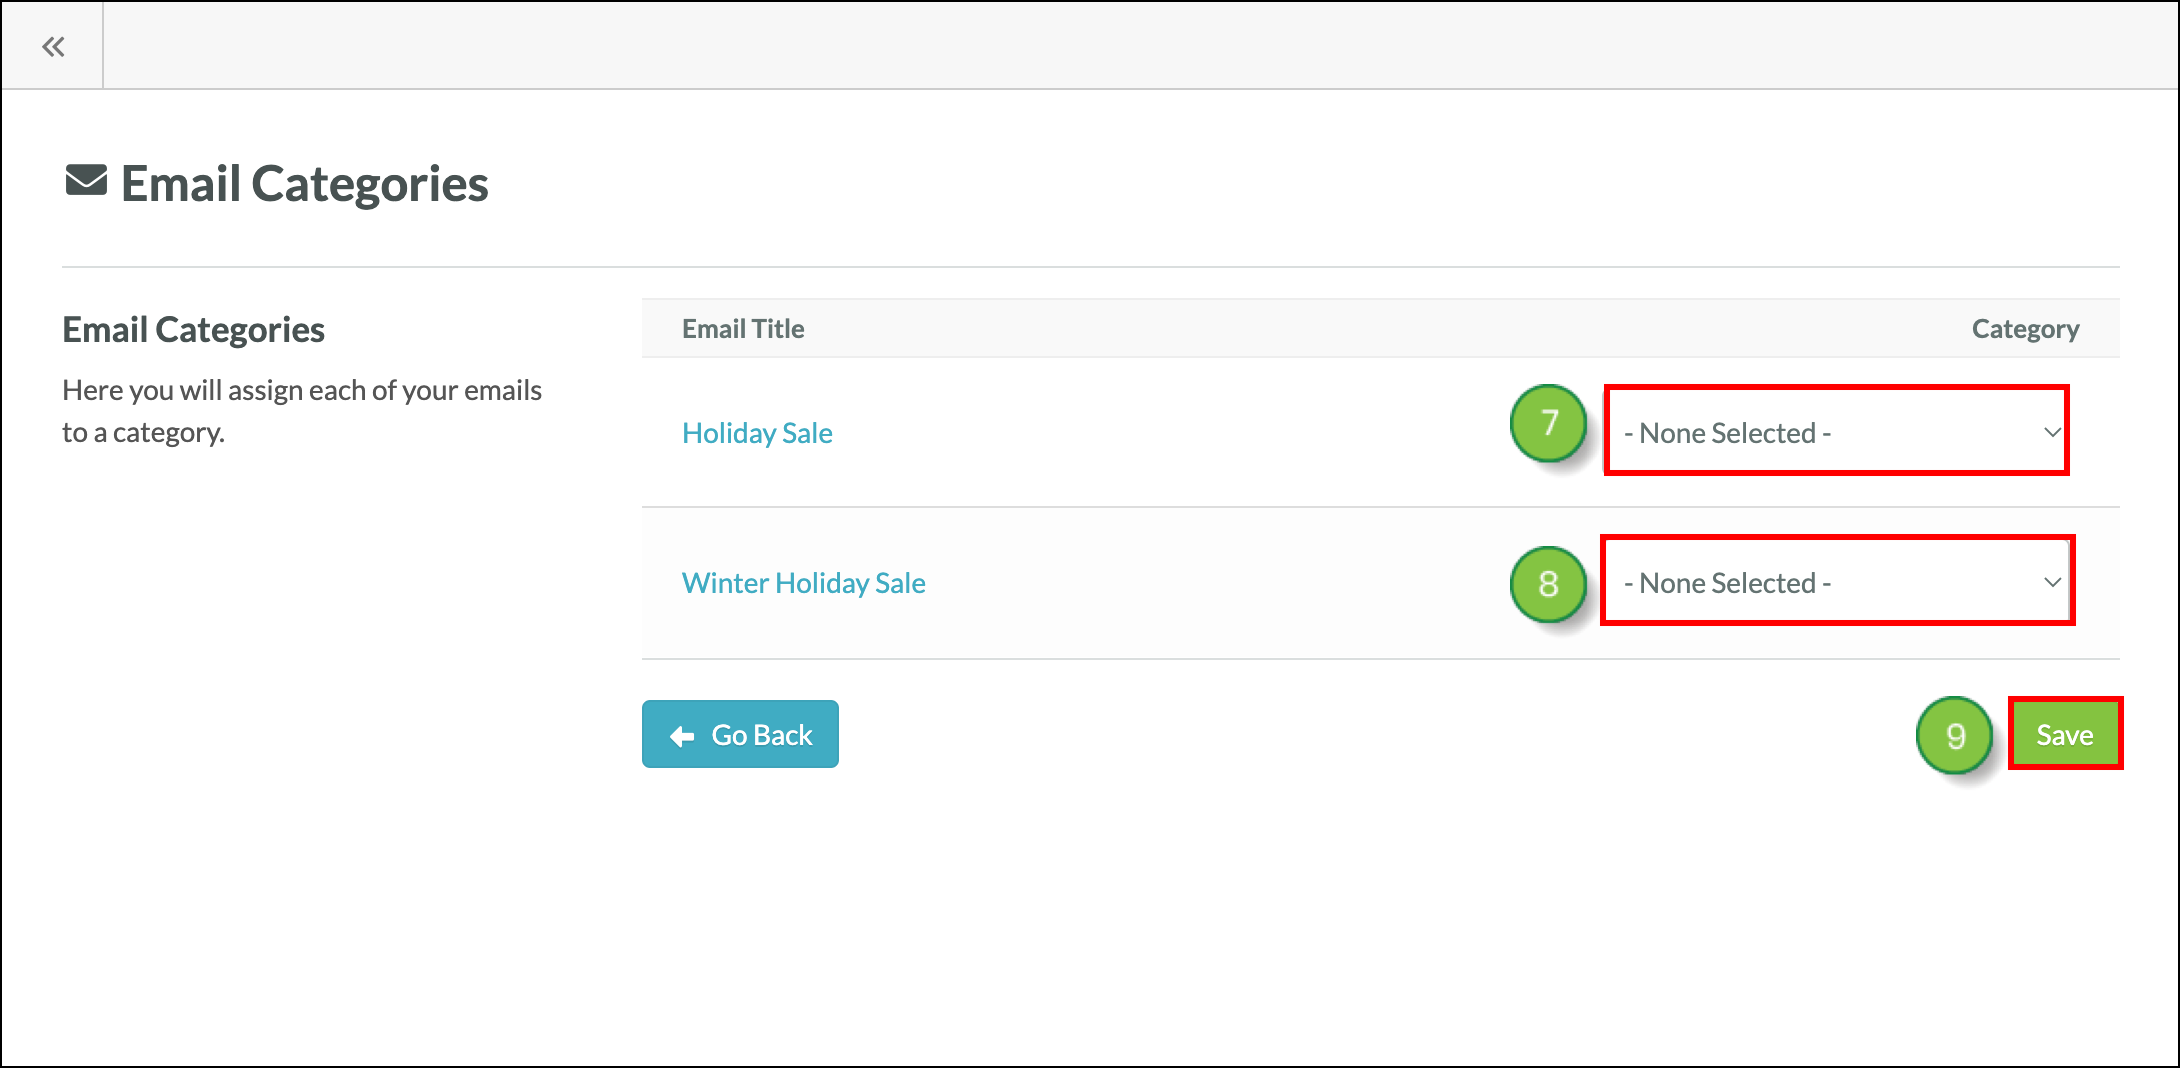
Once categories are created, all email content must be added into at least one of the categories you have created. If you fail to assign each of your emails, your granular unsubscription will not be activated.

In addition, once you have completed the setup process for granular unsubscriptions, you will be unable to create new categories or rename existing categories. In order to create or rename categories after setting up granular unsubscription, you will need to disable the feature, enable it again, and then create or rename categories. This also means that, as before, you will need to set categories for every email in order to save your settings.

Important: Disabling Granular Unsubscribe will fully unsubscribe anyone who has unsubscribed to one or more categories. 

To save time, review all of your categories—and any possible future categories you might want to include—in advance of setting up this feature.


Rebranding Unsubscription Pages

When granular unsubscription is enabled and viewers unsubscribe from your emails, they will be directed to an unsubscription page. You can customize this unsubscription page to better reflect your company's branding.

To customize your unsubscription page, navigate to the granular unsubscription settings page.

  1. Click the color swatch under Header Background Color.
     
    Note: The header background color is set to gray by default.
  2. Select the desired color and then click outside of the color picker modal window to close it.
  3. Enter what you want your page to say in the Header Text field.
  4. Click the color swatch under Button Color.
     
    Note: The button color is set to green by default. The button text is set to white and cannot be changed.


    Configure unsubscribe page branding


  5. Select the desired color and then click outside of the color picker modal window to close it.
  6. Click Save Changes.

    Save branding changes


Regarding Company Logo Rebranding

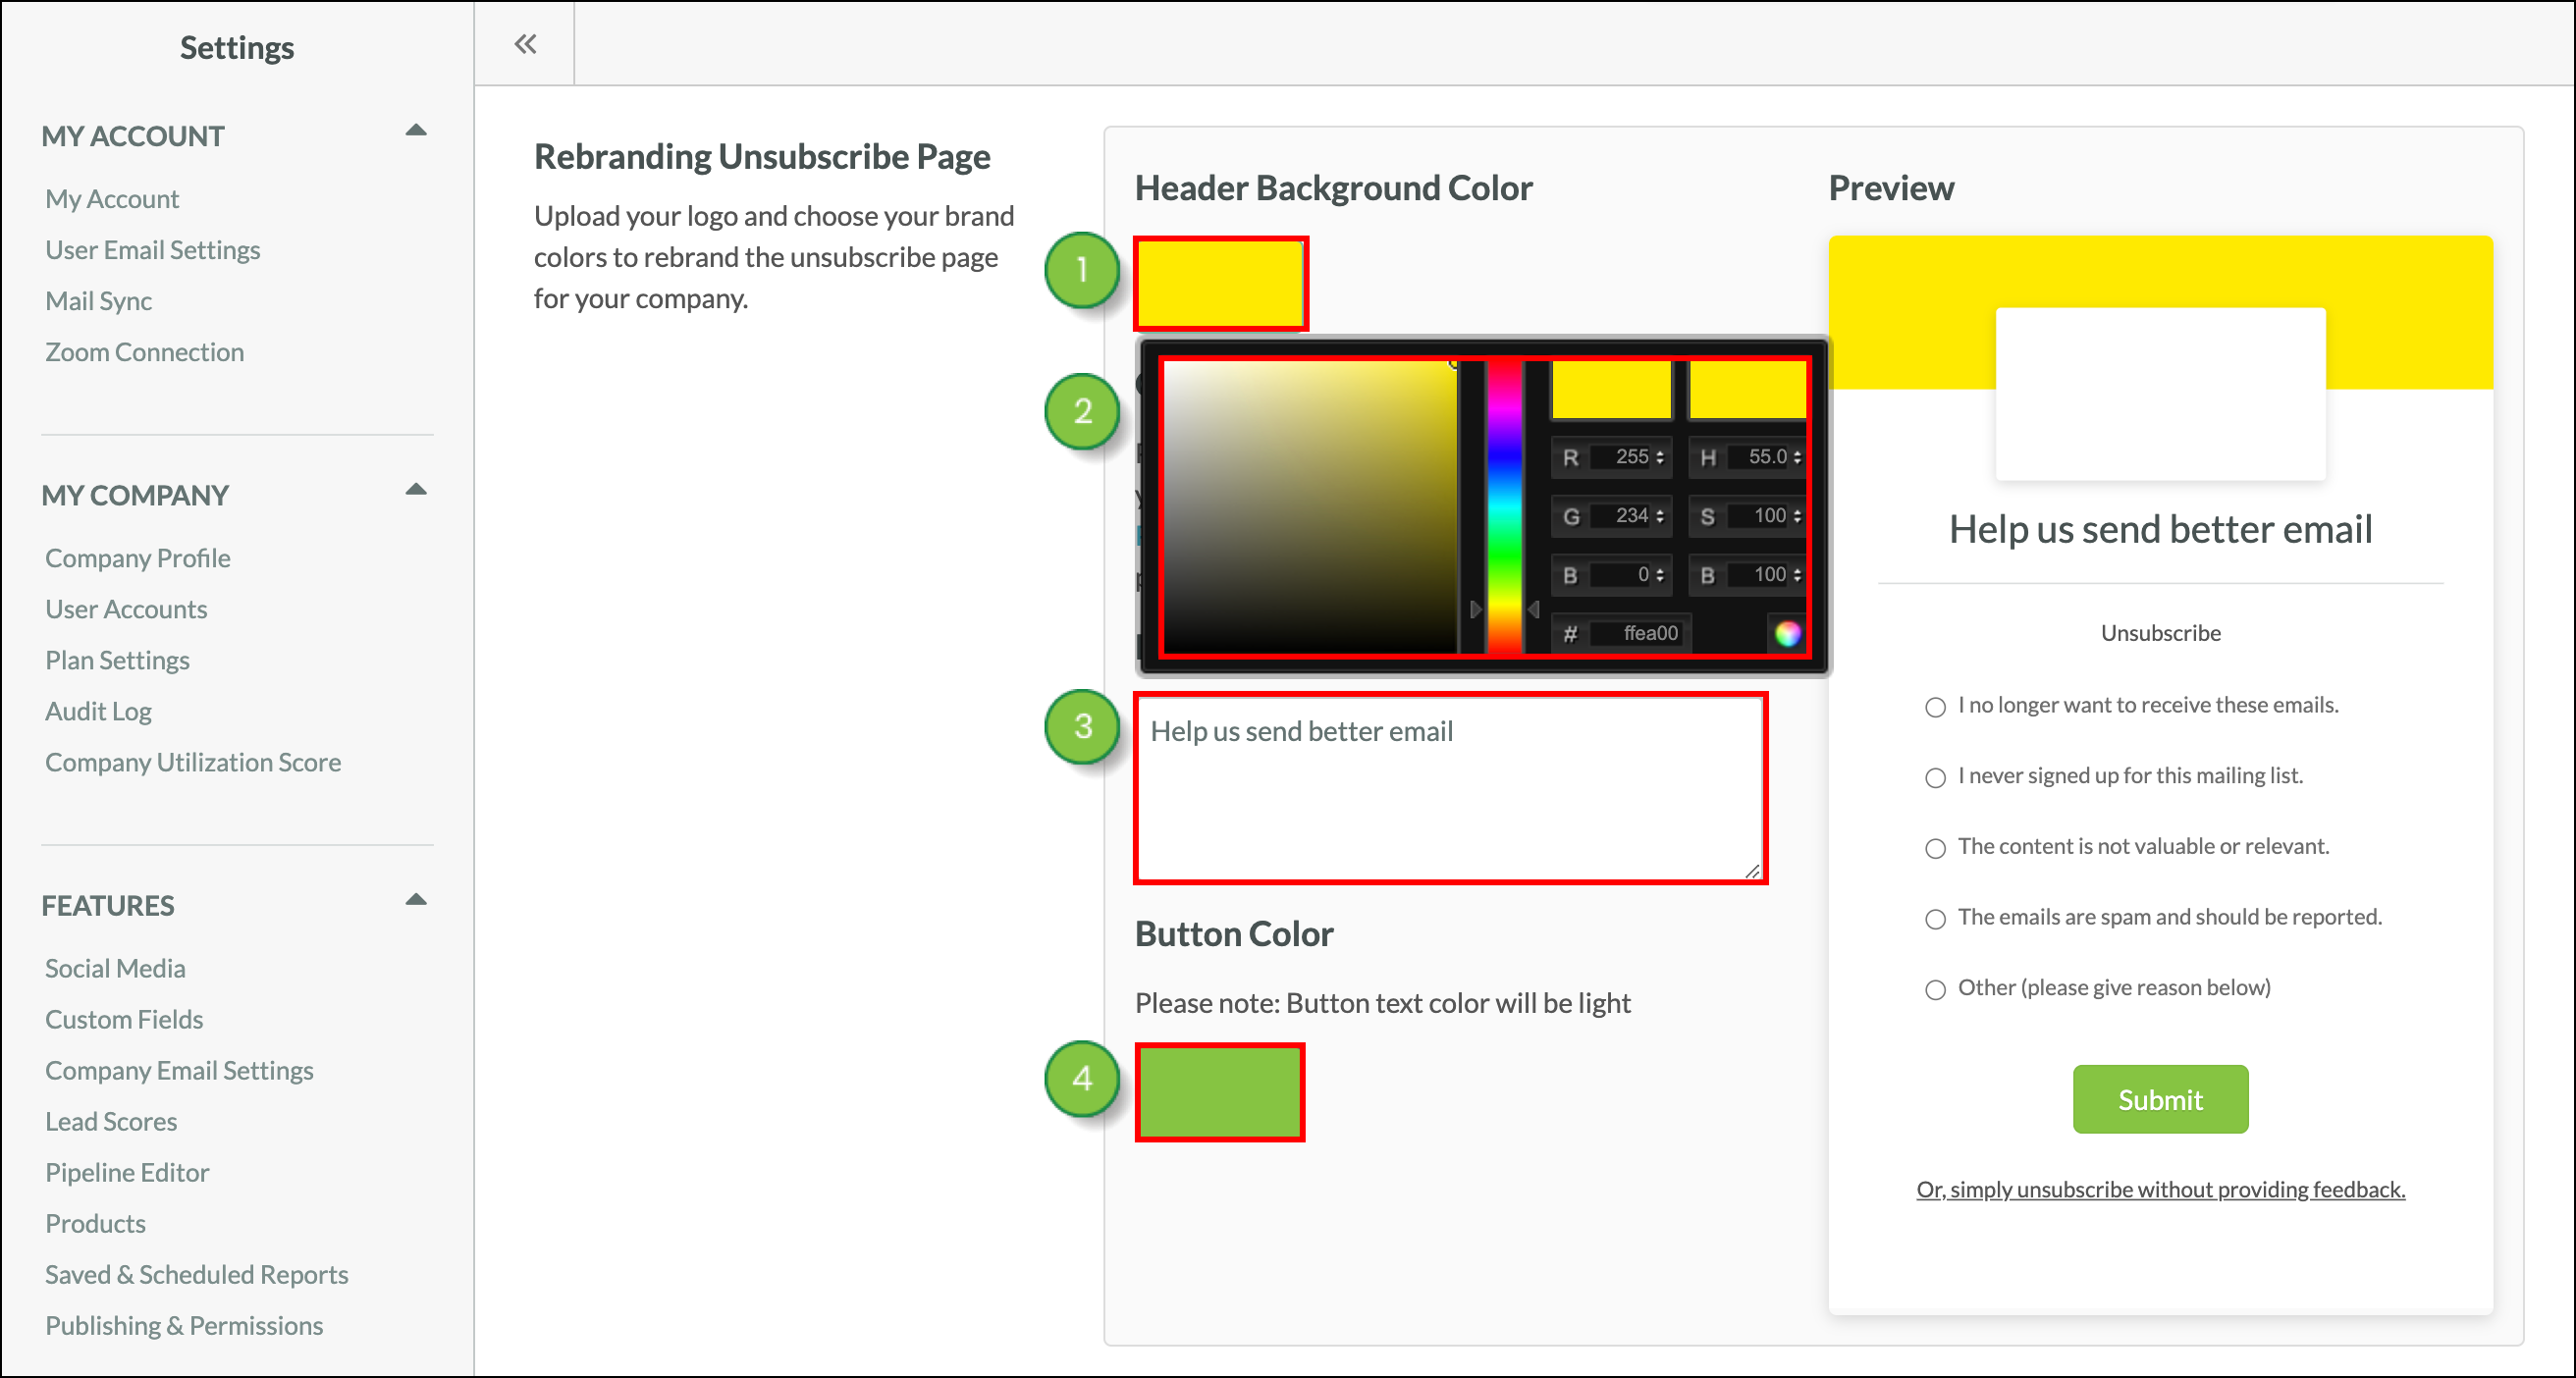
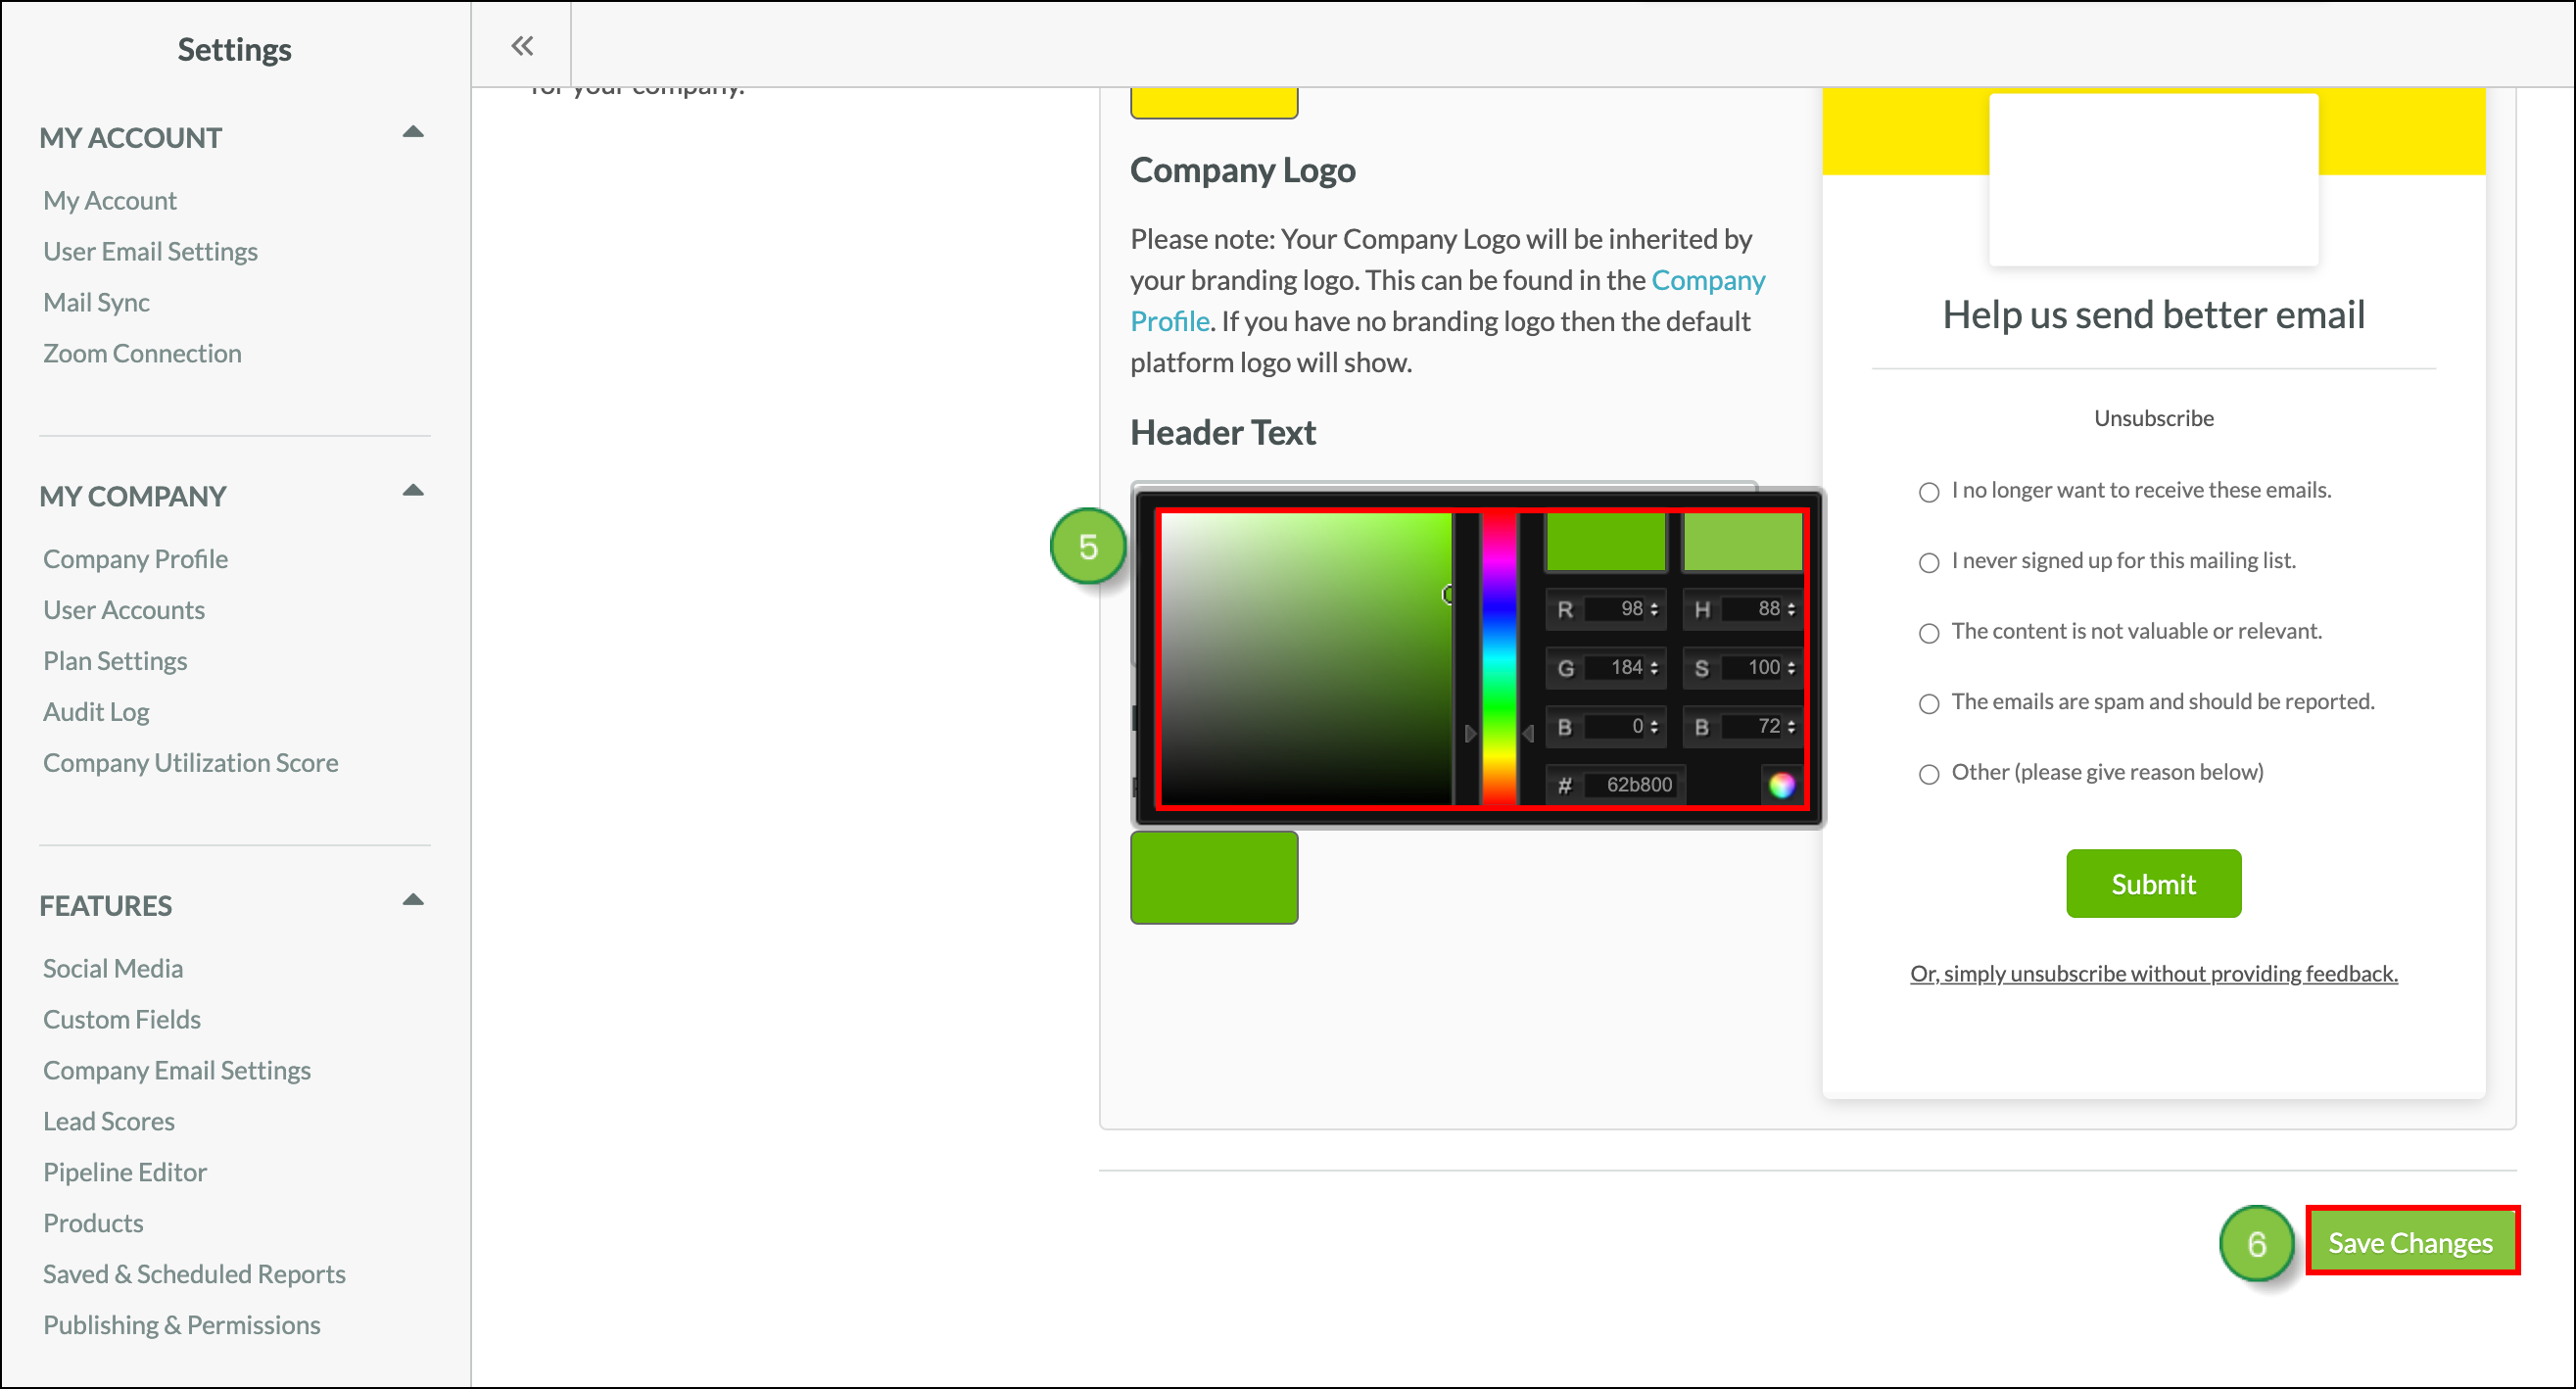
Your unsubscription page will feature your branding logo. Your branding logo is found in your Company Profile settings. Be aware that, if you do not have a branding logo set in your Company Profile settings, the Constant Contact logo will appear by default. 

Refer to Rebranding Lead Gen & CRM section for more information on setting your branding logo.


Testing Unsubscription Status

You can test to see how your unsubscription categories are performing.

To test created unsubscription categories, navigate to the granular unsubscription settings page.

  1. Confirm that the Configuration section now says Enabled.

    Confirm the configuration is Enabled


  2. Send an email to a test list, or to a list that contains your email address.

    Send a test email to yourself


  3. Look for the unsubscribe link.

    Click unsubscribe link in the email


    Note: The unsubscribe footer is only appended to list sends. As such, the unsubscribe link only shows up for bulk emails, and will not show for preview emails or a Smart Mail send.

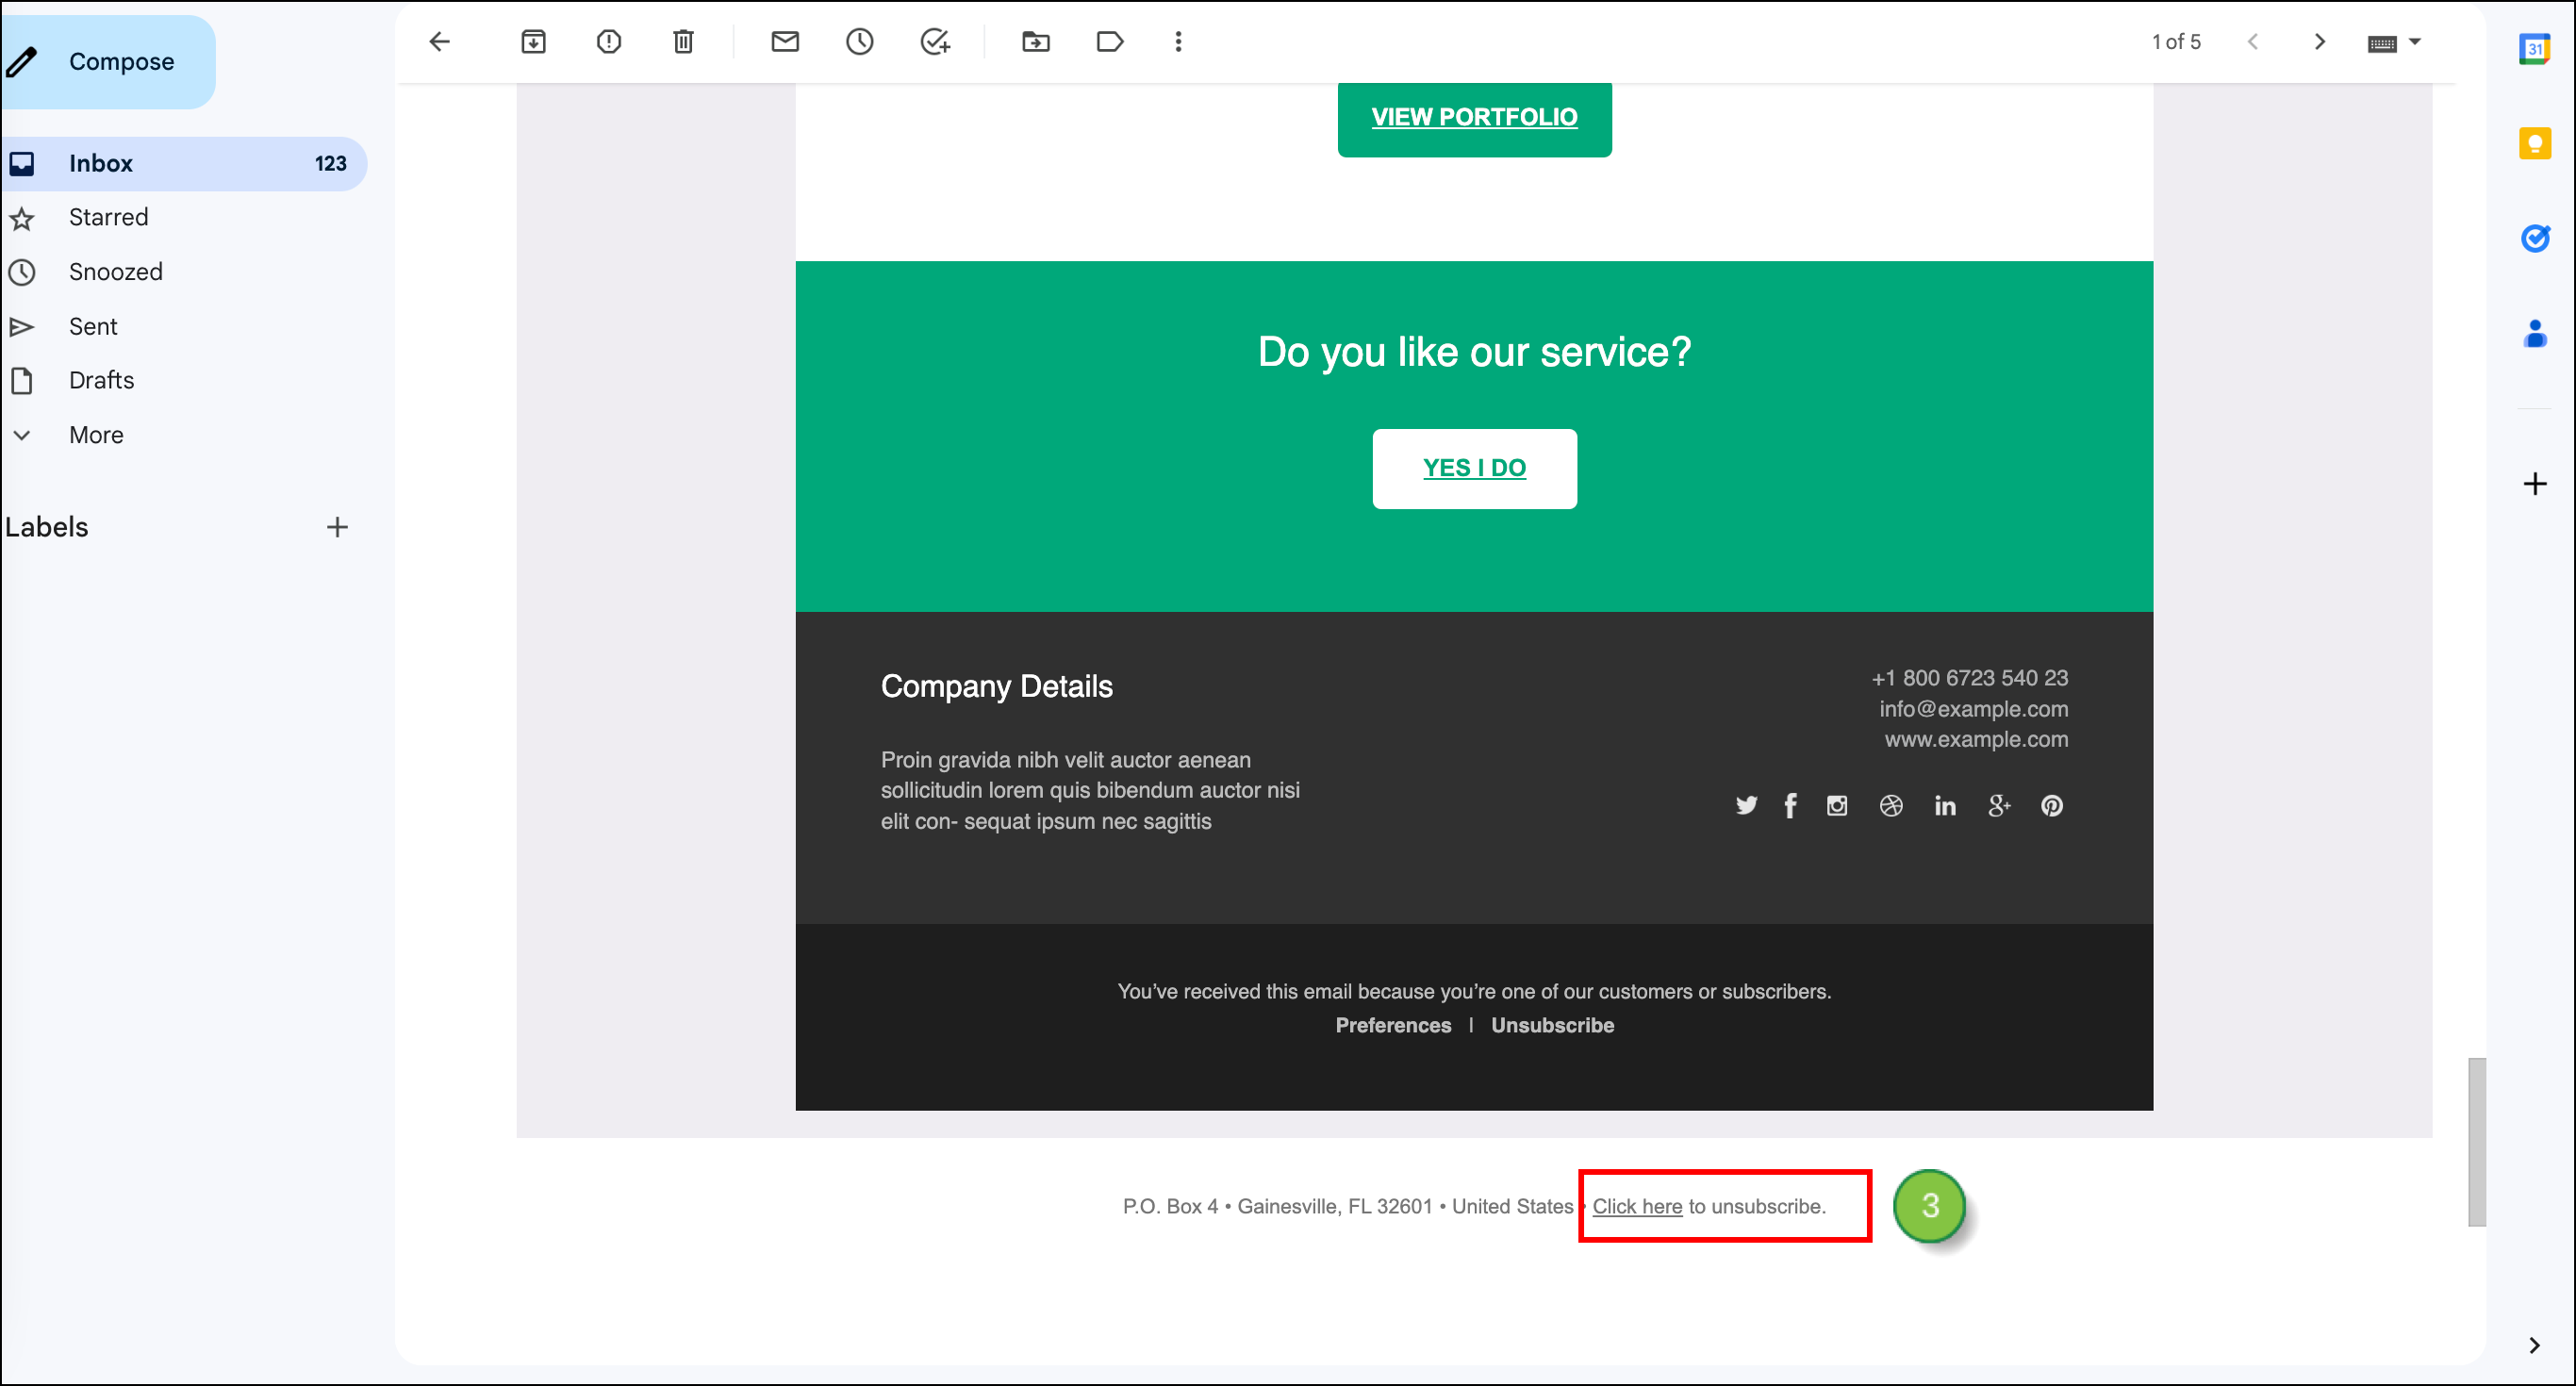
The granular unsubscription categories that you created will show up as checkbox fields under the Unsubscribe me from the following emails section when a lead clicks the unsubscribe link in their email.


Viewing Lead Unsubscriptions

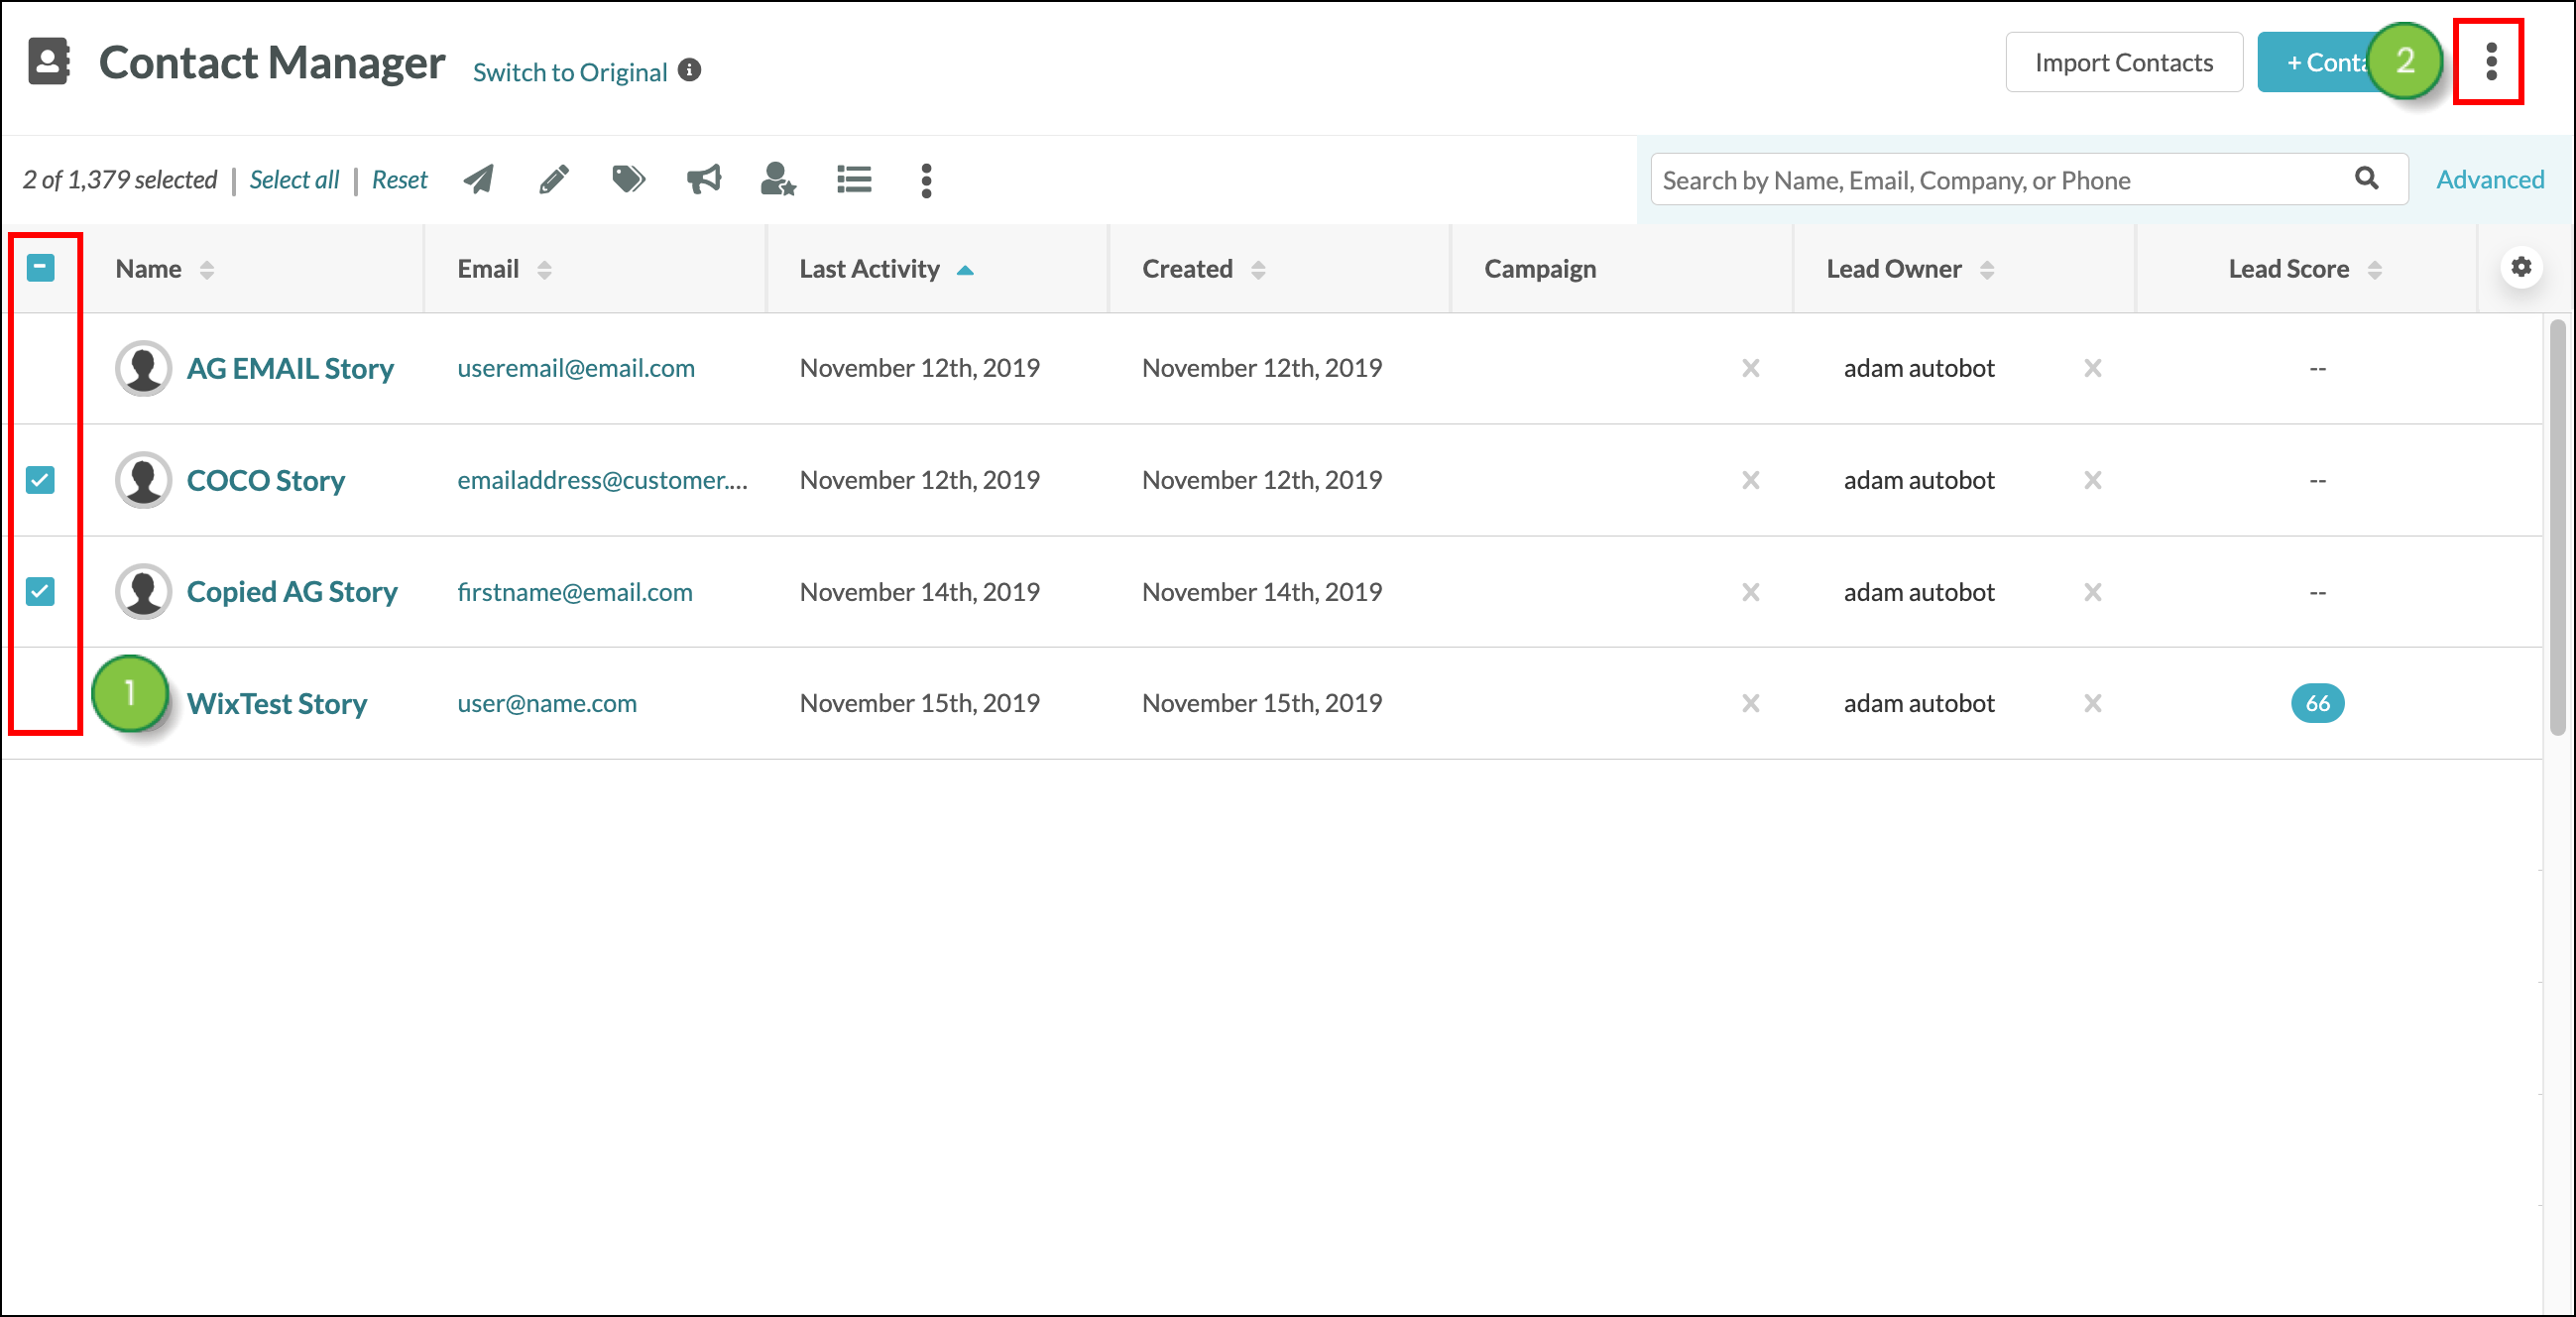
Note: You can see what category a lead unsubscribed from by going into the lead record. To see and export granular unsubscribes for multiple contacts at once, see the Exporting Lead Unsubscriptions section.

To see lead unsubscriptions, do the following:

  1. Click Contacts in the left toolbar.
  2. Click on the desired lead.
  3. Click the Memberships tab.
  4. Scroll down to Unsubscribe Categories.
  5. Observe which categories the lead is unsubscribed from.


Exporting Lead Unsubscriptions

In the Contact Manager, you can export a .CSV file that includes the categories leads have unsubscribed from. Select the contacts you want to export. 

  1. Check the box next to the desired lead(s). 
  2. Click     Options.


  3. Click Export Leads


  4. In the popup that appears, search or scroll through the list of contact data options to locate Granular Unsubscribes. 
  5. Select Granular Unsubscribes
  6. Click Export

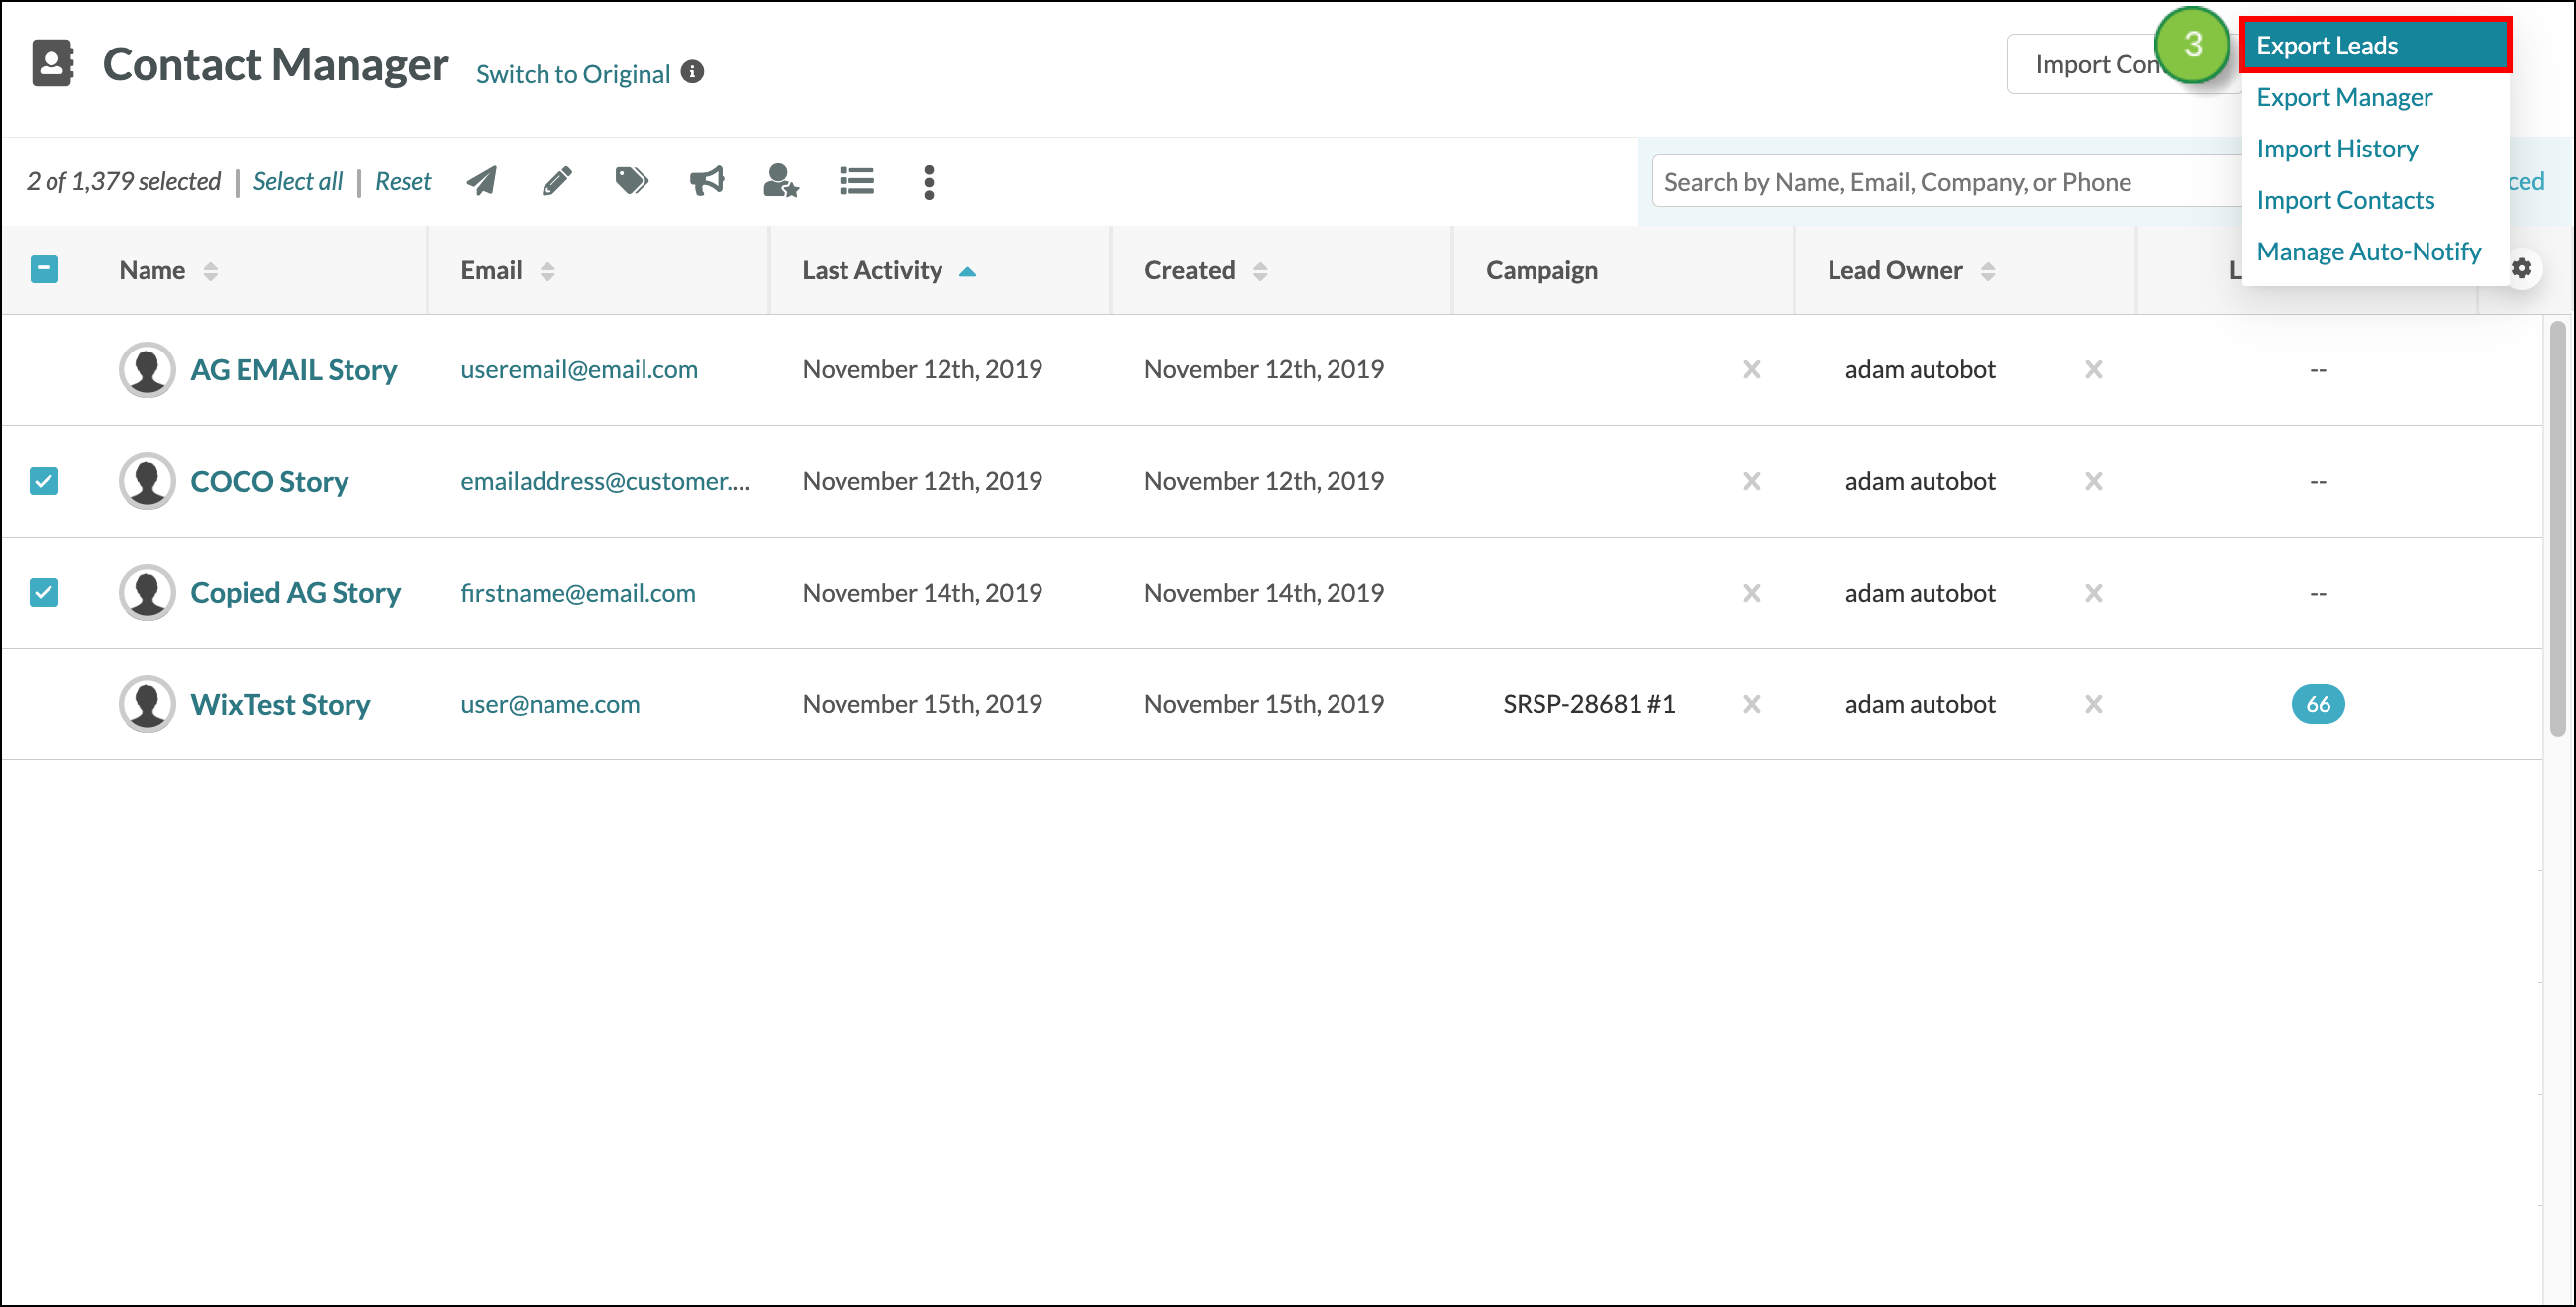
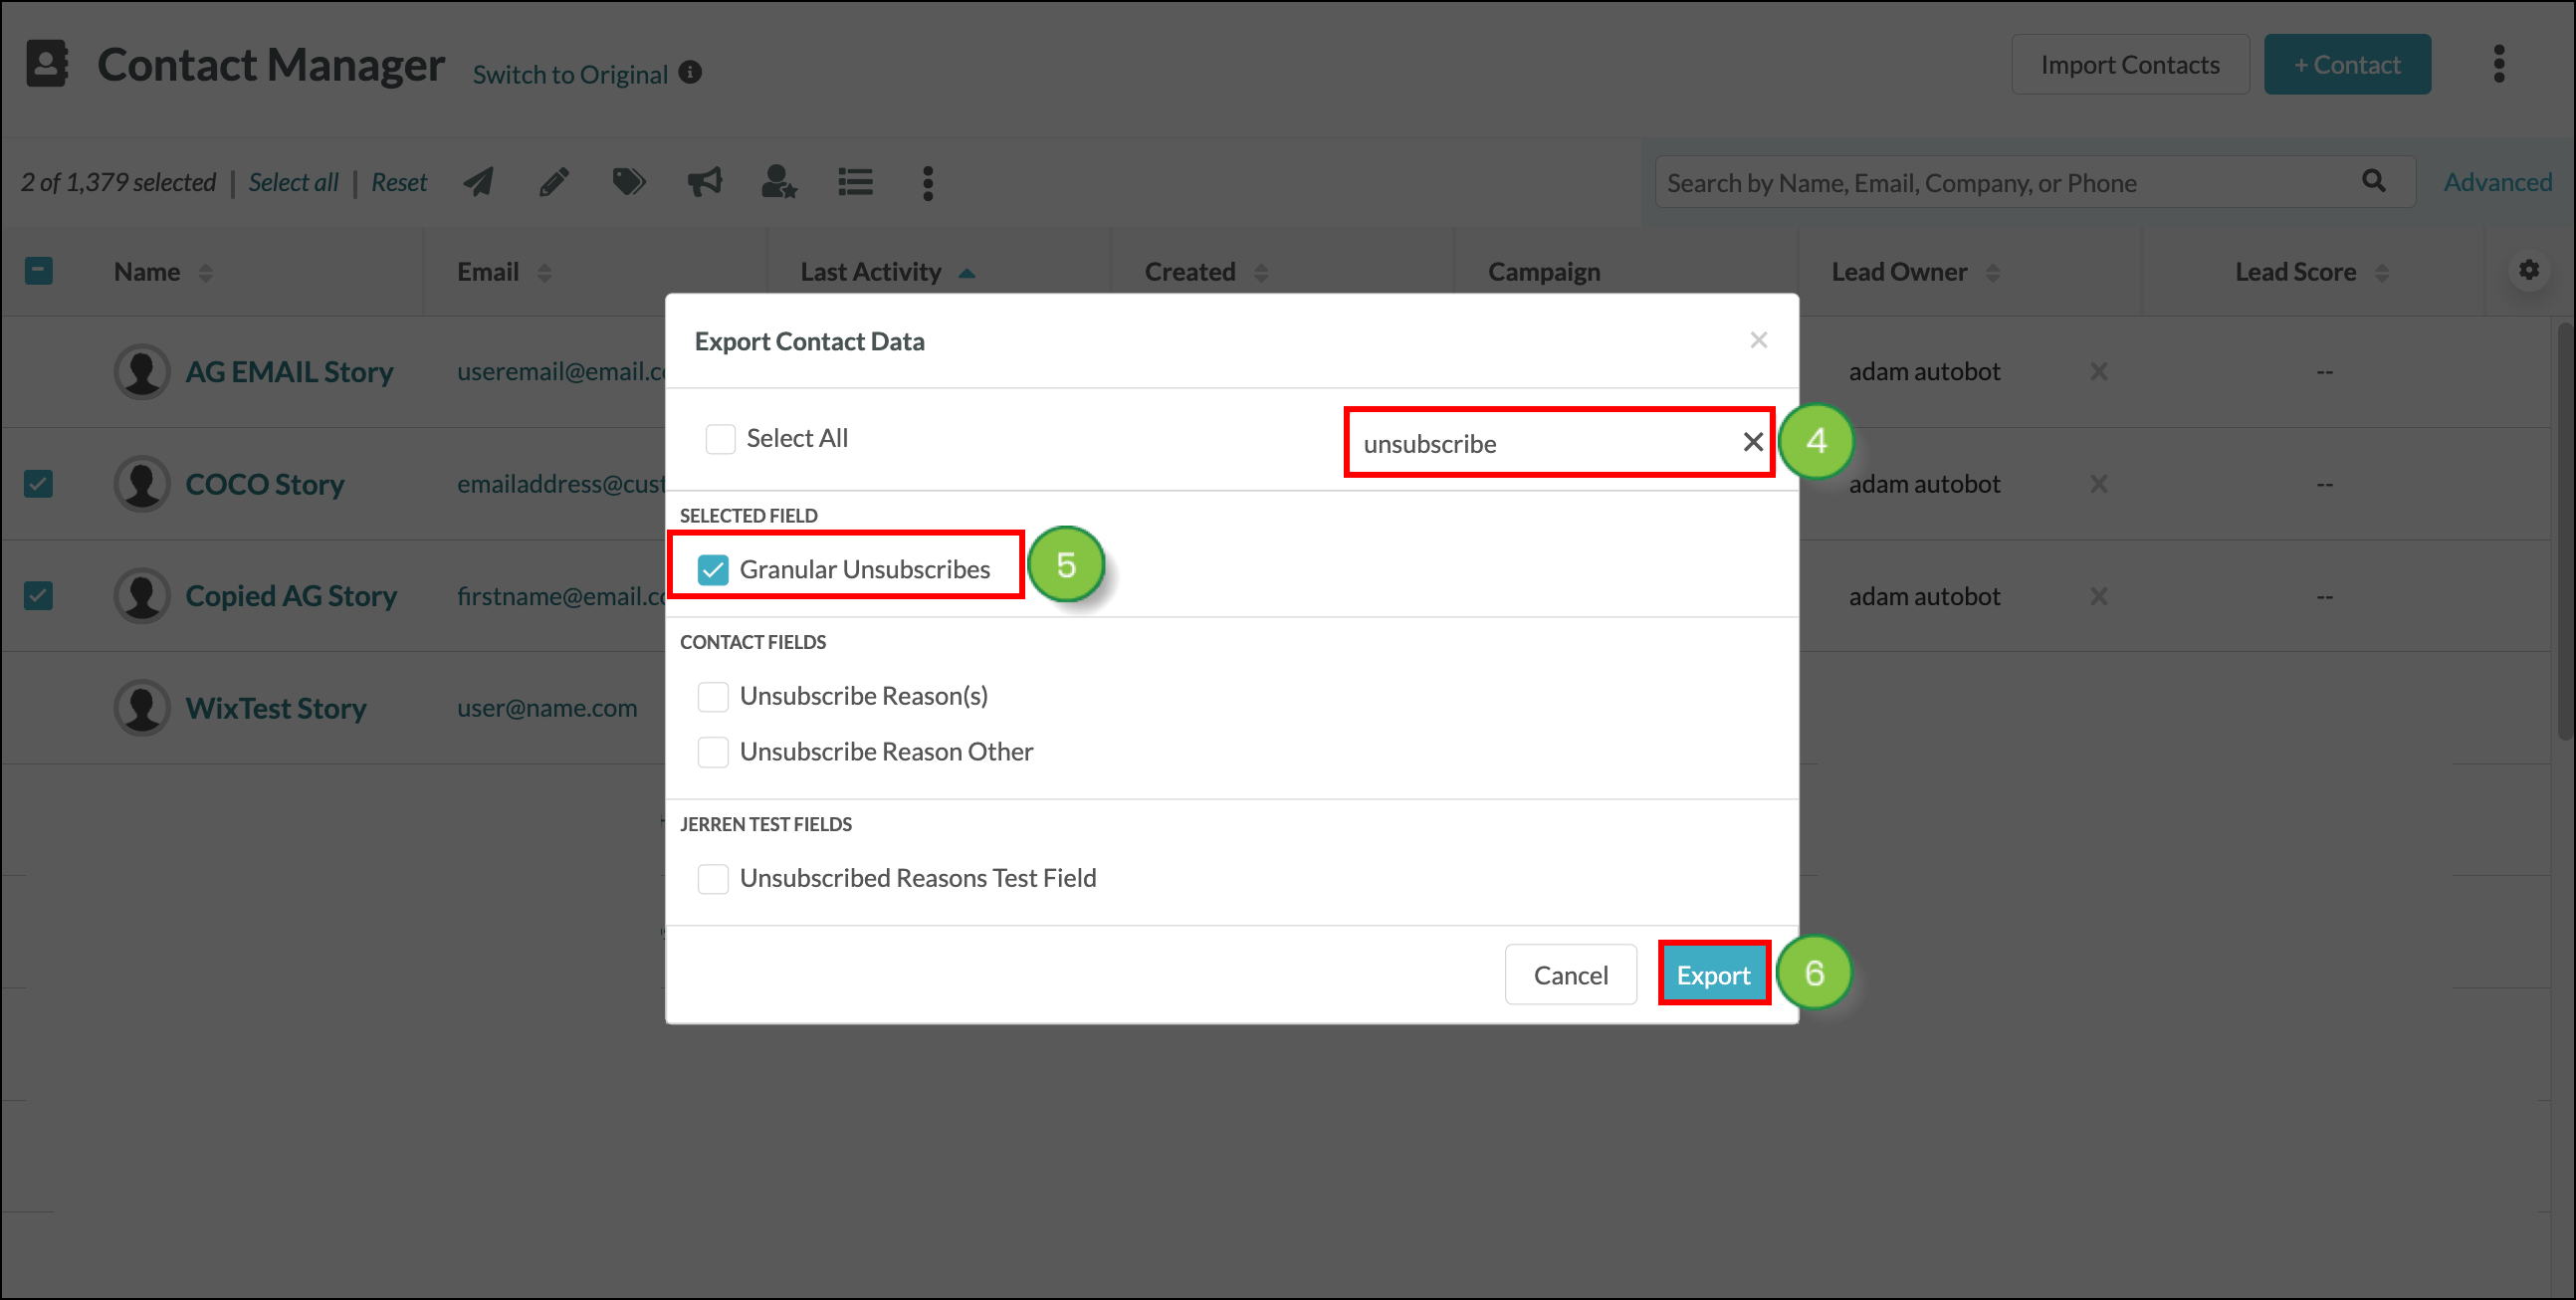
When your export is ready, you can download it from the Export Manager


Build a List Based on Granular Unsubscribed Status

You can build a list based on the granular unsubscribe status for contacts. For example, if you want to see all contacts who have unsubscribed from a specific granular unsubscribe category, you can:

  1. Navigate to the Lists page
  2. Build a new Rules-based List
  3. Create a new rule
  4. Under the “Leads” section, select “has the granular unsubscribe category”
  5. From the drop-down, select the desired granular unsubscribe category
  6. Click Save

Once the list finishes building, it will show all contacts who have unsubscribed from that specific category.


Disabling Granular Unsubscription

You can deactivate granular unsubscription. To deactivate the feature, do the following:

  1. Navigate to the granular unsubscription settings page.
  2. Click Disable.

Be aware that all of your categories will be lost when you disable granular unsubscription. This means that emails that were assigned to categories will lose that category information and become uncategorized.

Important: Disabling Granular Unsubscribe will fully unsubscribe anyone who has unsubscribed to one or more categories. 

If you want to use granular unsubscription again, you will need to enable and configure granular unsubscription categories, as well as set those categories to all of your created emails.


Did this article answer your question?


Constant Contact Logo

Copyright © 2025 · All Rights Reserved · Constant Contact · Privacy Center