Campaigns are any marketing initiative for which you would like to track results. When deciding what to track, it is best to be as granular as possible, as you can always tag multiple small campaigns together into a group.
In this article, you'll learn how to create a campaign. To learn how to modify existing campaigns, read Modifying Campaigns.
| Administrators | ✓ | |
| Company Managers | ✓ | |
| Marketing Managers | ✓ | |
| Sales Managers | ||
| Salespersons | ||
| Jr. Salespersons |
| Tip: Are you looking for information about Constant Contact’s Email and Digital Marketing product? This article is for Constant Contact’s Lead Gen & CRM product. Head on over to the Email and Digital Marketing articles by clicking here. Not sure what the difference is? Read this article. |
Campaigns help you track and manage your marketing initiatives, including landing page traffic and social media tracking. This data is available from Campaign Reports and Custom Reports.
The Campaign page houses all of your various campaigns. From there, you can create, modify, and view your campaigns. To navigate and view your campaigns click Campaigns > Campaigns in the left toolbar.
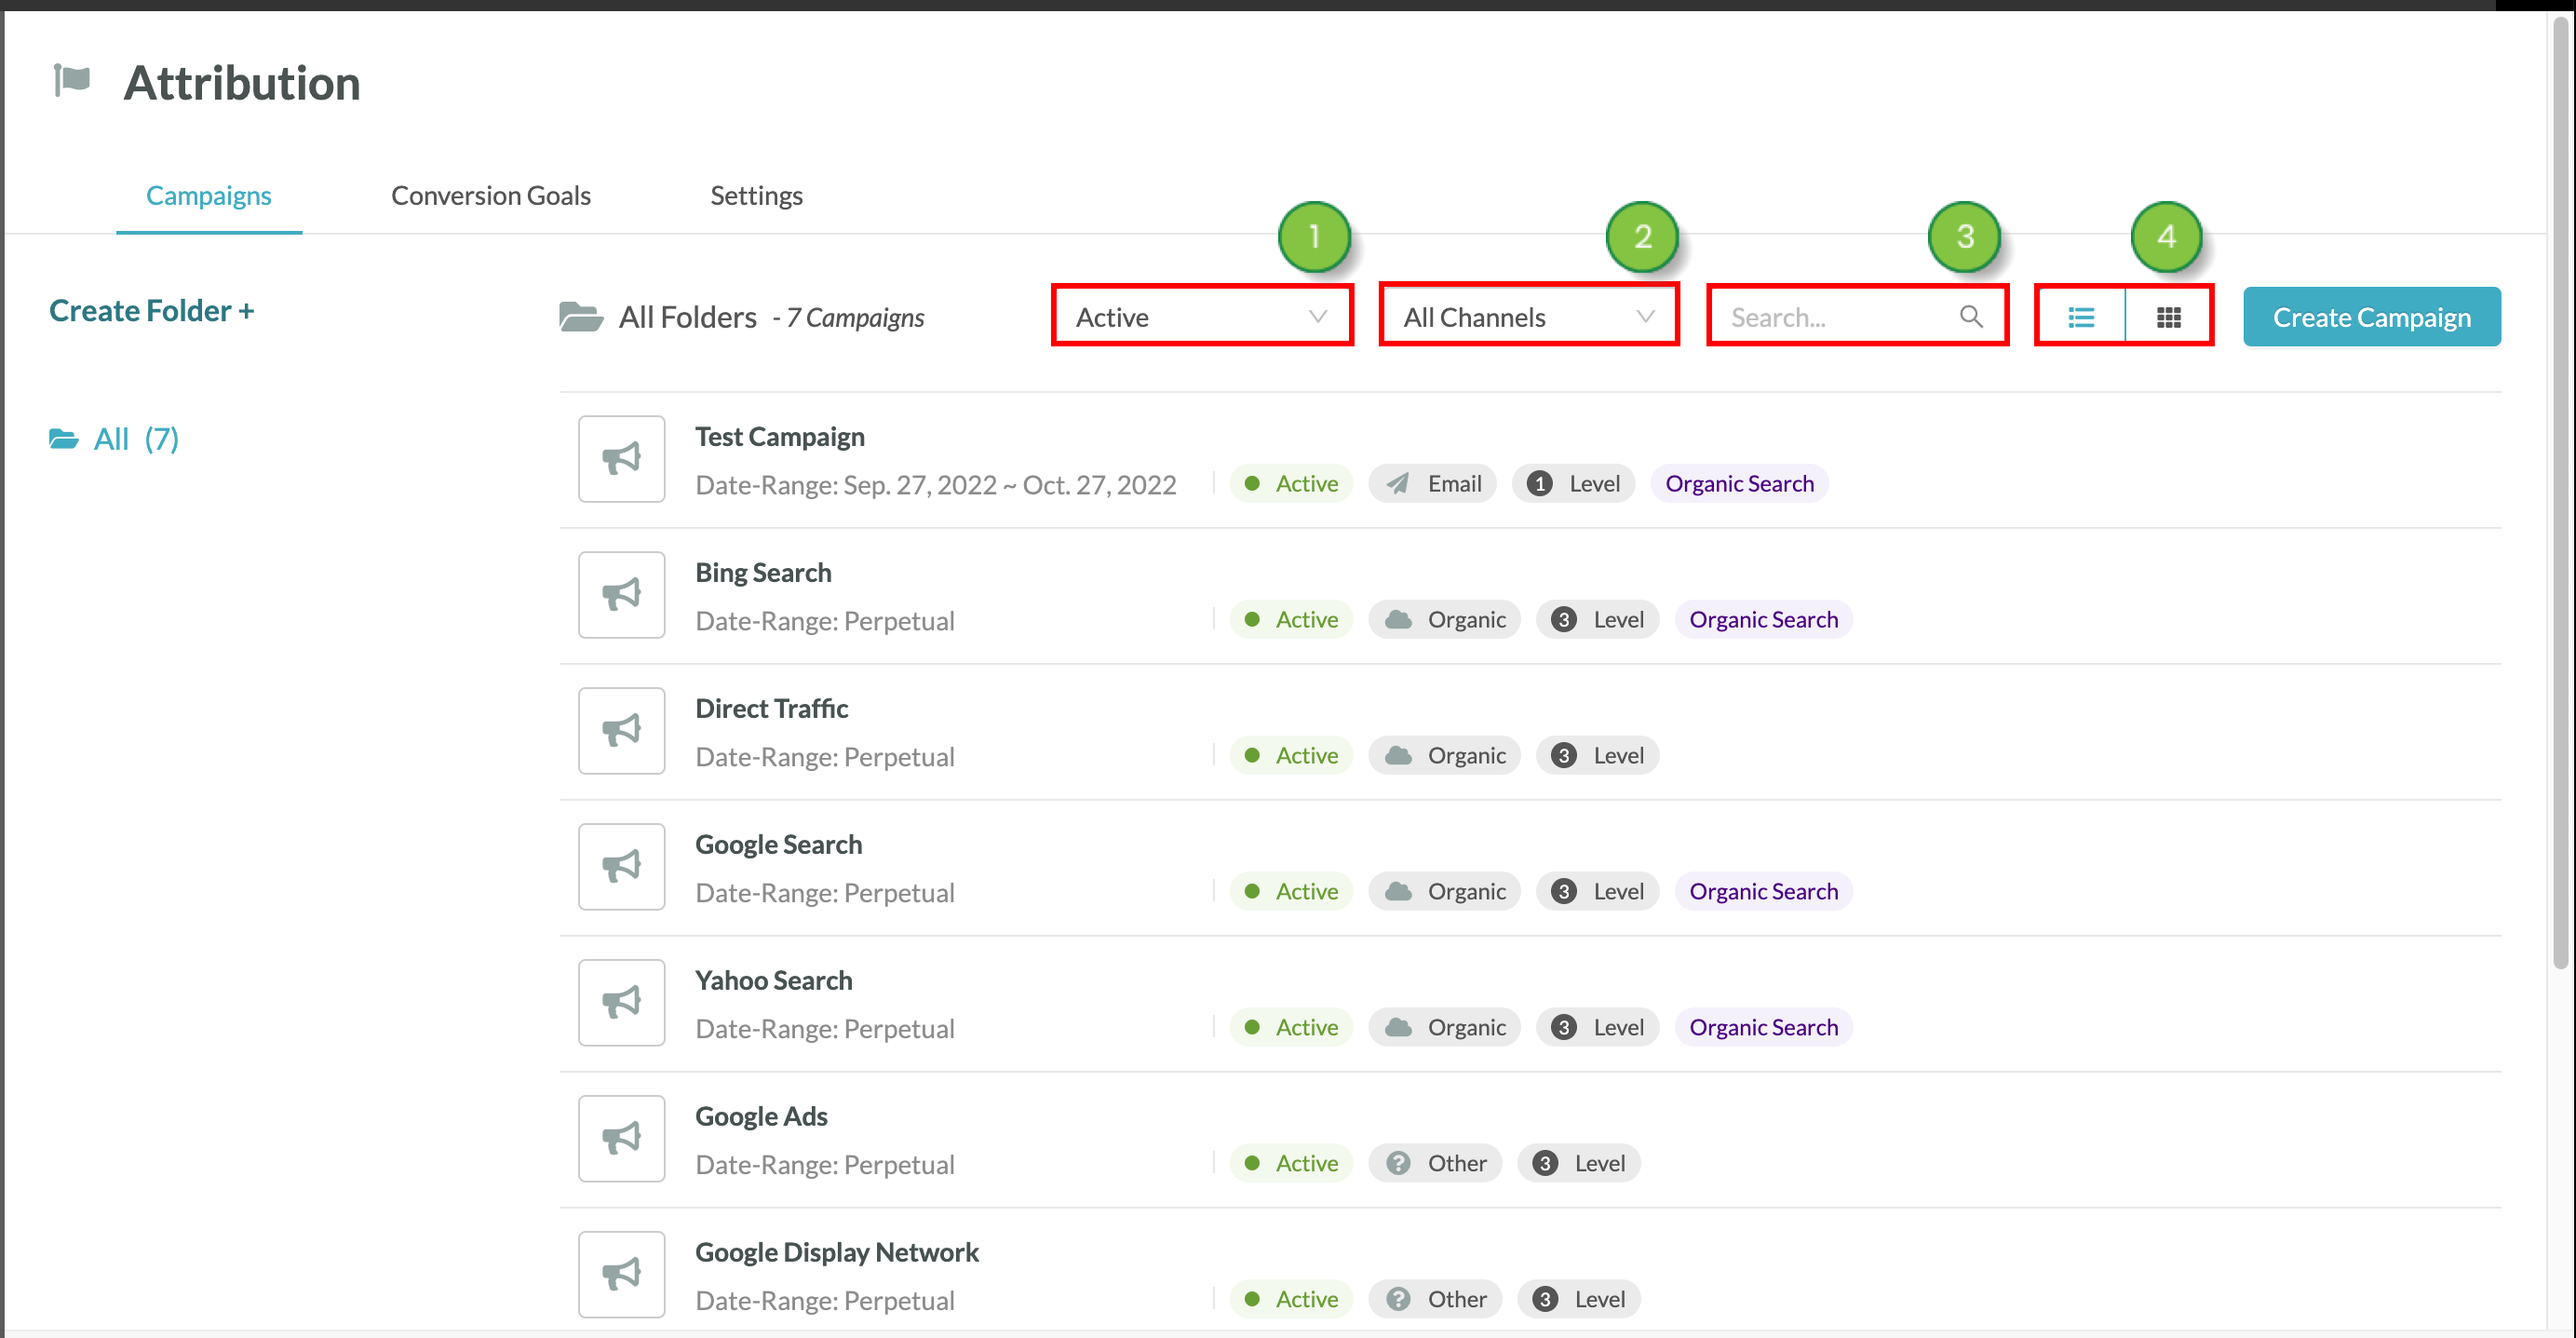
When you navigate to the Campaigns page, you'll see some pre-made campaigns, called Default Campaigns, and the option to create a new campaign using the Create Campaigns button.
Default campaigns (located in the All folder) can help you get started quickly and act as examples for any of your own campaigns you plan to create. The following default campaigns are included in your Lead Gen & CRM account:
Each default campaign is Active by default, which means it's gathering information from your landing pages based on incoming traffic. You can turn the campaigns off without removing the configuration from your Campaign folder. To Activate or Deactivate a campaign, click ![]() Options and then click the preferred status.
Options and then click the preferred status.
Note: You can activate and deactivate default campaigns and you can move the campaign's folder location. However other configurations, such as Channel, Tags, Tracking Rules, Duration and Attribution Weight (Level) are automatically set and cannot be changed. To customize a campaign, create a new campaign instead.
All default campaigns are set to Level 3 Attribution Weight, which has a Neutral Impact.
You can create different campaigns to suit your needs. When building a campaign, you will need to fill out general information, enter tracking data, set the campaign duration and attribution weight, and choose whether to track social posts.
Note: This article will help you to build campaign tracking in your Lead Gen & CRM instance. To build the channels that need tracking, navigate to the various sections of the platform using the left toolbar. Read our Landing Page, Email, and Social Media articles for help building your channels.
To get started with creating a new campaign, click Campaigns from the left toolbar, and then select Campaigns from the submenu.

Note: Return to the main Attribution page at any time by clicking ![]() Back in the Save Changes bar.
Back in the Save Changes bar. 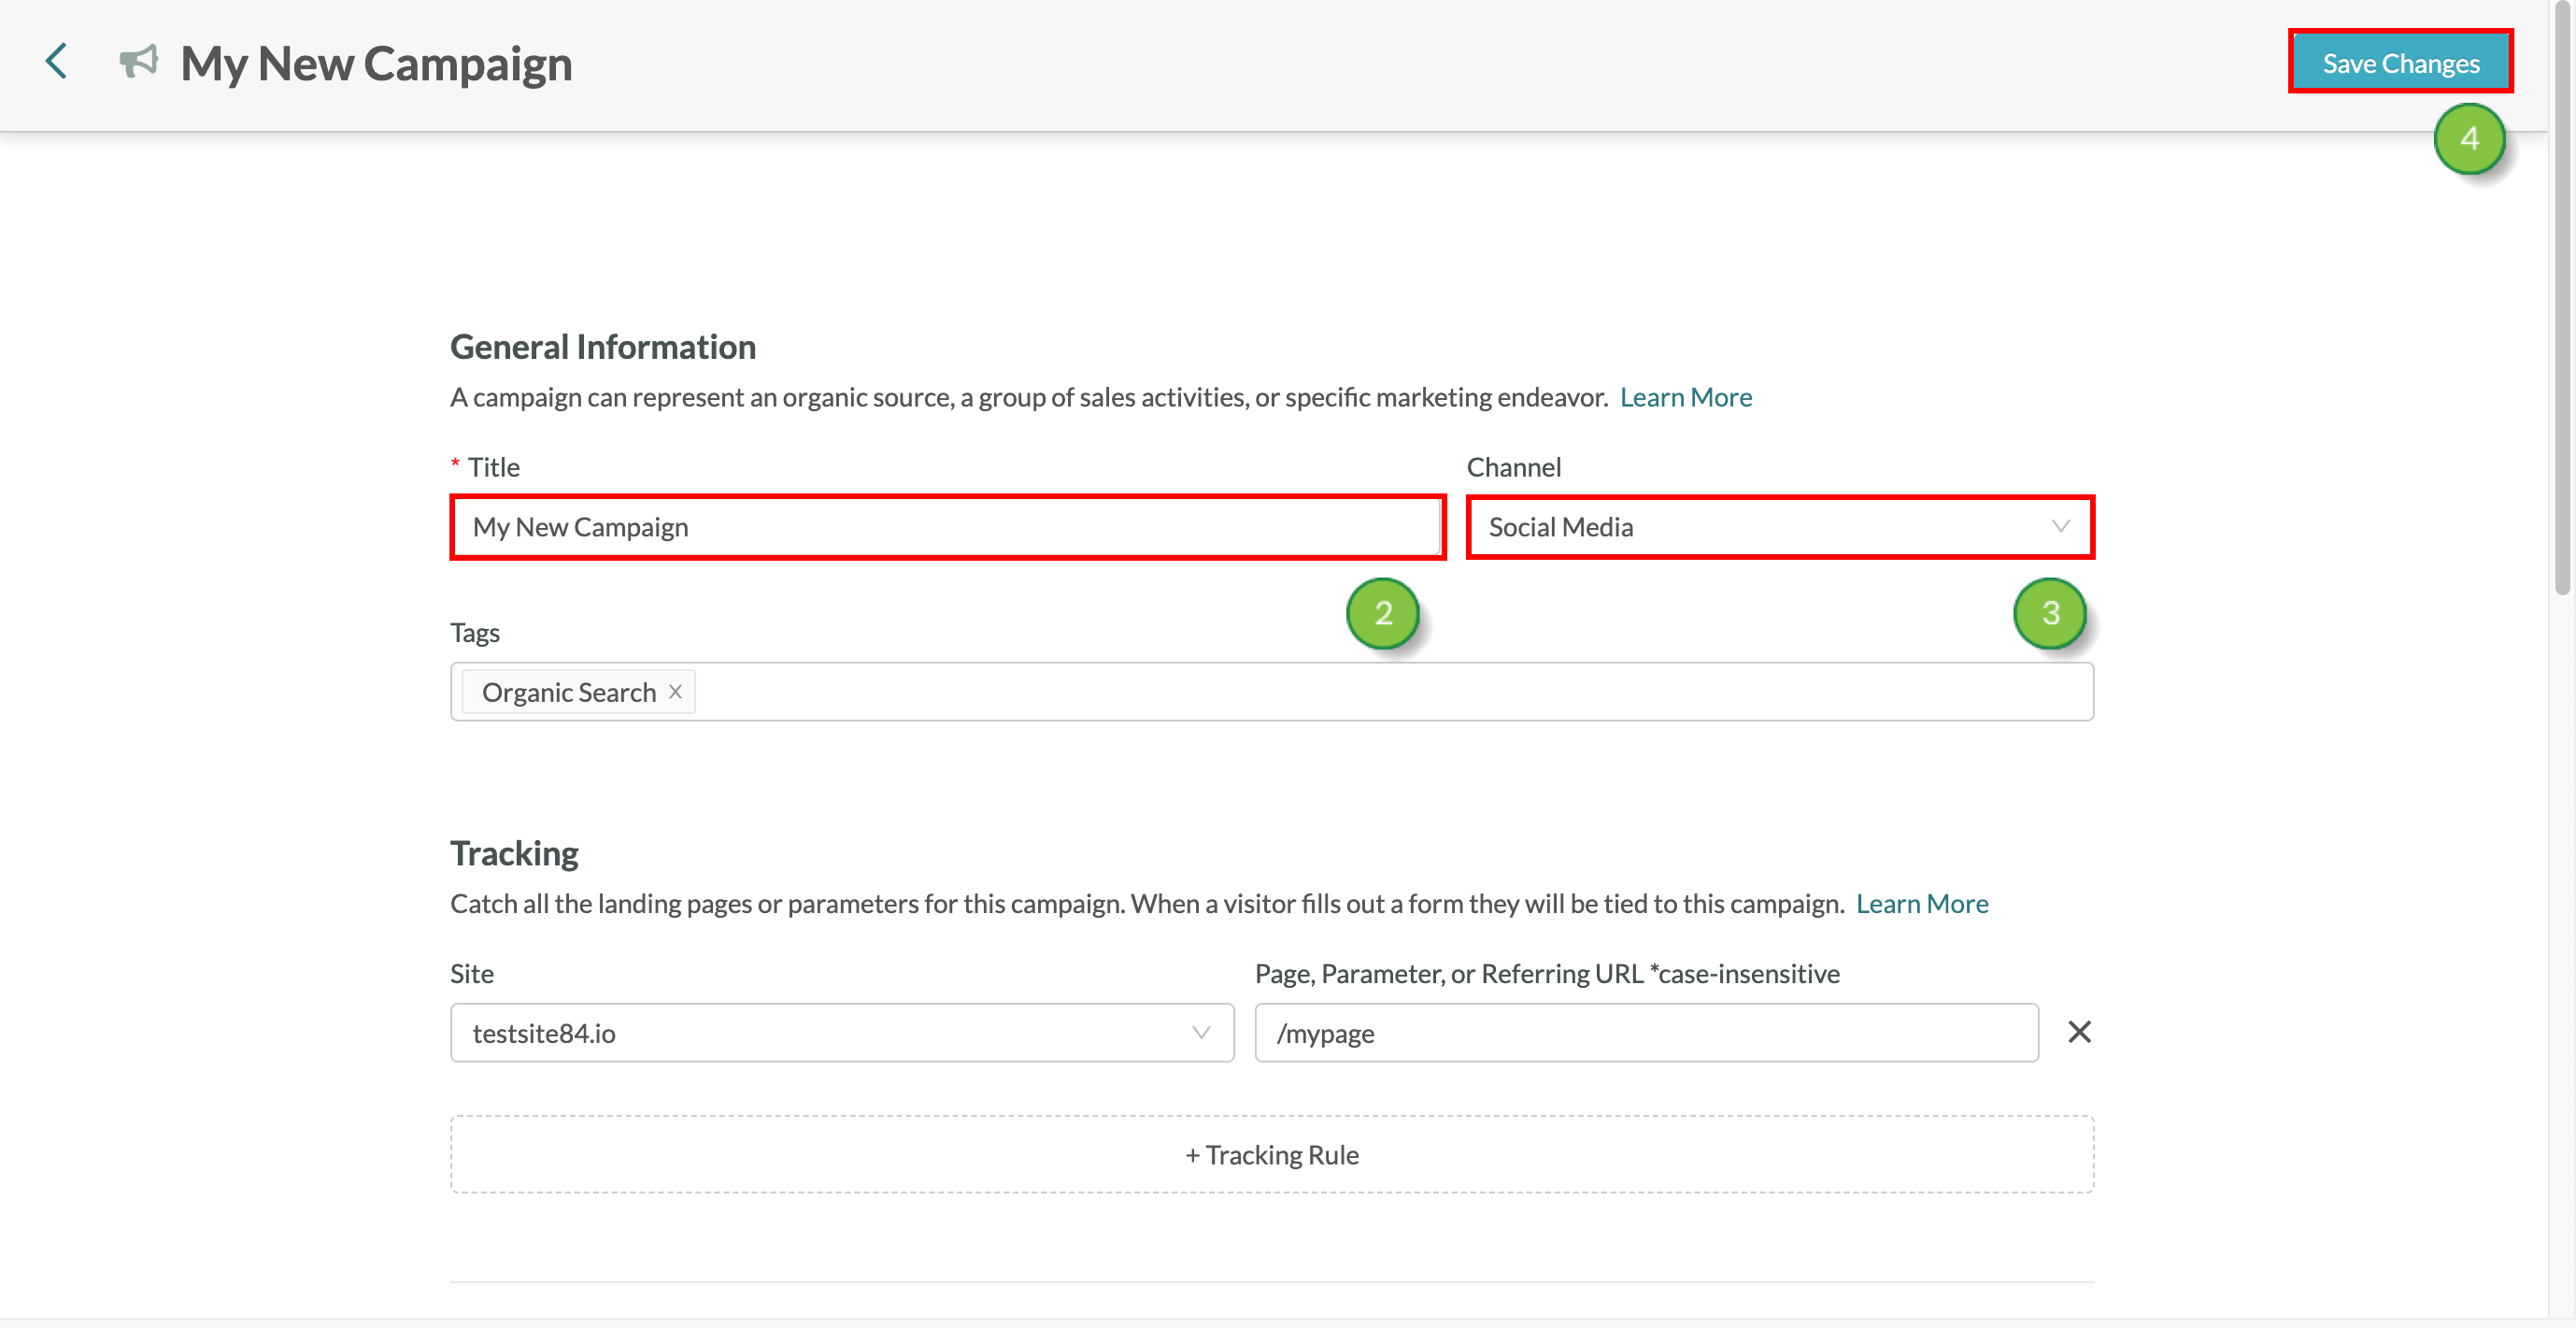
Title and Channel are required fields. Additional fields can be left on their default setting and you may create a Campaign with this limited information. However, there are additional, more advanced settings you can manage and select, as well. Keep reading to learn more about additional settings.
Channel will manually indicate which area of the business is being monitored by your campaign. Choose channel to display that information in reporting.
You may choose any necessary campaign tags from the Tags menu. If your tag doesn't exist, click Manage Tags to add it. You can manage campaign tags from there.
Under Tracking, click +Tracking Rule to assign the campaign with relevant tracking data. Select which Site to track. Existing landing pages can be selected from the drop-down menu.
Enter the Page, Parameter, or Referring URL. Add as many tracking rules as necessary.
Note: Any parameters, pages or referring URLs you enter are case sensitive.
In Lead Gen & CRM, campaign tracking options are used to assign a lead to a campaign by clicking a specific link. UTM parameters are a means of assigning a lead to a campaign. This means that when a contact is created in Lead Gen & CRM, there is information on file on where that lead came from.
UTM parameters in Lead Gen & CRM require one unique identifying parameter. This parameter is whatever you want it to be. Consider the following examples:
UTM=PandoraAD1UTM=DecEmailUTM=holidaypromoTo use a UTM parameter, you would need to add the snippet at the end of any link, separated by a ? character:
www.site.com?UTM=PandoraAD1
The entire UTM link would be used as a tracking identifier for things like a call to action in an email, a URL redirect for an ad, or to link to a social media post. When a tracked lead meets any of these campaign tracking criteria, the lead will be associated with the campaign.
Important: Tracking rules can have only one UTM parameter per rule. Tracking rules will not function if more than one parameter is set to them.
To add UTM parameters and tracking data to campaigns, scroll to the Tracking section:
Note: Repeat the above steps as necessary. Click ![]() Remove to remove a tracking entry.
Remove to remove a tracking entry.
Under Duration, decide how long your campaign should run. Choose Perpetual Campaign to run the campaign forever, until it is manually deactivated, or choose a Specific Date Range.
Note: When a date range is selected, your campaign will not track traffic outside of those date ranges. Campaigns will be deactivated automatically when the date range ends. Campaigns will begin automatically when the date range begins. Campaign date depends on your Lead Gen & CRM account's Localization Timezone. Return to the main Attribution page at any time by clicking ![]() Back in the Save Changes bar.
Back in the Save Changes bar.
Configure how impactful you want the campaign to be, when compared to other campaigns by managing attribution weight.
To set attribution weight, scroll to the Attribution Weight section and click-and-drag the slider to the desired impact level.
Click Save Changes.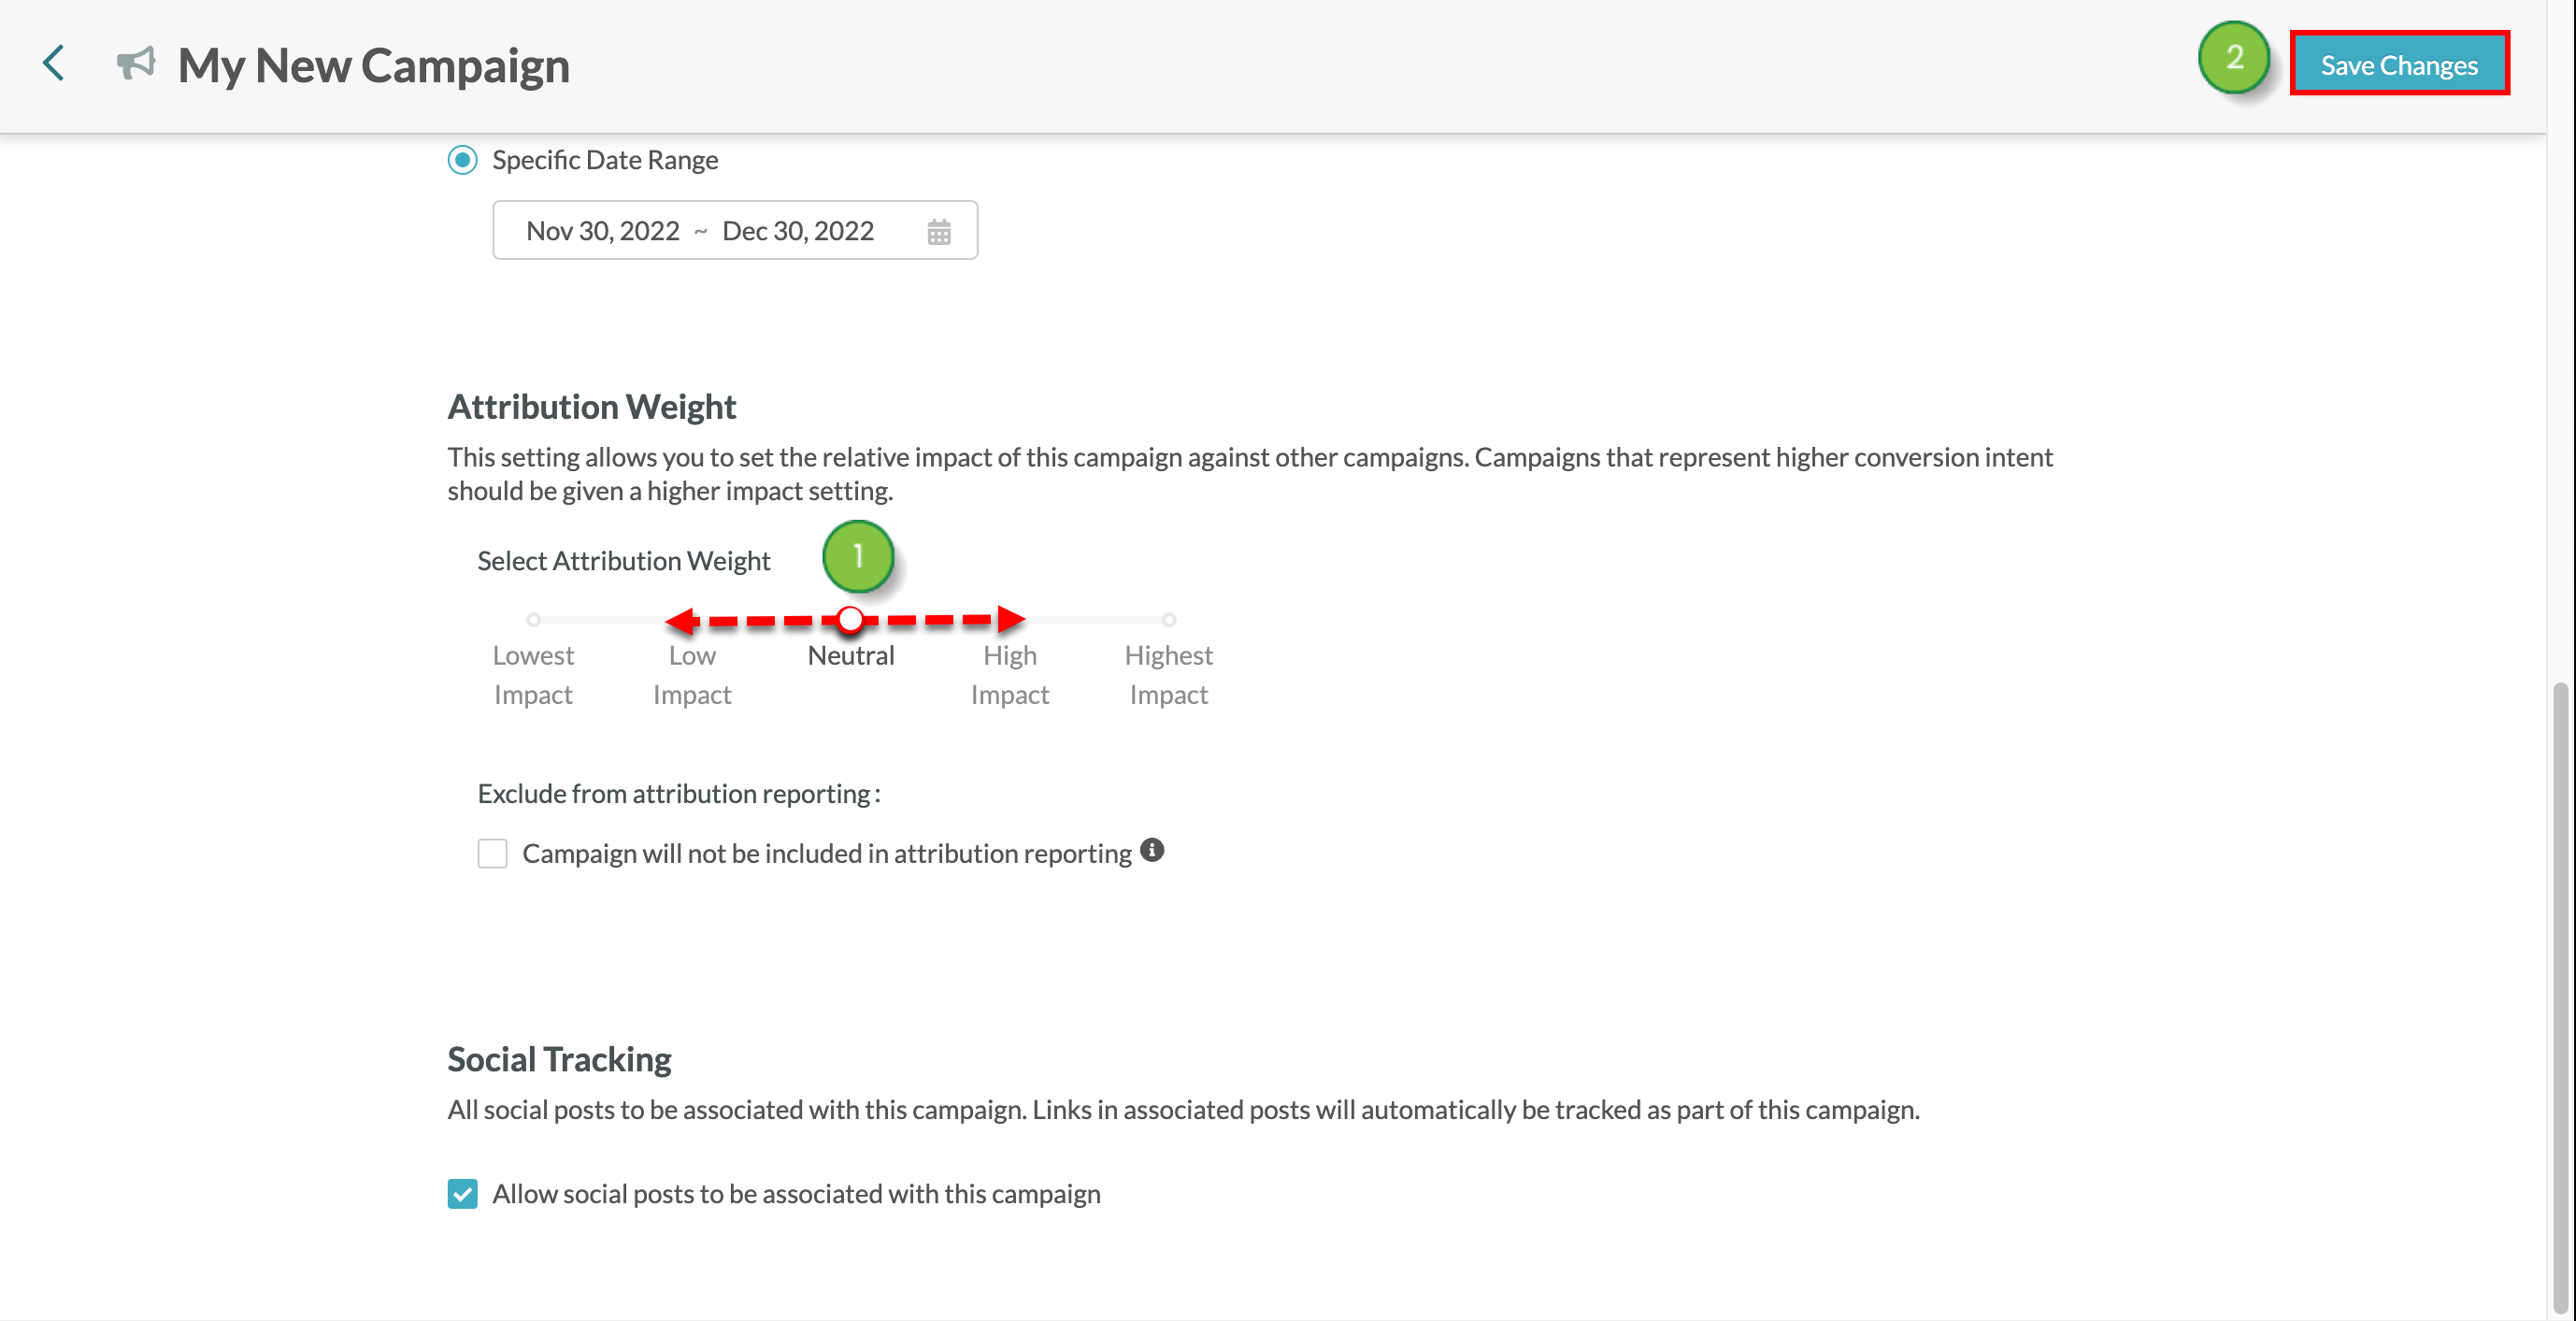
Determine whether the campaign will track social posts. This means that when leads click the a specific link in a social media post, they will be added to the campaign that was attributed to that post.
To set campaigns to track social posts, scroll to the Social Tracking section:
Select or deselect the Allow social posts to be associated with this campaign checkbox.
Click Save Changes.![]()
To learn how to modify the settings for an existing campaign, or change campaign folder location, please read our Modifying Campaigns article.
Copyright © 2026 · All Rights Reserved · Constant Contact · Privacy Center