Lead Gen & CRM offers an updated email editor that simplifies the email-building experience, making it easier to structure your email and fill your email with content. To learn how to navigate the older email editor, read the Email Content Editor Overview article.
This article will explain how to access the new email editor and what features it includes.
Users:
| Administrators | ✓ | |
| Company Managers | ✓ | |
| Marketing Managers | ✓ | |
| Sales Managers | ||
| Salespersons | ||
| Jr. Salespersons |
| Tip: Are you looking for information about Constant Contact’s Email and Digital Marketing product? This article is for Constant Contact’s Lead Gen & CRM product. Head on over to the Email and Digital Marketing articles by clicking here. Not sure what the difference is? Read this article. |
Lead Gen & CRM offers an updated email editor that simplifies the email-building experience, making it easier to structure your email and fill your email with content. This new editor joins our existing editor but focuses on rendering and ease of use.
To access the more advanced features of the older editor simply choose one of your existing emails or email templates. To learn how to navigate the older email editor, read the Email Content Editor Overview article.
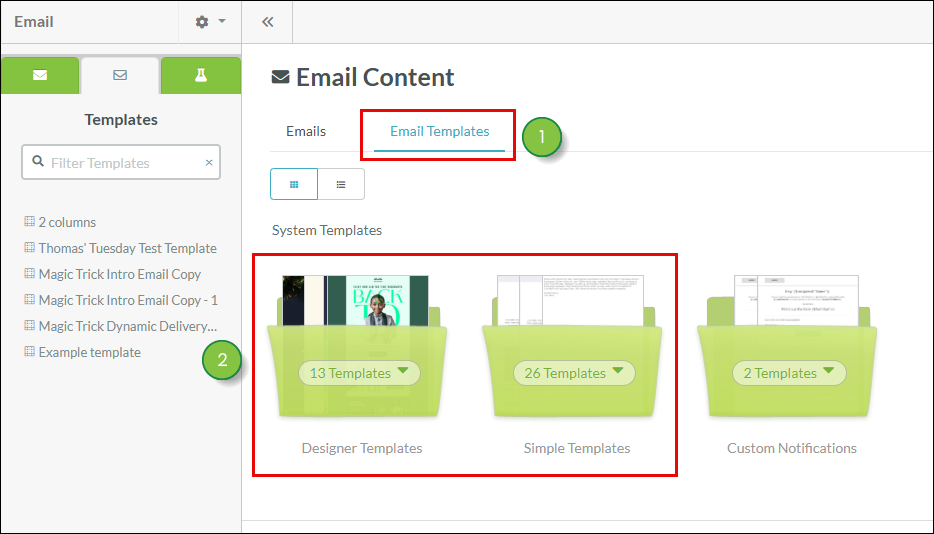
Navigate to the new editor by starting from the Email category.
Write with AI
Lead Gen & CRM now offers AI writing tools. Eliminate writer's block and write new taglines, headers, and paragraphs with our easy-to-access AI feature. AI is available in the new email editor, for all text content blocks. Read our New Email Editor Write With AI feature article for more information.
Navigation Menus
Add a menu to the top of your email with the new Menu content block. The old email editor requires you to build your menus manually with columns and text blocks, however, the new editor makes this process easy.
Video Previews
Videos are more engaging than text or images. Encourage your customers to interact with your emails with a video preview. This new feature automatically generates a preview image that redirects to your video URL.
Customize the Mobile vs Desktop Experience
In the US, more than half of web traffic is on a mobile device, this includes many of your customers reading your emails! Now, you have more control over the way your emails look and function on smaller screens. Toggle from desktop view to mobile view in the editor as you make changes.
Social Media Icon Styles
The new email editor offers 20 different styles of social media icons for you to choose from, including solid blue icons, black and white icons, greyscale icons, branded color icons, and more.
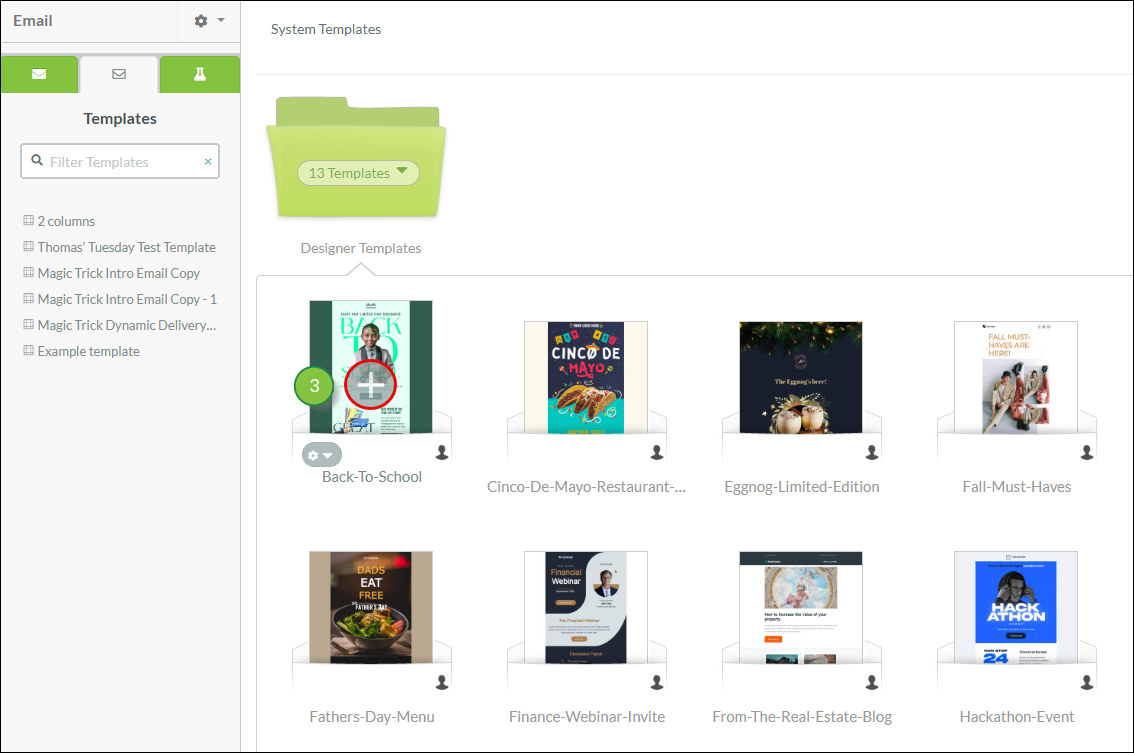
More Modern Template Designs
Lead Gen & CRM has developed over 15 new email templates. Visually appealing, thanks to eye-catching fonts and clean, professional layouts, these templates make for an impactful and effective communication tool.
Elements, including text, images, and buttons, are grouped under the Content tab. Layouts and columns are grouped under the Rows tab. Style emails are under the Settings tab. Send Settings and Attachments are at the top of the email editor next to the email file name.

Drag and drop content or rows into your email, using the blue line to guide you.

Click on the content in your email to modify it. Edit style, spacing, and alignment. Edit your content or take advantage of intelligent AI tools to write more impactful emails.

Under the Content Tab, you'll find the following elements:
| Element | Description |
|---|---|
| Title | Inserts a single-line H1 text title into your email. Read Modifying Text in the New Email Editor for more information. |
| Paragraph | Inserts a multi-line block of editable text into your email. Read Modifying Text in the New Email Editor for more information. |
| Text | Inserts a basic, editable text block into the email editor. Read Modifying Text in the New Email Editor for more information. |
| List | Inserts an unordered (bullet point) list into your email. Change to an ordered (numbered) list or modify the bullet point icon style. Read Modifying Text in the New Email Editor for more information. |
| Image | Inserts an image block into your email. Upload the image from your Lead Gen & CRM media folders or insert an image using a URL. You can also edit your image within the email editor. Read Images and Videos in the New Email Editor for more information. |
| Button | Inserts a button into your email. Edit the button label and link. Read the Modifying Buttons in the New Email Editor article to learn more. |
| Divider | Inserts a horizontal line into your email to divide the content. Read Add Divider and Space Elements in the New Email Editor for more information. |
| Spacer | Inserts 60px of vertical space into your email. Read Add Divider and Space Elements in the New Email Editor for more information. |
| Social | Inserts social media icons into your email. The Facebook, X, Instagram, and LinkedIn icons will be inserted by default. Different versions of the logo styles are available. |
| HTML | Insert a section with editable HMTL. Use the built-in editor to enter your preferred HTML and inline CSS code. Read HTML Elements in the New Email Editor for more information. |
| Videos | Inserts a video preview into your email. Add a YouTube or Vimeo URL to automatically generate a preview image. The image will link to the provided URL. Read Images and Videos in the New Email Editor for more information. Note: the video itself will not be playable within the email. |
| Icons | Inserts a 32px x 32px image into your email. With Icons, you can easily add additional icon-sized images to the right or left. You may associate a URL link with your icons. Read Images and Videos in the New Email Editor for more information. |
| Menu | Insert a horizontal navigation menu into your email. Read Modifying Text in the New Email Editor for more information. |
Under the Rows tab, you’ll find the following layout blocks. These blocks can be dragged into your email to structure the email.
| Size | Description |
|---|---|
| 100% | This block will insert a section into your email with one column that fills the entire width of the email. |
| 25% | 75% | This block will insert a section into your email with two columns, one that fills 25% of the width of the email and another that fills 75% of the width of the email. |
| 33% | 66% | This block will insert a section into your email with two columns, one that fills 33% of the width of the email and another that fills 66% of the width of the email. |
| 50% | 50% | This block will insert a section into your email with two columns, each filling 50% of the width of the email. |
| 66% | 33% | This block will insert a section into your email with two columns, one that fills 66% of the width of the email and another that fills 33% of the width of the email. |
| 75% | 25% | This block will insert a section into your email with two columns, one that fills 75% of the width of the email and another that fills 25% of the width of the email. |
| 33% | 33% | 33% | This block will insert a section into your email with three columns, each filling 33.3% of the width of the email. |
| 25% | 25% | 50% | This block will insert a section into your email with three columns, the two left columns fill 25% of the width of the email and the right column fills 50% of the width of the email. |
| 25% | 25% | 25% | 25% | This block will insert a section into your email with four columns, each filling 25% of the width of the email. |
| 16% | 16% | 16% | 16% | This block will insert a section into your email with four columns, each filling 16% of the width of the email. This is best for small icons or images. |
Emails consist of the email background and the content width area. Within the content width area, you can include sections (determined by the rows you use) and you can place content (images, text, buttons, etc.) into those sections.
The Settings tab allows you to modify and style the page Within the Settings tab you’ll find options to modify and manage the style of your overall email. You’ll see the following option:
| Setting | Description |
|---|---|
| Content Width Area | Set the max width of your email margins. Emails can have a minimum width of 480px and a maximum width of 900px. The width of included elements will adjust depending on their initial width setting. For example, content using 100% of the width of the page will enlarge as you increase the Content Width Area. |
| Content Area Alignment | Use the Content Area Alignment option to decide if content within the content width area should be left or center-aligned. |
| Background Color | Change the color of the email background using the HEX code or by clicking the color in the color picker. |
| Content Area Background Color | Change the color of the Content Width Area’s background using the HEX code or by clicking the color in the color picker. |
| Background Image |
Instead of a color, you can fill your email background with an image. The image will be applied left aligned by default however, you can center it using the Center checkbox. |
| Default Font | Set the font for the entire email. |
| Link Color | Set the default color of links in your email. You may override the default color by highlighting links in text content blocks and choosing a new color. |
Next to the email's file name, you'll find Send Settings and Attachment options. The Send Settings window allows you to modify how your email is sent and the text that appears -- including the email's Subject Line, Preheader Text, From Address, and Reply-To Email Address.
Attach up to 4 files to your emails from the File Manager. Upload your file directly to the file manager after clicking the Attachment button, or select a file that is already in your File Manager. 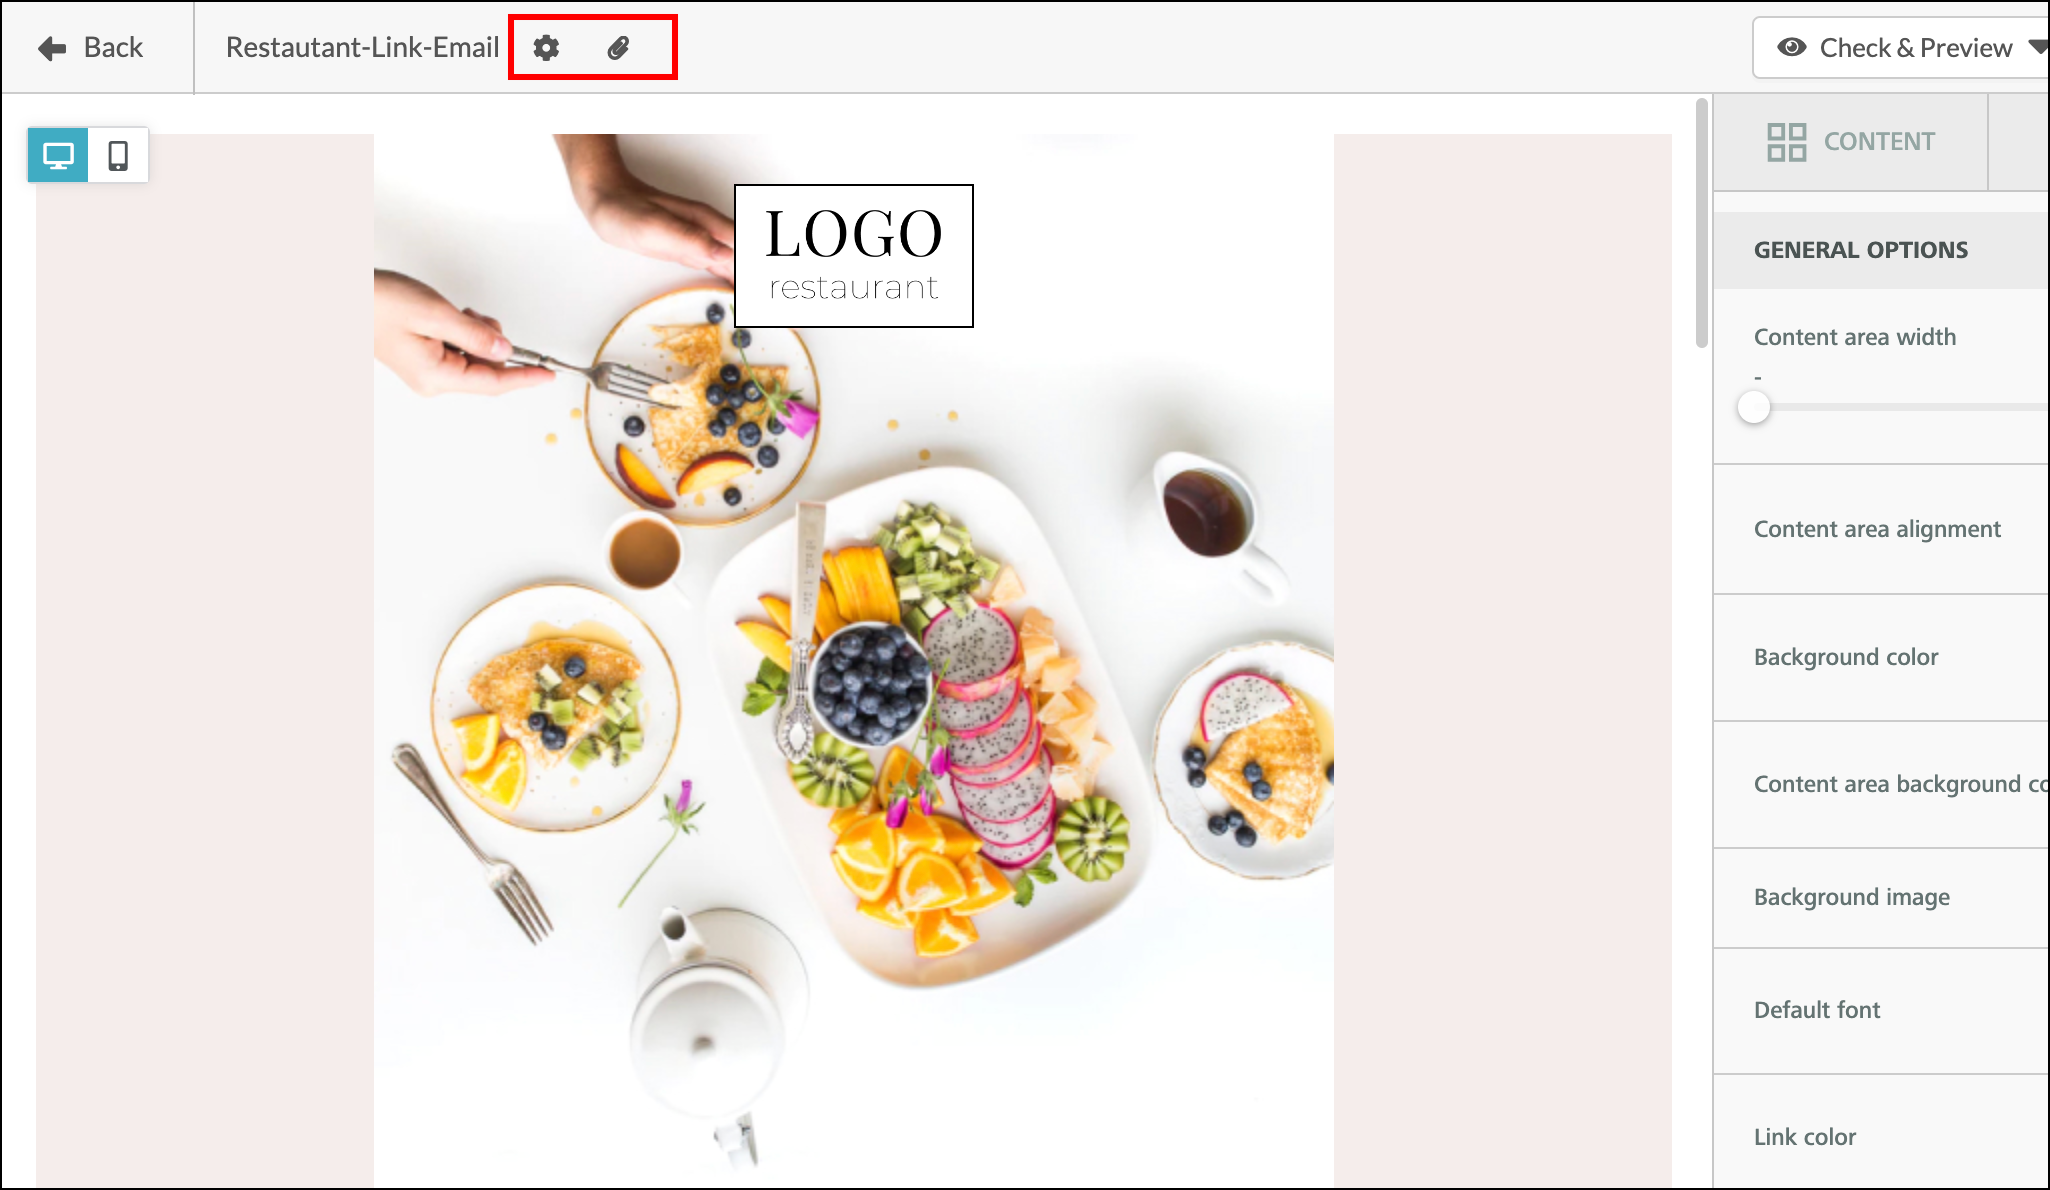
| Send Setting | Description |
|---|---|
| Subject | The email's subject title. |
| Preheader | The short summary text that comes after the subject line. It's displayed on mobile devices in app notifications when the email is received. |
| From Name | The name of the person sending the email. |
| From Email | The email address of the person sending the email. |
| Reply-To Email |
The email address that any replies will be sent to. Uses the From Email address by default. |
| Can send multiple times to one person checkbox | Allows the email to be sent repeatedly to the same person or list. When left unchecked, duplicate emails are suppressed. |
| Make Available as a Smart Mail in Contact Manager checkbox | Turns the email into a Smart Mail. |
| Send from lead owner when sending from automation engine checkbox | Send the email from the user-designated owner of the lead. |
| Include "view in browser" link checkbox | Allows the recipient to view the email in their browser. |
| Features | Where To Find It |
|---|---|
| Smart Mail | Click the Settings icon next to the title of your email template, to locate the Make Available as a Smart Mail in Content Manager checkbox. |
| HTML Editing | Instead of editing the entire email, you can now edit HTML in blocks. This helps to keep the structure of your email the same while giving you creative control. |
| Litmus Testing | The new editor focuses on rendering and ease of use. To access the Litmus Testing feature of the older editor choose one of your existing emails or email templates. |
| Shopping Cart | The new editor focuses on rendering and ease of use. To access the Shopping Cart feature of the older editor choose one of your existing emails or email templates. |
| Media Center Assets | The new editor focuses on rendering and ease of use. To use Media Center Assets in your email choose one of your existing emails or email templates to access the older editor. |
| Shutterstock Integration | The new editor focuses on rendering and ease of use. To access the ShutterStock feature of the older editor choose one of your existing emails or email templates. |
| RSS Feeds | The new editor focuses on rendering and ease of use. To access the RSS feeds feature of the older editor choose one of your existing emails or email templates. |
Copyright © 2026 · All Rights Reserved · Constant Contact · Privacy Center