Lead Gen & CRM
How can we help you?
Search our help articles, video tutorials, and quickstart guides

You've got this. You've got us. Search our Knowledge Base to quickly find answers to your questions.

Images and Videos in the New Email Editor

Article: 000051385
Updated: January 28, 2026

Learn how to add and edit images into the new email editor. You can include video previews to further engage recipients.

Add images to your emails, and now, with the new email editor, add video previews as well. Insert large, full-sized images or smaller images in the form of icons. In this article, you'll learn how to add and edit images and video previews using the new email editor.

Note: To learn more about images in the old email editor, read Adding Images to Emails.


Article Contents


Users:

Administrators 
Company Managers 
Marketing Managers 
Sales Managers  
Salespersons  
Jr. Salespersons  

Light Bulb IconTip: Are you looking for information about Constant Contact’s Email and Digital Marketing product? This article is for Constant Contact’s Lead Gen & CRM product. Head on over to the Email and Digital Marketing articles by clicking here. Not sure what the difference is? Read this article.


The New Editor

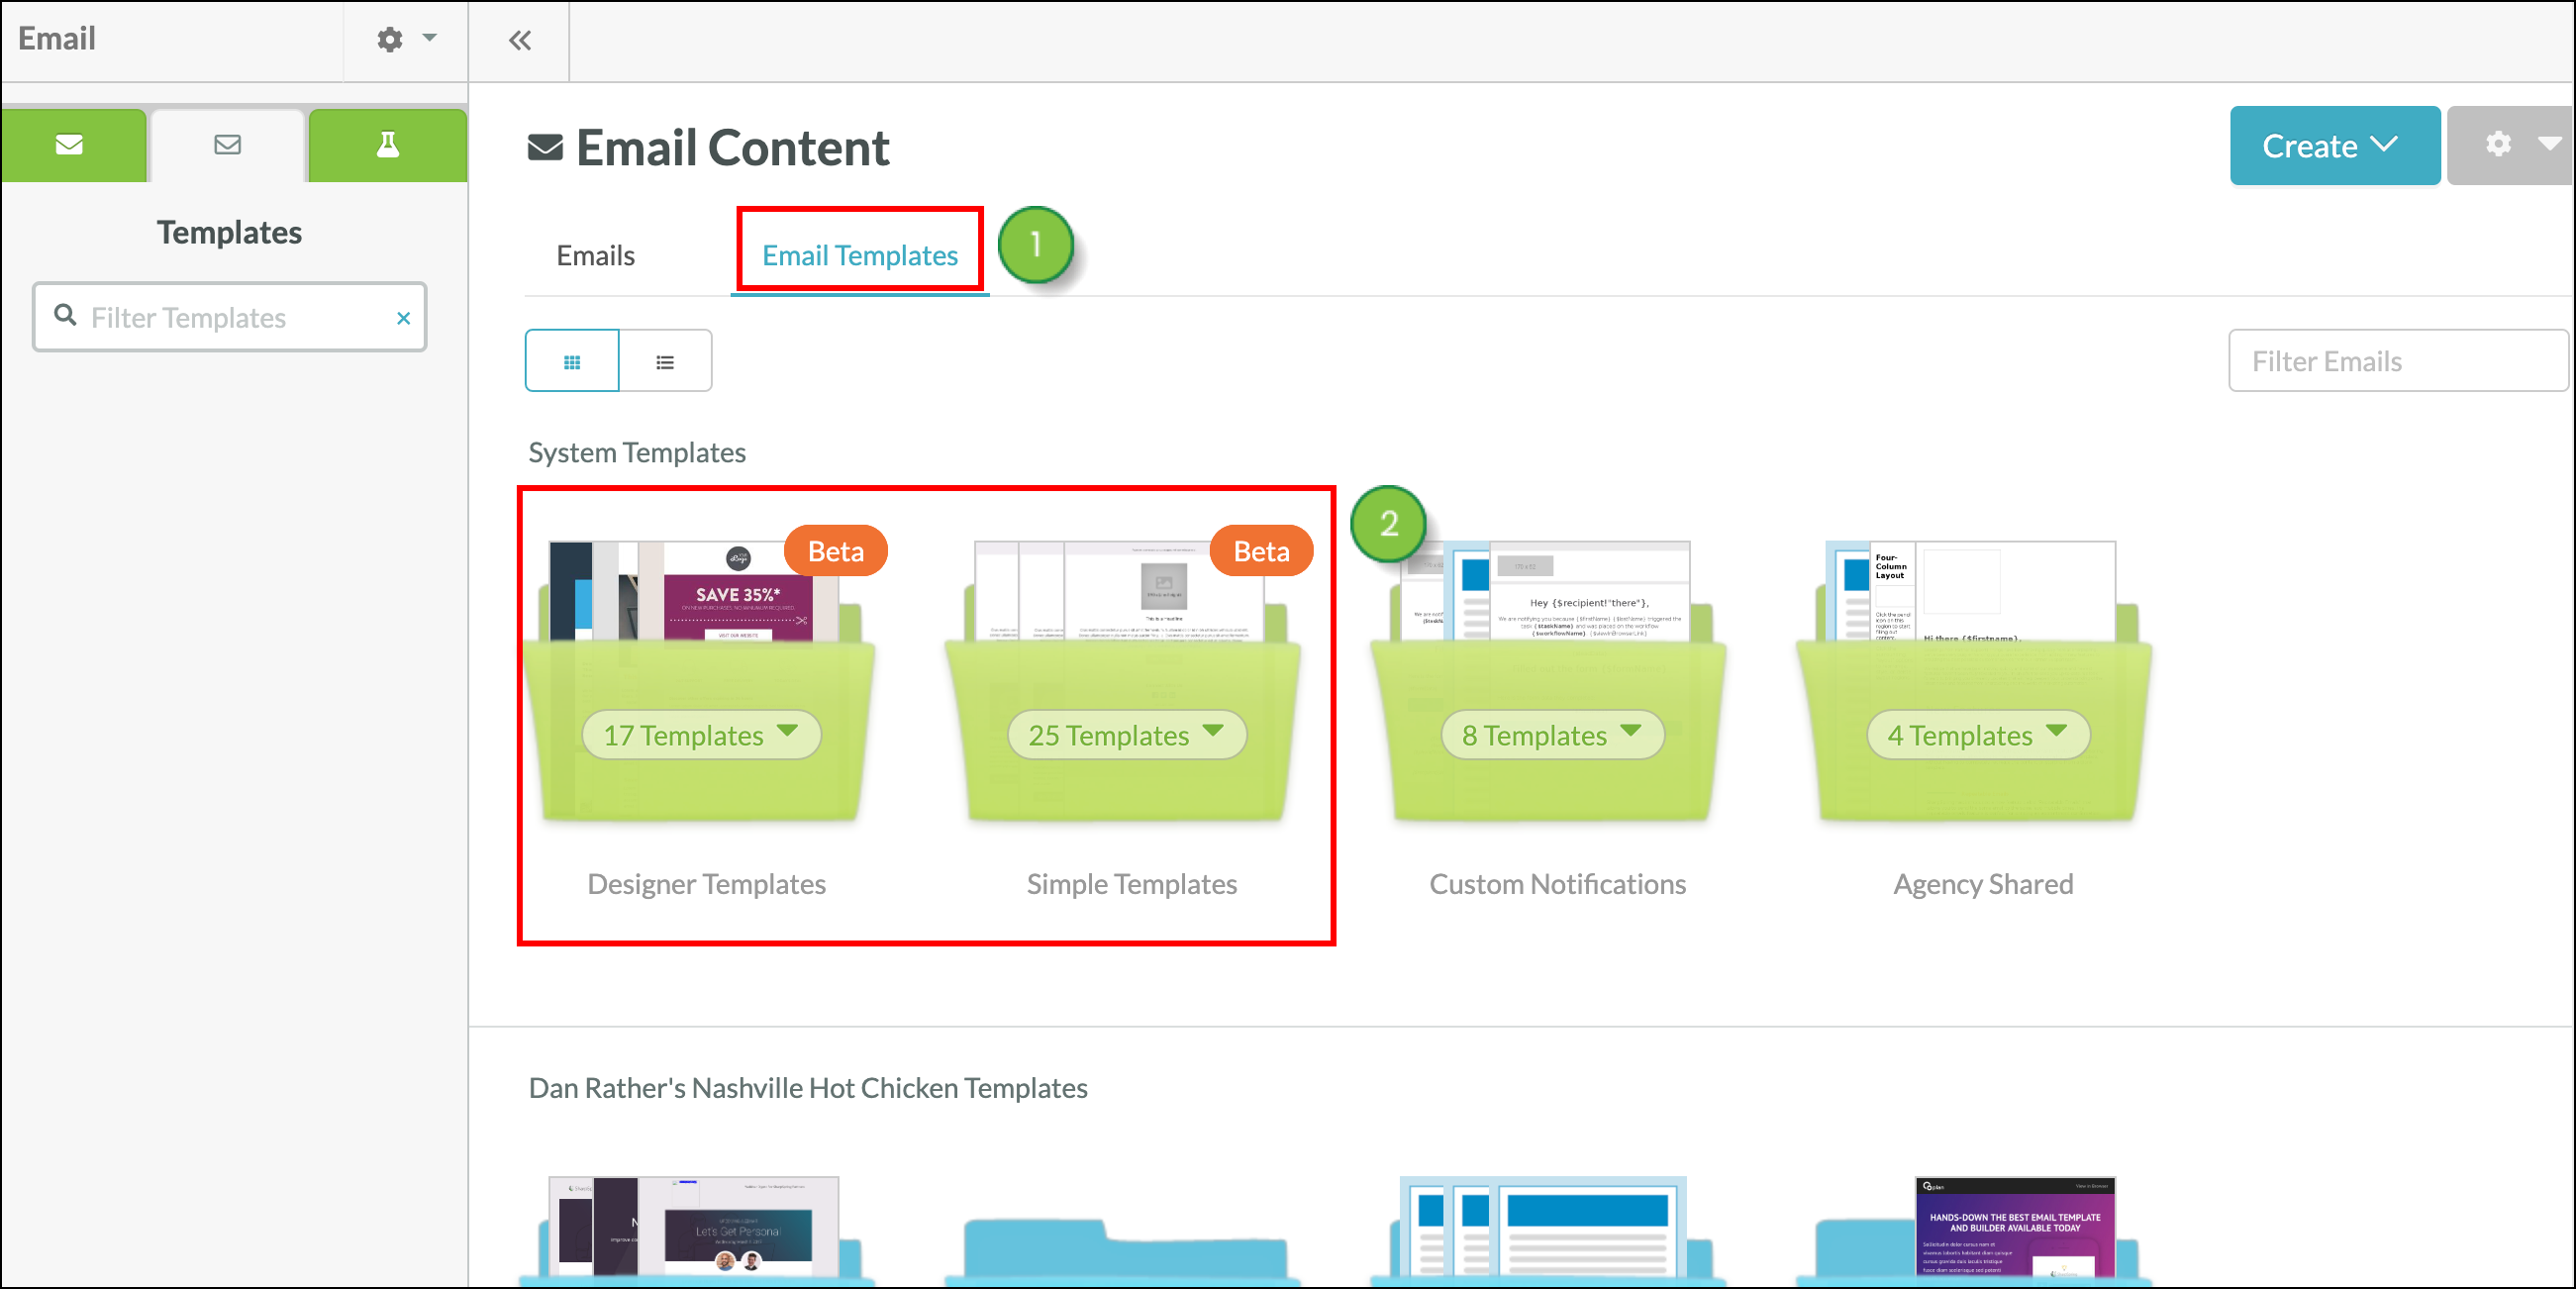
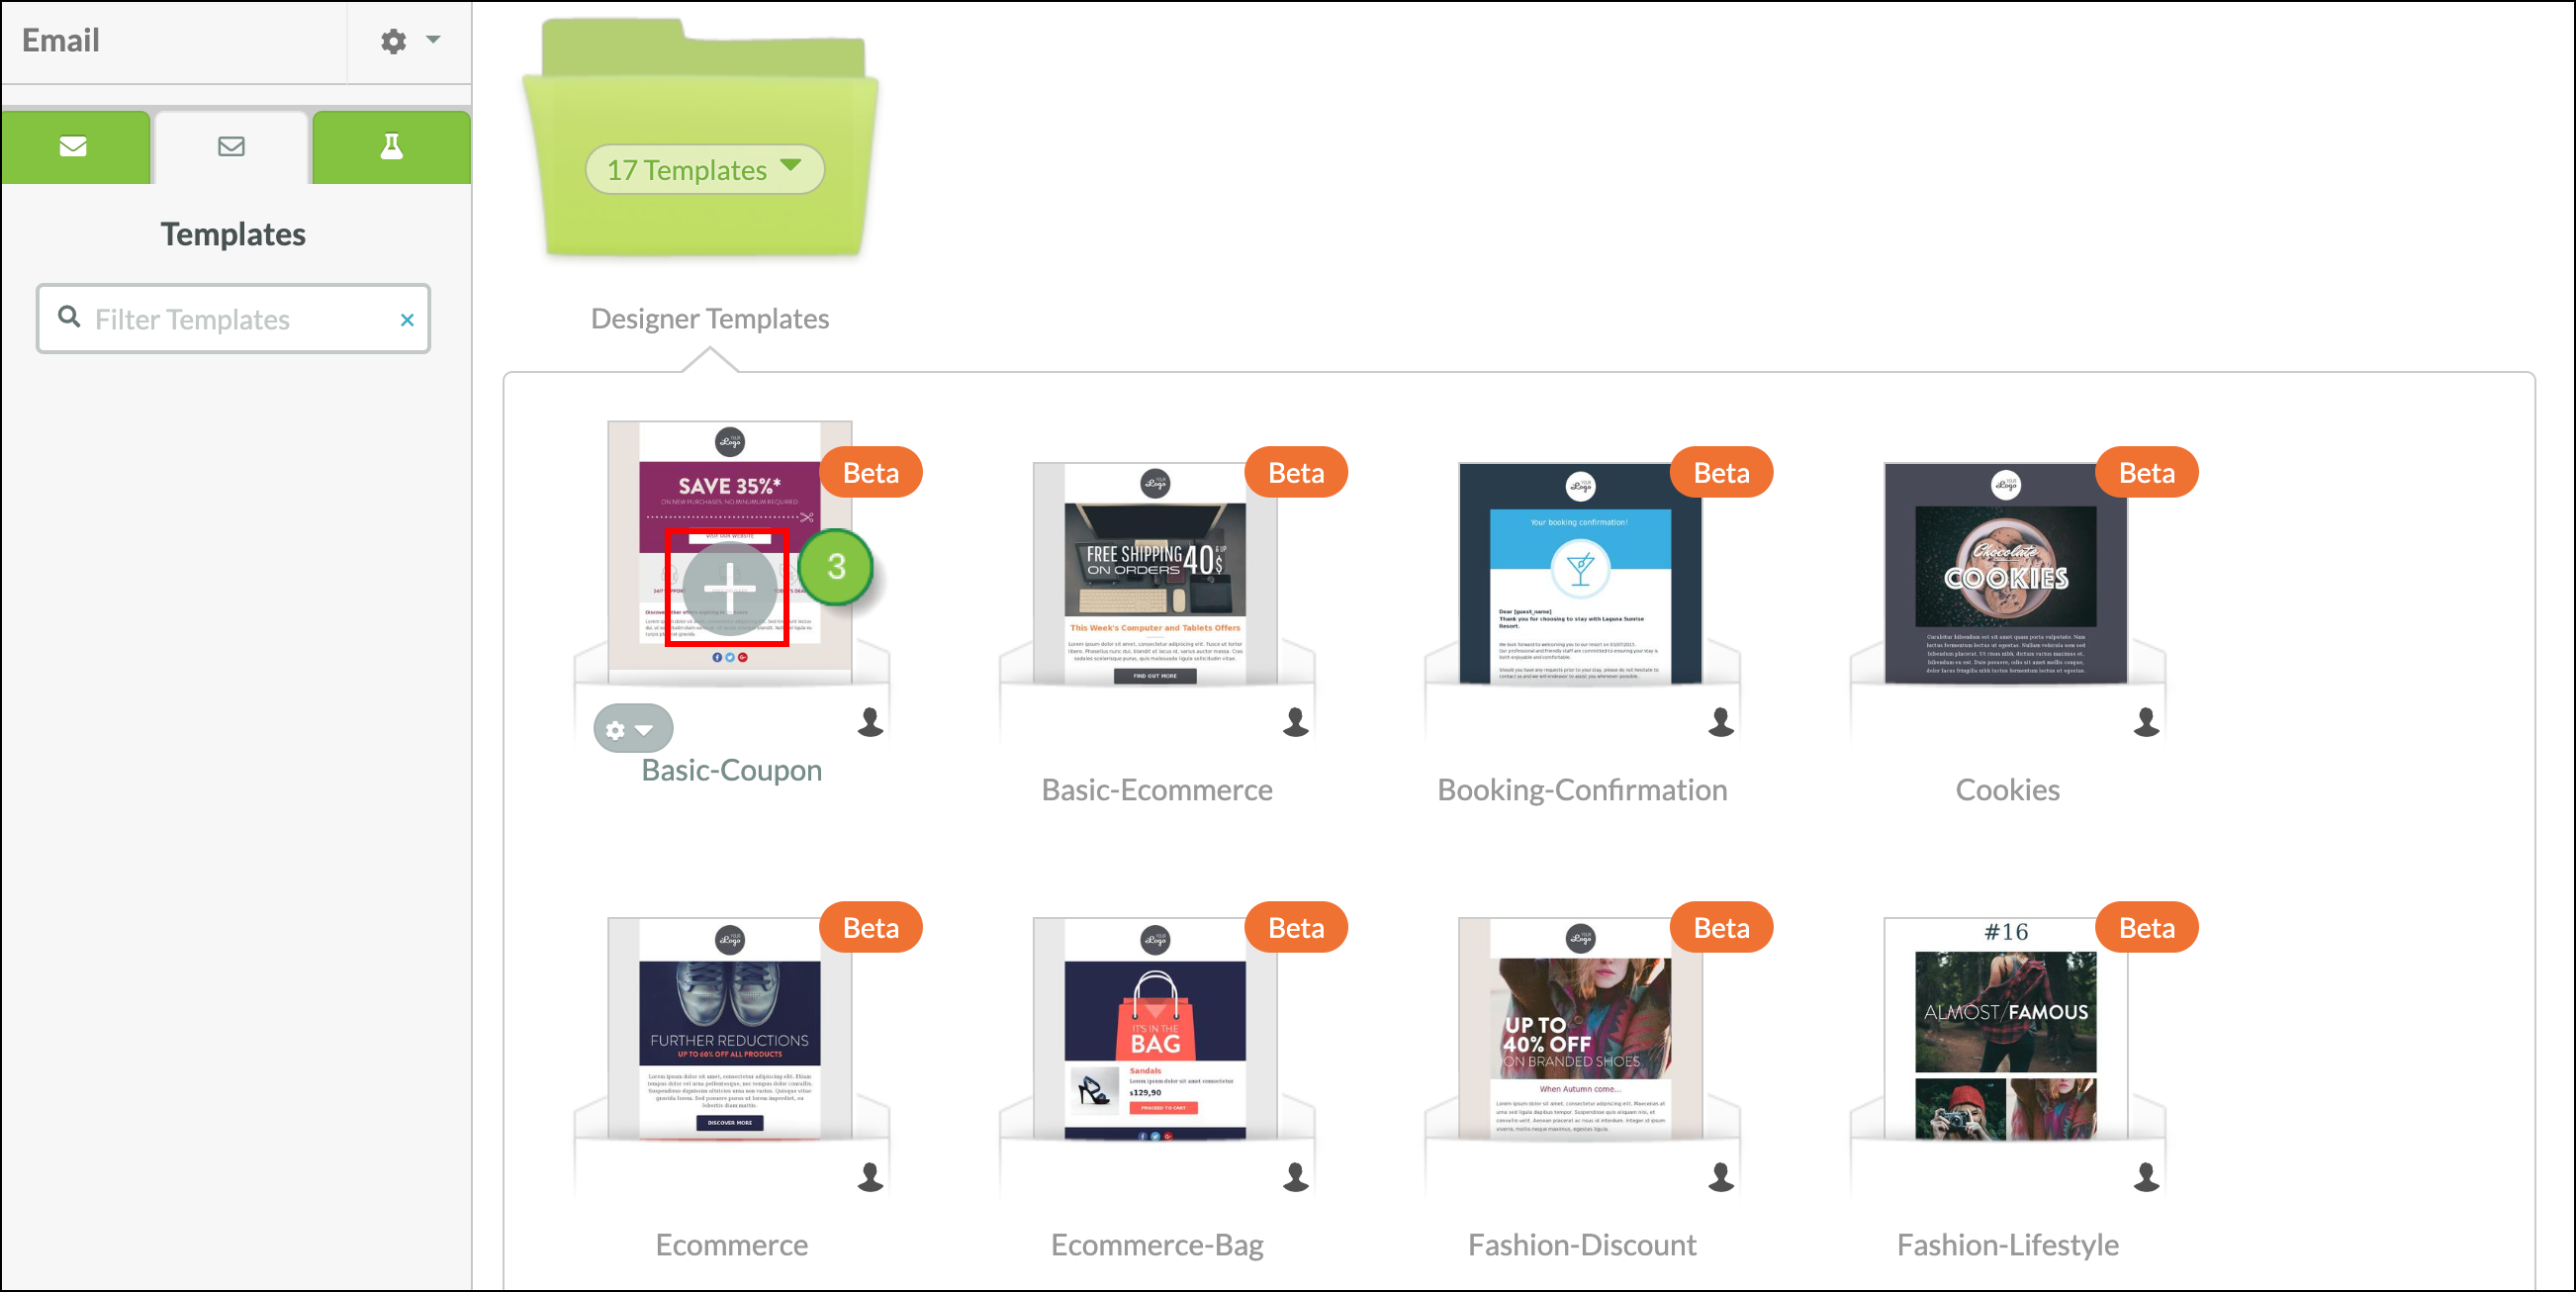
These image and video preview features are available in the new email editor. Read Overview of the New Email Editor to learn more about the included features and to find out how to build emails. Navigate to the new editor by starting from the Email category.

  1. Click on the Email Templates tab.
  2. Select the Designer or Simple template folders.

    User-added image
     
  3. Click the + button to create a new email from the template, using the new email editor. 

    Click the plus sign icon


Adding Images to your Email 

Drag and drop an image element into your email, using the blue lines to guide you as to where the image should be inserted. Click on the image block to modify it.

Drag Image Elements

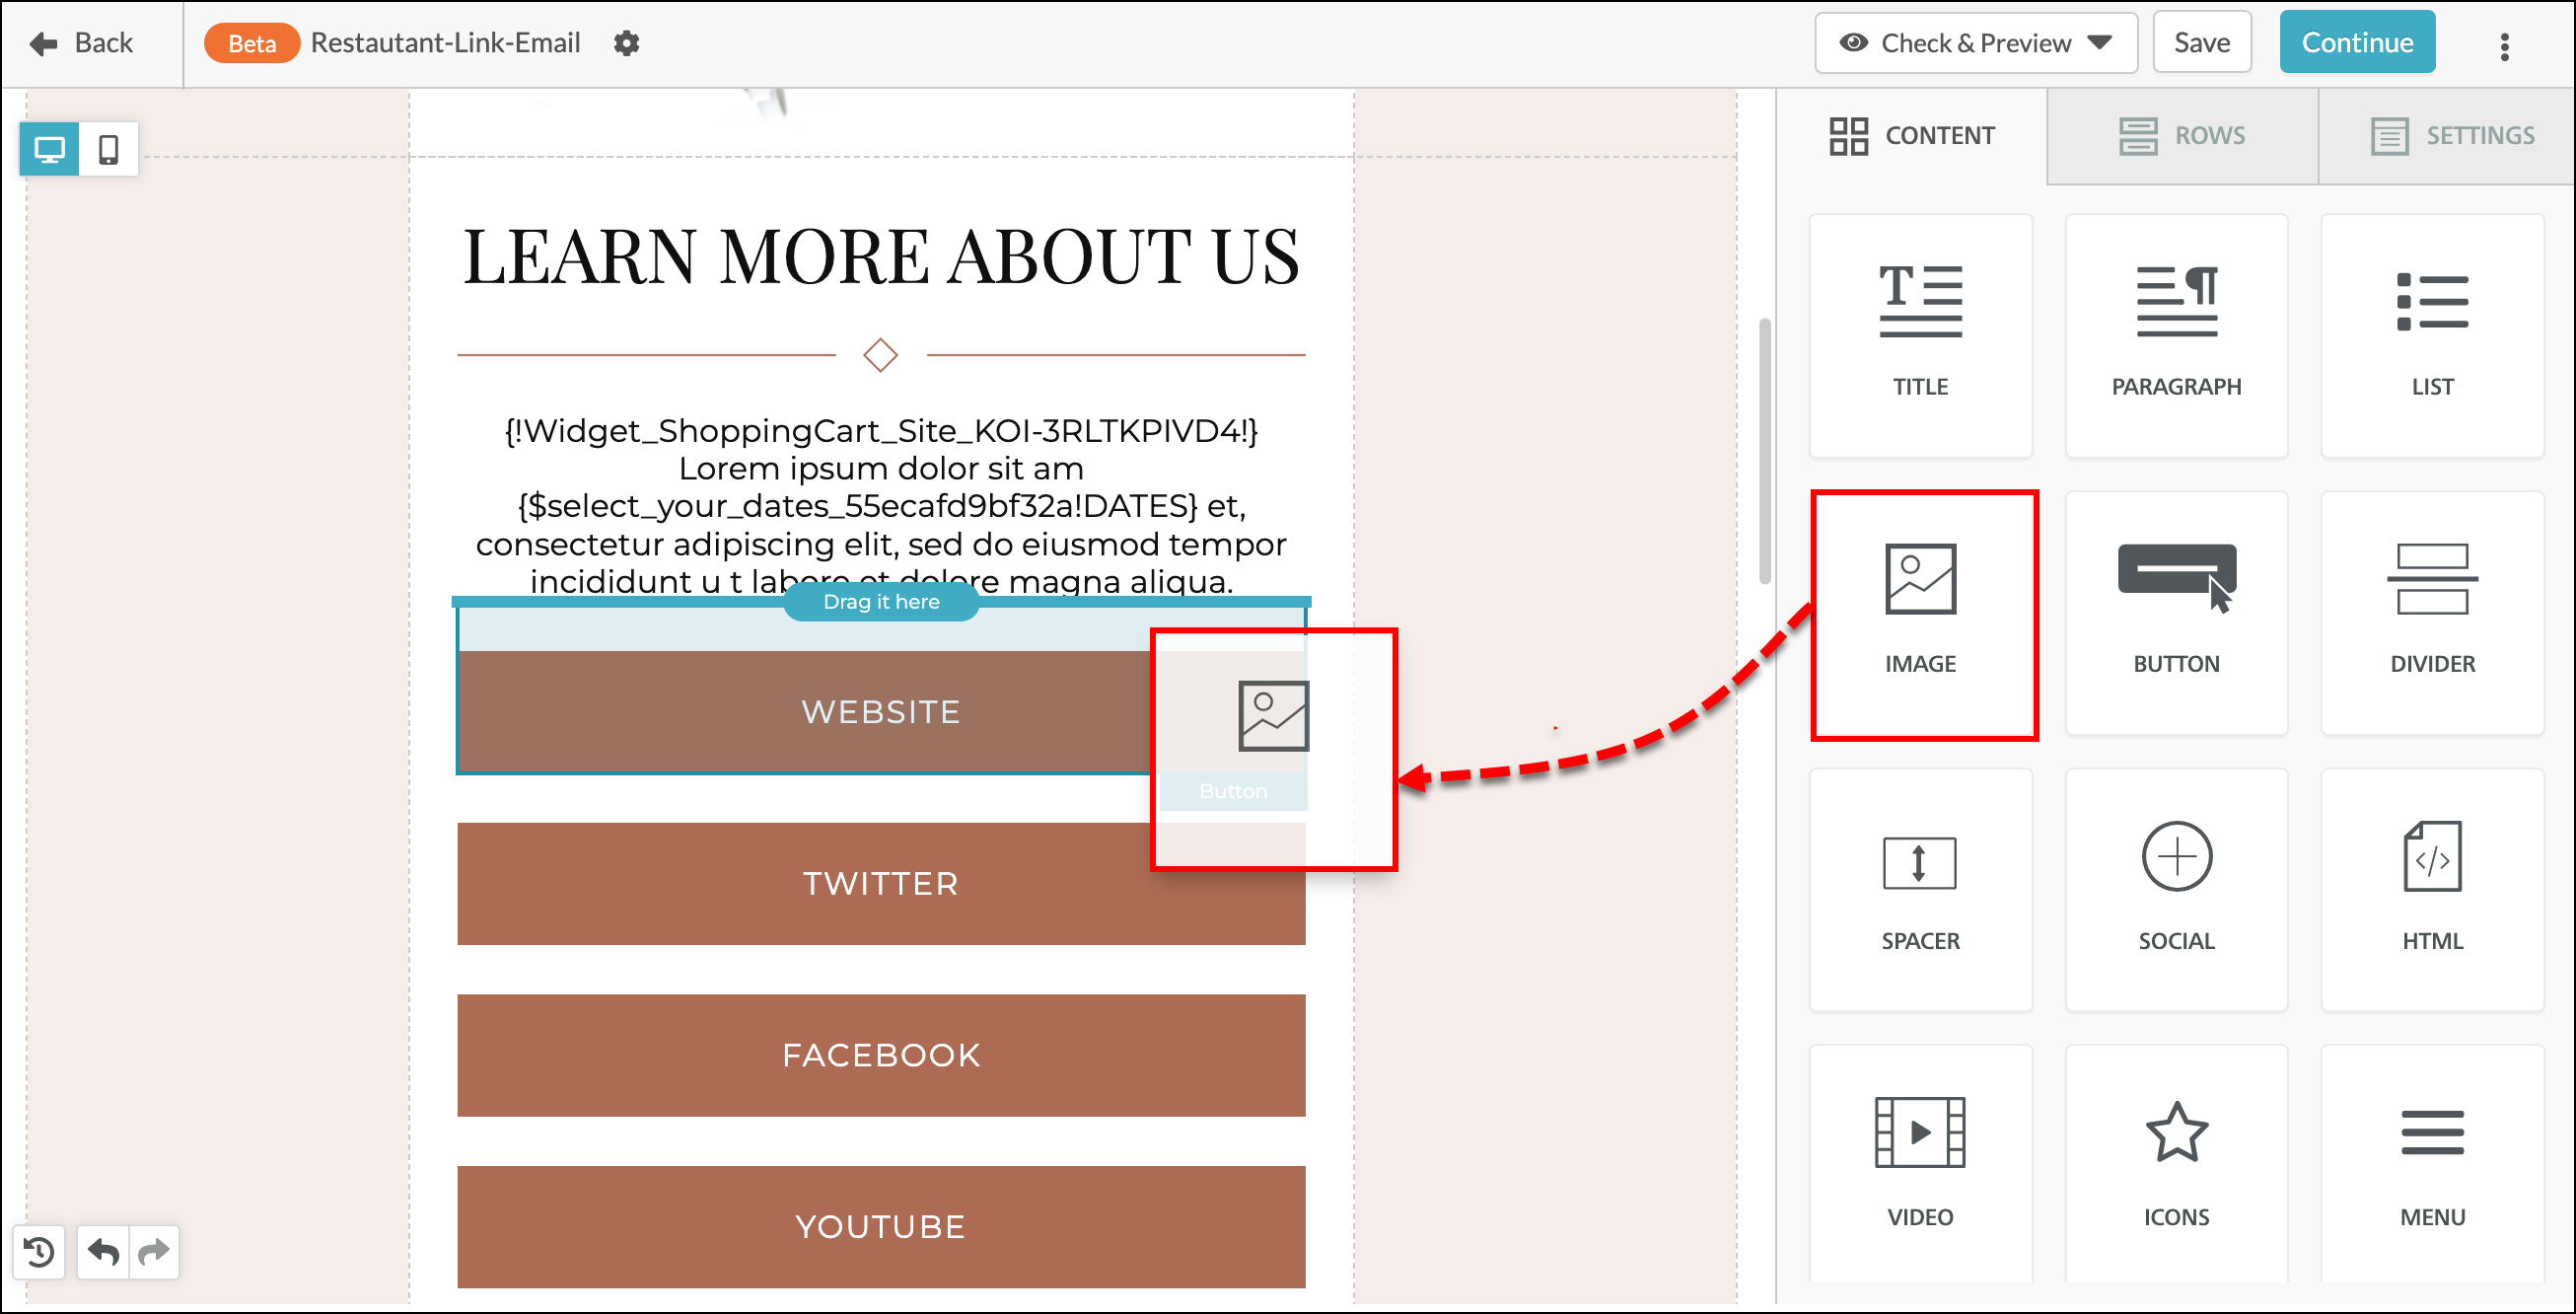
Click the Browse button on the image block, or the Change Image button under Image Properties, to upload an image from your computer or select an image from your media folder. 

If you want to insert an image using an image link, enter the web address of the image in the URL field

Browse or Upload an Image


Editing Images in your Email


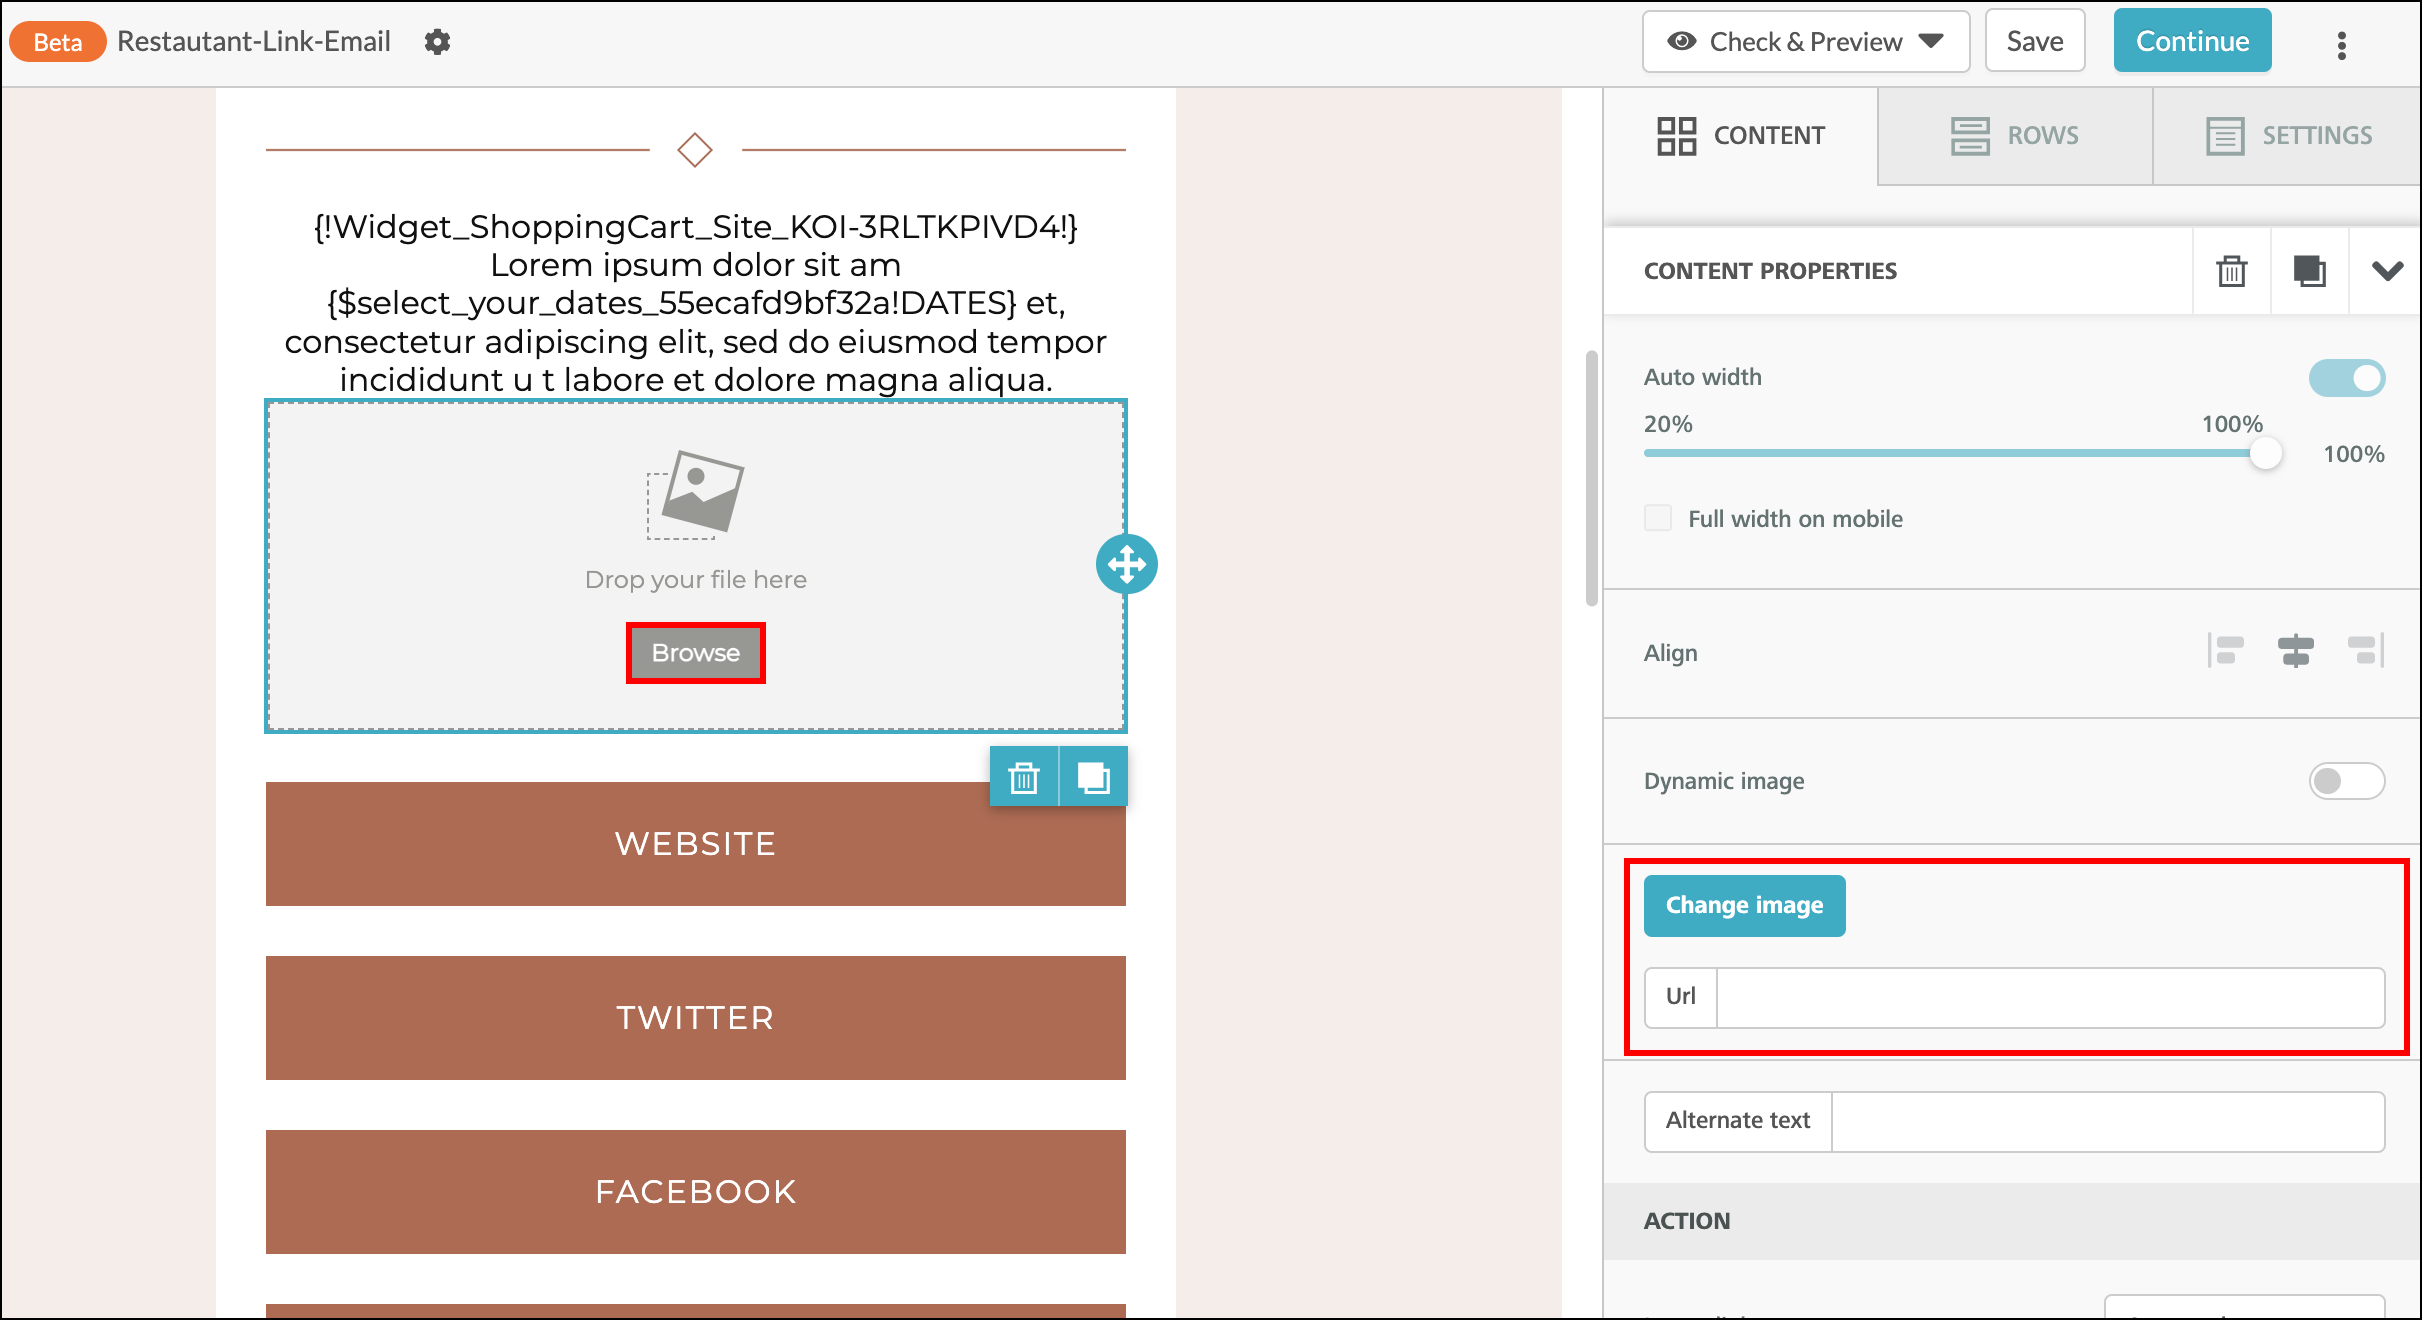
Modify Image Size and Alignment

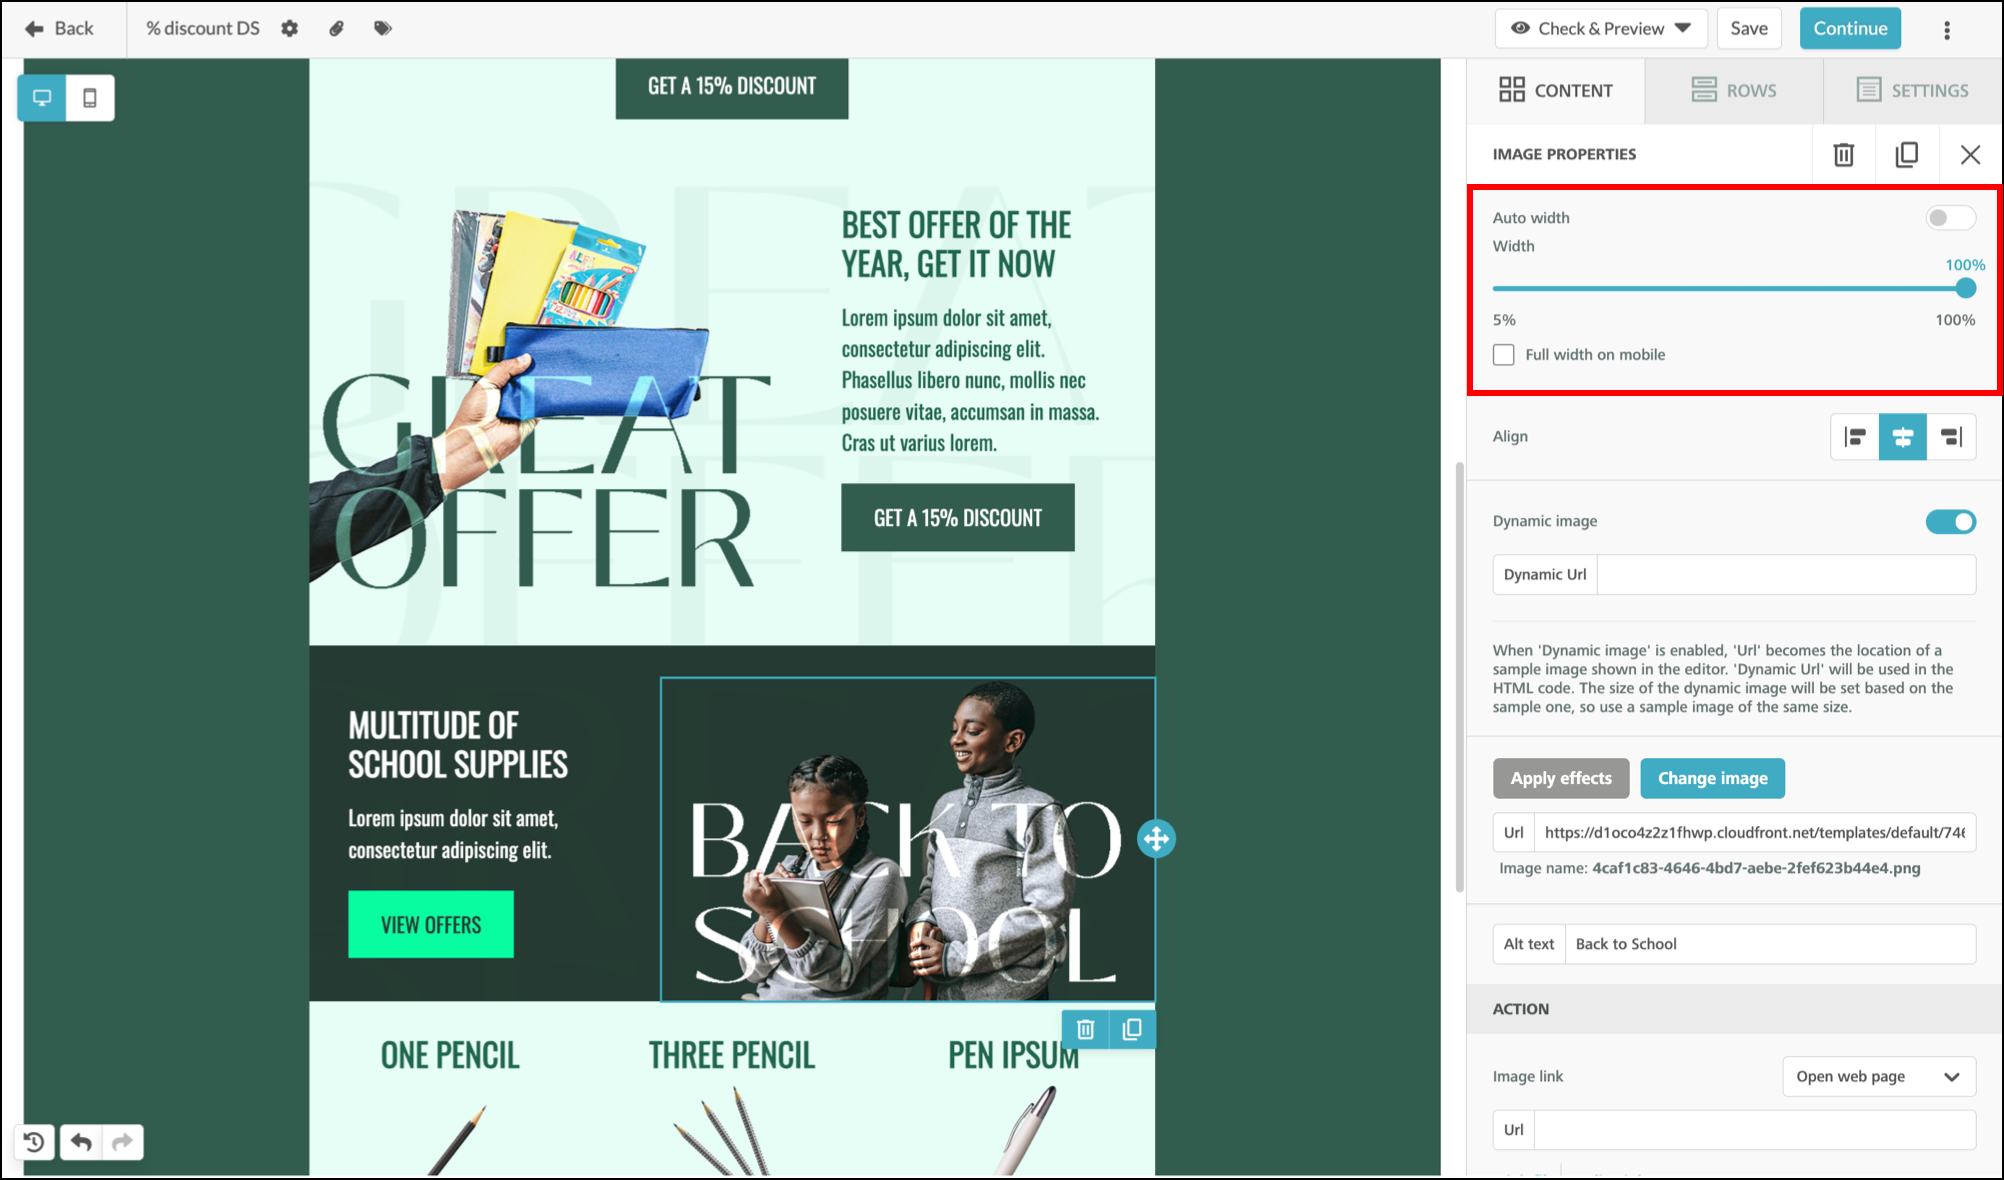
In the Image Properties section, disable Auto width to manually set your image's width.  


After Auto width is off, use the slider to adjust your image's width. This slider is relative to the size of your image file. If the slider is at 100% width but the image is still too small, resize the image in your preferred image editor and then upload it again, or use the image editing tools within the Lead Gen email editor by clicking "Apply Effects".

Optionally, check the Full width on mobile checkbox to ensure the image always appears at 100% width on mobile devices. 


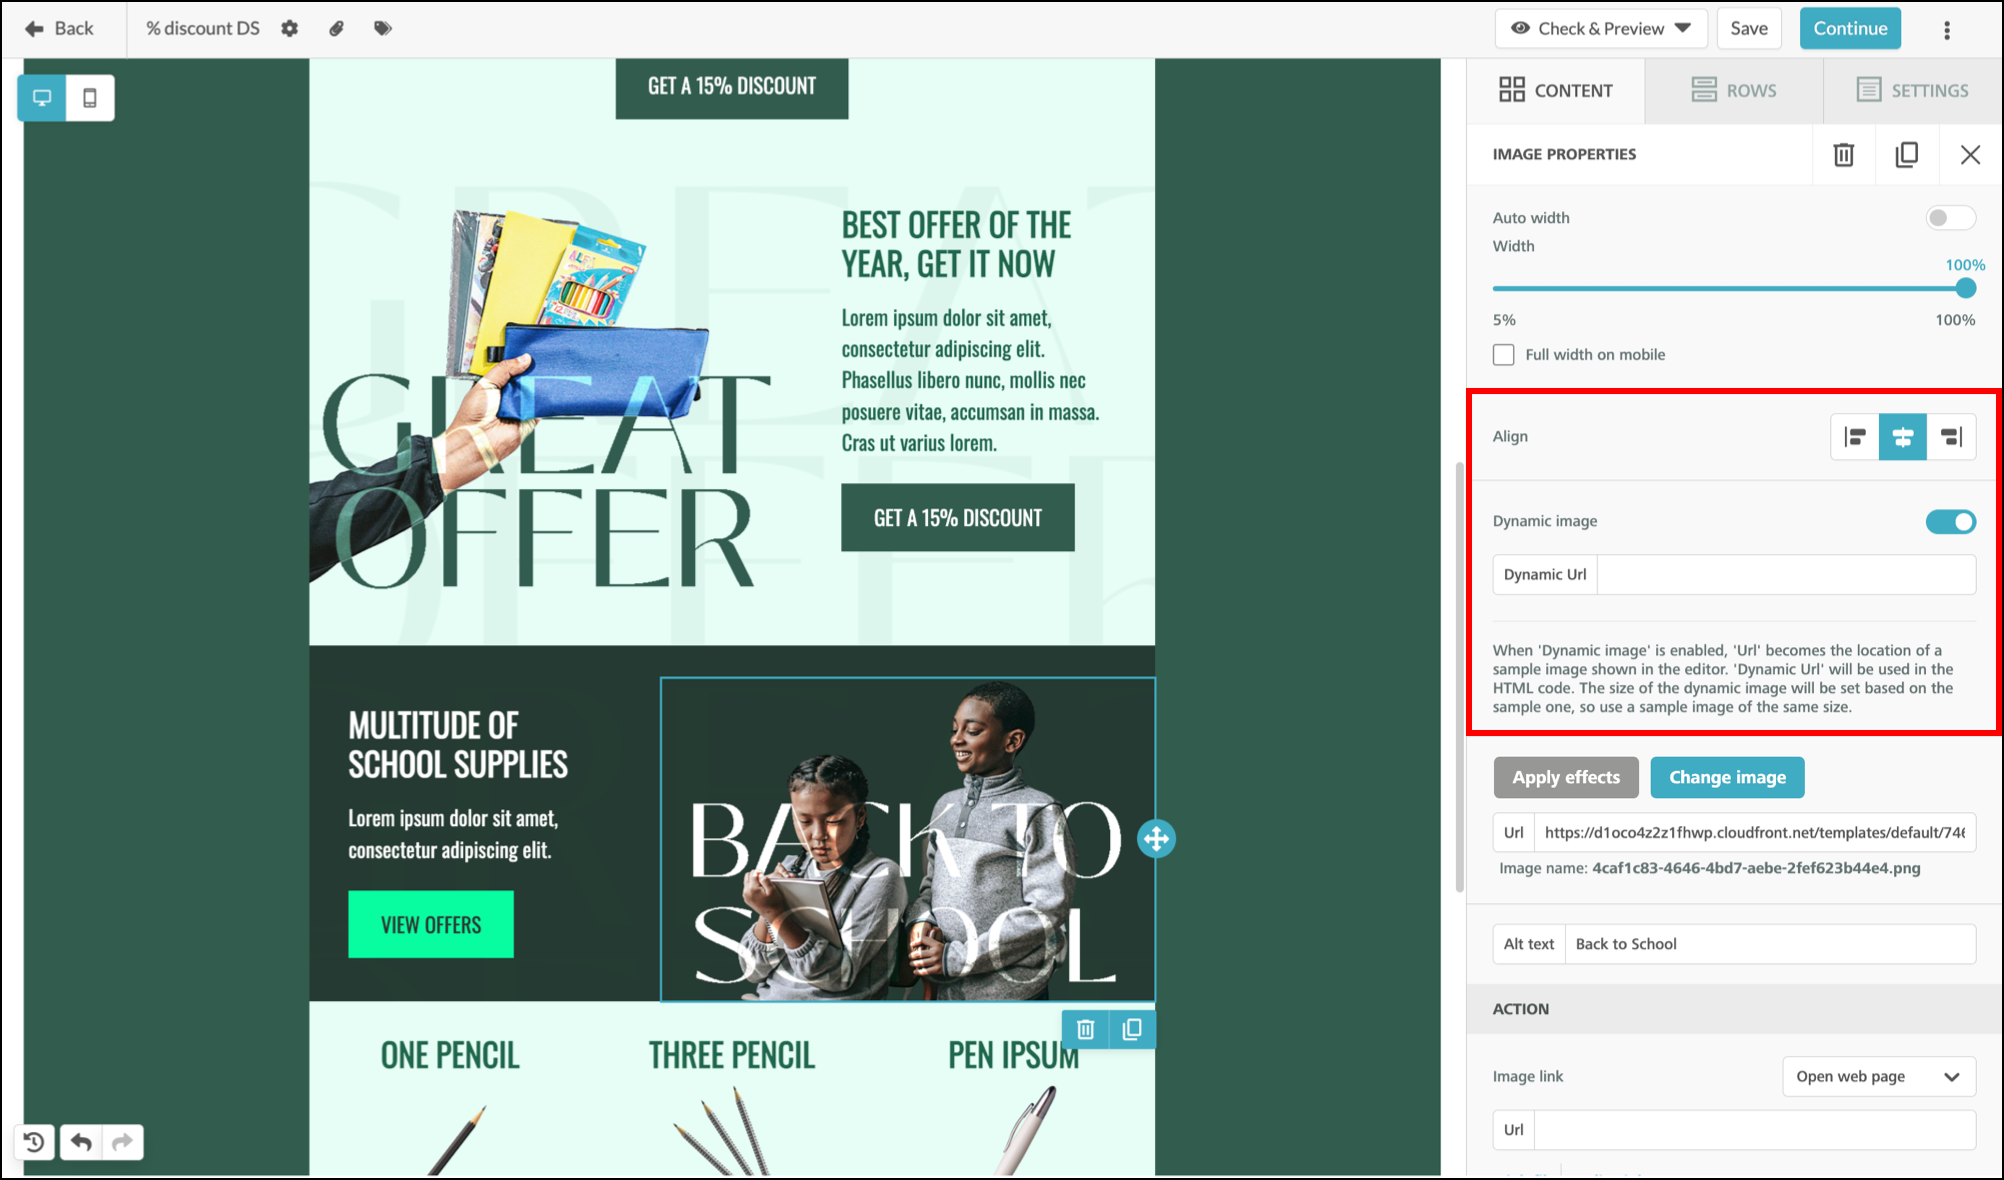
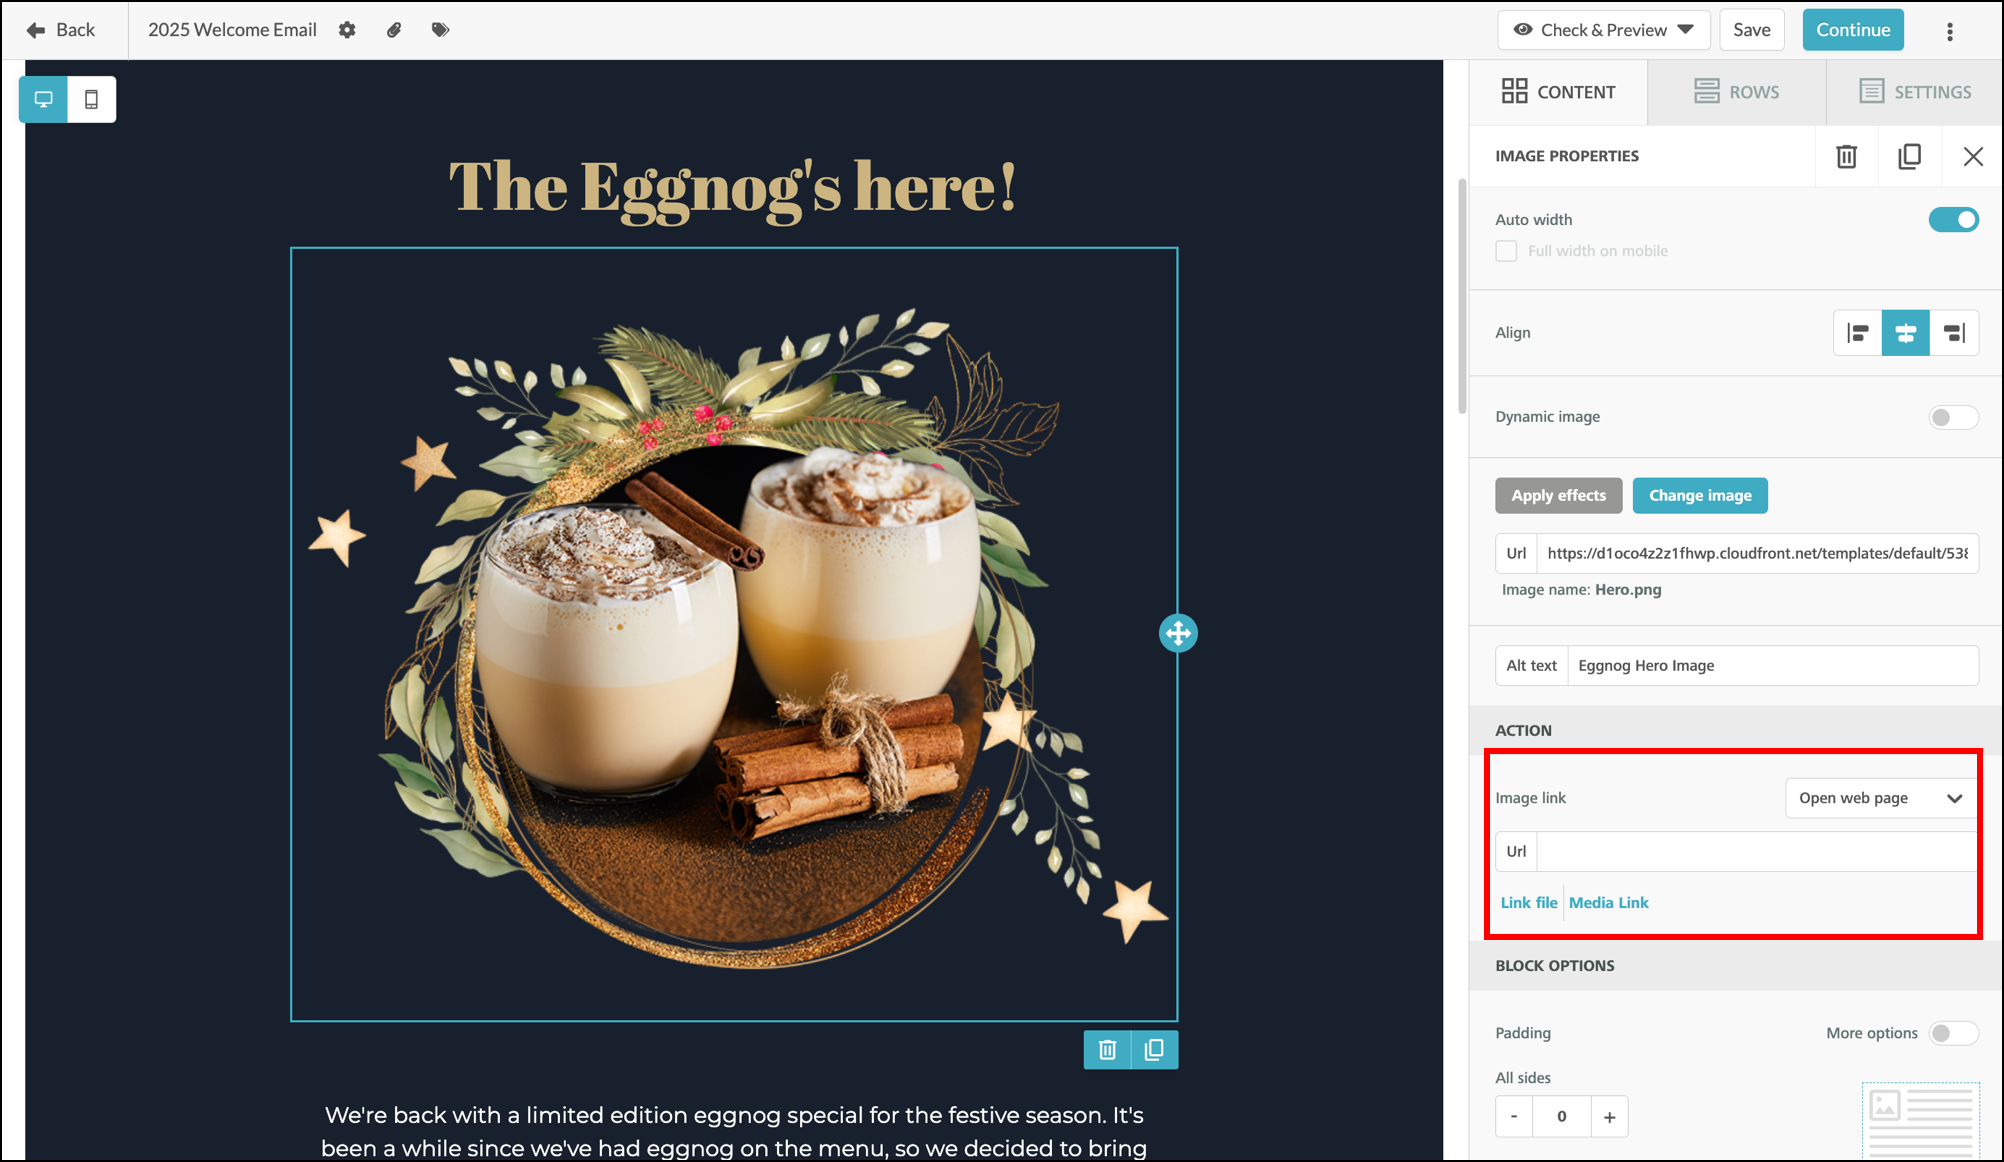
Align your image left, center, or right as needed using the align buttons and enable or disable Dynamic image.

You may want your contacts to each receive a different, unique image within your email. The Dynamic URL field supports two types of merge variables: you can either use Global Merge Variables or you can use Custom Fields. Read How to use Merge Variables to set up Dynamic Image URLs to learn more about dynamic images. 
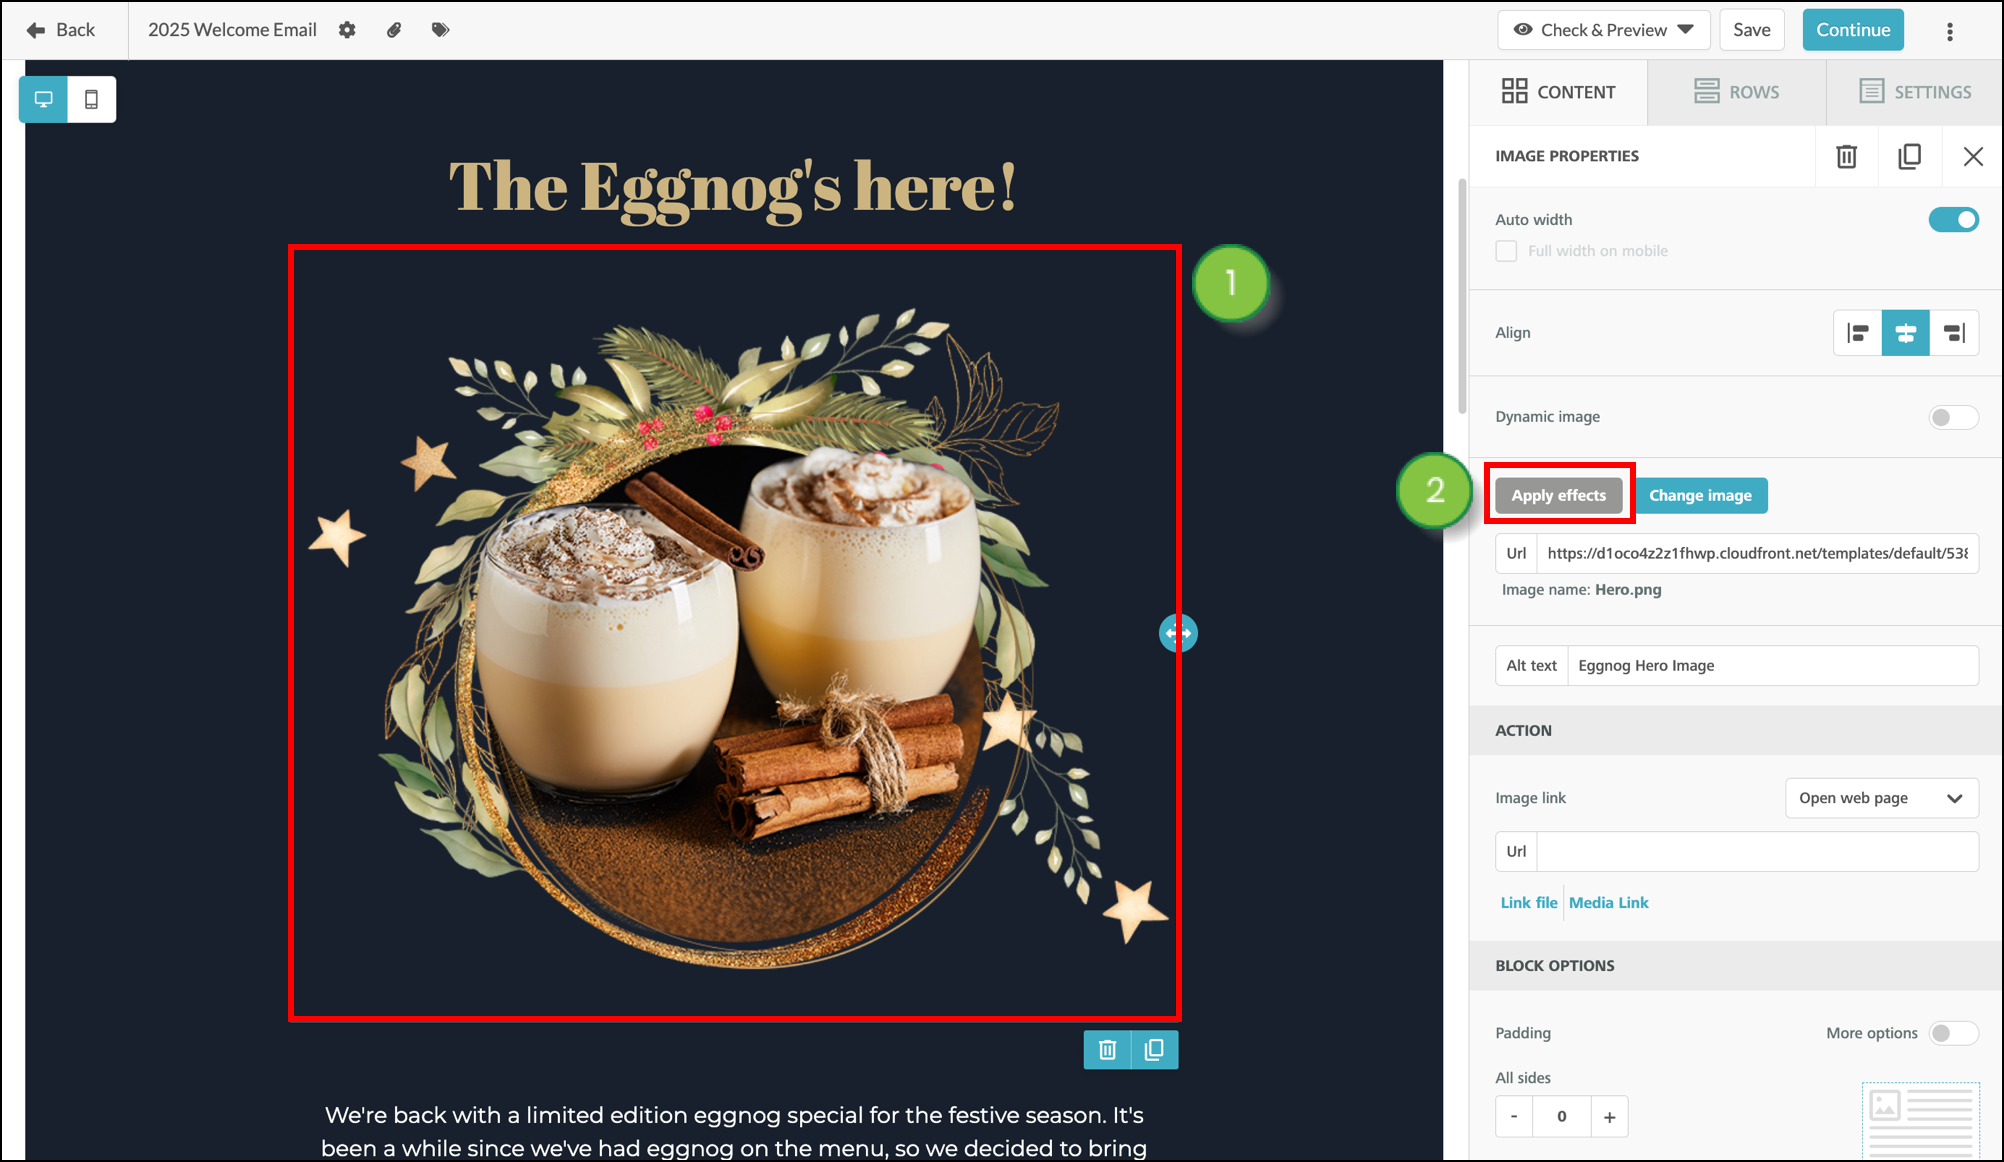
 

Apply Image Effects

Edit your image using built-in editing tools. Add a filter, resize, crop, or frame your image right from the email editor.

  1. Click the image in your email.
  2. Click Apply Effects.


  3. In the editor that appears, select one of the editing tools.

    Note: Use the mouse trackball to zoom in or out, or use the slider at the bottom of the screen. 

  4. When you're finished, tap Save.


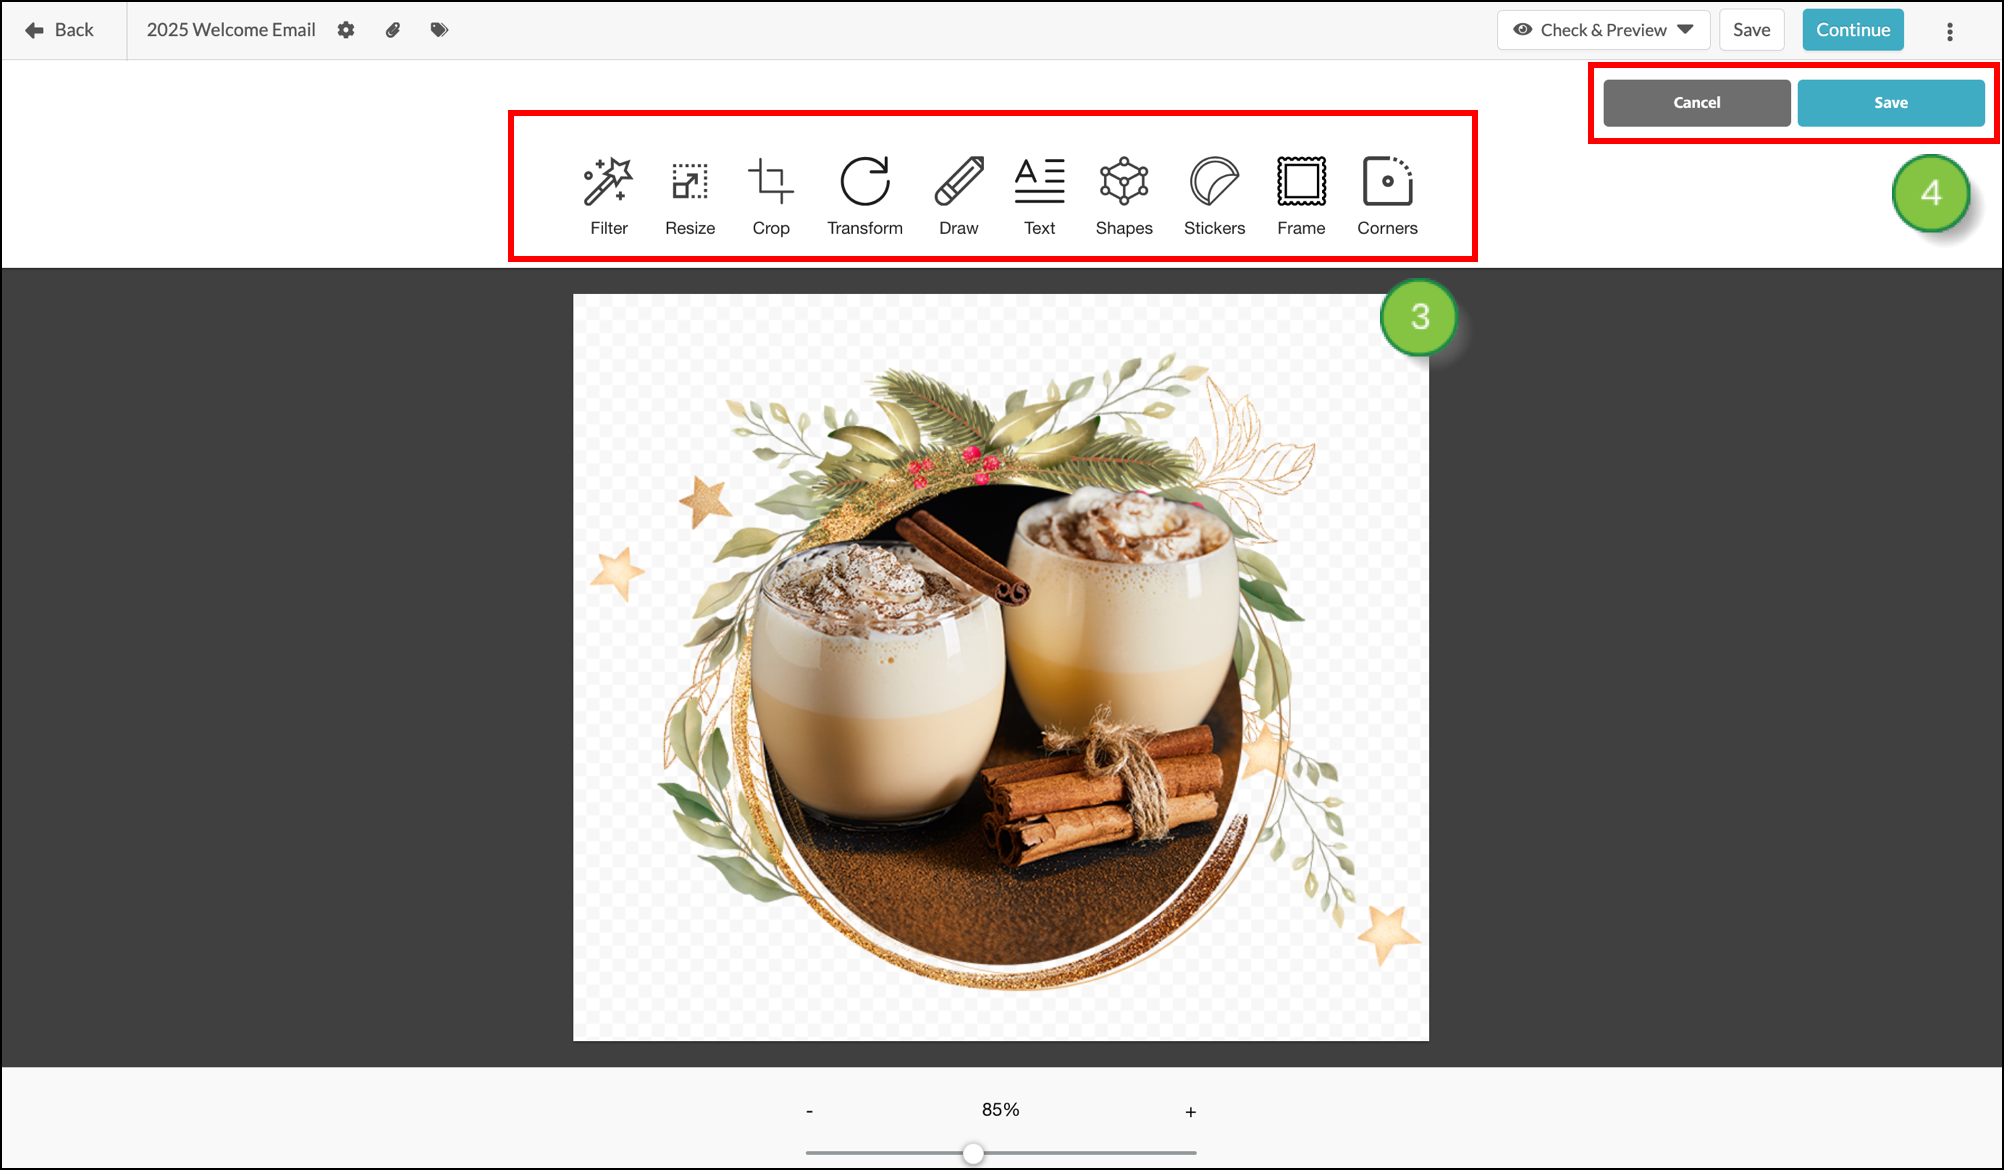
Available editing tools


  • Filter: Apply filters to your image, including: Grayscale, Black & White, Sharpen, Invert, Vintage, Polaroid, Kodachrome, Technicolor, Brownie, Sepia, Remove, Color, Brightness, Gamma, Noise, Pixelate, Blur, Emboss, and Blend.
     
  • Resize: Enter a width and height to resize your image. Choose to enter in pixels, or check the Use Percentages box to switch to percentage. Optionally, check the Maintain Aspect Ratio box.

  • Crop: Enter width or height in pixels to crop your image, or choose one of our pre-set aspect ratios. Alternatively, slide the borders over your image to crop.

  • Transform: Rotate your image left or right using the rotate buttons or the slider to the right of the options. Additionally, flip your image horizontally or vertically. 

  • Draw: Use your mouse to draw on your image, adjusting color, brush type, and brush size. 

  • Text: Click the Add text button to insert a text box into your image, adjusting the color and font as needed. 

  • Shape: Add shapes to your image, then click a shape to adjust its size, color, texture, gradient, and more. Shapes include circles, rectangles, triangles, ovals, arrows, lines, stars, octagons, and a shield. 

  • Stickers: Premade stickers can be added to your image to dress it up. Including a series of doodles, emoticons, places, stars, clouds, text bubbles, and seasonal stickers. 

  • Frame: Add Basic, Pine, Oak, Rainbow, Grunge, Ebony, and Artistic style frames to your image. 

  • Corners: Use the slider to adjust the roundness of your image corners. 


Action menu
In the Action section, you can turn your image into a link. Using the drop-down menu, select the action that occurs once the customer clicks on the image. The available actions are: 

  • Open Web Page - This opens a webpage in a new web browser tab when the image is clicked.
  • Send Email - This inserts a mailto link into your email, which opens the customer's email client when the image is clicked.
  • Make A Call - This presents an option to the customer to dial a number. It works best when the image is clicked on a mobile device. When on a computer, the computer will attempt to open whatever communication software is available to dial the number, such as Skype. 
  • Send SMS - This presents an option to the customer to send a text message to a number. It works when the image is clicked on a mobile device.
    Important: When your recipient is viewing the email on a desktop device, the image will be hidden. 
  • When a recipient clicks on the image, their SMS client will open with the message you've written in the image action section pre-typed, and the phone number to send the message pre-set. The customer needs only to click SEND to send the SMS message. 


Adding and Editing Video Previews

Drag and drop a video element into your email, using the blue lines to guide you to where the video should be inserted. 

Drag Video Elements

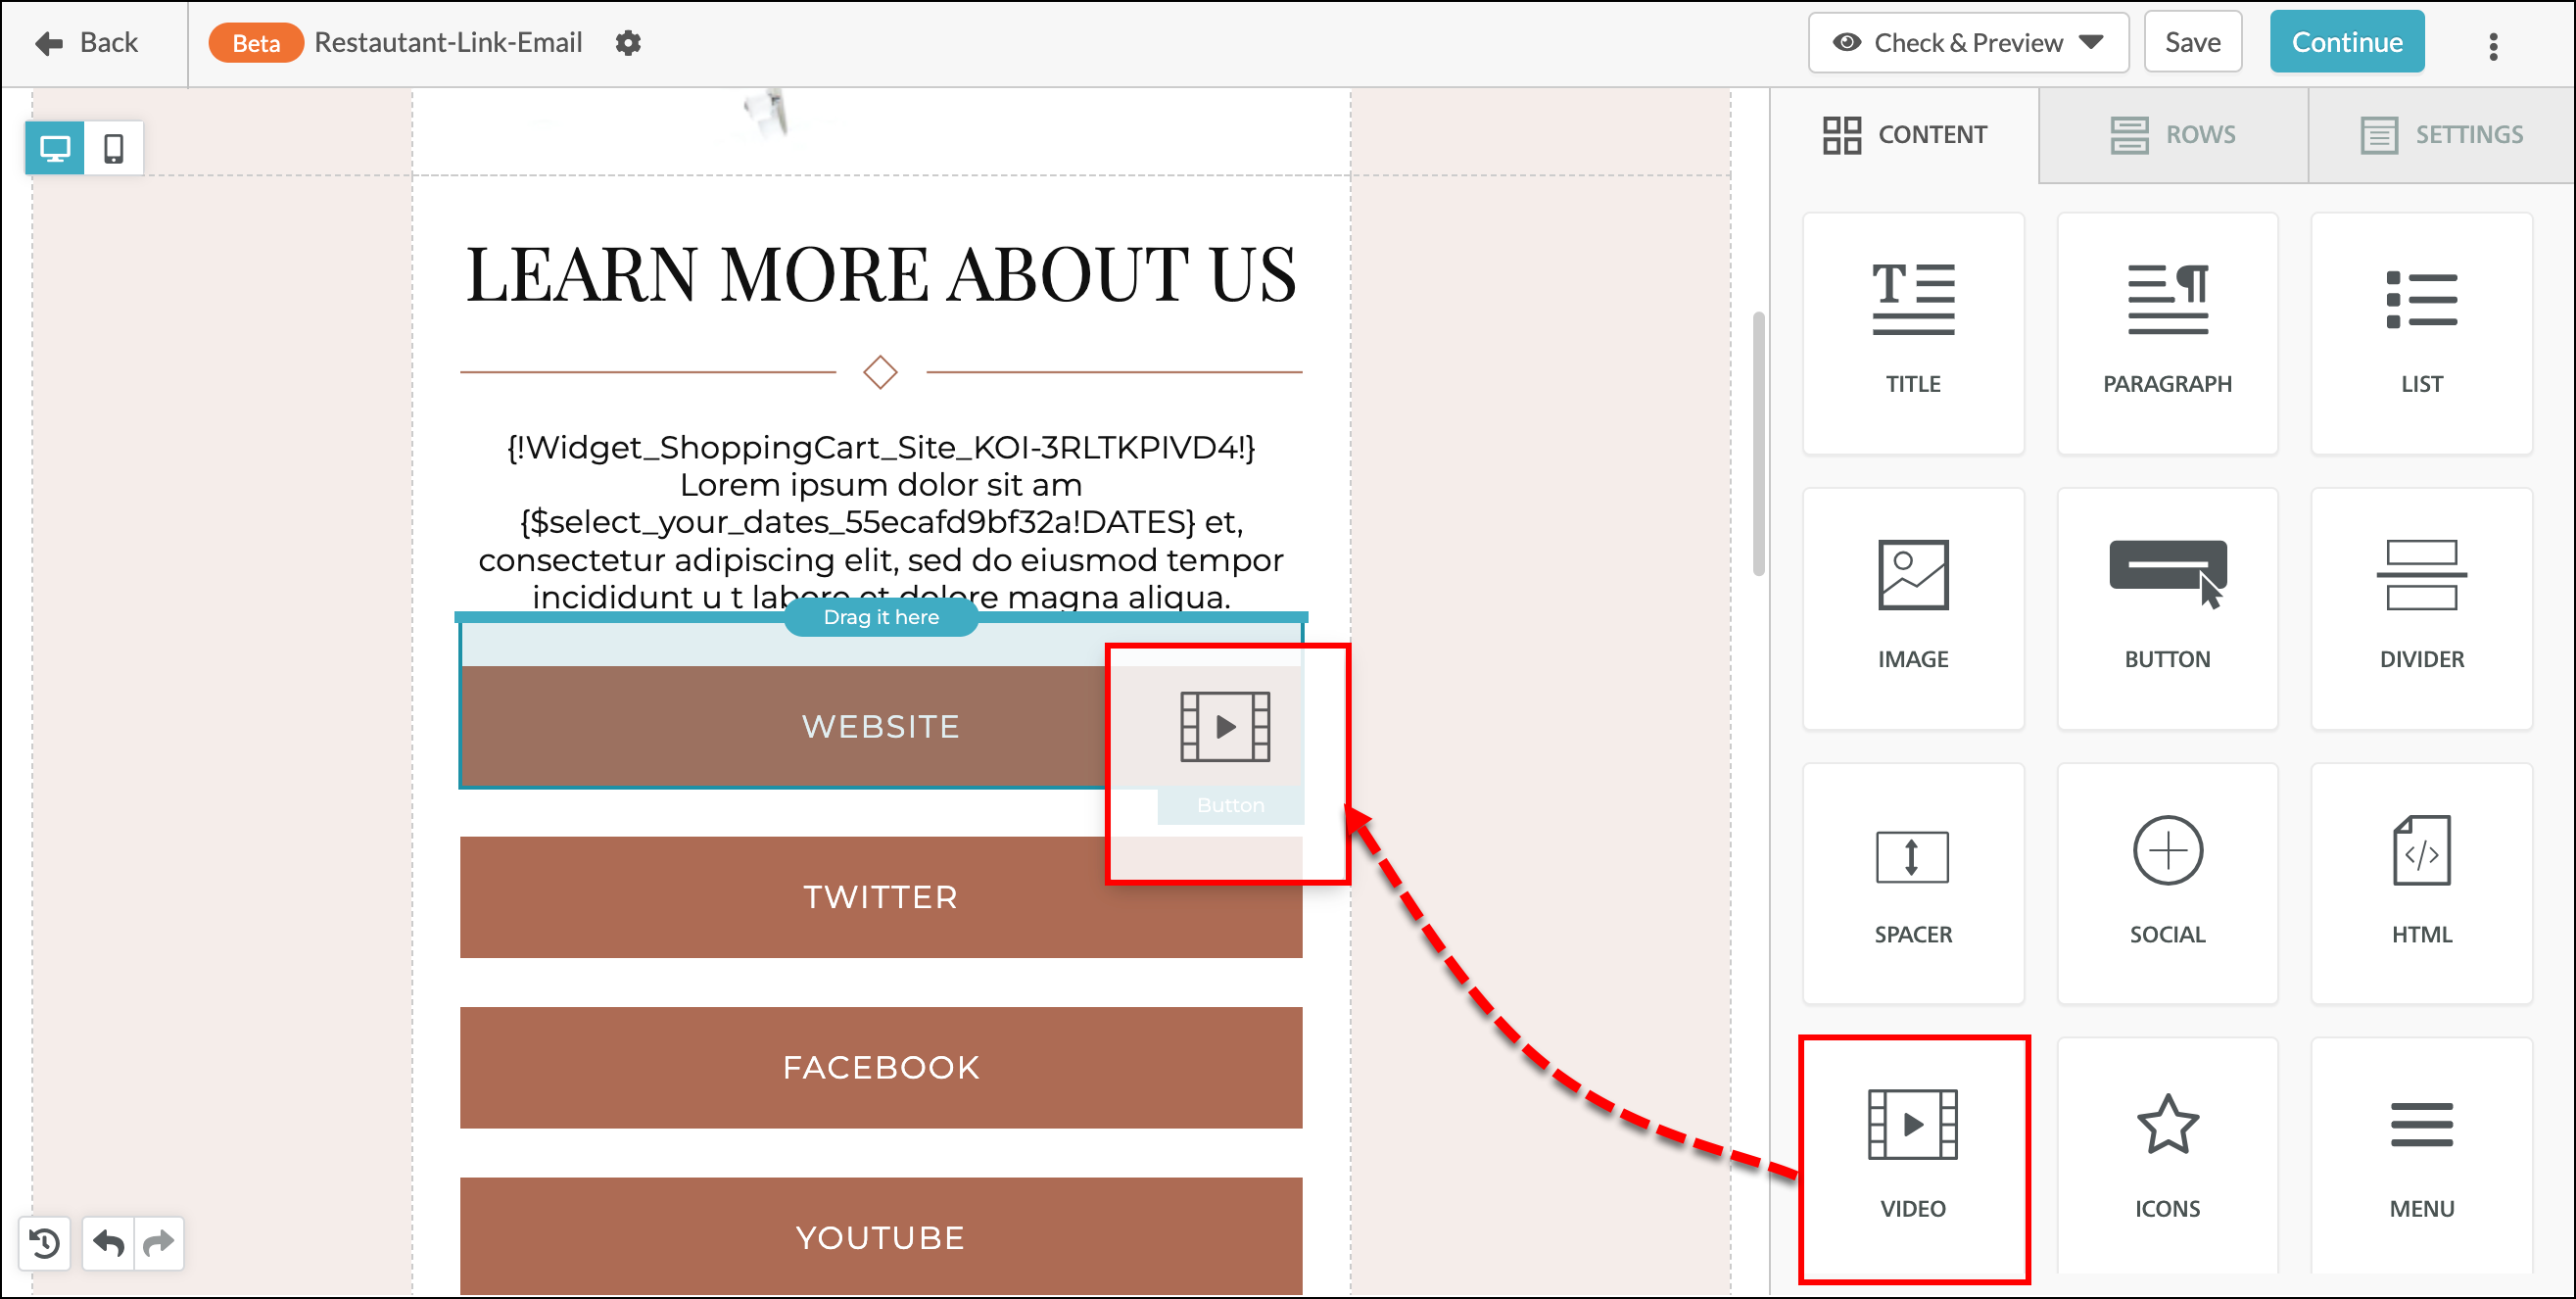
Click on the video element and, in the Content Properties window that appears on the right, enter the URL to a public or unlisted YouTube or Vimeo video. Lead Gen & CRM will automatically generate a preview image from the video thumbnail. This image will be included in your email.

Important: You must use a YouTube or Vimeo video URL and the video must be publicly available so that Lead Gen & CRM can automatically generate a preview image from the video thumbnail. 

Note: Consider using the Share feature to copy the needed URL. The URL from the browser may contain additional characters that make it hard for Lead Gen & CRM to access. 

After clicking on the preview image, email recipients will be directed to the video to watch it. 

Insert the video URL

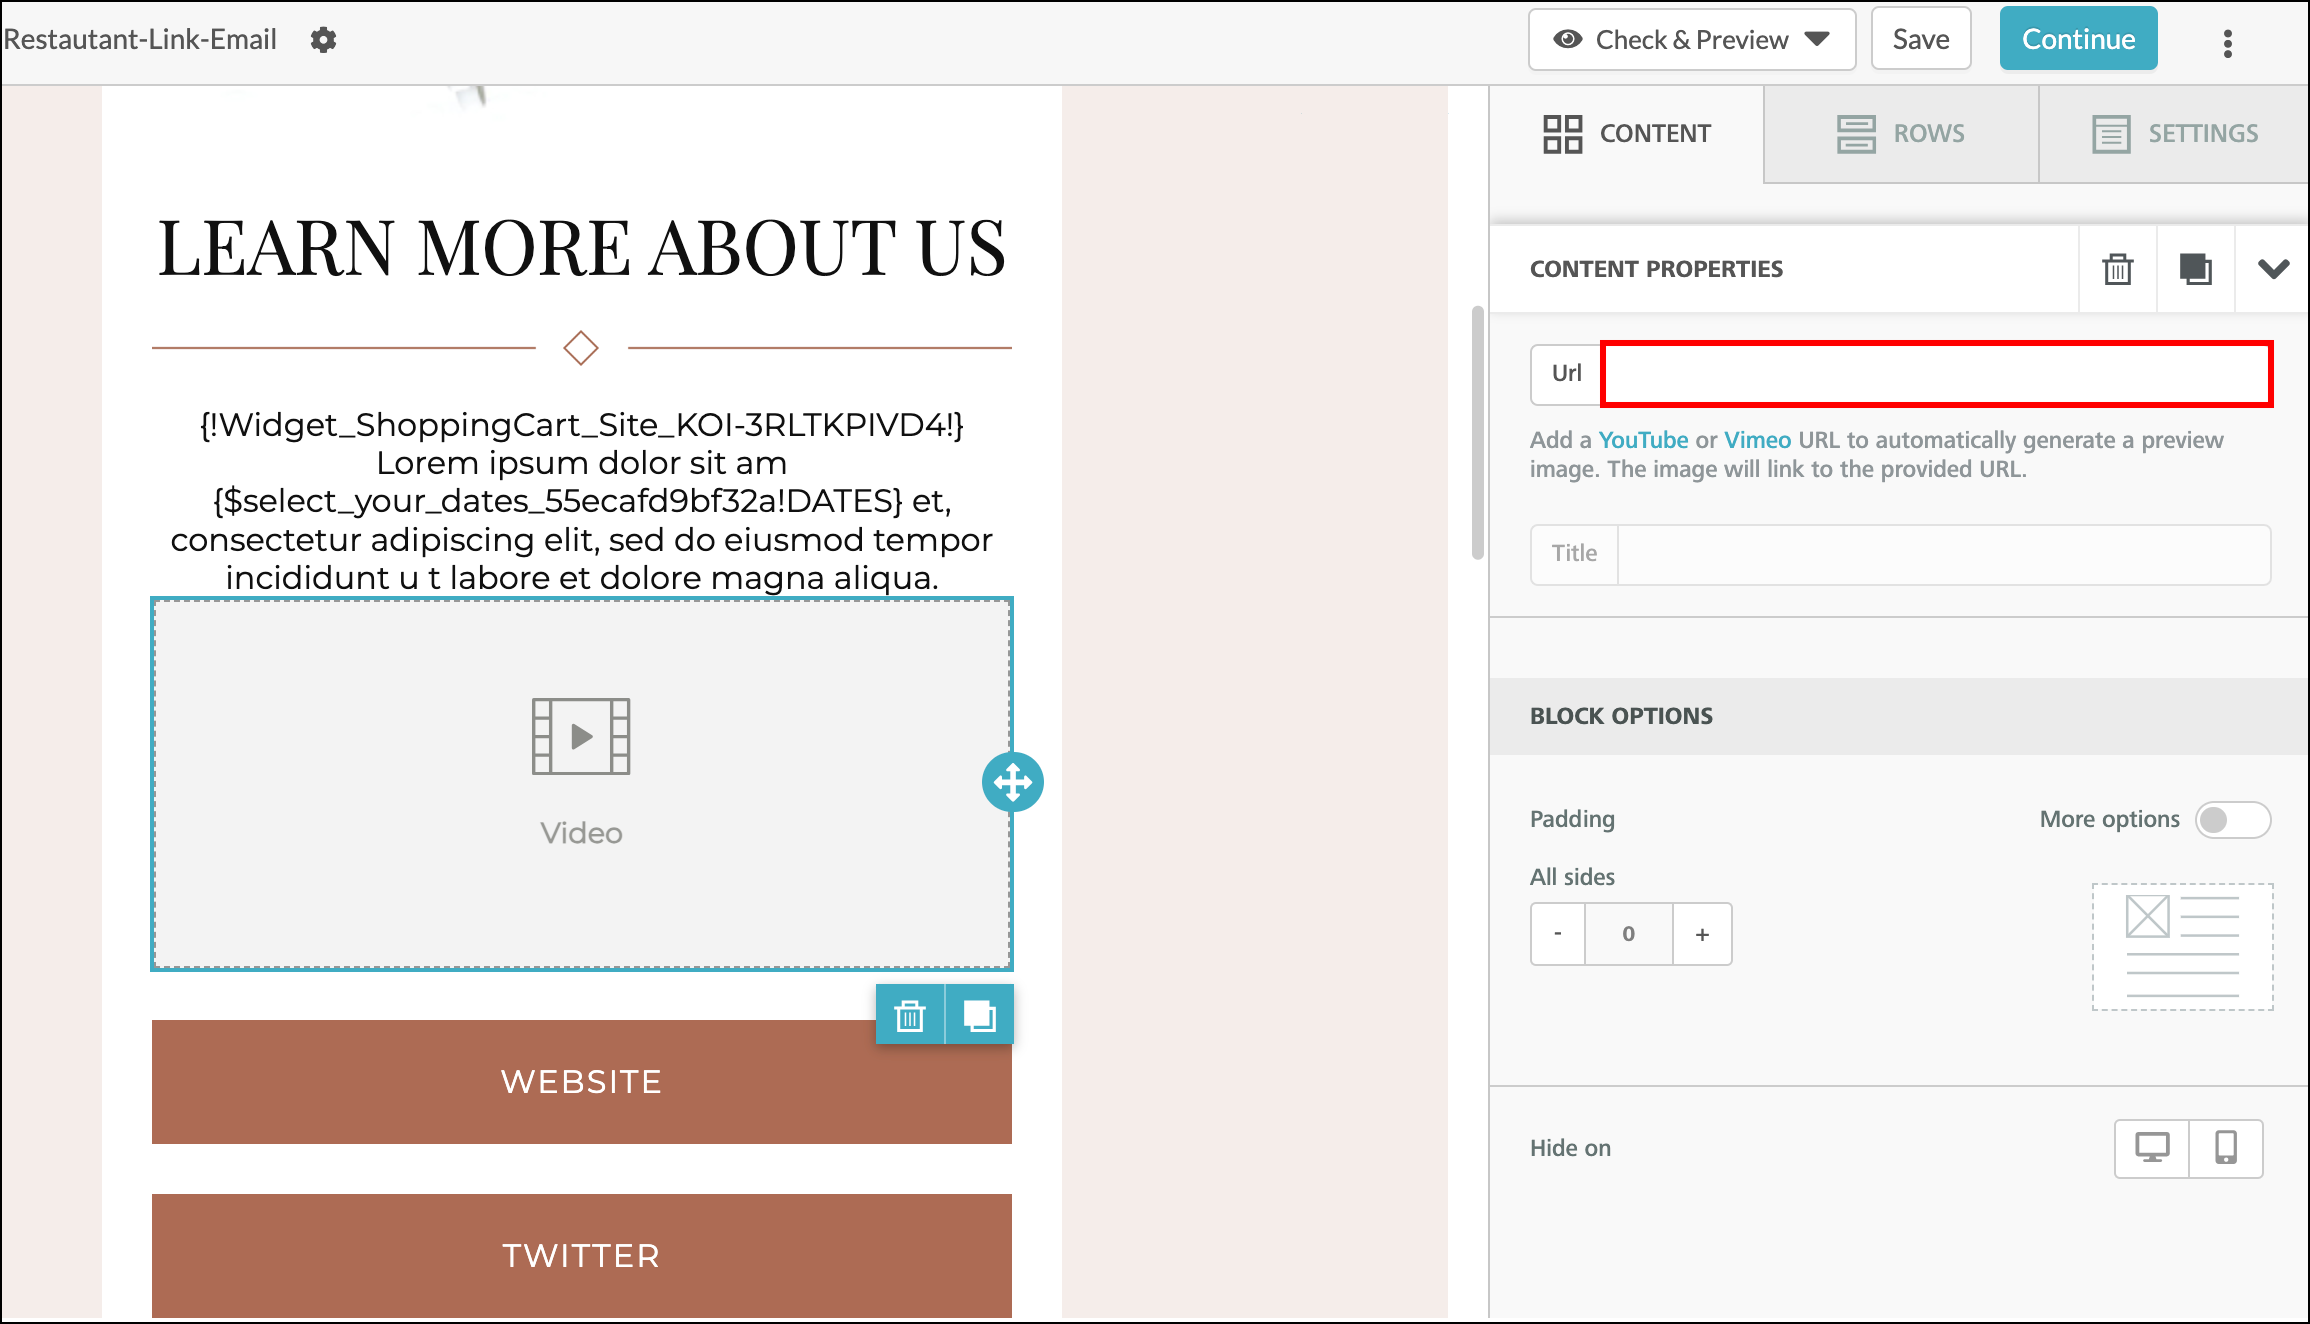
Once a video preview has been generated, you'll be able to modify the style of the play button that sits on top of the preview image. 

Modify the style of the play button


Adding and Editing Icons

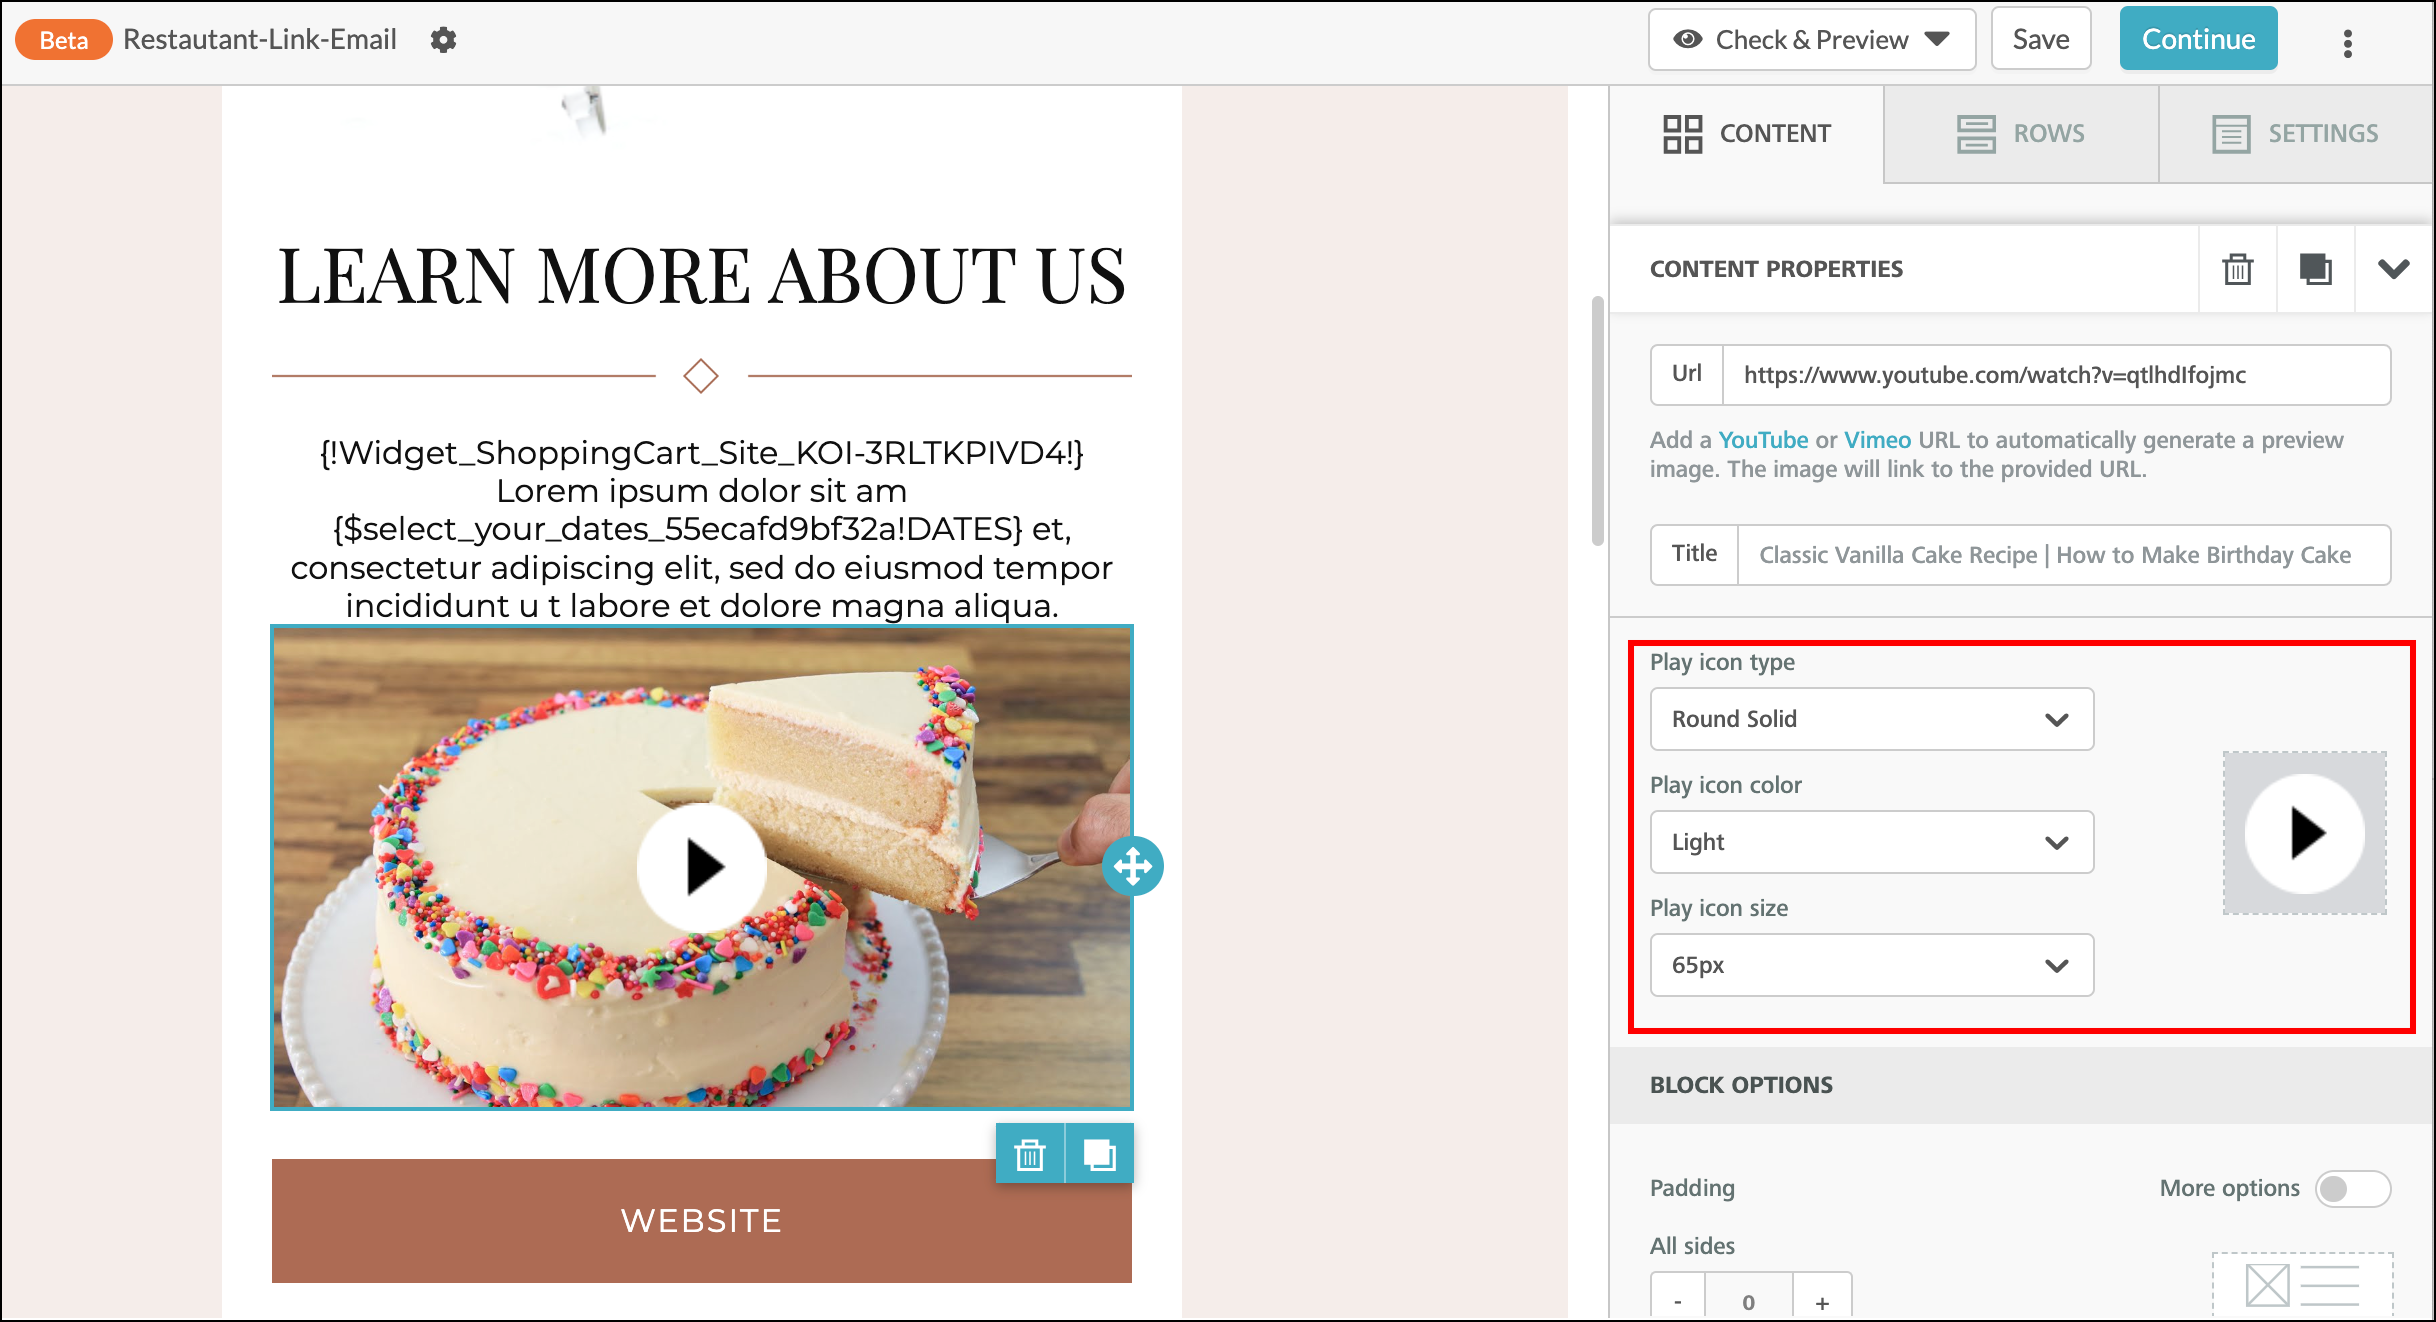
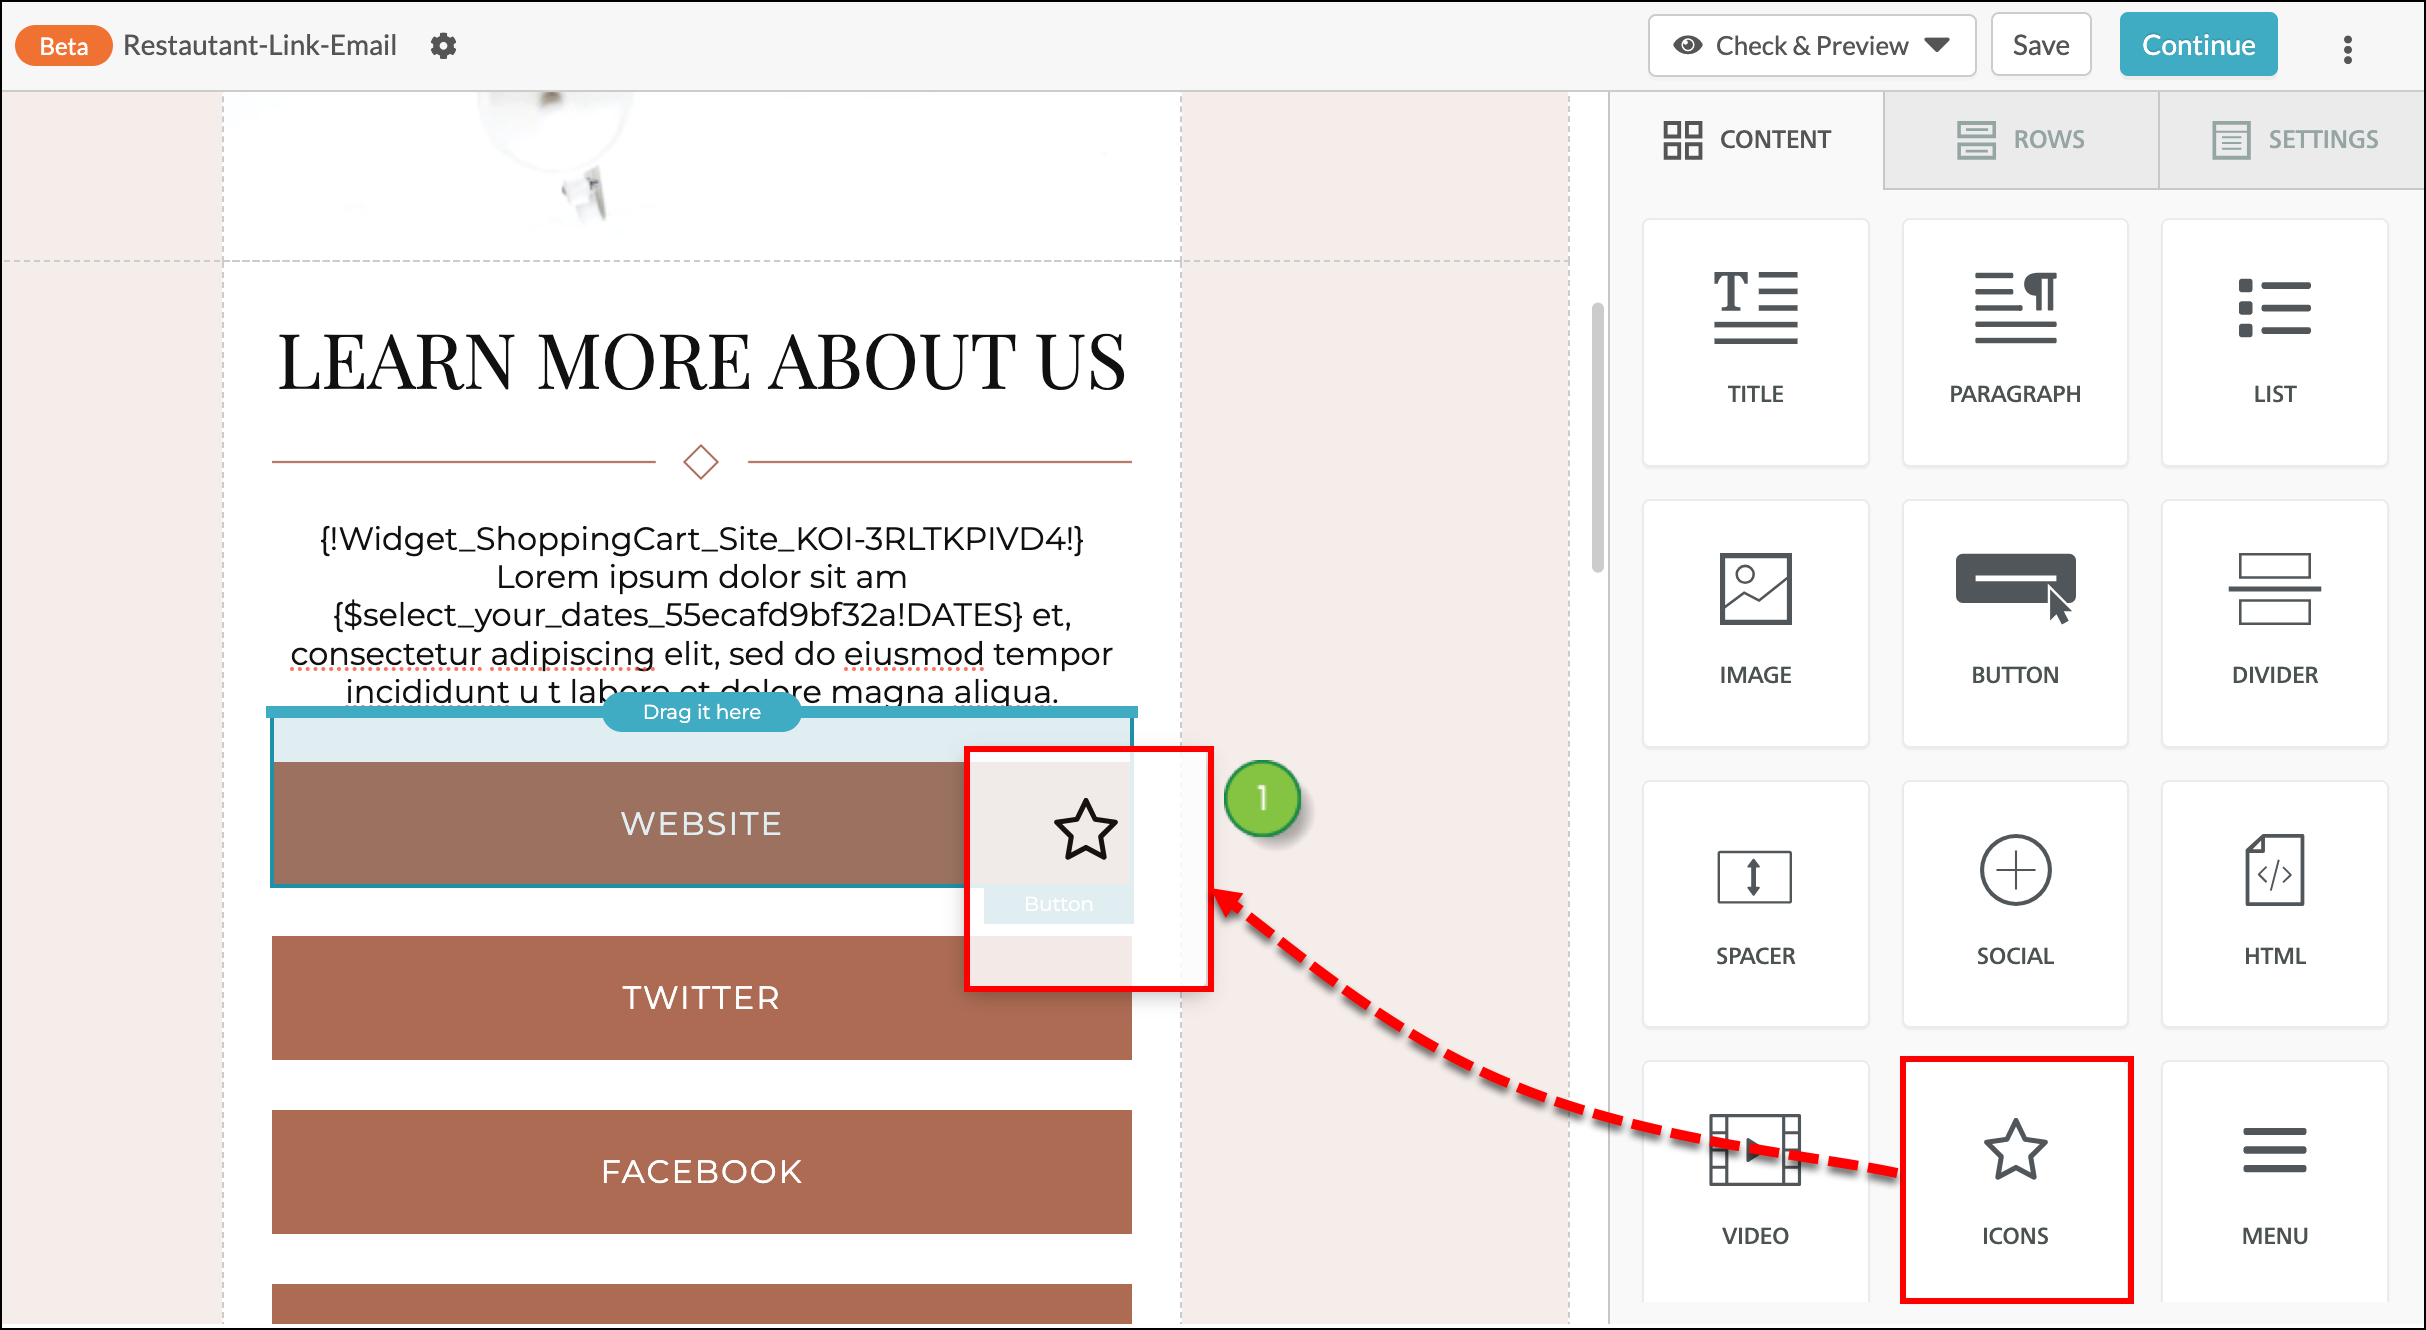
Add icon-sized images to your emails in a horizontal row using the Icon element. 

  1. Drag an Icon element into your email. 

    Drag Icon Element Into Email
     
  2. Click Add New Icon. Icons will appear horizontally in the Icon section. 
  3. Click the Change Image button to upload an icon image from your Lead Gen & CRM media folders. 

    Note: If you prefer to upload an image using a URL link, click the More Options toggle.

    Add Icons


Additional Icon Options

Use the More Options toggle to reveal additional icon image options:
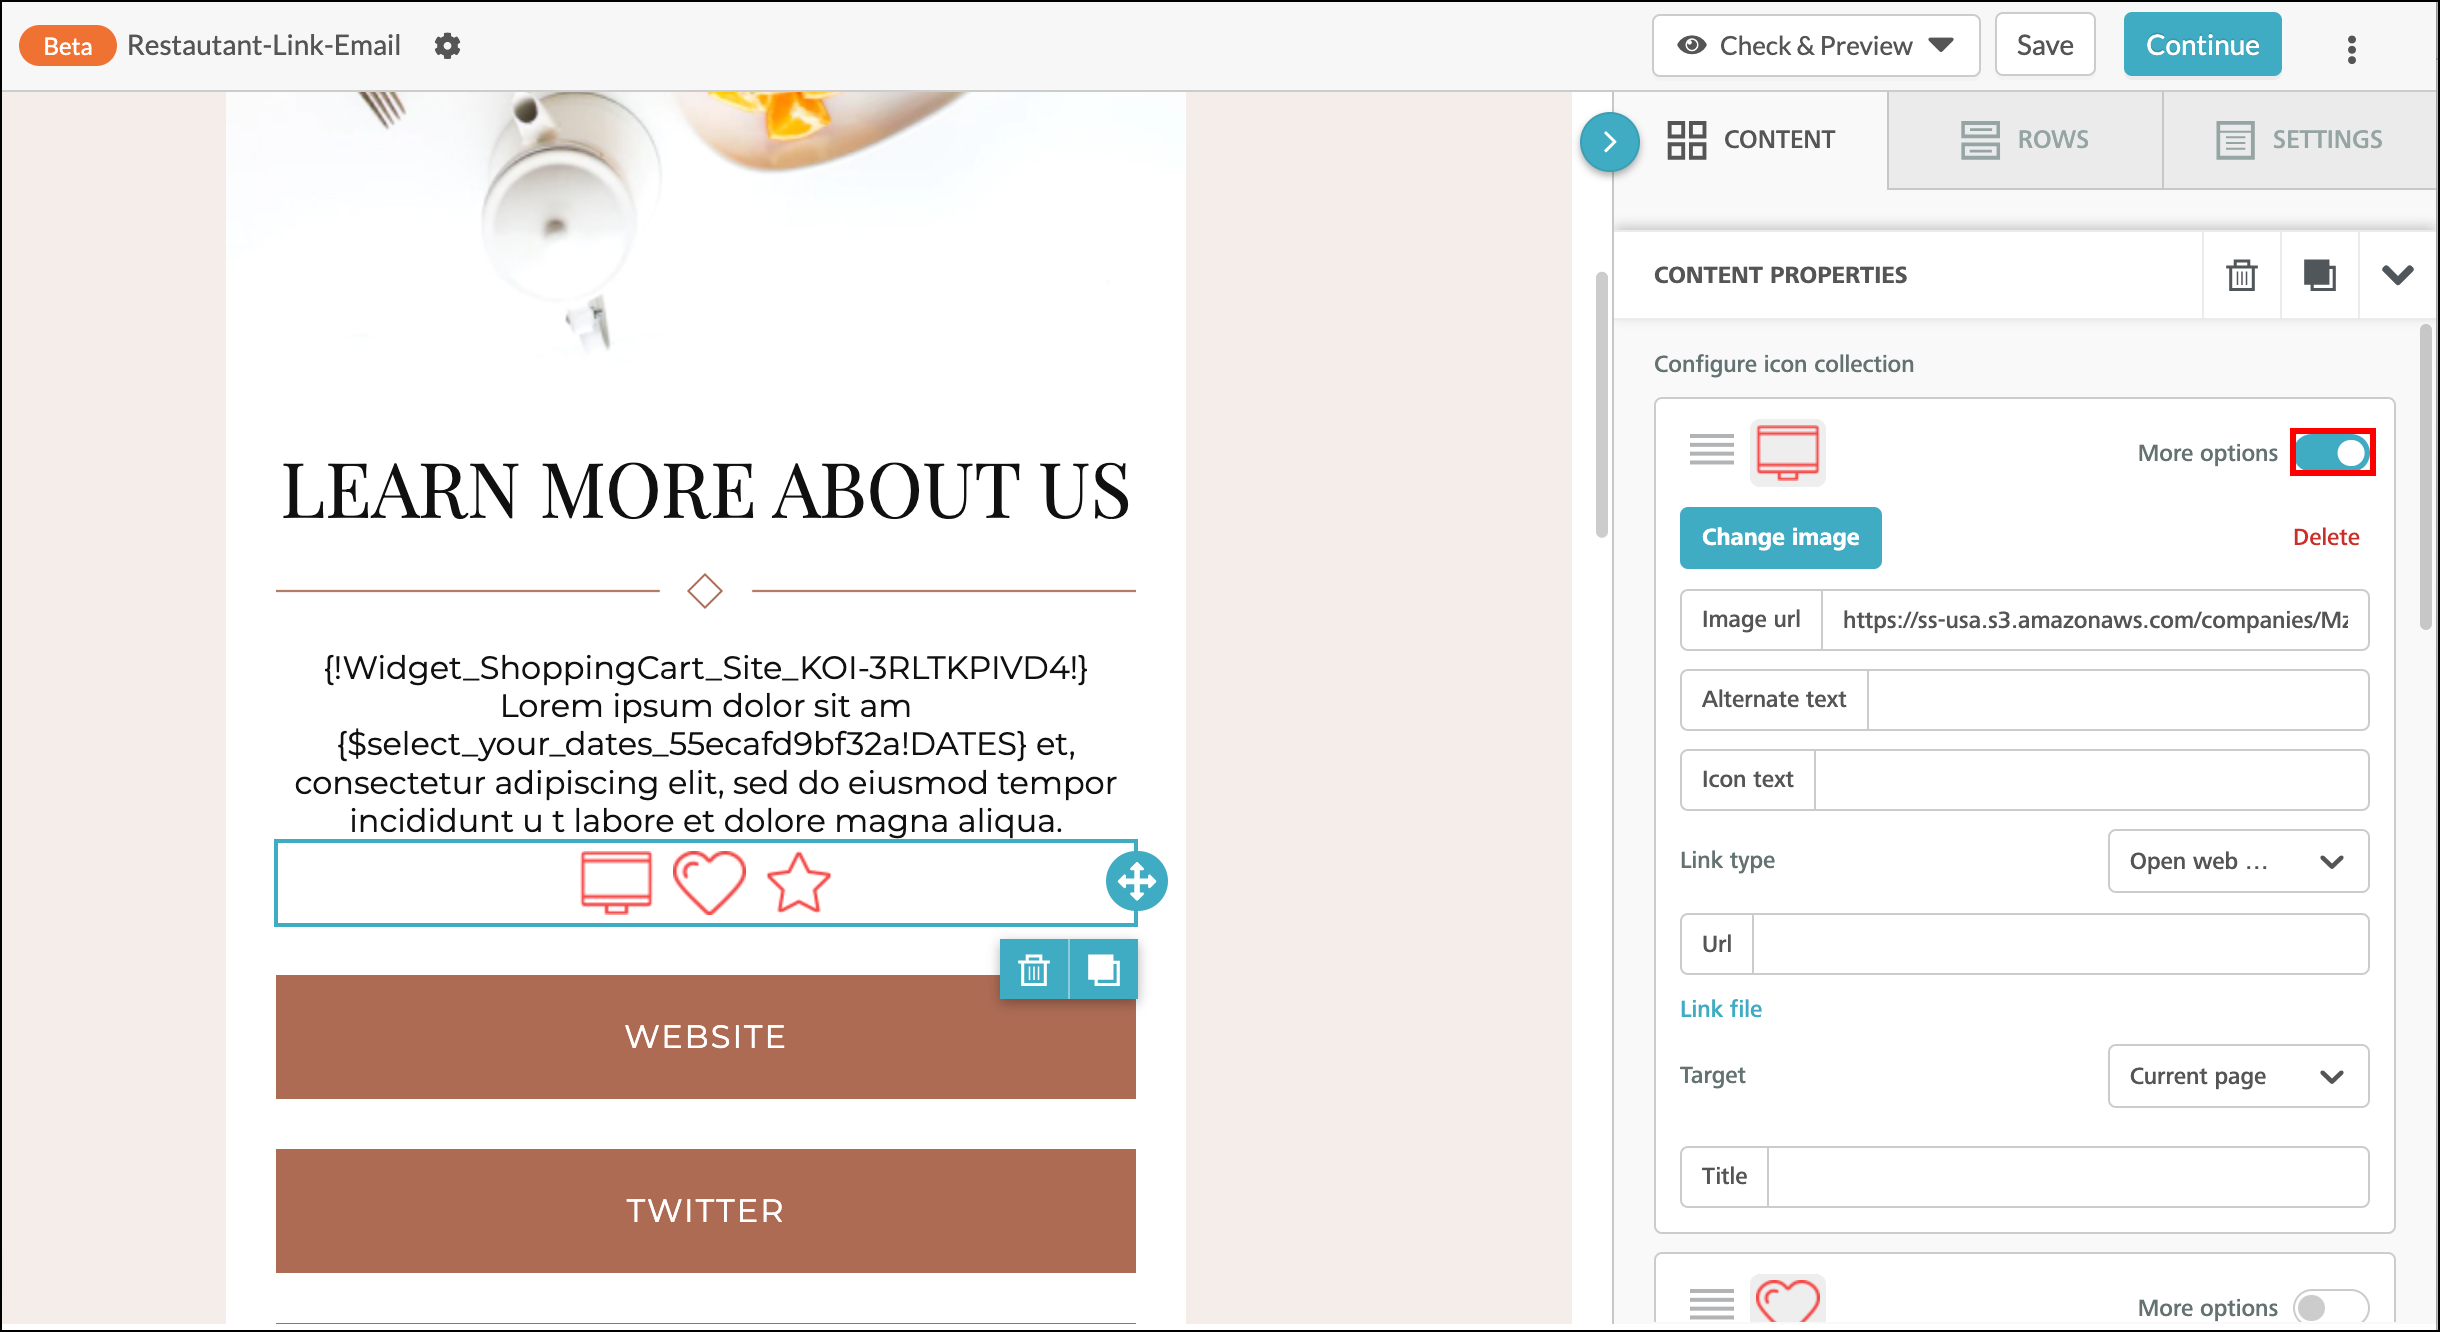
More Options
 

OptionDescription 
Image URLIf you prefer to update the icon image using an image link instead of uploading it from your Lead Gen & CRM folders, you can use the Image URL field.  
Alternative TextIt is a best practice to add alternative text for images in your email, in the event the image cannot be loaded on your recipient's screen. 
Icon TextIf you'd like to add text to describe your icons, use the Icon Text field. Style options are available to modify the text that is added to your icons. 
Text PositionPosition the icon text above your icons, below your icons, to the right of your icons, or to the left of your icons. Each icon can have a different position for icon text. 
Link TypeYou can make your icons a link using the Link Type field. Available link types are: 
  • Open Web Page - This opens a webpage in a new web browser tab when the icon is clicked.
  • Send Email - This inserts a mailto link into your email, which opens the customer's email client when the icon is clicked.
  • Make A Call - This presents an option to the customer to dial a number. It works best when the icon is clicked on a mobile device. When on a computer, the computer will attempt to open whatever communication software is available to dial the number, such as Skype. 
  • Send SMS - This presents an option to the customer to send a text message to a number. It works when the icon is clicked on a mobile device.
    Important: When your recipient is viewing the email on a desktop device, the icon will be hidden. 
  • When a recipient clicks on the icon, their SMS client will open with the message you've written in the icon link type section pre-typed, and the phone number to send the message pre-set. The customer needs only to click SEND, to send the SMS message. 


Did this article answer your question?


Constant Contact Logo

Copyright © 2026 · All Rights Reserved · Constant Contact · Privacy Center