In this article, you'll learn how to add images to your emails. To modify images that have been added to your emails, read Modifying Images in Emails.
Important: If you're using the new email editor, read Images and Videos in the New Email Editor instead.
| Administrators | ✓ | |
| Company Managers | ✓ | |
| Marketing Managers | ✓ | |
| Sales Managers | ||
| Salespersons | ||
| Jr. Salespersons |
| Tip: Are you looking for information about Constant Contact’s Email and Digital Marketing product? This article is for Constant Contact’s Lead Gen & CRM product. Head on over to the Email and Digital Marketing articles by clicking here. Not sure what the difference is? Read this article. |
Layout blocks are the foundation of emails created in your Lead Gen & CRM platform. Emails are created from templates. Layout blocks go into the email to help make up the structure and layout of the email.
Elements, such as images, go into your layout blocks. To learn more about creating an email, read one of the following articles.
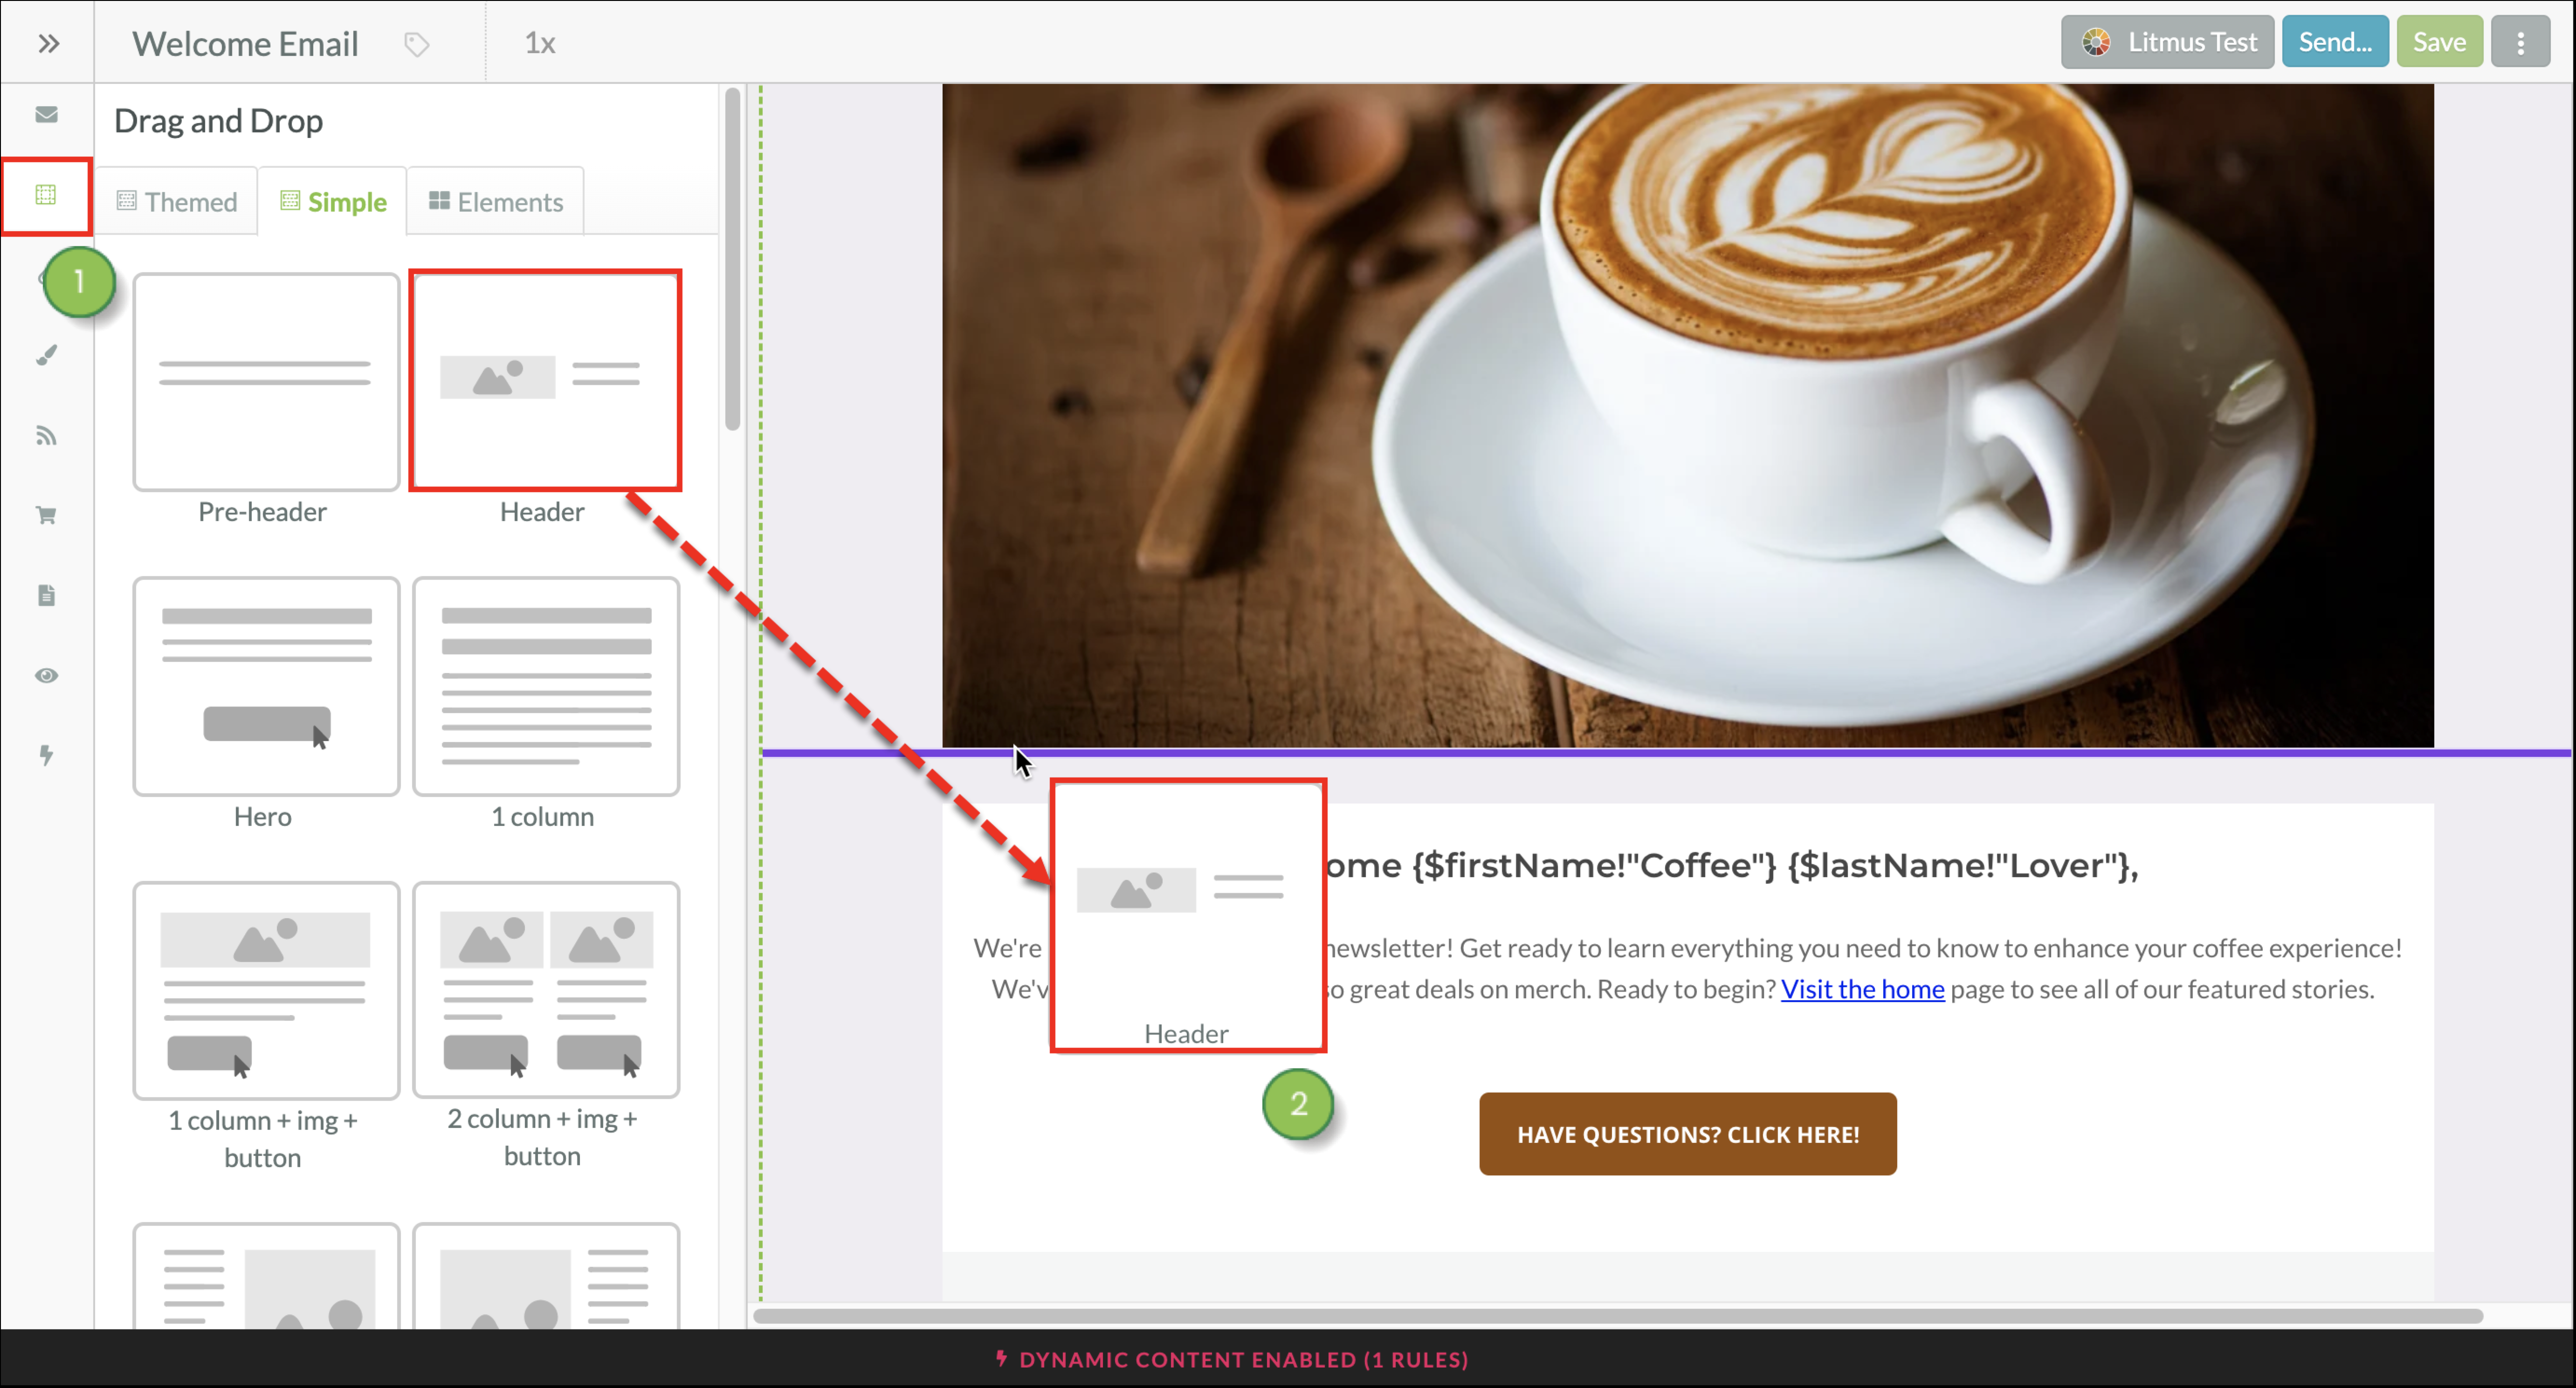
The email designer allows you to drag, drop, and reorder the layout blocks in your email to further customize it. Some layout blocks have image space built in, but in other layout blocks, you can add image elements yourself. To learn more about layout blocks, read Using Layout and Element Blocks in Emails.
To add image elements, start from the Email section in the left toolbar.
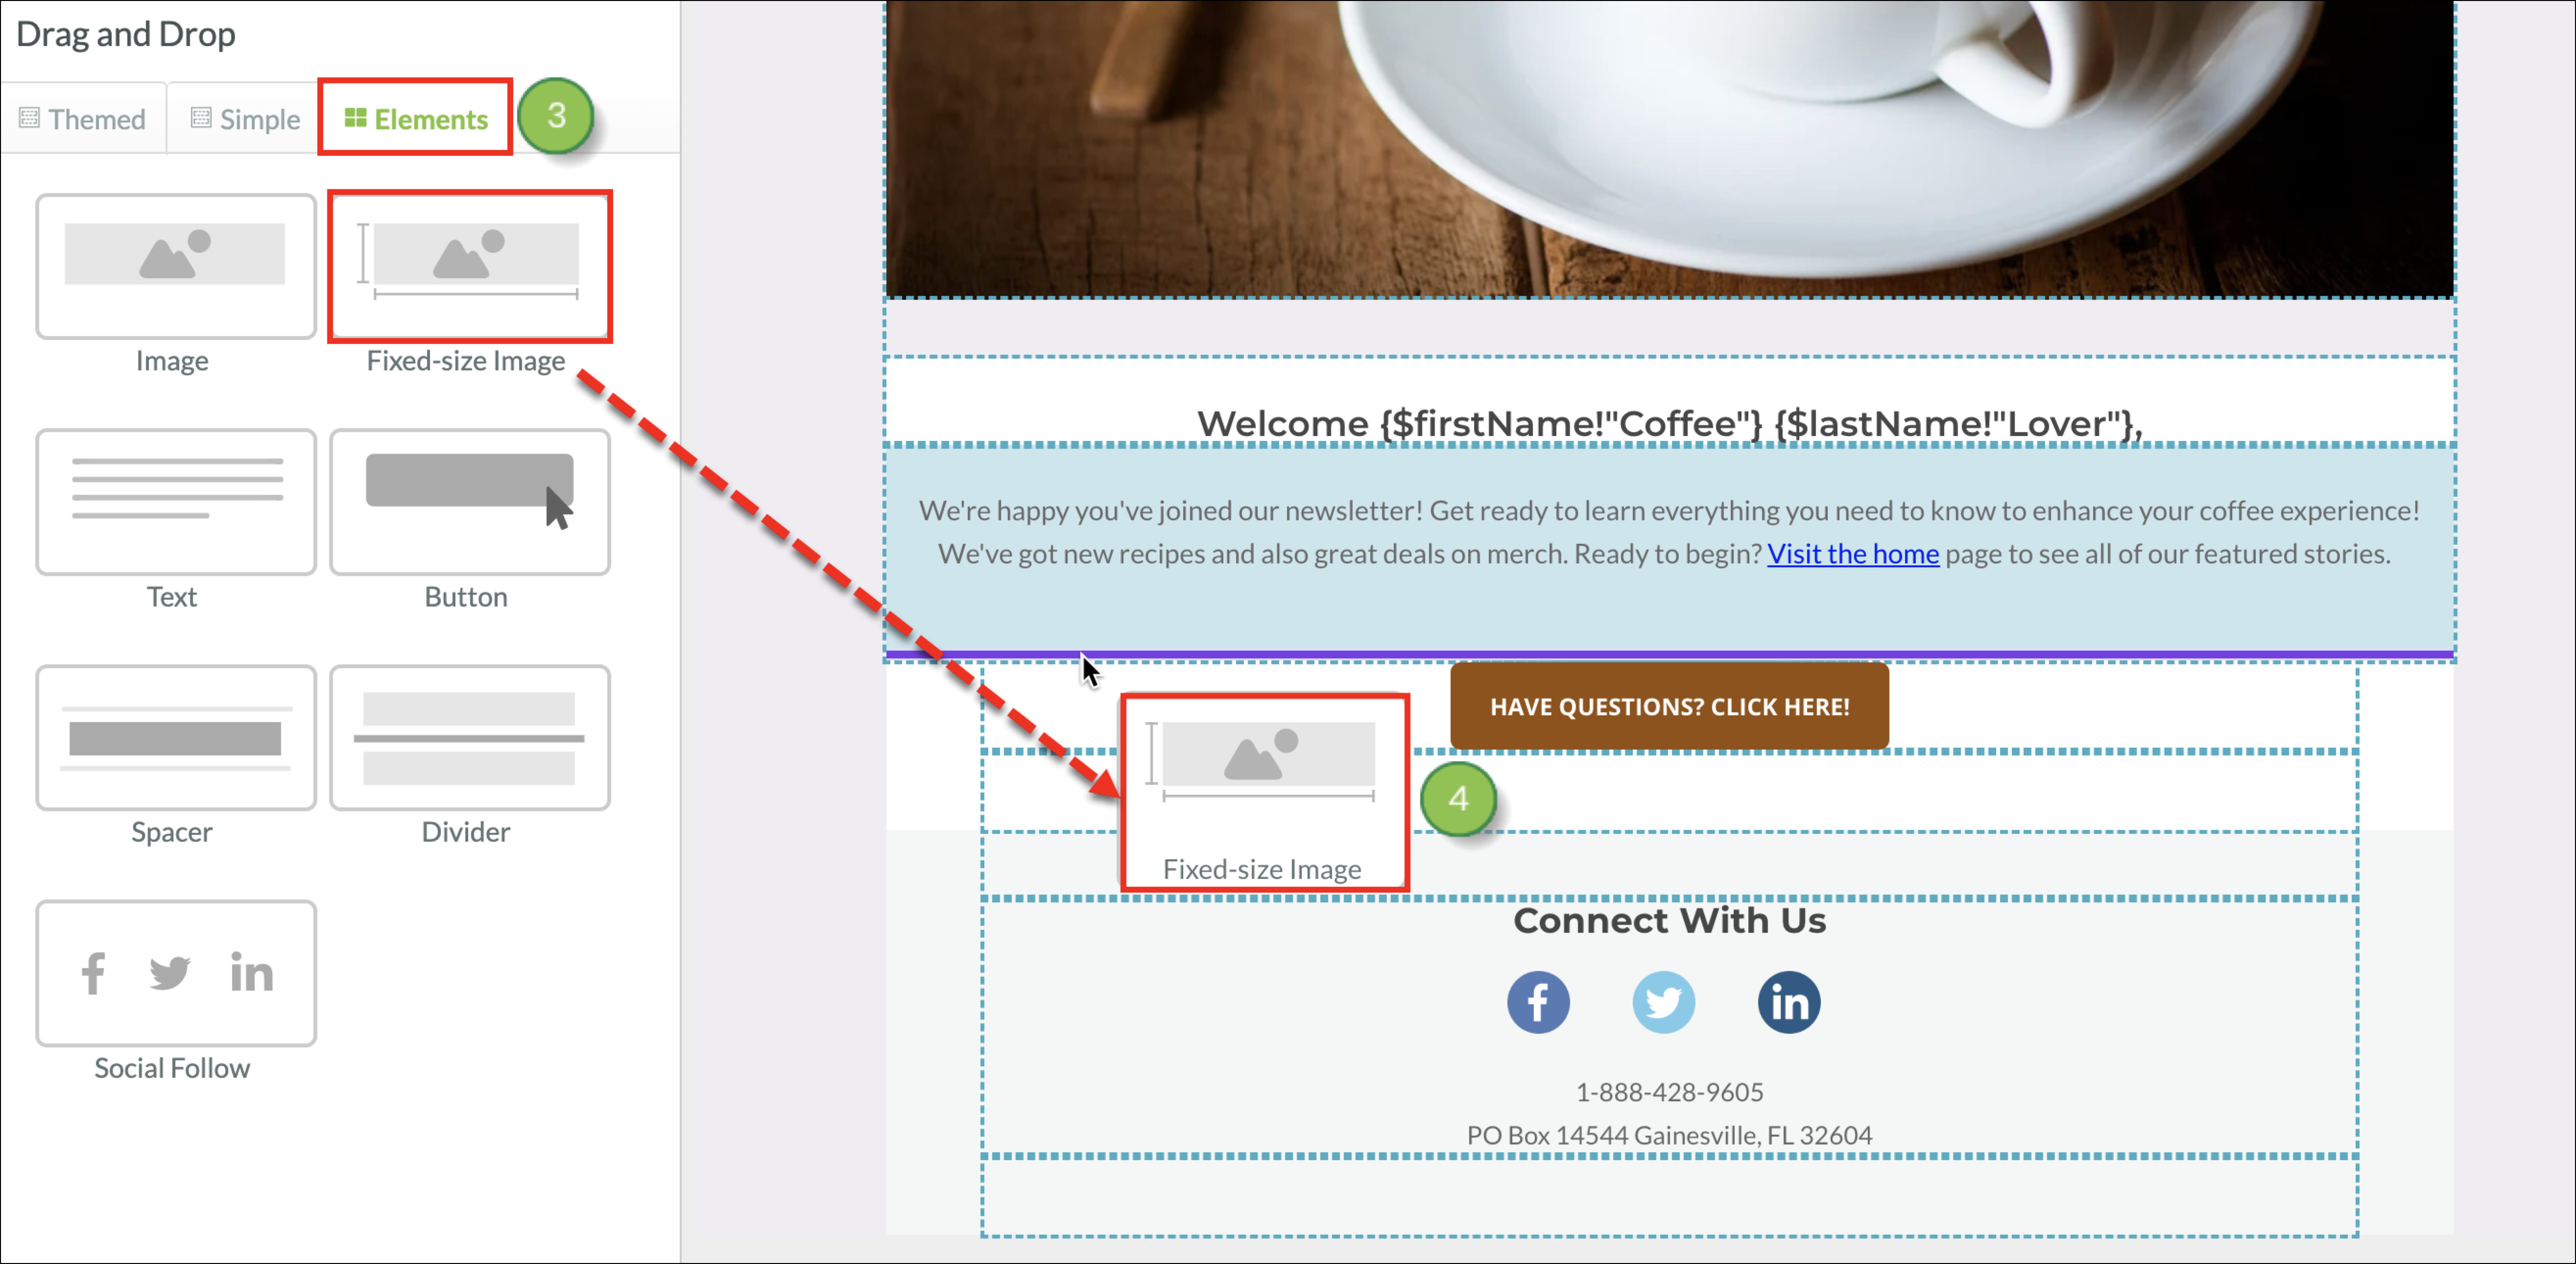
The following image elements are available:
| Icon | Element | Description | ||
| Image |
A single large-sized image that extends across the entire | |||
|
Fixed-Size |
An image with editable dimensions. When the height |
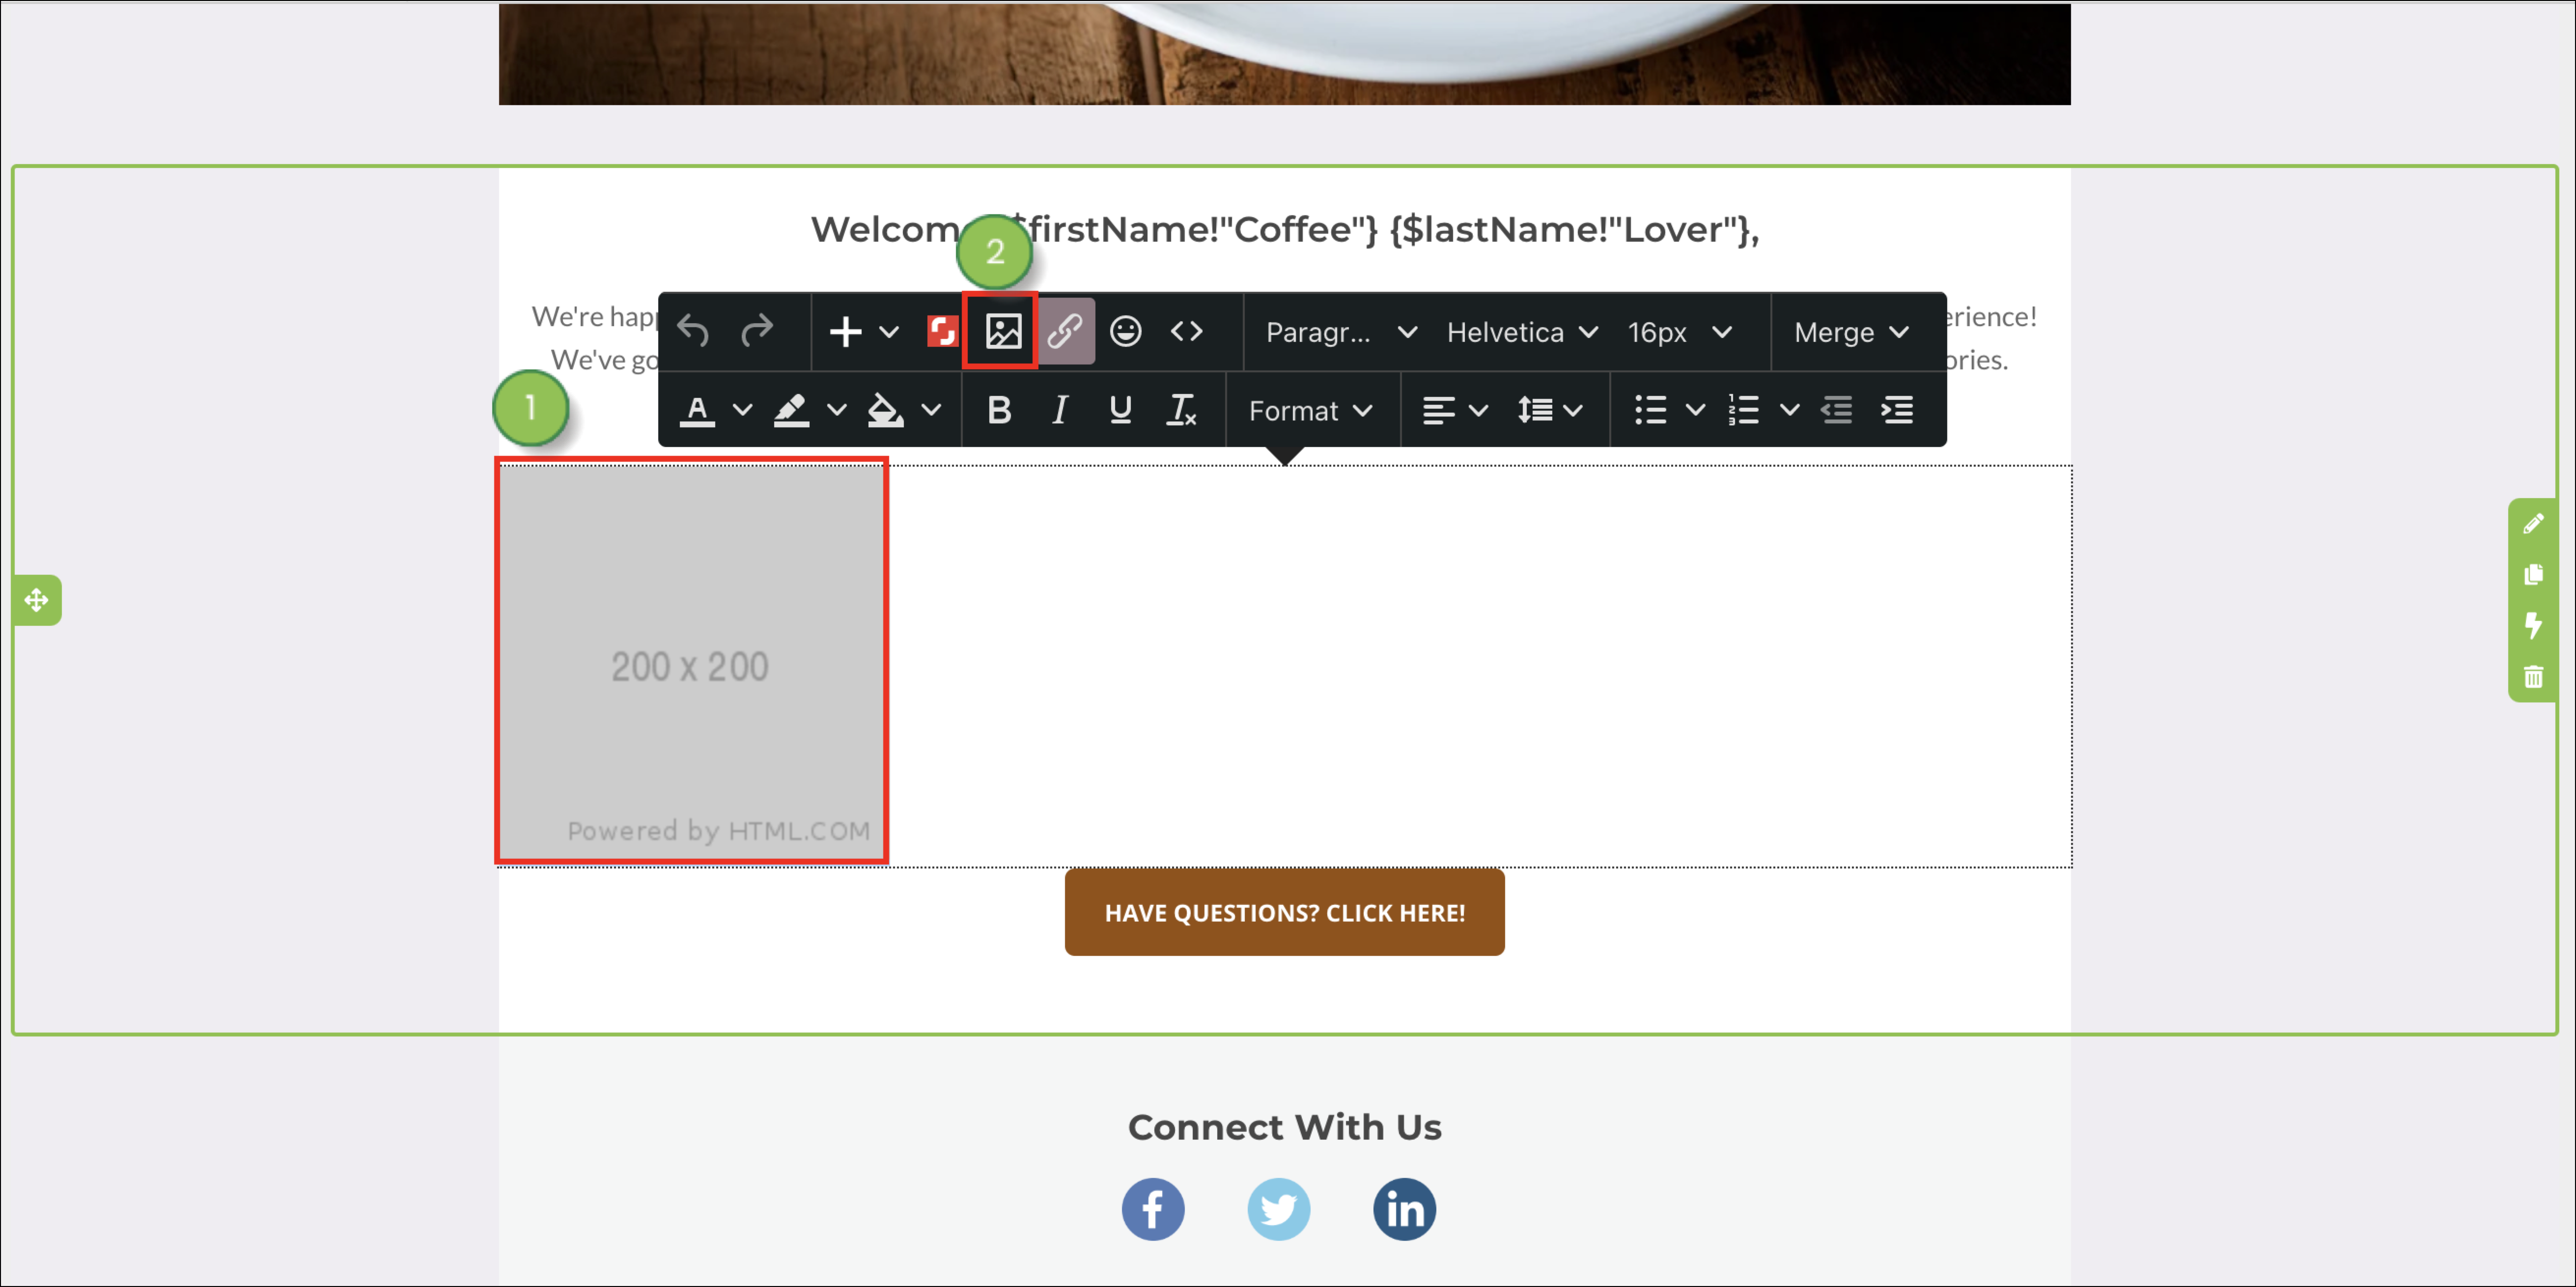
Once your image Element is inserted into your email, populate the image Element space with the actual image you want to use.
This applies to the classic email editor. If you're using the new email editor, read Images and Videos in the New Email Editor instead.
If the image has been saved to your computer: click ![]() Upload to add it to the Lead Gen & CRM platform and use it in the email.
Upload to add it to the Lead Gen & CRM platform and use it in the email.
When you upload images into the Lead Gen & CRM platform, be sure to upload an image that will accurately represent the size that you want to display it as. Otherwise, there may be issues with image scaling. This applies especially when setting uploaded content as background images. You will need to import images at a set resolution for them to render properly when set as background images.
In Lead Gen & CRM, the most common image scaling issue is upscaling, where the image is made to display as larger than its uploaded dimensions. When images with small dimensions are made larger, they are forced to upscale and become distorted, often appearing blurry or pixelated. For example, if you upload an image with a height and width of 200 pixels, it will best display at that size. If you try to use the image in a way that forces the image to become larger, it will upscale and not look as it did originally.
The best way to work with uploaded images is to upload images that conform to the specific dimensions of your emails, pages, or other content. Setting dimensions in a layout or template first and then uploading an image that fits those dimensions will limit scaling issues.
Currently, the generally accepted standard resolution for web pages is 1920 pixels wide by 1080 pixels tall. However, there is no uniform standard, as there are many video displays that have resolutions that are larger than this.
Be aware that, when viewed on certain video displays, even those images that have been saved as and set to certain dimensions might not display correctly for every person who views your web page. What may look fine on one display might be distorted on another.
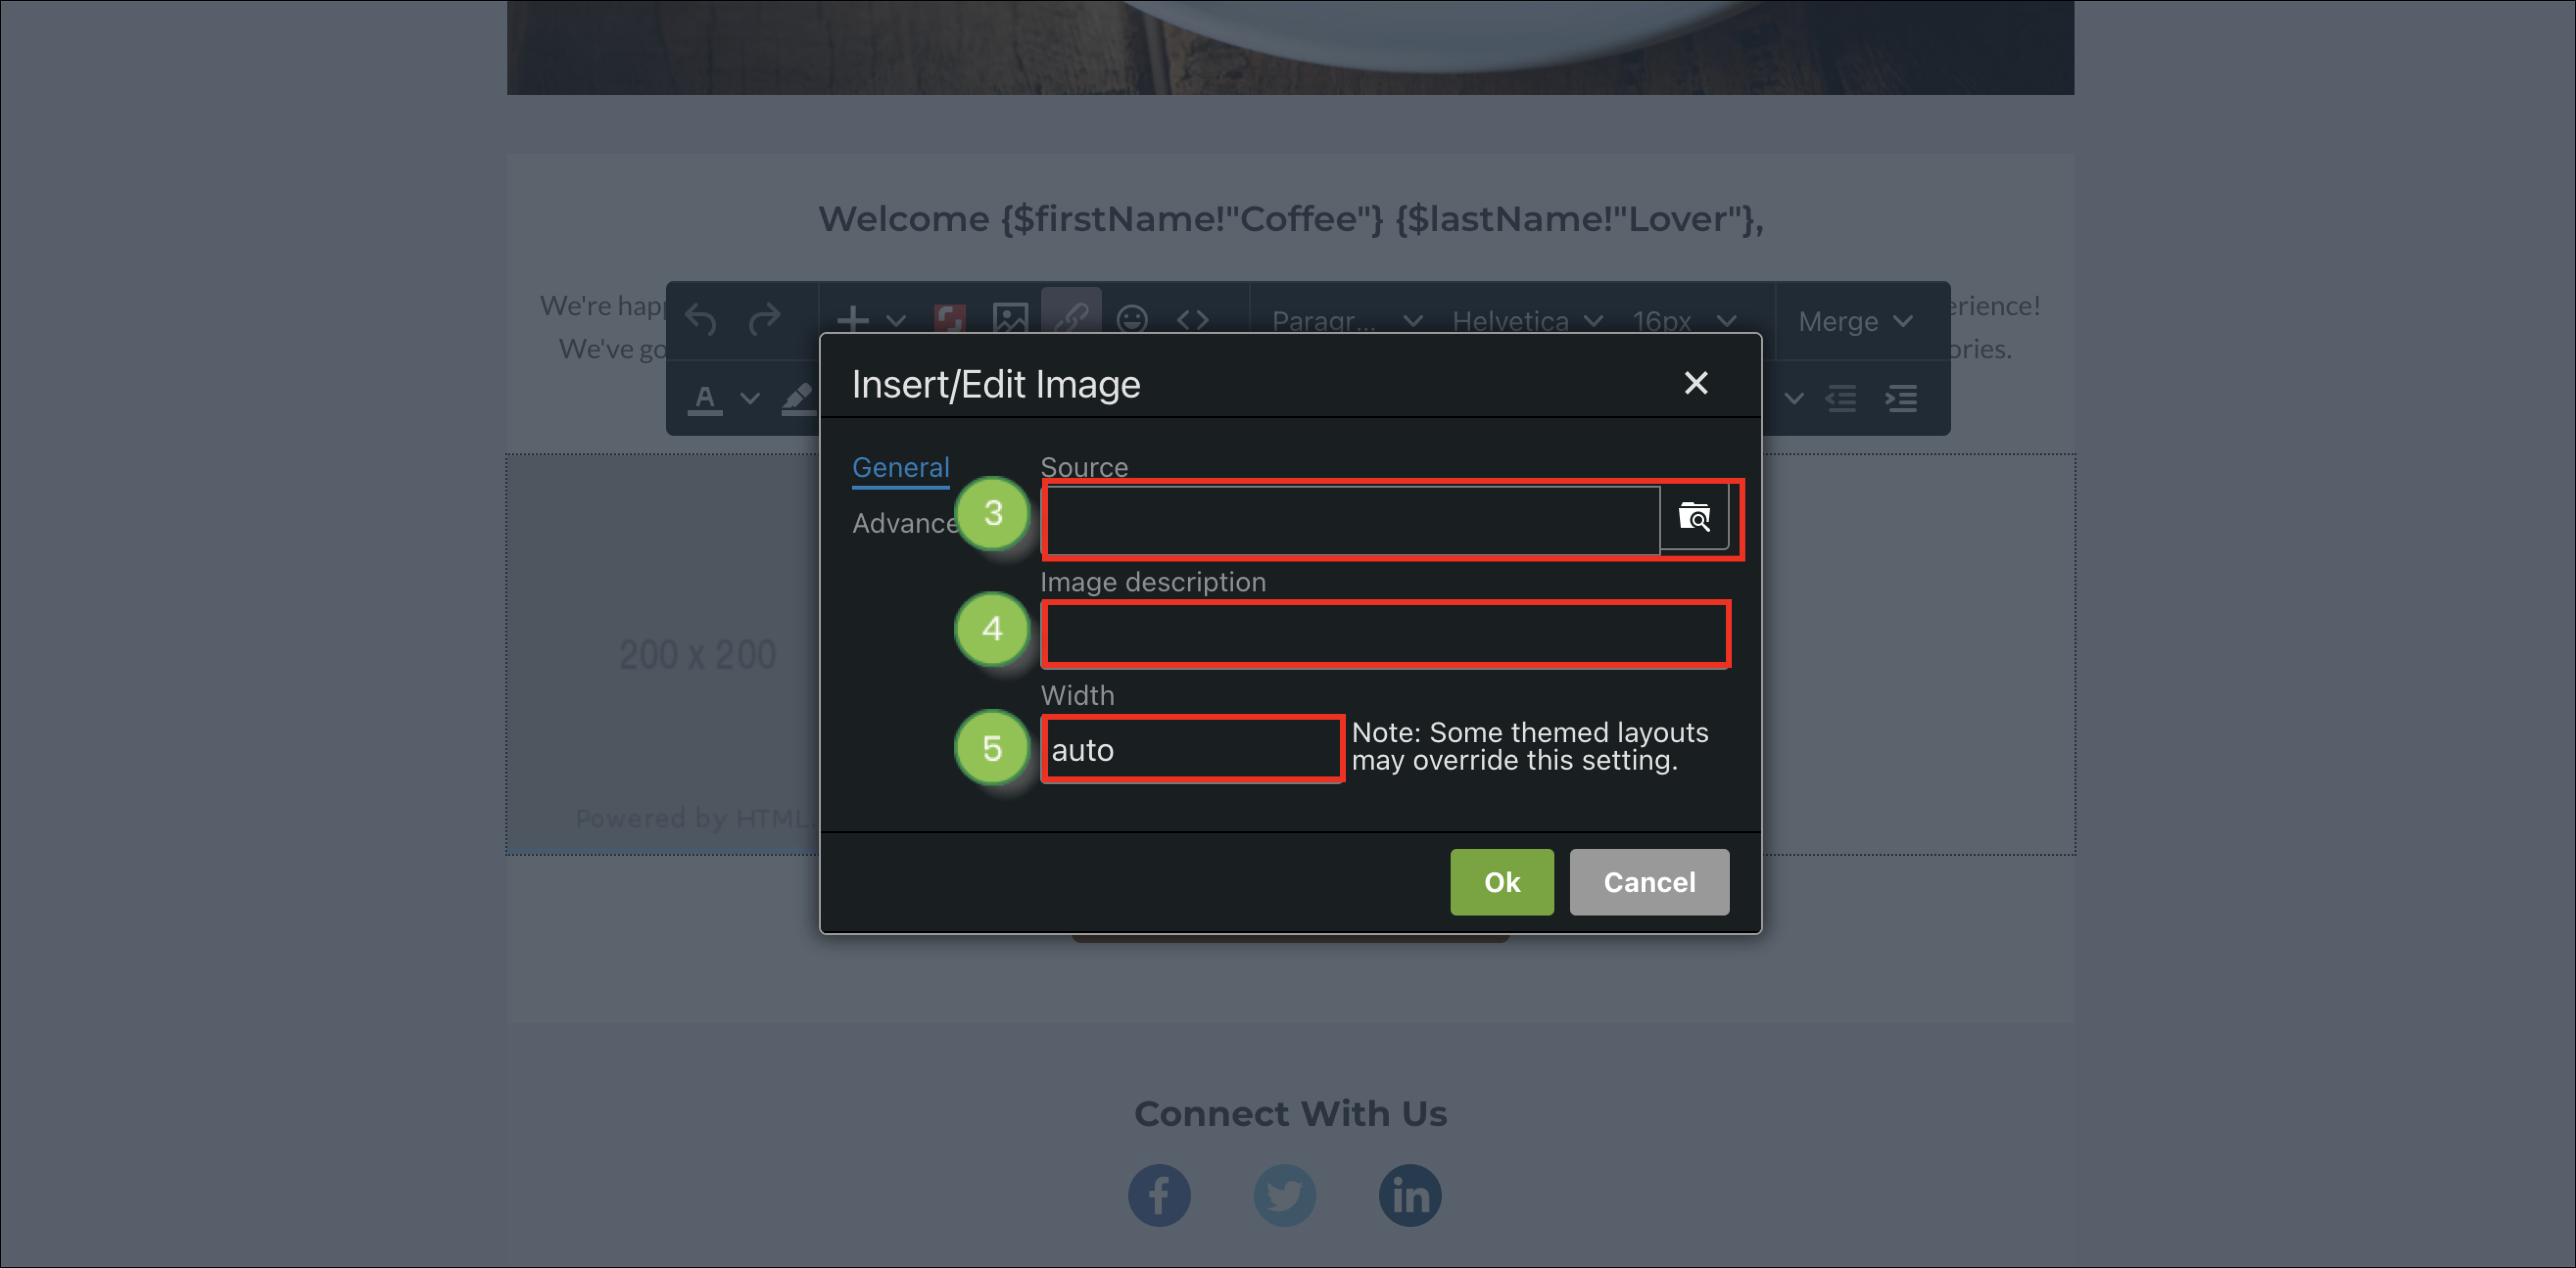
Image settings are listed in two different tabs in the Insert/Edit Image panel: General and Advanced.
The General tab houses settings that will need to be modified for nearly every image. The Advanced tab houses settings that will need to be modified on a case-by-case basis and have settings that can modify the email body surrounding the image.
The following settings are found in the General Settings section when you click the photo icon in the Simple Editor.
| Options | Description | |
| Source | The image's original source location. | |
|
Image | The description attached to the image that displays when hovered over. | |
| Width | The overall width, in pixels, of the image. |
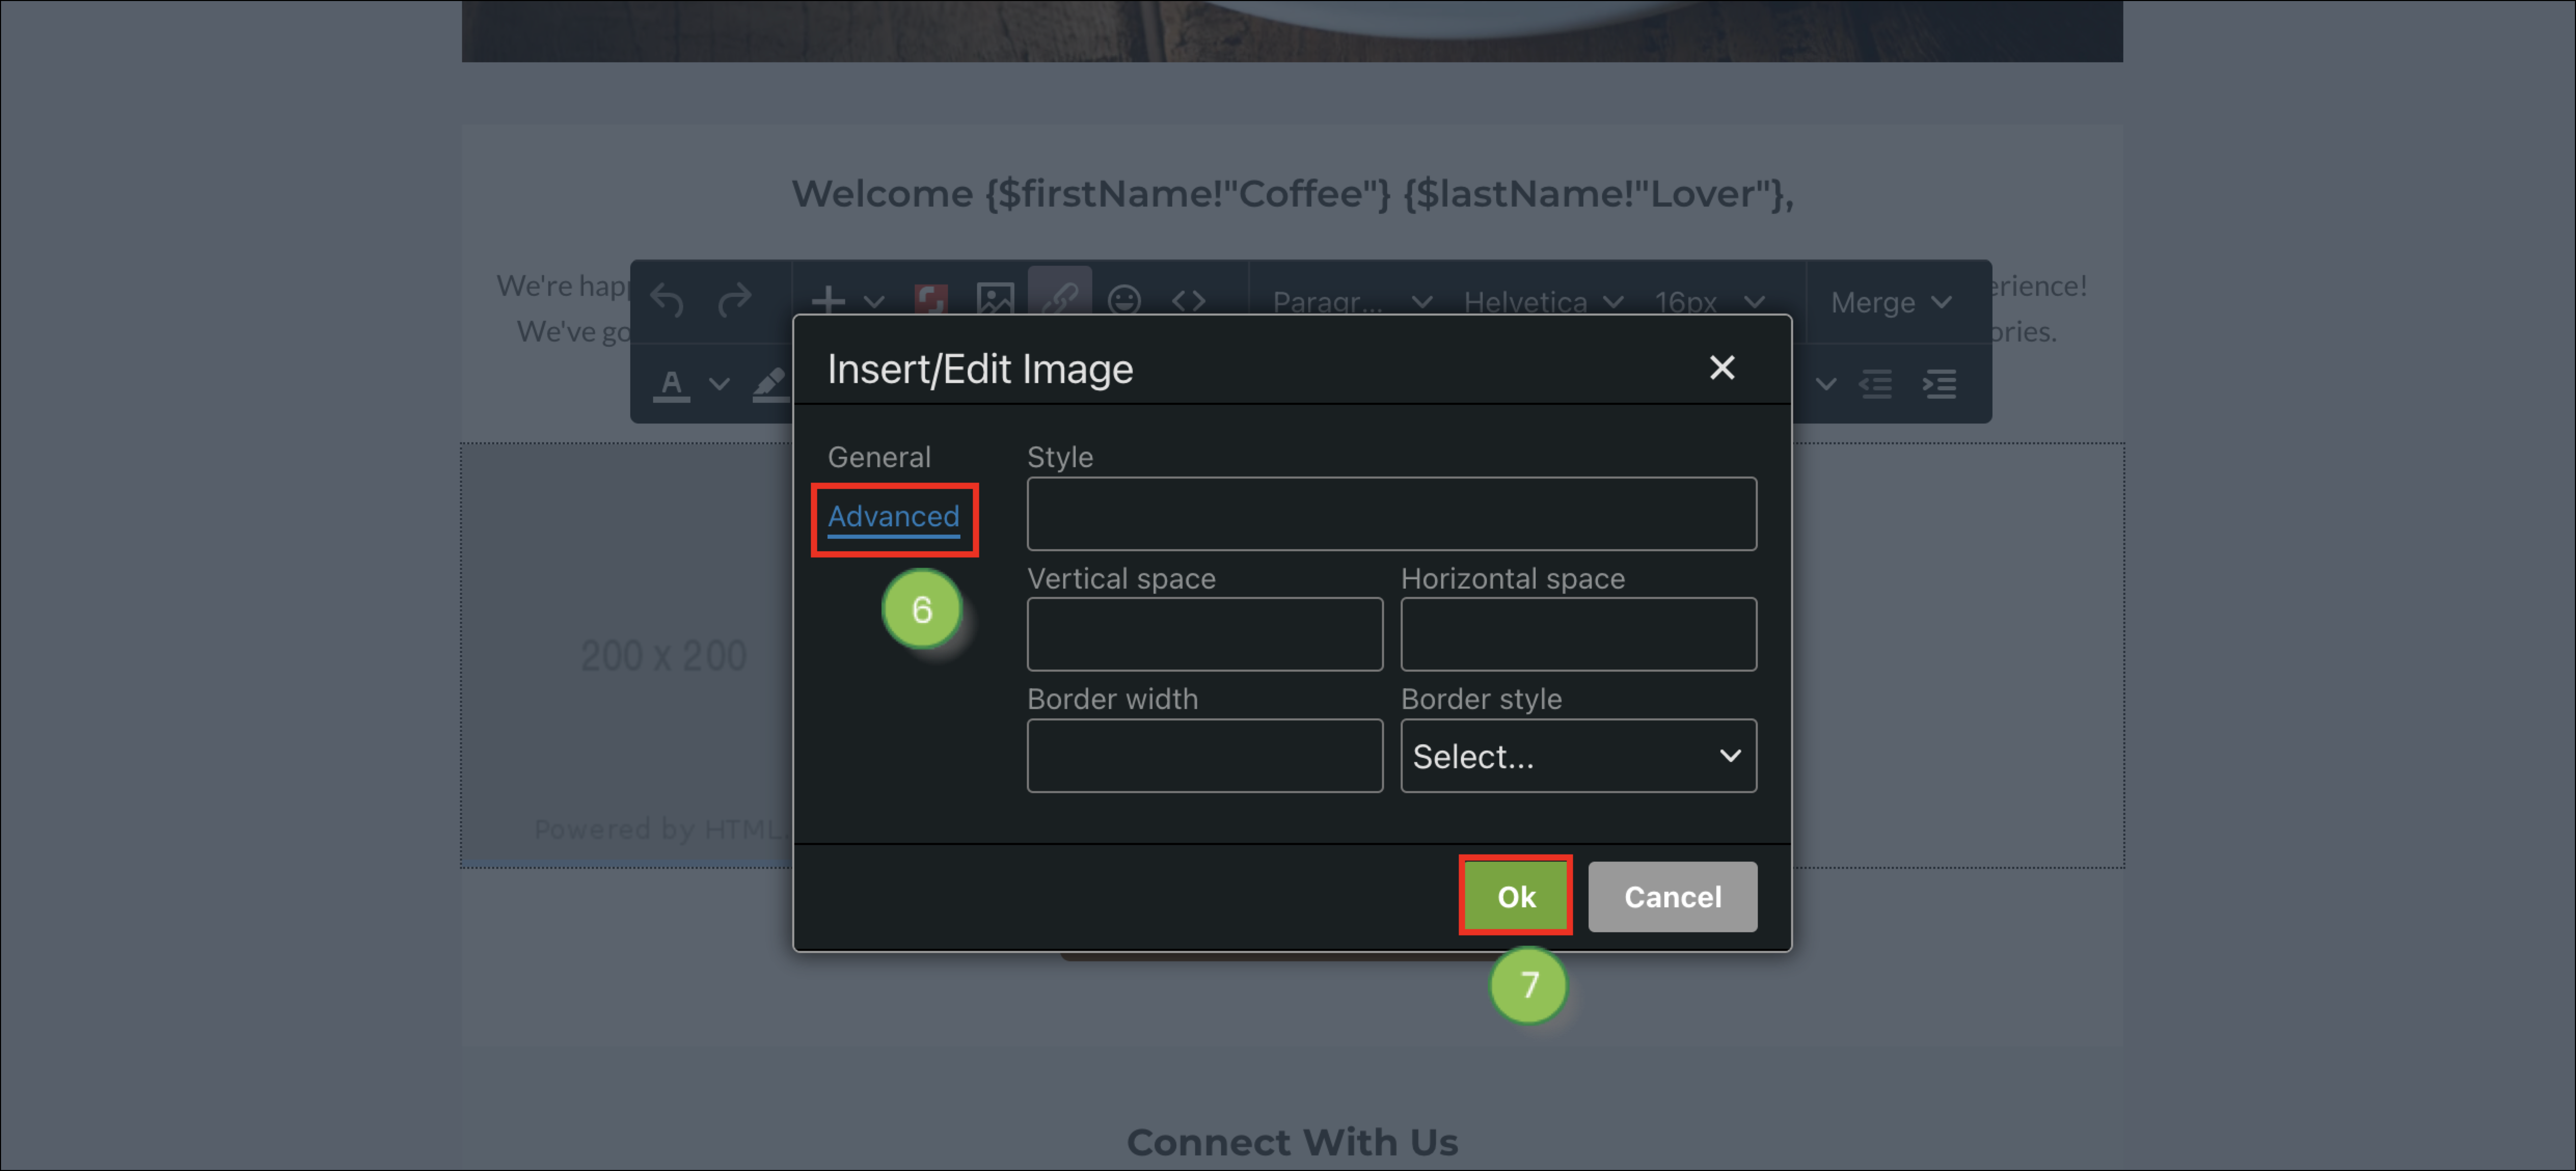
The following settings are found in the Advanced Settings section when you click the photo icon in the Simple Editor.
| Options | Description | |
| Style | The CSS style attached to the image in the email. | |
|
Vertical | The margin, in pixels, around the top and bottom of the image. | |
|
Horizontal | The margin, in pixels, around the left and right sides of the image. | |
| Border | The border thickness, in pixels, of the image. |
Copyright © 2026 · All Rights Reserved · Constant Contact · Privacy Center