To learn how to add an image to your emails using layout blocks, read Adding Images to Emails. If you're using the new email editor, read Images and Videos in the New Email Editor instead.
| Tip: Are you looking for information about Constant Contact’s Email and Digital Marketing product? This article is for Constant Contact’s Lead Gen & CRM product. Head on over to the Email and Digital Marketing articles by clicking here. Not sure what the difference is? Read this article. |
| Administrators | ✓ | |
| Company Managers | ✓ | |
| Marketing Managers | ✓ | |
| Sales Managers | ||
| Salespersons | ||
| Jr. Salespersons |
Layout blocks are the foundation of emails created in the Lead Gen & CRM platform. Images are elements and can be inserted into the layout blocks within your email. To learn more about creating an email, read one of the following articles.
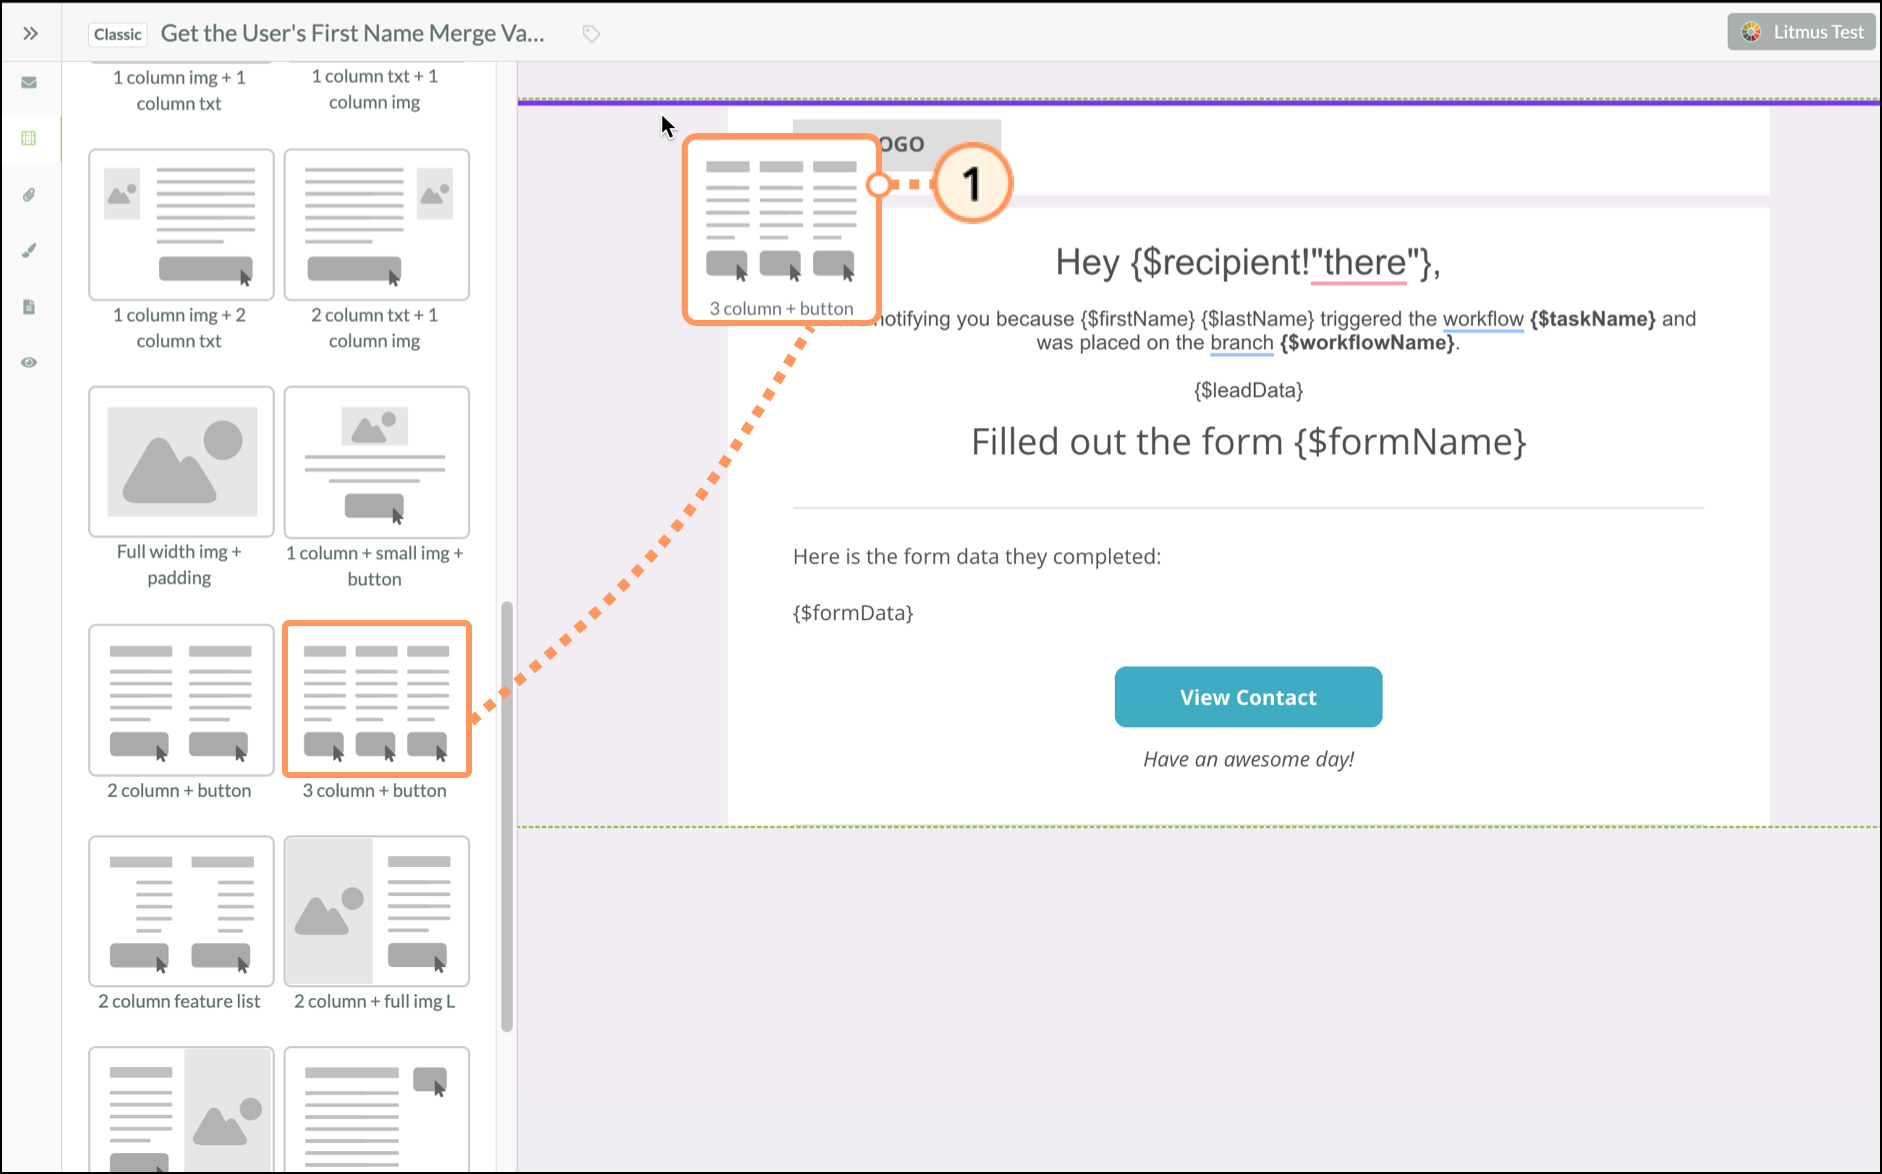
The email designer lets you drag, drop, and reorder layout blocks to further customize your email. Some layout blocks have image space built in, but in other layout blocks, you can add image elements yourself. To learn more about layout blocks, read Using Layout and Element Blocks in Emails.
To learn more about adding images to your emails and how to adjust the layout of your images within the email, read the Adding Images to Emails article.
When you upload images to the Lead Gen & CRM platform, be sure to upload an image that accurately represents the size you want to display. Otherwise, there may be issues with image scaling. This applies especially when setting uploaded content as background images. You will need to import images at a set resolution for them to render properly when set as background images.
In Lead Gen & CRM, the most common image scaling issue is upscaling, where the image is made to display as larger than its uploaded dimensions. When images with small dimensions are enlarged, they are upscaled and often become distorted, appearing blurry or pixelated. For example, if you upload an image with dimensions of 200×200 pixels, it will display best at that size. If you try to use the image in a way that forces the image to become larger, it will upscale and not look as it did originally. To enforce a maximum width, select the Advanced tab and enter the max-width property.
The best way to work with uploaded images is to use images that match the dimensions of your emails, pages, or other content. Setting dimensions in a layout or template first, then uploading an image that fits those dimensions, will reduce scaling issues.
Currently, the generally accepted standard resolution for web pages is 1920 pixels wide by 1080 pixels tall. However, there is no uniform standard, as many video displays have resolutions larger than this.
Be aware that when viewed on certain video displays, even images saved with specific dimensions might not display correctly for every person who views your web page. What may look fine on one display might be distorted on another.
You can add clickable links to images in emails. To add clickable links, create or edit an email with a layout block containing image space.


You can insert a text block into a row and then turn the row's background into an image. This can help create sections in your email, like navigation menus.


You can edit images with the Image Editor.
To edit images, create or edit an email with a layout block containing image space.


When you click on an image, a small toolbar will appear. That toolbar, called the Simple Editor, has several features that let you quickly modify an image. The Simple Editor also houses the Image Editor.
Lead Gen & CRM's Image Editor can be used to add or edit images directly within the Email Designer. This means that, for simple image editing, you do not need an external image editor.
The Simple Editor has several innate features.
| Icon | Feature | Description | ||
| Rotate Counterclockwise | Rotates the image counterclockwise by 90 degrees. | |||
| Rotate Clockwise | Rotates the image clockwise by 90 degrees. | |||
| Flip Vertically | Flips the image vertically. | |||
| Flip Horizontally | Flips the image horizontally. | |||
| Edit Image | Opens the Image Editor. | |||
| Image Options | Opens the image's General and Advanced settings. |
The Image Editor offers many editing features.
| Icon | Feature | Description | ||
| Crop | Crops the image to the chosen size. | |||
| Resize | Resizes the image's dimensions through pixel values. | |||
| Orientation | Orients the layout of the image horizontally or vertically. | |||
| Brightness | Adjusts the overall brightness of the image. | |||
| Sharpen | Counteracts blur and sharpens the image's appearance. | |||
| Contrast | Modifies the contrast of black and white in the image. | |||
| Color Levels | Alters the image's red, blue, and green levels. | |||
| Gamma | Corrects levels of luminescence in the image. | |||
| Invert | Inverts the image's colors. |
Copyright © 2026 · All Rights Reserved · Constant Contact · Privacy Center