When it comes to rendering emails, every email client has a different approach based on its own unique standards.
This article will provide information on email renders in Microsoft Outlook.
| Administrators | ✓ | |
| Company Managers | ✓ | |
| Marketing Managers | ✓ | |
| Sales Managers | ||
| Salespersons | ||
| Jr. Salespersons |
| Tip: Are you looking for information about Constant Contact’s Email and Digital Marketing product? This article is for Constant Contact’s Lead Gen & CRM product. Head on over to the Email and Digital Marketing articles by clicking here. Not sure what the difference is? Read this article. |
Lead Gen & CRM cannot influence how email clients render HTML emails. Lead Gen & CRM has a Litmus Test feature built into the email designer that allows you to see what your emails look like in different email clients.
This is because email clients do not render HTML emails the same way, among other reasons. There may be times when your emails vary across email clients. For example, they may look great in Gmail but appear distorted in Microsoft Outlook.
Microsoft Outlook does not render email images correctly at times. Emails created in Lead Gen & CRM will display regular, static background images for Outlook 2016 and 2019. However, due to these rendering limitations on Microsoft Outlook’s part, dynamic content in sections with background images will not render correctly.
This means that Lead Gen & CRM email layouts that contain dynamic content will not render background images in Outlook 2016 or Outlook 2019, but will render correctly otherwise.
Microsoft Outlook has issues with rendering buttons. In the past, buttons with a modified border-radius value did not render in emails in Microsoft Outlook. This meant that emails in Microsoft Outlook would render with square buttons, regardless of the time invested in modifying them. Ultimately, this is due to Microsoft Outlook's difficulties with rendering CSS.
Microsoft Outlook can now render buttons with a modified border-radius value, but there is a catch: buttons in layouts with background images will not render border-radius. In order to render border-radius and keep rendering issues to a minimum when using buttons in Microsoft Outlook, make sure that they are in layouts without background images.
For emails to render properly in Microsoft Outlook, you will need to edit the HTML of an email created in Lead Gen & CRM.
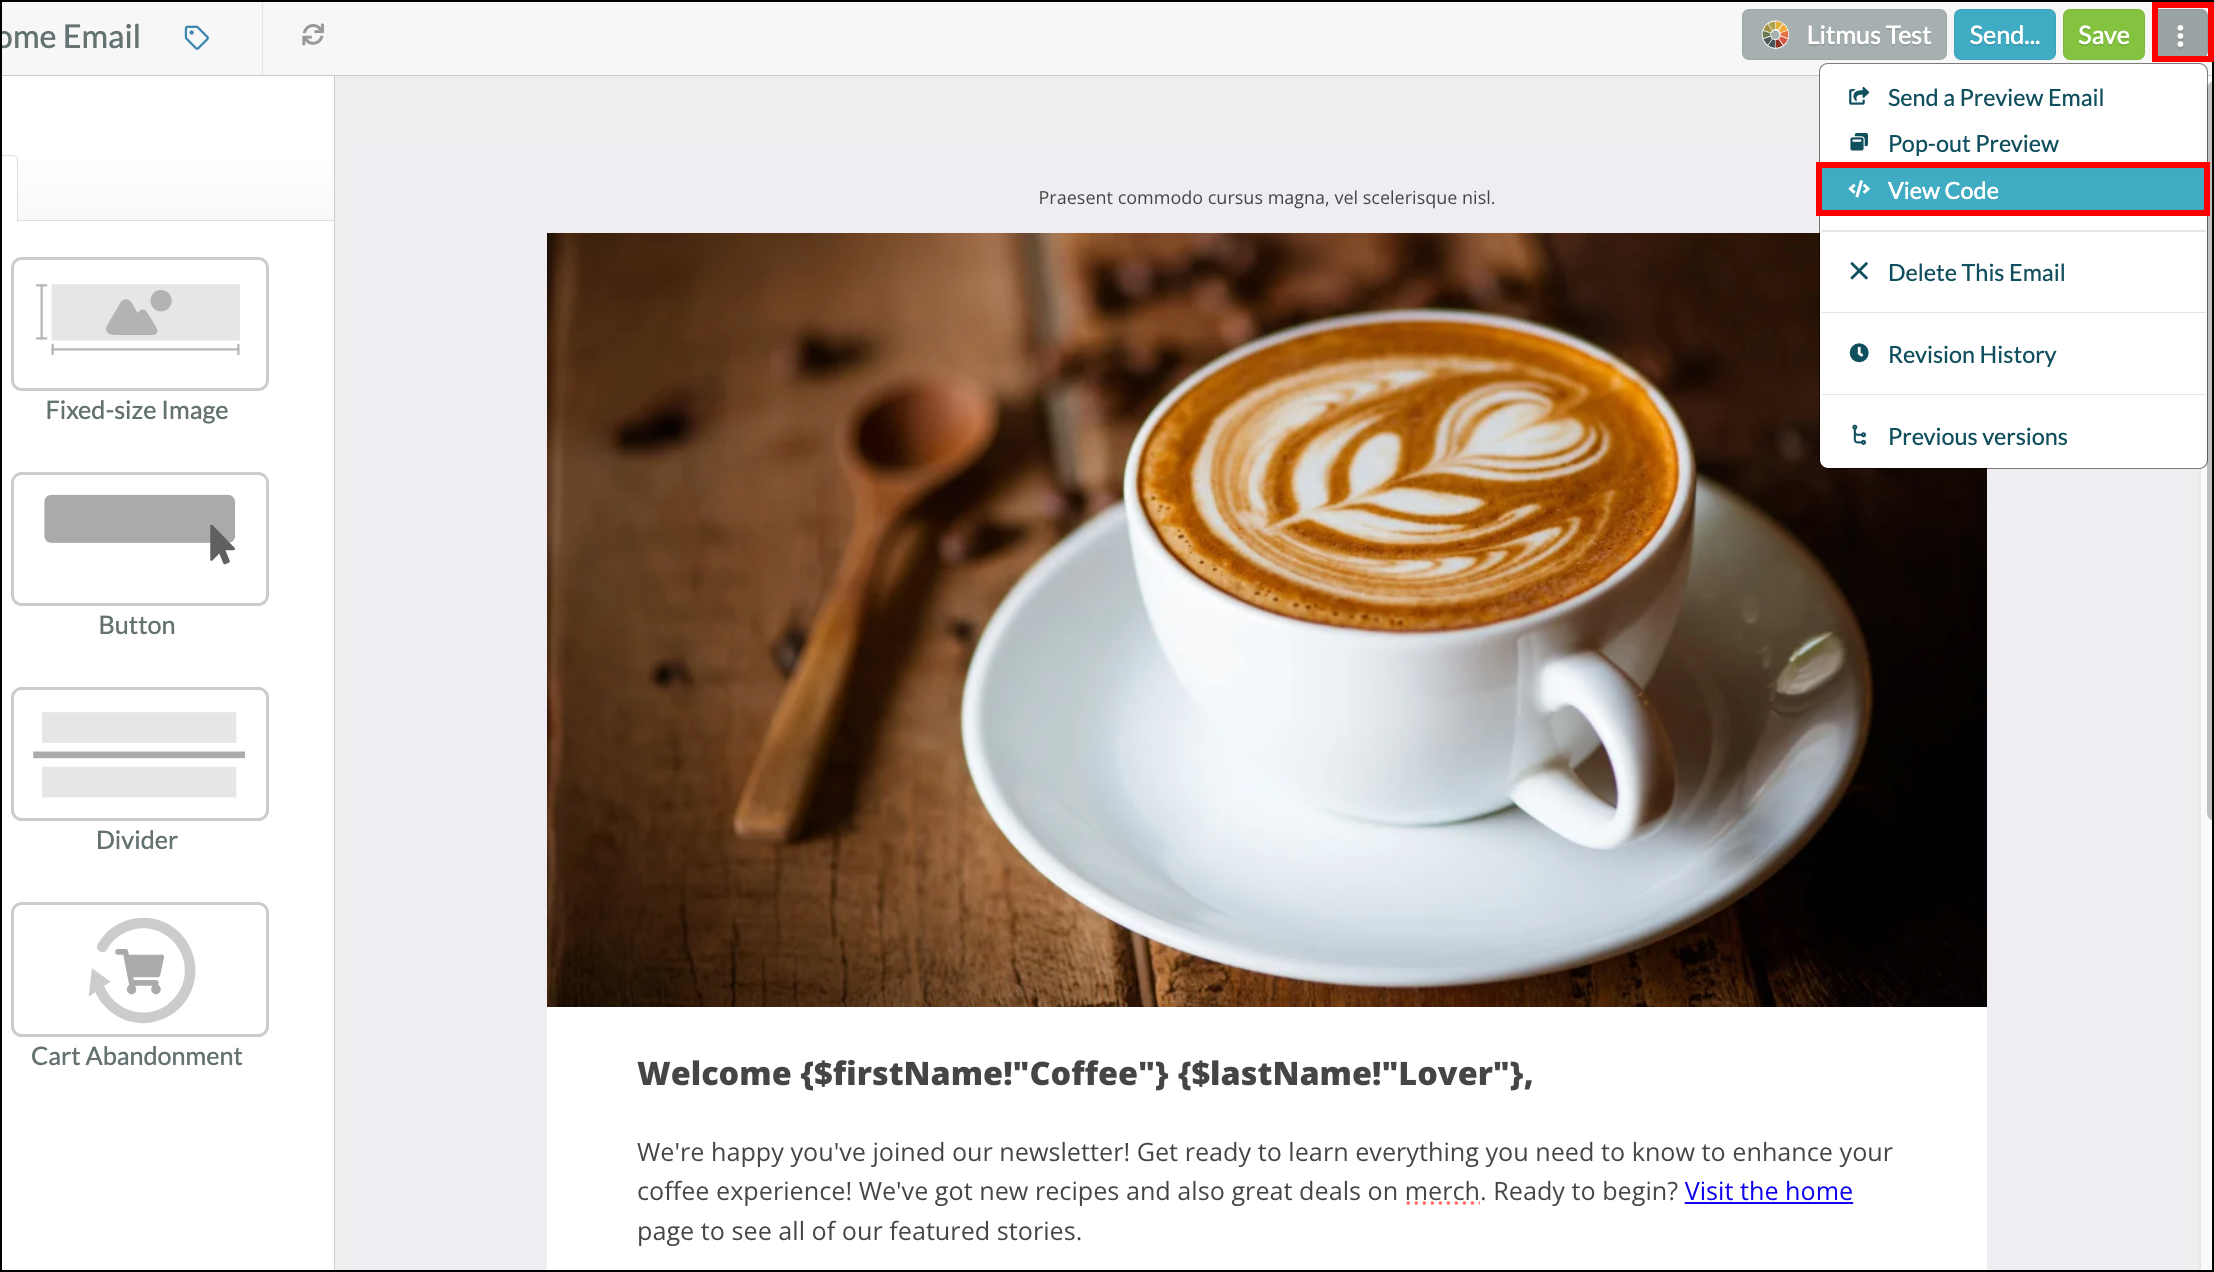
To access an email's HTML create a new email, or edit an existing one from the Email page in the left toolbar.
Click ![]() Options >
Options > ![]() view code in the email designer.
view code in the email designer.
To add a button, you will need to create the HTML. The following code is an example of a button's HTML. Copy and paste the following code where you would like the button to appear in the email:
<div  data-editable="standard">
<table width="100%" border="0" cellspacing="0" cellpadding="0">
        <tr>
          <td>
            <a href="www.mywebsite.com" target="_blank" style="font-size: 16px; font-family: Helvetica, Arial, sans-serif; color: #ffffff; text-decoration: none; border-radius: 3px; -webkit-border-radius: 3px; -moz-border-radius: 3px;background:#EB7035; border-top: 12px solid #EB7035; border-bottom: 12px solid #EB7035; border-right: 18px solid #EB7035; border-left: 18px solid #EB7035; display: inline-block;">

Click Here!

</a>

      </table>
    </td>
  </tr>
</table></div>
When using the preceding code, consider the following when adding buttons:
Centering an image in the email designer does not always translate when rendering in Microsoft Outlook.
To ensure that your images are centered, wrap your images with one of the following tags:
<center><img src="http://www.mywebsite.com/test.jpg"></center><p style="text-align: center;"><img src="http://www.mywebsite.com/test.jpg"></p>
If your email exceeds 1800 pixels, Microsoft Outlook will automatically create a page break for you. This page break may affect how your email is read by your leads. As such, controlling where the page break occurs is key.
To create a page break, do the following:
If you have an image and a paragraph next to each other, the spacing between the two elements may render differently in Microsoft Outlook than it does in other email clients. To add additional spacing between two pieces of content, you must create a three-column table with the middle column being the space between the other two.
To create such a table, do the following:
Microsoft Outlook will often replace your font with Times New Roman or another standard font. If you are using a custom font, an !important tag at the end of the list of fonts is essential.
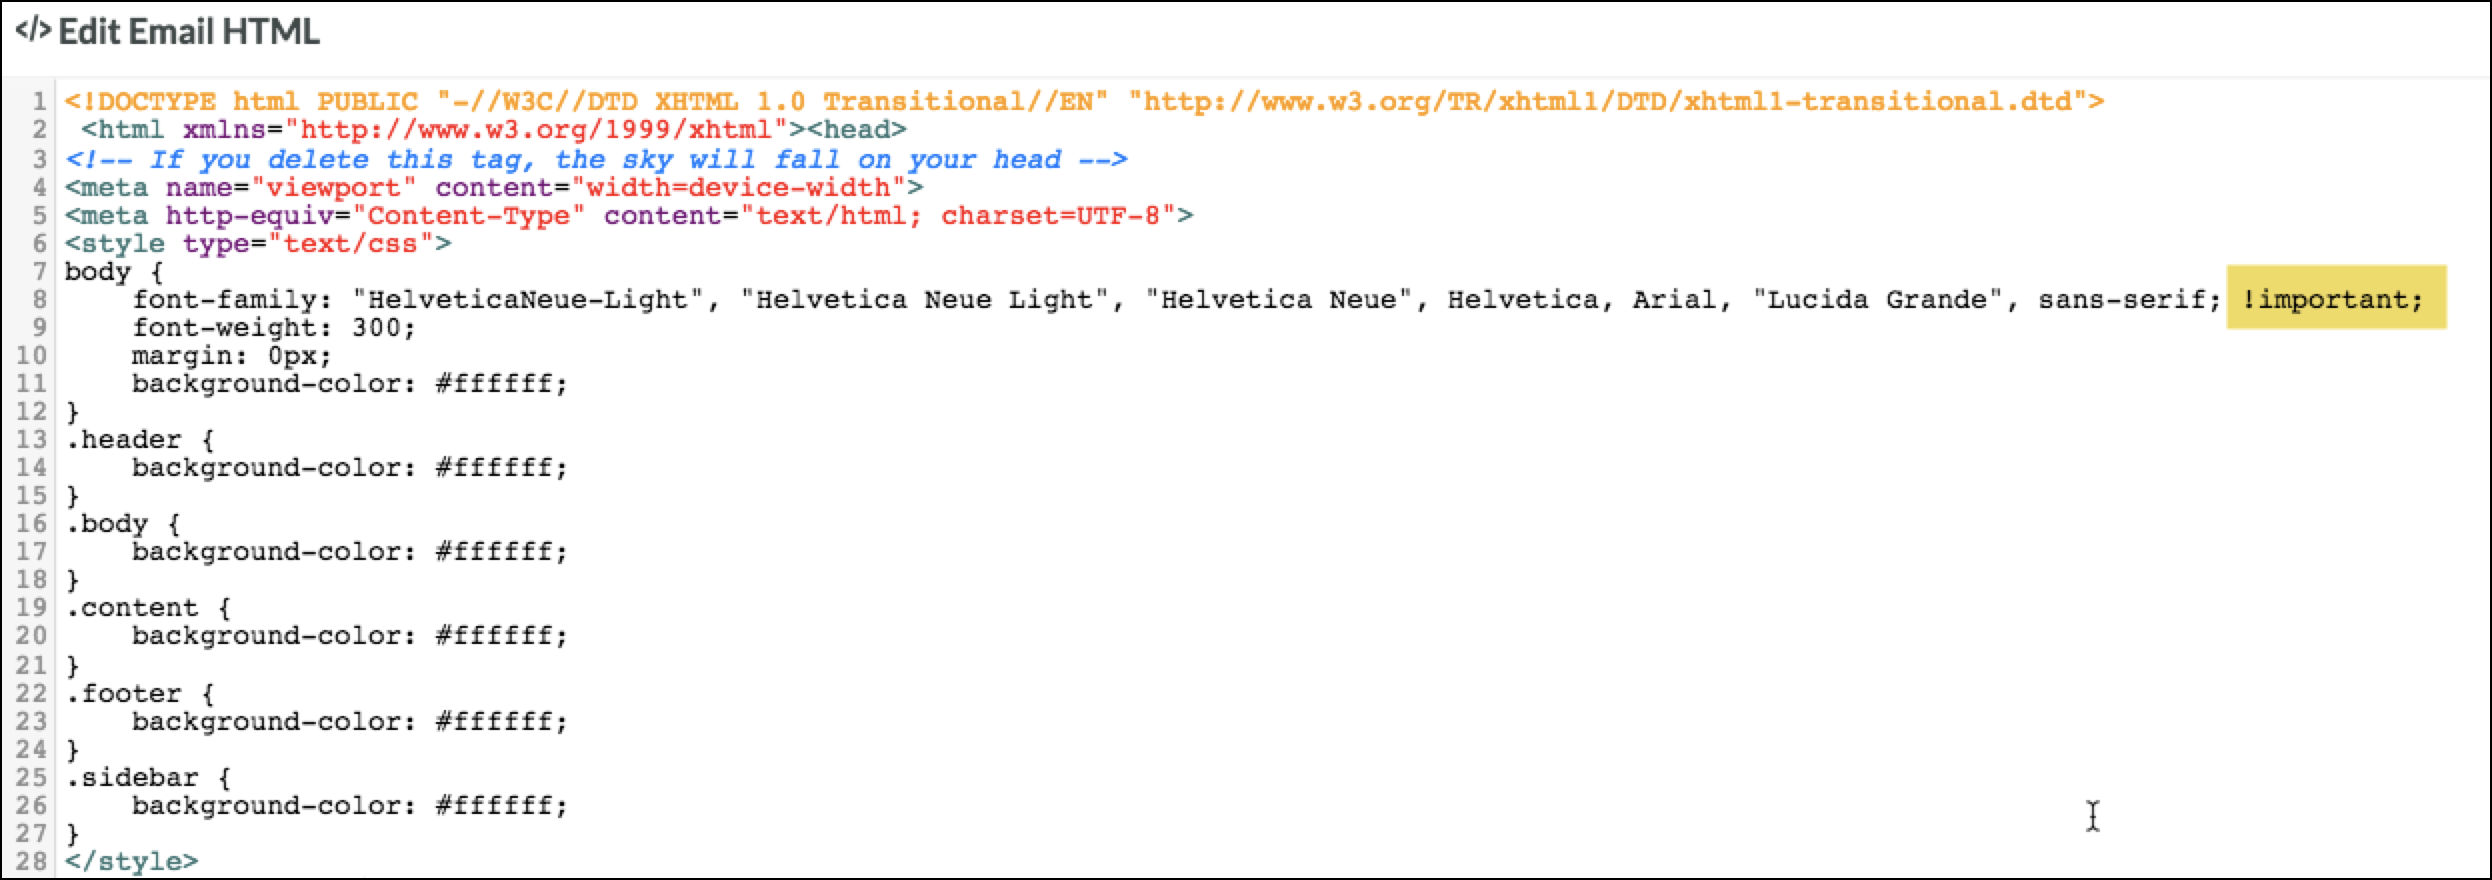
The placement of the tag should appear similar to the following code:
<style>
    body {
      font-family: Georgia, serif !important;
    }
</style>
<br><br><br><br><br>
Older versions of Microsoft Outlook do not support line height that is designated without a percent. You need to declare a line height as a percentage in order for Microsoft Outlook to respect the spacing between text.
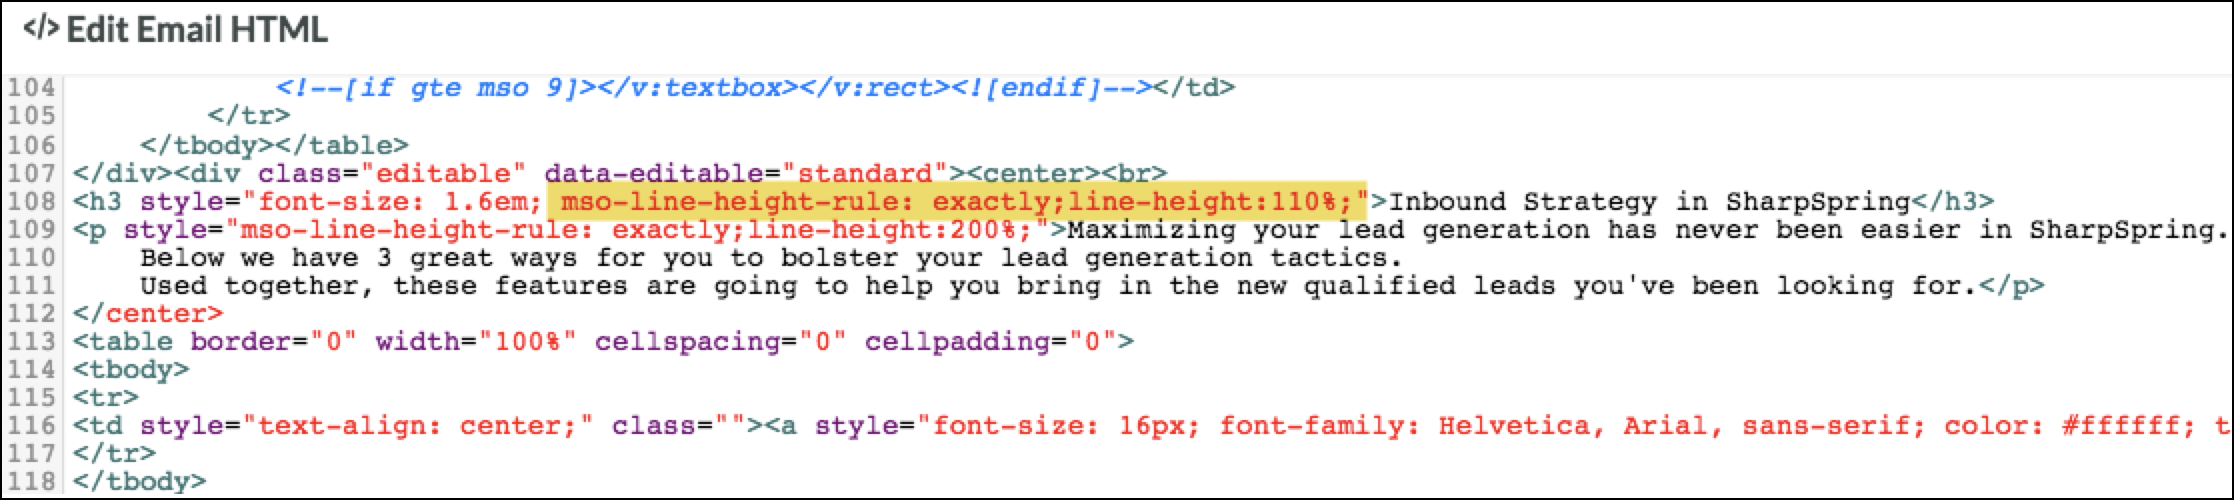
| Correct: | mso-line-height-rule: exactly;line-height:110%; | |
| Incorrect: | line-height:13px |
Keep these best practices in mind as you design emails for Outlook in Lead Gen & CRM:
Copyright © 2026 · All Rights Reserved · Constant Contact · Privacy Center