Lead Gen & CRM
How can we help you?
Search our help articles, video tutorials, and quickstart guides

You've got this. You've got us. Search our Knowledge Base to quickly find answers to your questions.

Creating Email Templates

Article: 000050295
Updated: October 4, 2023

Your marketing content is a reflection of your brand. Having the option to create customized email templates in Constant Contact's Lead Gen & CRM lets you have full control on how your messages will appear in the inbox.

This article will detail how to create a custom simple or designer email template.


Article Contents

 
Users:
Administrators 
Company Managers 
Marketing Managers 
Sales Managers  
Salespersons  
Jr. Salespersons  

Light Bulb IconTip: Are you looking for information about Constant Contact’s Email and Digital Marketing product? This article is for Constant Contact’s Lead Gen & CRM product. Head on over to the Email and Digital Marketing articles by clicking here. Not sure what the difference is? Read this article.


Regarding Email Creation

To create an email in Lead Gen & CRM, you must first start with a template. You can use either a created template or an existing template. Emails can only be created by using a template.

Be aware that simple and designer email templates are set, by default, to be 800 pixels wide. This size cannot be changed. However, these email templates are responsive by nature. Up-to-date browsers and email clients will automatically resize these templates to appropriate sizes that look appealing. 

In addition, while Lead Gen & CRM does not have any specific image size requirements for email templates, consider it a best practice to keep image file sizes as small as possible. This helps to facilitate quick downloads. 


Creating Templates in Lead Gen & CRM

You can create email templates as necessary.

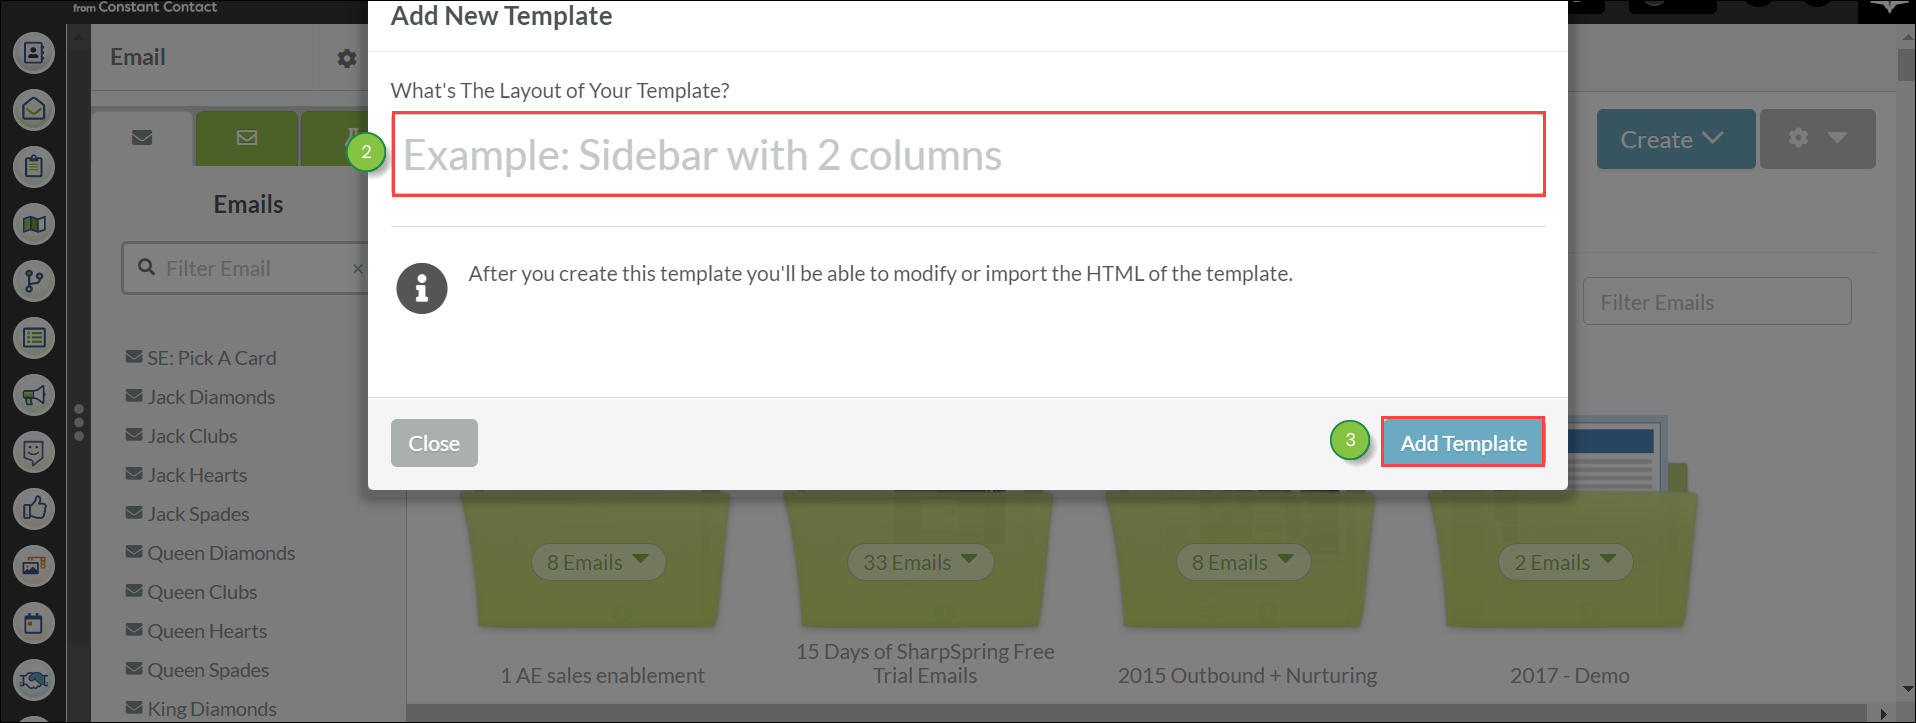
To create email templates, click Email in the toolbar and do the following:

  1.  Click Create>Create Email Template.

    Creating Email Templates


  2. Enter a name for the template.
  3. Click Add Template.


  4. Click  email.png  Send Settings in the left panel.

    Important: When using the Send Settings option group, the Email Name will auto-fill into the Subject field. Be sure to change it, as the email name is for internal use only.

  5. Enter a title for the email template.
  6. Optionally, enter a description for the email template.Creating Email Templates


  7. Click  grid.png  Content and Layout in the left panel.
  8. Drag and drop the desired layouts or elements into the template.

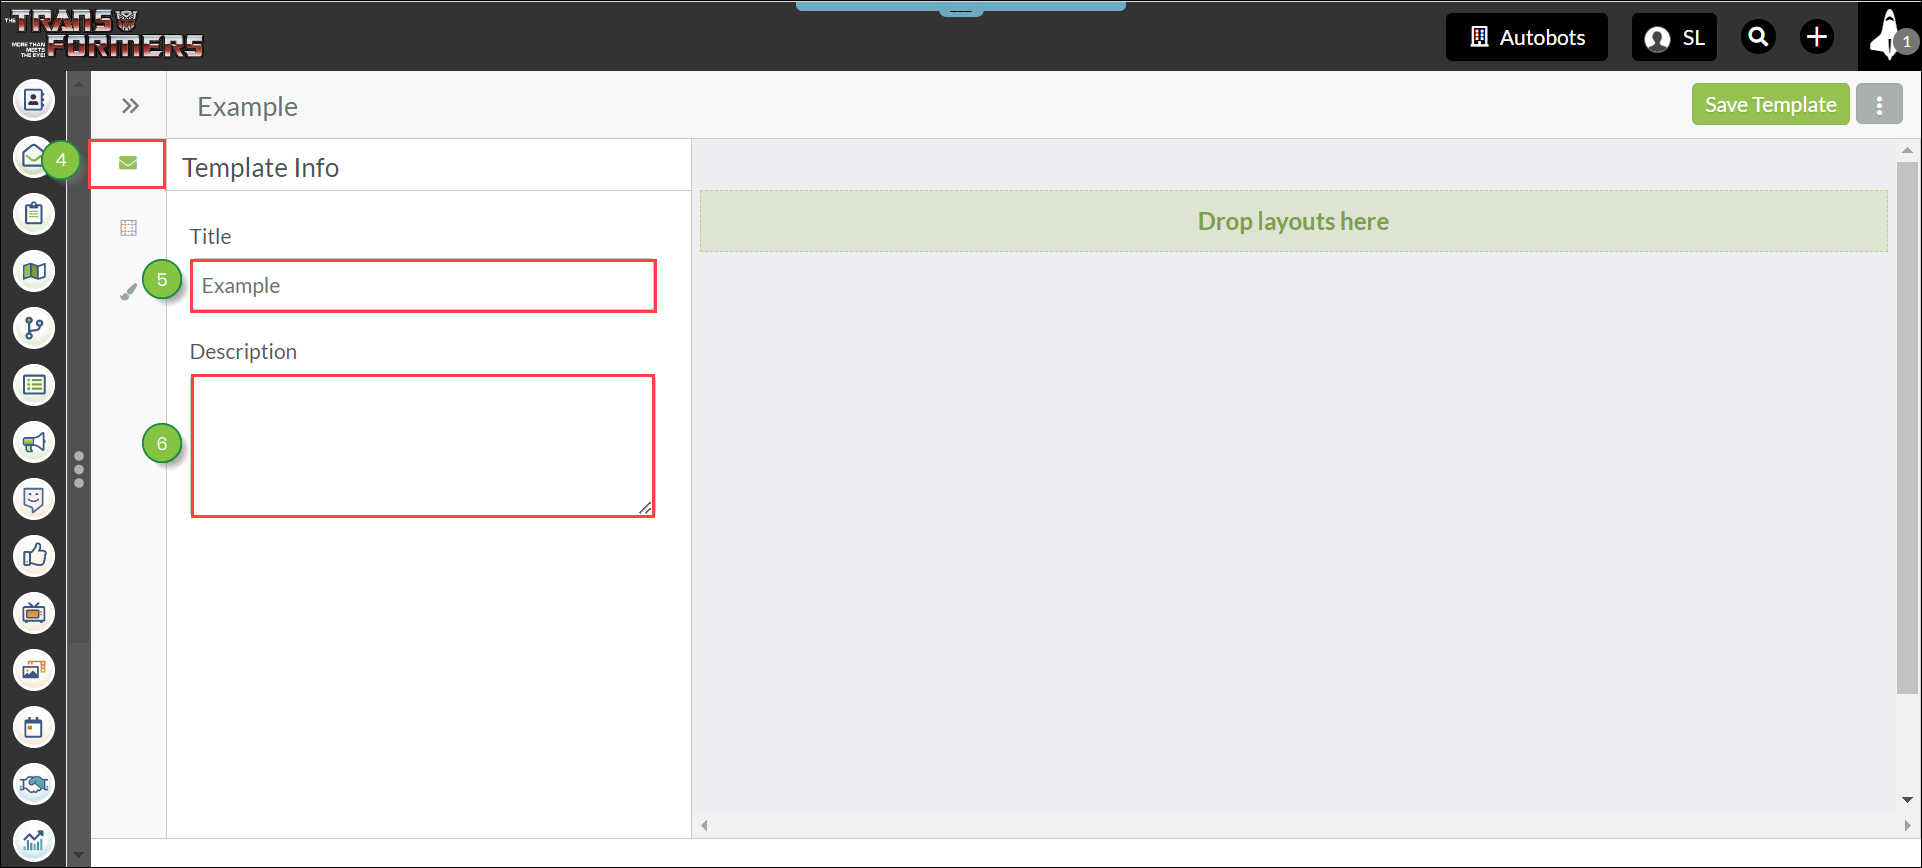
    Note: When using the Send Settings option group, the Email Name will auto-fill into the Subject field. Be sure to change it, as the email name is for internal use only.

    Creating Email Templates


  9. Click  brush.png  Theme Styles in the left panel and modify template fonts and colors as needed.
  10. Optionally, click  more.png  More Options > View Code to edit the template's HTML code.
  11. Click Save Template.

Creating Email Templates


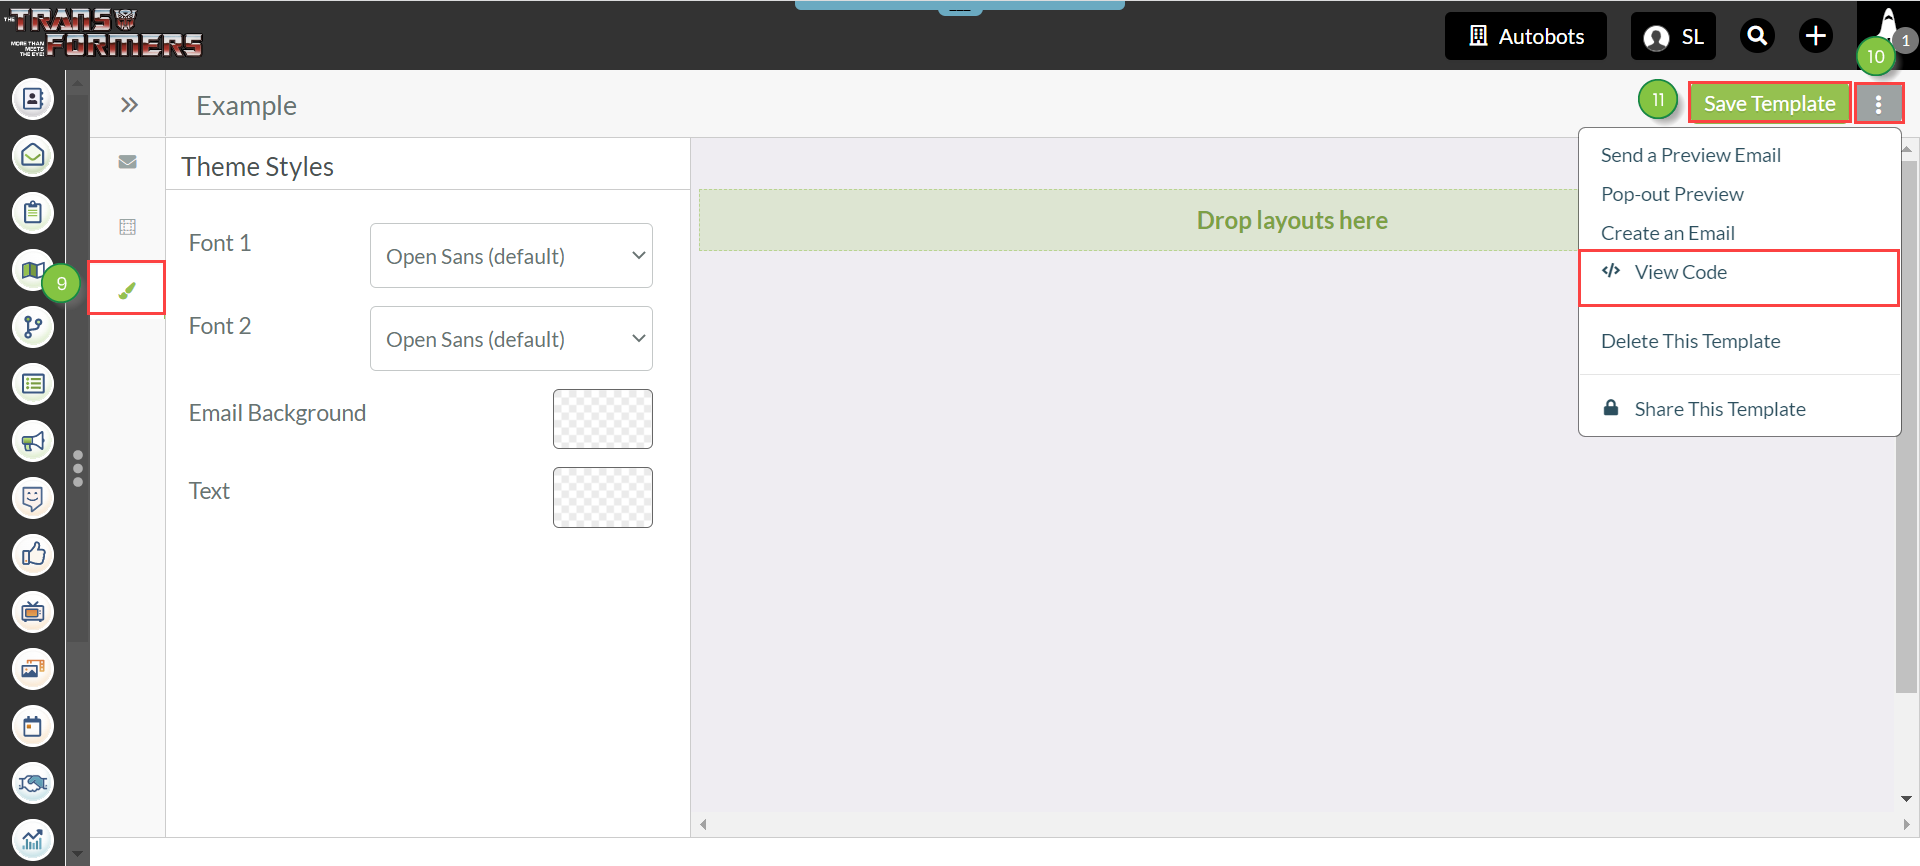
Note: To remove a theme color in the Theme Styles menu, click the  eraser.png  Erase icon next to the color box.

You can begin creating individual emails once you have saved the template. Refer to the following articles for more information on how to create emails after you have created a template:


Other Information on the Email Designer

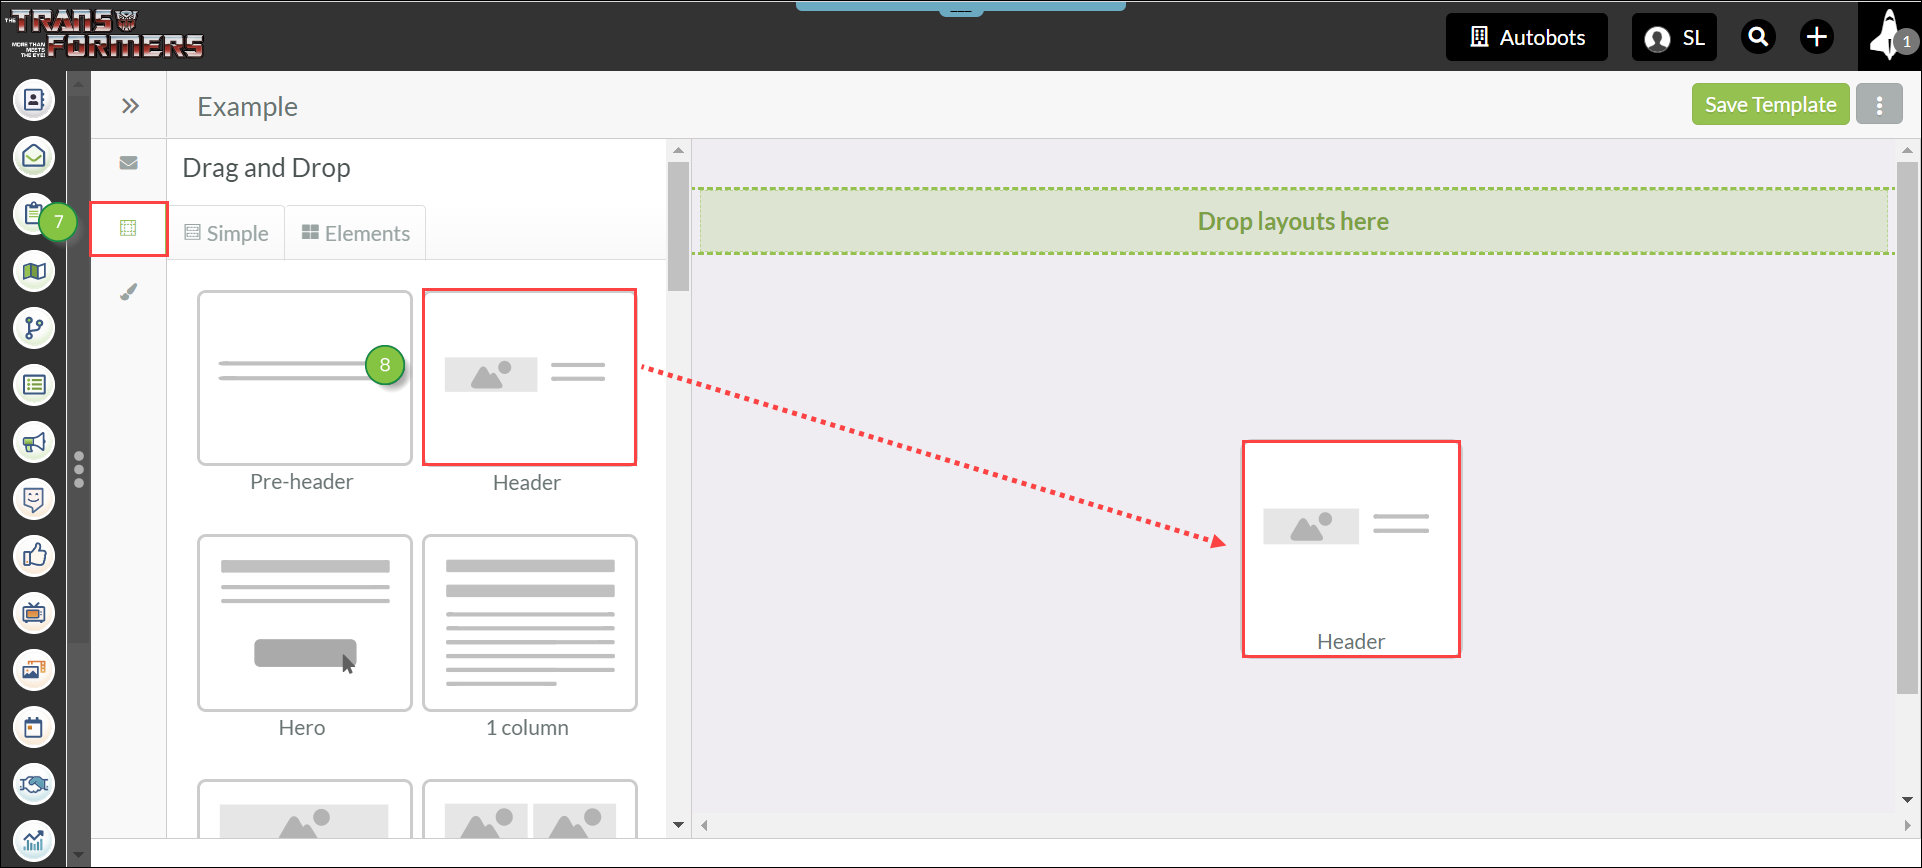
When using the Email Designer, consider the following:

  • Certain styles will not be displayed in View Code mode. The email designer takes any of the styles in the HTML for Email Standard Styles, pulls them into the database, and removes them from the HTML. Do not be alarmed when these styles are removed from the HTML in the View Code mode.
  • The email designer will look at the first <style> element in the <head> of the HTML and find the CSS for the relevant classes. If the styles are transparent, that means the color is not in the database. It is either in the email’s standard style or in the head of the email. If that happens, the color will be set in the database. Though it no longer shows in the head, it will appear.
  • Use these styles to ensure that your desired global styles are brought in by the email designer. If you make a template outside the Lead Gen & CRM application and import it, you will need to put styles in the head.
Note: Lead Gen & CRM offers Professional Services to assist with custom coding.
  • With standard styles, inline email editor styles will override the email standard styles that CSS applied to the header of your email. Overriding the global styles inline is applicable on secondary styles that are exceptions to your primary styles.
  • Tables are unavailable in Simple and Designer emails. Tables are only available with Legacy emails. Legacy templates are no longer available for creation. 


Did this article answer your question?


Constant Contact Logo

Copyright © 2025 · All Rights Reserved · Constant Contact · Privacy Center