This type of automation is a great way to communicate with leads who are interested in your product or service, but not ready to purchase just yet. This article will go over how to create a basic behavioral drip campaign.
Article Contents
Users:
| Administrators | ✓ | |
| Company Managers | ✓ | |
| Marketing Managers | ✓ | |
| Sales Managers | | |
| Salespersons | | |
| Jr. Salespersons | | |
Creating Visual Workflows
Drip campaigns are often built with visual workflows. With the Visual Workflow Builder, you can build simple or complex automation workflows using a combination of triggers and filters to fire off actions or action groups.
For example, you could build a workflow that sends an email to all contacts who visited one of your landing pages. The email could include a discount code and could be scheduled to be sent after a certain amount of time.
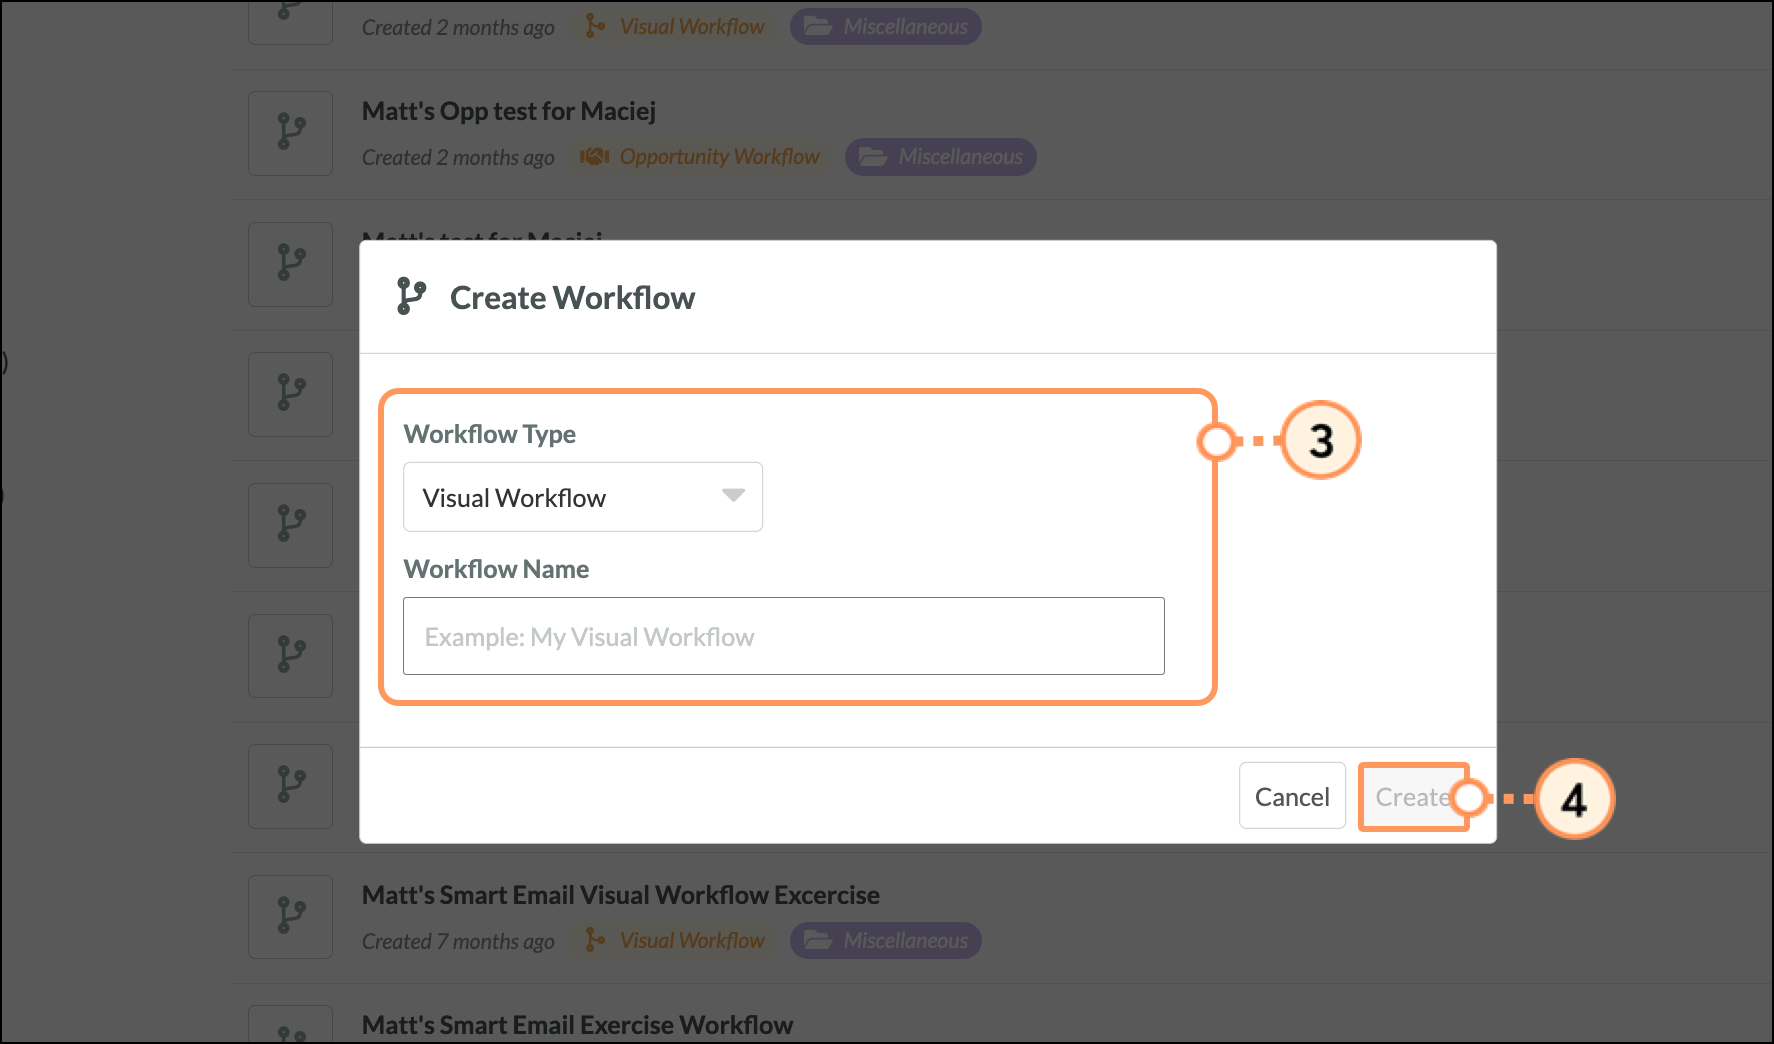
To create a visual workflow for a drip campaign, do the following:
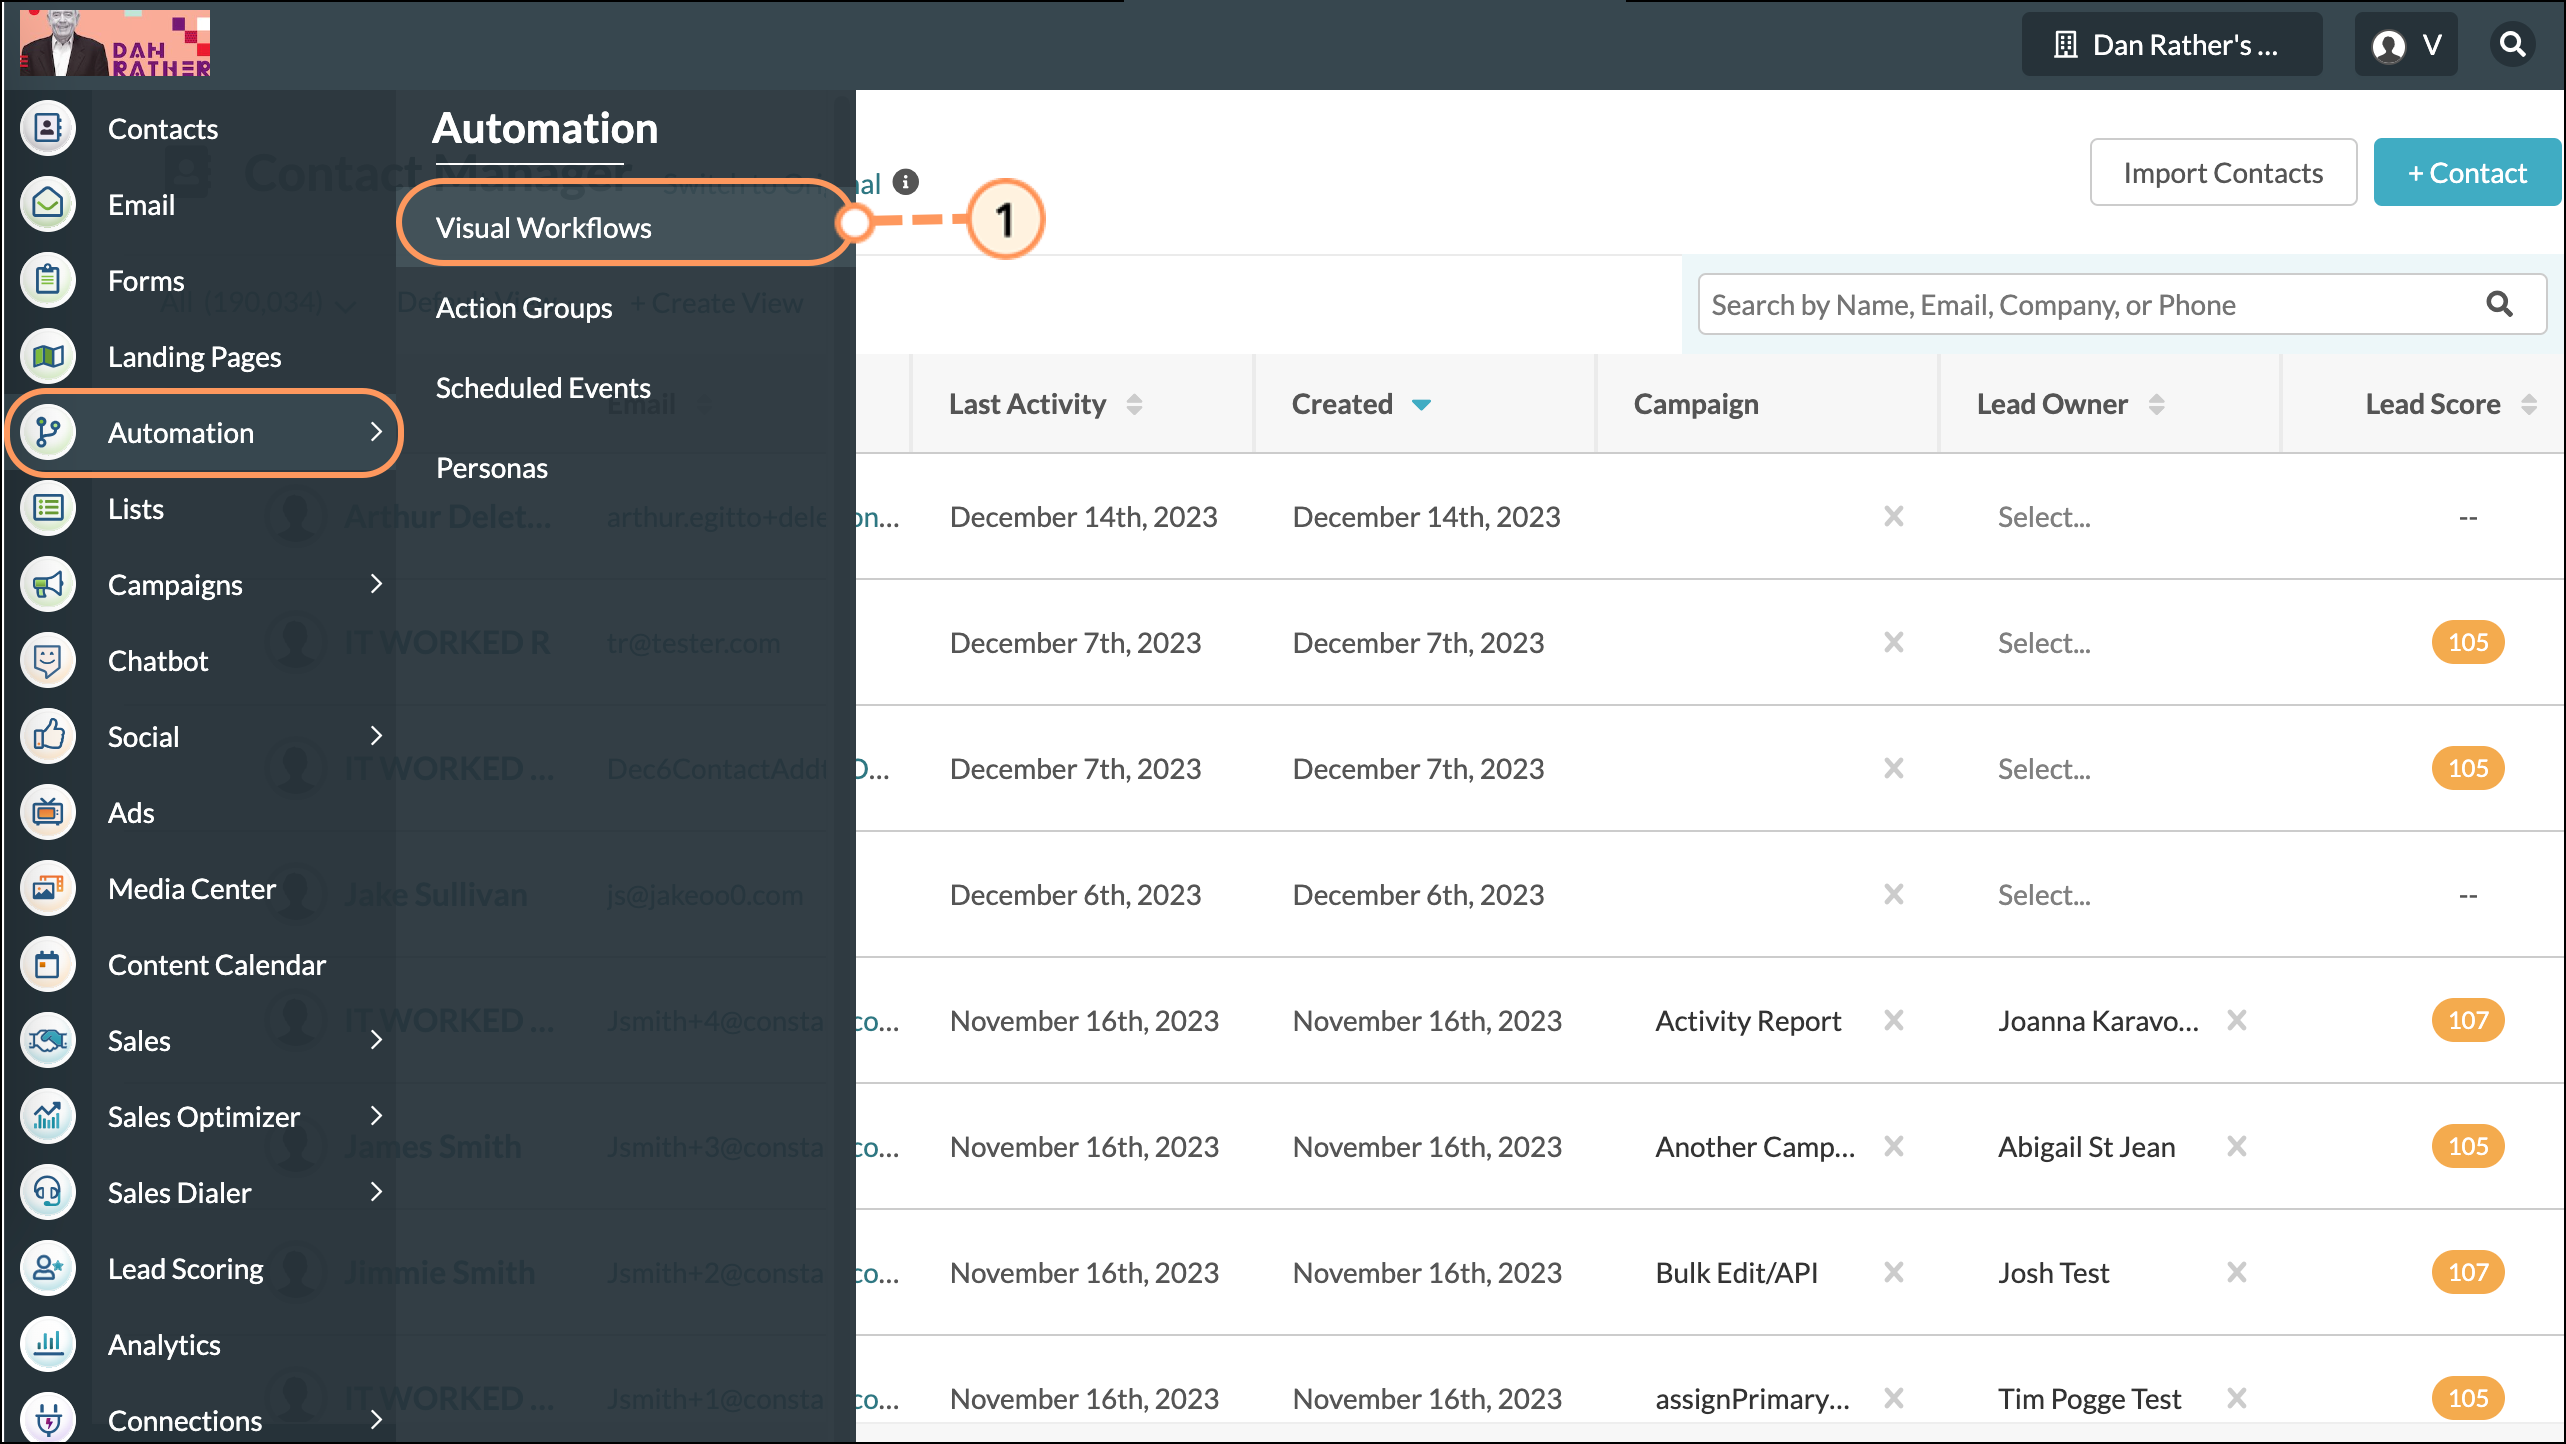
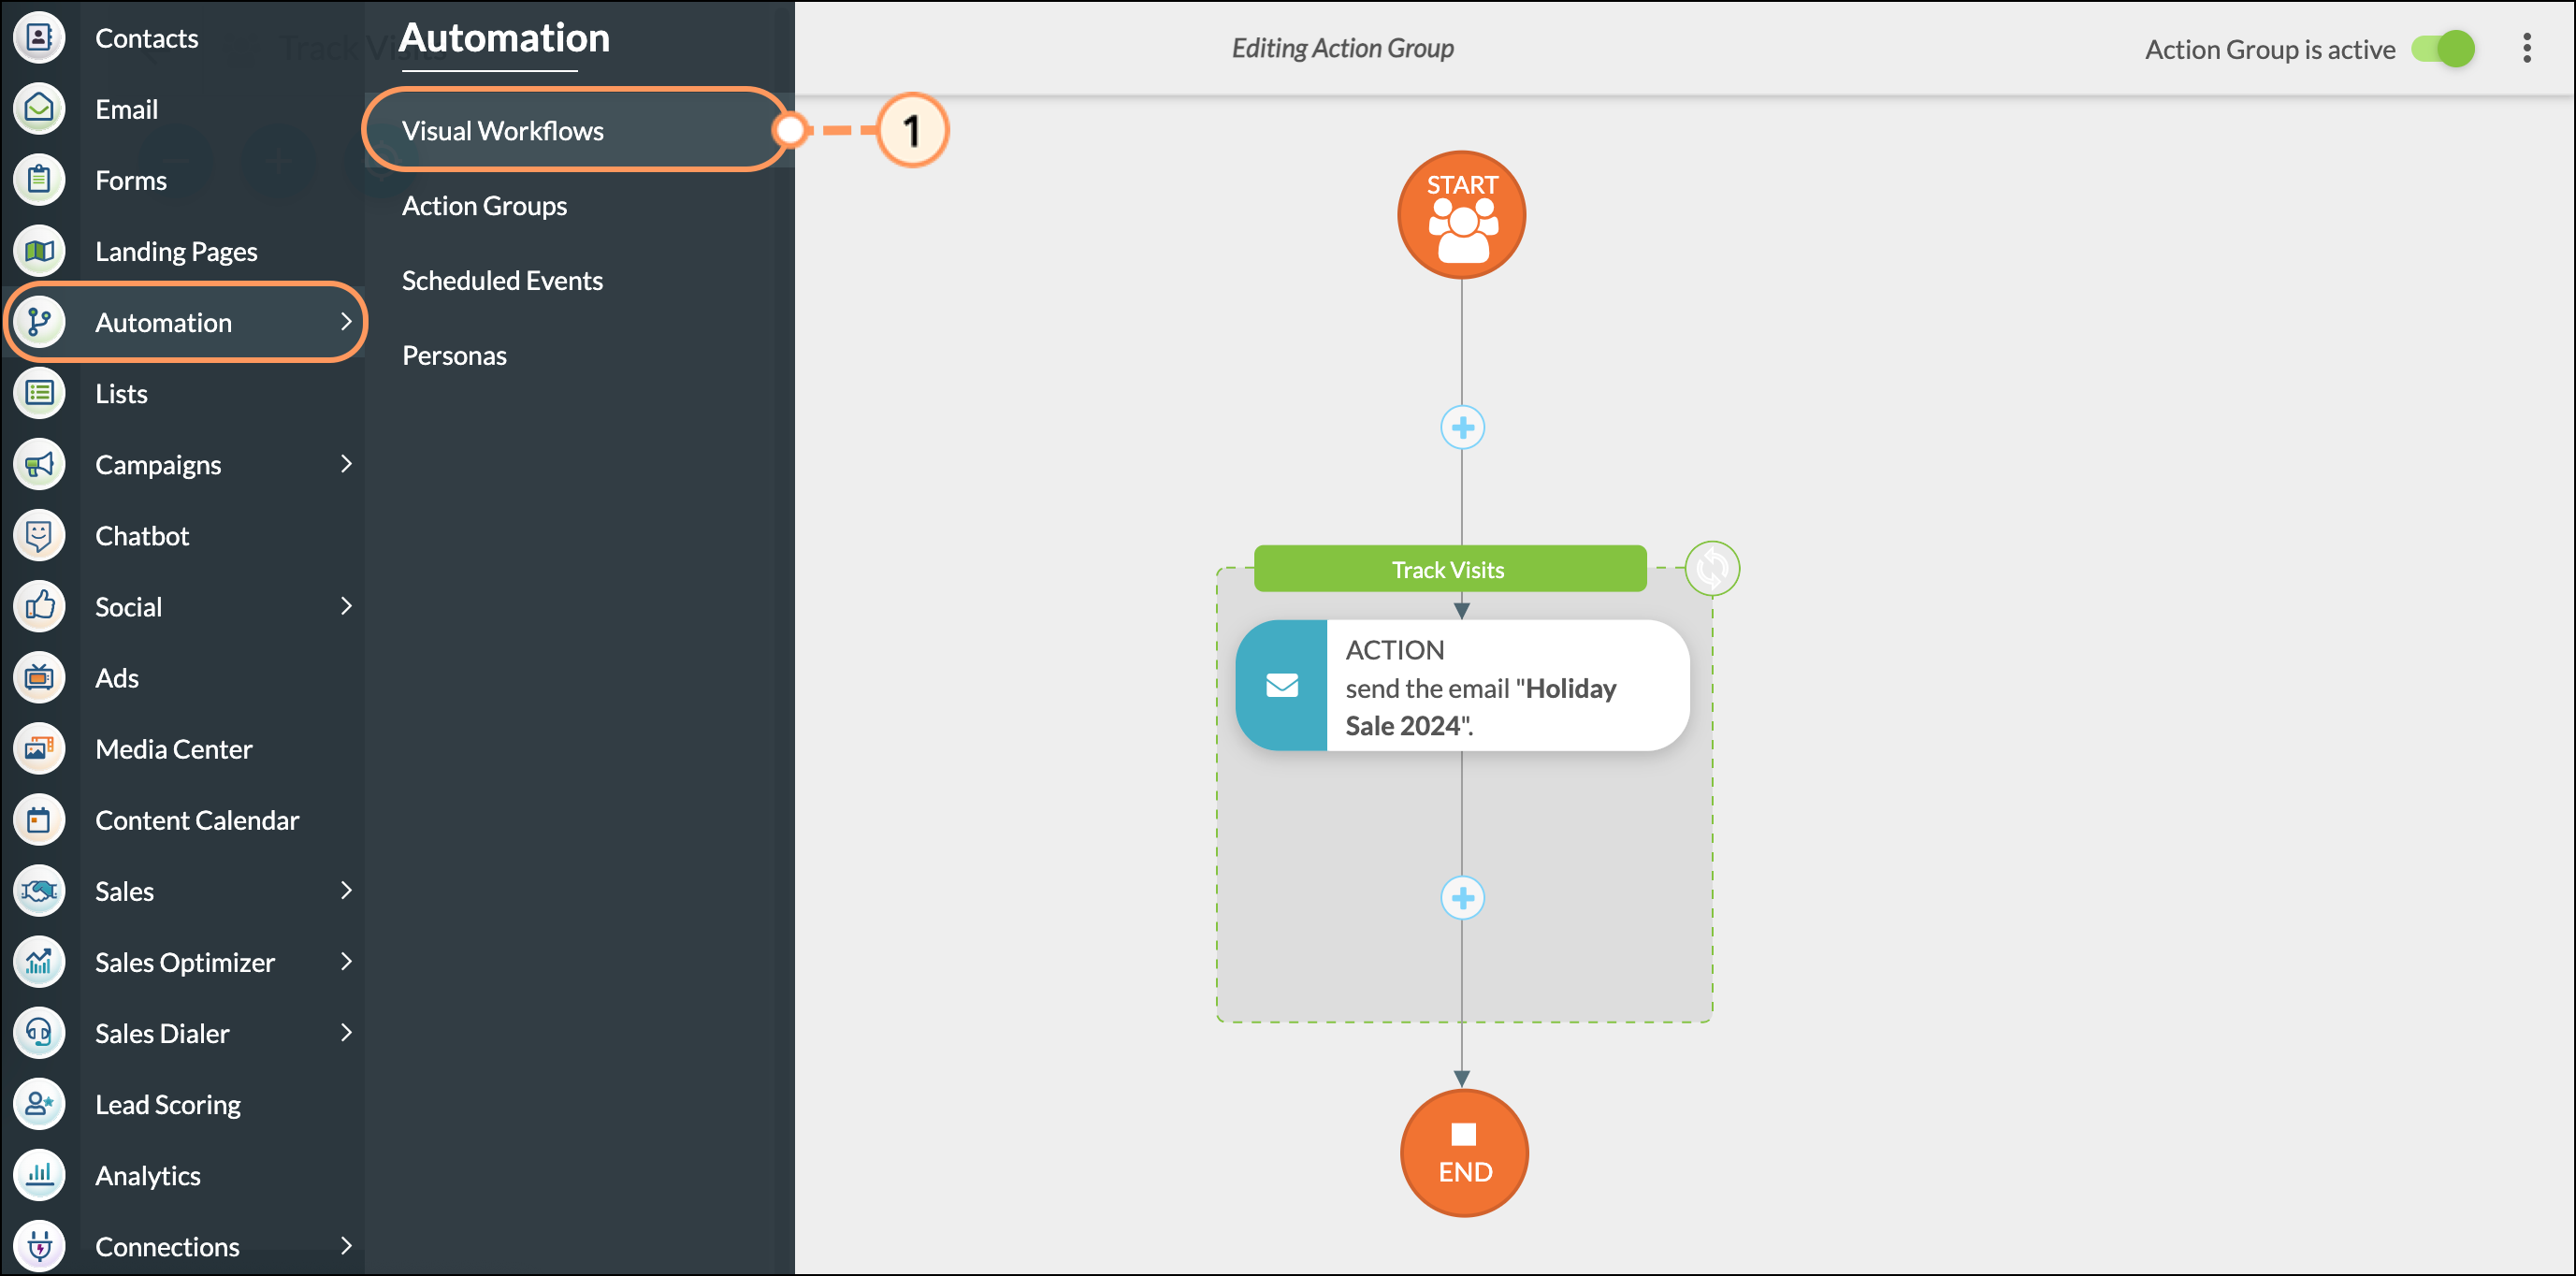
- Click Automation > Visual Workflows in the left toolbar.
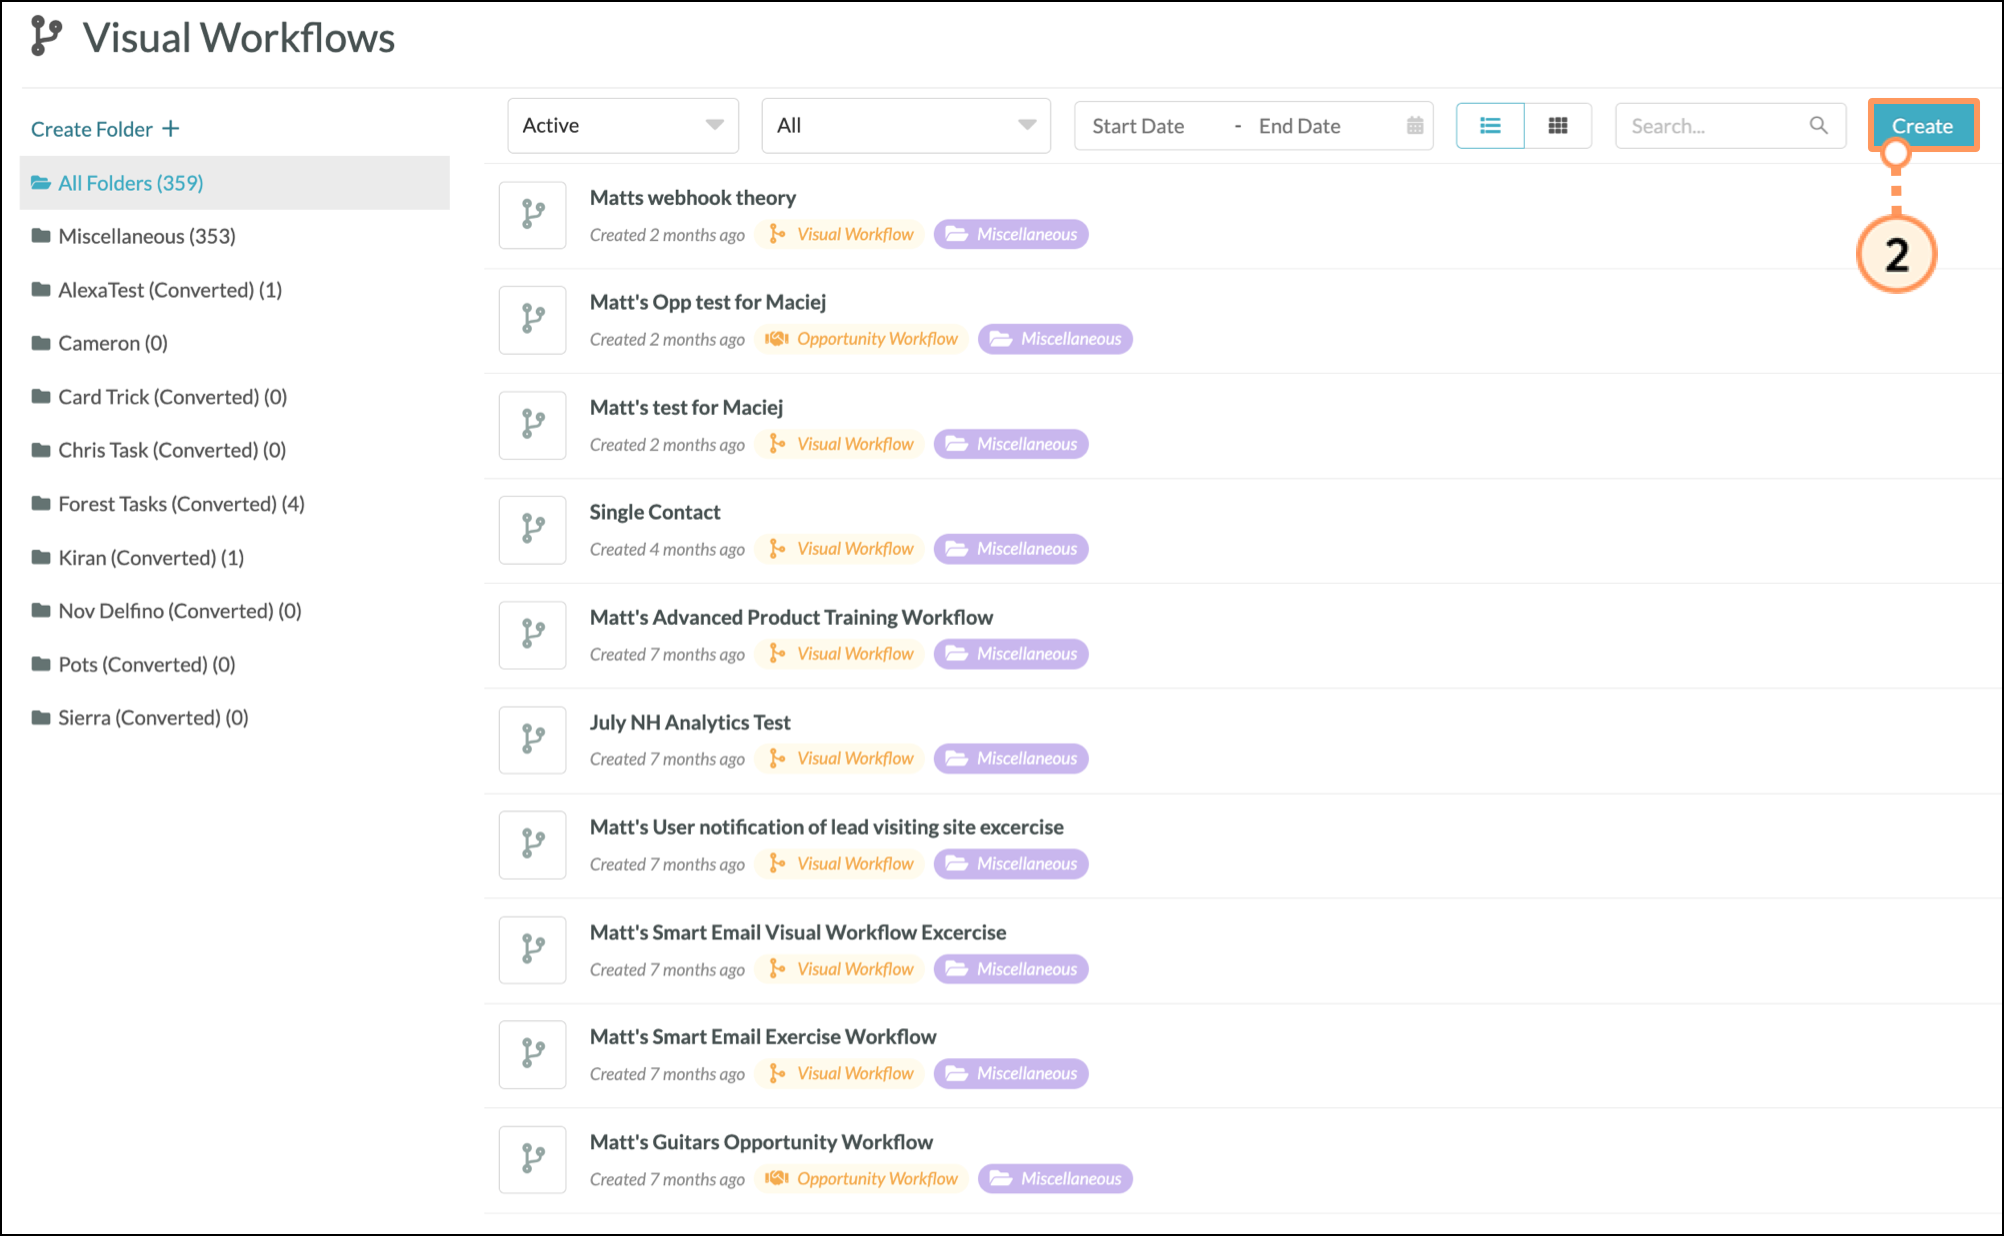
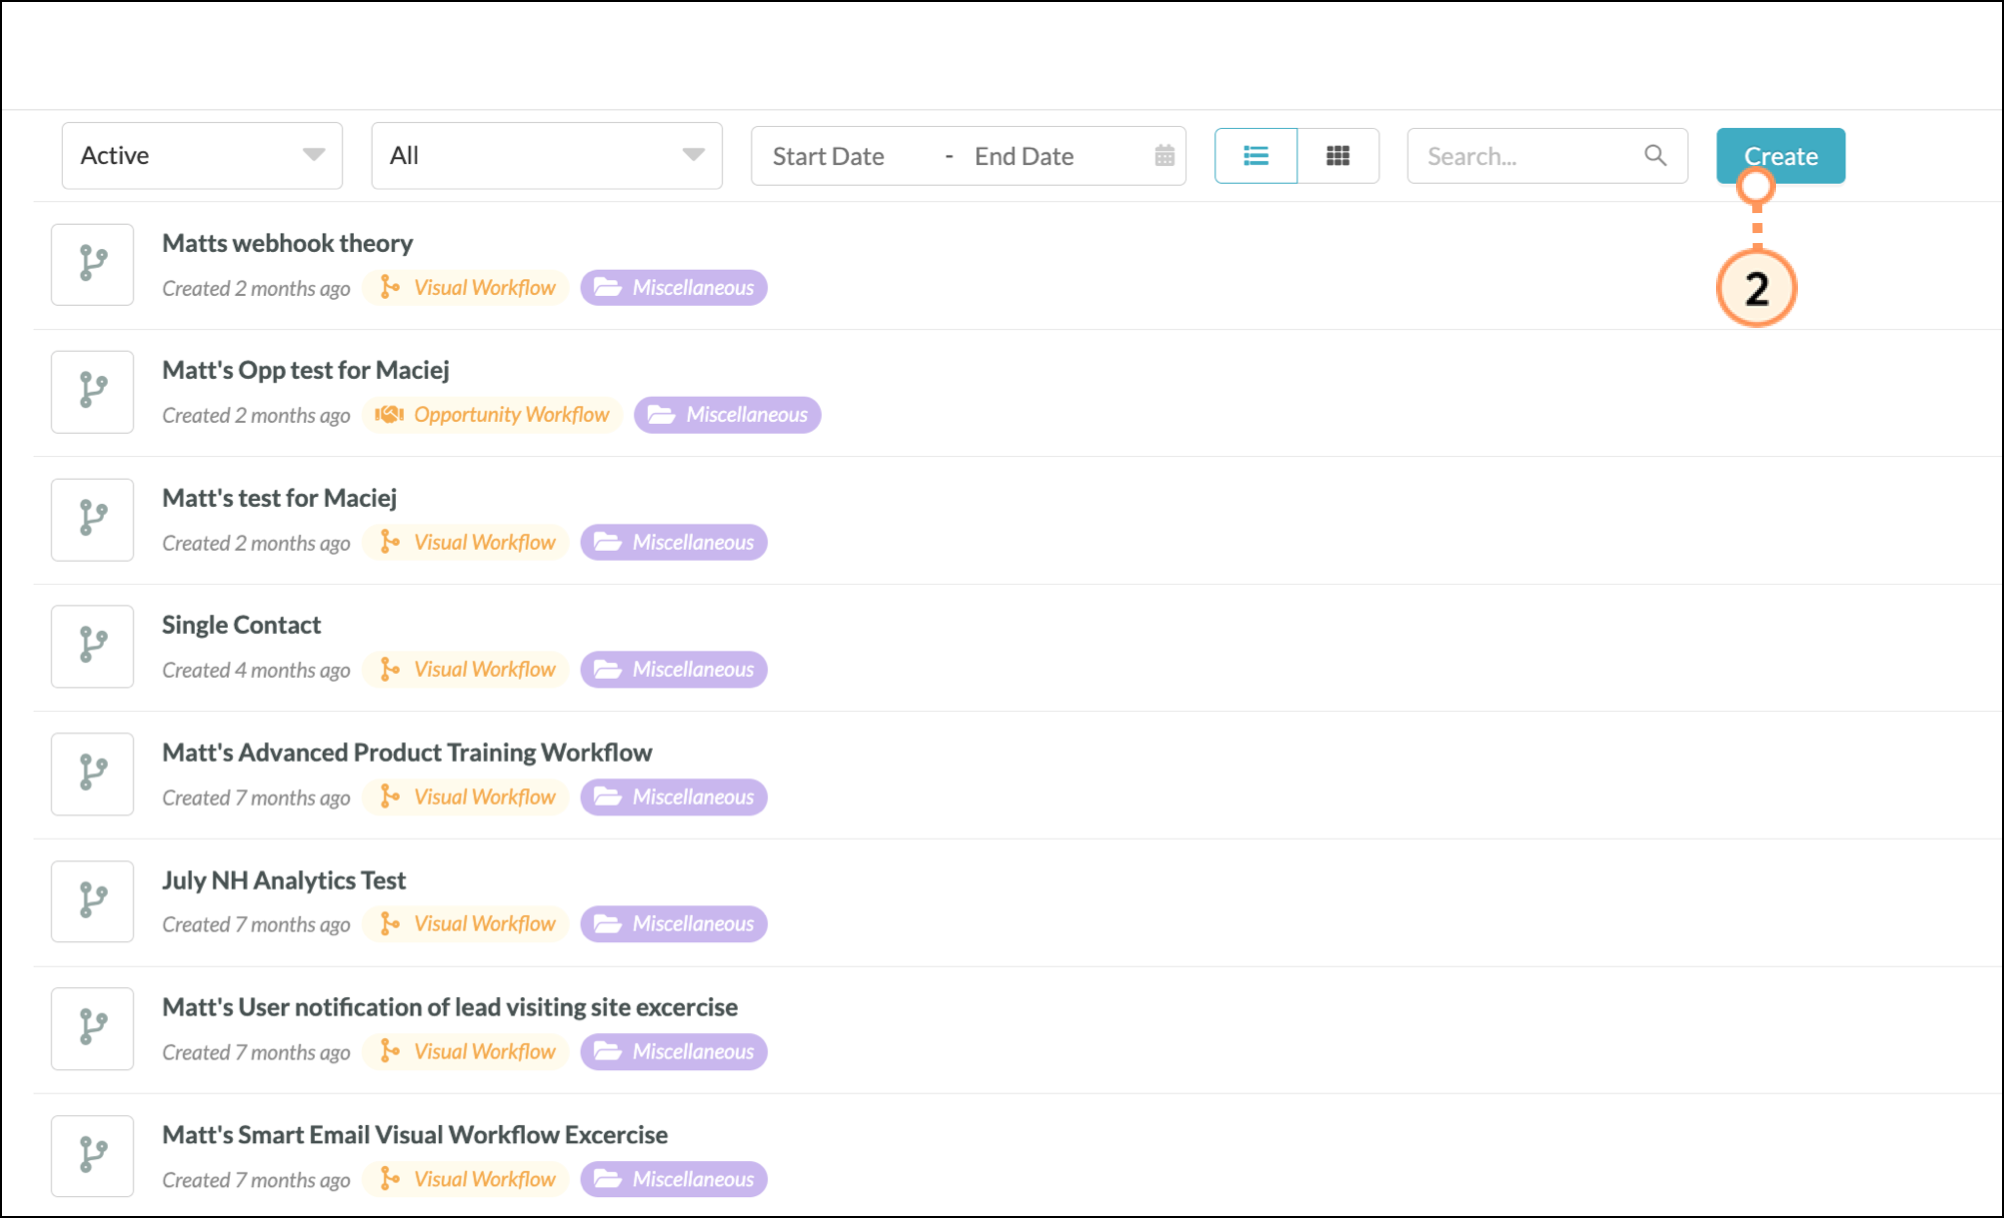
- Click Create.
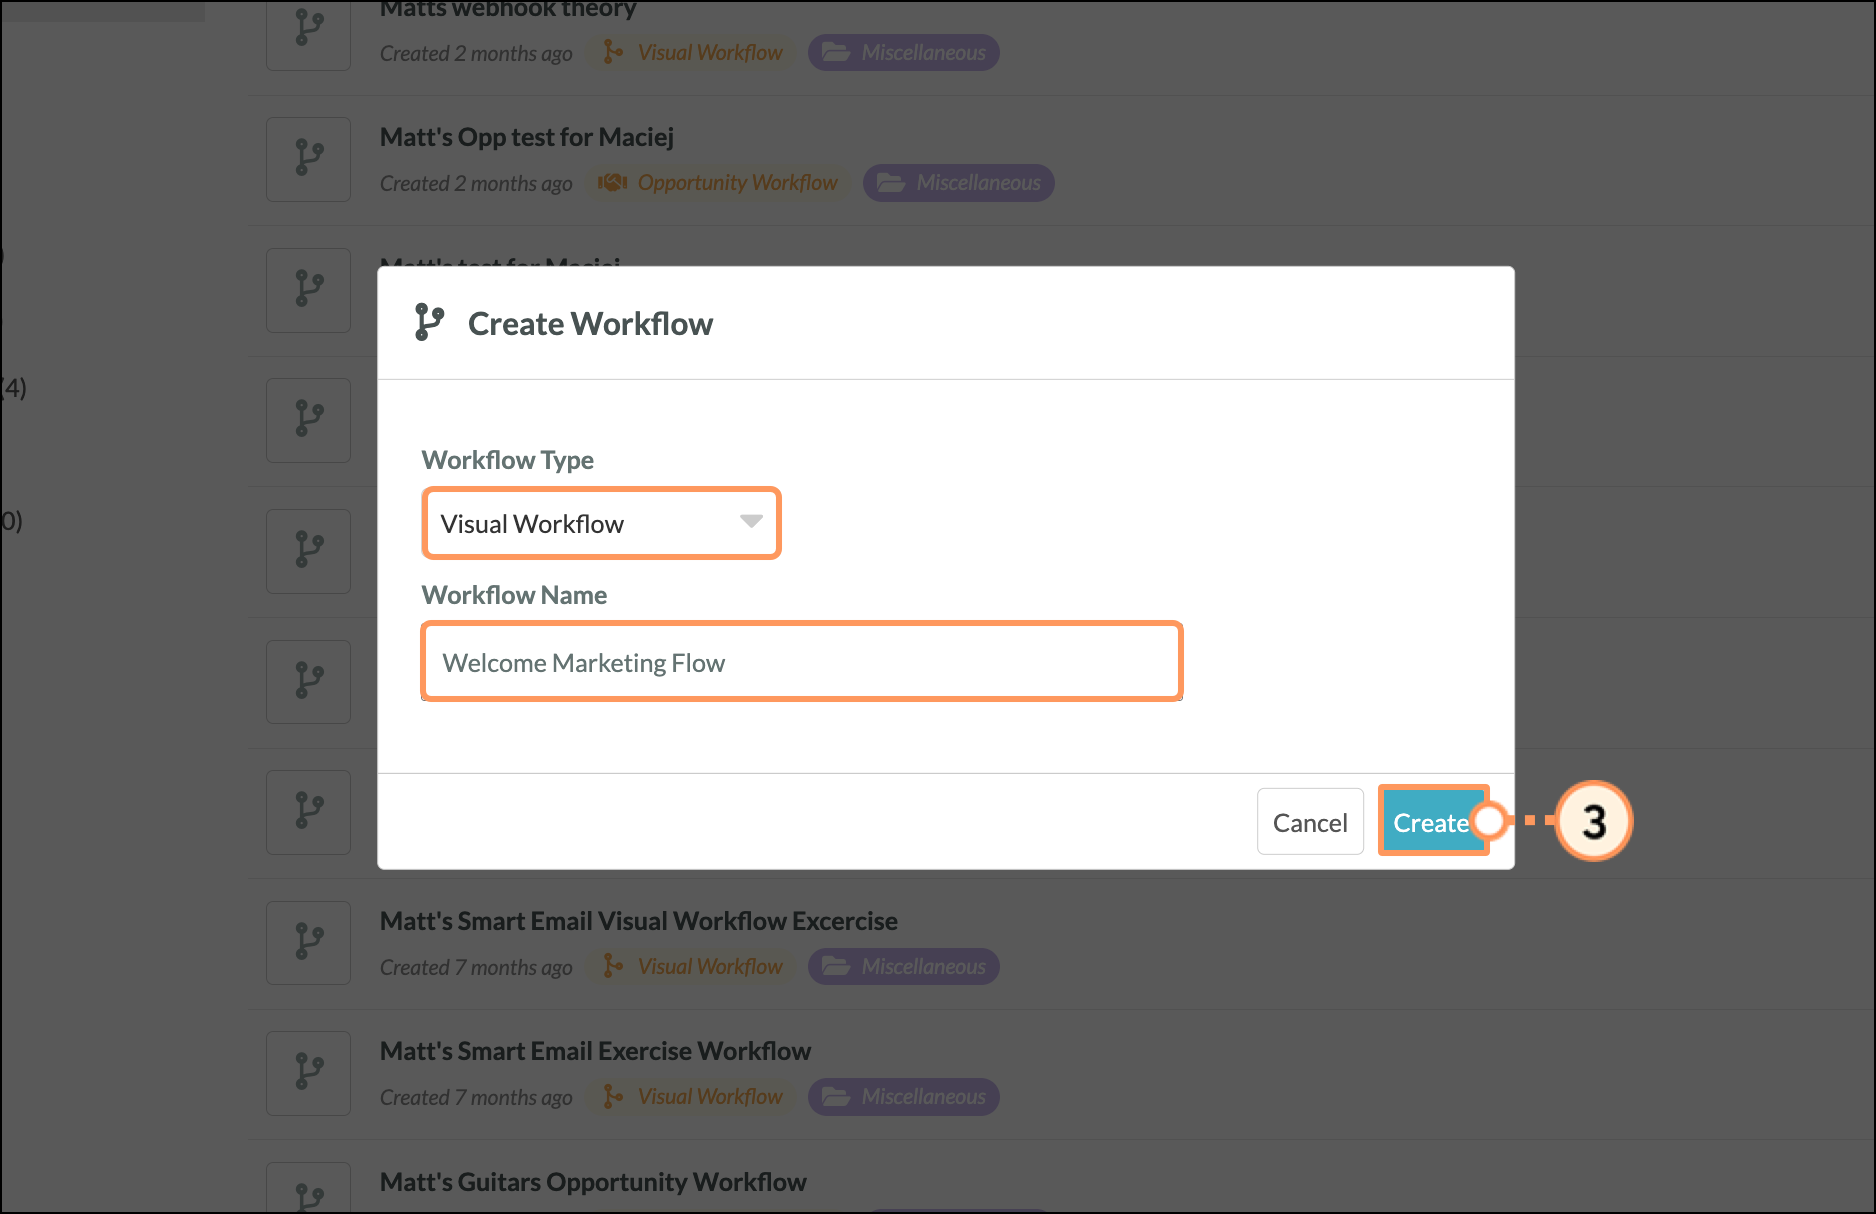
- Select and name the visual workflow and click Create.
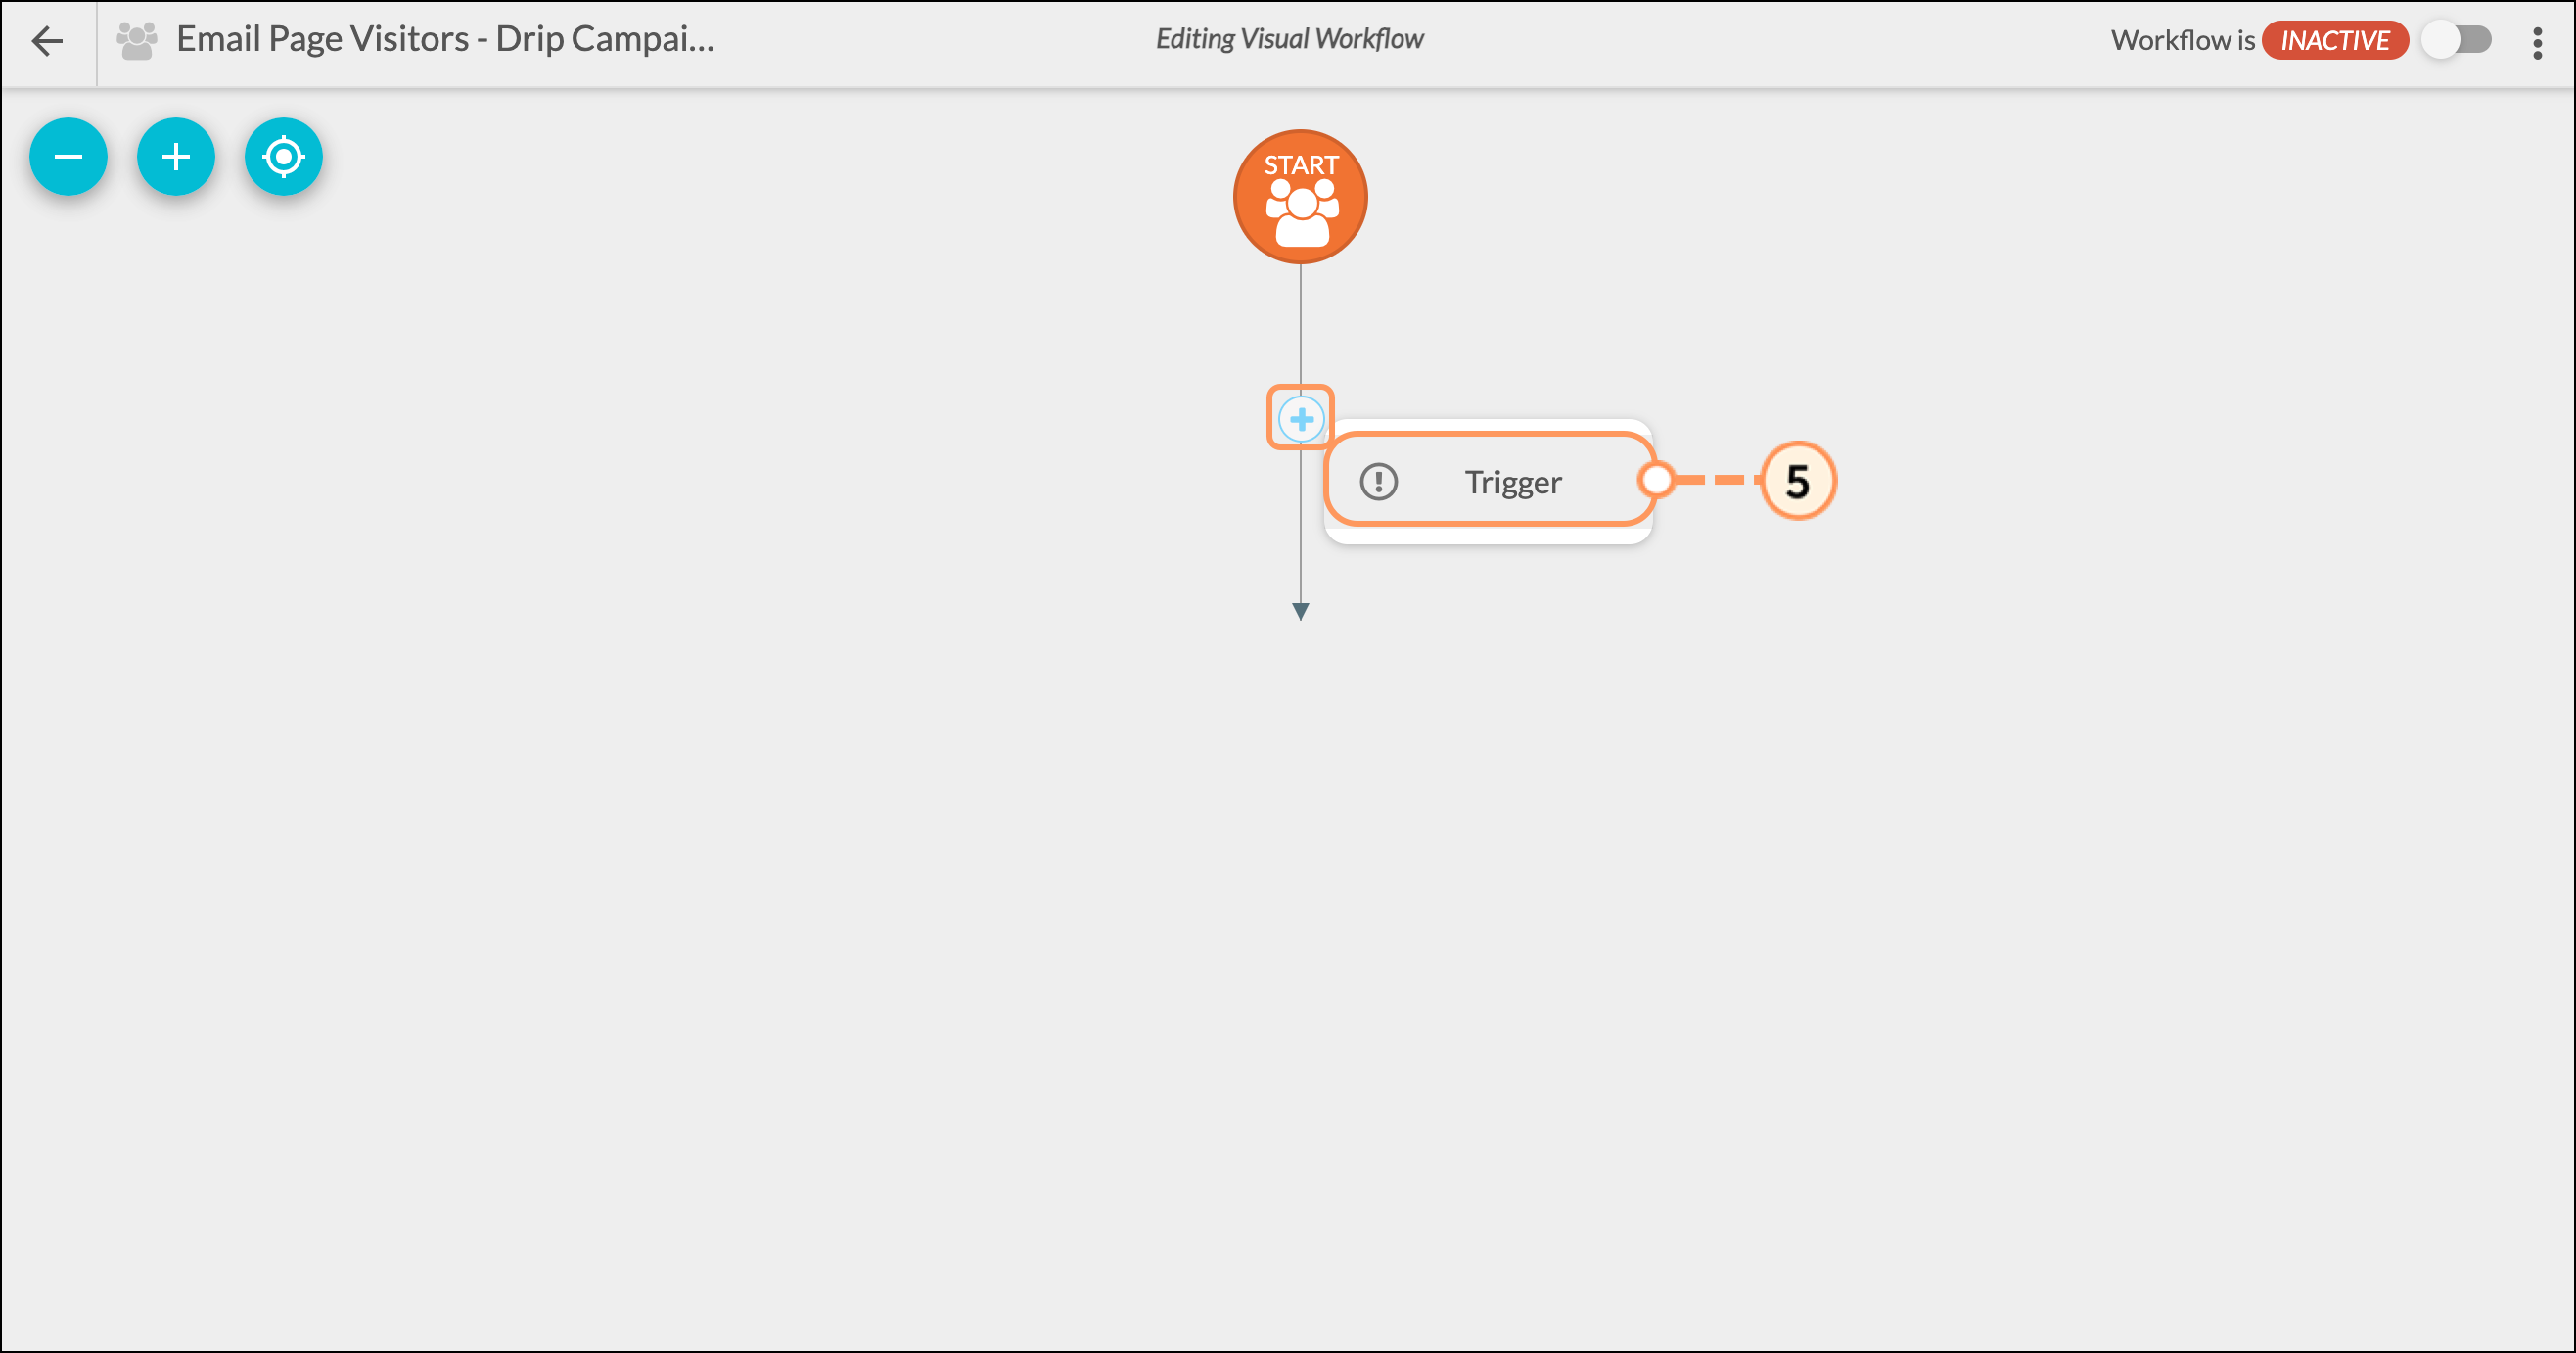
- Click + Add > Trigger under Start.
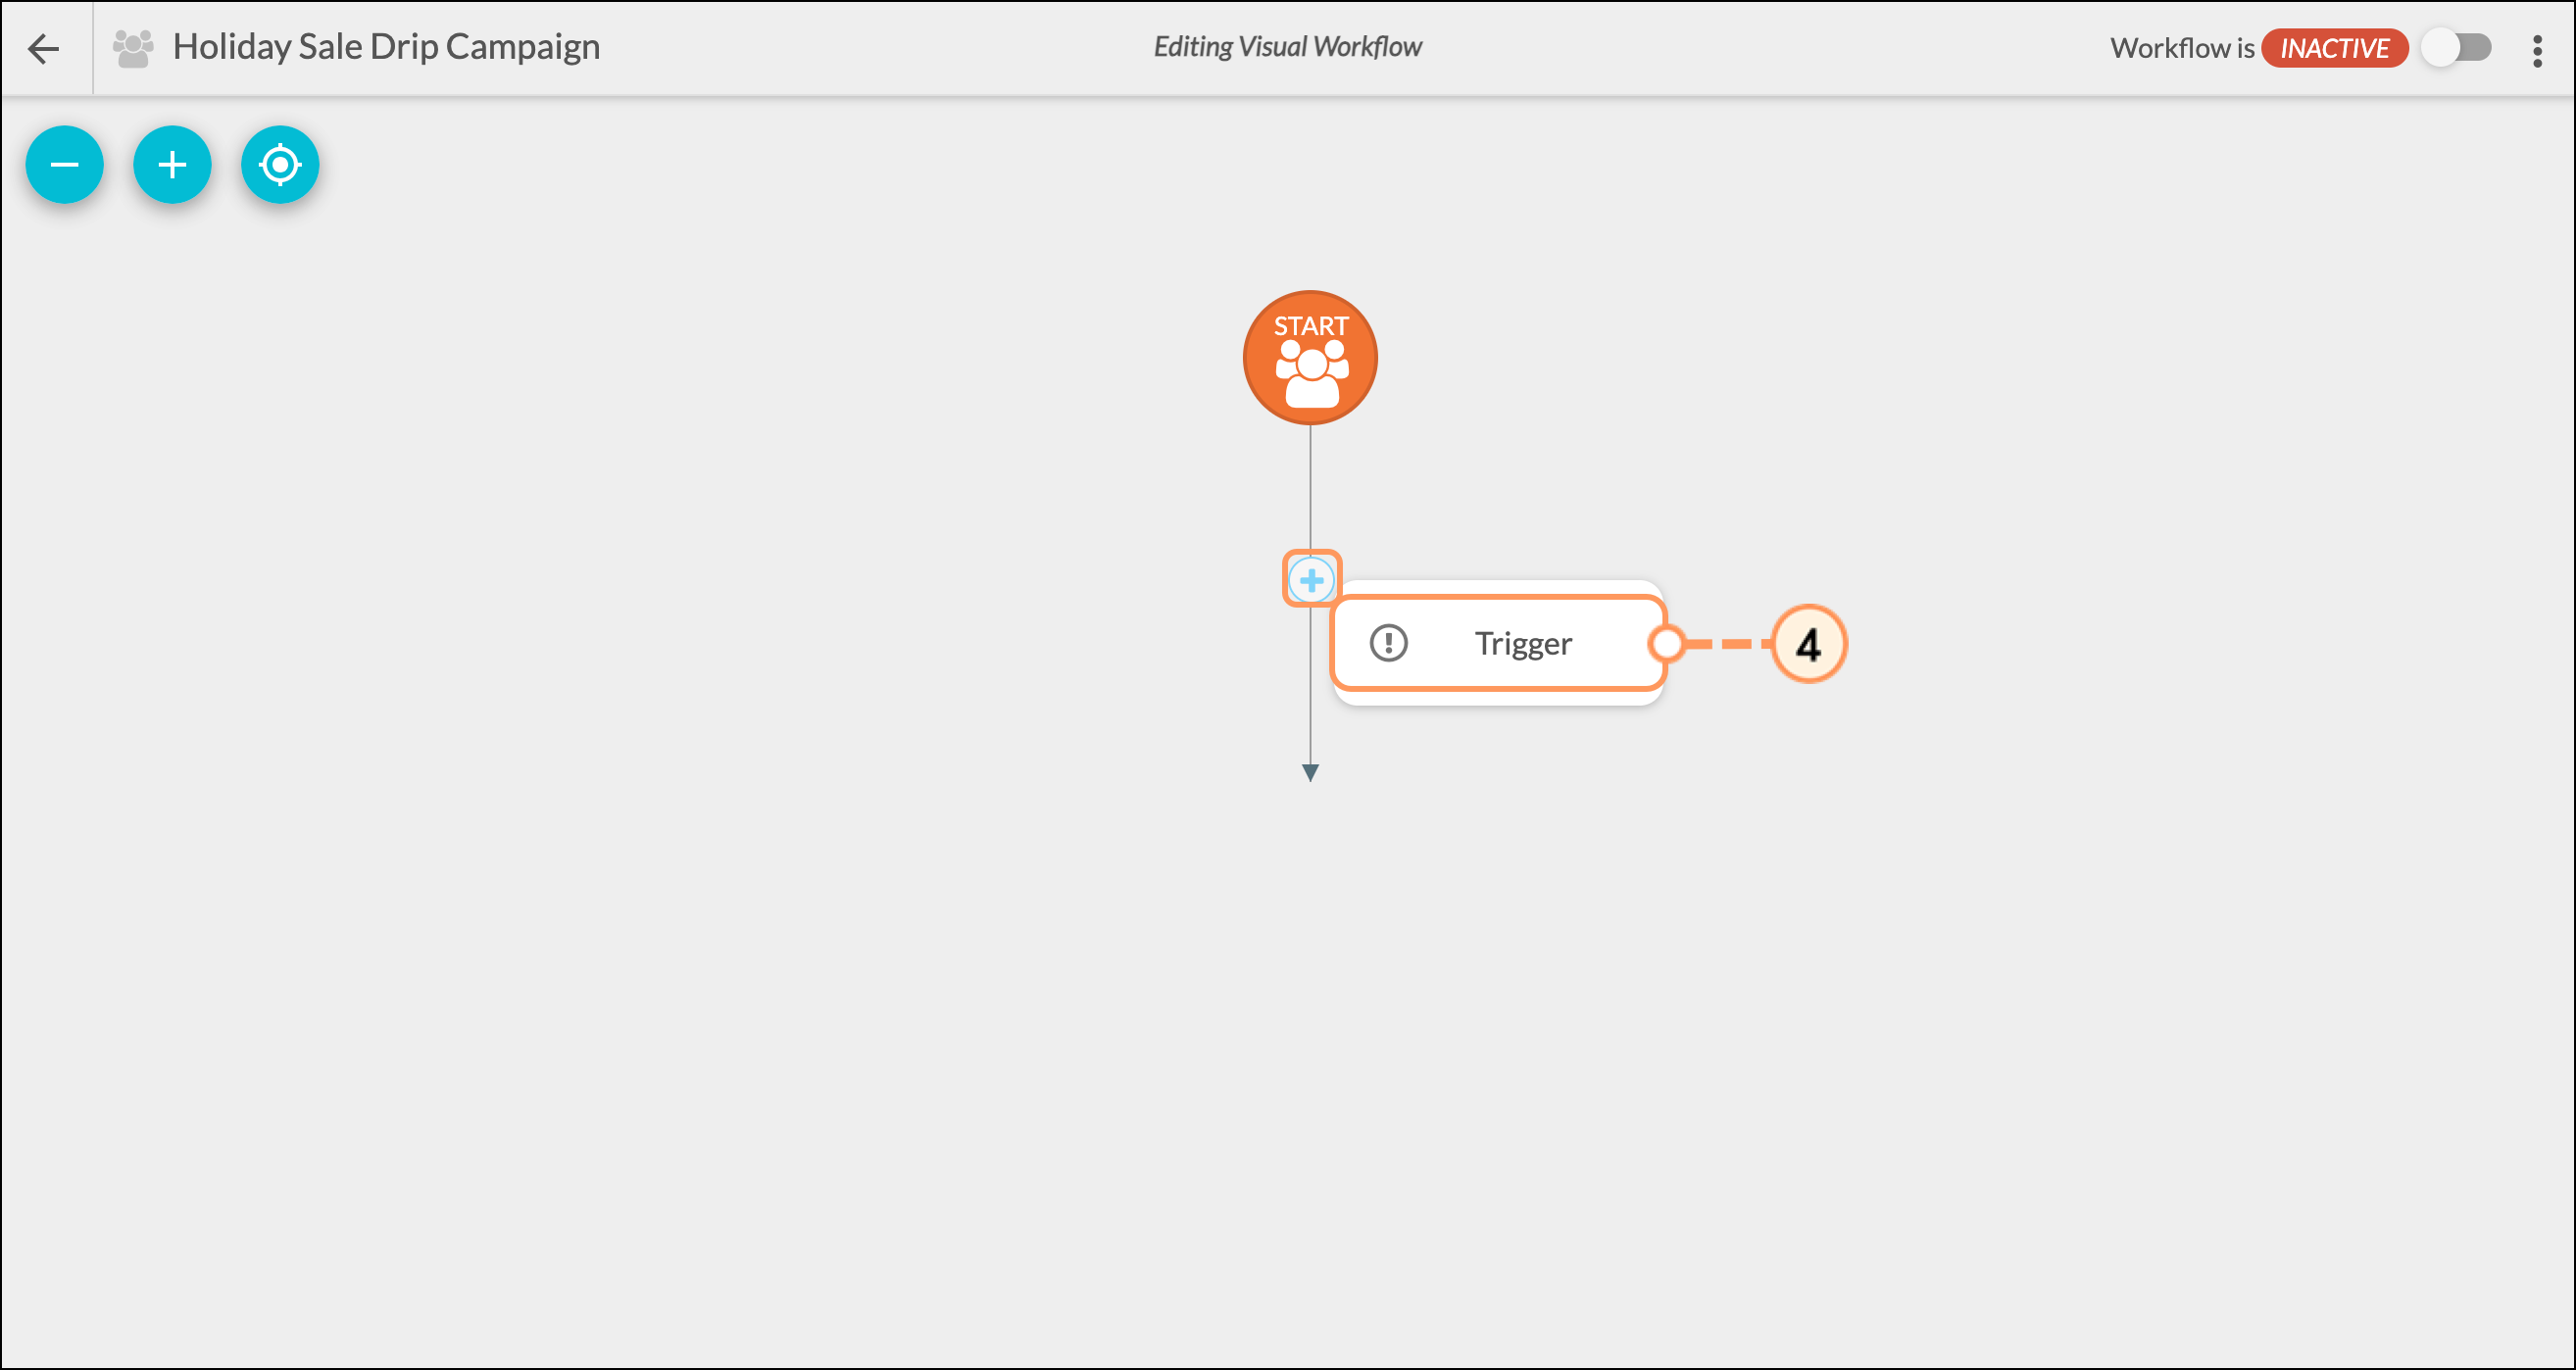
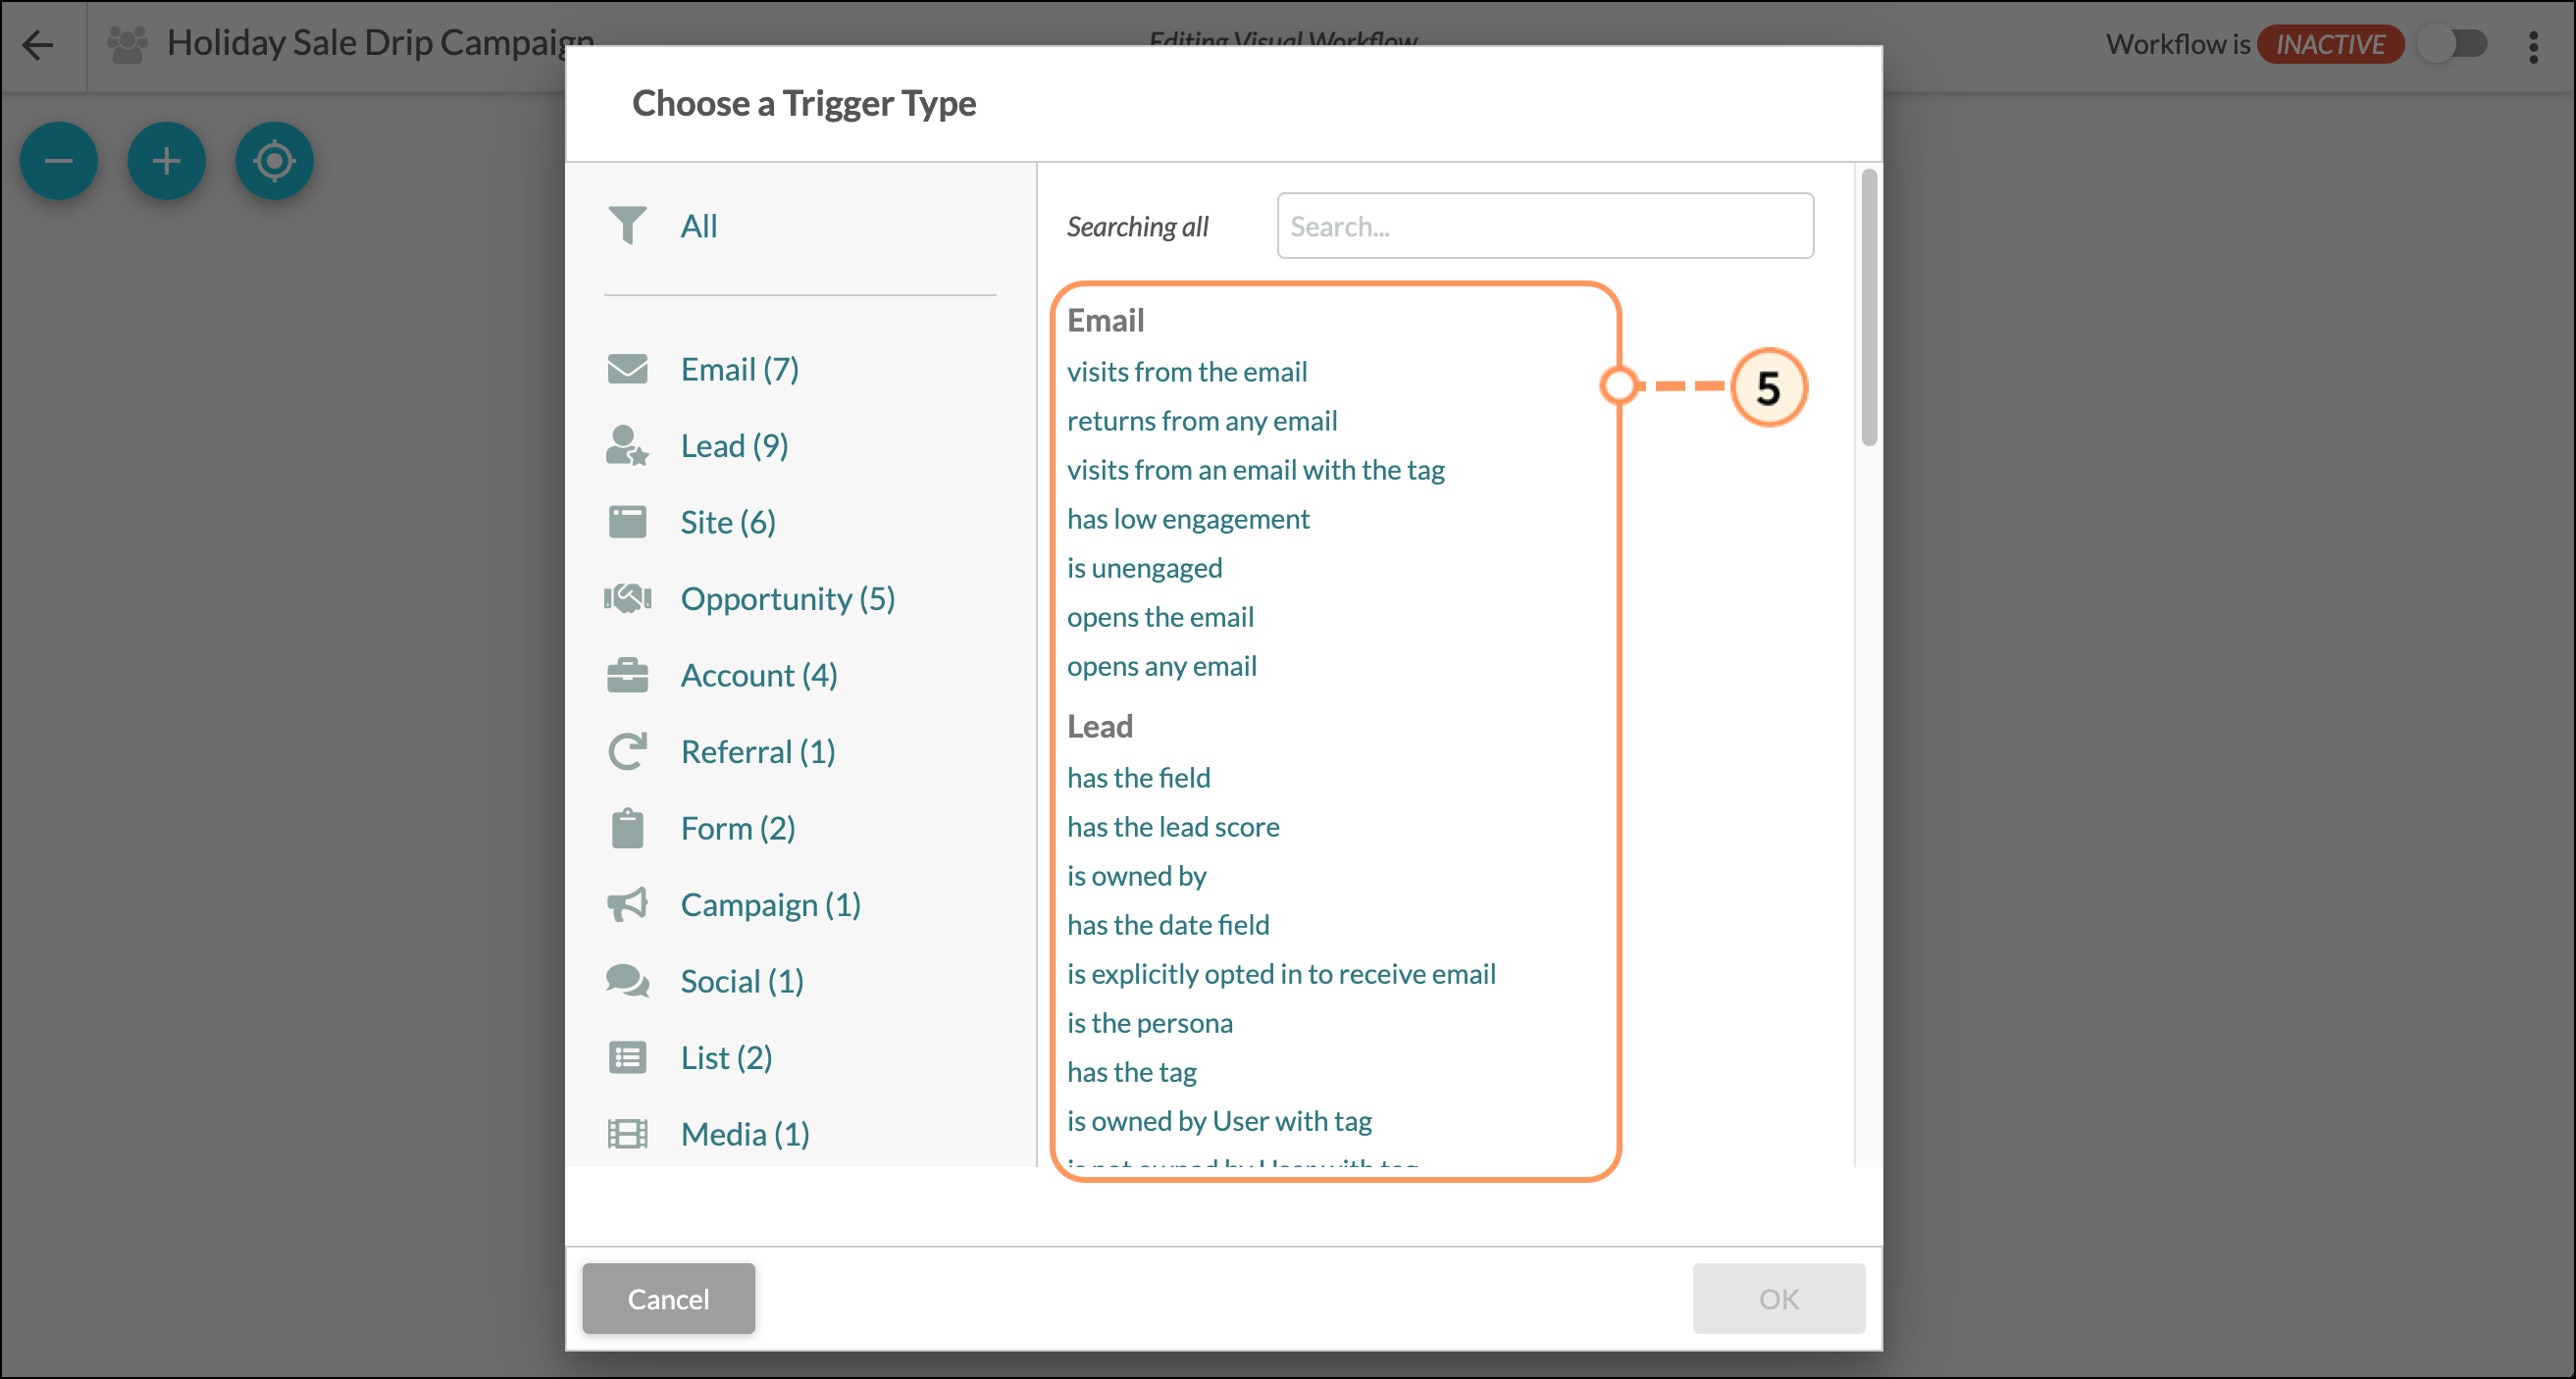
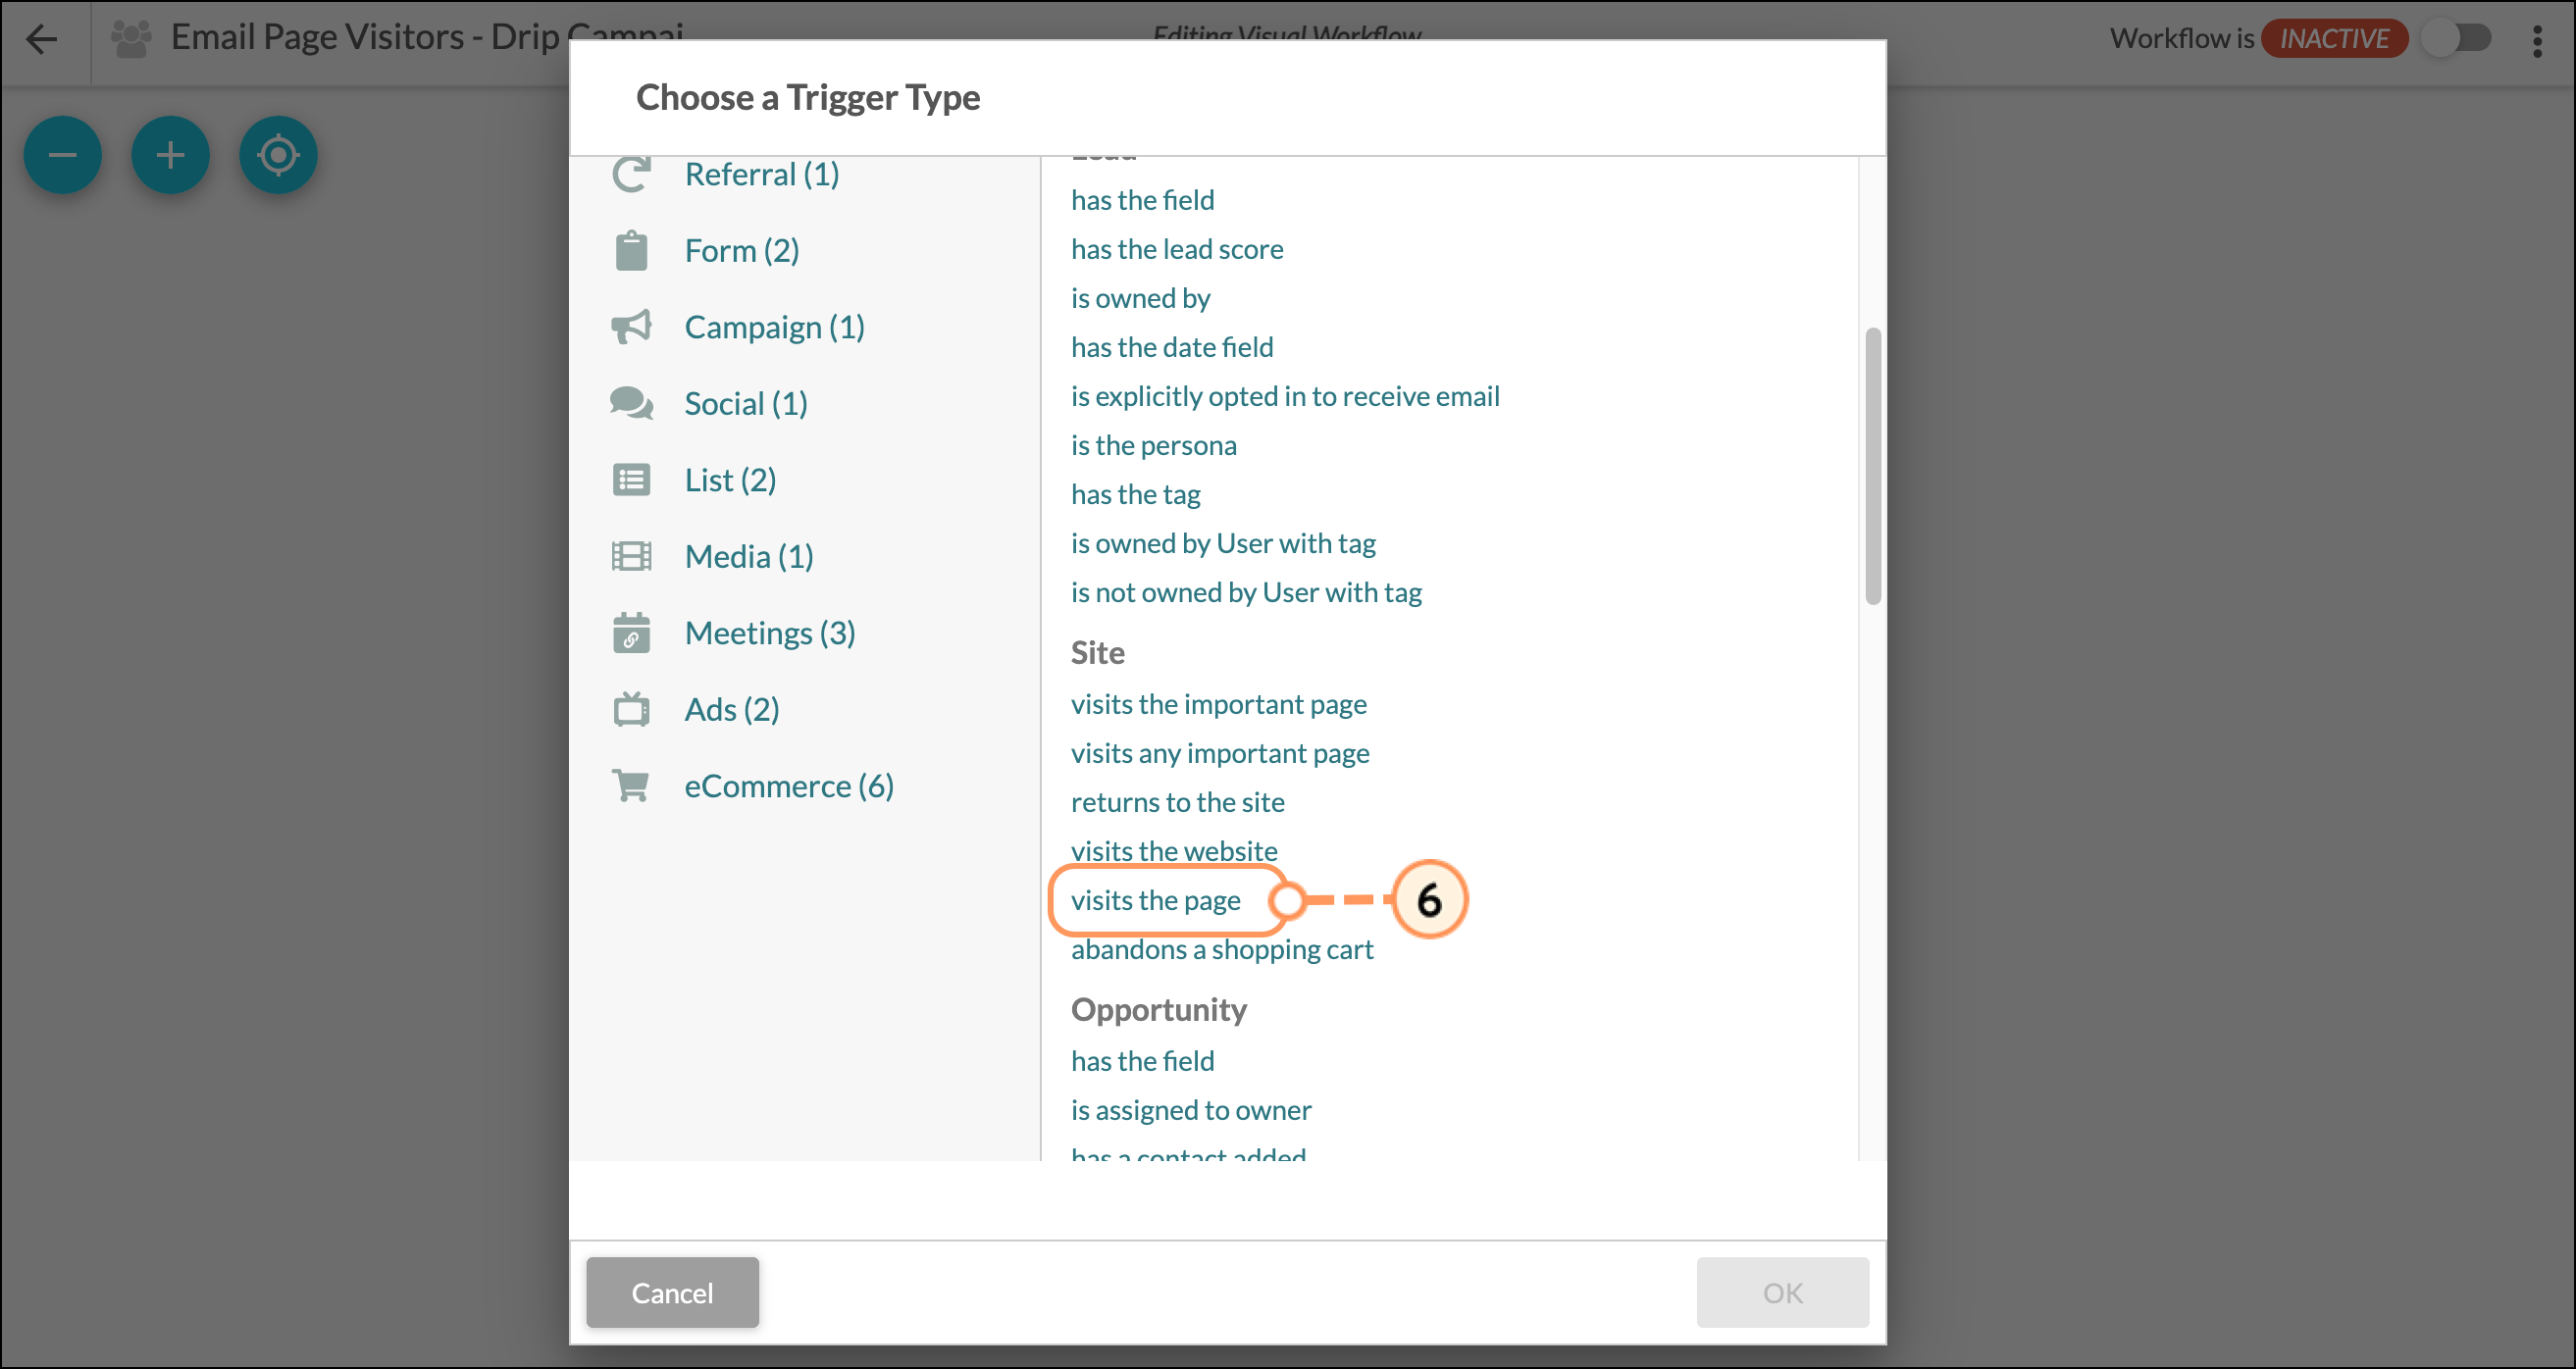
- Select a trigger that can be used to start drip campaigns.
Note: The "Fills out the form" and the "Visits the page" triggers are typically used in drip campaigns include, however, feel free to select the trigger that best fits your workflow.
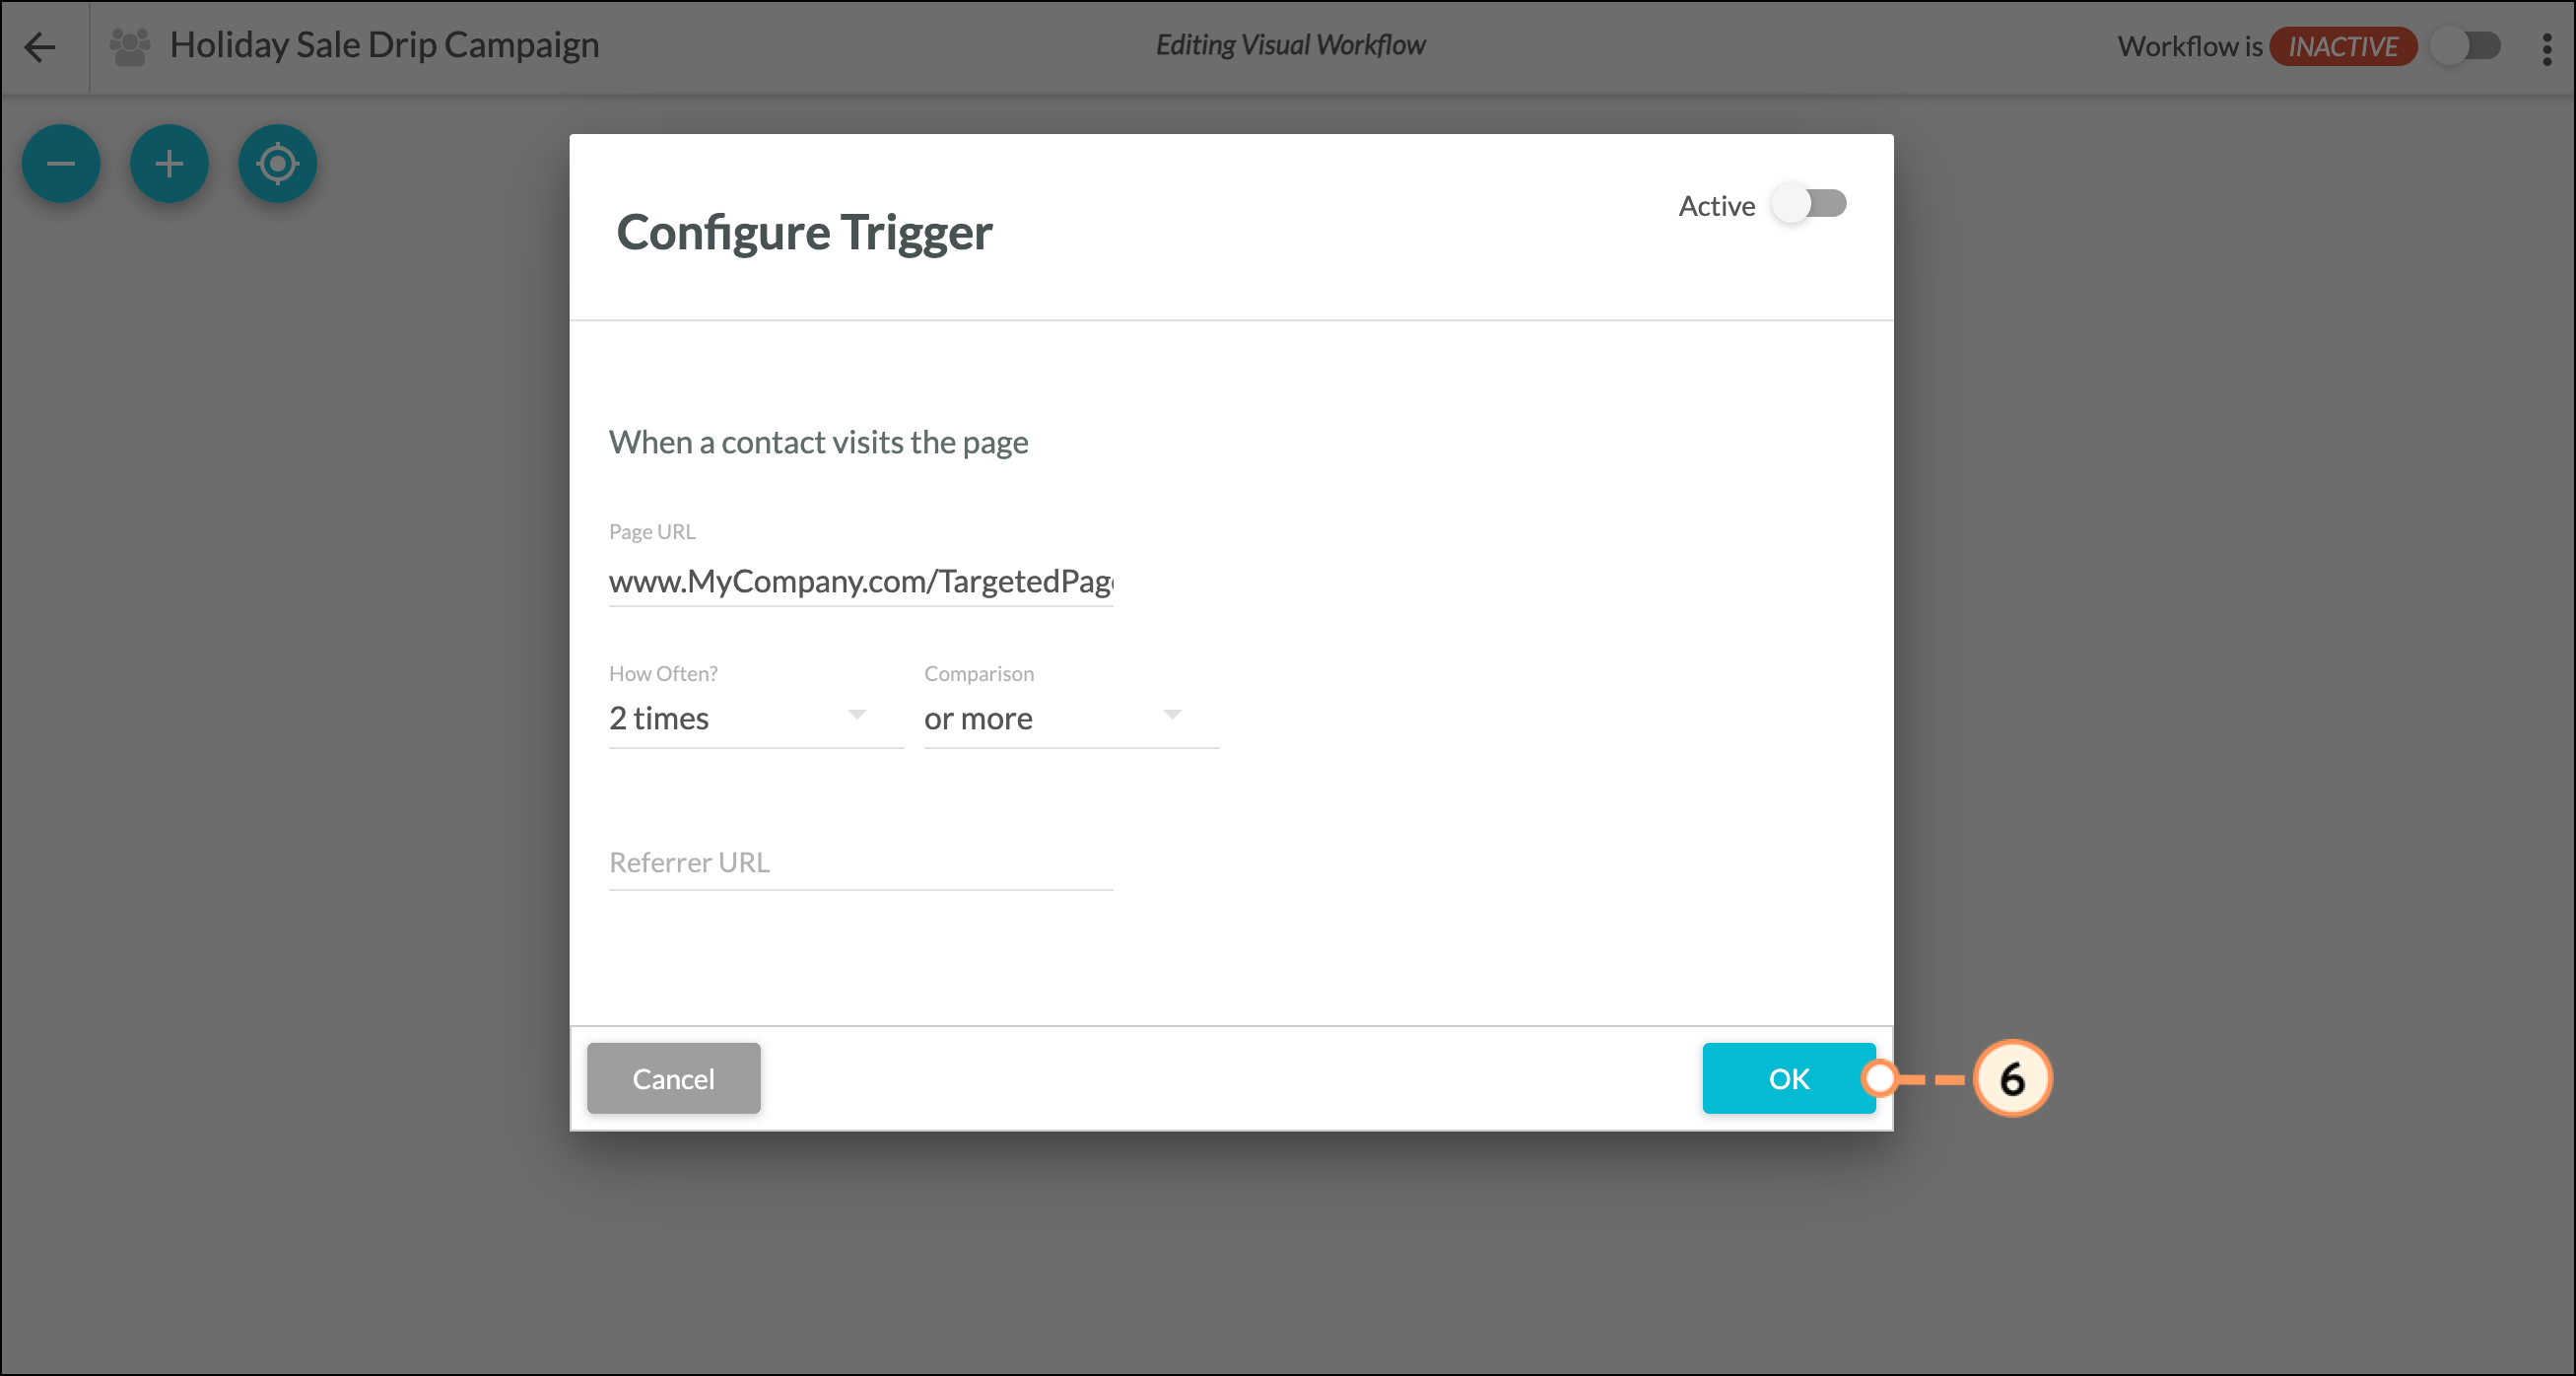
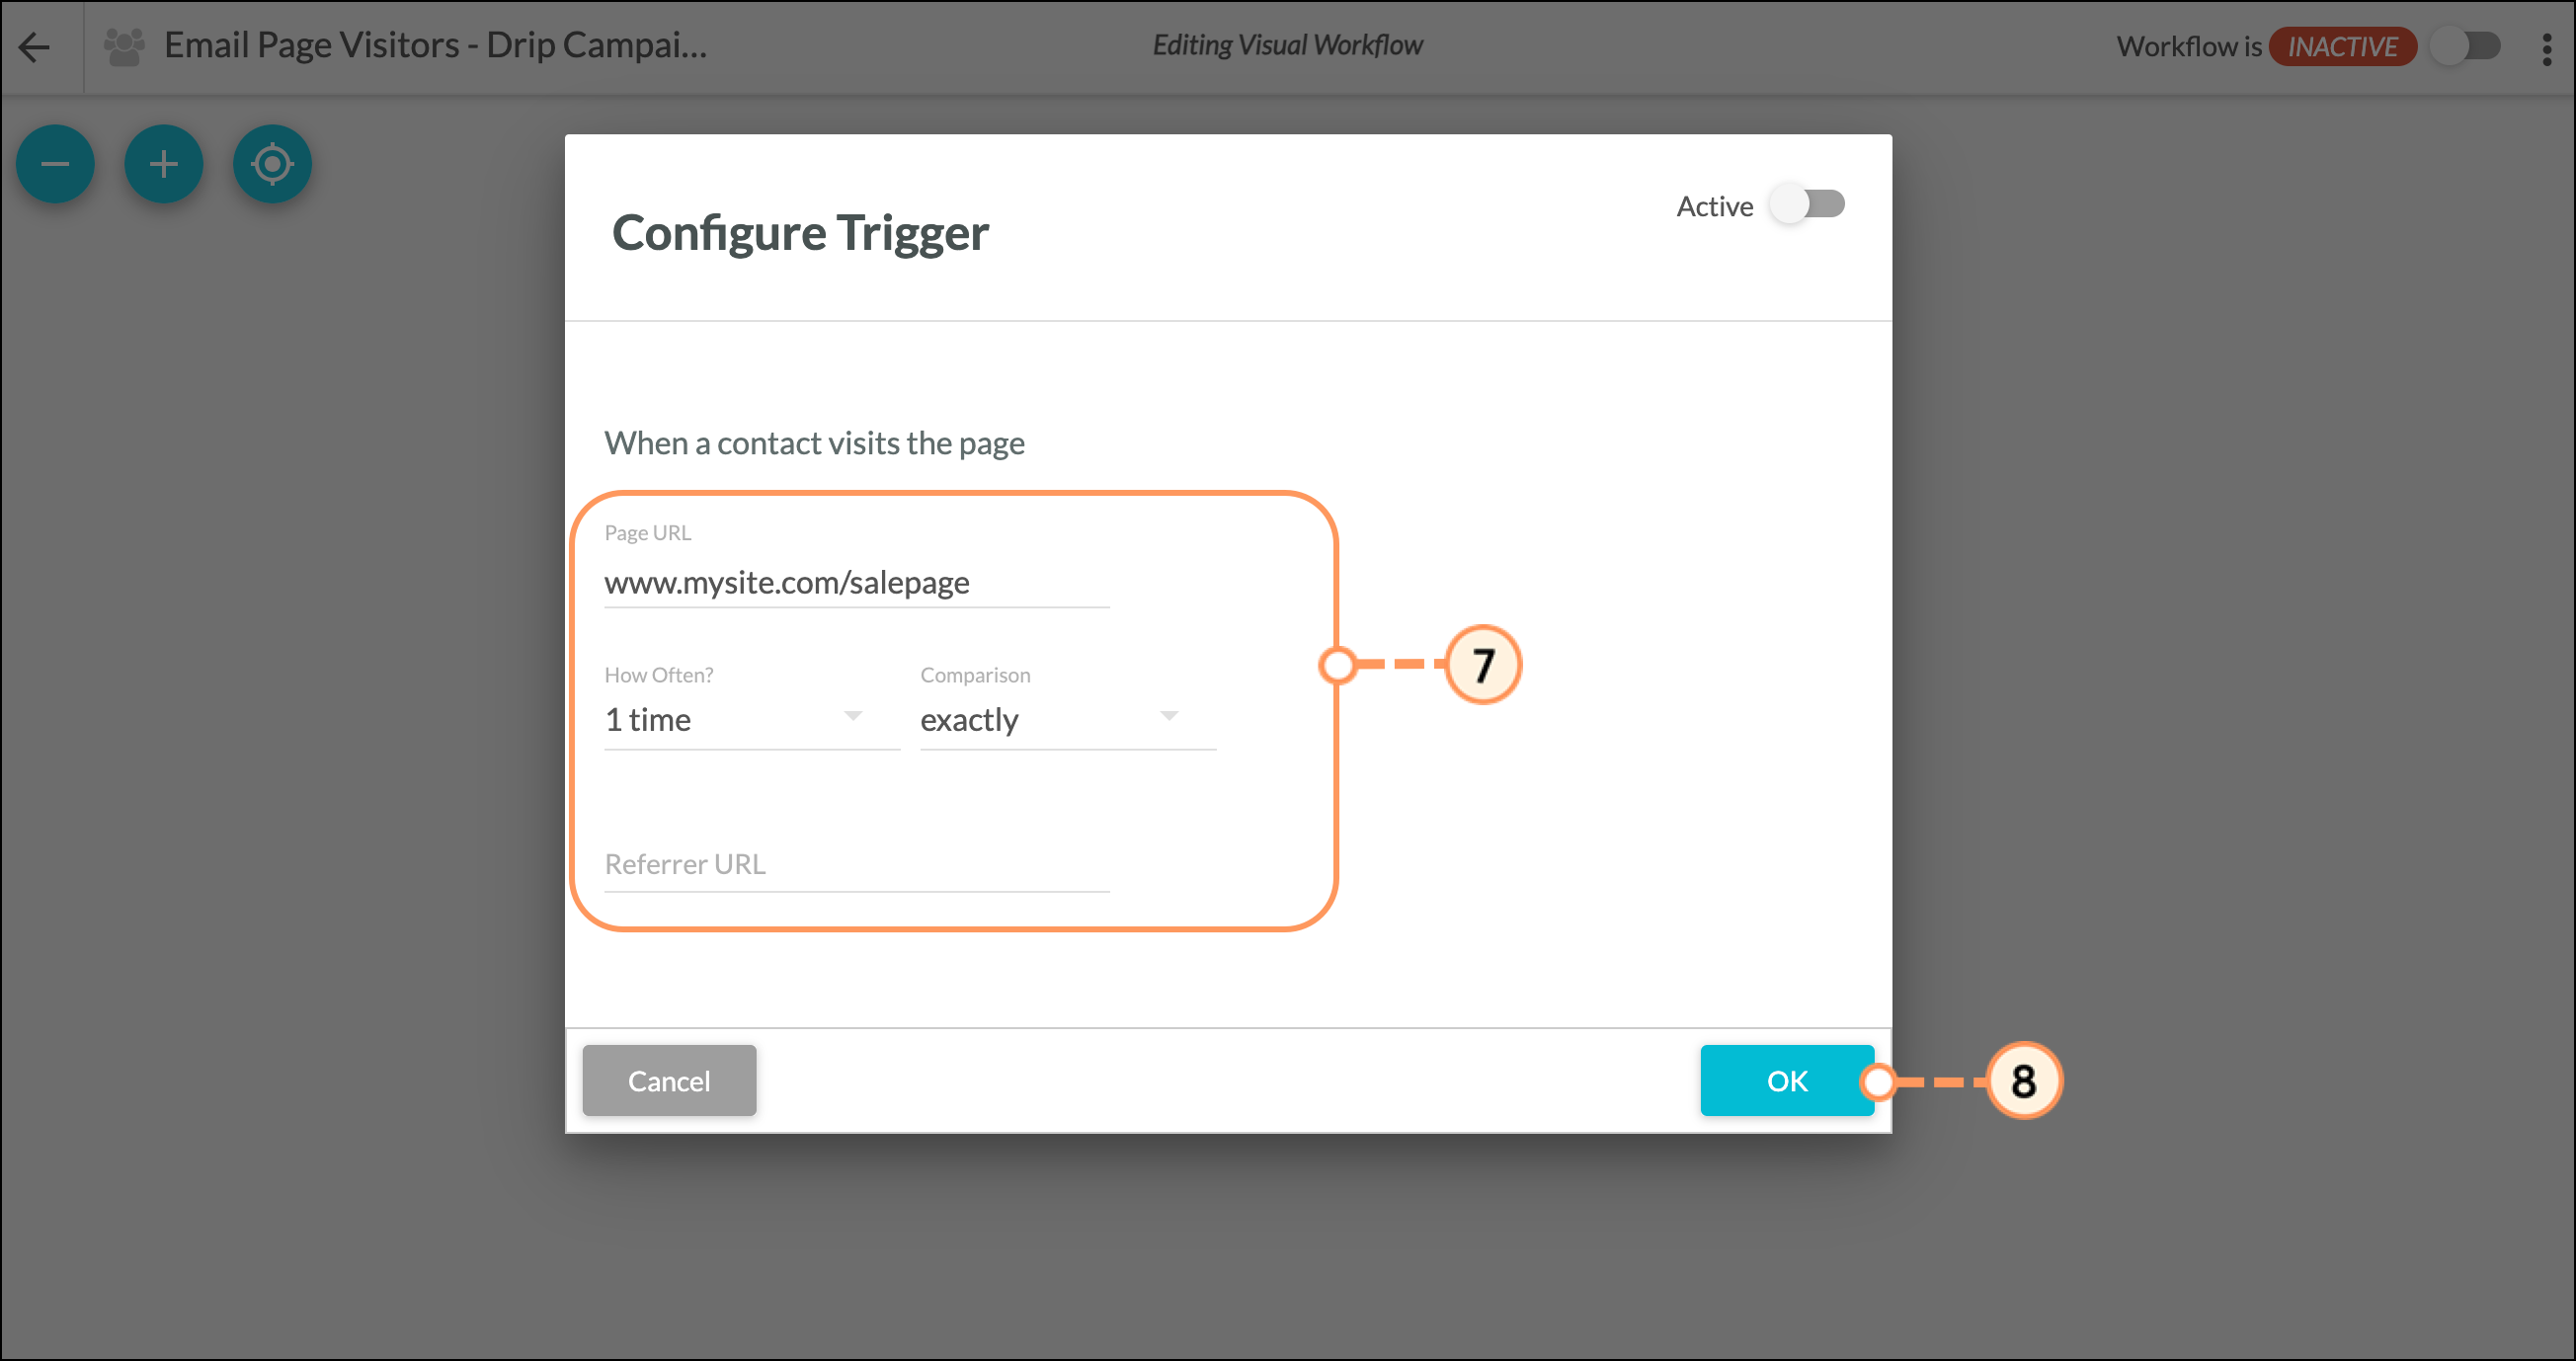
- Enter the necessary information for the trigger and click OK.
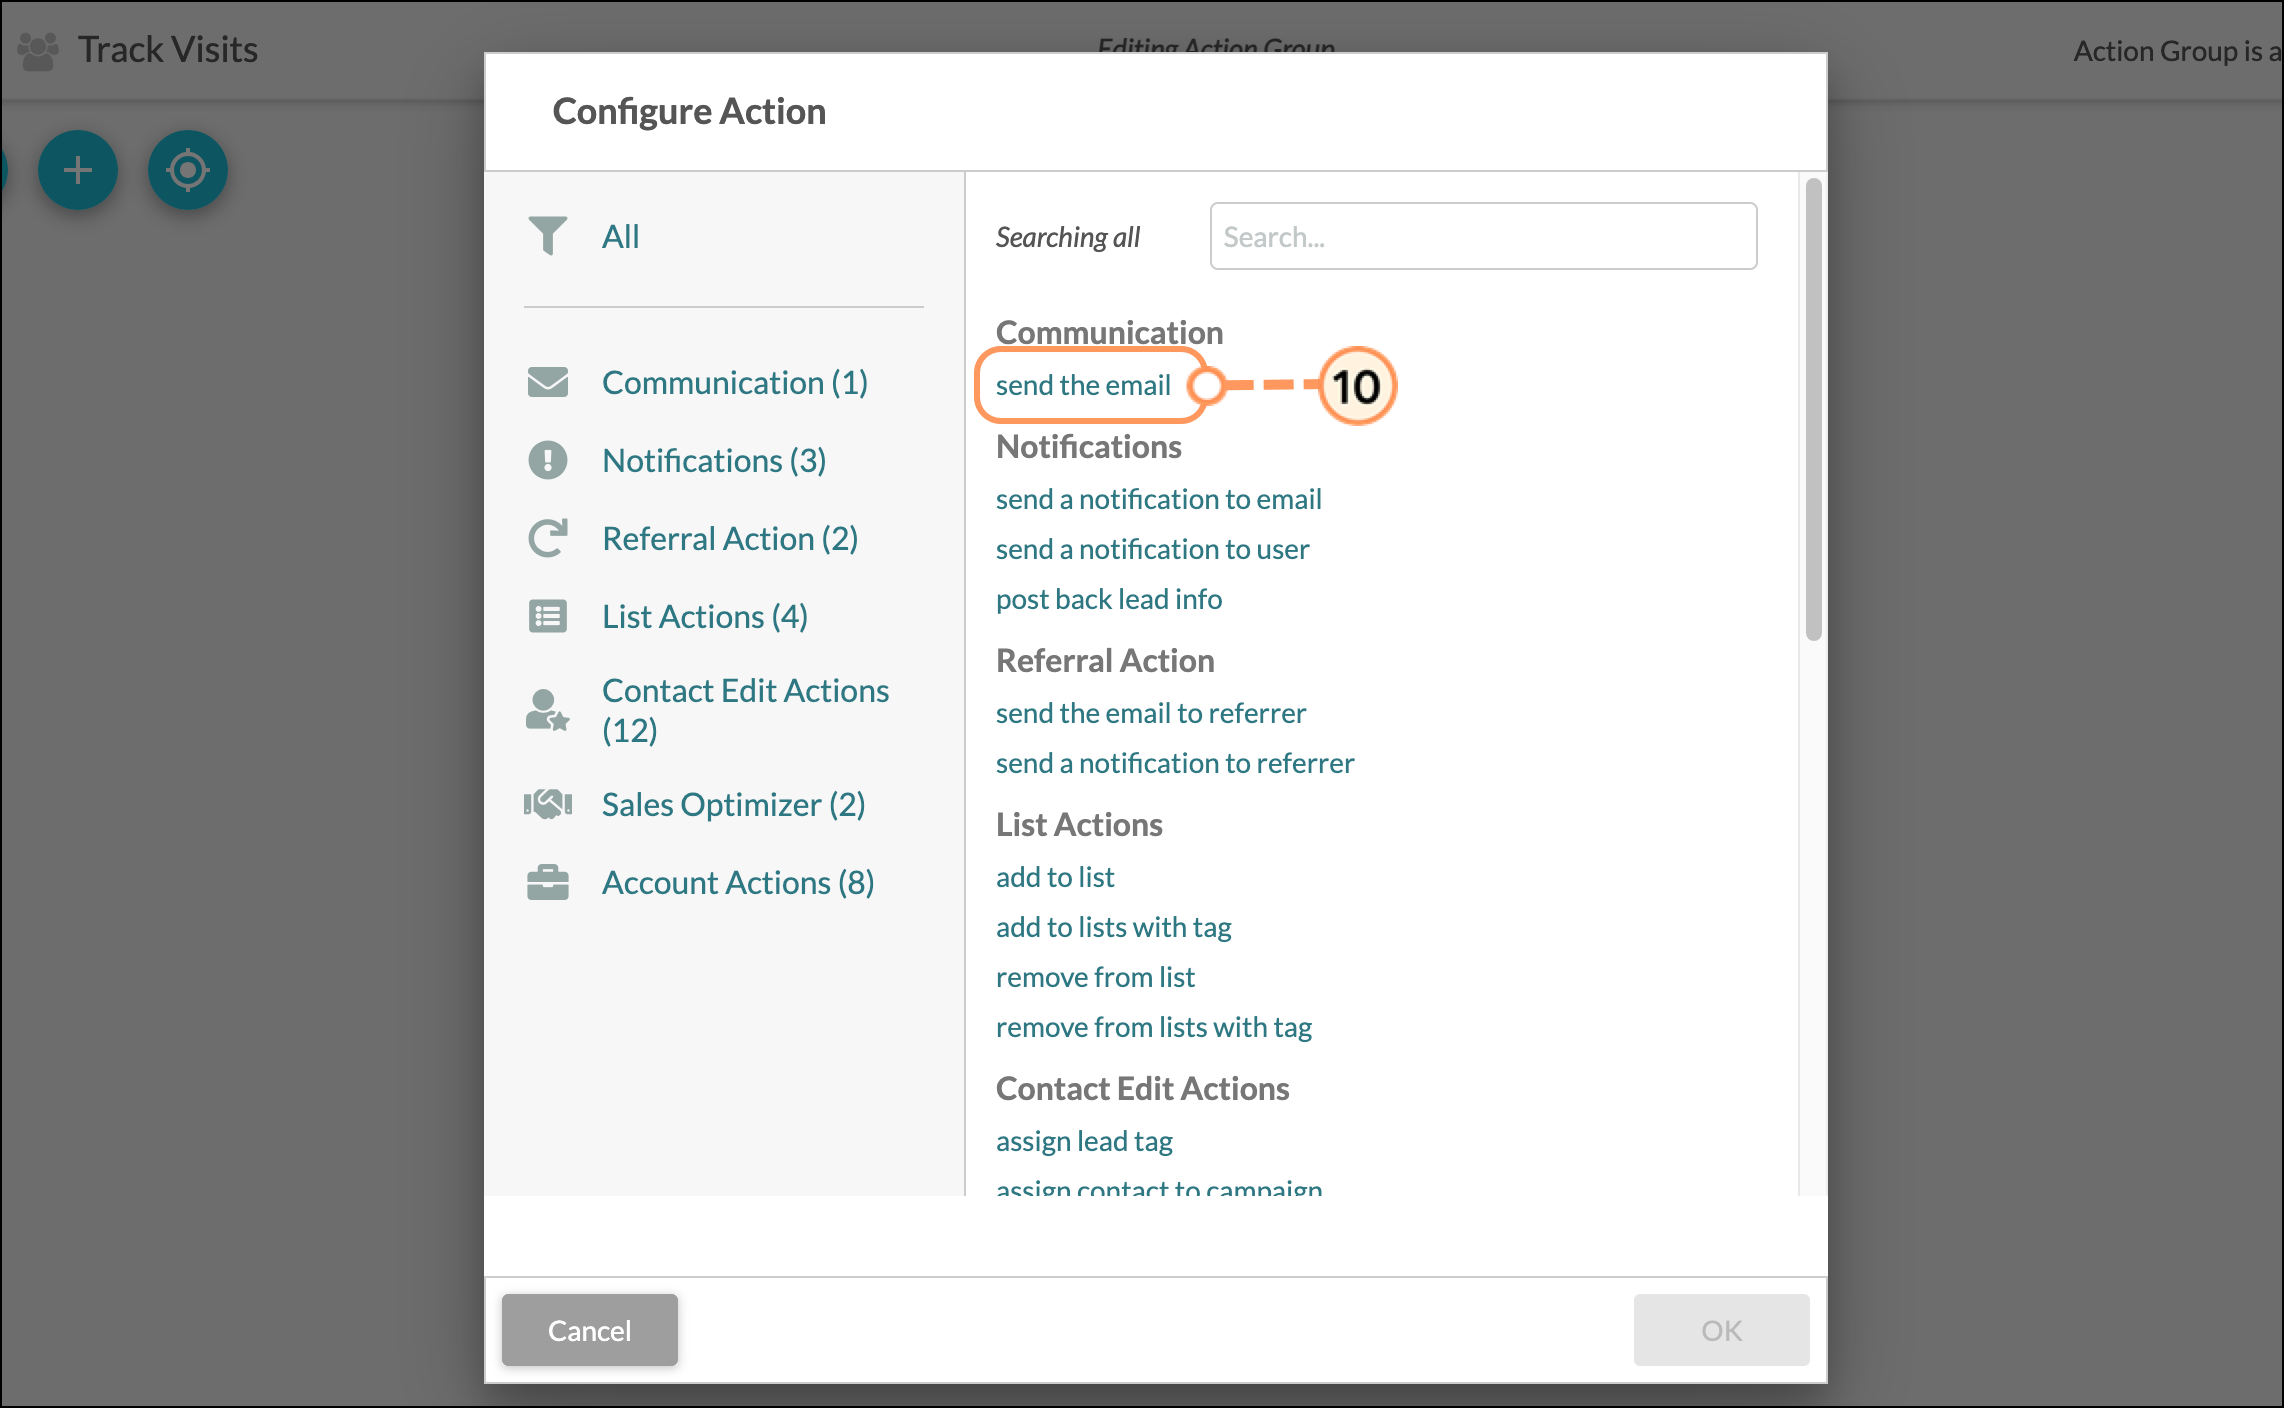
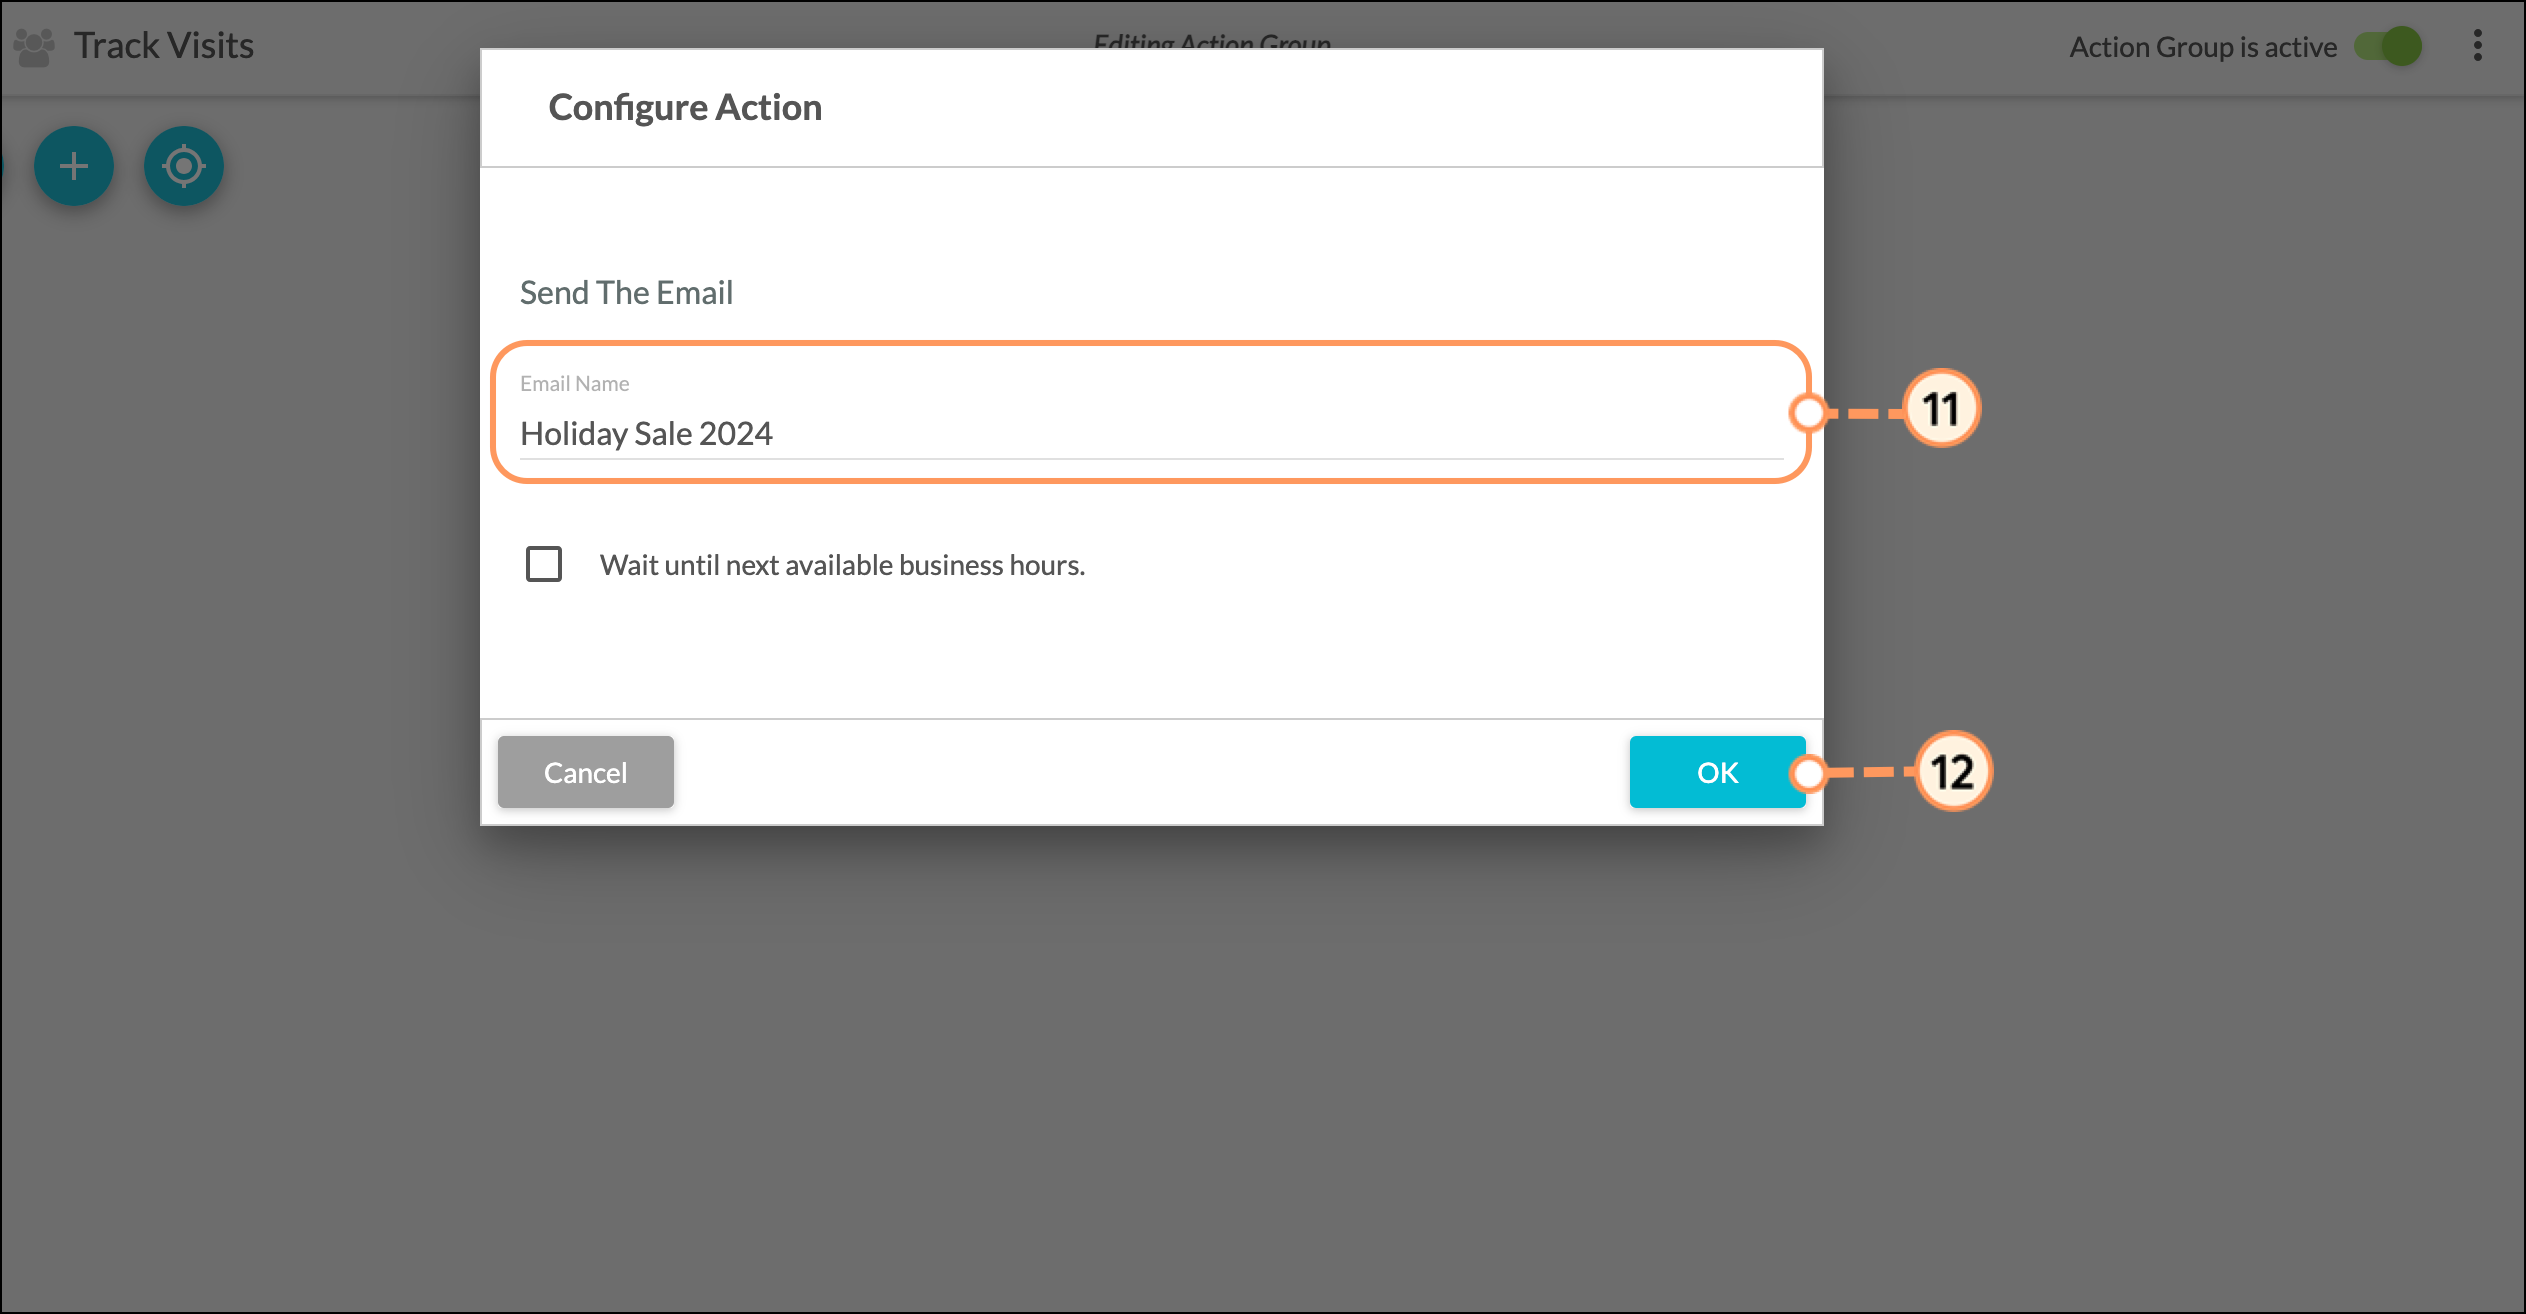
- Now, click + Add > Action to select what happens when your trigger requirement is met.
Note: The "Send the email" action is typically used in drip campaigns, however, feel free to select the action that best fits your workflow.
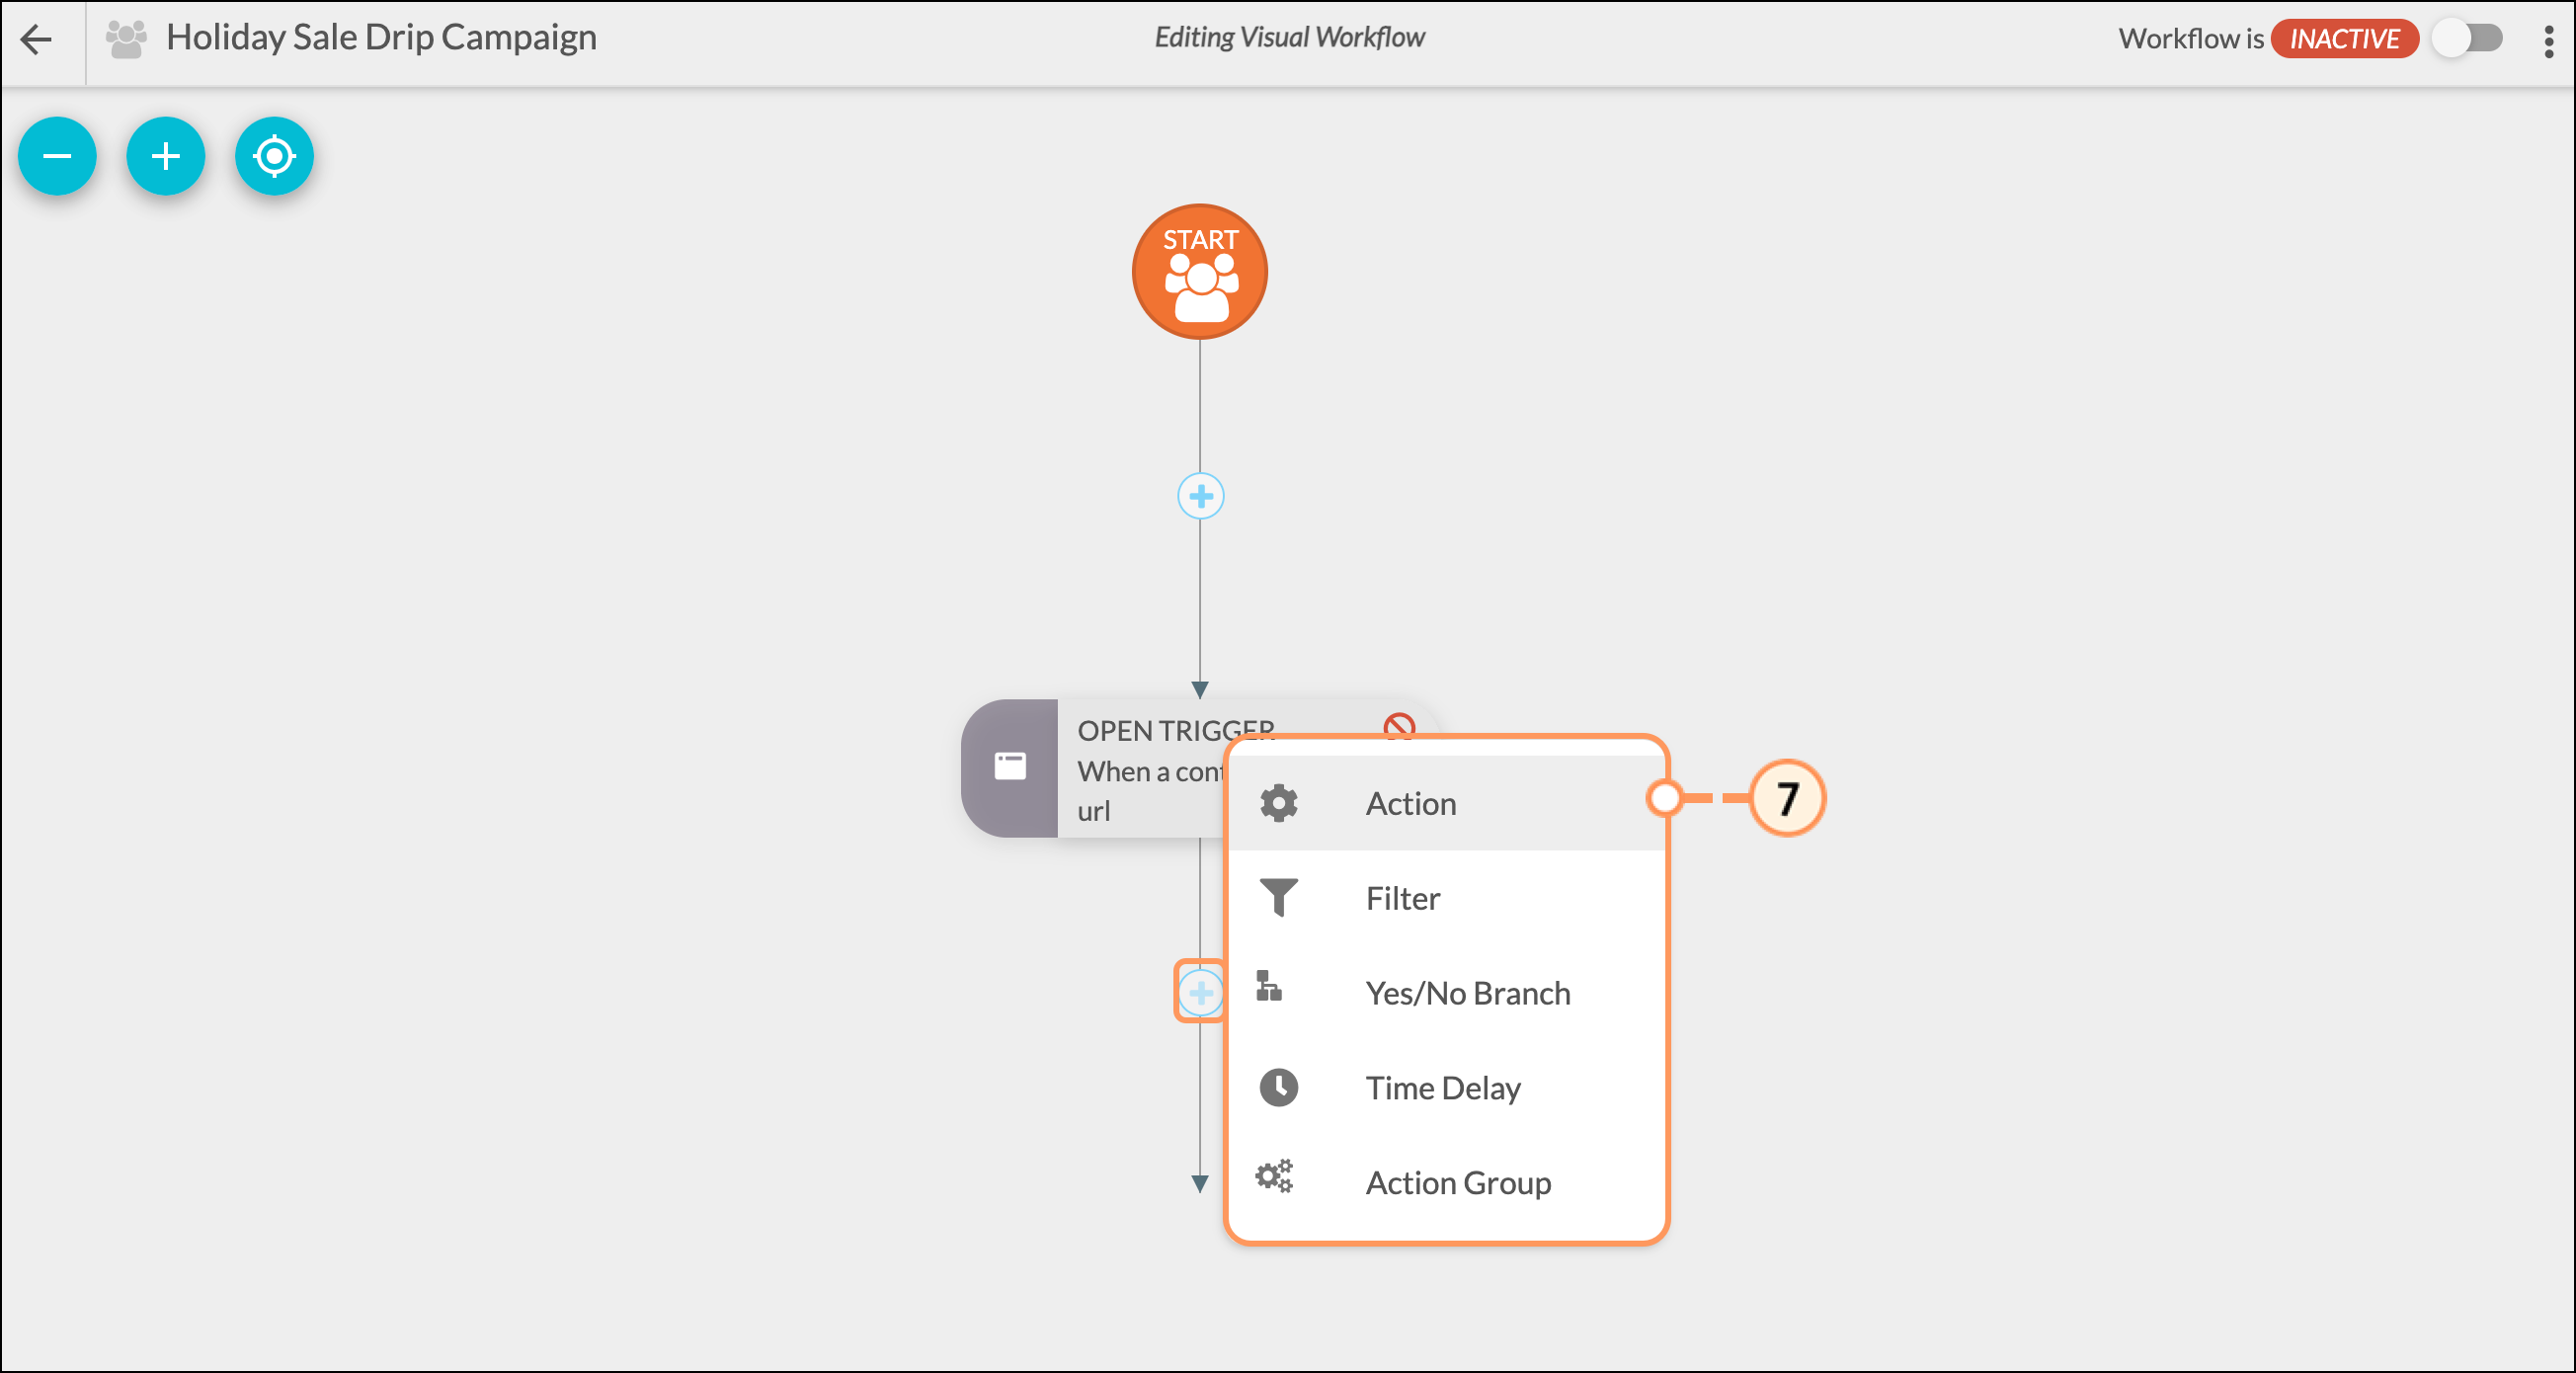
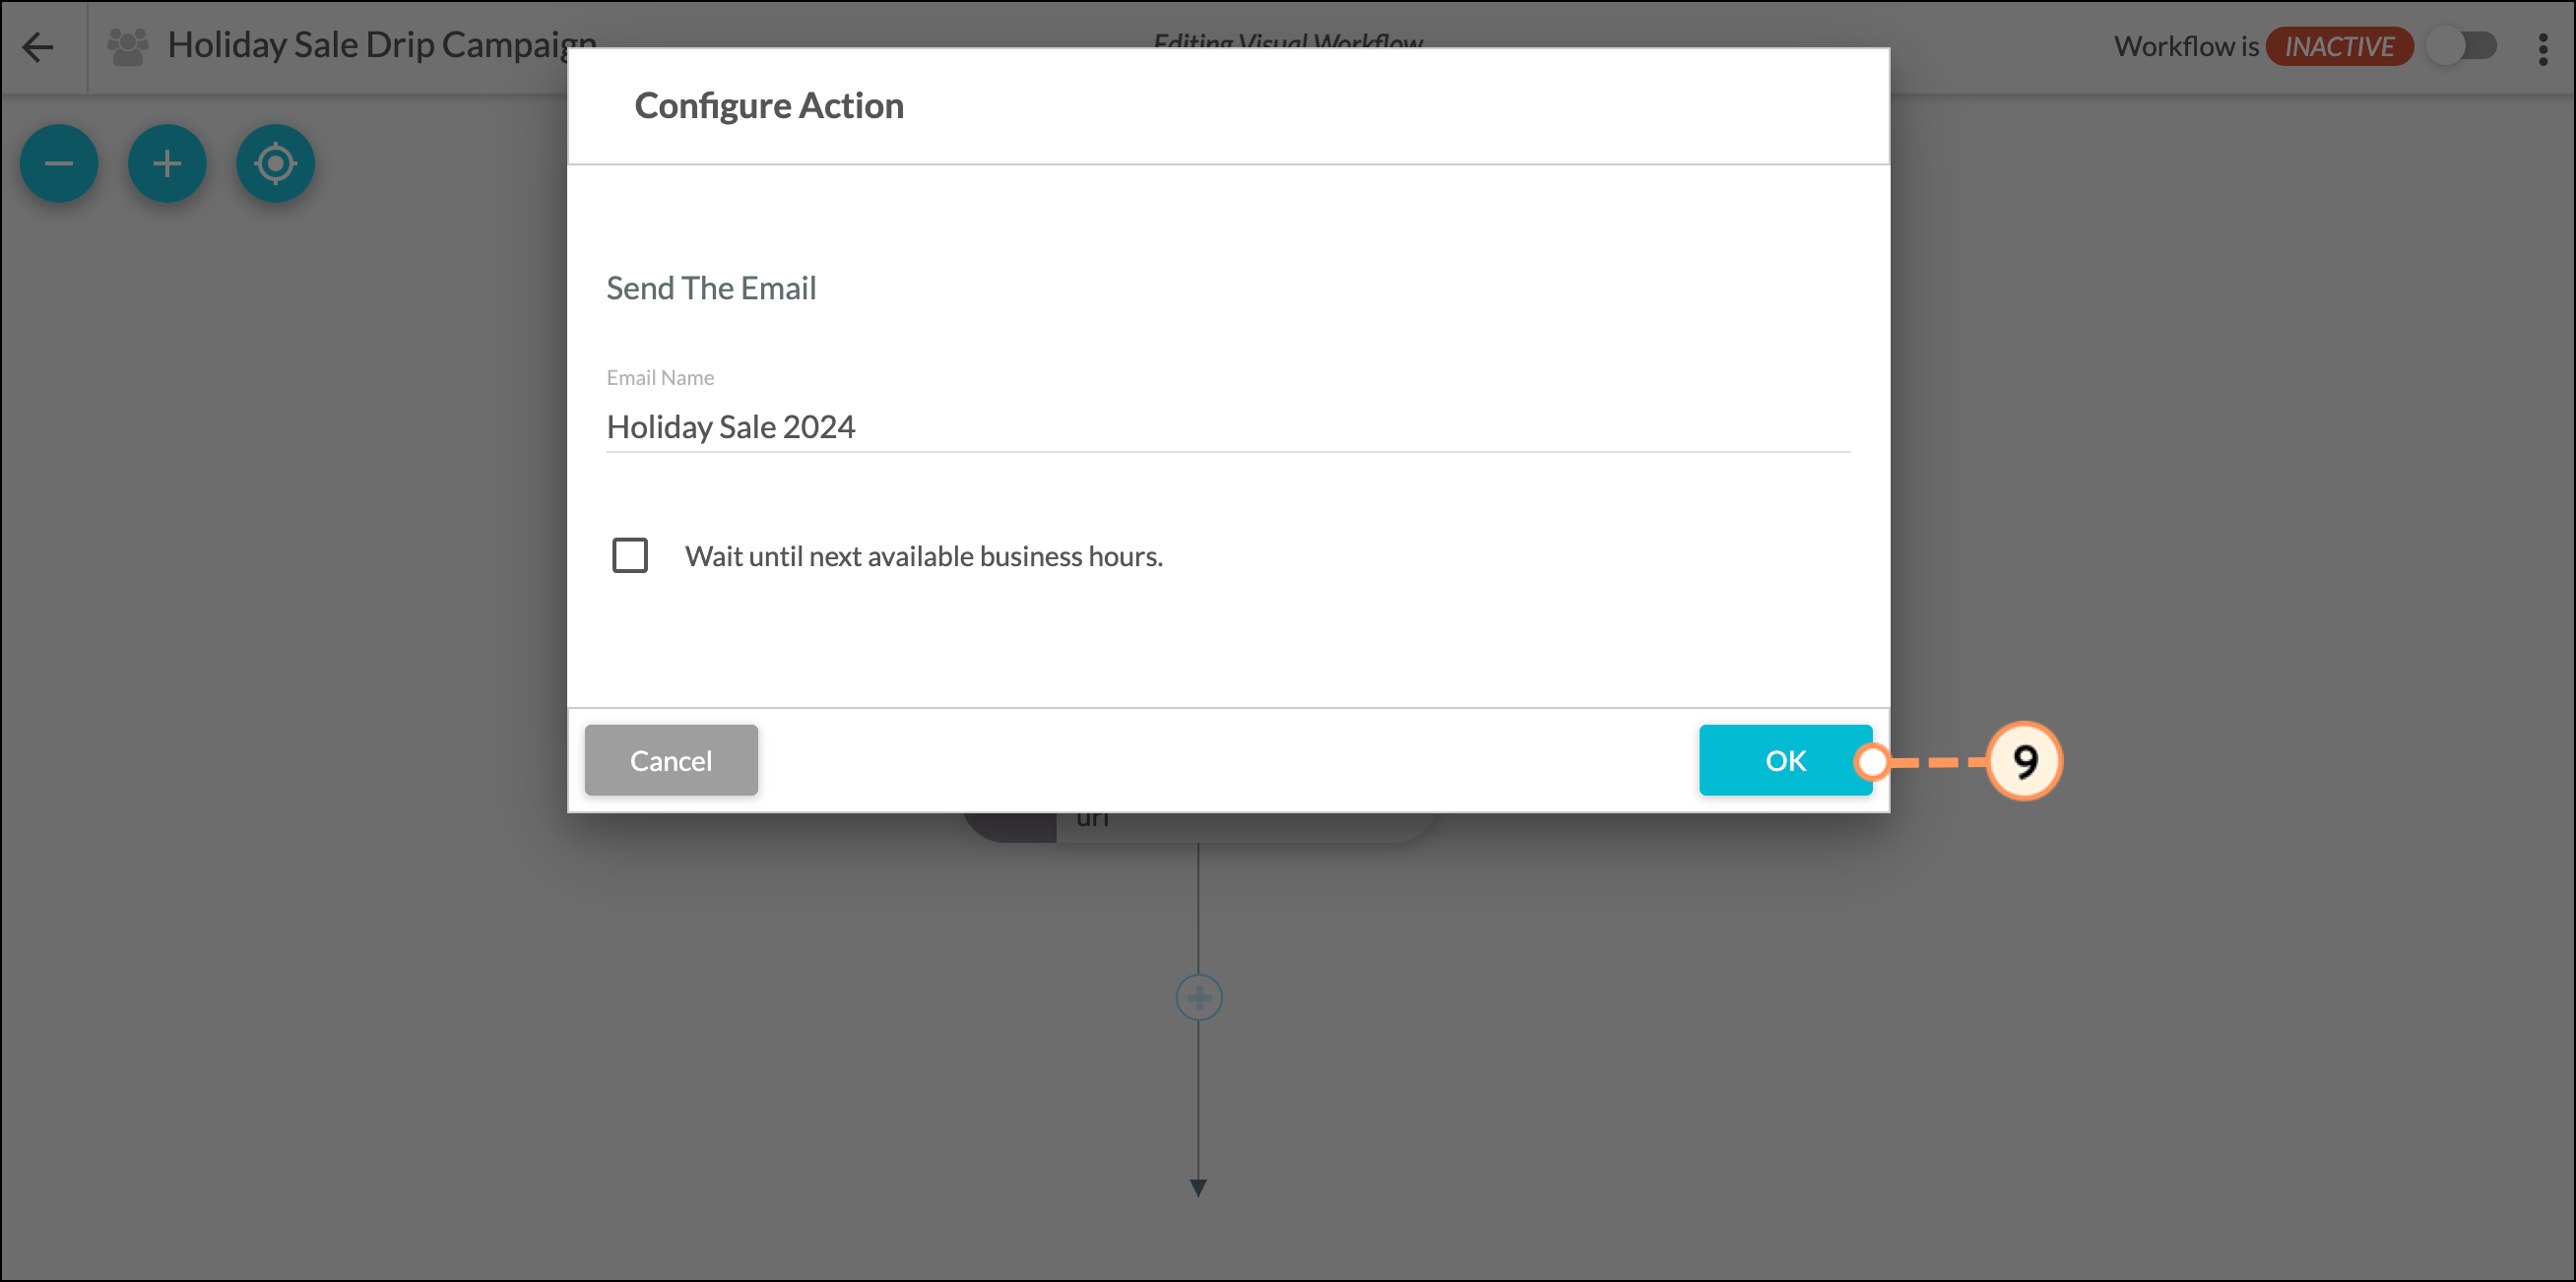
- Select the action that will fire to send your drip campaigns.
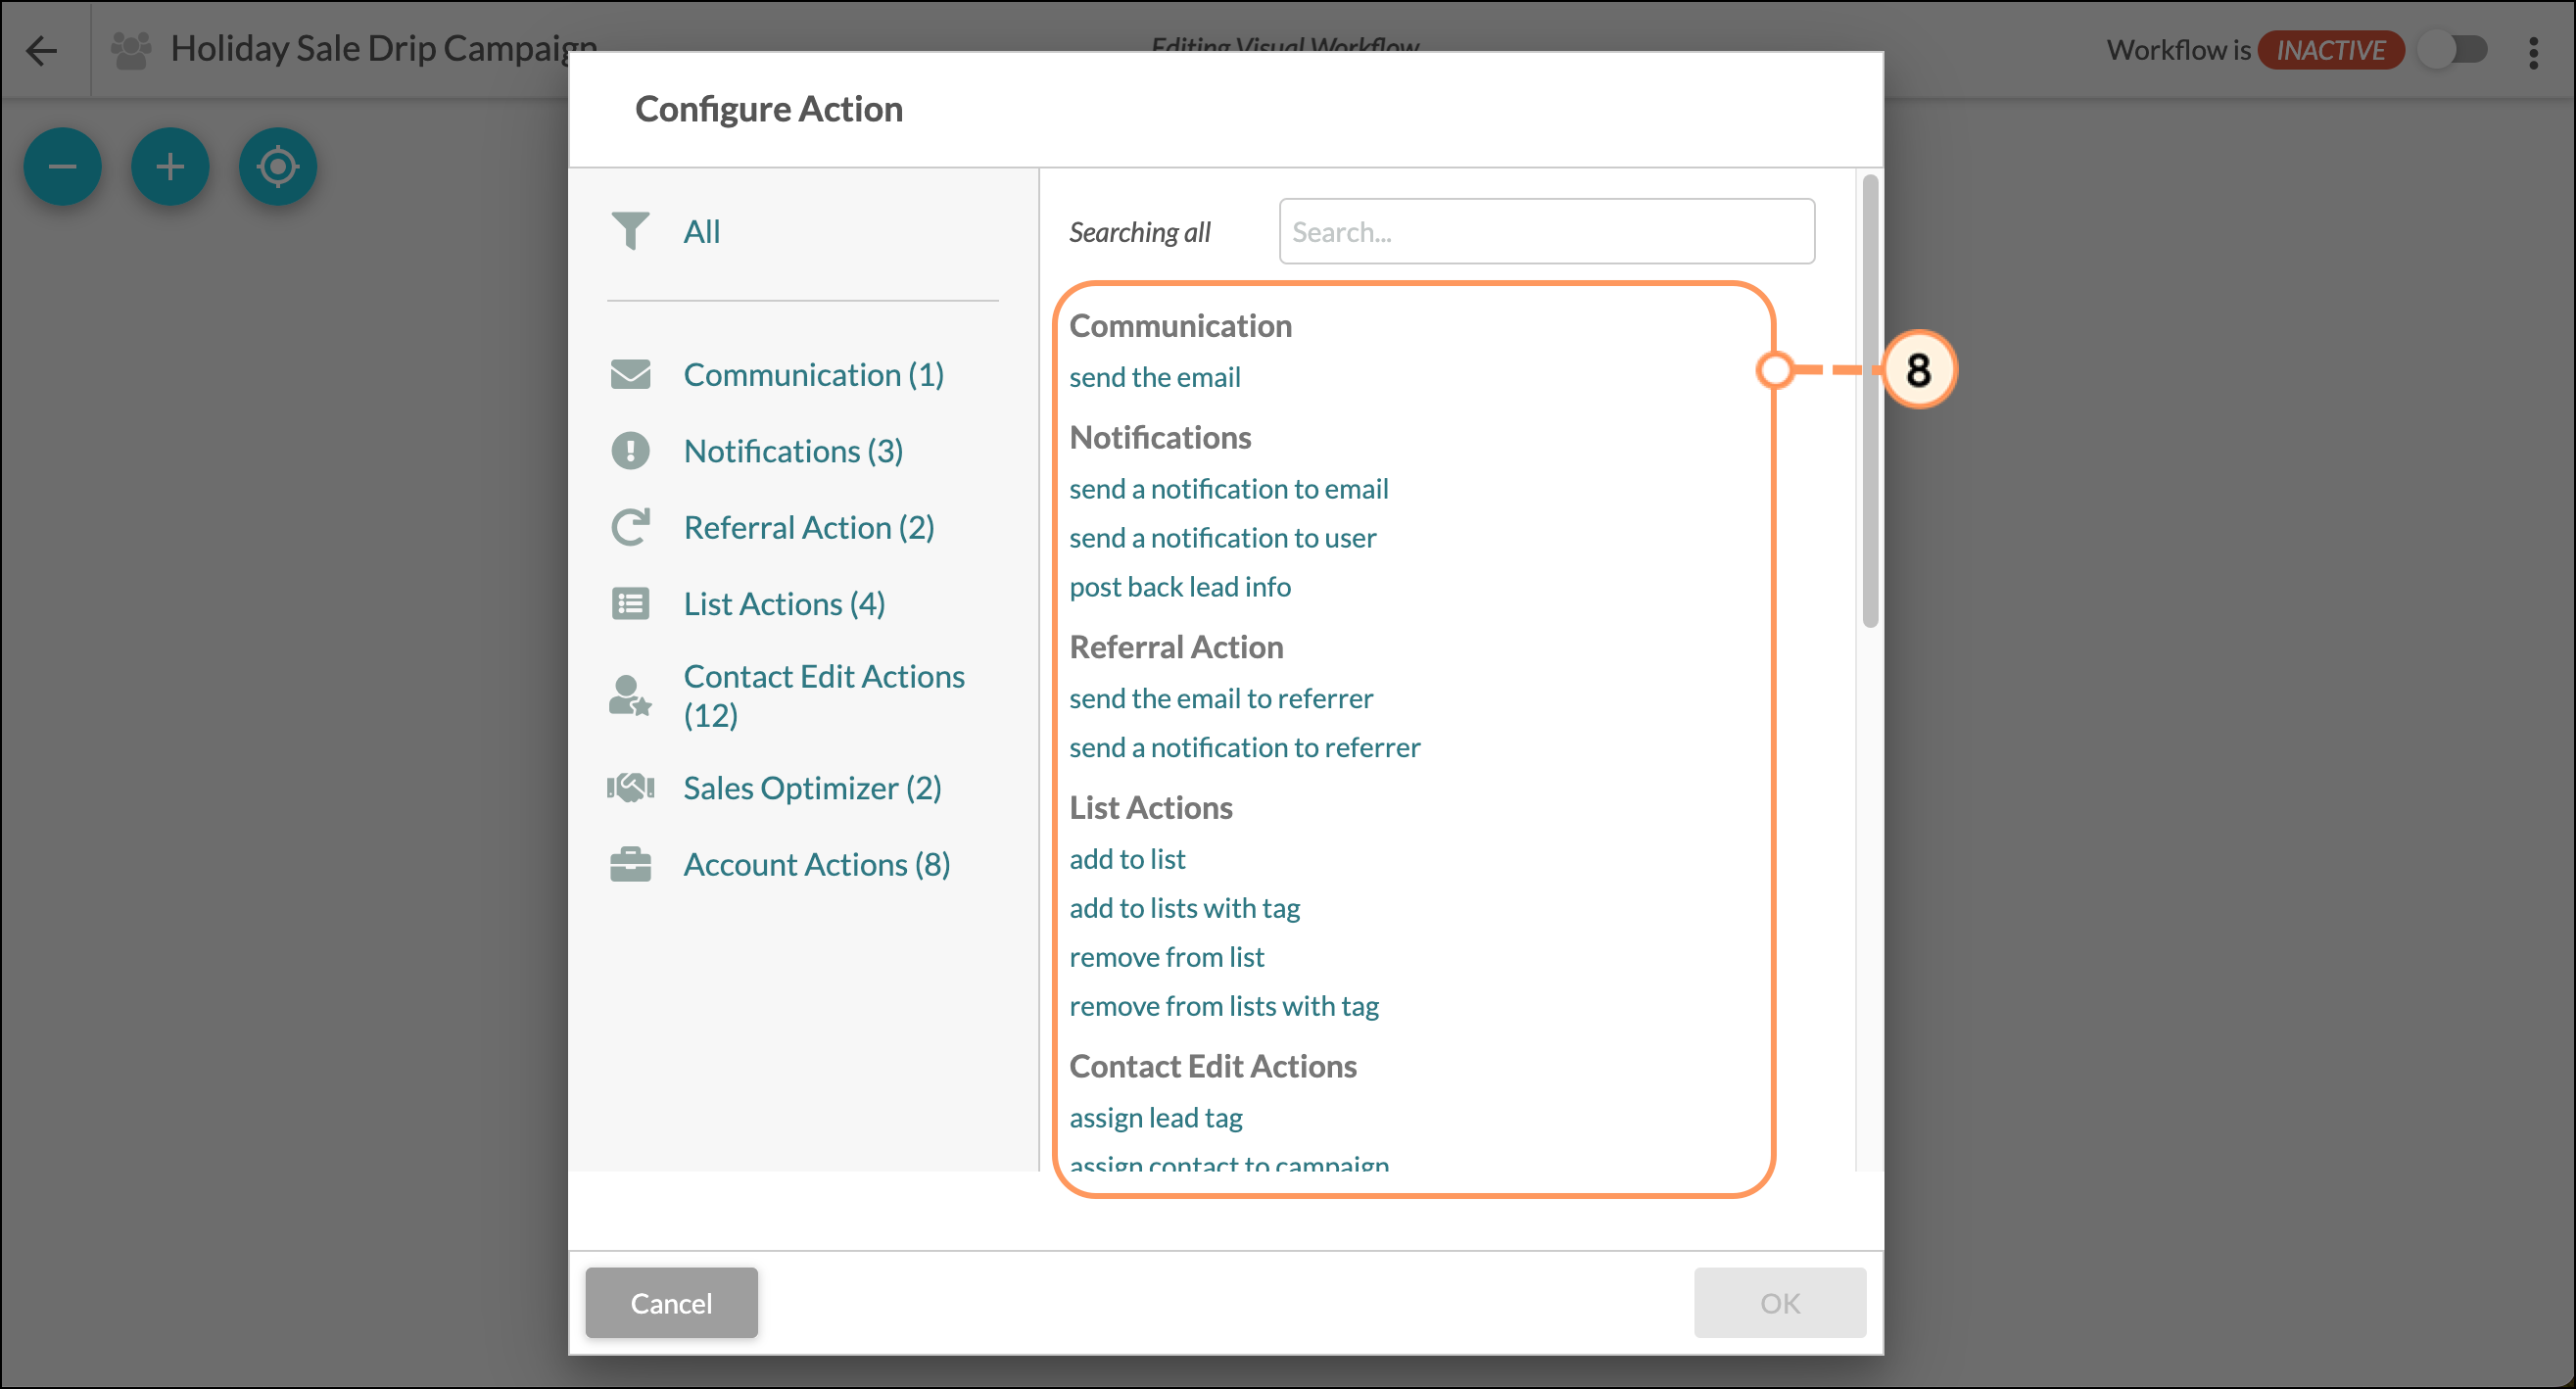
- Enter the action details and click OK.
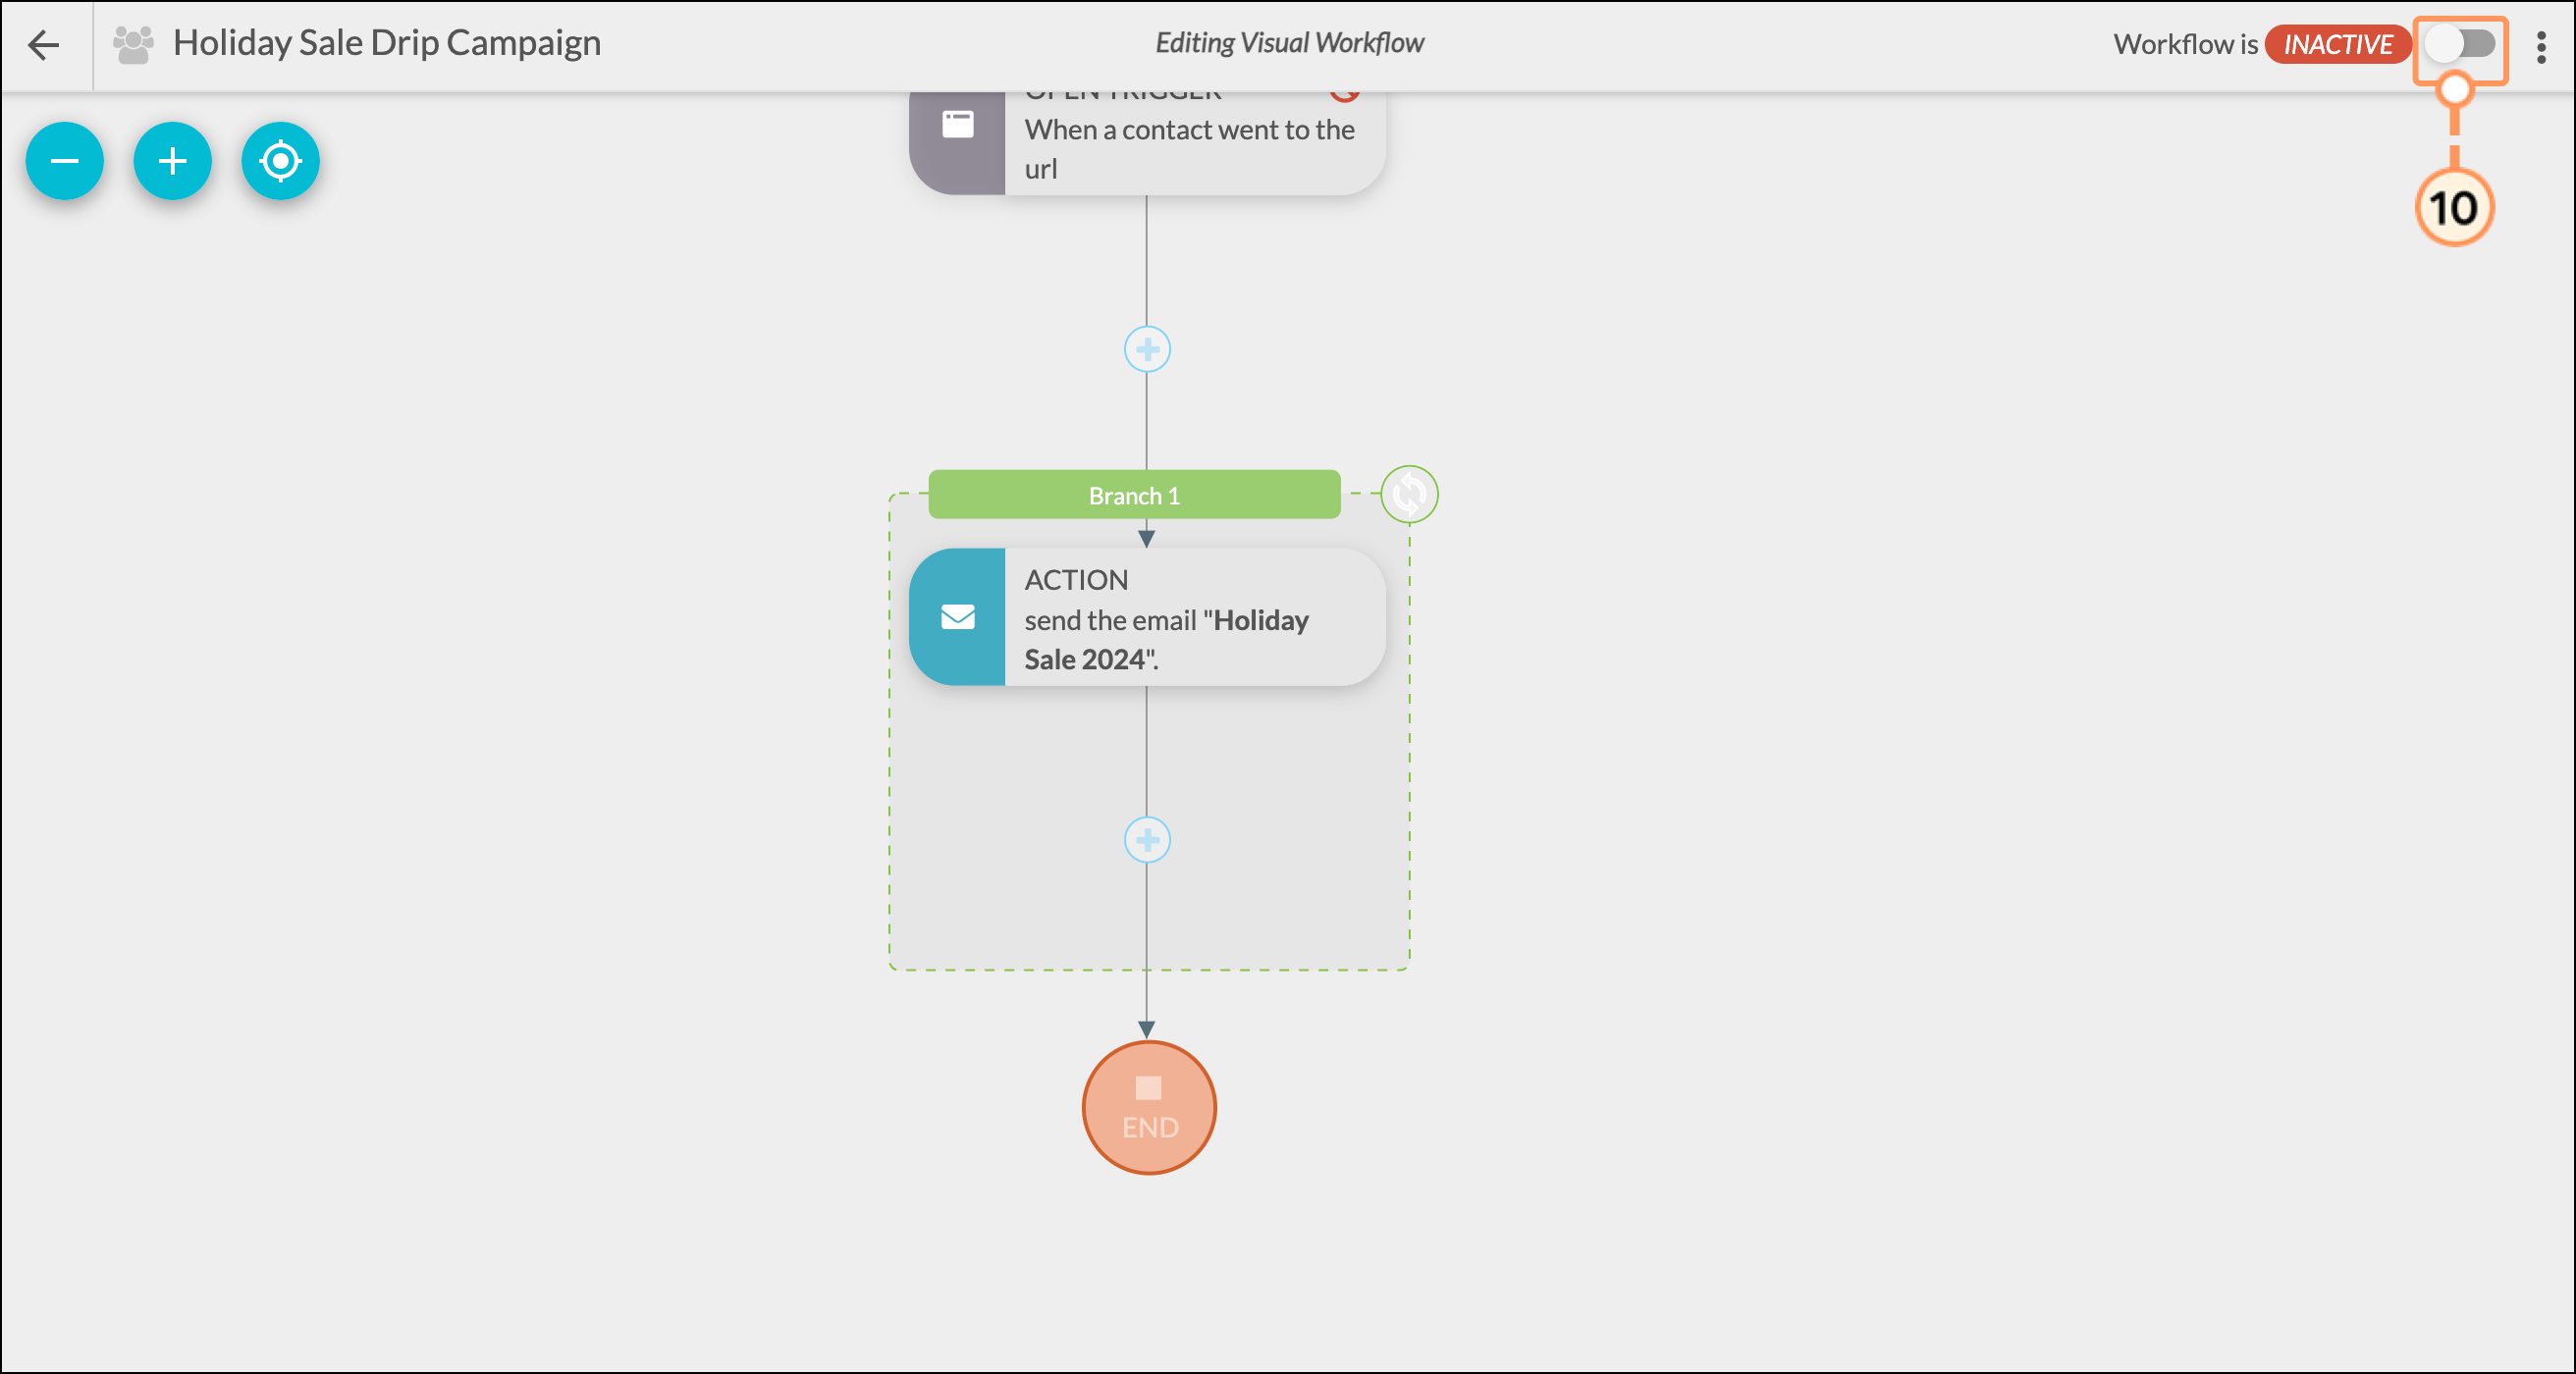
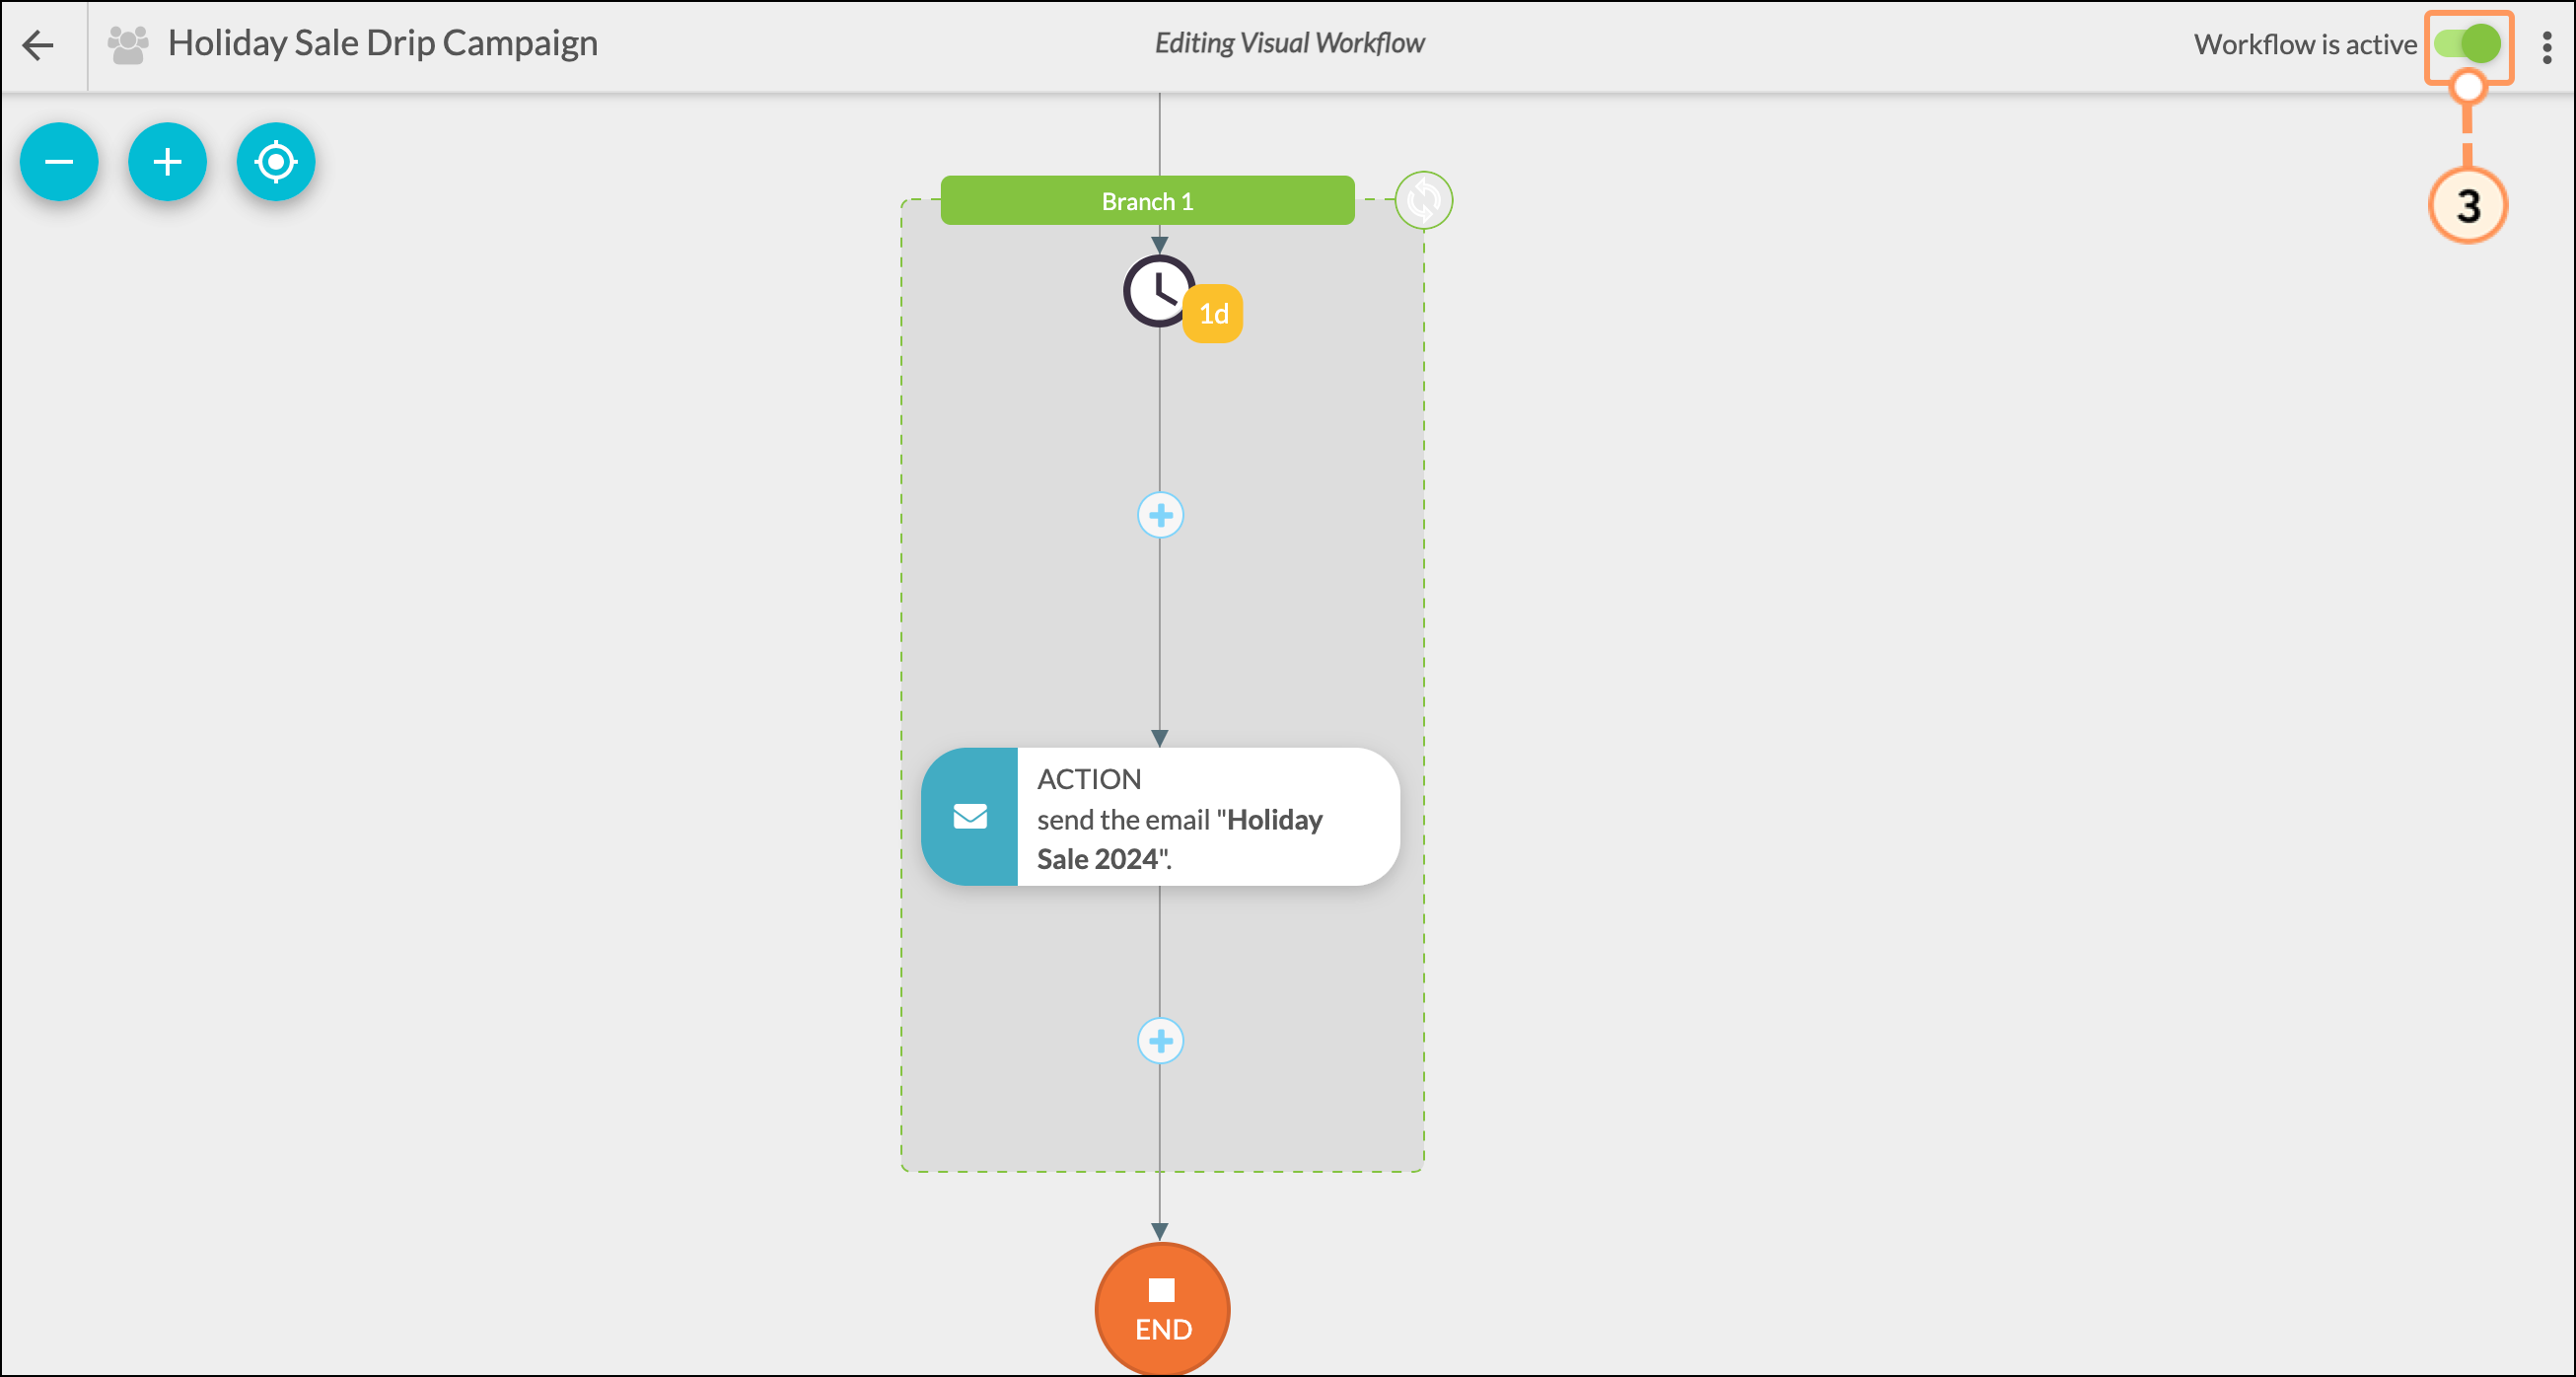
- Add actions and triggers as needed and, when finished, activate the workflow.
In this case, you've created a workflow that automates an email send based on the chosen trigger. For more effective drip campaigns, modify and personalize your workflow by adding filters and time delays. Keep reading, to learn more about adding filters, additional actions, and time delays.
Refer to Creating Visual Workflows for more information on building visual workflows.
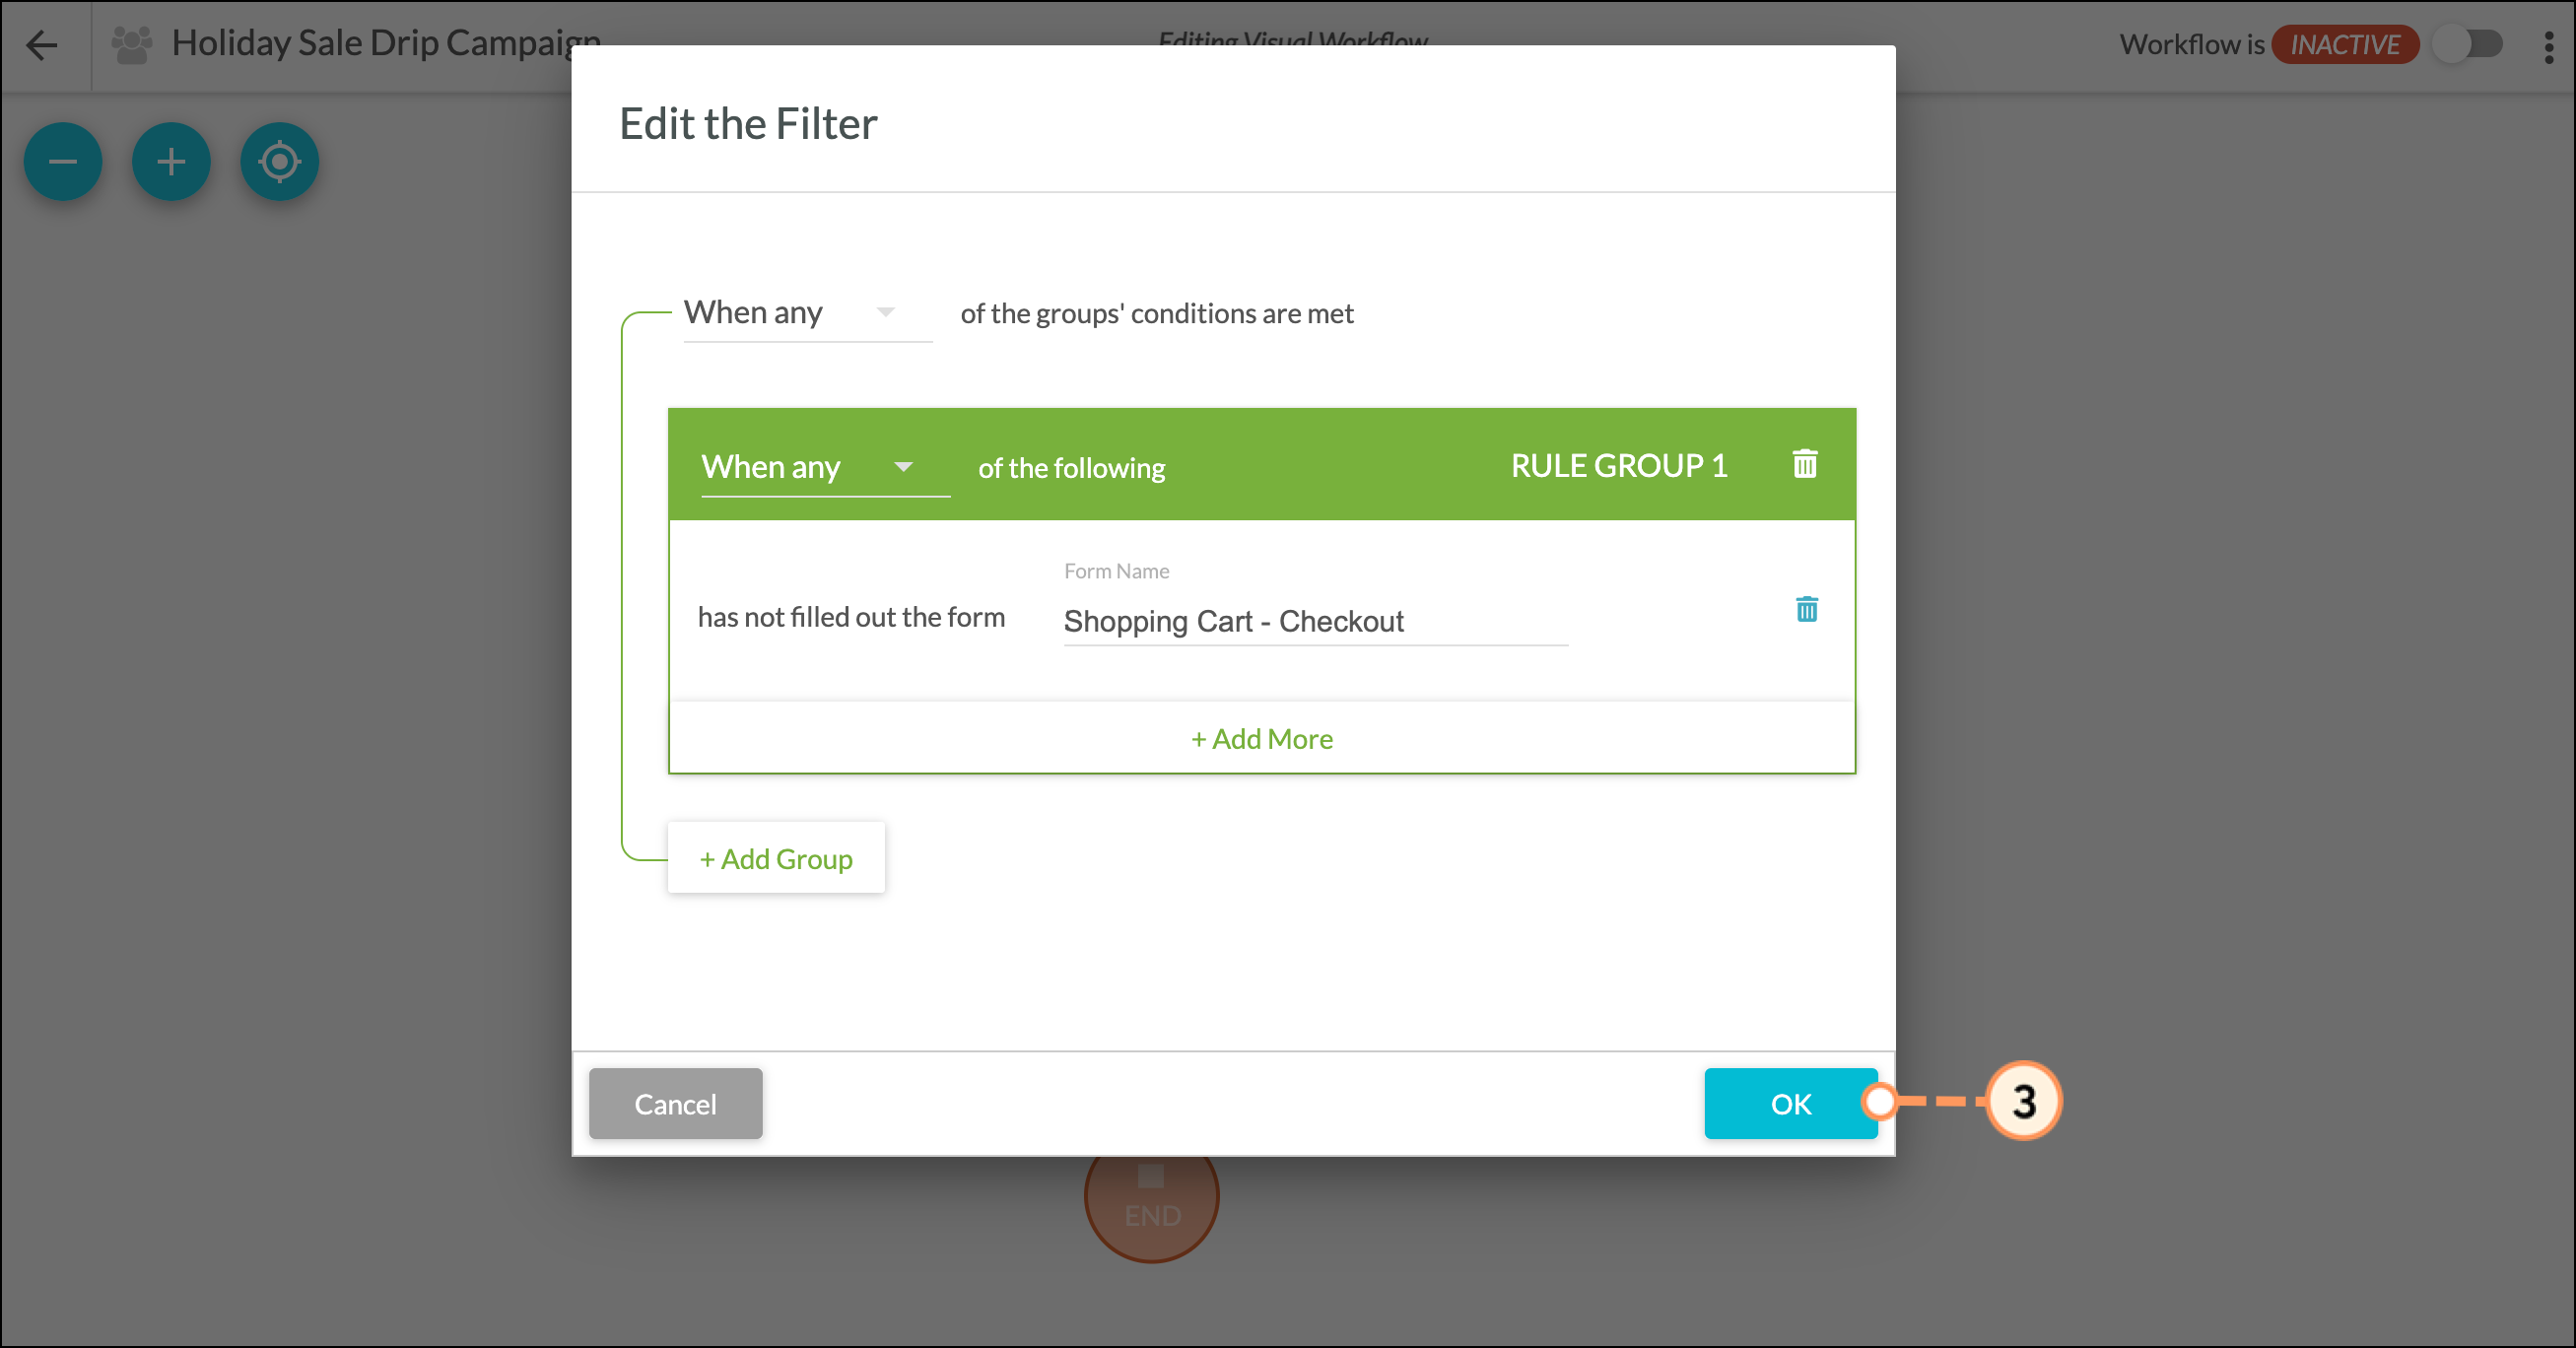
Optional: Adding Filters
Filters provide focus for a trigger and direct it to operate in specific ways. While optional, consider adding filters to further refine who your drip campaign will send to.
To add filters to a drip campaign visual workflow, do the following:
- Click + Add > Filter under the trigger.

- Select a filter that can be used to refine your initial trigger.
Note: The "has the field" filter, defined by state and location, is a typical filter used in drip campaigns. Other common filters include "lead score" and "visits the page". However, feel free to select the filters that best define your workflow.
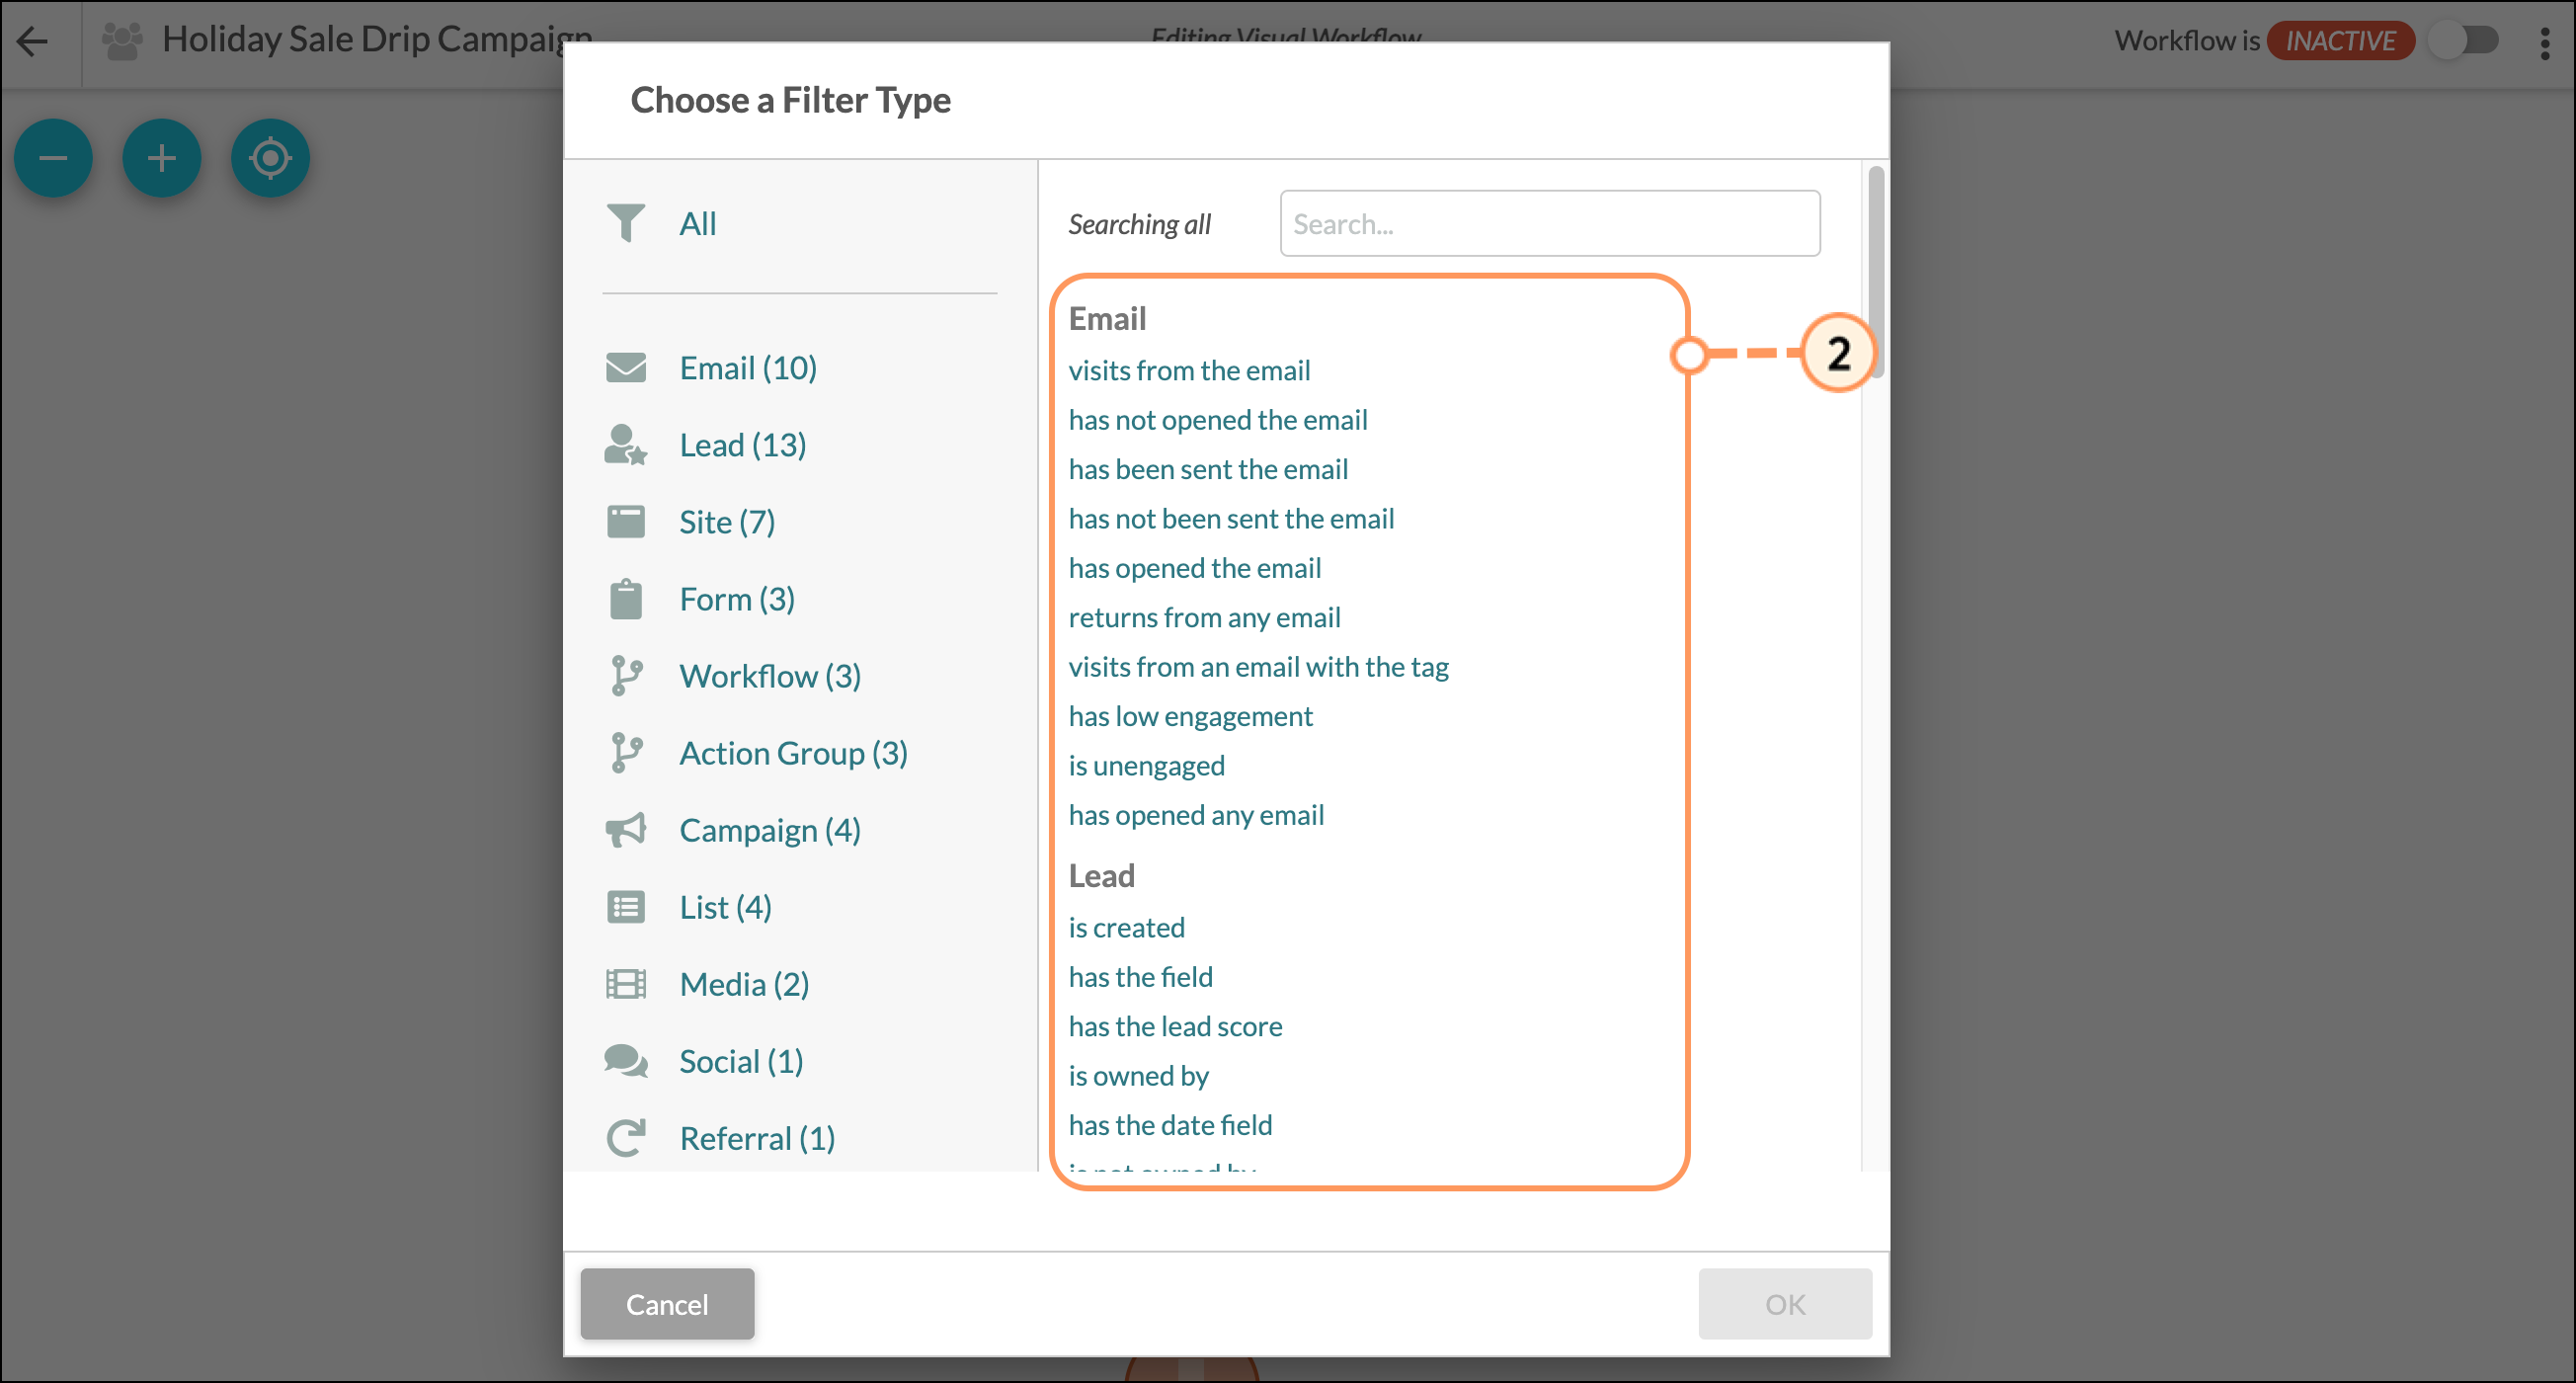
- Enter the necessary information for the filter and click OK.
Time Delays
Time delays dictate how long it takes for an action to activate. For your drip campaign, you might want to wait a certain amount of time after the trigger applies. For example, you can send your marketing email 24 hours after a customer visits your landing page. When paired with triggers and actions, time delays round out how a drip campaign to relevant individuals.
To add time delays to a drip campaign visual workflow, do the following:
- Click + Add > Time Delay under the created action.
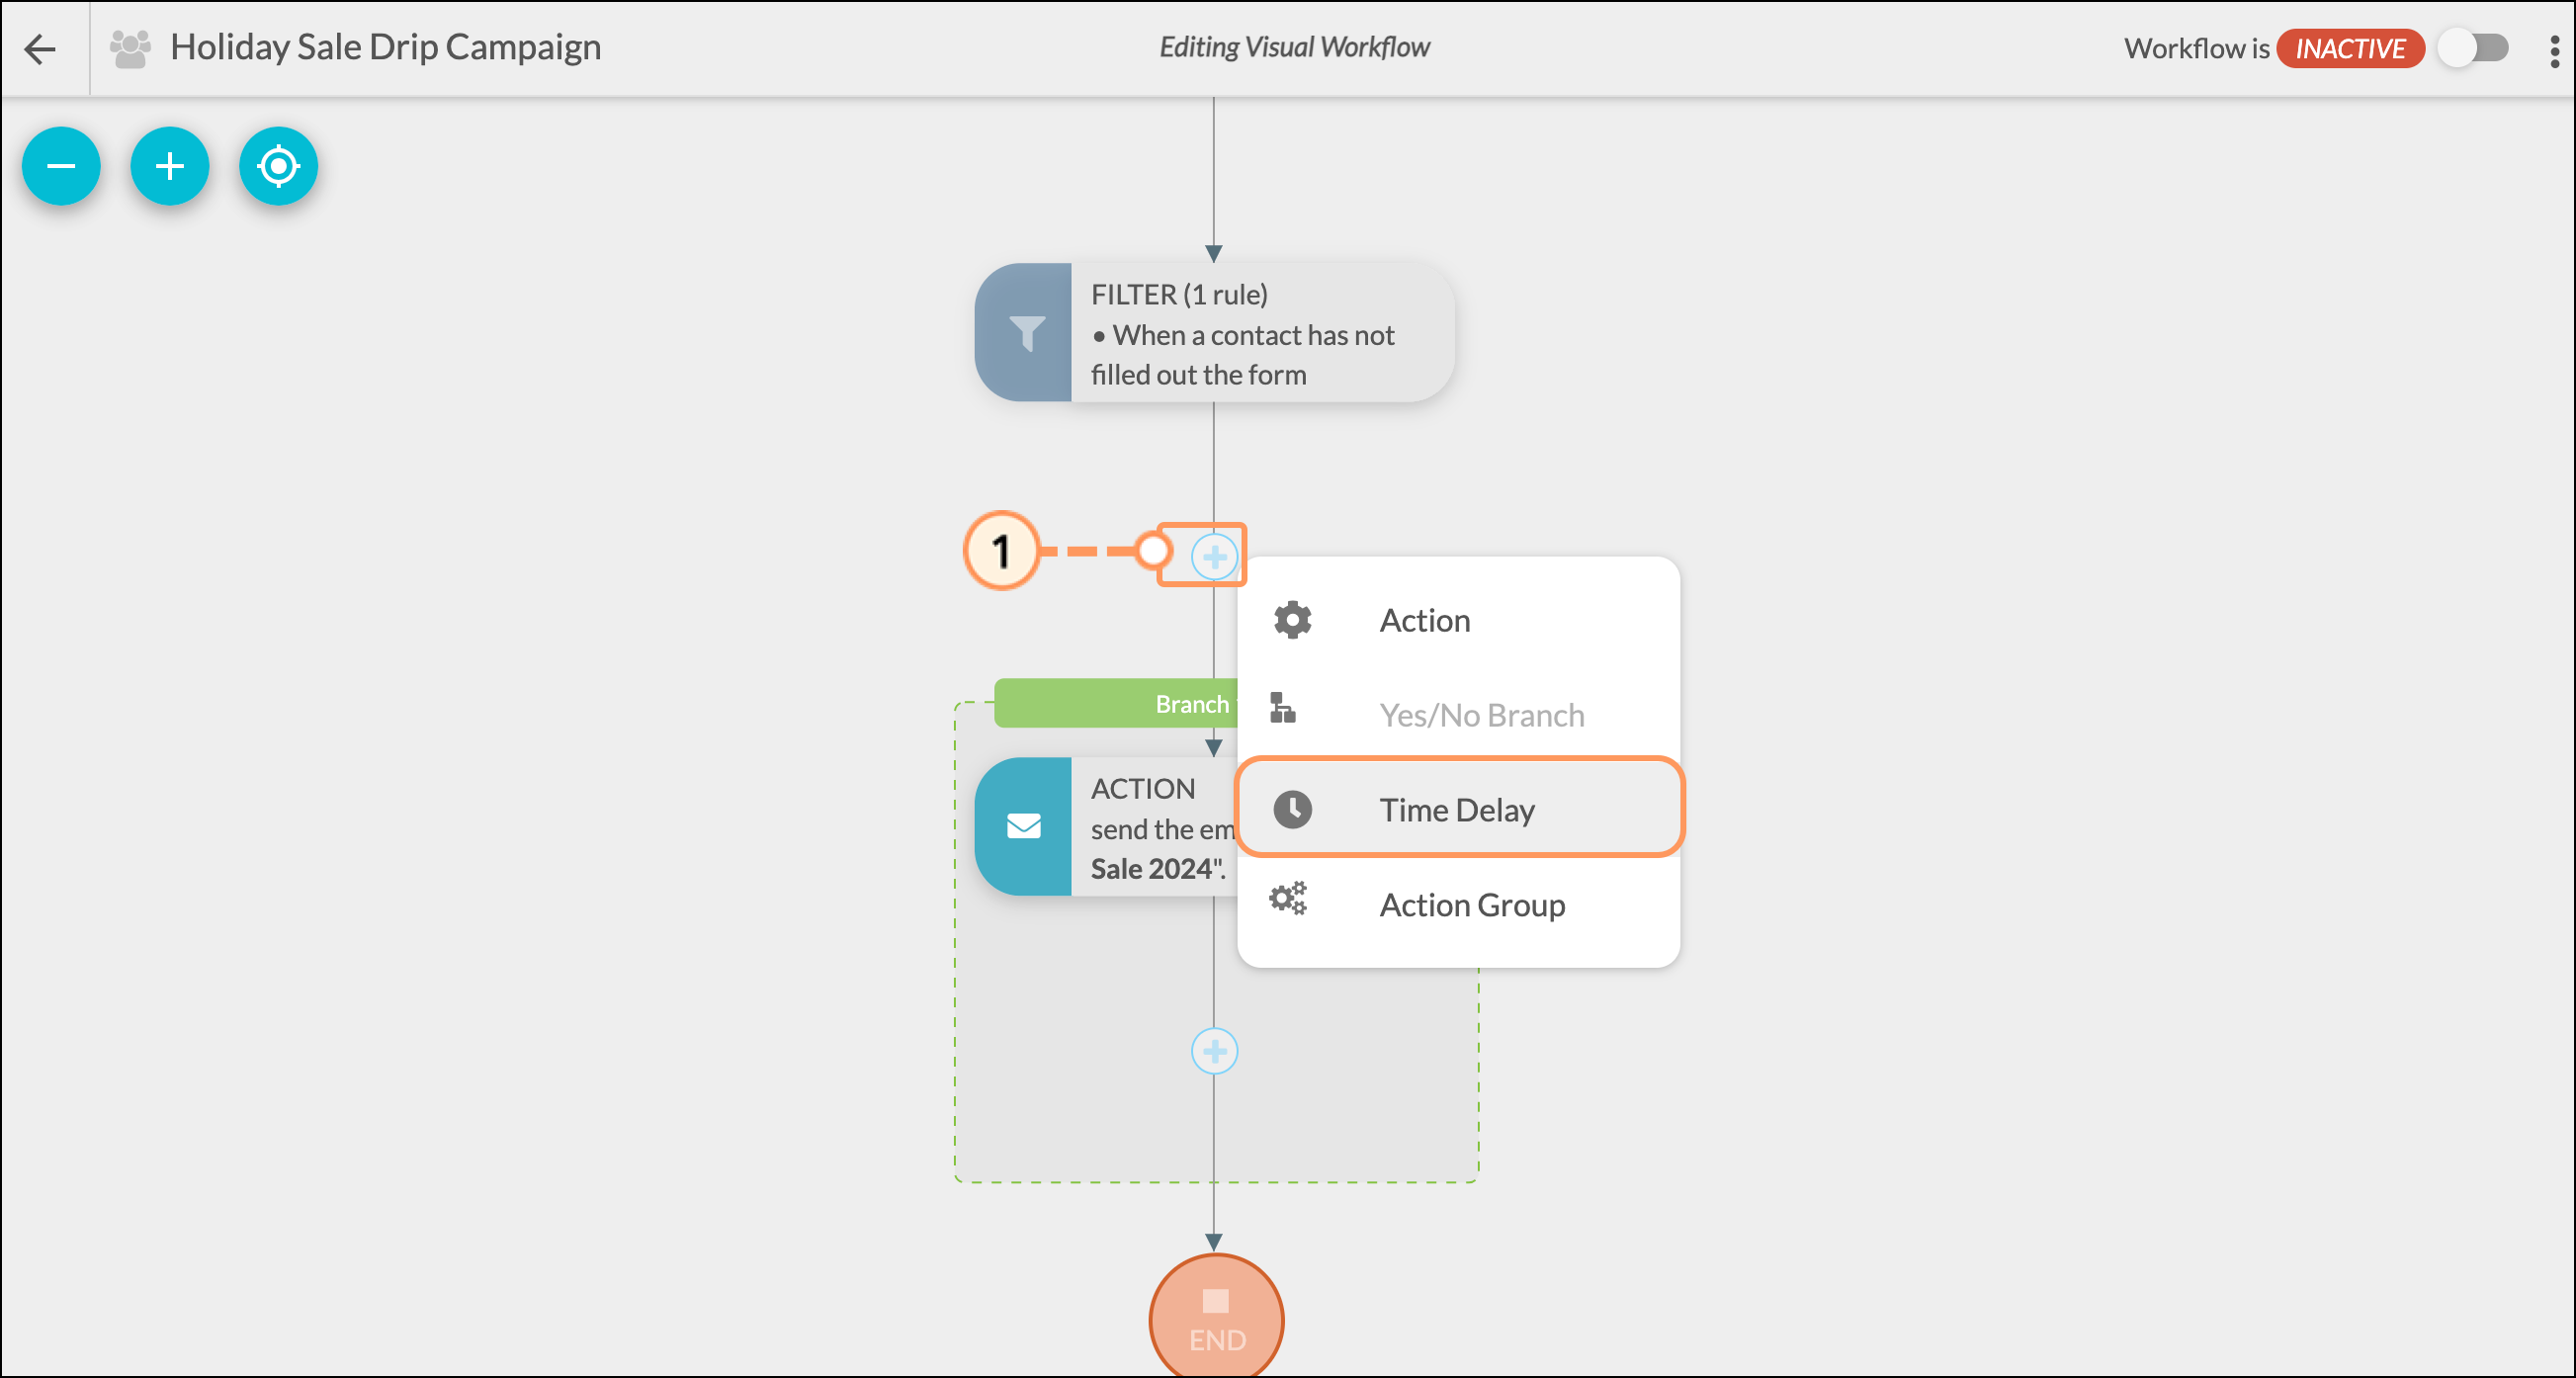
- Enter the desired time parameters and click OK.
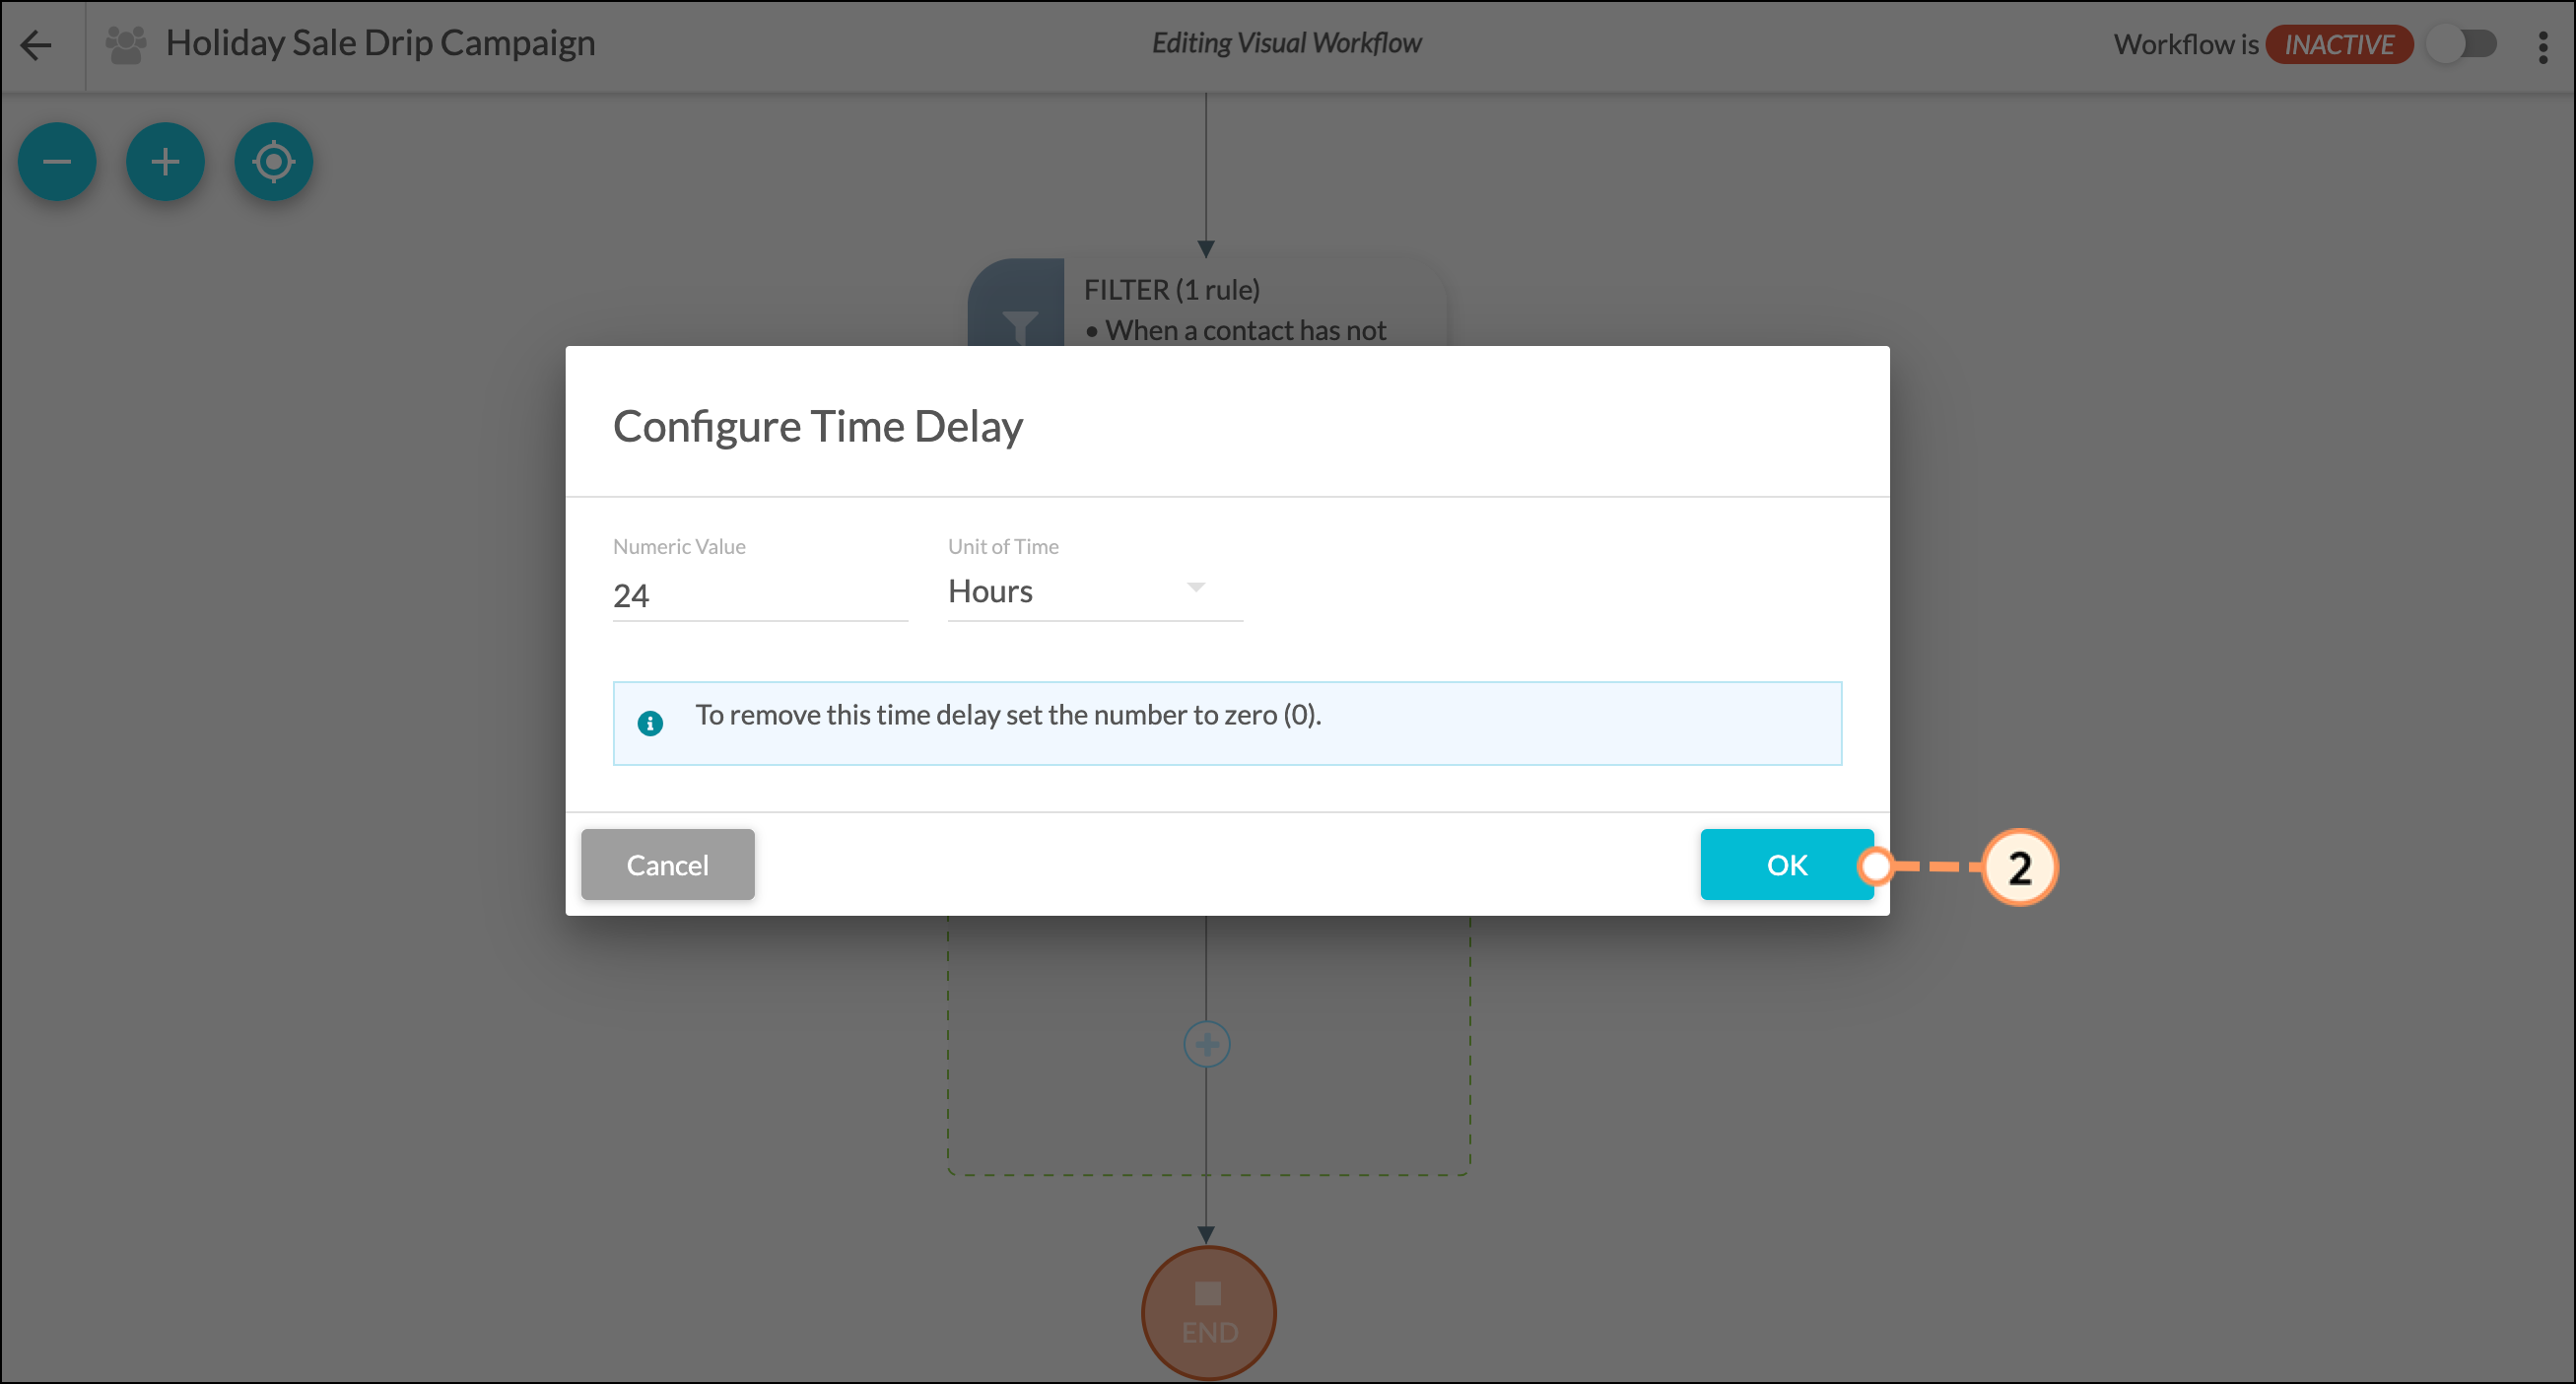
- Repeat as necessary to add any other desired emails to the initial trigger and when finished, click the Active/Inactive toggle to set this workflow to Active.
Example of an Advanced Drip Campaign: User Site Visit Drip Campaign
There are many ways you can utilize the different triggers, filters, actions, and even action groups when creating a drip campaign. The following instructions are an example drip campaign for when users visit specific sites. This example is more advanced when compared to the above procedures for creating a basic drip campaign framework, but it encompasses all aspects of a successful drip campaign.
Now that you know how to create visual workflows, filters, and time delays, let's explore a more complex example of a drip campaign. In this example, you can send a marketing email to contacts who visited a landing page, specifically when those contacts reached the landing page from a previous email.
Feel free to build this drip campaign (or create your own).
- Schedule an email with a link to your landing page.
- Create an action group to track landing page visits from that email.
- Create a workflow to send an email to contacts based on landing page visits.
- Filter the workflow to only send to contacts who came from the previous email.
Scheduling An Email
To create a drip campaign, you will need to first schedule emails for sending. To schedule emails, do the following:
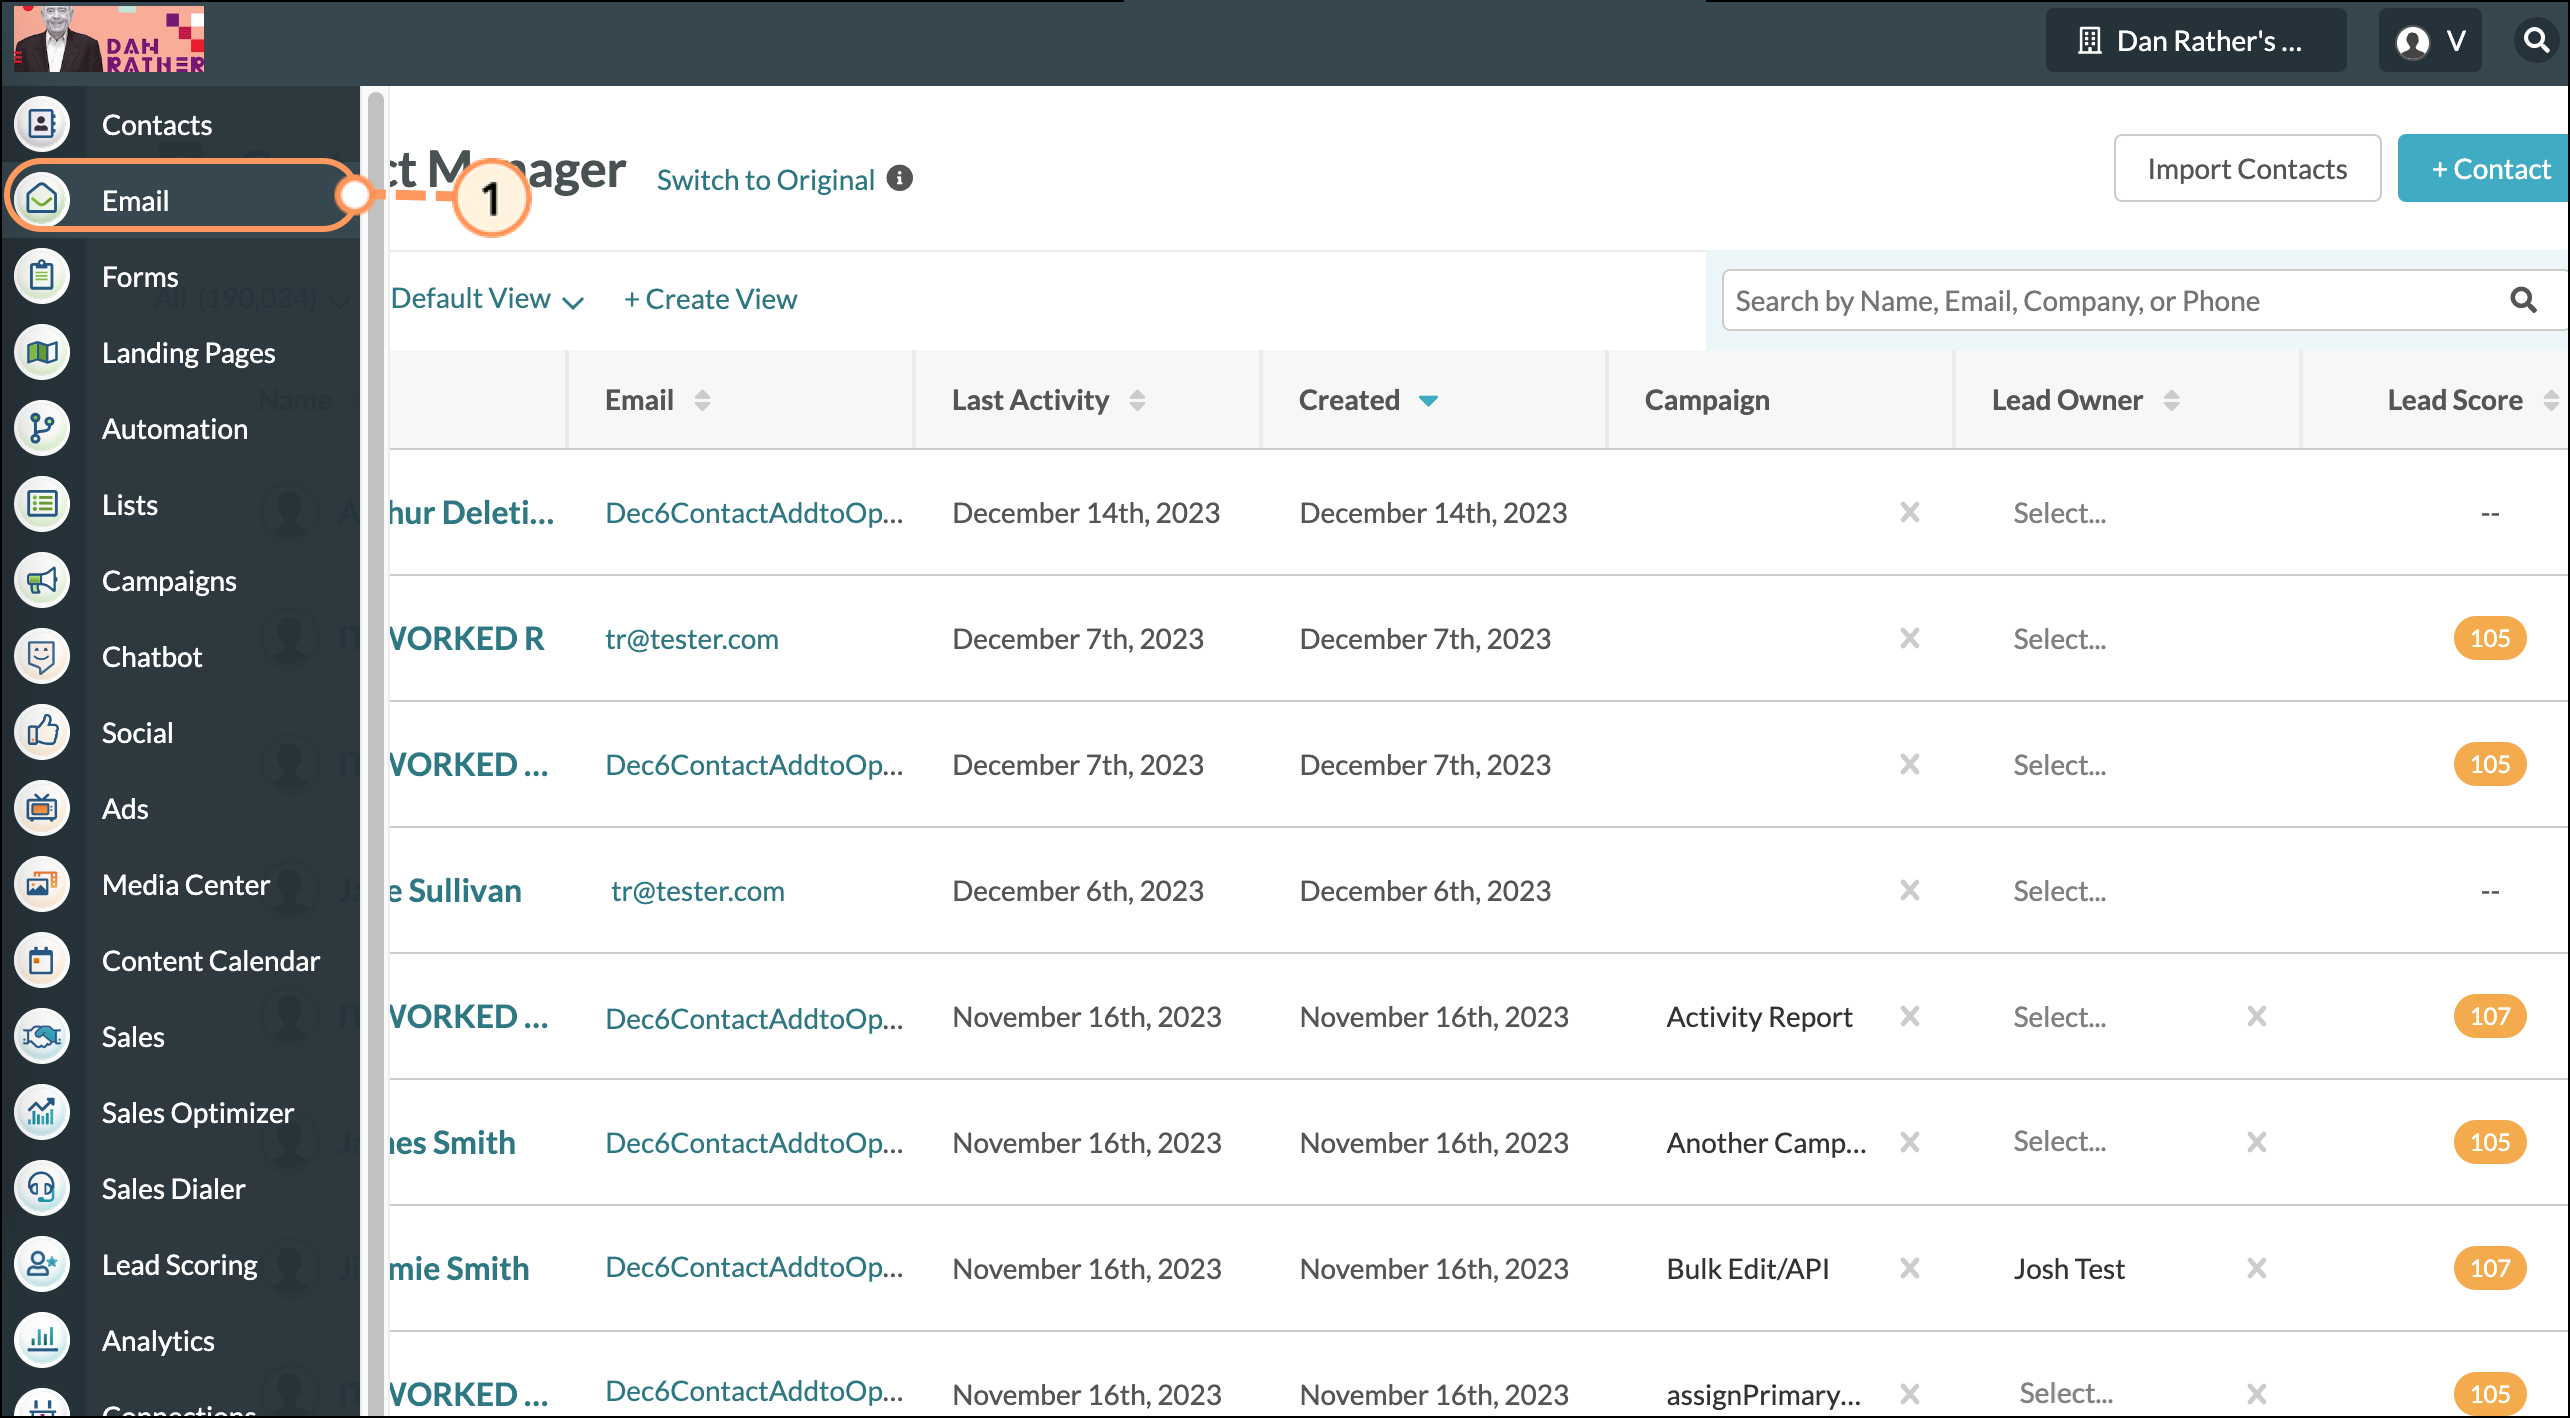
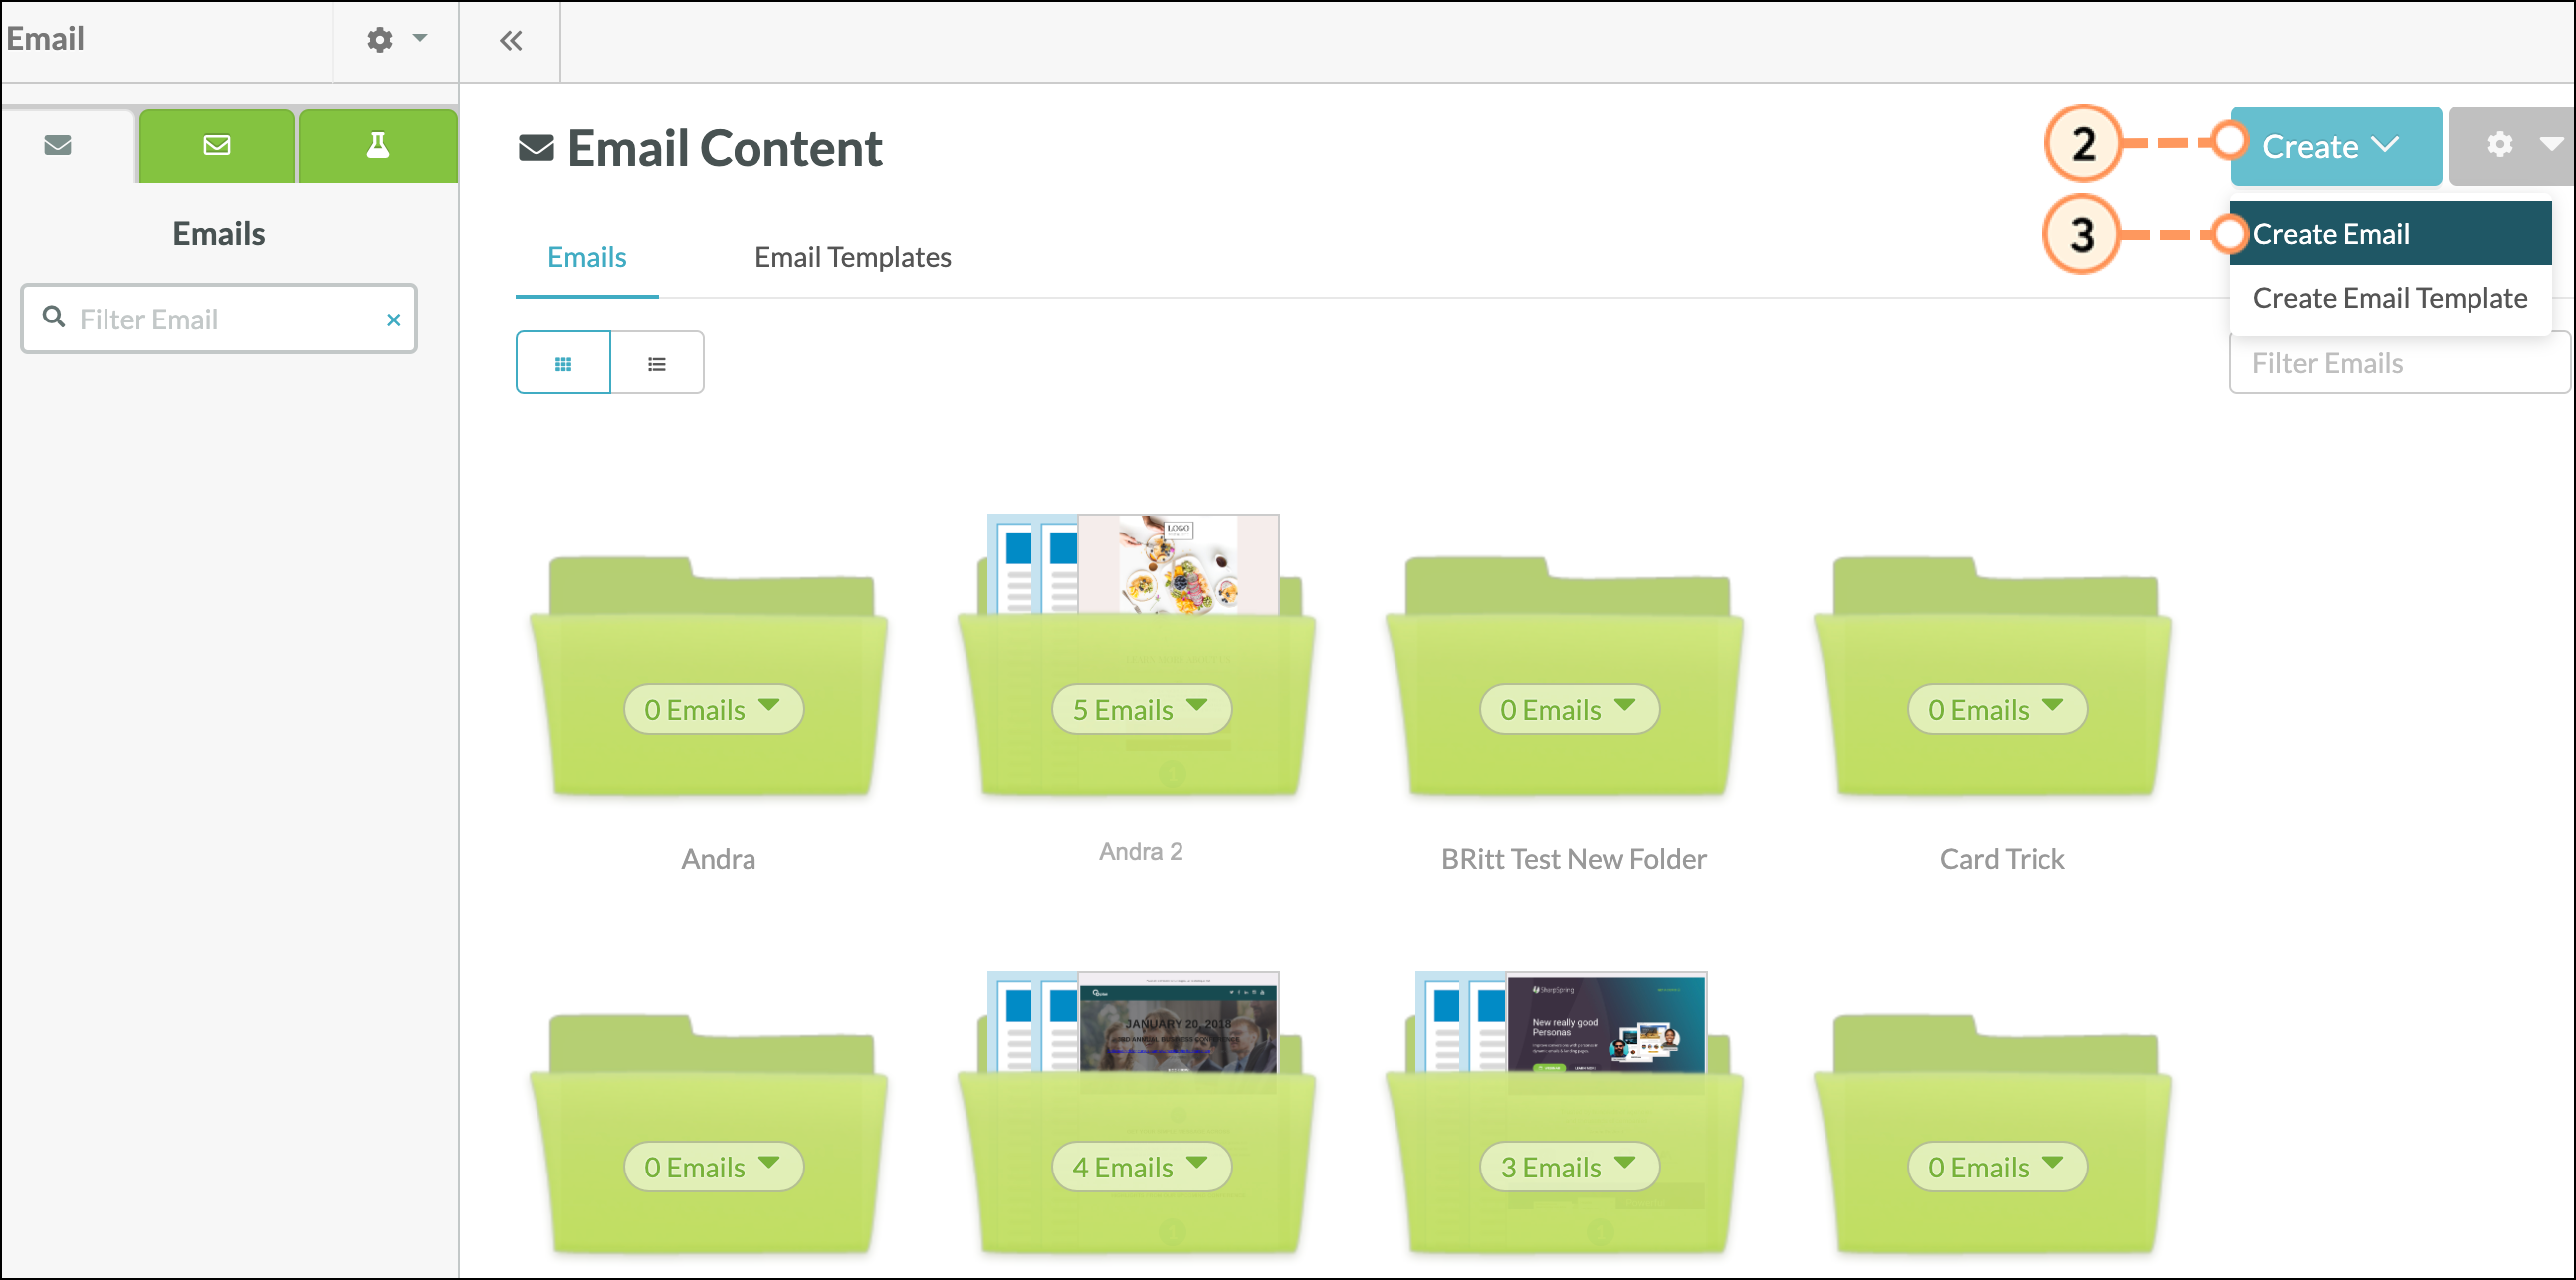
- Click Email in the left toolbar.
- Click Create.
- Create a new email (or edit an existing email).
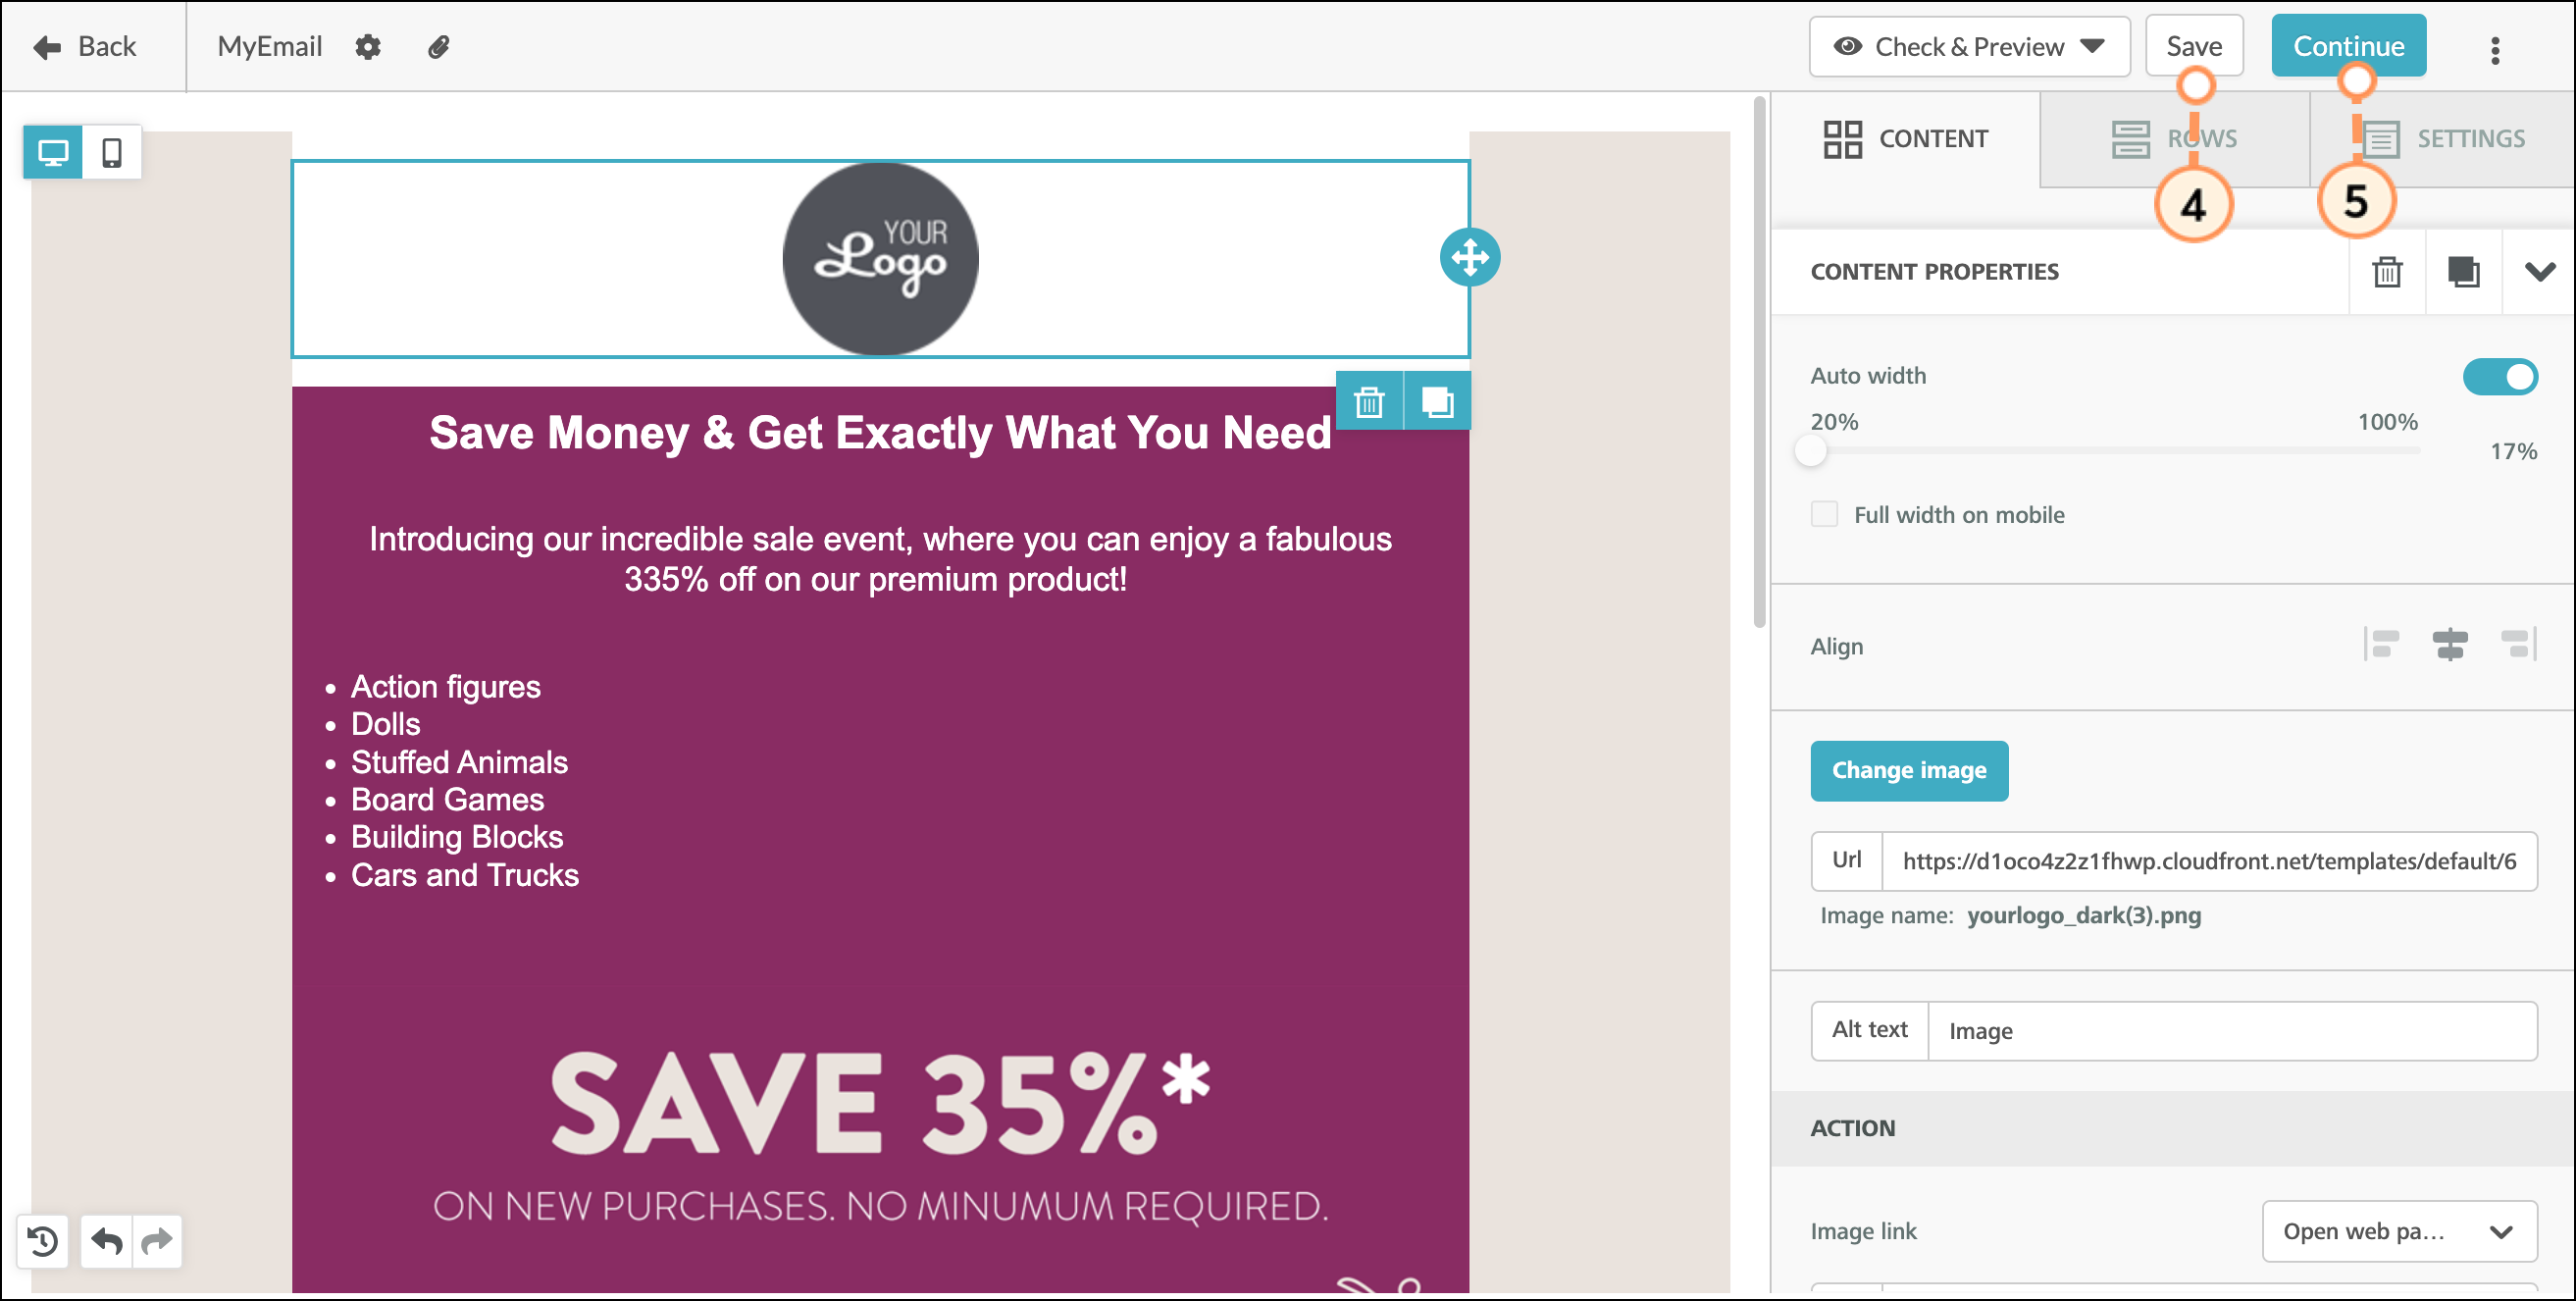
- Modify your email as necessary and then Save any changes made to your email.
- Click Continue.
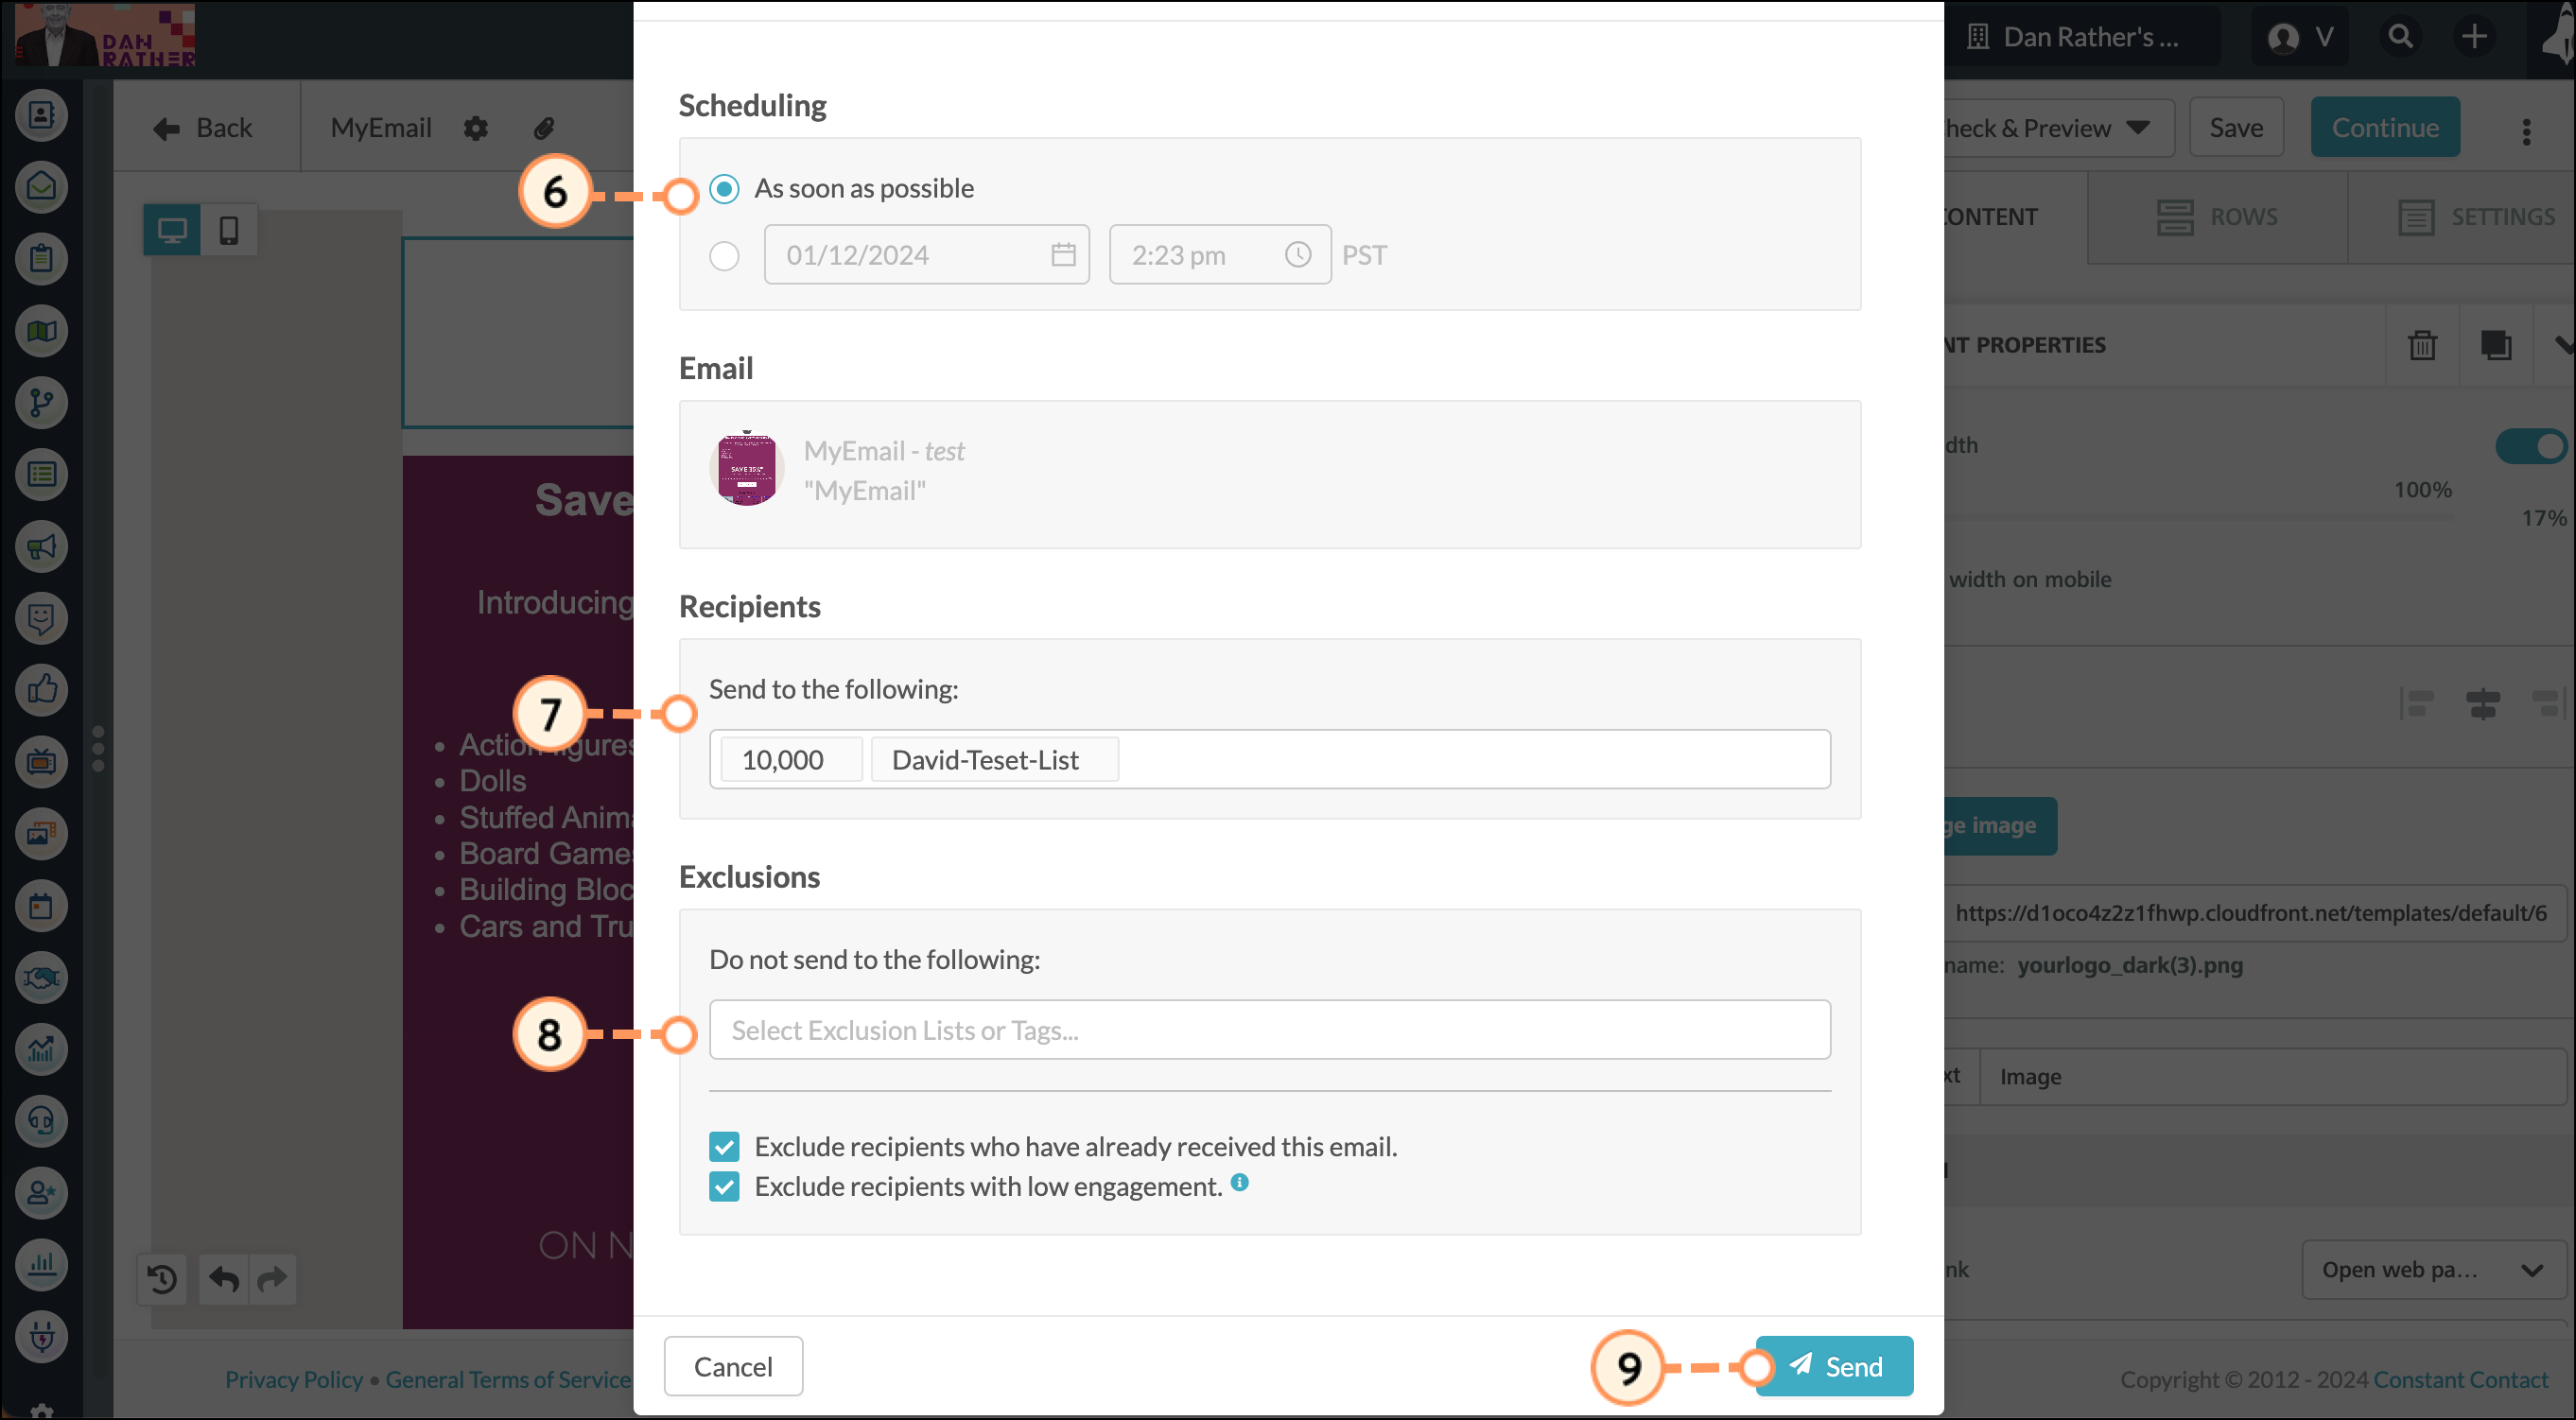
- Schedule when the email should be sent.
- Select the list of contacts to receive the email.
- Optionally, make any necessary exclusions to the recipient list.
- Click Send.
Create An Action Group
Once you have scheduled an email for sending, you can create an action group to track those recipients who click through your content. To create a drip campaign action group, do the following:
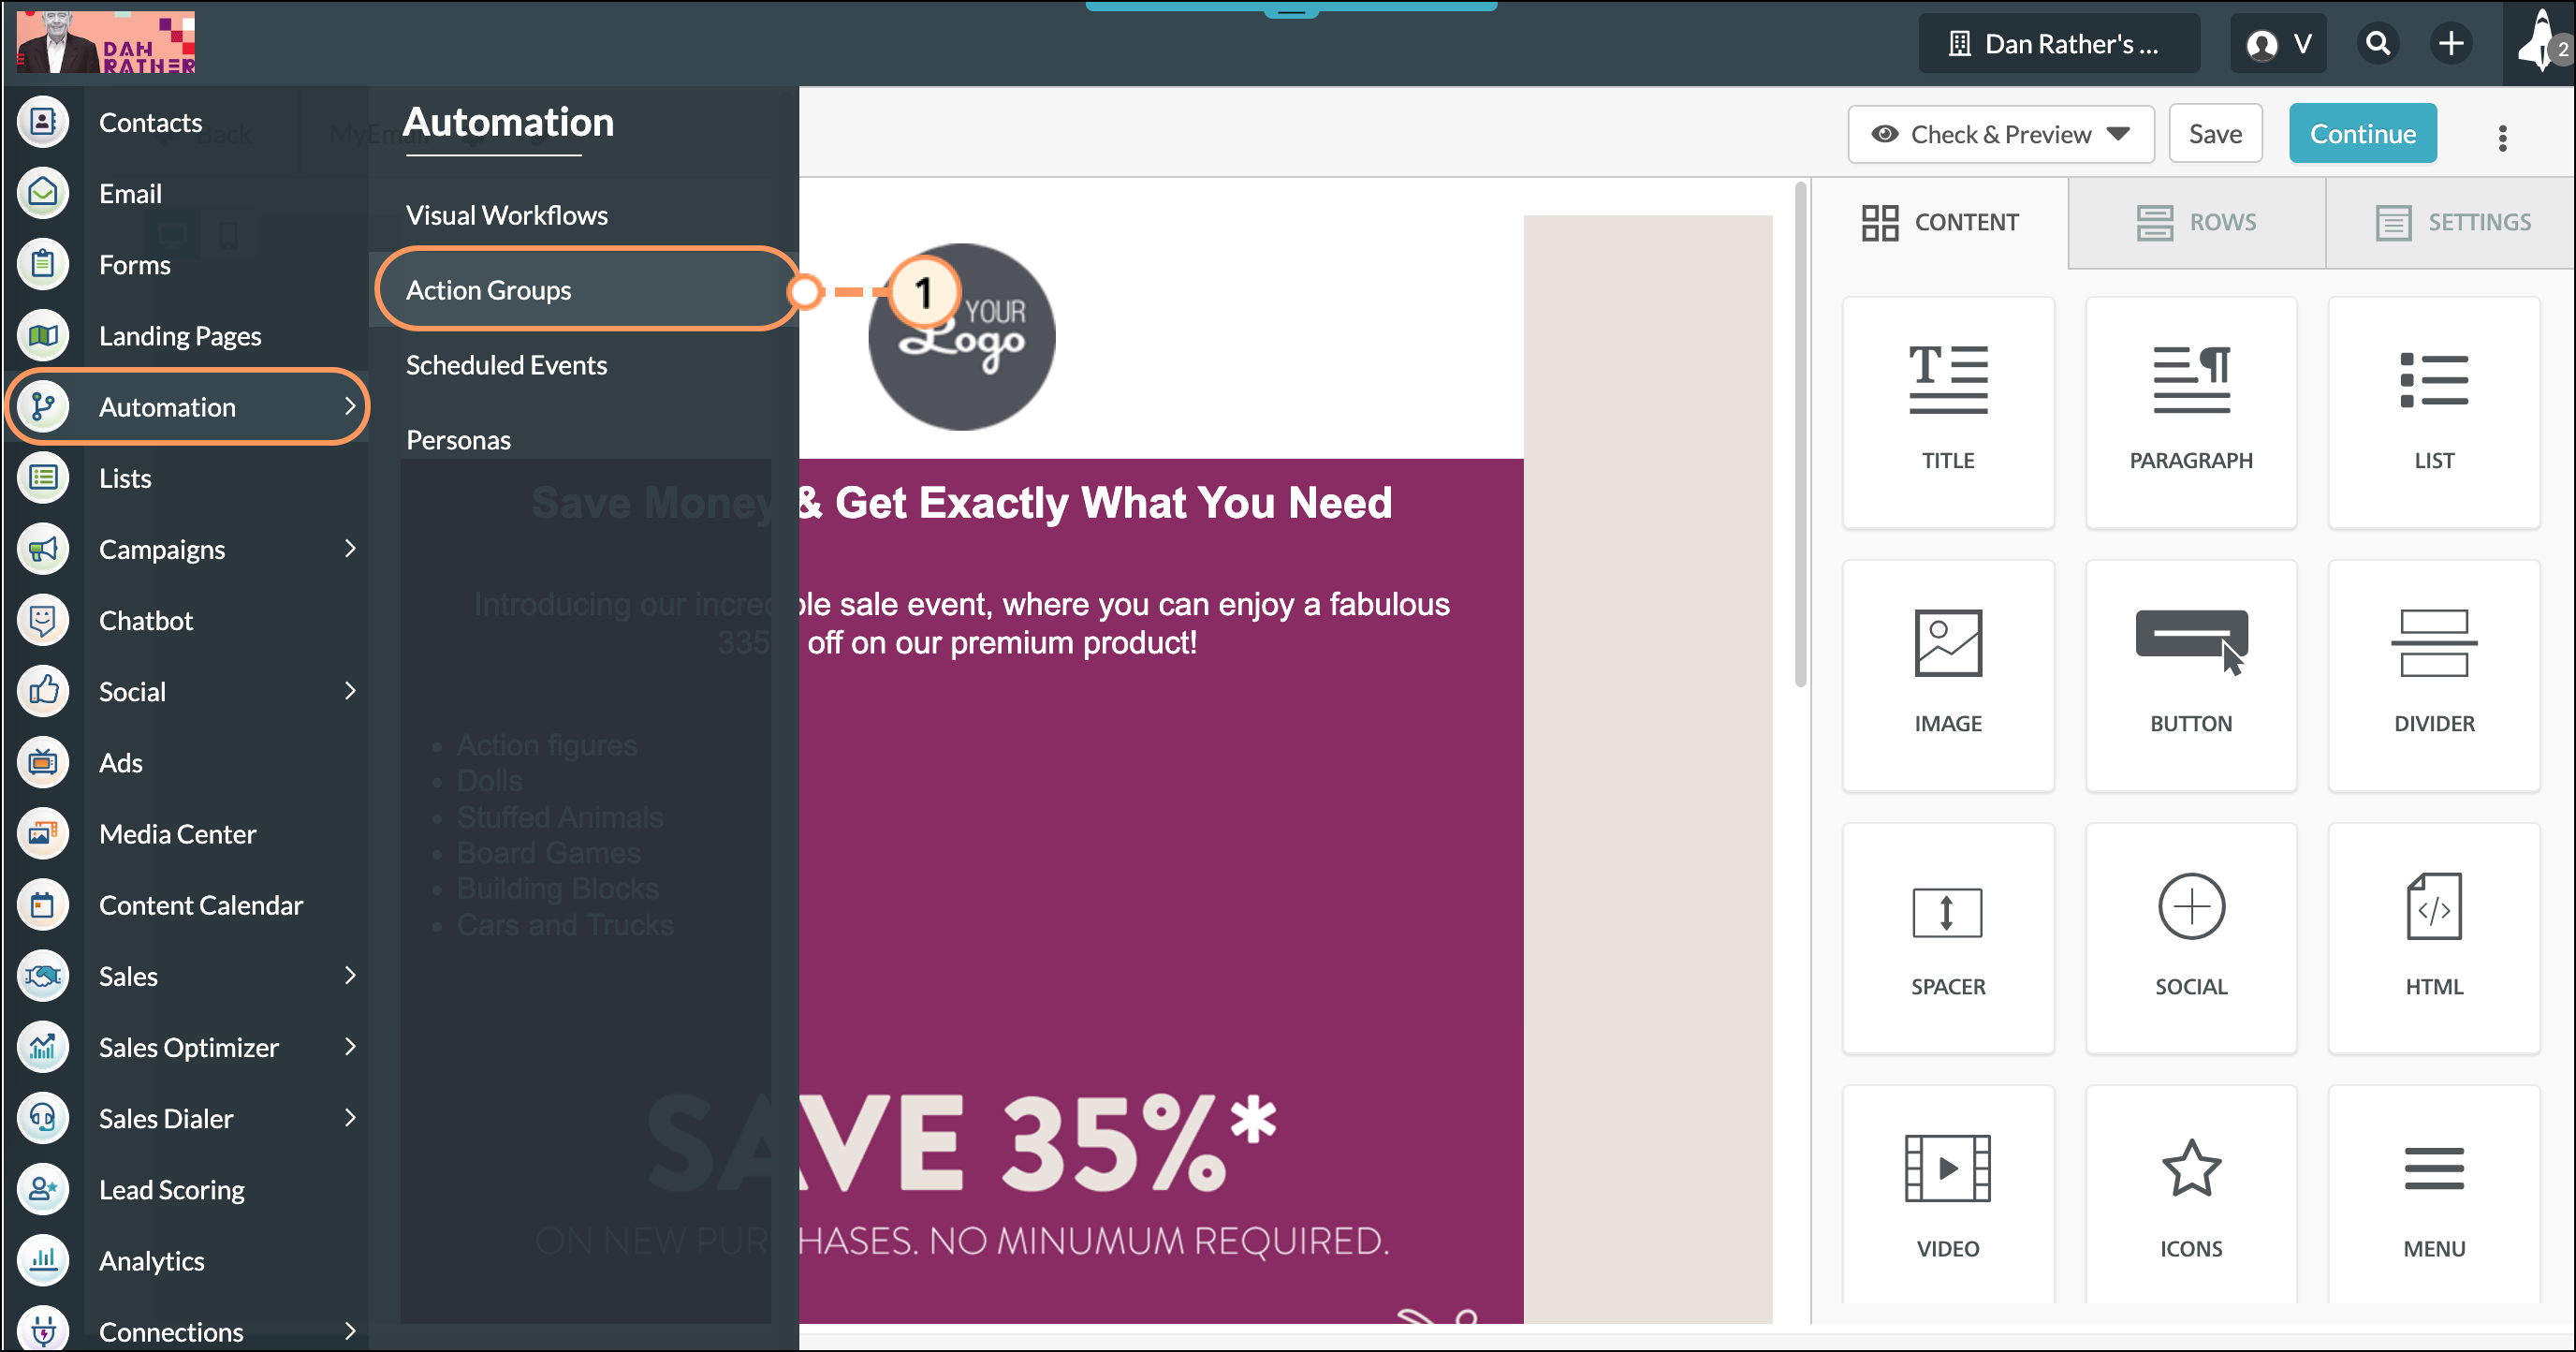
- Click Automation > Action Groups in the left toolbar.
- Click + New Action Group to create a new action group, or edit an existing action group instead.
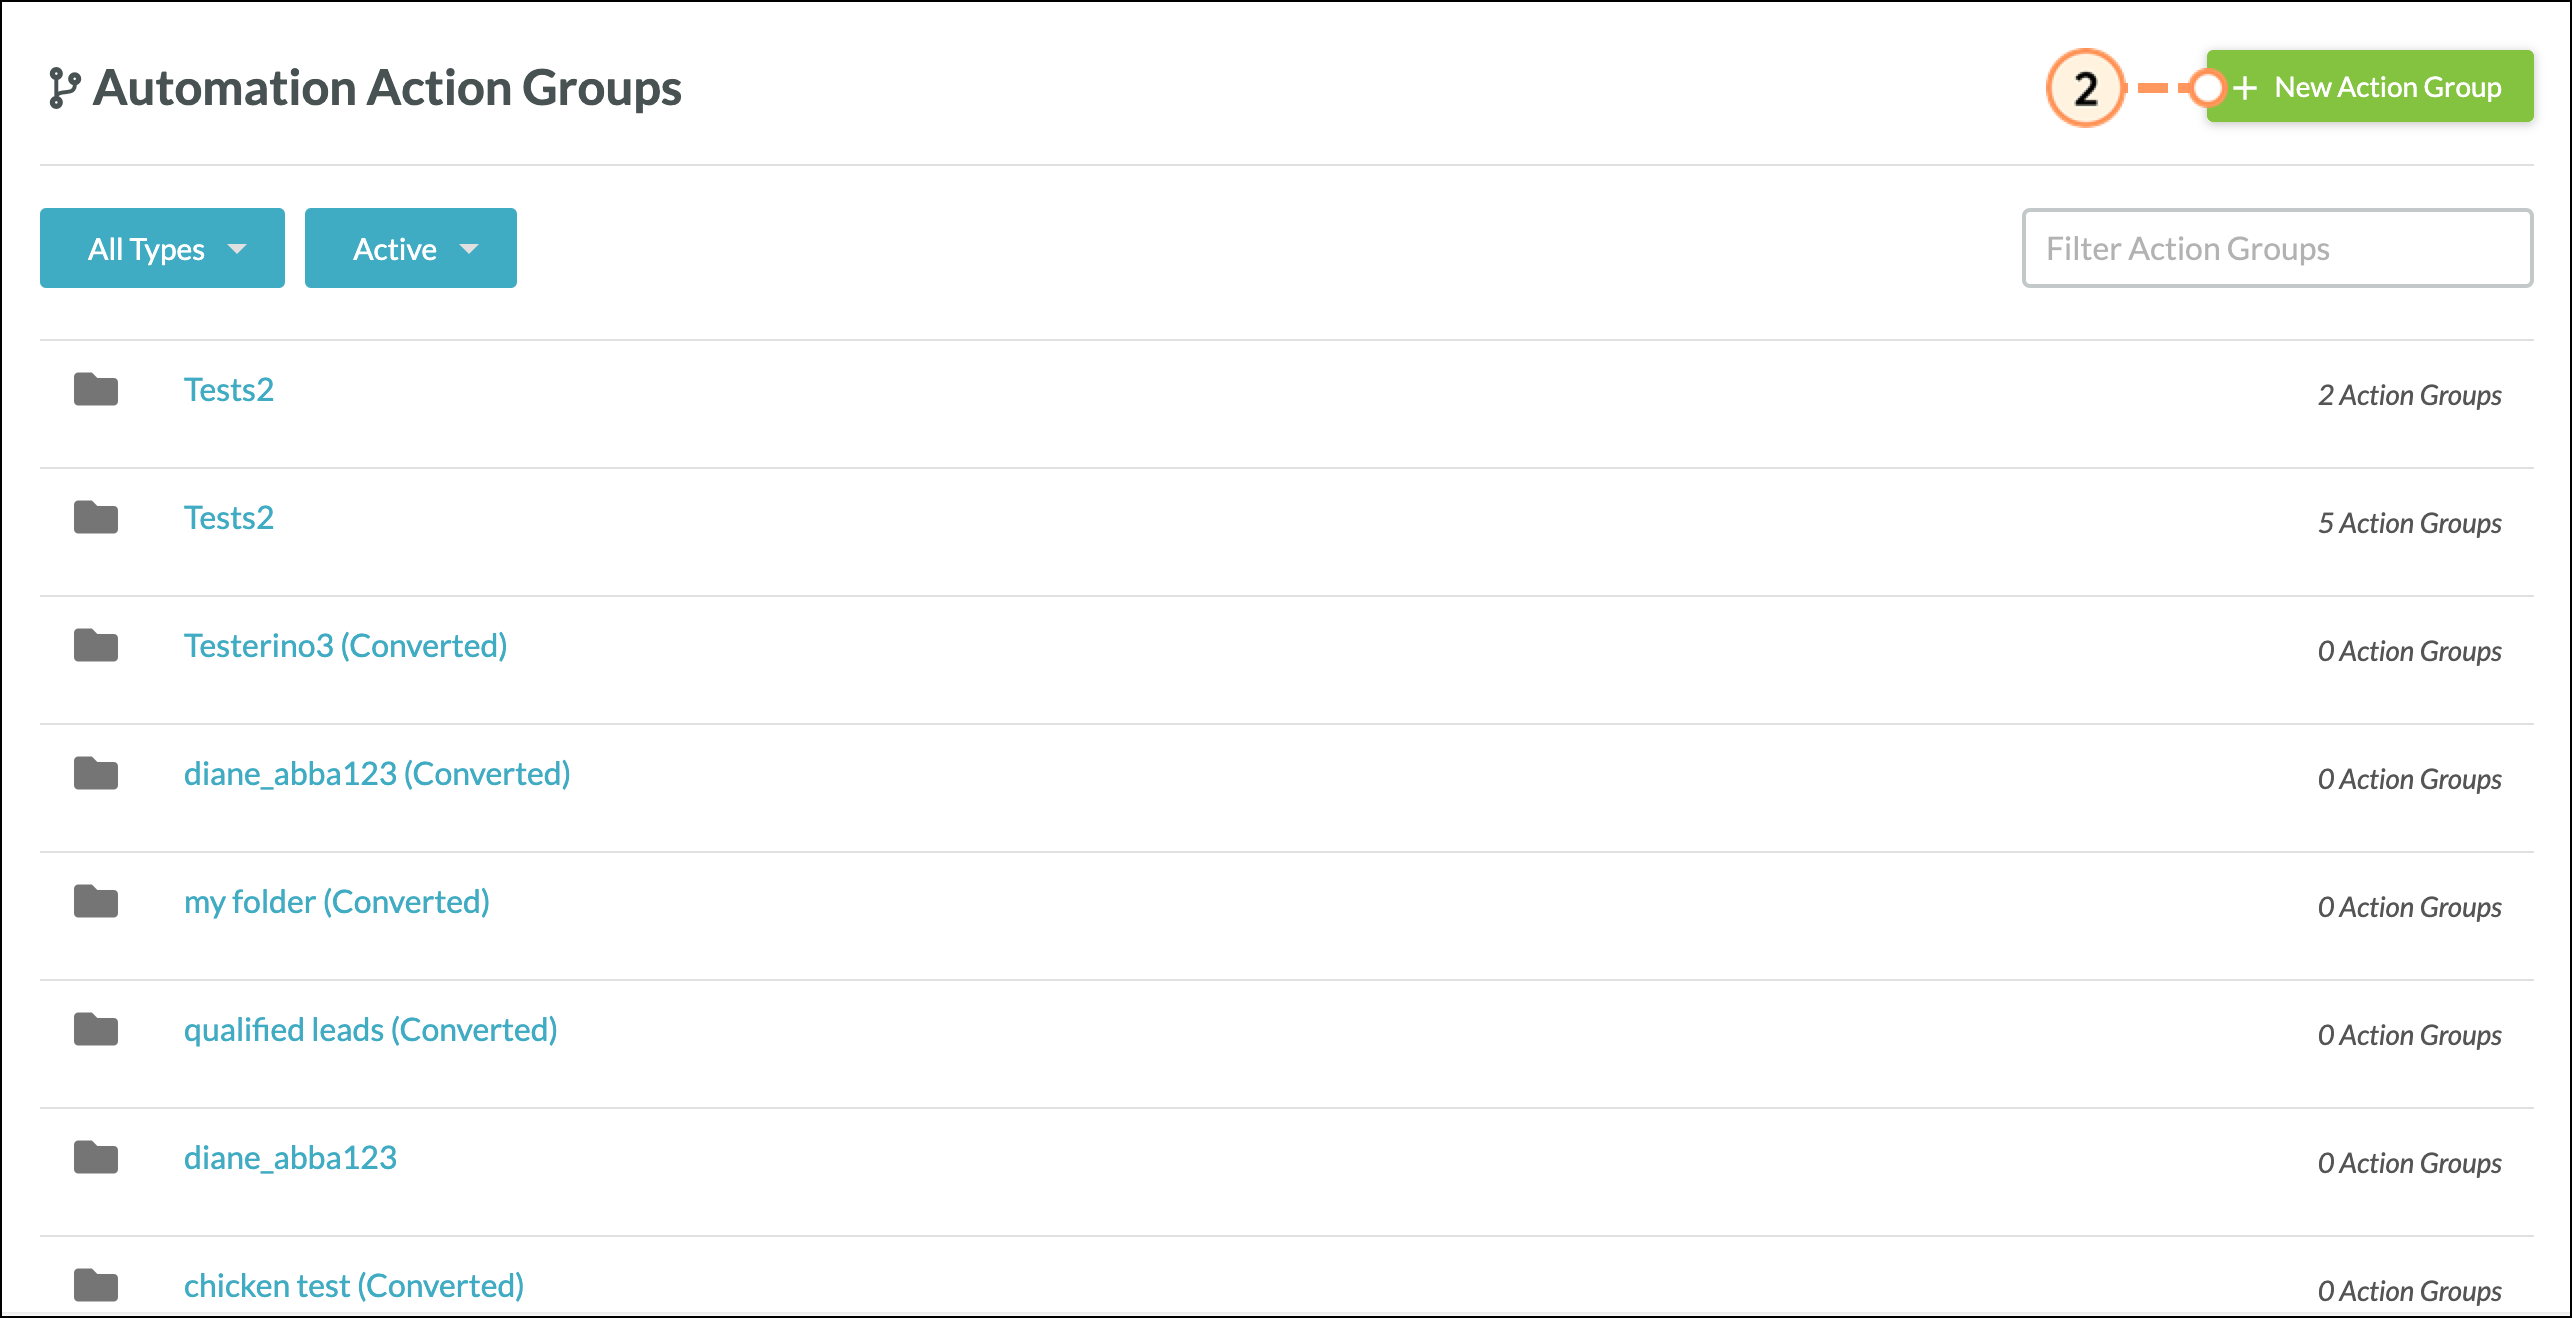
- If you're creating a new action group, select an Event-Based action group.
- Click Get Started.

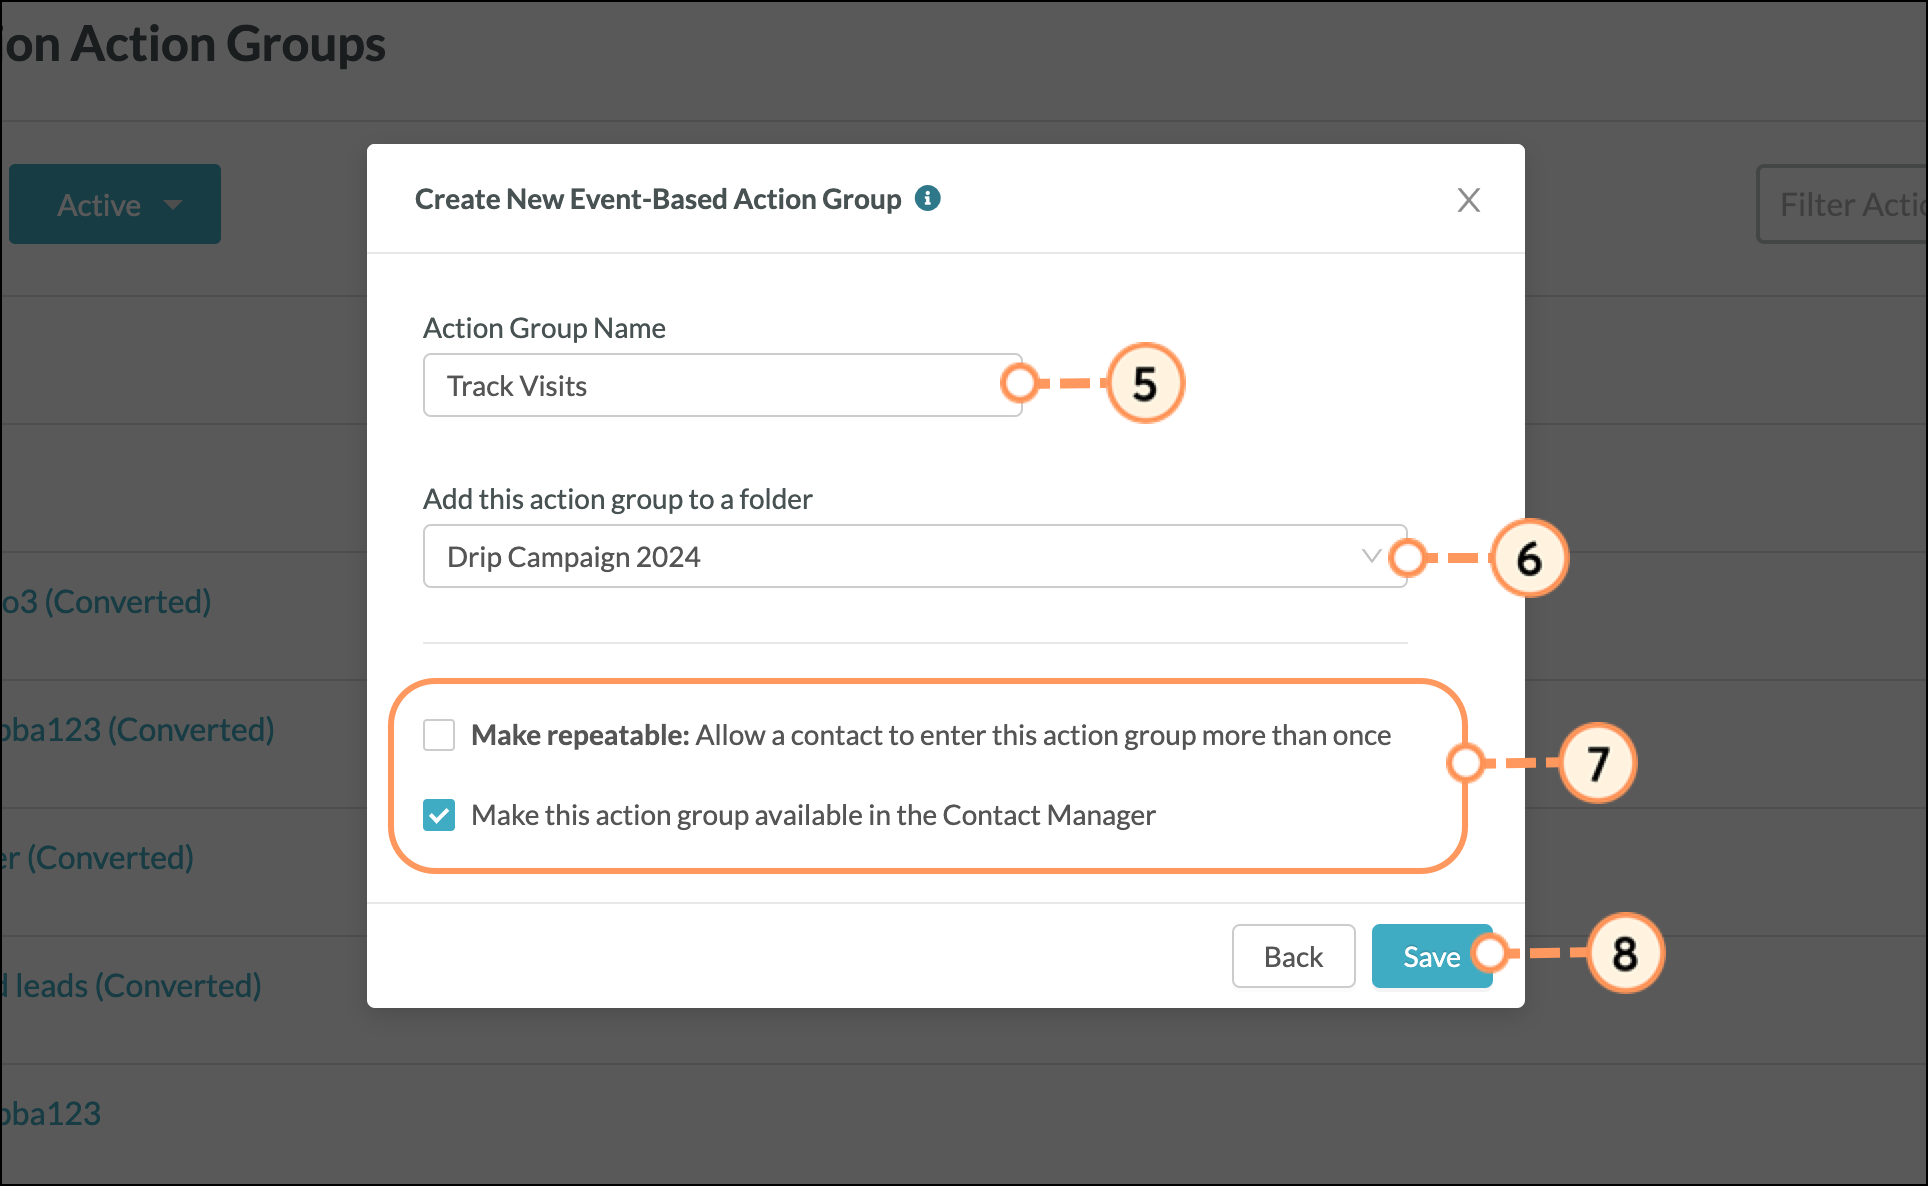
- Name your action group.
- Select a location for the action group.
- Decide if your action group should be repeatable or if it should be manageable from the Contact Manager.
- Click Save.
- Under Start, or an applicable group branch, click + Add > Action.
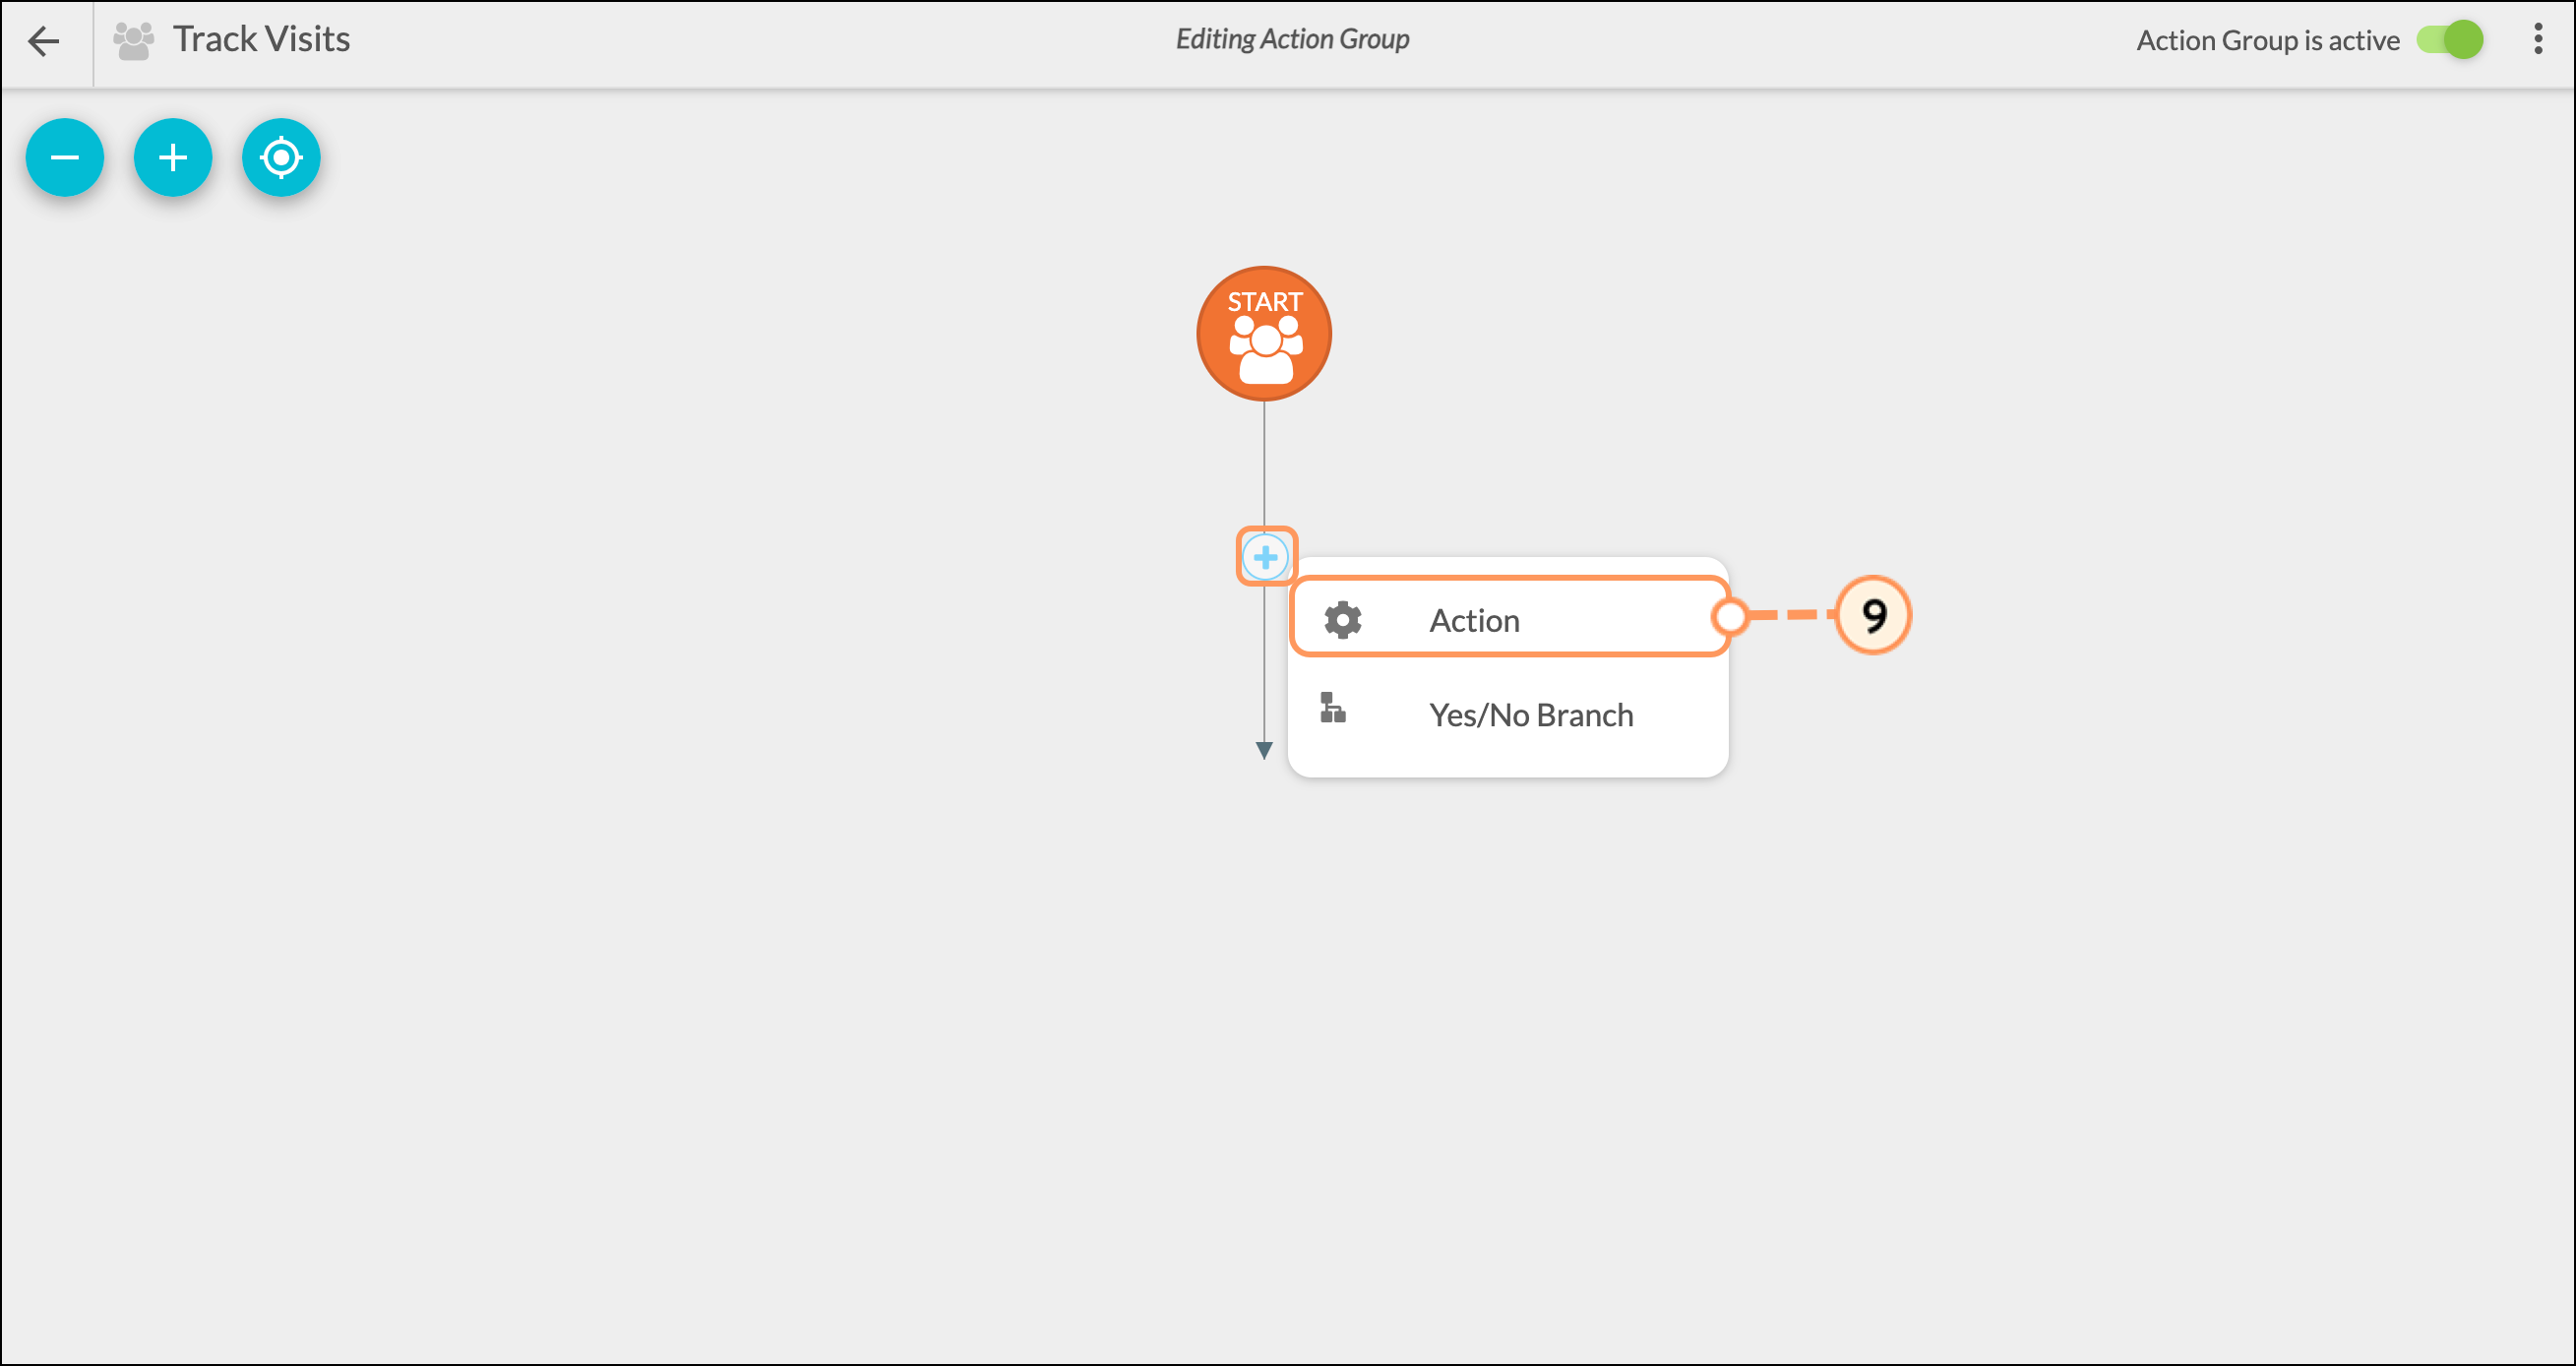
- Select Send the email in the Communication section.
- Important: Lead Gen & CRM does not recommend that you build an automation based on recipients opening or not opening emails. Constant Contact aims for email clicks and not email opens.
- Select the campaign email that was scheduled.
- Click OK.
Create A Workflow
Once an action group has been created, you will need to create a companion visual workflow. To create a drip campaign workflow, do the following:
- Click Automation > Visual Workflows in the left toolbar.
- Create a new visual workflow or edit an existing one.
- Select Visual Workflow from the Workflow Type field and name the workflow.
- Click Create.
- Click + Add > Trigger under Start or an applicable workflow branch.
- Note: Lead Gen & CRM cannot trigger automations on email opens. Automations can trigger on click-throughs to a website or on media center asset views.
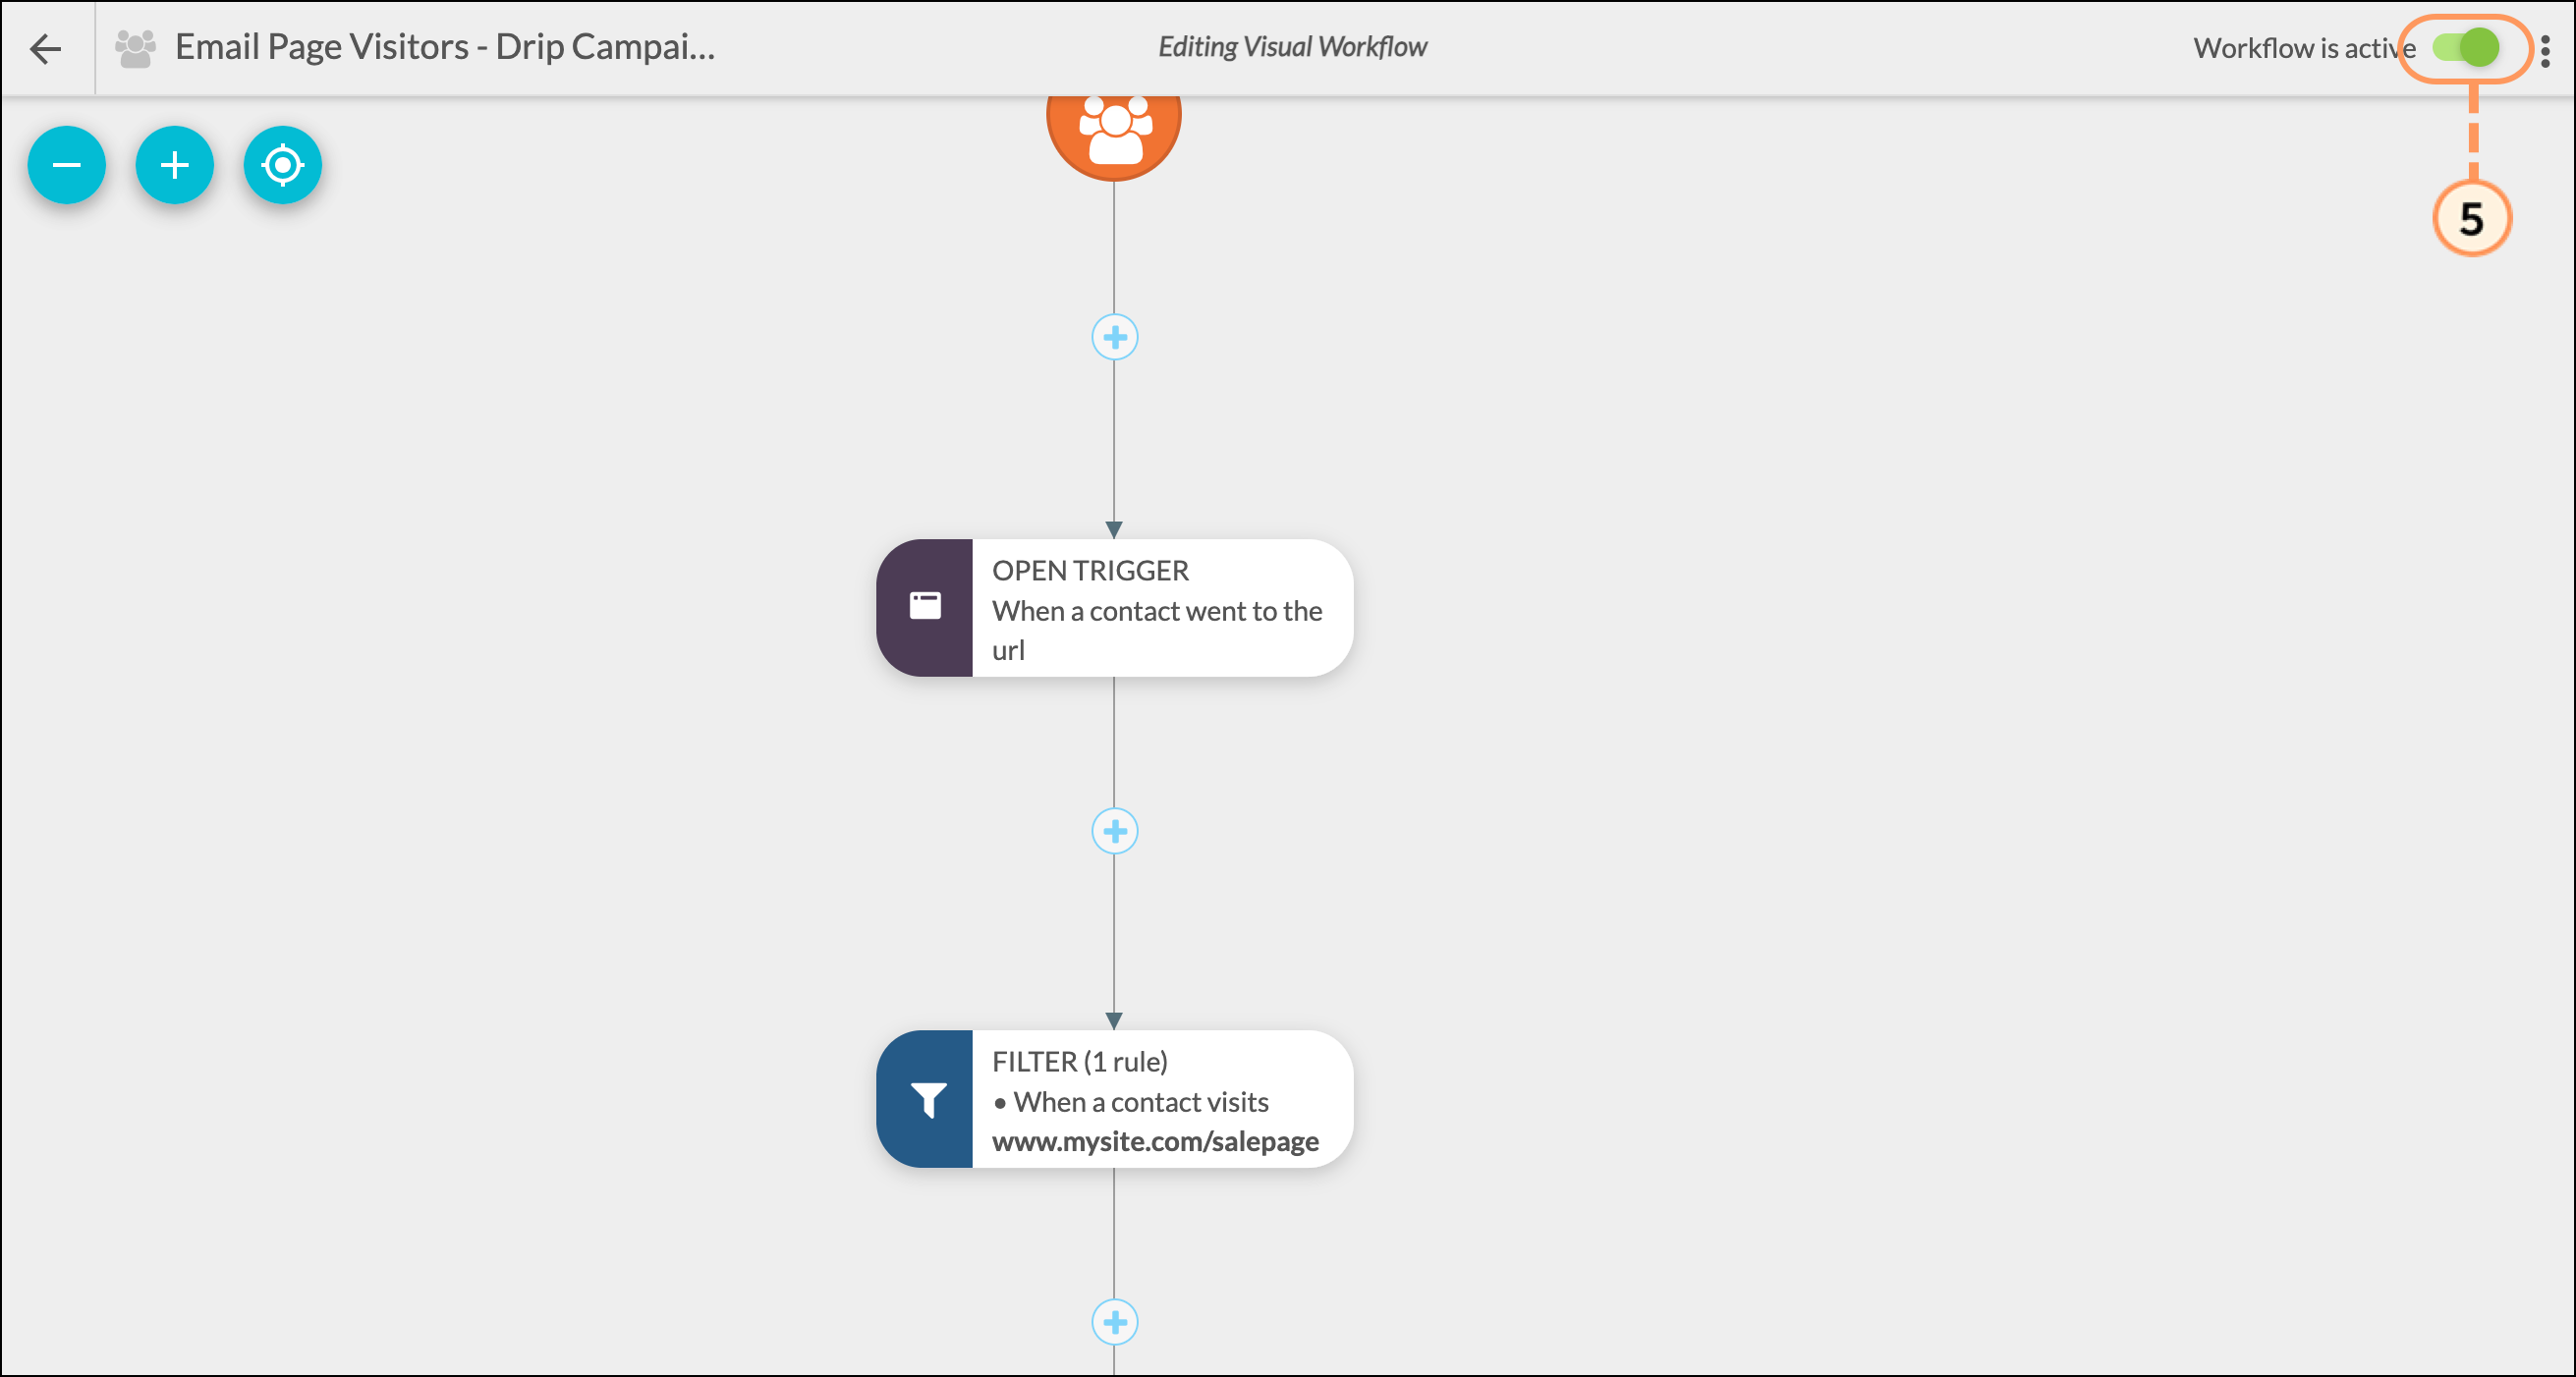
- Select visits the page in the Site section.
- Configure the Visits the page trigger.
- Type in the target website URL in the Page URL field.
- Select 1 time in the How Often? drop-down menu.
- Select exactly in the Comparison drop-down menu.
- Optionally, enter a Referral URL.
- Click OK.
Adding A Filter
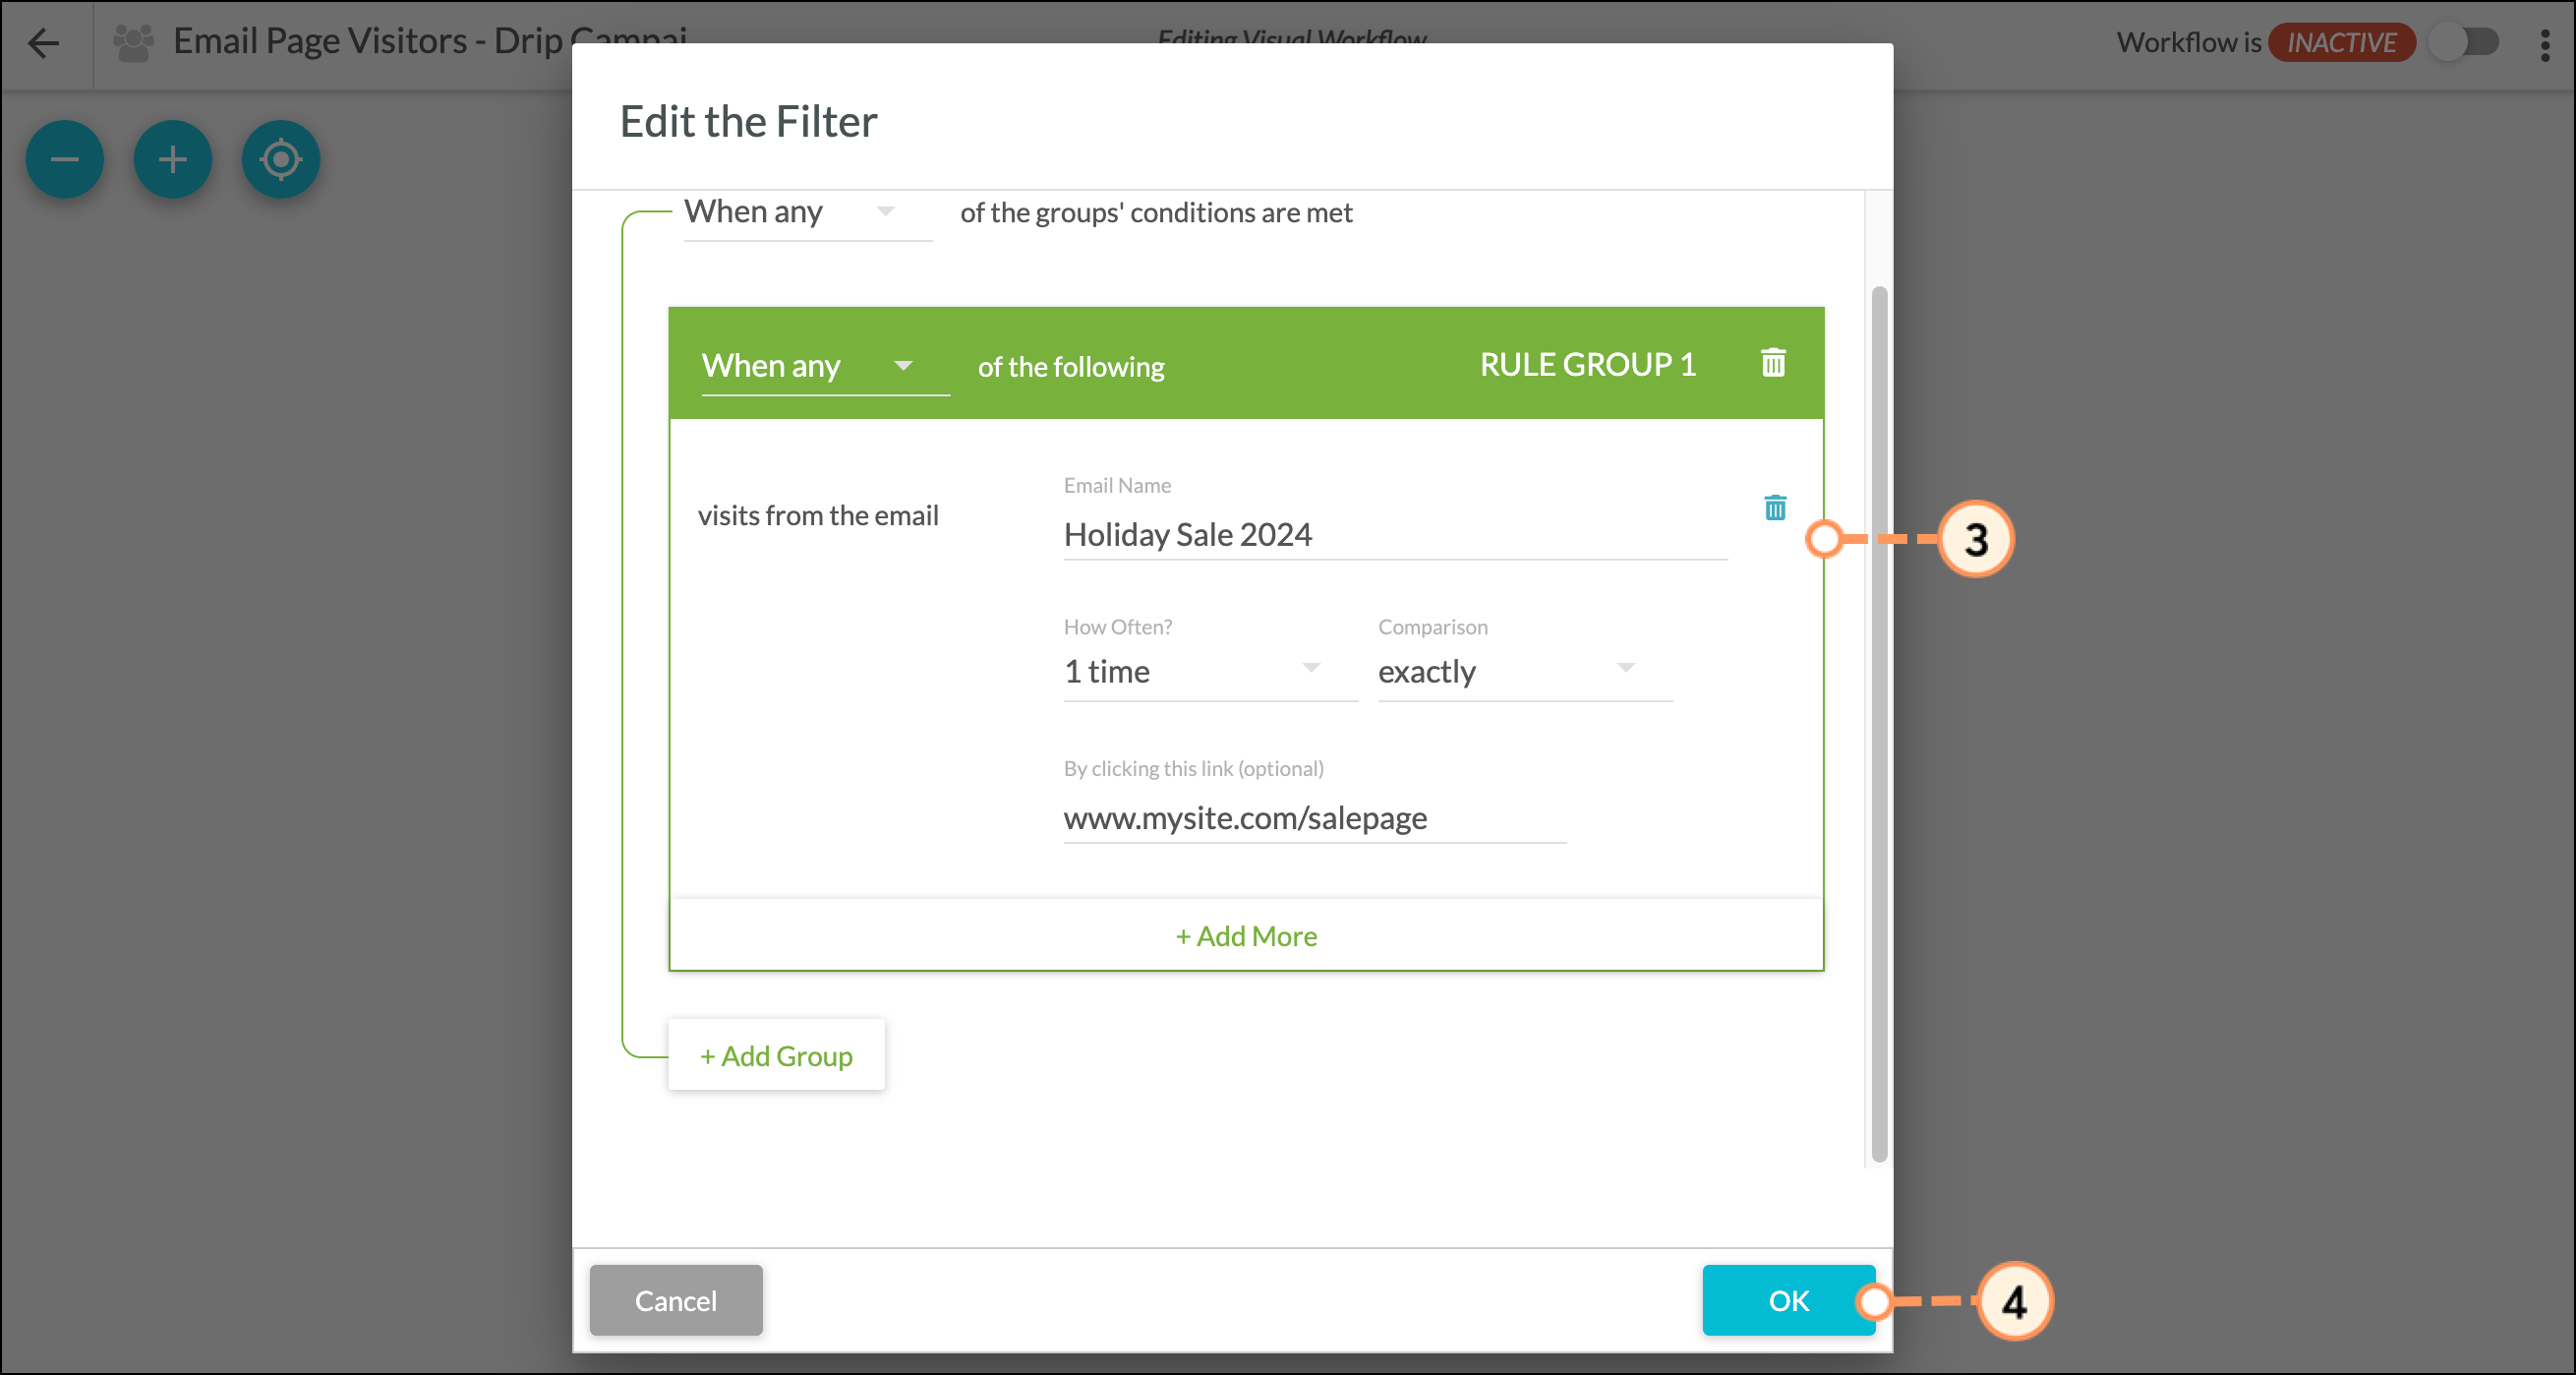
Once the initial workflow and trigger have been created, you will need to add the appropriate filters to the automation. To create a filter that limits the recipients of the email drip campaign, do the following:
- In your visual workflow, click + Add > Filter under the created visits the page trigger.
- Note: While email opens cannot be used as a trigger, they can be used as a filter.
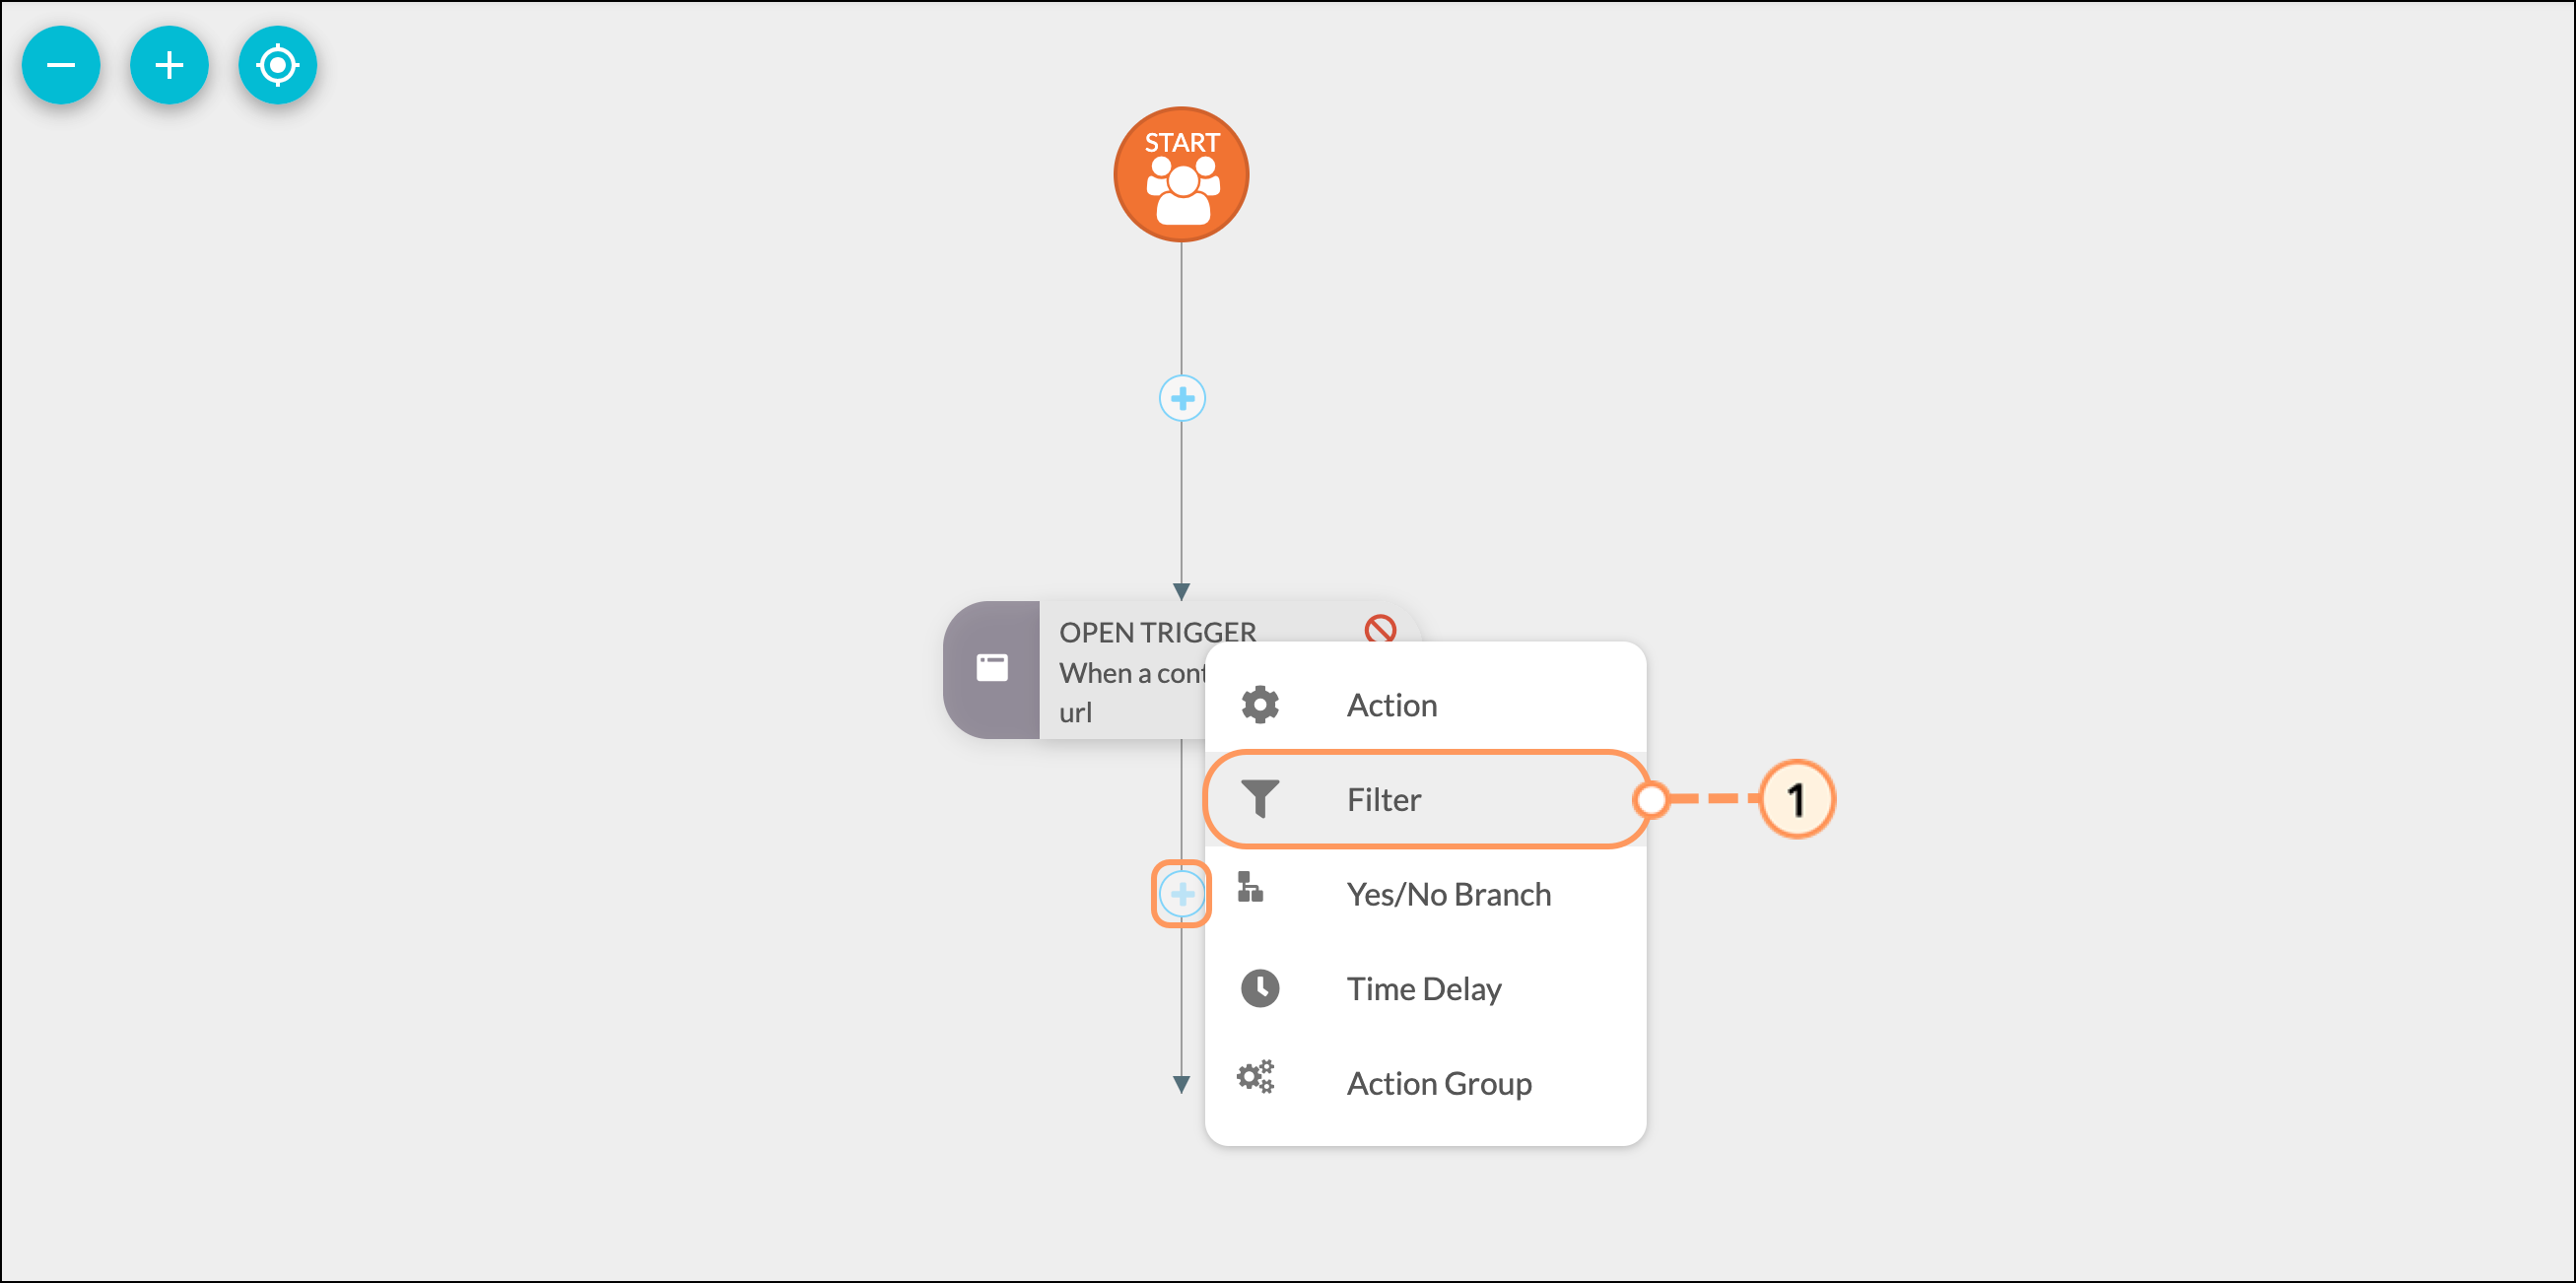
- Select visits from the email in the Email section.
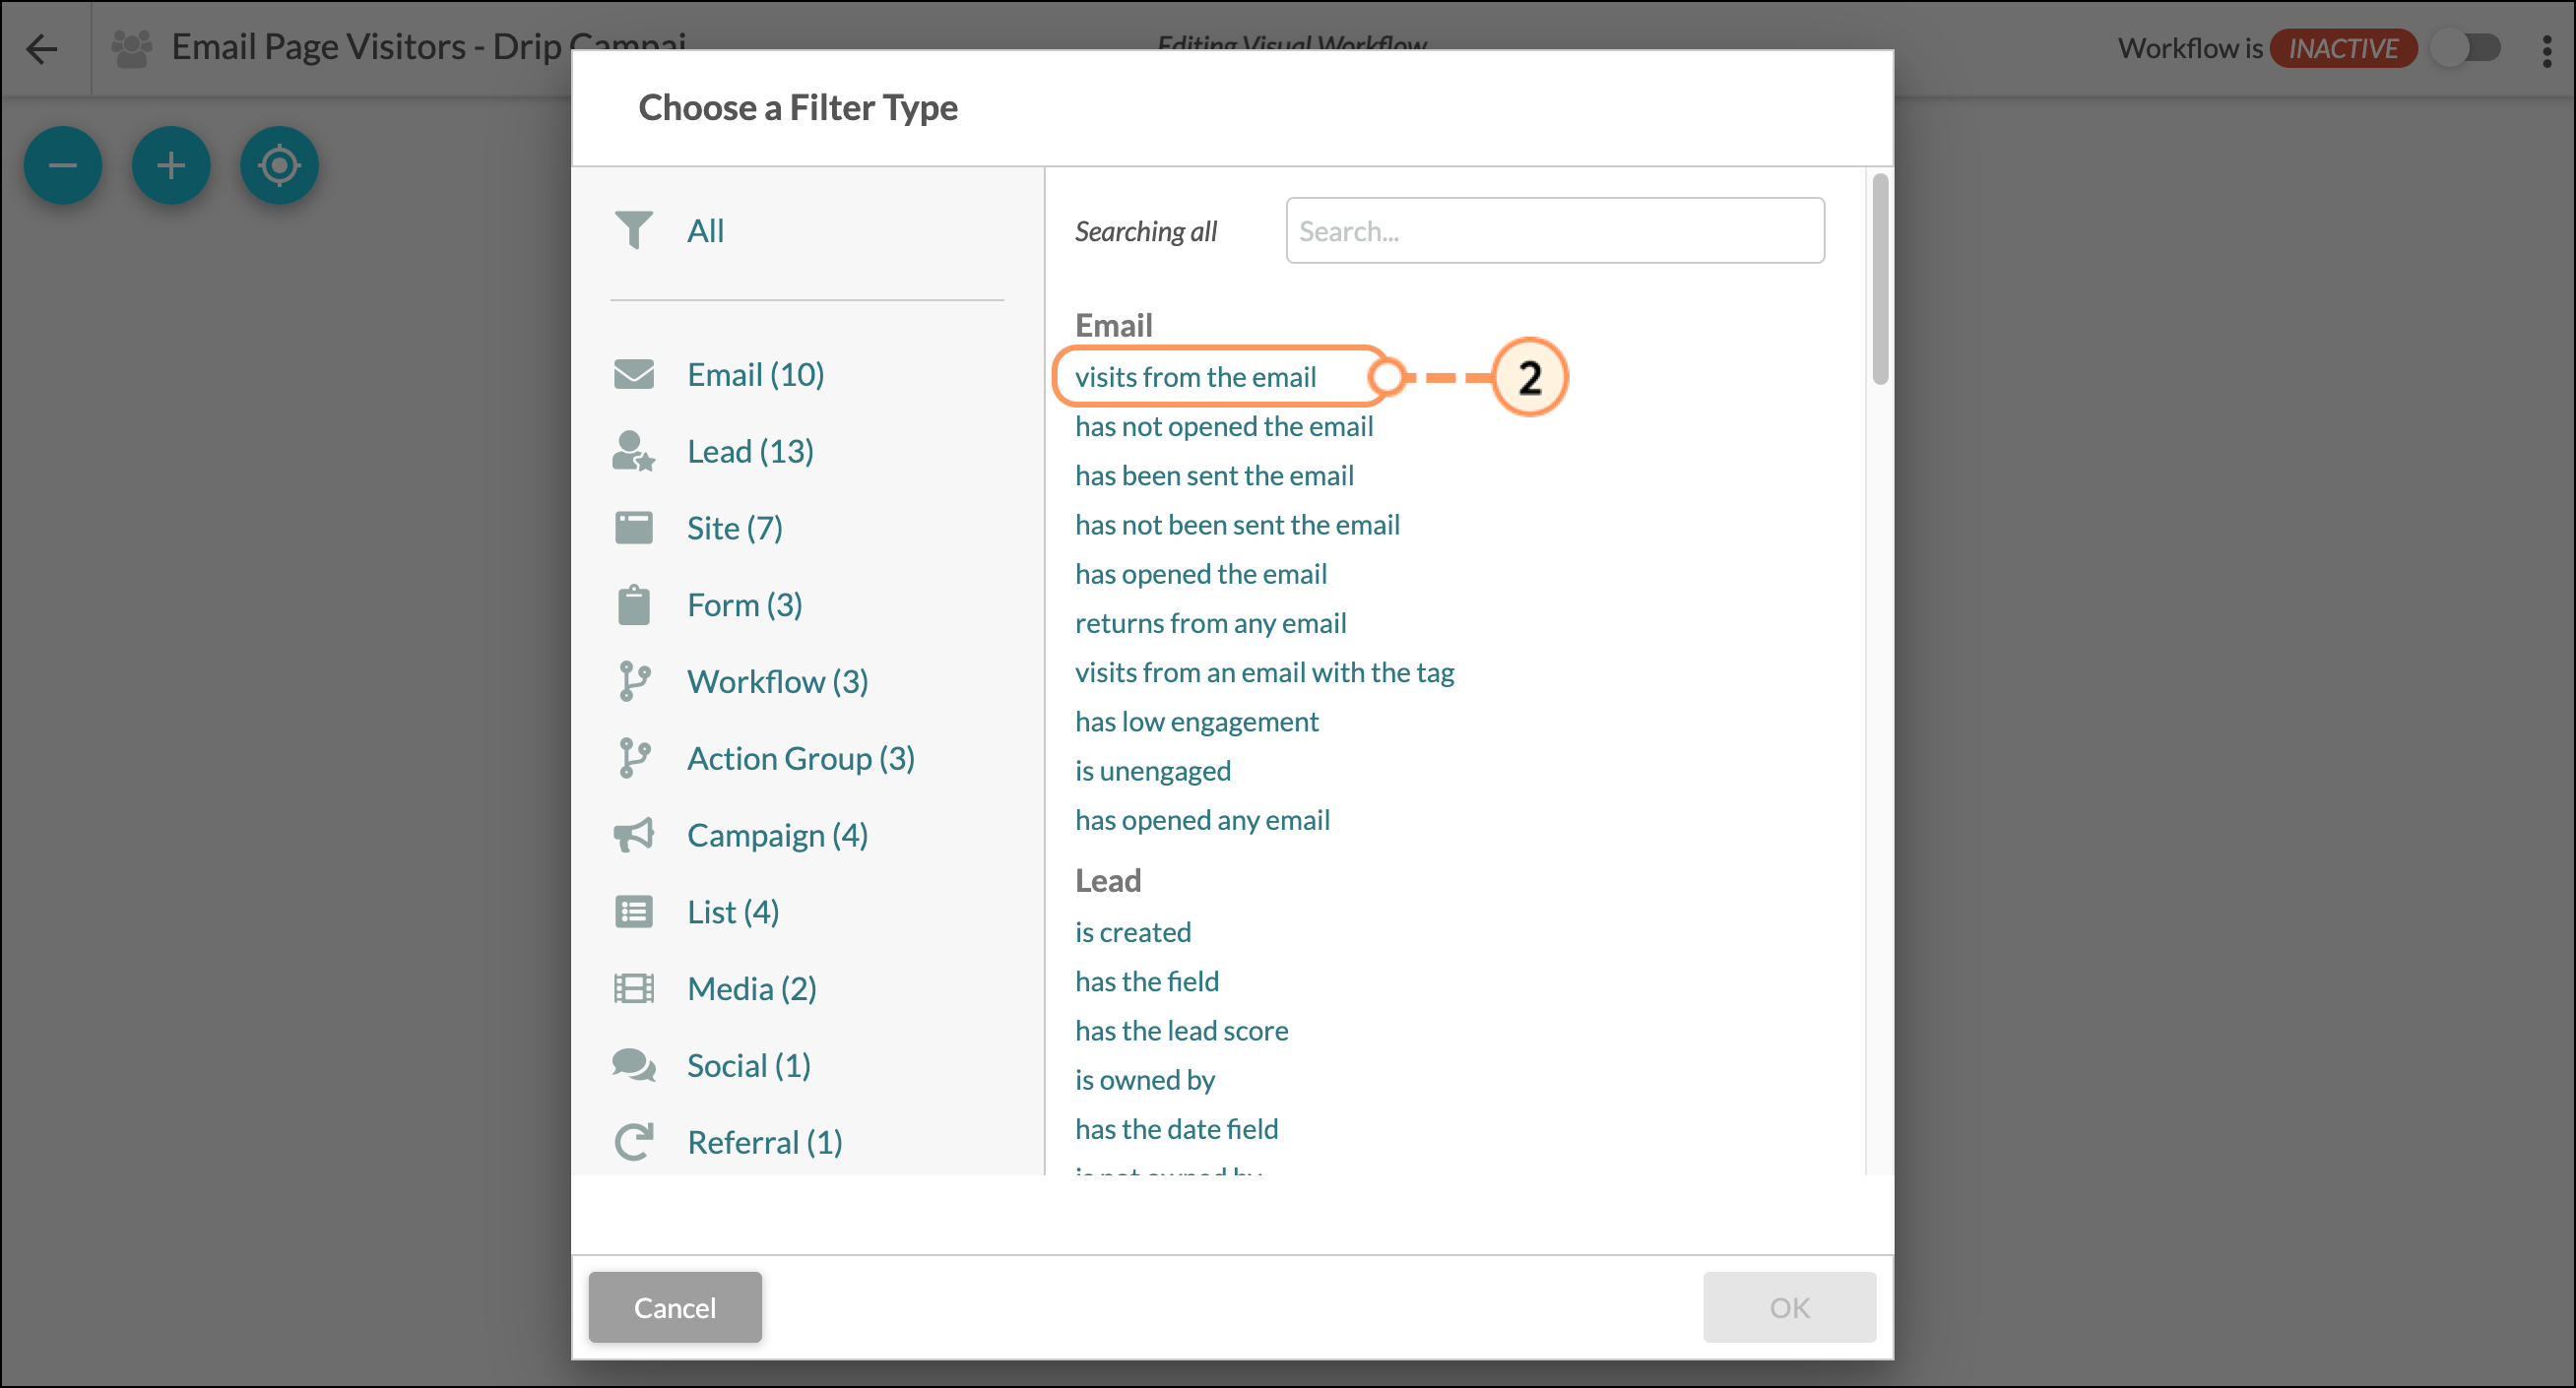
- Configure your filter.
- Click OK.
- Add any other desired emails or actions to the workflow and when finished, click the Active/Inactive toggle to set this workflow to Active.