Opportunities are created and added to a pipeline to monitor progress across deal stages in the sales process. Opportunities contain information about a deal, including the likelihood to close the deal, the value of the deal, and company information. Opportunities can be created in the Opportunity Manager, from the sales pipeline, or from a contact record.
The sales pipeline displays opportunities in a progression format, helping you visualize where a deal sits in the pipeline, while the Opportunity Manager displays all opportunities in a table format, helping you explore all available opportunities and select the one you need.
This article will help you understand and navigate the Opportunity Manager.
| Administrators | ✓ | |
| Company Managers | ✓ | |
| Marketing Managers | ✓ | |
| Sales Managers | ✓ | |
| Salespersons | ✓ | |
| Jr. Salespersons | ✓ |
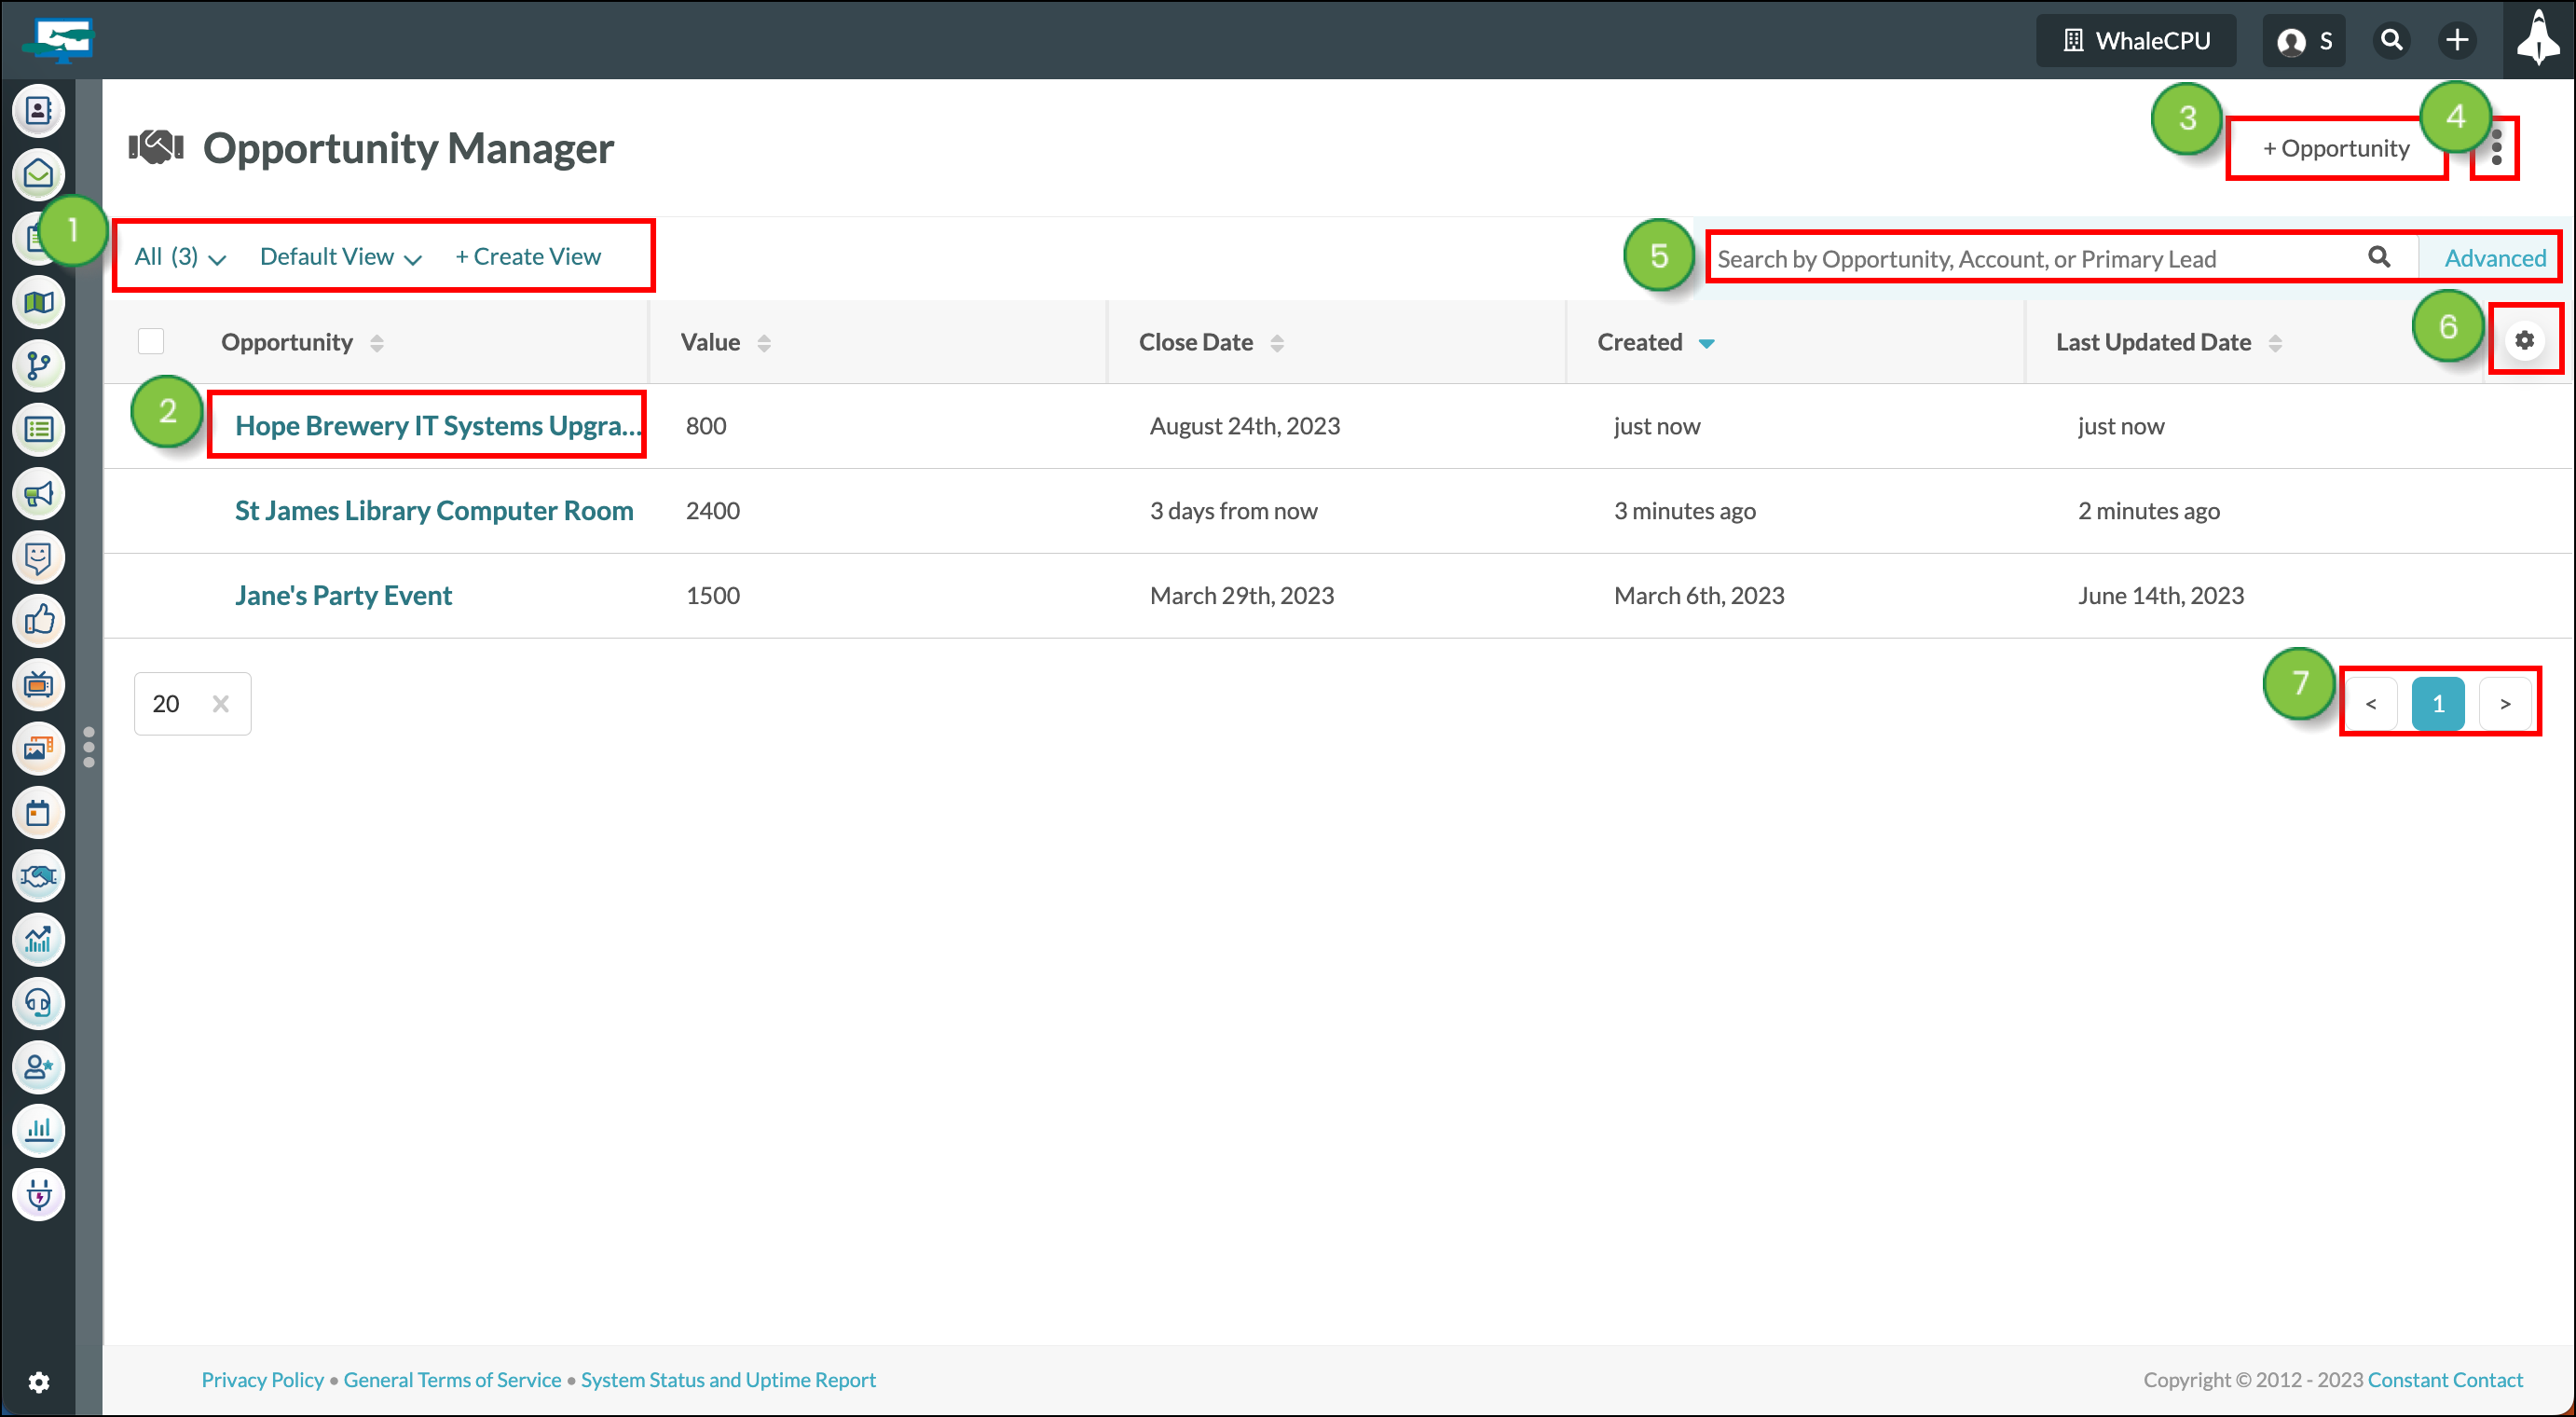
| 1: View Filters | ||
| Item | Description | |
| All |
You can search for opportunities with specific properties using the Search Bar or the Advanced Search feature. With the dropdown in this section, display all opportunities, opportunities from a recent search, or opportunities from a Saved Search. | |
| Default View |
The Default View is the view that appears when you first visit the Opportunity Manager. When you have a filtered view that you like -- from manipulating your columns -- you can save that view and access saved views from this dropdown. You can set any new view you create to be the Default View. | |
| + Create View |
When you have a filtered view that you like -- from manipulating your columns -- click + Create View to save that view for future use. | |
| 2: Opportunities | ||
| Item | Description | |
| Opportunity Title |
Click the title of an opportunity to open the Opportunity Drawer, where all of the opportunity's details can be seen and modified -- including notes, assigned contacts, the close date, the probability to close percentage, custom fields, tasks, and more. | |
| 3: Create A New Opportunity | ||
| Item | Description | |
| + Opportunity |
Create a new opportunity with an existing contact or a new contact. Once created, opportunities cannot be deleted. Instead, the opportunity status can be updated to Archived. | |
| 4: Export Opportunities | ||
| Item | Description | |
| Export Opportunities |
Export a .CSV file of opportunity data with set columns. | |
| Export Manager |
Go to the Export Manager page to view and manage previous and pending exports. | |
| 5: Search & Advanced Search | ||
| Item | Description | |
| Search Bar |
Search for opportunities quickly by typing in the name of the opportunity, associated account, or name of the primary lead on the account. | |
| Advanced Search |
Complete a more advanced, more detailed search, of opportunity fields and opportunity data, using the Advanced button. | |
| 6: Manage Columns | ||
| Item | Description | |
| Visible Fields |
Certain fields will be displayed in the opportunity manager, as columns, by default. Check or uncheck the box in the Manage Columns, Visual Fields section to add or remove these columns from the Opportunity Manager table. | |
| Opportunity Fields |
Fields within opportunities, such as the assigned lead, opportunity value, etc., can be displayed as a column in the opportunity manager. Check the box next to the opportunity fields you'd like to display as columns in the Opportunity Manager table. | |
|
Custom Fields
|
Any custom fields in your Lead Gen & CRM instance can be displayed as columns. Check the box next to the custom fields you'd like to display as columns in the Opportunity Manager table. | |
| 7: See More Opportunities | ||
| Item | Description | |
| Page Number |
See which page number you are currently on, and click on other page numbers to jump to that page of the Opportunity Manager table. The Opportunity Manager displays up to 20 opportunities at a time, by default. You can edit the table to display 10, 20, or 50 opportunities at a time. | |
| Arrows |
Use the left arrow to go to the previous page. Use the right arrow to go to the following page. The arrows move your position in 1-page increments. | |
Copyright © 2026 · All Rights Reserved · Constant Contact · Privacy Center