With the Content Calendar, you will never have the issue of sending the same email on the same day, or worry about publishing your content too frequently. This article will detail how to create and visualize all of your scheduled content in Lead Gen & CRM's Content Calendar.
| Administrators | ✓ | |
| Company Managers | ✓ | |
| Marketing Managers | ✓ | |
| Sales Managers | ||
| Salespersons | ||
| Jr. Salespersons |
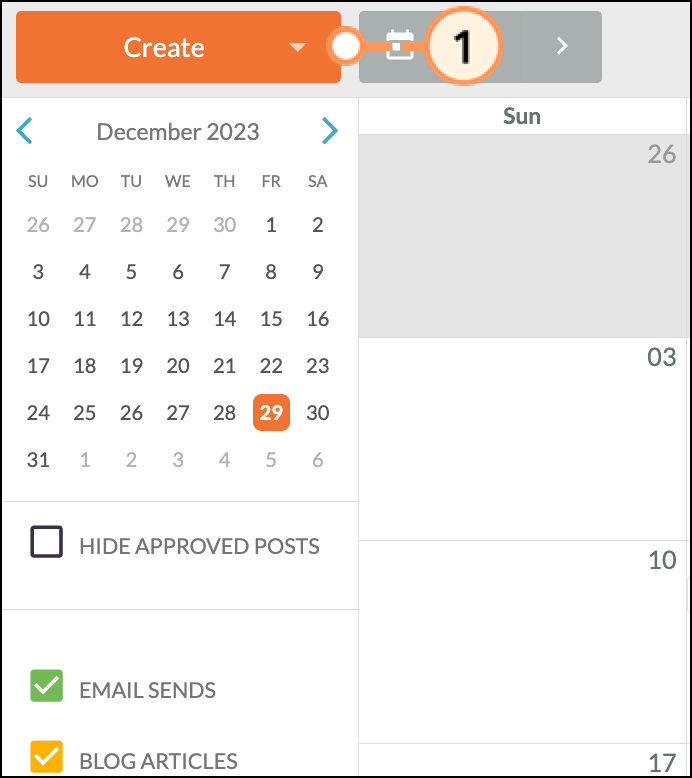
The Content Calendar not only provides a view of your scheduled events, but it also enables you to create content directly in the calendar view. Click Content Calendar in the left toolbar to access the Content Calendar.
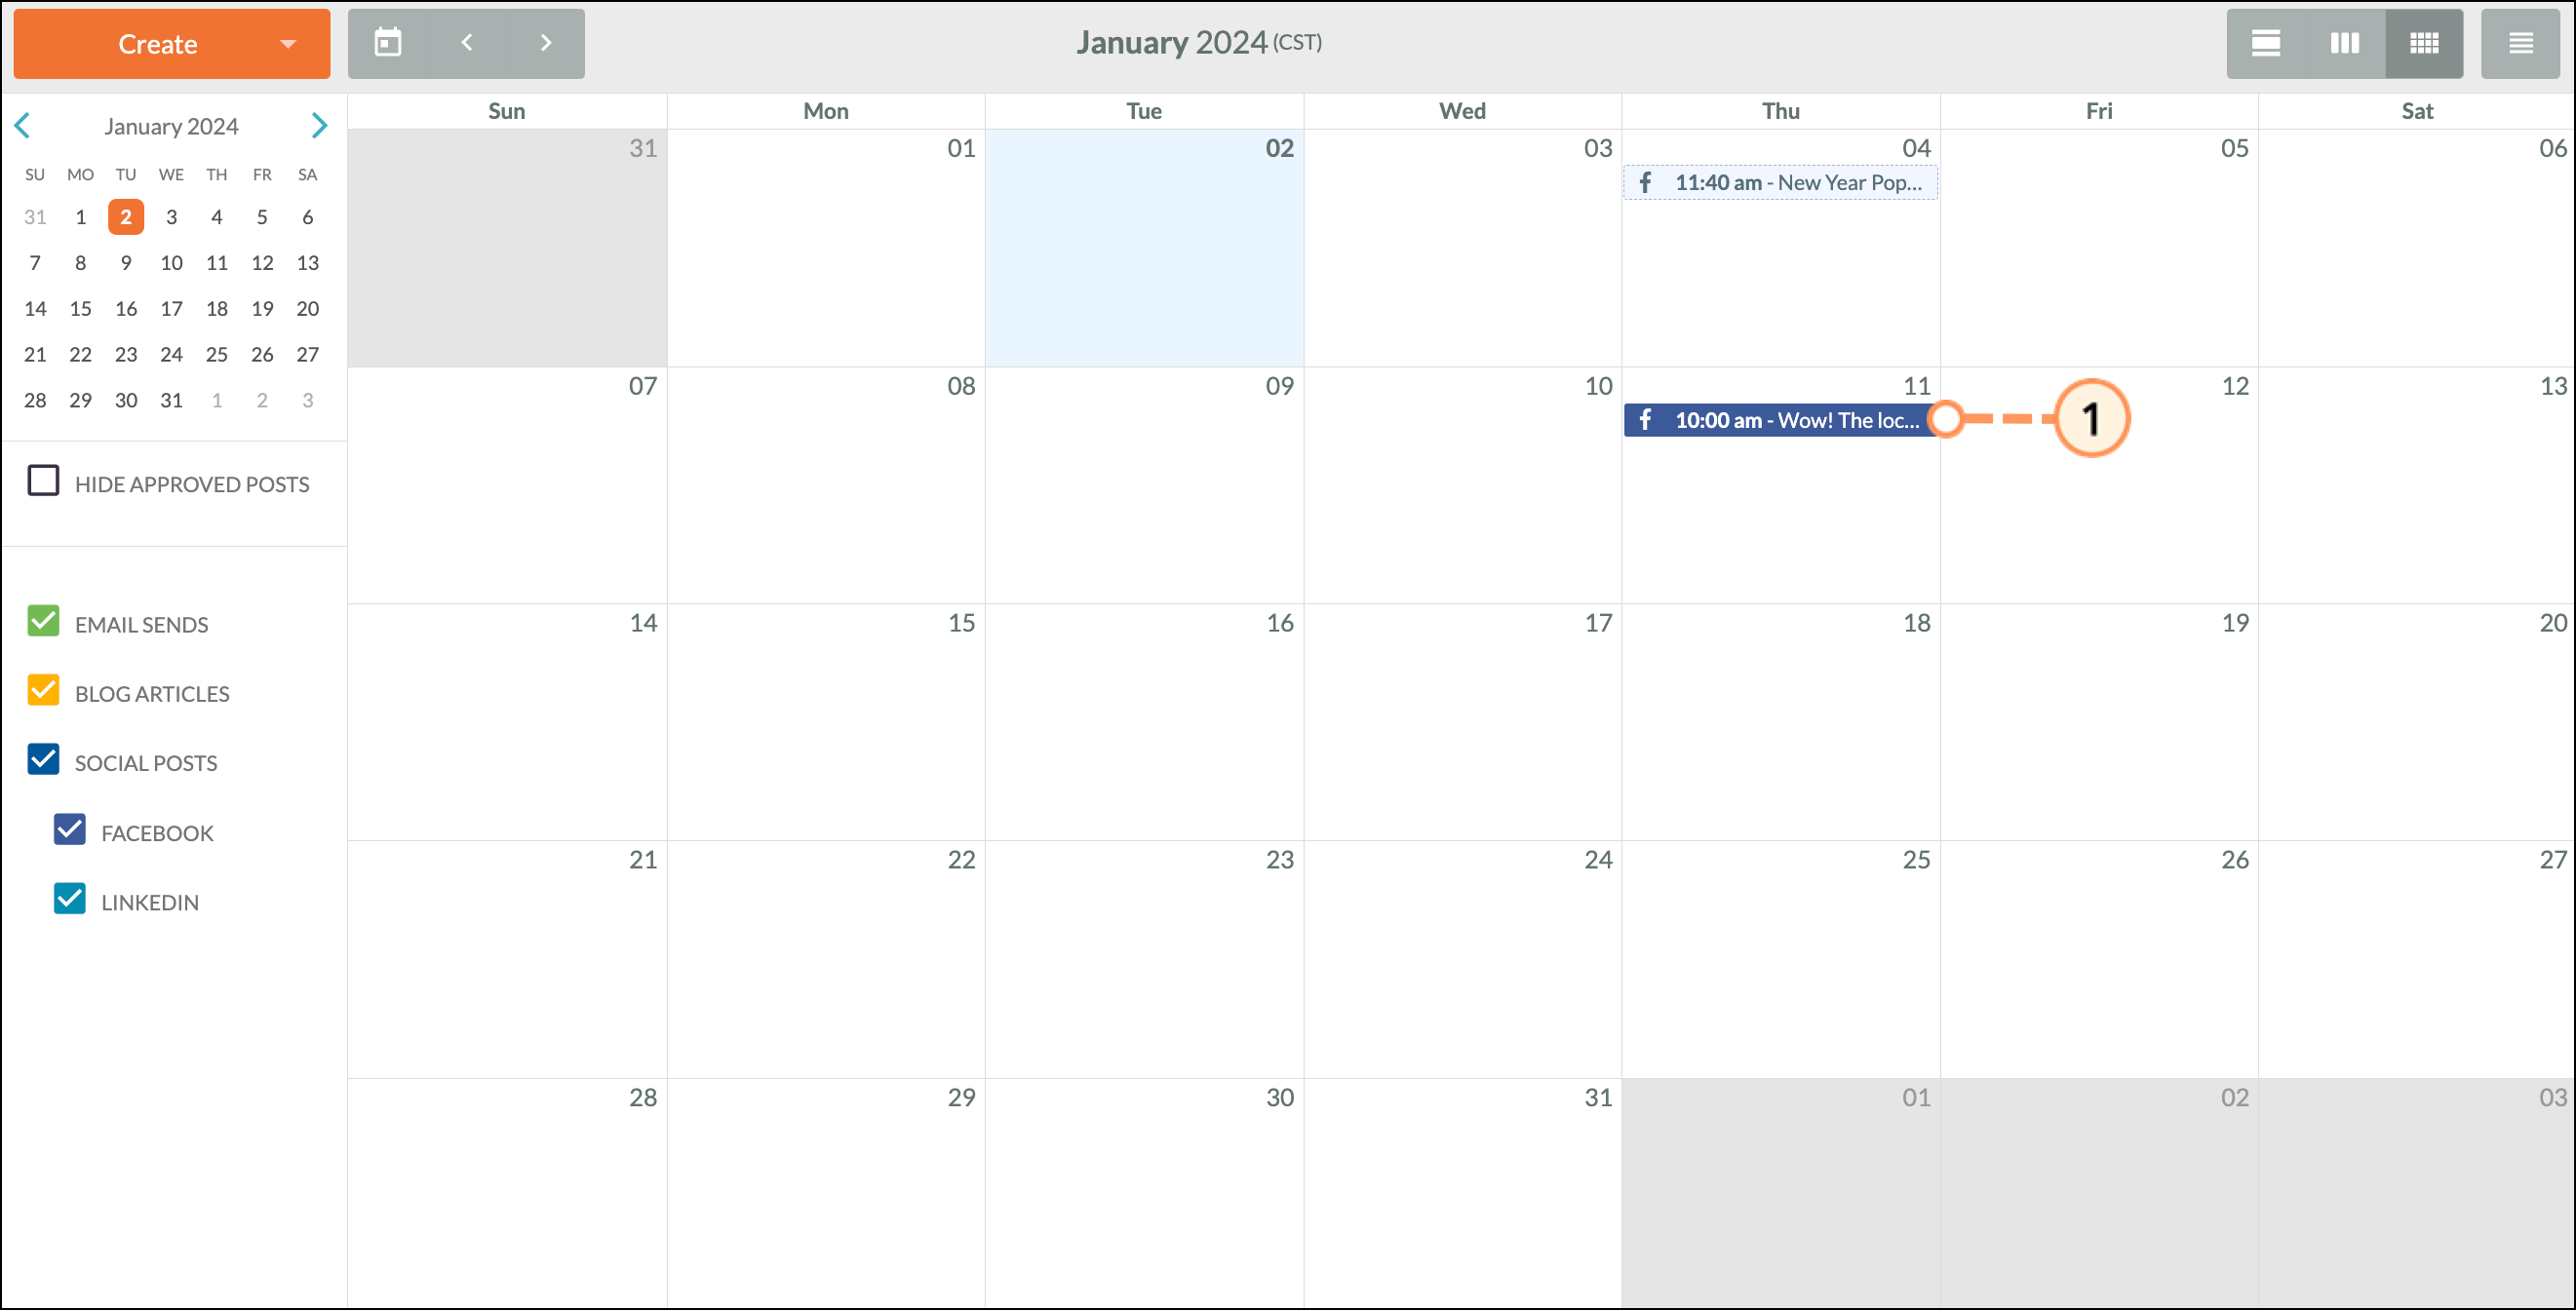
You can click into each calendar event to see a preview of your email, blog article, or social post. The preview is a direct reflection of that content, aside from blog articles. Blog articles will take on the look and feel of the landing page template.
 |  |
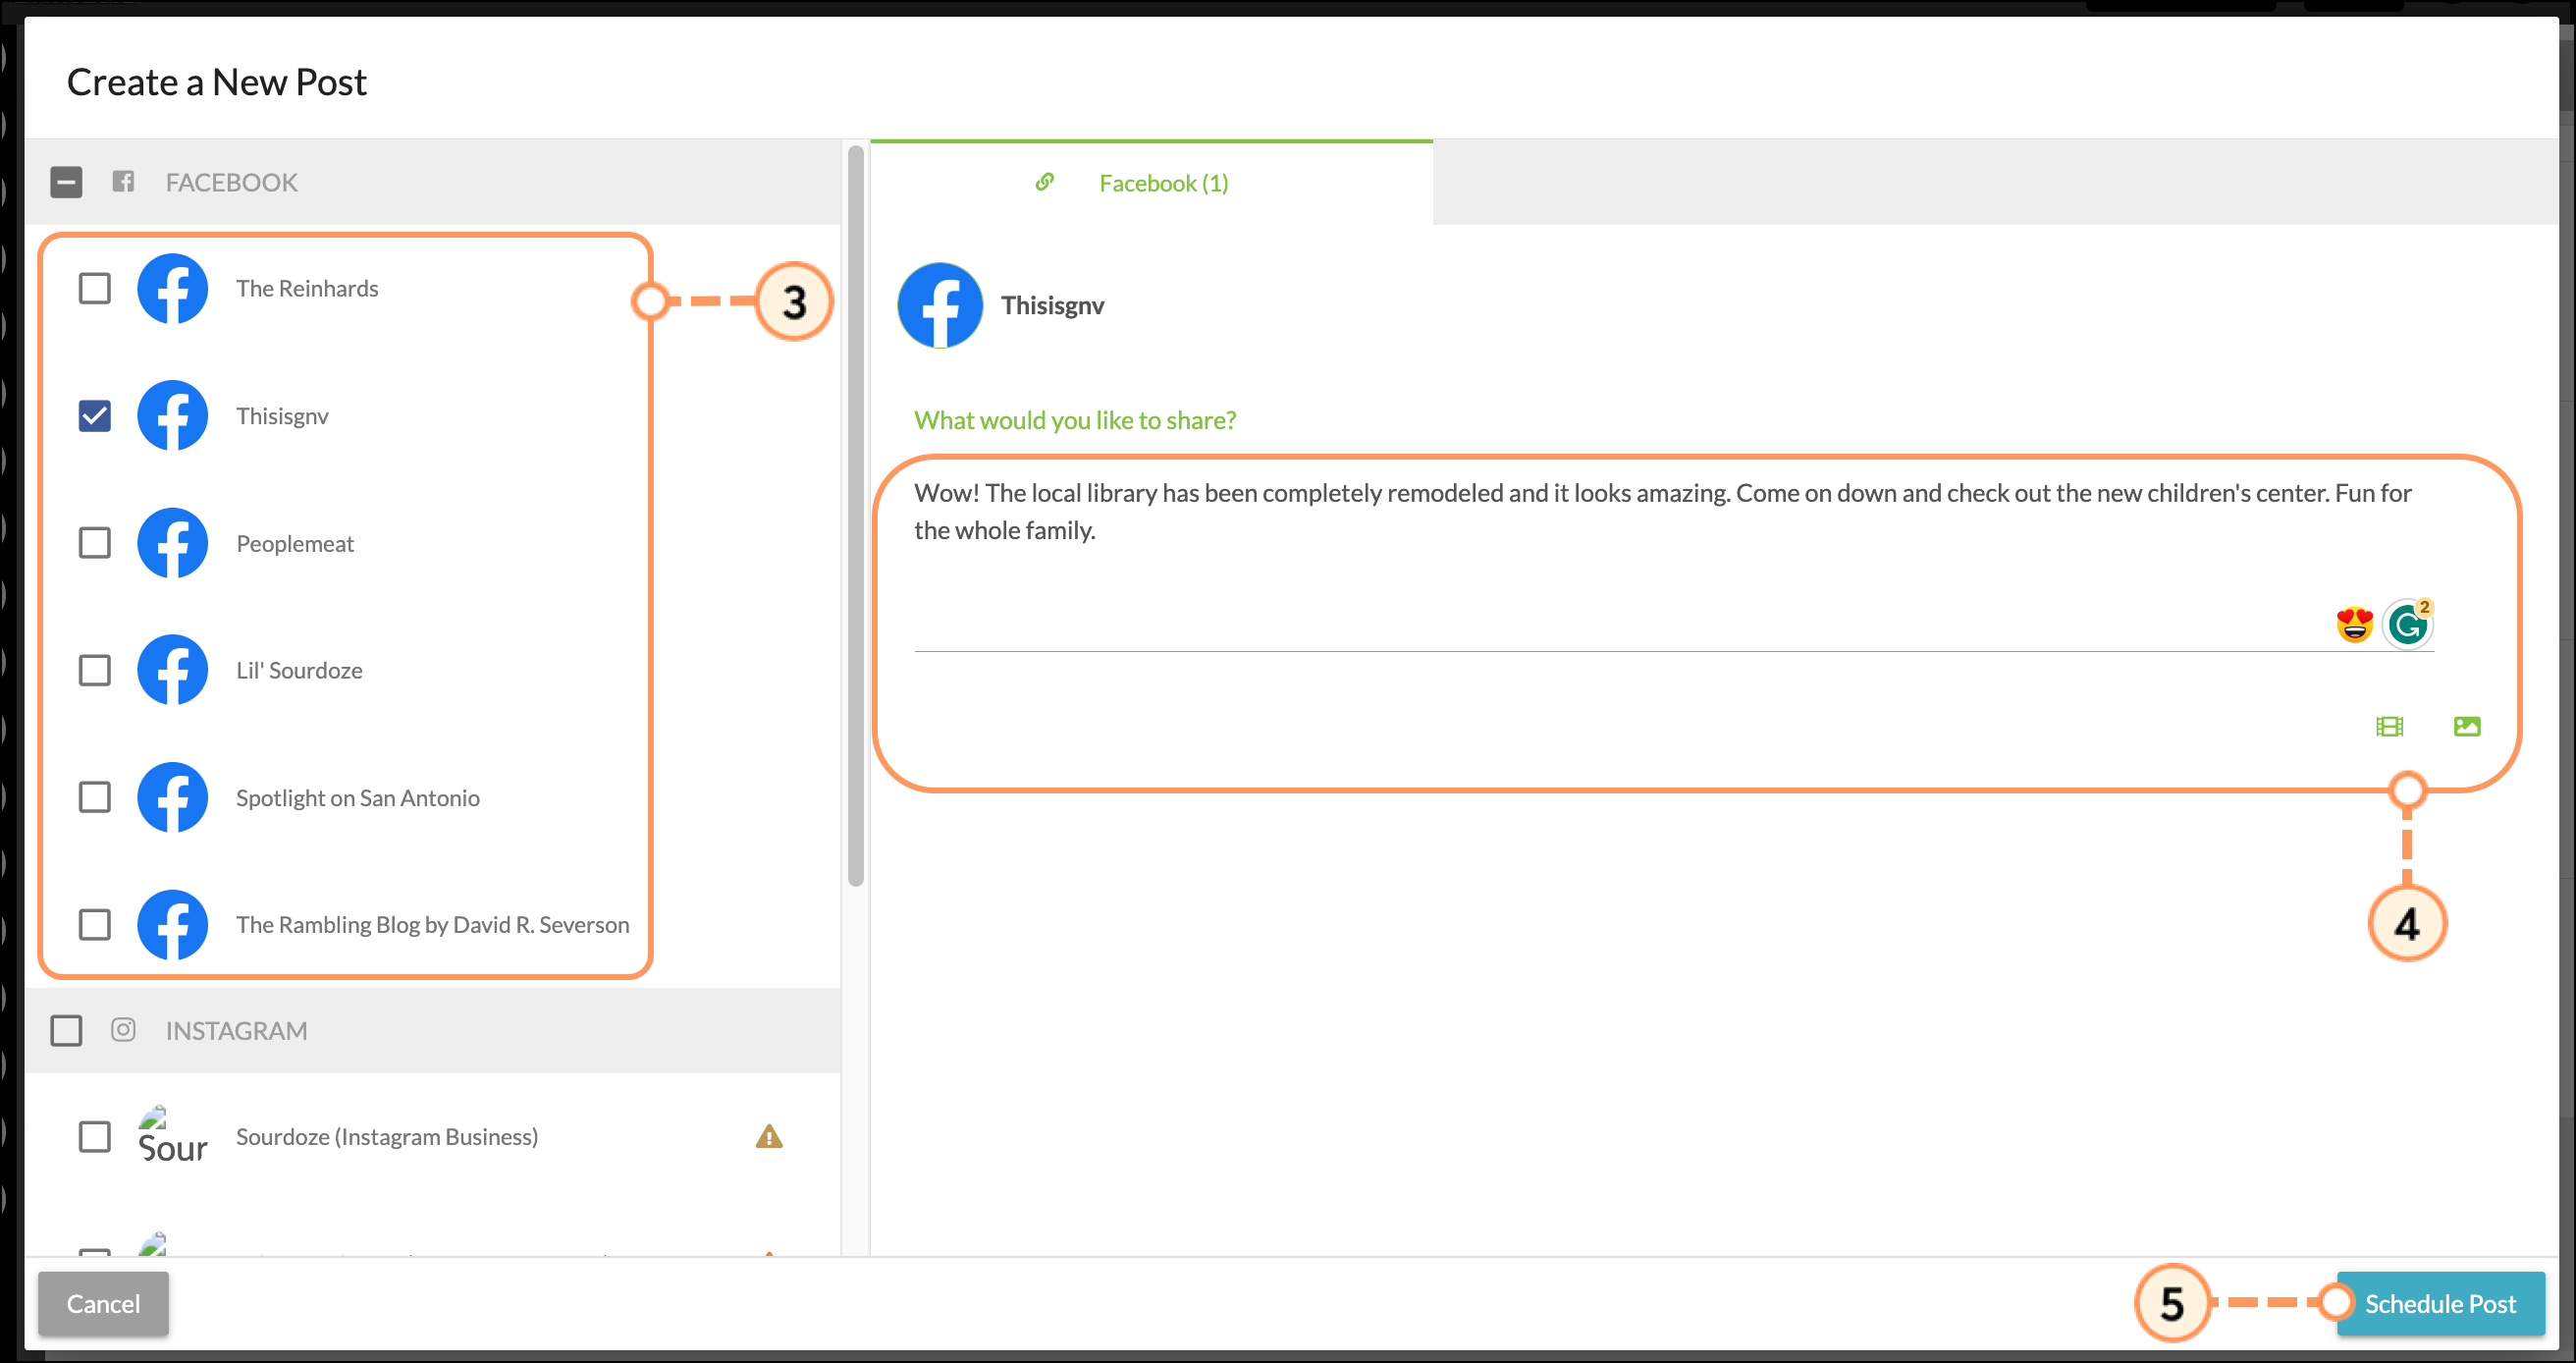
Before being able to use the social media tools, you will need to first connect your social media platforms. Once your social media platforms are connected, you will be able to post directly to those social platforms in Lead Gen & CRM.
Refer to the following articles for more information on creating new social posts:
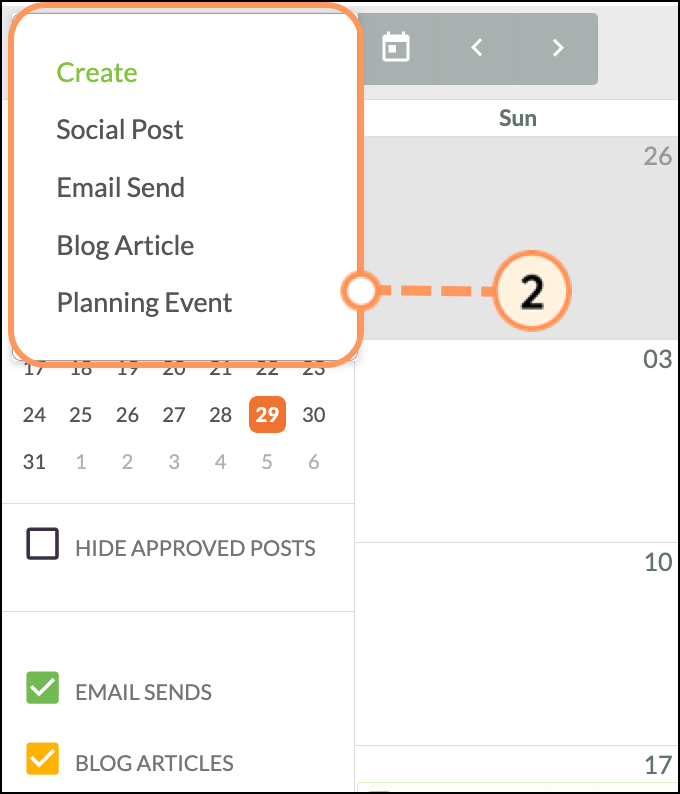
You can schedule emails to lists directly from the Content Calendar. To send emails to lists, do the following:
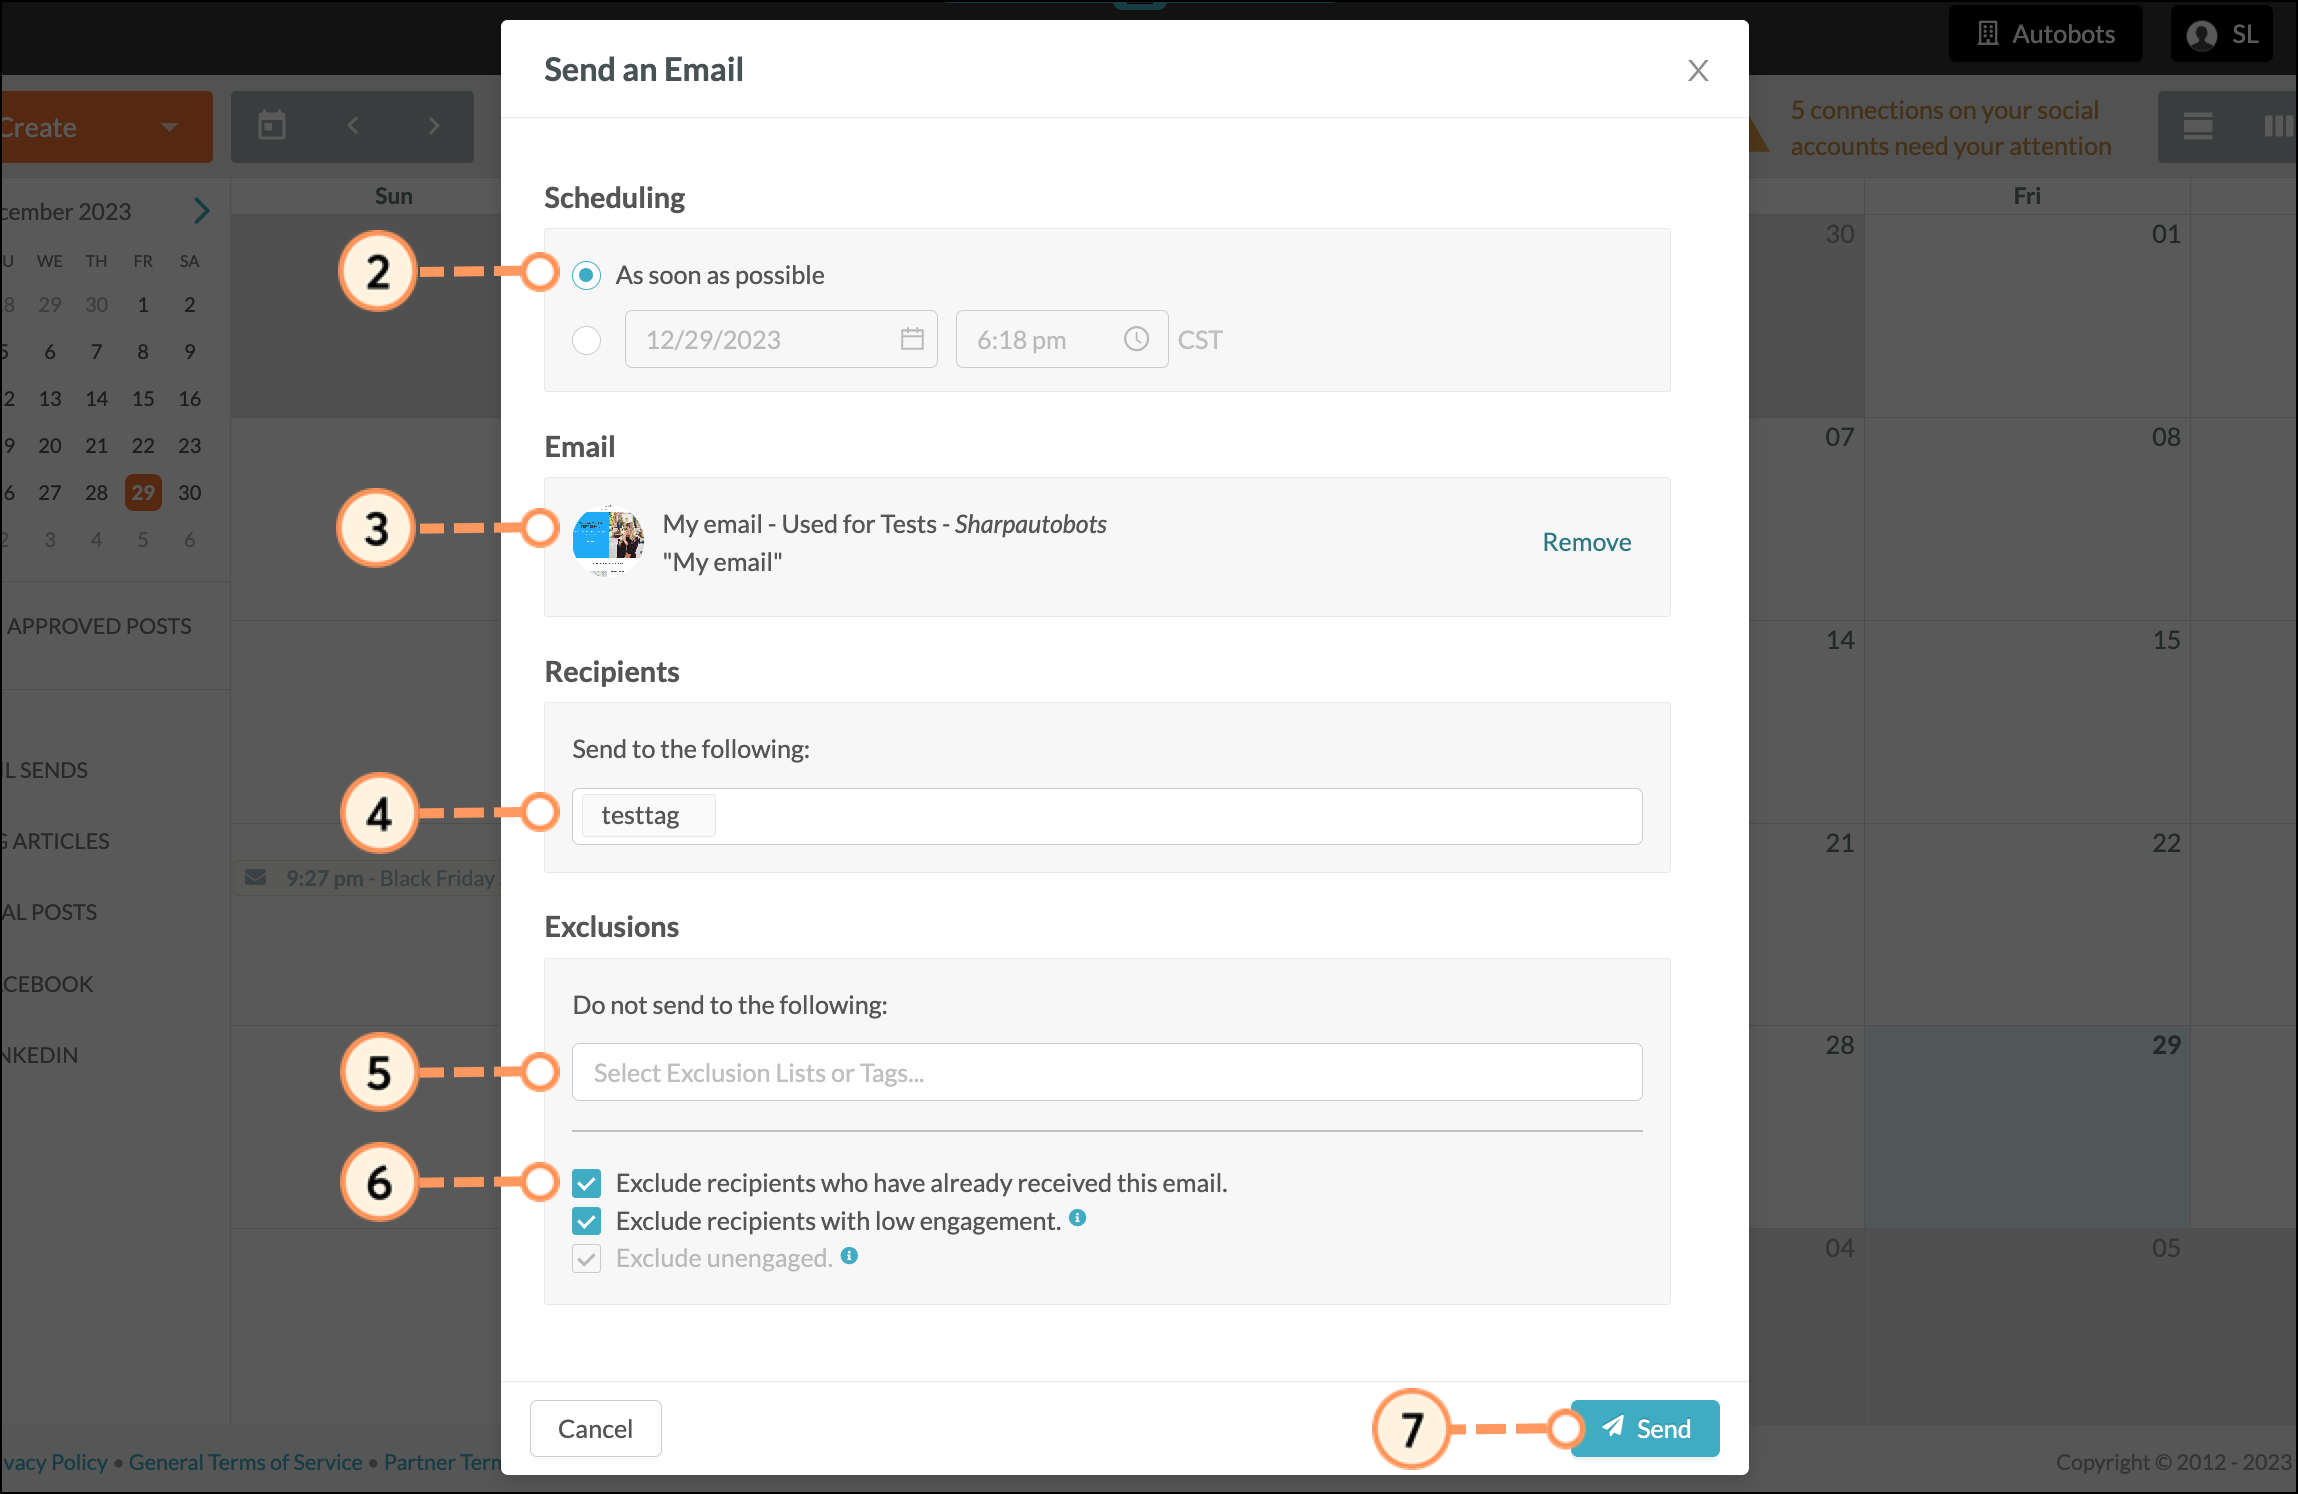
Refer to Sending Emails to Lists for more information on email sending.
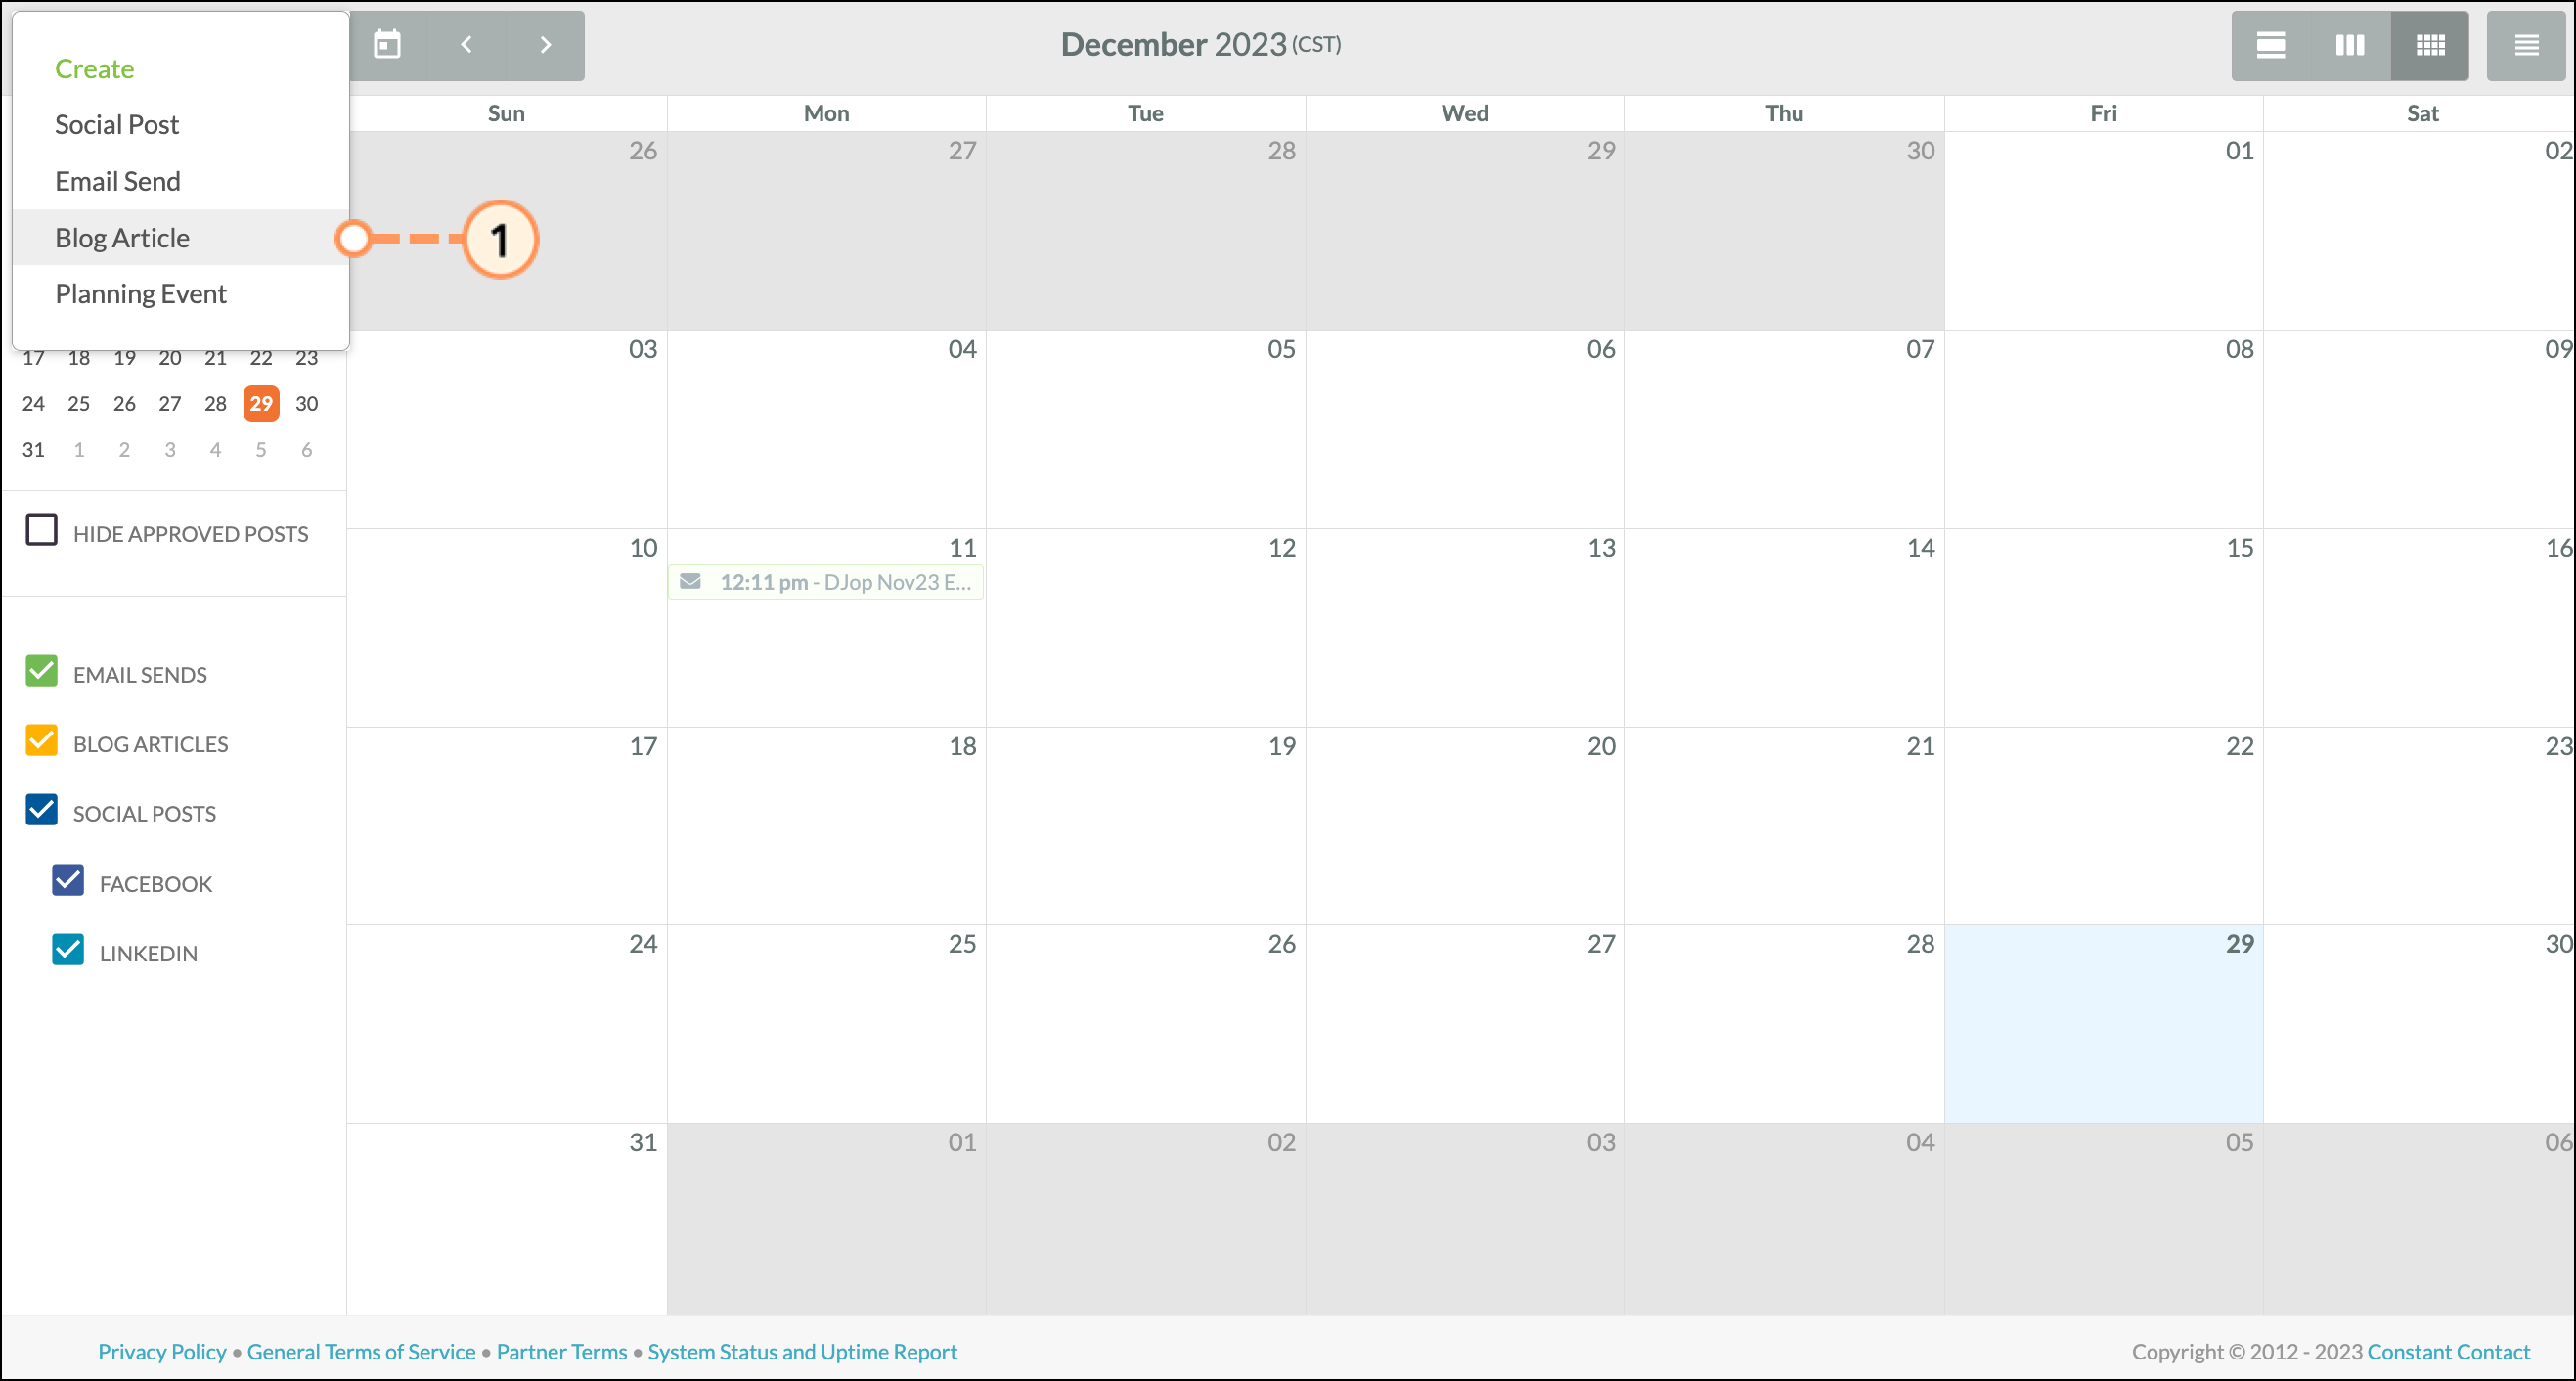
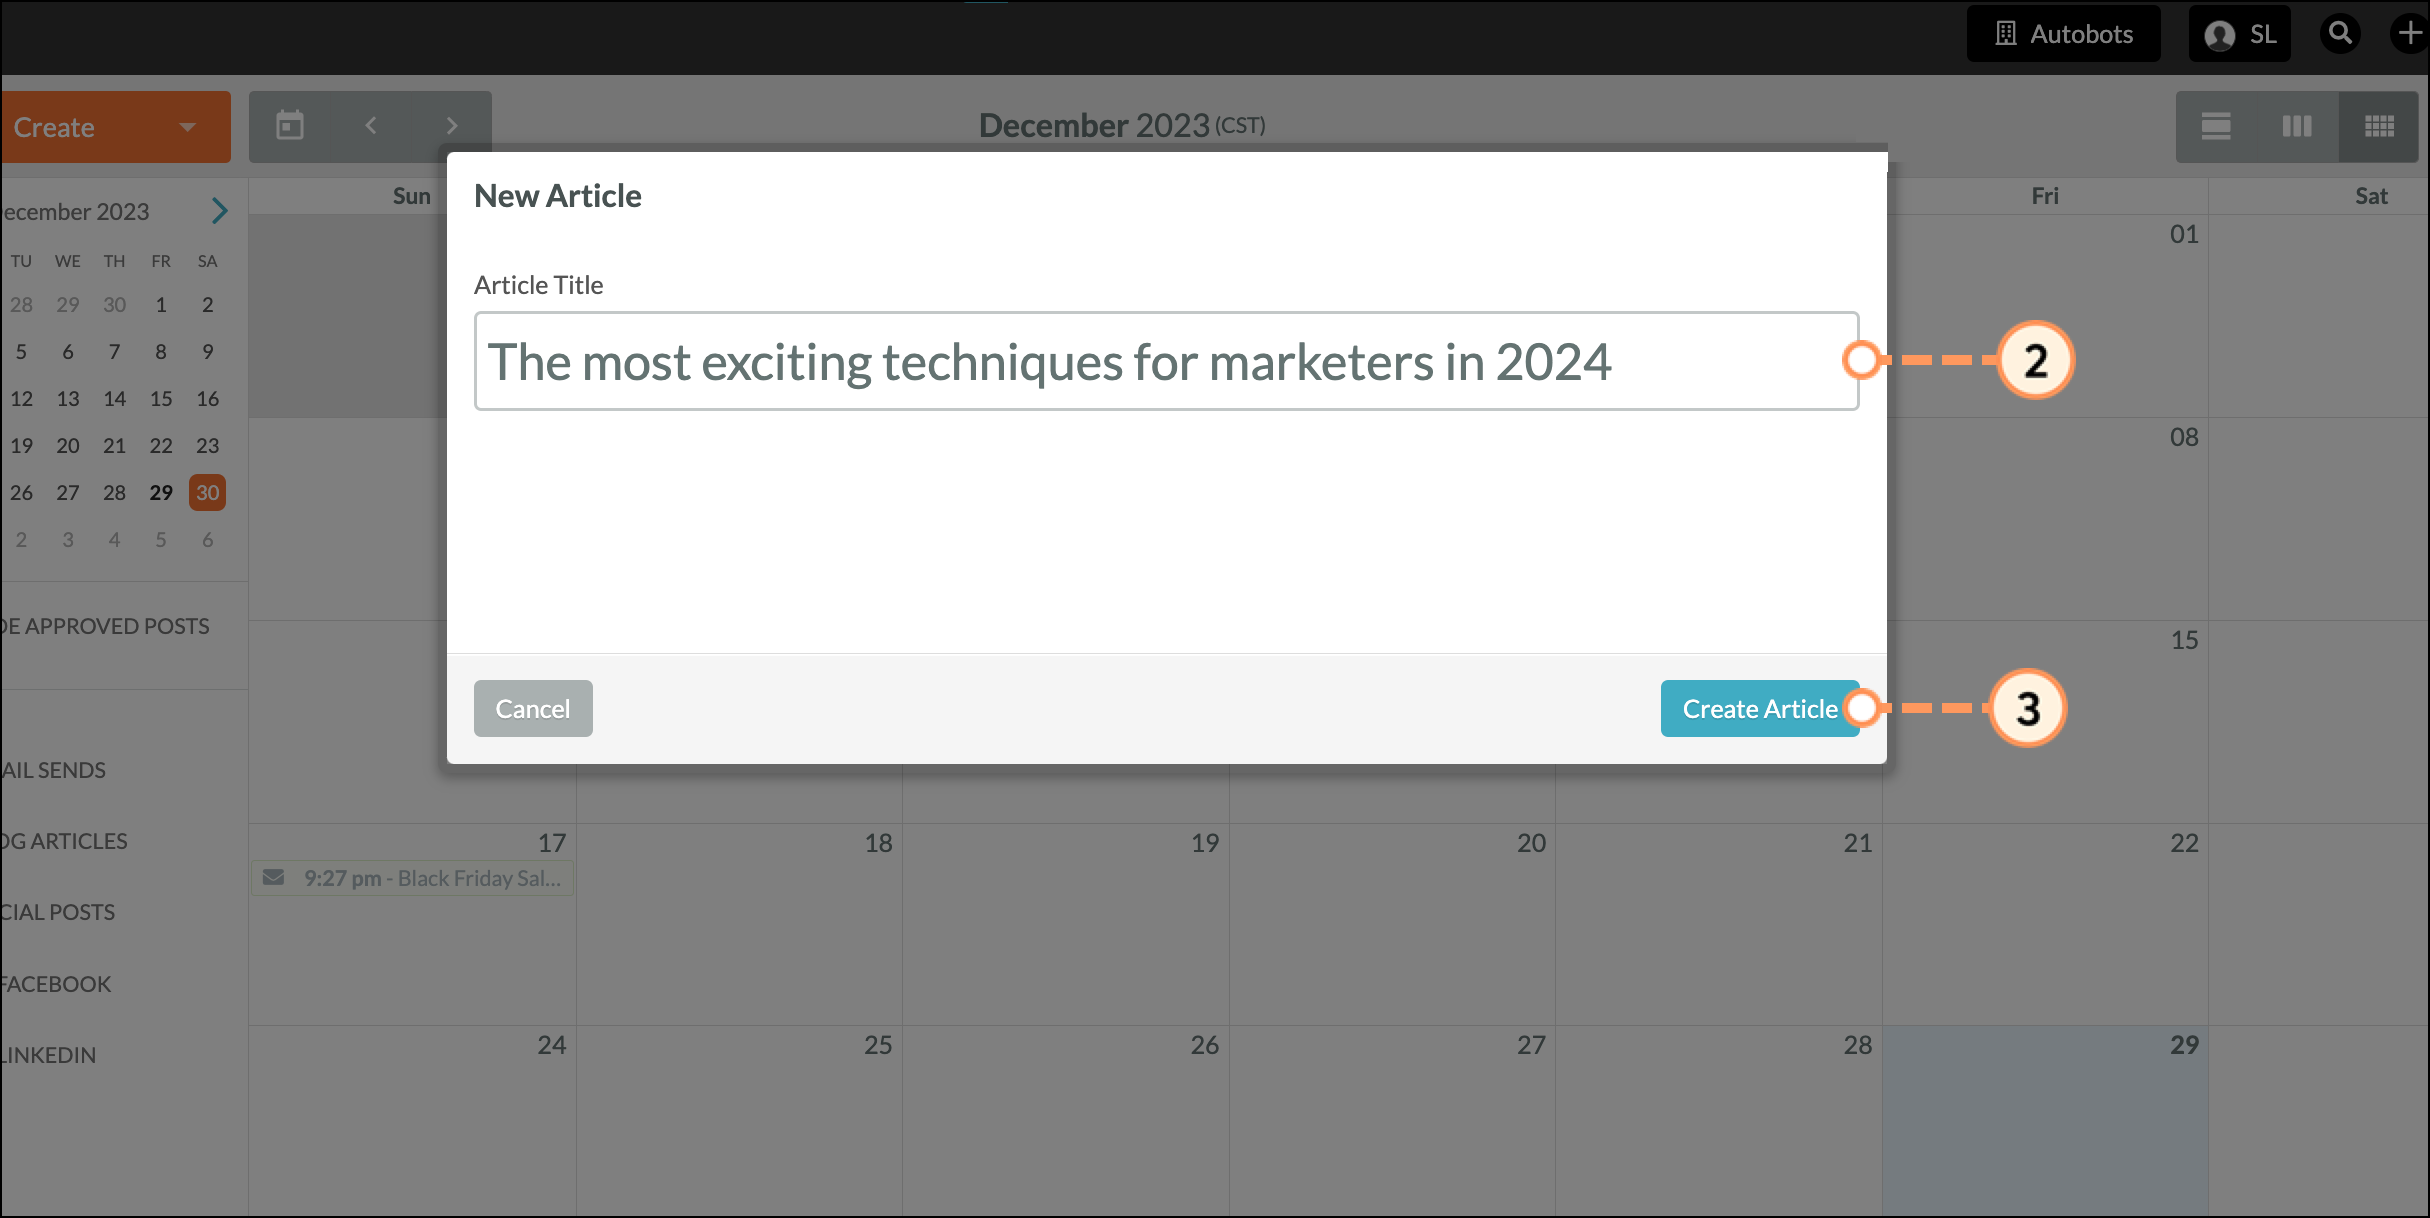
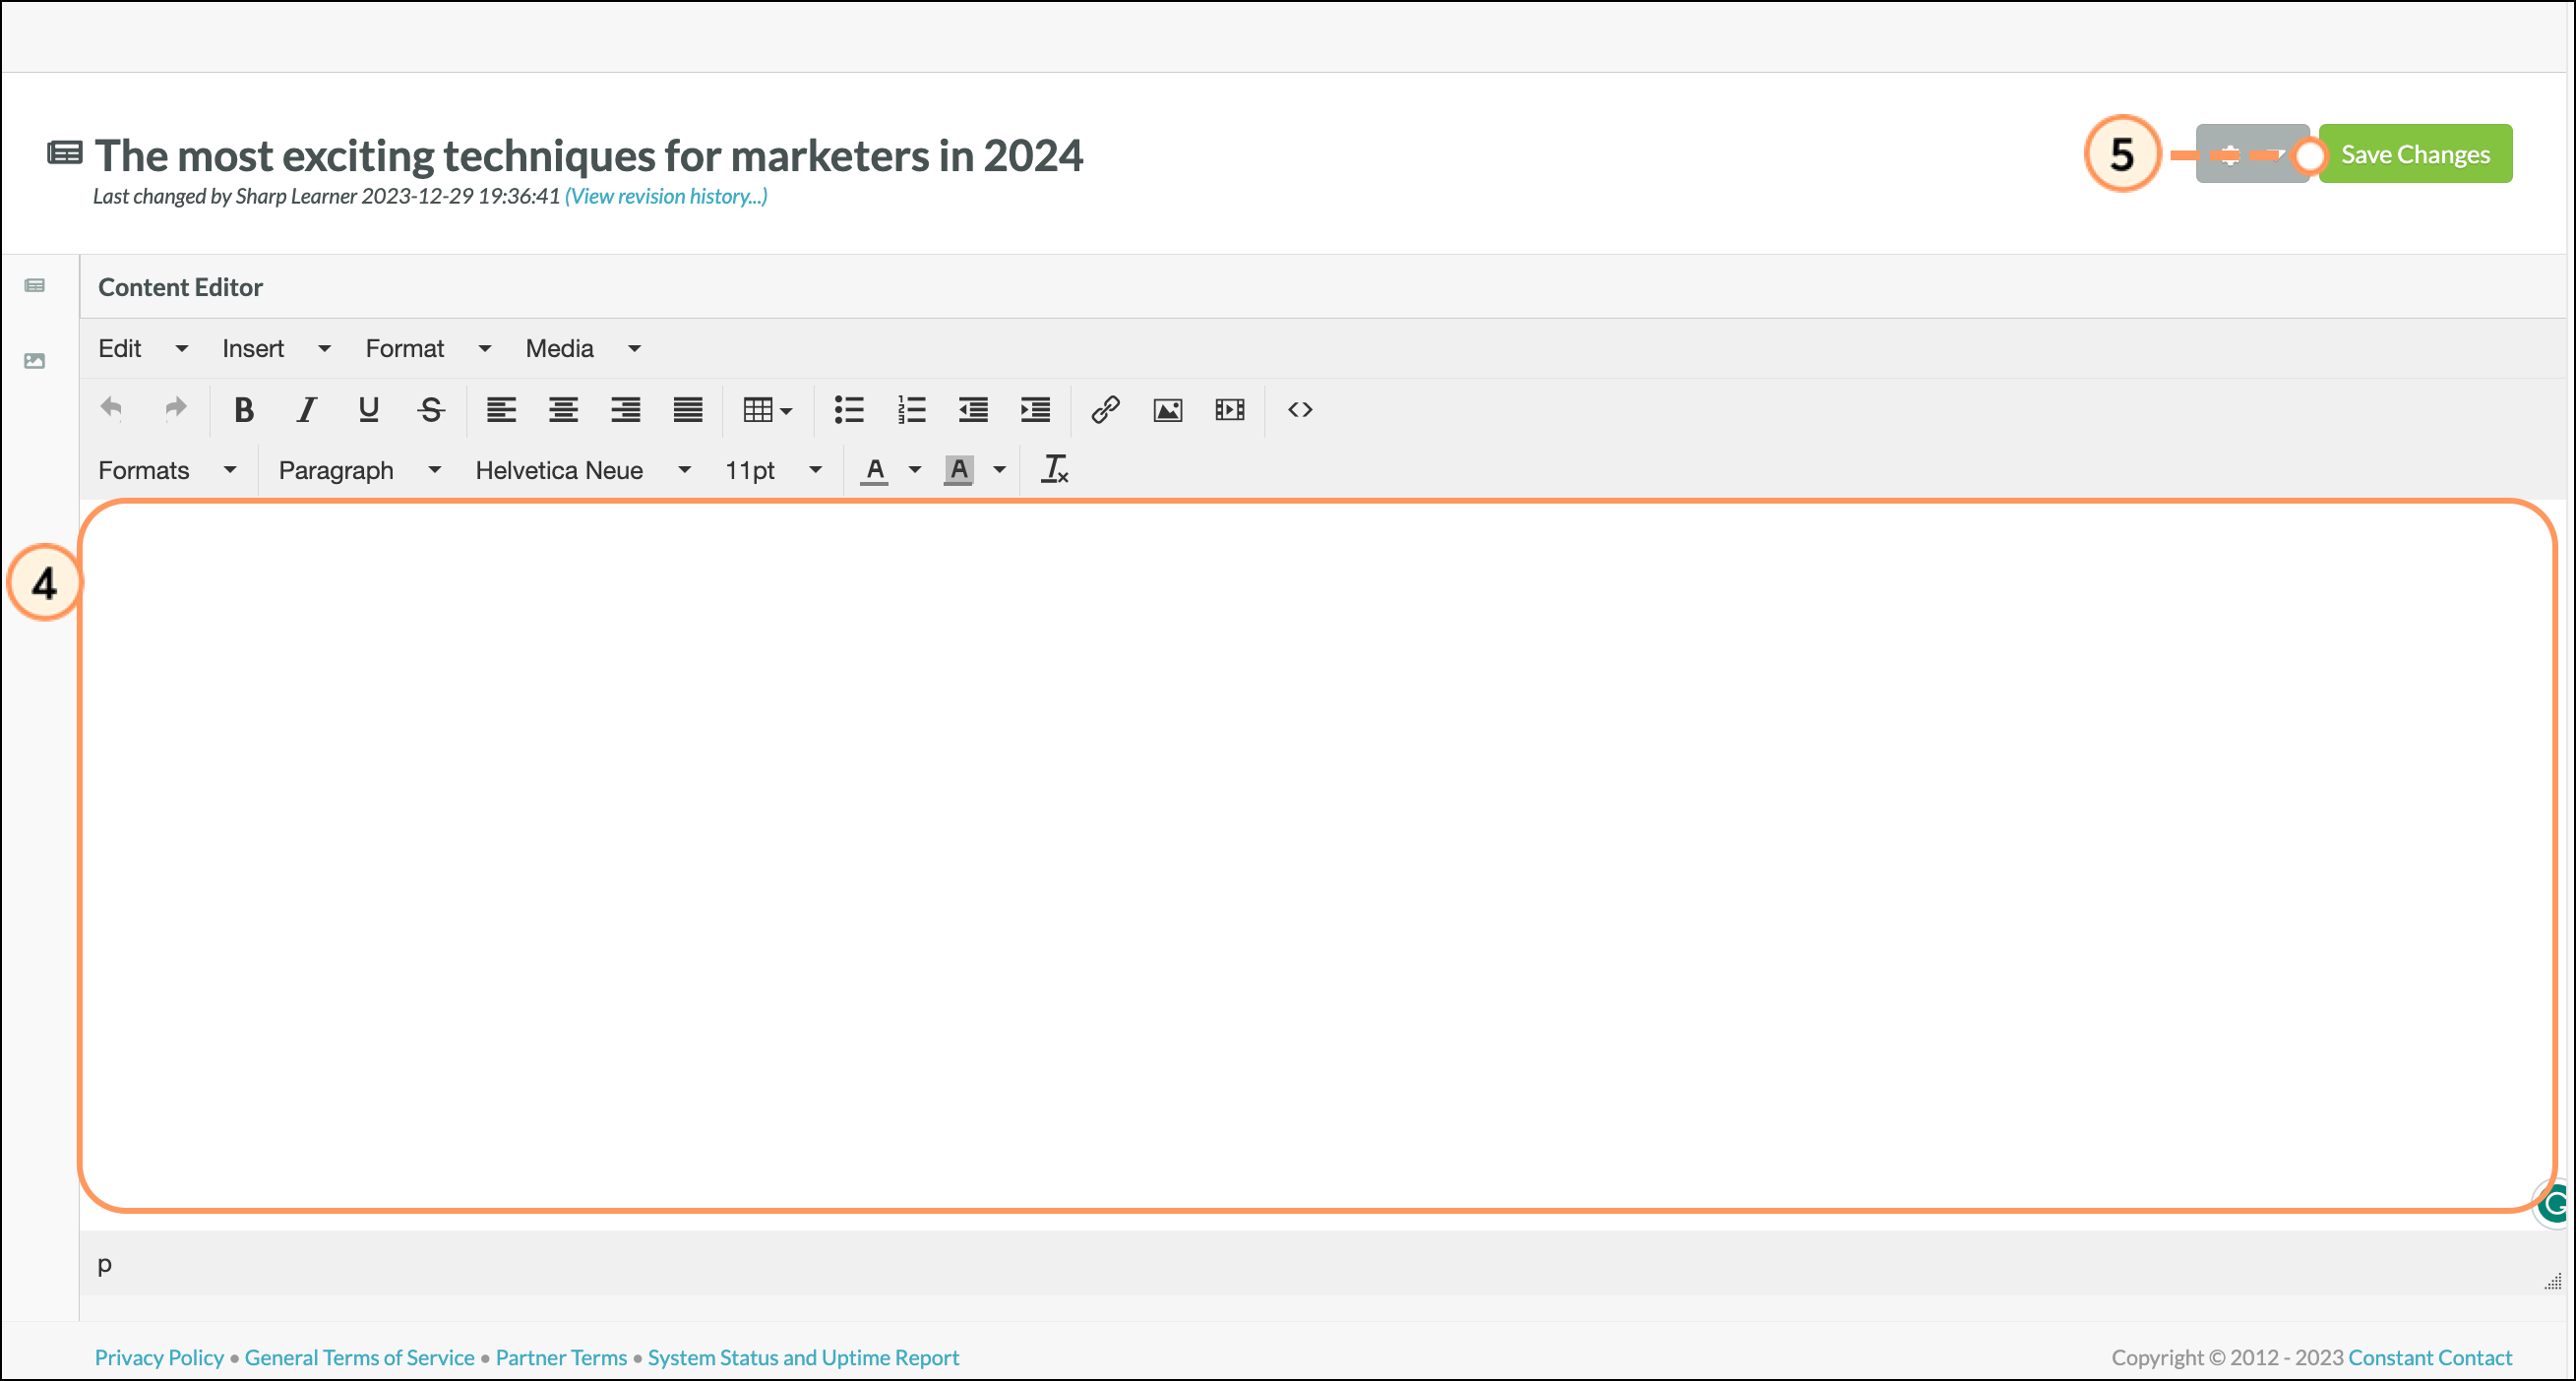
Within the Content Calendar, you can create a blog article. To create a blog article, do the following:
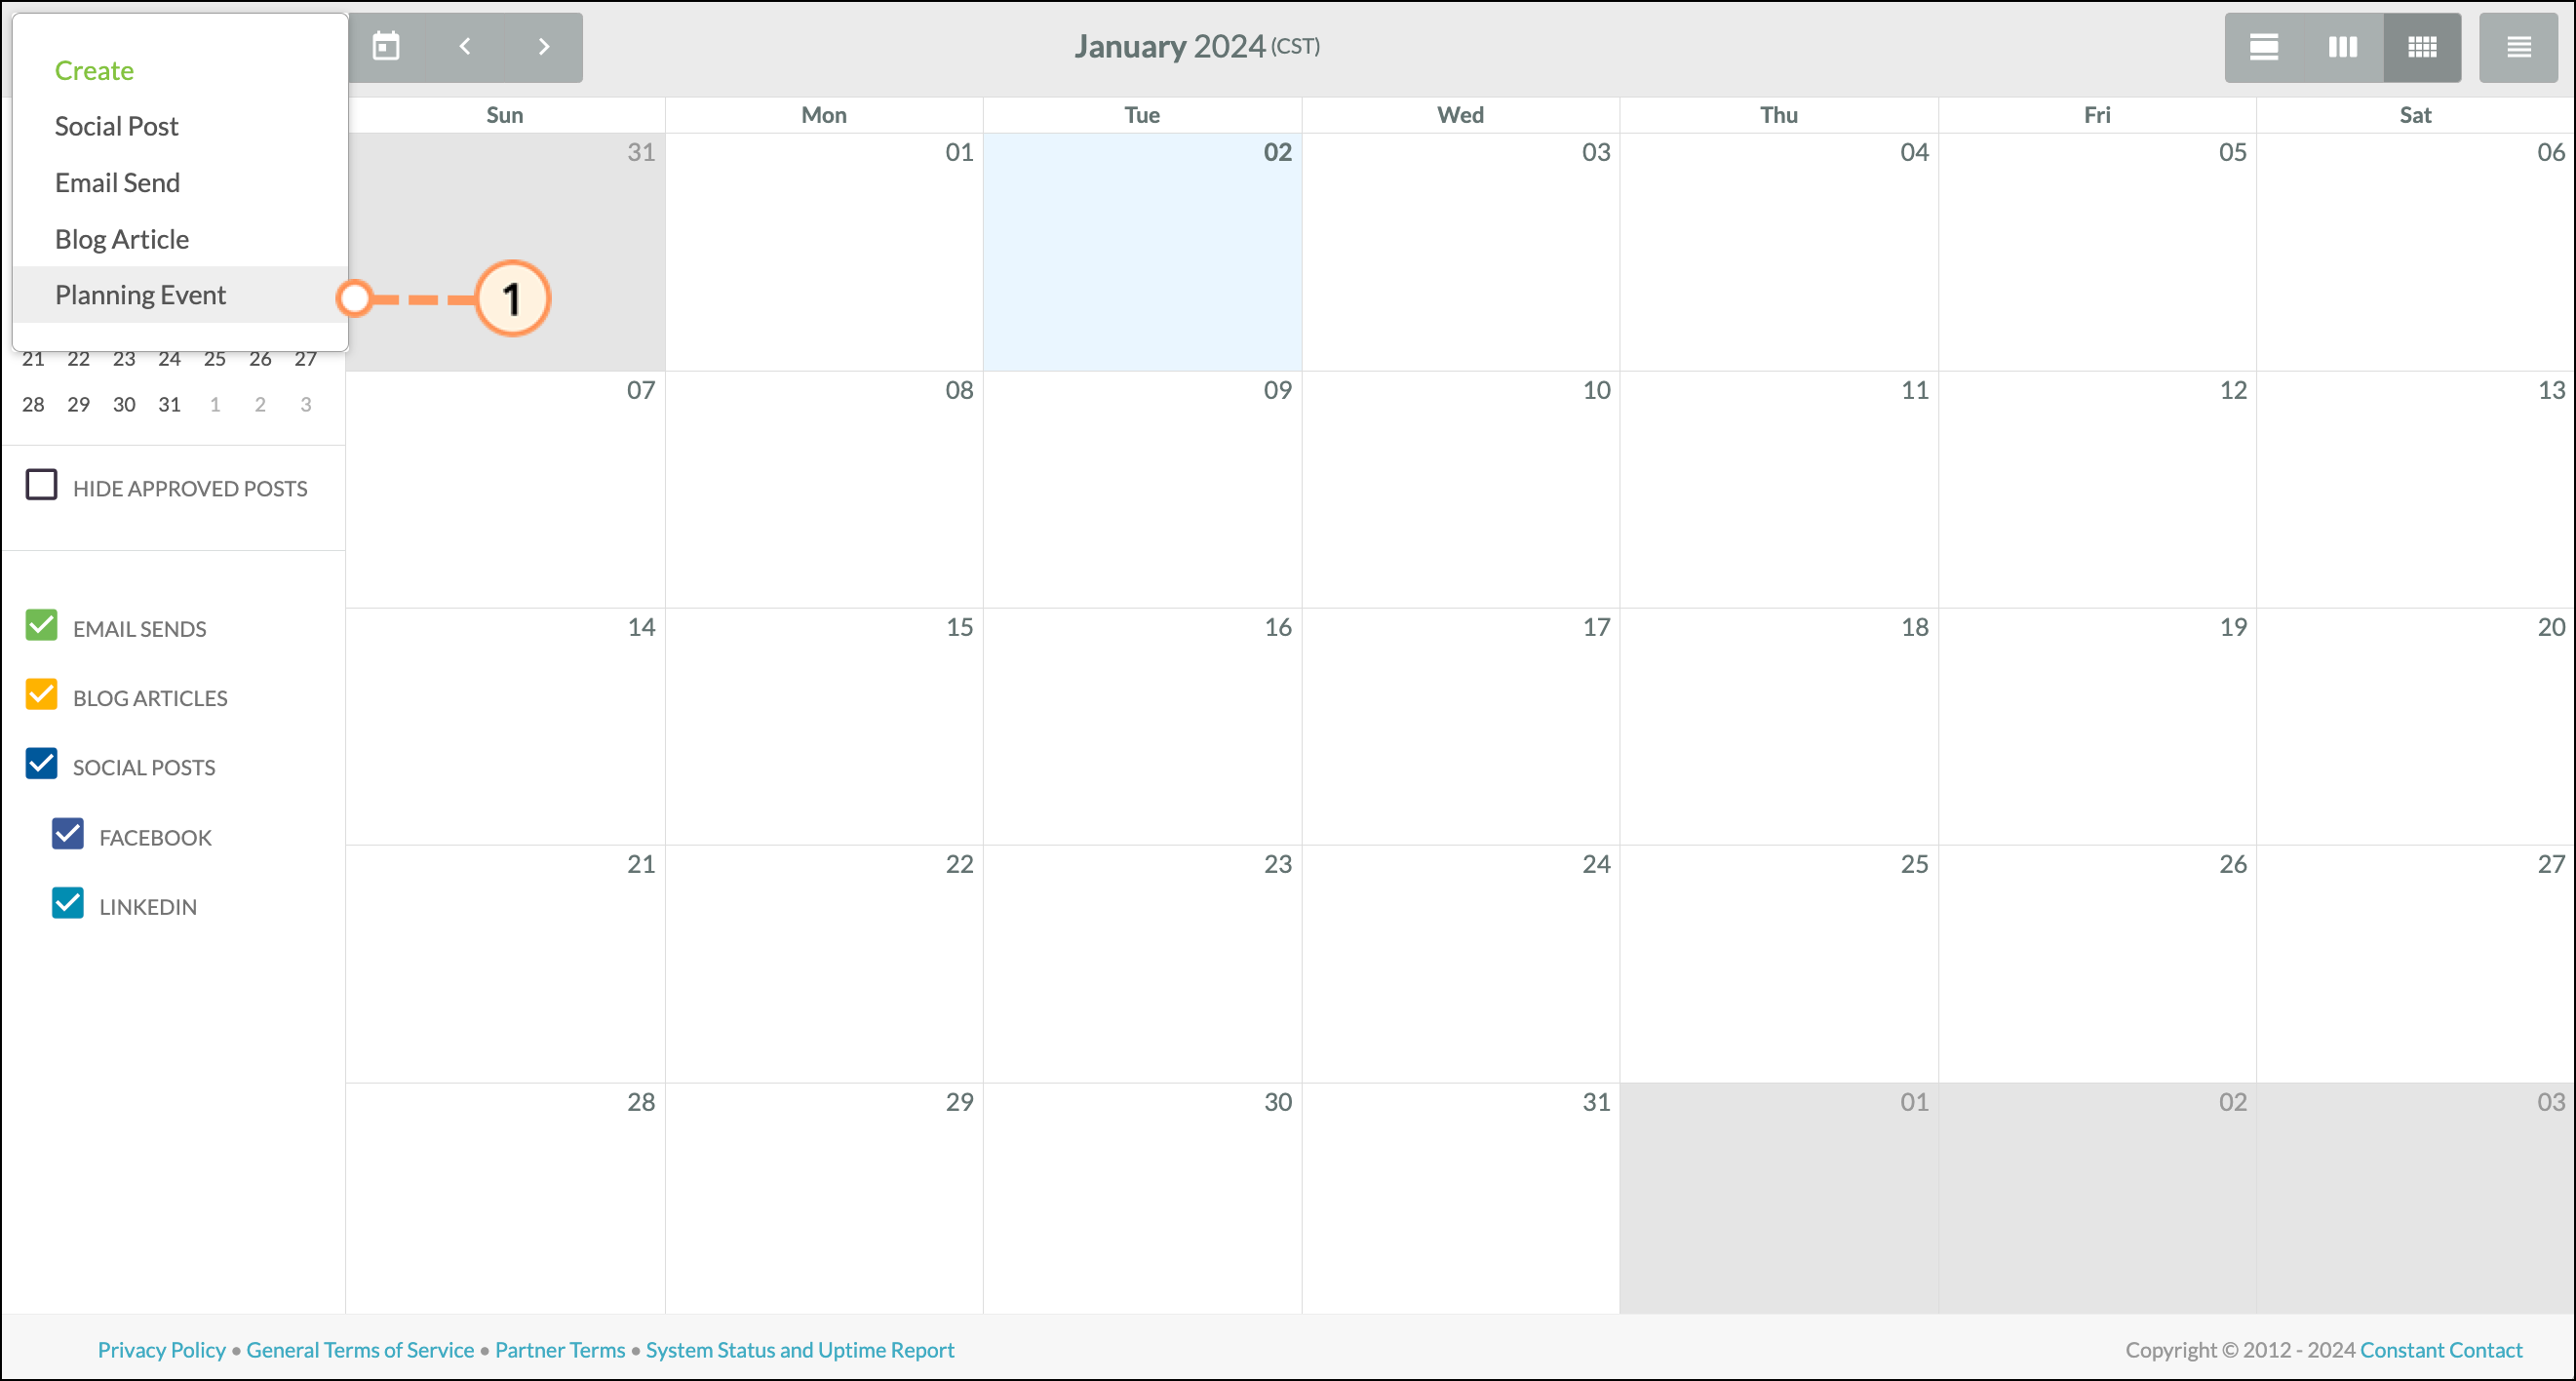
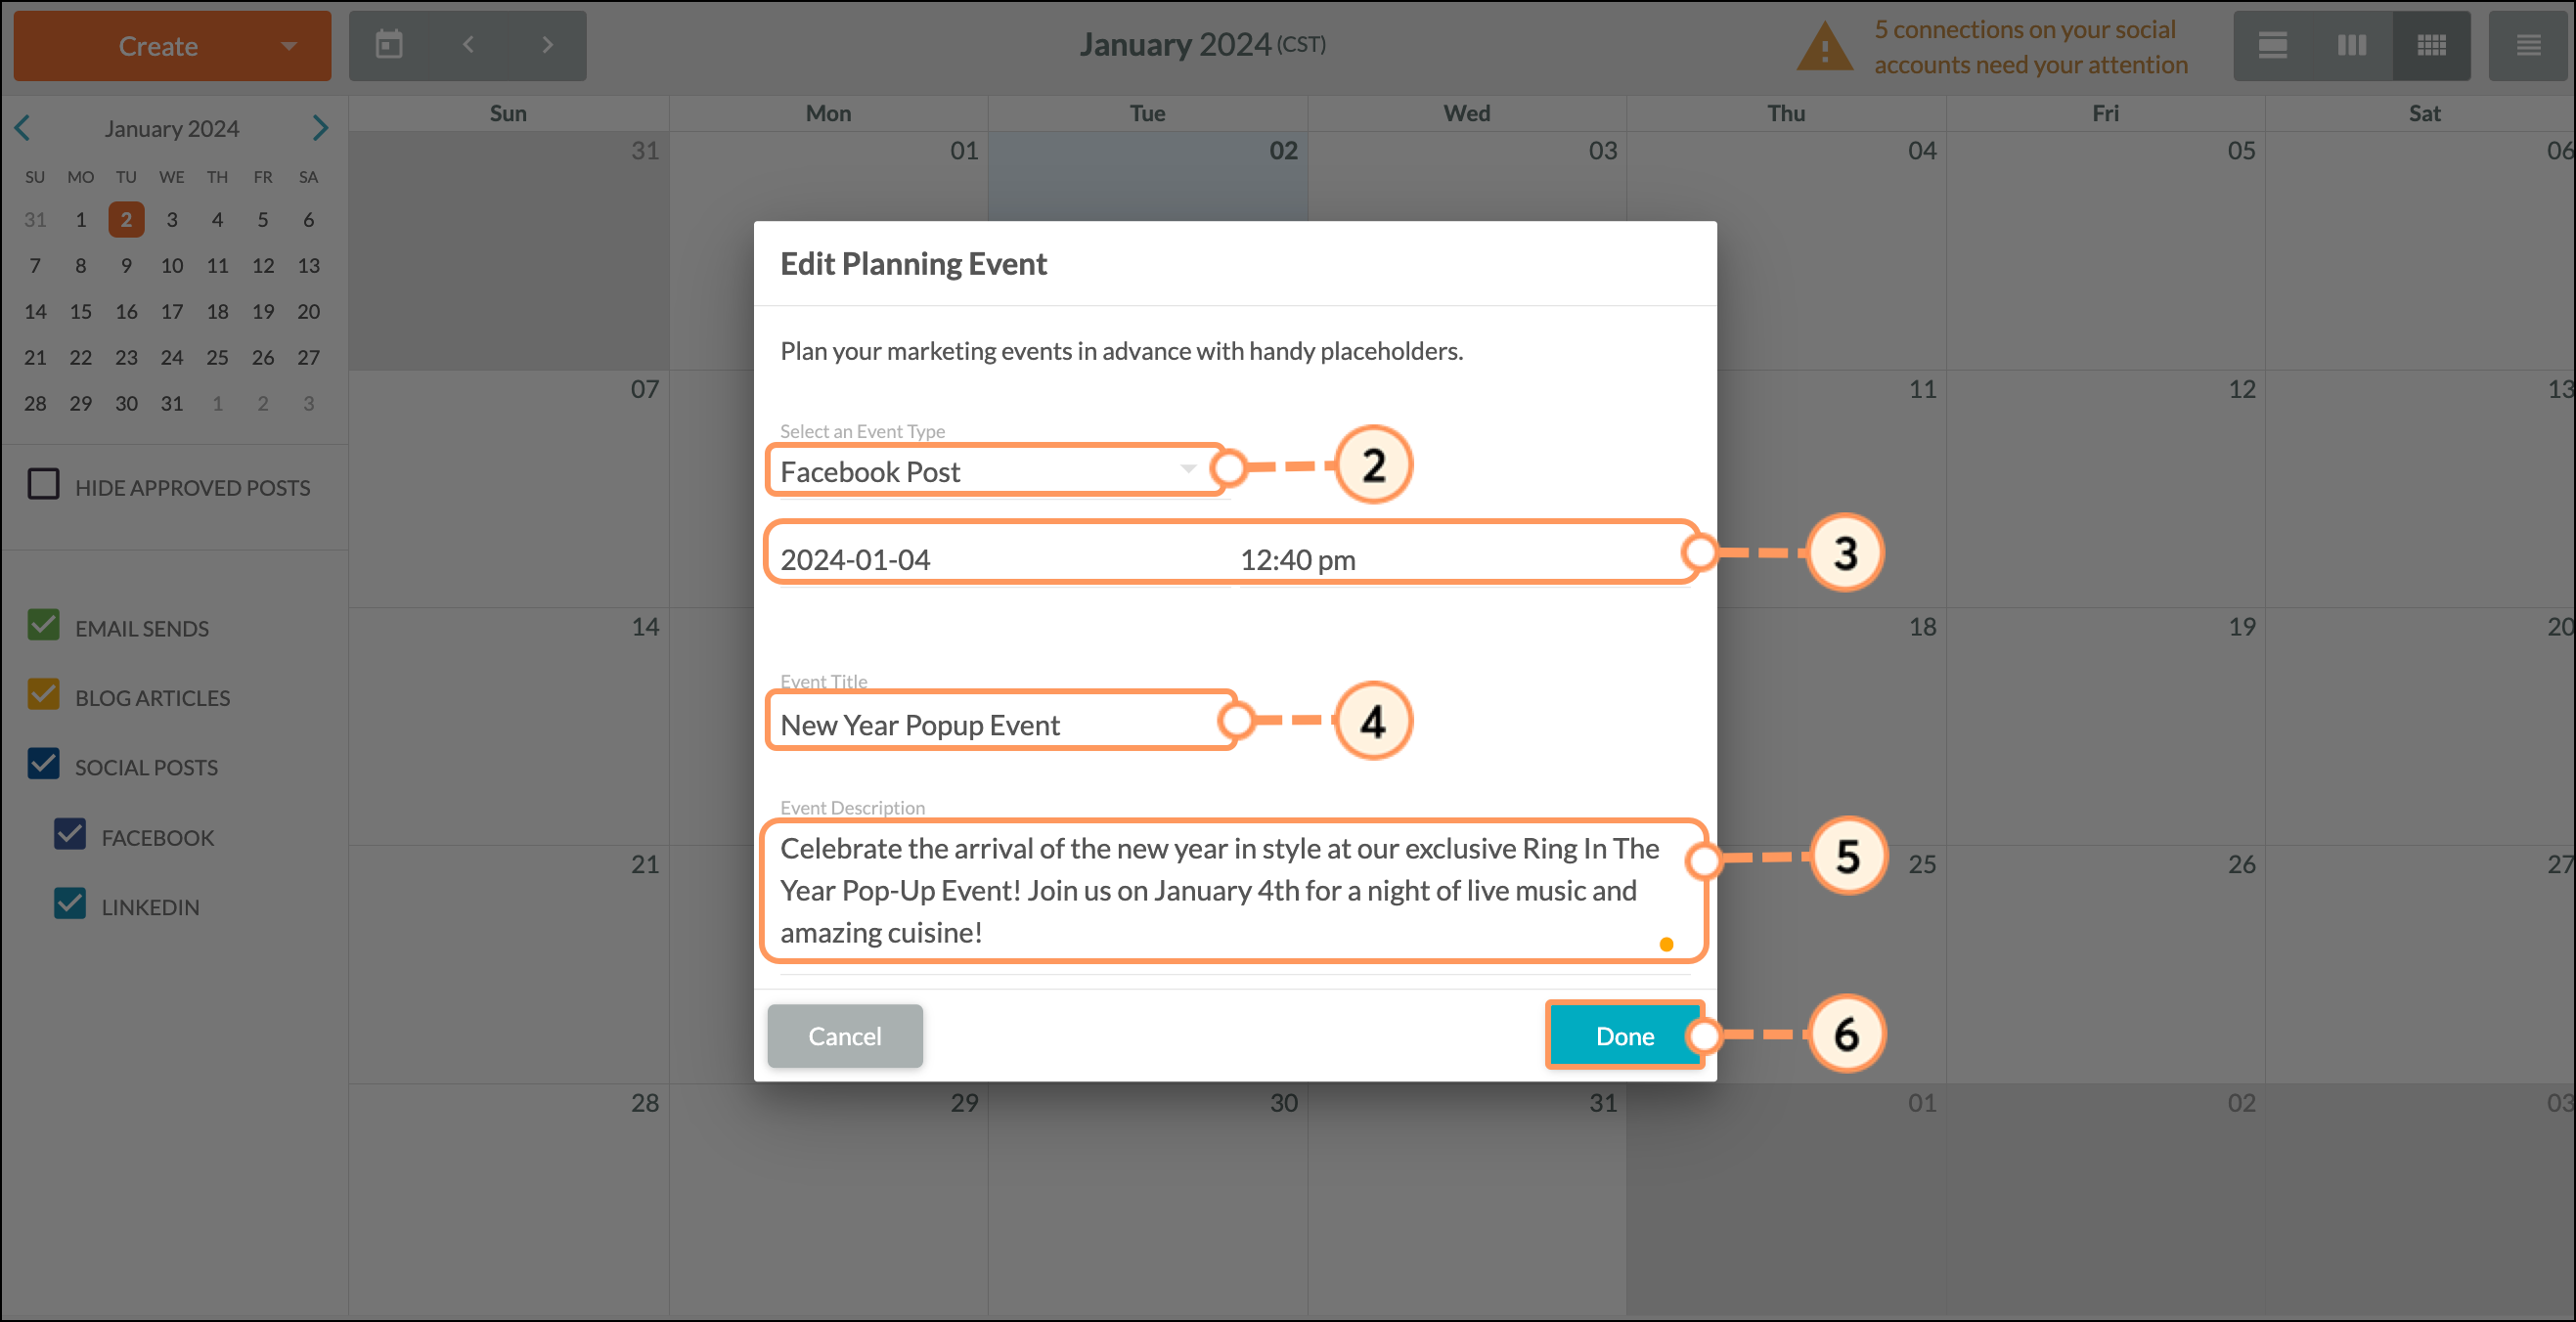
Planning events allow you to plan your marketing strategy without the need for the content to be completely done. With planning events, you can organize your content distribution plan and plan for social posts, blogs, and email sends without the content being ready to go.
To create a planning event, do the following:
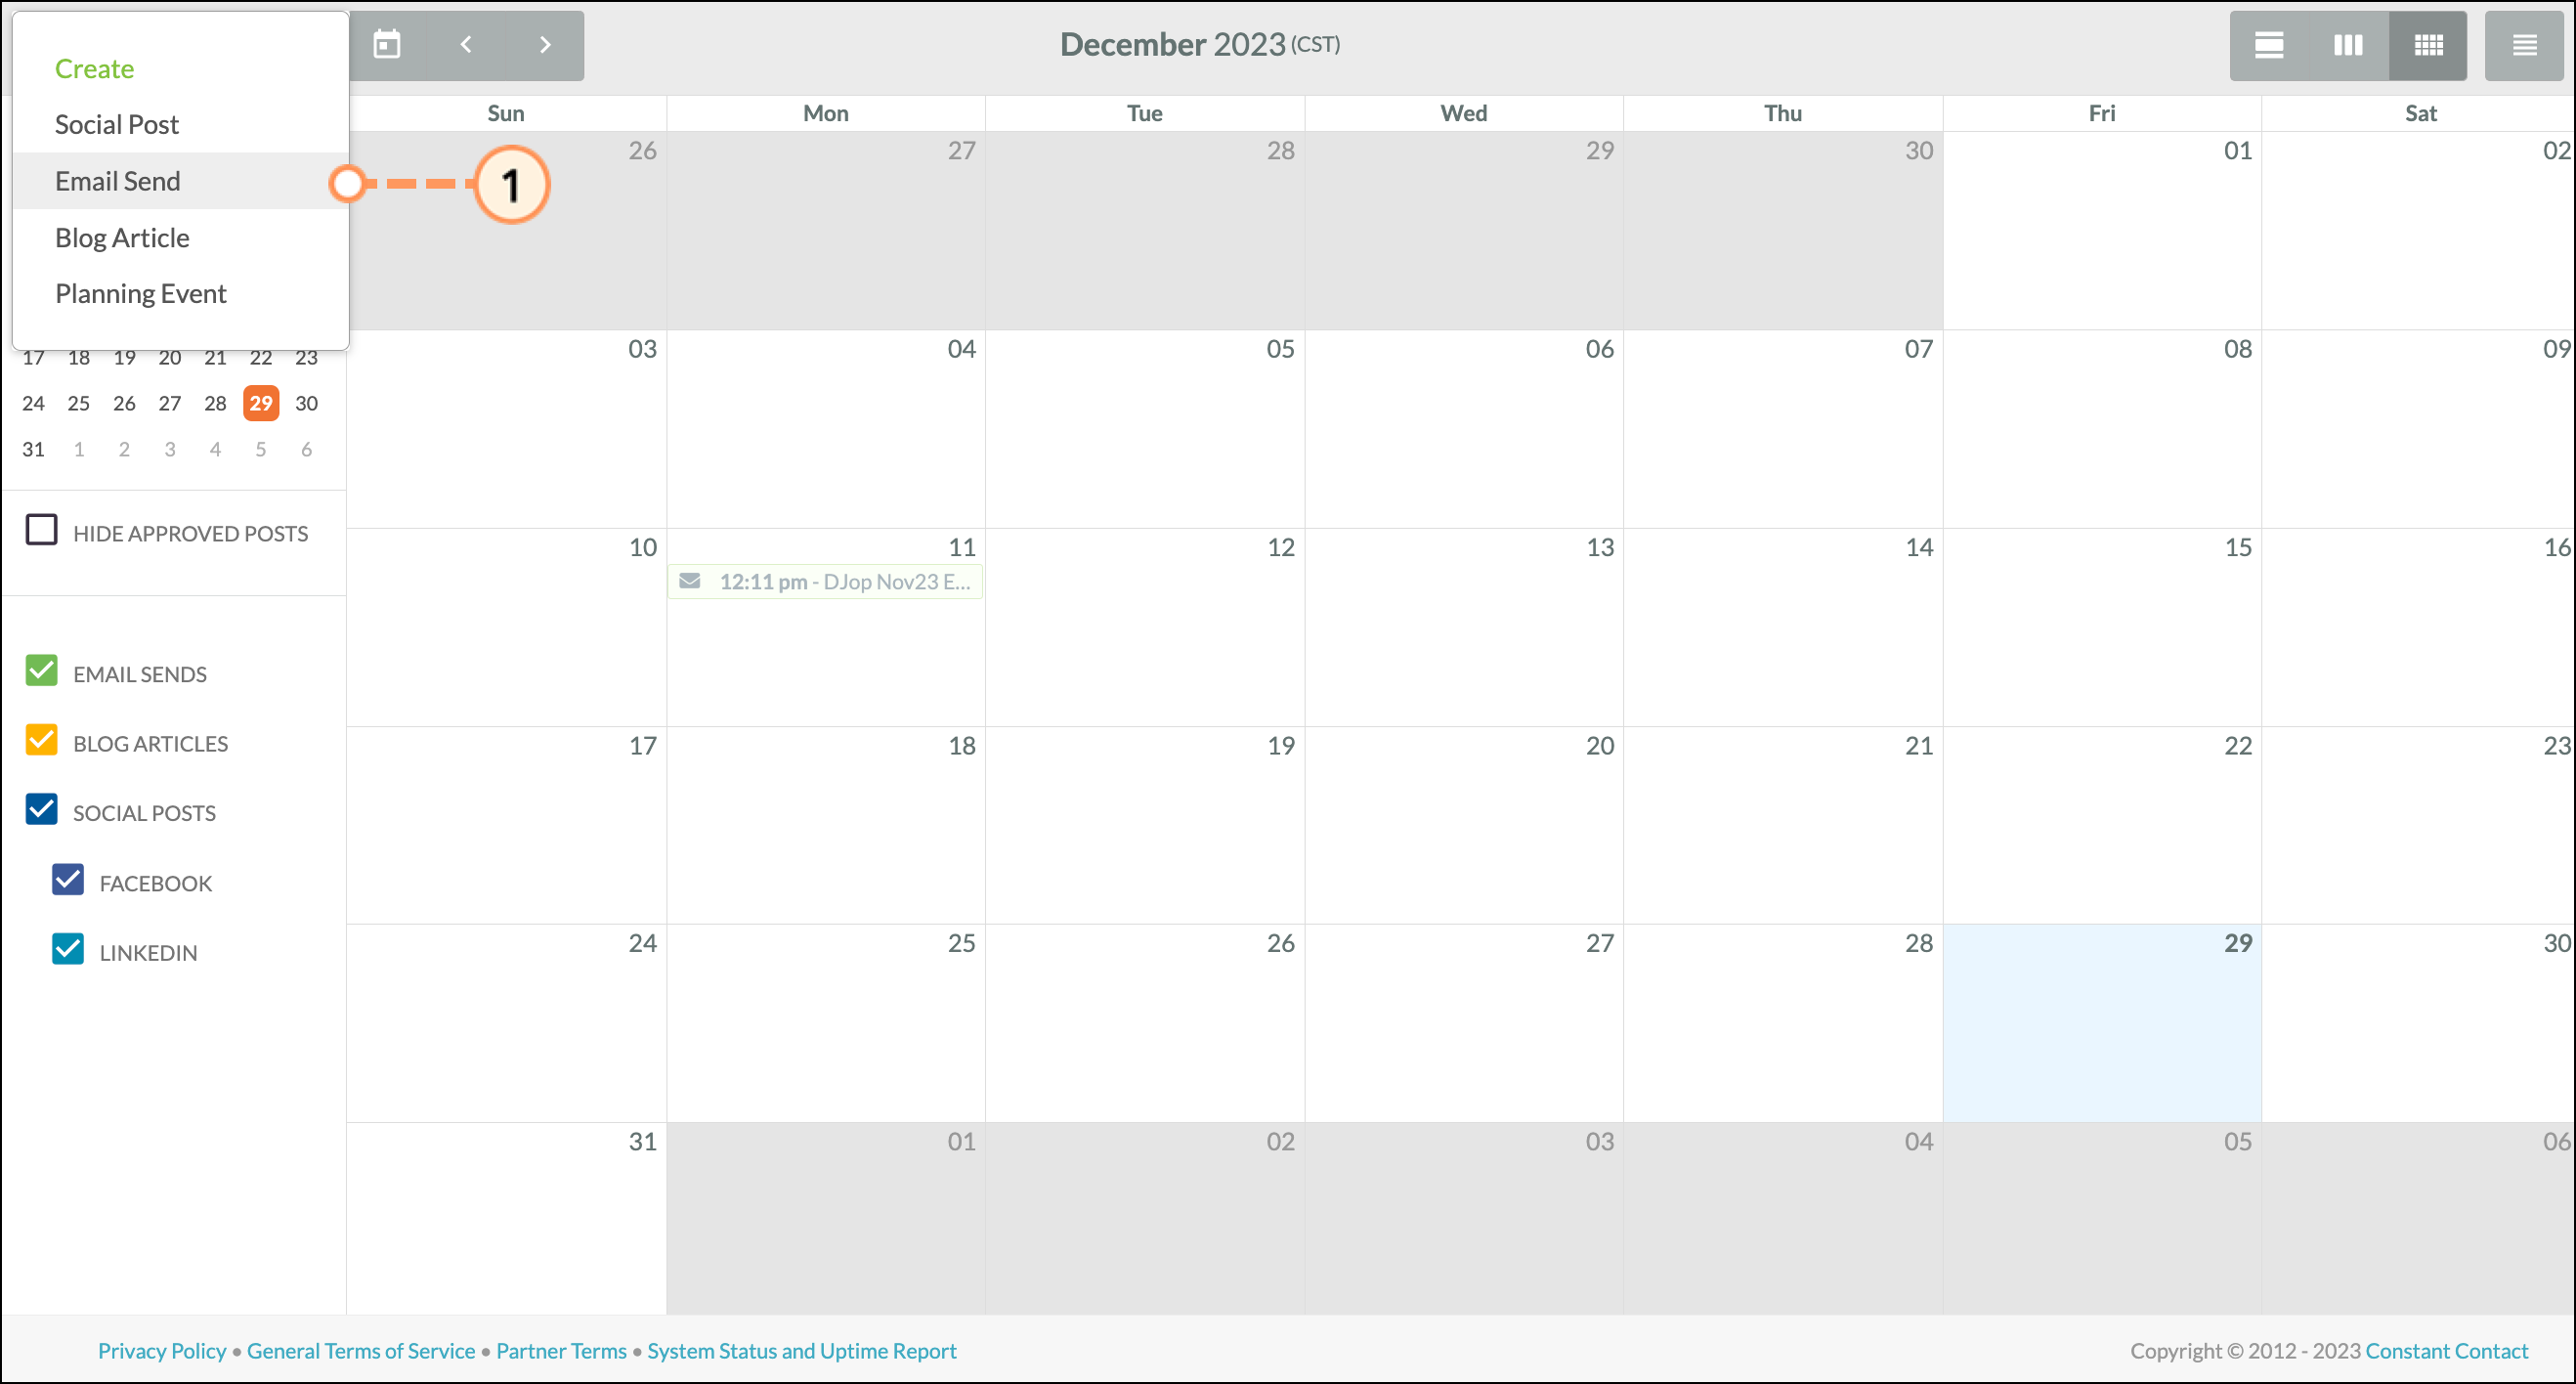
The Content Calendar offers many ways to view, edit, and otherwise curate content. The Content Calendar provides an overview of what content has been published in the past, as well as what content is scheduled to be published at a later date.
To further narrow this content overview, you can filter content. On the left side of the calendar, there is a filter section. Here, you can click the checkboxes to hide or show your email sends, blog articles, or social posts.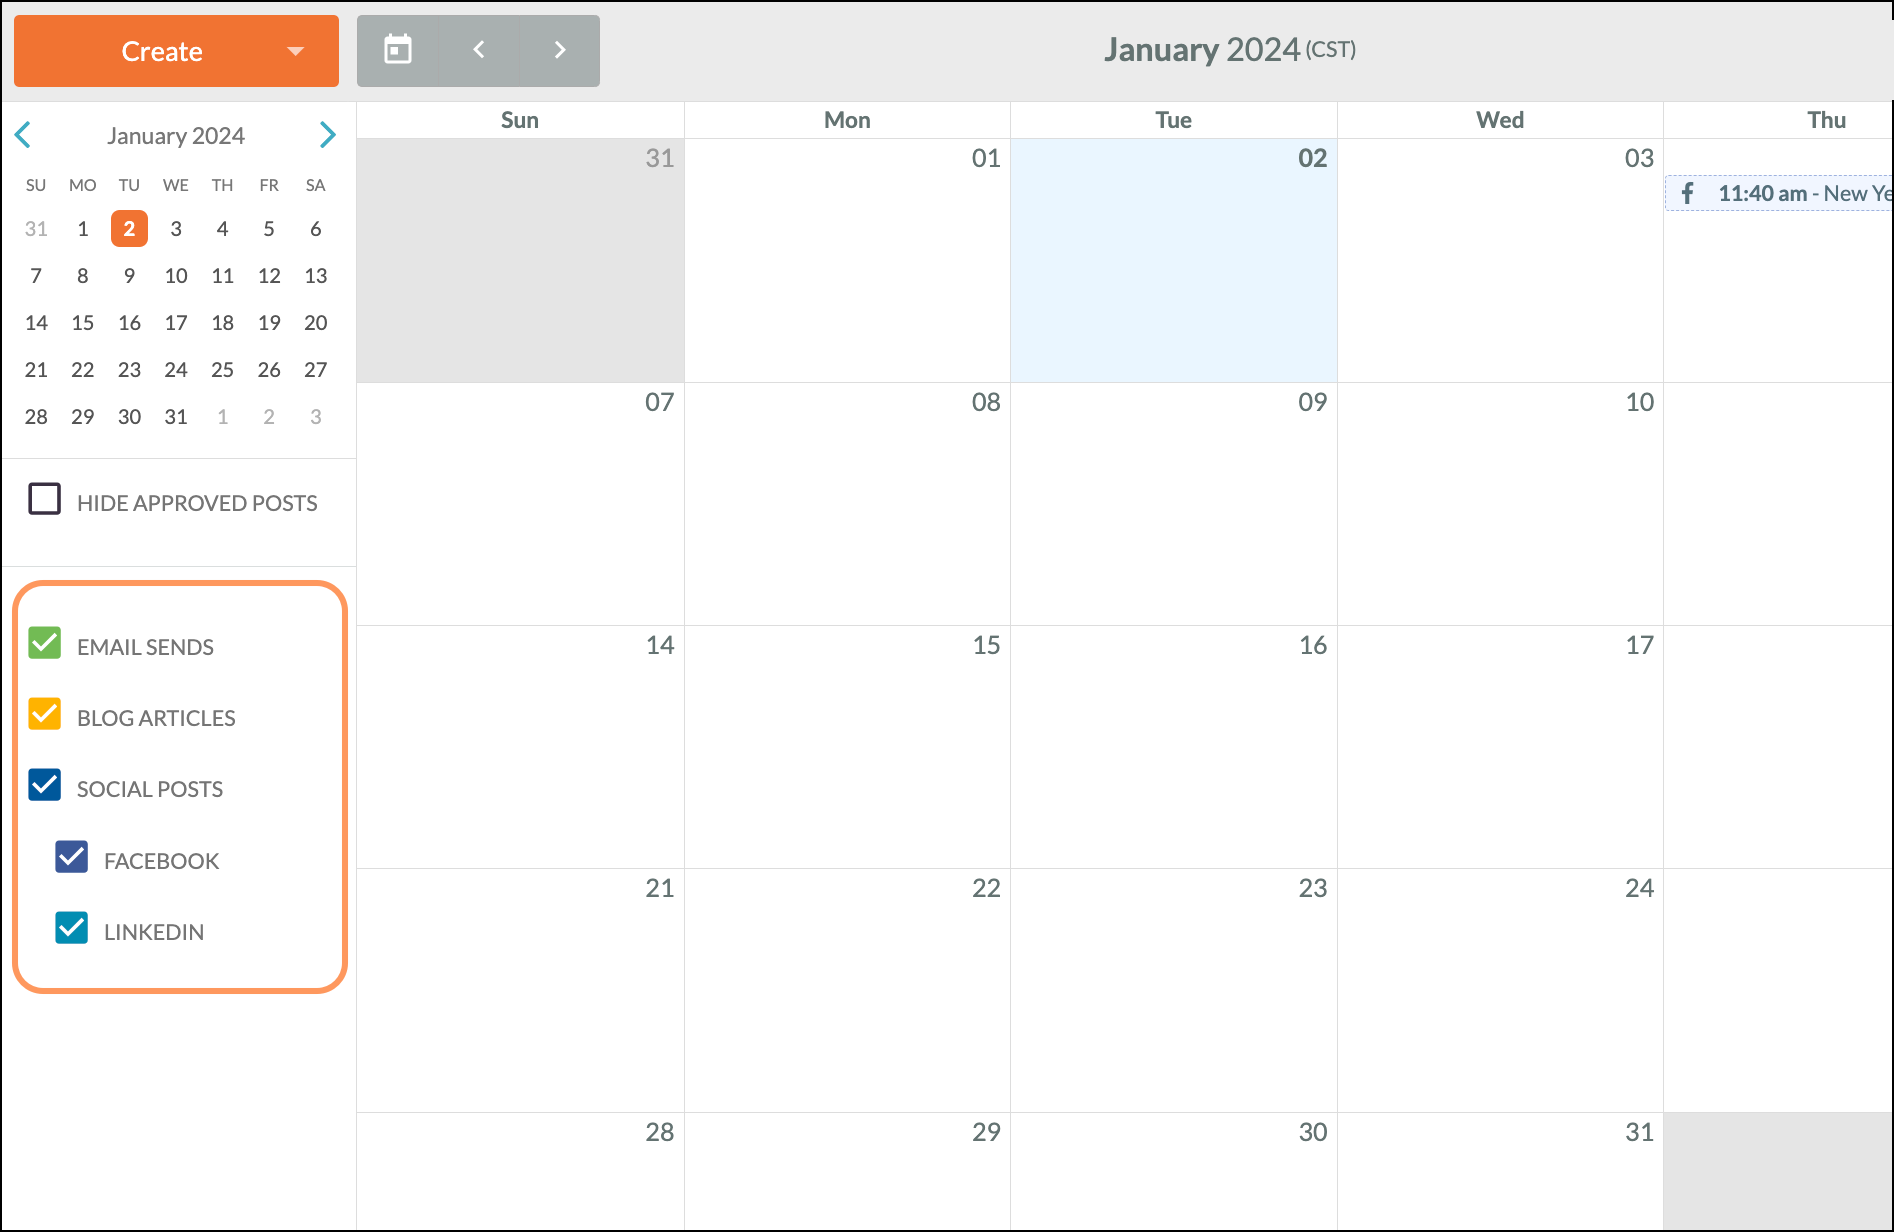
You can further filter which social content is shown on the Content Calendar. When the social posts filter is on, you can click checkboxes to hide or show all Facebook, and LinkedIn posts.
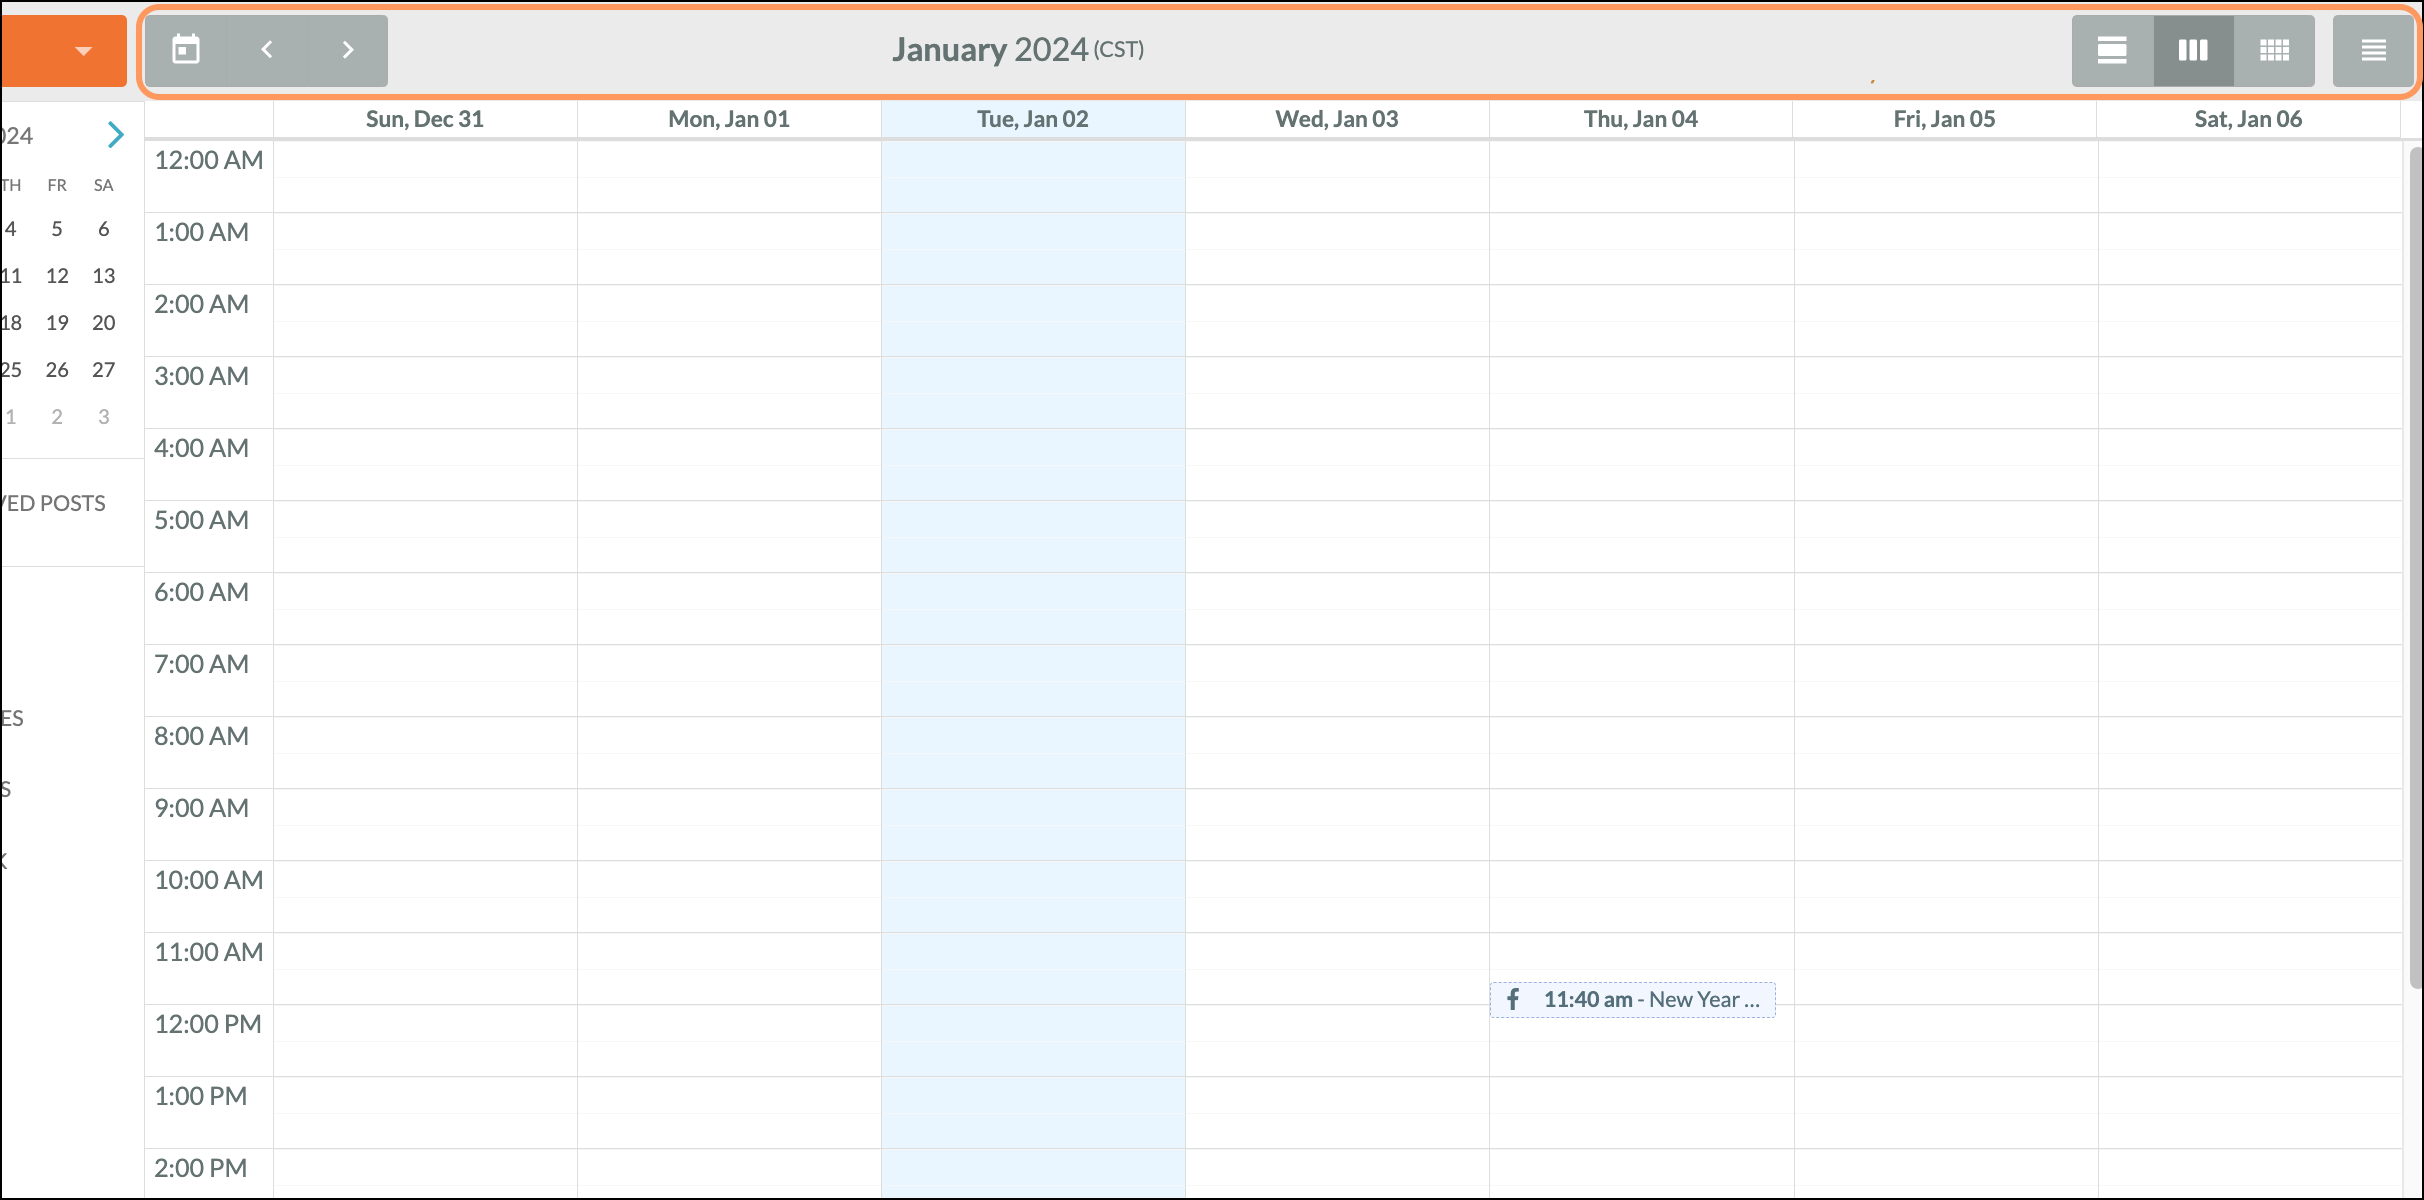
When viewing content, you can change the overall calendar view. The calendar has the following options available:
| Icon |
Option |
|
Description |
|
|
View Day |
|
This icon allows you to view all social media posts posted |
|
|
View Week |
|
This icon allows you to view all social media posts posted |
|
|
View Month |
|
This icon allows you to view all social media posts posted |
|
|
View Agenda |
|
This icon allows you to view all social media posts posted |
|
|
Previous |
|
This icon allows you to navigate backward a given period |
|
|
Next |
|
This icon allows you to navigate forward a given period |
|
|
Today |
|
This icon returns your calendar view to the current day. |
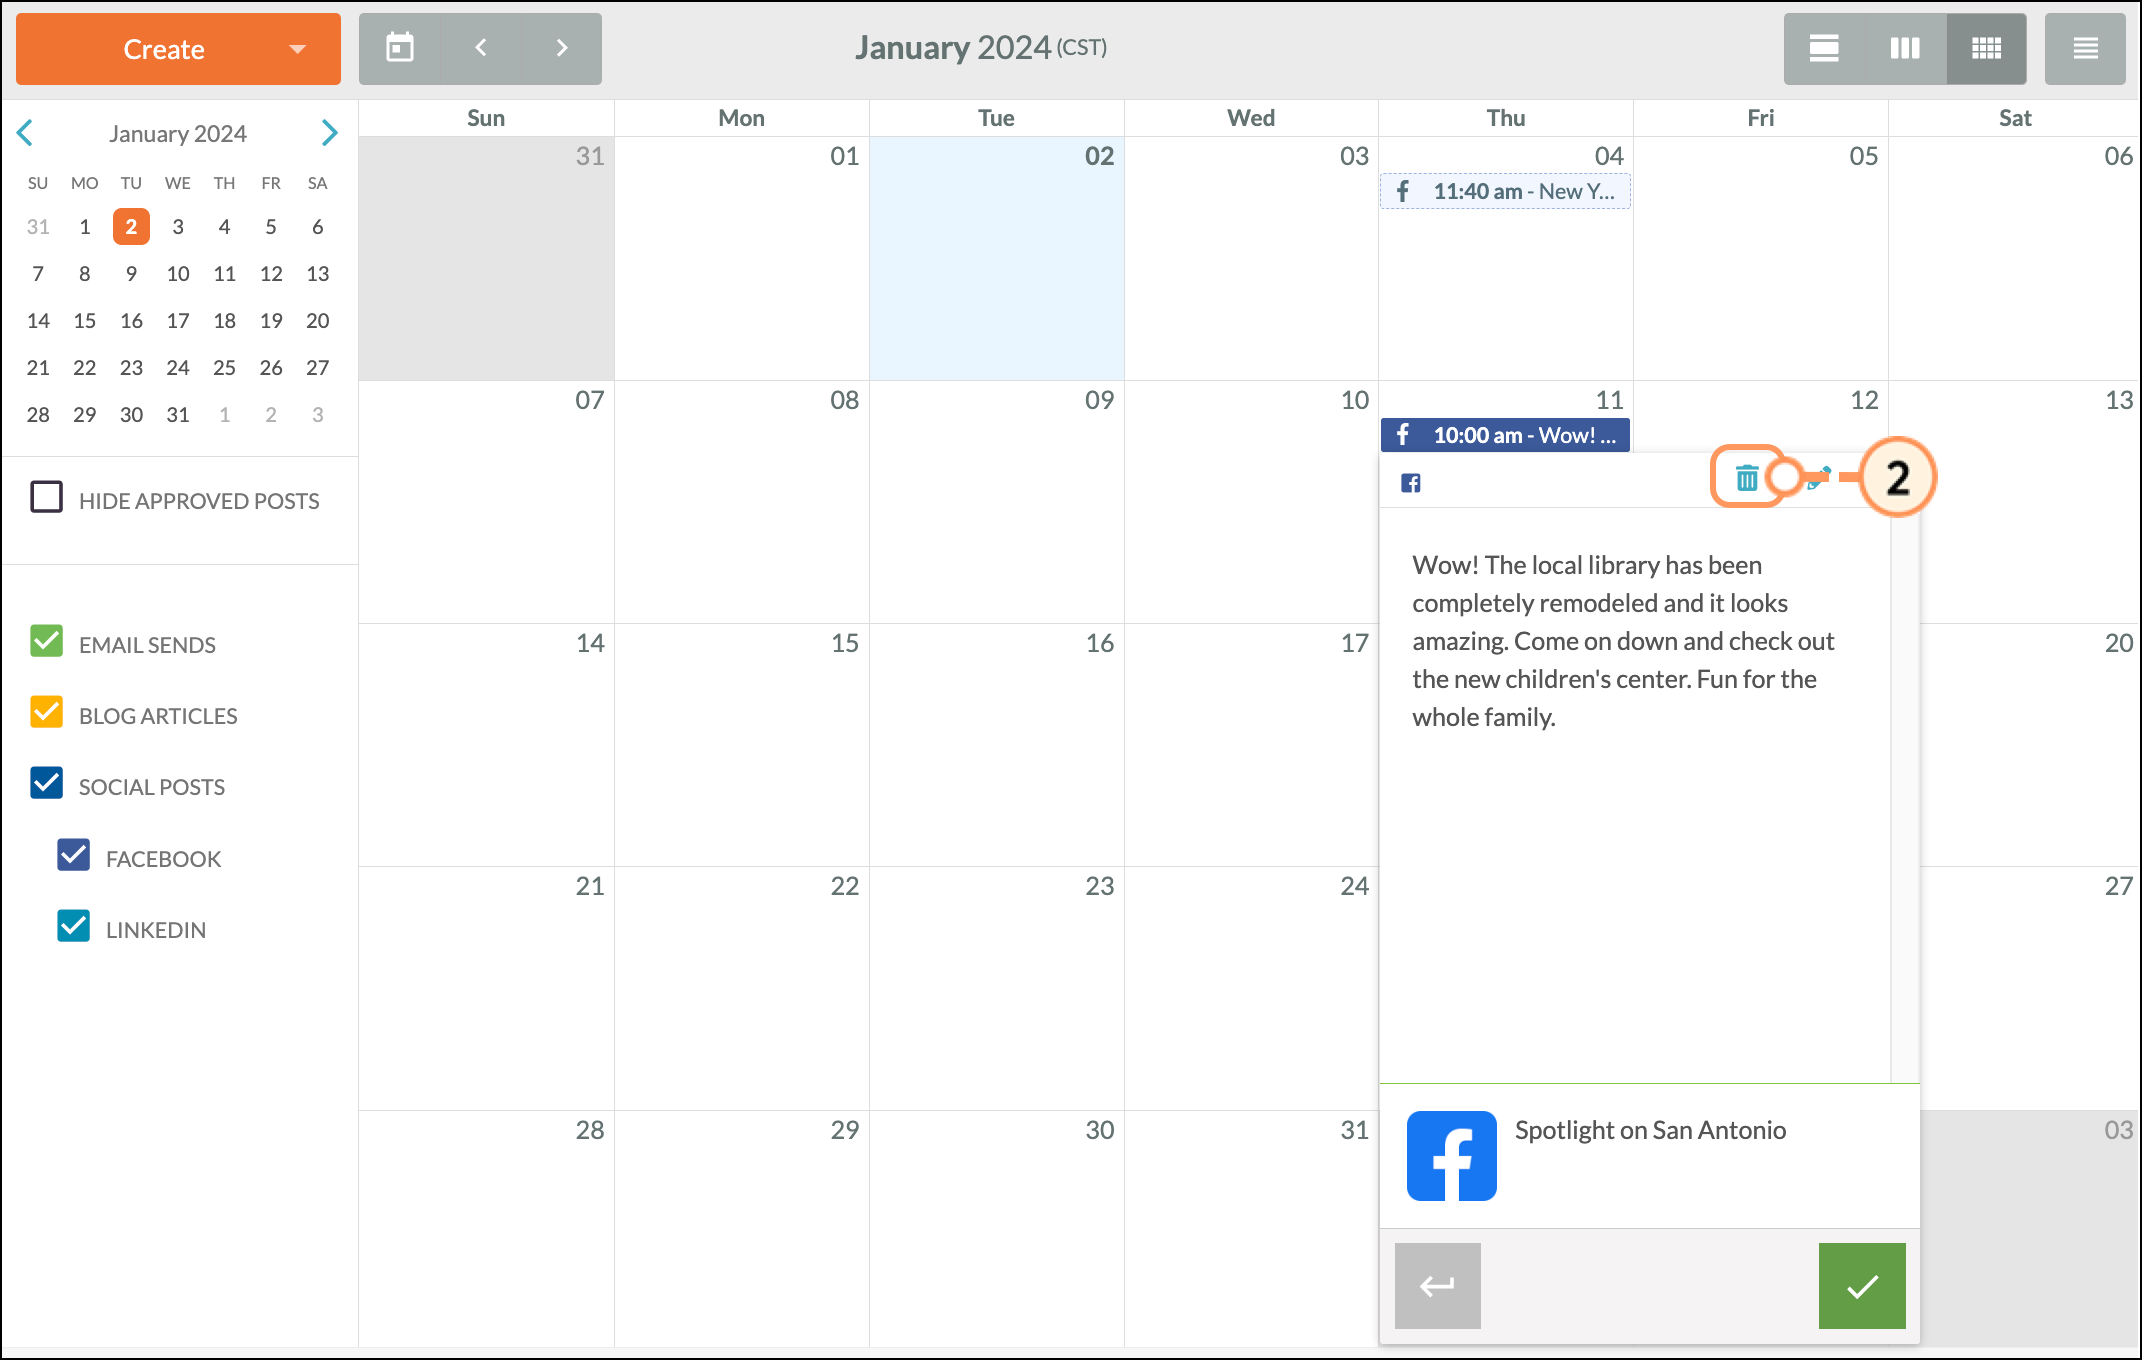
You can edit posted content that has yet to be published. To edit social posts that are scheduled but have not yet been published, do the following:
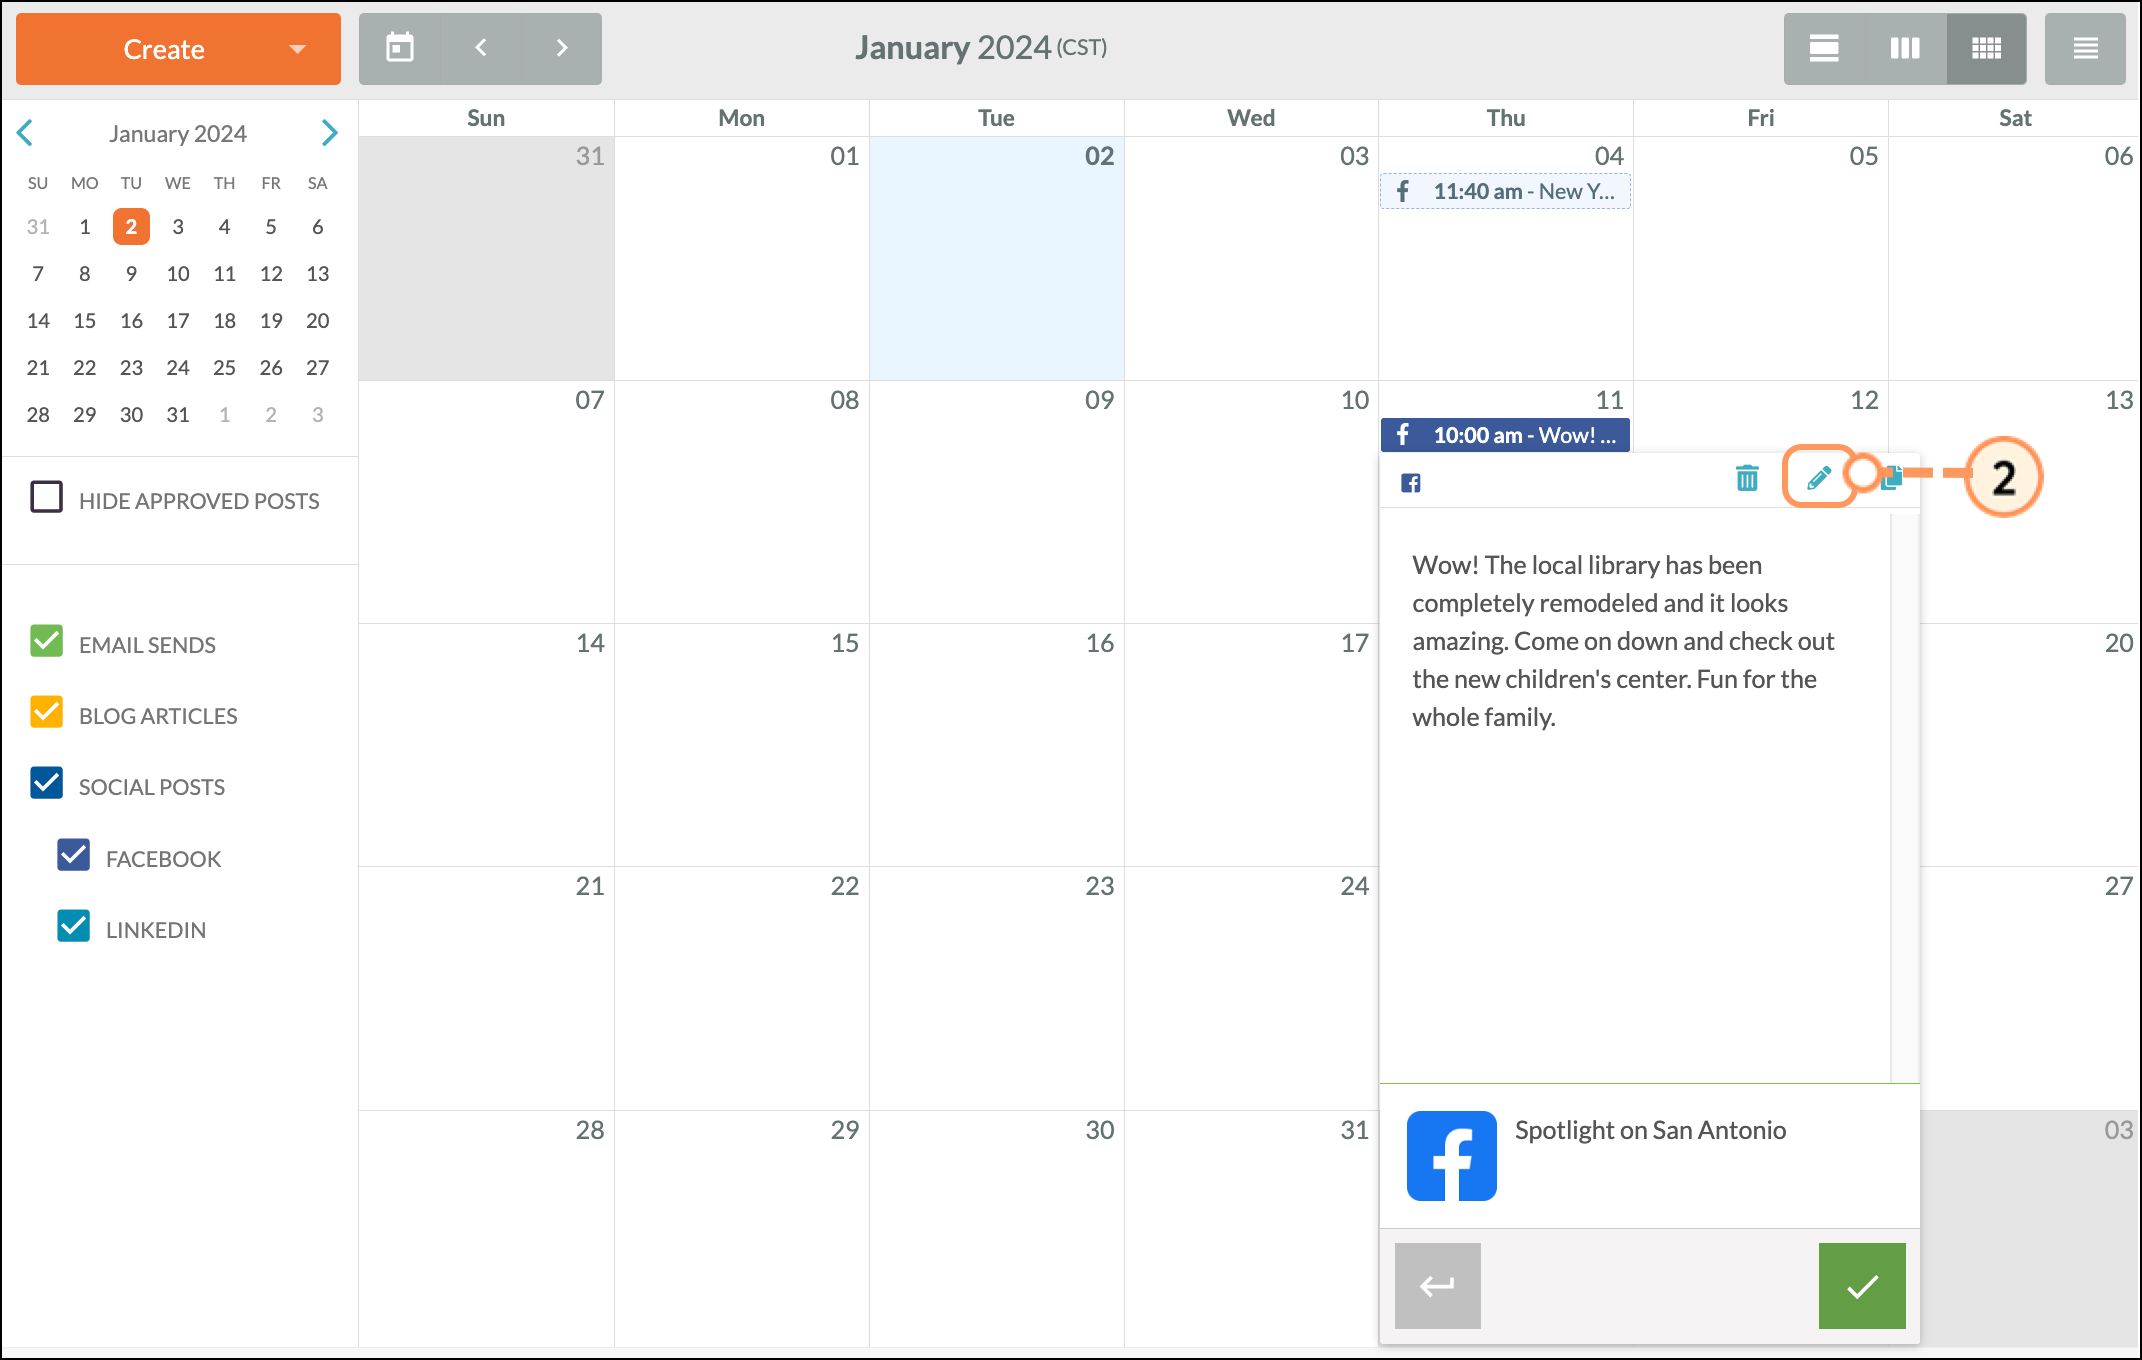
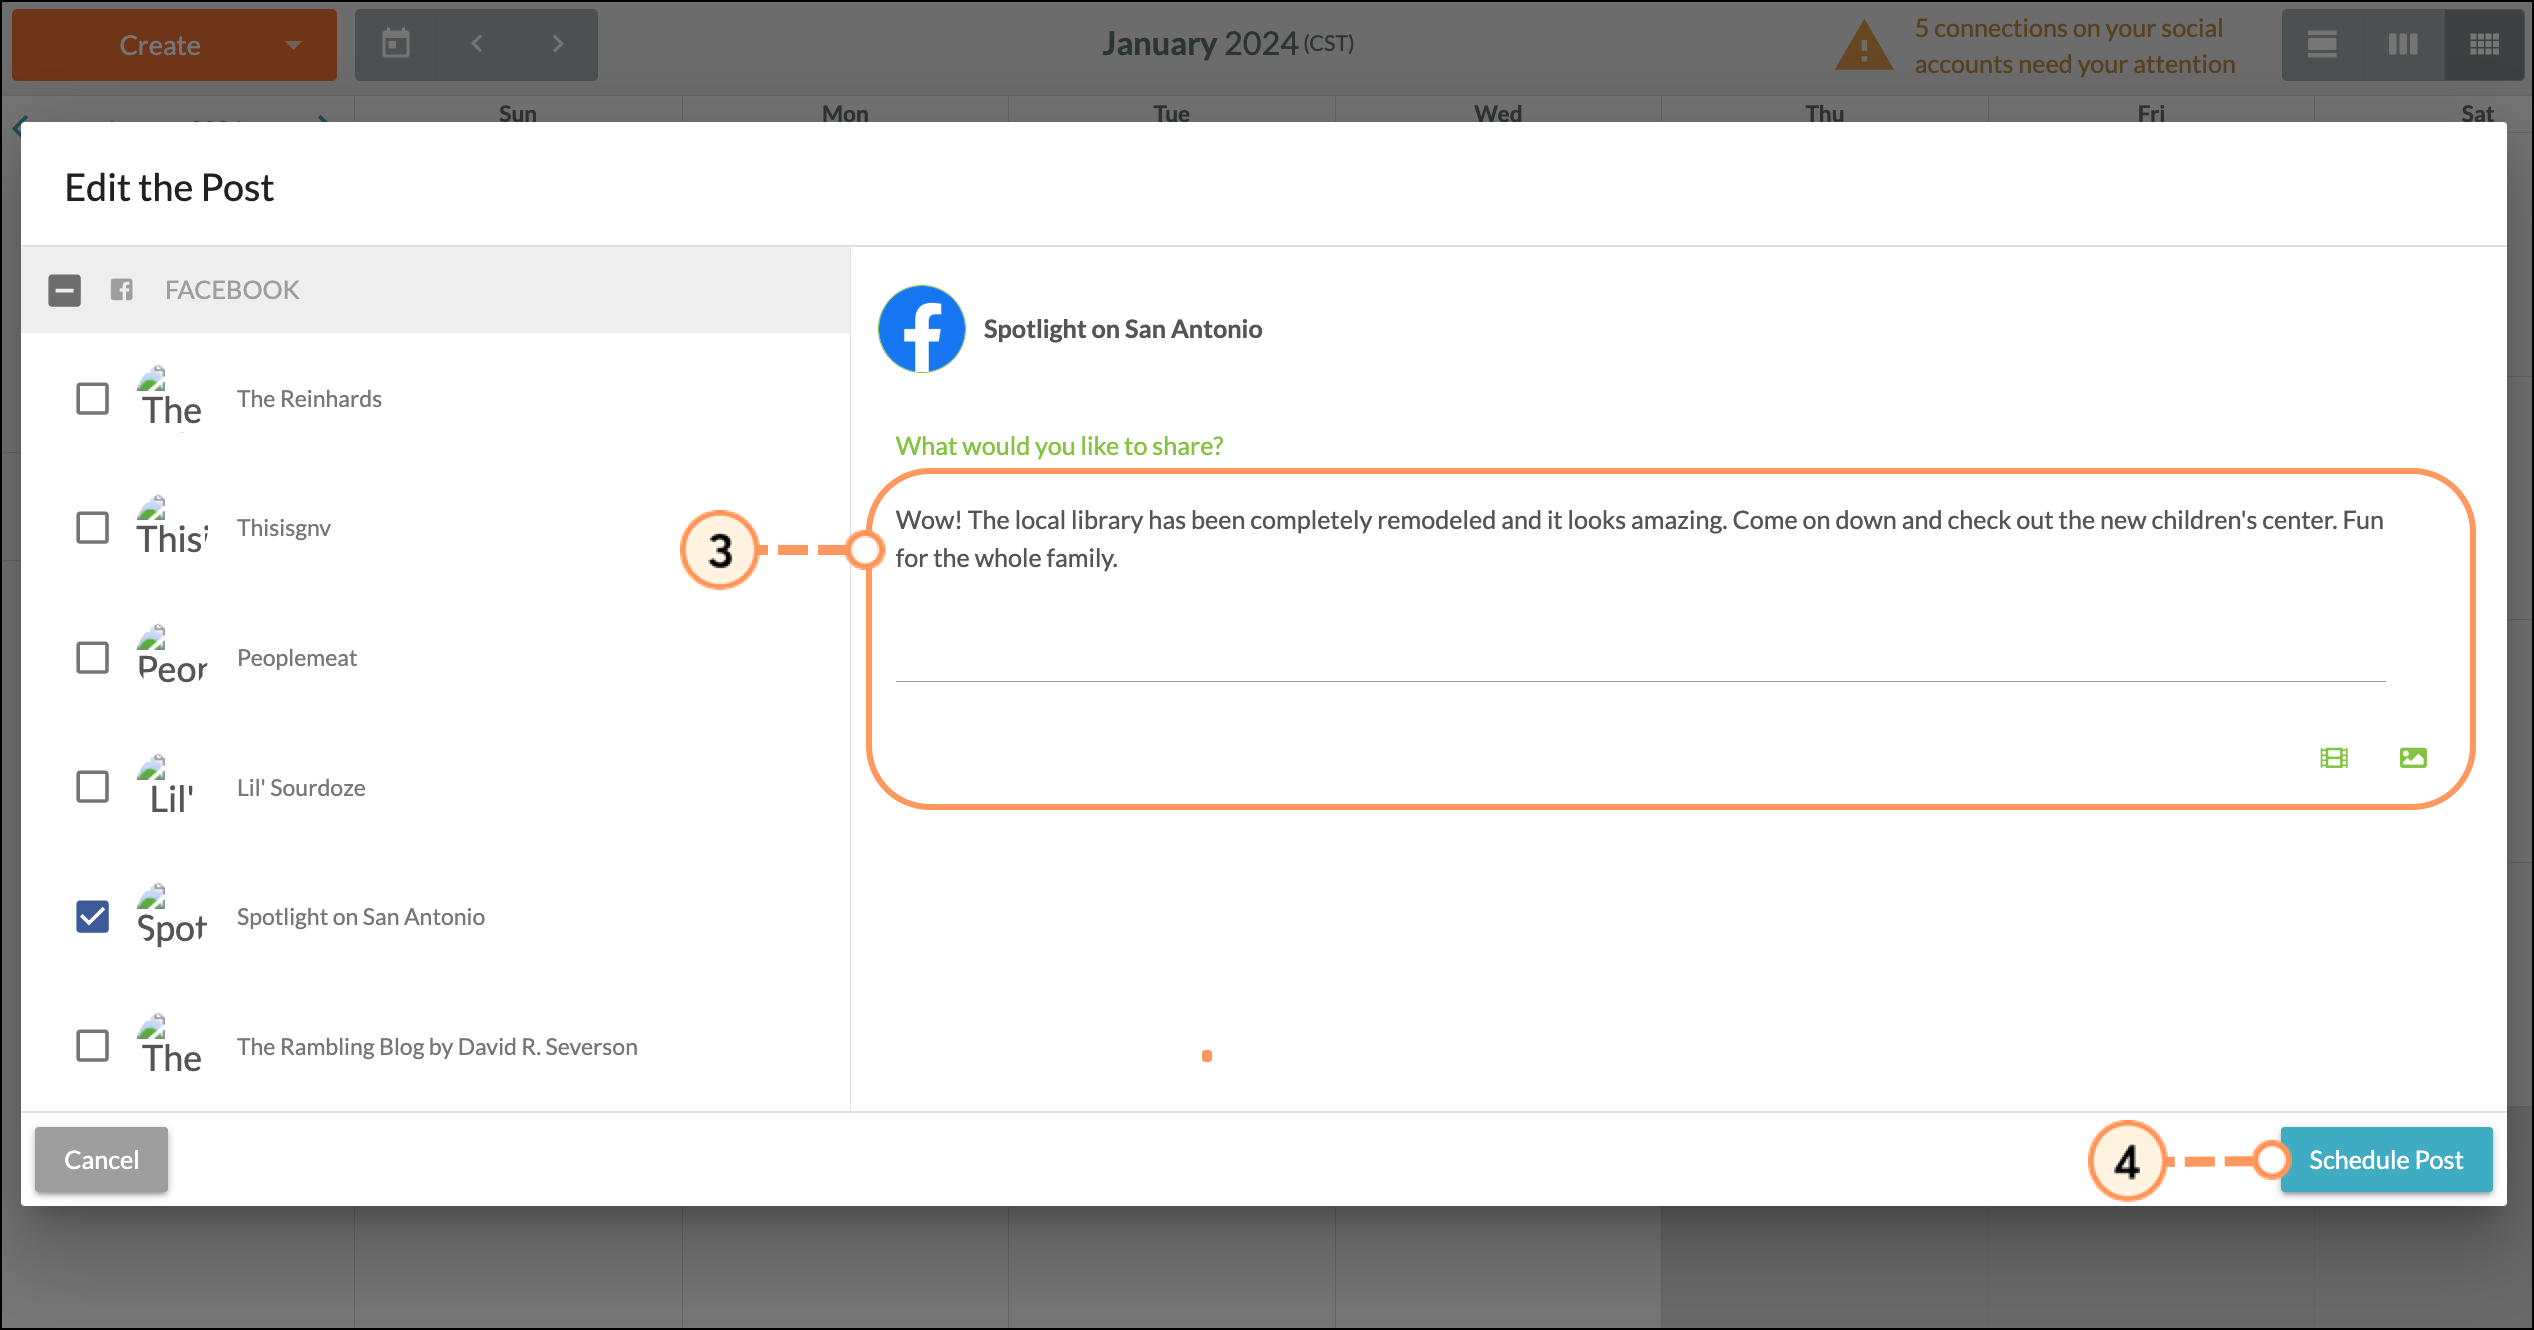
Be aware that published content must be edited through its respective social media platform.
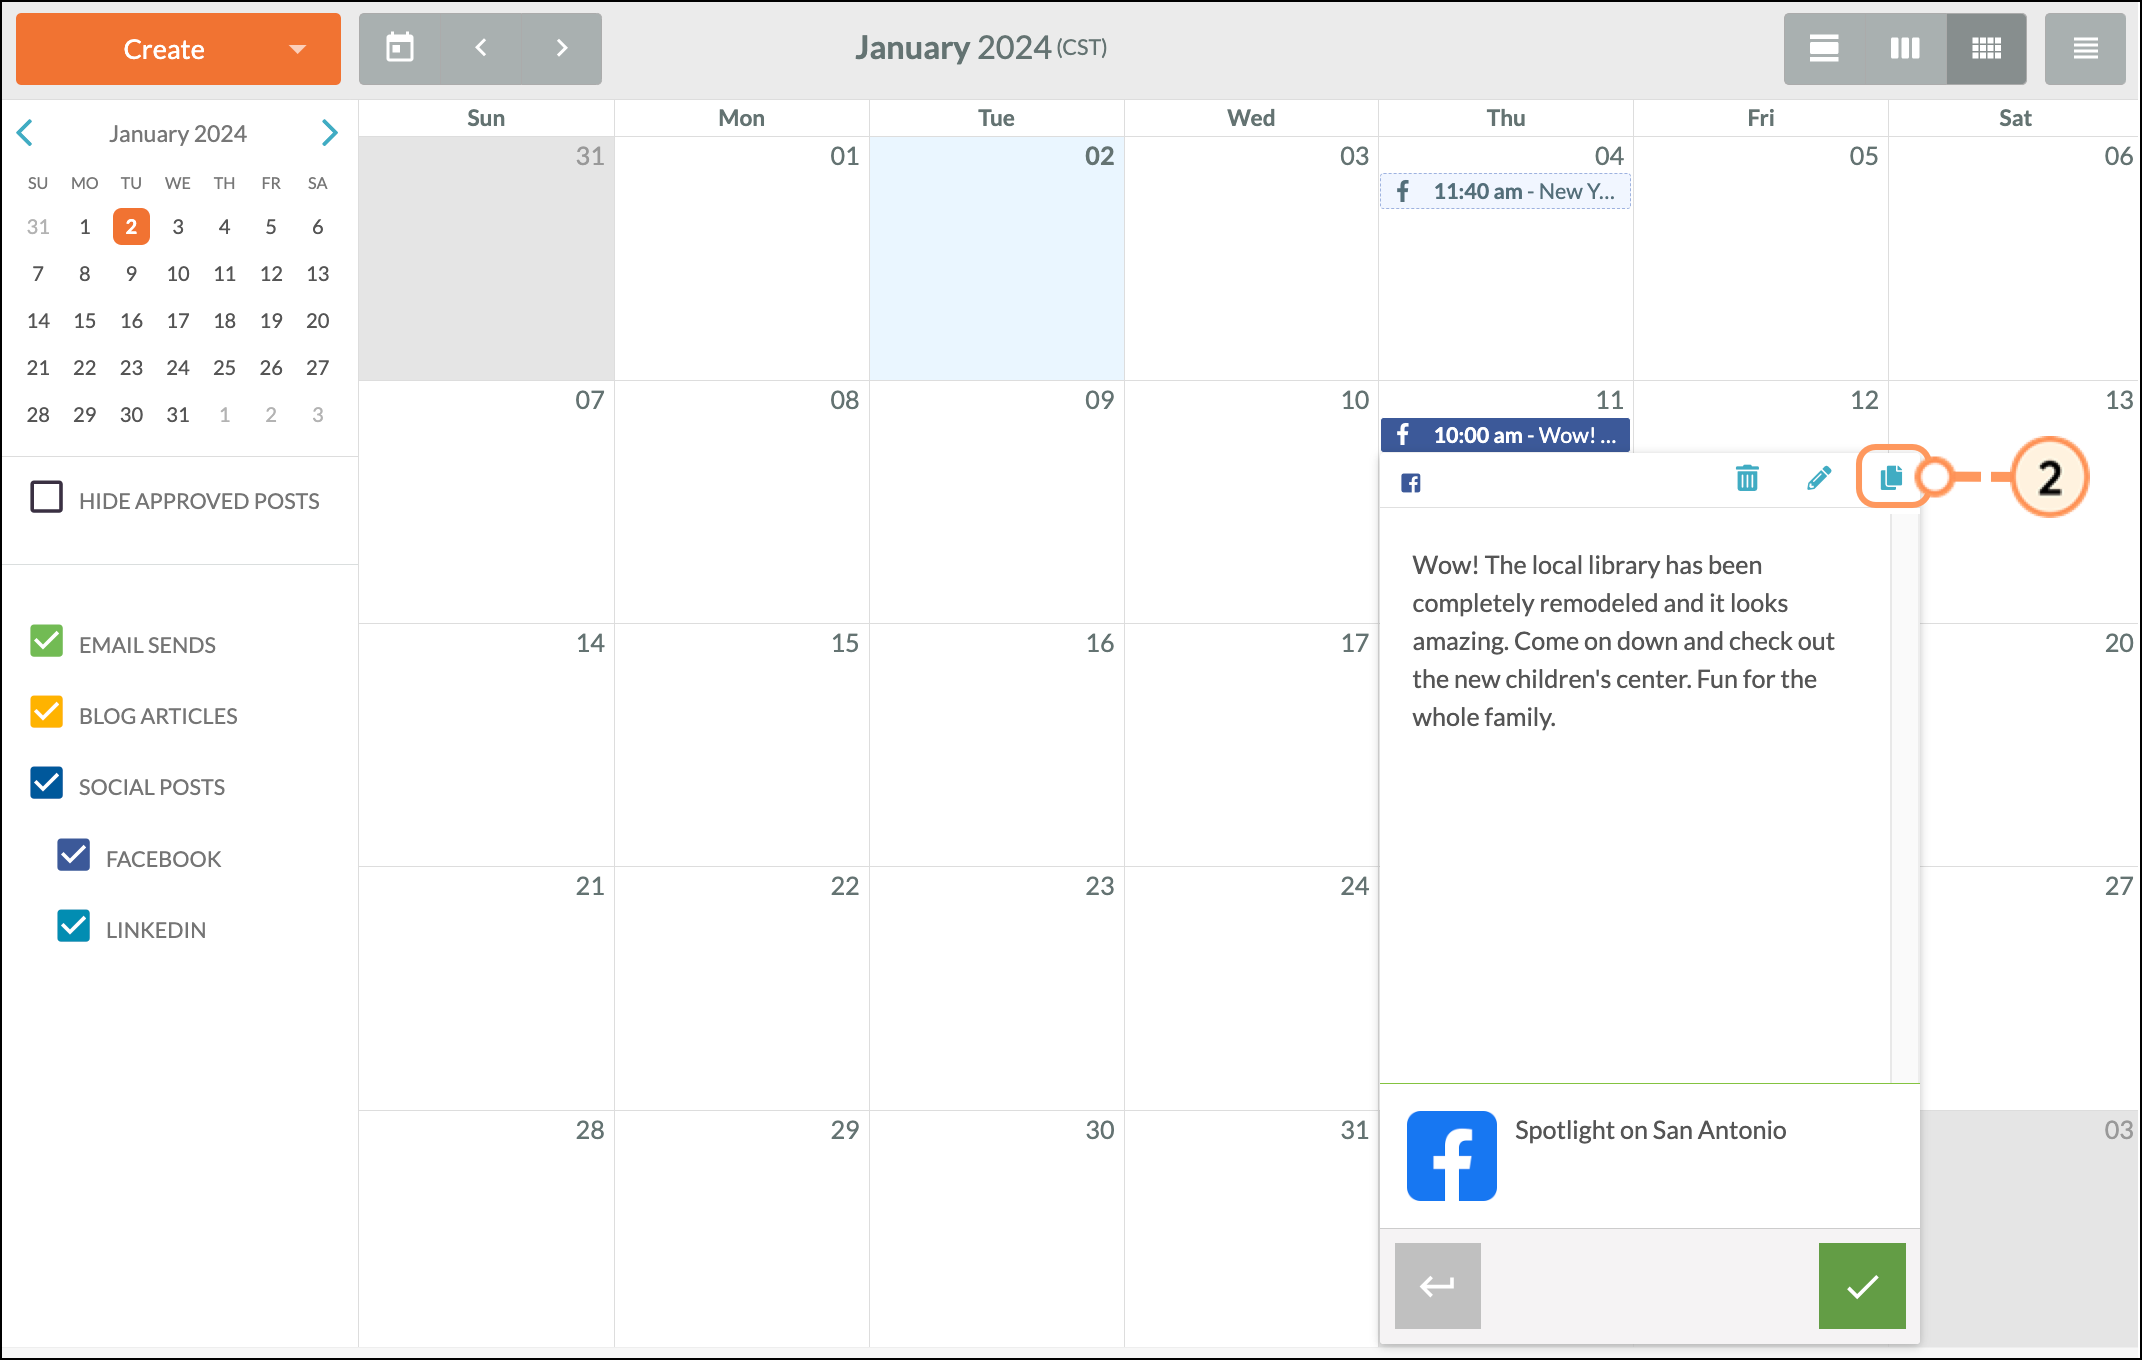
You can copy posted content as necessary. To copy posted content, do the following:
You can delete scheduled content that has yet to be published from the Content Calendar. To delete future posts, do the following:
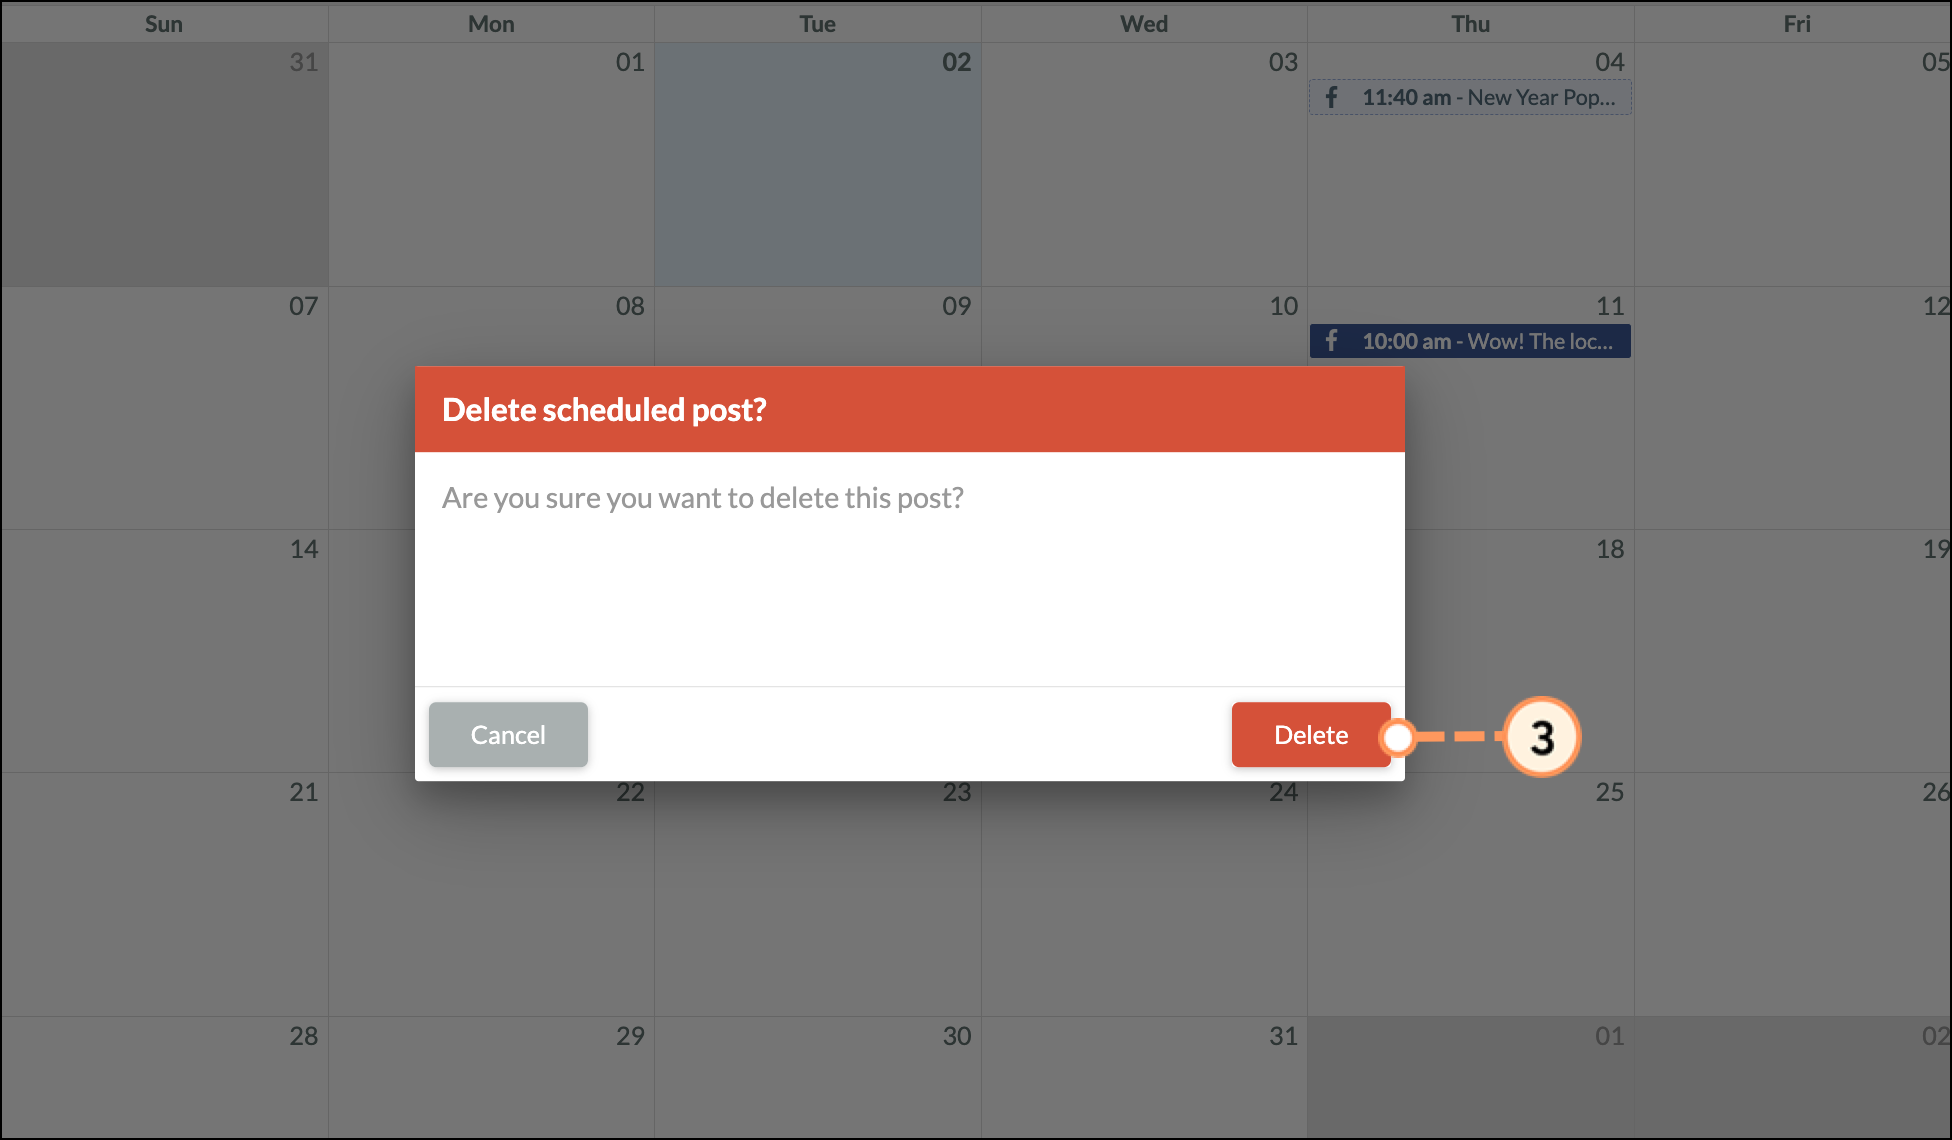
Deleting within the Content Calendar will unschedule your content. Your emails, blog articles, and social posts will no longer be published when deleted. You cannot delete previously scheduled content that has since been published.
Copyright © 2026 · All Rights Reserved · Constant Contact · Privacy Center


