Setting up an automated time-based workflow to replace manual responses to every engagement or interaction will save an untold amount of time and, ultimately, improve your bottom line.
This article will provide an overview on time-based workflow content, as well as how to tie time-based action groups—or action groups based on a specific date and time field—into Lead Gen & CRM's other automation processes.
| Tip: Are you looking for information about Constant Contact’s Email and Digital Marketing product? This article is for Constant Contact’s Lead Gen & CRM product. Head on over to the Email and Digital Marketing articles by clicking here. Not sure what the difference is? Read this article. |
| Administrators | ✓ | |
| Company Managers | ✓ | |
| Marketing Managers | ✓ | |
| Sales Managers | ||
| Salespersons | ||
| Jr. Salespersons |
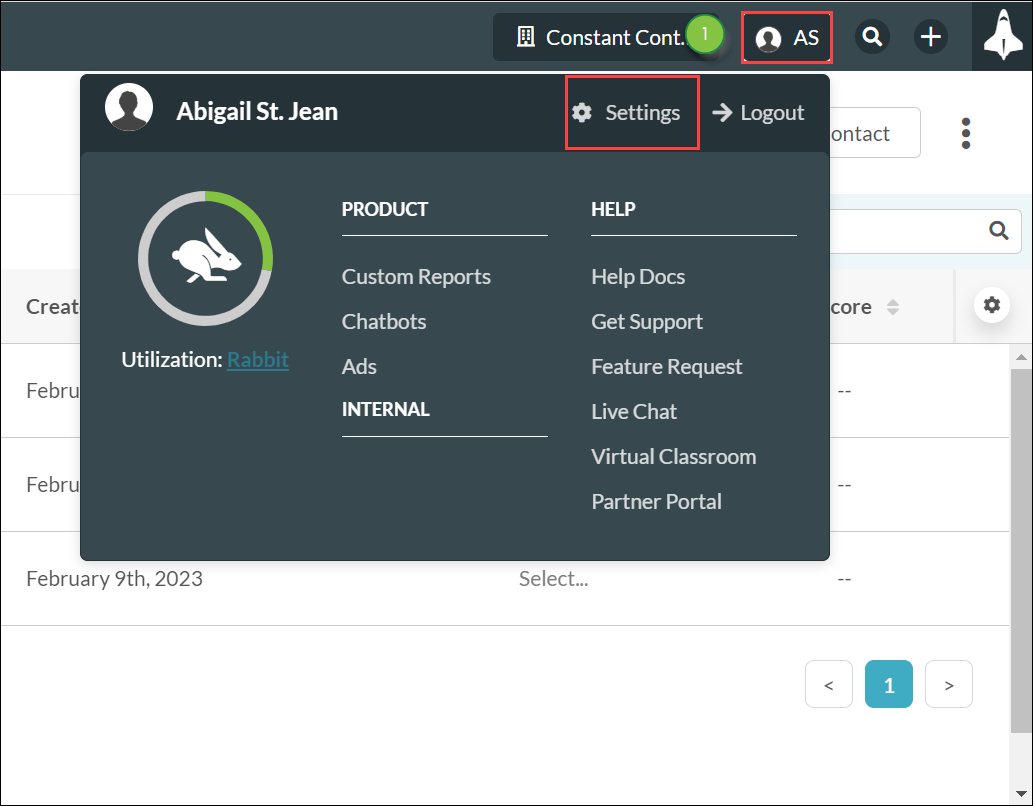
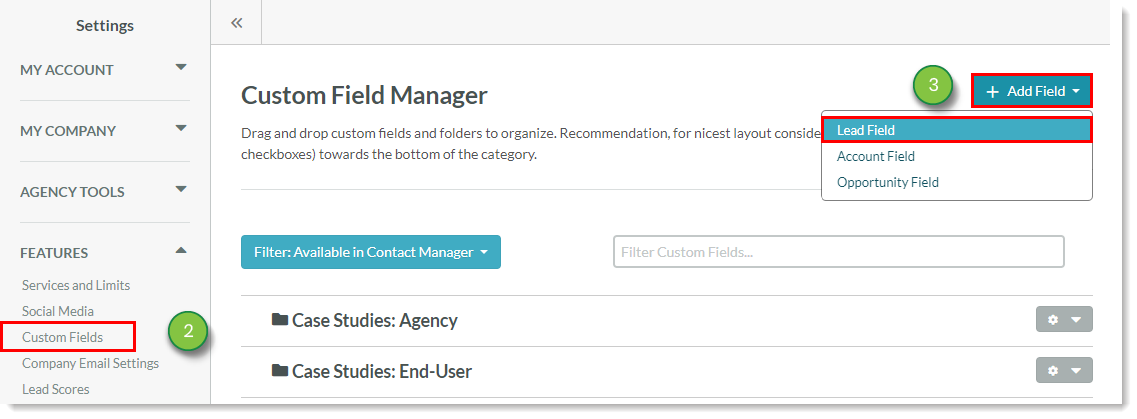
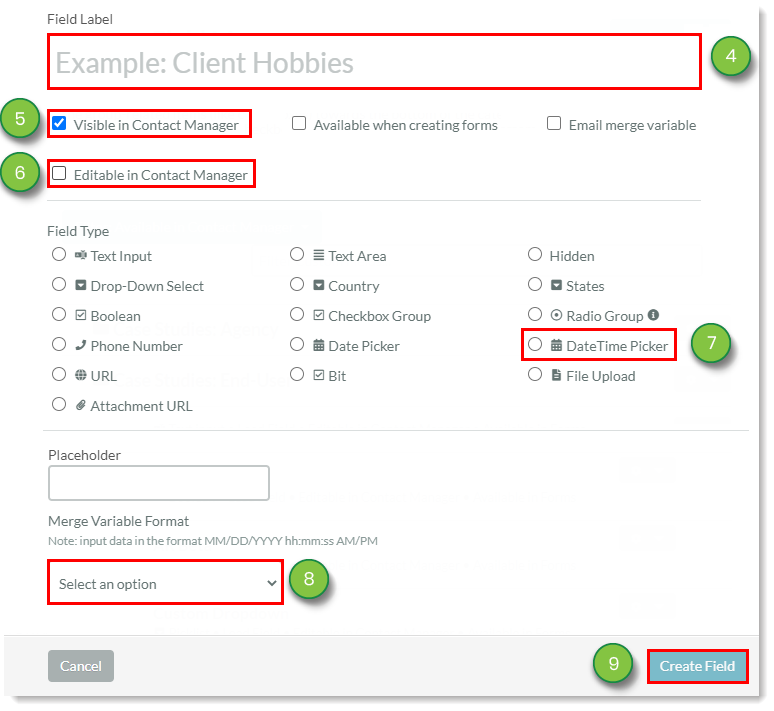
Time-based automations require DateTime fields. To create a custom DateTime field, do the following:
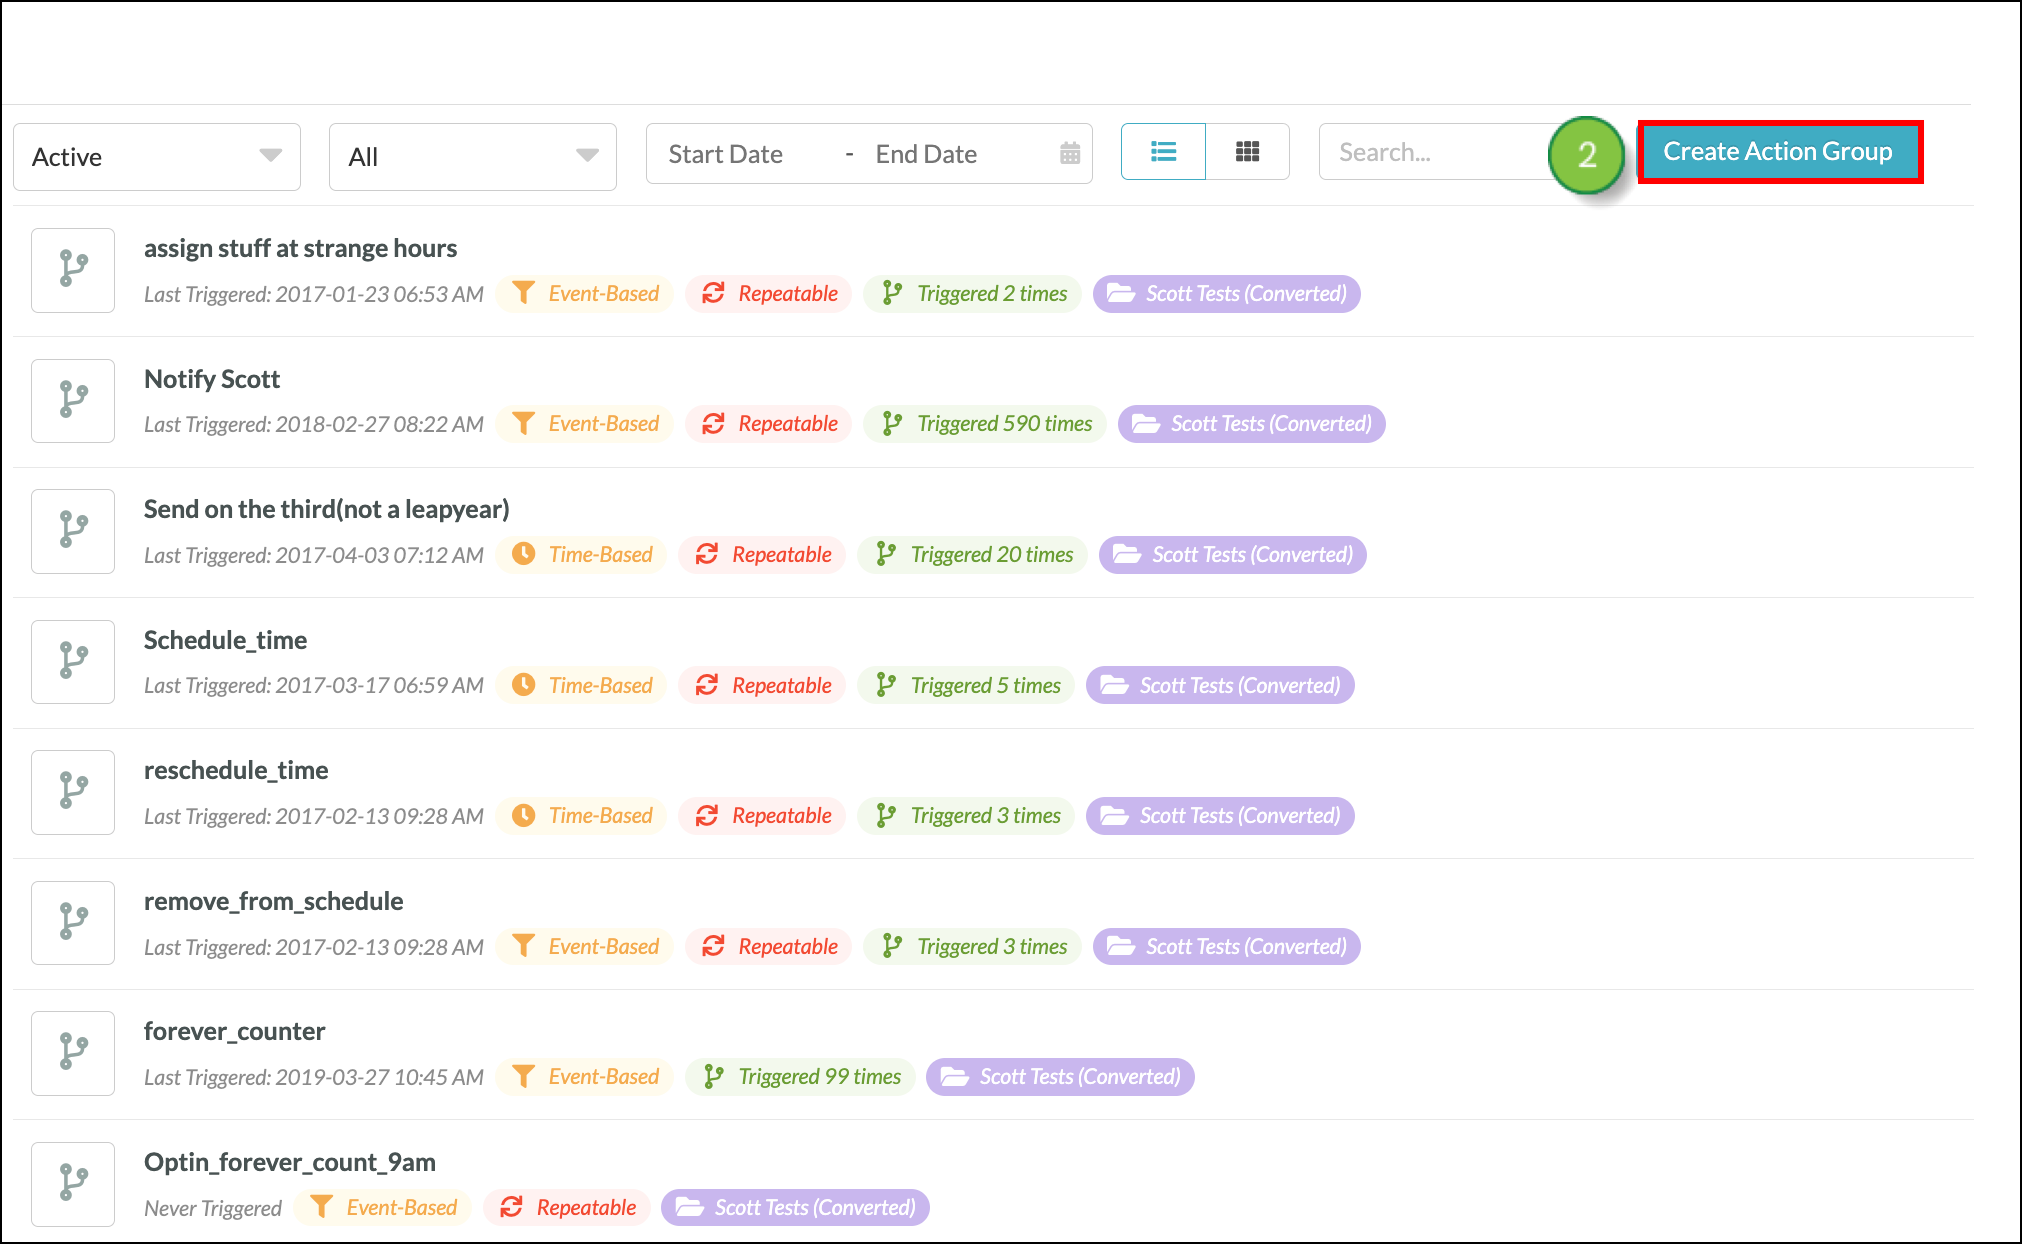
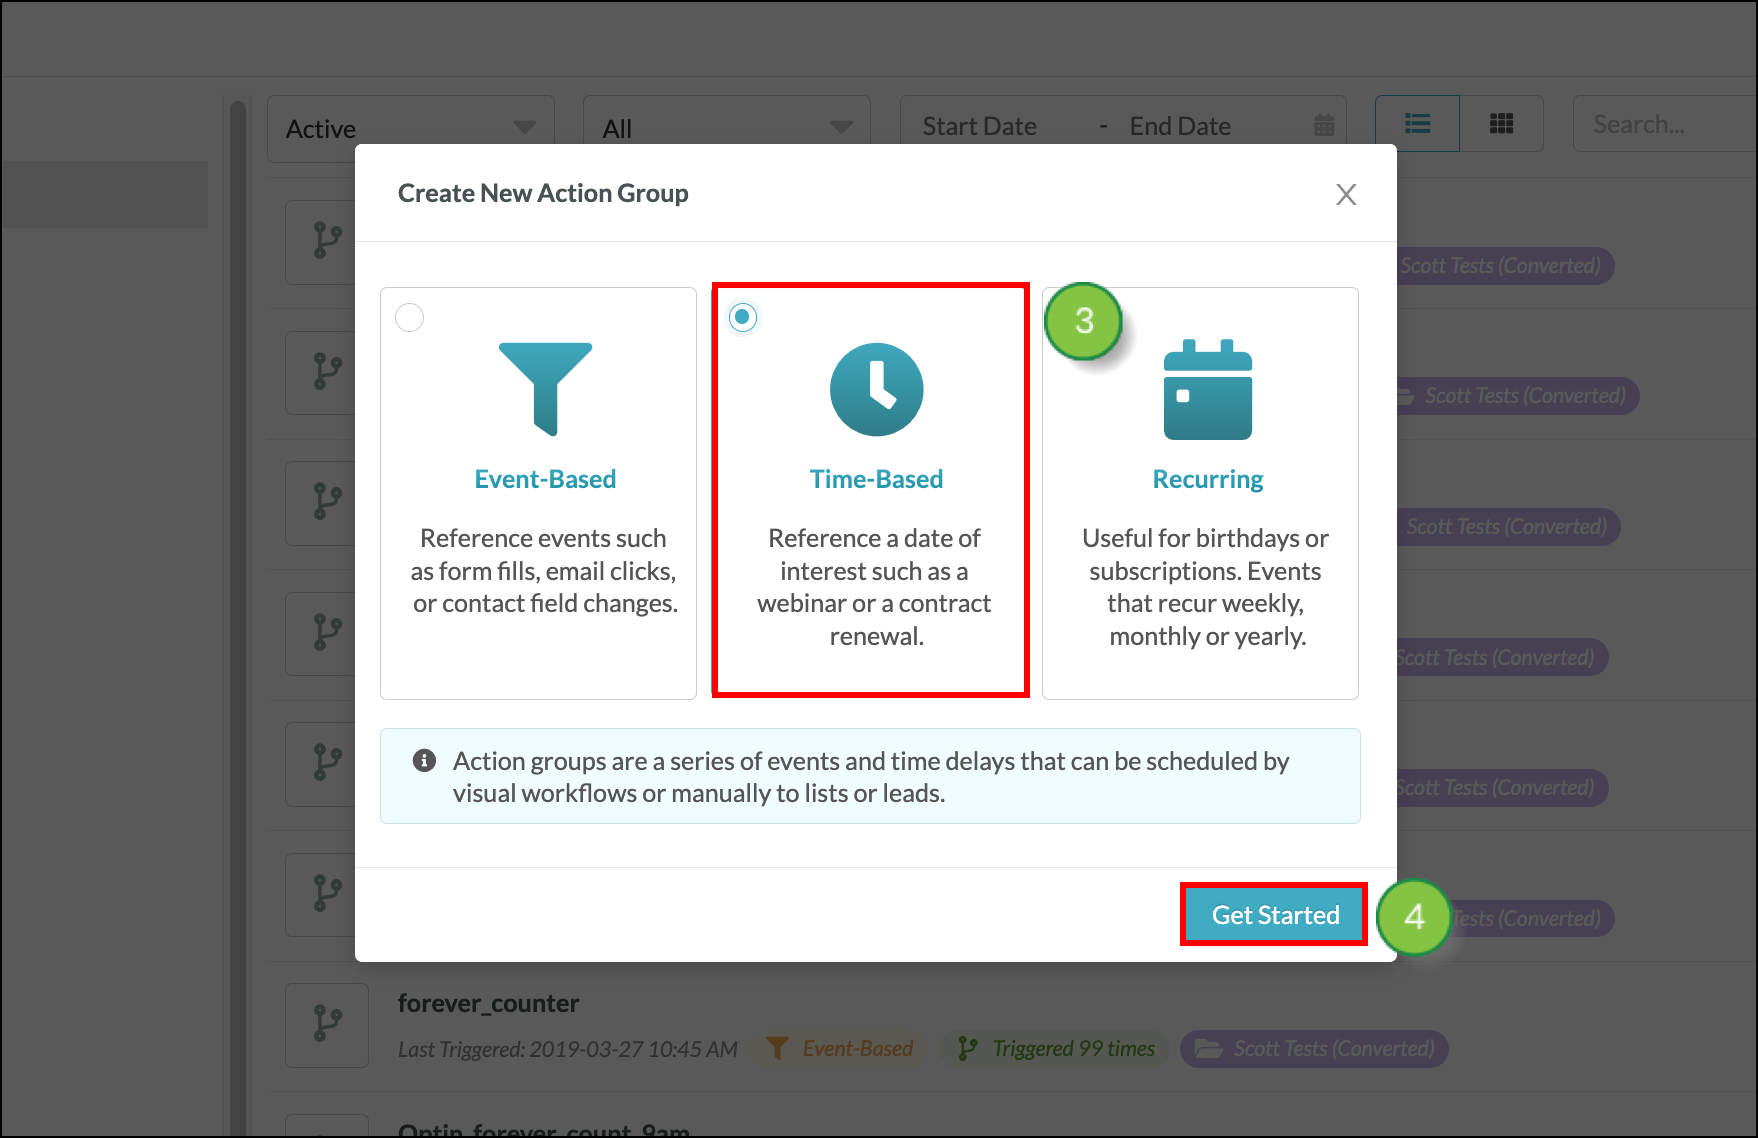
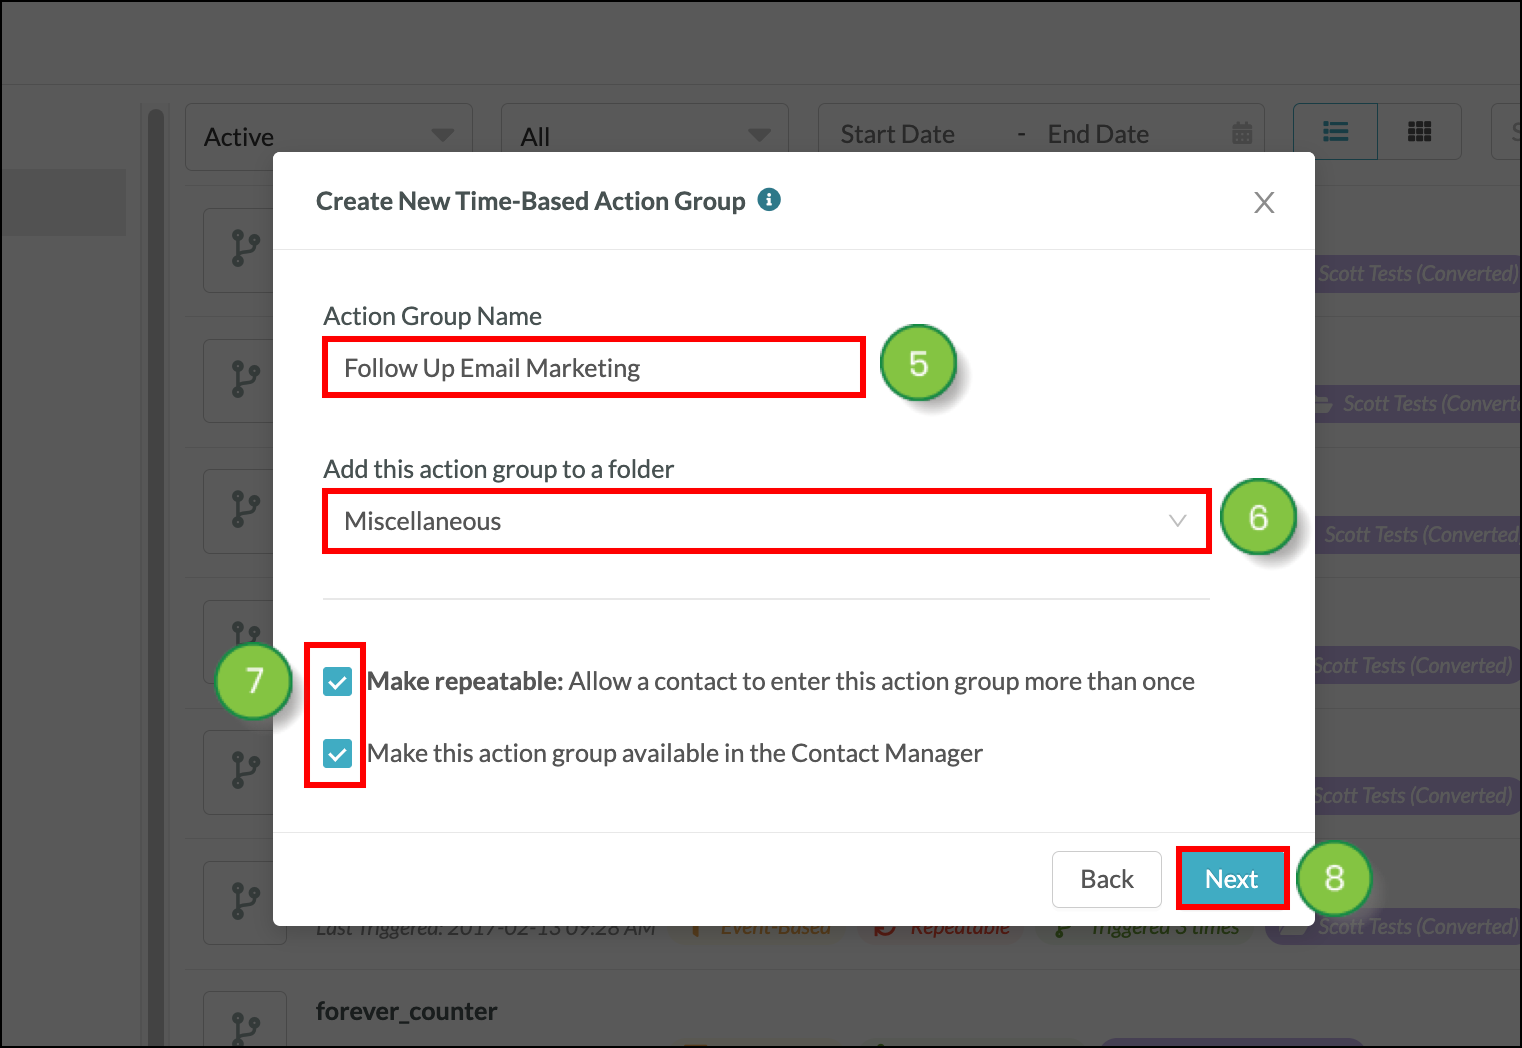
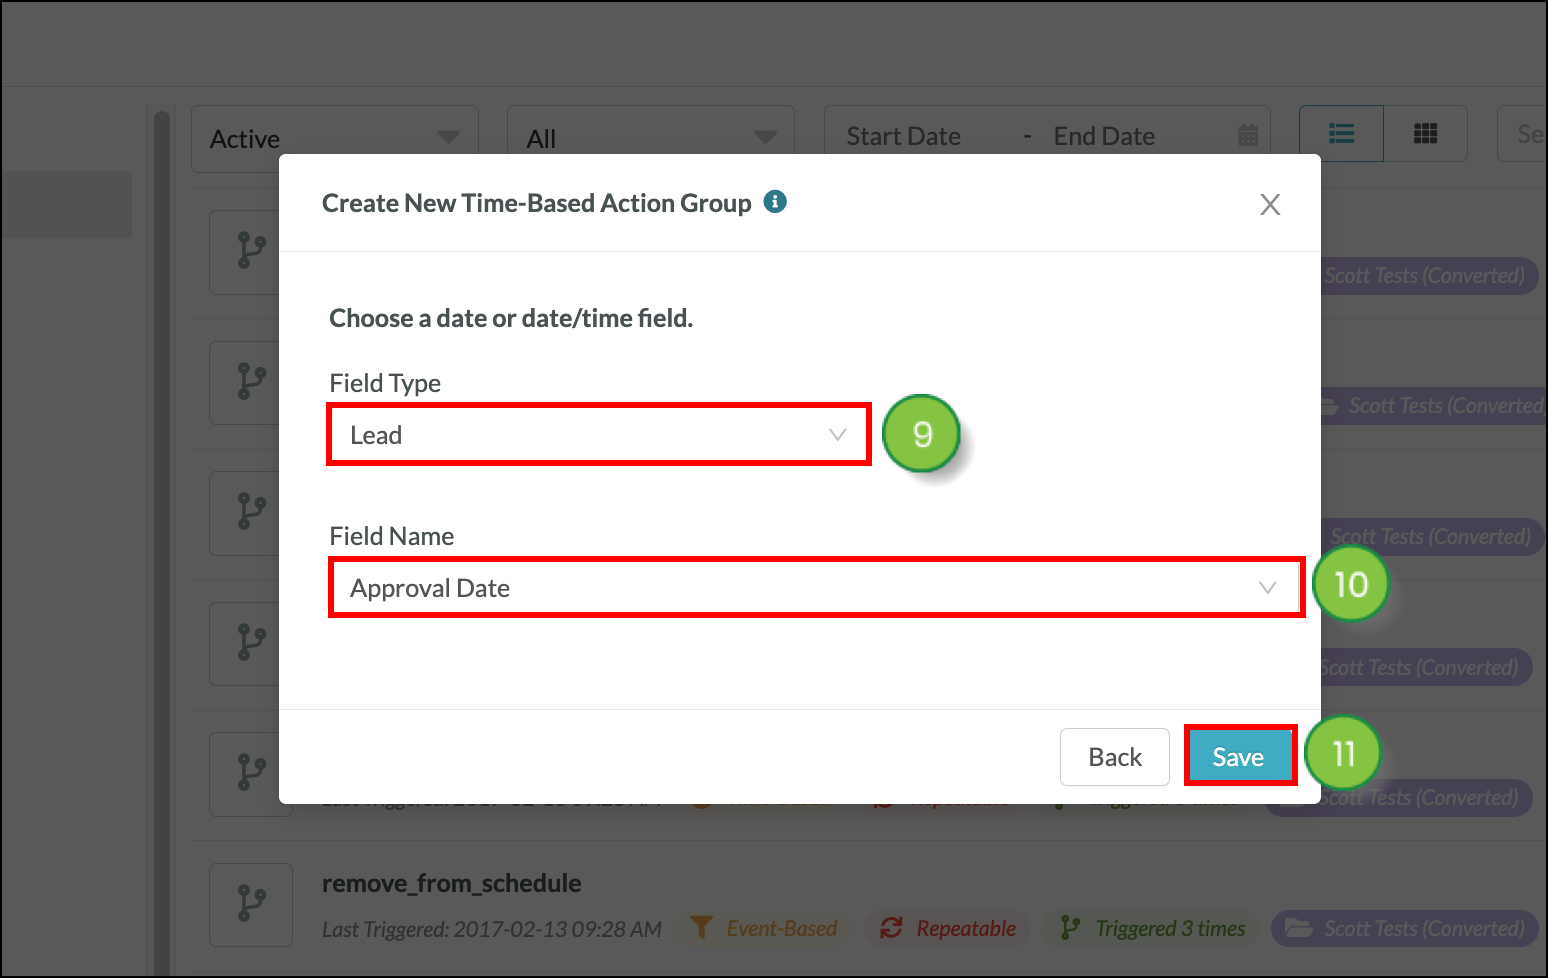
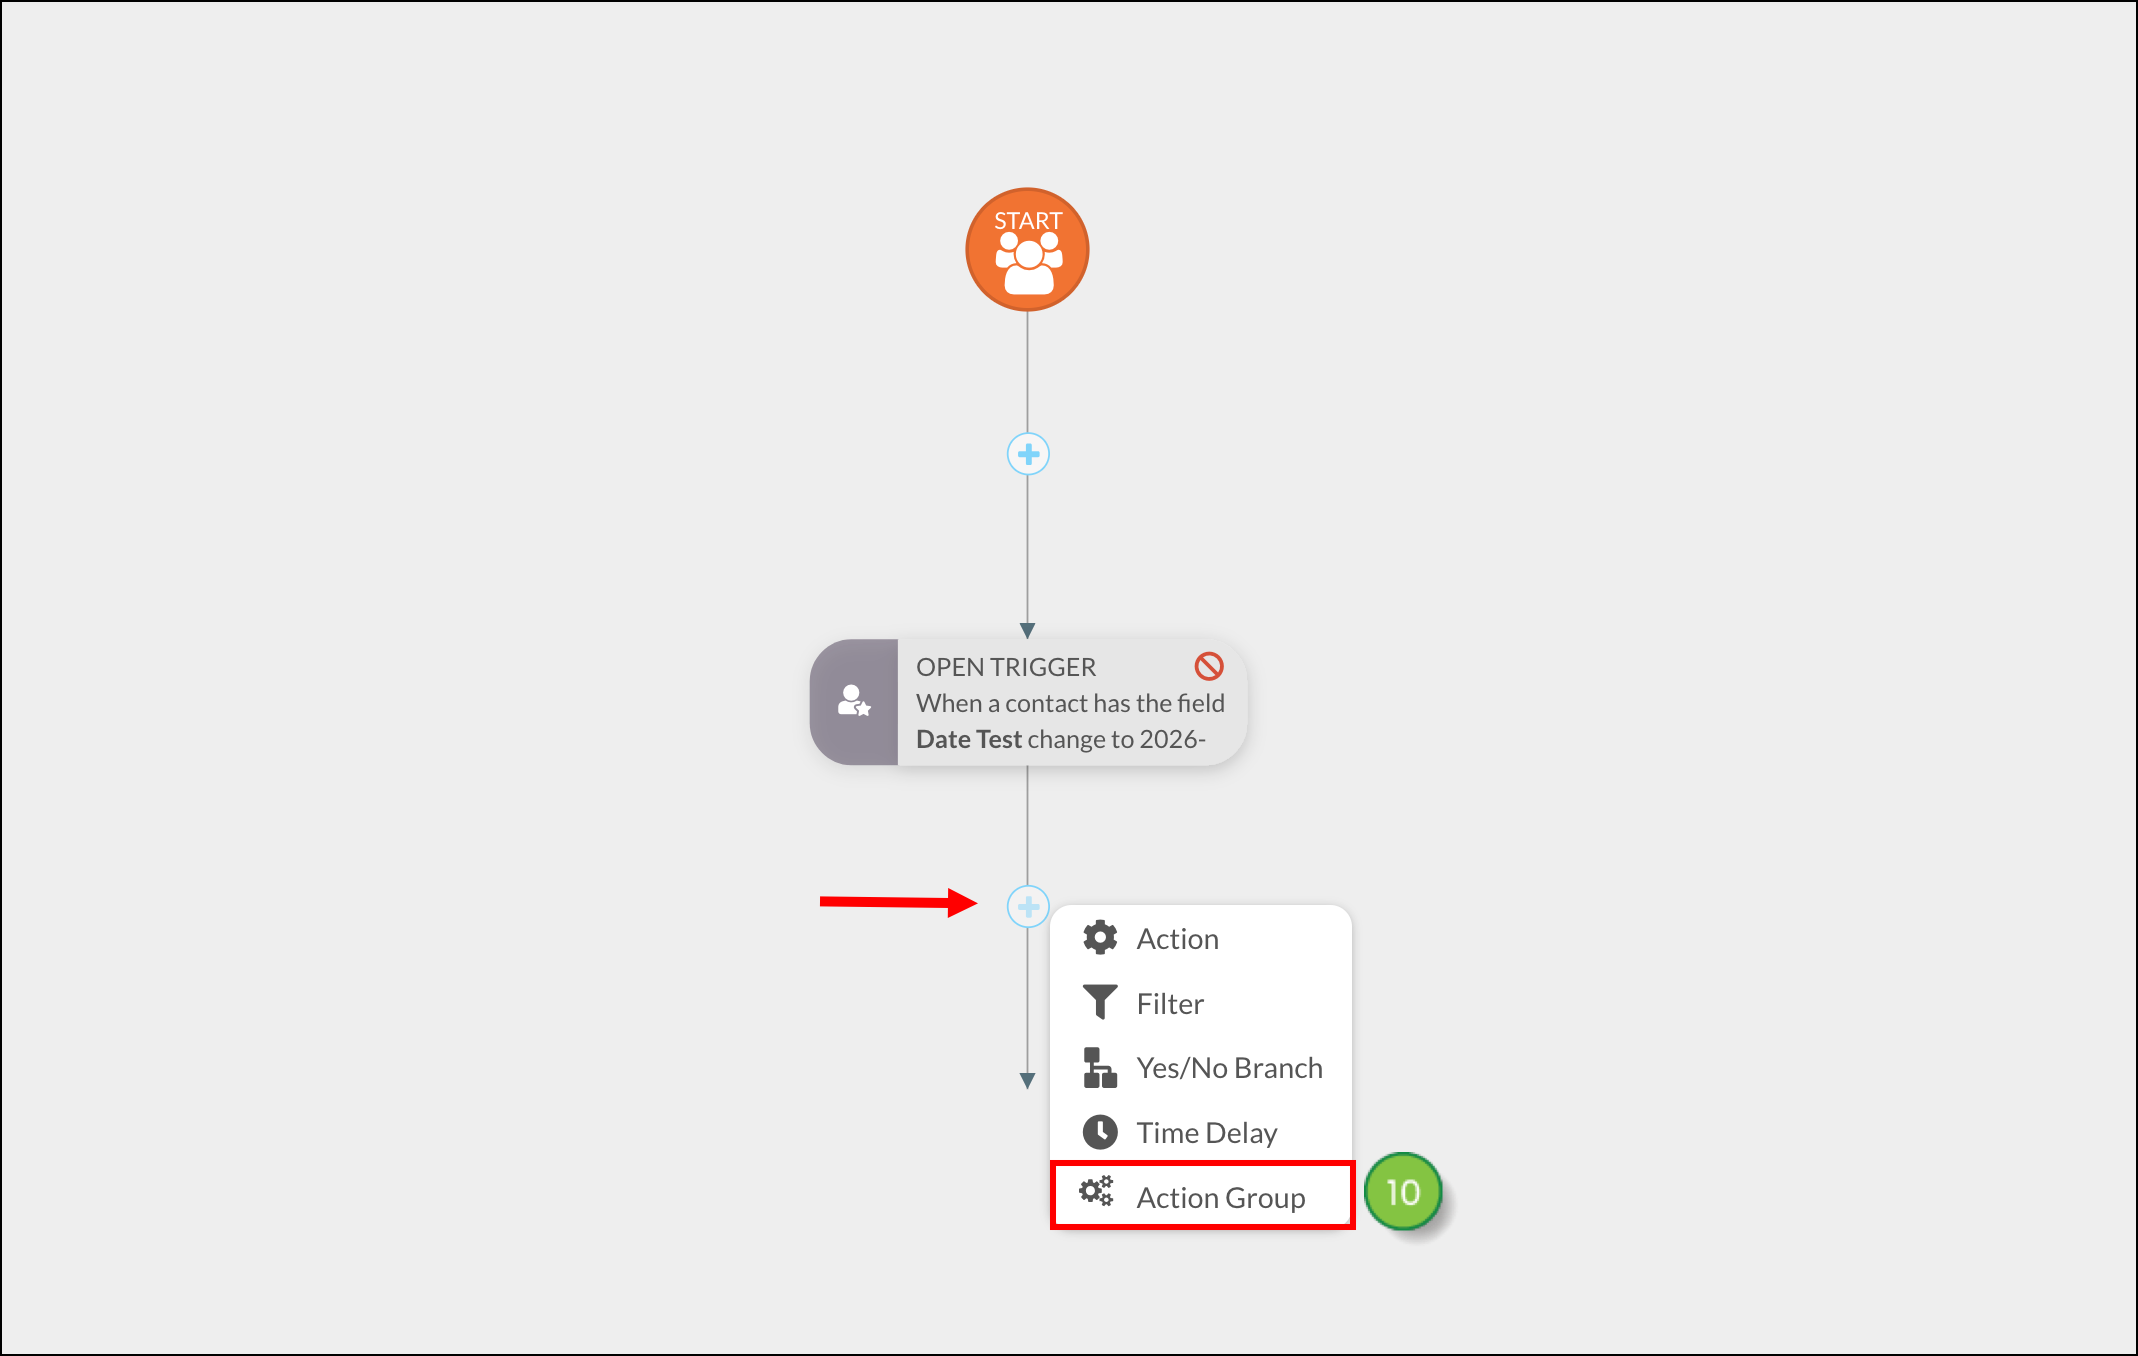
You can create time-based action groups based on DateTime Custom Fields.
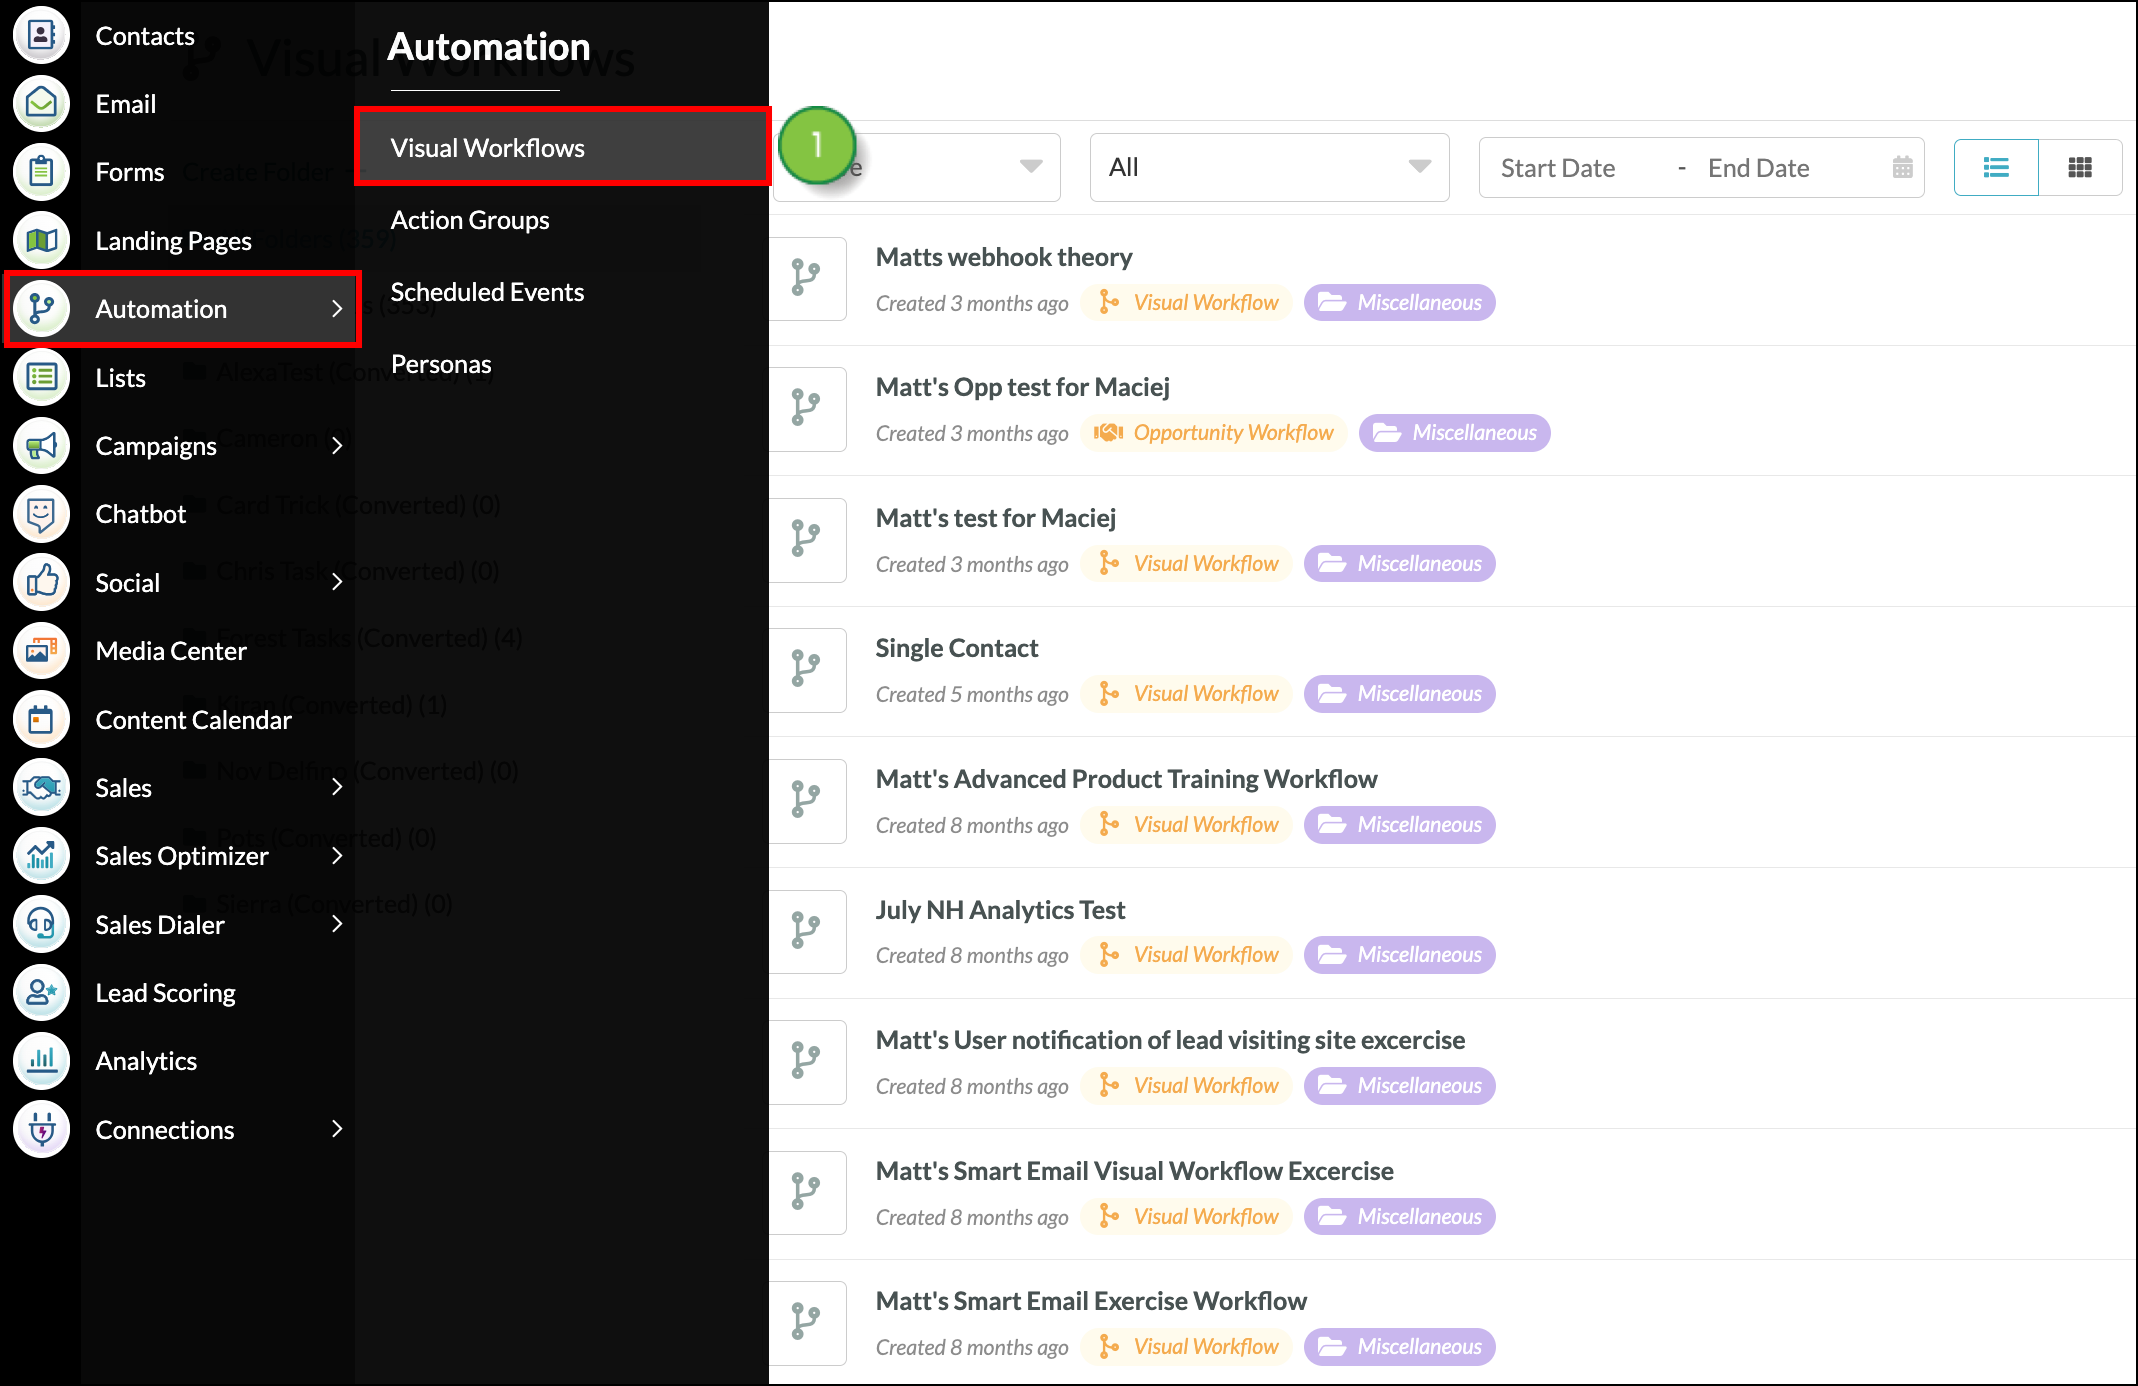
Important: The Visual Workflow Builder is not supported in Internet Explorer 11. Use one of the other browsers supported by Lead Gen & CRM to create visual workflows.
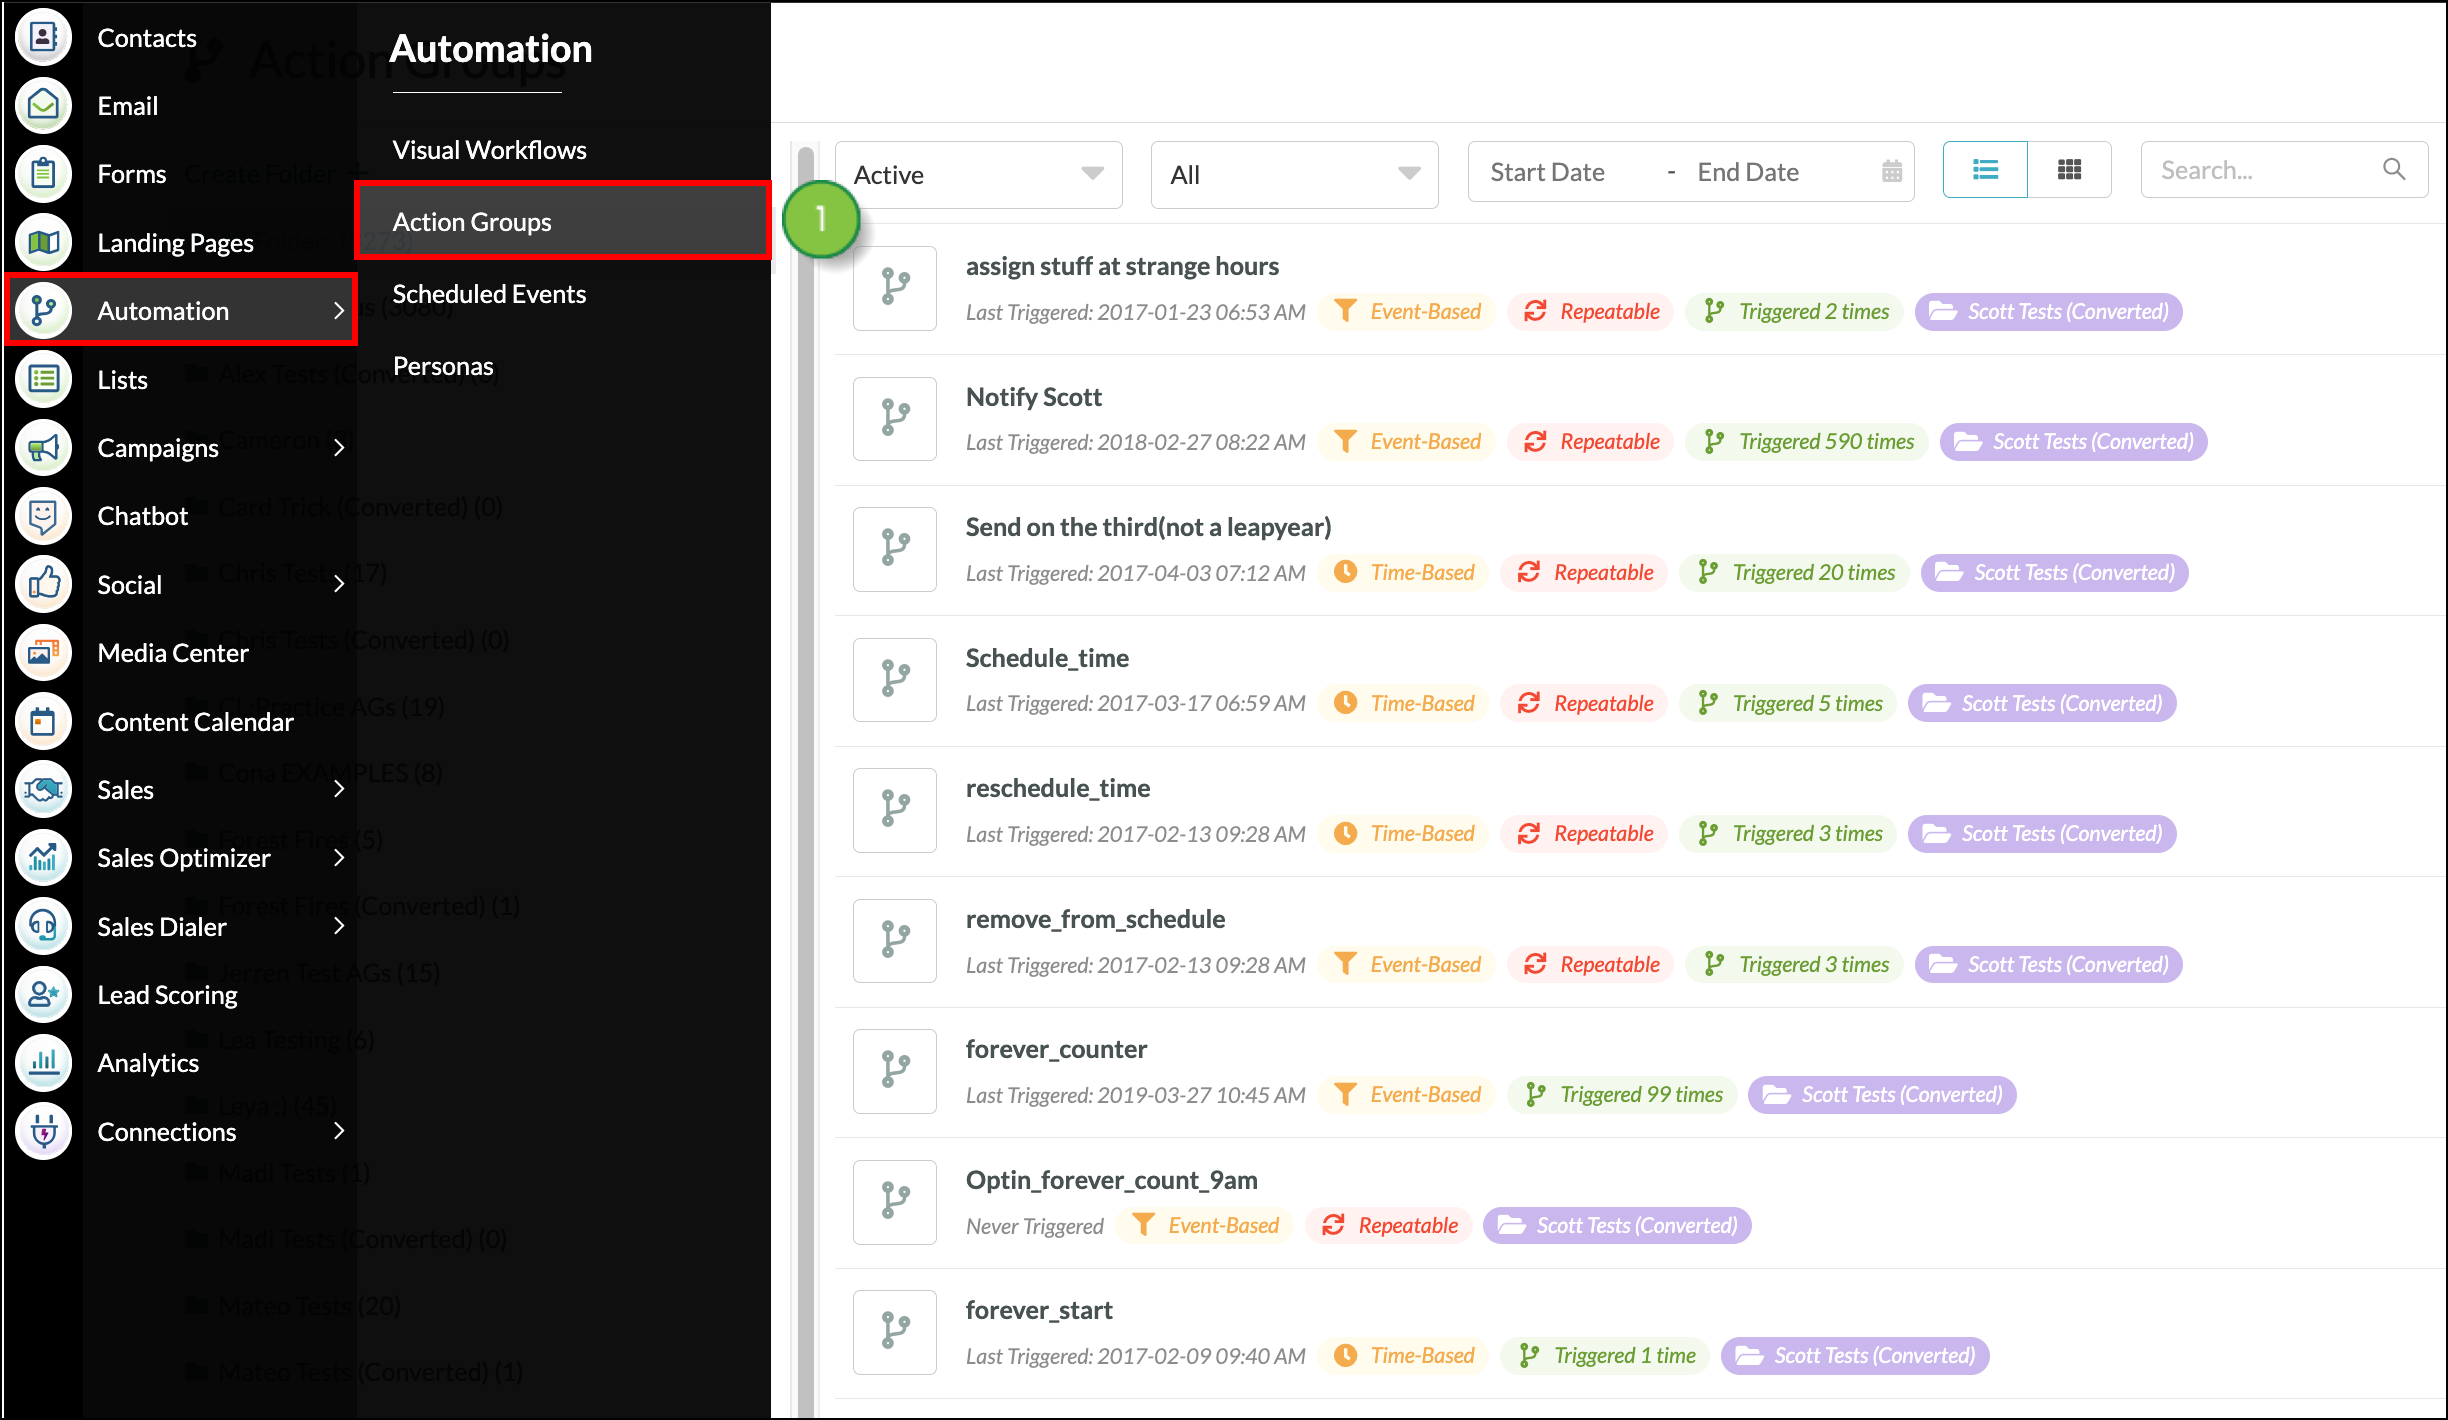
Note: Action groups must be part of a visual workflow with triggers for the action group to fire.
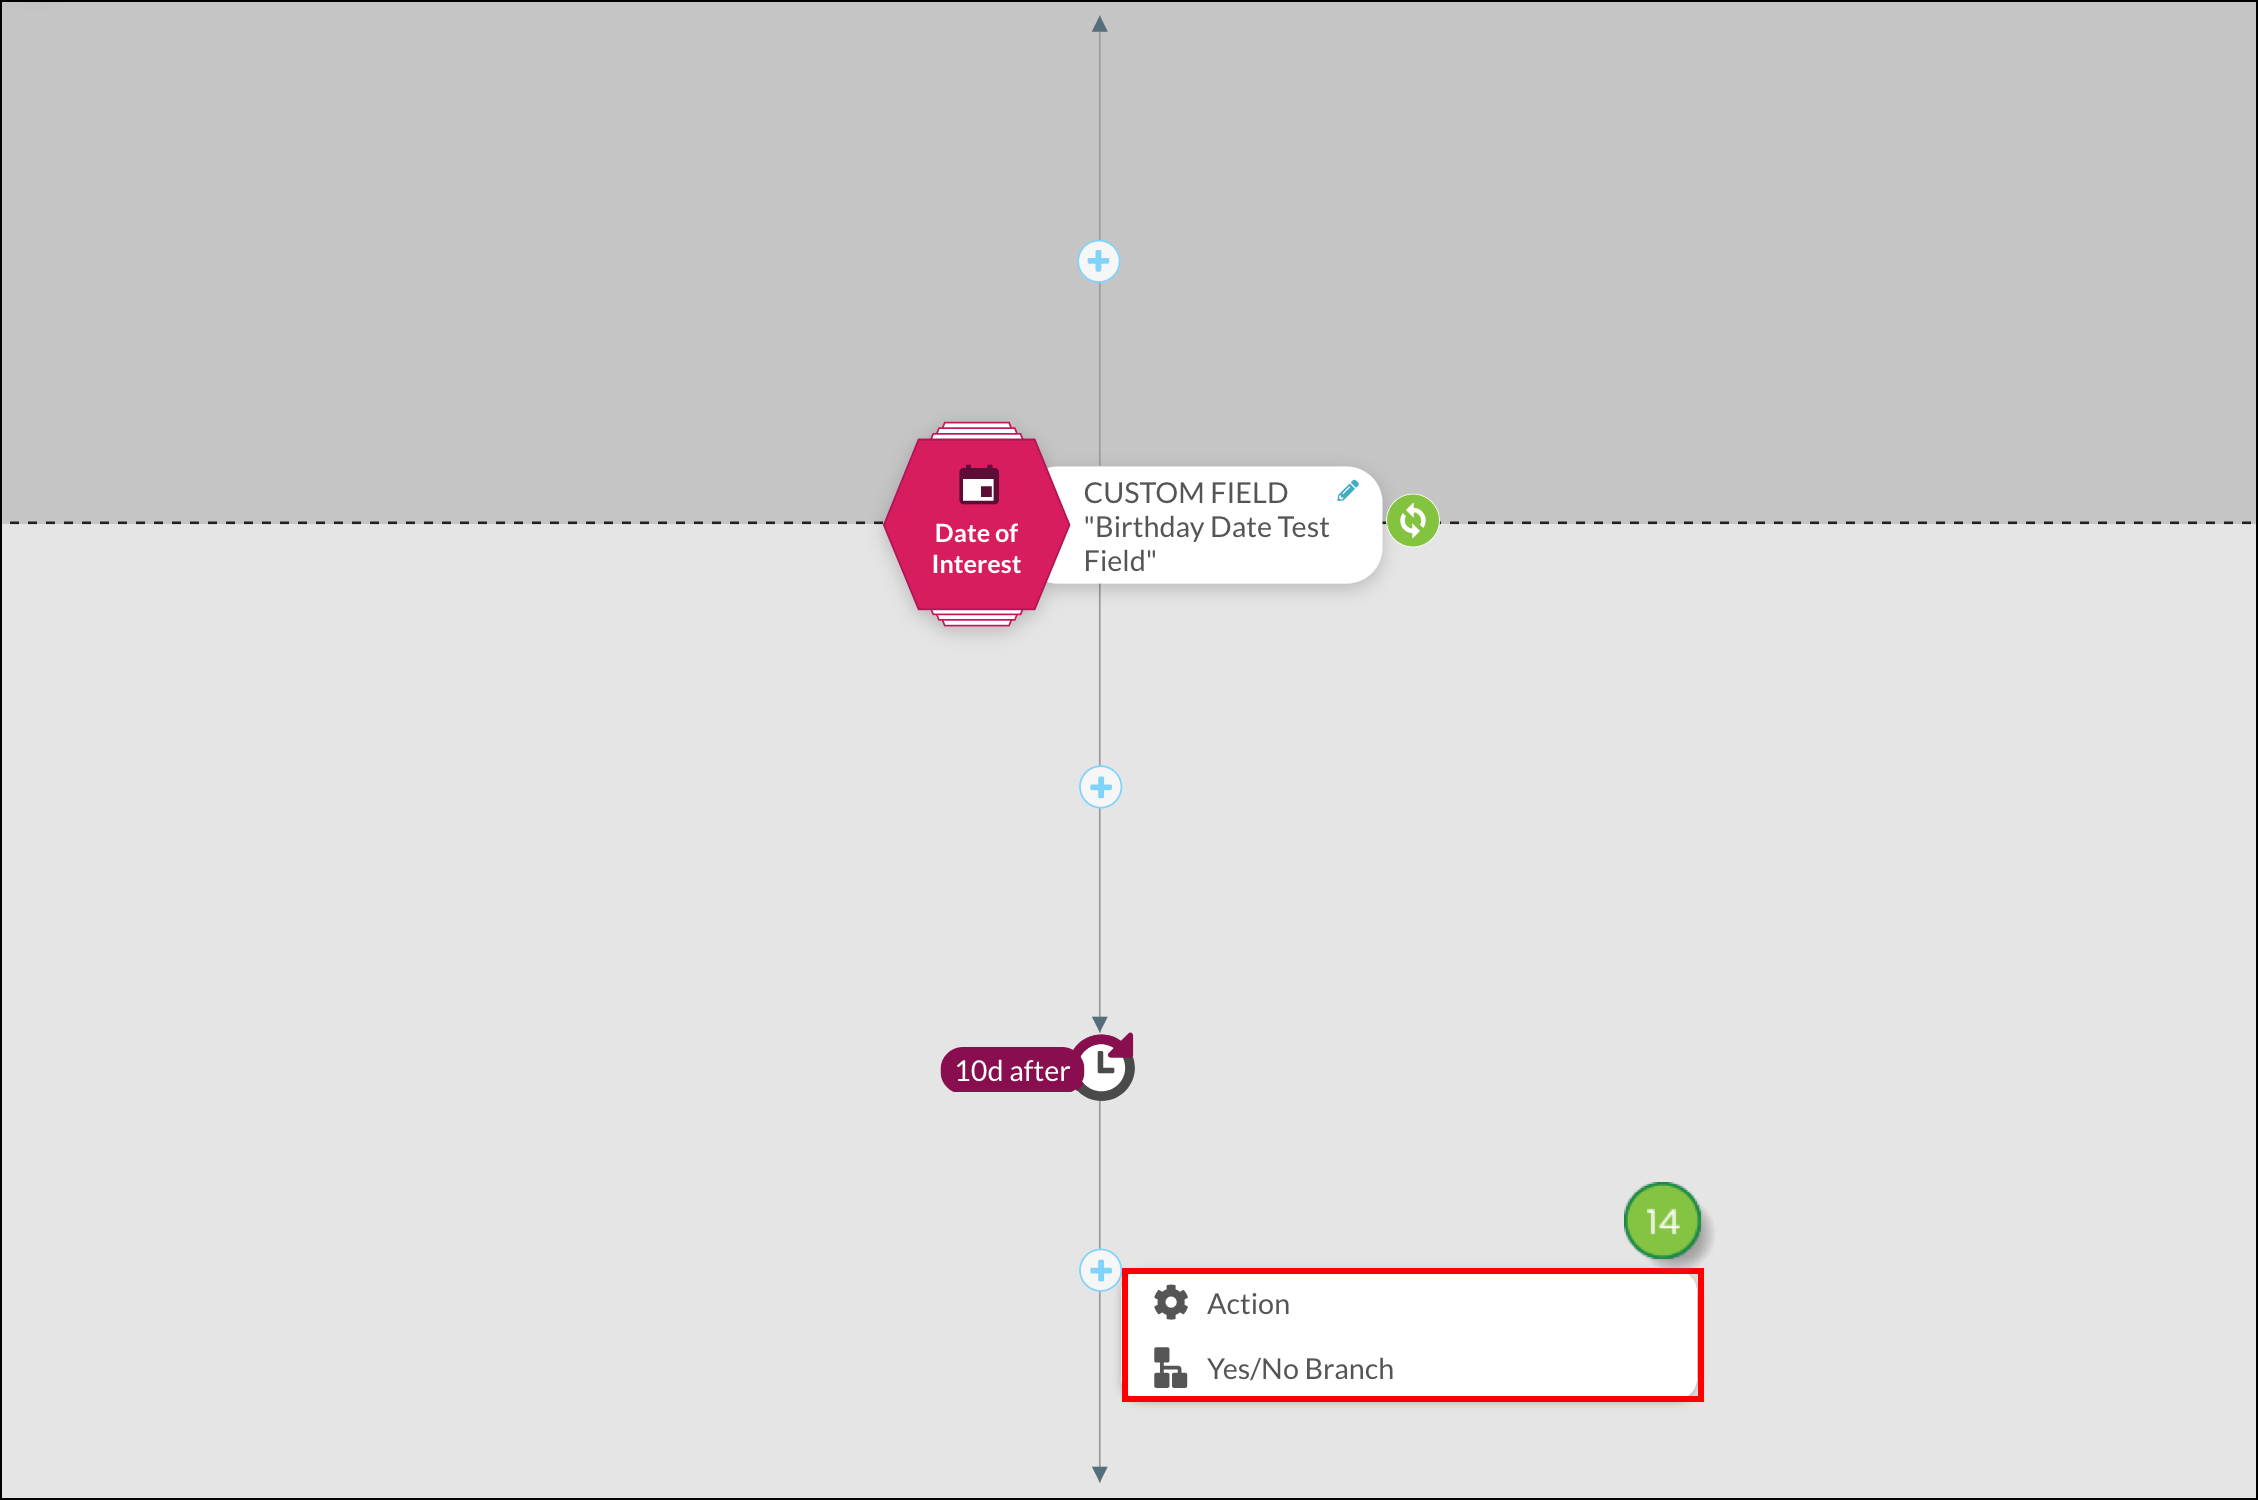
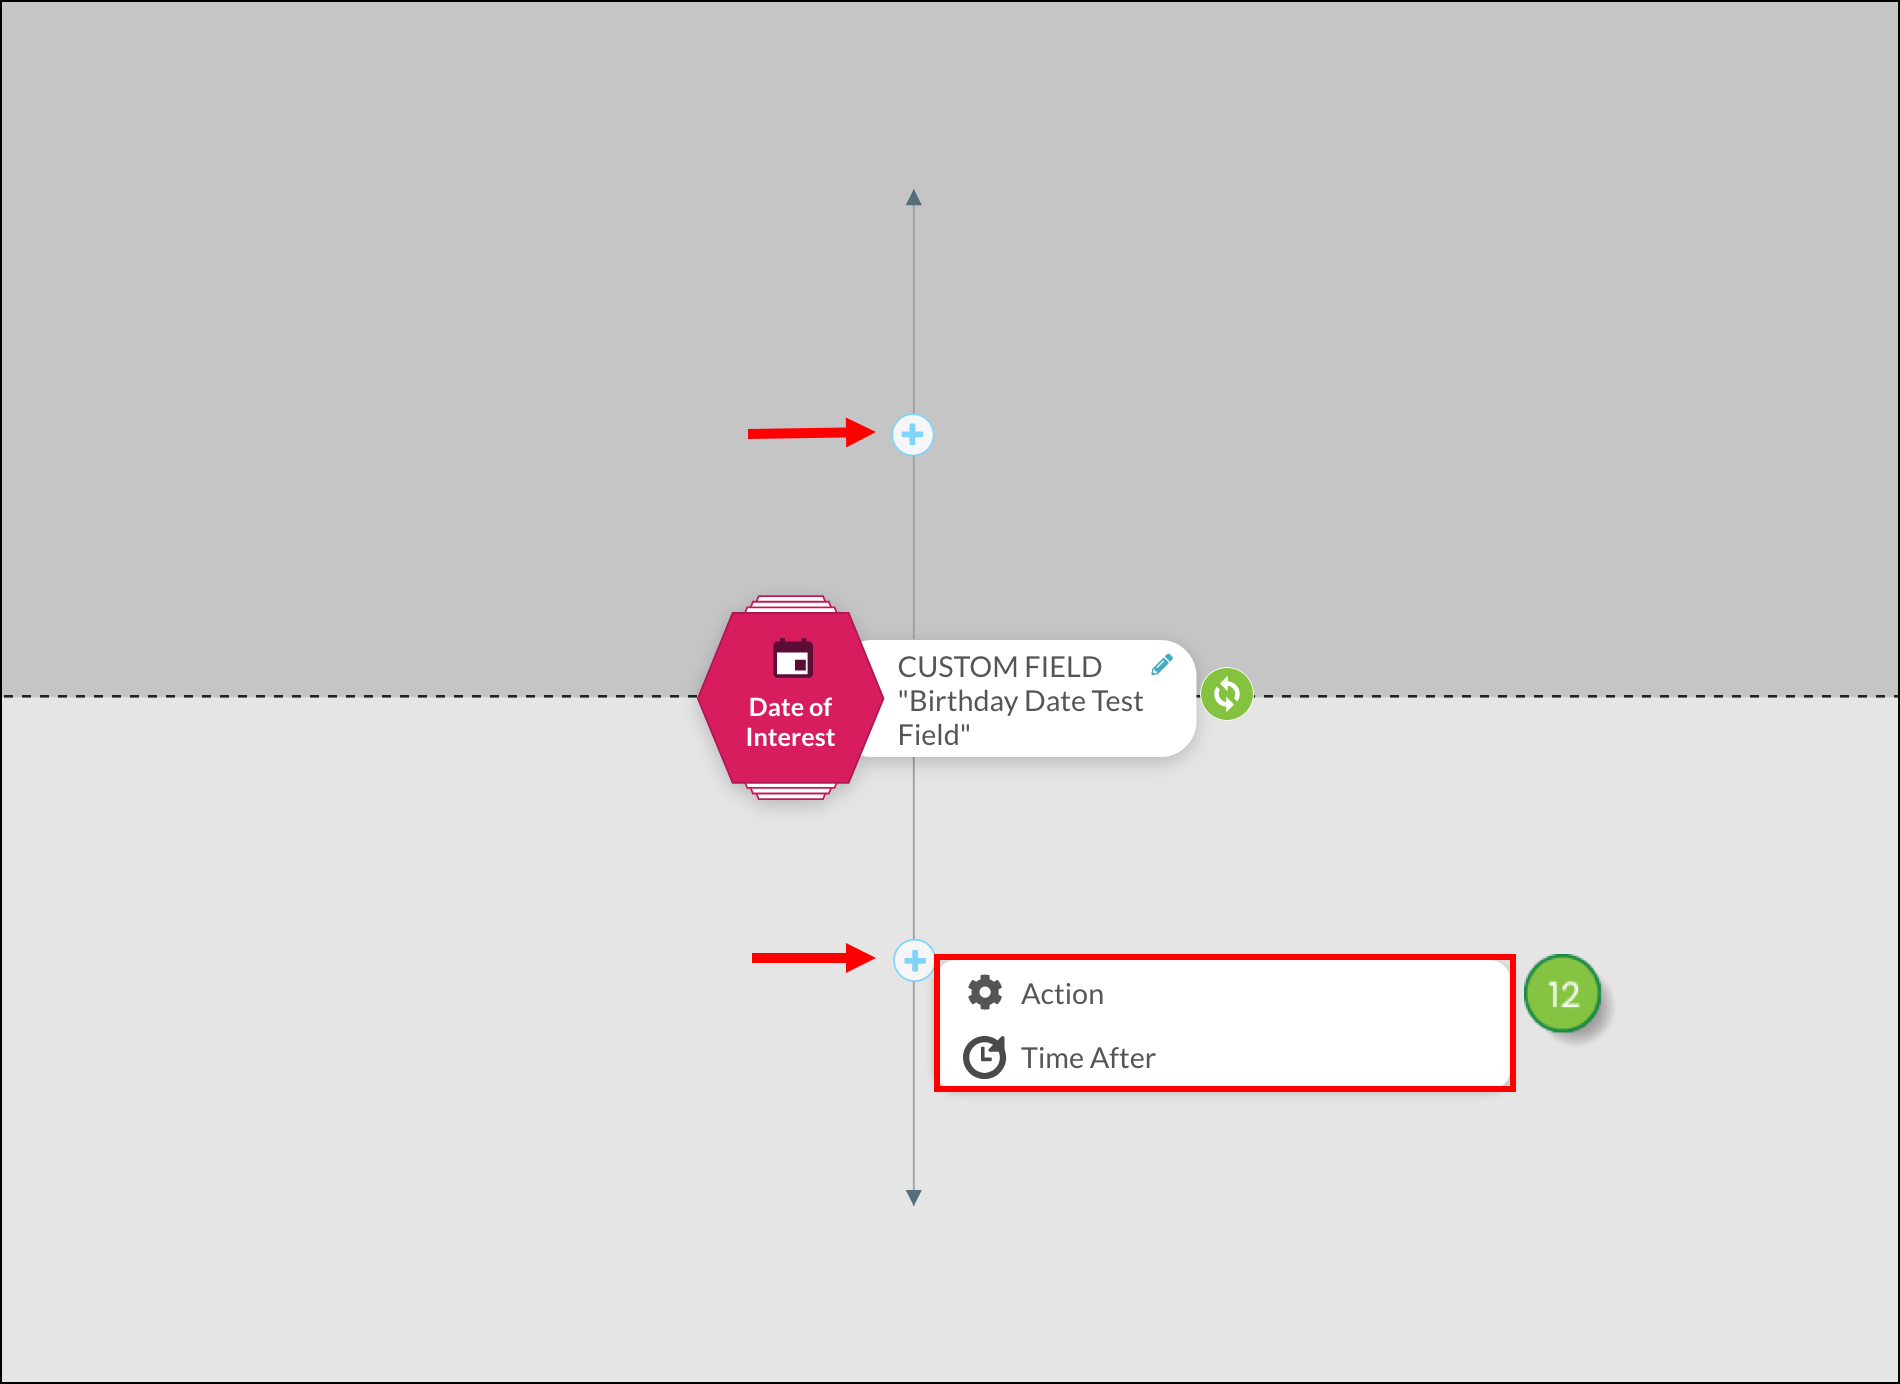
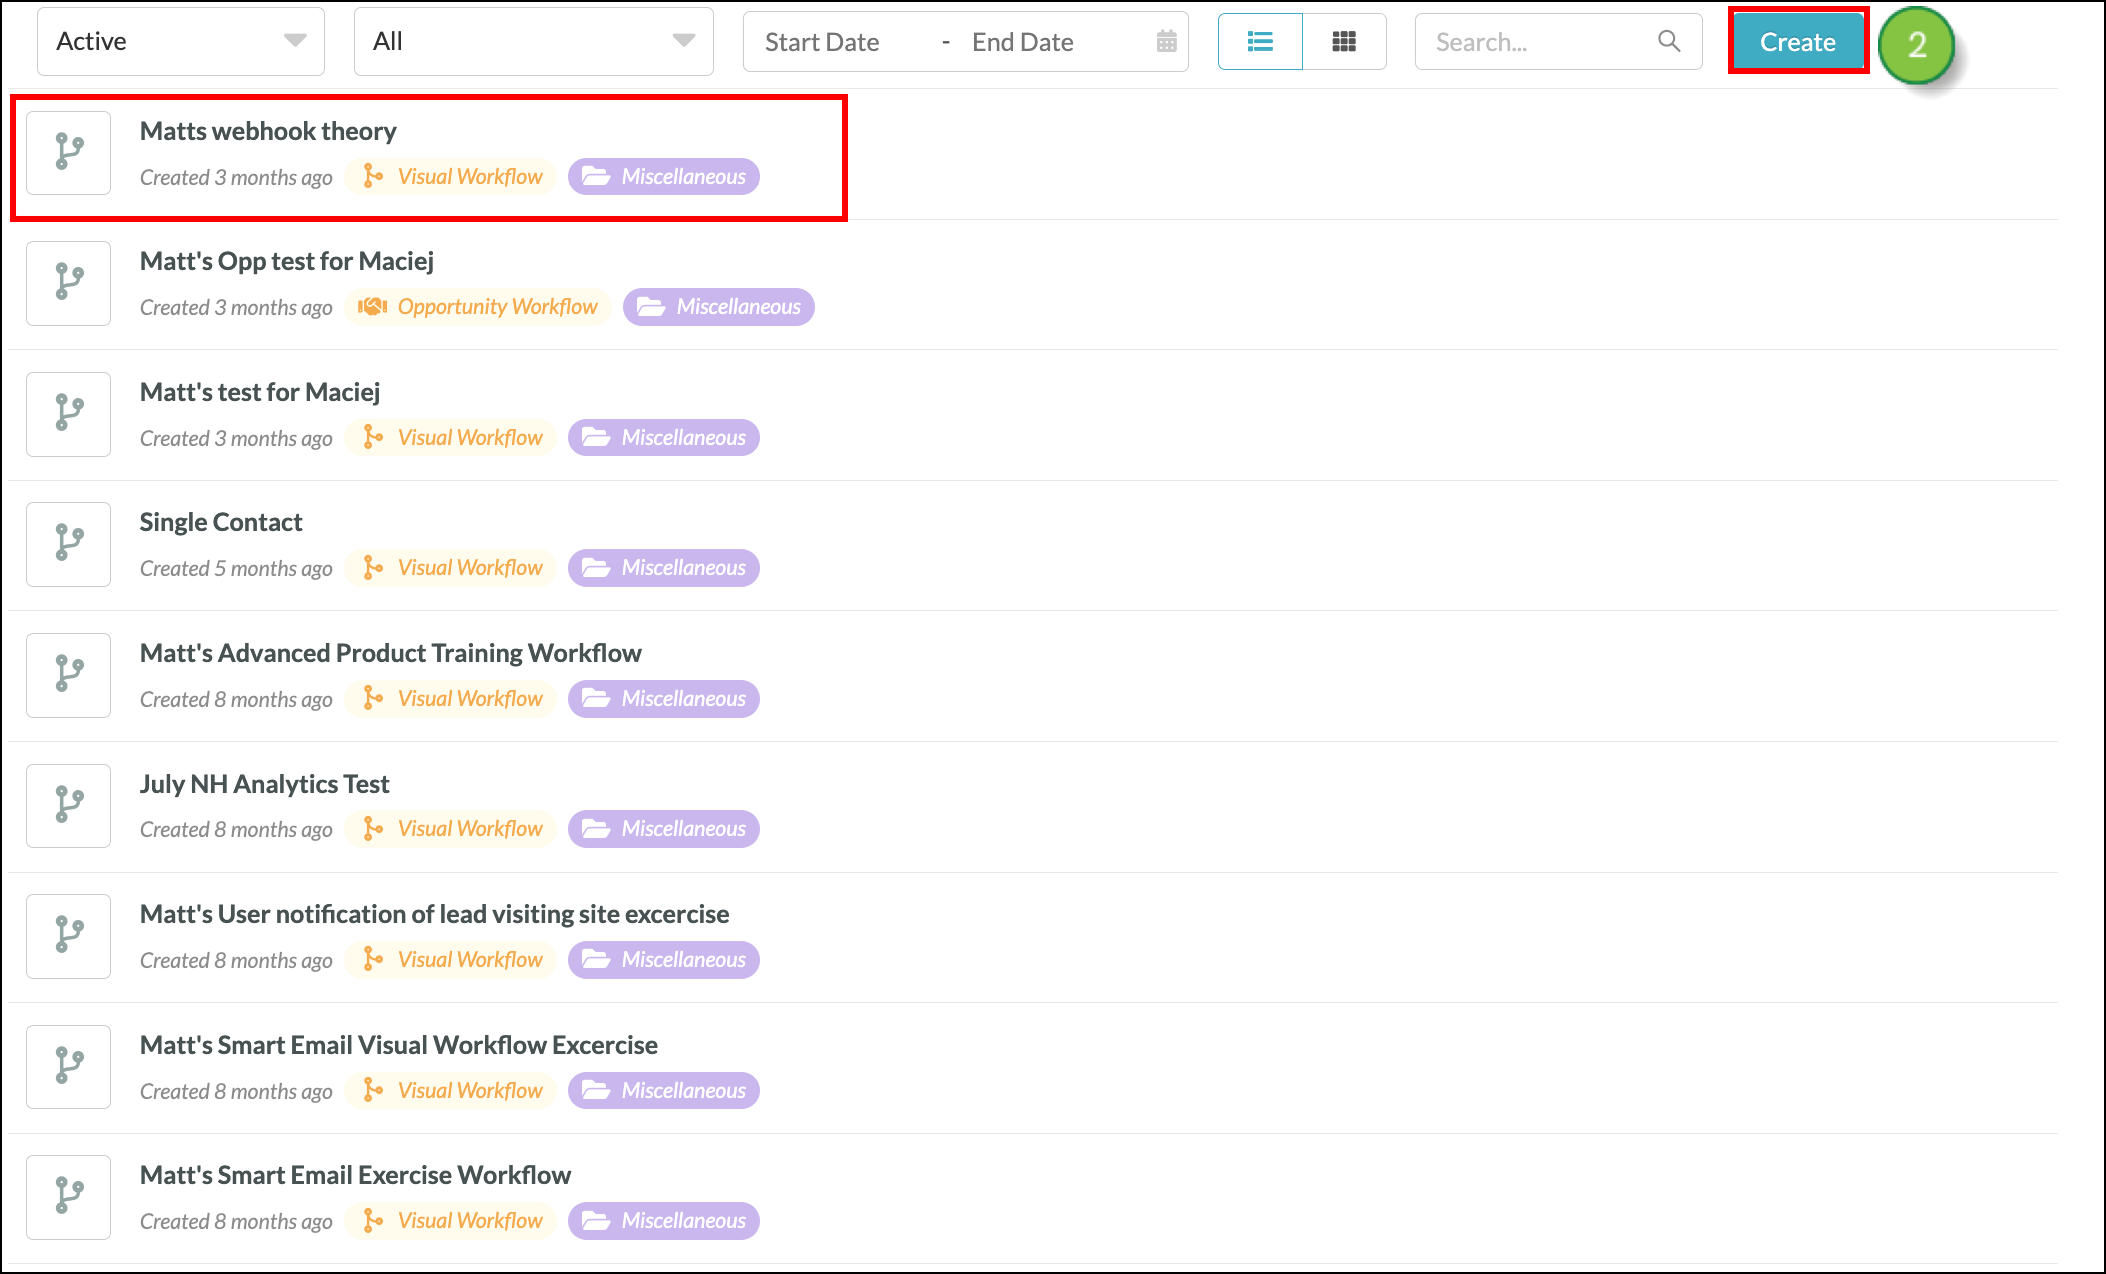
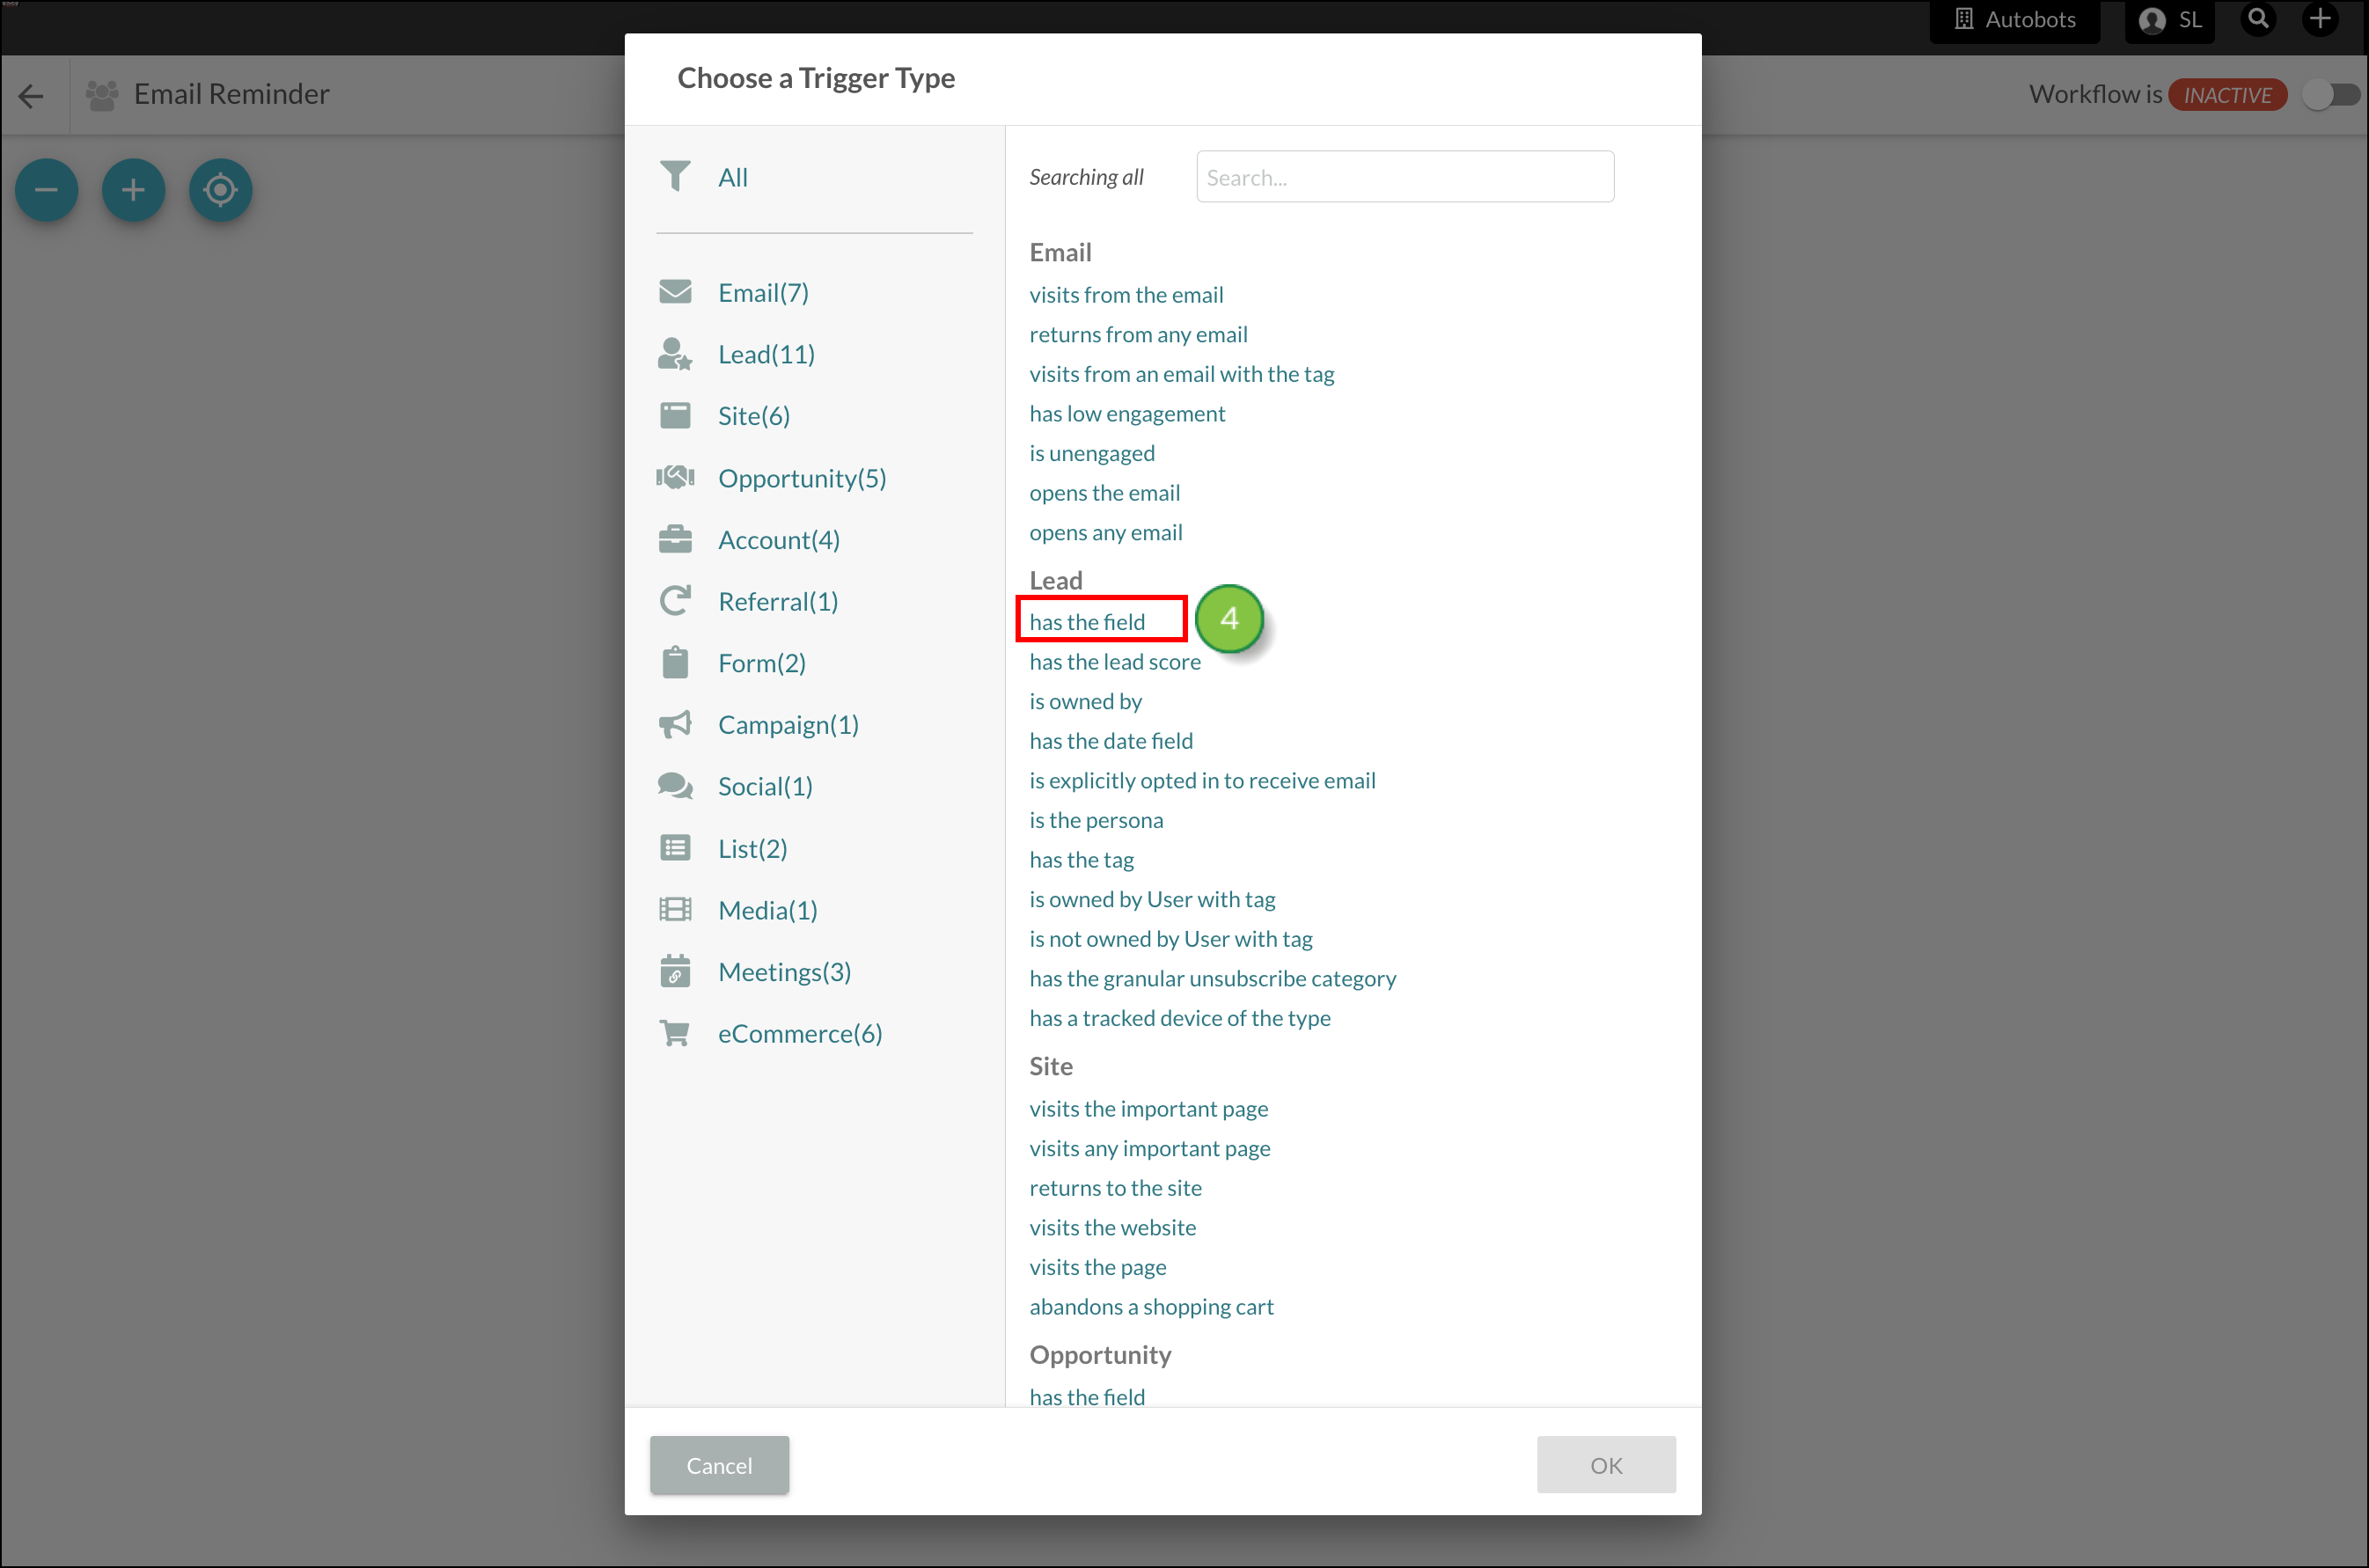
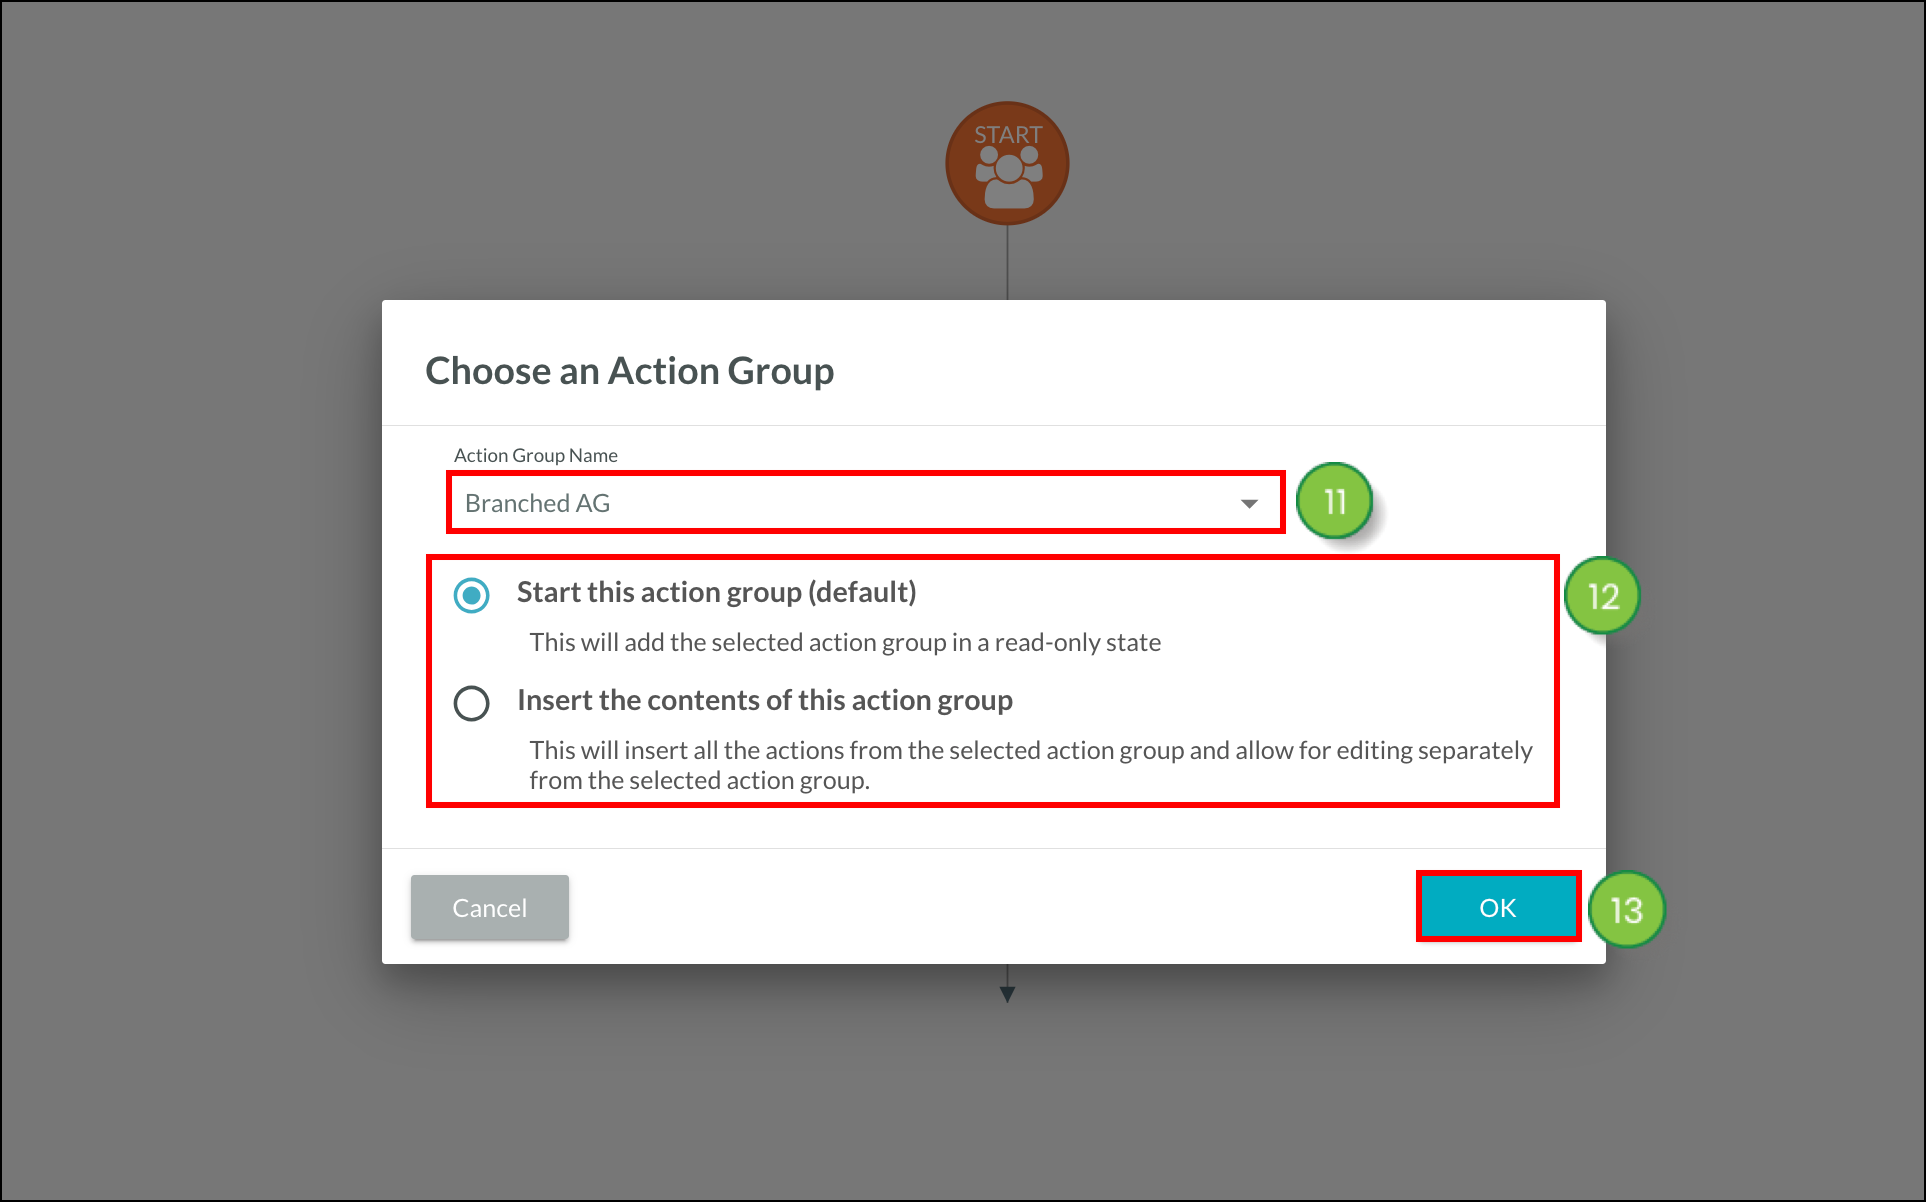
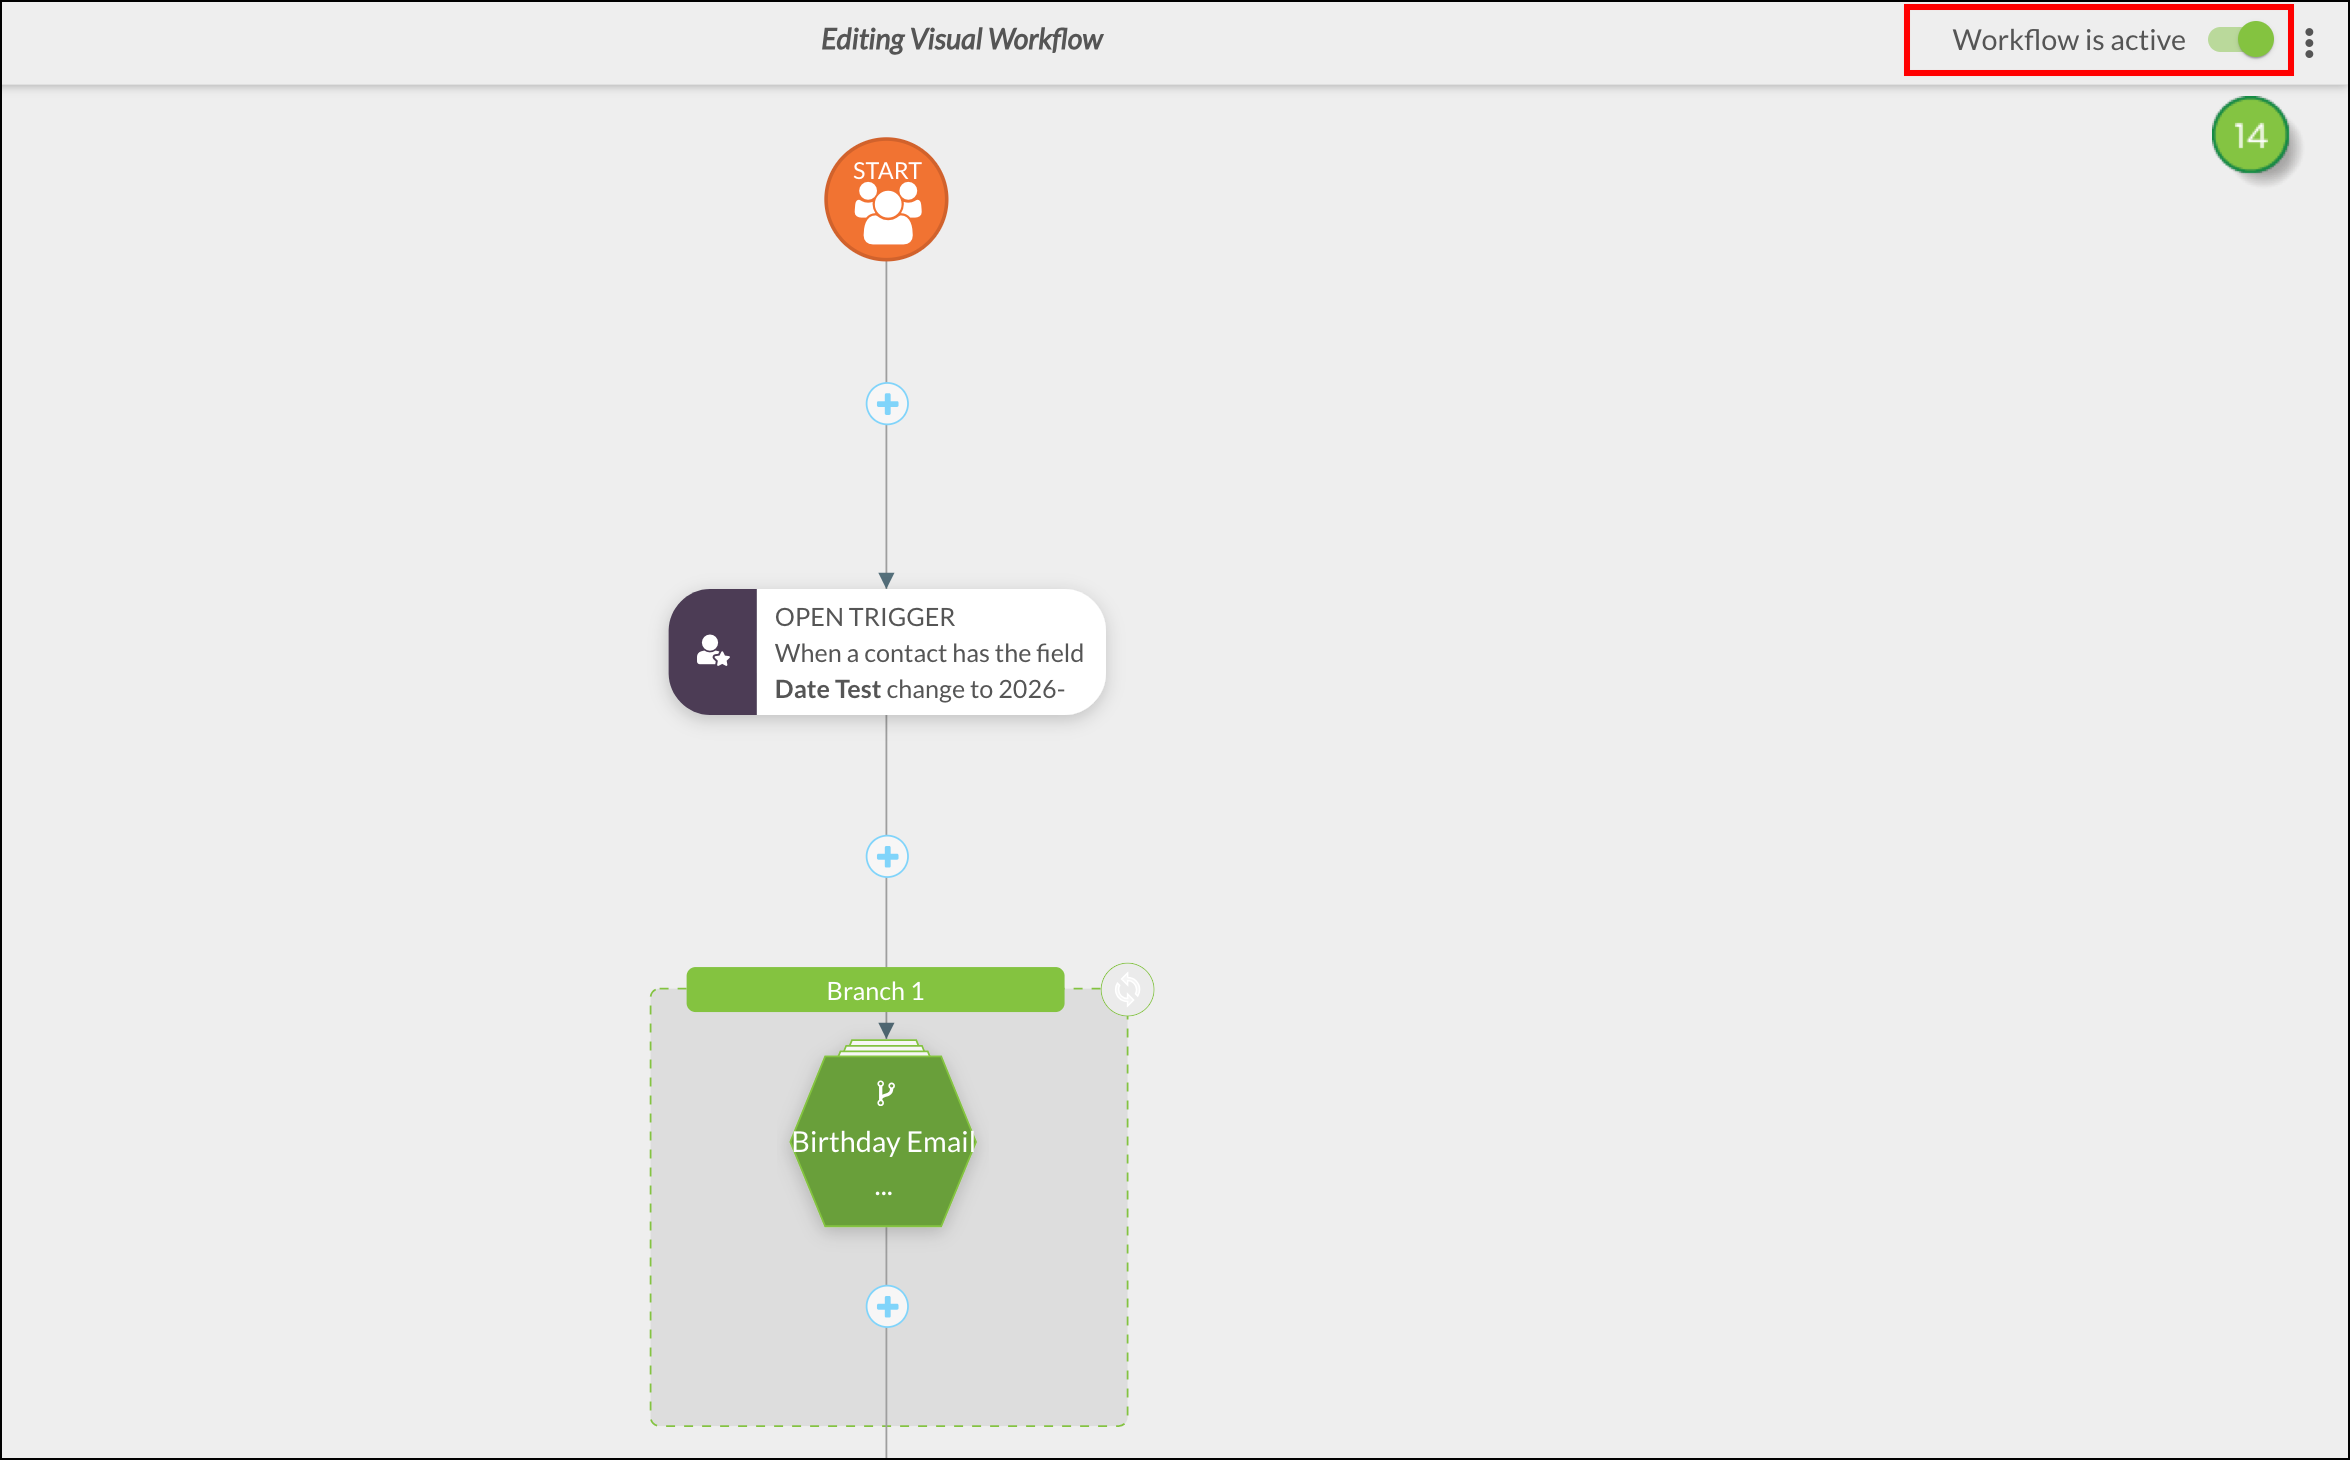
You can use time-based automations to create email reminders. To create an email reminder workflow, do the following:

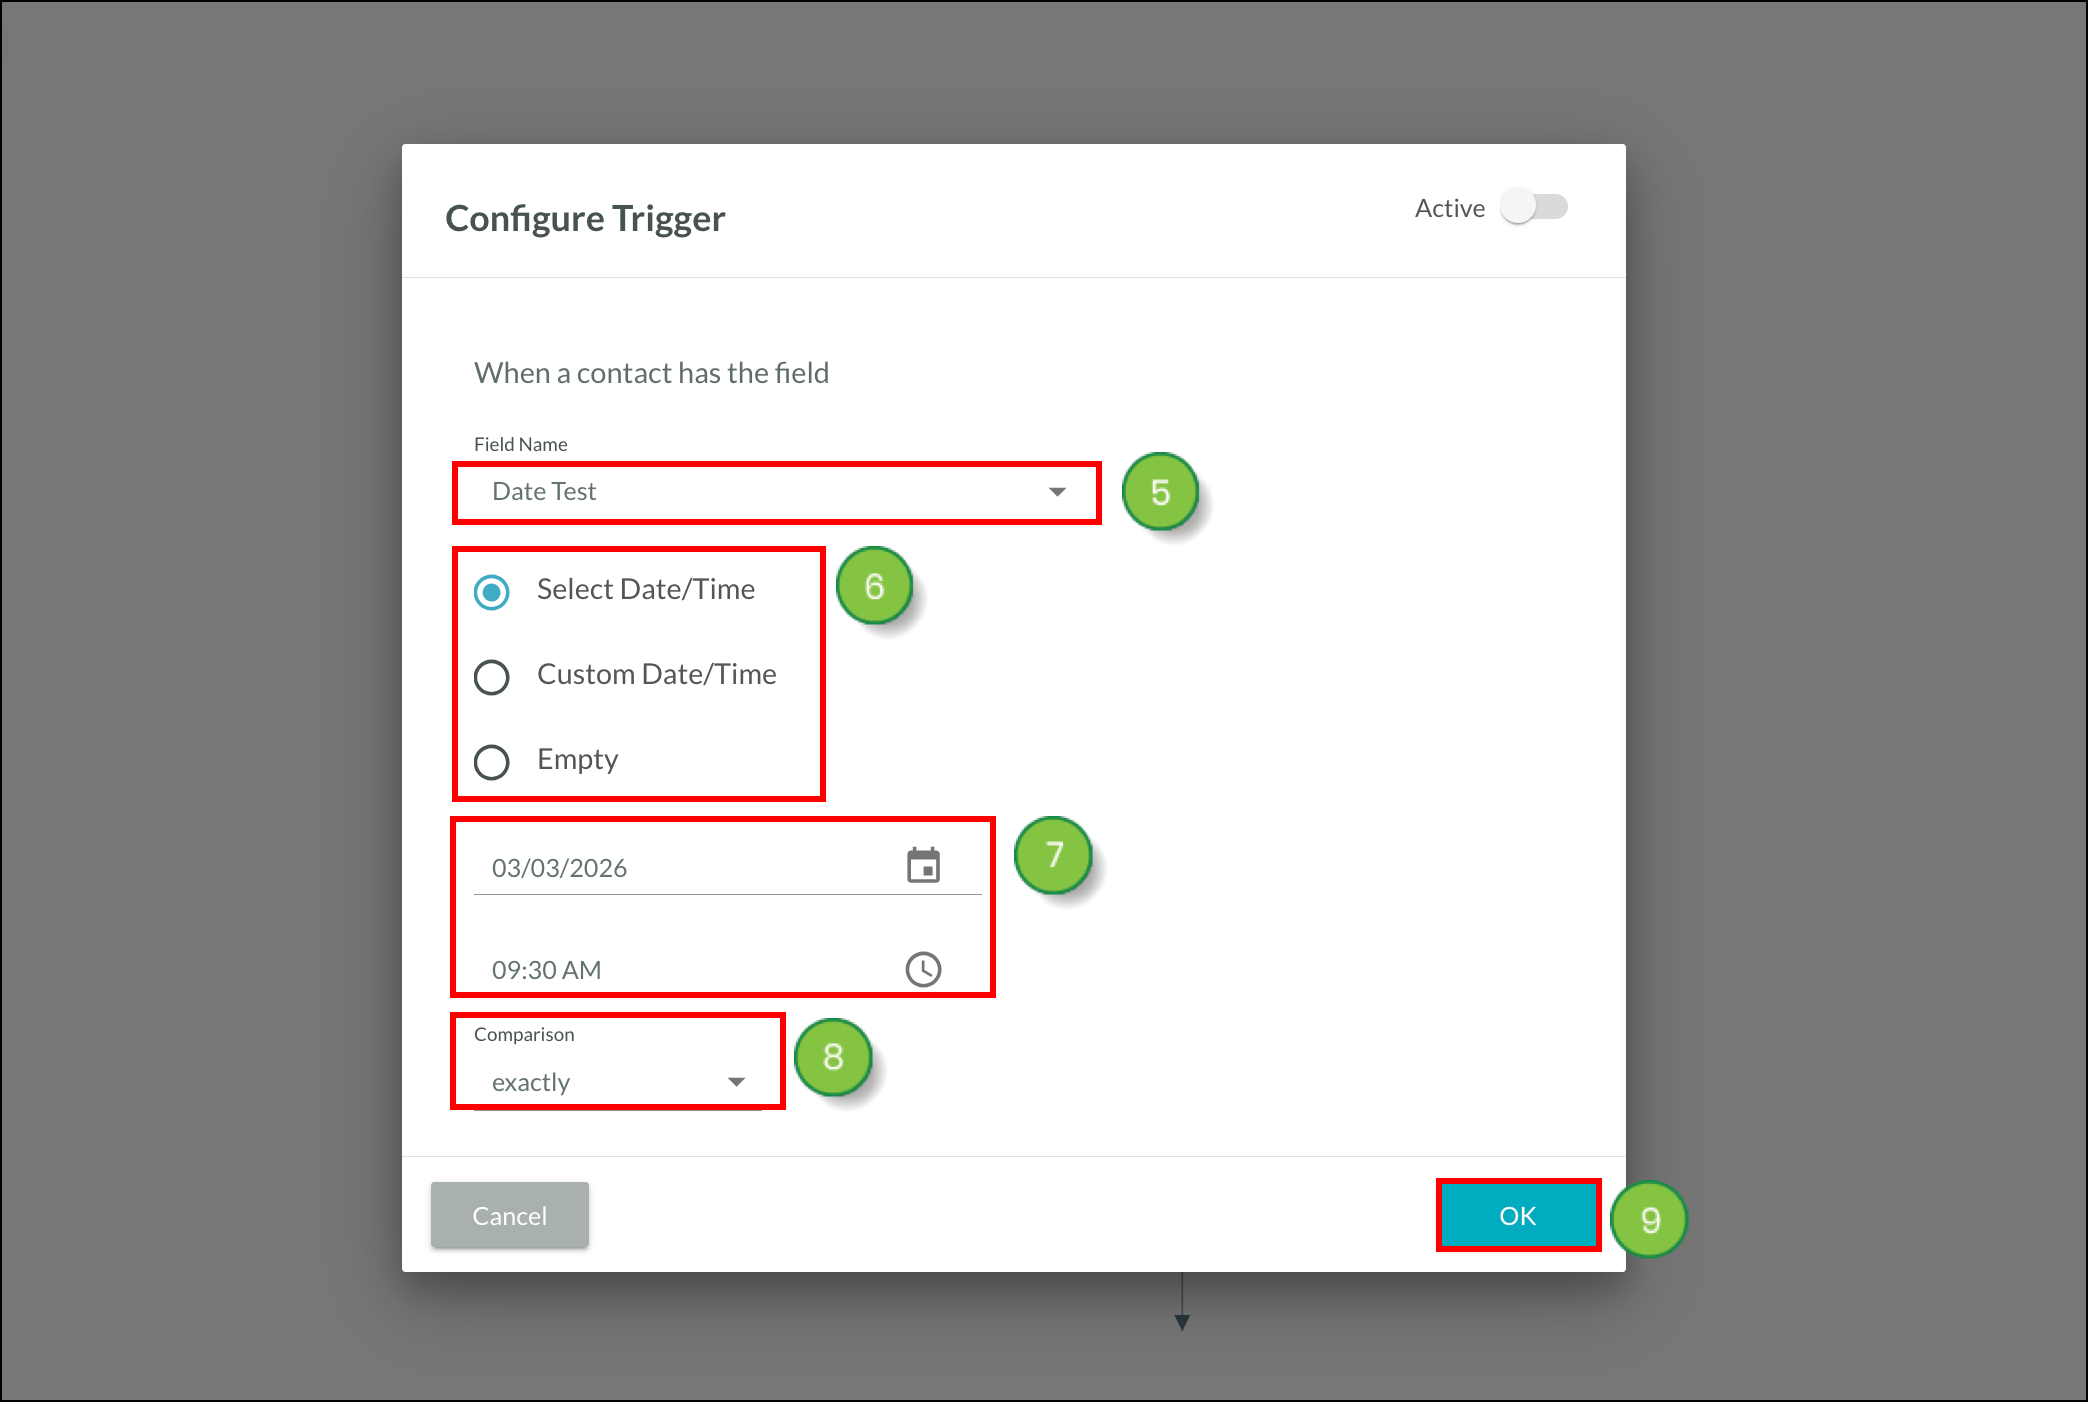
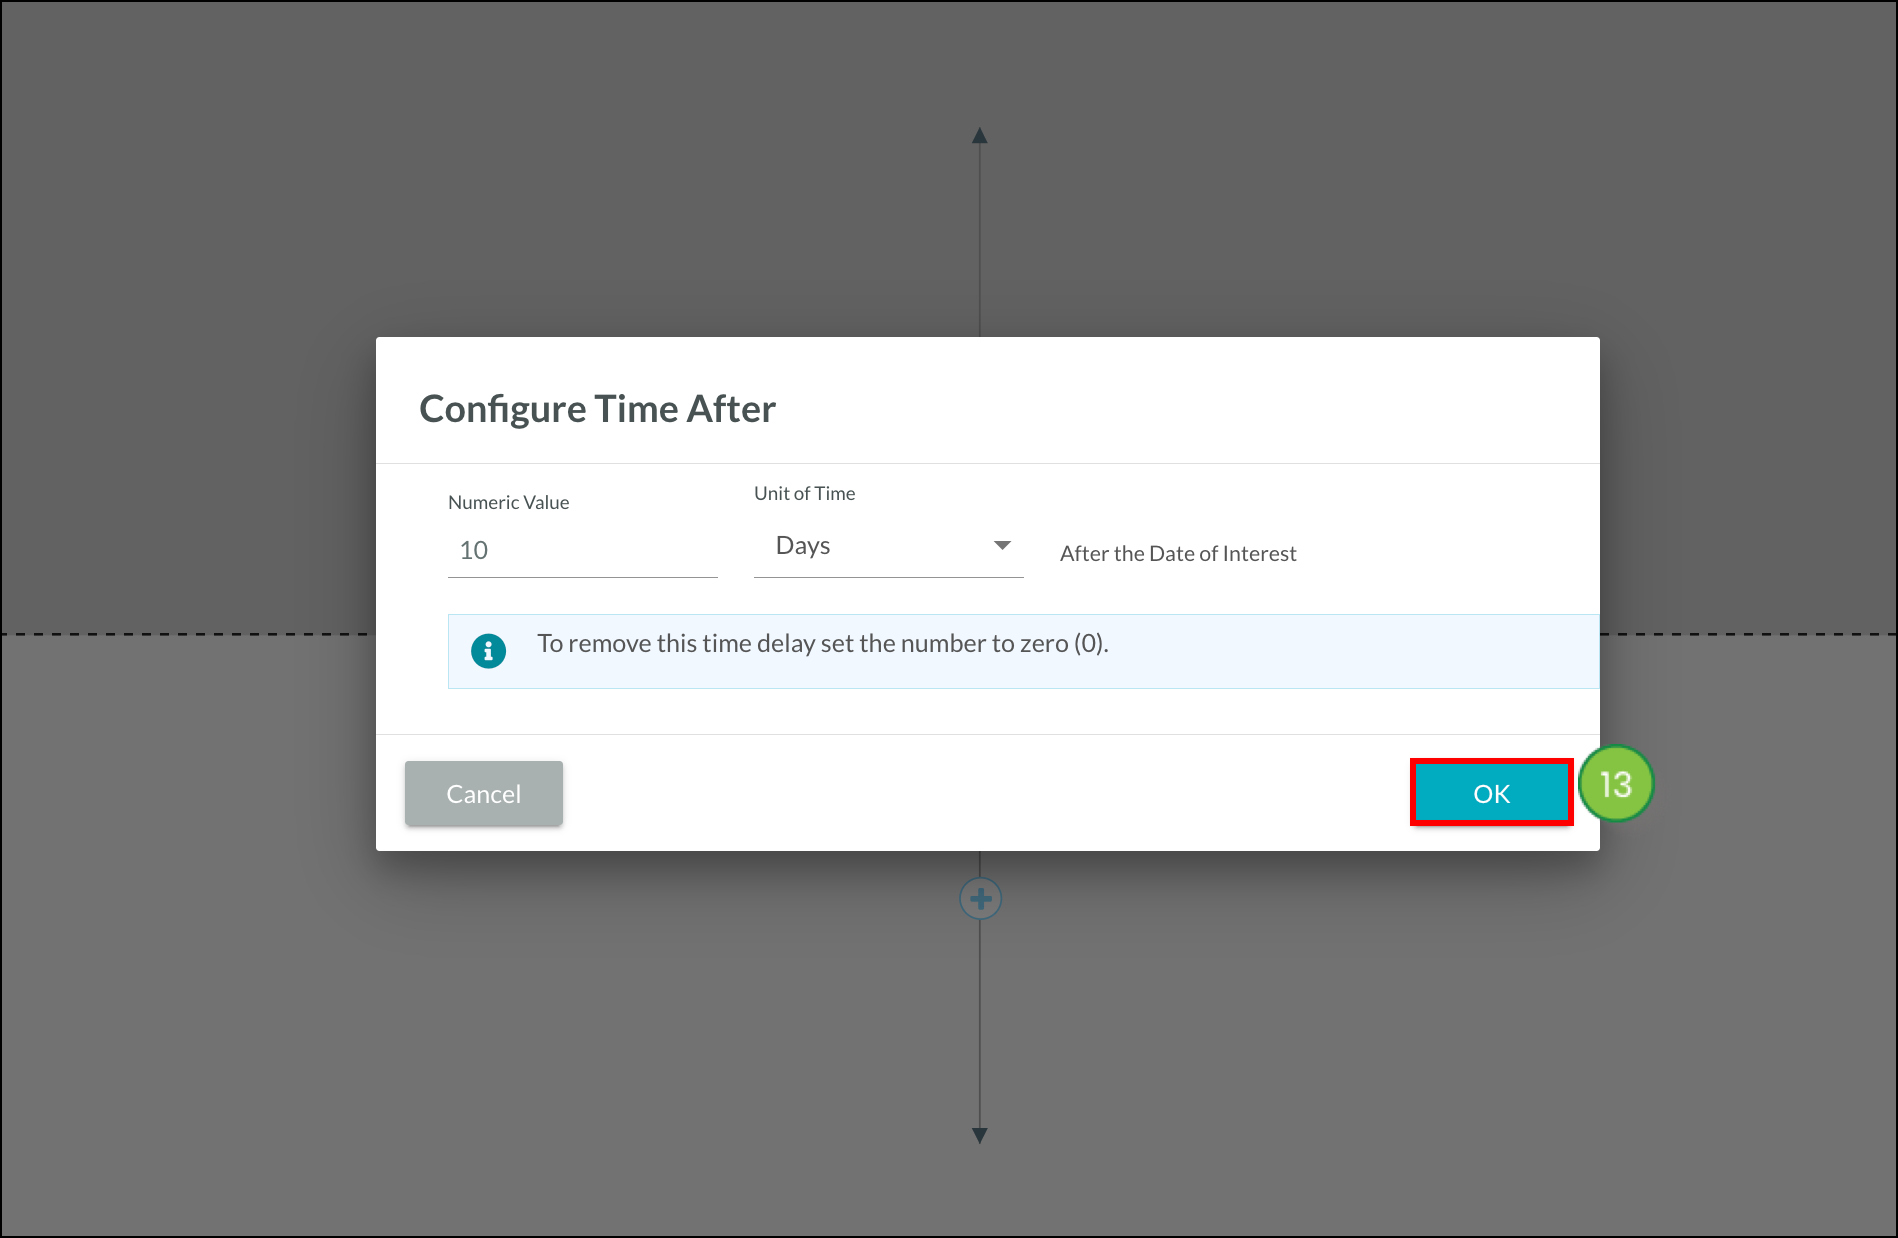
When creating Date/Time automation, the following options are available:
| Option |
Description | |
|
Select Date/Time |
All standard times that can be selected through Lead Gen & CRM's calendar date and time clock features. | |
|
Custom Date/Time |
Allows for specific, custom dates and times to be entered. The date and time should be entered in the following format: YYYY-MM-DD hh:mm:ss This format requires a four-digit year value, a two-digit month value, a two-digit day value, a two-digit hour value, a two-digit minute value, and a two-digit second value | |
|
Empty | Removes the Date/Time date and time information entirely. |
Q: What are the differences between action groups and branches?
A: Reusable action groups are a collection of standalone events that can be referenced within a visual workflow or be manually scheduled to a list. Branches are not action groups. Branches refer to a collection of actions created for use only within a visual workflow. As the name implies, this collection of actions branch out from the action group and are dependent upon additional criteria in order to function. Branches will not be added as reusable, standalone action groups.
Q: When is the cut-off period is for contacts entering the action group and receiving reminder emails?
A: Contacts will receive an email if they join the action group within 48 hours of the date and time of the event.
Q: I used a date field in my time-based action group, but something is not right. What am I doing wrong?
A: Often, a date field is used in place of a DateTime field. DateTime is required.
Q: Can I create a birthday email?
A: Yes. However, Lead Gen & CRM does not have a birthday custom field. You would have to manually change the DateTime field to reflect the birthday period. The year would have to be the current year or the next year the individual has a birthday. Consider the following example:
DateTime field has XX/XX/2018 00:00:00
The Action Group is
`one week after DateTime field send email "Birthday week"`
Q: How do I change the format of the DateTime field?
A: You can change this field in the Custom Field Manager.
Copyright © 2026 · All Rights Reserved · Constant Contact · Privacy Center