Lead Gen & CRM
How can we help you?
Search our help articles, video tutorials, and quickstart guides

You've got this. You've got us. Search our Knowledge Base to quickly find answers to your questions.

Using Contact Tags

Article: 000050392
Updated: June 18, 2025

Lead Gen & CRM offers several different ways to segment leads. Contact tags are a way to group any number of contacts together under a similar label.


Light Bulb IconTip: Are you looking for information about Constant Contact’s Email and Digital Marketing product? This article is for Constant Contact’s Lead Gen & CRM product. Head on over to the Email and Digital Marketing articles by clicking here. Not sure what the difference is? Read this article.


Understanding Contact Tags

Contacts can have multiple tags associated with them, which can make organizing them easier.  For example, a contact can be a partner, vendor, or someone otherwise special to your business. Contact tags allow you to categorize those contacts using many different tags. 

Consider that tags can be used to emphasize demographics. These demographics can include such information as location, revenue, or company size. You can add state or province tags to a contact so that you can have regional representatives keep in touch with them.

Also, tags can be entirely personal. You can tag contacts with personal information, like a birthday or sign-up anniversary. Tagging contacts with such information allows you to engage with more personal interactions, such as a special offer on their birthday or sign-up anniversary.

Note: You can import contact tags from another CRM or export tags from Lead Gen & CRM. Include your contact tags in a column (separated by commas) in your import file to map them to Lead Gen & CRM's 'Contact Tags' field. Read Import Tool Overview to learn more about the import process. 


Setting Contact Tags

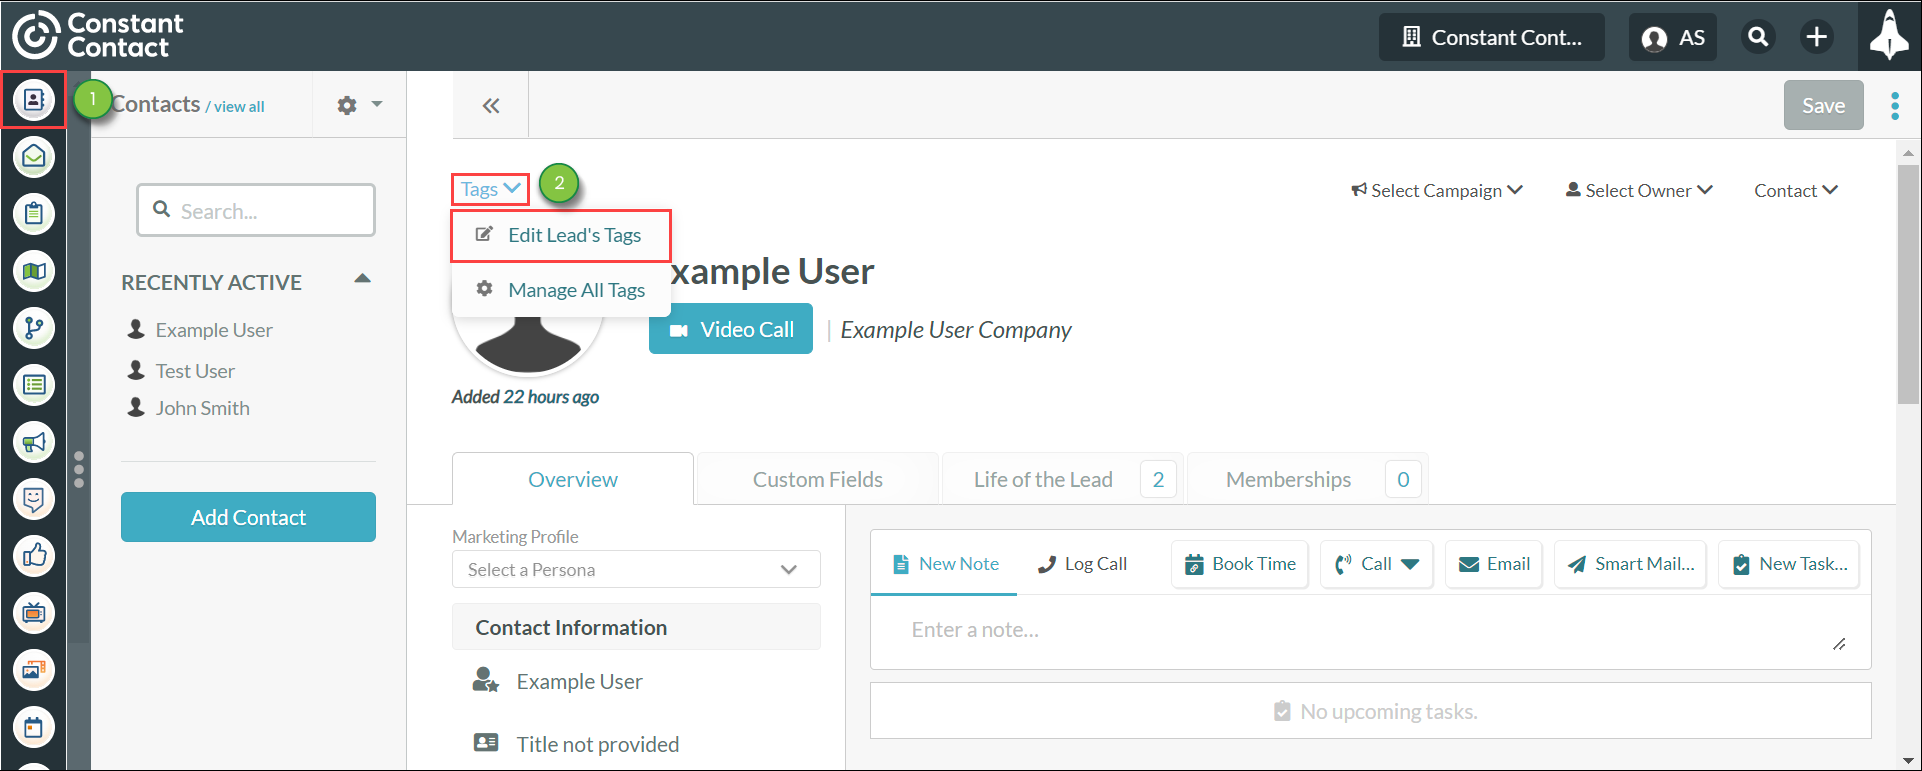
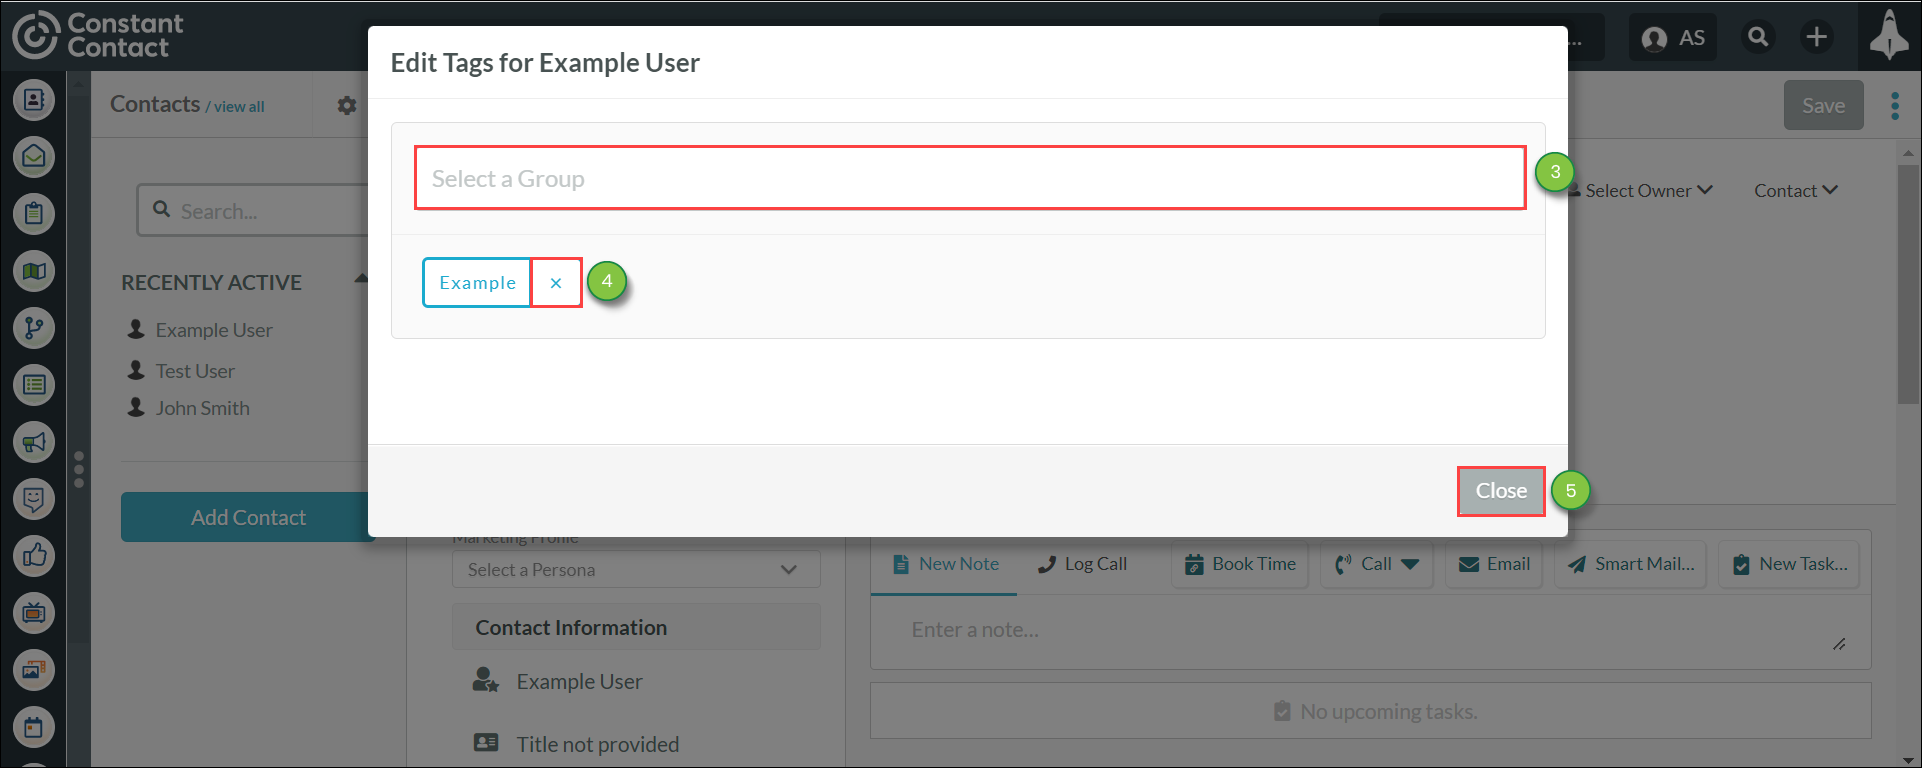
To set contact tags, do the following:

  1. Click Contacts in the left toolbar. Click the desired contact's name.
  2. Click Tags > Edit Lead's Tags.

    ALTTEXT


  3. Enter a tag name in the Select a Group field. Repeat as necessary.
  4. Optionally, click  close.png  Delete next to a tag to remove it.
  5. Click Close.

    Using Contact Tags


  6. Click Save.

When adding or editing contact tags, be aware of the following:

  • Clicking Edit Contact's Tags will display all tags currently attributed to the contact.
  • Clicking the Select a group text box when it does not have text in it will display all tags across all contacts.

Refer to Using the Tag Manager for information on creating, modifying, and using tags in Lead Gen & CRM.


Setting Contact Tags via Bulk Editing

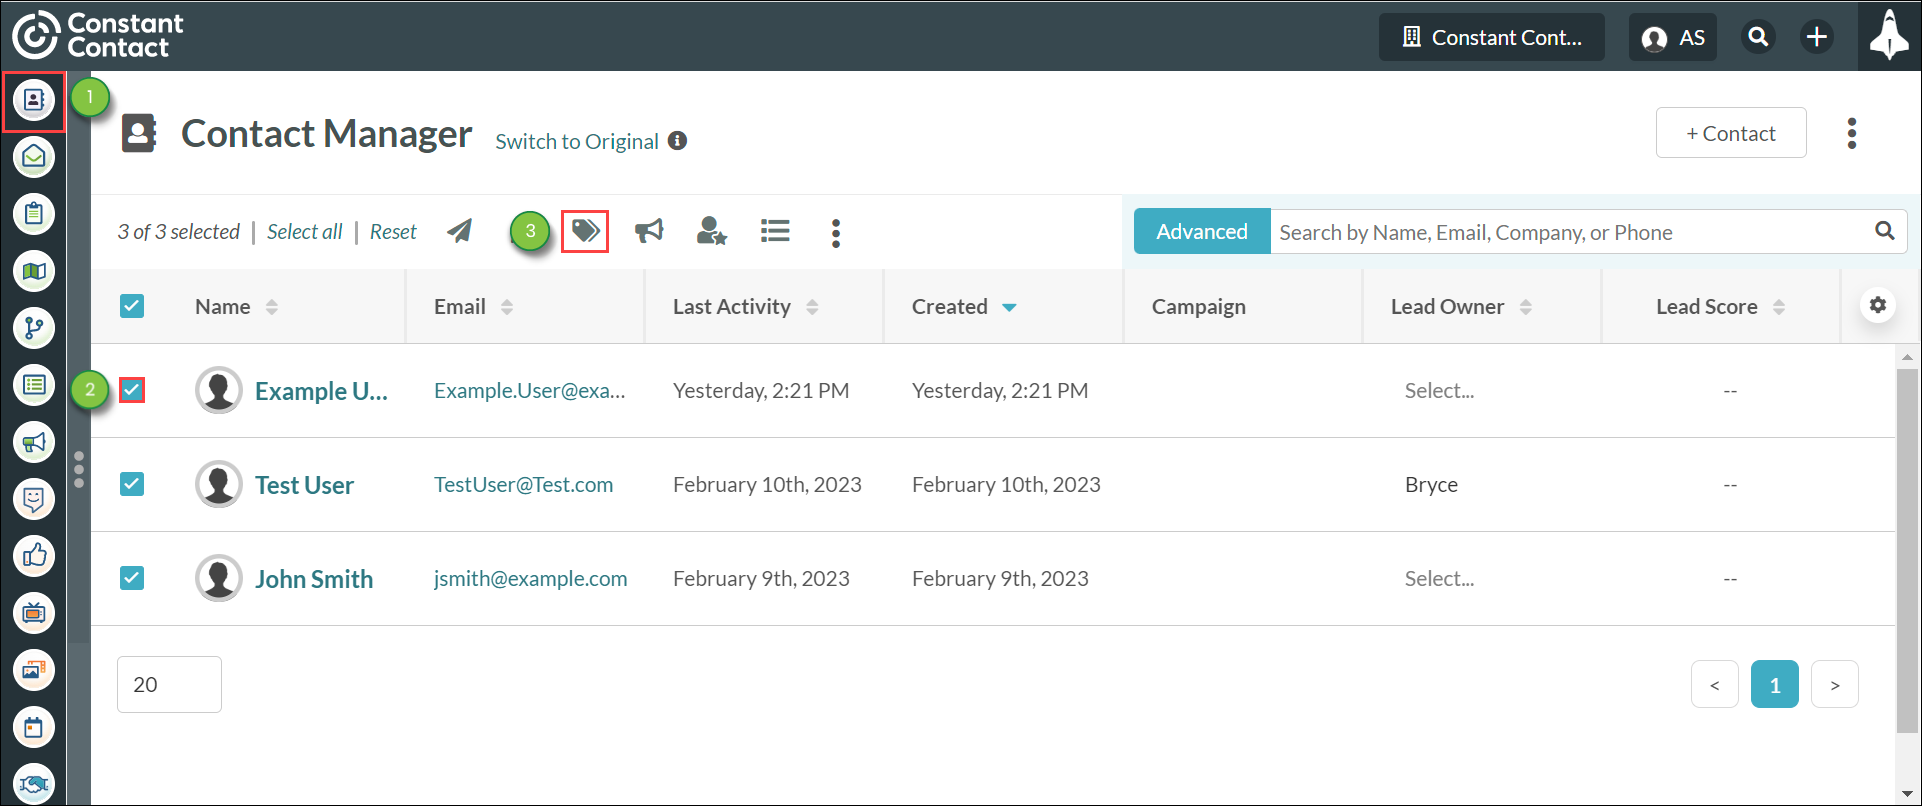
If you have several contacts who would benefit from being set to the same tag, you can use the Contact Manager's bulk editing feature. Bulk editing allows you to edit information for several contacts at the same time.

To edit contact tags via bulk editing, do the following:

  1. Click Contacts in the left toolbar.
  2. Click the  checkbox-unchecked.png  selection checkbox next to the desired contacts' names.
  3. Click  tags.png  Edit Contact Tags.

    Using Contact Tags


  4. Select the desired tag name from the Select a Contact Tag drop-down menu.
  5. Do either of the following:
          Click Add Tag to add the tag to the
            contacts
          Click Remove Tag to remove the tag
            from the contacts
  6. Click Save.

    Using Contact Tags


Using Contact Tag Triggers in Visual Workflows

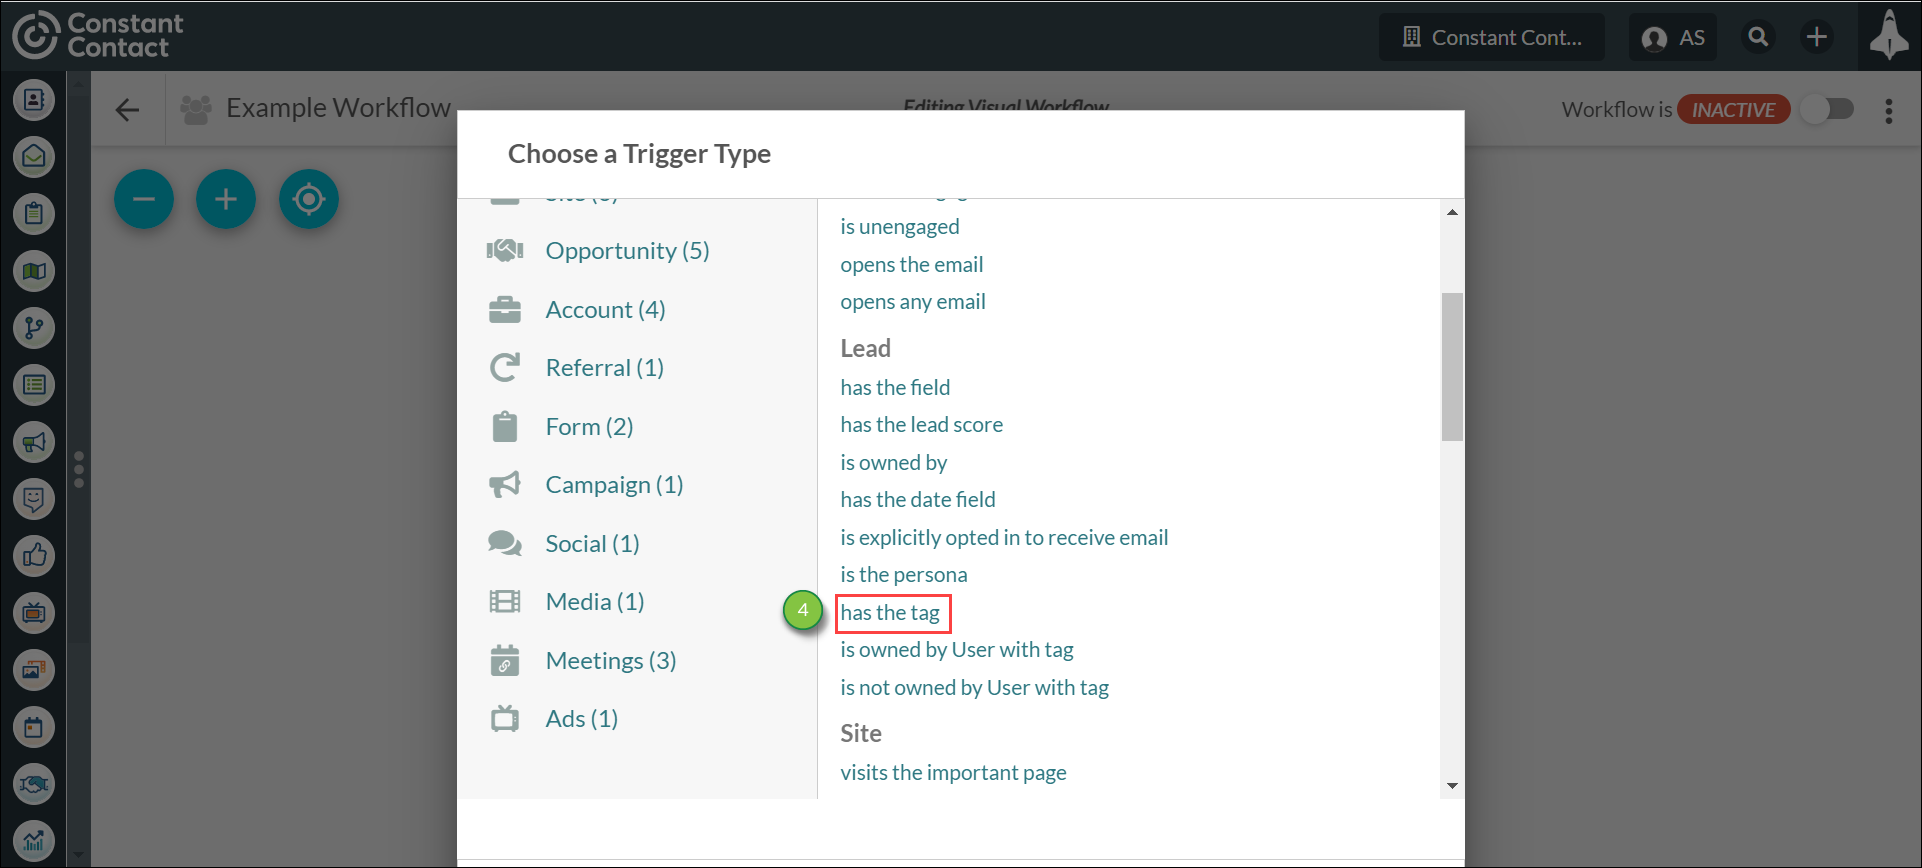
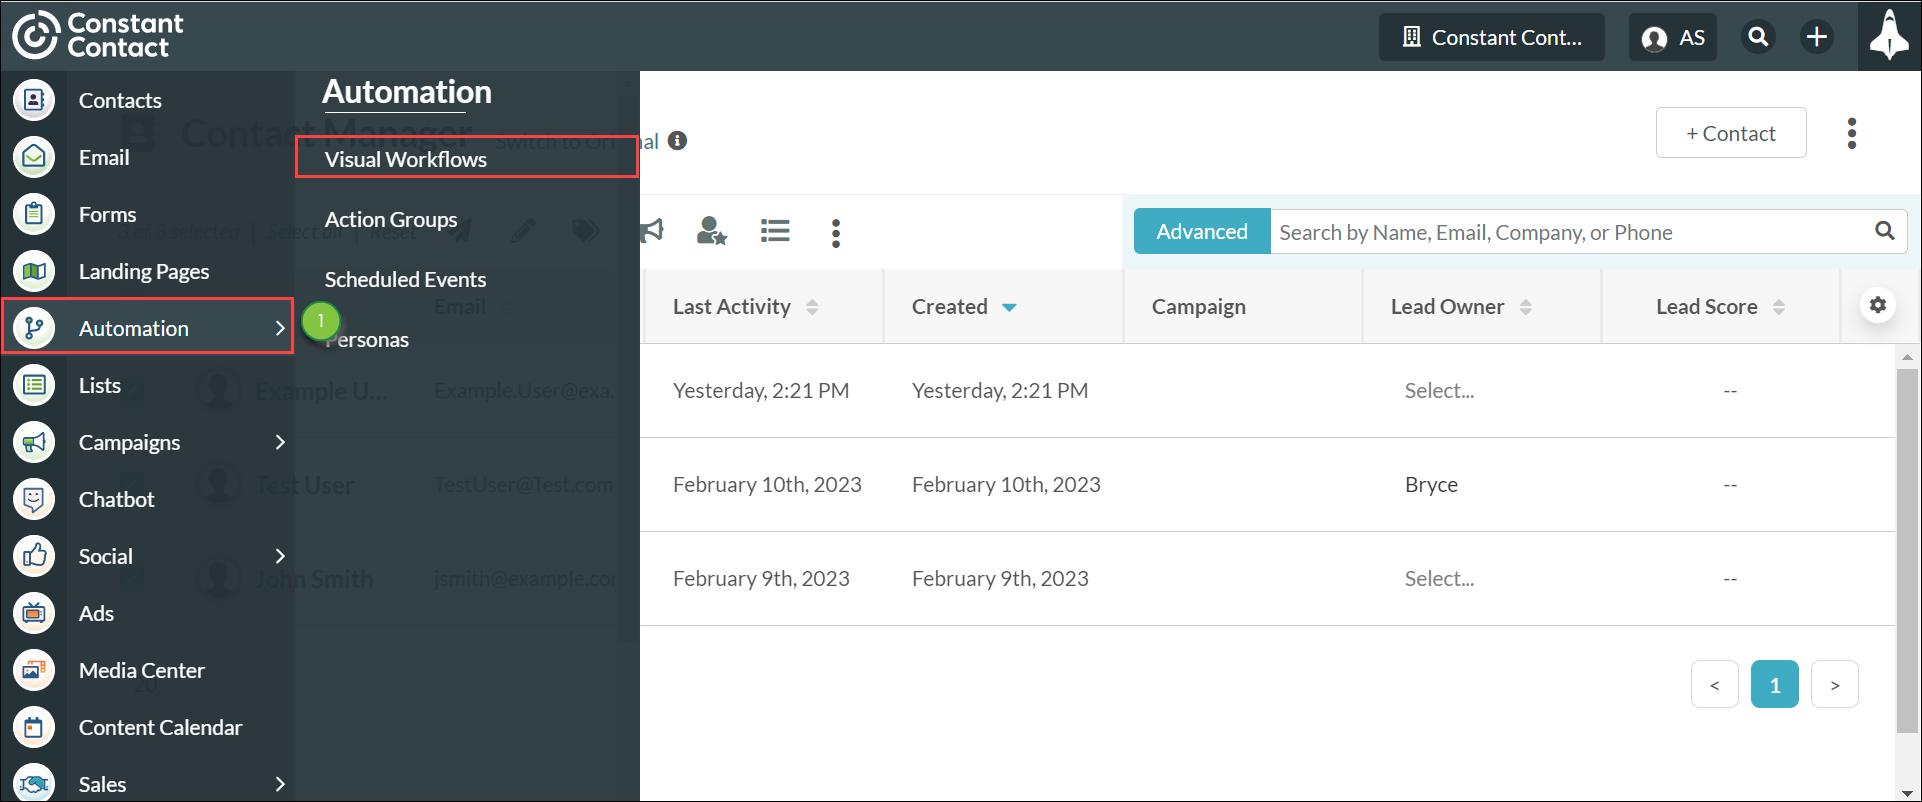
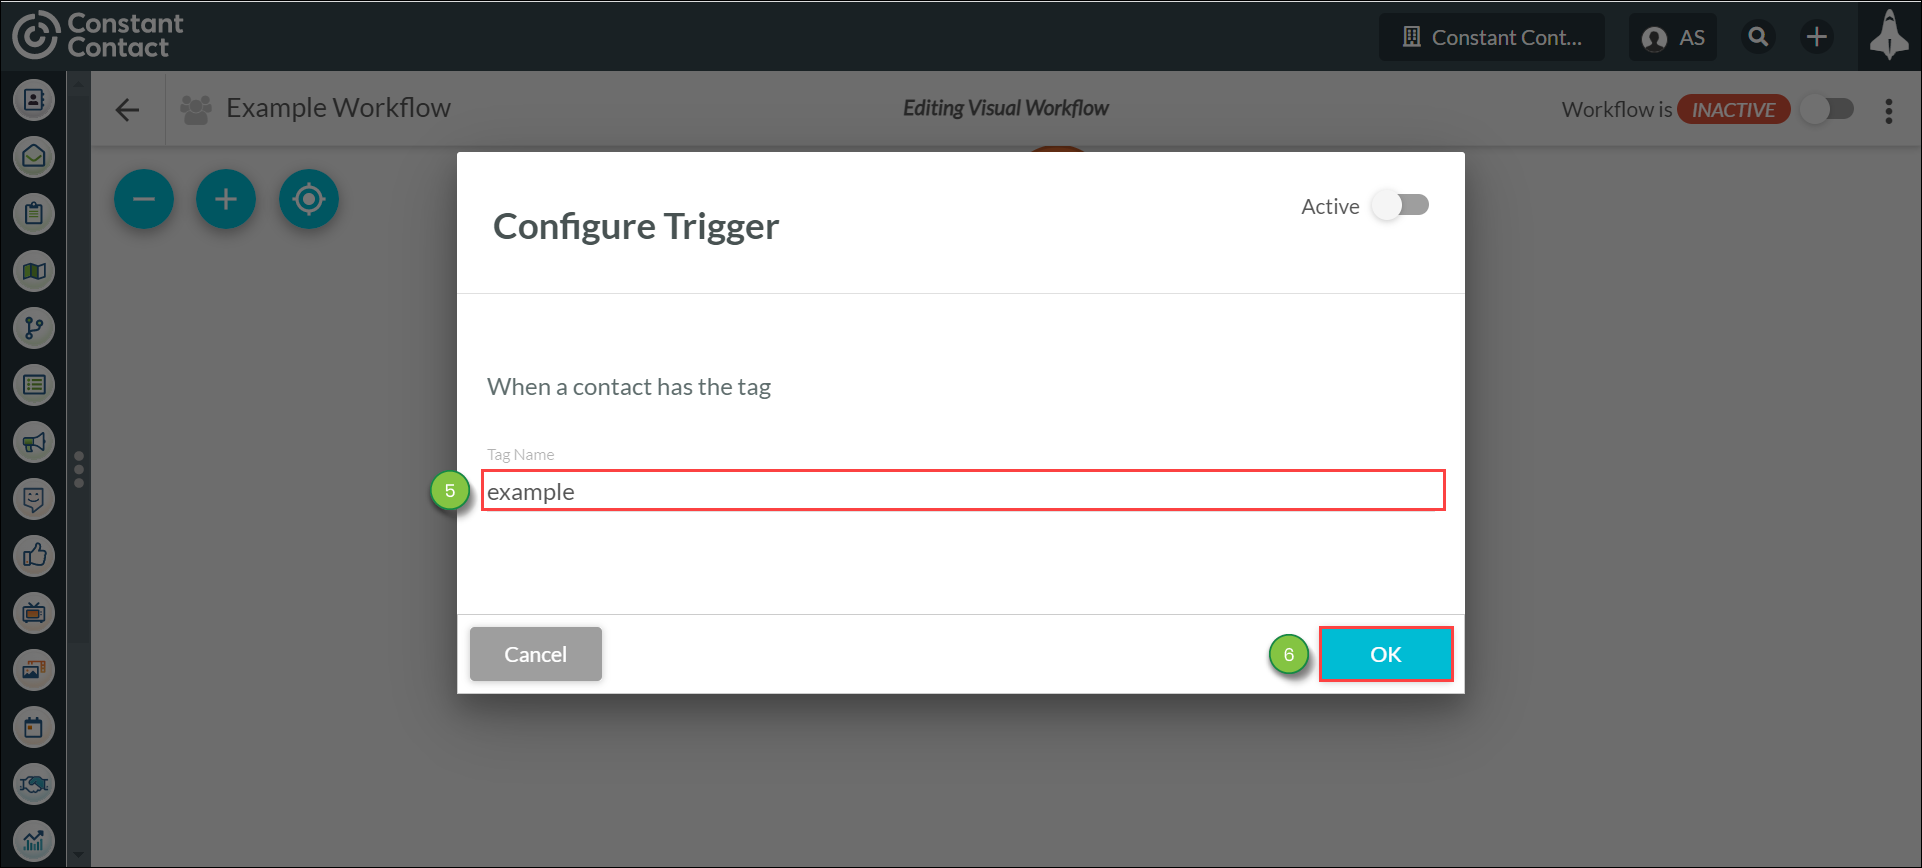
You can use contact tags to create a list or as a trigger in visual workflows. To use contact tags in visual workflows, do the following:

  1. Click Automation > Visual Workflows in the left toolbar.

    Using Contact Tags


  2. Create or open a visual workflow.
  3. Click Add > Trigger under Start or an applicable branch.

    Using Contact Tags


  4. Click has the tag, located under Lead.

    Using Contact Tags


  5. Select the desired contact tag name to trigger the automation.
  6. Click OK.

    Using Contact Tags


  7. Complete the workflow with other triggers, filters, delays, or actions.


Assigning Tags to Contacts in Visual Workflows

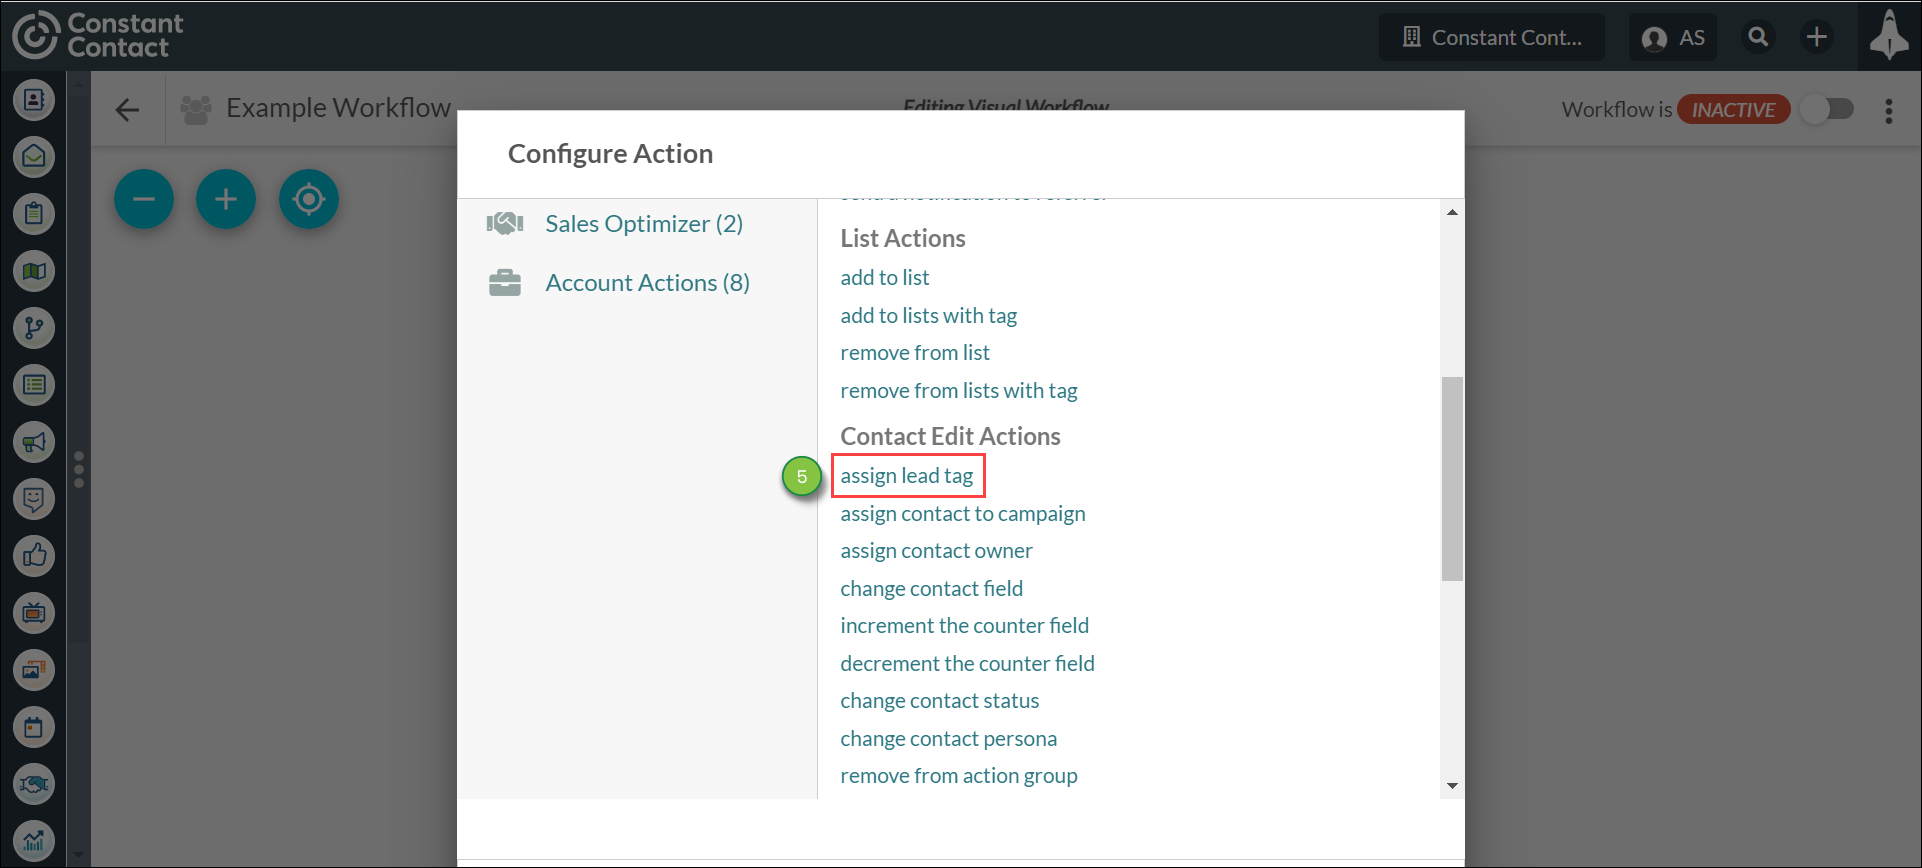
You can create a visual workflow to automatically set tags to contacts. This is done by way of a workflow action.

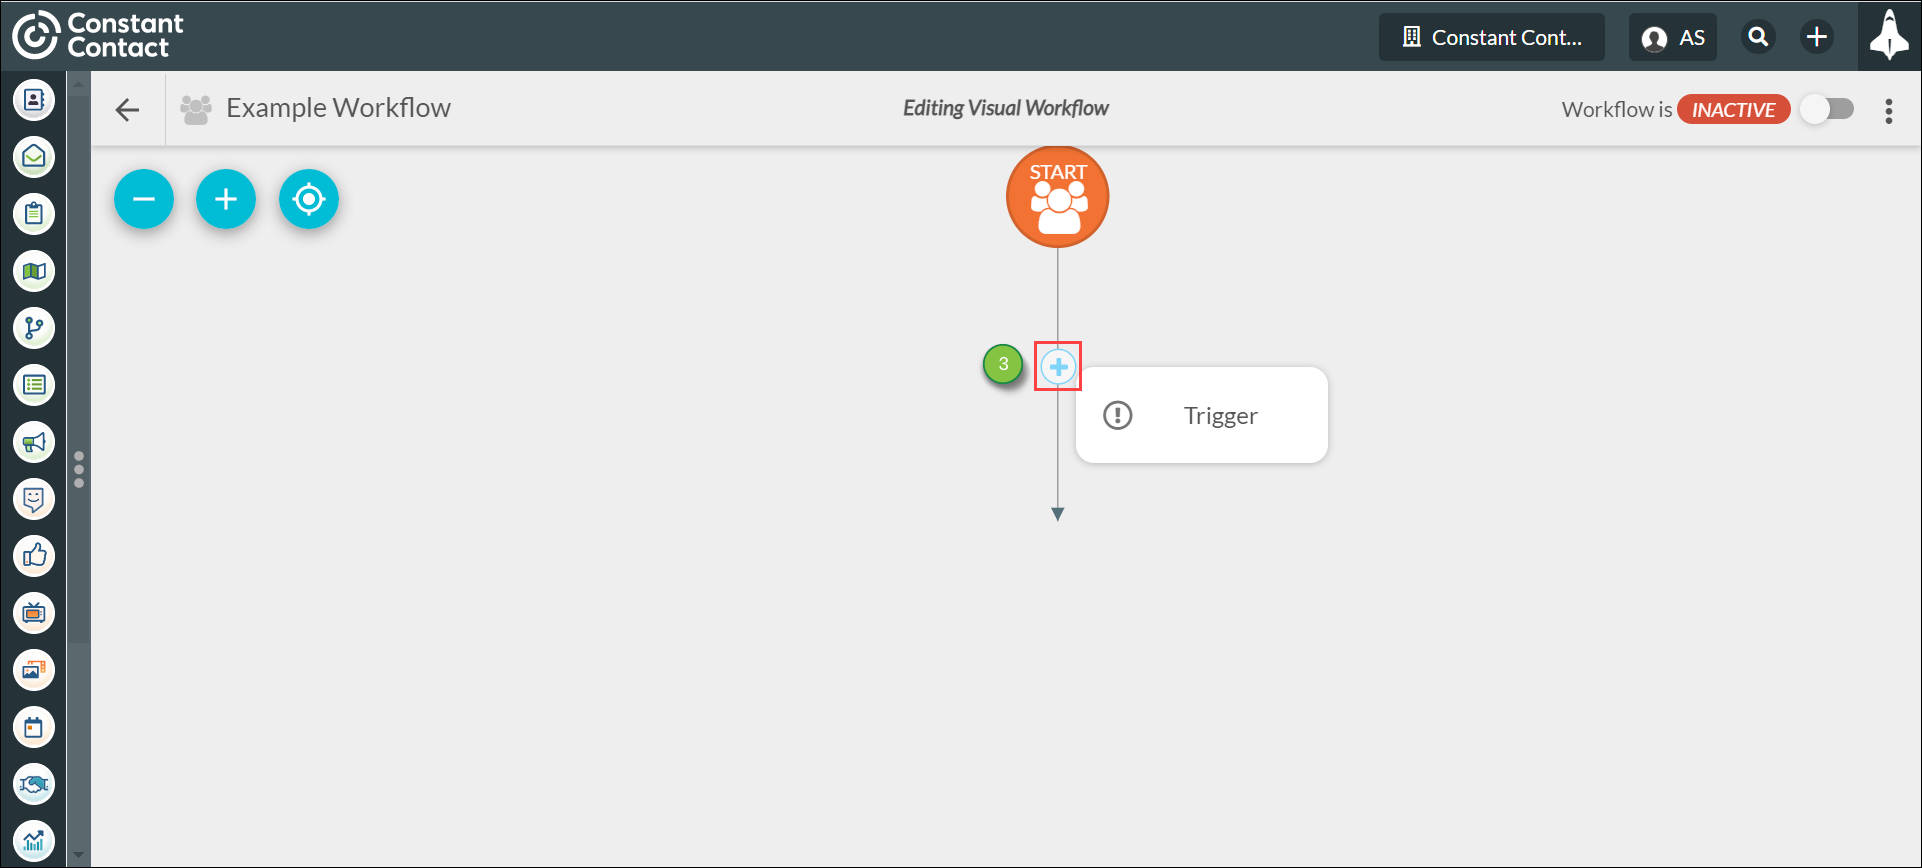
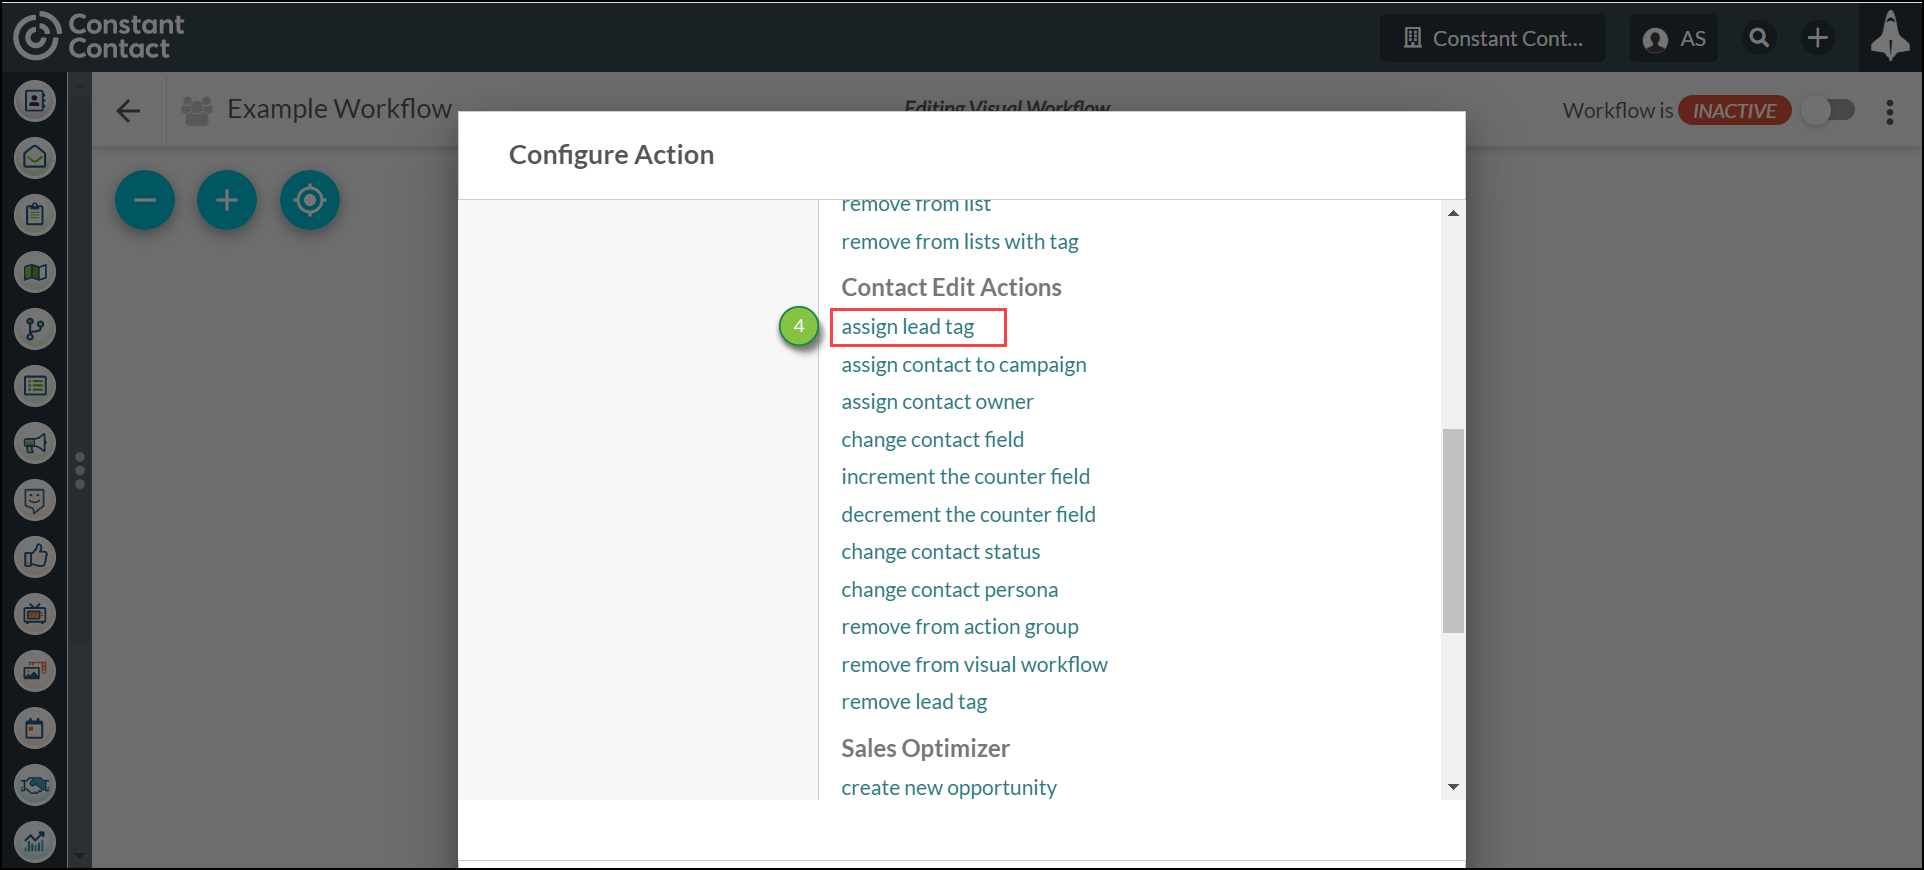
To assign tags to contacts in visual workflows, do the following:

  1. Click Automation > Visual Workflows in the left toolbar.

    Using Contact Tags


  2. Create or open a visual workflow.
  3. Add a trigger.

    Using Contact Tags


  4. Click Add > Action under the added trigger or an applicable trigger in another branch.

    Using Contact Tags


  5. Click Assign Lead Tag, located under Contact Edit Actions.

    Using Contact Tags


  6. Enter the name of the desired lead tag.
  7. Click OK.

    Using Contact Tags


  8. Complete the workflow with other triggers, filters, delays, or actions.


Removing Tags from Contacts in Visual Workflows

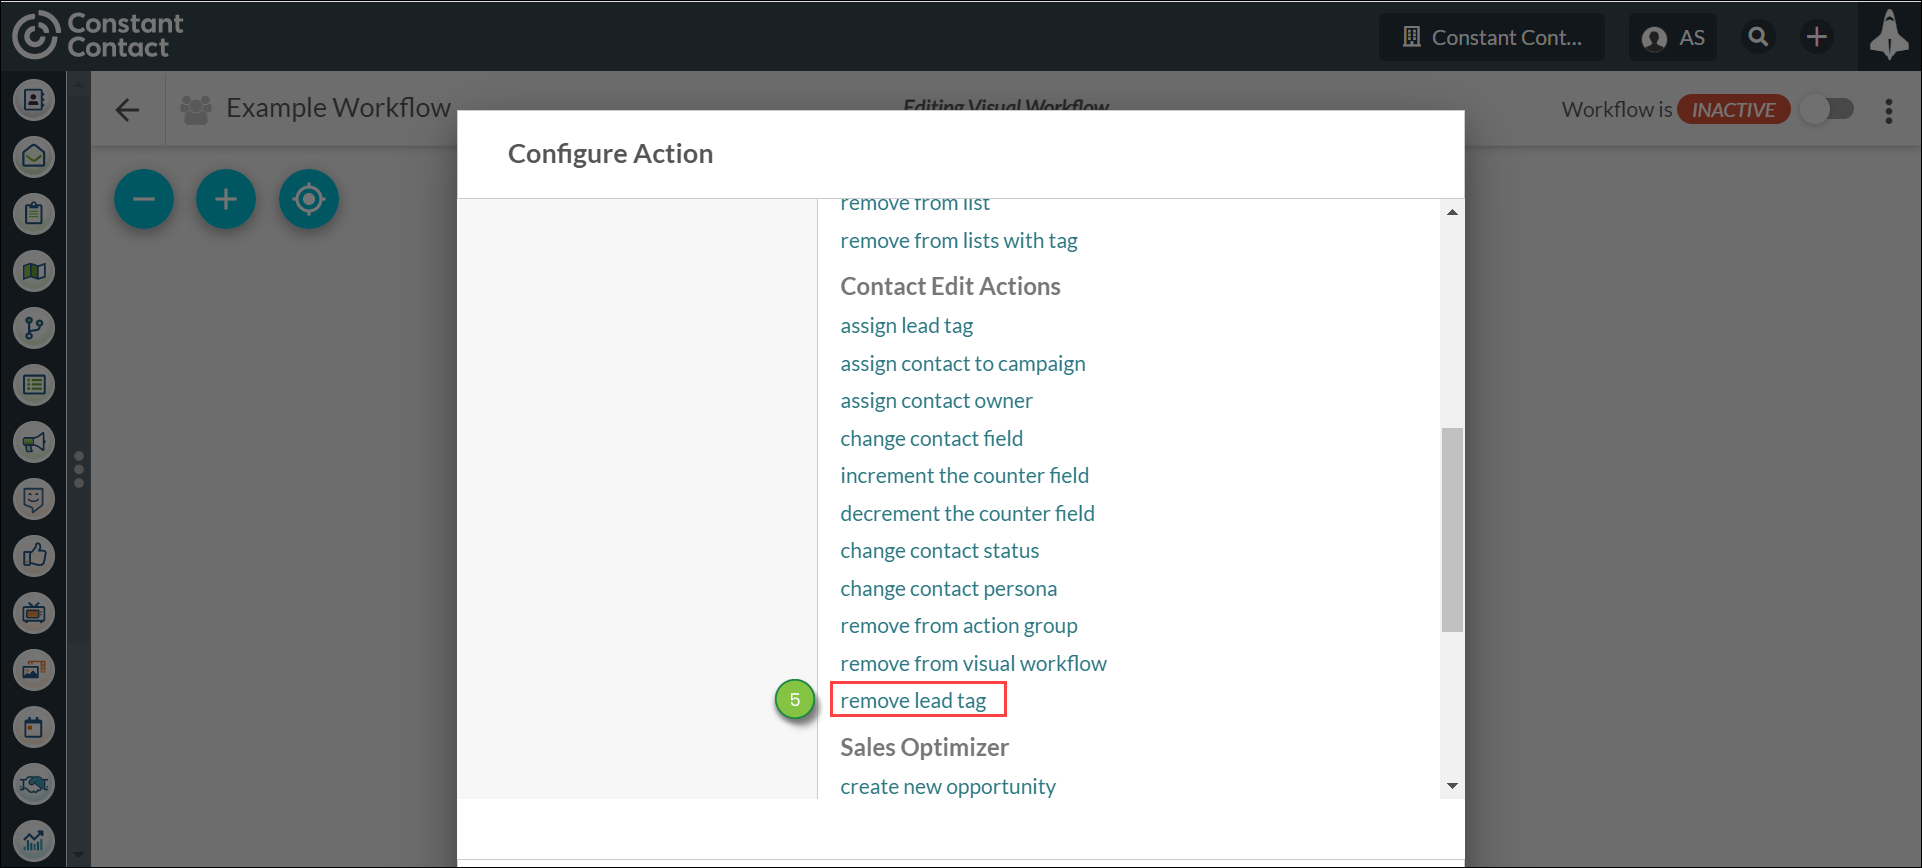
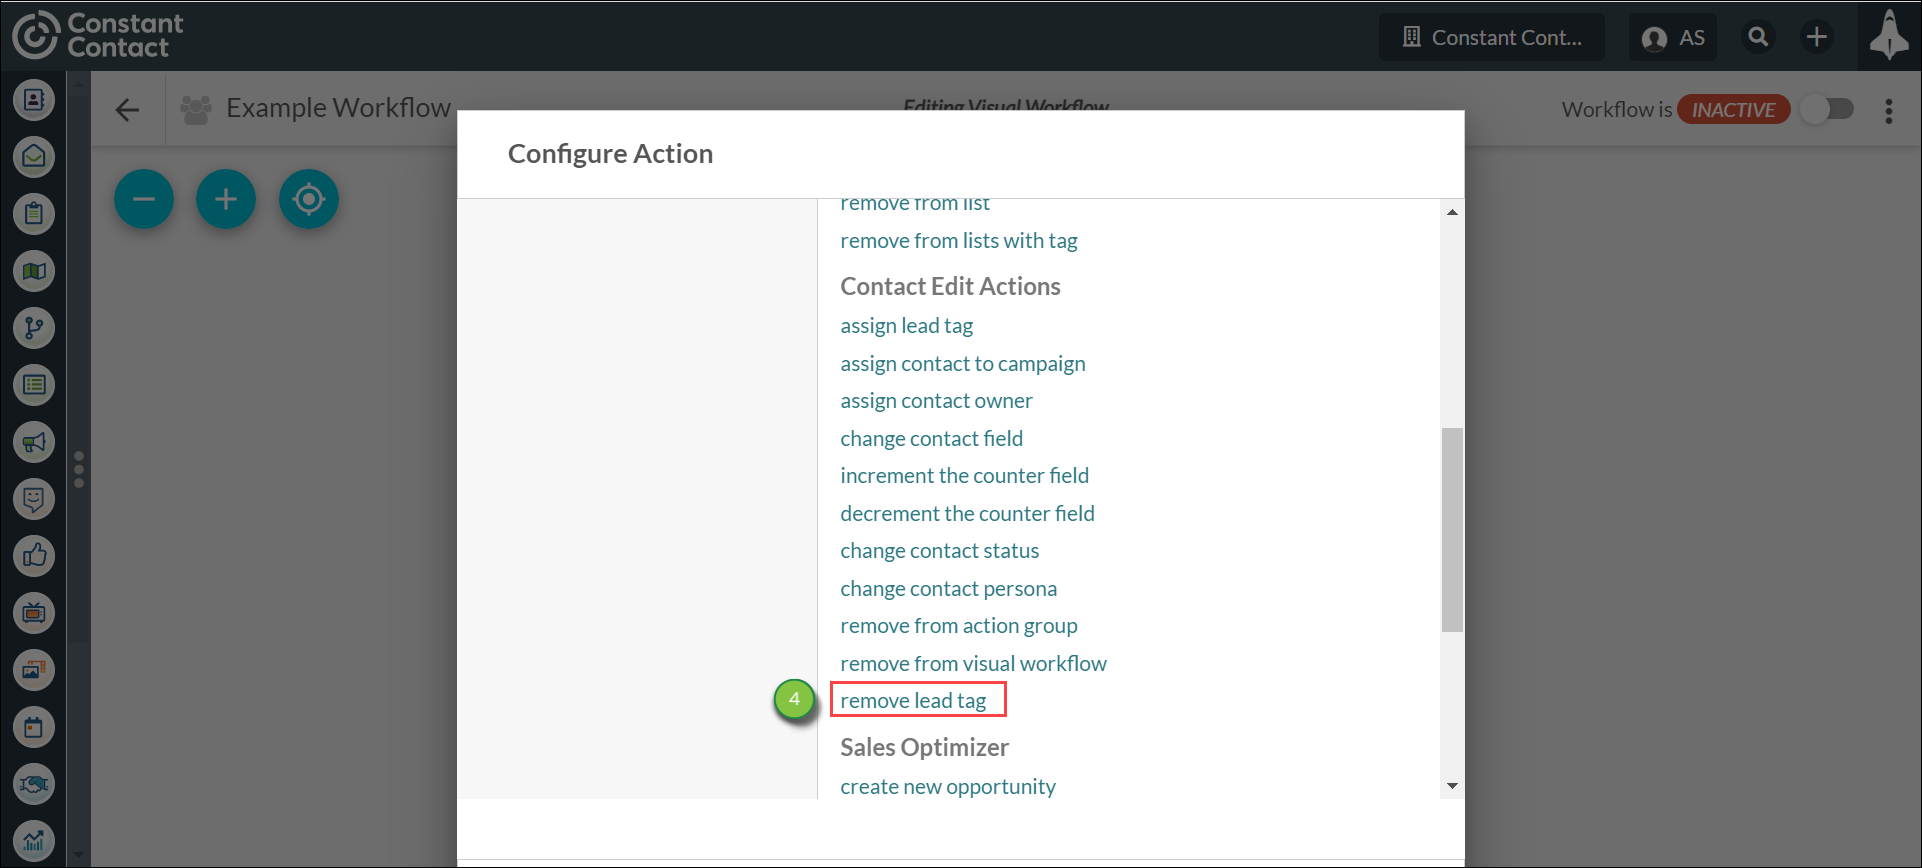
You can also remove previously assigned tags from contacts through visual workflows. This is done by way of a workflow action.

To remove tags from contacts in visual workflows, do the following: 

  1. Click Automation > Visual Workflows in the left toolbar.

    Using Contact Tags


  2. Create or open a visual workflow.
  3. Add a trigger.

    Using Contact Tags


  4. Click Add > Action under the added trigger or an applicable trigger in another branch.

    Using Contact Tags


  5. Click Remove Lead Tag, located under Contact Edit Actions.

    Using Contact Tags


  6. Enter the name of the desired lead tag.
  7. Click OK.

    Using Contact Tags


  8. Complete the workflow with other triggers, filters, delays, or actions.


Adding Tags to Contacts in Action Groups

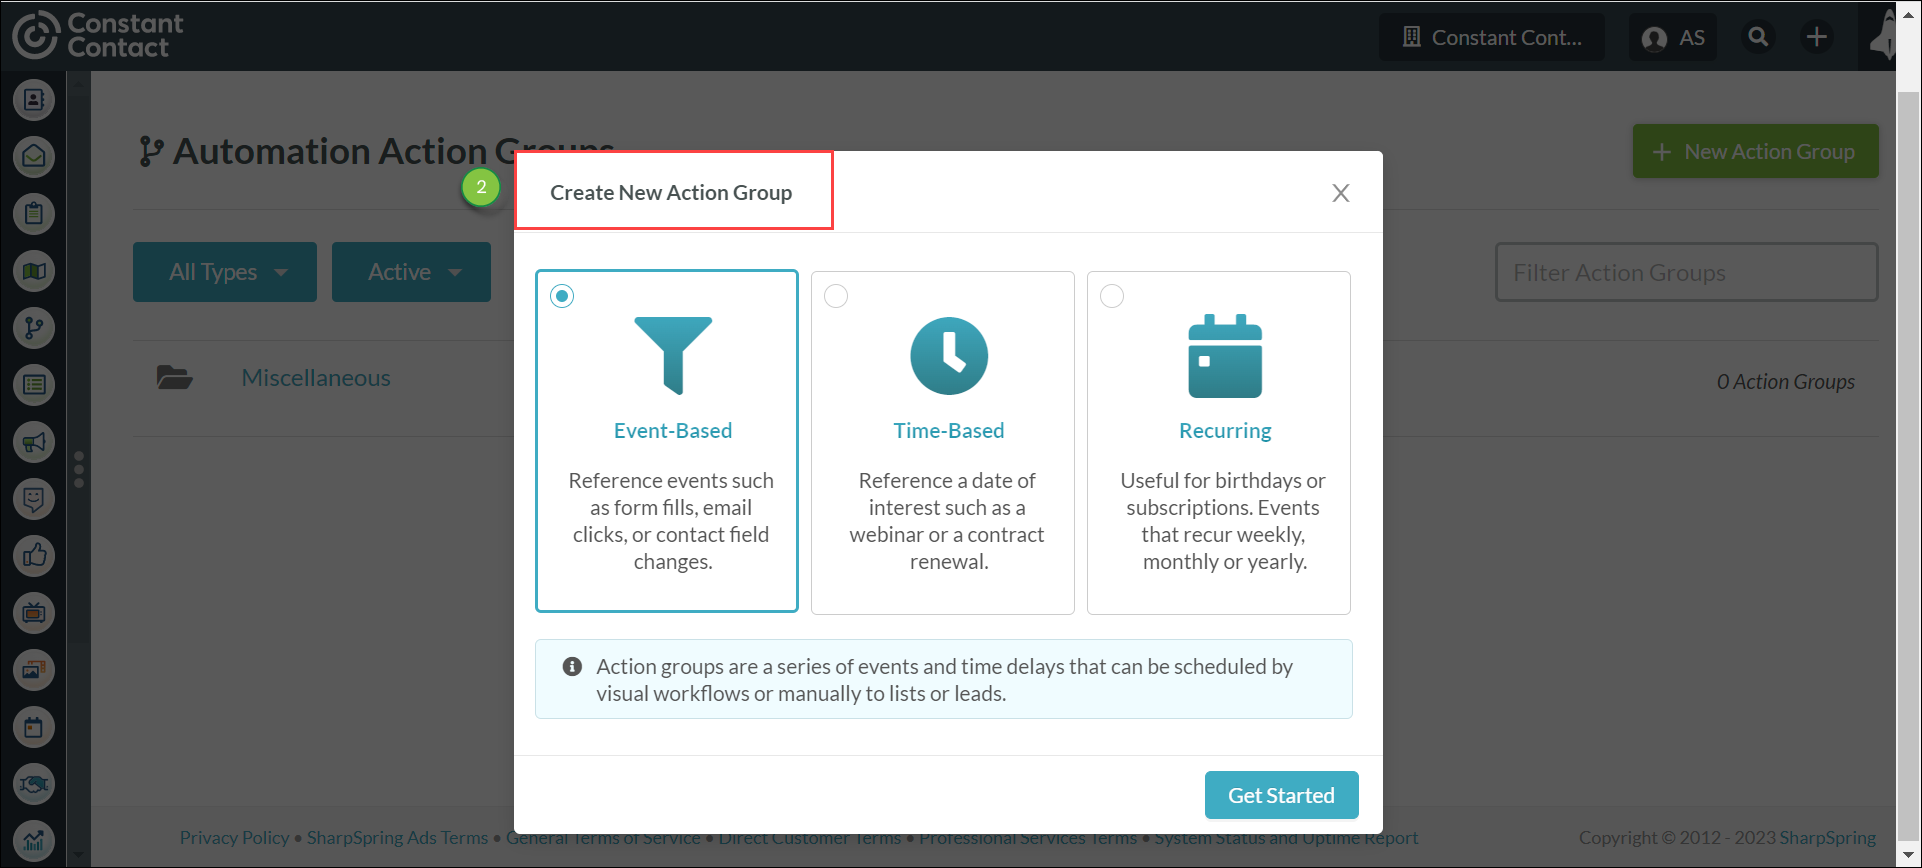
You can automatically add contact tags with action groups.

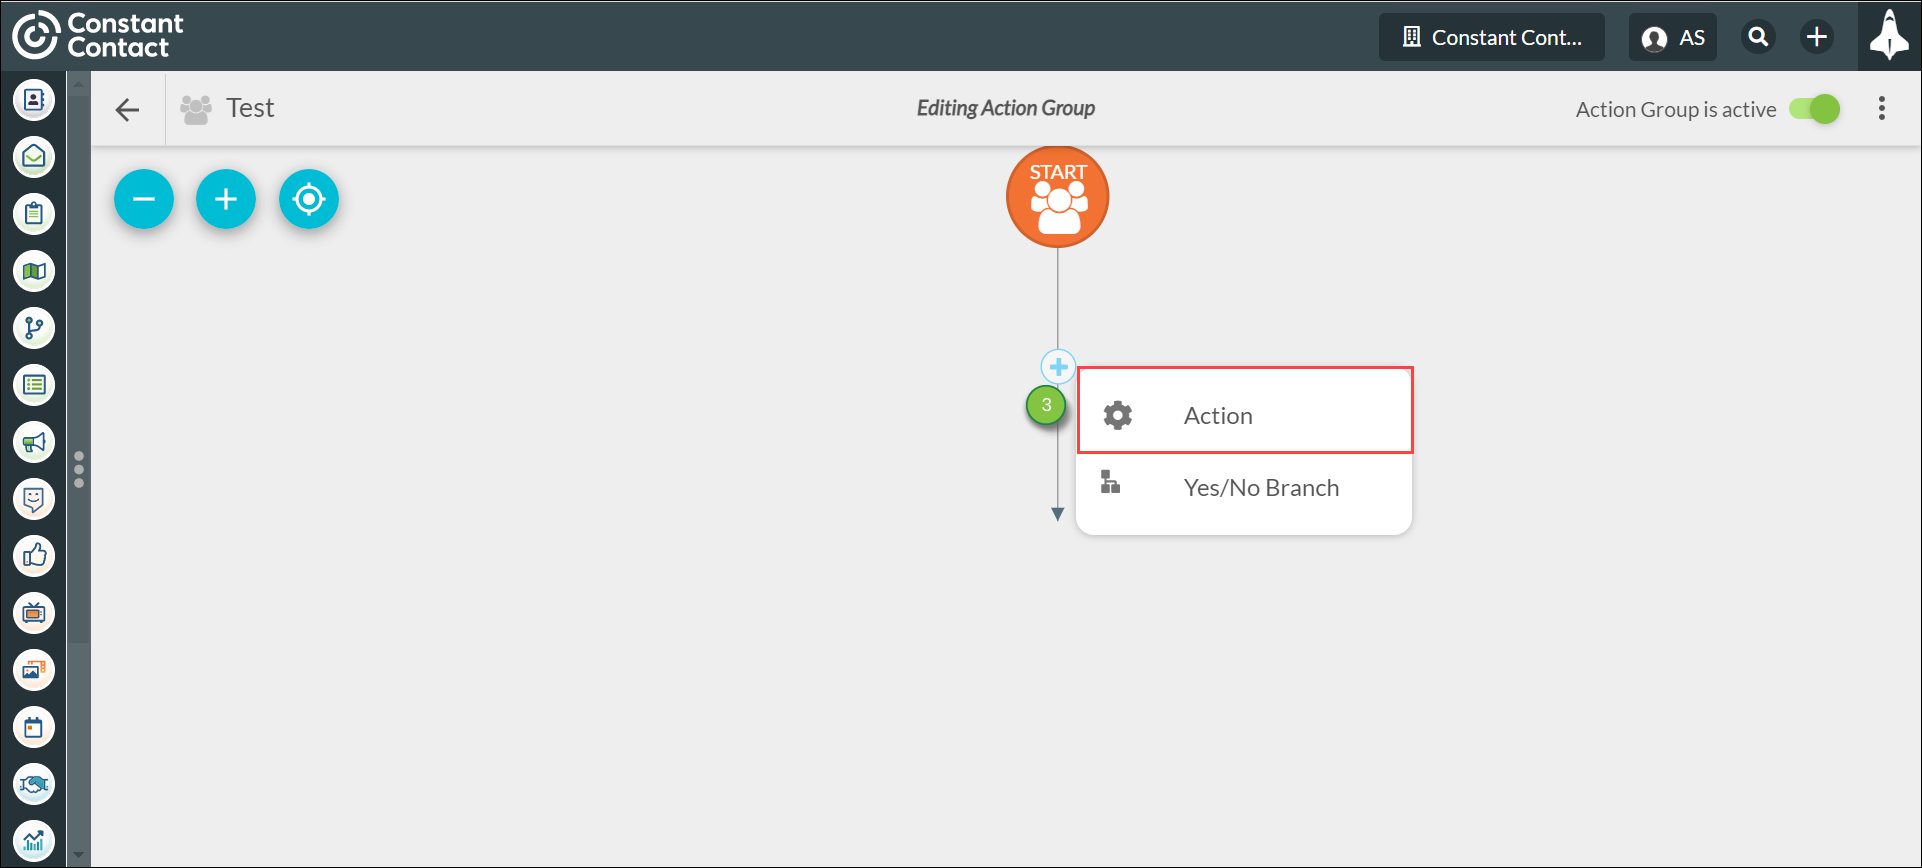
To assign tags to contacts in action groups, do the following:

  1. Click Automation > Action Groups in the left toolbar.

    Using Contact Tags


  2. Create or open one of the following action group types:
    • Event-based
    • Time-based
    • Recurring

    Using Contact Tags


  3. Click Add > Action under Start, Date of Interest, or an applicable branch.

    Using Contact Tags


  4. Click Assign Lead Tag, located under Contact Edit Actions.

    Using Contact Tags


  5. Enter the name of the desired lead tag.
  6. Click OK.

    Using Contact Tags


  7. Complete the action group with other actions, filters, delays, or action groups.


Removing Tags from Contacts in Action Groups

You can also remove previously assigned tags from contacts through action groups.

To remove tags from contacts in action groups, do the following:

  1. Click Automation > Action Groups in the left toolbar.

    Using Contact Tags


  2. Create or open one of the following action group types:
    • Event-based
    • Time-based
    • Recurring

    Using Contact Tags


  3. Click Add > Action under Start, Date of Interest, or an applicable branch.

    Using Contact Tags


  4. Click Remove Lead Tag, located under Contact Edit Actions.

    Using Contact Tags


  5. Enter the name of the desired lead tag.
  6. Click OK.

    Using Contact Tags


  7. Complete the action group with other actions, filters, delays, or action groups.


Did this article answer your question?


Constant Contact Logo

Copyright © 2026 · All Rights Reserved · Constant Contact · Privacy Center