Lead Gen & CRM
How can we help you?
Search our help articles, video tutorials, and quickstart guides

You've got this. You've got us. Search our Knowledge Base to quickly find answers to your questions.

Using Manual Lists

Article: 000050635
Updated: July 16, 2024

You can ensure that lists contain only certain leads by manually adding them. These lists are called manual lists.

Manual lists differ from rules-based lists in that rules-based lists add users based on a set of configured rules. This is done automatically and continues after list creation.

This article will detail how to create and populate manual lists.


Article Contents


Users:
Administrators 
Company Managers 
Marketing Managers 
Sales Managers  
Salespersons  
Jr. Salespersons  


Creating Manual Lists

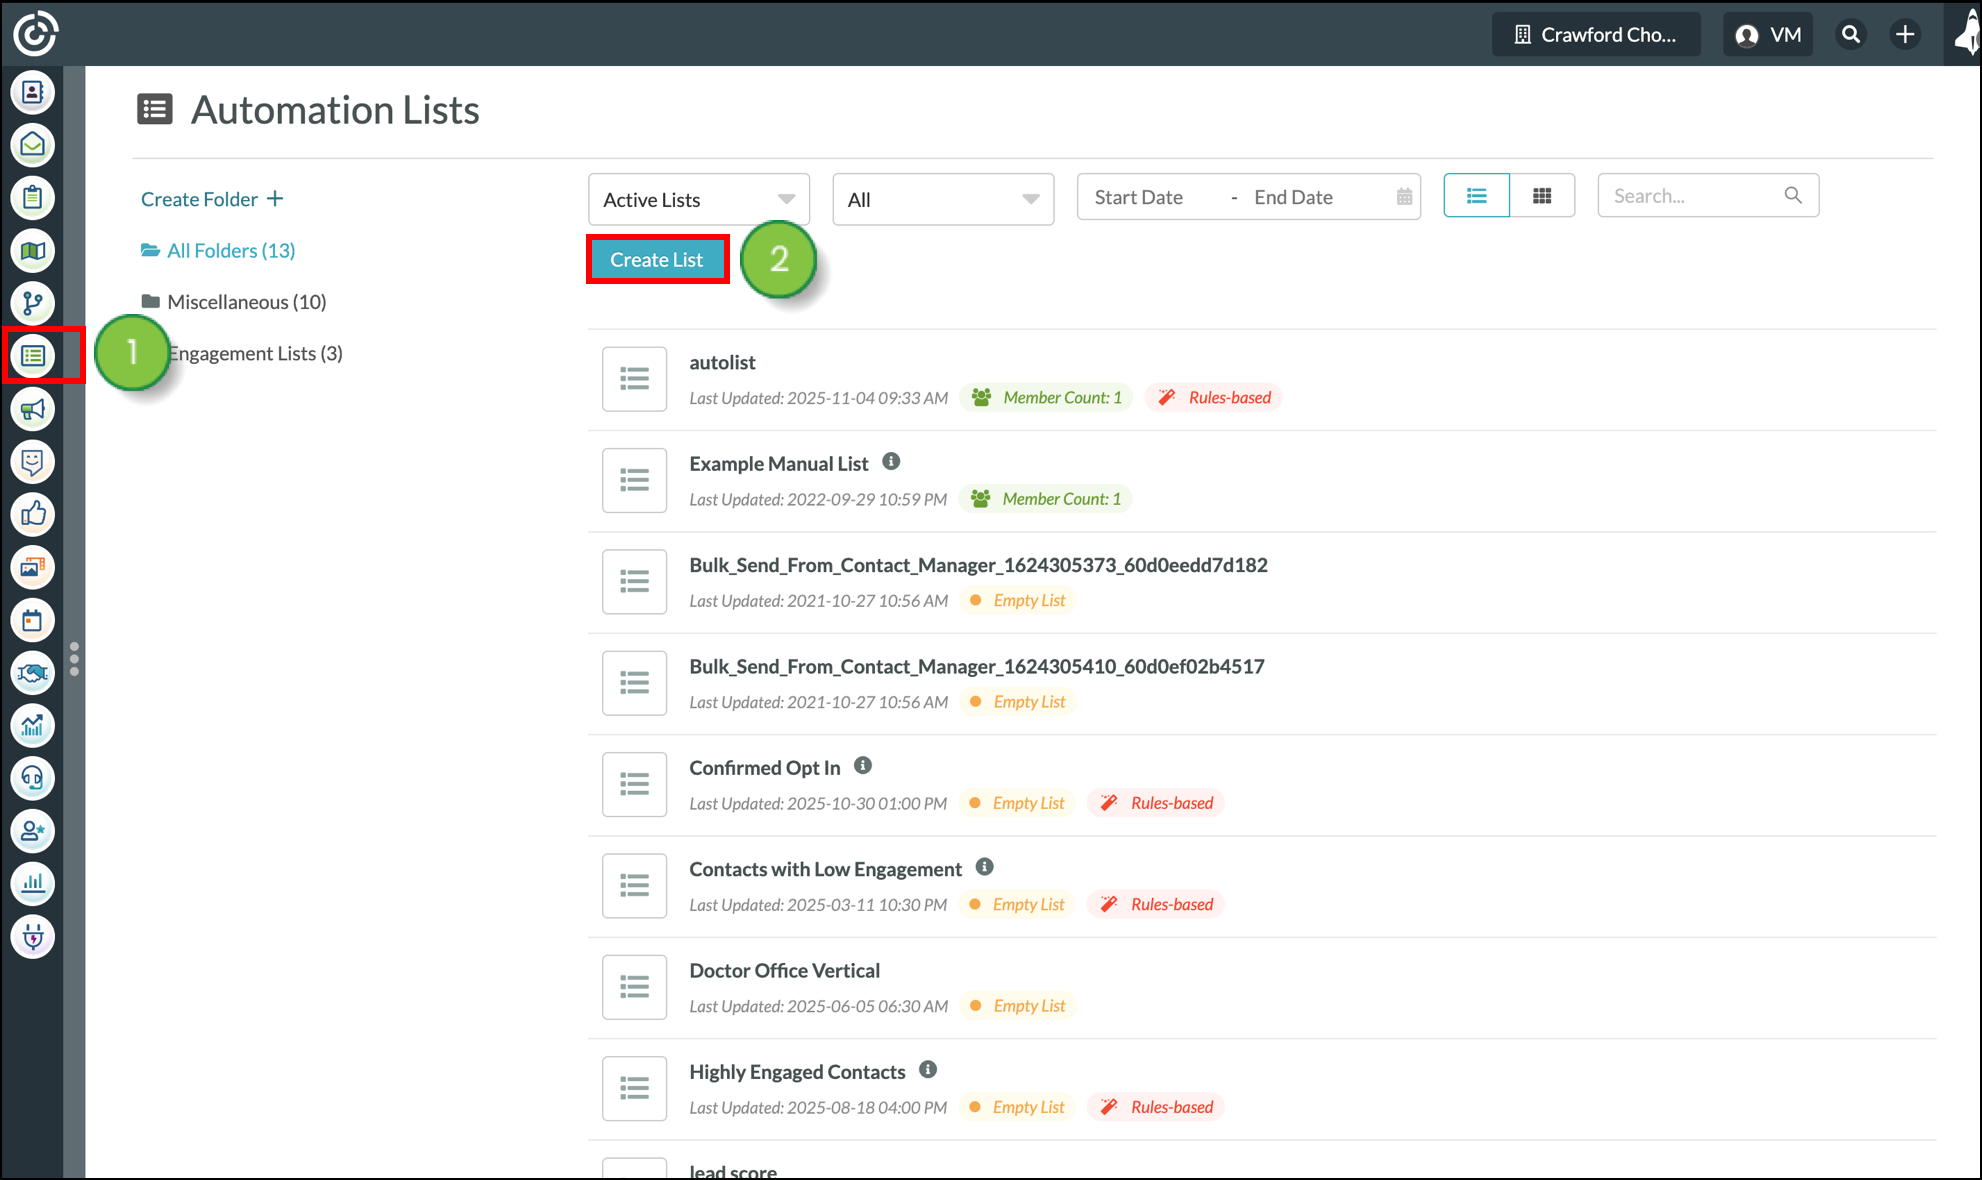
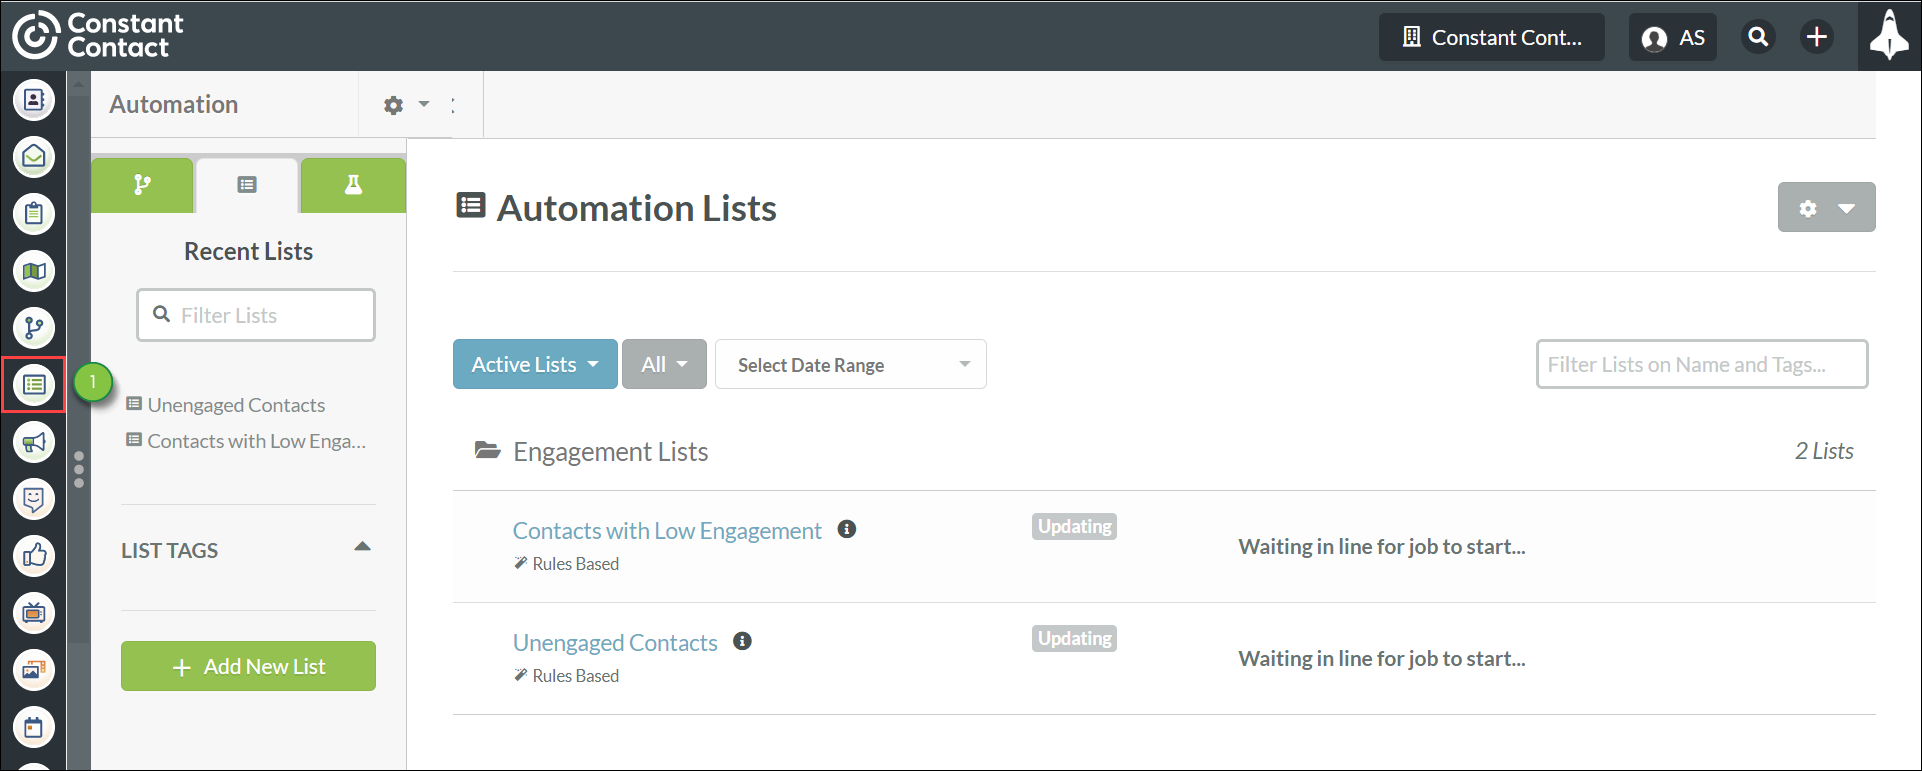
You can create manual lists as necessary. Manual lists are housed alongside rules-based lists in list folders.

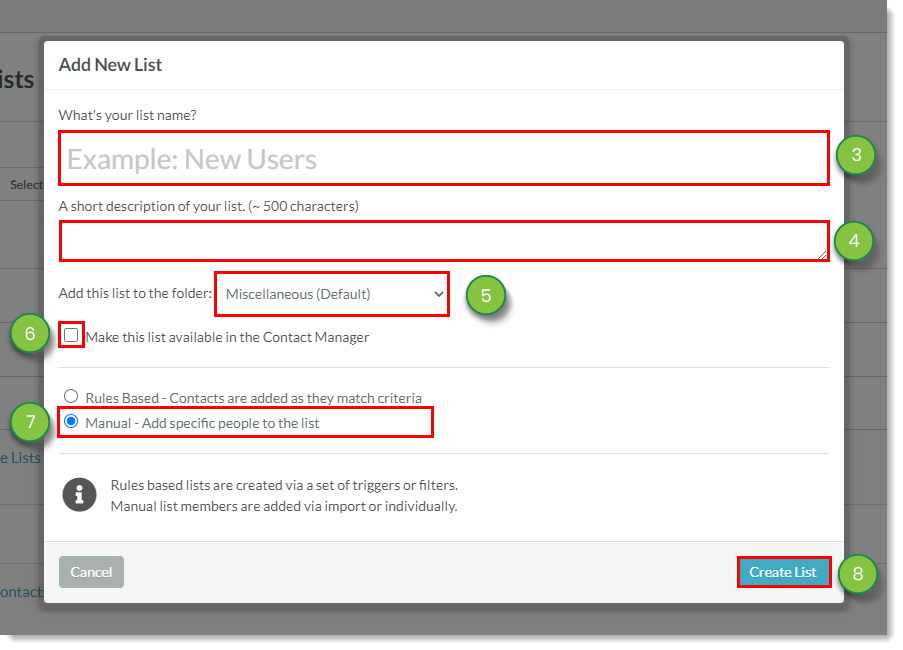
To create manual lists, do the following:

  1. Click Lists in the left toolbar.
  2. Click  12cog.png  Settings > New List on the right side of the page.

    Manual list settings


  3. Enter a name for the list.
  4. Optionally, enter a list description.
  5. Select the folder to add the list to.
  6. Optionally, click the Make this list available in the Contact Manager checkbox.
  7. Click the Manual toggle.
  8. Click Create List.

    Manual list settings


Adding Leads to Lists

Manually Adding a Lead to a List

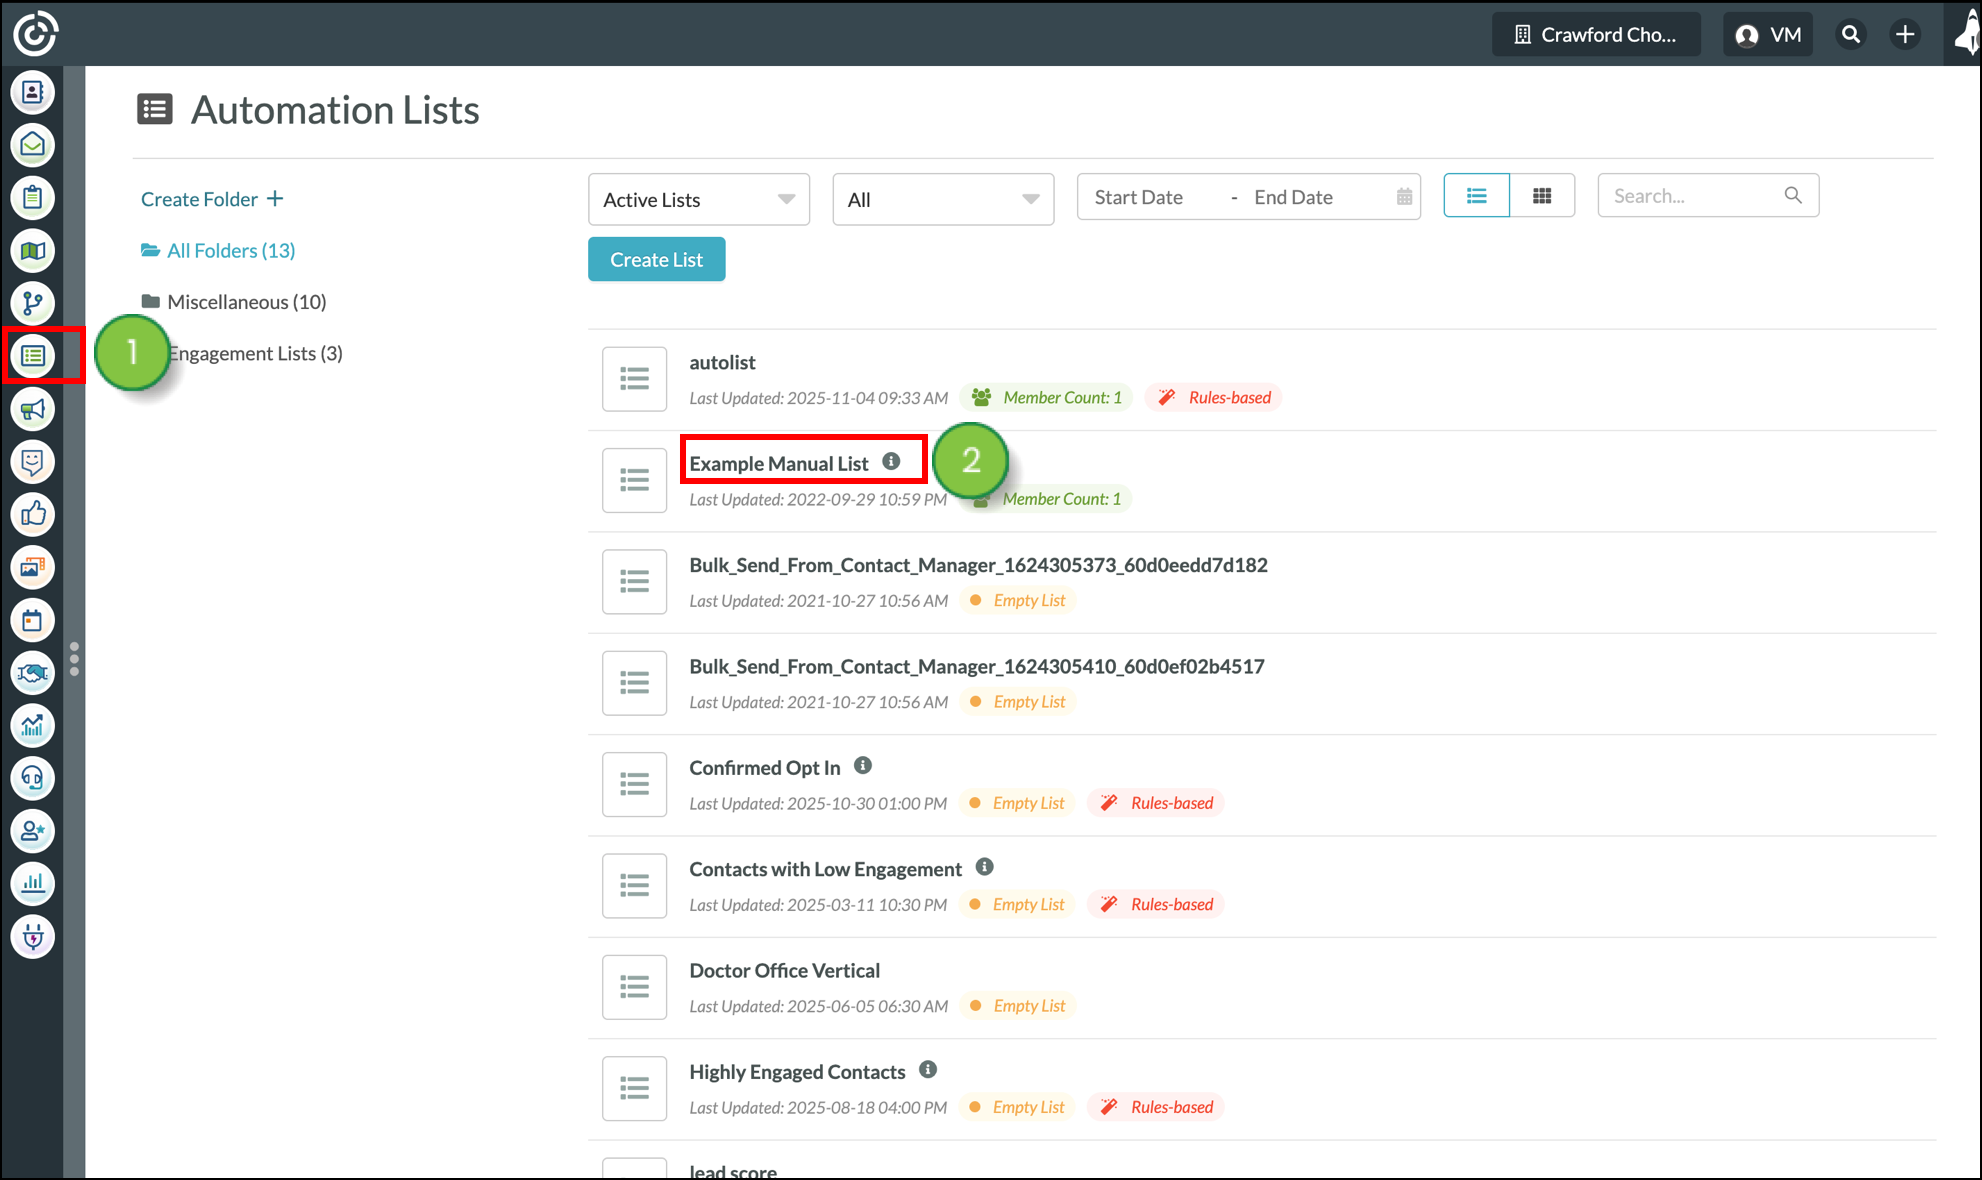
As their name implies, you can manually add leads to manual lists.

To manually add leads to lists, do the following:

  1. Click Lists in the left toolbar.

    Manual List Settings


  2. Create or open a manual list.
  3. Enter the desired lead's name into the Add a New Member field.
  4. Select the desired lead from the list that appears.

    Add a member to the list

Note: 
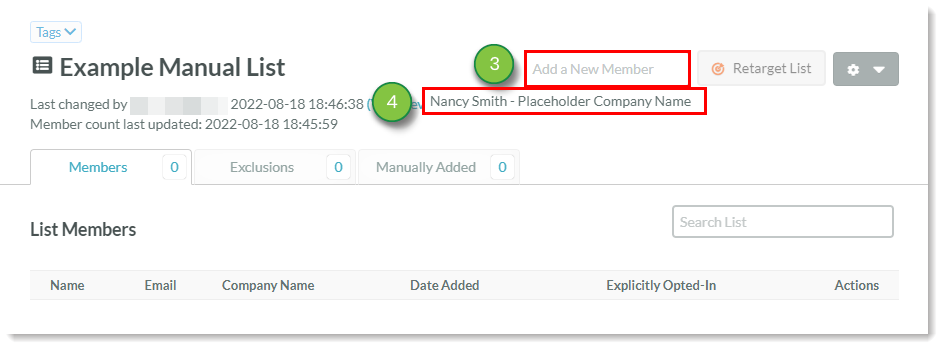
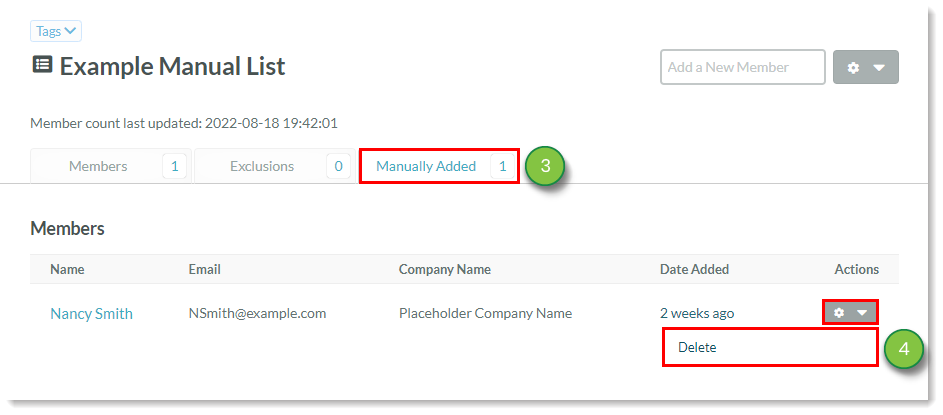
Manually added leads will appear in the Manually Added tab


Importing Leads from Existing Lists

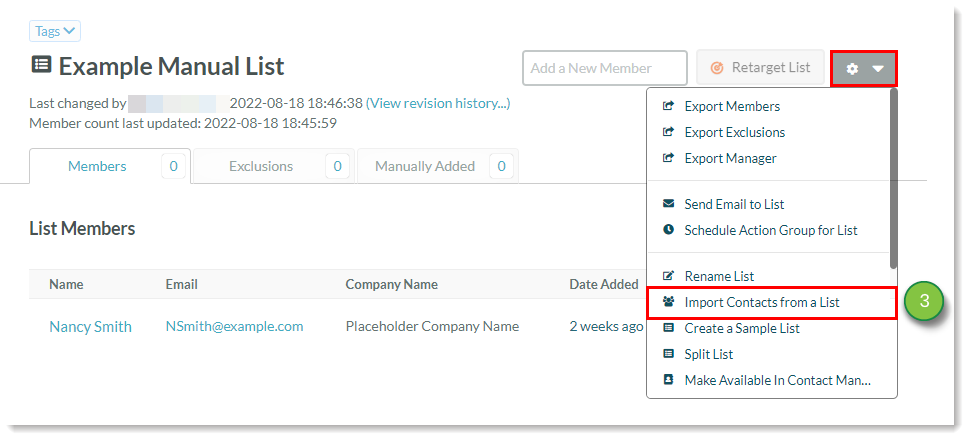
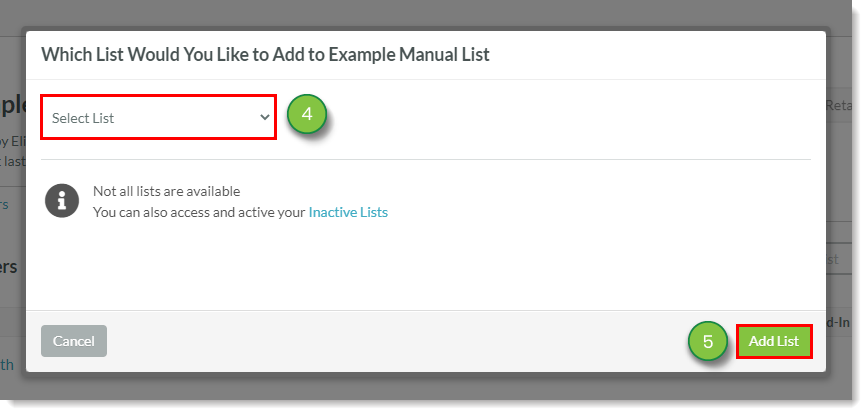
You can add leads from existing lists.

To import leads into manual lists, do the following:

  1. Click Lists in the left toolbar.

    Manual List settings


  2. Create or open a manual list.
  3. Click  1cog.png  Settings > Import Contacts from a List at the top of the page.

    Import contacts option 
  4. Select the list from the drop-down menu.
  5. Click Add List.

    Select list


Removing List Members

Removing List Members Individually

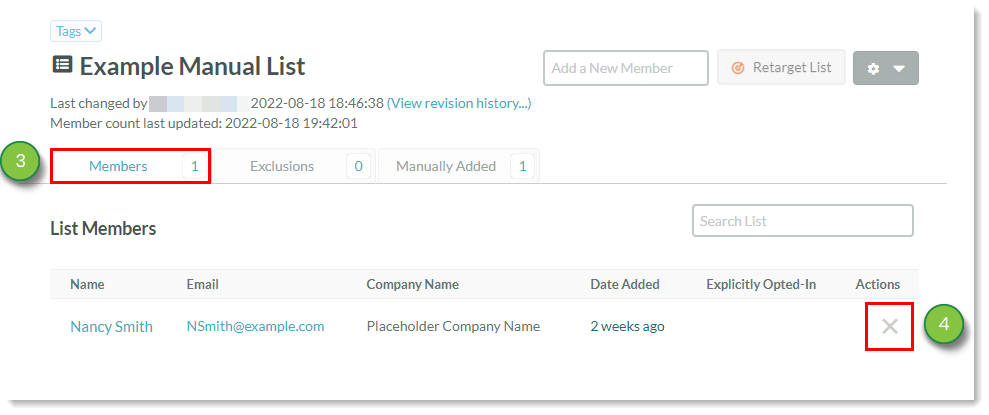
You can remove members from lists as necessary.

To remove individual members from lists, do the following:

  1. Click Lists in the left toolbar.

    Manual List Settings


  2. Open a previously created manual list.
  3. Click the Members or Manually Added tab.
  4. Do one of the following:
    • For the Members tab: Click  12close.png  Remove to the right of the desired lead's name.
    • For the Manually Added tab: Click  12cog.png  Settings > Delete to the right of the desired lead's name.
    • Important: Be aware that removing a manually added lead from a list prohibits them from being added back to that list.

Deleting from the Members tab:

Deleting from the Manually Added tab:


Refer to Removing or Restoring List Members for more information on removing leads within lists.


Removing All Members from Manual Lists

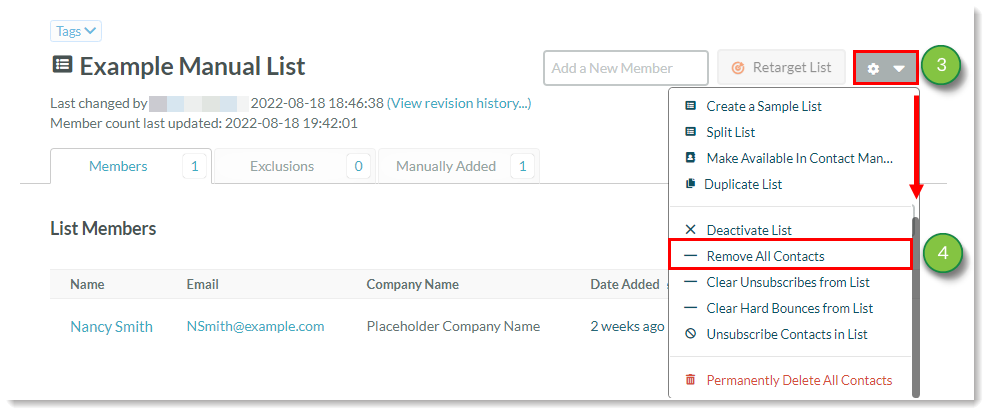
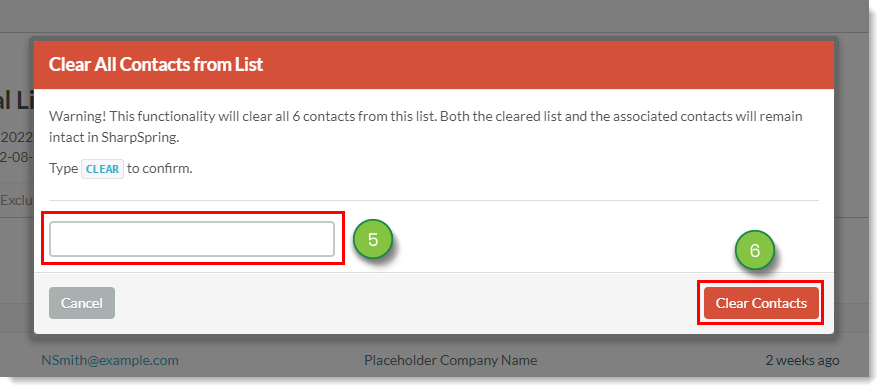
You can remove all leads within a list at once.

Be aware that the only available method to remove multiple leads from a list in bulk is to remove them all at once.

To remove all leads from a list, do the following:

  1. Click Lists in the left toolbar.

    Manual List Settings


  2. Open a previously created manual list.
  3. While on the Members tab, click  12cog.png  Options.
  4. Scroll down and click Remove All Contacts.

    Remove all contacts 
  5. Enter Clear in the text box of the modal window that appears.
  6. Click Clear Contacts.

    Type CLEAR

Refer to Removing or Restoring List Members for more information on removing leads within lists.


Renaming Manual Lists

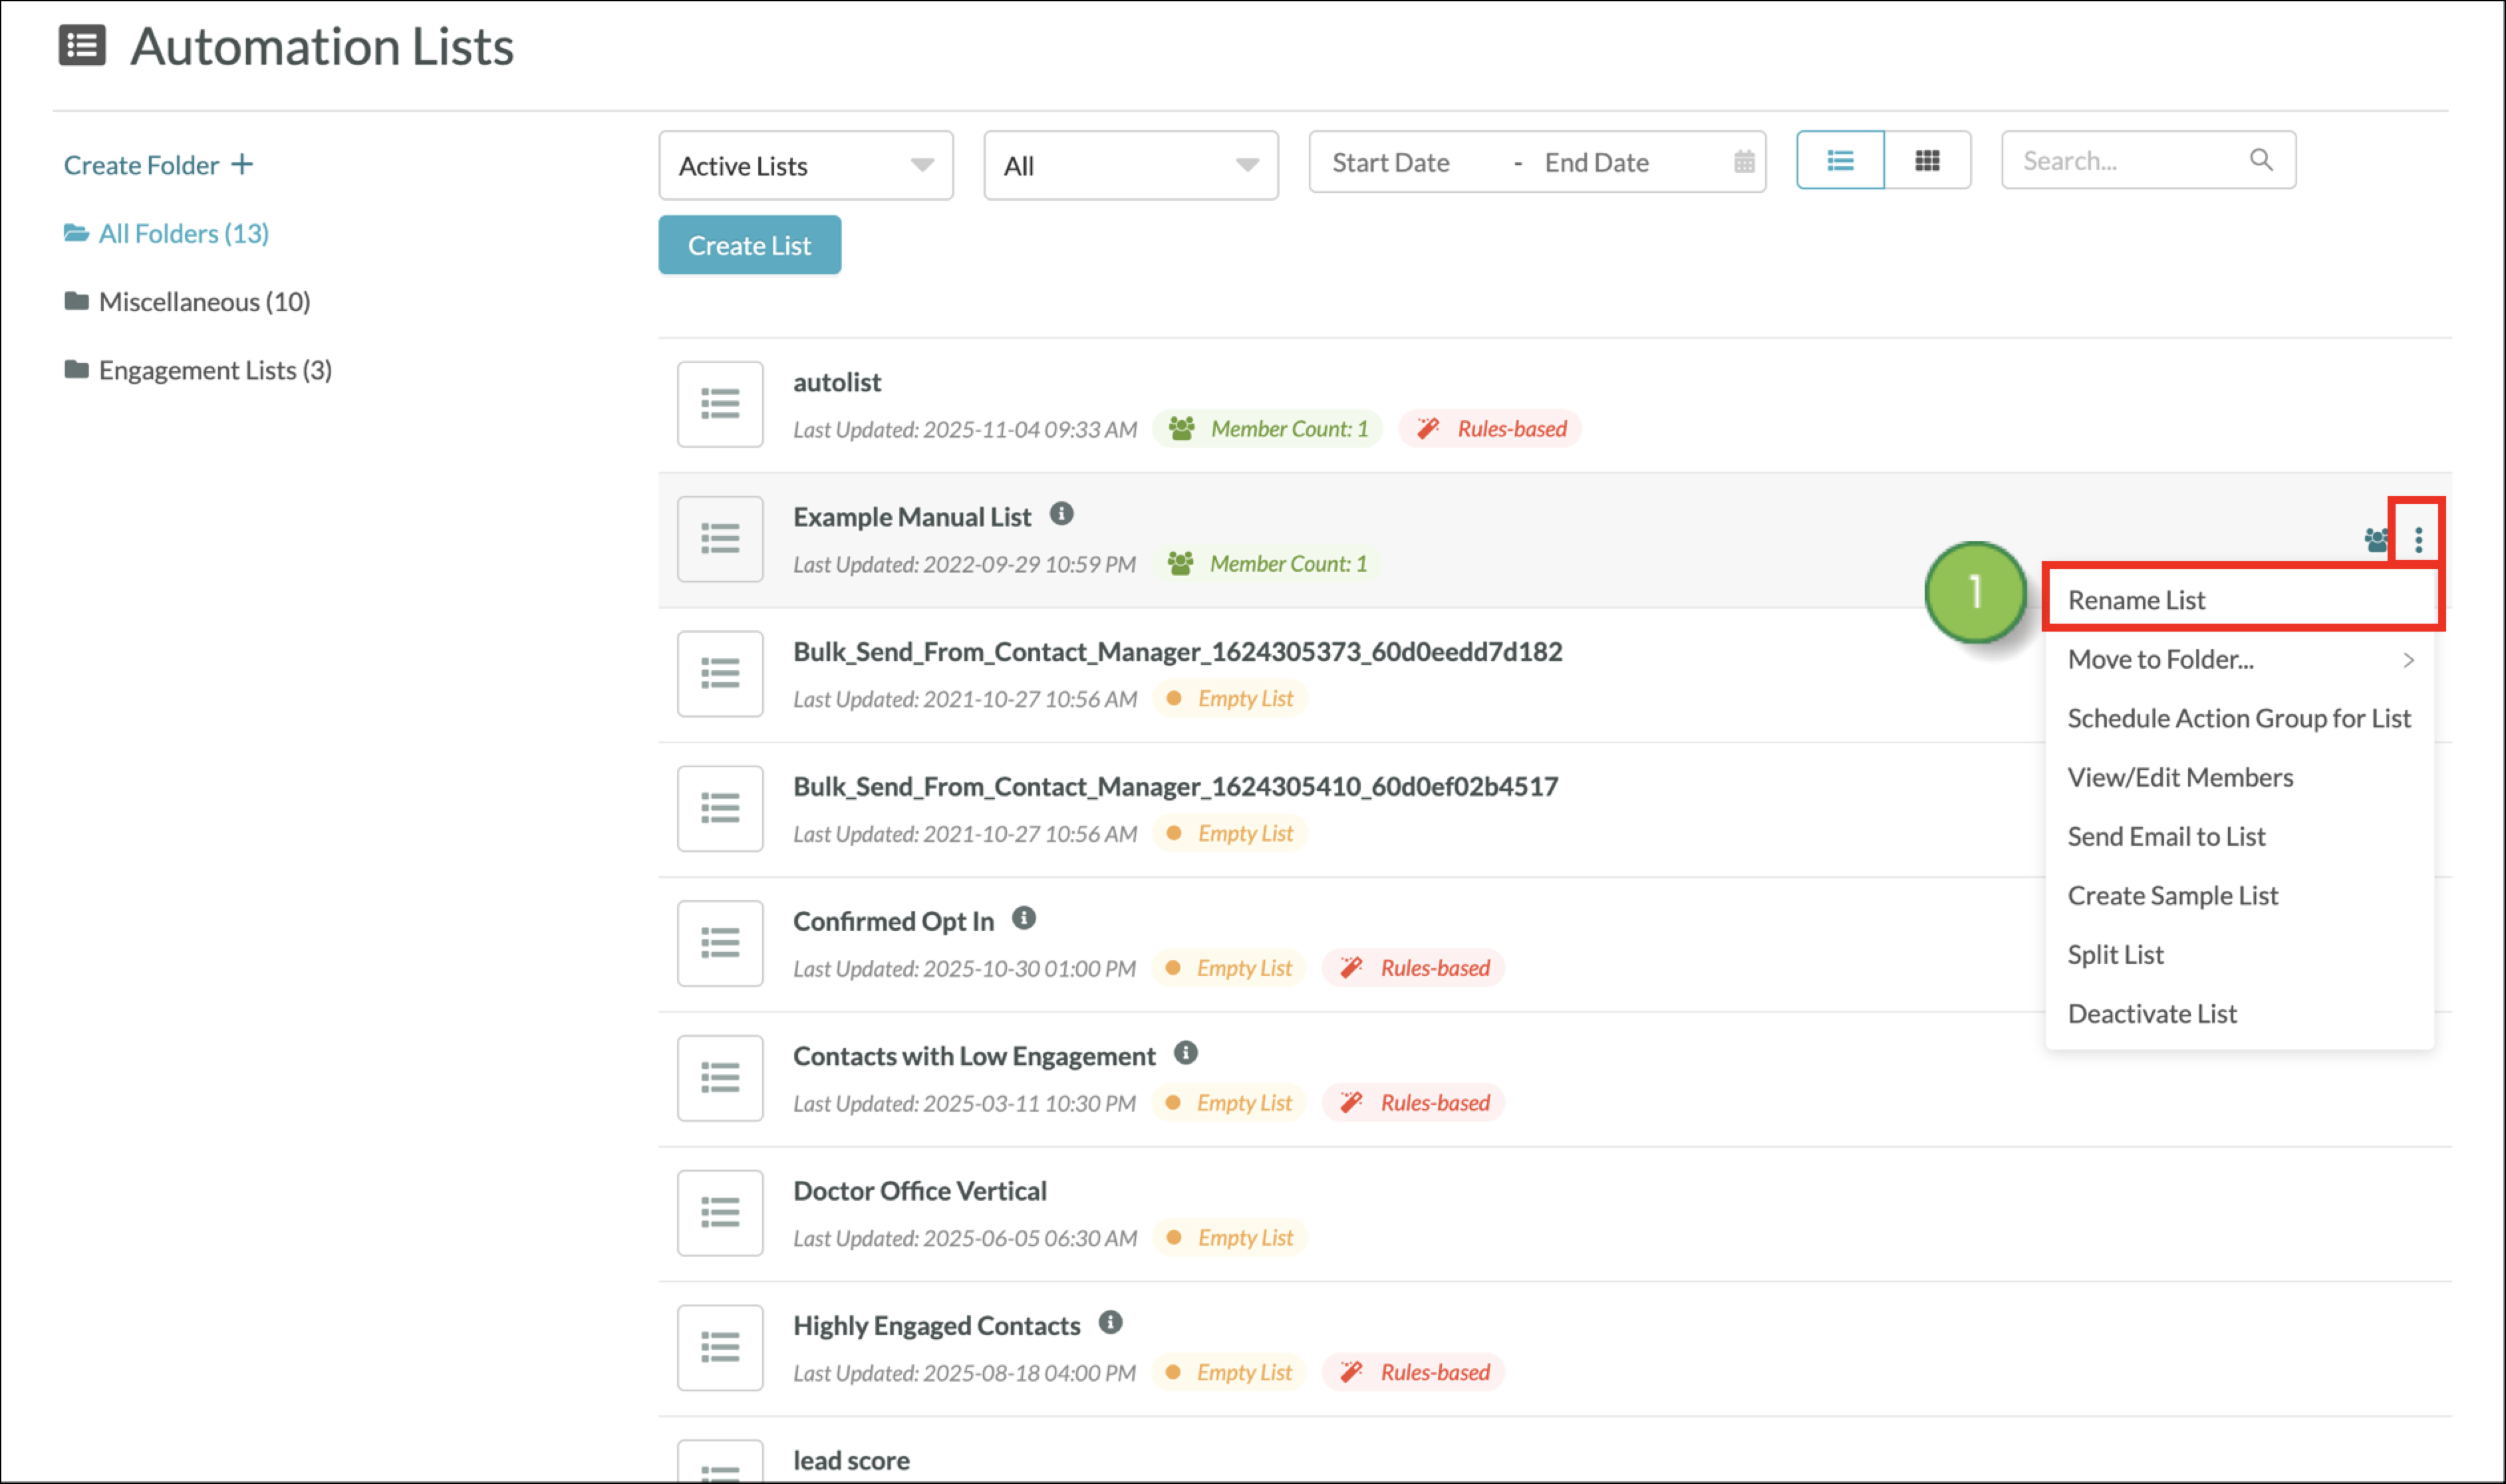
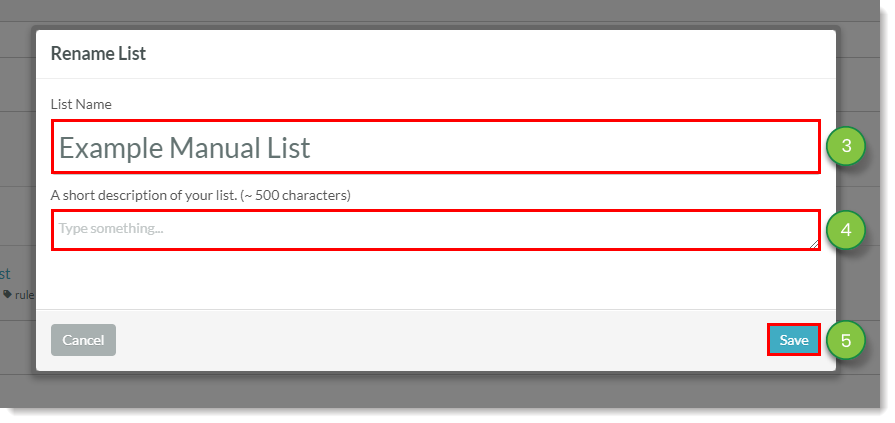
You can rename manual lists as necessary.

To rename manual lists, do the following:

  1. Click Lists in the left toolbar.

    Manual List Settings


  2. Hover over the desired list and click  12cog.png  Settings > Rename List to the right of its name.

    Manual List Settings


  3. Enter a name for the list in the List Name field.
  4. Optionally, enter a description for the list in the A short description field.
  5. Click Save.

    Enter the new list name


Regarding Manual List Modification

Be aware that manual lists do not have list settings, since they are not rules-based. This means that, aside from basic options, these lists cannot be modified.

In addition, manual lists cannot be converted into rules-based lists. Manual list members will need to be imported into existing rules-based lists.

Refer to the following articles for more information on options available to manual lists:


Did this article answer your question?


Constant Contact Logo

Copyright © 2025 · All Rights Reserved · Constant Contact · Privacy Center