When enabling social posting permissions, posts created by other users with social media access and emails sent by unapproved users must be approved before publishing.
| Administrators | ✓ | |
| Company Managers | ||
| Marketing Managers | ||
| Sales Managers | ||
| Salespersons | ||
| Jr. Salespersons |
| Tip: Are you looking for information about Constant Contact’s Email and Digital Marketing product? This article is for Constant Contact’s Lead Gen & CRM product. Head on over to the Email and Digital Marketing articles by clicking here. Not sure what the difference is? Read this! |
In the Social Posting Permissions settings, administrators can disable or enable posting approval. When approval is disabled, all administrators and marketing managers will be able to publish posts to connected accounts.
When approval is enabled, you can choose to give posting approval to either all administrators, or to specific users. Any user lacking approval will not be able to post directly, and will have to have their posts approved before being published.
To enable posting approval, do the following:
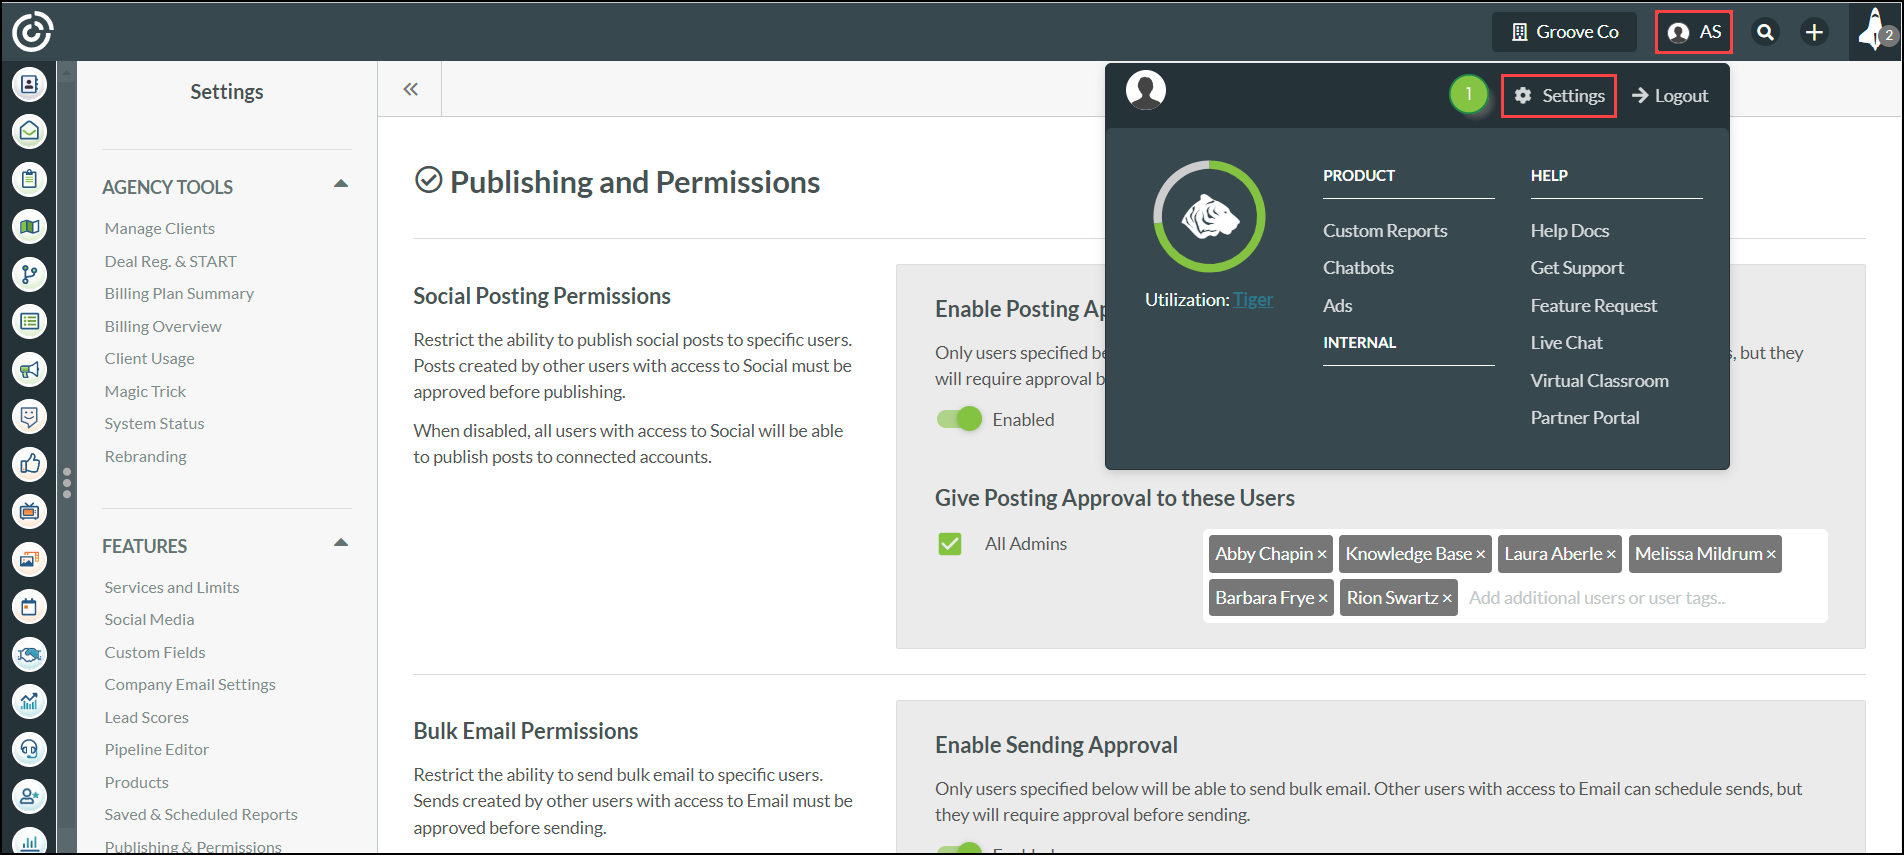
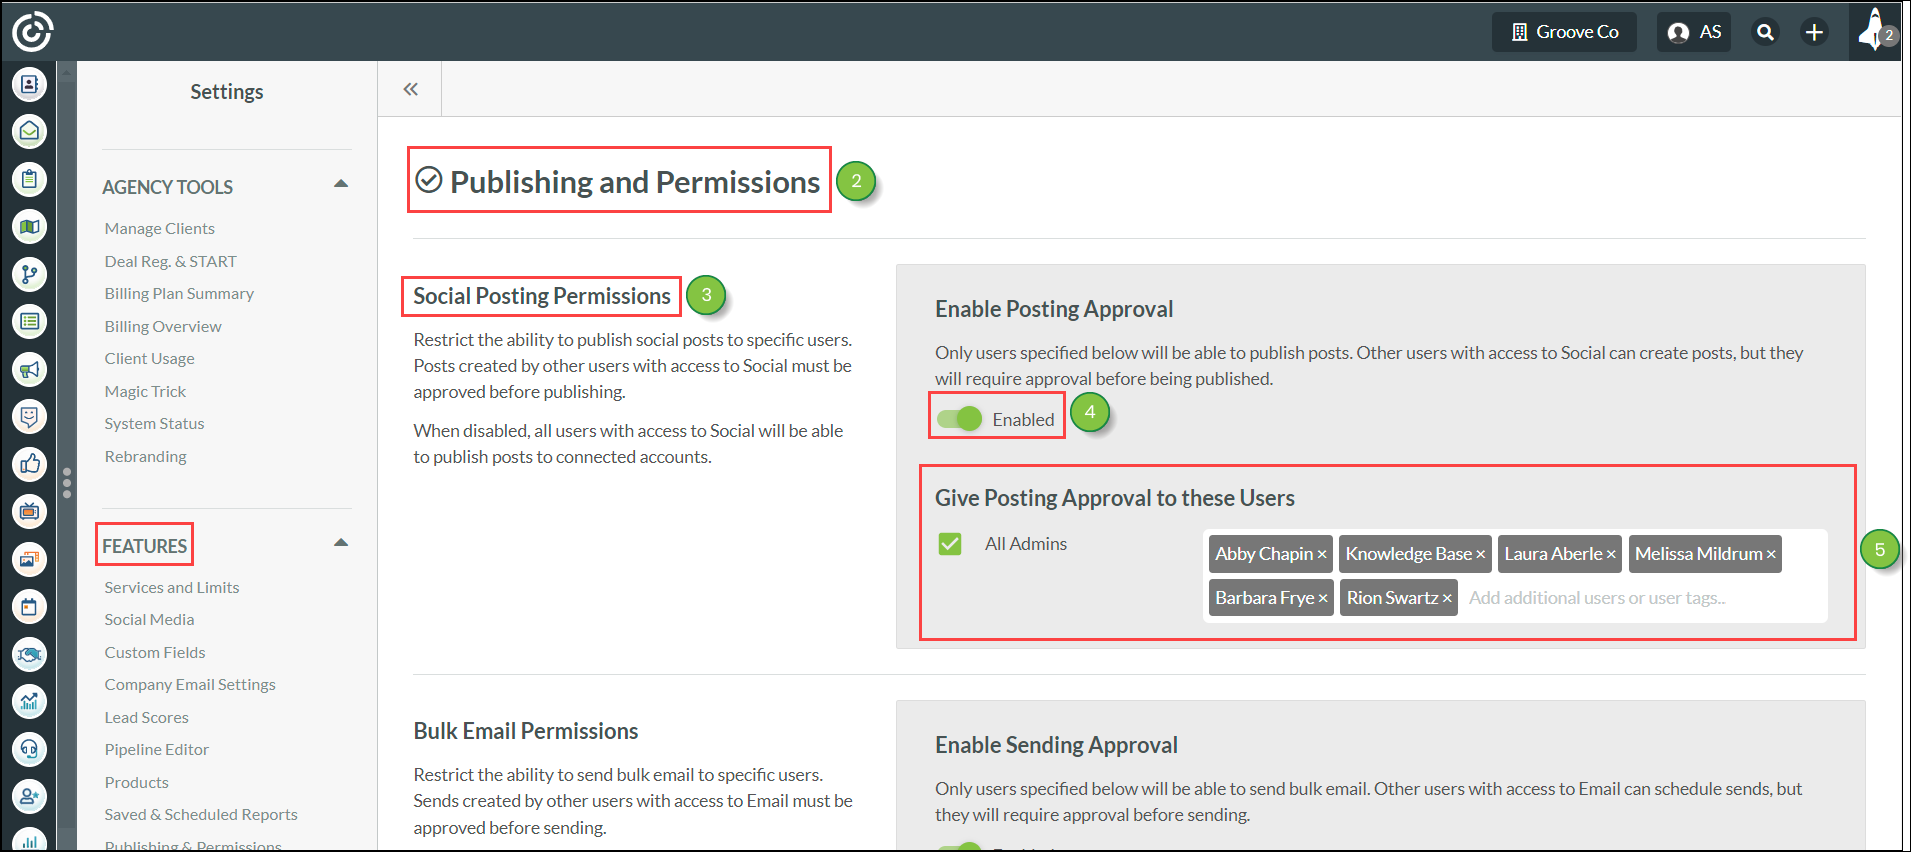
Important: When social posting permissions are enabled and All Admins is unselected, Administrators, Company Managers, and Marketing Managers will still have permissions.
You can disable social posting permissions as necessary.
To disable social posting permissions, do the following:
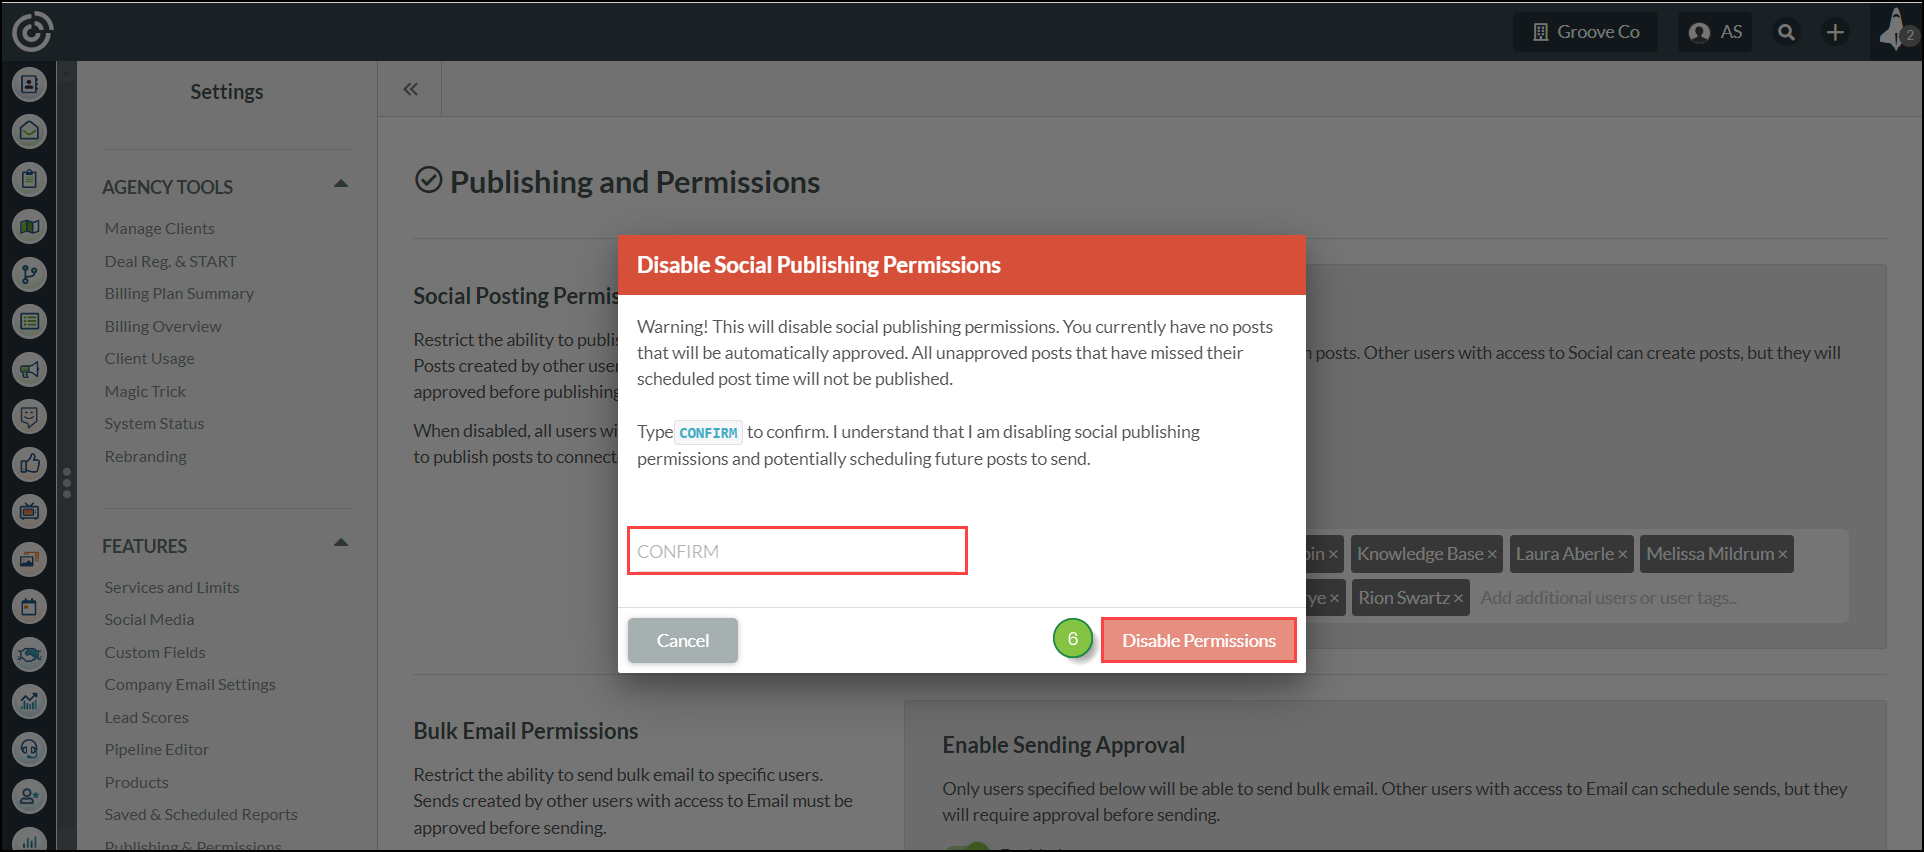
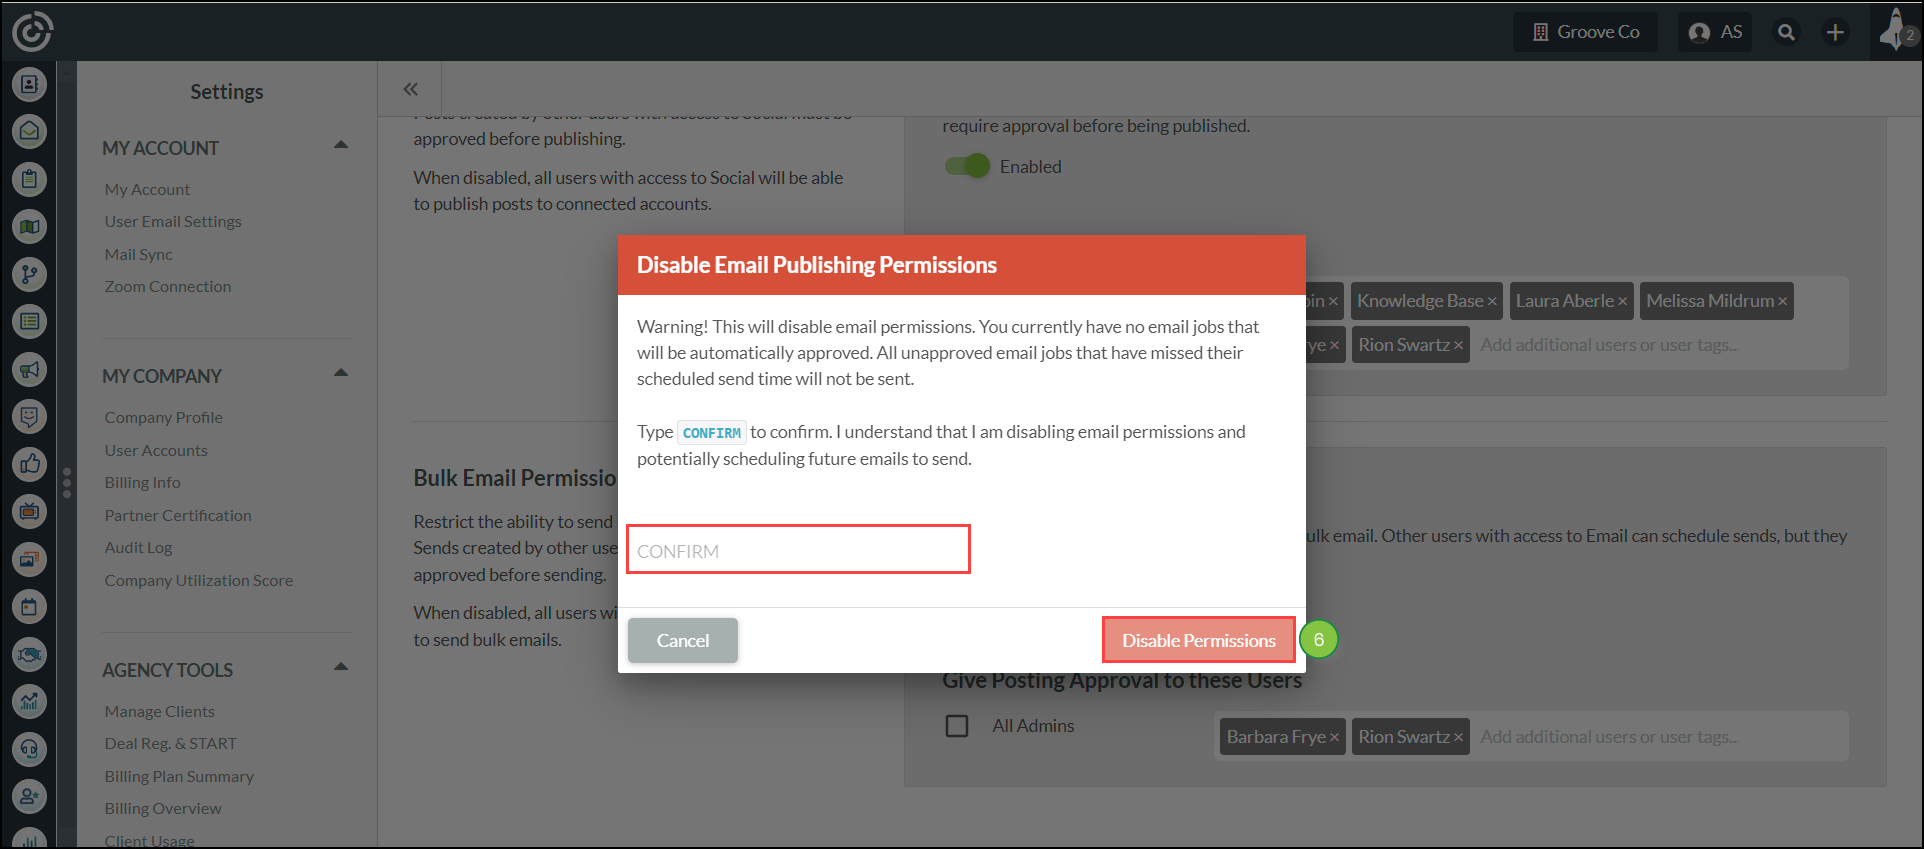
Important: Disabling social publishing permissions will force all unapproved posts that have missed their scheduled post time to not be published.
Once permissions are enabled, only your designated users will be able to post social media content without requiring permission. All other users without social posting approval will need permission.
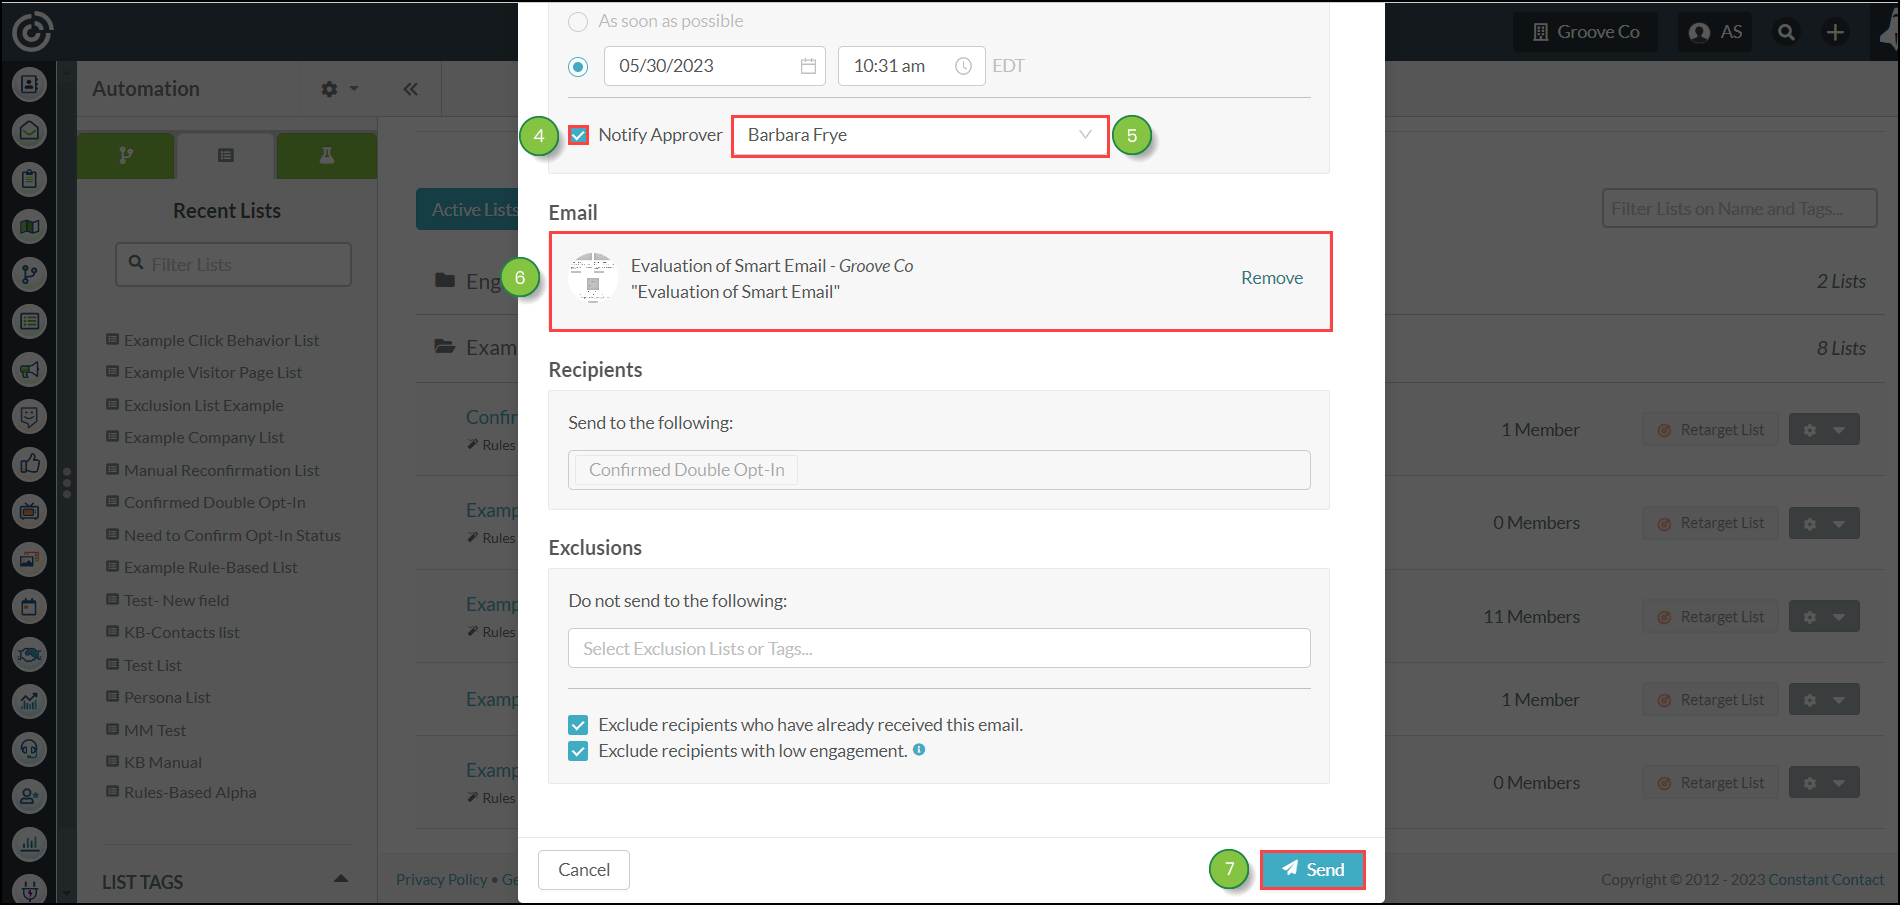
Users with permissions can be notified about requests to post scheduled social media content. These notifications are safeguards that are in place to prevent unauthorized publishing.
To schedule unapproved posts for review, do the following:
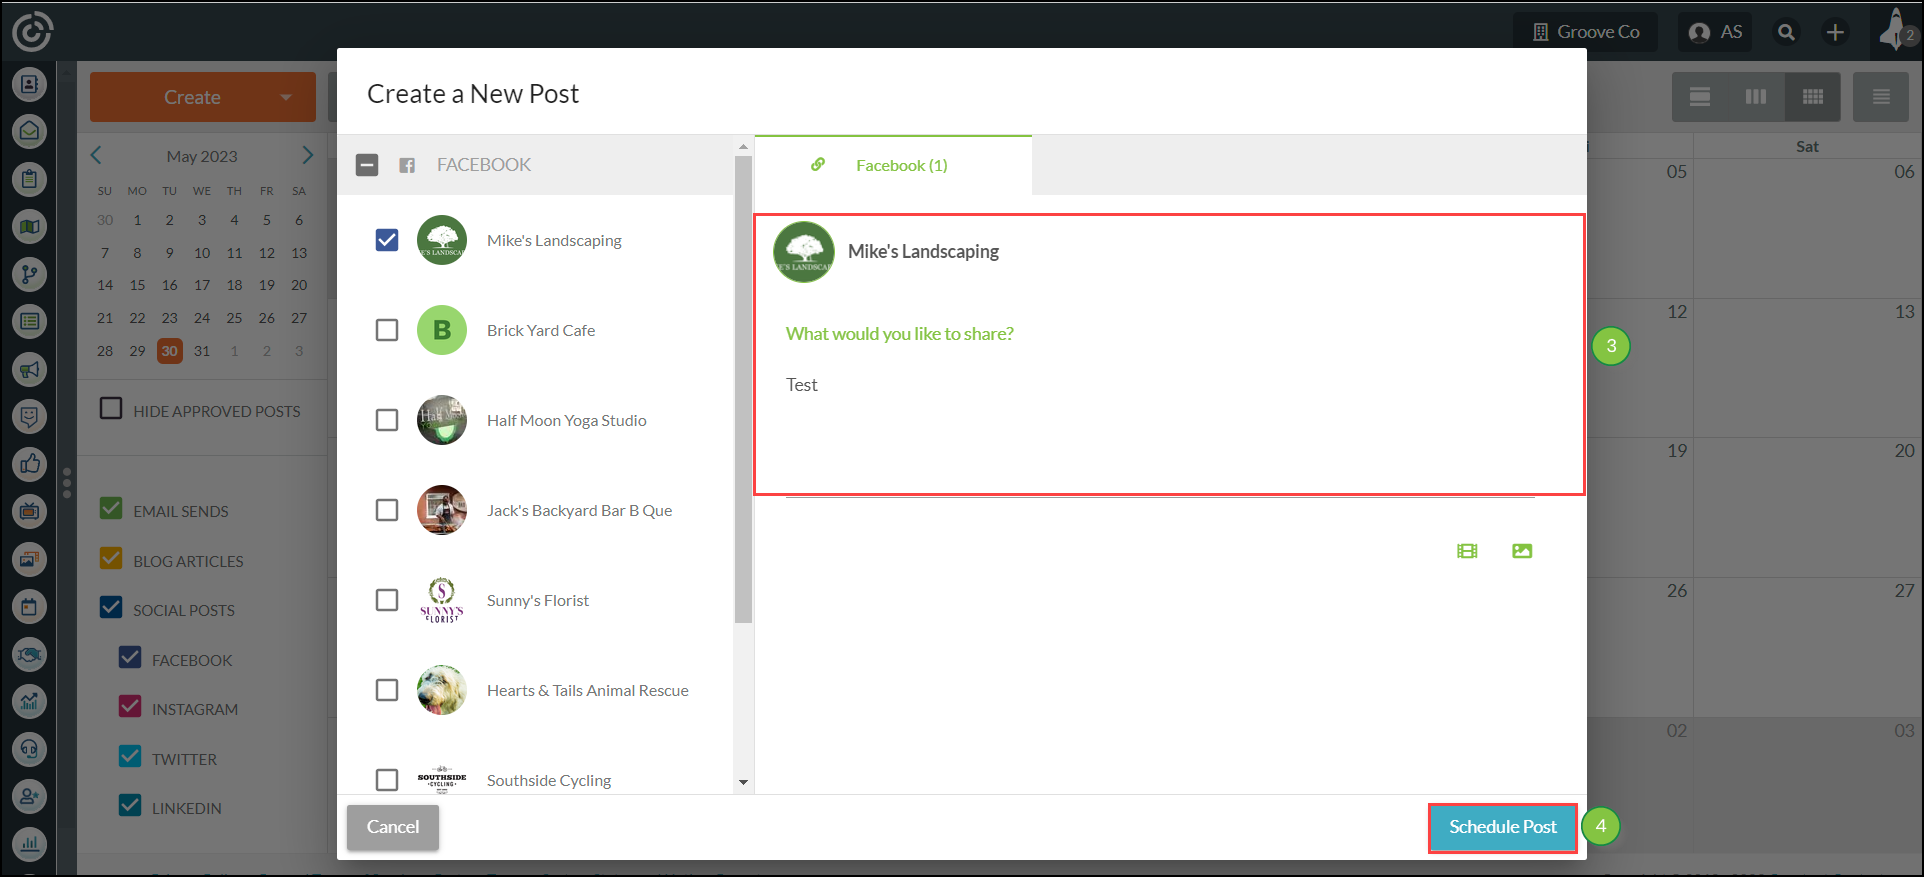
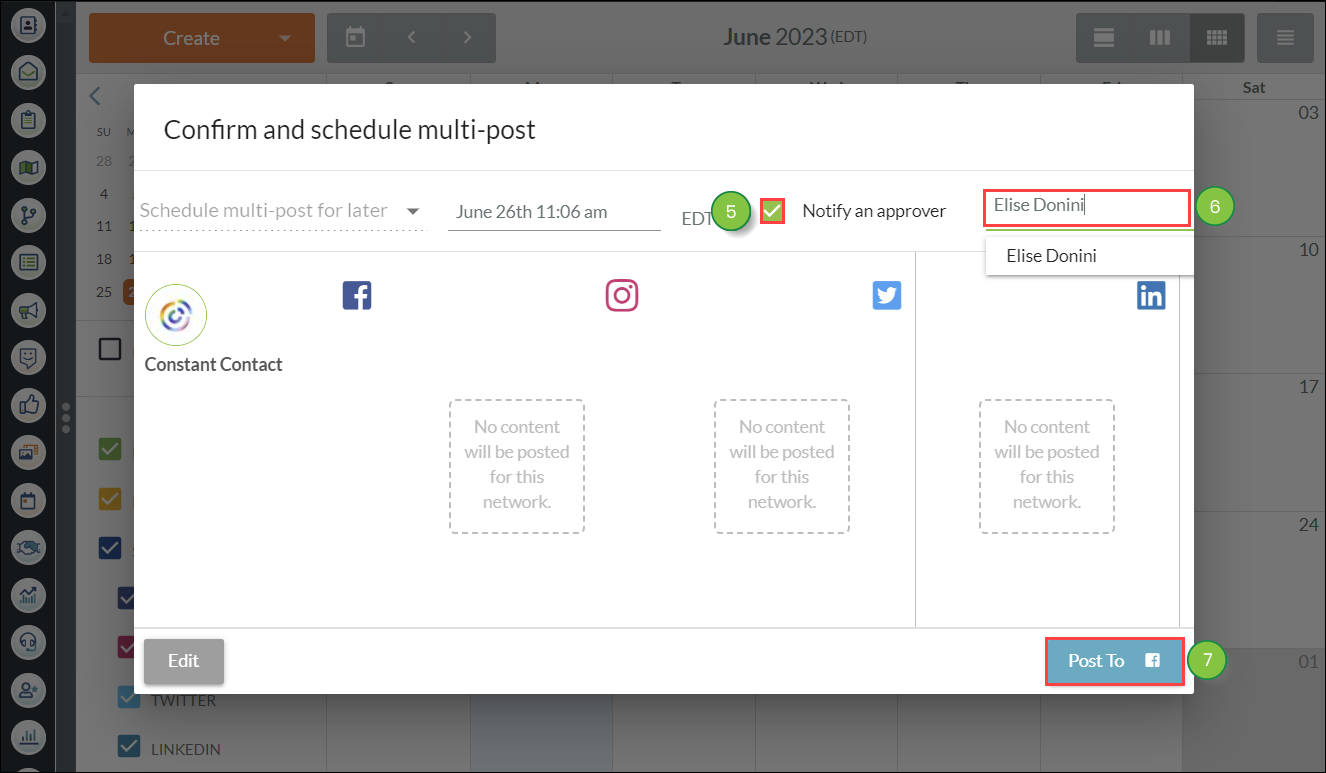
Once a user that does not have posting approval schedules a post and notifies an approver, an email notification will be sent to the approver.
Important: Users that do not have posting approval cannot post immediately. These users must only schedule future posts due to the posts requiring approval.
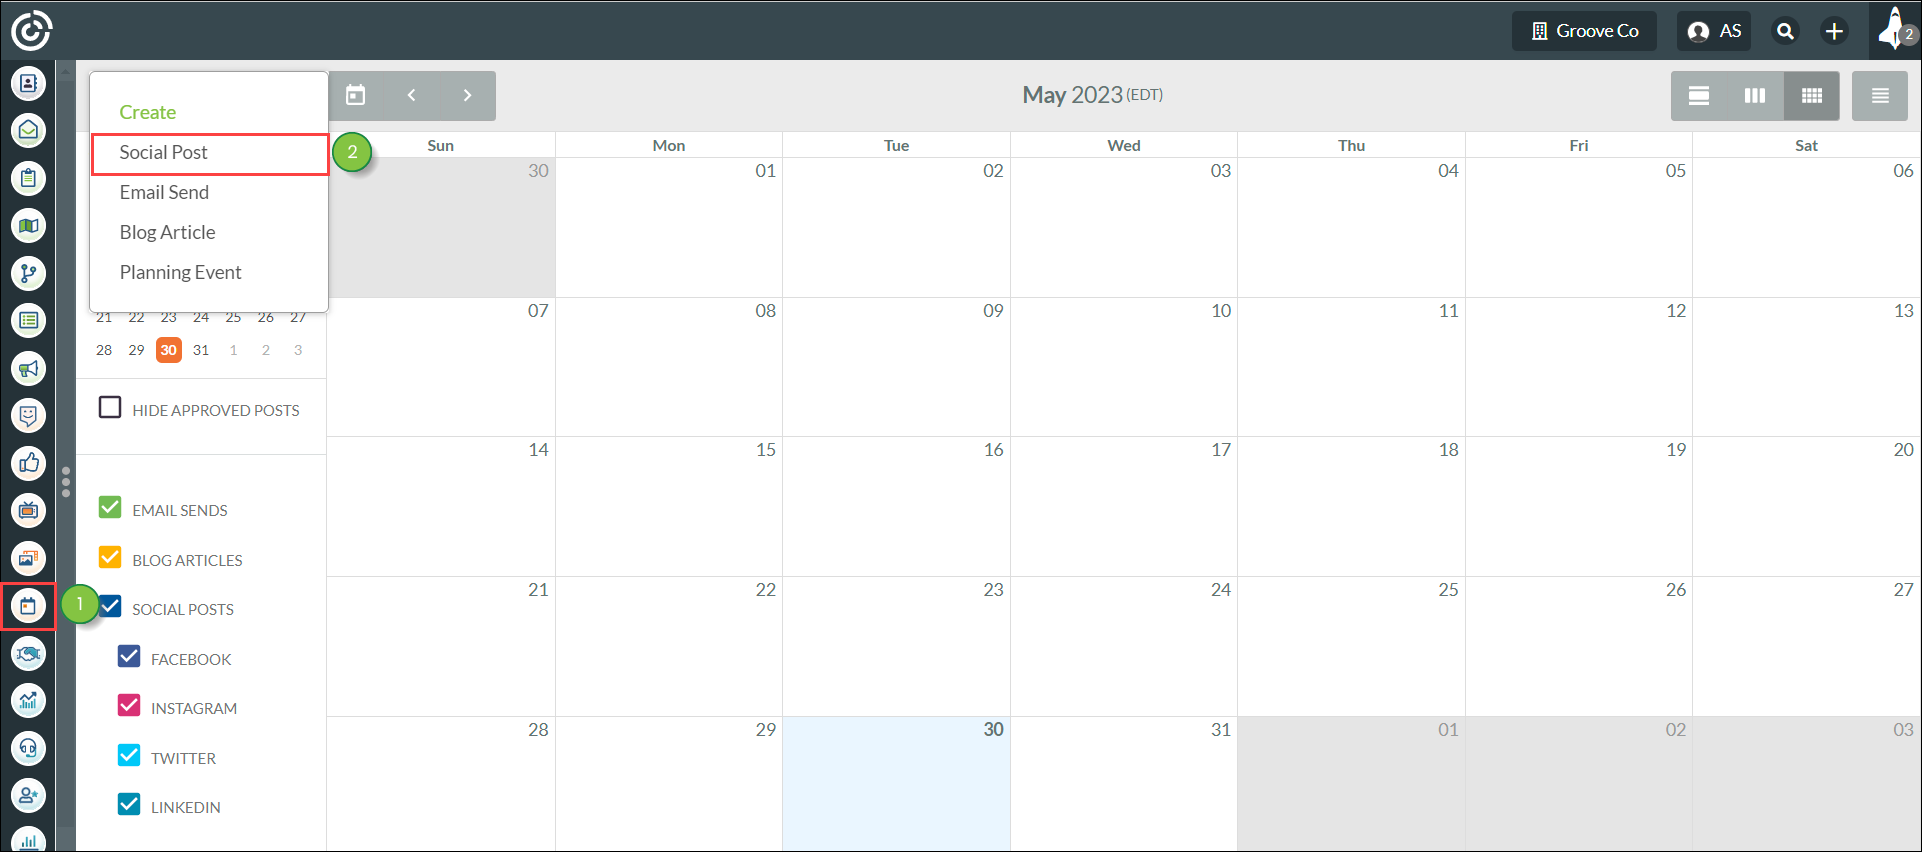
When a user that does not have posting approval creates a post, the post will show up in the Content Calendar. An administrator must then approve the post.
To approve social posts, do the following:
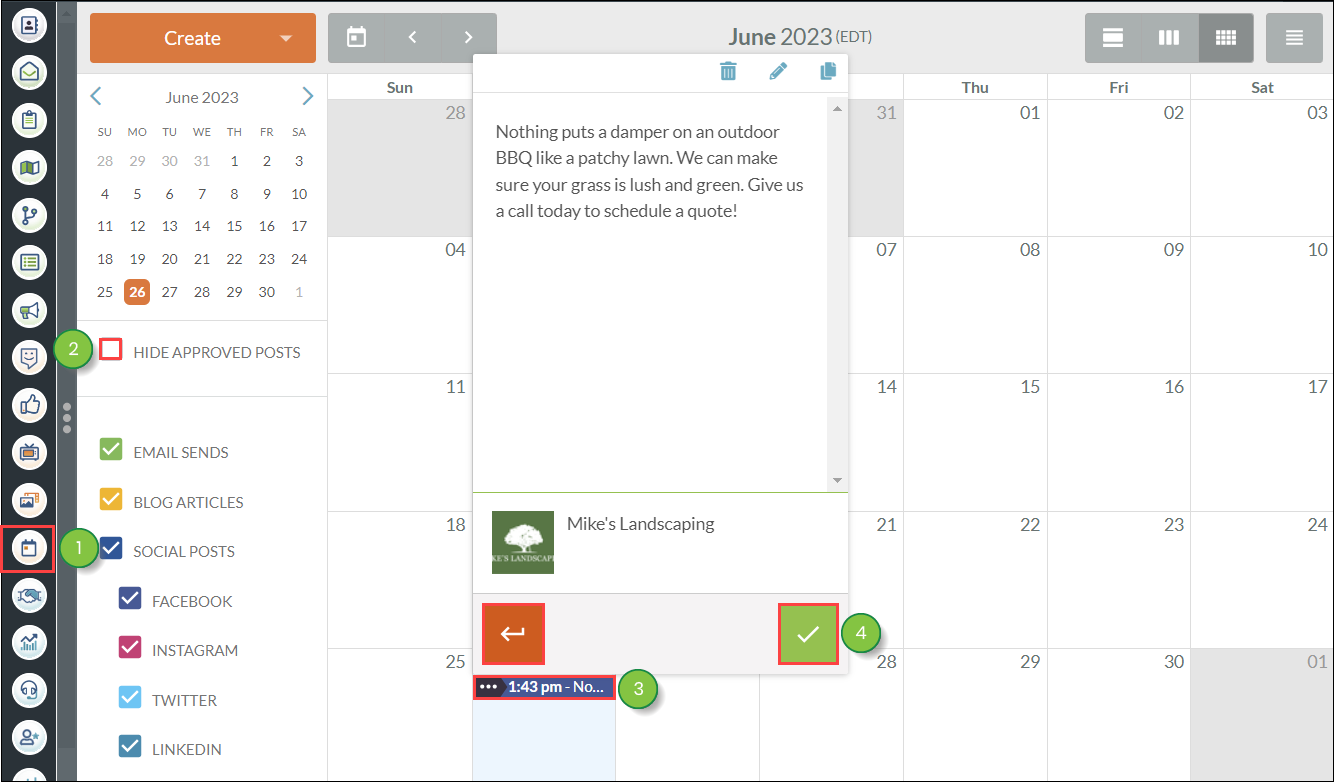
Once approved, the post is scheduled and published live.
If a post is marked for changes, Lead Gen & CRM will send an email to the user requesting approval. The email will explain that changes were requested by the approver. The user will then be prompted to return to Lead Gen & CRM and update the post.
Important: Once approved, a post cannot have changes requested. The post will be scheduled and must be manually edited or deleted.
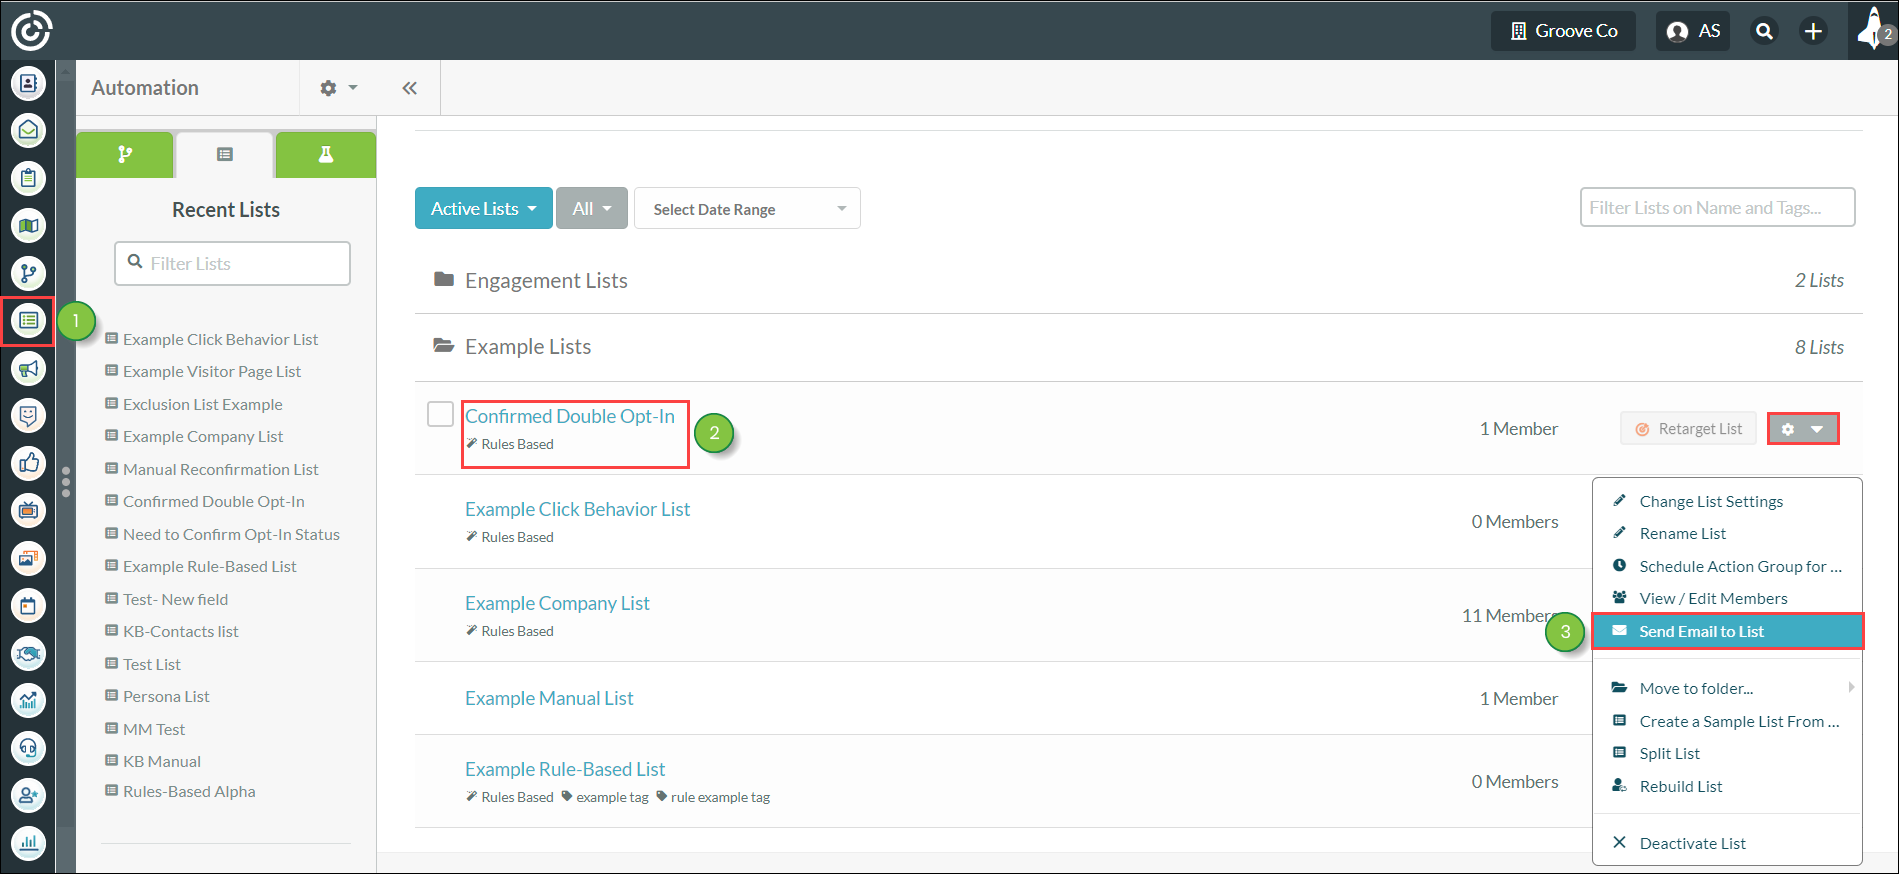
The Bulk Email Permissions settings restrict the ability to send bulk email to specific users. Like how the Social Posting Permissions settings deal with social posts, email sends created by other users with access to emails must be approved before sending. When Bulk Email Permissions are disabled, all users with access to emails will be able to send bulk emails.
To set Bulk Email Permissions, do the following:
When not using All Admins, only entered users will be able to send bulk email. Other users with access to email can schedule sends, but they will require approval before sending.
Important: When Bulk Email Permissions are enabled and All Admins is unselected, Administrators, Company Managers, and Marketing Managers will still have permissions.
You can disable bulk email permissions as necessary.
To disable social posting permissions, do the following:
For users without bulk email sending approval, precautions are in place to prevent unauthorized sending.
To schedule unapproved bulk email sends for review, do the following:
Once bulk email sending permissions have been set, the designated users can approve or deny bulk email send requests.
To schedule unapproved bulk email sends for review, do the following:
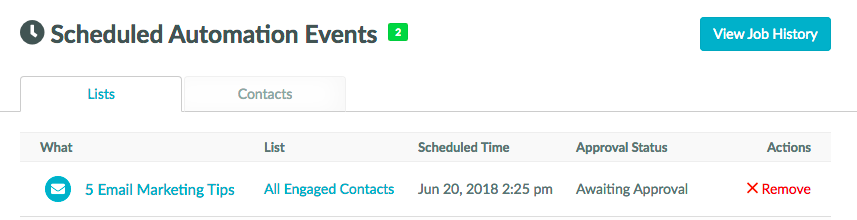
Additionally, you can see unscheduled posts in the Scheduled Events page.
Click Automation > Scheduled Events in the left toolbar to access the page.
Unapproved sends will appear in the Scheduled Events page with the Awaiting Approval status.
Copyright © 2026 · All Rights Reserved · Constant Contact · Privacy Center