Create a new task from the Account. Set the date and time the task should be completed, what kind of task to complete, and who is responsible for completing the task.
In this article, you'll learn how to create tasks from the account page, assign and re-assign tasks, and remove tasks.
Article Contents
Users:
| Administrators | ✓ | |
| Company Managers | ✓ | |
| Marketing Managers | ✓ | |
| Sales Managers | ✓ | |
| Salespersons | ✓ | |
| Jr. Salespersons | ✓ | |
 | Tip: Are you looking for information about Constant Contact’s Email and Digital Marketing product? This article is for Constant Contact’s Lead Gen & CRM product. Head on over to the Email and Digital Marketing articles by clicking here. Not sure what the difference is? Read this article. |
Create A New Task
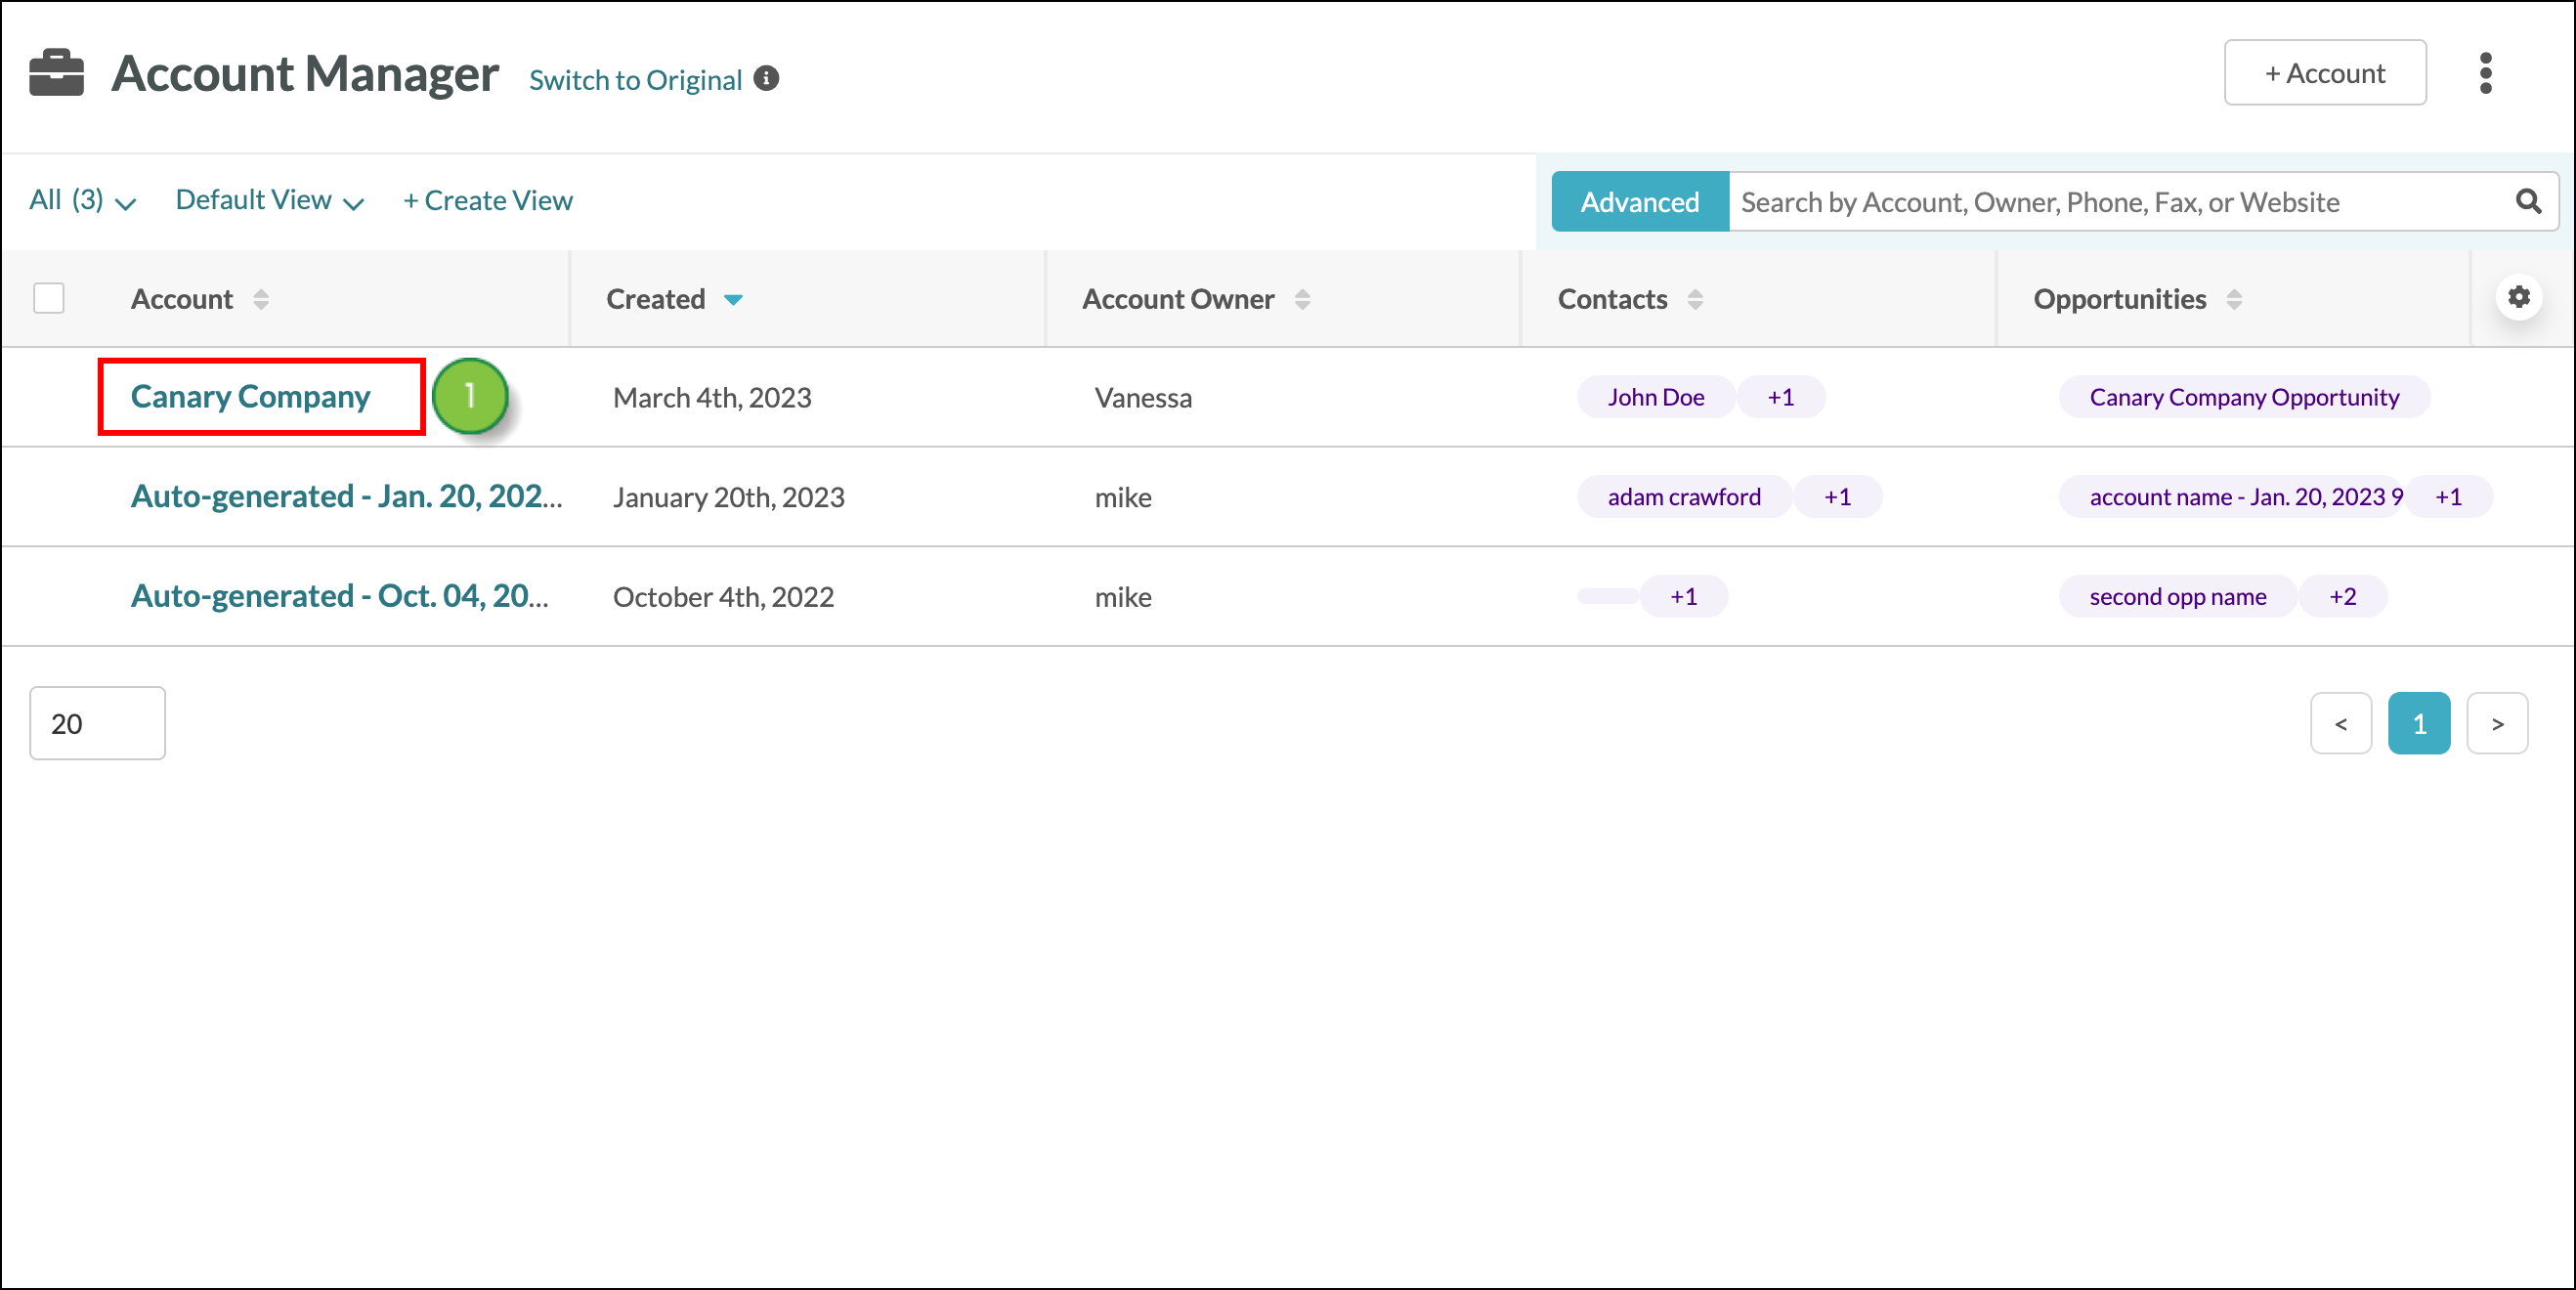
Create a new task and assign it to a member of your sales team. Start from the Sales > Accounts page in the left toolbar.
- Select the desired account from the Account Manager.
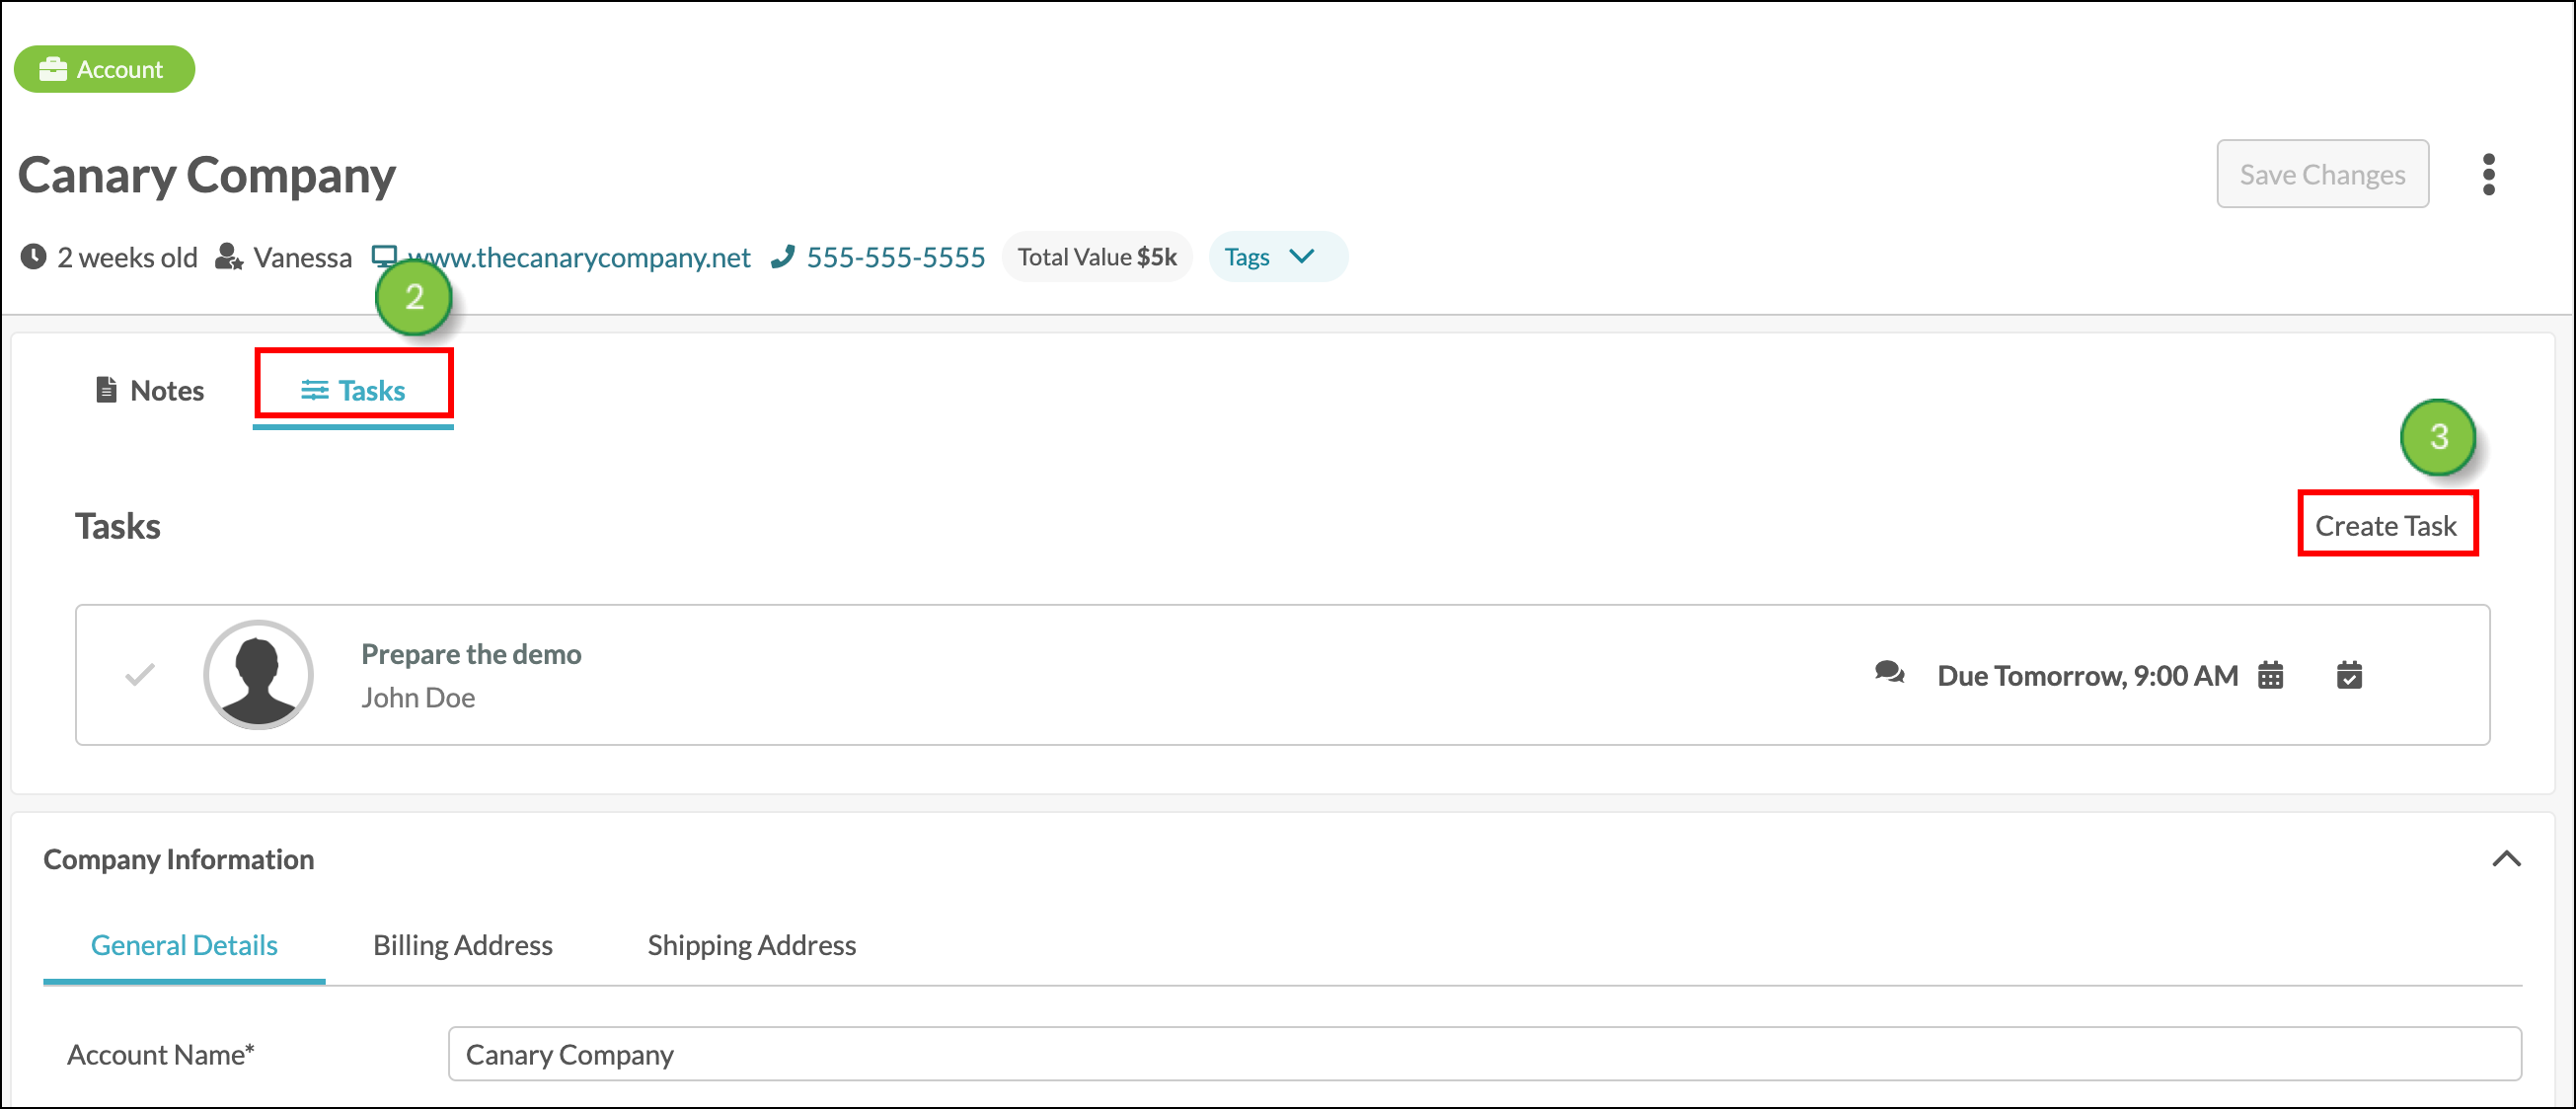
- Click the Tasks tab.
- Click Create Task.
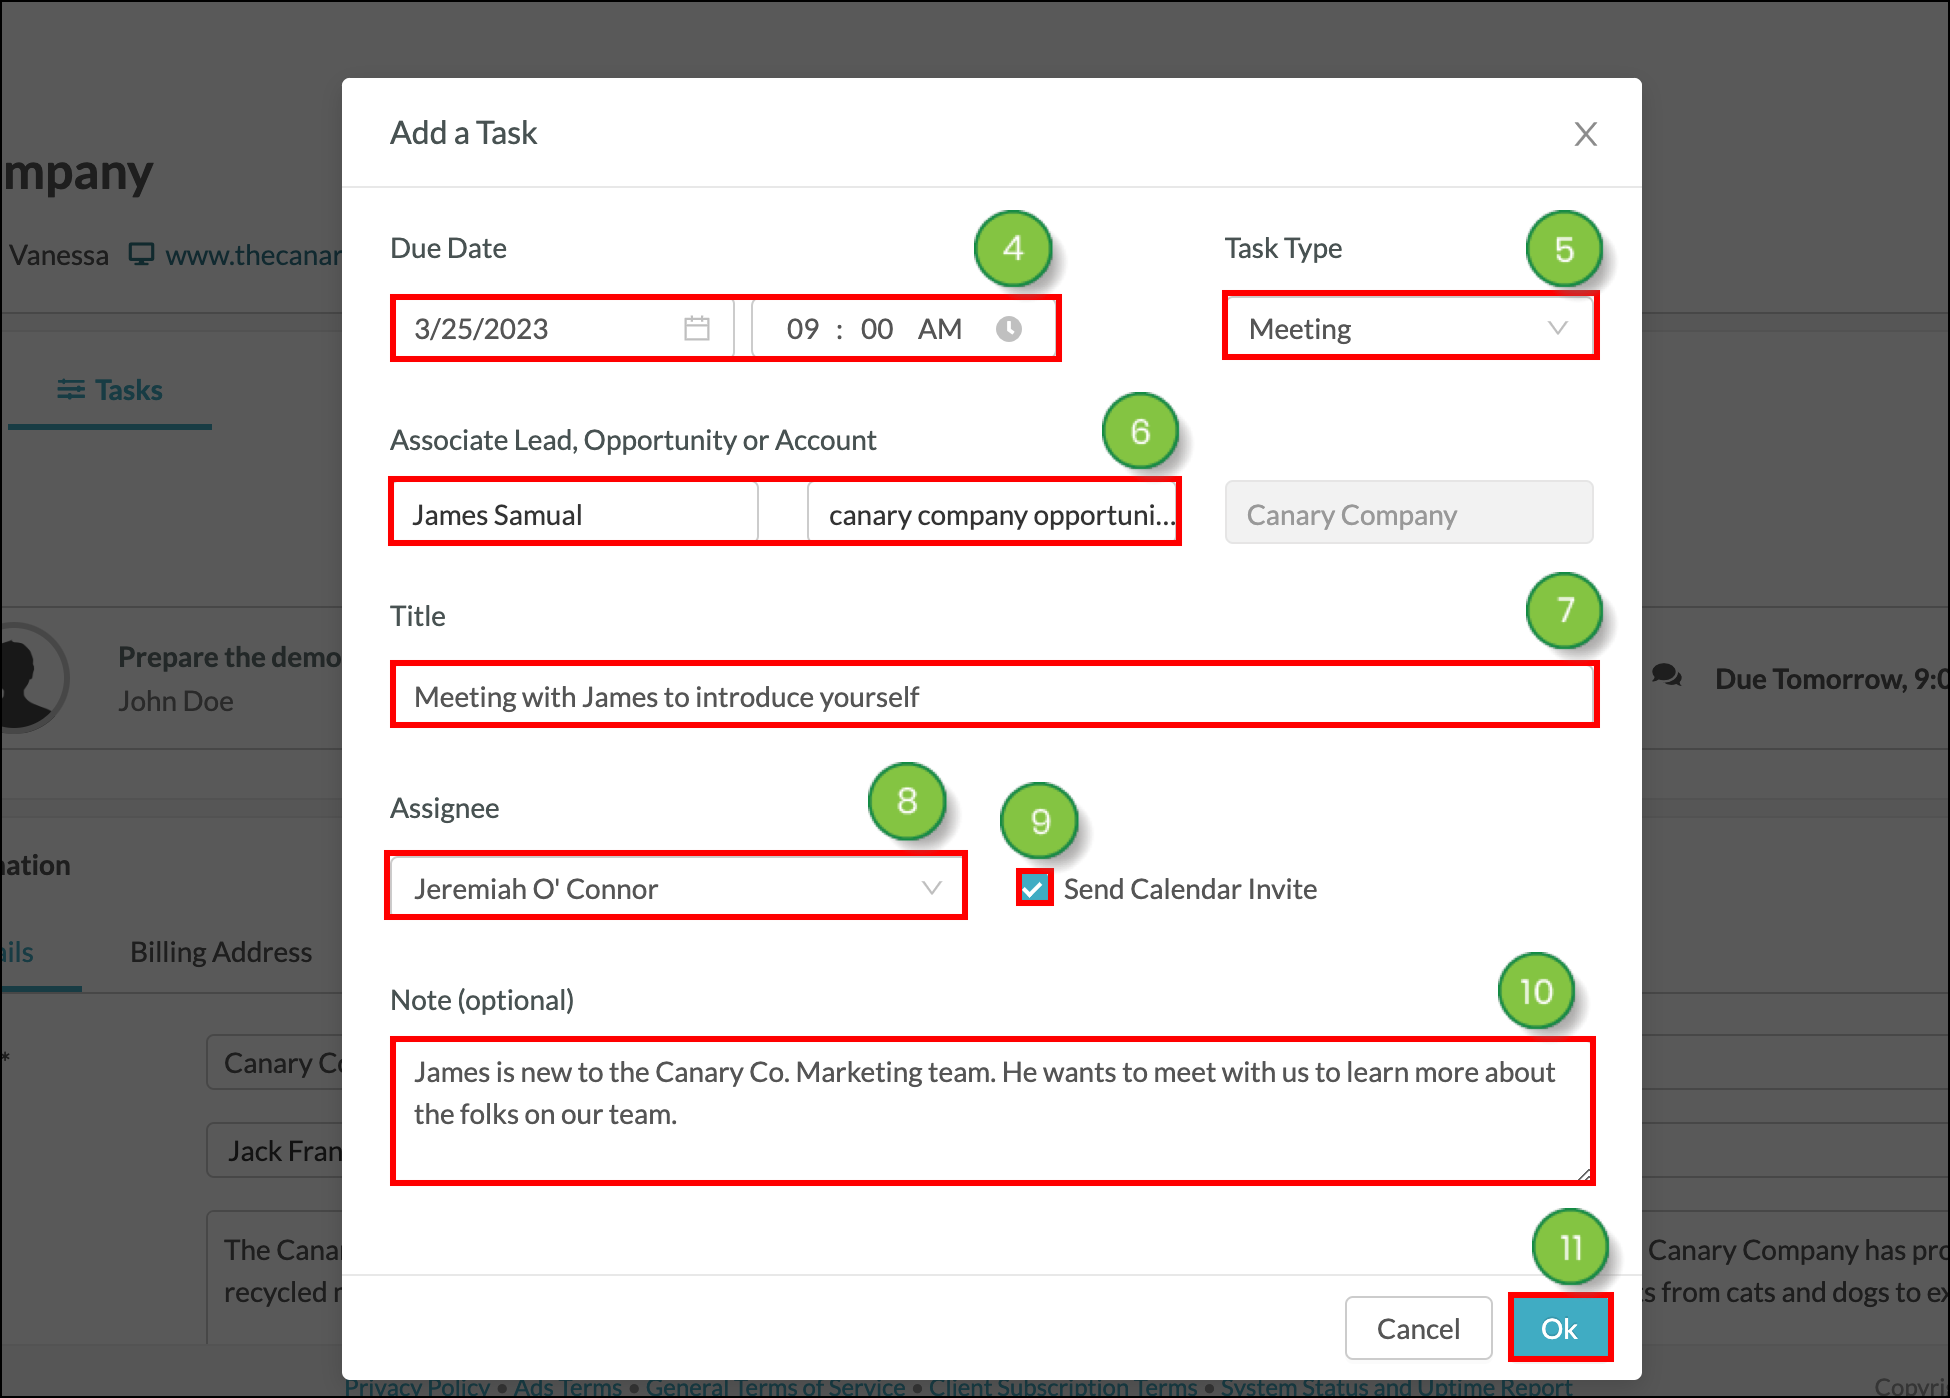
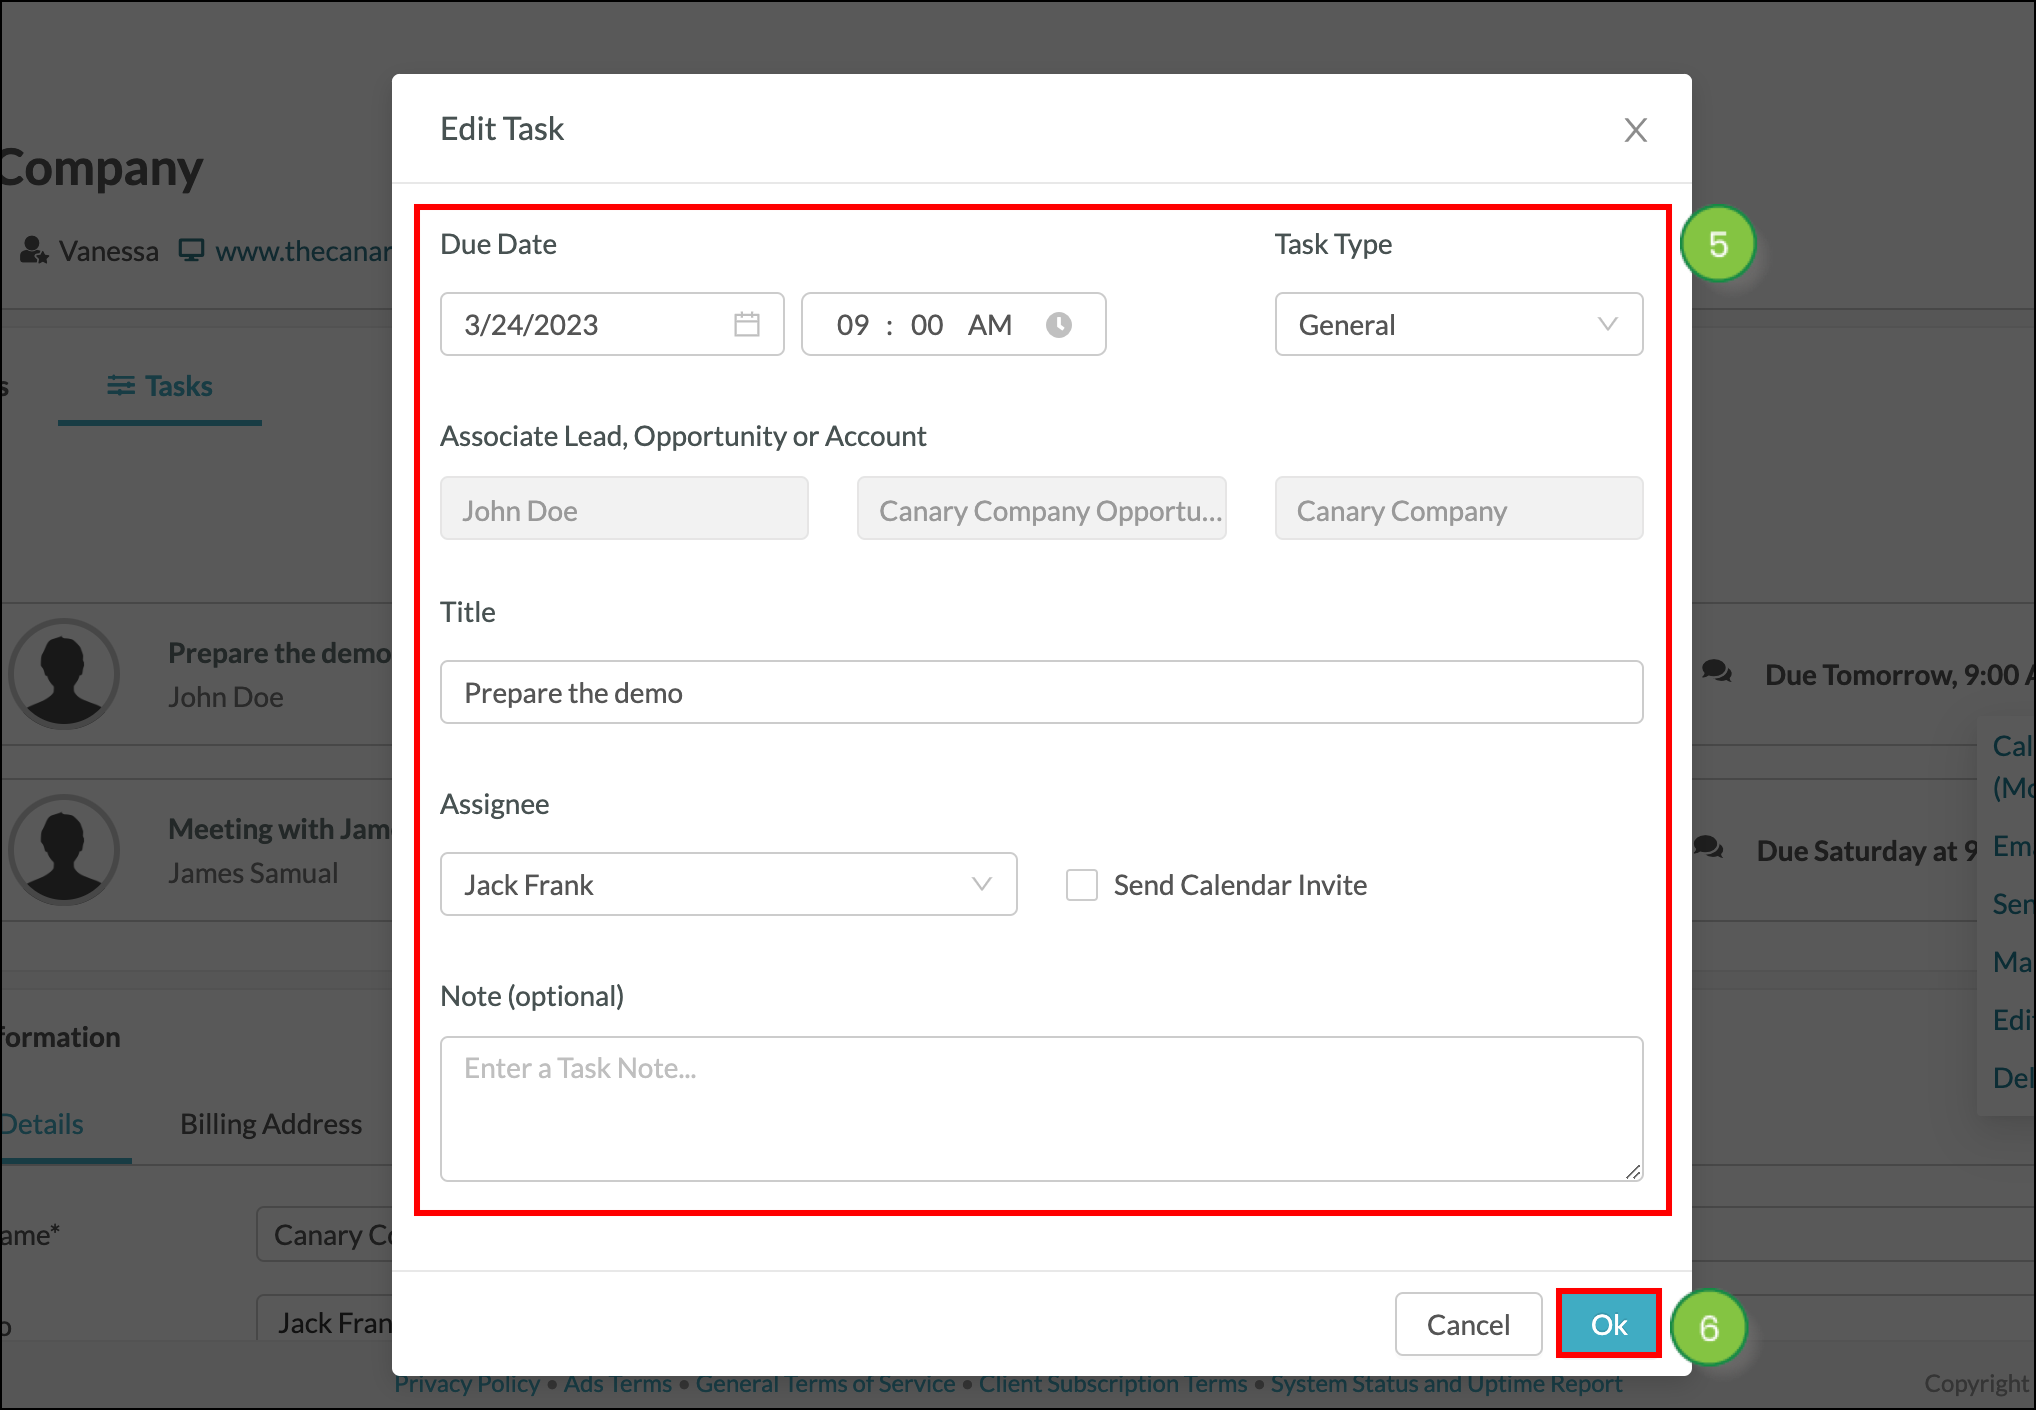
- Select the date and time this task is due. The task Assignee will see a notification in the top right corner of the page, for tasks that are past due, when entering into the account.
- Select the Task Type: General, Meeting, Email, or Phone Call. This will inform your team if and how they should reach out to the account contact.
Note: When the phone call task type is selected, you’ll have additional options available to you, after the task has been created. You’ll be able to indicate if the call is an incoming or outgoing call. You’ll also be able to select one of three outcomes: Spoke with a contact, Left a message, or No answer.
- Optionally, associate any leads or opportunities related to the task. A single lead or opportunity can be associated with a task, at a time.
- Create a Title for your task.
- Select the Assignee from the dropdown menu to assign the task. The individual creating the task will be the Assignee by default.
- When you choose to Send A Calander Invite, upon creation of the task, Assignees will receive a calendar invite to the email address used to create their Lead Gen & CRM account.
- Enter any necessary Notes related to the task. Notes left within tasks will not automatically appear in the account’s overall Notes section. Notes left within Tasks will remain within Tasks.
- Click OK.
Note: Due date, Task Type, Assignee, and Title are required fields.
Once a Task has been created, it will be visible from the Tasks tab by all team members with access to Lead Gen & CRM. Tasks will also appear in the Launchpad, under Task Manager, however, tasks in Launchpad will only be visible to the Assignee.
Tasks created in the account page are also applied to the assigned contact’s overview on the contact information page, and the opportunity page.
Editing An Existing Task
To edit an existing task start from the Sales > Accounts page in the left toolbar.
- Select the desired account from the Account Manager.
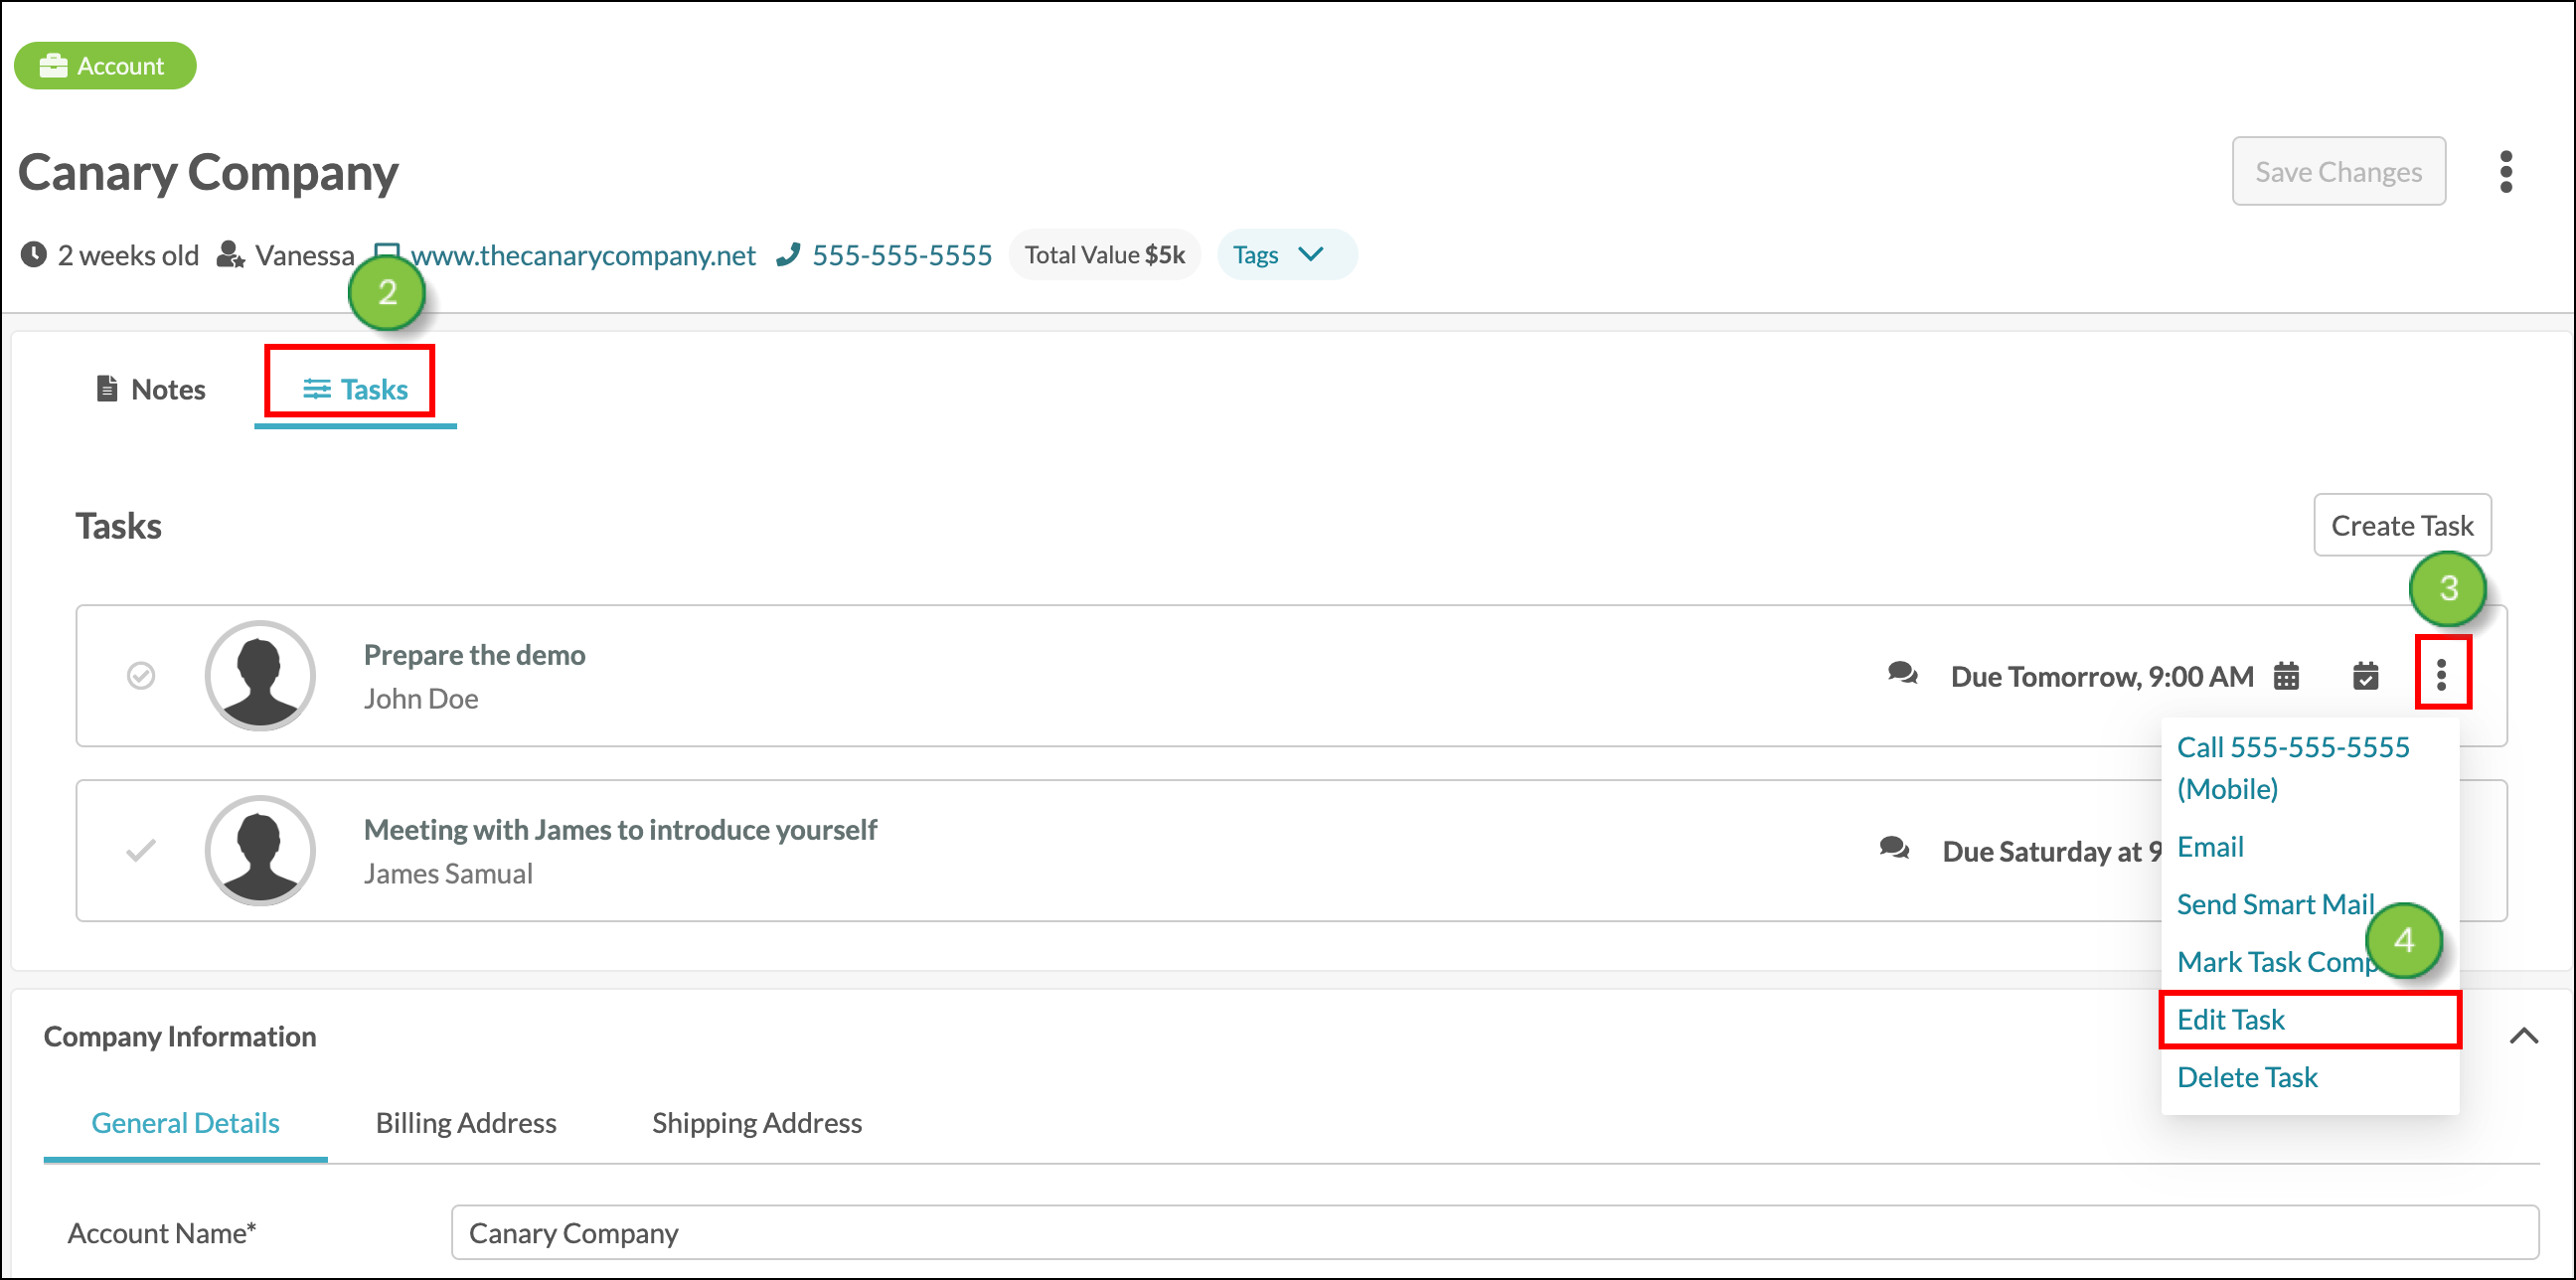
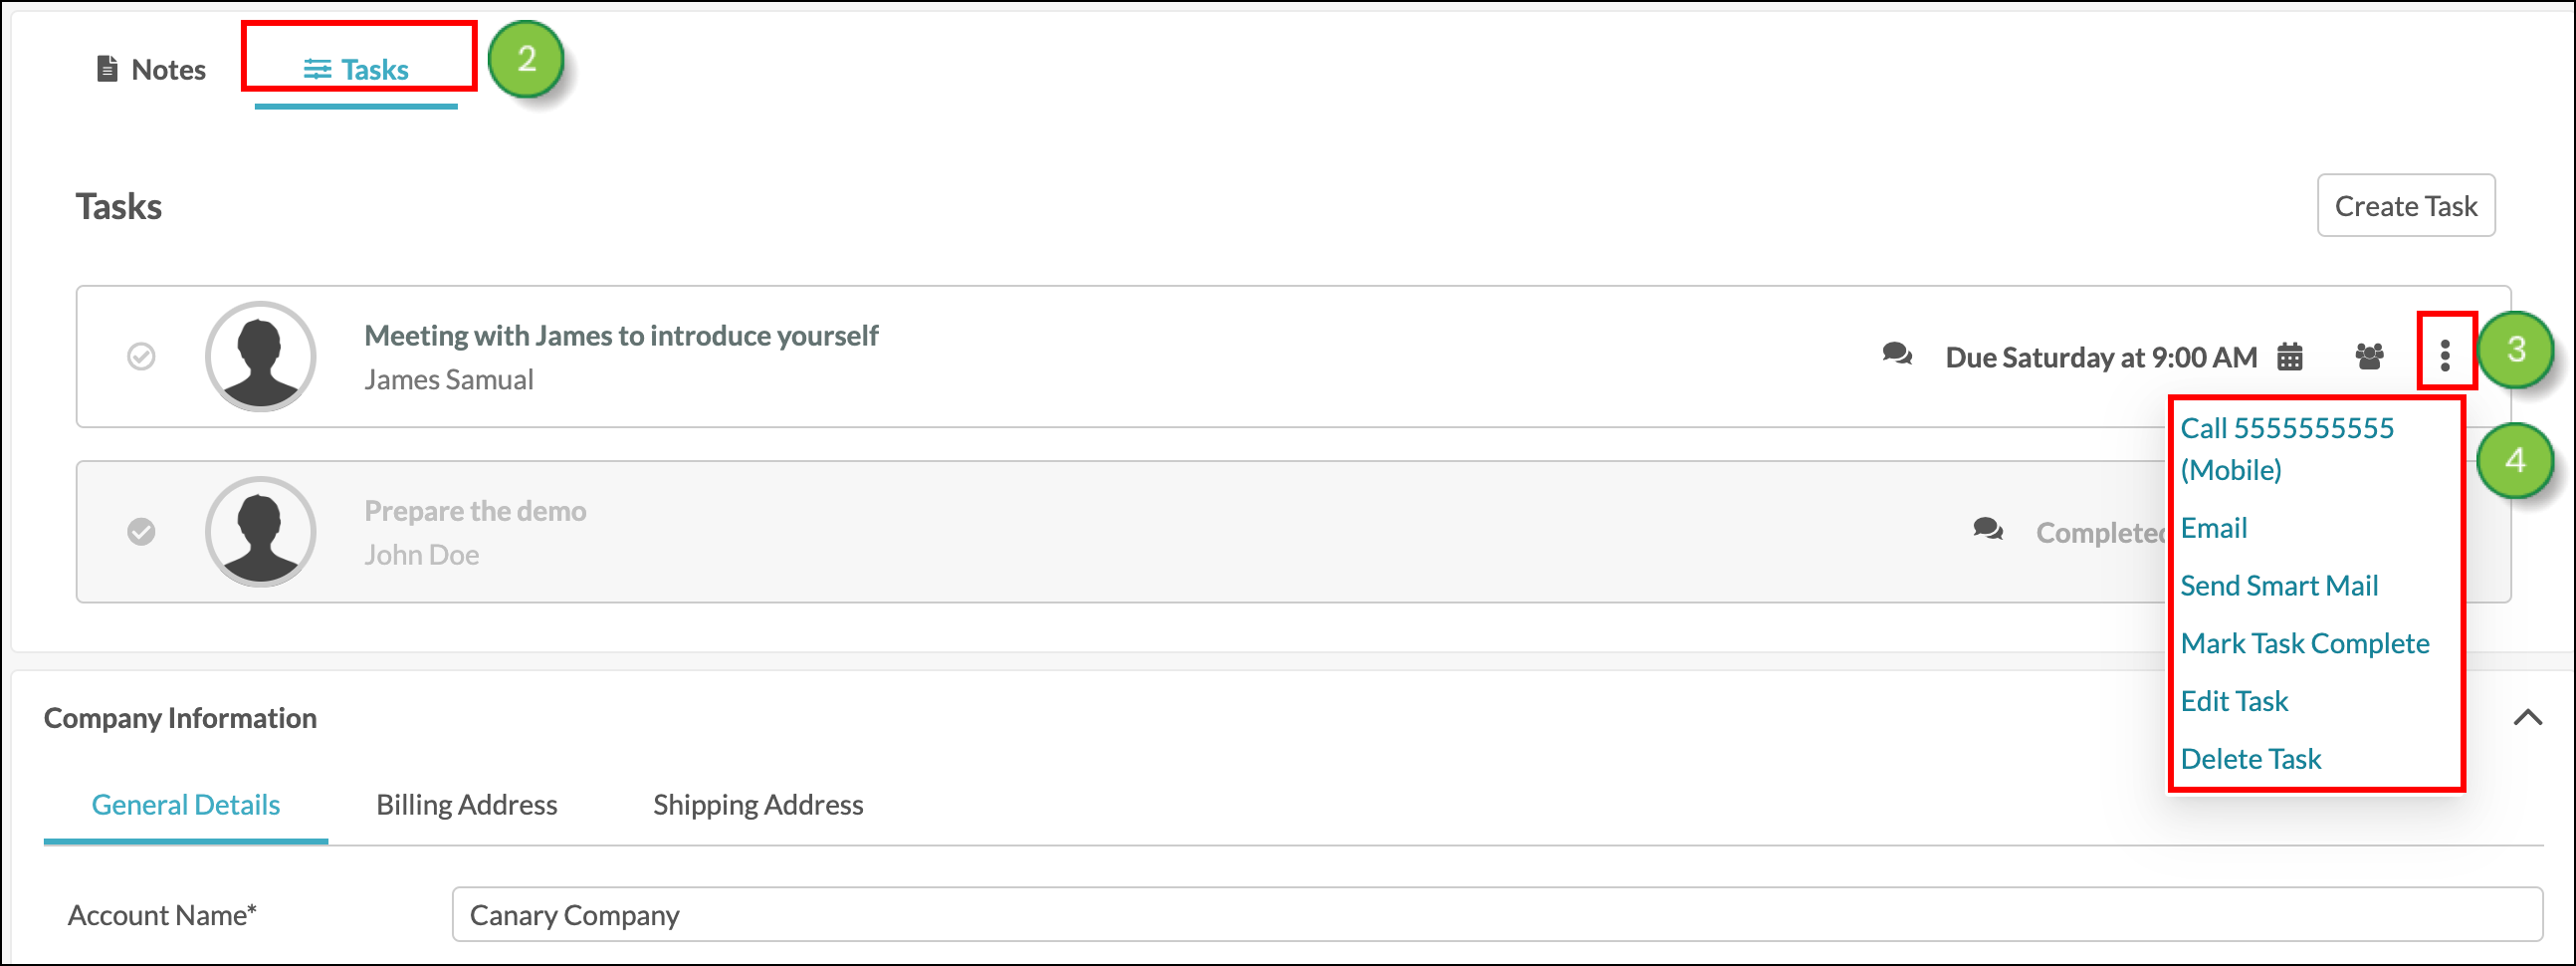
- Select the Tasks tab.
- Click the Options icon to make edits to the task.
- Select Edit Task from the drop-down menu.
- You can edit the Due Date, Task Type, Title, and Assignee for a task. You can also add new Notes for the task.
Note: The associated lead, opportunity, and account cannot be edited.
- Click OK to save the changes.
- To edit notes that have been left for the account, click the task to expand it and display the notes.
- Click the Options icon next to the note and then select Edit Note.
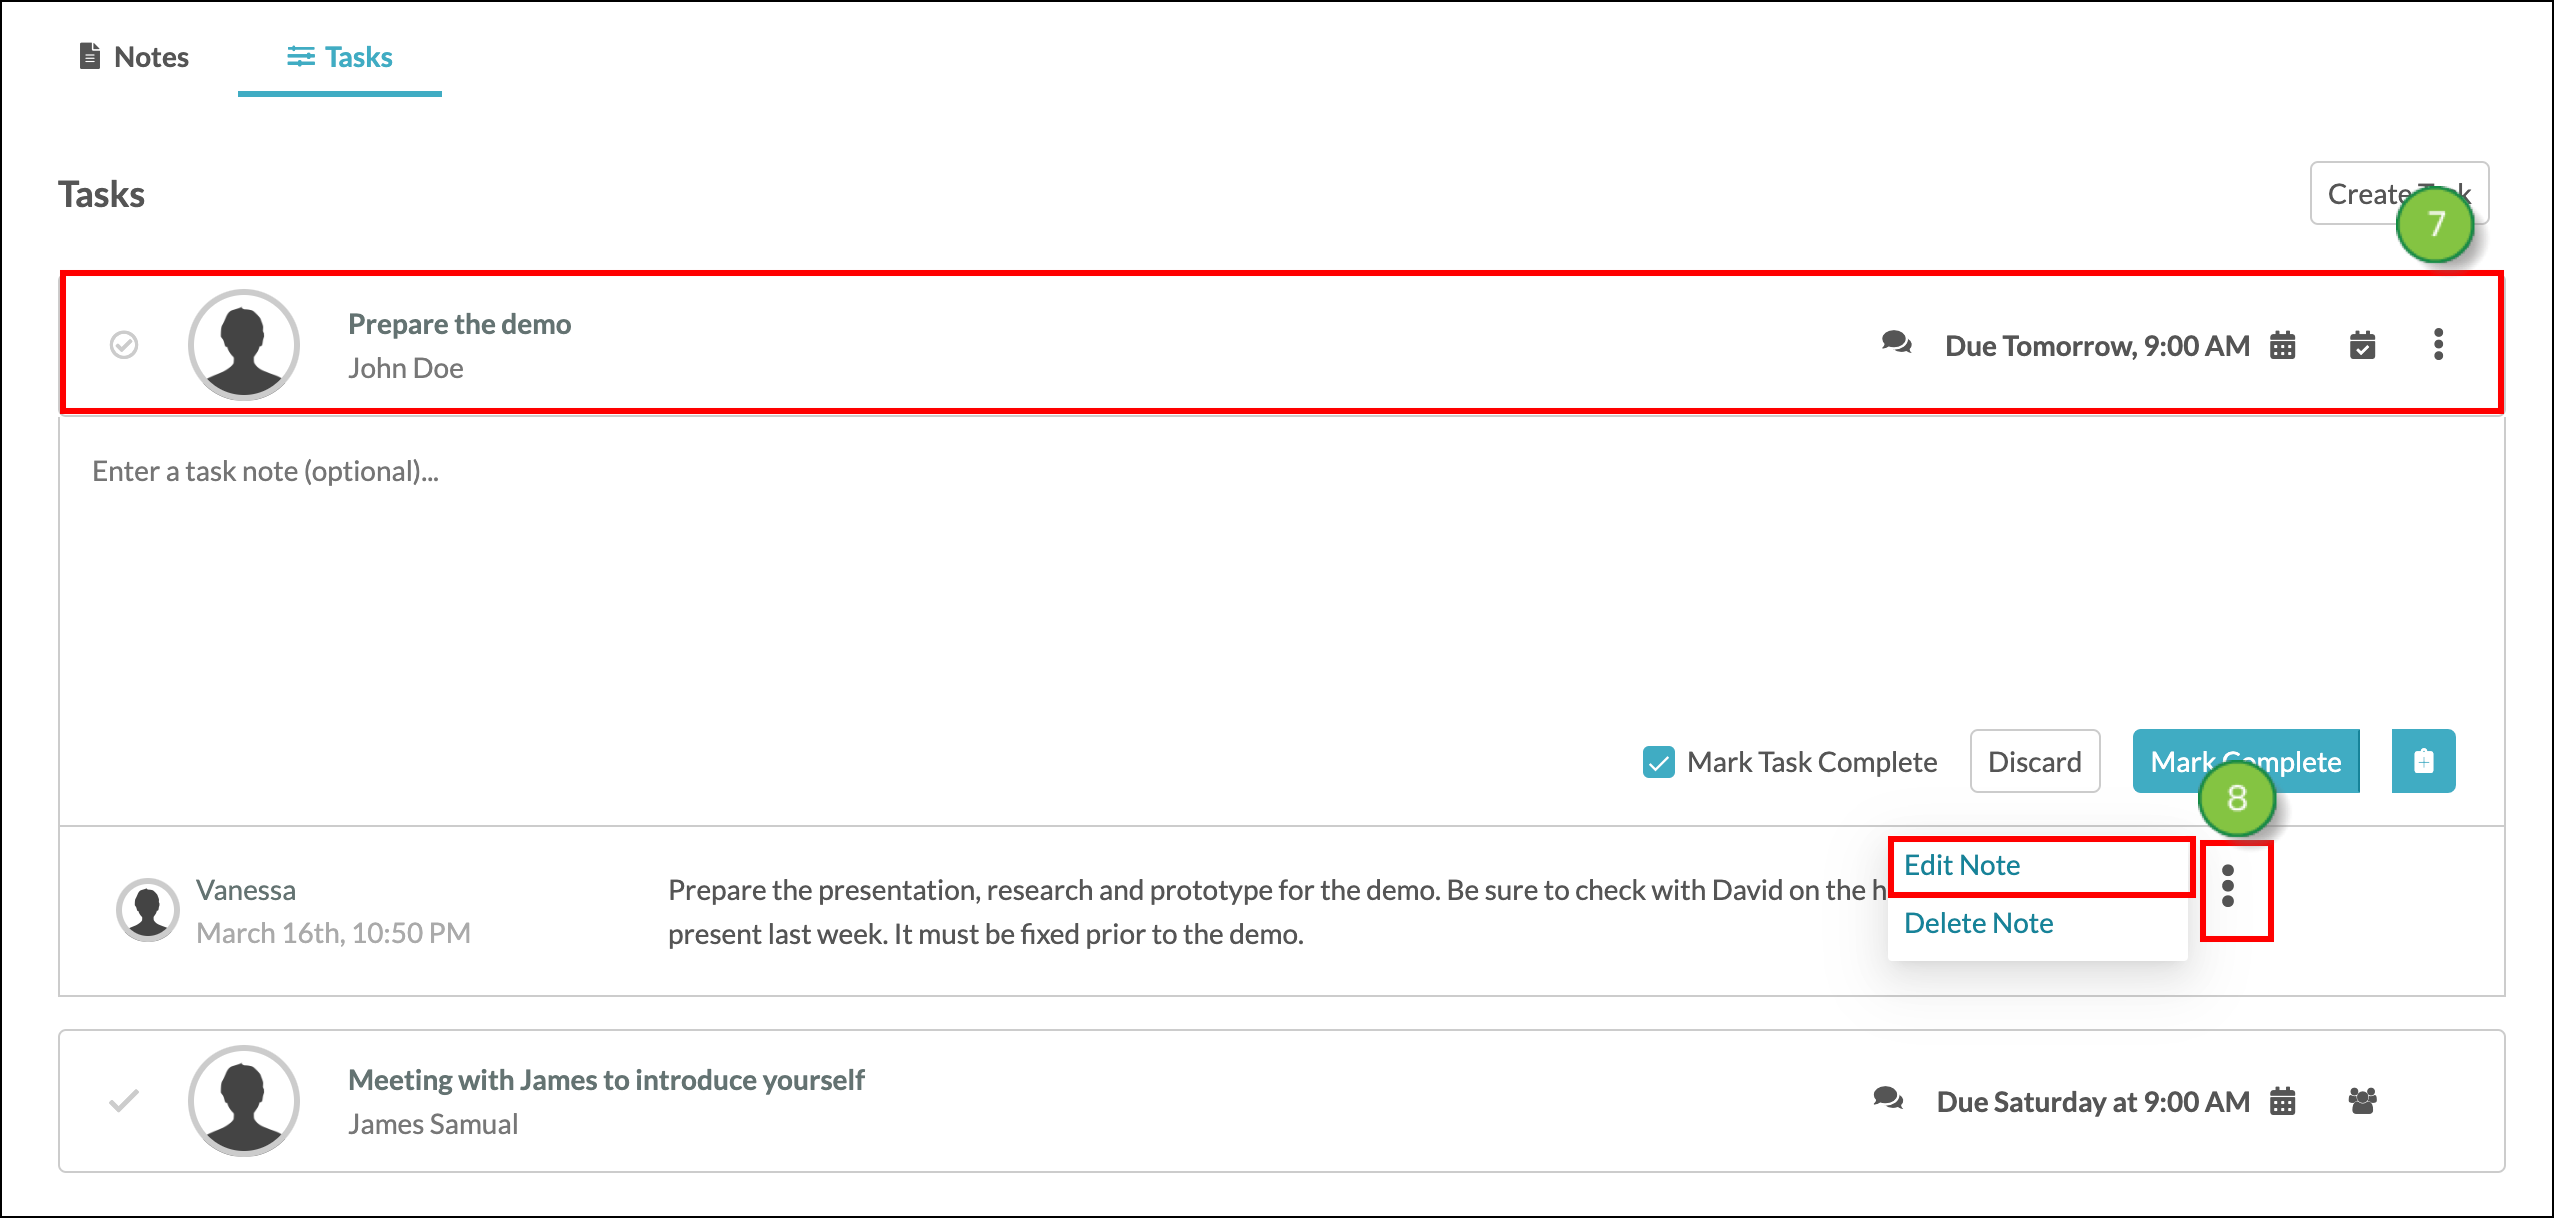
Note: All notes for a task can be edited by anyone with access to the account, even if the editor did not initially leave the note. The editor’s name will not replace the original note author.
Calling or Emailing from Account Tasks
Tasks typically call for the assignee to meet with a contact, email a contact, or call a contact. You can email or call a contact from the Tasks tab within an account.
Note: Calling the contact, sending an email to the contact, and sending a smart mail to the contact is possible from Tasks, however, these actions will not automatically mark your task as complete nor log the call in the contact history. You will still need to modify the account to leave a record of these actions.
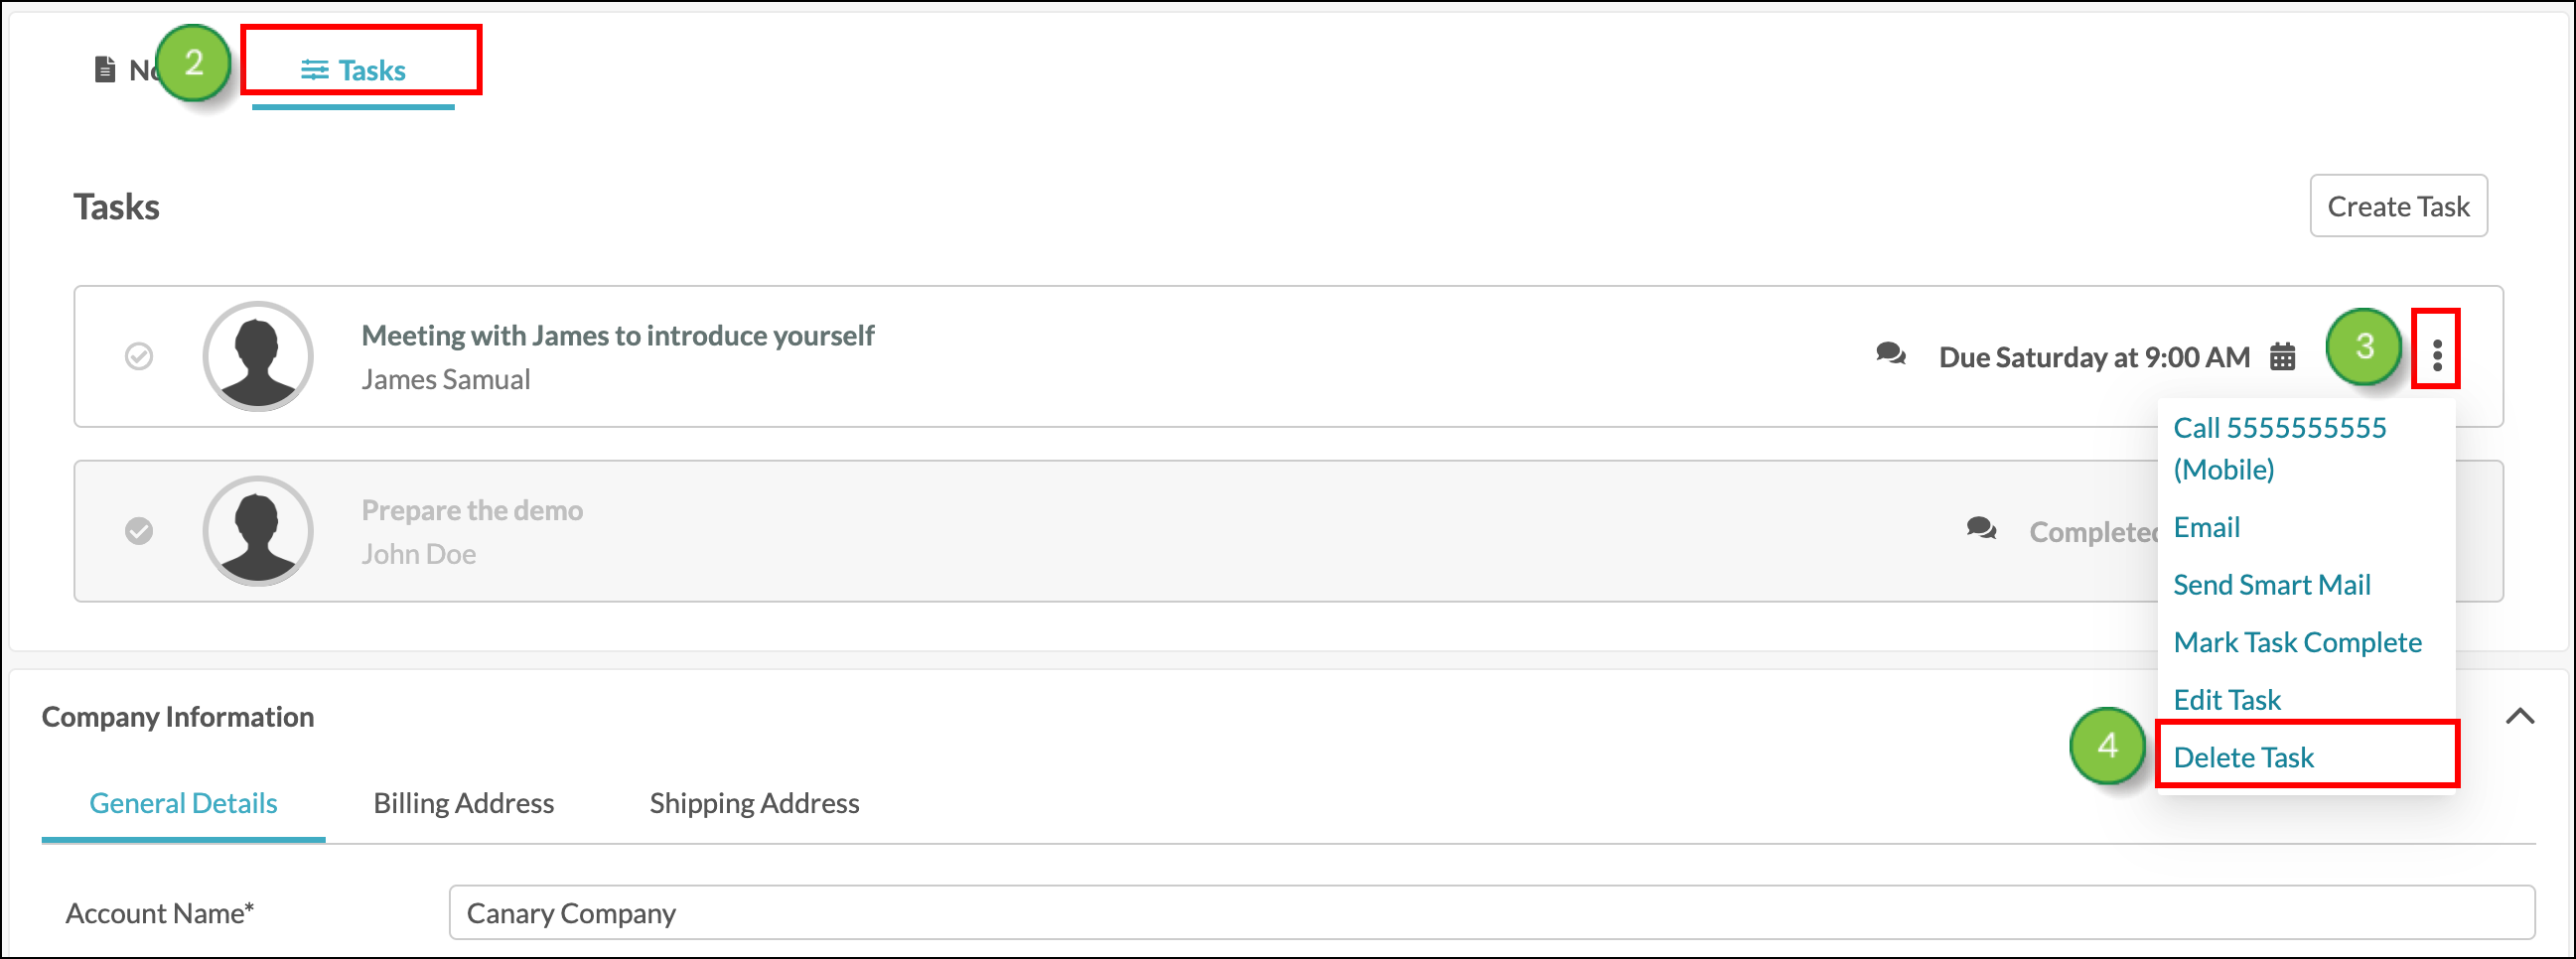
To complete an action from account tasks, start from the Sales > Accounts page in the left toolbar.
- Select the desired account from the Account Manager.
- Click the Tasks tab.
- Click the Options icon next to the task you want to act on.
- Select an option:
- Call
- Email
- Send A Smartmail
Mark A Task As Complete
Tasks can be completed from the Launchpad by the Assignee. Read the Task Manager Overview article for more information on managing tasks from the Launchpad. To complete a task from the Account page, click on the Task and then click on the Mark Complete button. Alternatively, click on the  checkmark icon to mark the task as completed and immediately start the creation of a new task. To mark a task as complete, start from the Sales > Accounts page in the left toolbar.
- Select the desired account from the Account Manager.
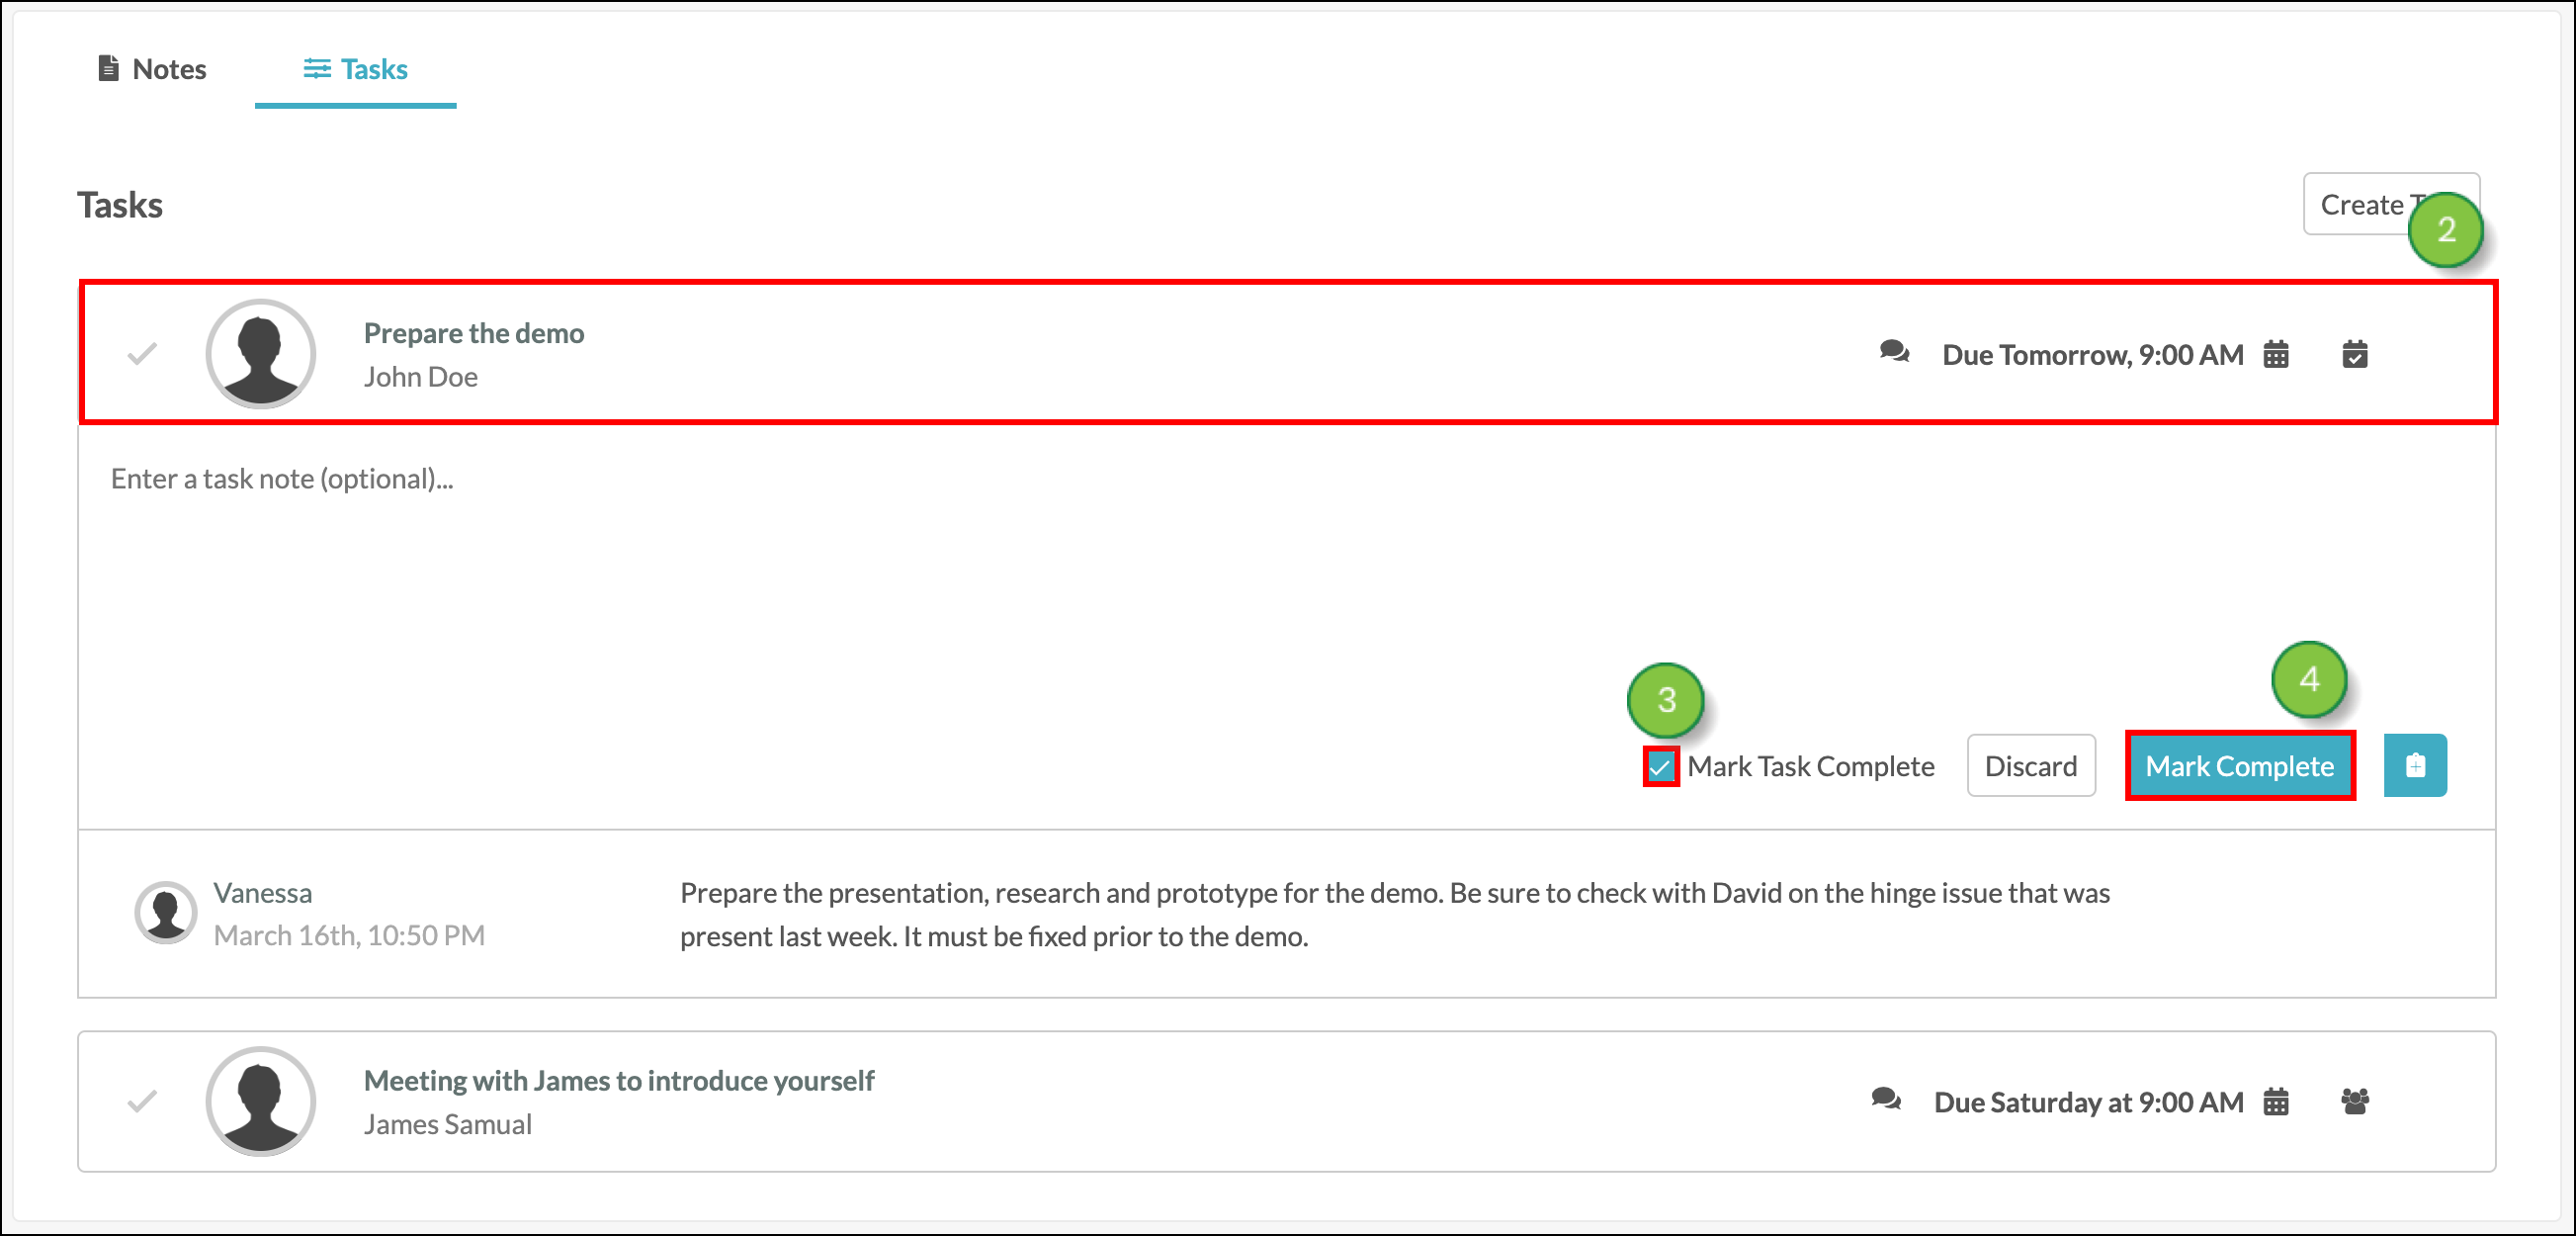
- Click on the Tasks tab.
- Click on the title of the task, or click on the checkmark to the left of the task’s title.
- Make sure “Mark Task Completed” is checked, and then click the Mark Complete button.
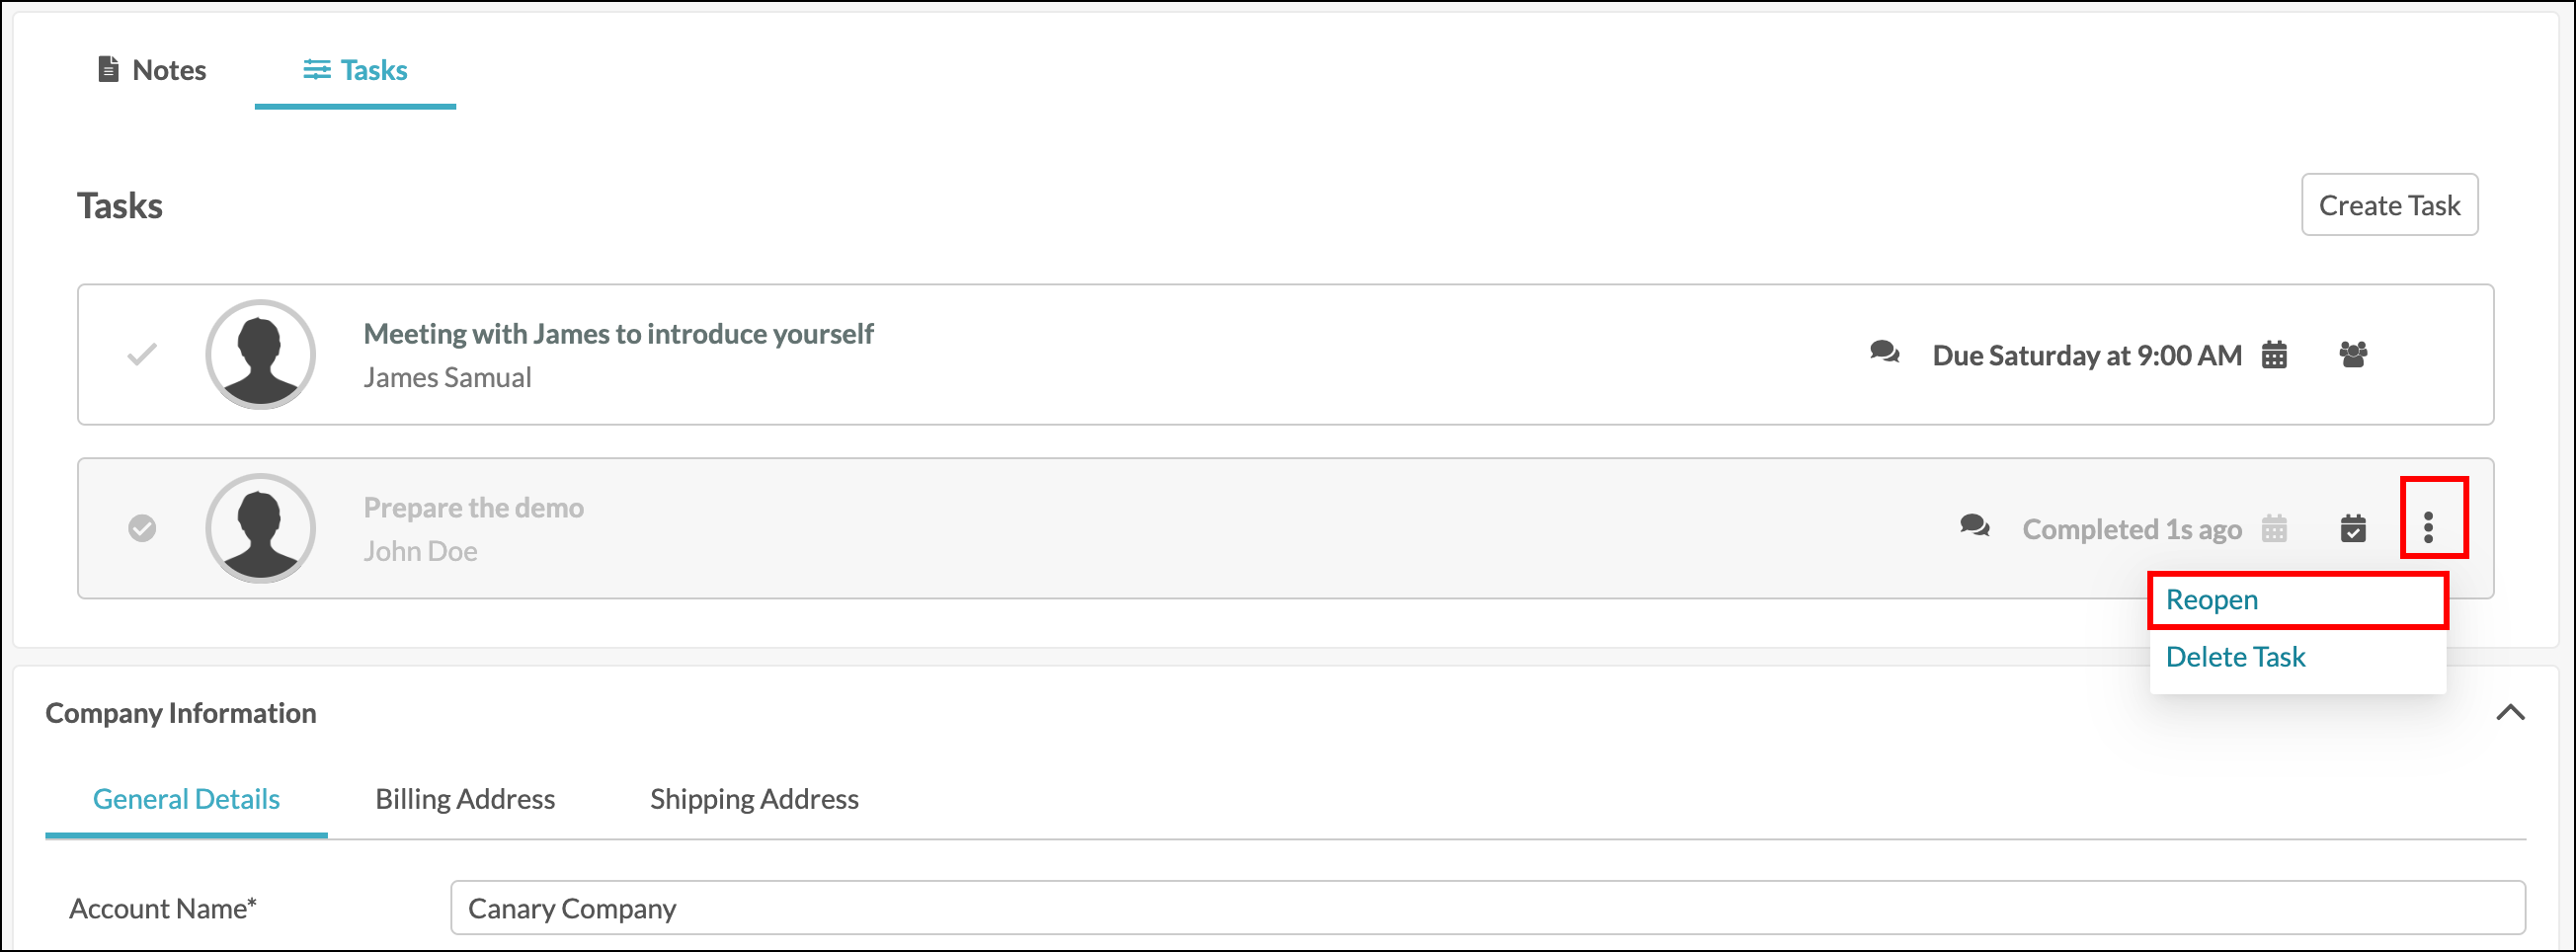
Tasks that have been completed will still remain within the Tasks section, however, they will be grey to indicate that they are completed. To completely remove a task from an account, delete the task instead.
Completed tasks can be reopened. Click the options icon and select Reopen from the dropdown menu.
Note: Anyone with access to the account can mark a task as complete, even if the task is not assigned to them.
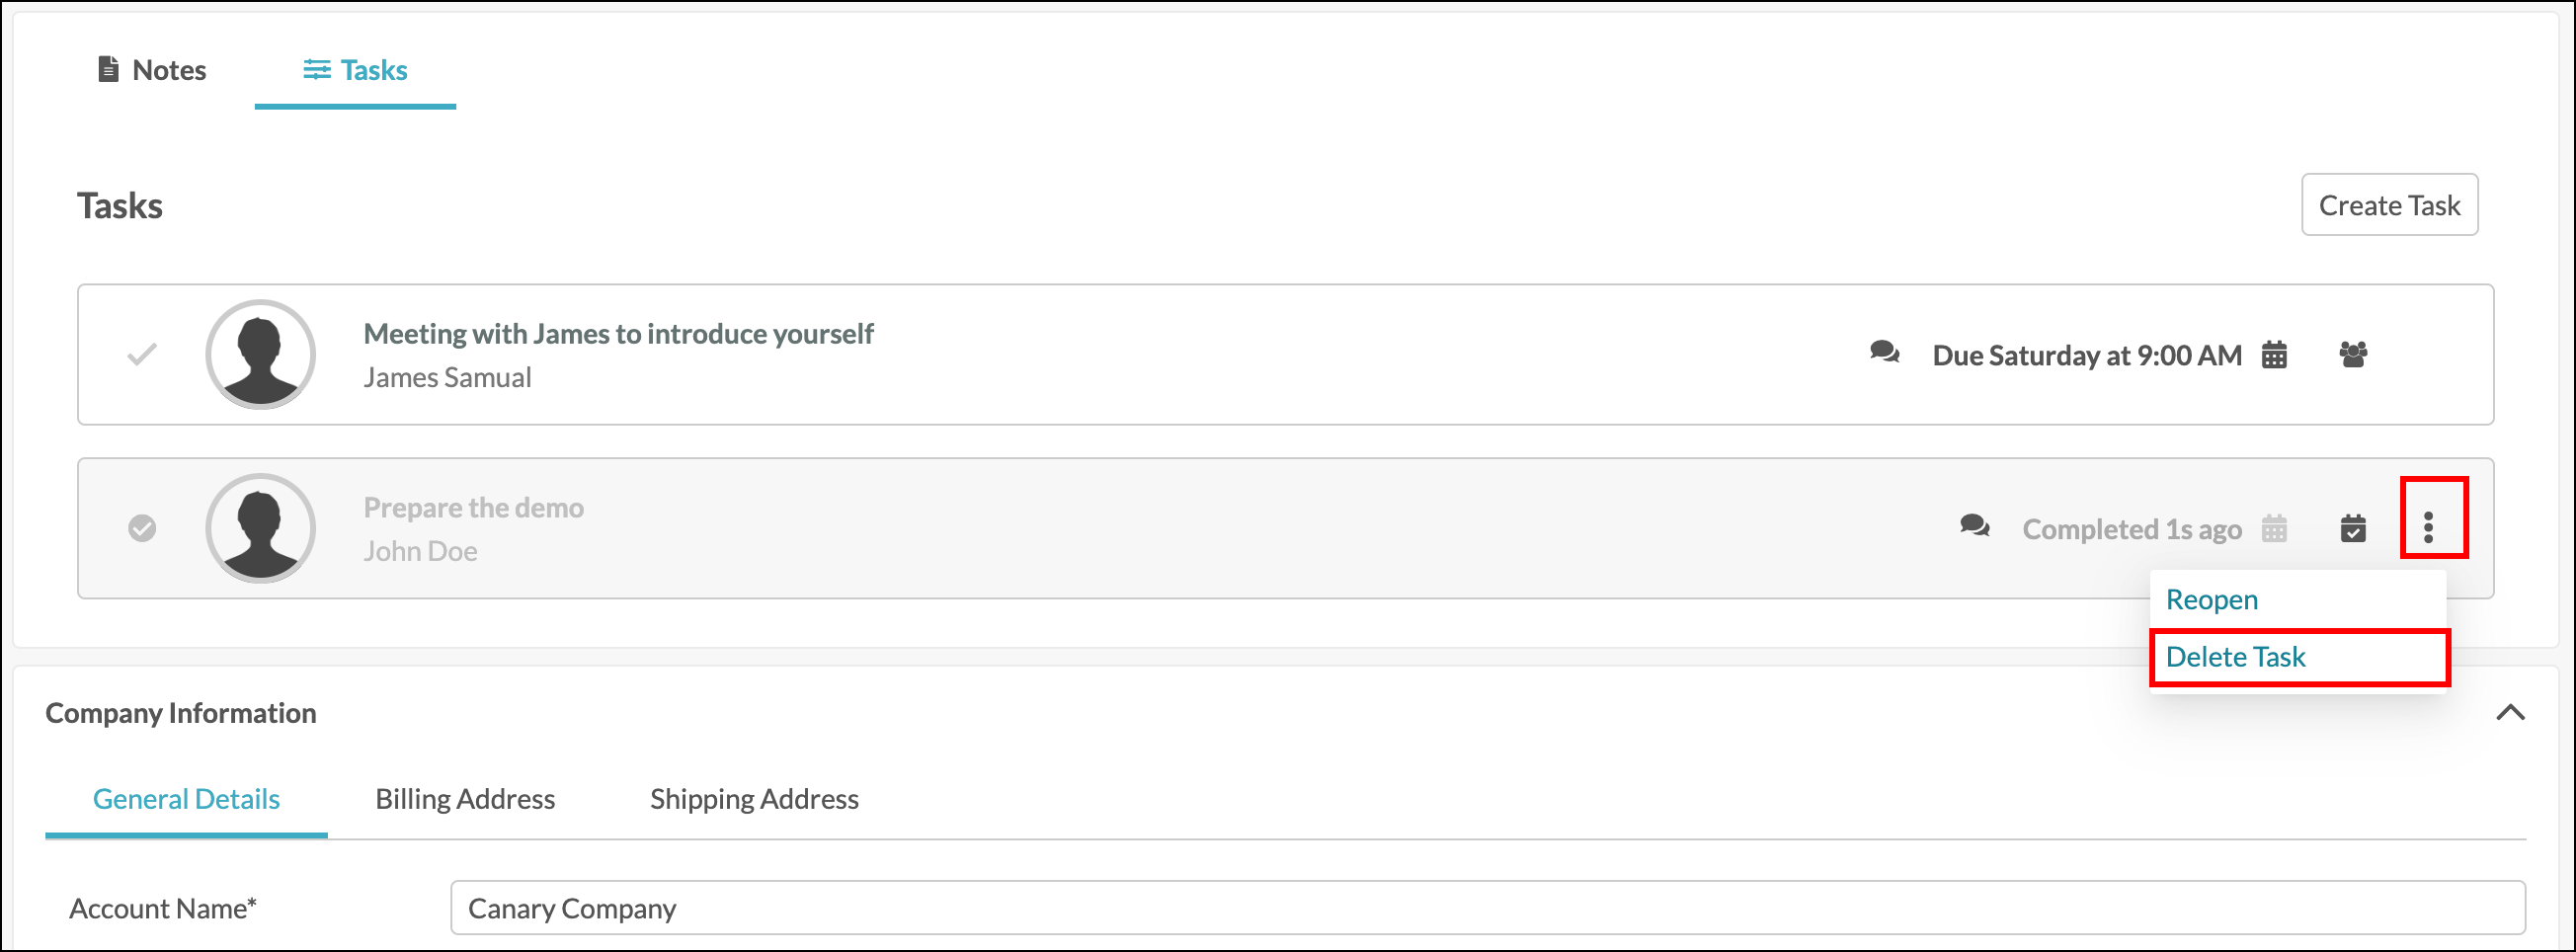
Delete A Task
To delete a task start from the Sales > Accounts page in the left toolbar.
- Select the desired account from the Account Manager.
- Click on the Tasks tab.
- Click the options button next to the task you’d like to remove.
- Click Delete Task from the dropdown menu.
This will remove the task from the account, from the Launchpad, and it will remove the task from the assigned contact’s overview on the contact information page.
Note: All tasks can be deleted from the Account page, by any Lead Gen & CRM user with access to accounts.
How Reporting Is Affected
There are custom reporting widgets for the status of tasks. All tasks – from the Contacts page, Opportunities page, and Accounts page – will be combined and calculated in reports.
Deleted tasks will be removed from current and past reporting data. They will not be included in the calculations.
Note: Custom Reporting is available on Ultimate plans only.
Custom reporting widgets for tasks include:
- Open Tasks
- Overdue Tasks
- Task Completion Rate
- Tasks Completed
- Tasks Completed Late or Rescheduled
- Tasks Completed On Time
- Tasks Due
To learn more about custom reporting, read Using Custom Reports.