| Administrators | ✓ | |
| Company Managers | ✓ | |
| Marketing Managers | ✓ | |
| Sales Managers | ||
| Salespersons | ||
| Jr. Salespersons |
Attachments can be a great supplement to an email, however, they should only be a supplement. Large attachments can intimidate potential leads, so we recommend sending one or two small attachments instead. You should never send an email with just an attachment and no content in the body since those emails will most likely enter the recipient's spam folder.
Lead Gen & CRM allows you to upload several different file types as attachments. Lead Gen & CRM supports the following file types:
|
File Types Supported by Lead Gen & CRM | |||||
|
• .CSV |
• .GIF |
|
• .XLS | ||
|
• .DOC |
• .ICS |
• .PNG |
• .XLSX | ||
|
• .DOCX |
• .JPG |
• .TXT |
• .ZIP | ||
The safest file types to send are .GIF, .JPG, .PDF, and .PNG. While Lead Gen & CRM supports their attachment, .ZIP files should never be included as attachments in an email.
There are times when an attachment may be unwarranted. If you would rather not attach files to an email, you can instead use Media Center links in the email's body.
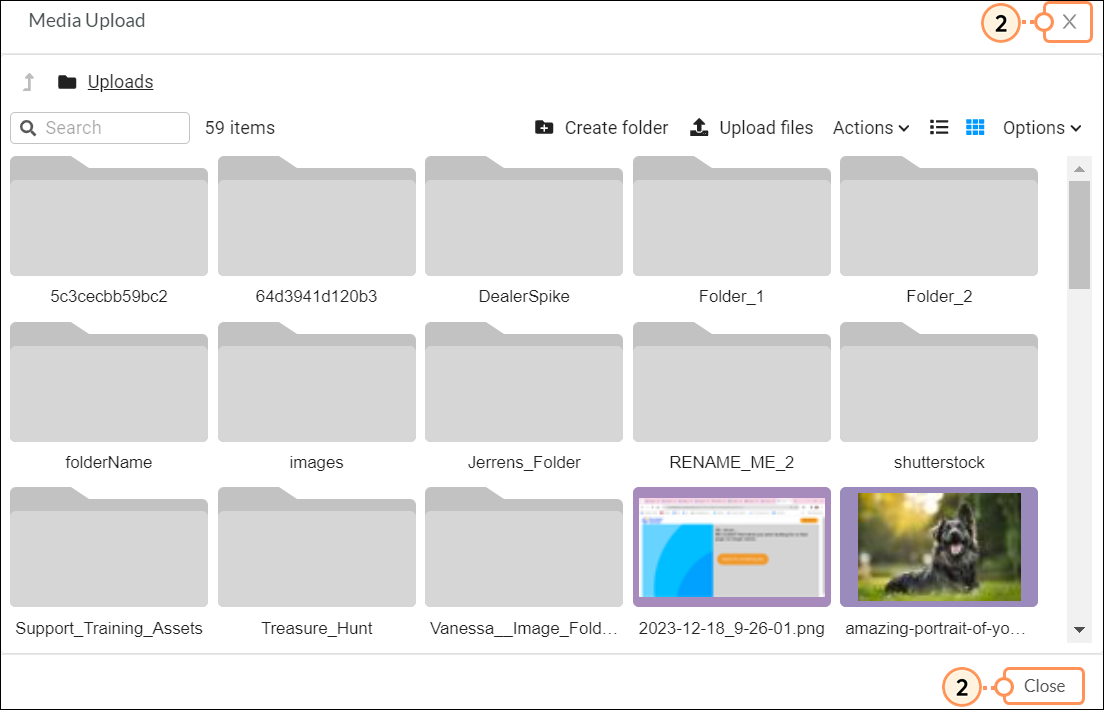
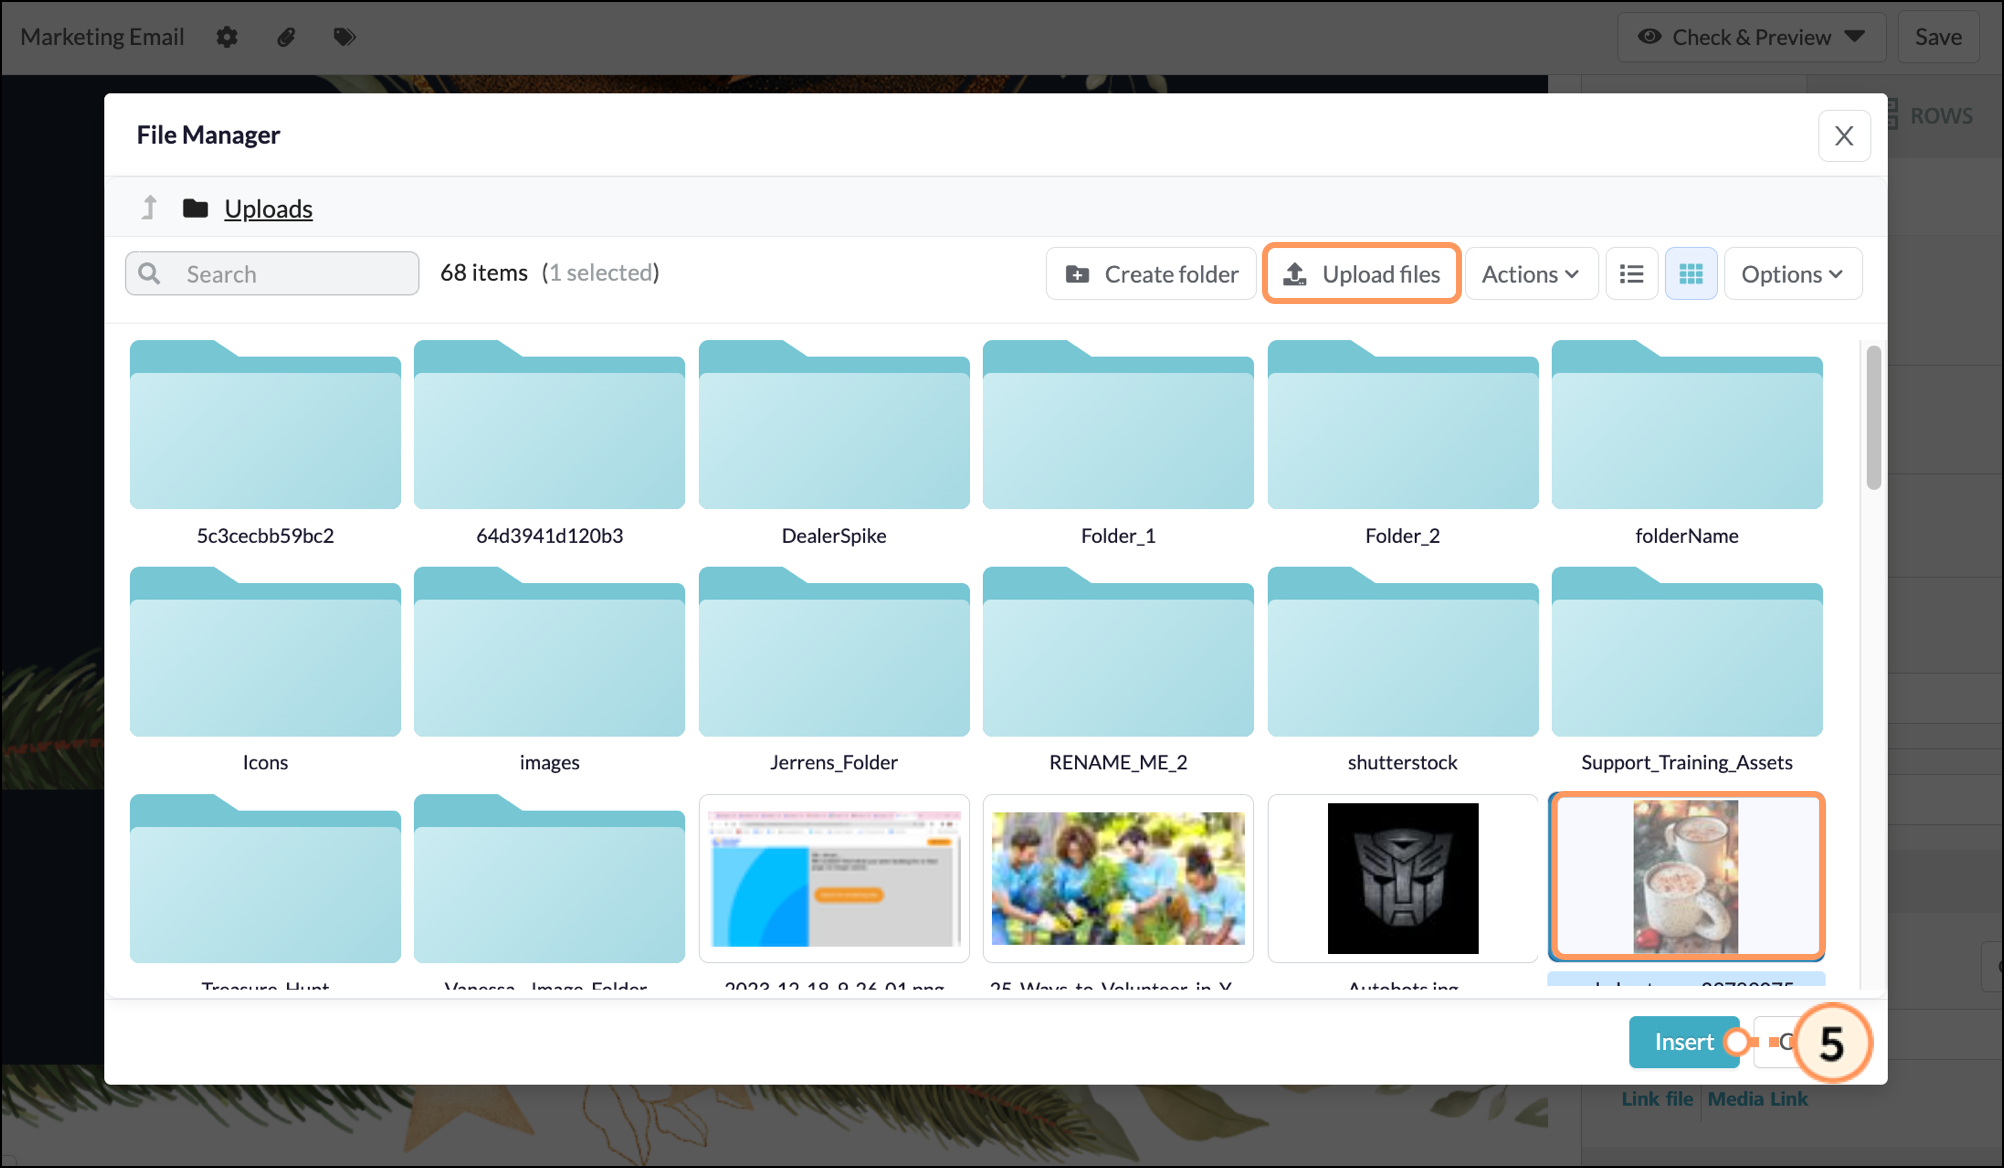
The File Manager's core functions are located in its toolbar. The toolbar contains the following:
| Option | Description | |||
|
Create Folder | Creates a new folder. | |||
|
Upload Files | ||||
|
Actions | ||||
|
List View | Display files and folders in a list | |||
|
Grid View |
Display files and folders in a grid with large images | |||
|
Options |
Sorts files and folders by name, file size, type, and last modified date. | |||
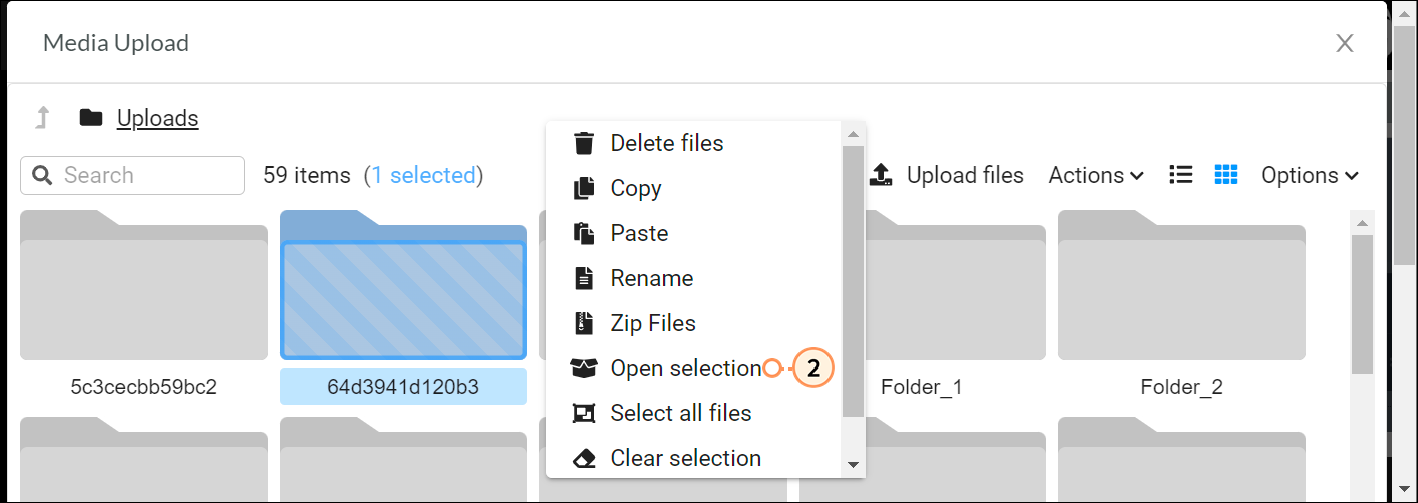
The File Manager has an actions menu that lets you edit, manage, and maintain files in various ways. Read Organizing the File Manager to learn more.
Important: Some options are only available to legacy accounts.
The panel contains the following:
| Option | Description | |||
|
Delete Files |
Delete any selected file(s) | |||
|
Download Files |
Download any selected file(s) to your computer | |||
|
Copy |
Copy any selected file(s) to your clipboard to be pasted later. This helps with moving content to different folders as needed | |||
|
Paste |
Make a duplicate of any file(s) that have been copied to the clipboard, and add a copy to the file manager | |||
|
Zip Files |
Compress a file or folder | |||
|
Open Selection |
Open the selected file(s) in a new tab or download them to the computer | |||
|
Select All Files |
Automatically select all files in the file manager level without clicking them individually | |||
|
Clear Selection |
Clear any selected file (s) | |||
Files uploaded to the File Manager can be viewed at a glance with the ![]() Thumbnail view in the toolbar. The thumbnail displays for image files with large dimensions will be a downscaled version of the actual file. You can view uploaded files at any time.
Thumbnail view in the toolbar. The thumbnail displays for image files with large dimensions will be a downscaled version of the actual file. You can view uploaded files at any time.
To view uploaded files, do the following:
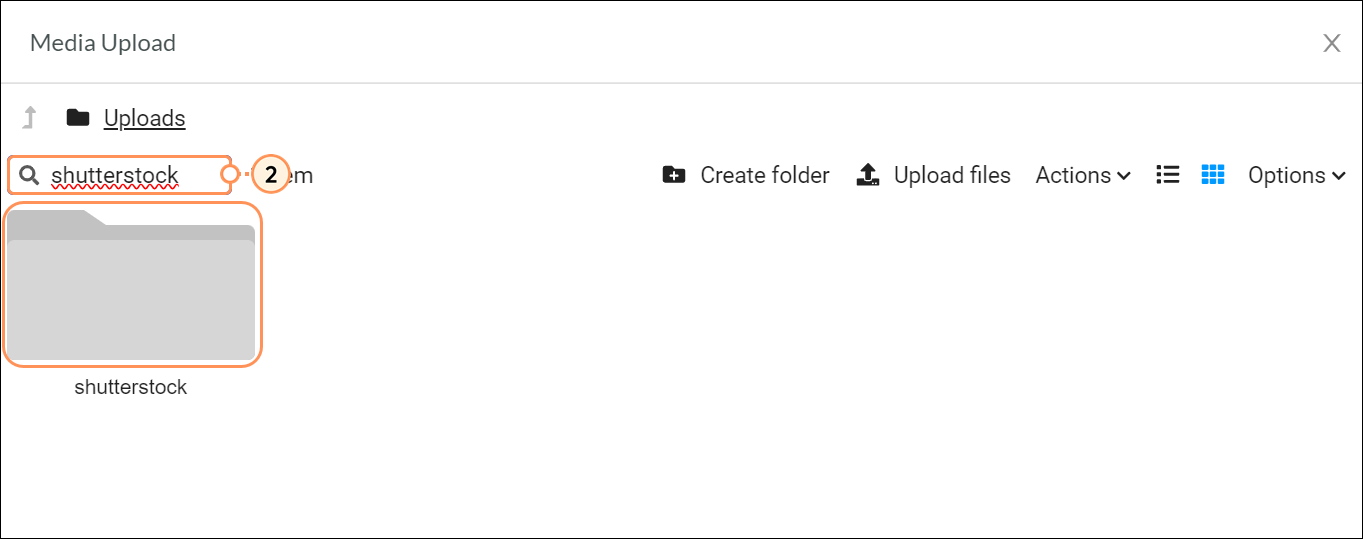
If you have purchased Shutterstock images through your Lead Gen & CRM account, they will appear in the File Manager.
To access the Shutterstock image folder in the File Manager, do the following:
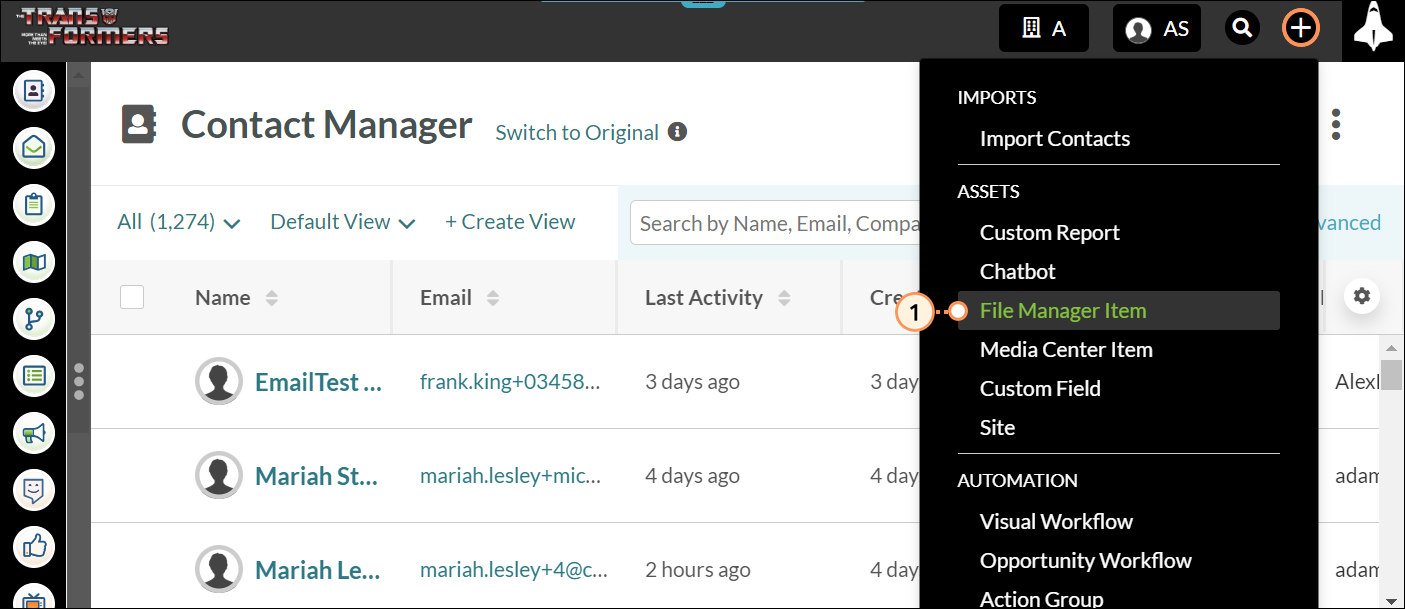
Lead Gen & CRM's Email Content Editor provides ways to add images to an email's body. You can upload images to the email via the File Manager, or add images you have previously uploaded. To add images to emails via the File Manager, do the following:


|
|

Copyright © 2026 · All Rights Reserved · Constant Contact · Privacy Center