This article will detail the data points and features of the Email Reports tool.
| Administrators | ✓ | |
| Company Managers | ✓ | |
| Marketing Managers | ✓ | |
| Sales Managers | ||
| Salespersons | ||
| Jr. Salespersons |
| Tip: Are you looking for information about Constant Contact’s Email and Digital Marketing product? This article is for Constant Contact’s Lead Gen & CRM product. Head on over to the Email and Digital Marketing articles by clicking here. Not sure what the difference is? Read this article. |
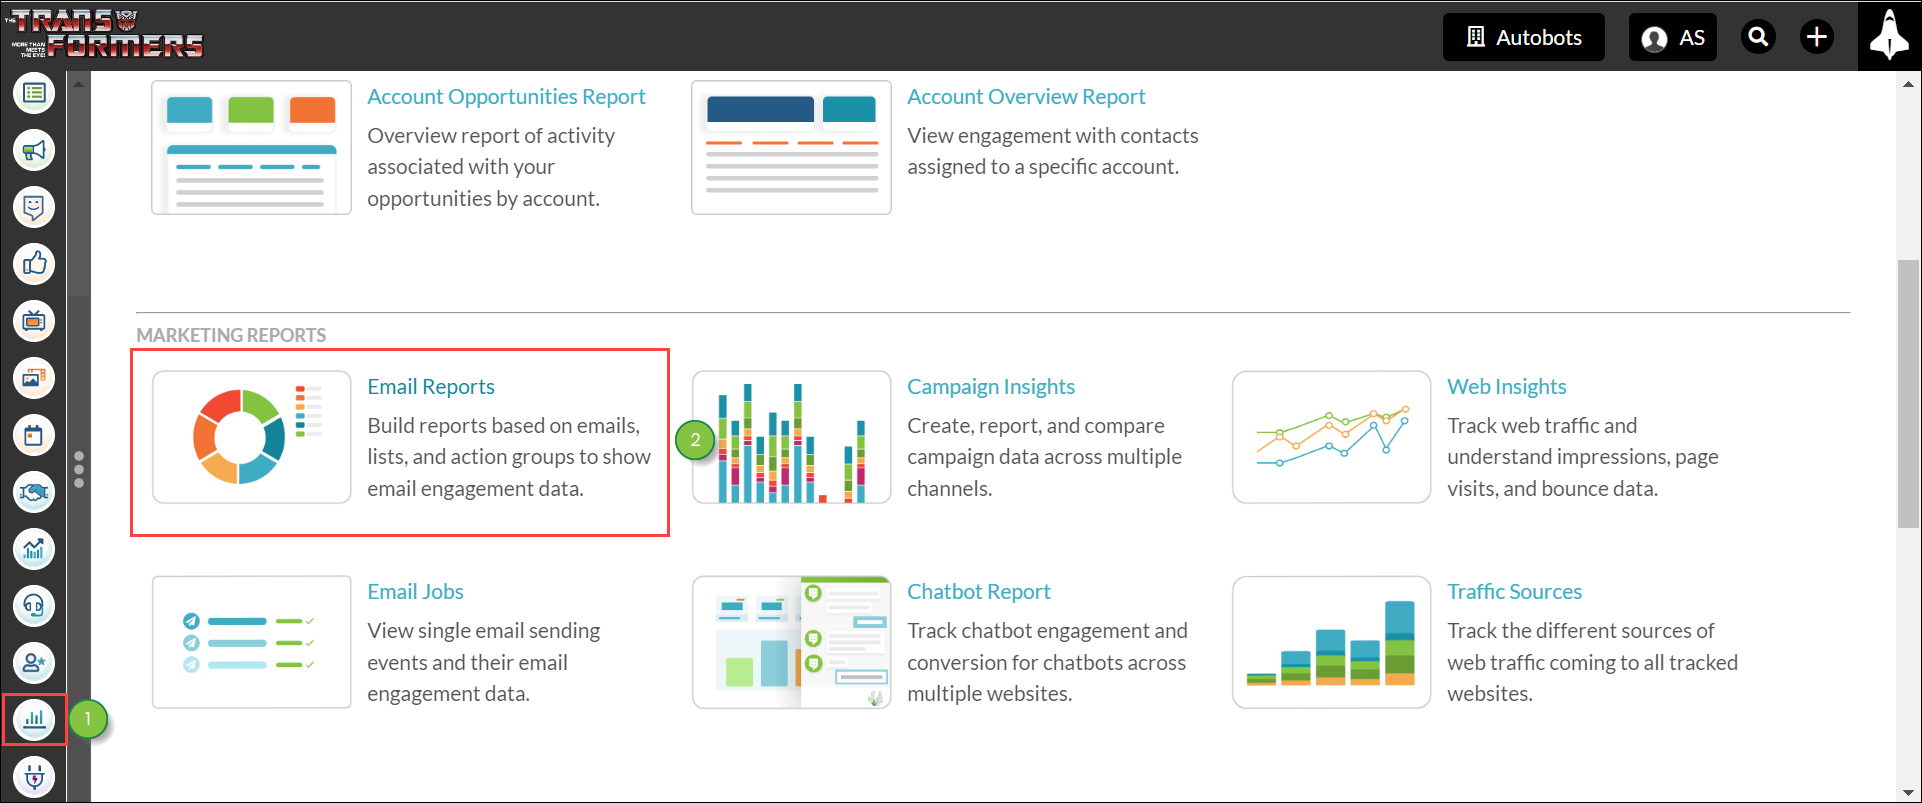
Building a Report: Email Report
You can build a report from a number of different categories.
To access the Email Reports tool and build a report from the Email Report category, do the following:

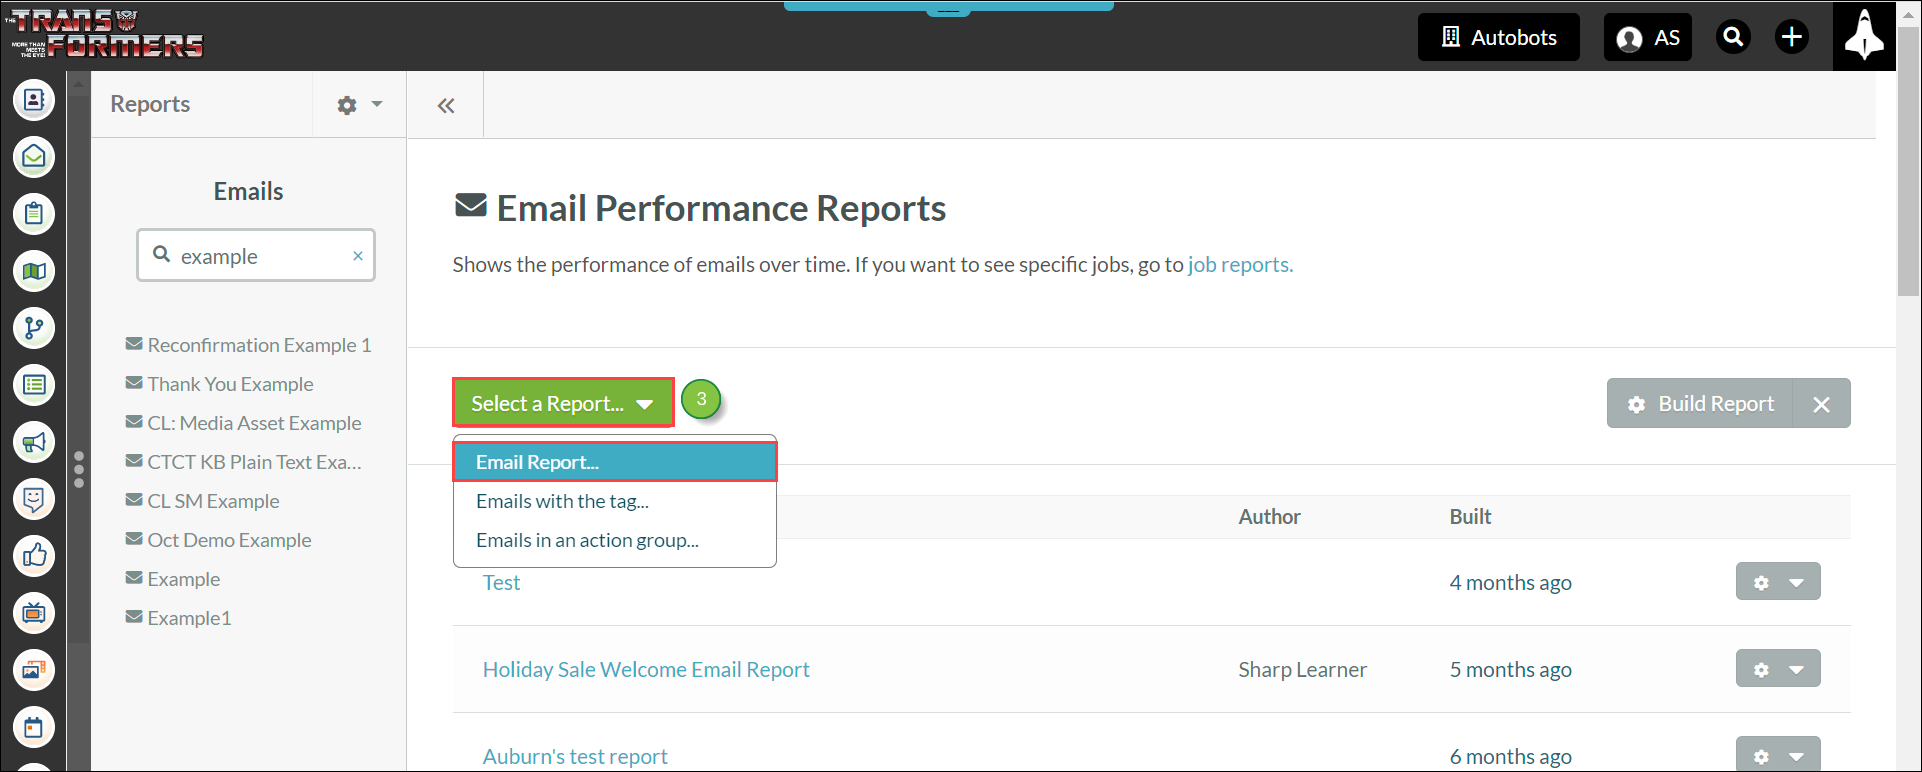
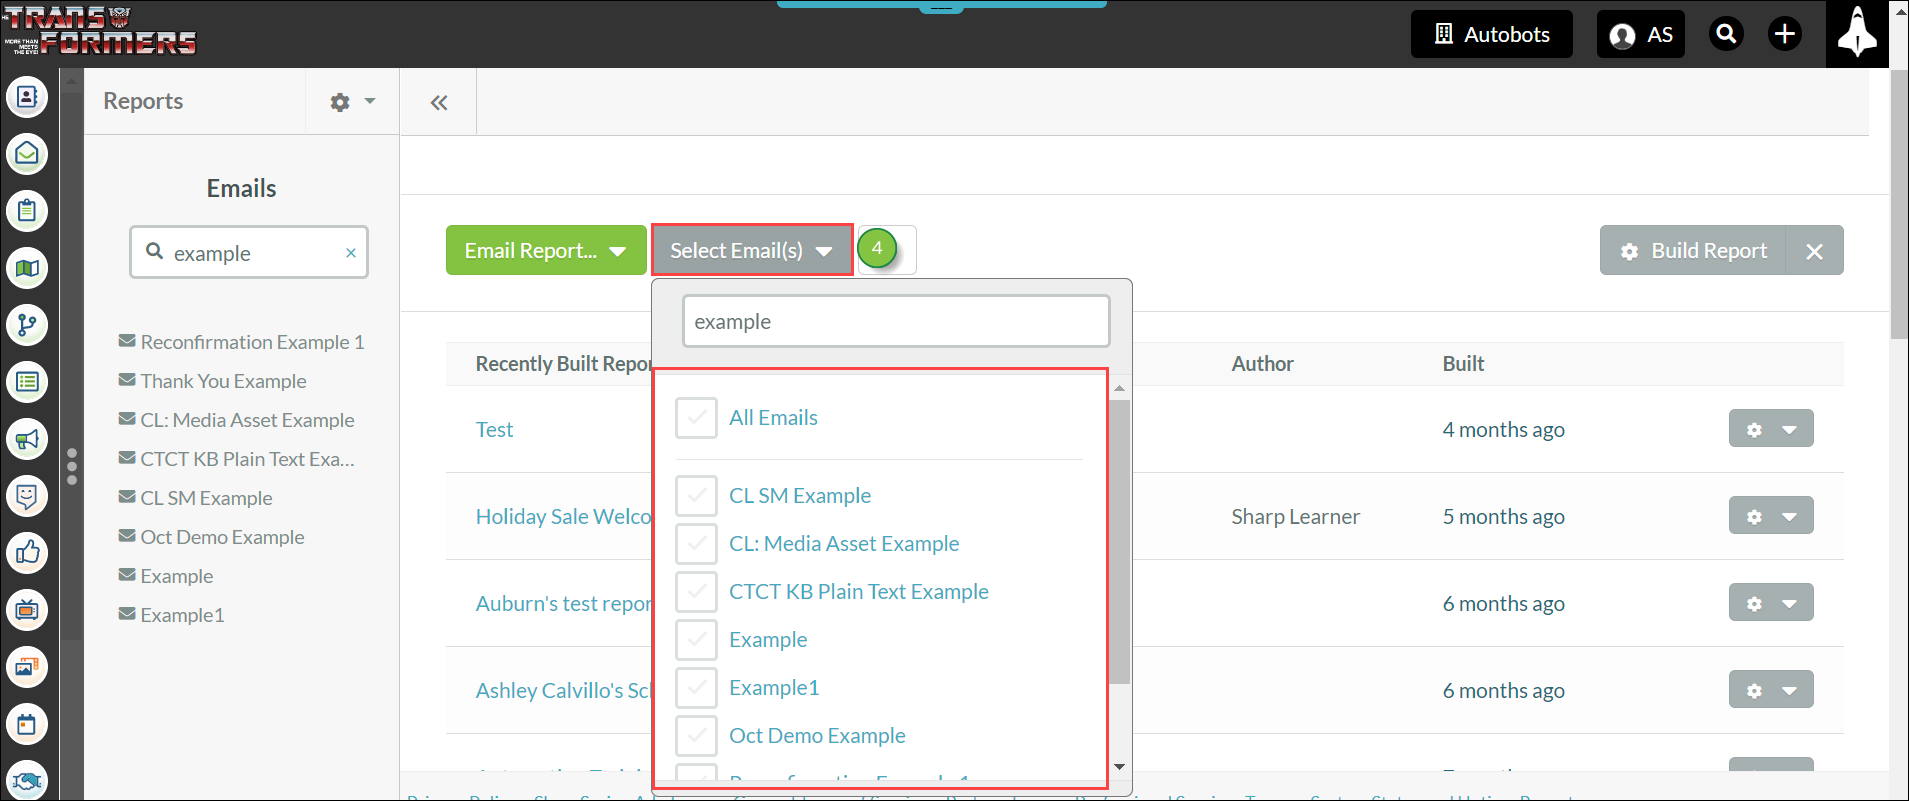
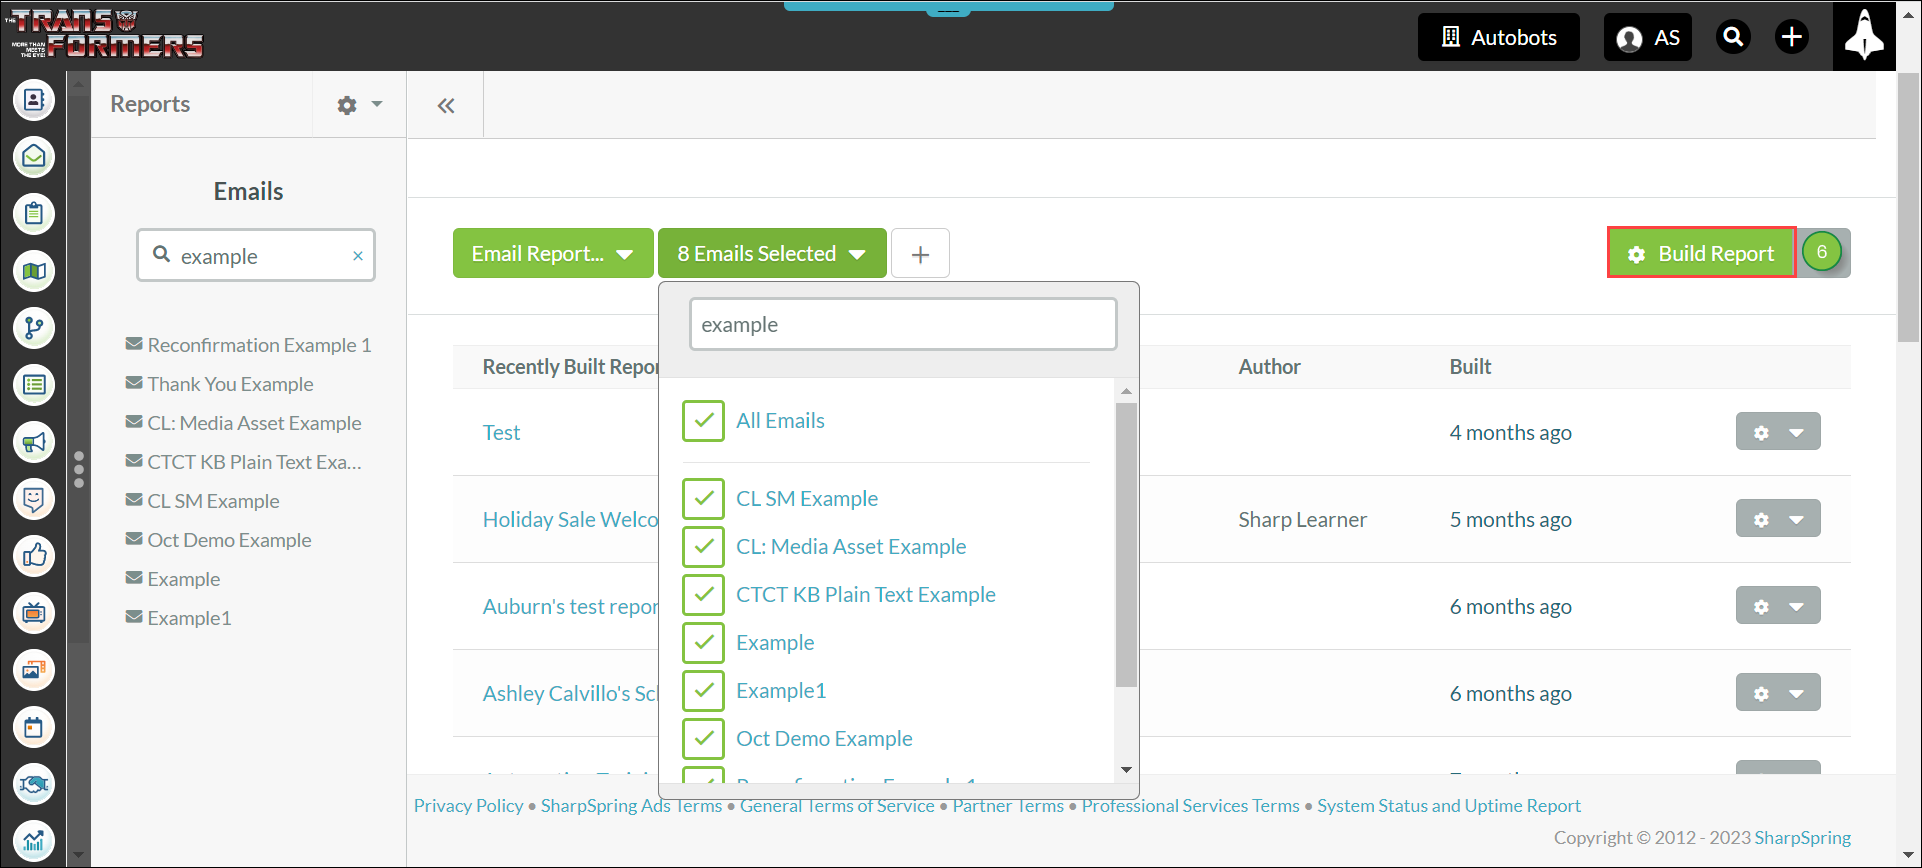
Note: If you make any errors in entering your report parameters, click the X button next to Build Report. At this time, clicks do not show on email reports for Smart Mails.
You can build a report from a number of different categories. To access the Email Reports tool and build a report from the Emails with the Tag category, do the following:

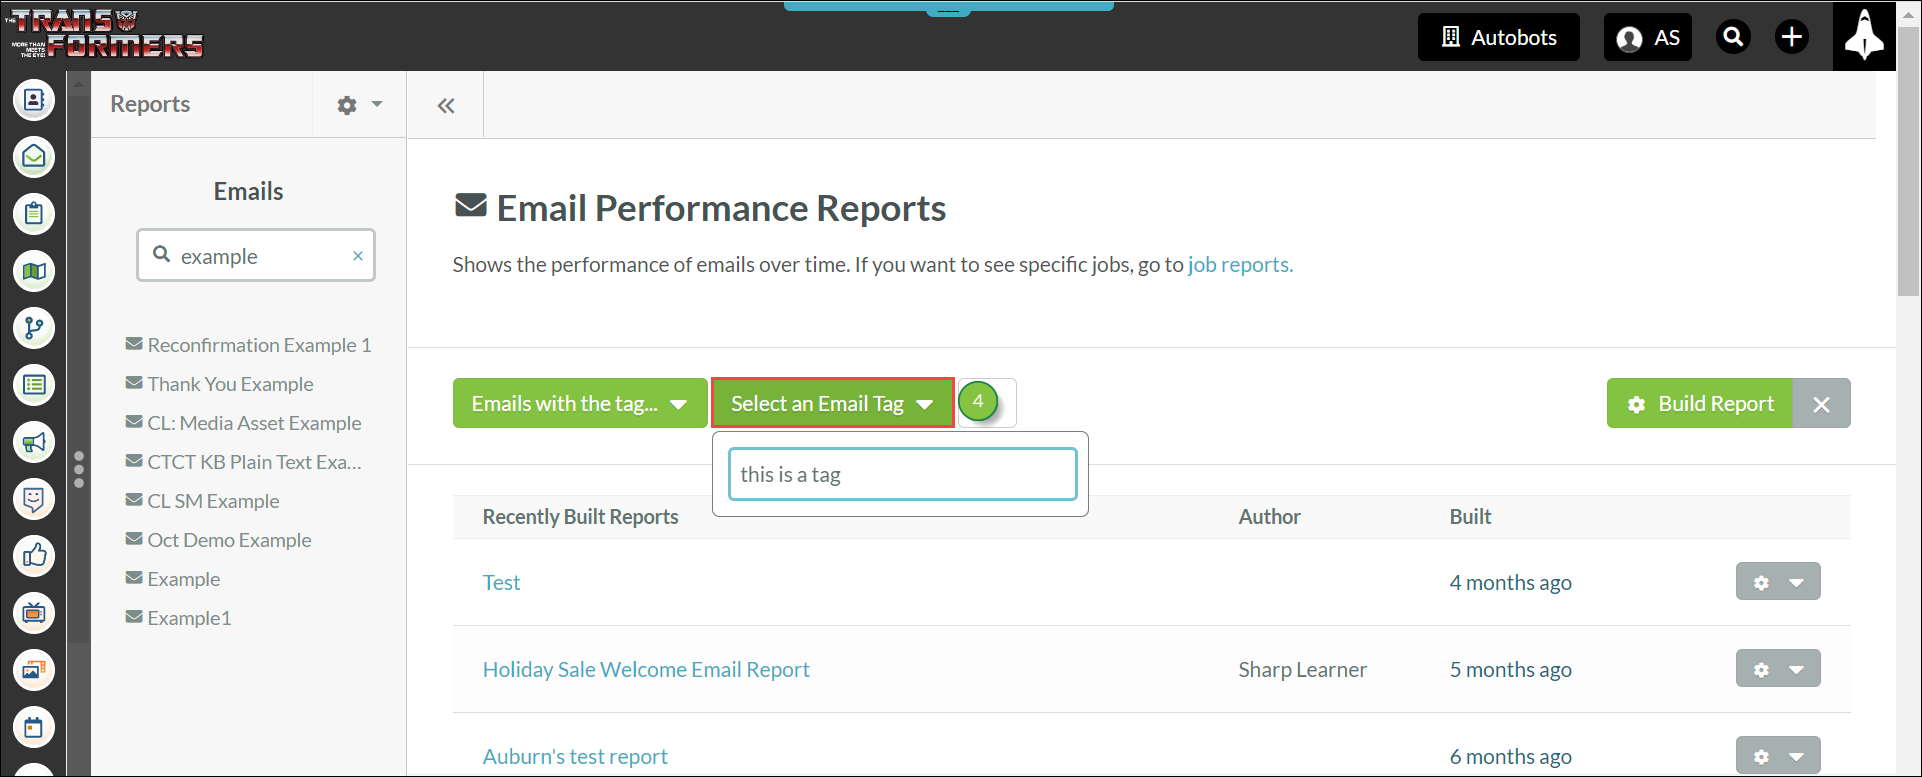
The box will populate with only tags that have been saved to emails. You cannot enter into the box tags that have not been saved to emails.
Note: If you make any errors in entering your report parameters, click the X button next to Build Report.
You can build a report from a number of different categories.
To access the Email Reports tool and build a report from the Emails in an Action Group category, do the following:

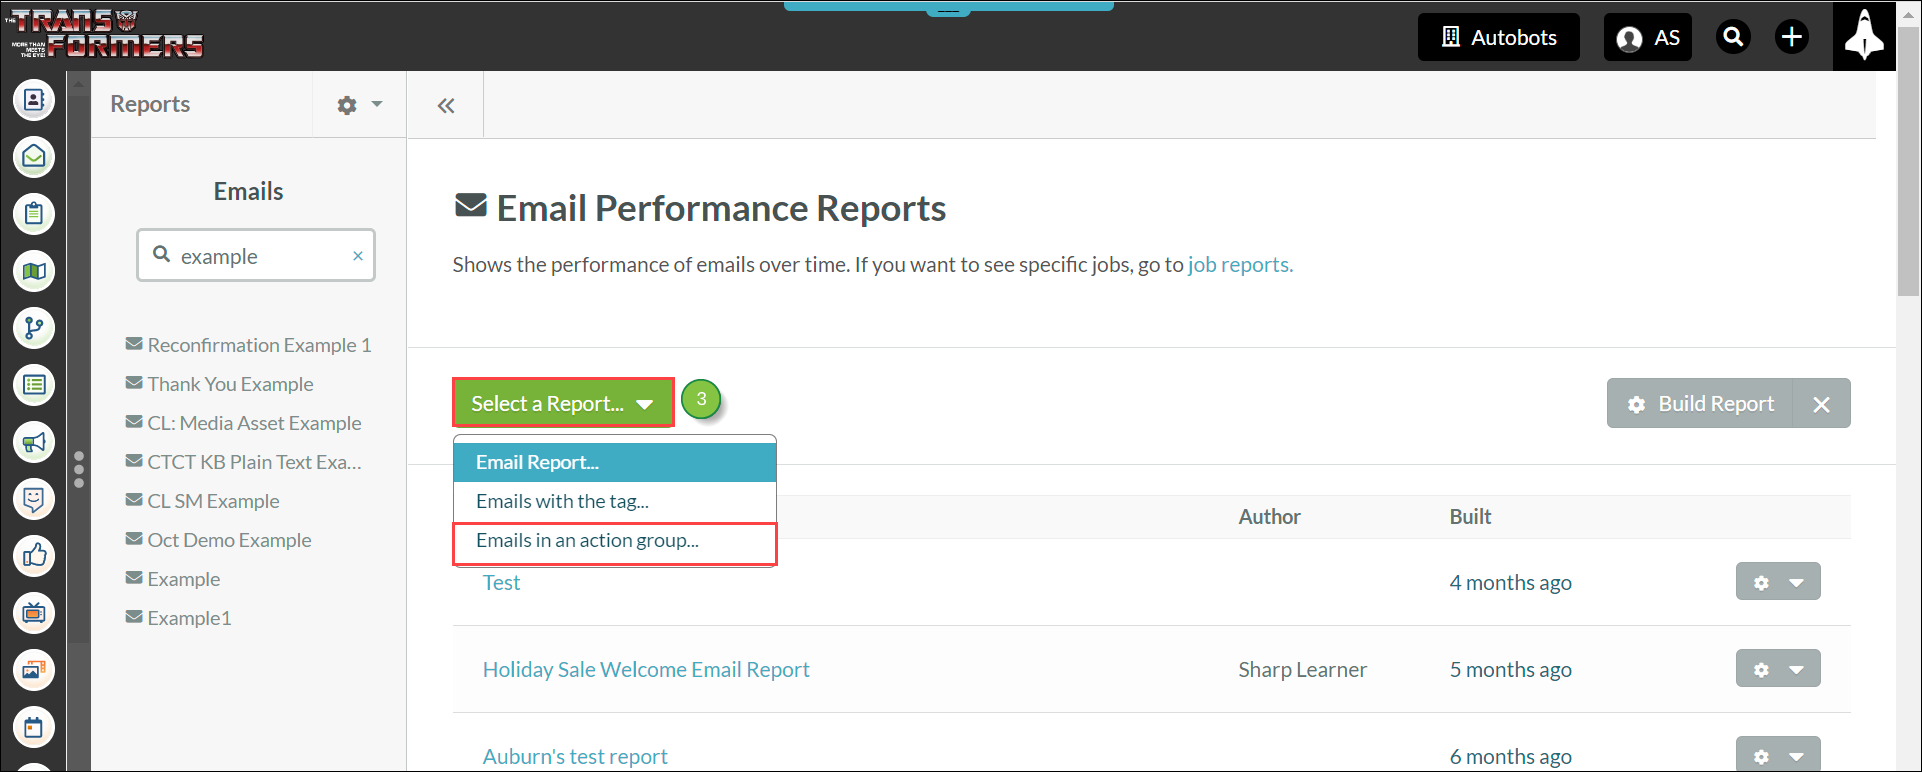
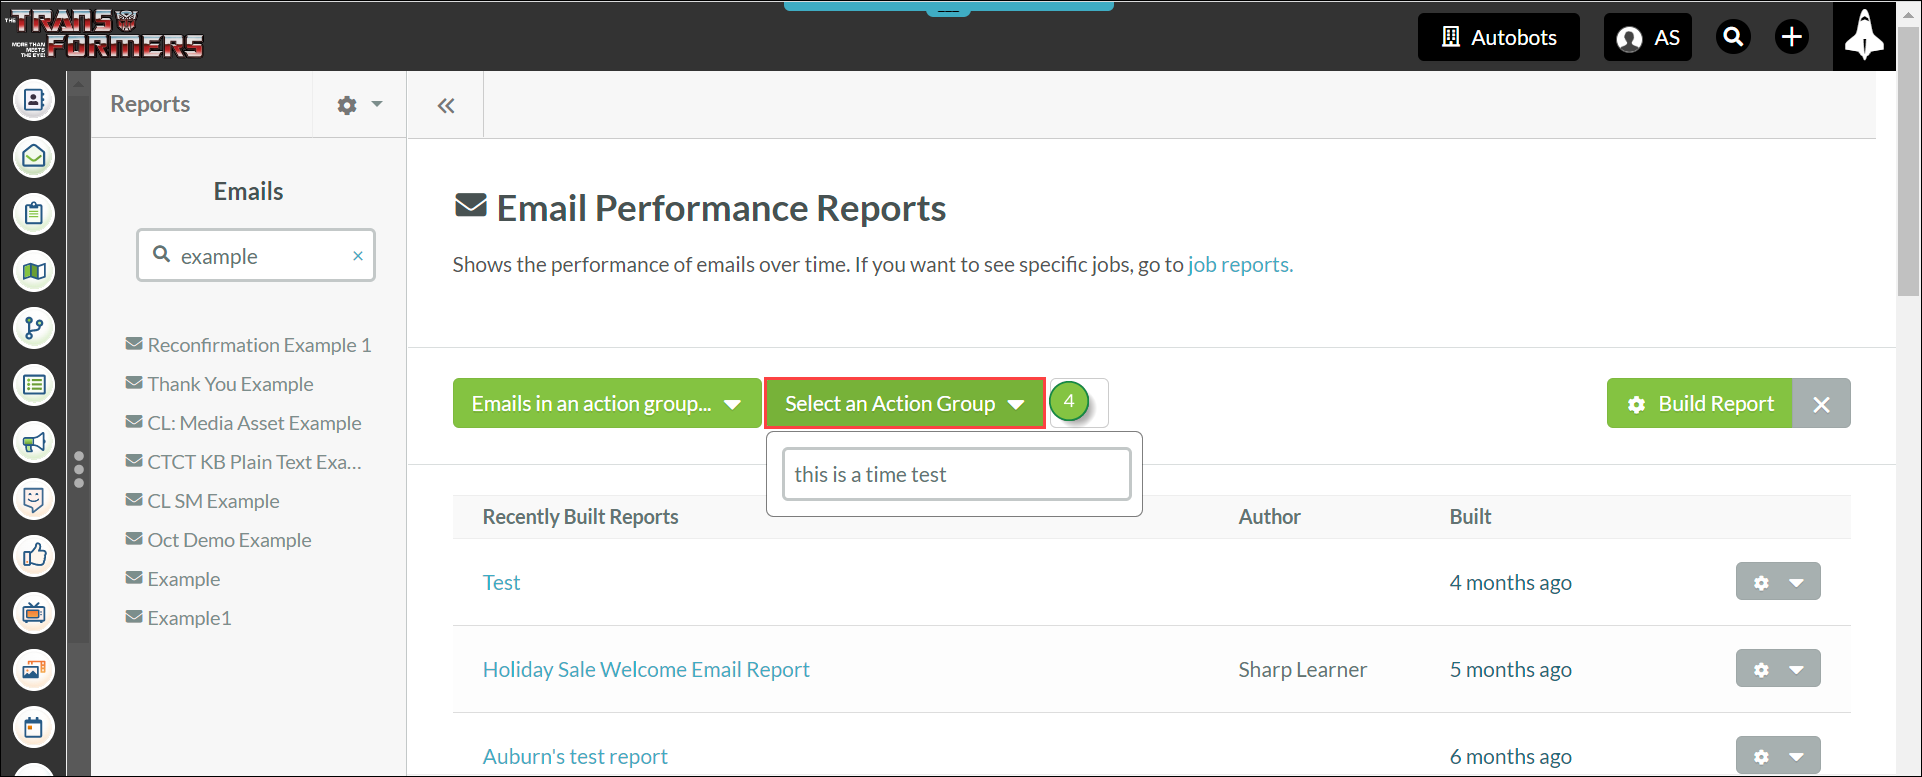

The box will populate with only action groups that have been created. You cannot enter into the box action groups that do not exist.
Note: If you make any errors in entering your report parameters, click the X button next to Build Report.
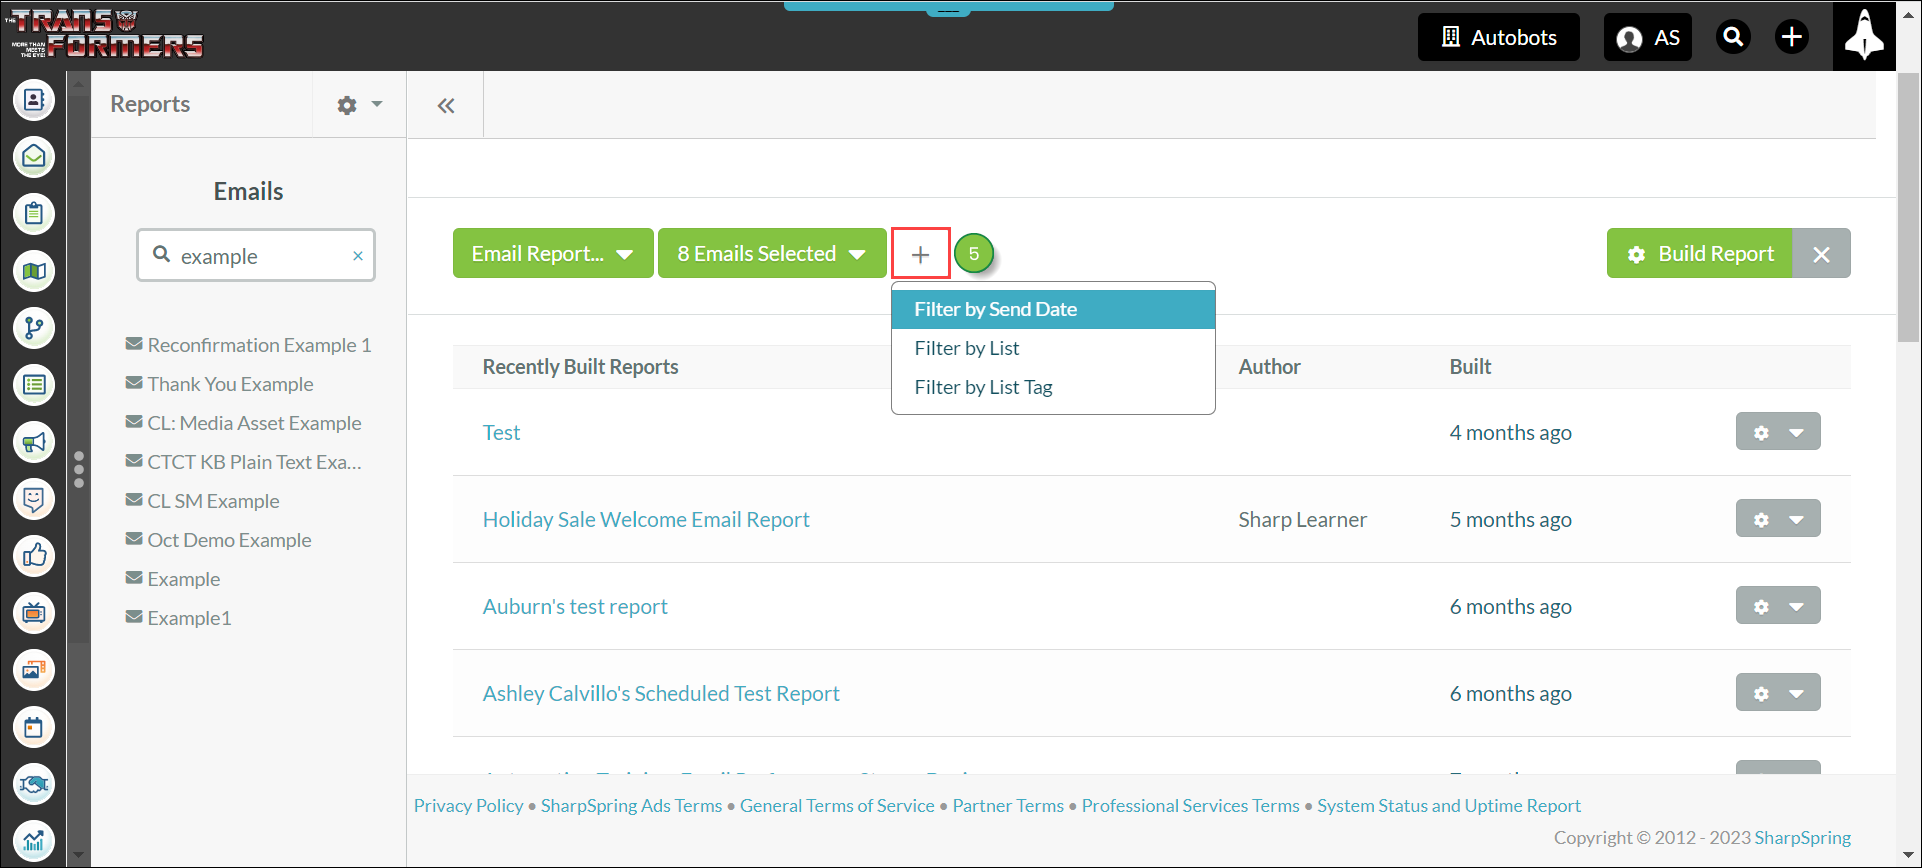
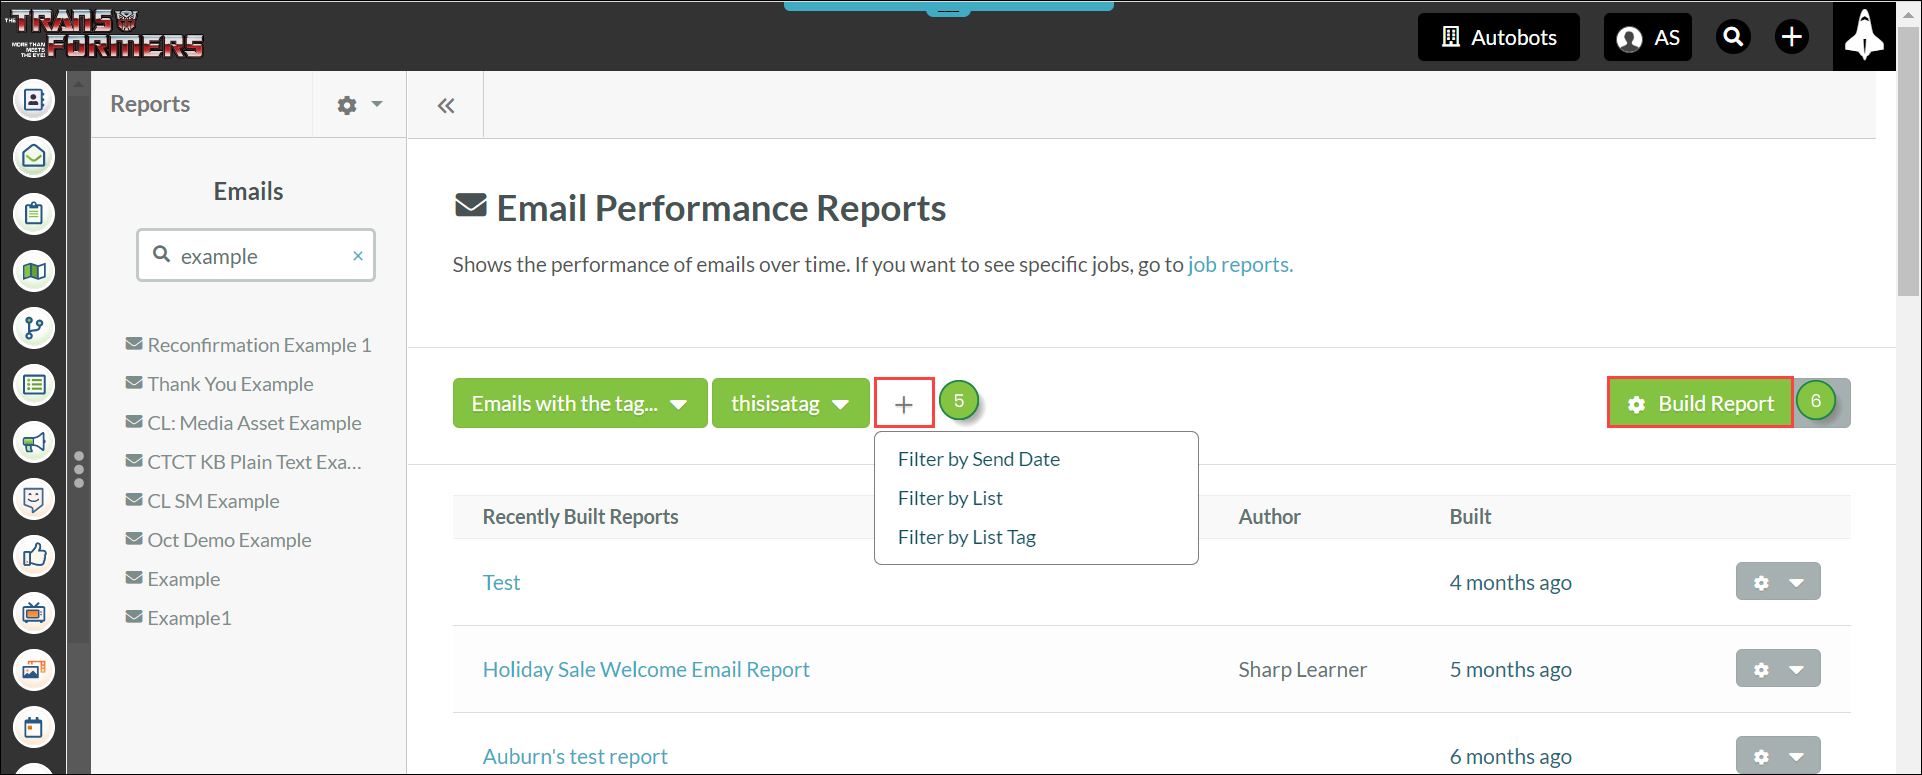
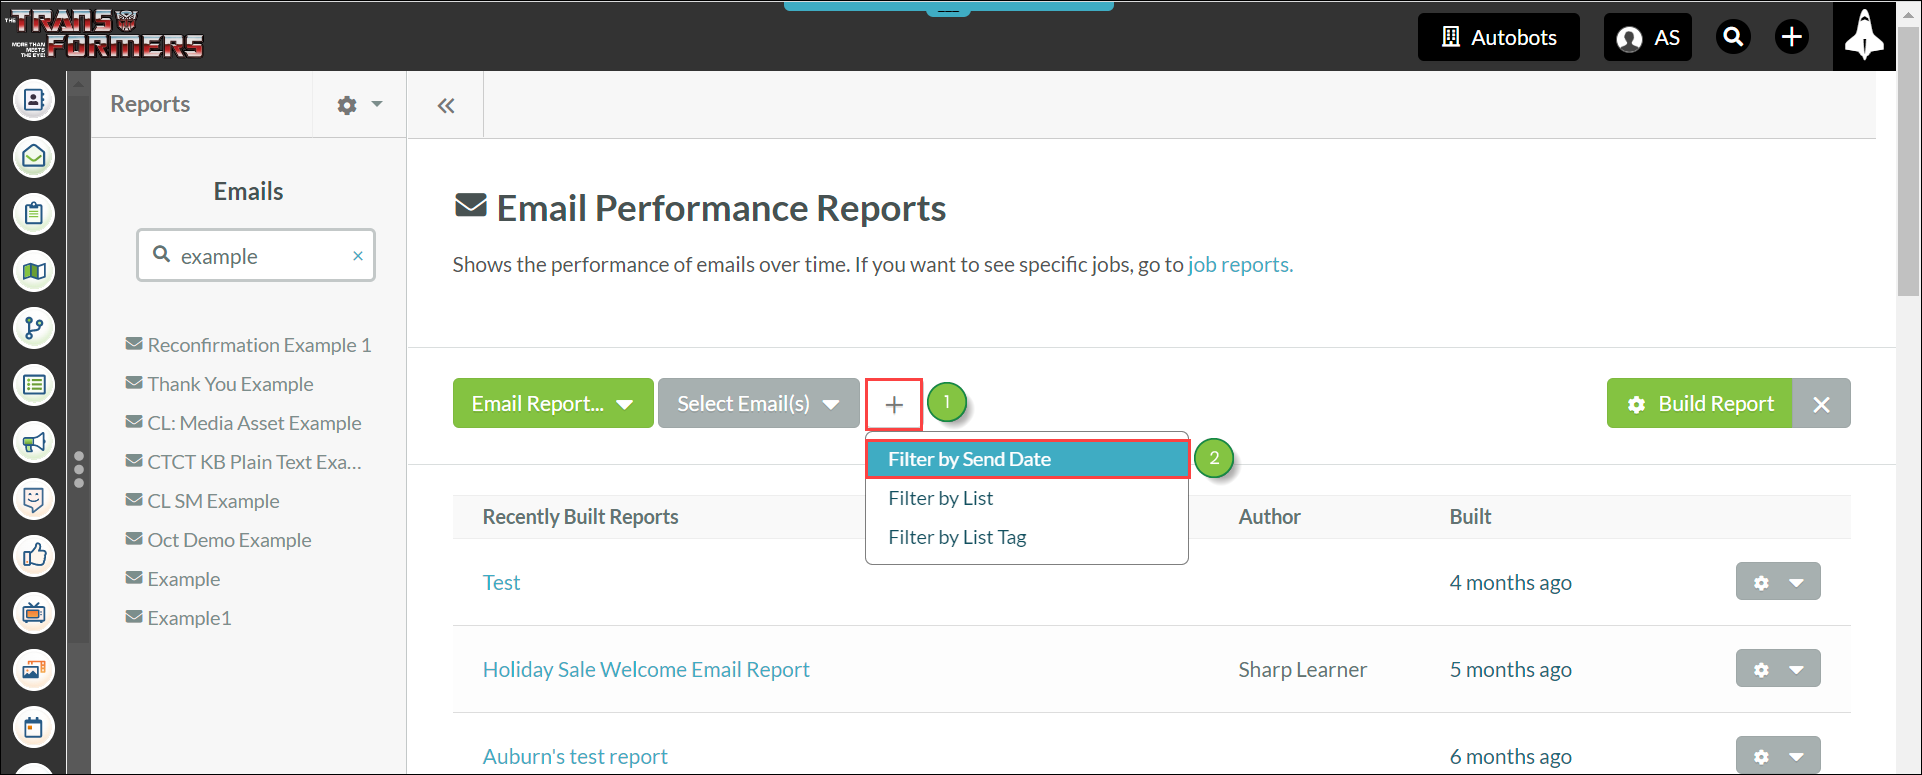
When building a report, you can further refine the presented data.
To add Send Date filters to an email report, begin building an email report and do the following:
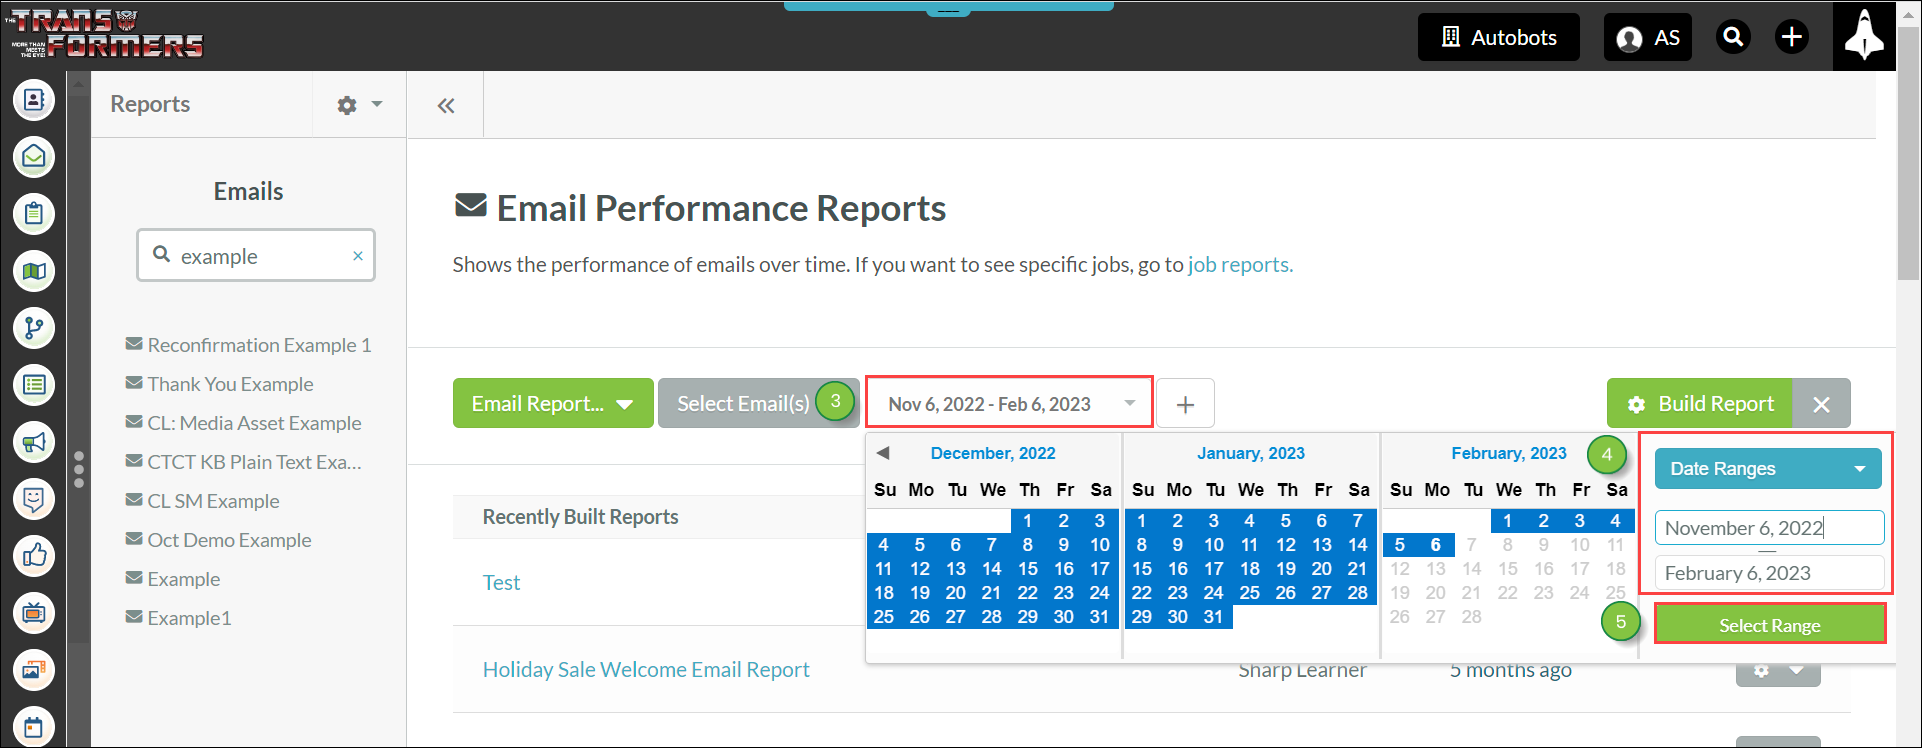
Note: The Date Ranges menu has several pre-populated date ranges. Selecting one of the pre-populated ranges will automatically enter a relevant date range.
When building a report, you can further refine the presented data.
To add List filters to an email report, begin building an email report and do the following:

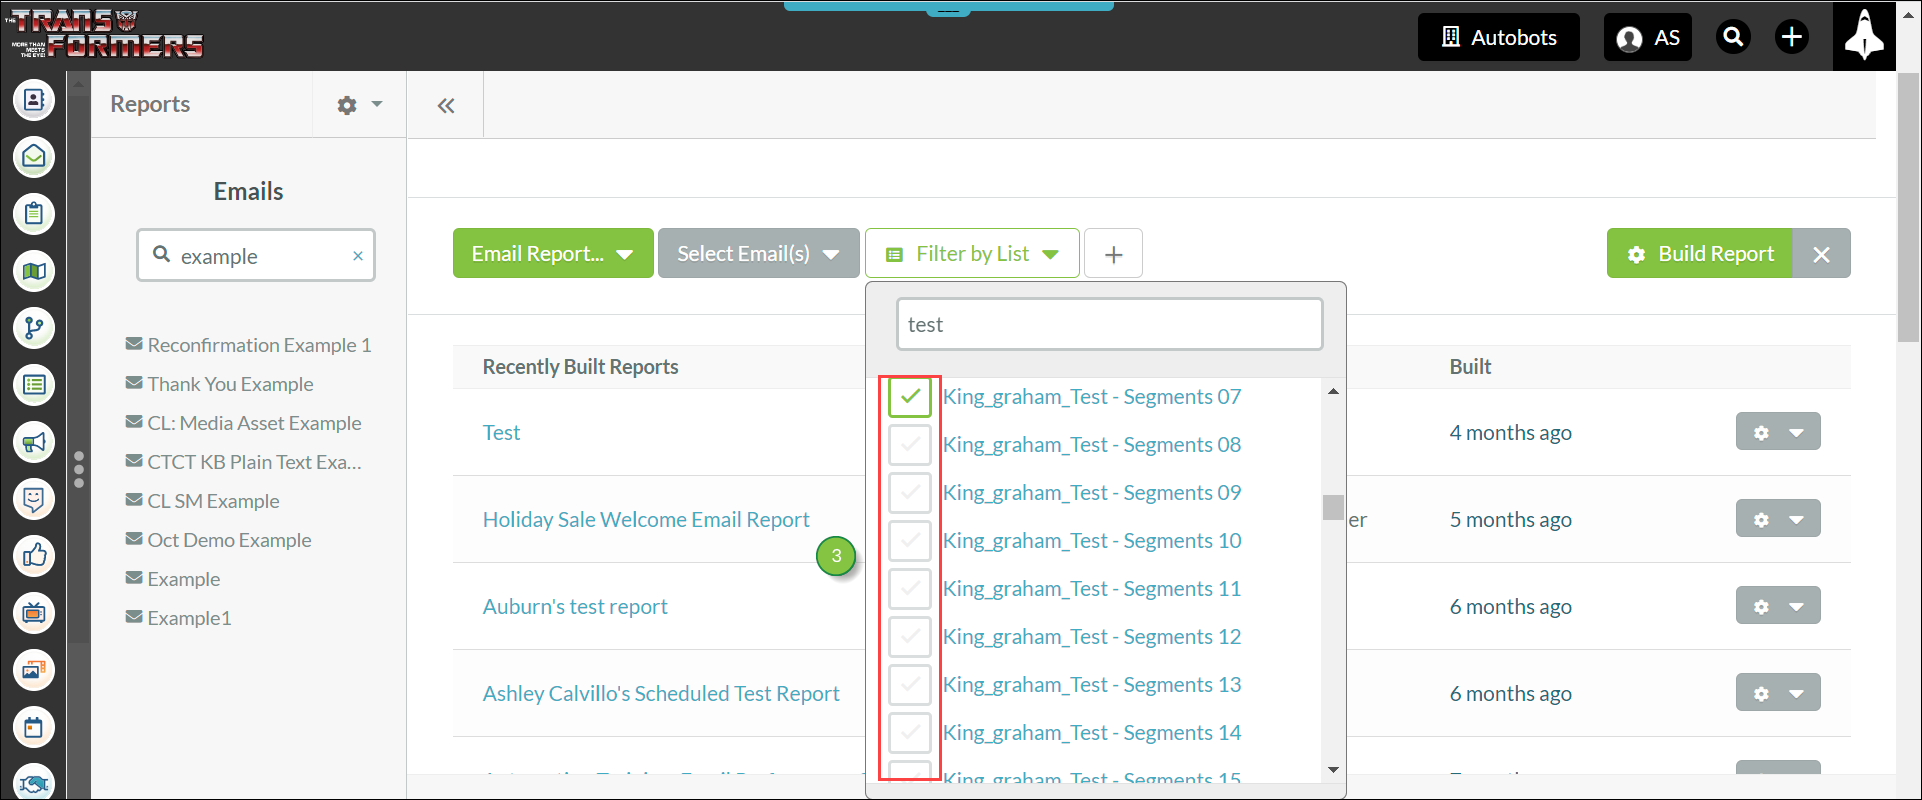
When creating lists, be aware that building lists based on Site or Email Actions may have the list contain fewer members than the corresponding email report due to users with cookies or Javascript disabled.
Note: You can type in a list keyword in the search box to find an appropriate lists.
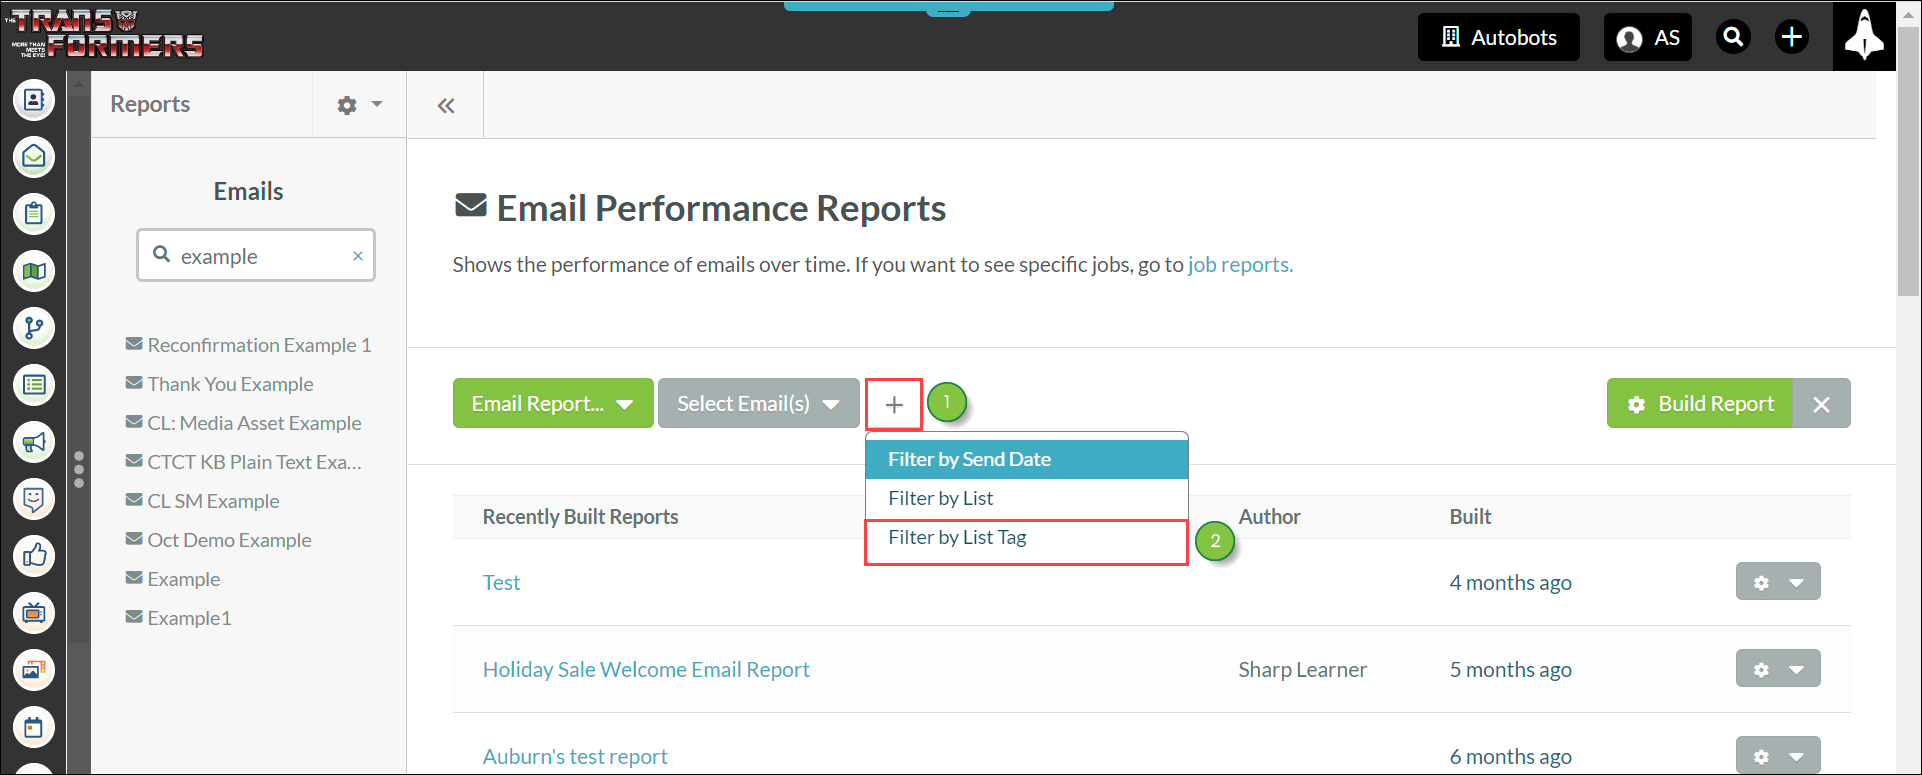
When building a report, you can further refine the presented data.
To add List tag filters to an email report, begin building an email report and do the following:
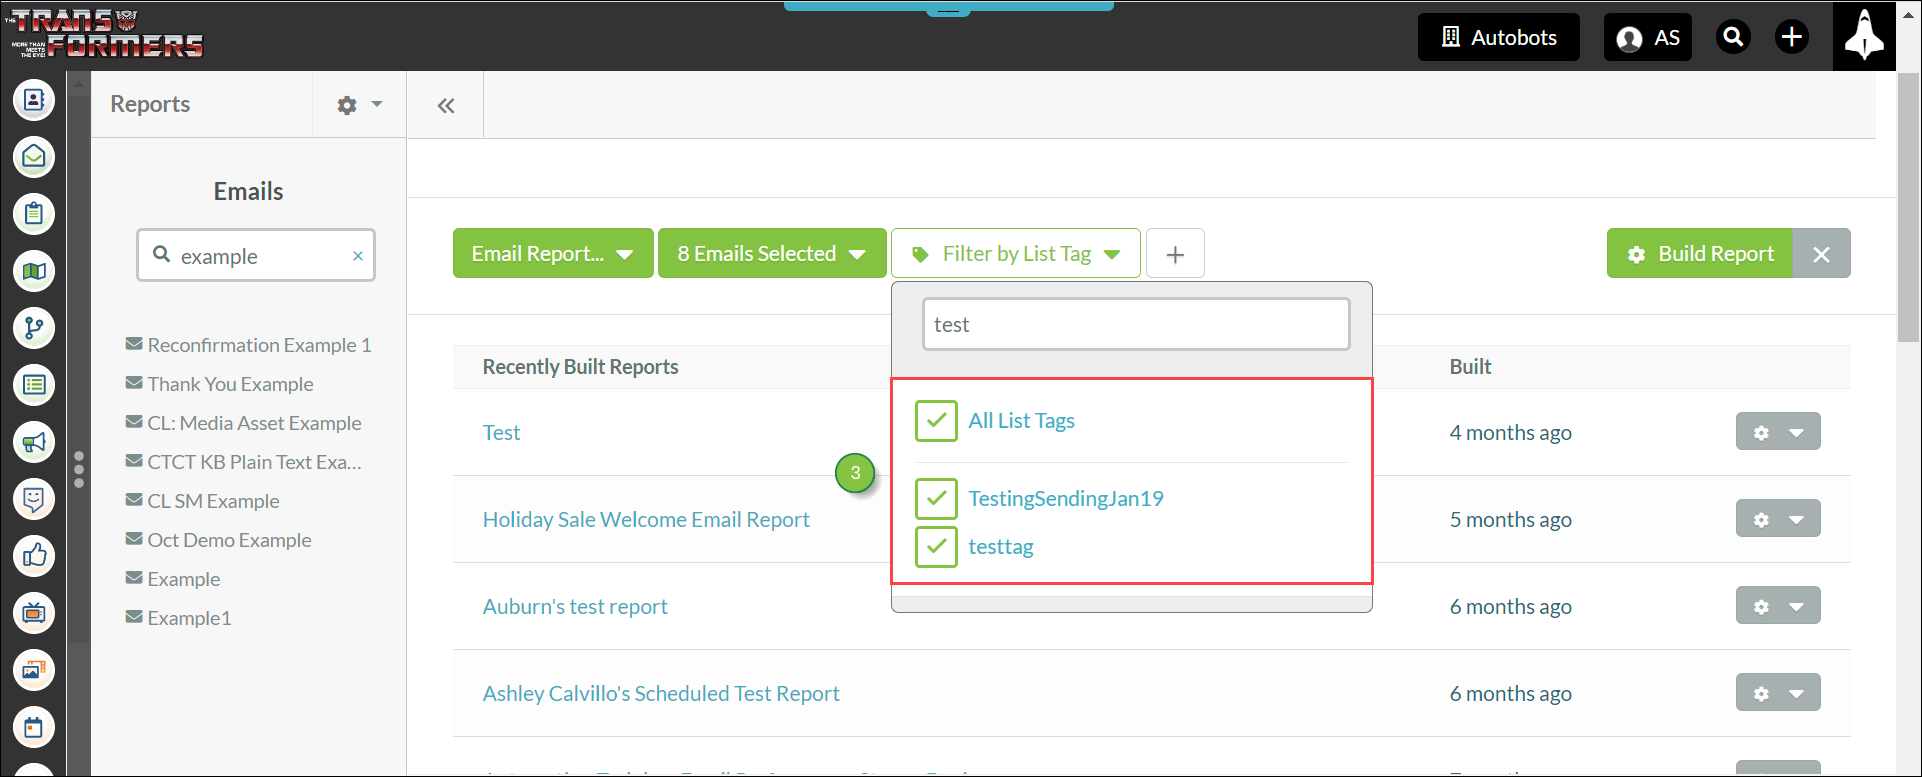
Note: You can type in keywords in the search box to find an appropriate list.
The email report will populate with various metrics across multiple sections.
The report will display several statistics regarding the email:
| Statistic | Description | |
| Delivered Emails |
This section lists all emails that were delivered to contacts. This | |
|
Unique |
This is the number of emails that were opened by unique contacts. | |
|
Unique |
This is the number of emails that were clicked through by | |
|
Total |
This is the number of emails that were clicked through by contacts. At this time, clicks do not show on email reports for Smart Mails. | |
Unsubscribes | This is the number of emails that were unsubscribed from. | |
|
Spam |
This is the number of emails that were reported as spam mails. | |
|
Hard |
This is the number of emails that were rejected by the recipient | |
|
Soft |
This is the number of emails that were rejected by the recipient | |
|
Messages |
This is the total number of messages sent to contacts and does |
This section details when the email was last sent, and who the email was sent to. The section has clickable links to the previous few instances of when the email was sent. The section also provides a graph on delivery rates.
This section provides information on the contacts who most clicked through the email. The section has clickable links to applicable contacts. The section also provides a graph on engagement rates, denoting the instances of opened emails, unopened emails, clicks, and unsubscribes.
Domains are the email addresses that the email was sent to. This section breaks down the domains of the recipients, and it shows how many recipients share the same domain. The section provides a graph on the top five domains our recipients use.
This section provides information on the number of clicked links in the email. If there are multiple links in the email, then the links will be listed in this section in order of most clicked to least clicked. The section also provides a graph on how many times different links were clicked. The top links in this breakdown are non-unique clicks across all emails in the report.
This section provides the survey results from unsubscribed emails. The section provides a graph on the occurrences of the results.
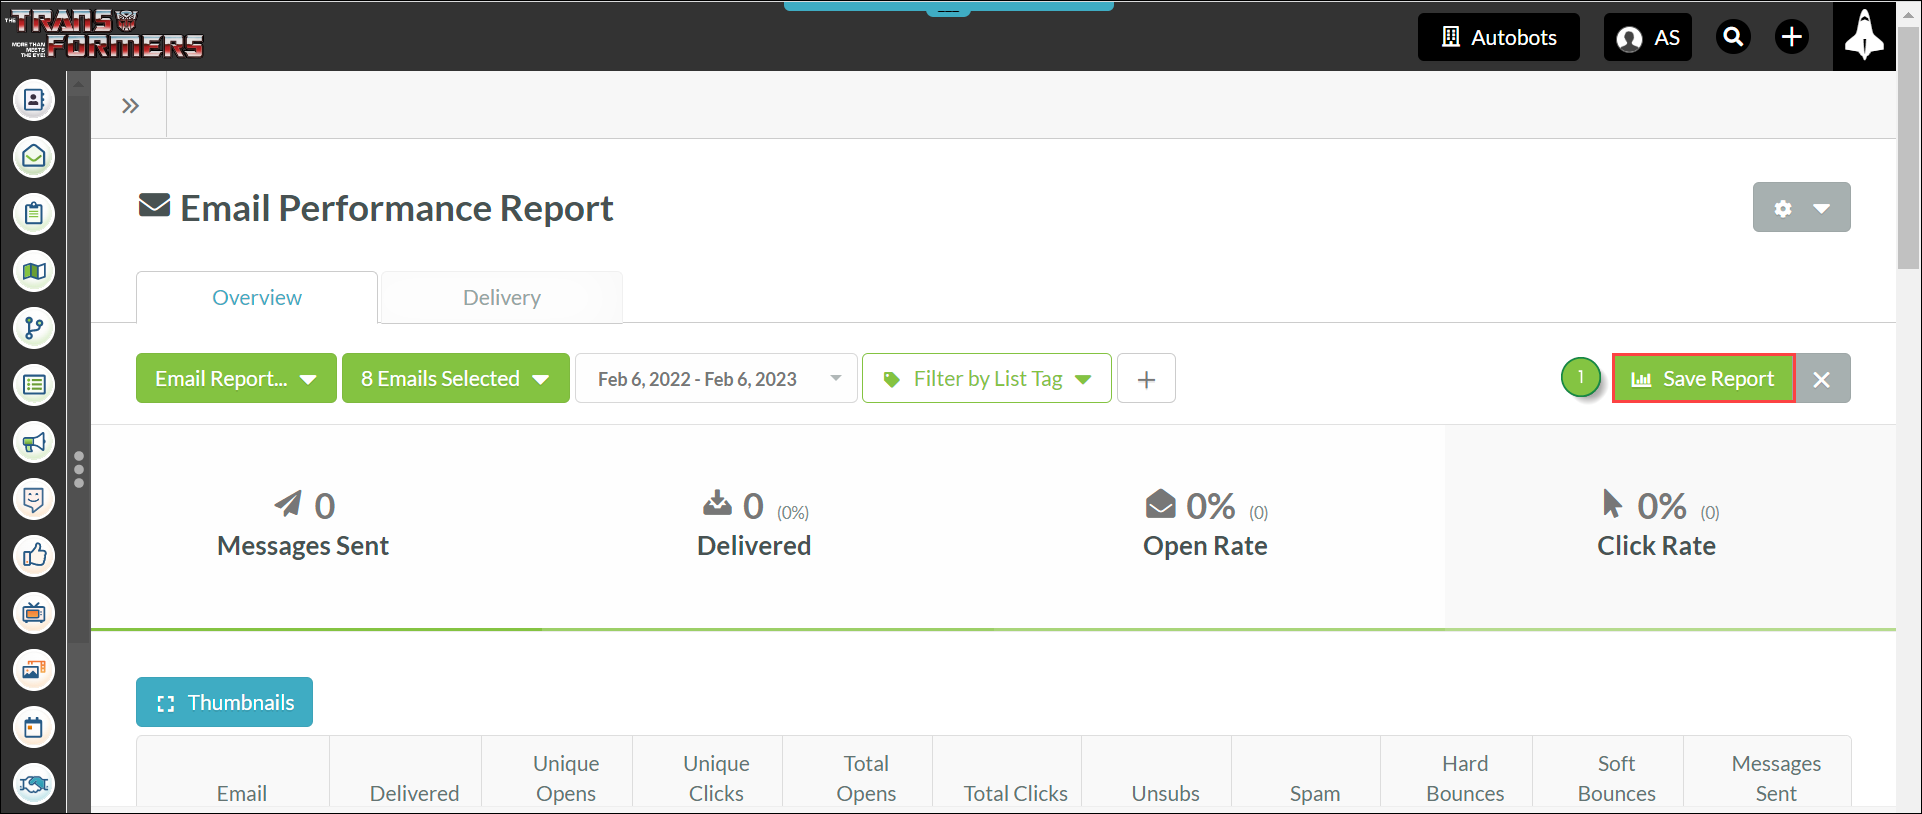
The Overview tab contains information at a glance. You may want to save the report for any number of purposes, such as archiving email campaigns. Lead Gen & CRM provides you the ability to save an unlimited number of email reports to your account.
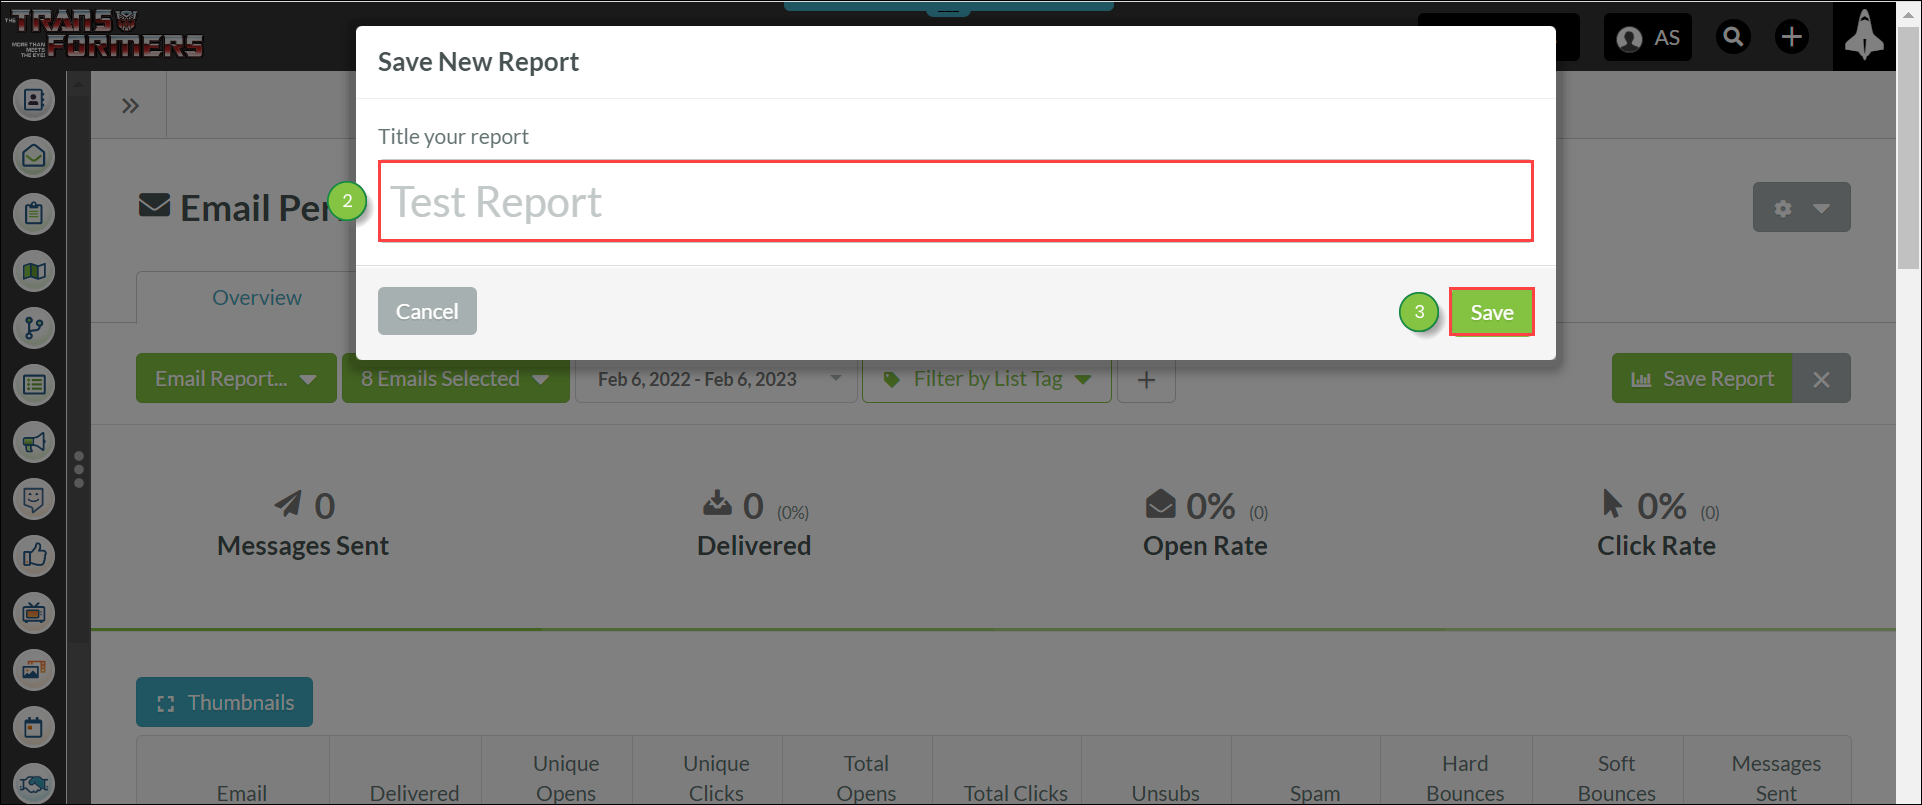
To save email reports to your account, do the following:
The Overview tab contains information at a glance.
To export the information contained in the overall email report as a .PDF or .CSV file, or to export individual parts of the report as a .CSV file, do the following:
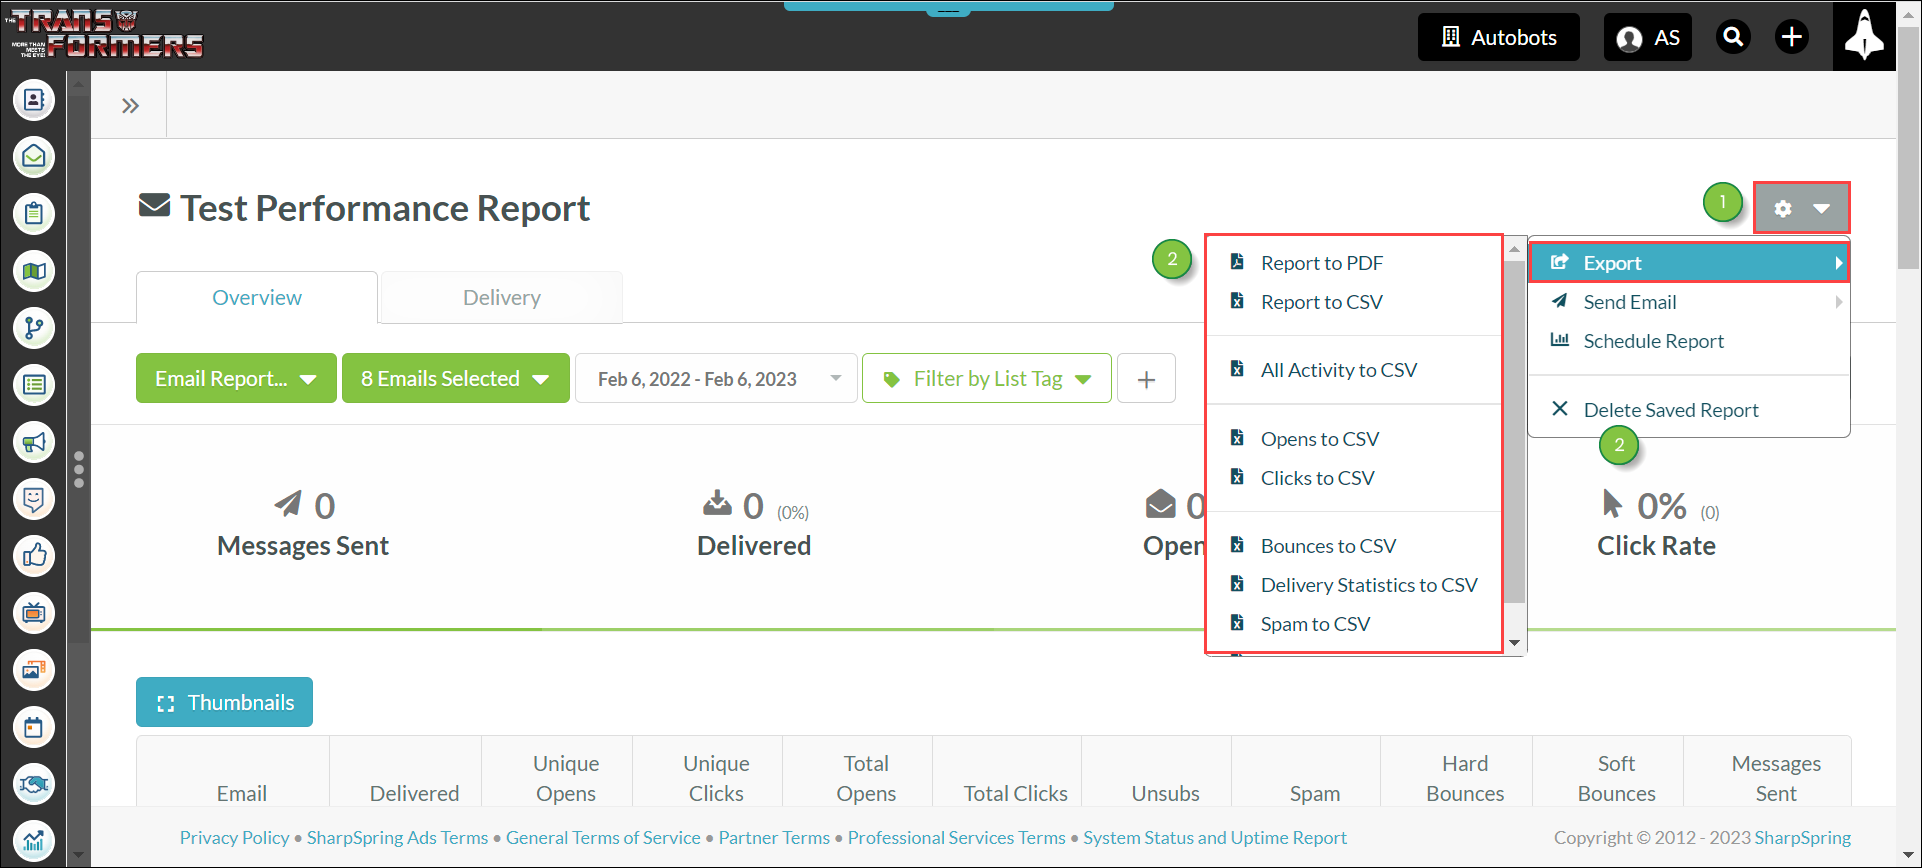
Saved .CSV files will download to your Internet browser's default download folder. Refer to your browser's help documentation for more information on how to access downloaded files.
Note: Different .PDF reader programs have different saving functions. Refer to your .PDF reader's help documentation for more information on how to save files.
You can send emails to specific contacts.
To send emails, do the following:
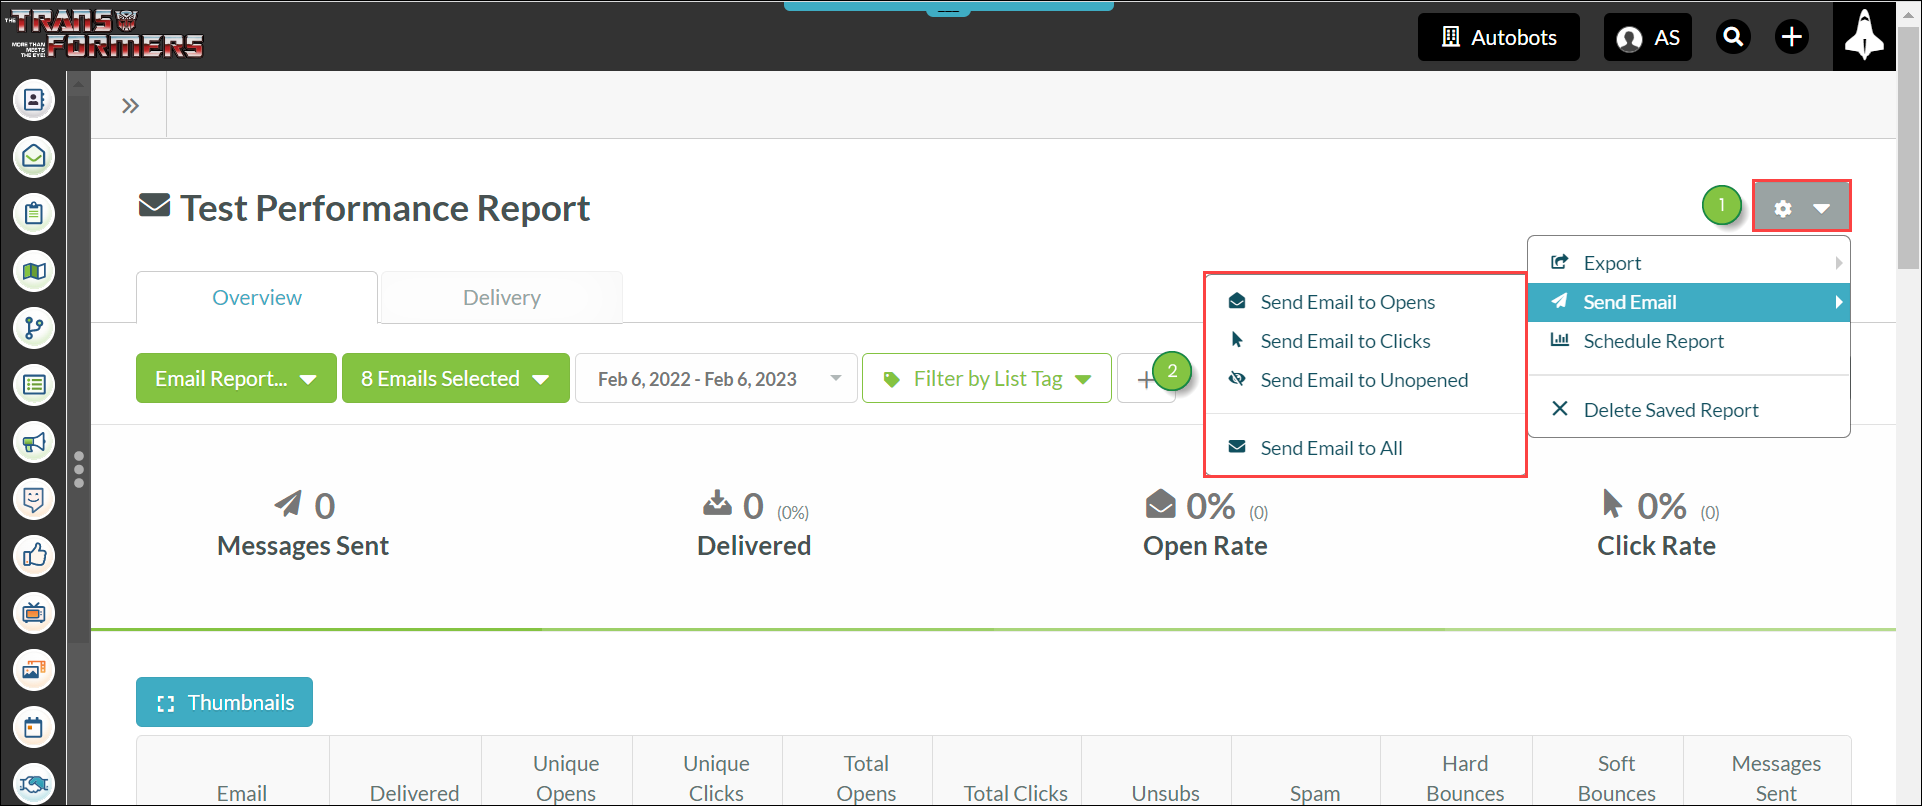
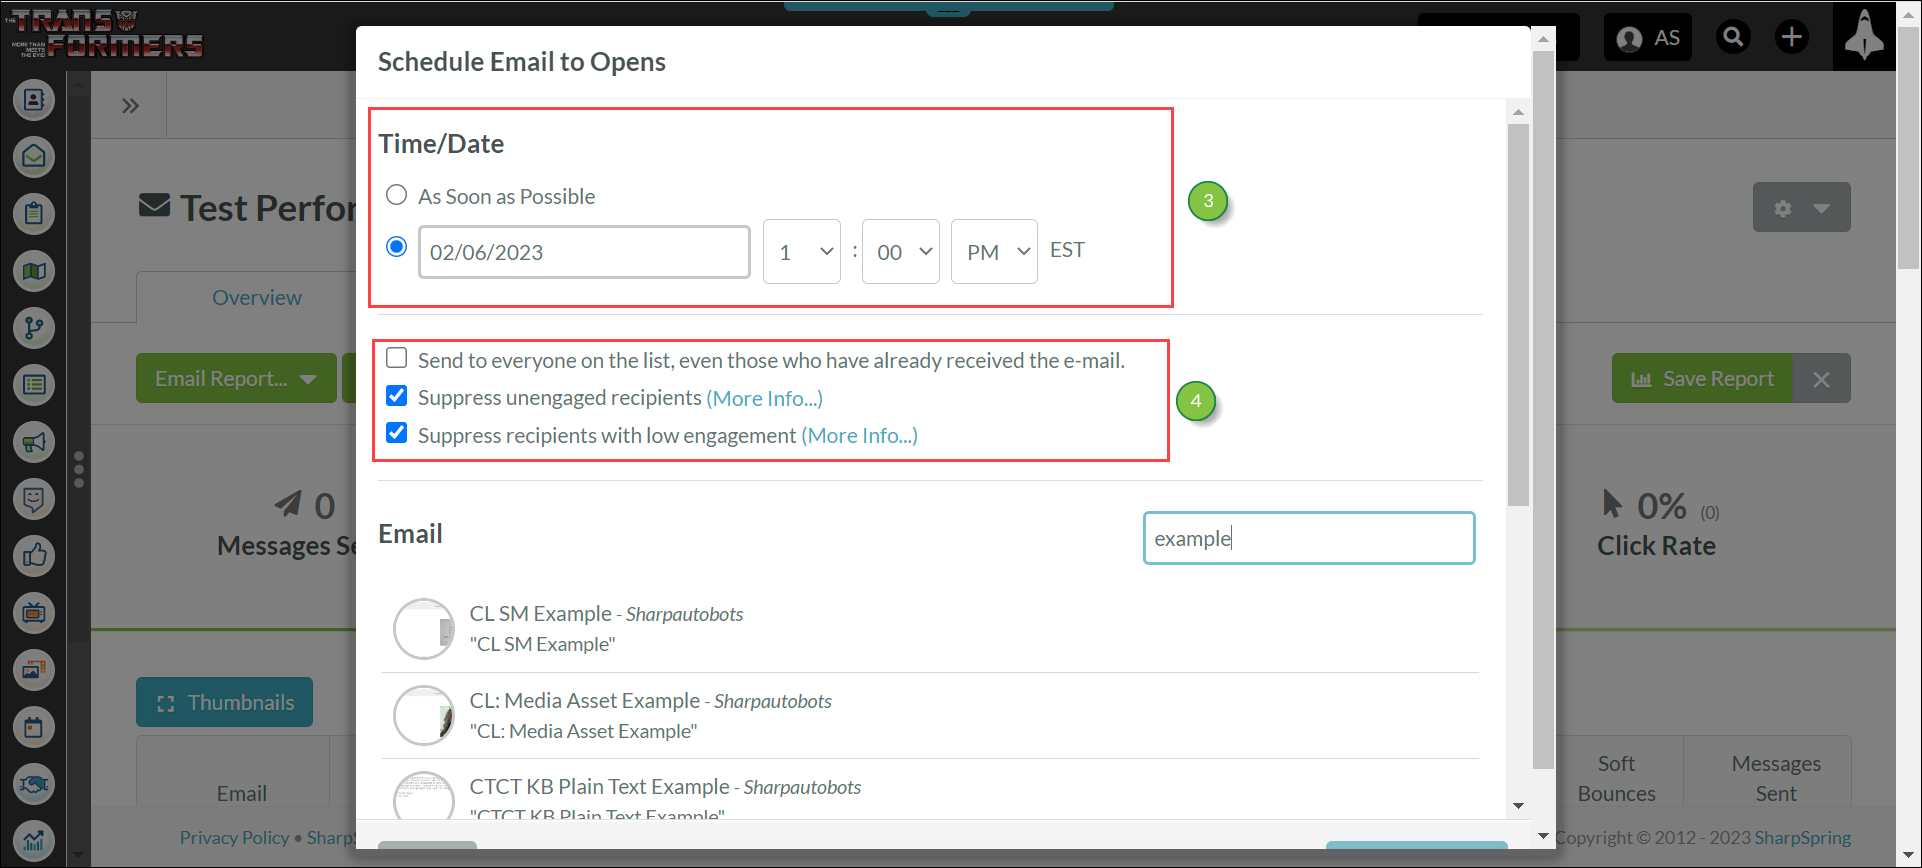
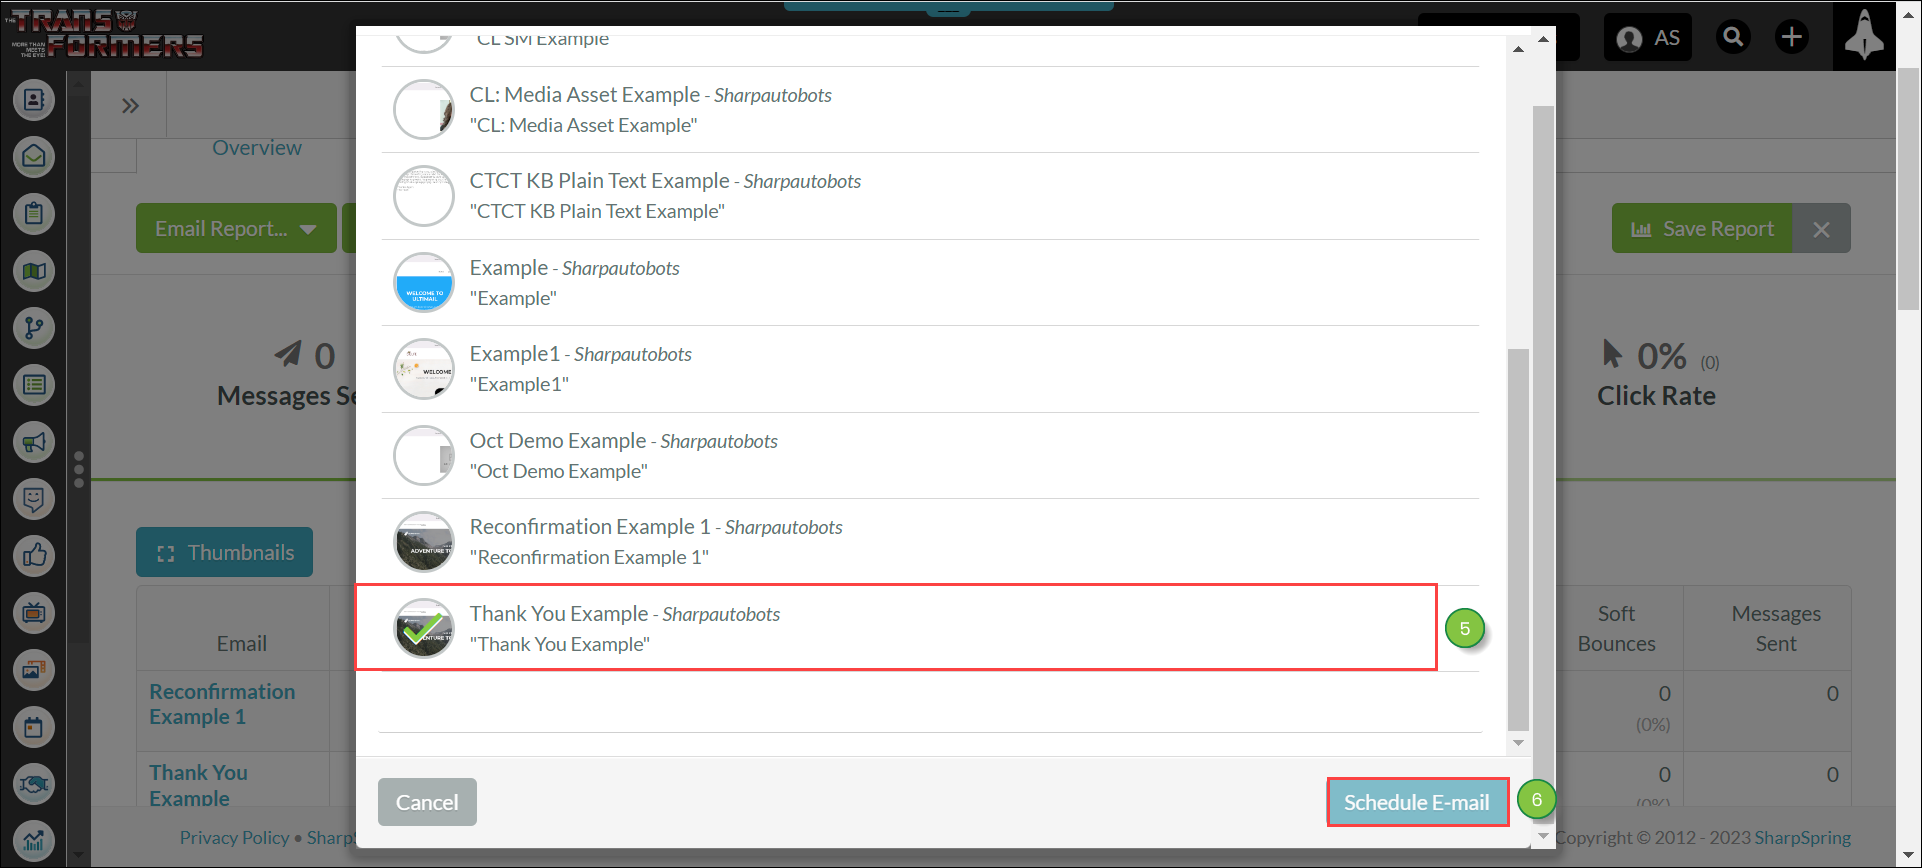
Note: You can type in keywords in the search box to find an appropriate email.
Refer to Saving and Scheduling Reports for information on scheduling a report.
Click ![]() Settings > Delete Saved Report to delete a saved report.
Settings > Delete Saved Report to delete a saved report.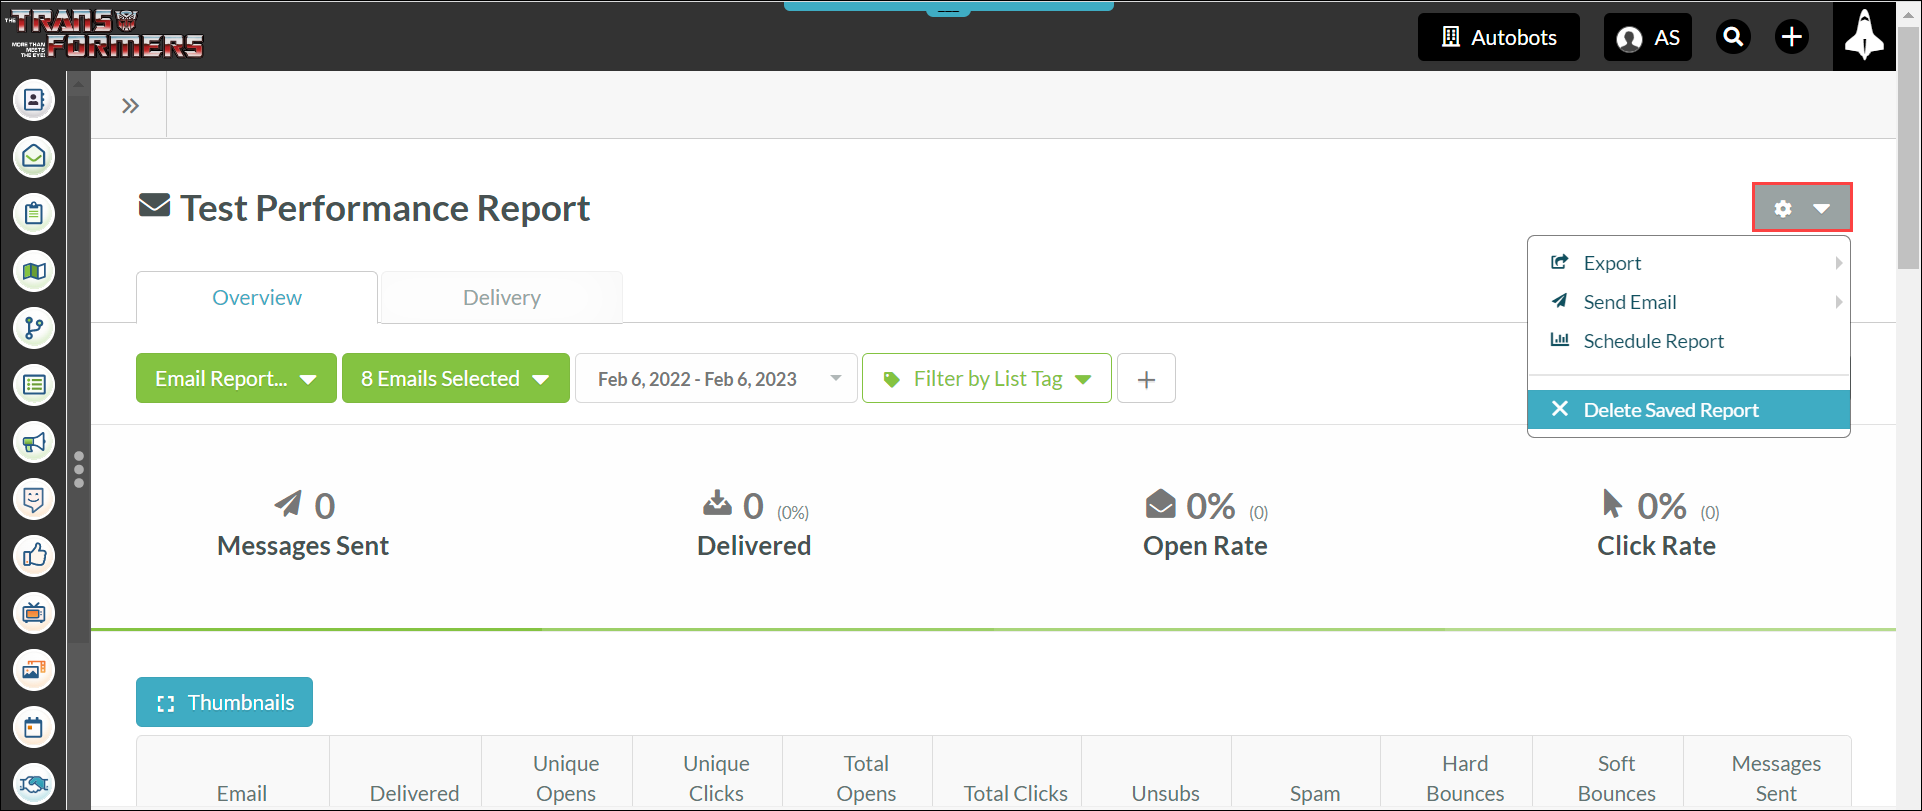
Important: This process is irreversible.
The Delivery tab provides details on the contacts who were sent the email. These contacts are sorted into the same groups as they are in the Overview section.
To view the individual contact groups, do the following:
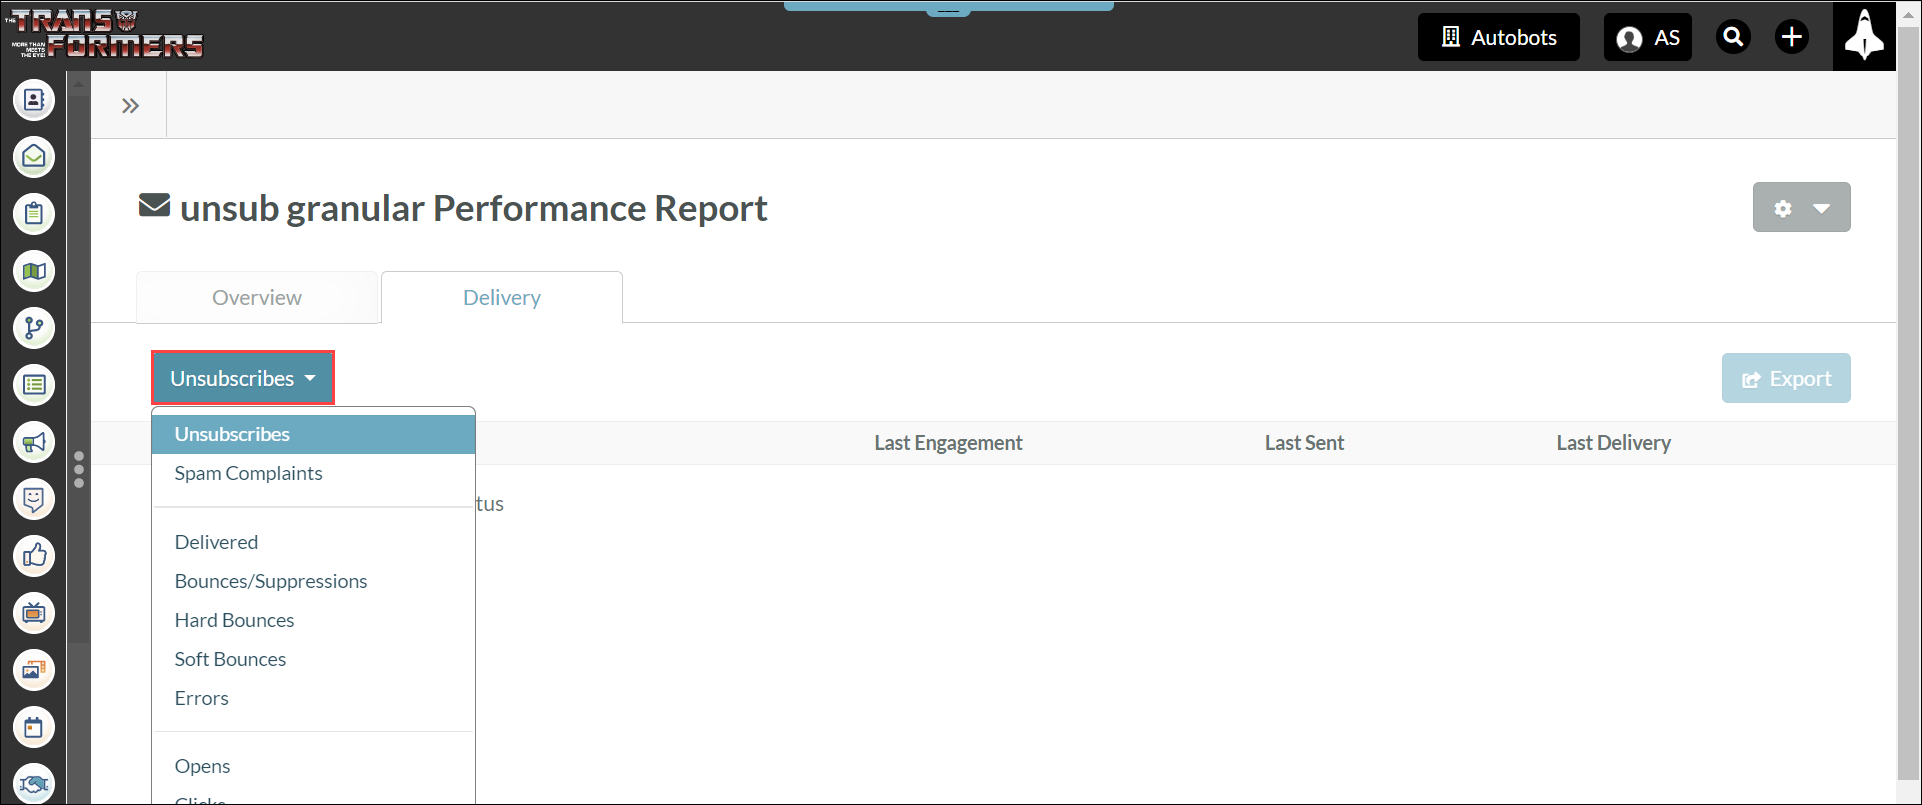
The selected contact group will appear. The email report provides information on the following:
Note: The Unsubscribes button is set to Unsubscribes by default.
The Delivery tab provides details on the contacts who were sent the email. These contacts are sorted into the same groups as they are in the Overview section.
To export the individual contact group information, click the Export button.
The exported information will appear in the Export Manager section of the Contact Manager.
Copyright © 2026 · All Rights Reserved · Constant Contact · Privacy Center