Lead Gen & CRM
How can we help you?
Search our help articles, video tutorials, and quickstart guides

You've got this. You've got us. Search our Knowledge Base to quickly find answers to your questions.

Using the Attachment URL Custom Field

Article: 000050293
Updated: March 24, 2025

Lead Gen & CRM enables you to create custom fields that be used in various locations in the application. These custom fields come in a variety of formats, enabling you to tailor your instance of Lead Gen & CRM to fit your company’s needs.

 
Users:
Administrators 
Company Managers 
Marketing Managers 
Sales Managers  
Salespersons  
Jr. Salespersons  


Understanding the Attachment URL Custom Field

The Attachment URL custom field is a lead field containing a URL for attachments outside of Lead Gen & CRM. While the Attachment URL can be any URL link, since it stores file locations, it's mainly used in emails to add attachments. For example, consider that you have a file hosted at the following URL:

http://yourownwebsitehere.com/myFile.PDF

You can place that URL in the leads' Attachment URL field, and create an email with the merge variable so the URL's file becomes an email attachment without showing in the email body. This lets you attach different files for different leads, so the same email can have different attachments— all depending on the URL stored in a recipient's field.

Important: This will only work if the email is sent from a visual workflow or action group. If sent to a list, the file will not be attached.


Creating the Attachment URL Field 

To begin, you'll need to create a custom Attachment URL field to use it in other features found in your Lead Gen & CRM account.
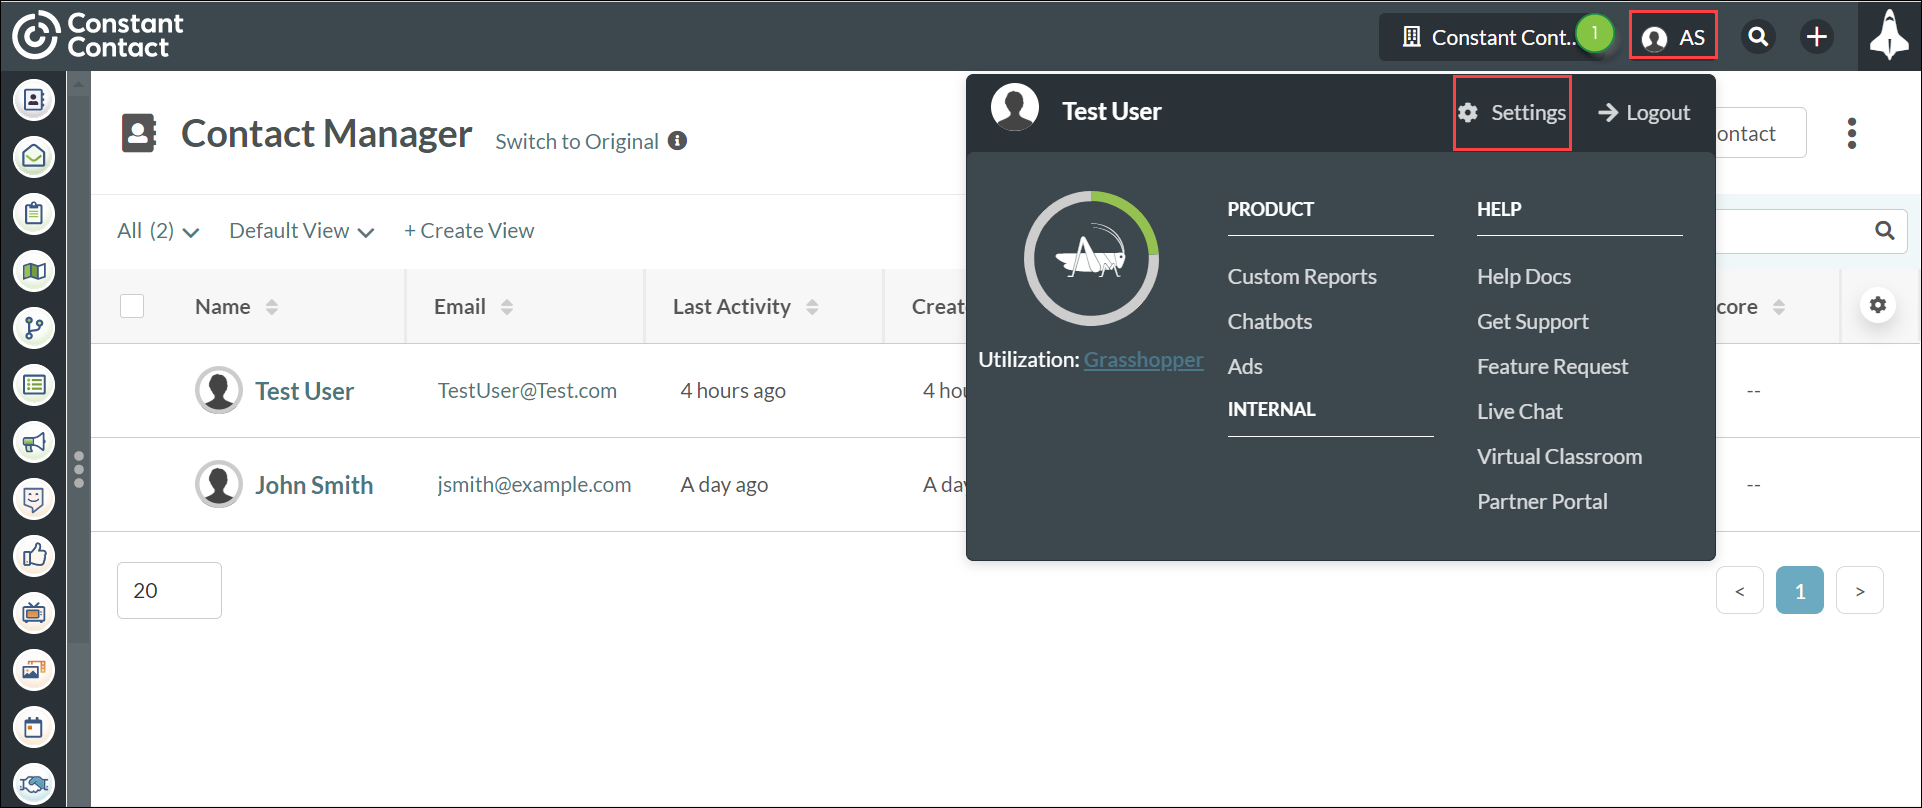
  1. Click  13personas.png  User Menu > Settings in the top toolbar.

    Account settings


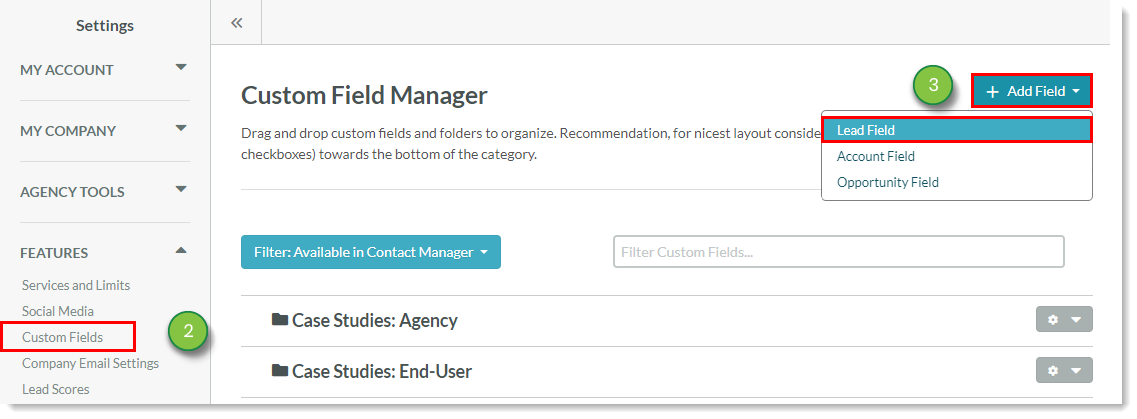
  2. Click Custom Fields, located under Features in the left panel.
  3. Click Add Field > Lead Field.

    Creating_the_Attachment_URL_Field_2-3.png
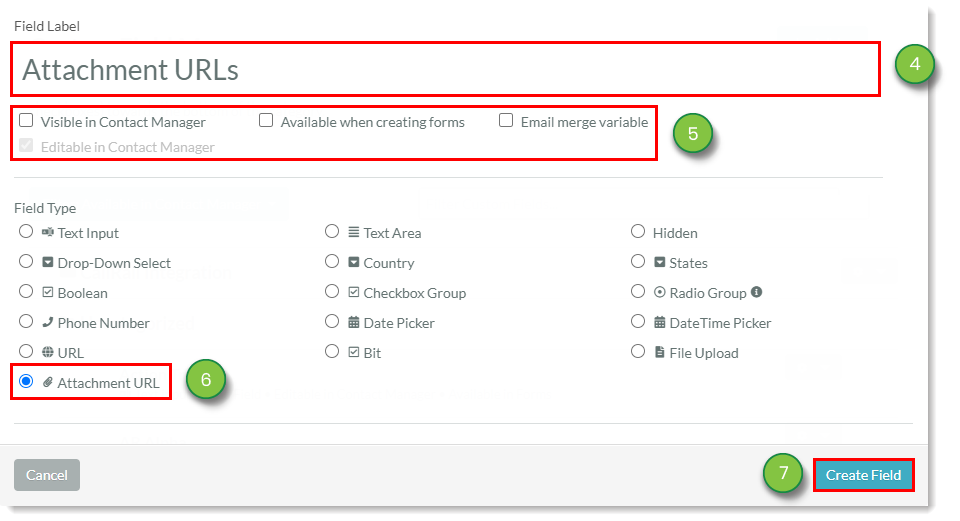
  4. Enter the desired name for the field.
  5. Click the Email merge variable checkbox. Optionally, select any desired settings for the field.
  6. Select Attachment URL in the Field Type section.
  7. Click Create Field

Creating_the_Attachment_URL_Field_4-5-6-7.png

Be aware that creating custom fields with the same name as available system fields will result in those system fields being rendered invisible and unusable in the platform.

If this happens to you, you will need to contact Support in order to restore your system fields


Mapping the Field on Import

When importing .CSV files, if there an Attachment URL column included in the file, you can map the contents of that column to the leads during the import process.

To map the Attachment URL field, do the following:
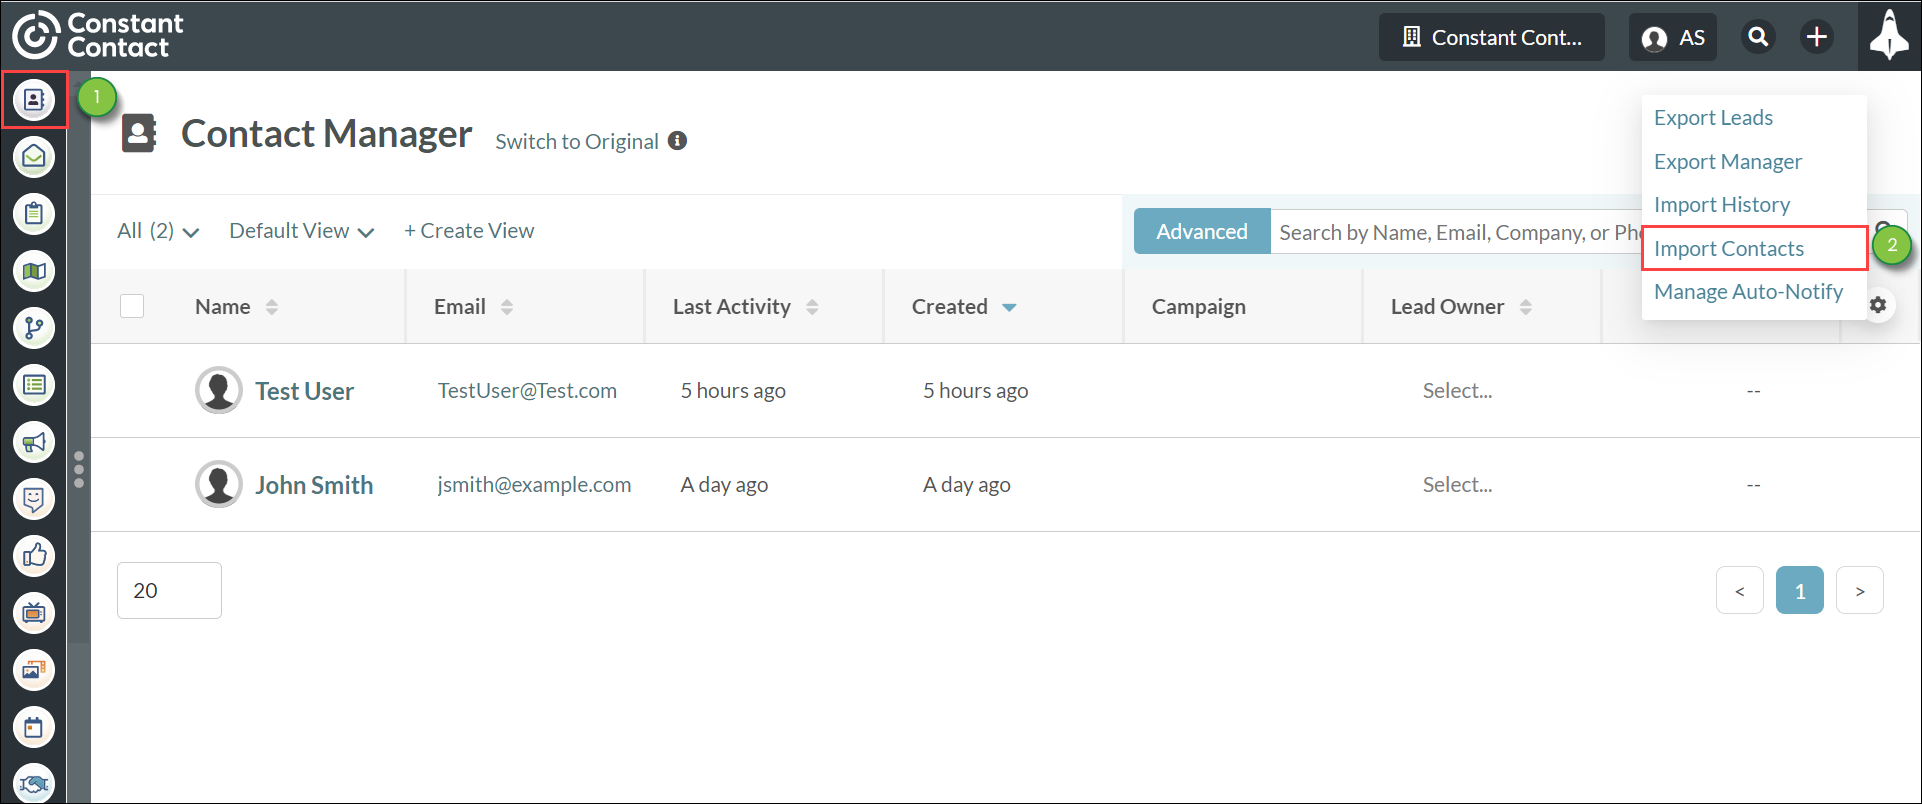
  1. Click Contacts in the left toolbar.
  2. Click  12more.png  Options > Import Contacts.

    Using URL Custom Fields


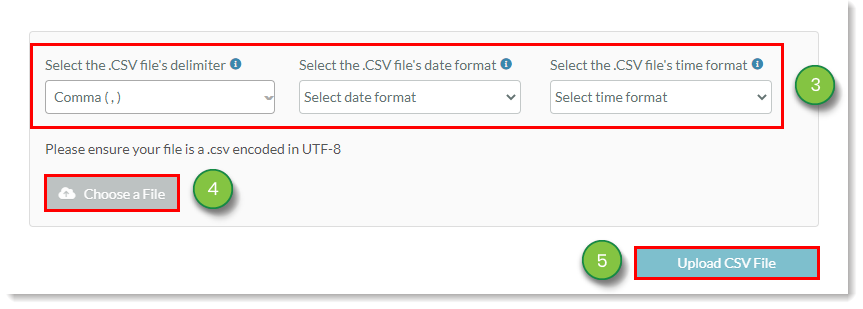
  3. At the bottom of the Import Tool page, select the appropriate file settings.
  4. Click Choose a File to select the desired .CSV file.
  5. Click Upload .CSV File.

    Mapping_the_Field_on_Import_3-4-5.png
     
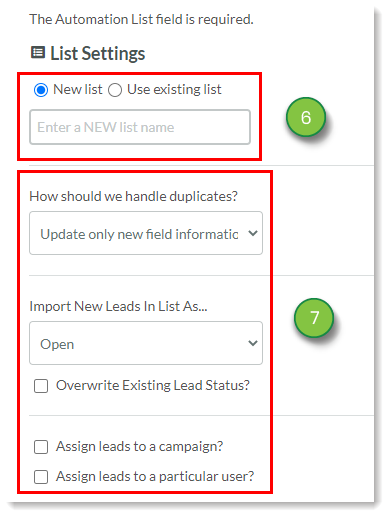
  6. Select either New List or Use Existing List, under the List Settings section on the Import Contacts page that automatically opens. Depending on the list type you have chosen:
    • New lists: Enter a name for the list.
    • Existing lists: Enter the name of the desired existing list to add contacts to.
  7. Set the list settings for how you would like to import the contacts.

    Mapping_the_Field_on_Import_6-7_new.png
     
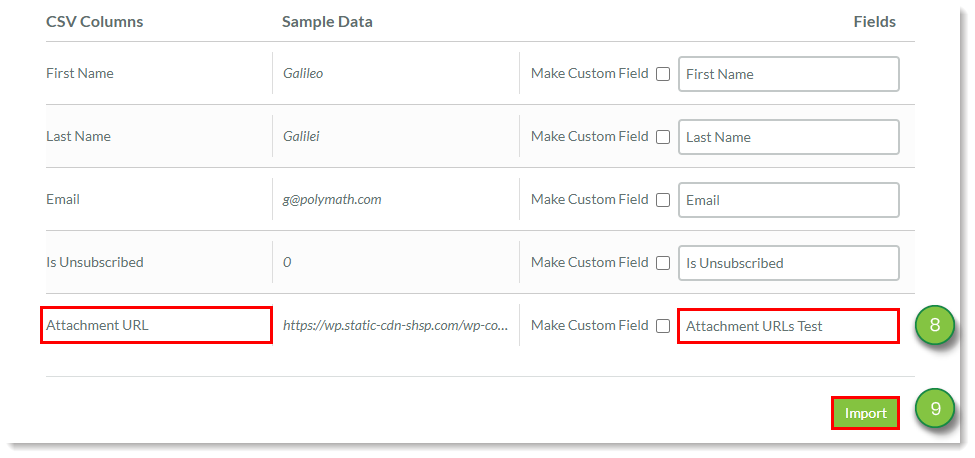
  8. In the .CSV Columns section, match the Attachment URL column header to the Attachment URL custom field.
  9. Click Import.

    Mapping_the_Field_on_Import_8-9.png
     
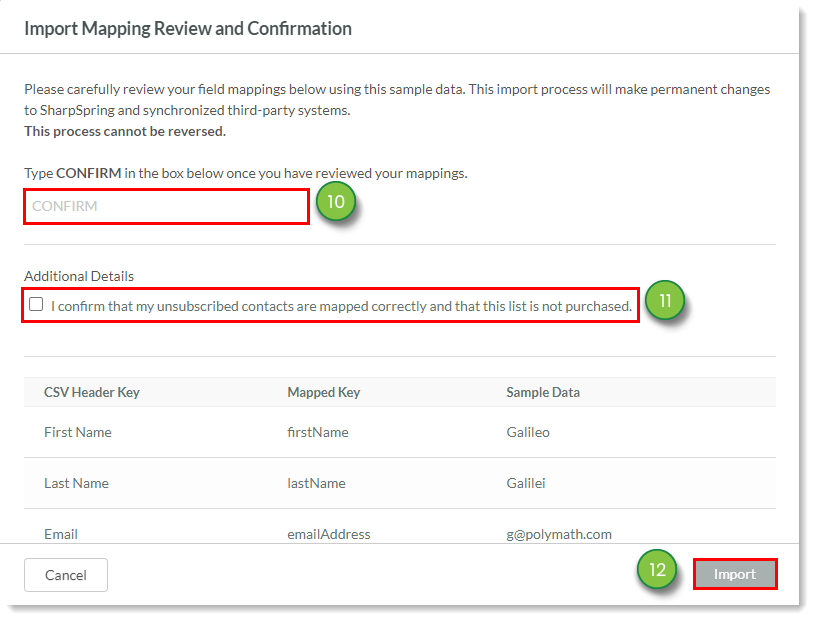
  10. Type CONFIRM into the text field.
  11. Click the I confirm that my unsubscribed contacts are mapped correctly and that this list is not purchased checkbox.
  12. Click Import.

    Mapping_the_Field_on_Import_10-11-12.png

Once the import is complete, you will be able to see the Attachment URL as a custom field in the Contact Manager.


Using the Field in Emails and Workflows

Note: Attachment URLs as merge variables can only be used when sending emails that are a part of a workflow. If you attempt to send an email that contains an Attachment URL merge variable directly to a list, or from the email itself, the Attachment URL merge variable will not populate as intended.

Adding the Attachment URL Custom Field to Emails

You can build Visual Workflows that will send an email that contains the Attachment URL as a merge variable when a user does a specific action.

To set the Attachment URL field in an email, do the following:
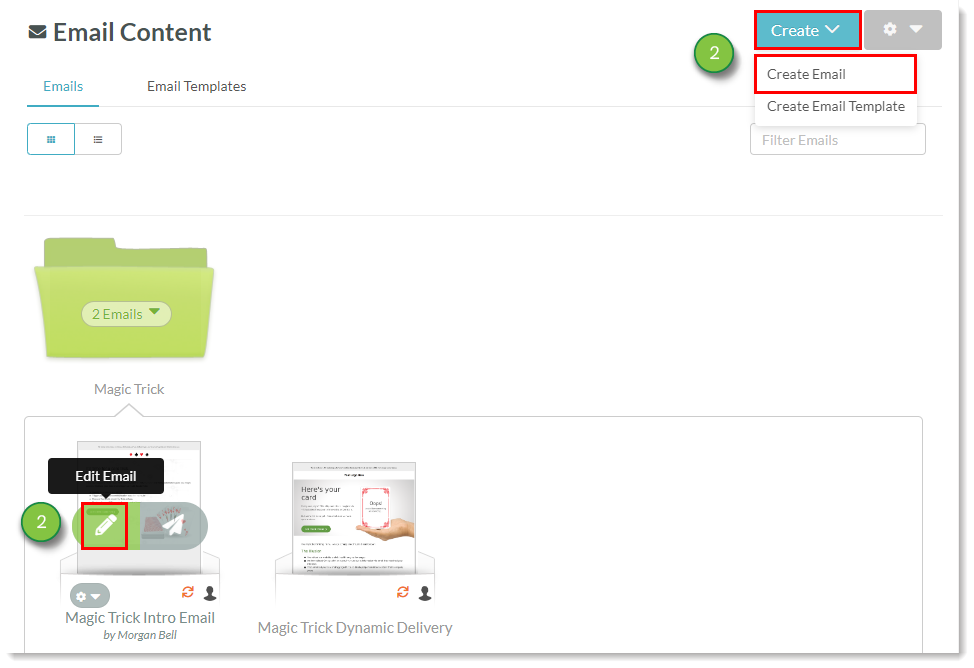
  1. Click Email in the left toolbar.
  2. Create or edit an email.

    Adding_the_Attachment_URL_Custom_Field_to_Emails_2.png
     
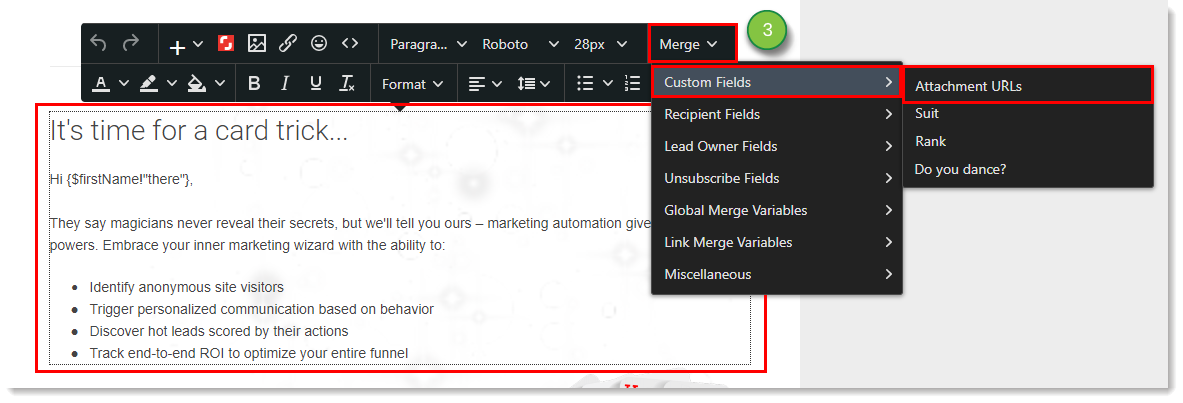
  3. Click into an email textbox and click Merge > Custom Fields > Attachment URL in the Email Designer toolbar. Note: This field will not work in custom notification emails.

    Adding_the_Attachment_URL_Custom_Field_to_Emails_3.png
     
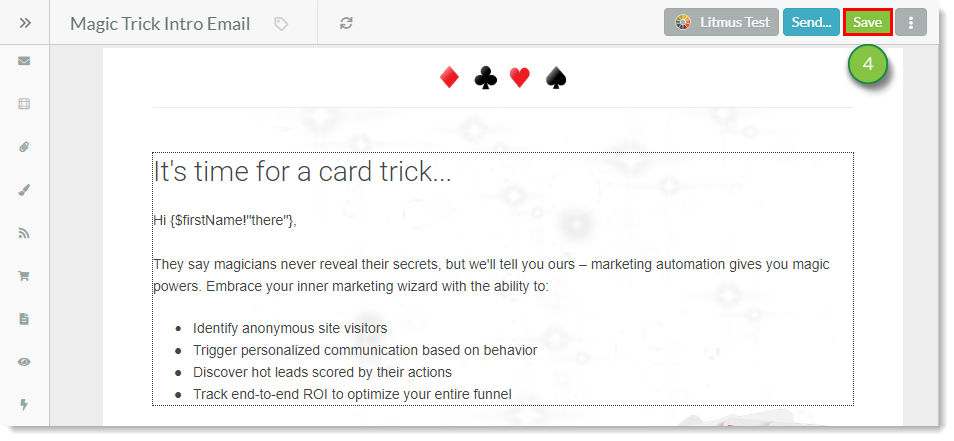
  4. Add other content to the email as necessary and click Save

    Adding_the_Attachment_URL_Custom_Field_to_Emails_4-5.png


Adding the Attachment URL Custom Field to Workflows

Once you have added the Attachment URL field to an email, you can set it to operate in a workflow.

To add the Attachment URL as an action in visual workflows, do the following:
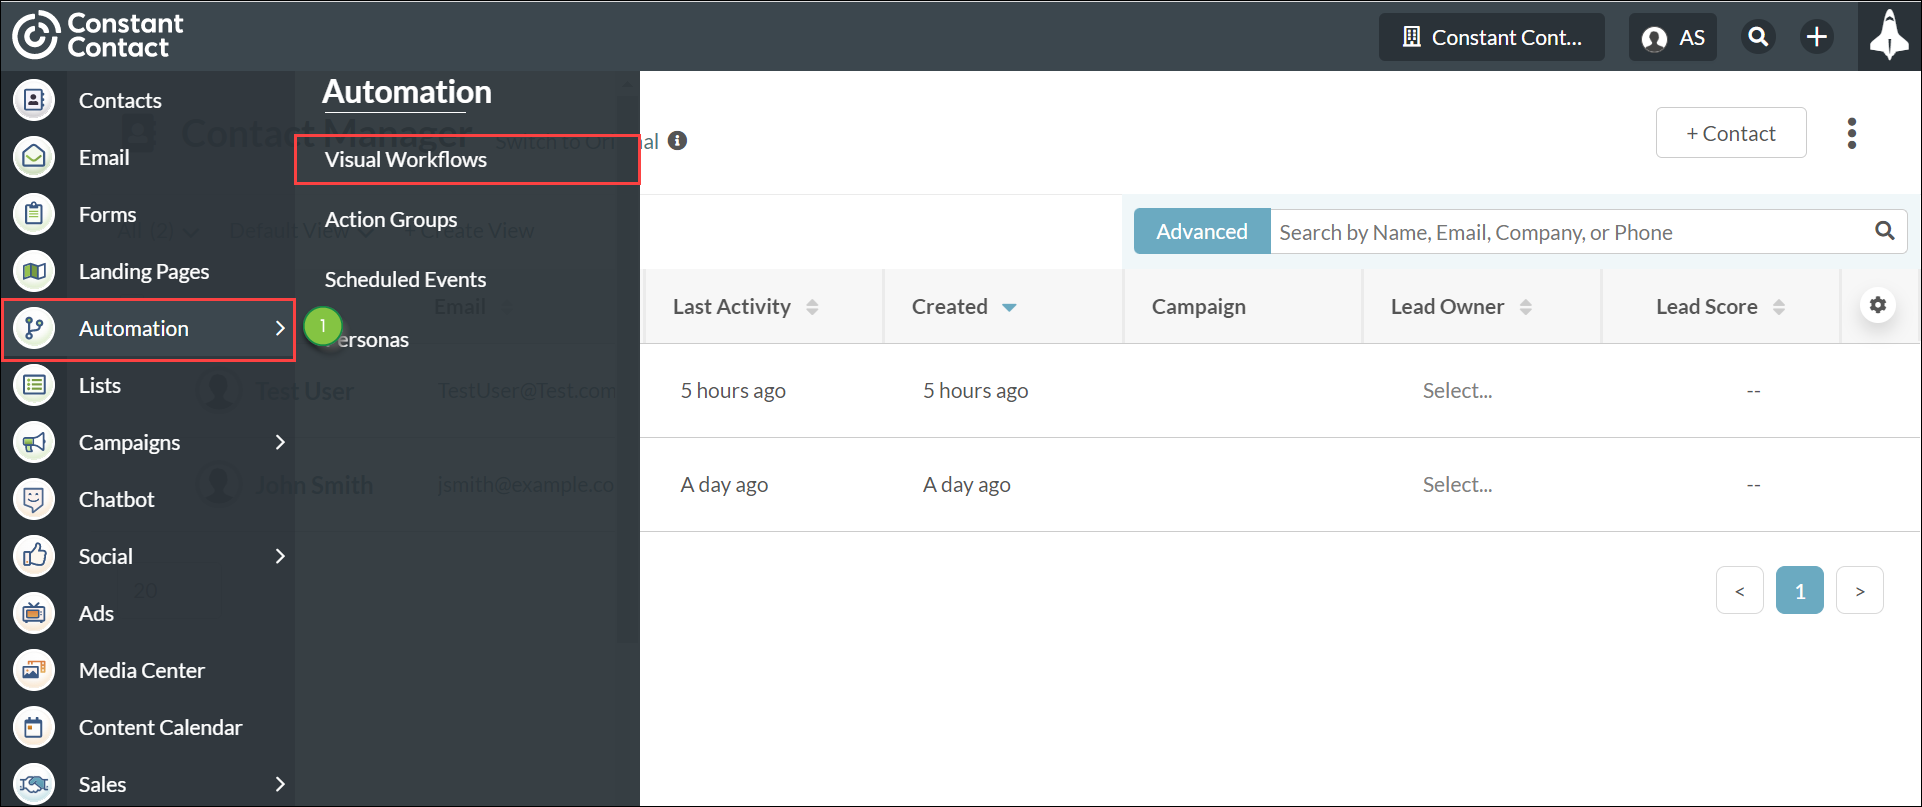
  1. Click Automation > Visual Workflows in the left toolbar.

    Visual Workflow


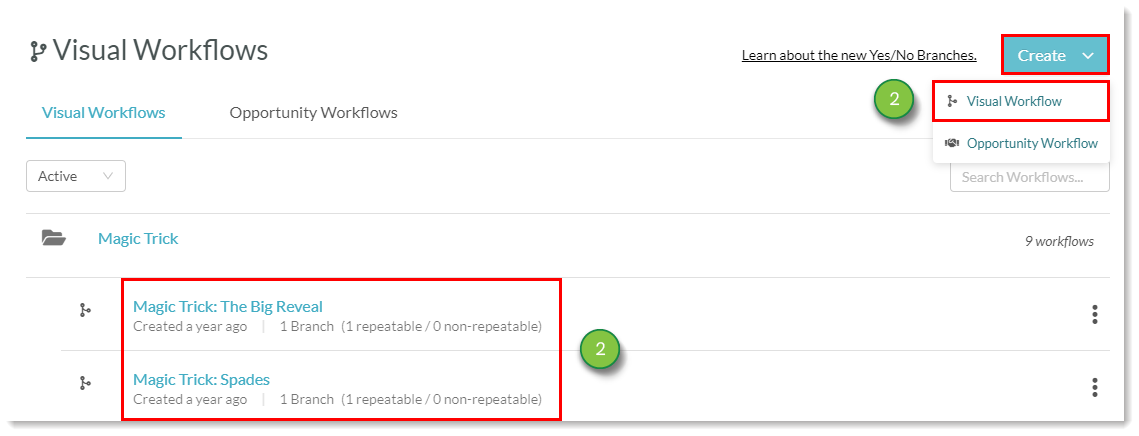
  2. Create or edit a workflow.

    Adding_the_Attachment_URL_Custom_Field_to_Workflows_2.png
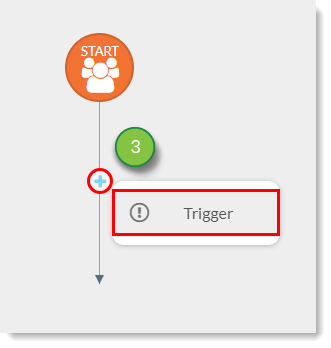
  3. Click + Add > Trigger under Start or an applicable branch and add the desired trigger.

    Adding_the_Attachment_URL_Custom_Field_to_Workflows_3.png
     
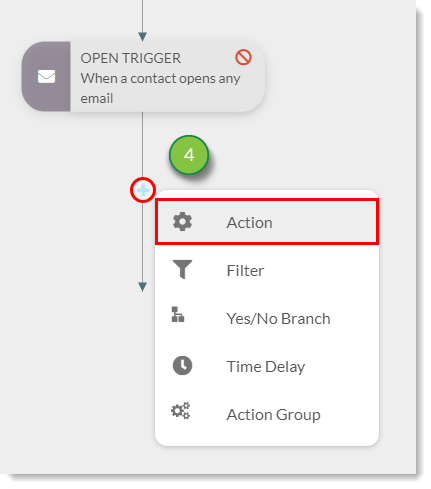
  4. Click + Add > Action under the created trigger.

    Adding_the_Attachment_URL_Custom_Field_to_Workflows_4.png
     
  5. Click send the email, located under Communication.

    Adding_the_Attachment_URL_Custom_Field_to_Workflows_5.png
     
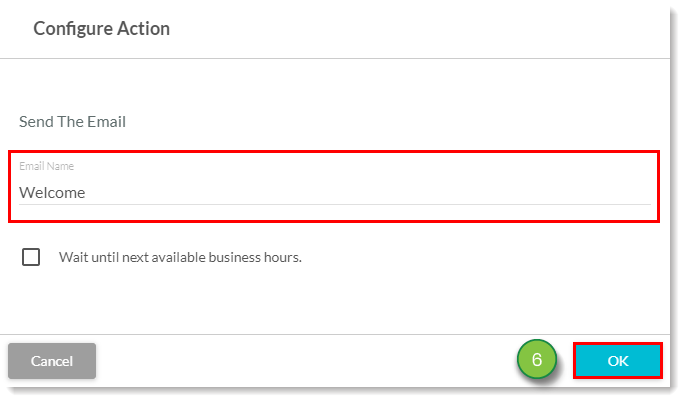
  6. Enter the name of the email with the Attachment URL merge variable and click OK.

    Adding_the_Attachment_URL_Custom_Field_to_Workflows_6.png
     
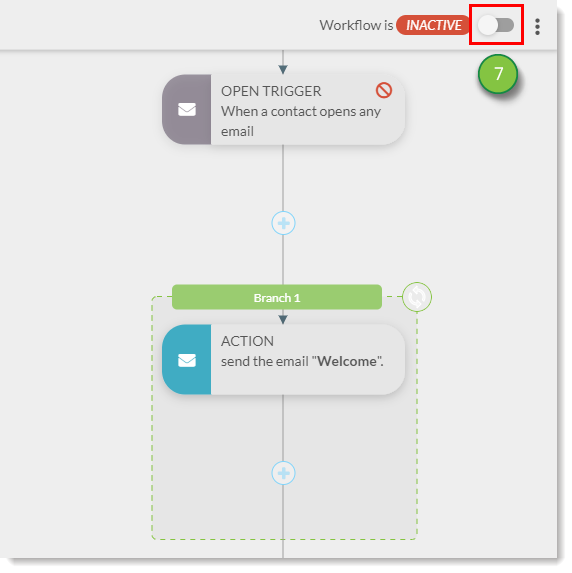
  7. Add triggers, actions, time delays, and action groups as necessary, and when finished, click the Active/Inactive toggle to set this workflow to Active.

    Adding_the_Attachment_URL_Custom_Field_to_Workflows_7.png

Contacts who trigger the workflow will receive the email containing their specific Attachment URL as a merge variable.


Did this article answer your question?


Constant Contact Logo

Copyright © 2025 · All Rights Reserved · Constant Contact · Privacy Center