Lead Gen & CRM
How can we help you?
Search our help articles, video tutorials, and quickstart guides

You've got this. You've got us. Search our Knowledge Base to quickly find answers to your questions.

Importing and Mapping Contacts from .CSV Files

Article: 000050296
Updated: June 18, 2025

Lead Gen & CRM enables you to import your contacts through a Comma-Separated Value (.CSV) spreadsheet by using the Import Tool. To import the file properly, you will need to map your spreadsheet to Lead Gen & CRM.

 
Users:
Administrators 
Company Managers 
Marketing Managers 
Sales Managers 
Salespersons  
Jr. Salespersons  

Light Bulb IconTip: Are you looking for information about Constant Contact’s Email and Digital Marketing product? This article is for Constant Contact’s Lead Gen & CRM product. Head on over to the Email and Digital Marketing articles by clicking here. Not sure what the difference is? Read this article.


Important Information Regarding .CSV Files

The Import Tool uses information from .CSV files and creates contact lists from this information. These files contain only alphanumeric data and are presented in a table format.

Any .CSV file that you import should be structured similar to the following:
 

First NameLast NameEmailIs Unsubscribed
GalileoGalileig@polymath.com

0

Edwin Hubblespace@extragalatic.com

0

Hipparchus math@trig.com

1


When importing .CSV files, be aware of the following:

  • Header rows are required. Header rows are necessary for mapping Lead Gen & CRM fields to imported fields.
  • Email fields are required. The Import Tool requires that your .CSV file contain a column mapped to the Email field. You will still need to include the Email column when a contact does not have an email address. 
  • Is Unsubscribed fields are required. For Lead Gen & CRM to successfully import a .CSV file, the file needs one column header that is labeled as Is Unsubscribed. The Is Unsubscribed field should be a boolean field, where 0 is for leads who are opted in, and 1 is for leads who are not opted in.
  • Utilize first and last names. For the import to be successful, a first and last name are suggested in the event that you do not have an email address for that contact. Use both as often as possible.
  • Values must match. When importing custom field values, ensure that they are formatted to match the custom field values. For example, picklist and checkbox values are case-sensitive.
  • When importing data with picklist and checkbox fields, the fields must be present in the file import in order to appear. Ensure that the picklist or checkbox fields in your file exist before importing. Otherwise, the data may not import properly.
  • When importing to a checkbox custom field, the data cannot have spaces between values and commas. An example of this would be value1,value2,value3. 
  • When importing contact tags, separate multiple tags in the same cell using a comma. Contact tags are case sensitive. If a contact tag doesn't already exist in your instance, a new one will be created.

For more information on how to structure .CSV files and what they should contain, refer to the following help articles:


Importing Contacts

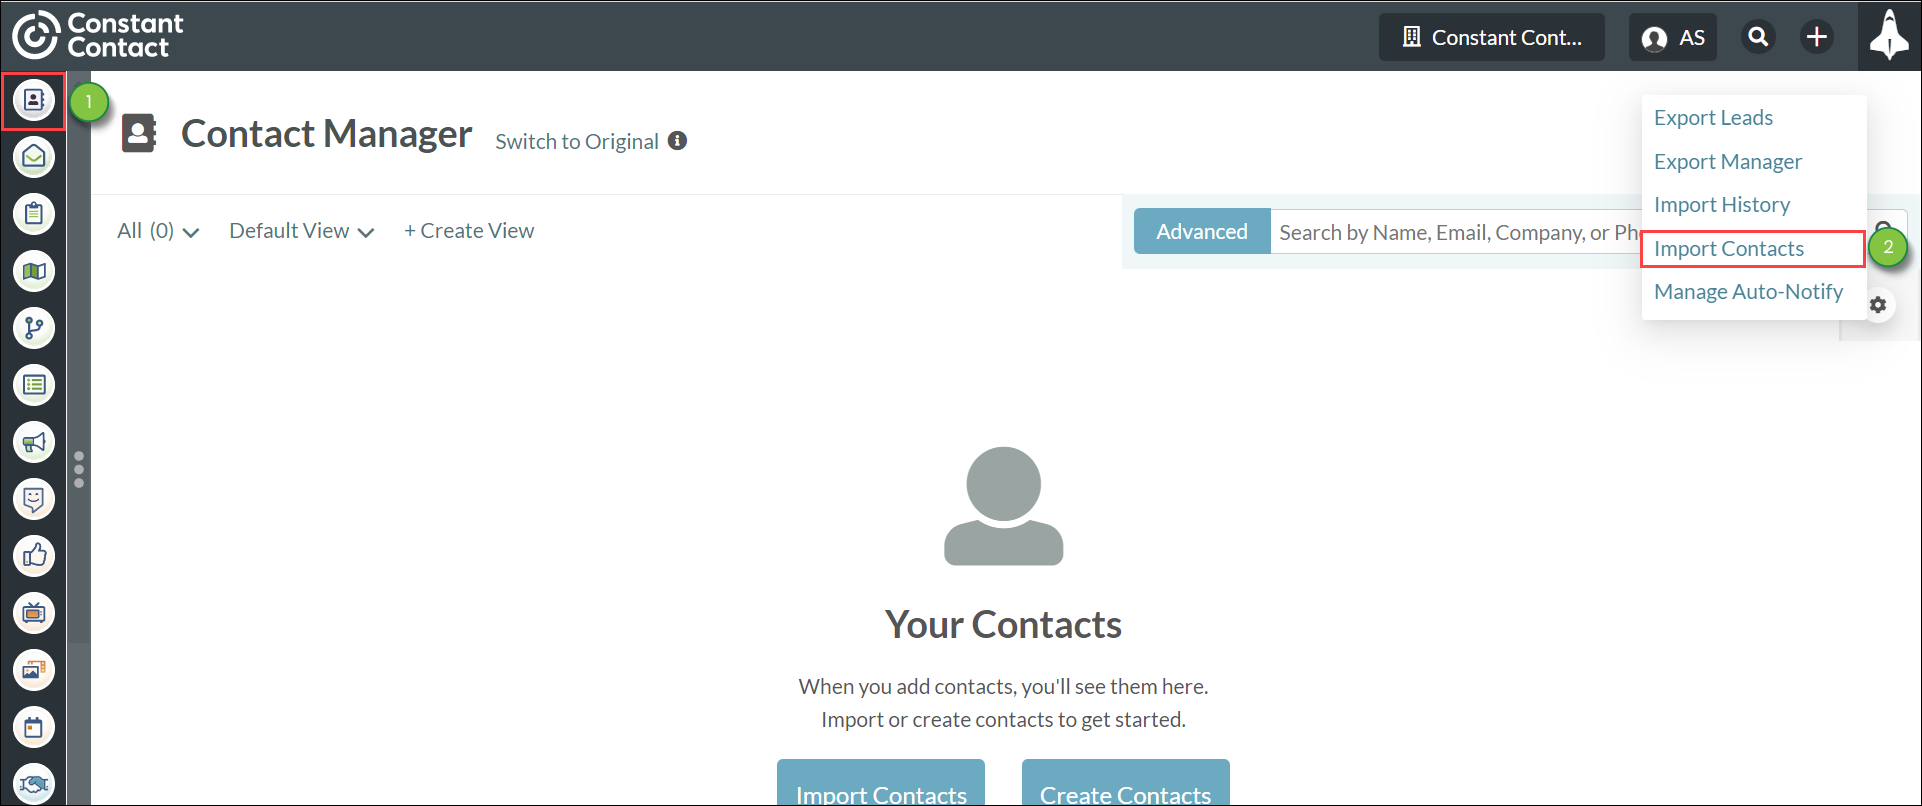
You can import contacts through the Import Tool.

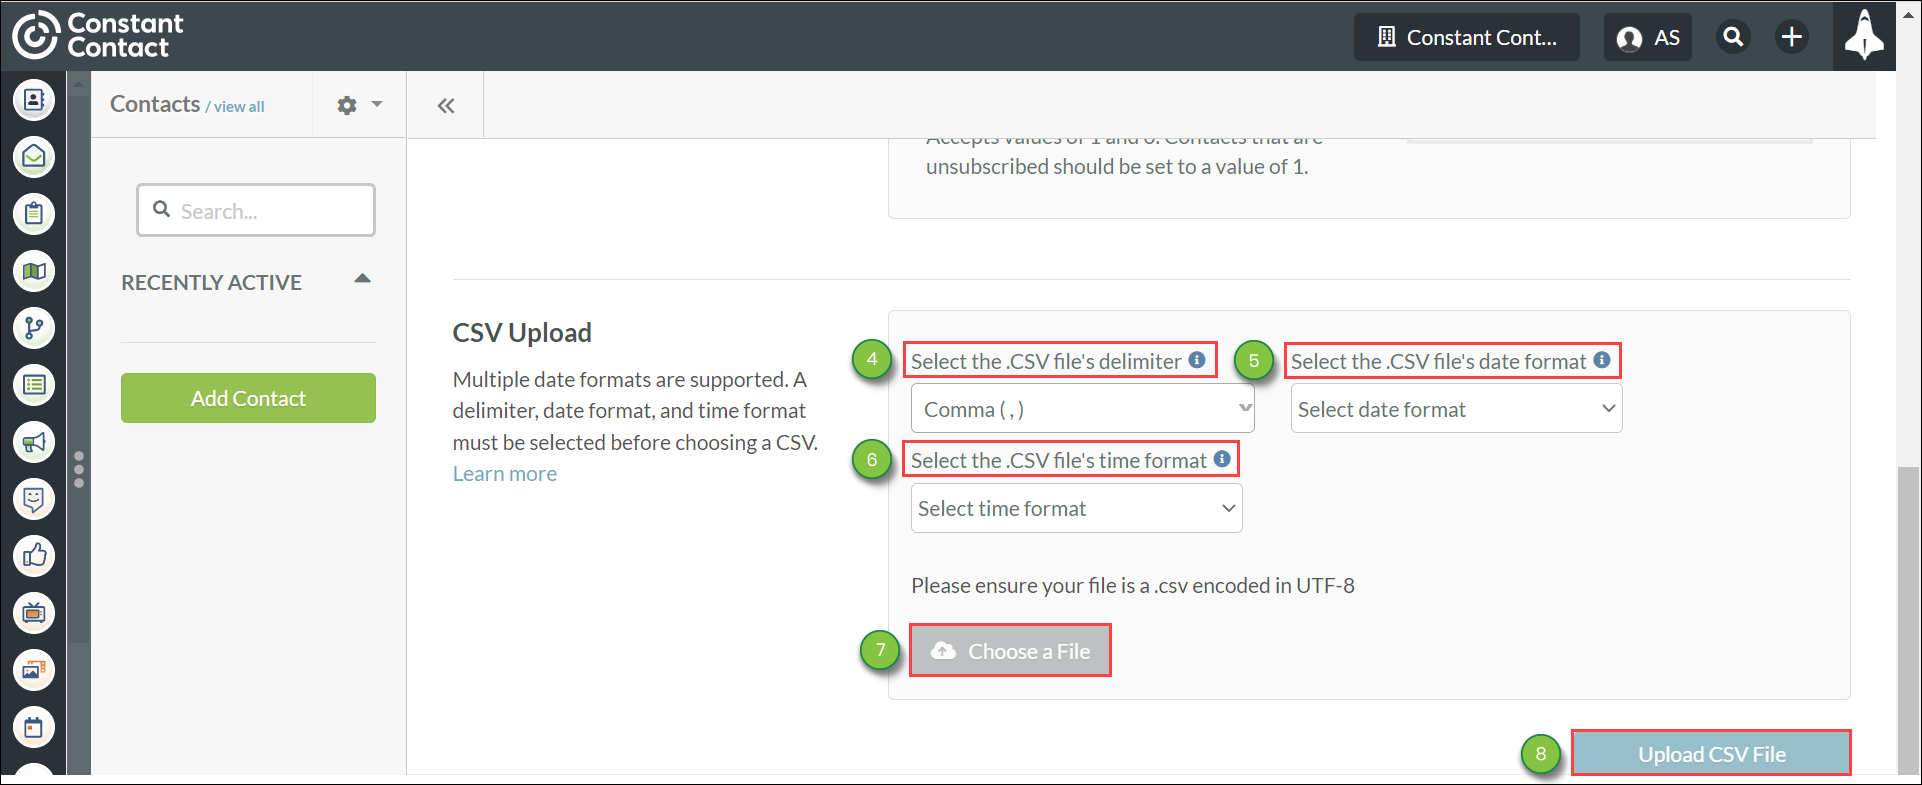
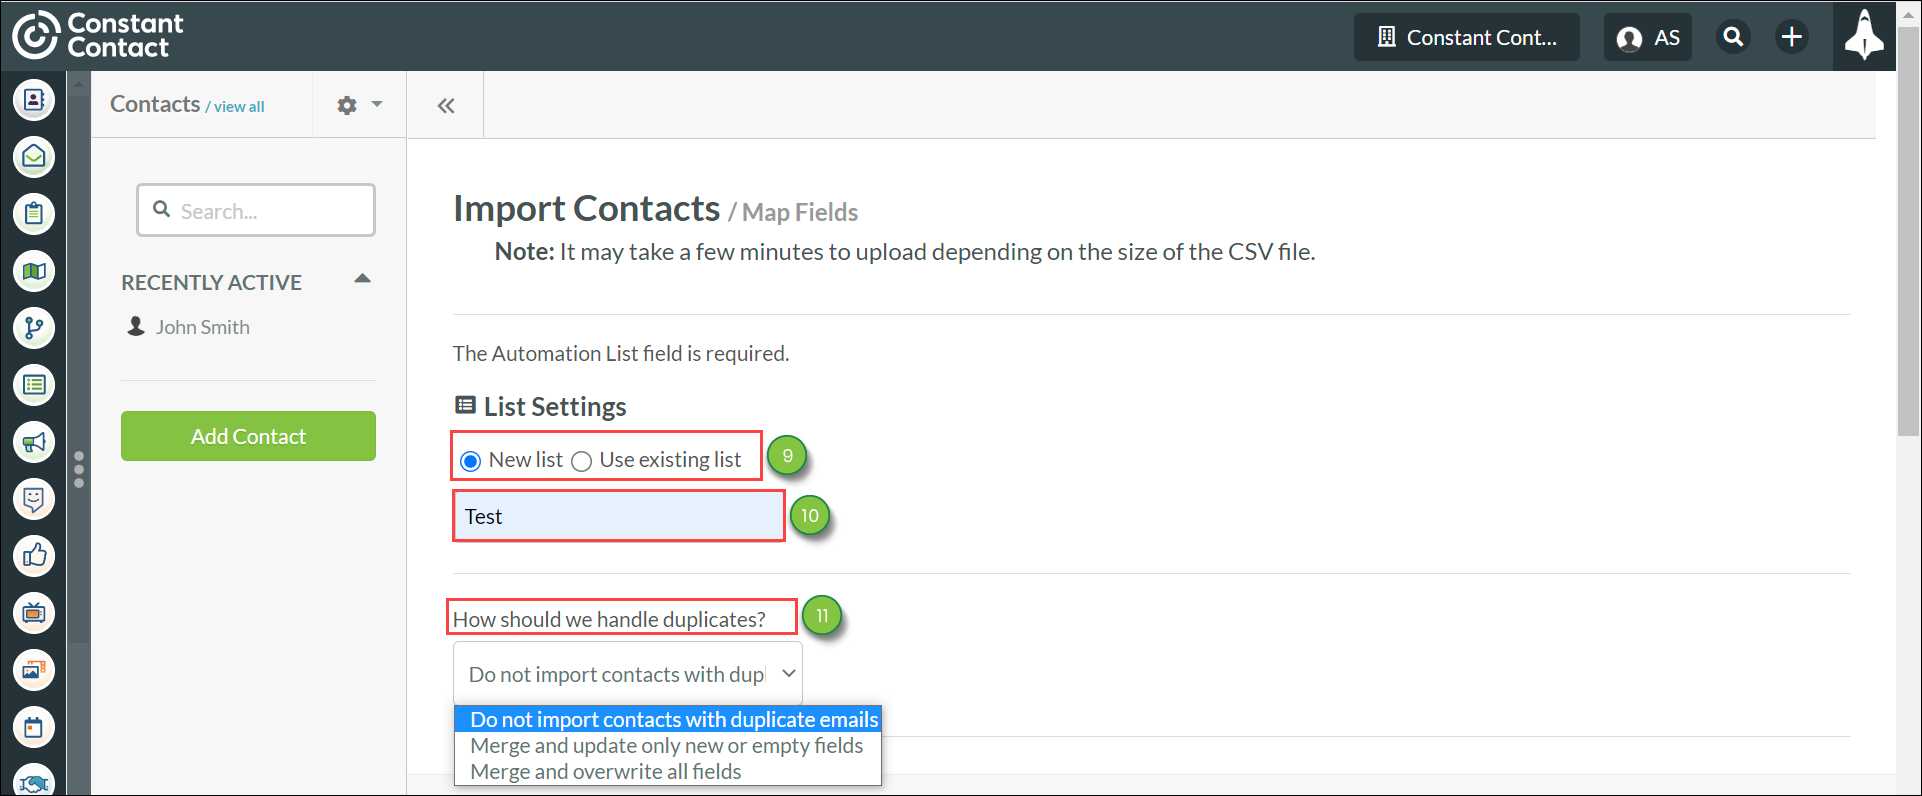
To import contacts, do the following: 

  1. Click Contacts in the left toolbar.
  2. Click  12more.png   Options > Import Contacts.

    Import Mapping


  3. Scroll to the bottom of the Import Tool page.
  4. Select the appropriate delimiter from the Select delimiter drop-down menu.
  5. Select the appropriate date format from the Select date format drop-down menu.
  6. Select the appropriate time format from the Select time format drop-down menu.
  7. Click Choose a File. Choose the applicable .CSV file. 
  8. Click Upload .CSV File.

    Import Mapping


  9. Select either New List or Use Existing List, located under List Settings on the Import Contacts page. 
  10. Depending on the list type, do one of the following in the List Name text box:
    • New lists: Enter a name for the list.
    • Existing lists: Enter the name of the desired existing list to add contacts to.
  11. Select from the following options the How Should We Handle Duplicates? drop-down menu:
    • Do not update: Duplicate fields and information are not updated.
    • Update only new: Adds information from a new column.
    • Update new and existing: Updates all fields and information in the record.
       
    Import Mapping


  12. Select one of the following in the Import Unassigned Leads in List As... drop-down menu:
    • Open
    • Unqualified Leads
    • Qualified Leads
    • Contacts
    • Customers
    Import Mapping


  13. Optionally, do the following:
    • Click the Assign to a campaign? checkbox.
    • In the drop-down menu that appears, select the desired campaign.
  14. Optionally, do the following:
    • Click the Assign leads to a particular user? checkbox.
    • In the drop-down menu that appears, select the desired user. 

    Import Mapping


Note: You can import notes via the CRM Migration Tool.


Mapping Fields  

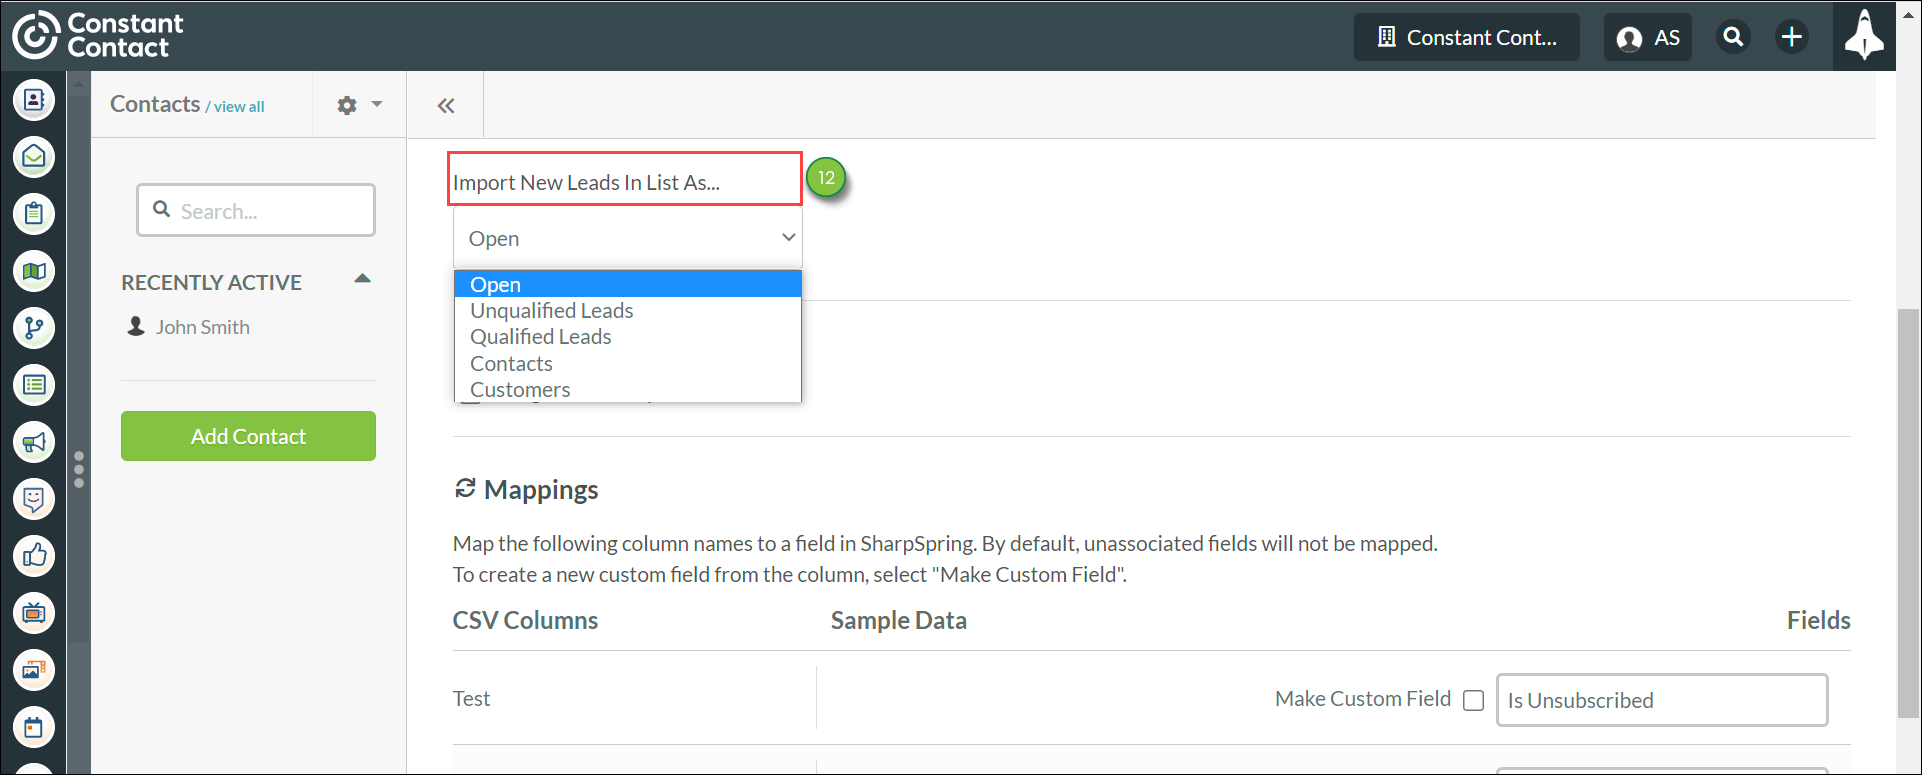
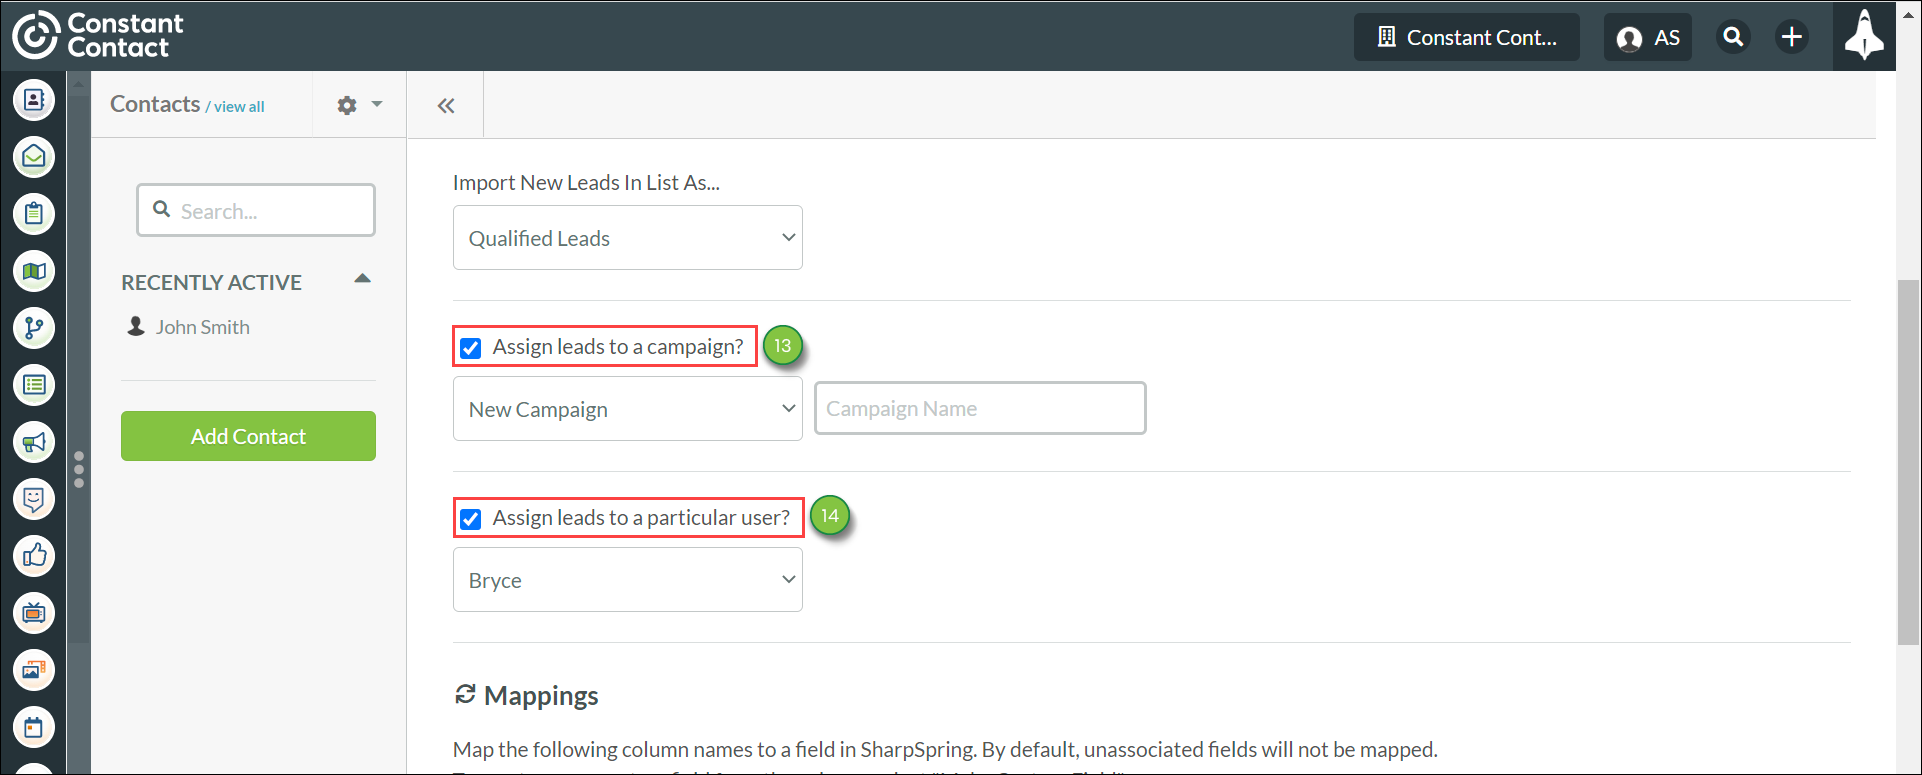
When importing .CSV files, Lead Gen & CRM tries to automatically map certain standard fields like First Name, Last Name, and Email.
It is not always able to do so, but you may see fields already mapped.
You can reassign these fields if you do not want to map them how Lead Gen & CRM tries to map them for you.

To map contacts when importing .CSV files, Import an applicable .CSV file and do the following:

  1. Select the appropriate fields to map to in the field text boxes.
  2. Optionally, click the Make Custom Field box to import the column as a custom field.
  3. Repeat as necessary for all applicable fields.
  4. Click Import

    Importing Contacts


  5. Type Confirm in the pop-up window that appears.
  6. Click the I confirm that my unsubscribed contacts are mapped correctly and that this list is not purchased checkbox.
  7. Click Import

    Importing Contacts


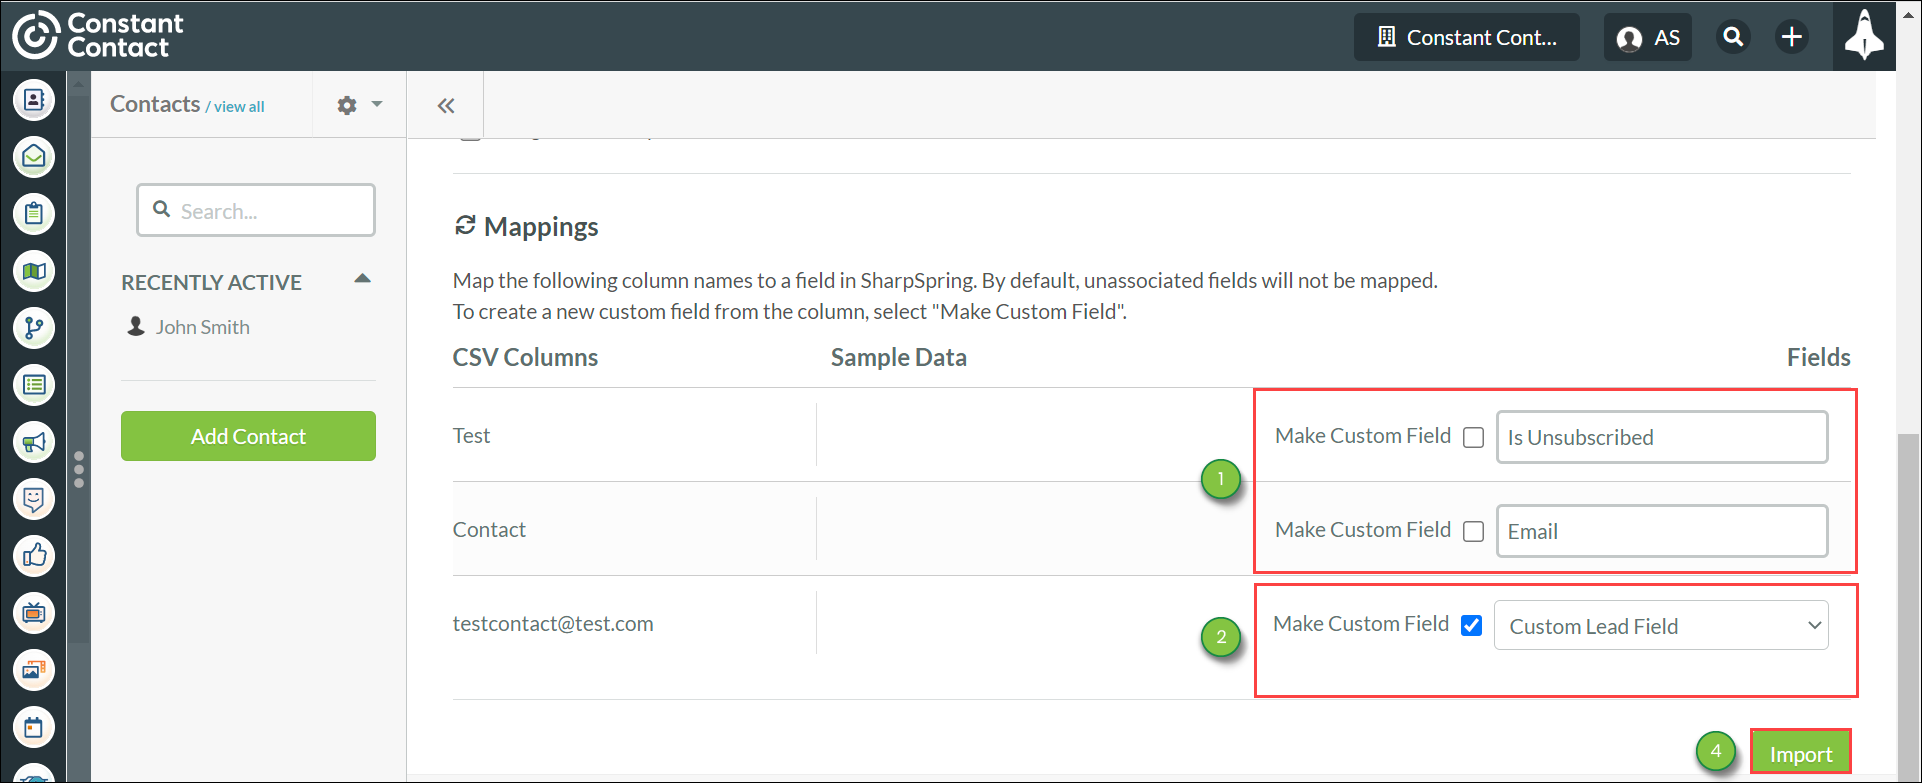
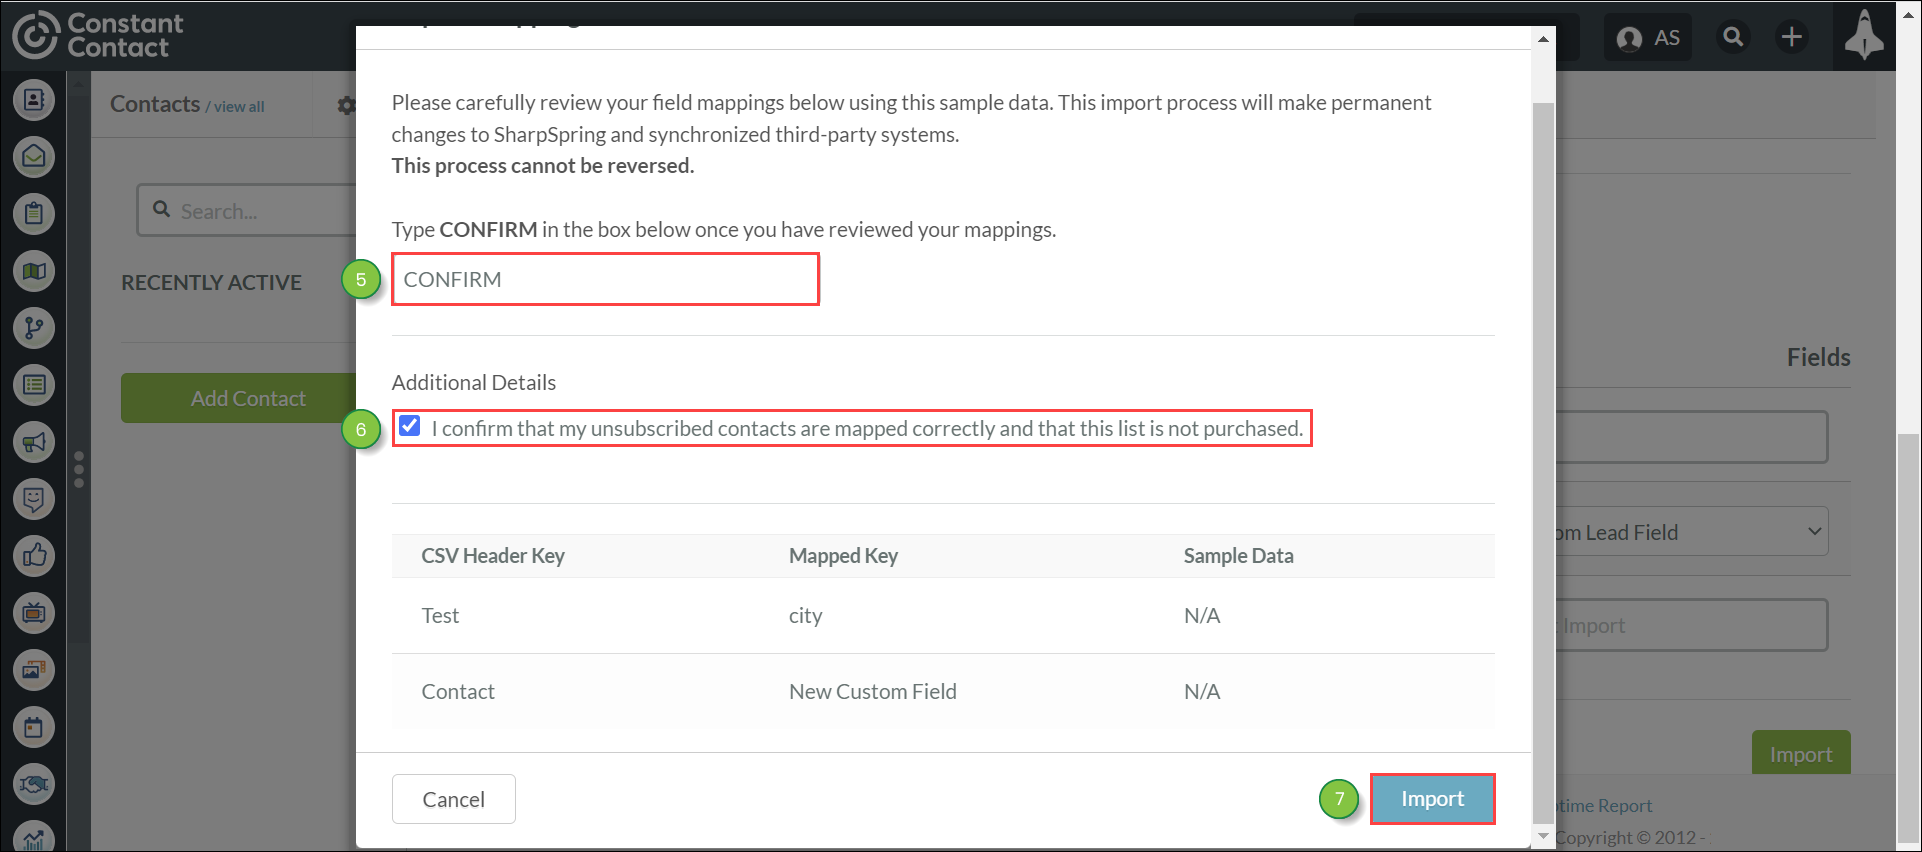
Important: When importing and mapping contacts, use Lead Gen & CRM fields already present in the system when possible instead of duplicating the fields. Importing and mapping custom fields with the same name as system fields results in those system fields being rendered invisible and unusable in the platform. For more information on available system fields, refer to Available Lead Gen & CRM System Fields. To restore system fields, contact Constant Contact's Lead Gen & CRM Support.


Did this article answer your question?


Constant Contact Logo

Copyright © 2025 · All Rights Reserved · Constant Contact · Privacy Center