Lead Gen & CRM has several compliance-related tools available for opting-in leads. One such tool is an automated standard double opt-in process.
This article will provide a walkthrough on creating custom opt-in processes.
| Administrators | ✓ | |
| Company Managers | ✓ | |
| Marketing Managers | ✓ | |
| Sales Managers | ||
| Salespersons | ||
| Jr. Salespersons |
| Tip: Are you looking for information about Constant Contact’s Email and Digital Marketing product? This article is for Constant Contact’s Lead Gen & CRM product. Head on over to the Email and Digital Marketing articles by clicking here. Not sure what the difference is? Read this article. |
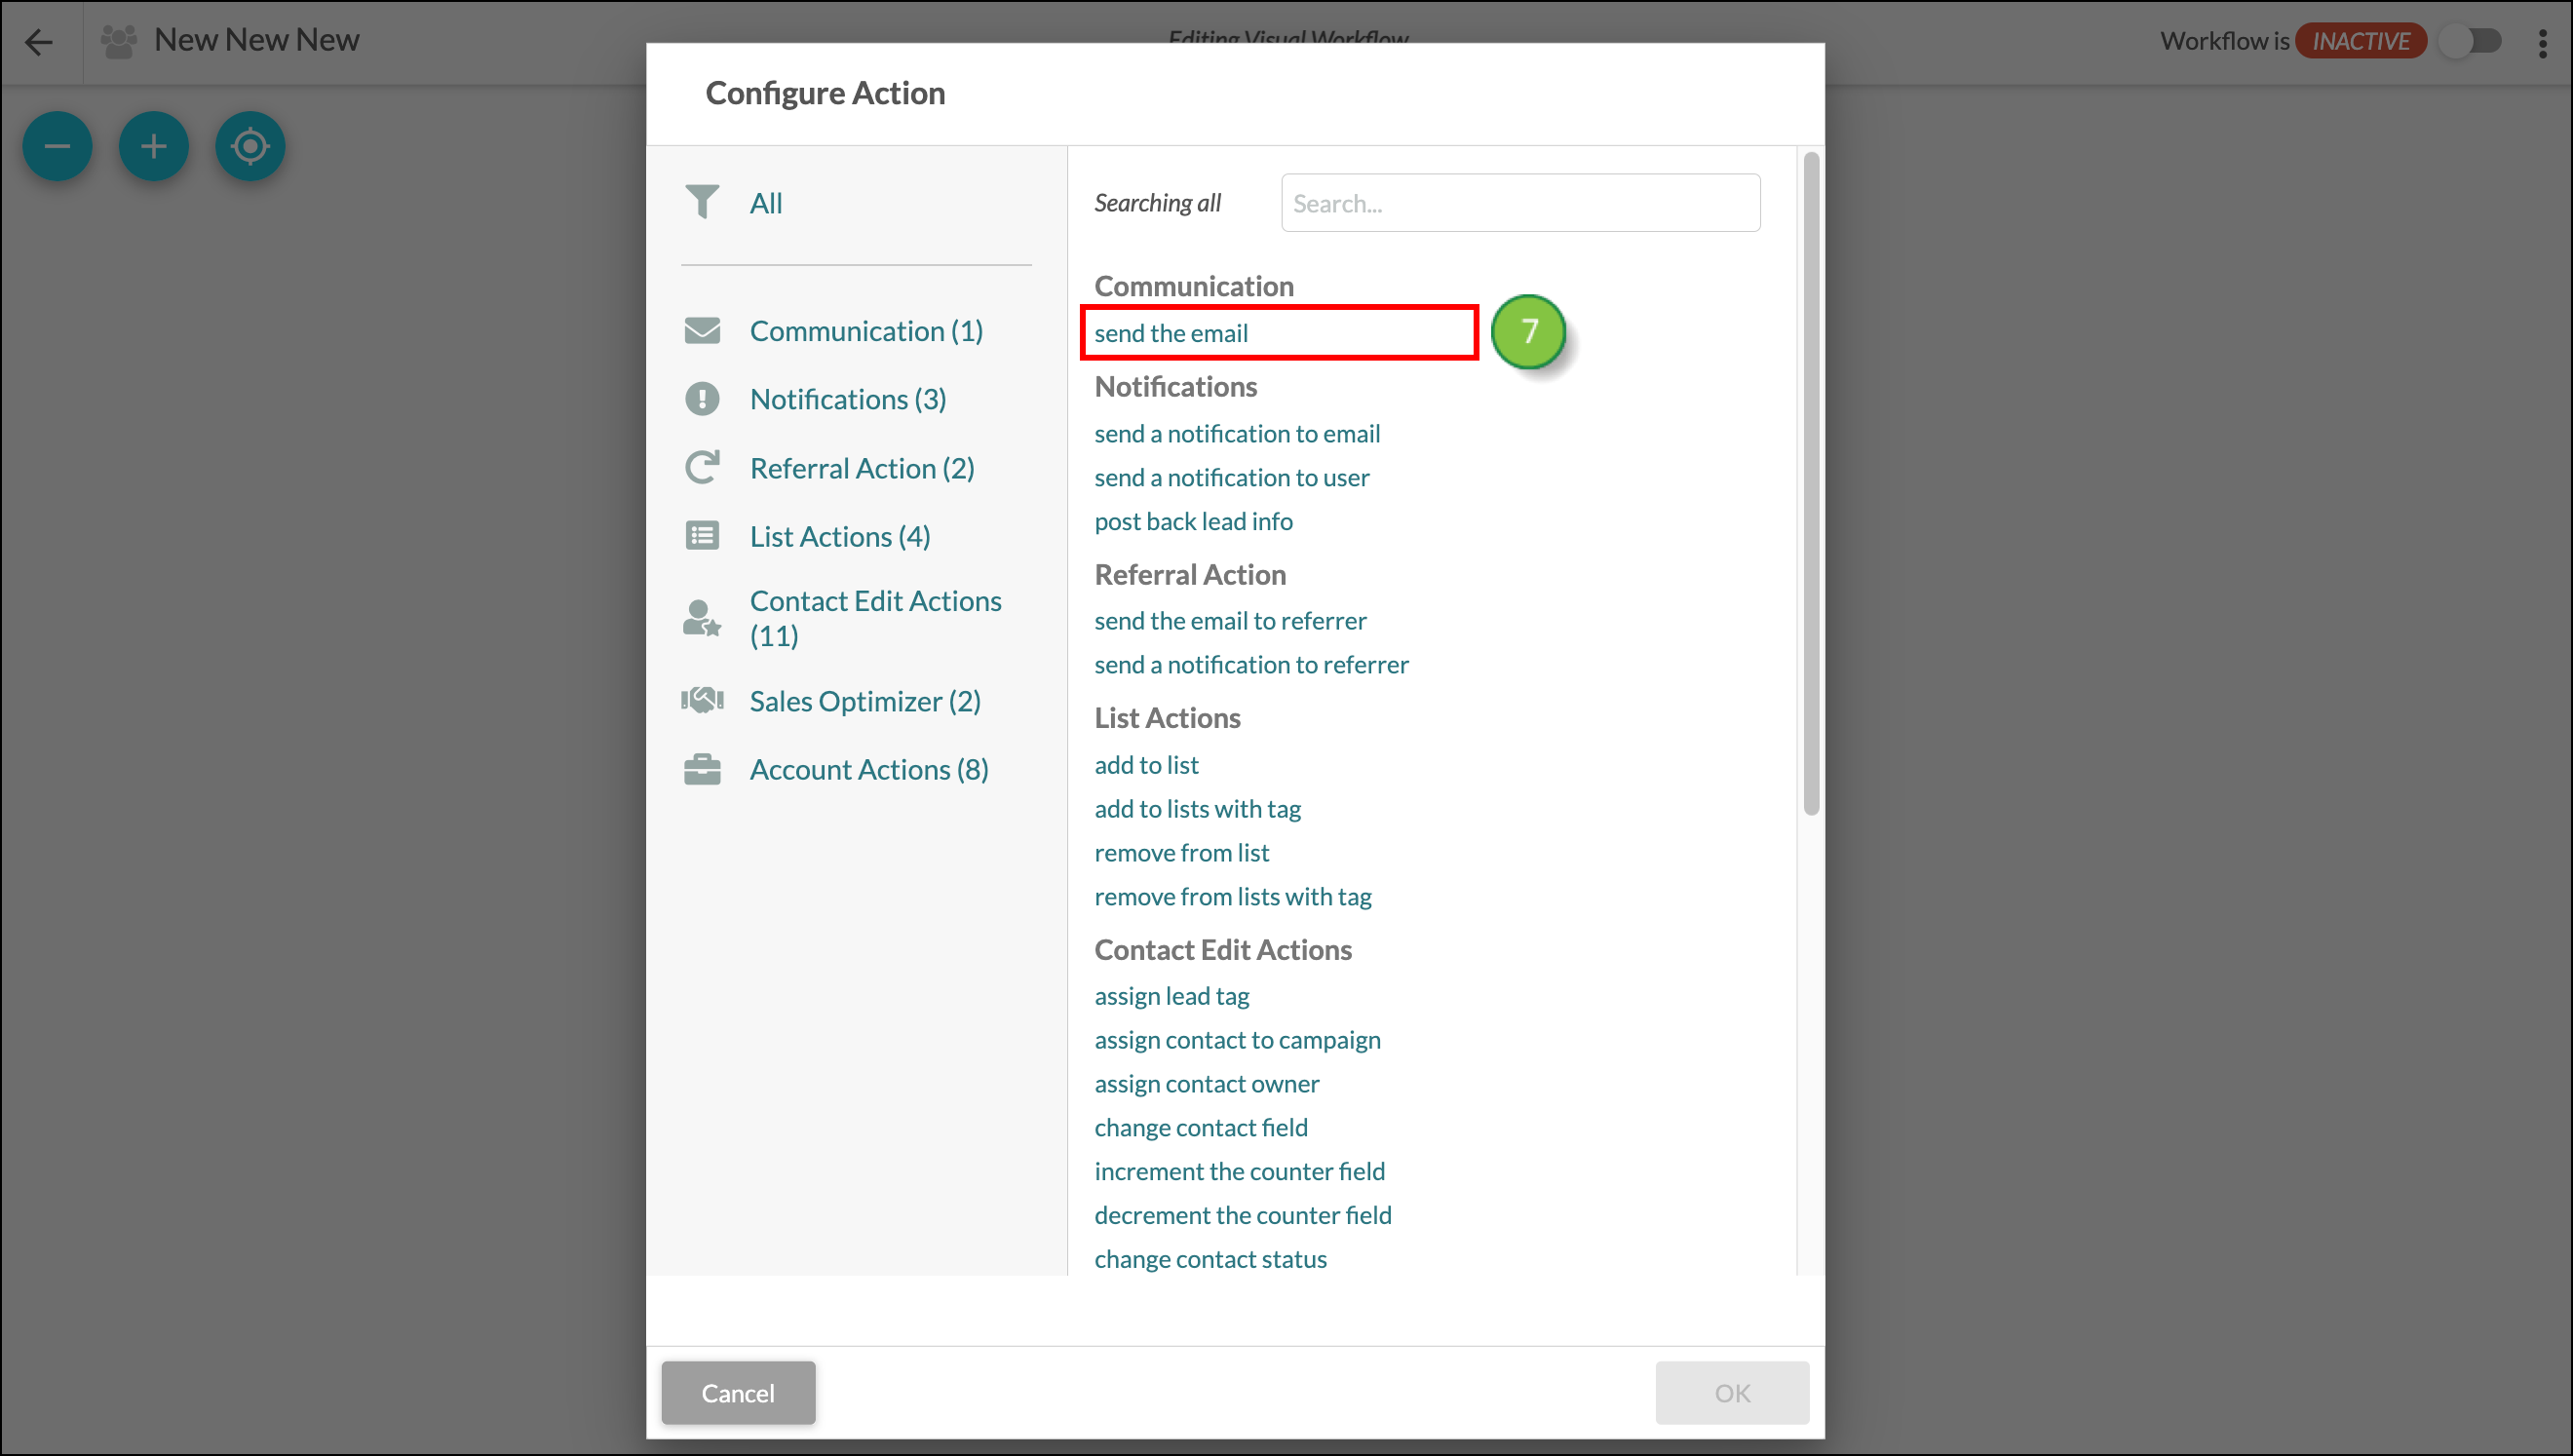
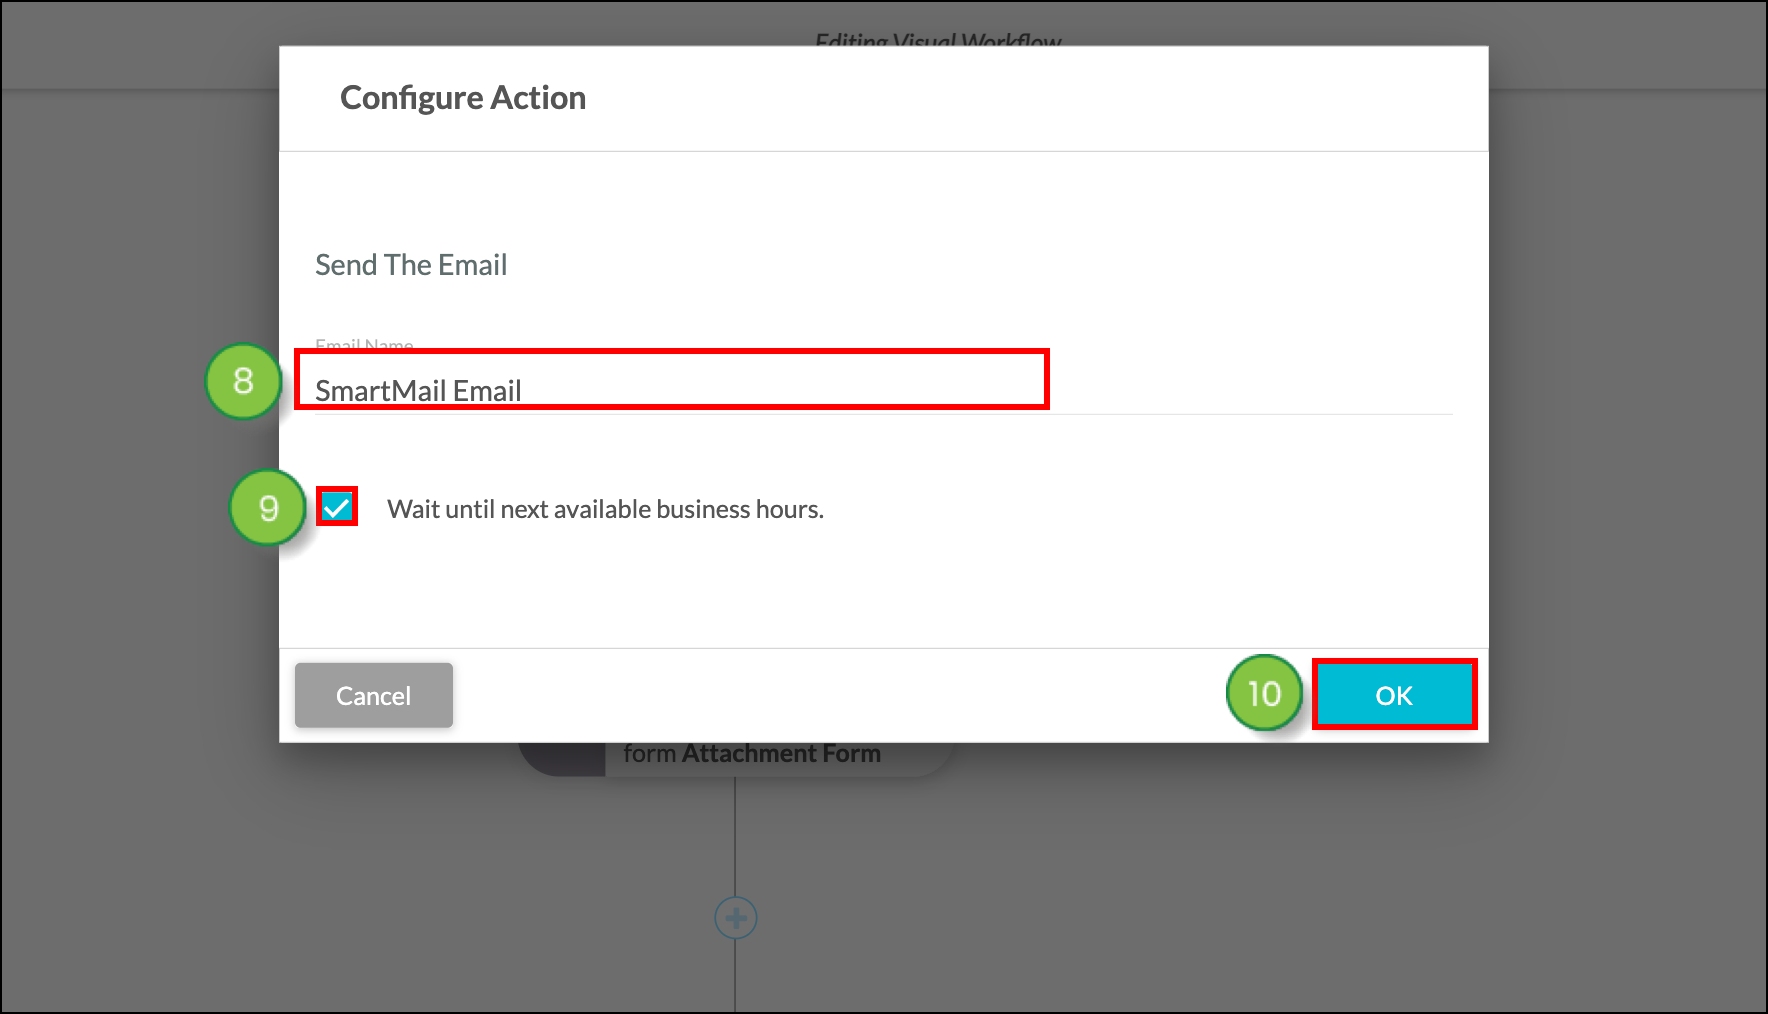
To create a custom opt-in process, you will first need to create an opt-in email. Using a double opt-in process validates the email address a lead has provided, in addition to verifying that they would in fact like to receive further communications. For example, this process is useful in requesting that a lead join a mailing list.
To create a double opt-in email, create a Lead Gen & CRM form or a native/third-party form.
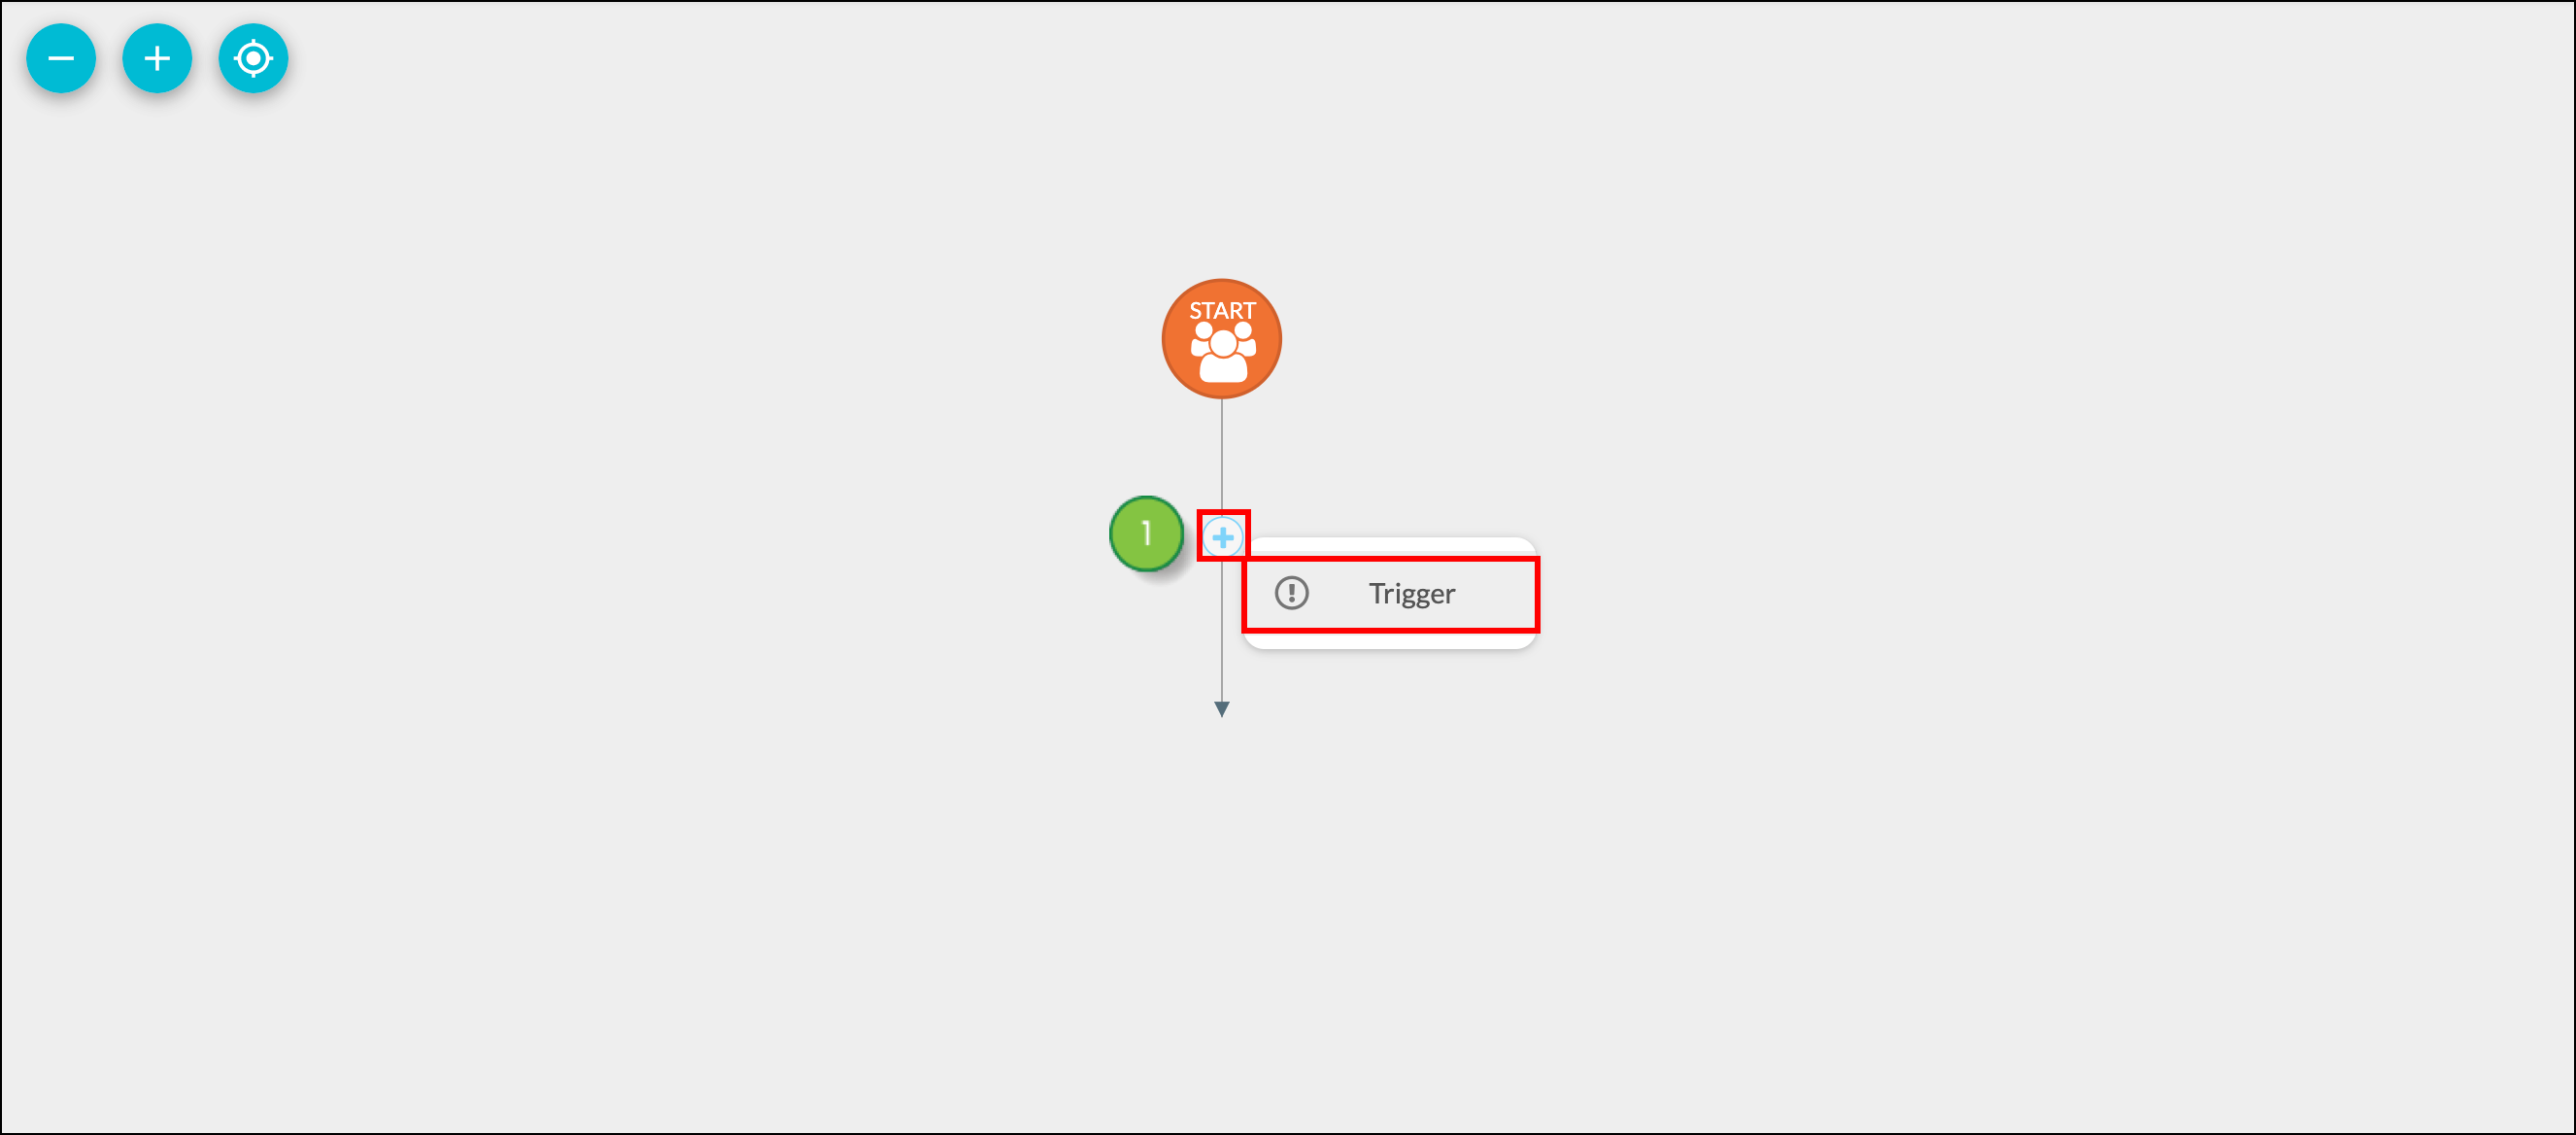
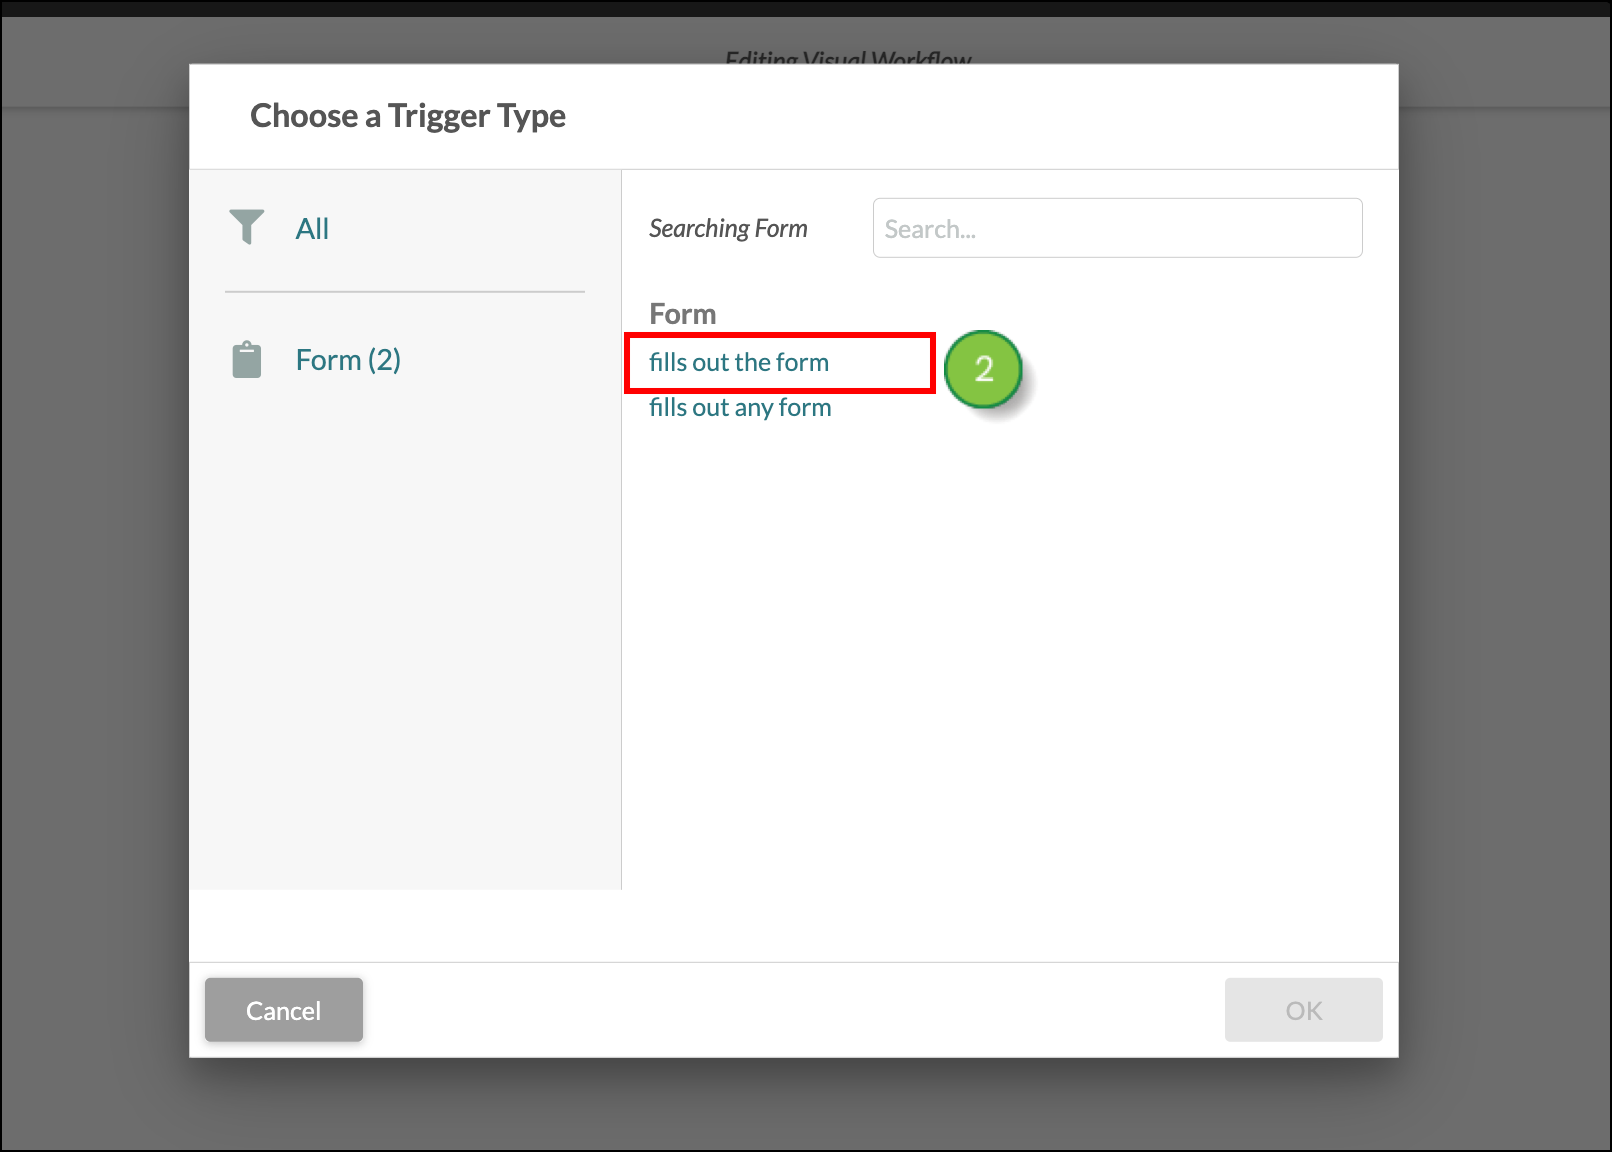
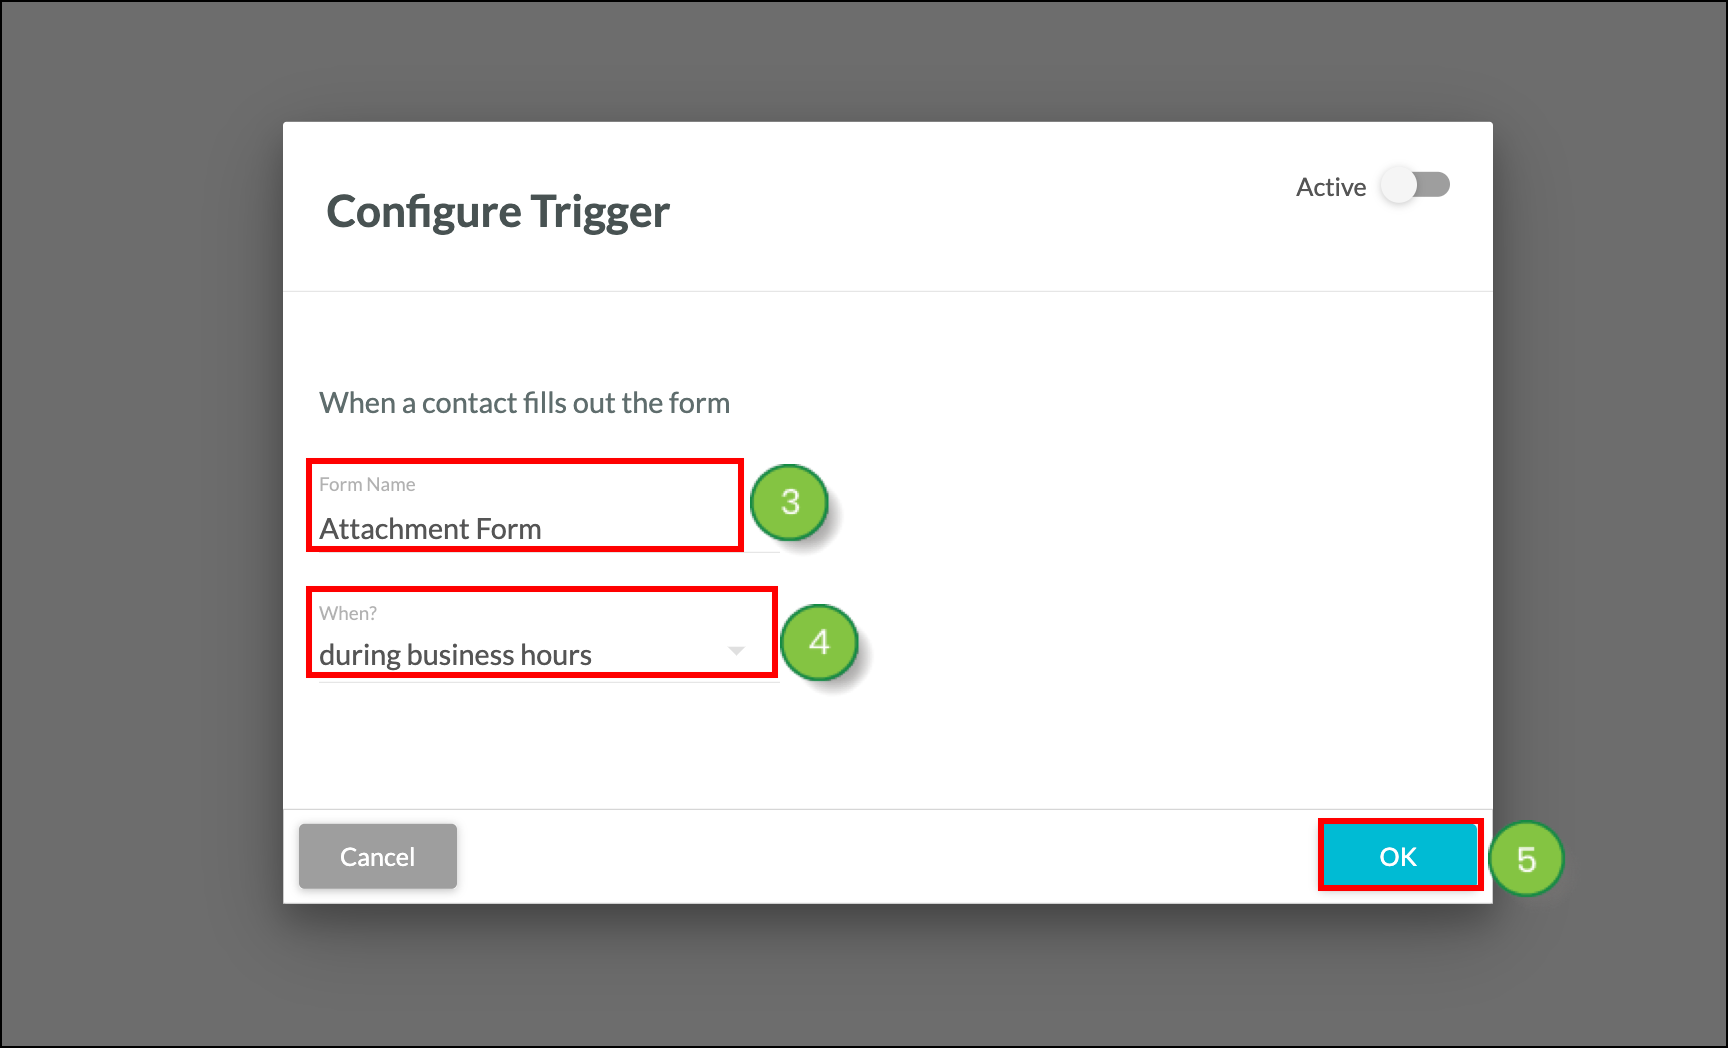
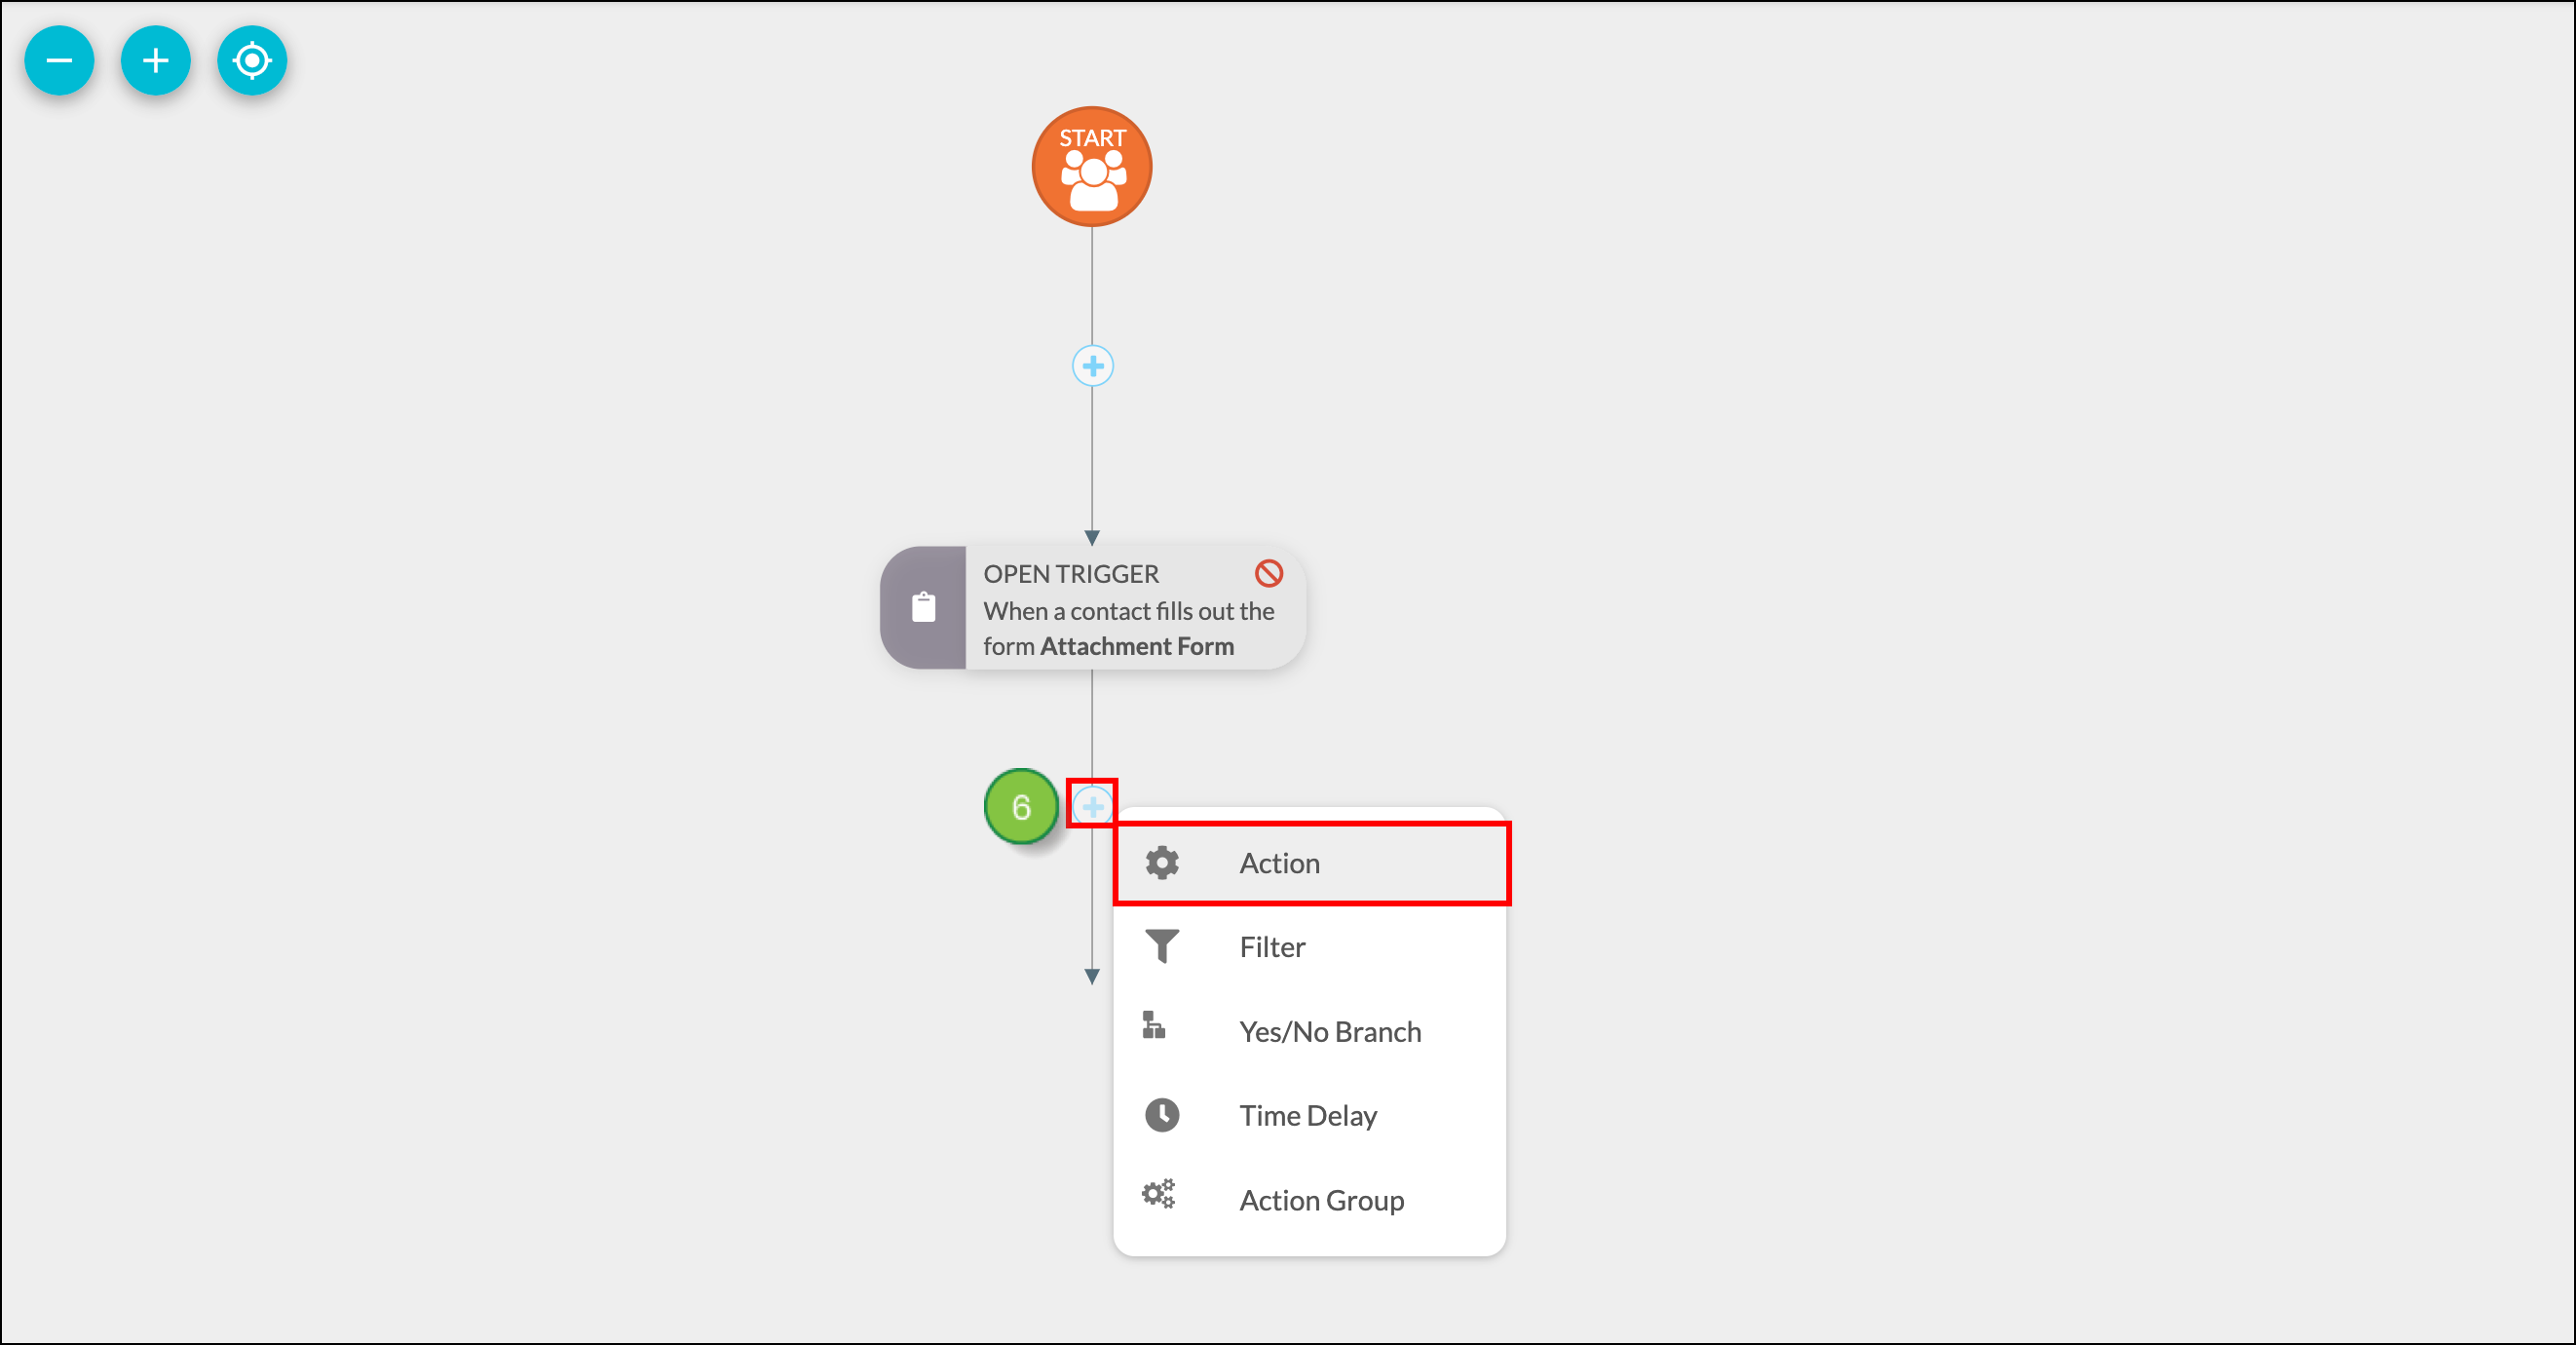
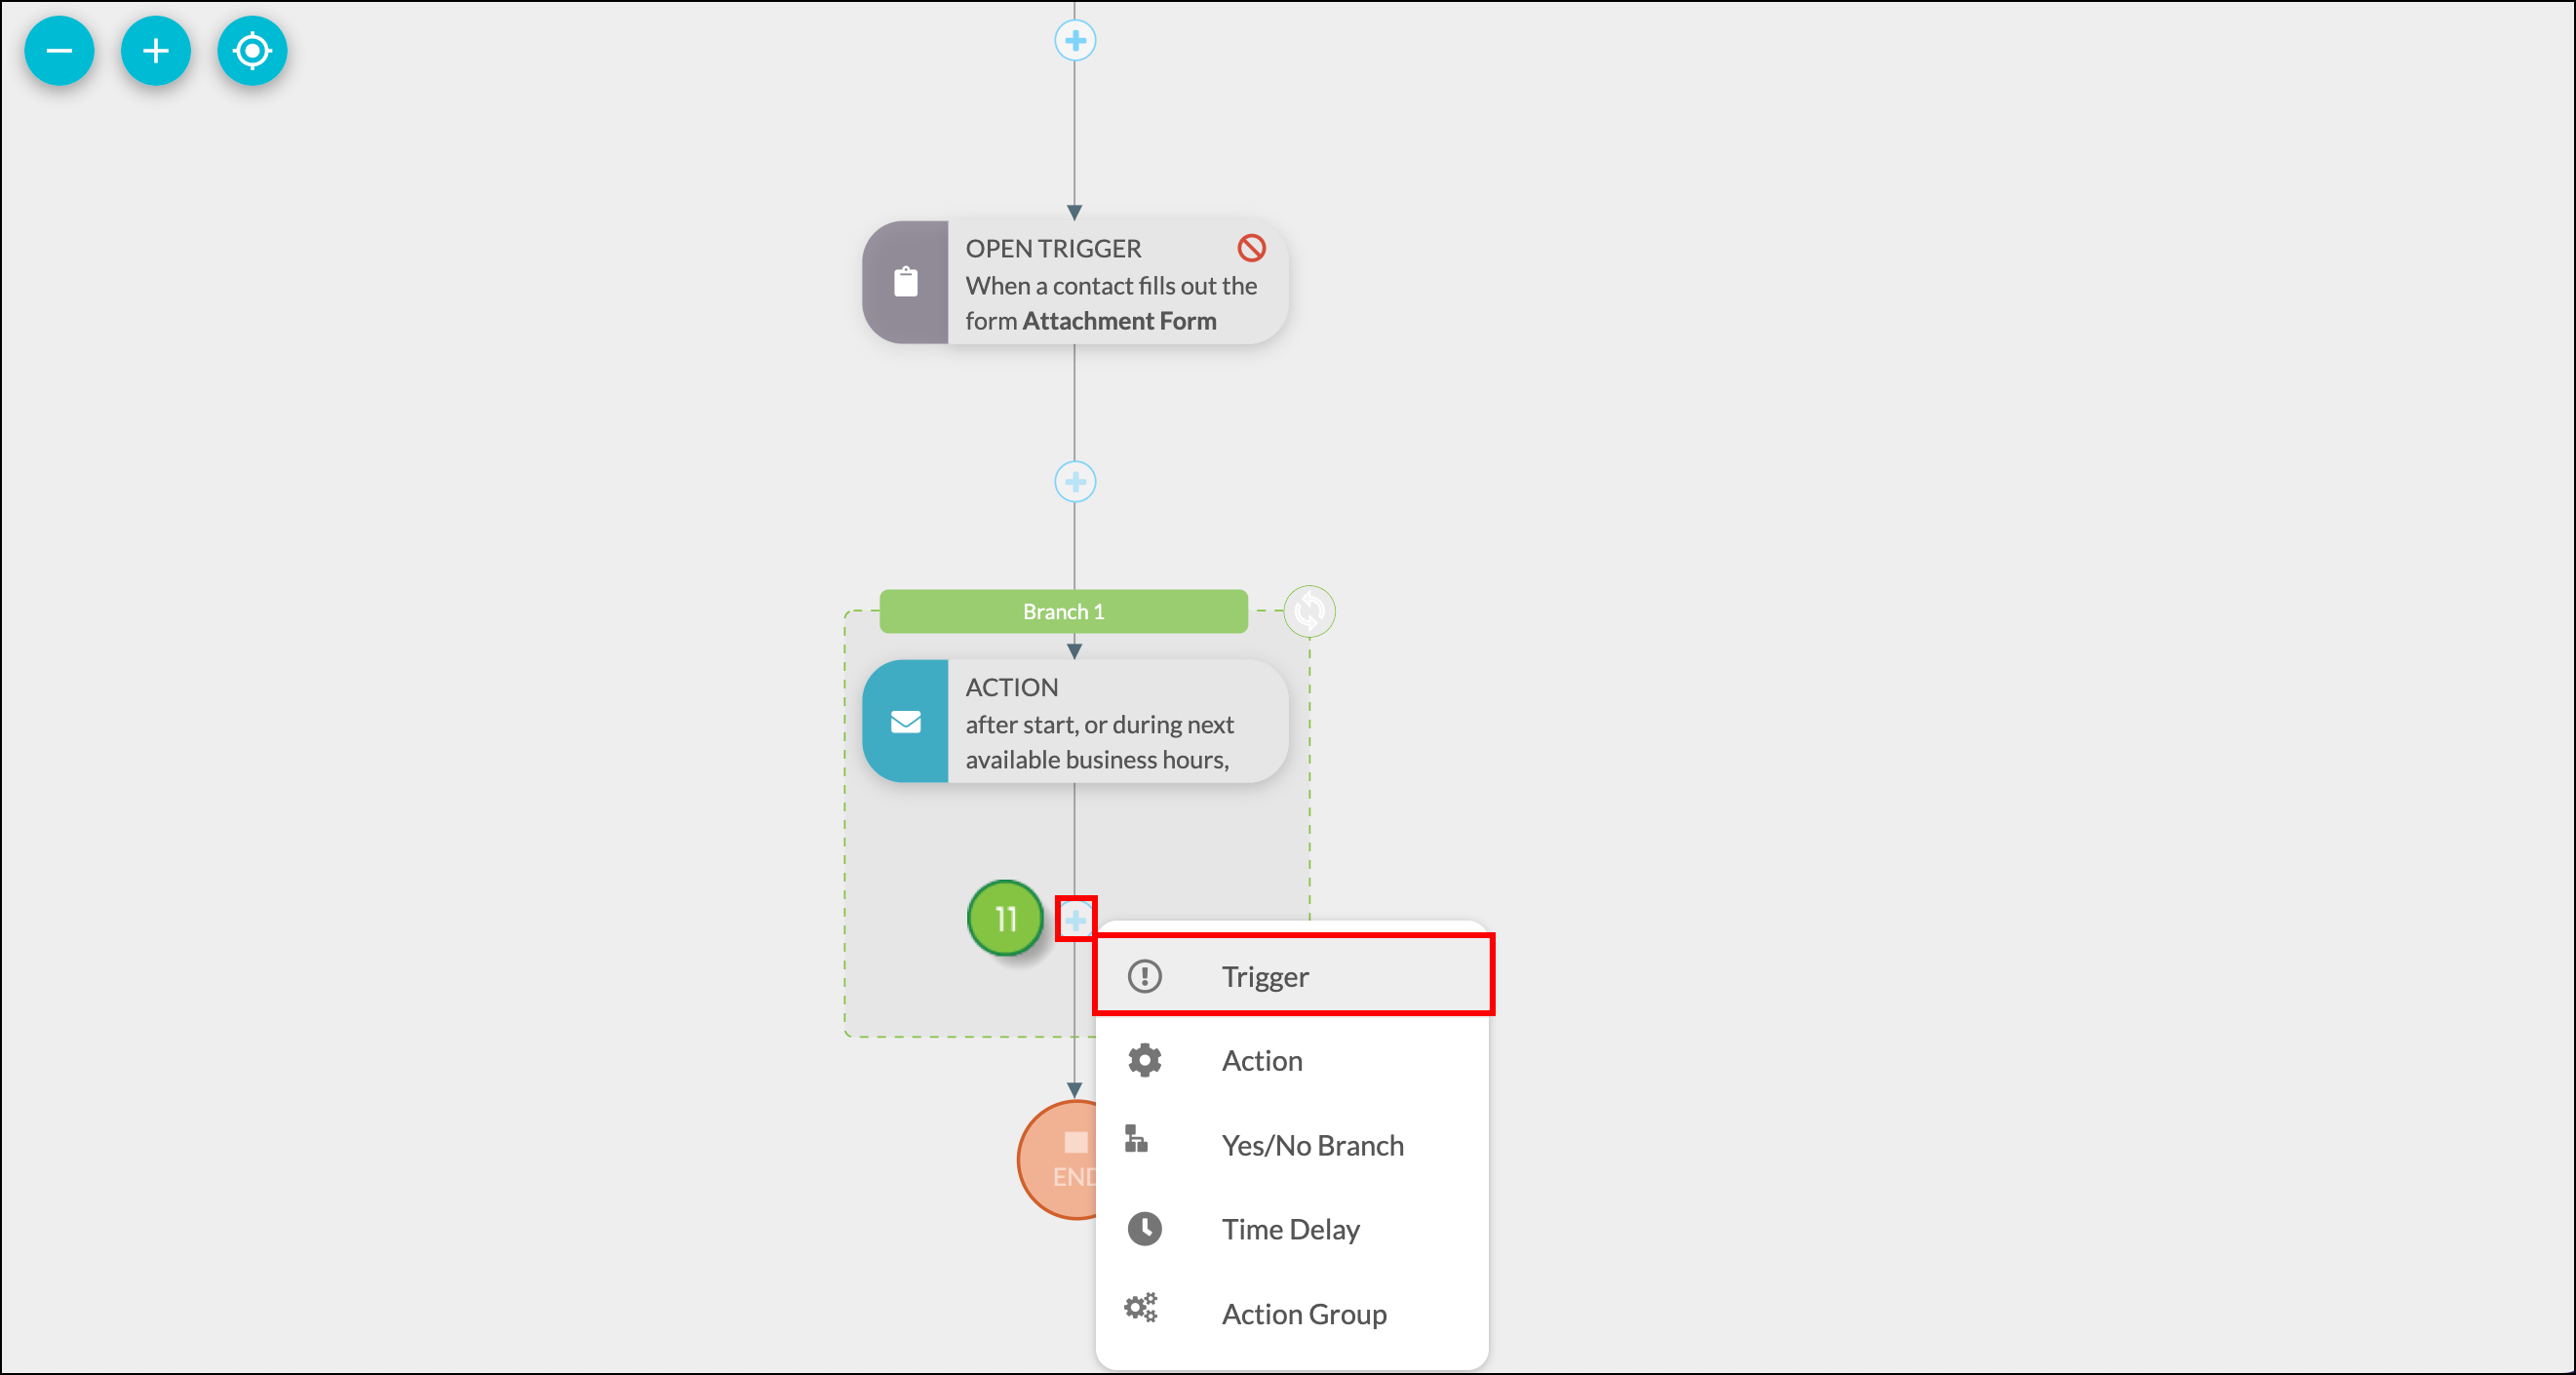
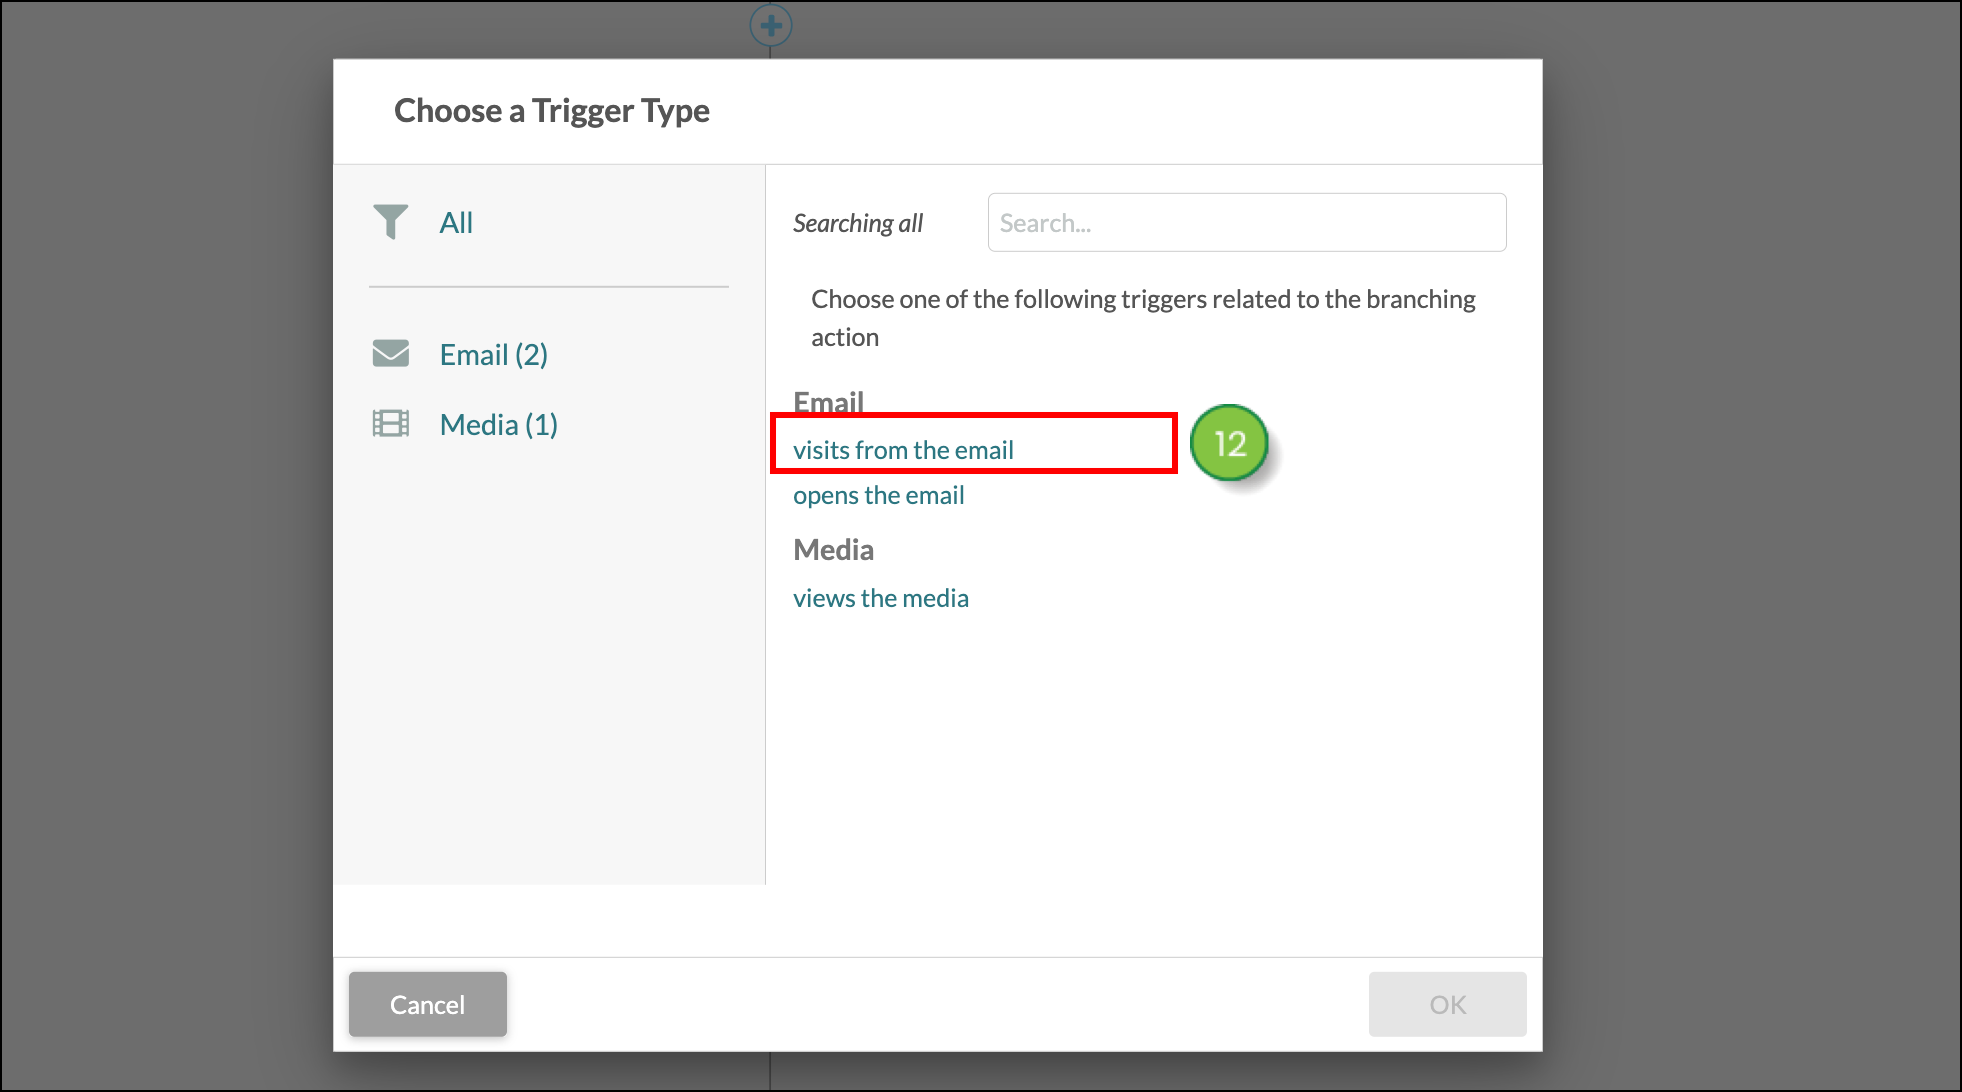
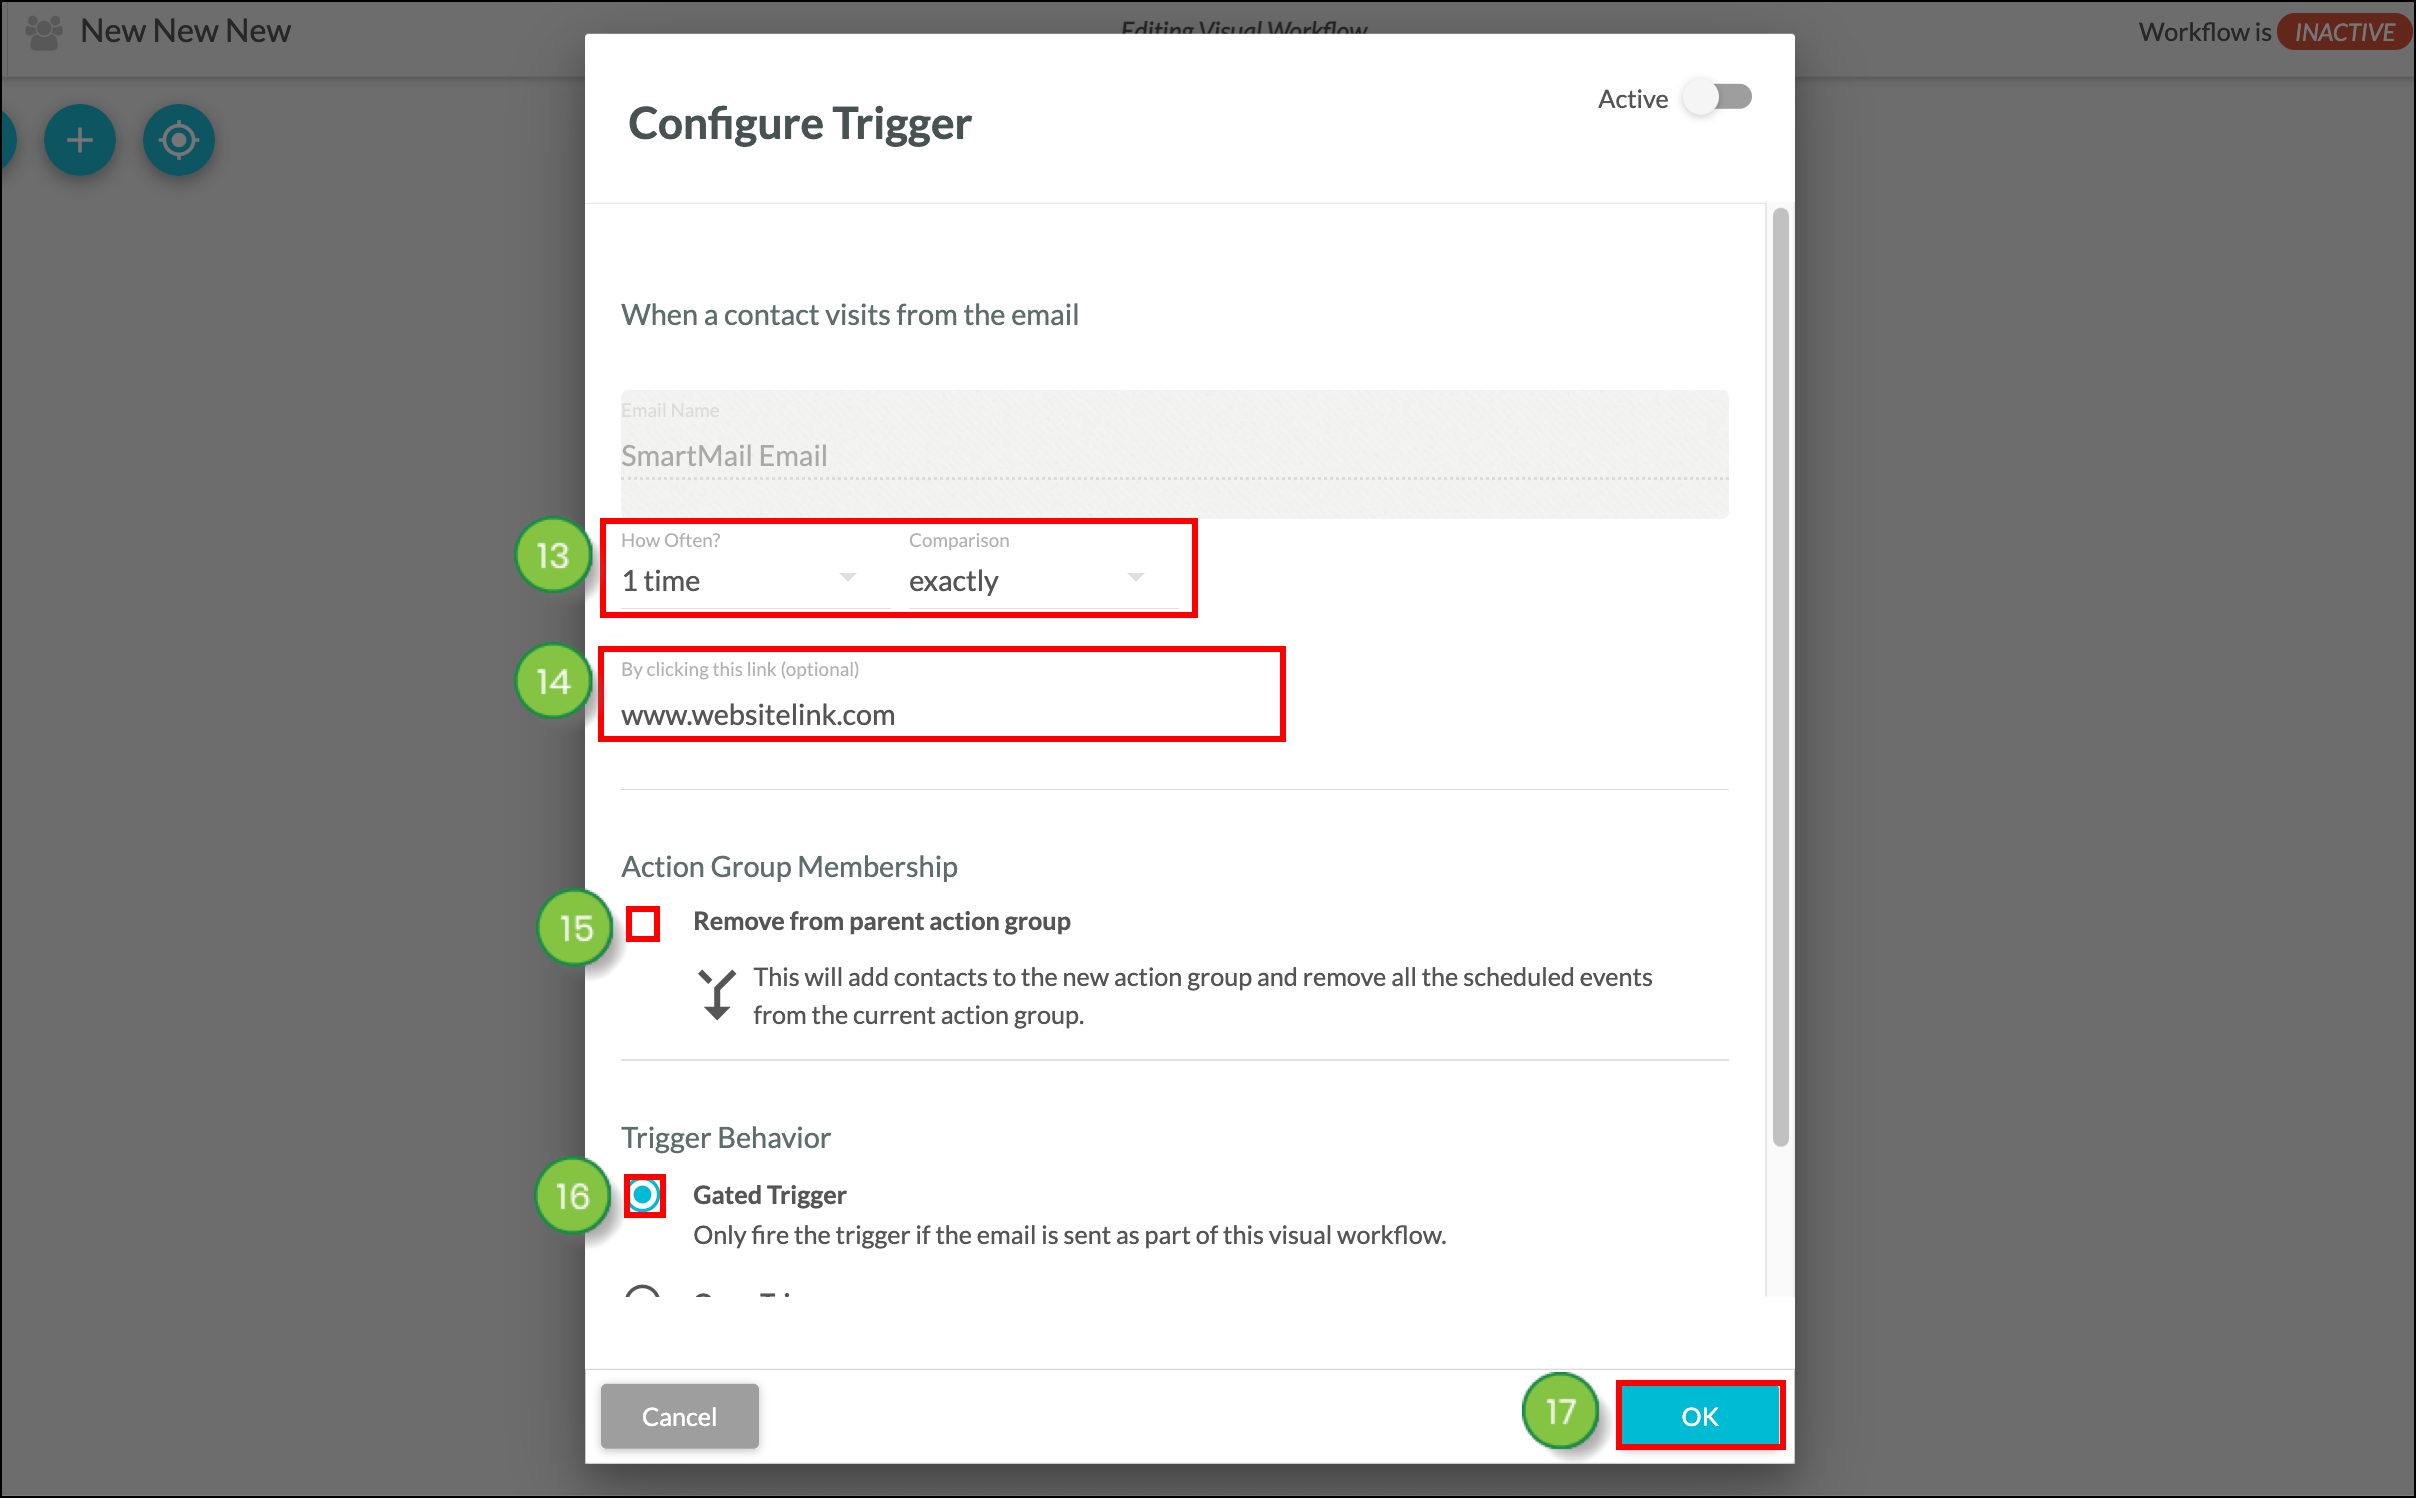
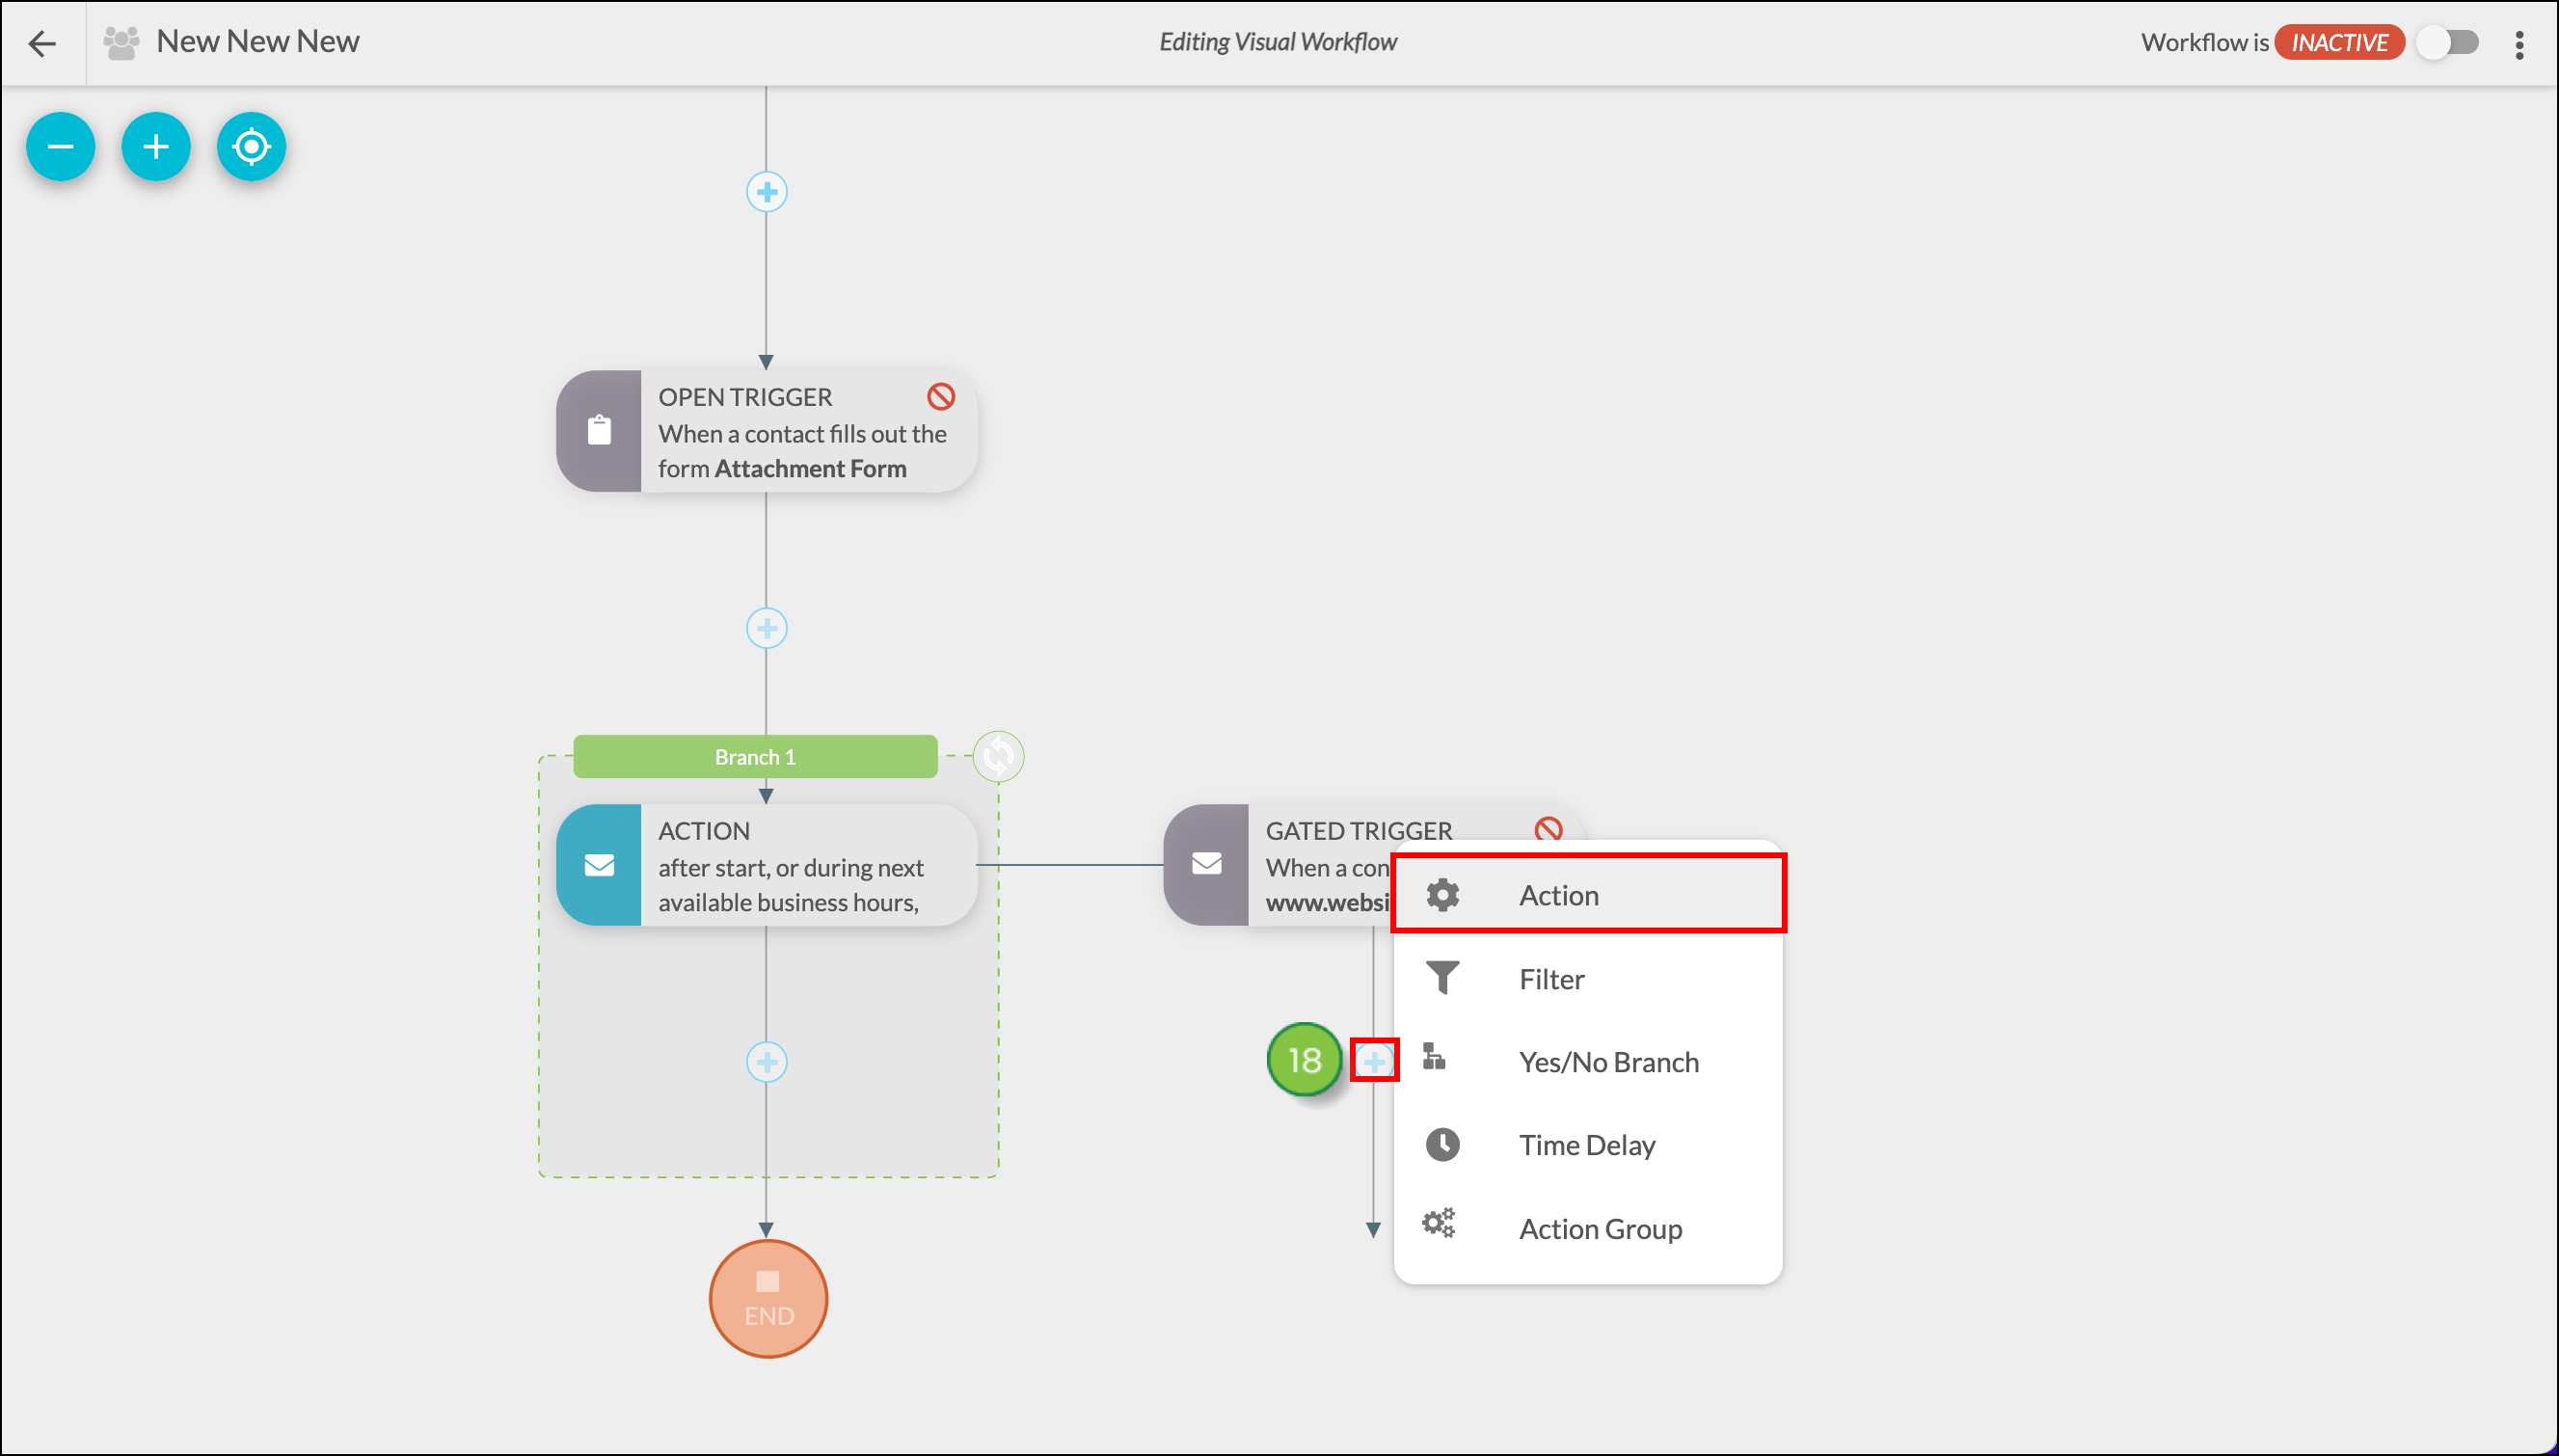
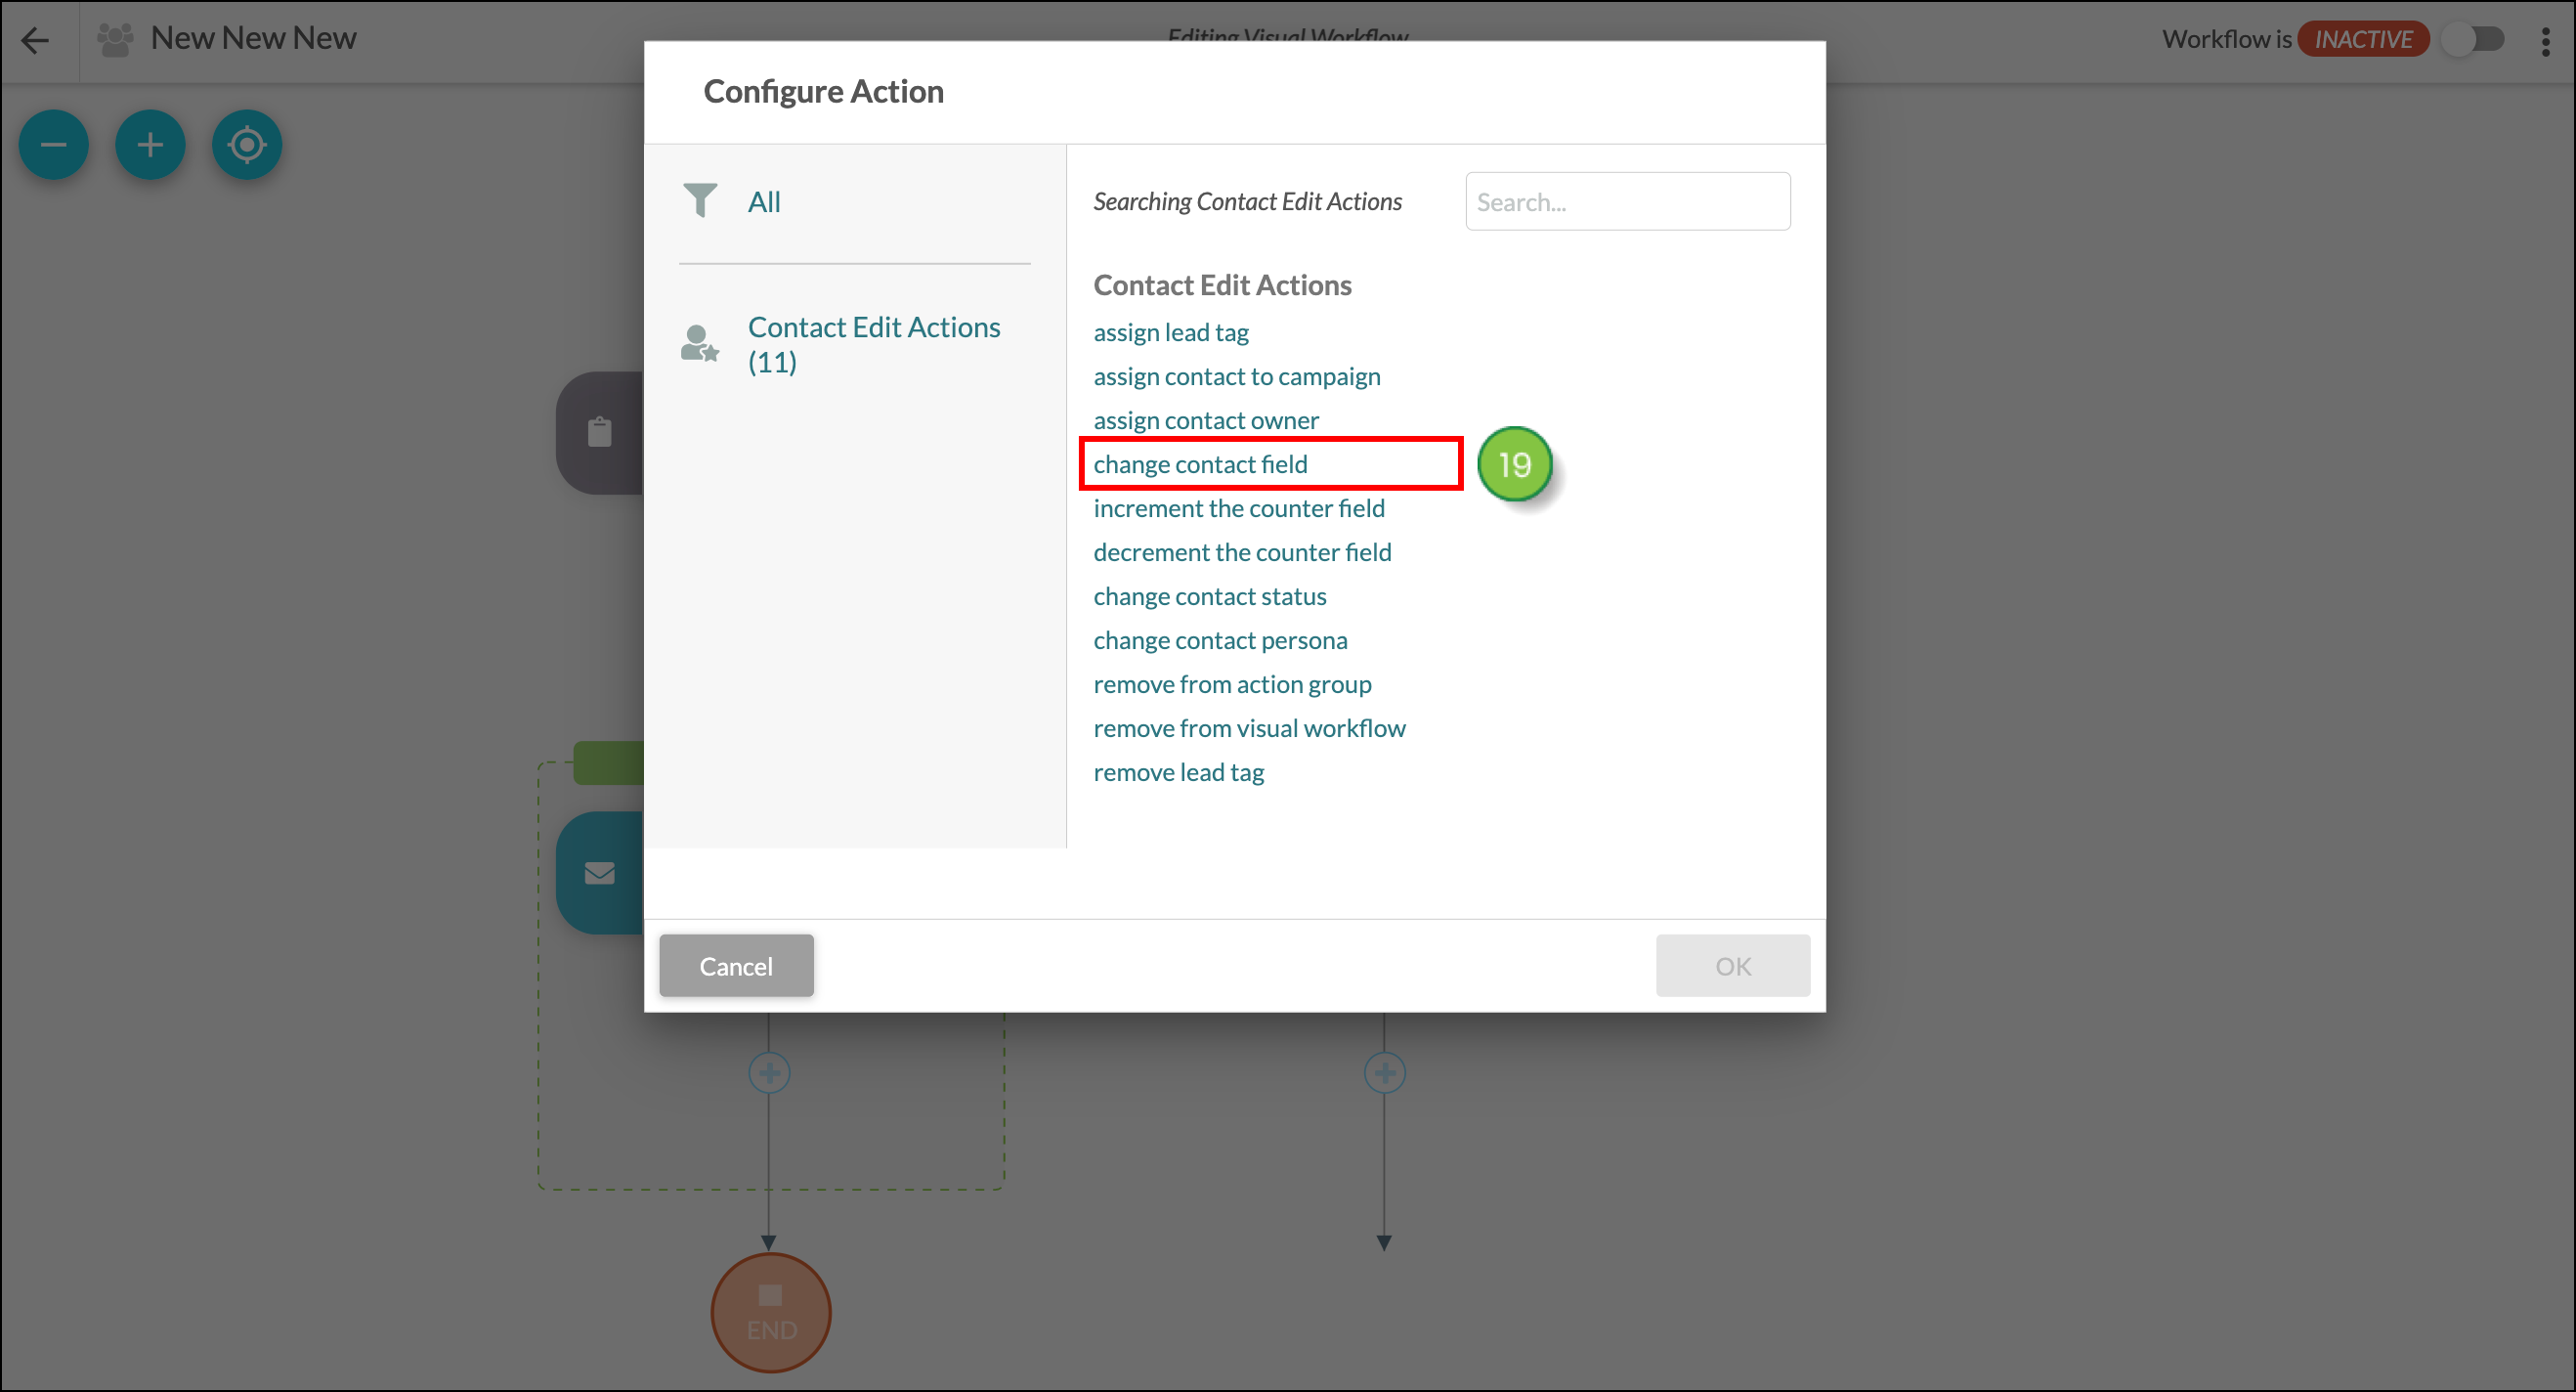
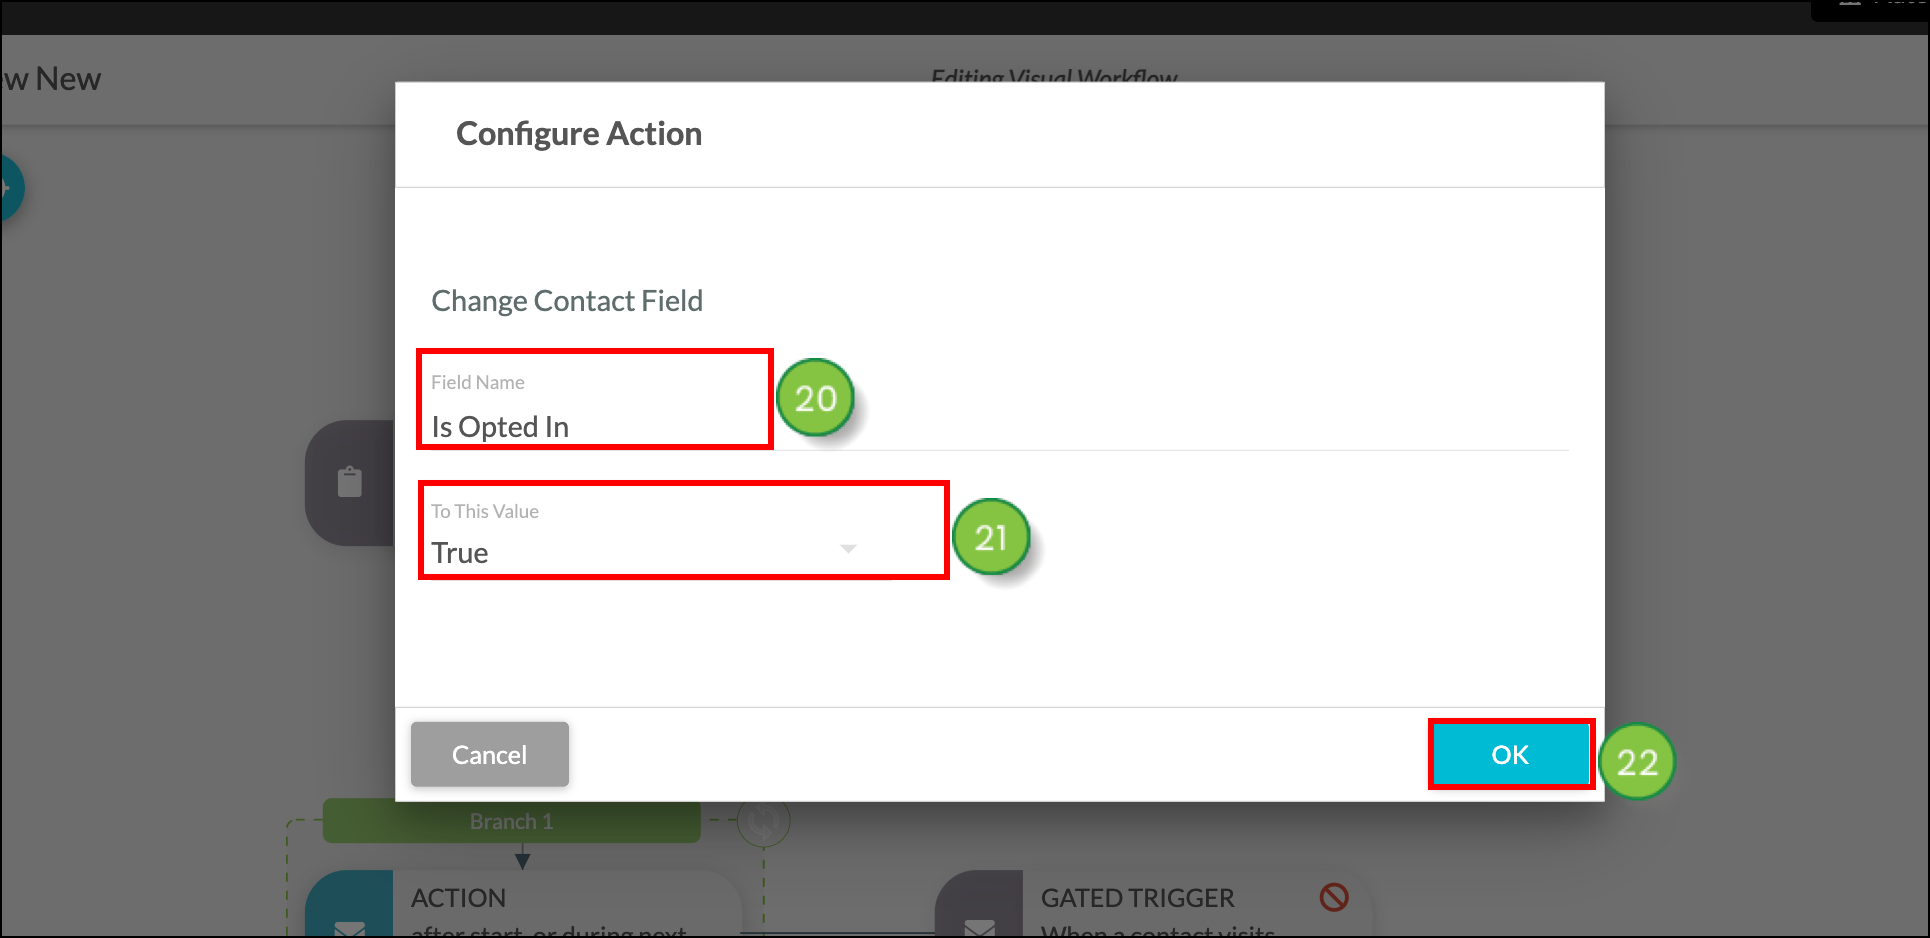
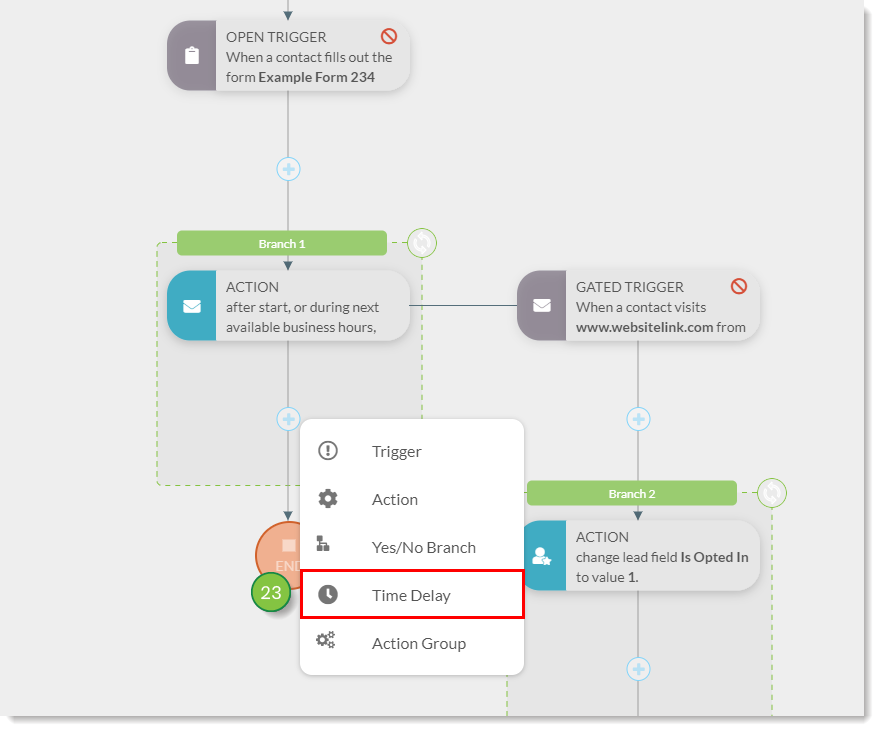
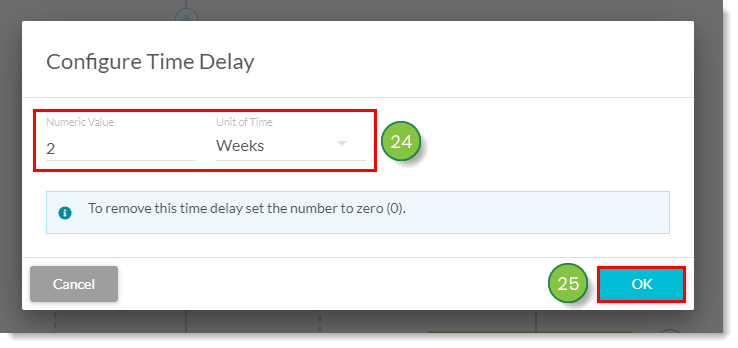
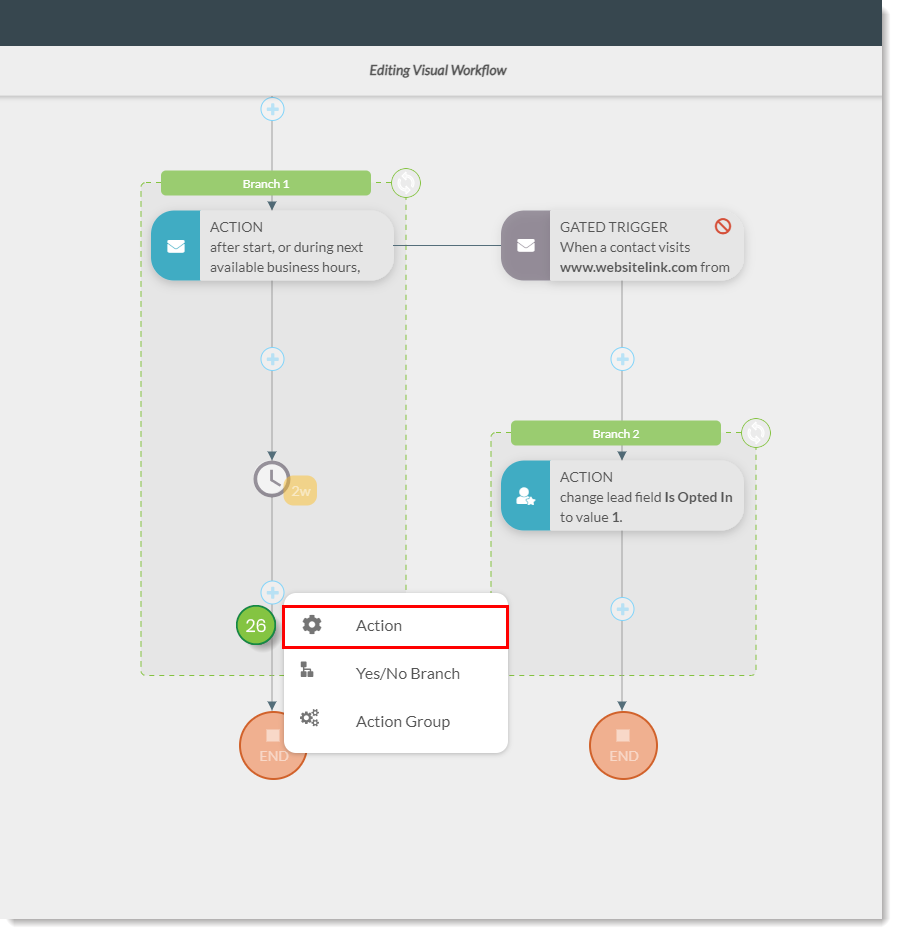
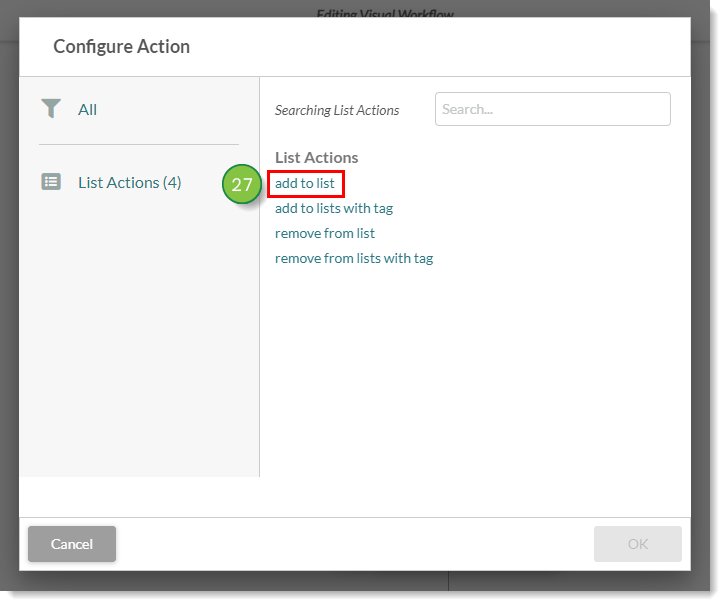
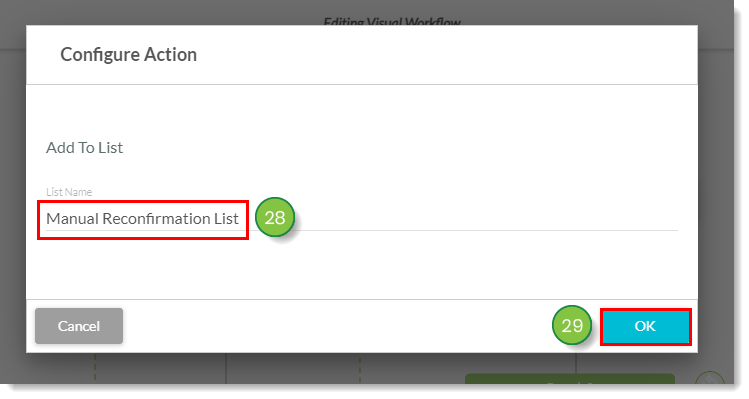
Once you have created the double opt-in email, you will need to apply the appropriate opt-in triggers and actions. By setting up the workflow outlined below, after a lead fills out a form, they will receive your double opt-in email. When they click the link or button in the email to confirm their interest in receiving emails, their contact info in Lead Gen & CRM will automatically be updated to reflect they've opted in. Additionally, any leads who do not opt in after 2 weeks will be added to a manual list.
To create a set of triggers and actions, create or edit a visual workflow from Automation > Visual Workflows in the top toolbar.
.

Copyright © 2026 · All Rights Reserved · Constant Contact · Privacy Center