In this article, you'll learn how to add buttons to your emails.
Important: If you're using the new email editor, read Modifying Buttons in the New Email Editor instead.
| Administrators | ✓ | |
| Company Managers | ✓ | |
| Marketing Managers | ✓ | |
| Sales Managers | ||
| Salespersons | ||
| Jr. Salespersons |
| Tip: Are you looking for information about Constant Contact’s Email and Digital Marketing product? This article is for Constant Contact’s Lead Gen & CRM product. Head on over to the Email and Digital Marketing articles by clicking here. Not sure what the difference is? Read this article. |
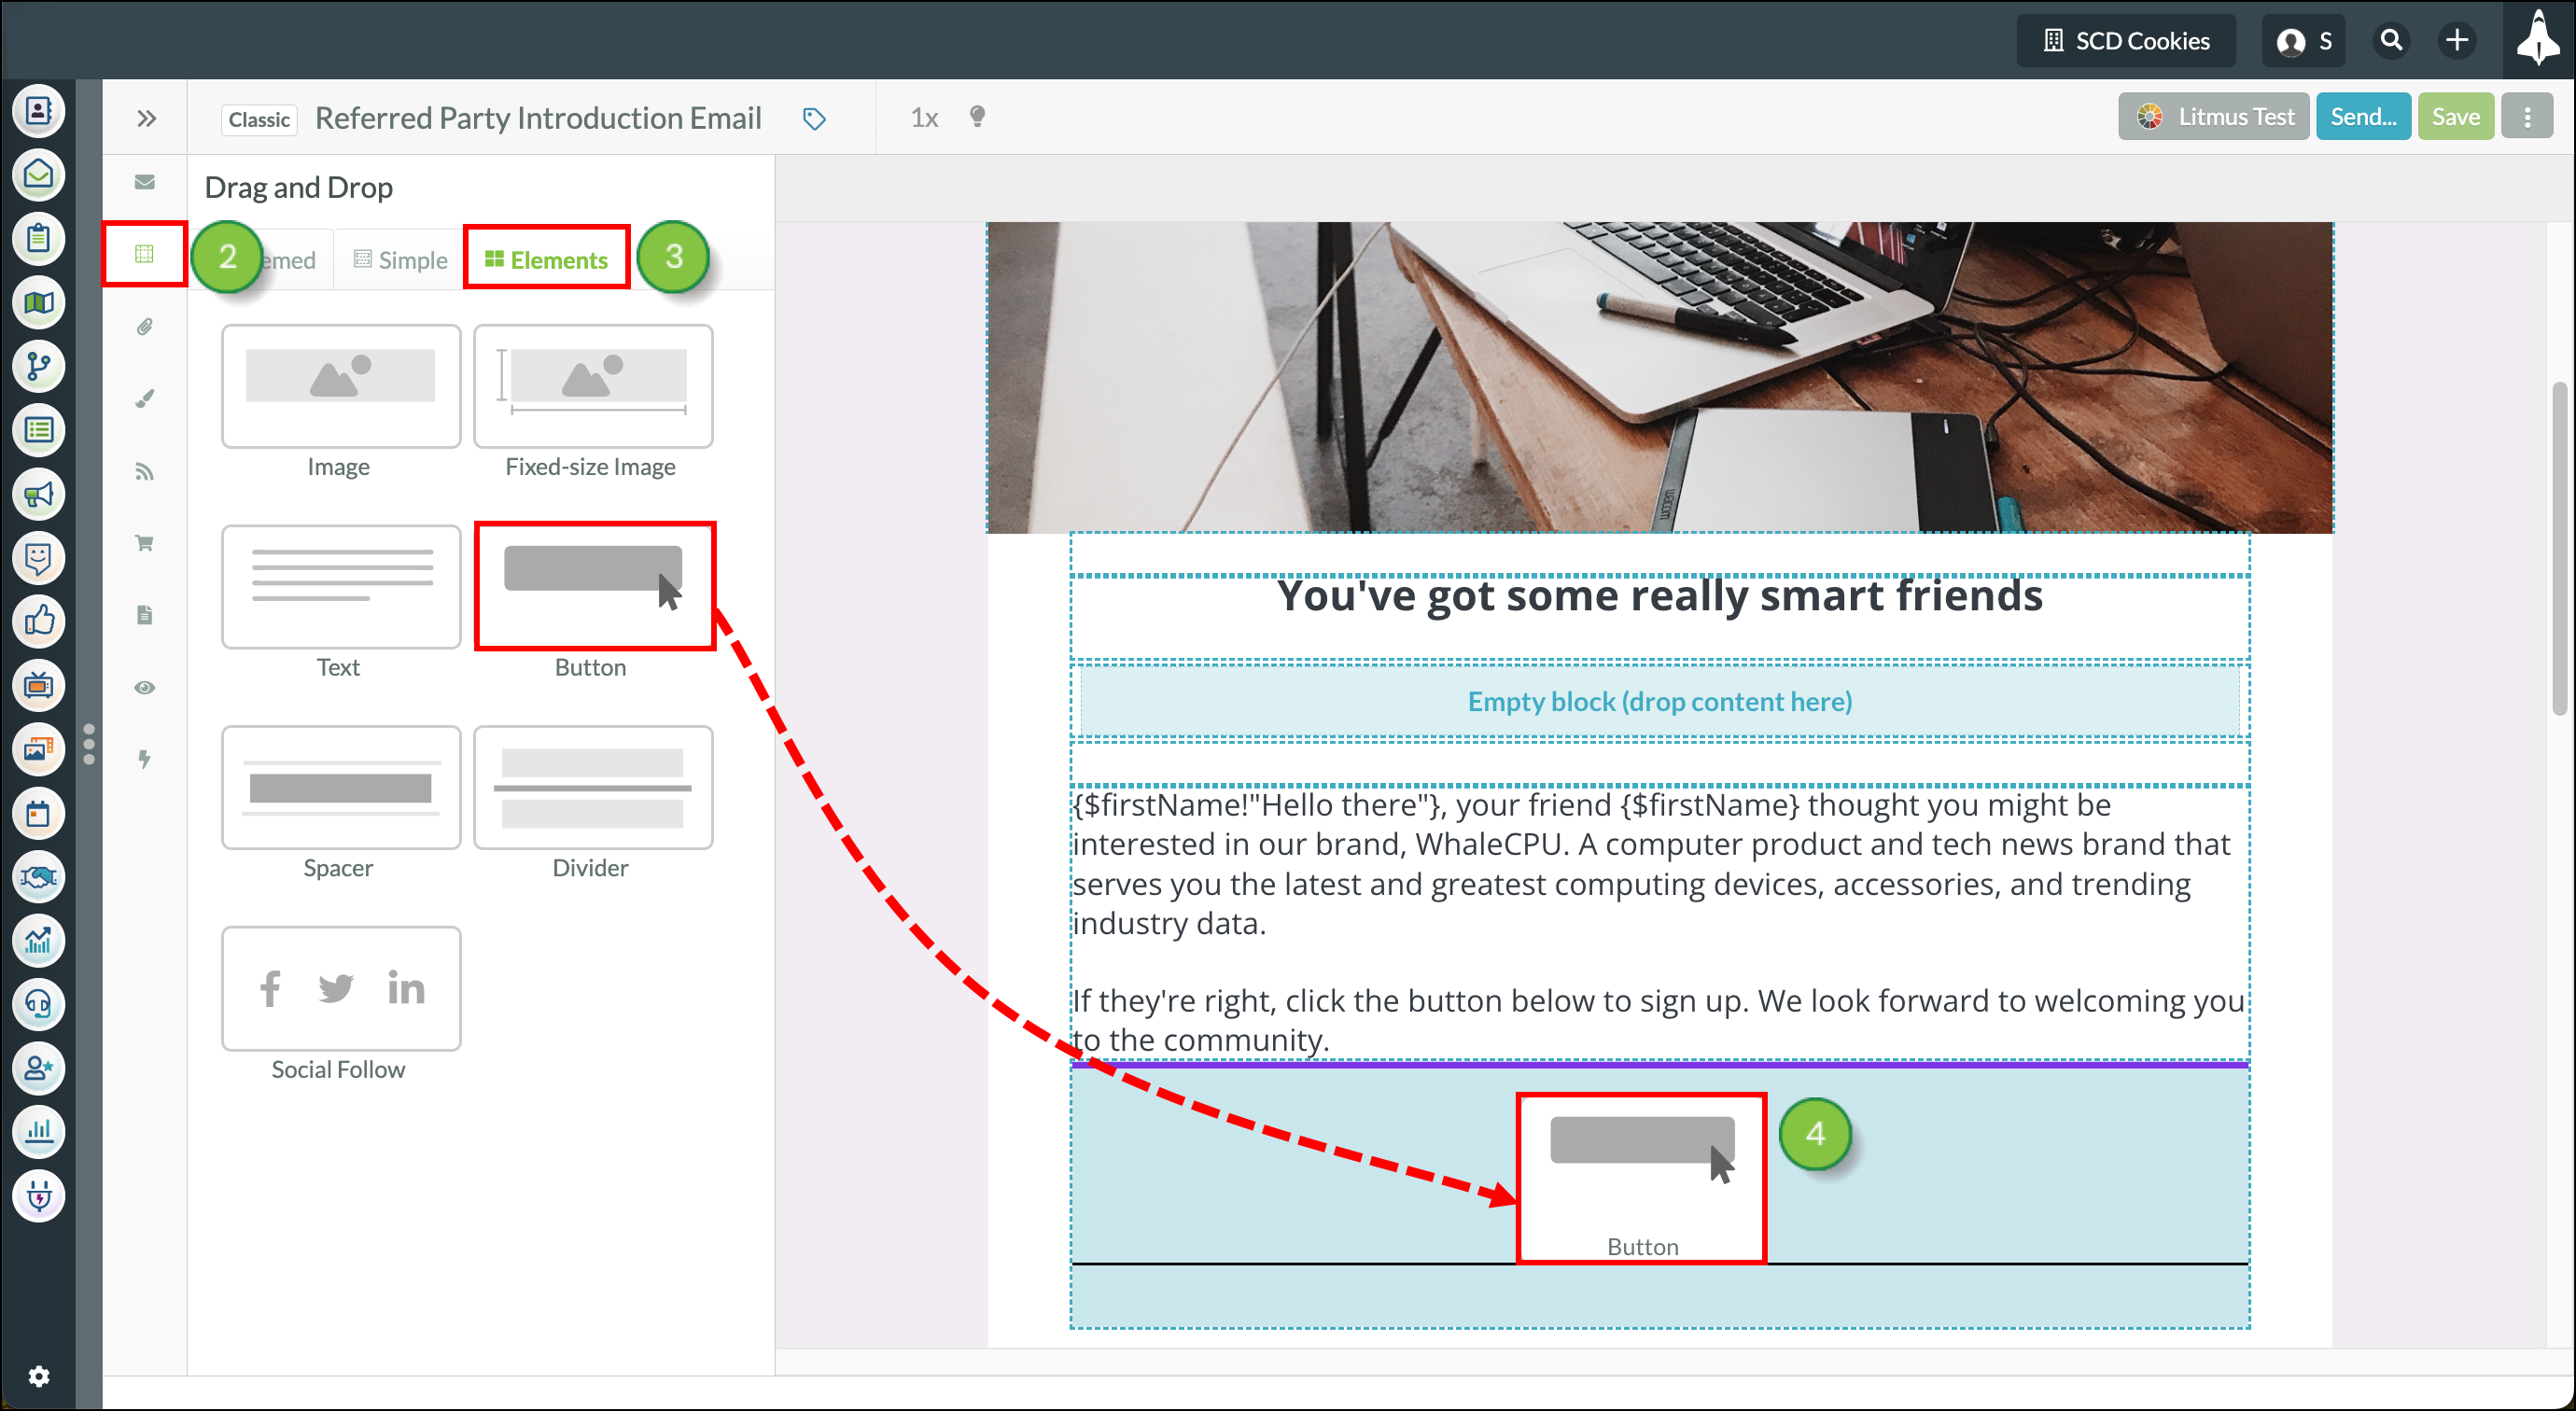
Layout blocks are the foundation of emails created in the Lead Gen & CRM platform. Layout blocks allow you to build sections into your email and elements (text, media, and buttons) can be added into those layout blocks.
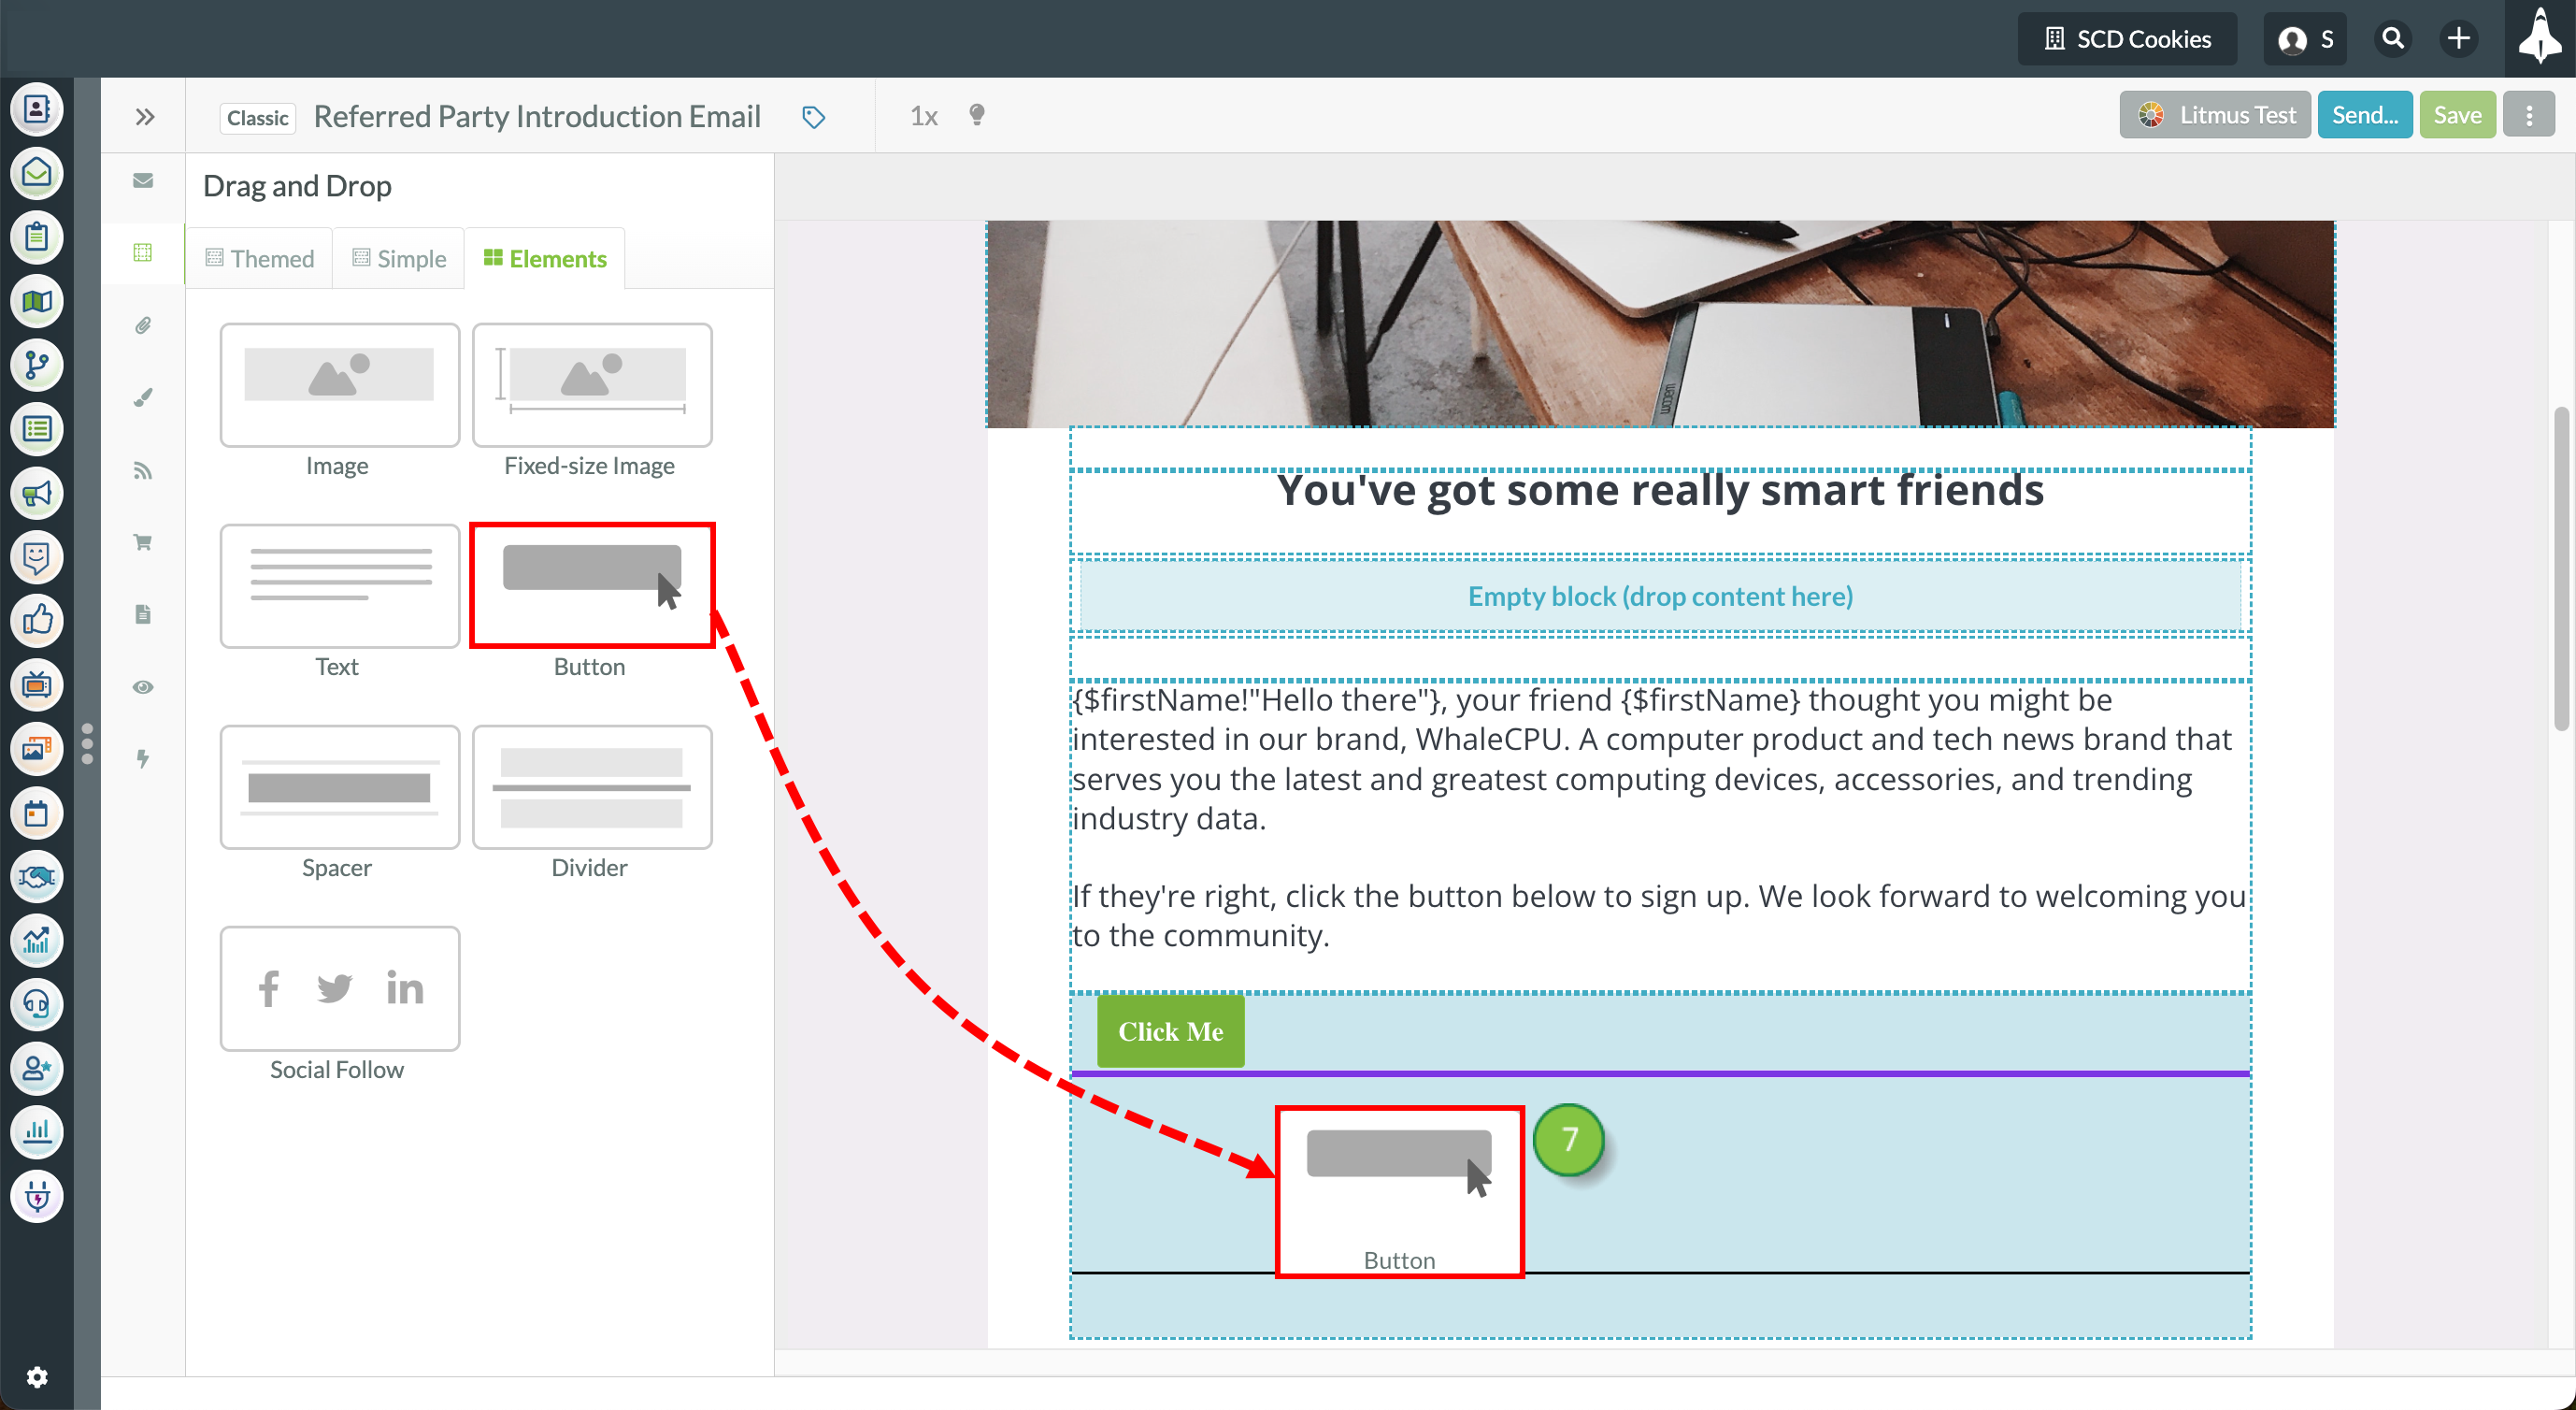
You can put buttons into layout blocks, or you can put buttons above or below elements that are already in a layout block.
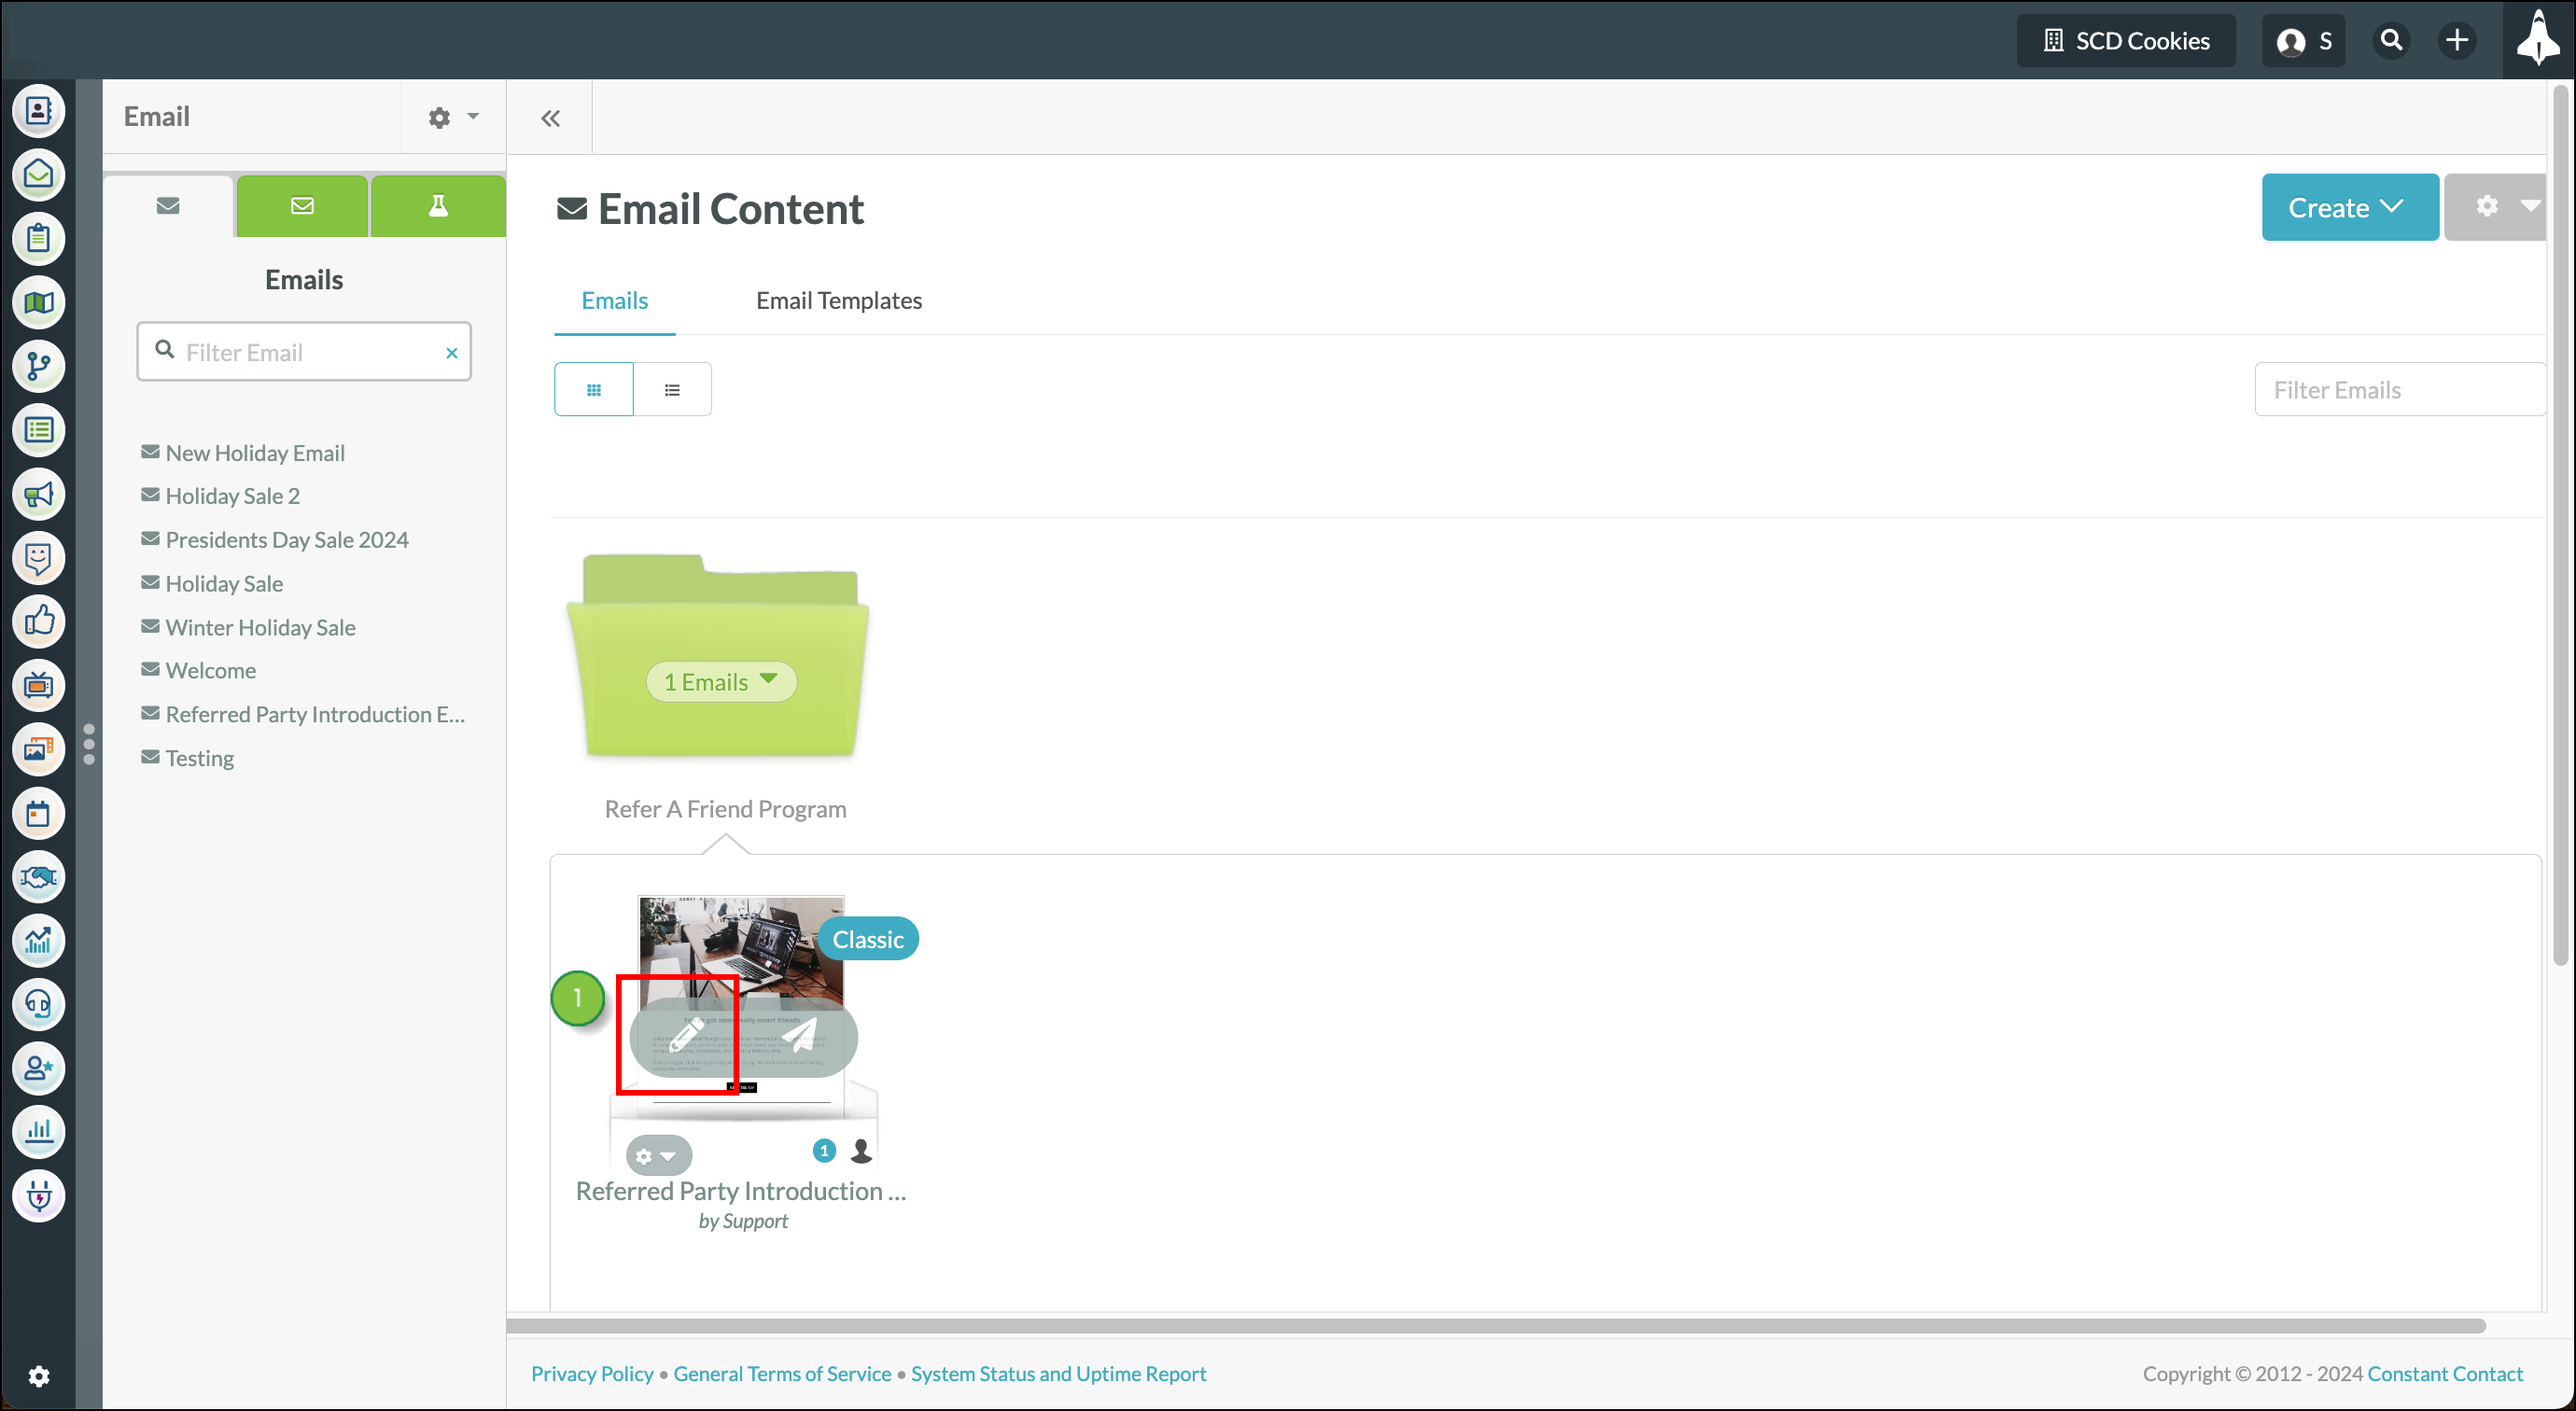
To add buttons to your email, click Email in the left toolbar. Before you can add buttons to an email, you must create or edit an email.
This information applies to the Classic email editor. If you're using the new email editor, read Modifying Buttons in the New Email Editor instead.

Click ![]() Move to reorder the element, if necessary.
Move to reorder the element, if necessary.
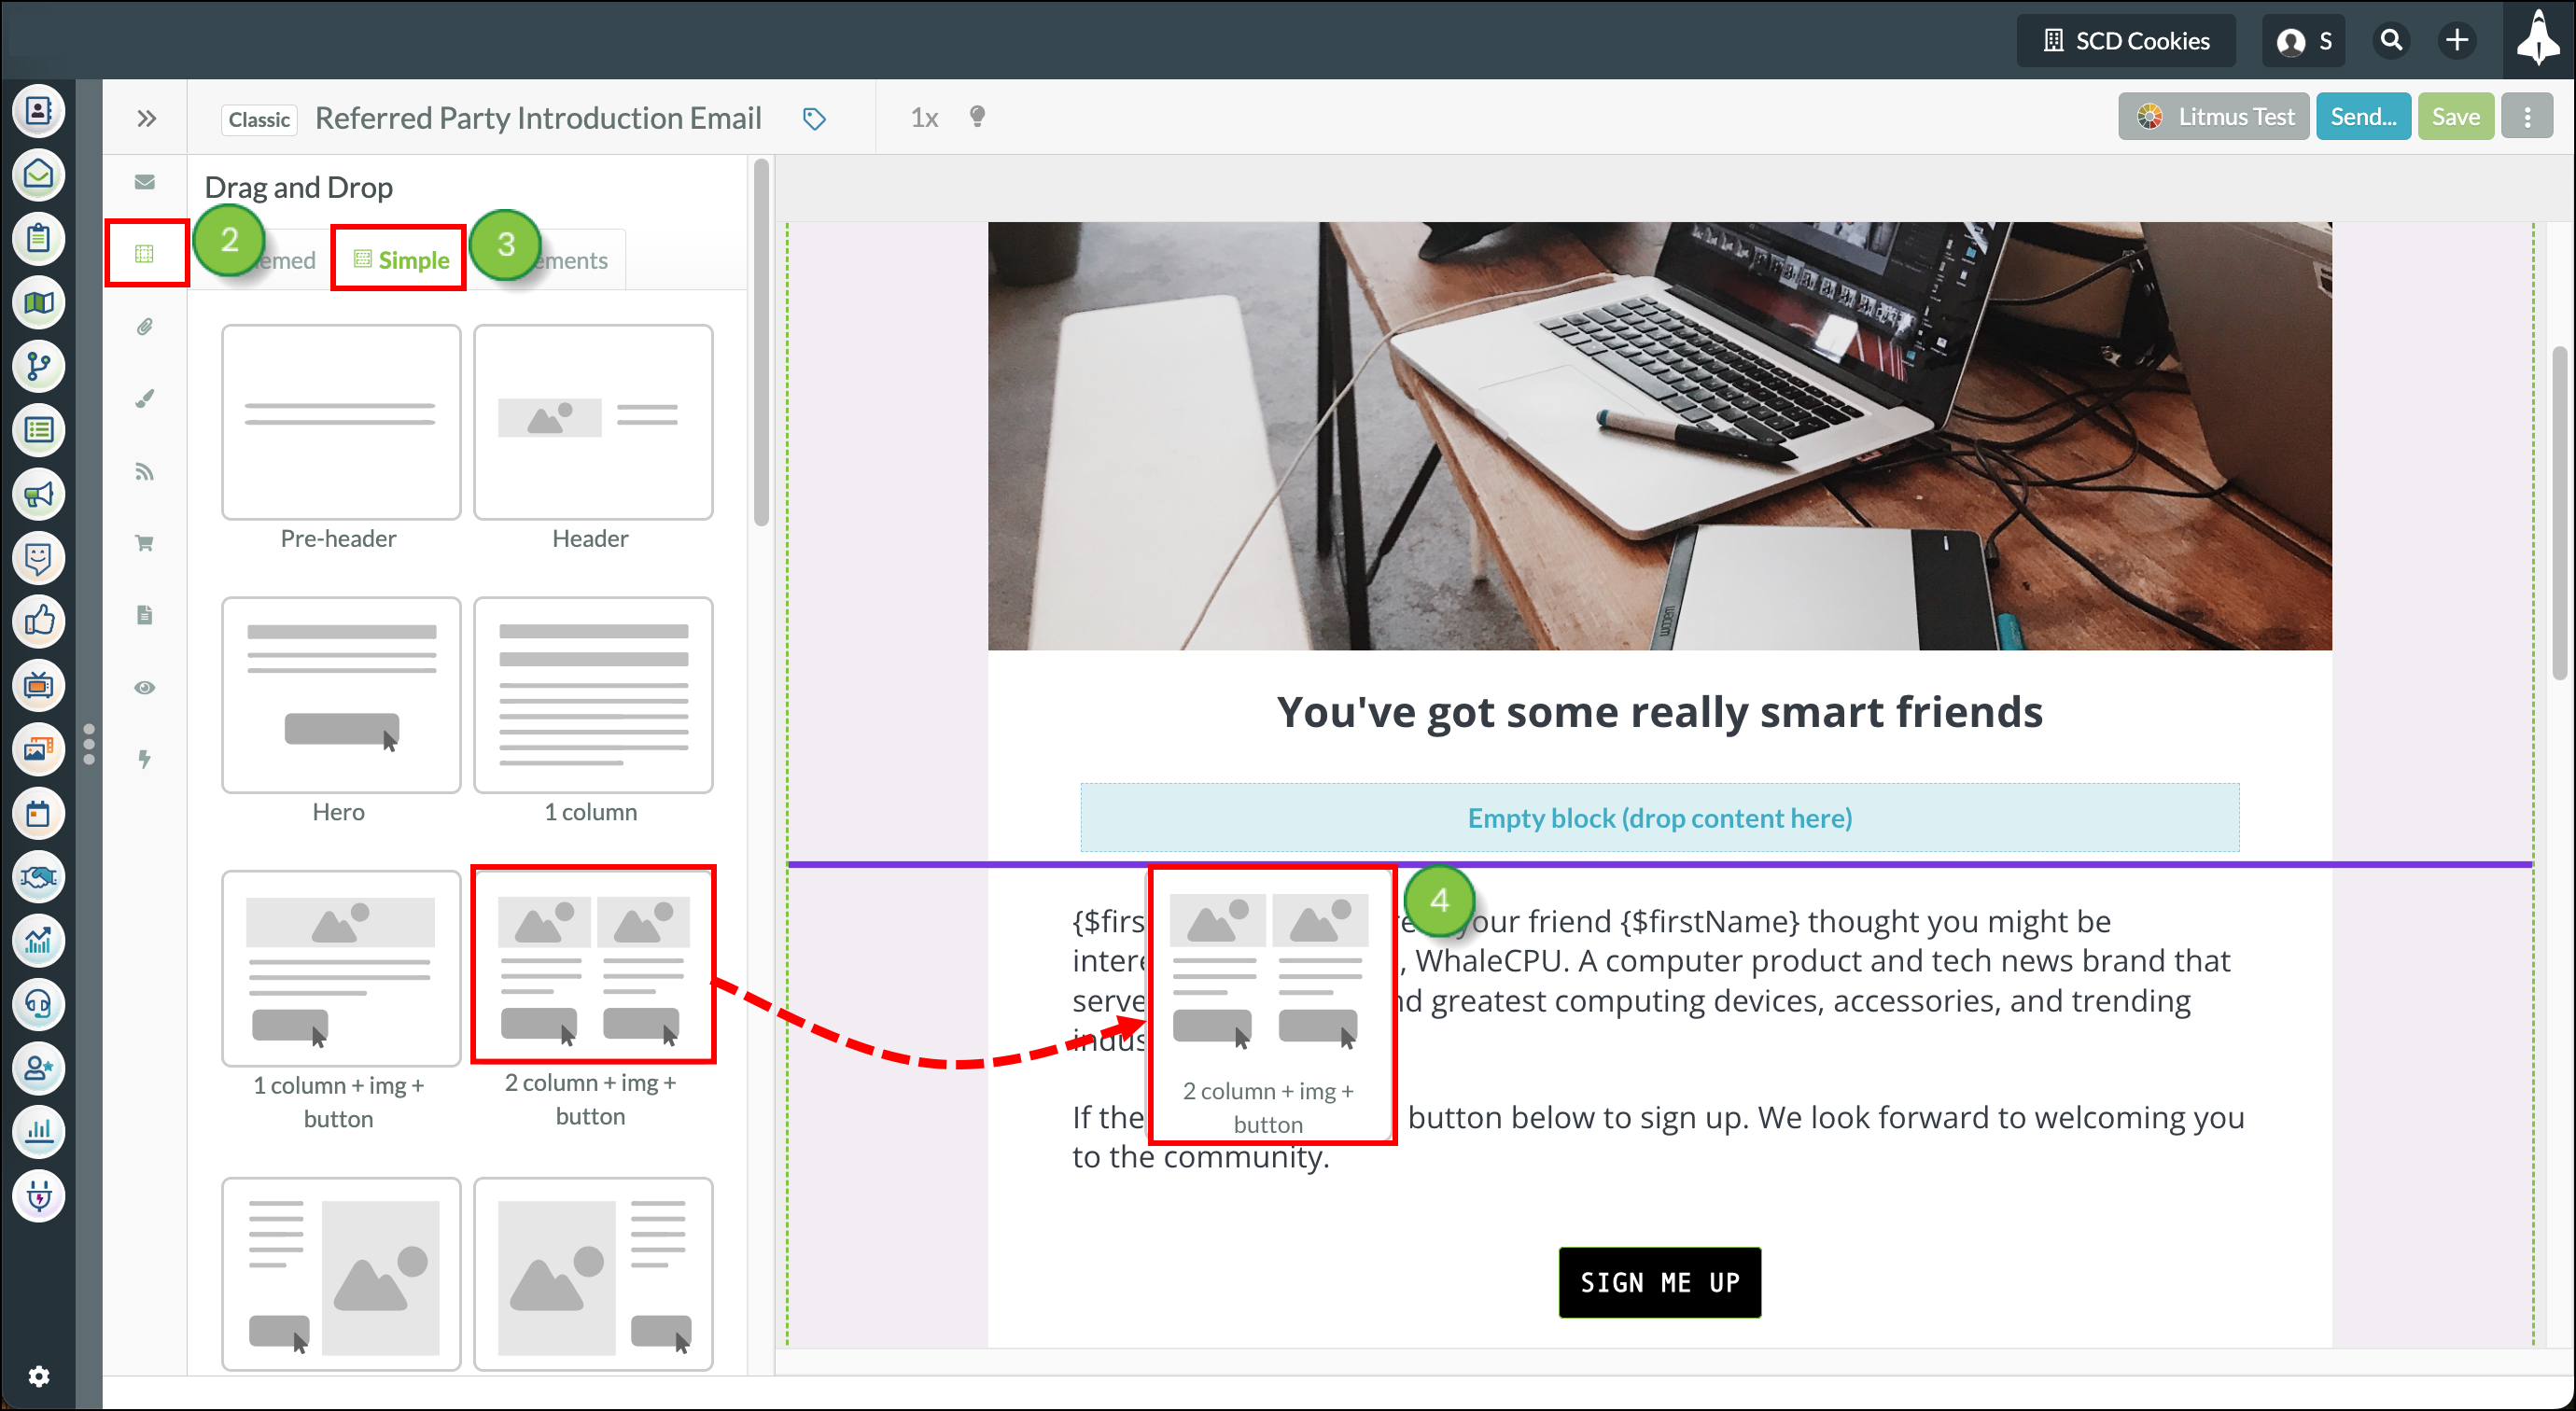
To sit buttons side by side in your email, use a layout block with the number of columns that fit your needs. Start from the Email section in the left toolbar.
This information applies to the Classic email editor. If you're using the new email editor, read Modifying Buttons in the New Email Editor instead.
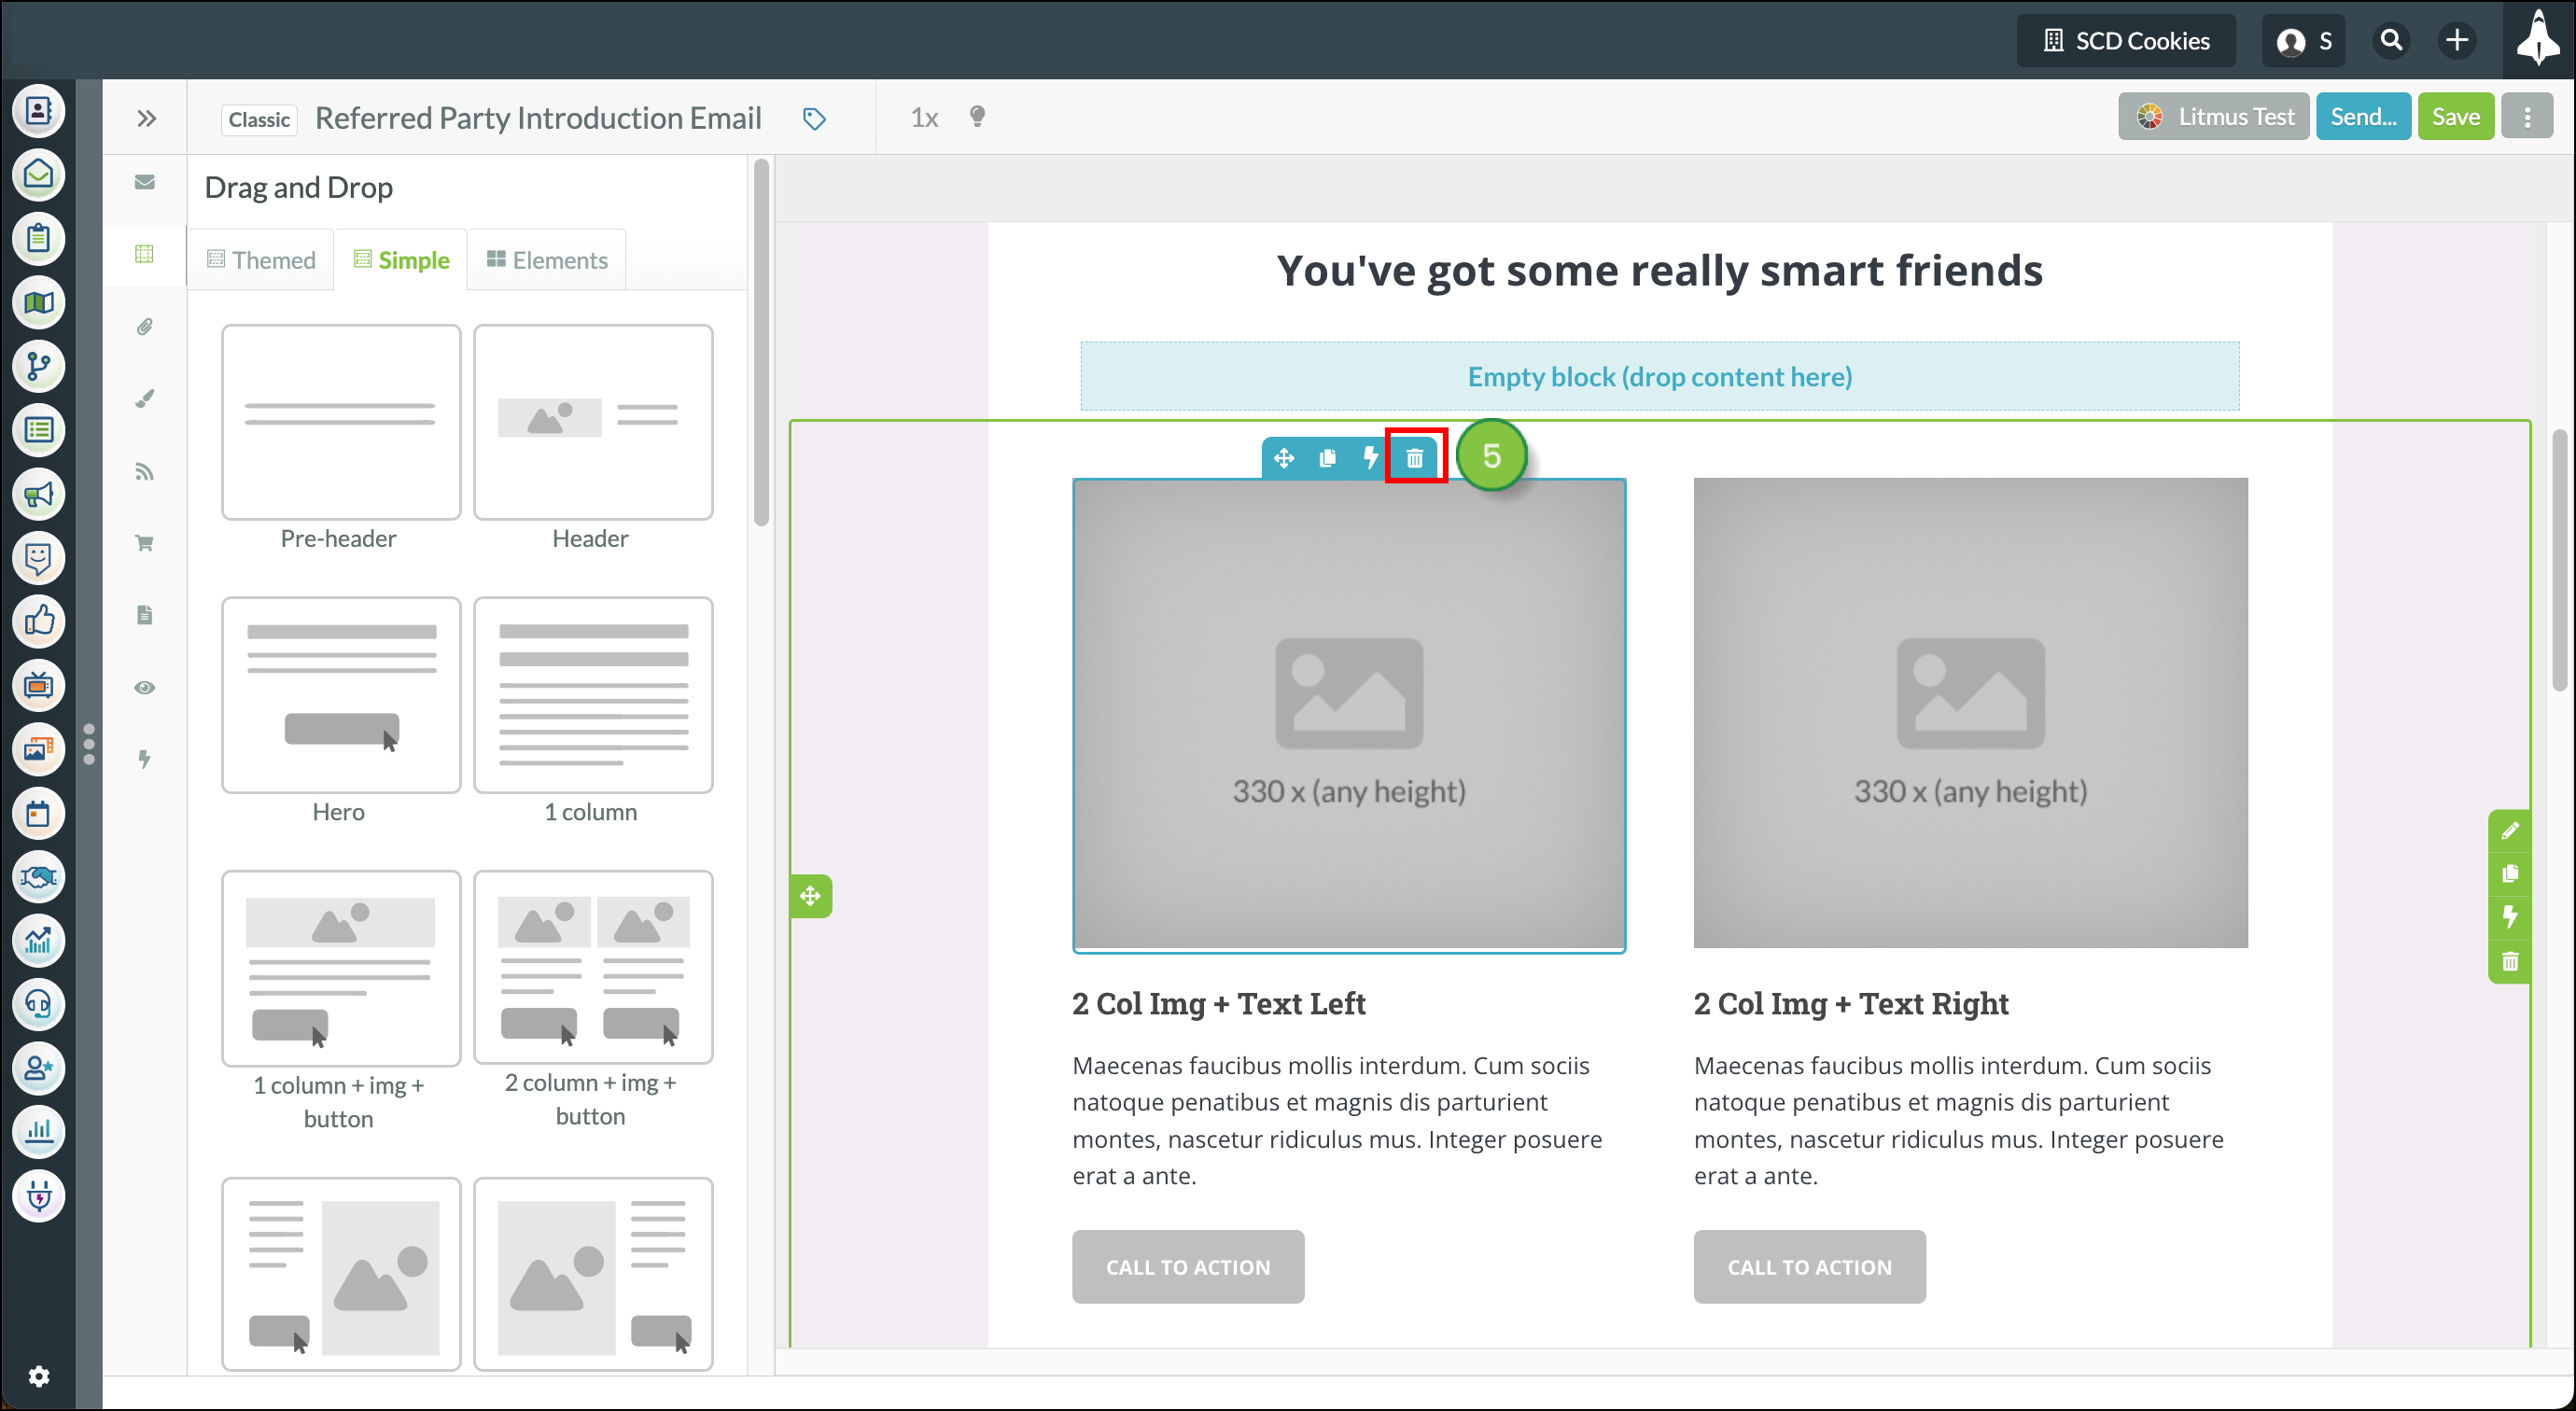
To sit buttons one on top of the other in your email, use a layout block with the number of rows that fit your needs. Start from the Email section in the left toolbar.


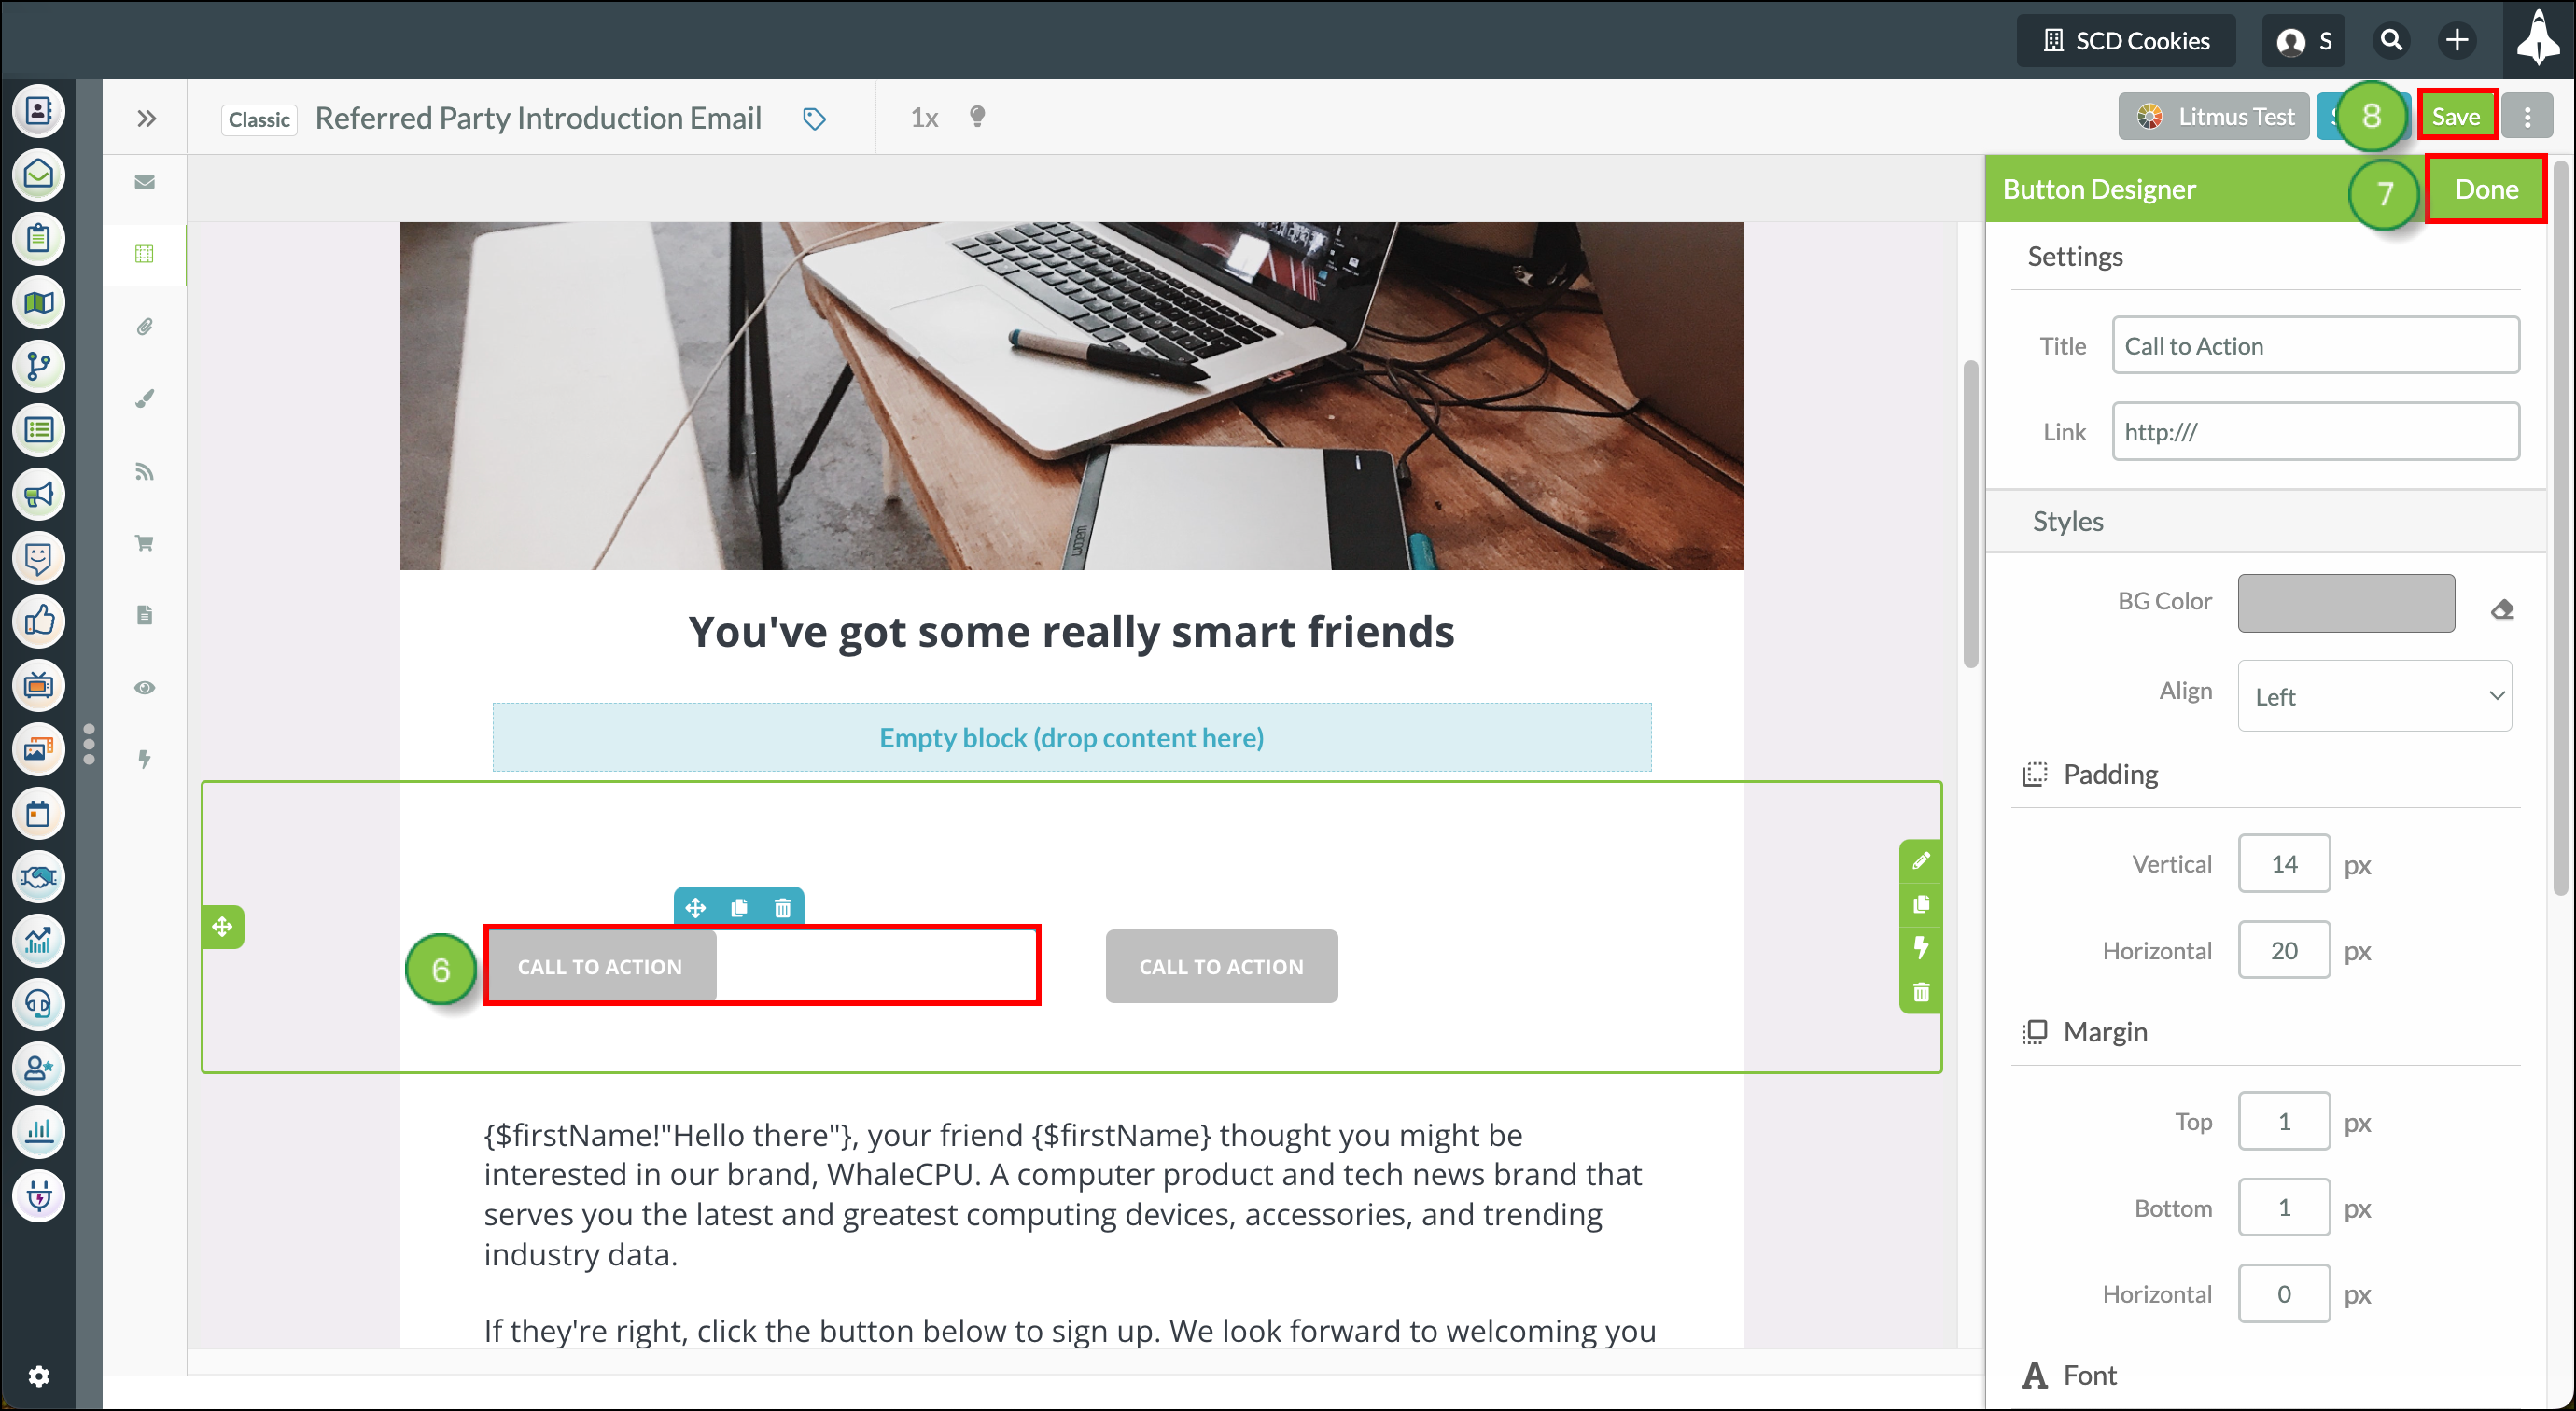
You can edit and customize button labels and links, using the Button Designer. Click on your button element to open the Button Designer.
This information applies to the Classic email editor. If you're using the new email editor, read Modifying Buttons in the New Email Editor instead.
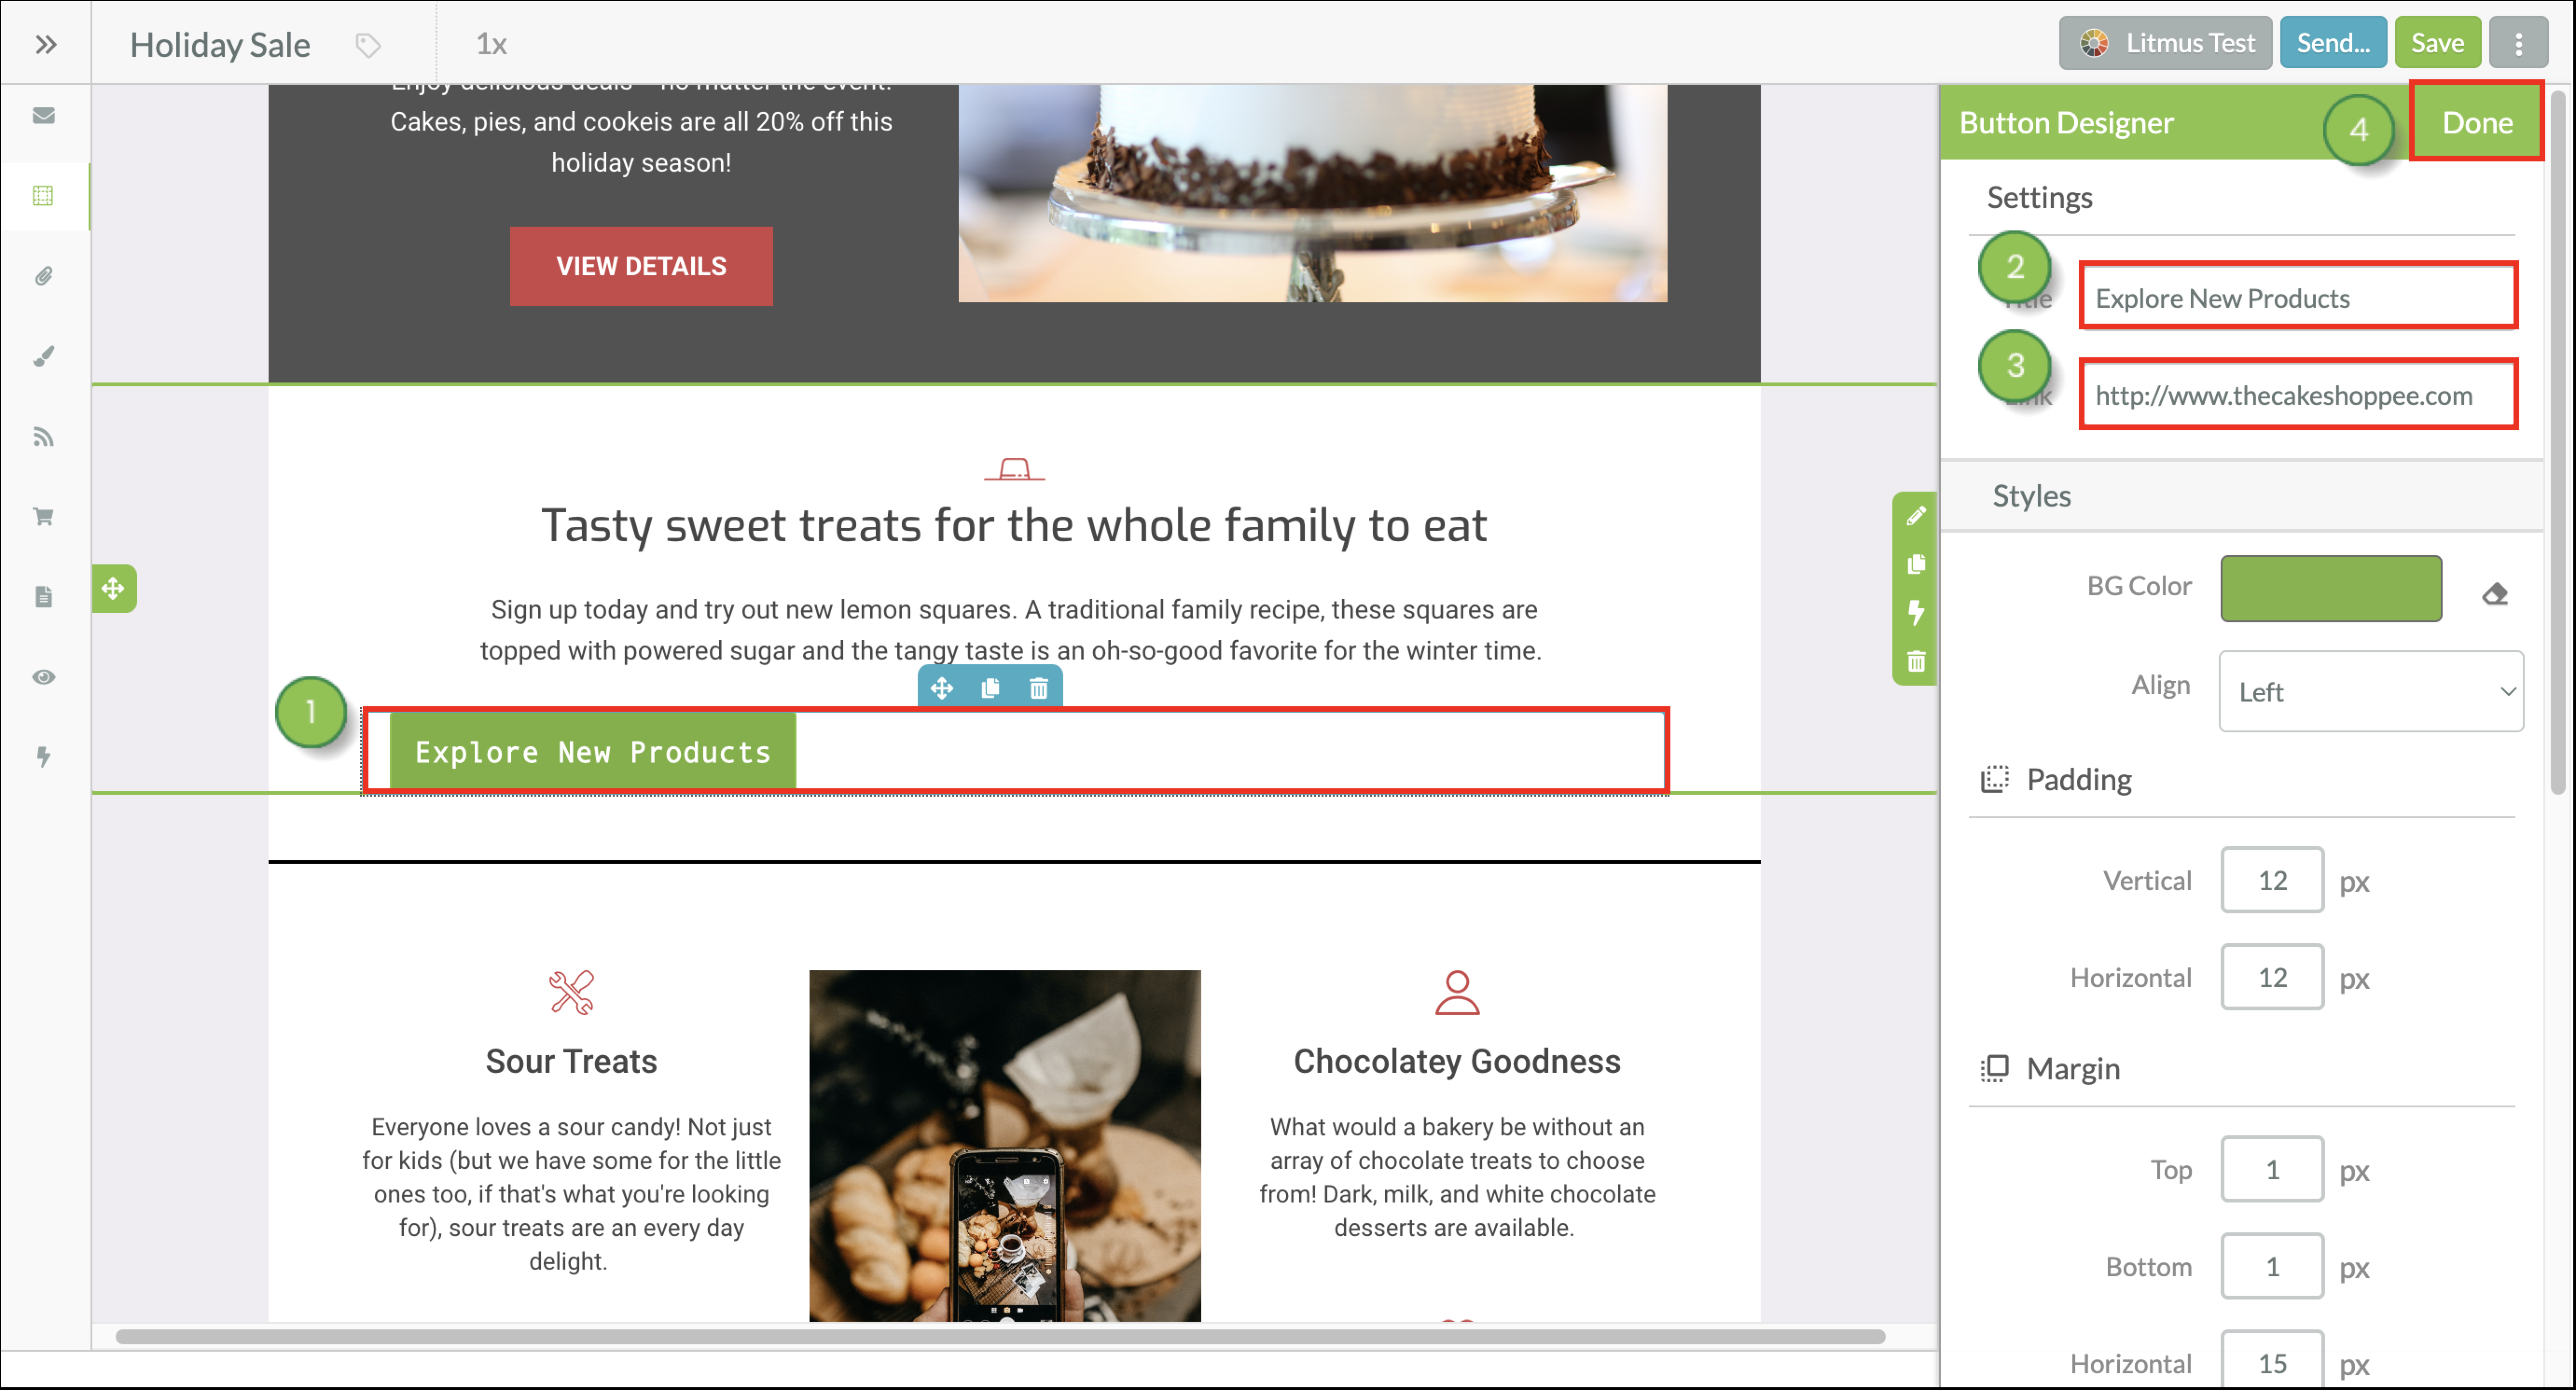
Remember to Save any changes you make to your email.
You can edit and customize button visual styles from the Button Designer. Click on your button element to open the Button Designer.

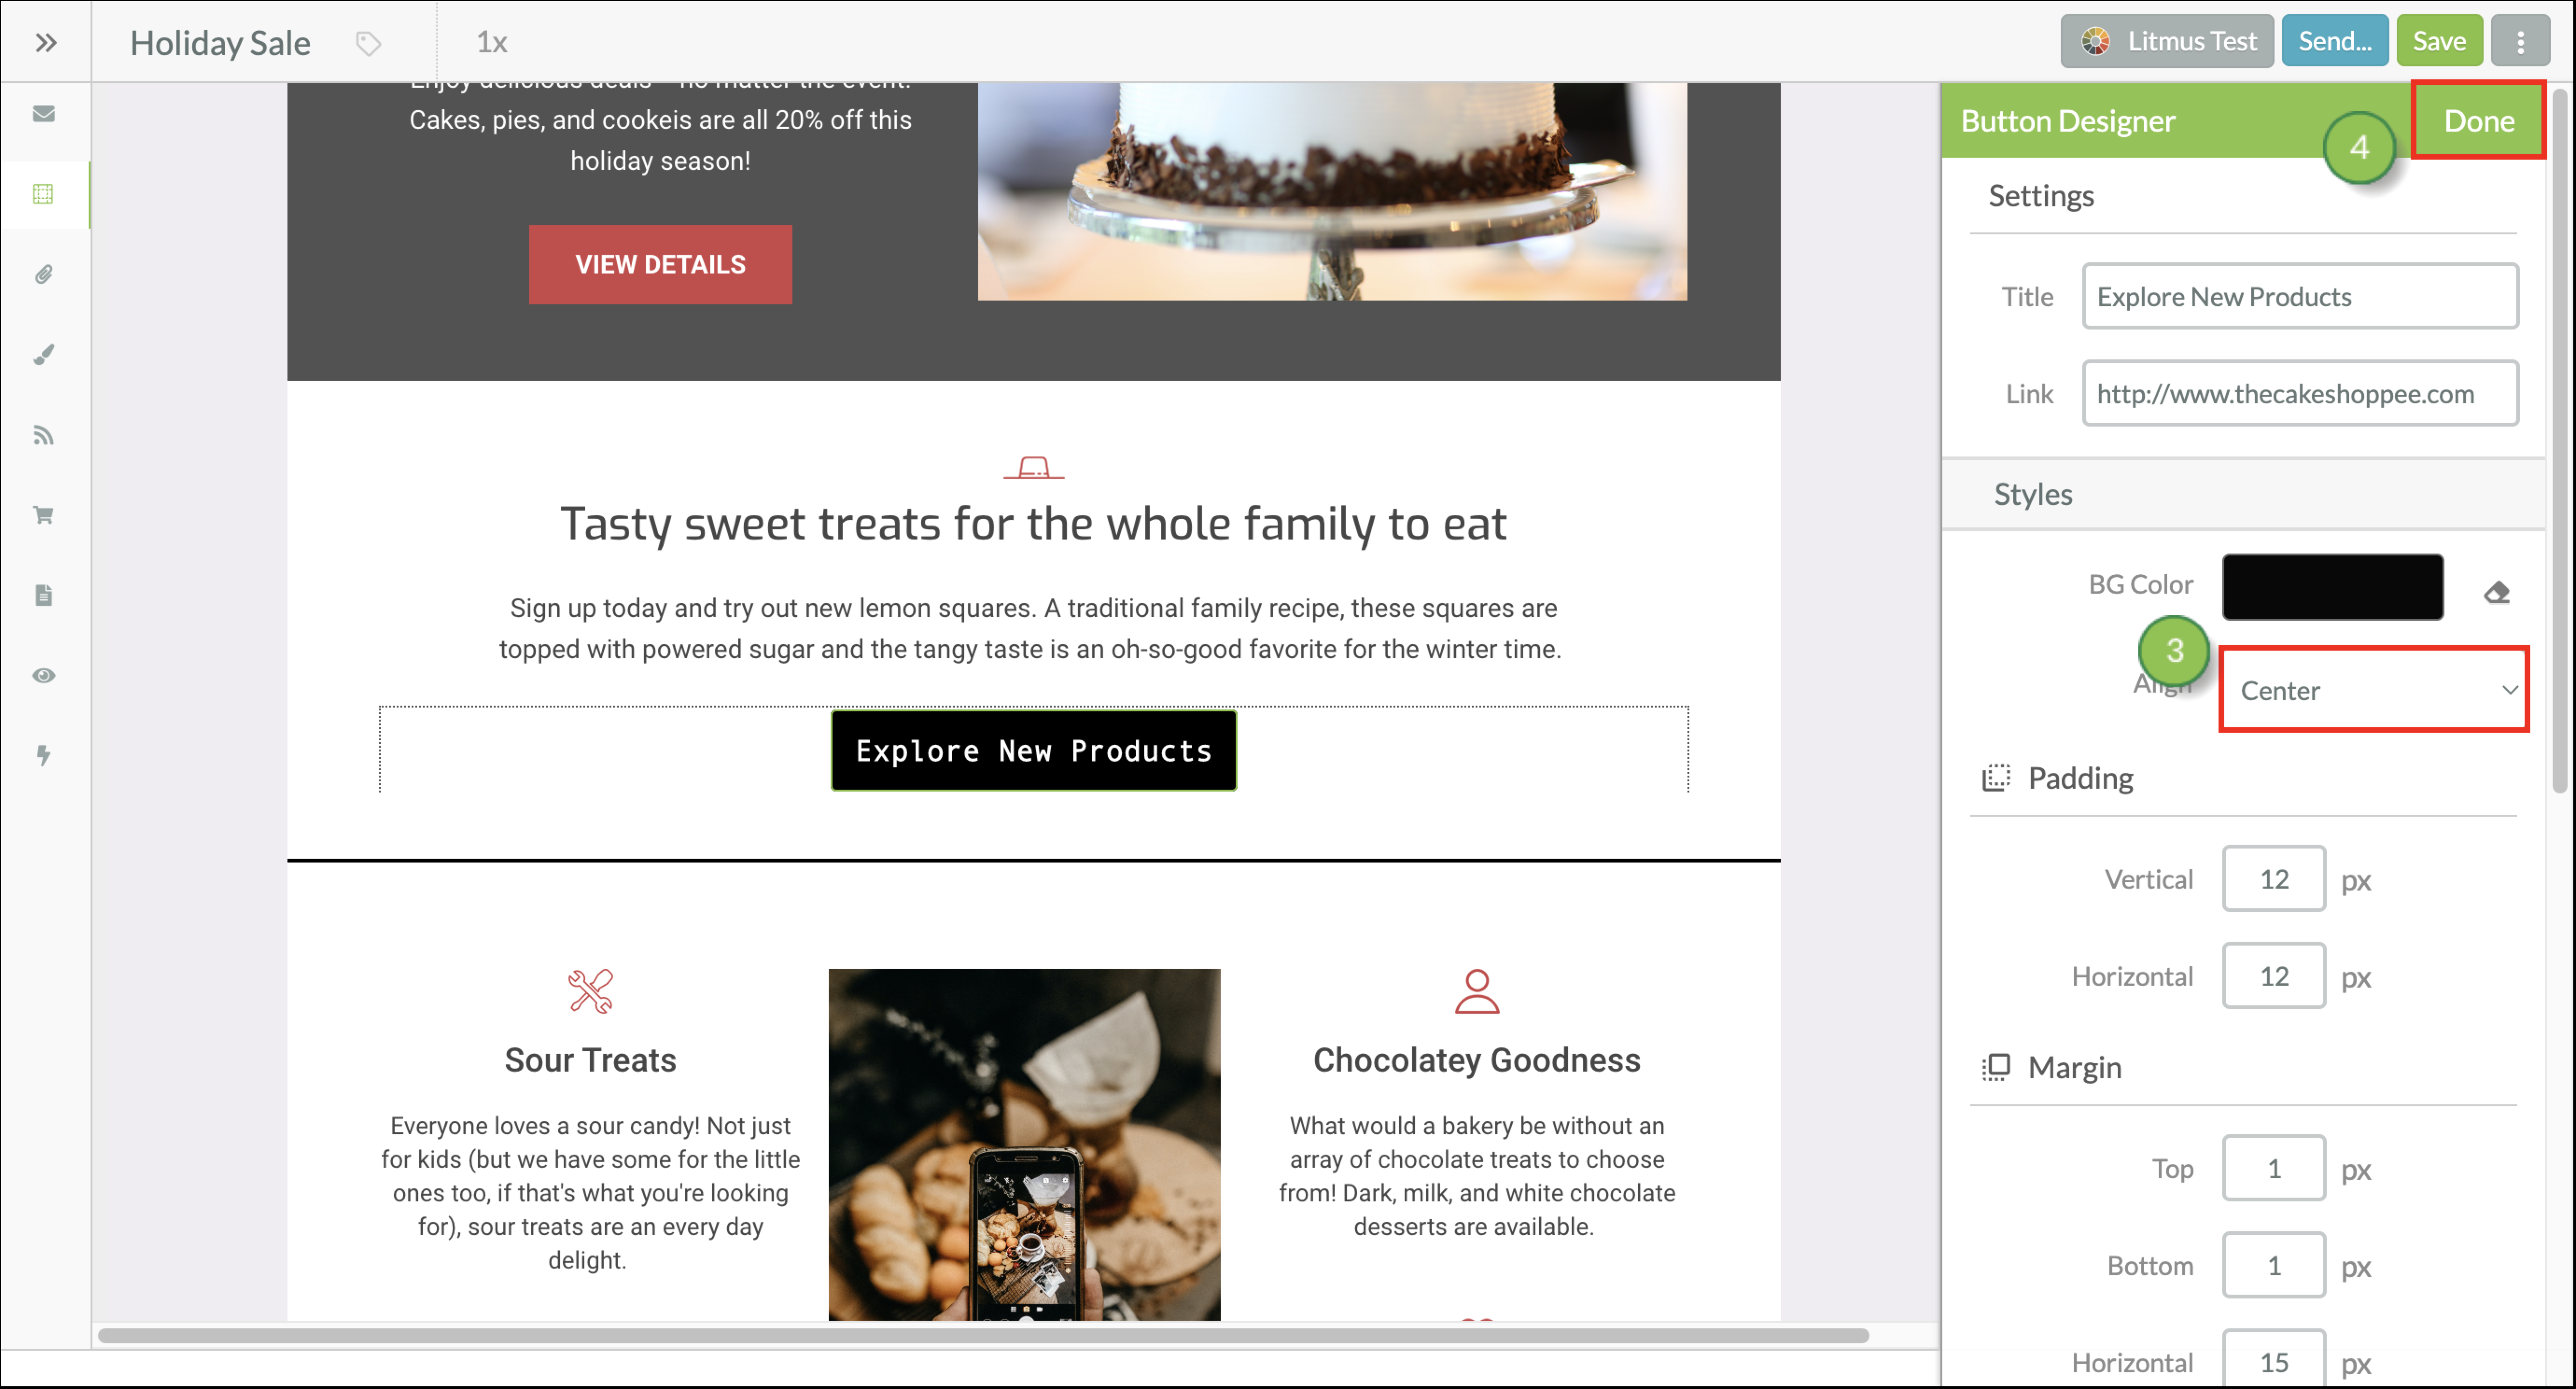
Remember to Save any changes you make to your email.
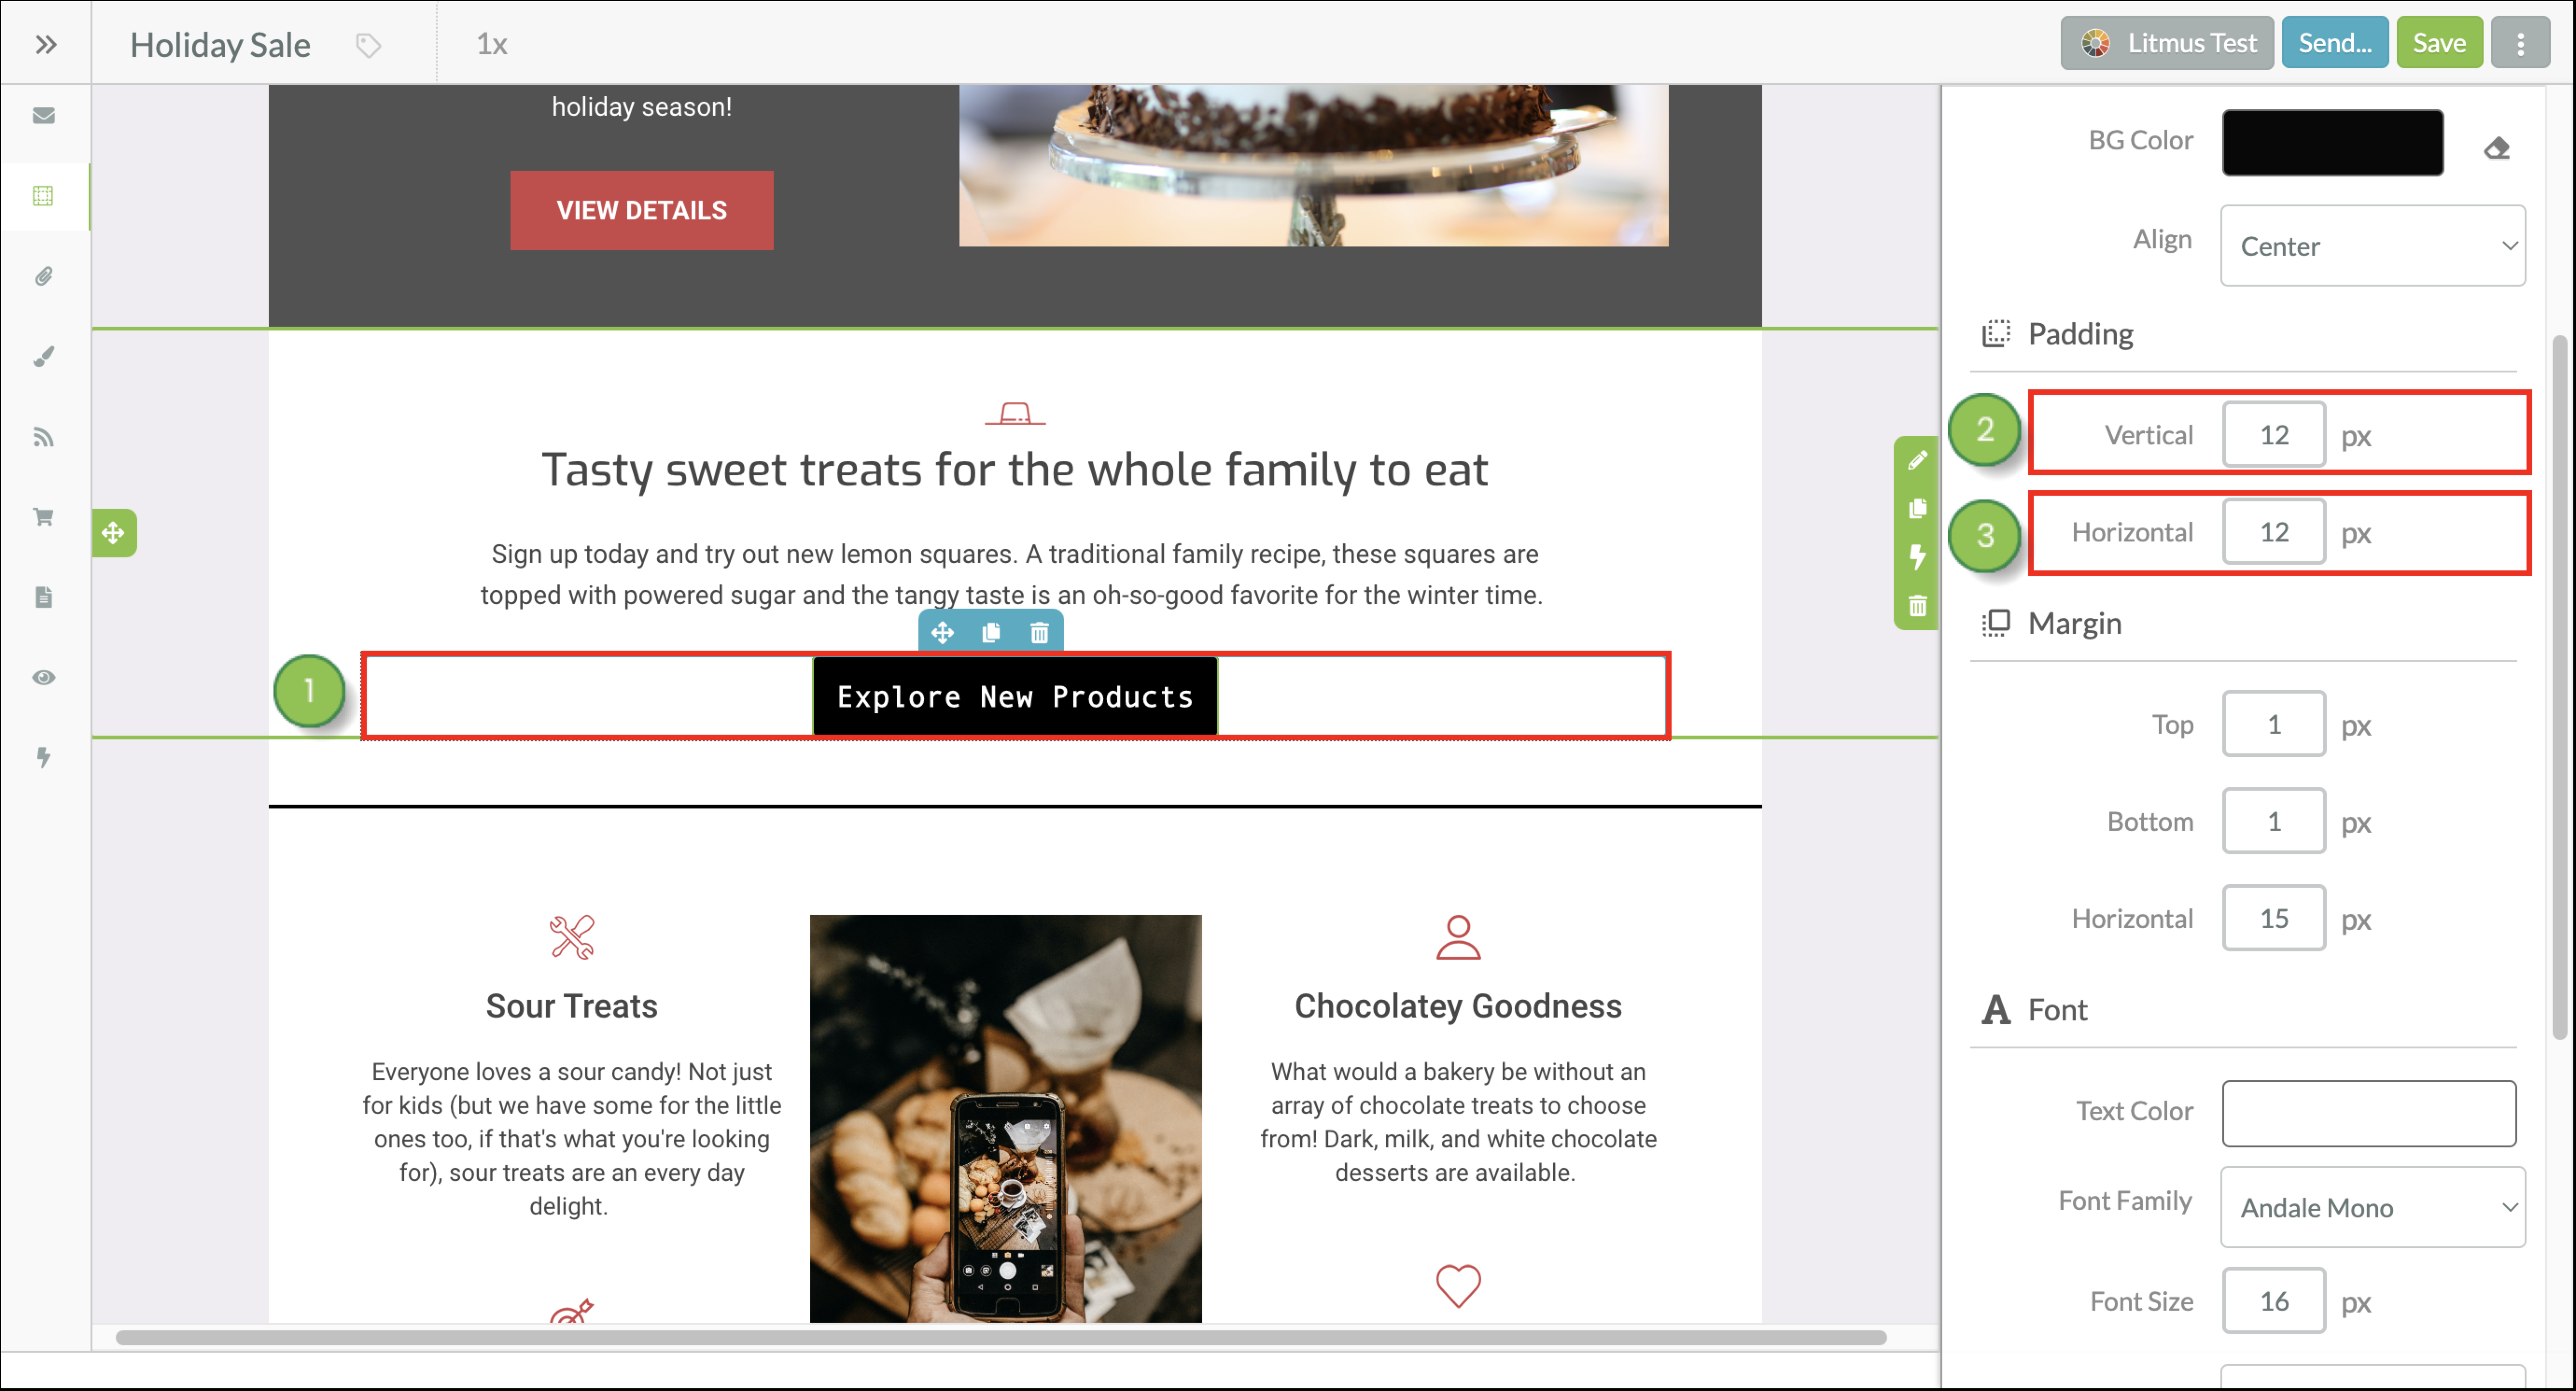
You can edit and customize button padding. Padding is the space around the text inside of the button. It is not the space around the button element entirely (for that, customize your button's margins).
This information applies to the Classic email editor. If you're using the new email editor, read Modifying Buttons in the New Email Editor instead.
Scroll to the top or bottom of the Button Designer and click Done. Remember to Save any changes you make to your email.
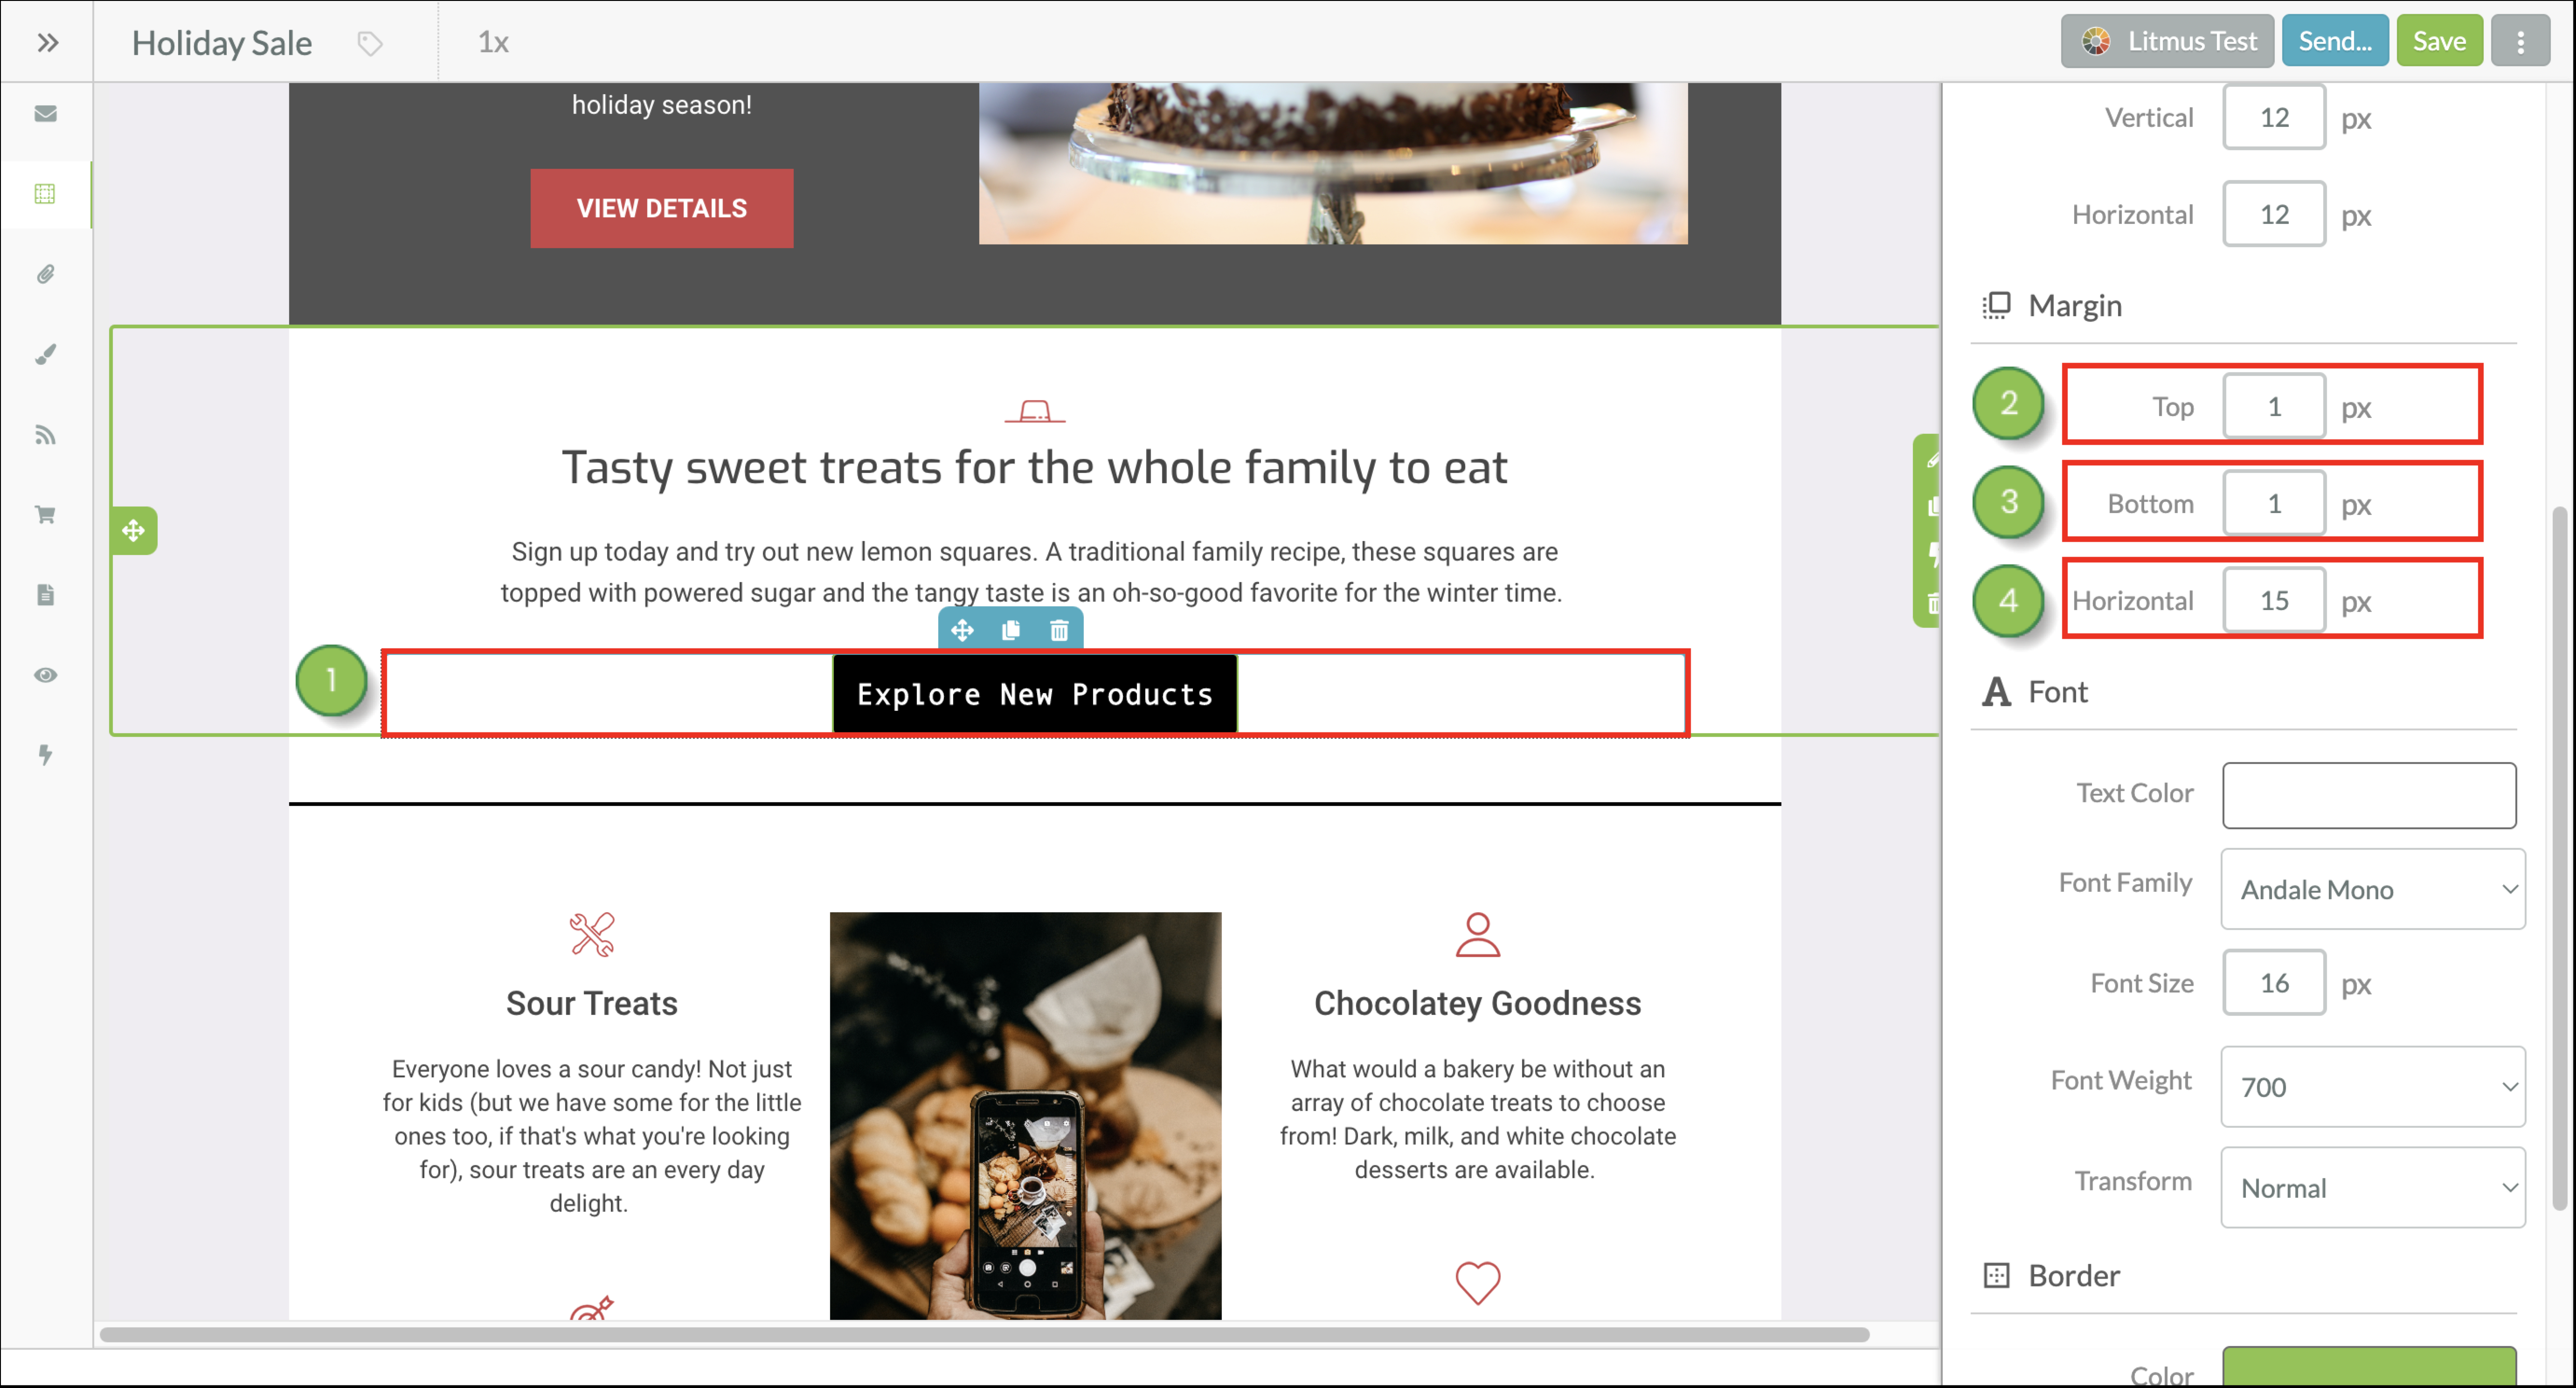
You can edit and customize button margins. Margin is the space around the button element. Editing margins will not affect the size of your button.
This information applies to the Classic email editor. If you're using the new email editor, read Modifying Buttons in the New Email Editor instead.
Scroll to the top or bottom of the Button Designer and click Done. Remember to Save any changes you make to your email.
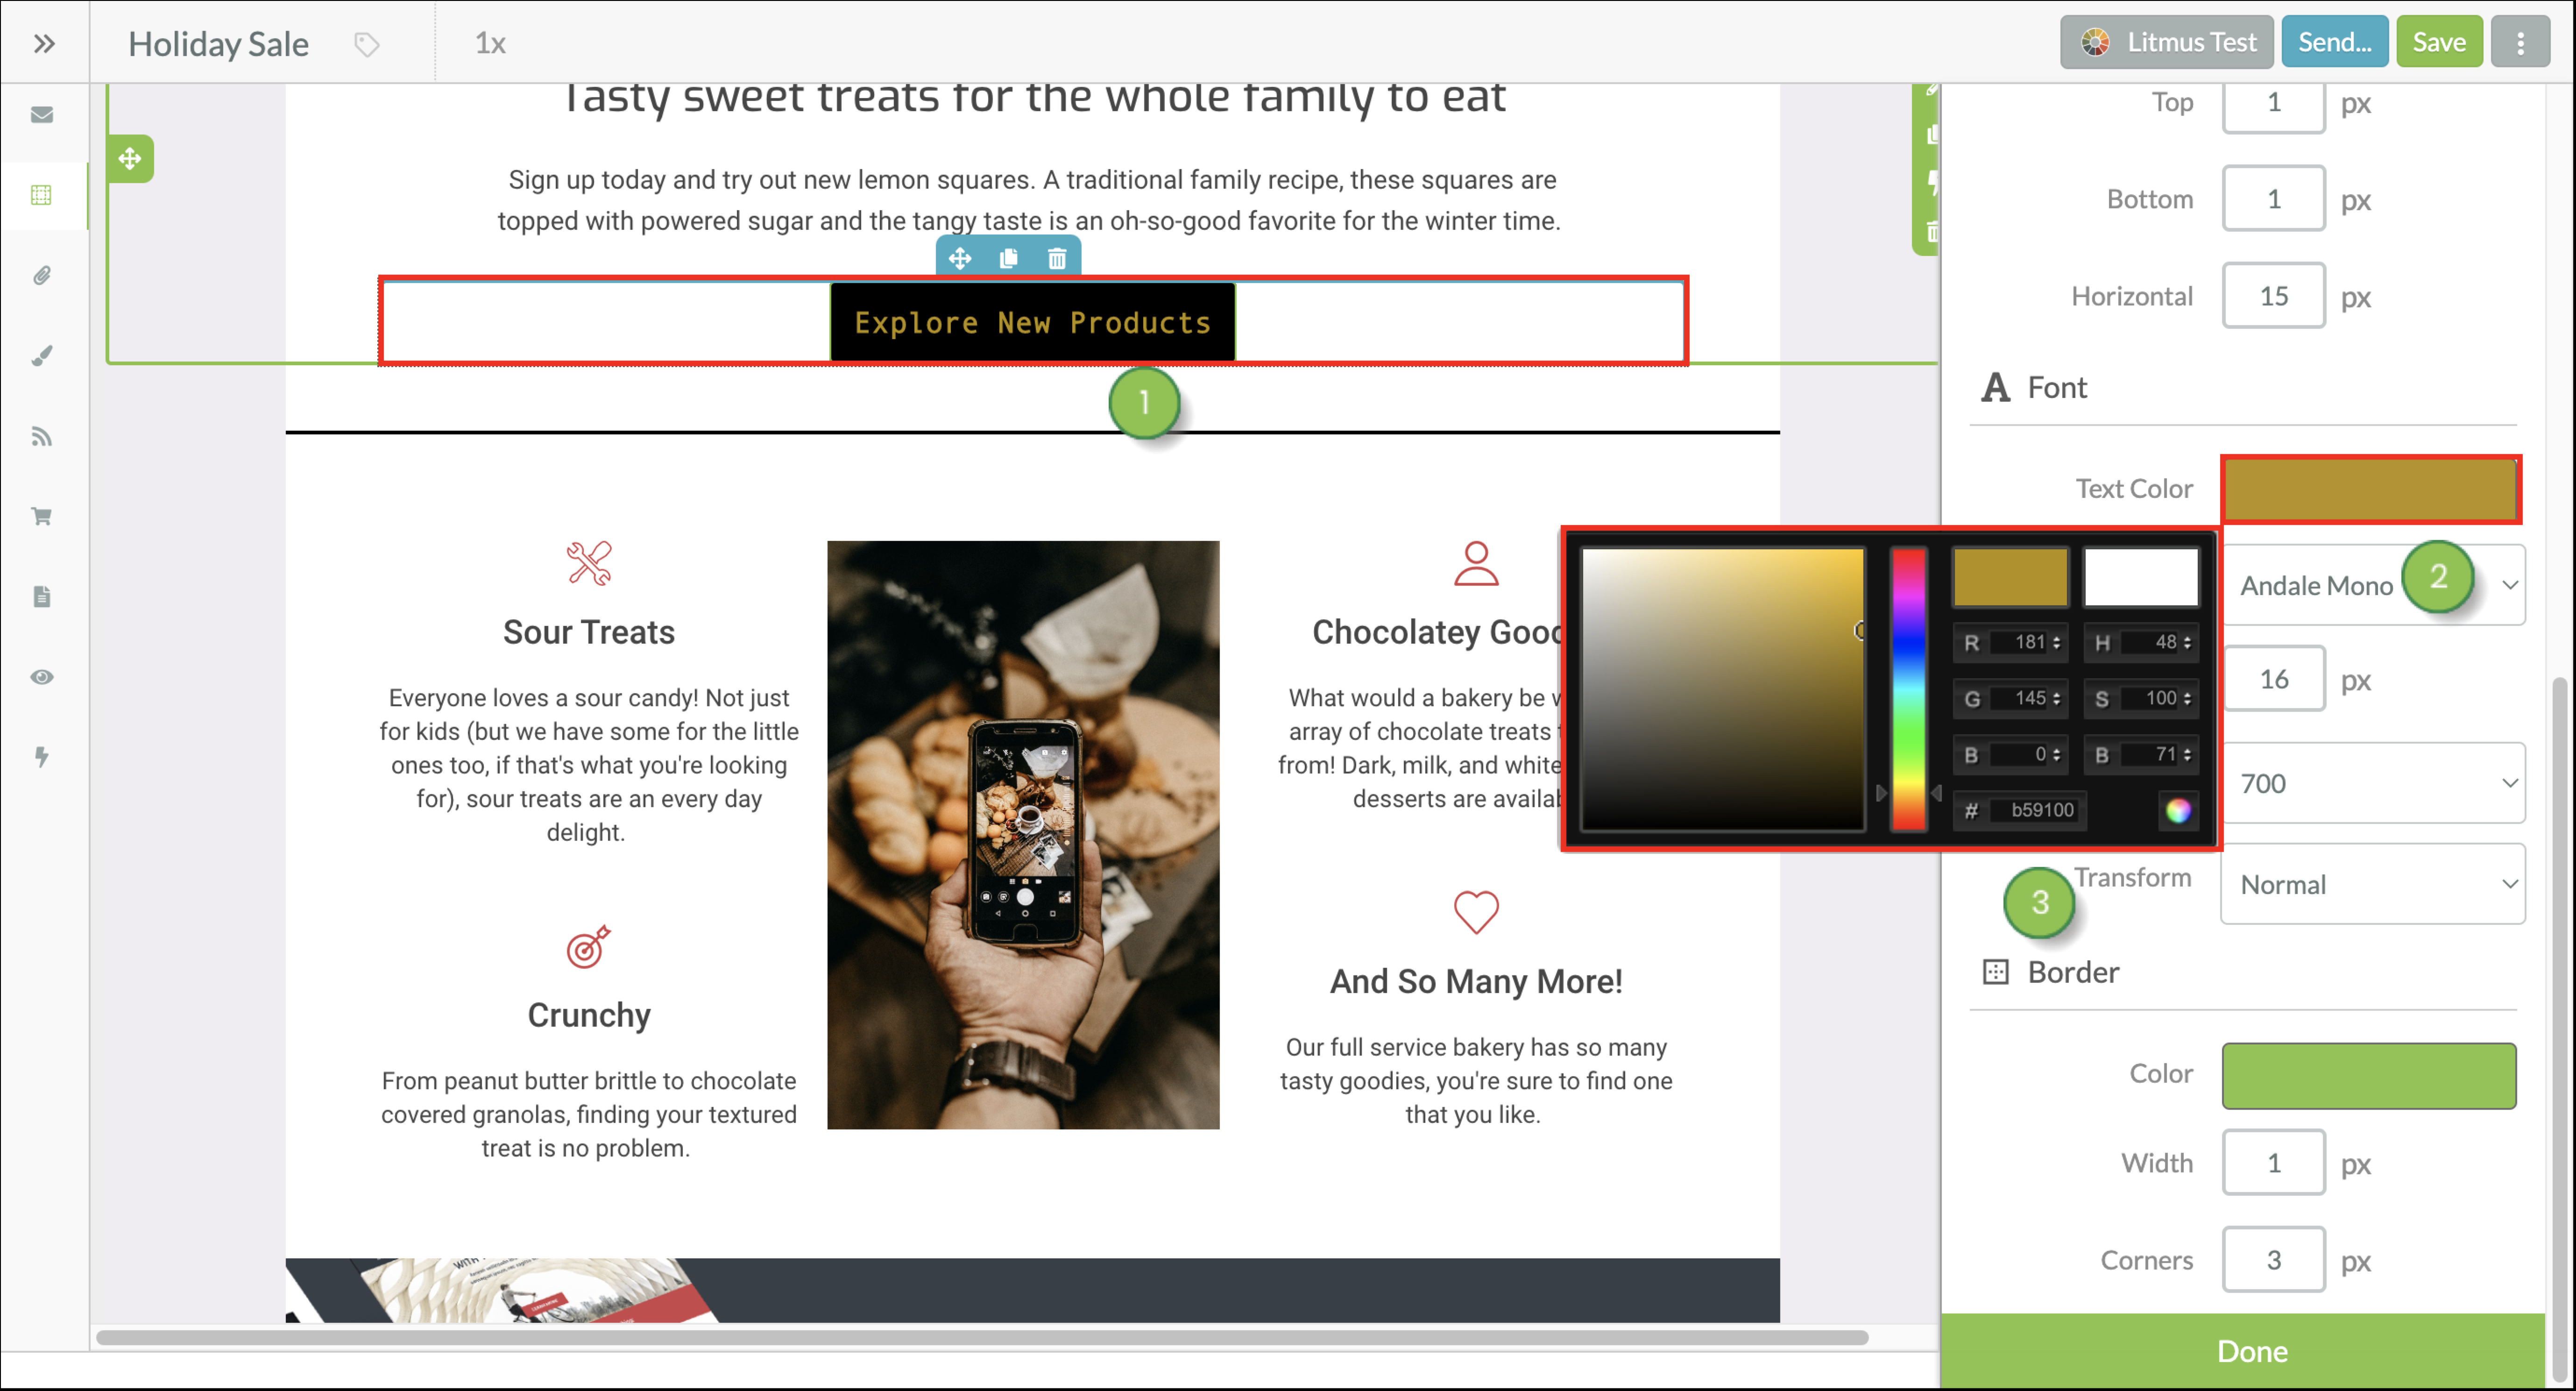
You can edit and customize button fonts.
This information applies to the Classic email editor. If you're using the new email editor, read Modifying Buttons in the New Email Editor instead.
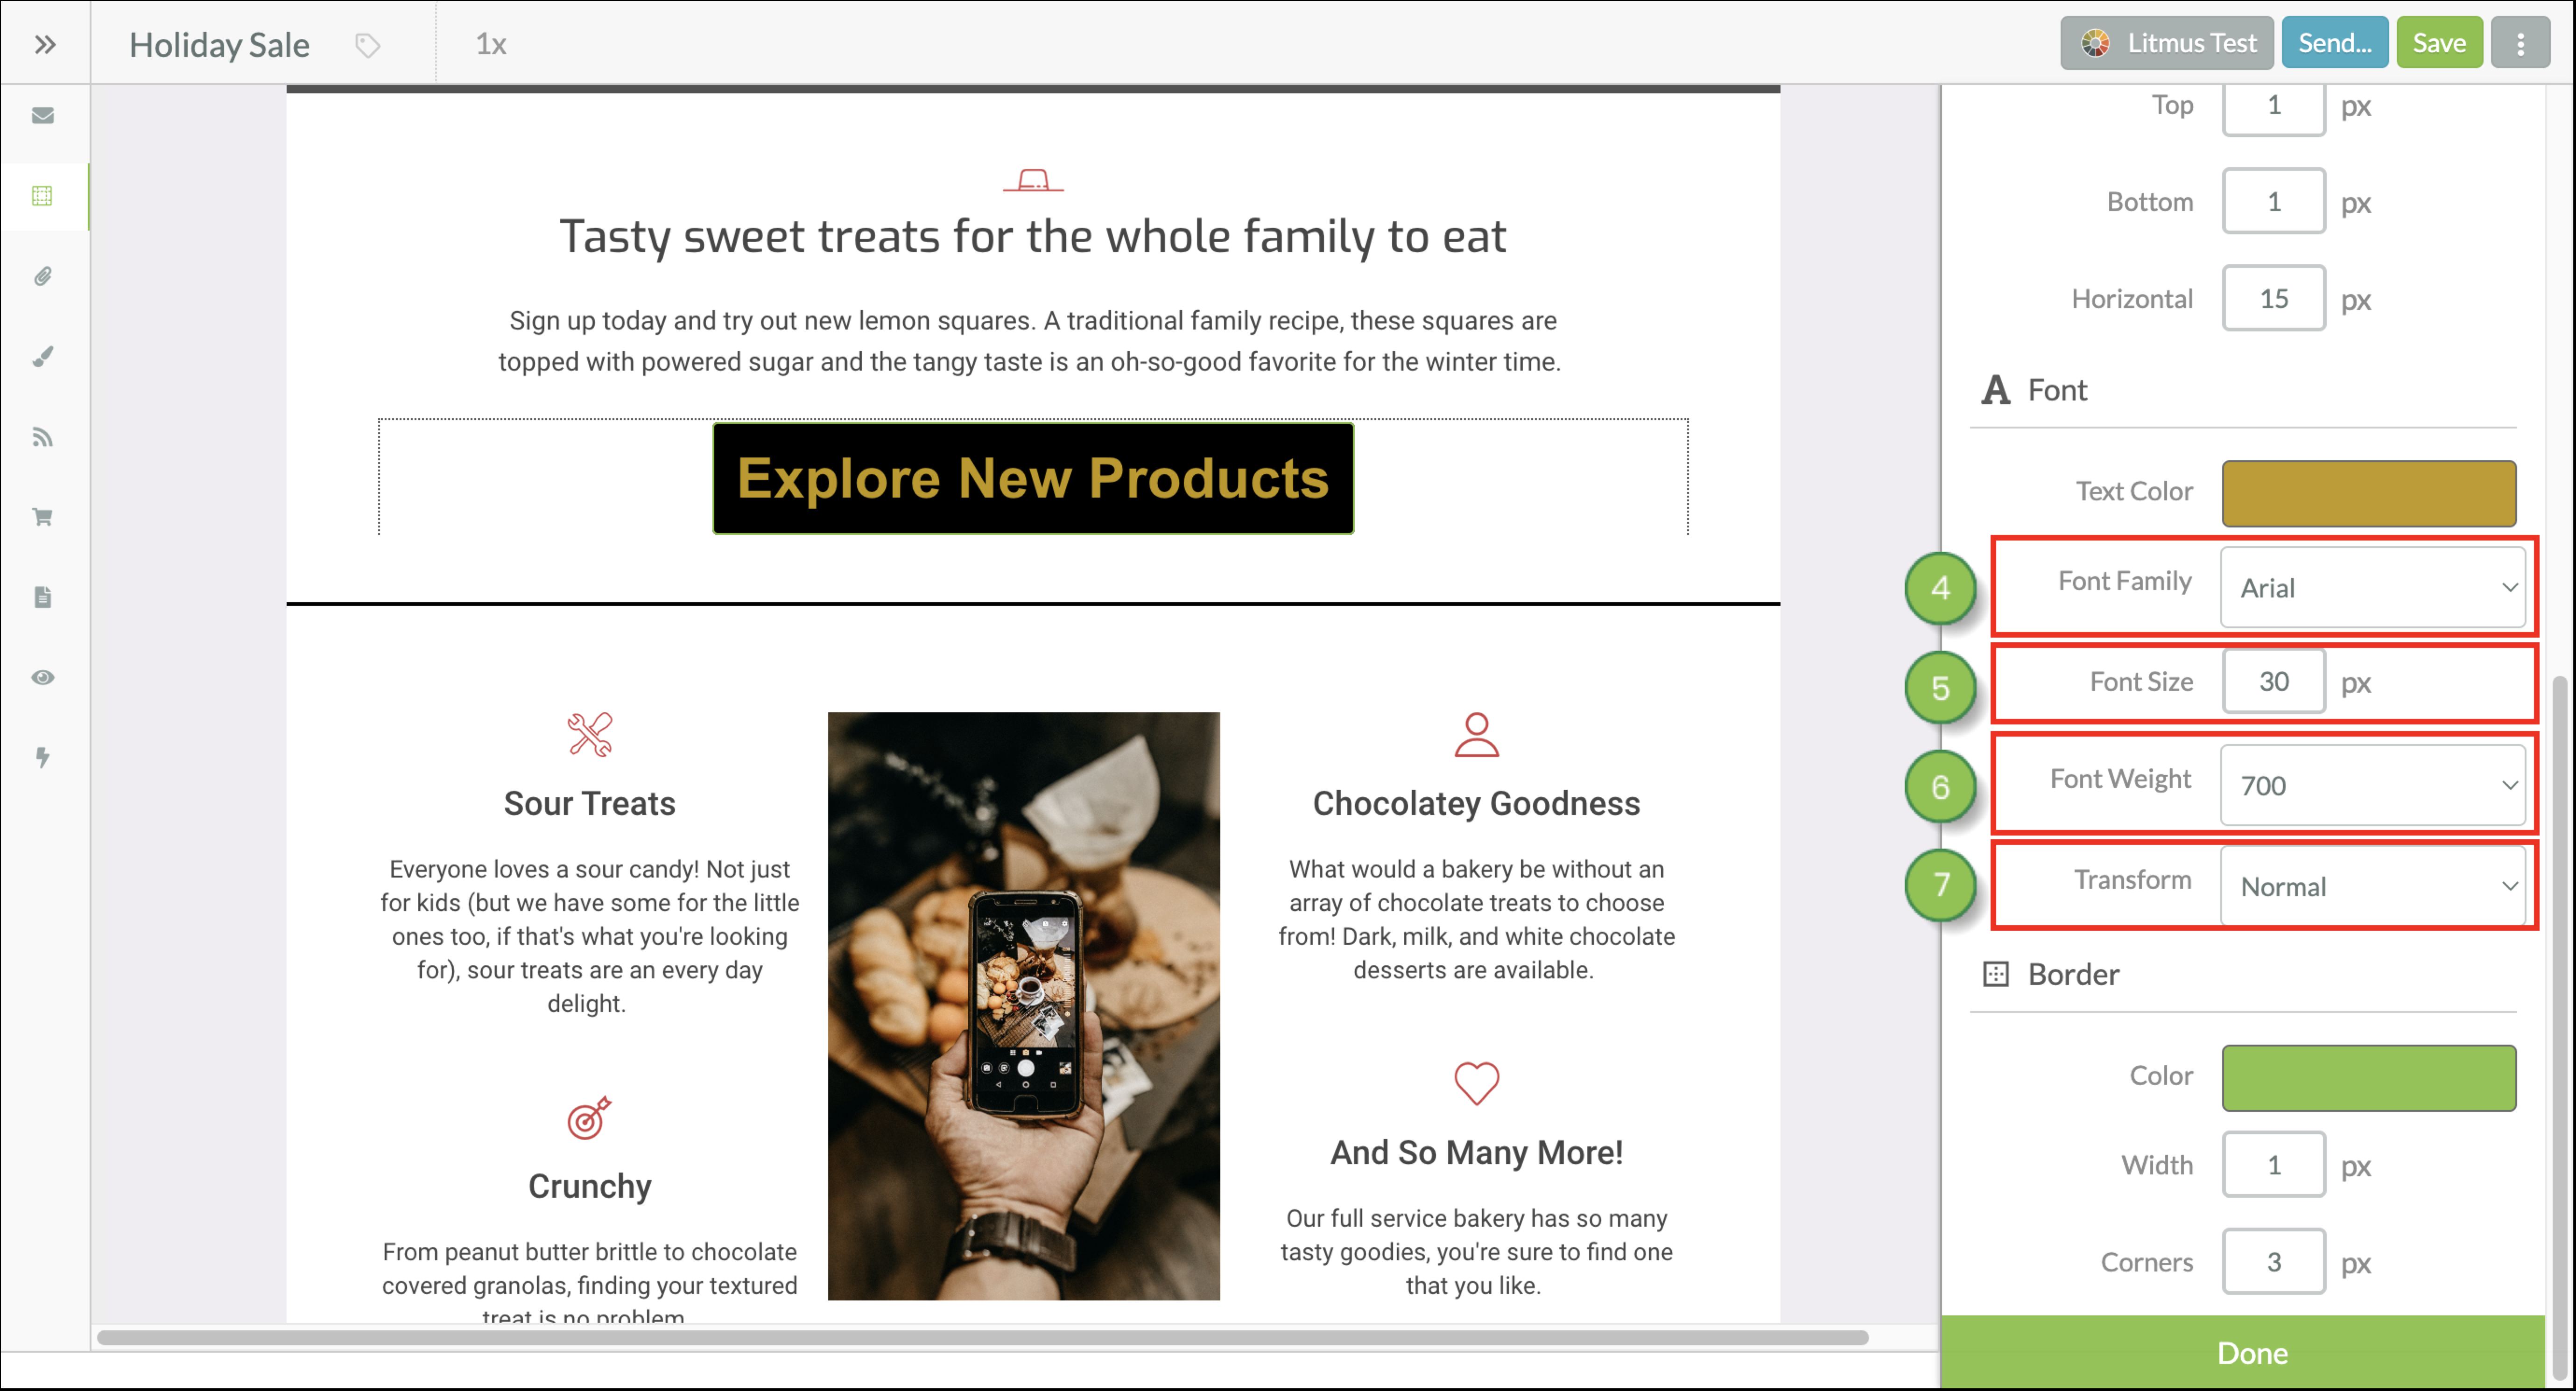
Scroll to the top or bottom of the Button Designer and click Done. Remember to Save any changes you make to your email.
You can edit and customize button borders.
This information applies to the Classic email editor. If you're using the new email editor, read Modifying Buttons in the New Email Editor instead.
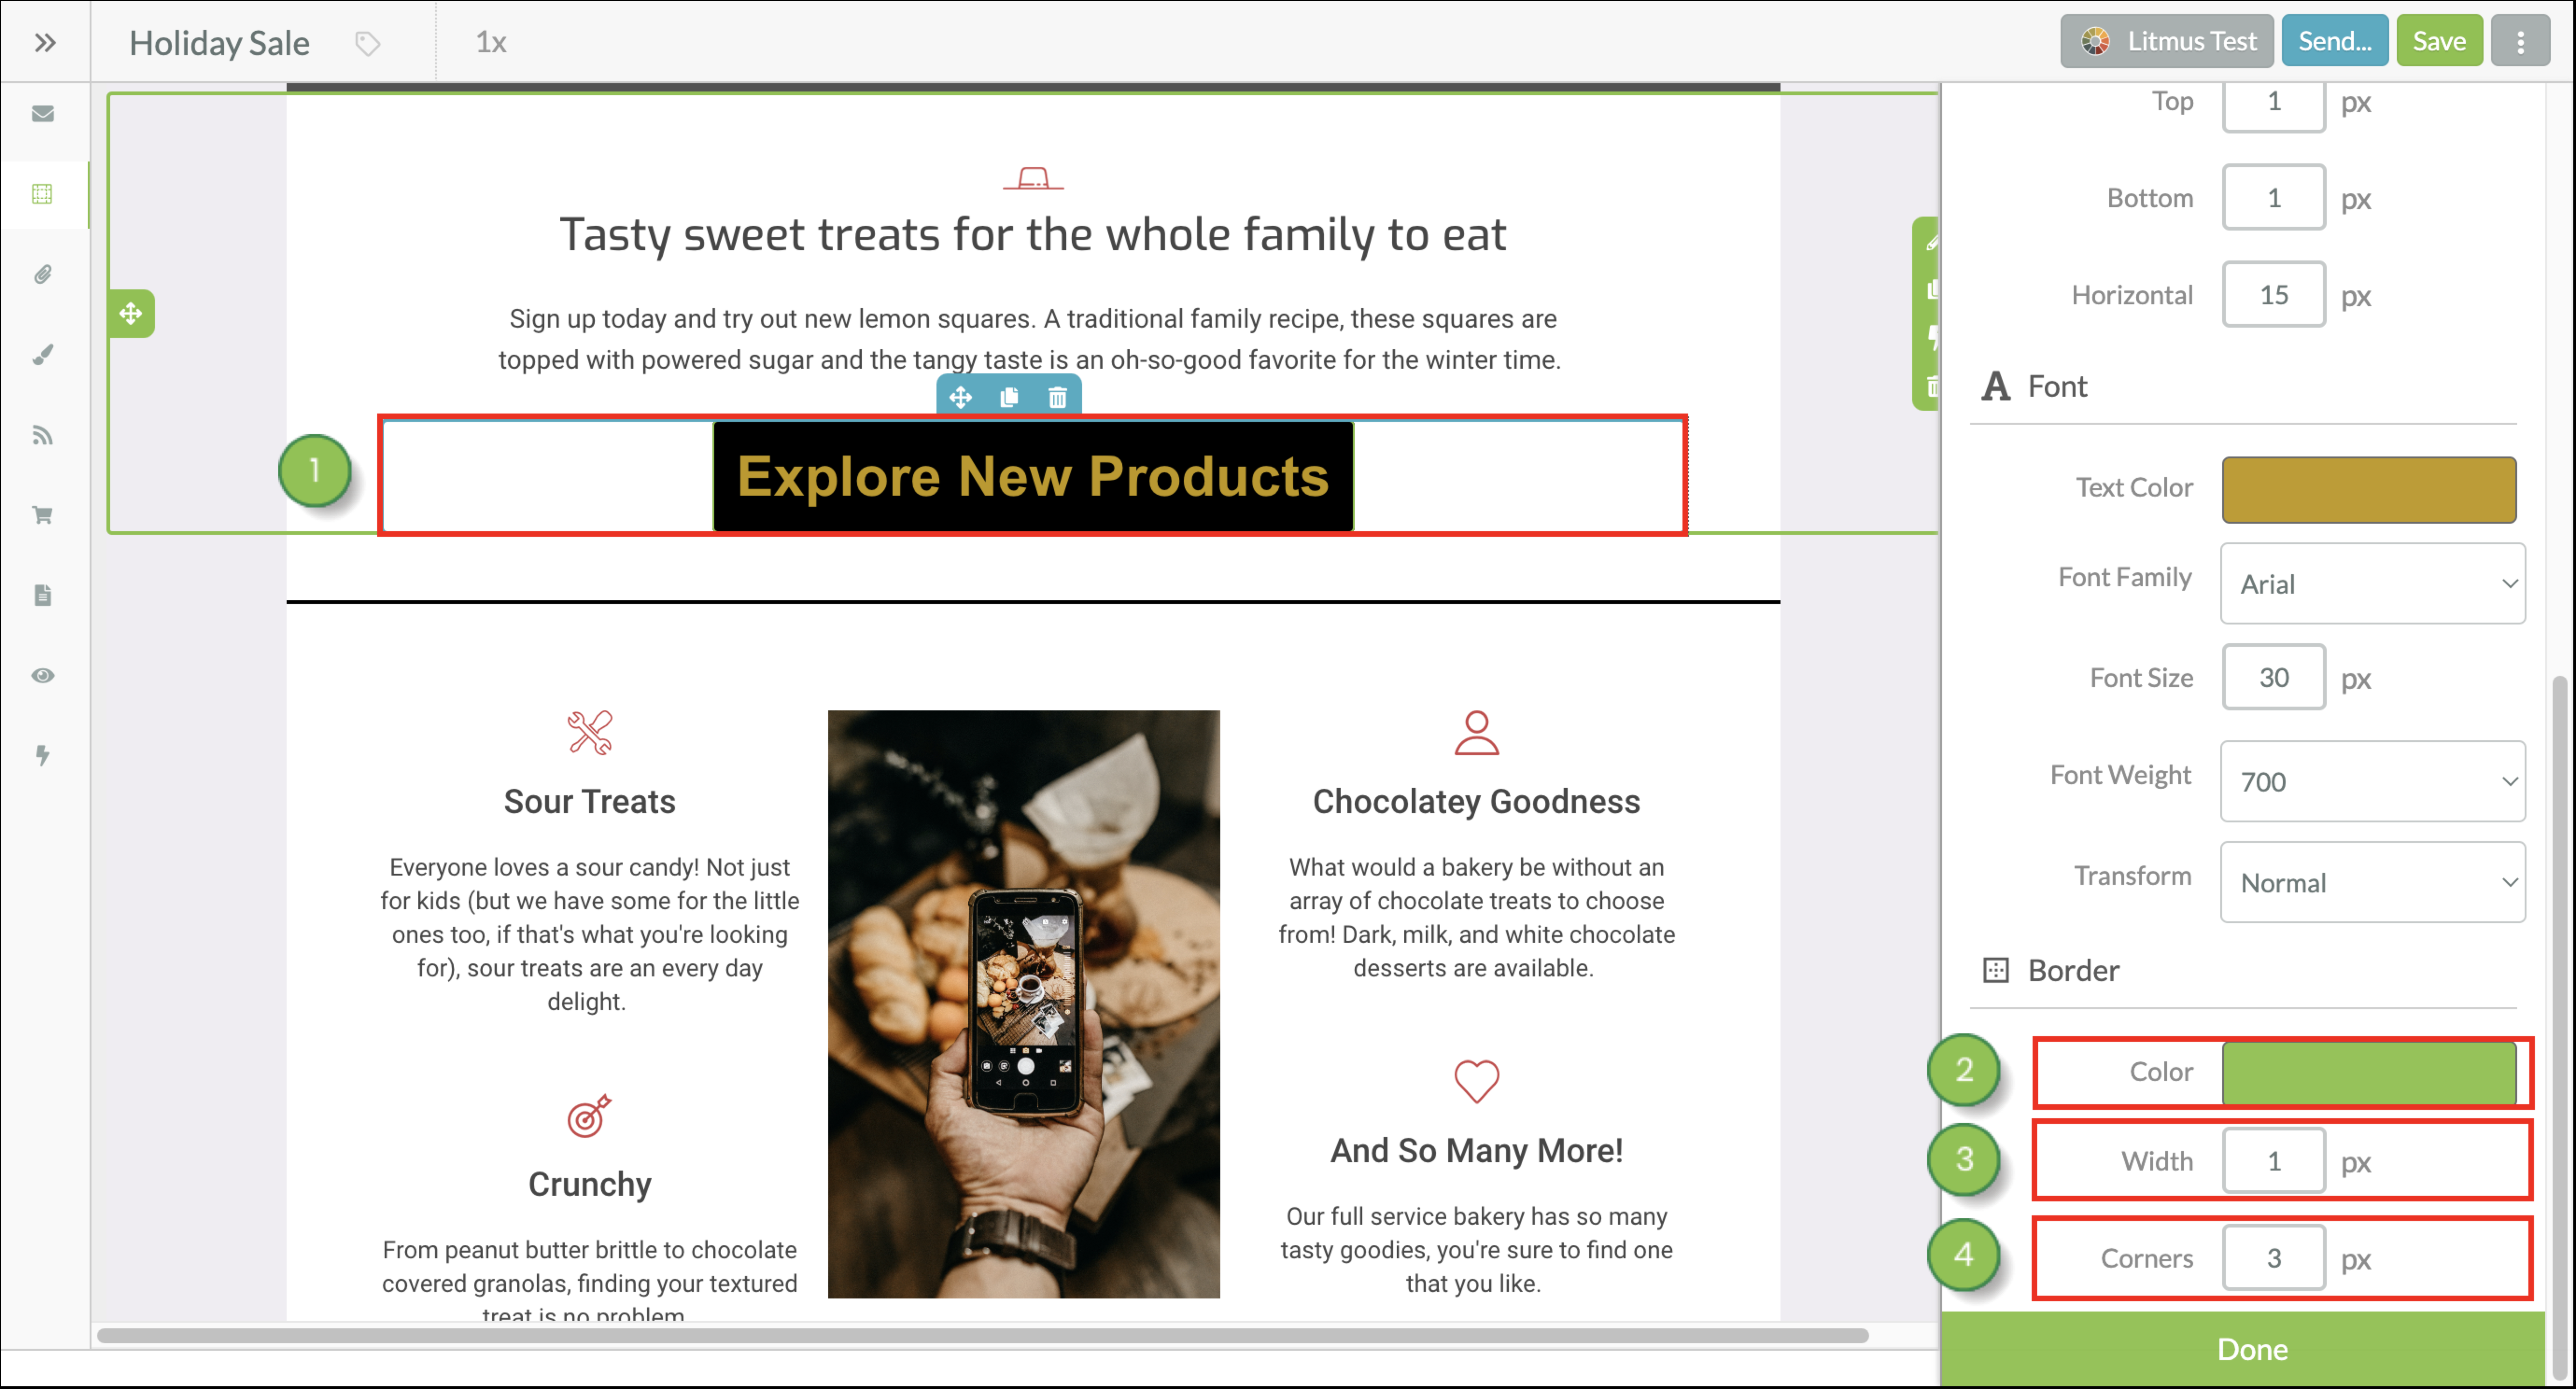
Scroll to the top or bottom of the Button Designer and click Done. Remember to Save any changes you make to your email.
While your buttons may look fine in Gmail, they may sometimes appear incorrect when displayed in Outlook. Lead Gen & CRM has a Litmus Test feature built into the email designer that allows you to see what your emails look like in email clients. Be sure to preview your emails to ensure your design is as you want it to appear.
Copyright © 2026 · All Rights Reserved · Constant Contact · Privacy Center