Lead Gen & CRM
How can we help you?
Search our help articles, video tutorials, and quickstart guides

You've got this. You've got us. Search our Knowledge Base to quickly find answers to your questions.

Adding Dividers to Emails

Article: 000050605
Updated: July 26, 2024

When editing emails, you may want to provide a clear, distinct separation between sections or content. Dividers, which are long and unbroken lines, are a way to display a subtle-yet-obvious separation. 

When configured, they can enhance your email or appear as part of an email's overall design. In this article, you'll learn how to add dividers to emails.


Article Contents


Users:
Administrators 
Company Managers 
Marketing Managers 
Sales Managers  
Salespersons  
Jr. Salespersons  

Light Bulb IconTip: Are you looking for information about Constant Contact’s Email and Digital Marketing product? This article is for Constant Contact’s Lead Gen & CRM product. Head on over to the Email and Digital Marketing articles by clicking here. Not sure what the difference is? Read this article.


Adding Layout Blocks

Layout blocks are the foundation of emails created in Lead Gen & CRM. Elements -- including images, text, and even blank space -- can be added into layout blocks.

The Email Designer allows you to drag, drop, and reorder layout blocks into your email to further customize it. 

To add layout blocks, begin by creating or editing an email from the Email page in the left toolbar.

  1. Click  grid.png  Content and Layout in the Email Designer toolbar.
  2. Click either the Themed or the Simple tabs. 
     
    Note: Themed blocks are available only in emails created from designer templates.
  3. Drag and drop desired layouts into your email.
  4. Click Save.

    Insert layout blocks


    Note: Click  move.png  Move to reorder any content or layout blocks. Remember to Save any changes you make. 


Adding Divider Elements to Layout Blocks

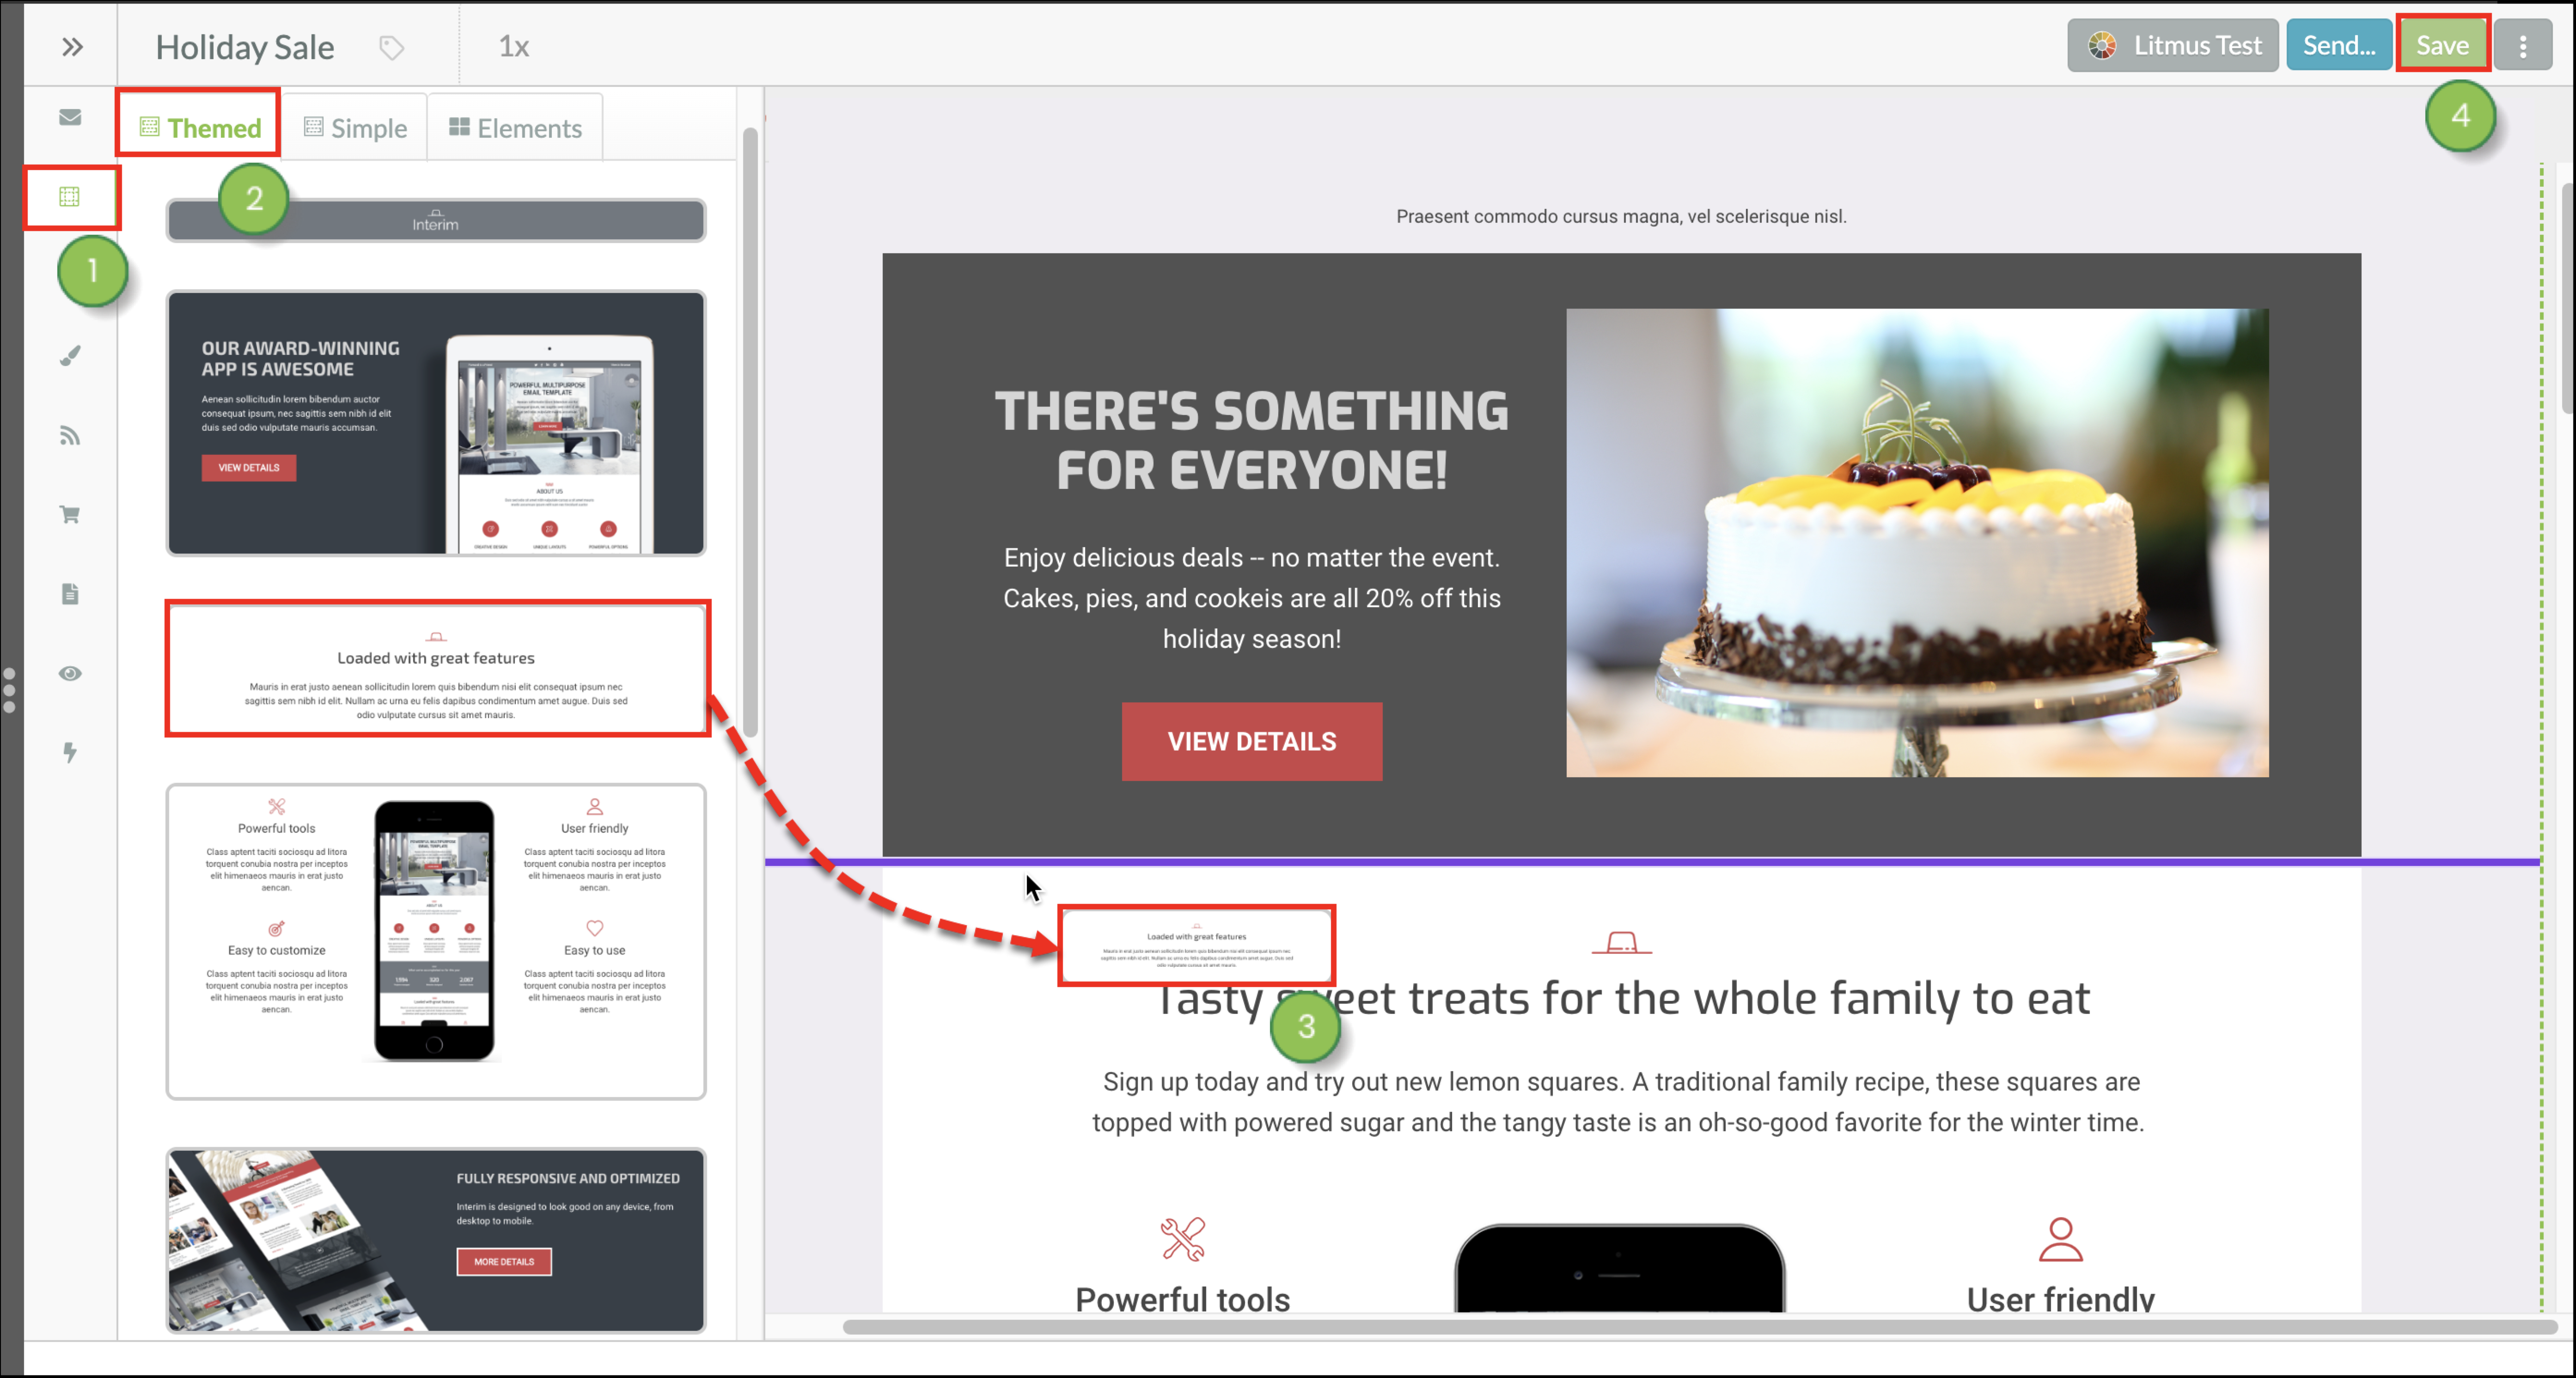
You can add divider elements to an email from the Email Designer toolbar.

To add divider elements, begin by creating or editing an email from the Email page in the left toolbar.

  1. Click  grid.png  Content and Layout in the Email Designer toolbar.
  2. Click the  layout6.png  Elements tab.
  3. Drag-and-drop a Divider element onto a purple line in the desired part of the email.
  4. Click Save

    Insert a divider


    Note: Click  move.png  Move to reorder the element, if necessary. Remember to Save any changes you make.


Editing Divider Elements

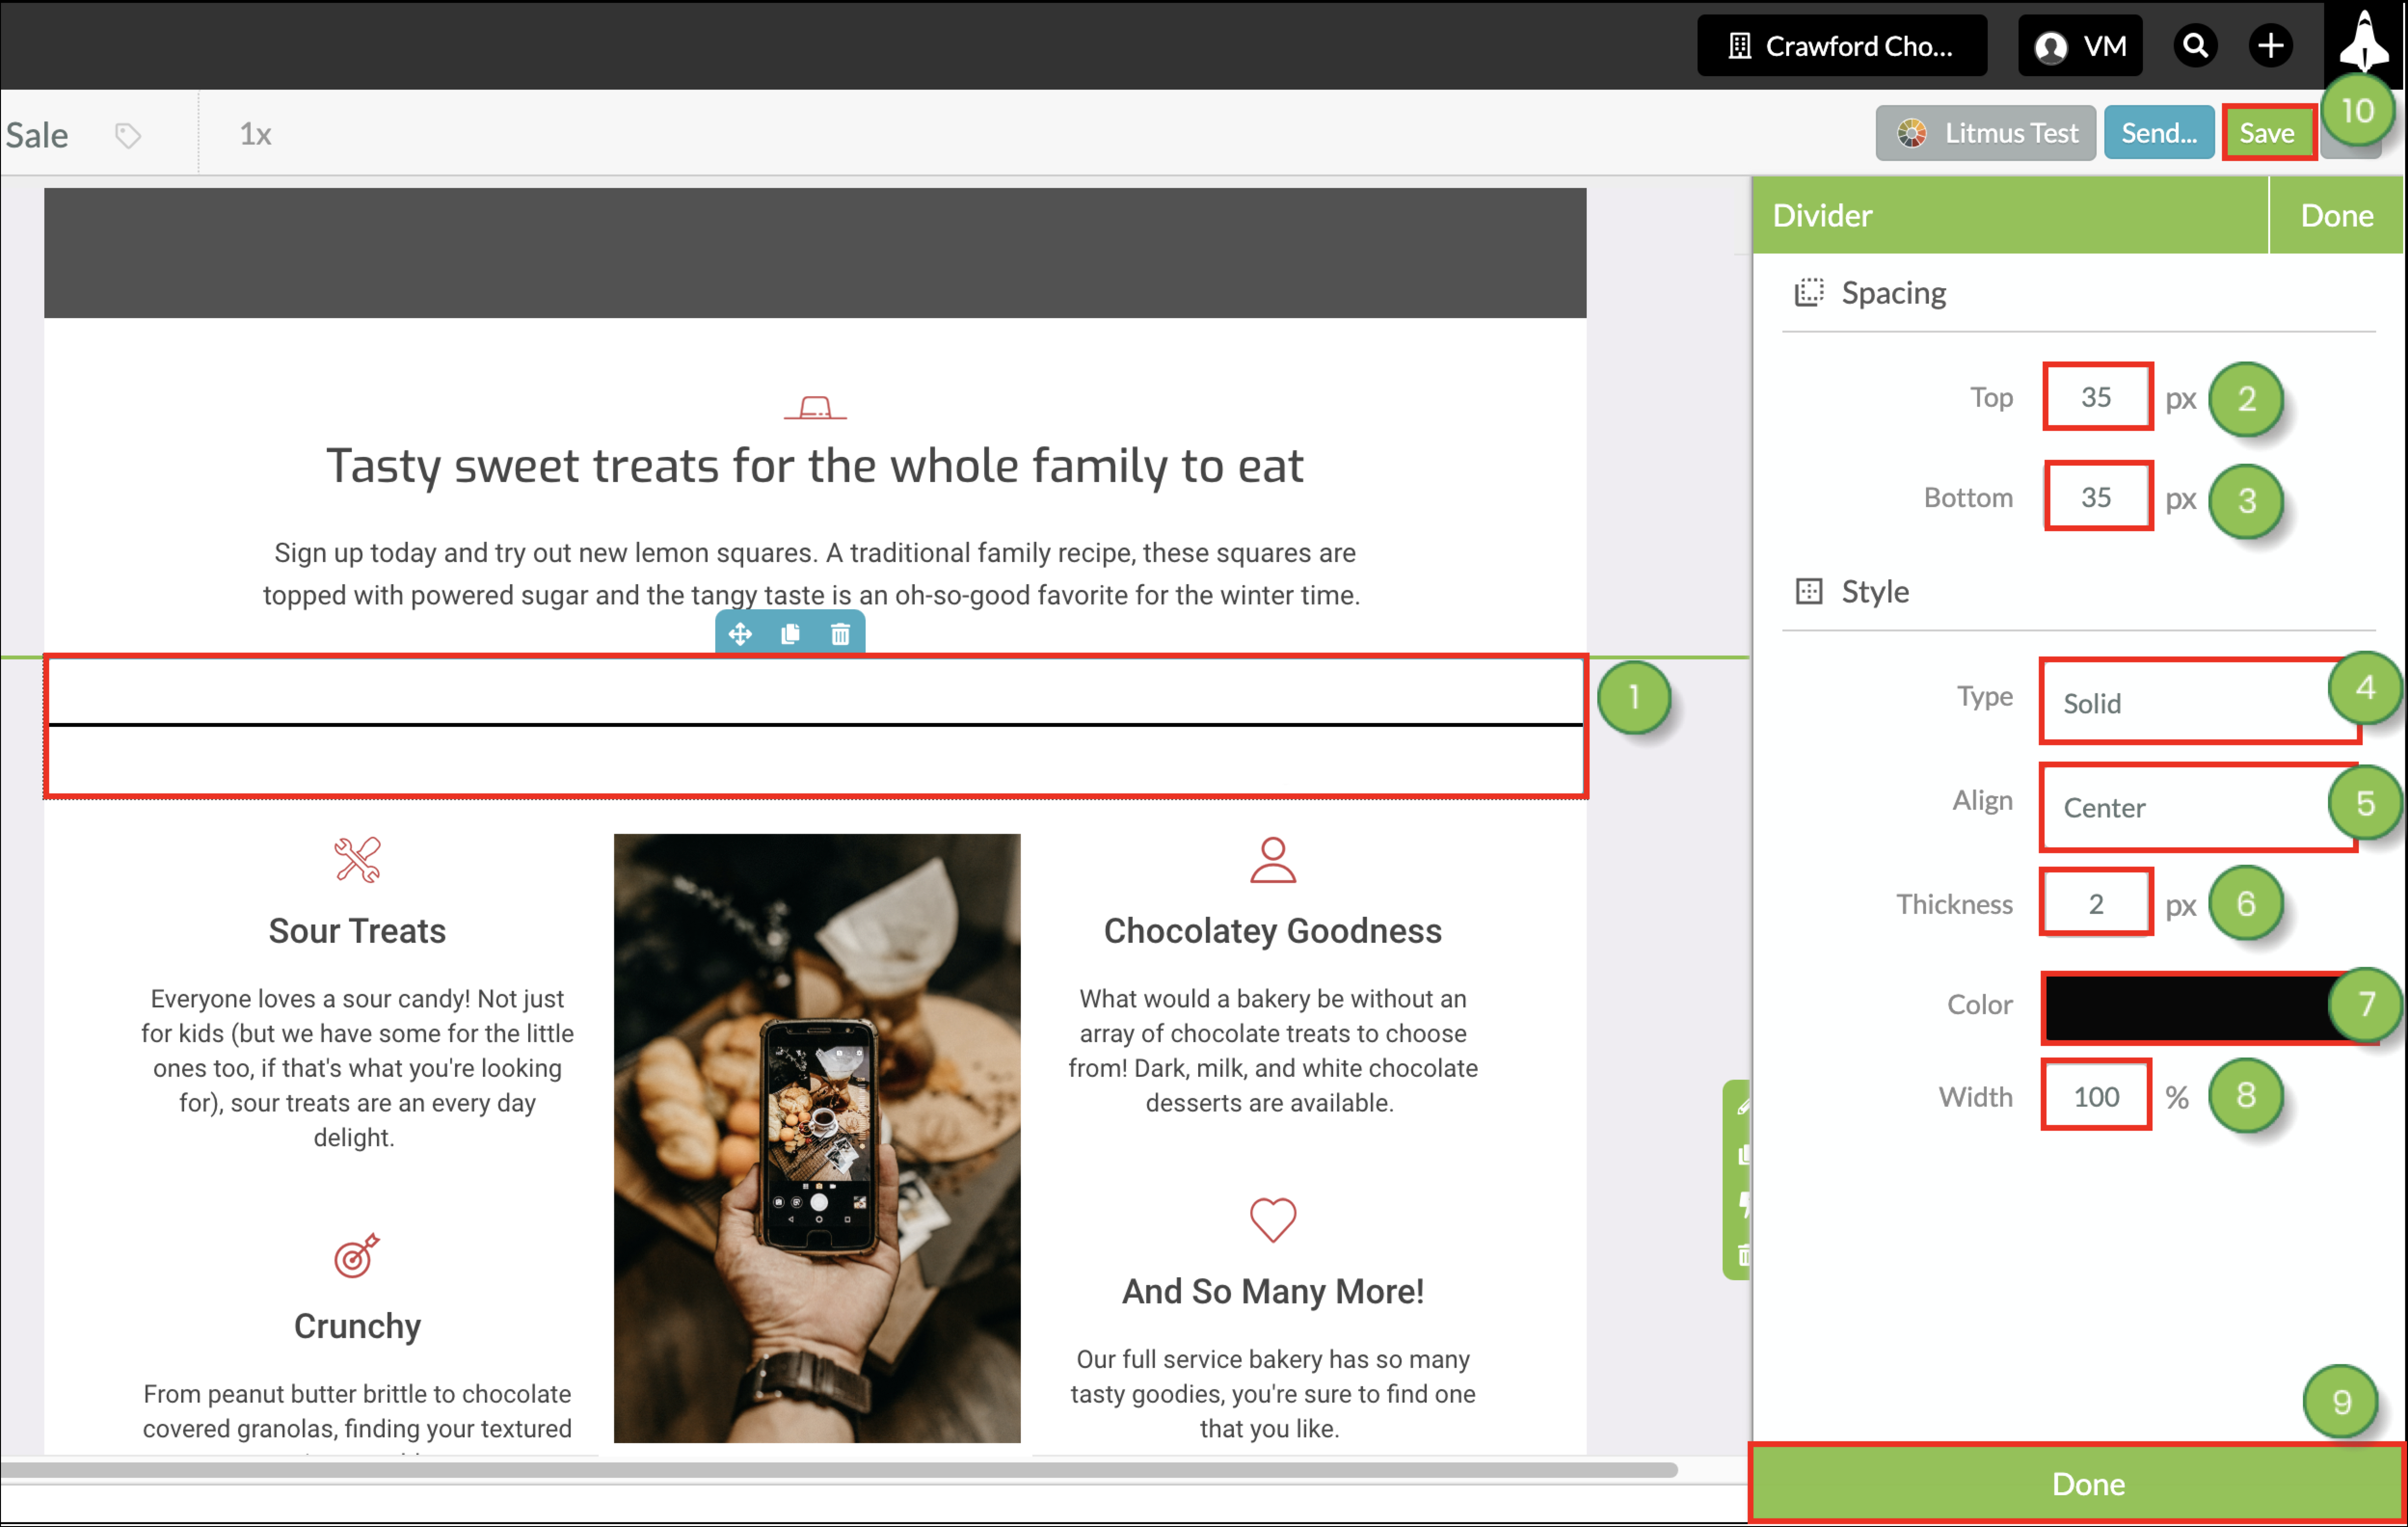
You can edit the appearance of divider elements.

  1. Click the Divider element in your email.
  2. Enter, in pixels, the amount of space you want above the divider, in the Top field.
  3. Enter, in pixels, the amount of space you want below the divider, in the Bottom field.
  4. Select one of the following line styles from the Type drop-down menu:
    • Solid
    • Dashed
    • Dotted
  5. Select one of the following line justifications from the Alignment drop-down menu:
    • Left
    • Center
    • Right
  6. Enter, in pixels, the divider's thickness in the Thickness field. 
  7. Select the divider's color from the Color menu.
  8. Enter the divider's overall width in the Width field.
     
    Note: The divider's width, as a percentage, is in relation to its parent container. In most cases, that will be the table data row it is in.
  9. Click Done.
  10. Click Save.

    Edit divider elements


Did this article answer your question?


Constant Contact Logo

Copyright © 2025 · All Rights Reserved · Constant Contact · Privacy Center