It is important to make sure that you are sending emails to recipients that want to receive those emails. Otherwise, you could be sending spam.
Reconfirming a list, which is asking a group of contacts if they want to continue to receive your emails, is a quick and easy way to ensure that your list is composed of active and valid leads.
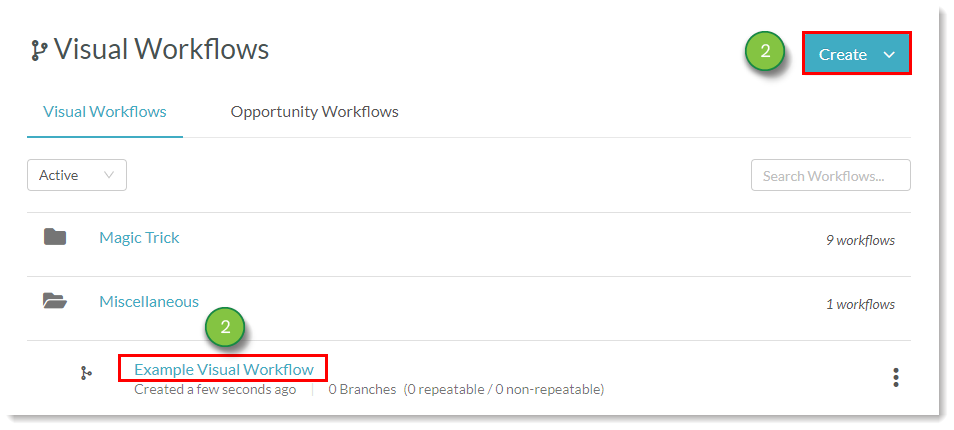
This article will outline how to reconfirm a list in Lead Gen & CRM.
| Administrators | ✓ | |
| Company Managers | ✓ | |
| Marketing Managers | ✓ | |
| Sales Managers | ||
| Salespersons | ||
| Jr. Salespersons |
With recent privacy and consent updates as a result of the GDPR, it is essential for you to keep track of whether your leads consent to receive your emails. If you do not know or do not have that data collected, then reconfirming a list is important for your future marketing sends.
Reconfirming lists involves tying several different parts of the platform together. To reconfirm a list, you need to send an email that asks the contacts on the list to re-subscribe. When the contacts click the link, they will be taken to a thank you page. From there, you then identify all contacts that have resubscribed to maintain a list of those that want to continue correspondence.
Before any reconfirmation can occur, you will first need to create a landing page that thanks visitors for resubscribing. This landing page needs to be created before the reconfirmation email since you will have to include the landing page link in the email.
To create a thank you page for reconfirmation purposes, do the following:


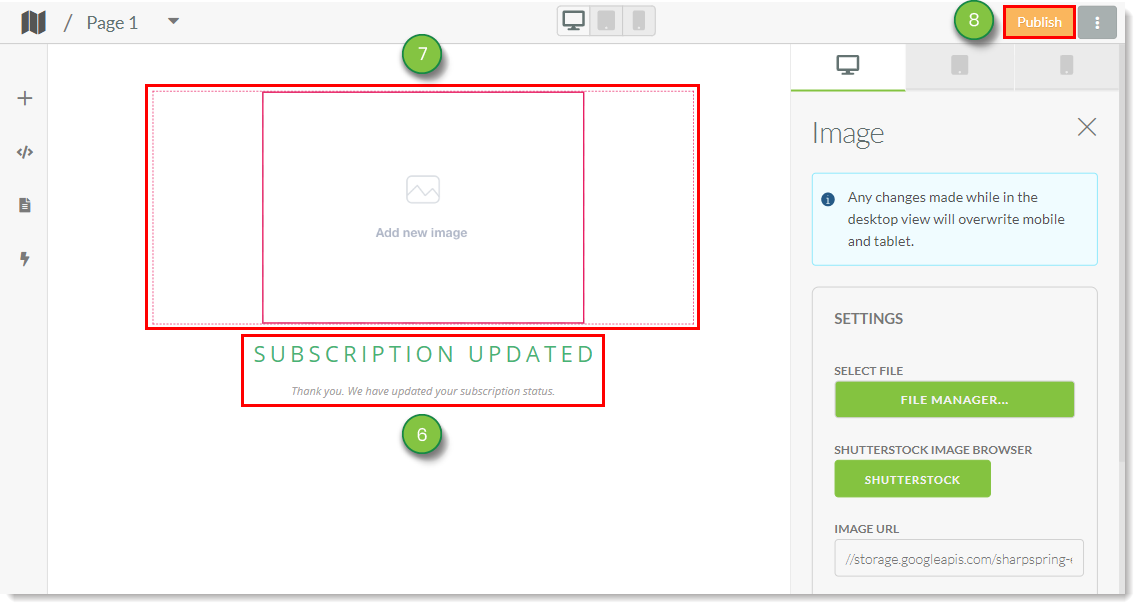
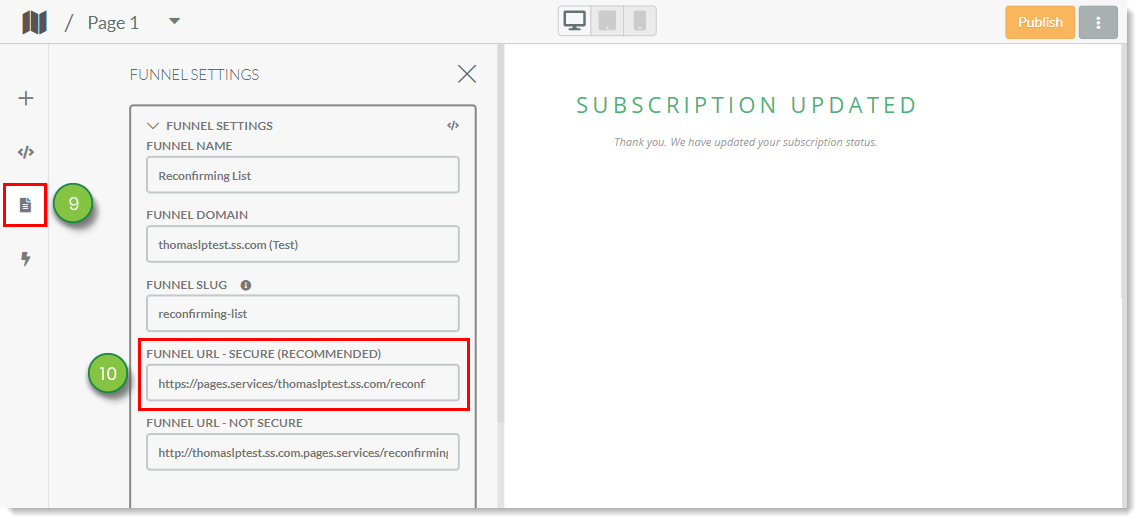
Hold on to the Funnel URL. You will need to access it later.
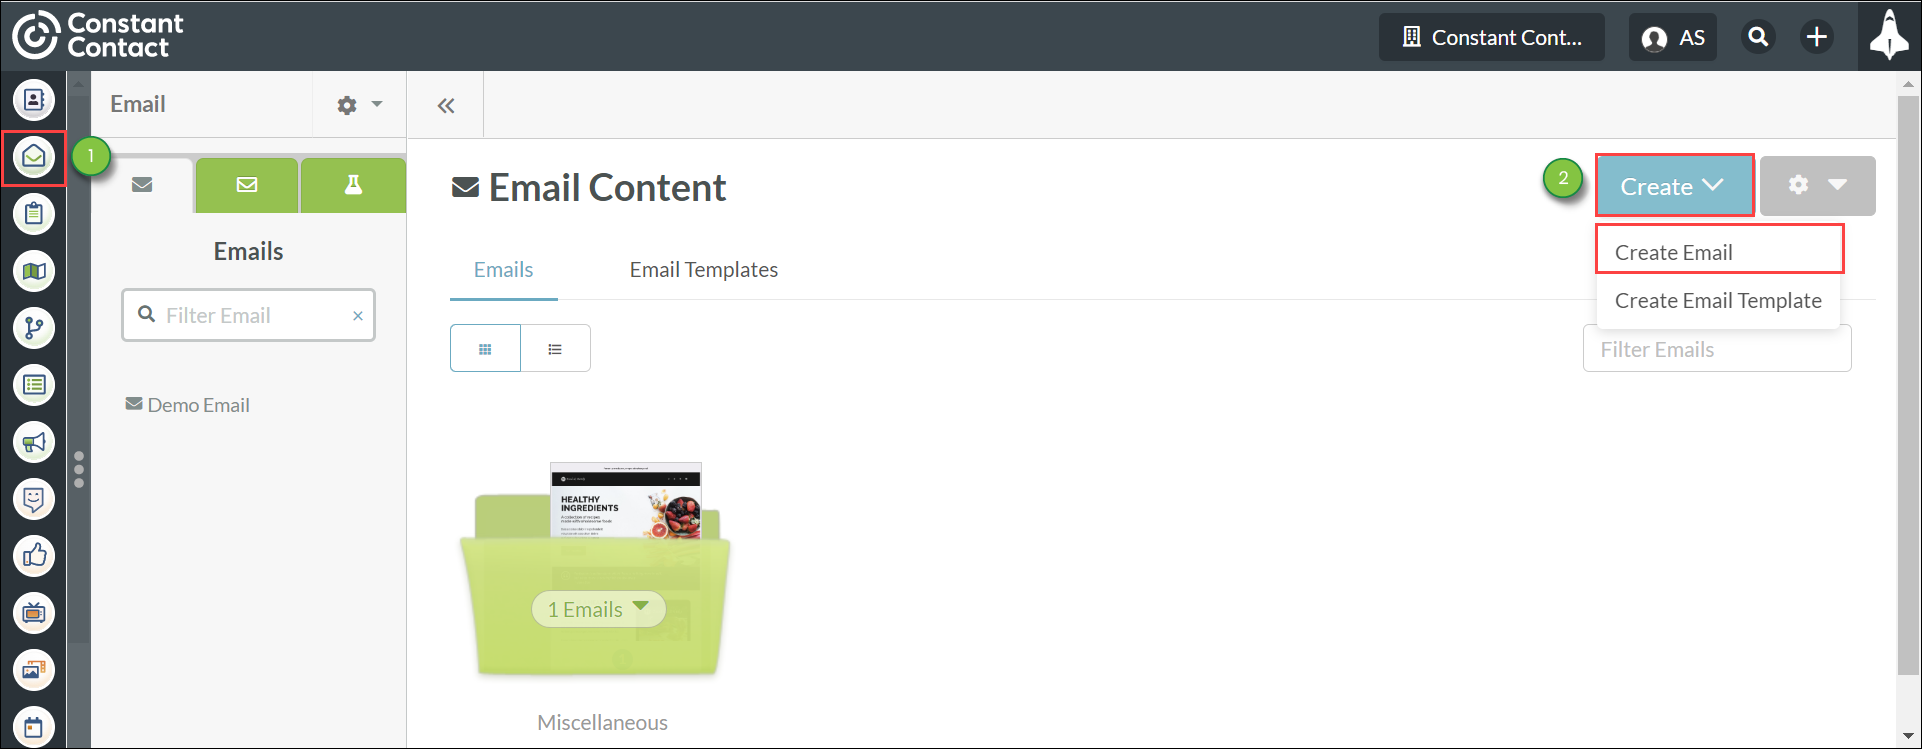
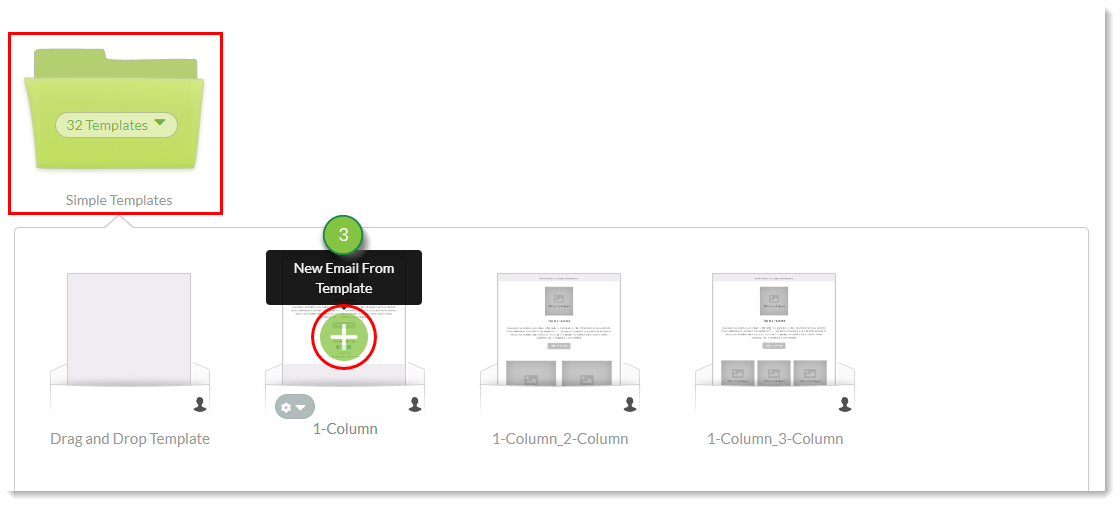
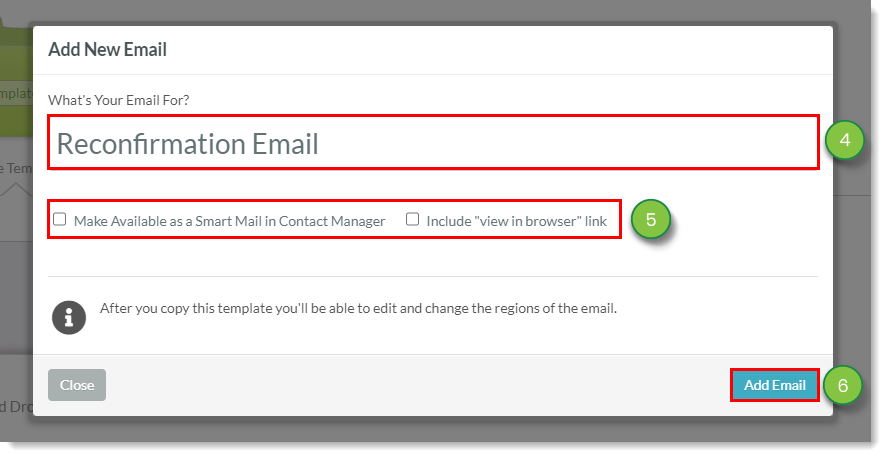
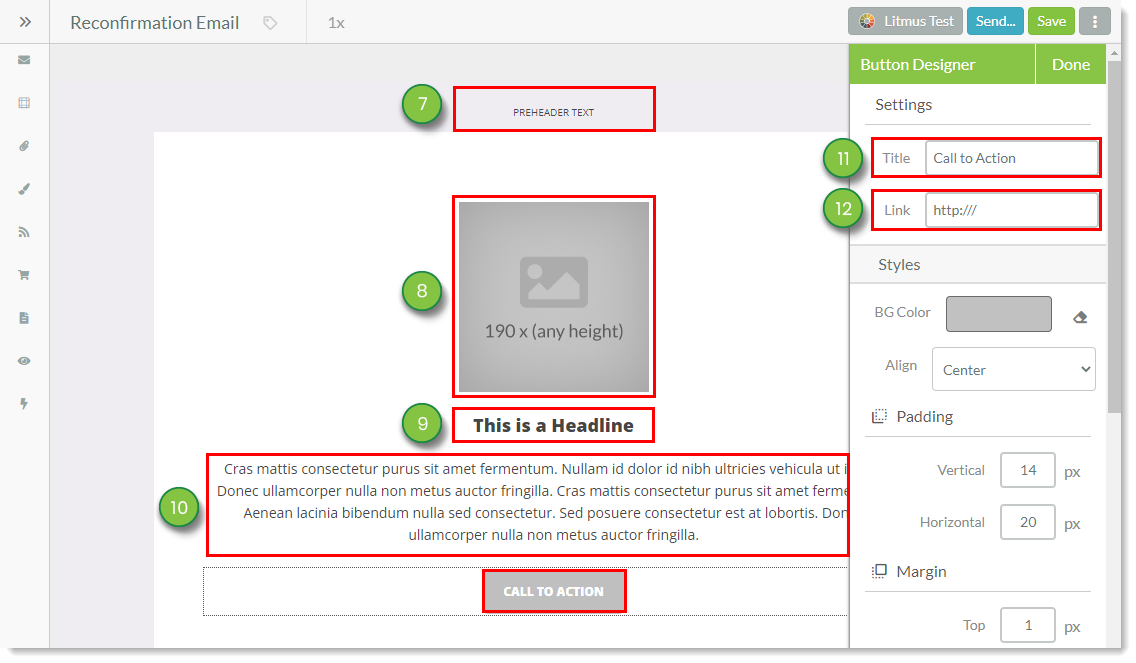
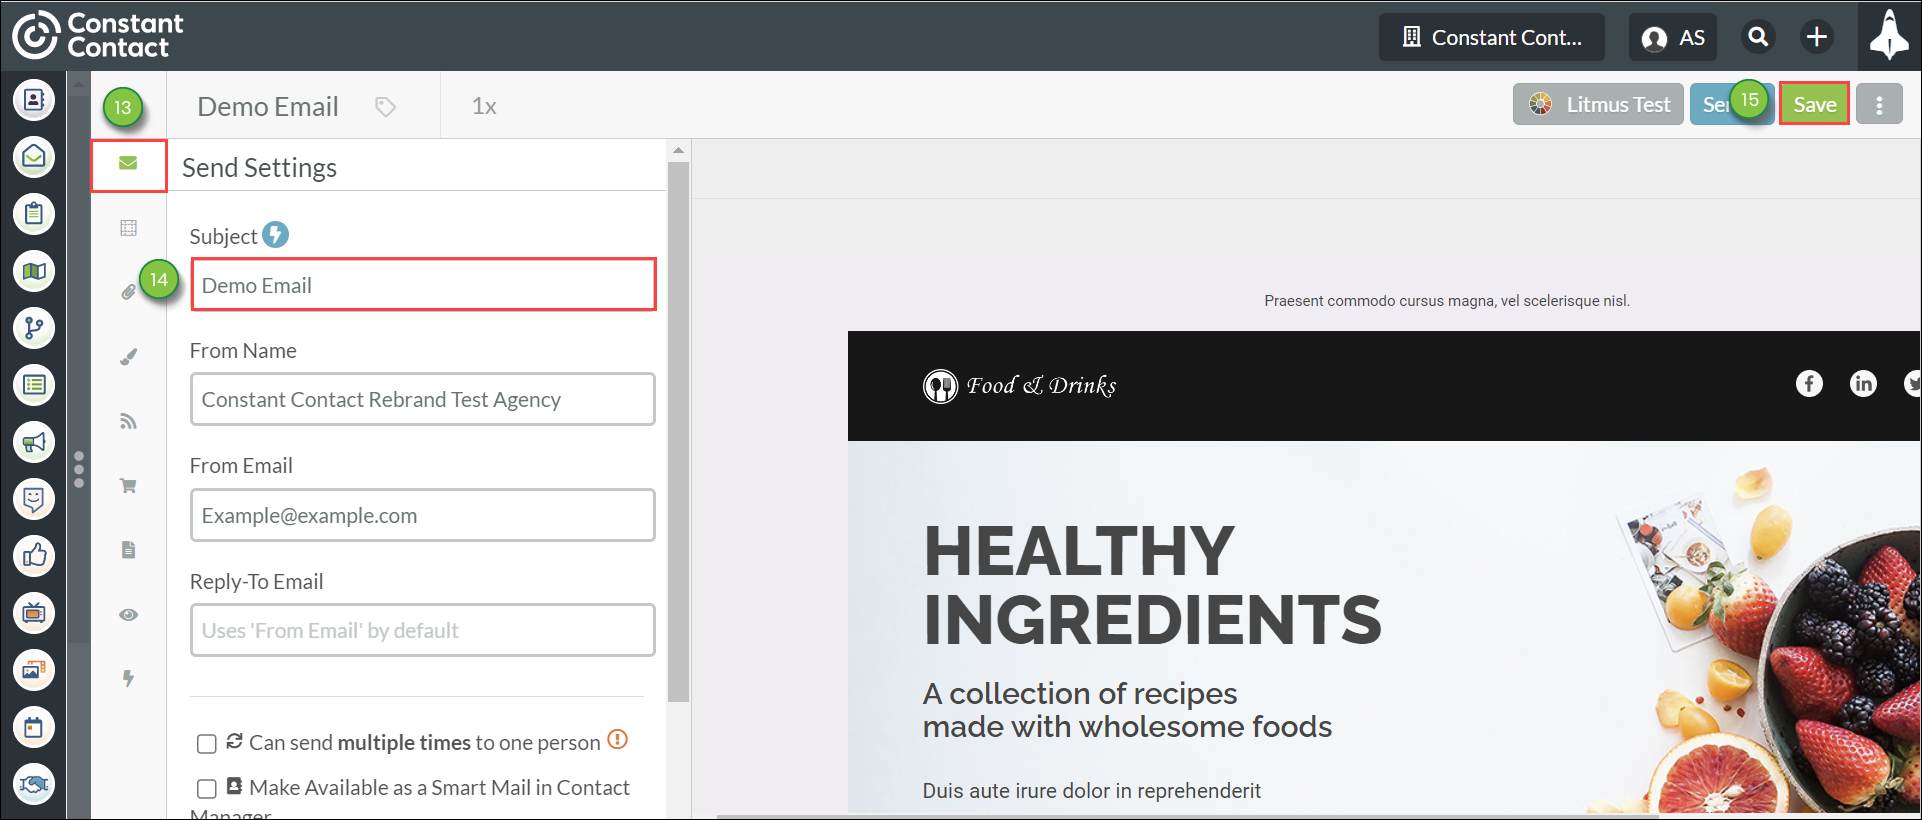
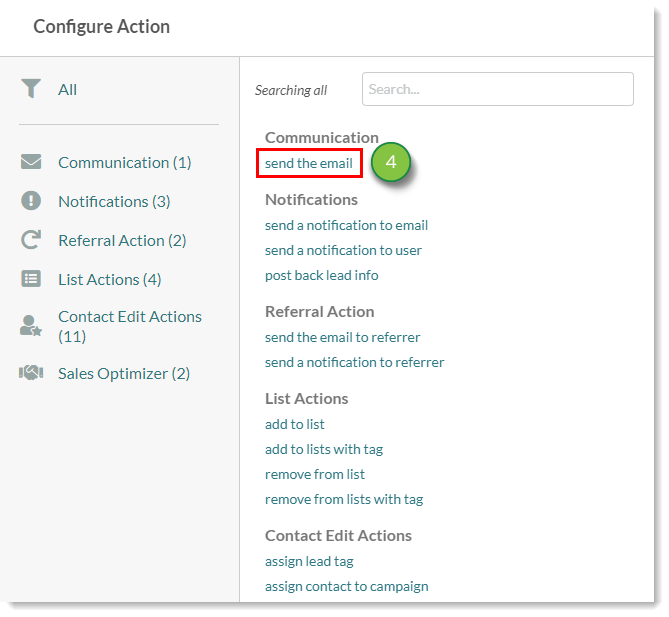
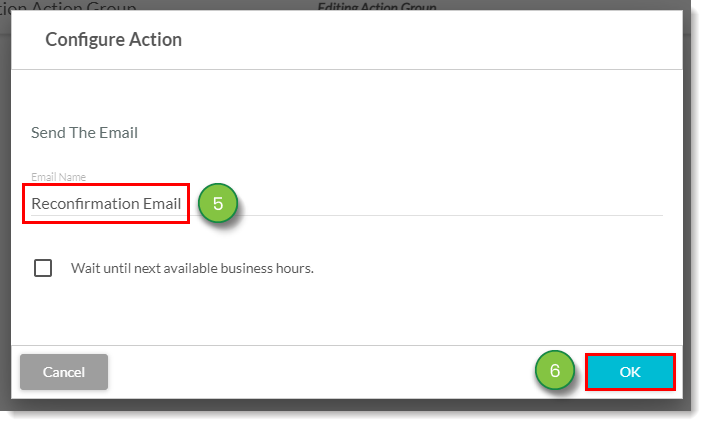
Once you have created a landing page, you can create a reconfirmation email that redirects to it. To create a reconfirmation email, do the following:
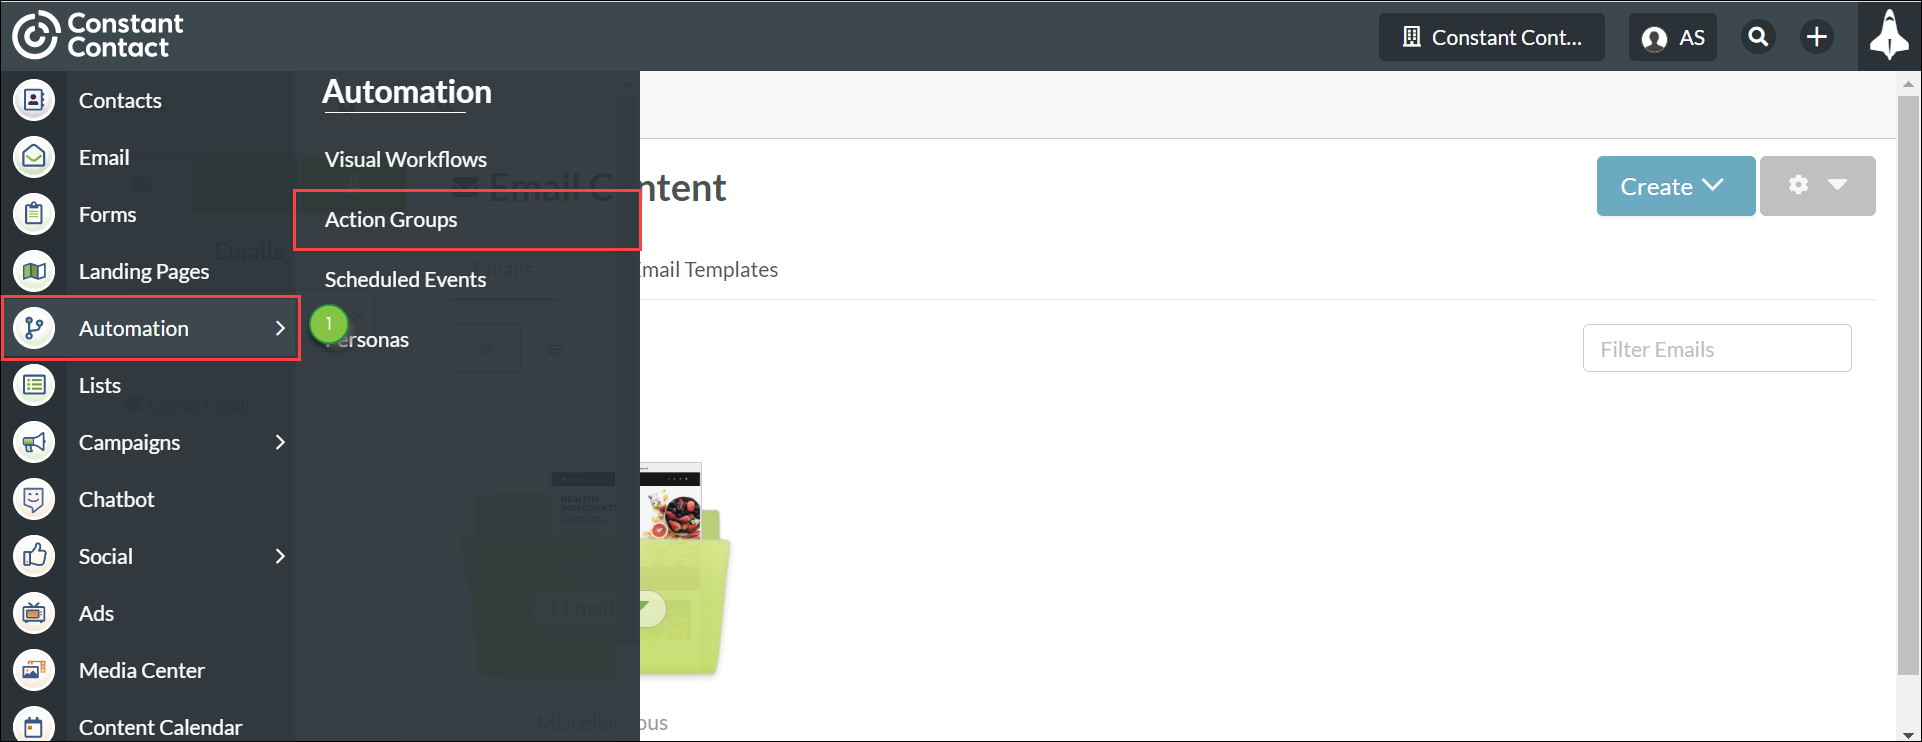
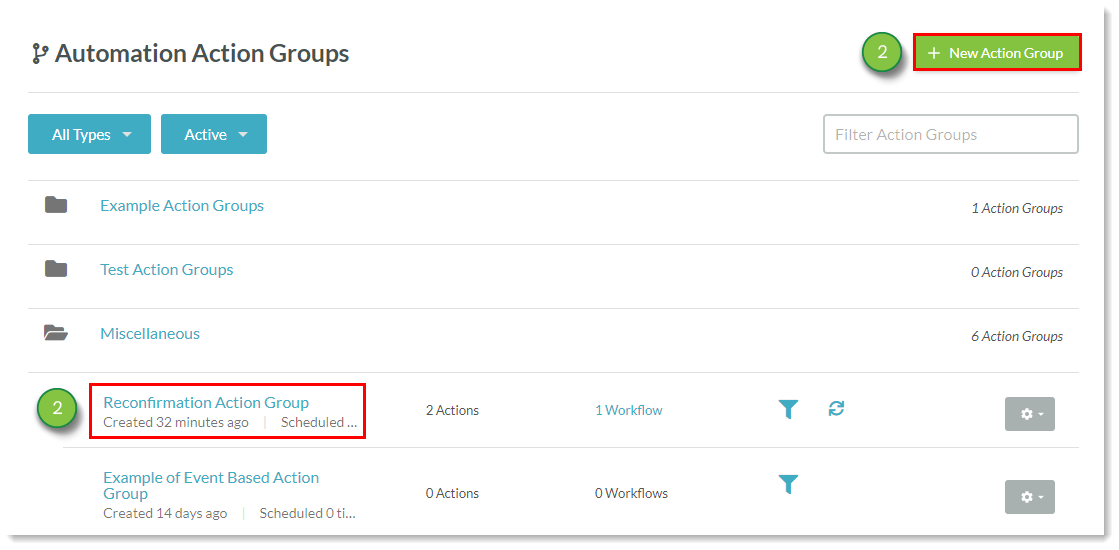
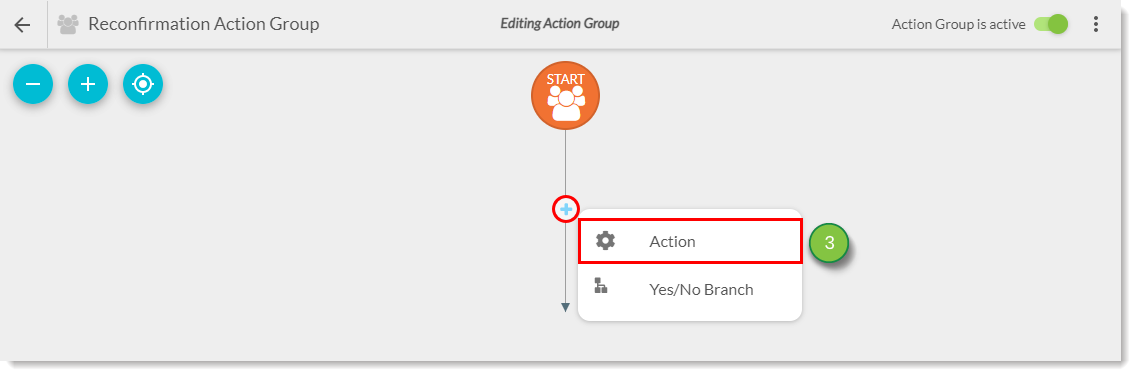
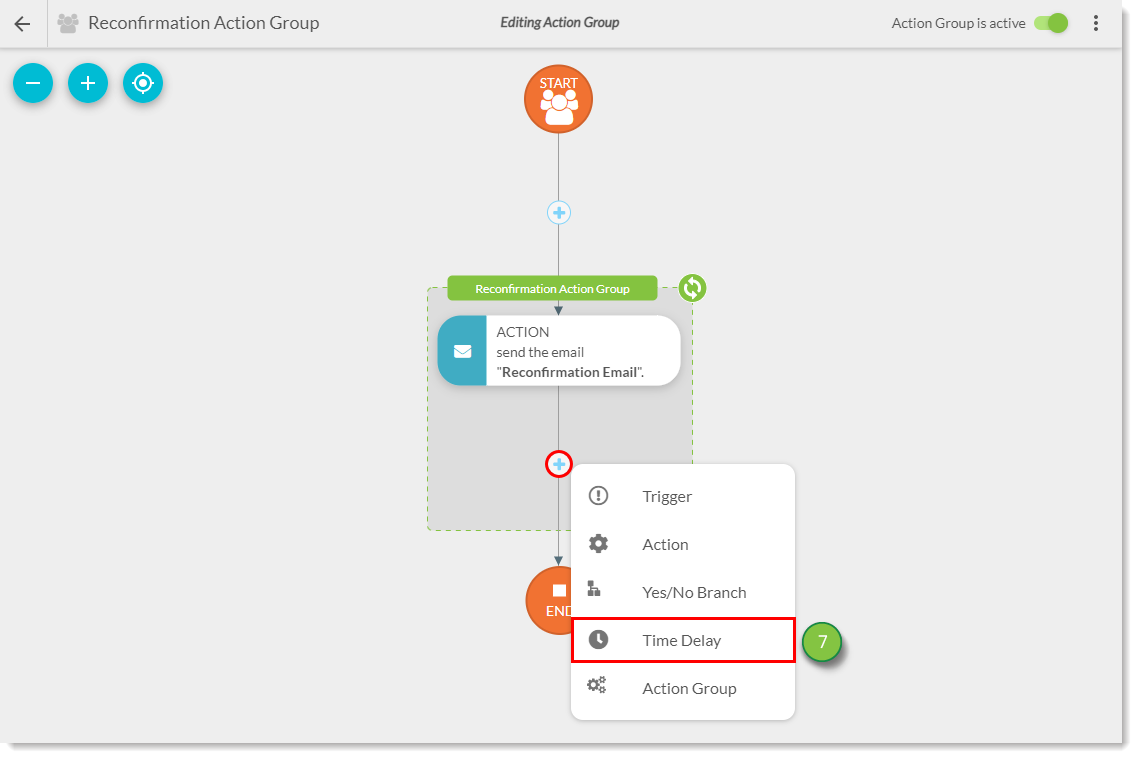
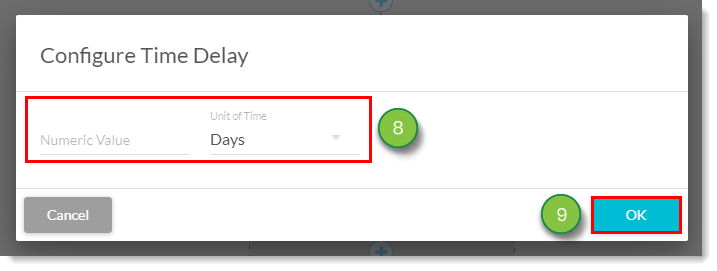
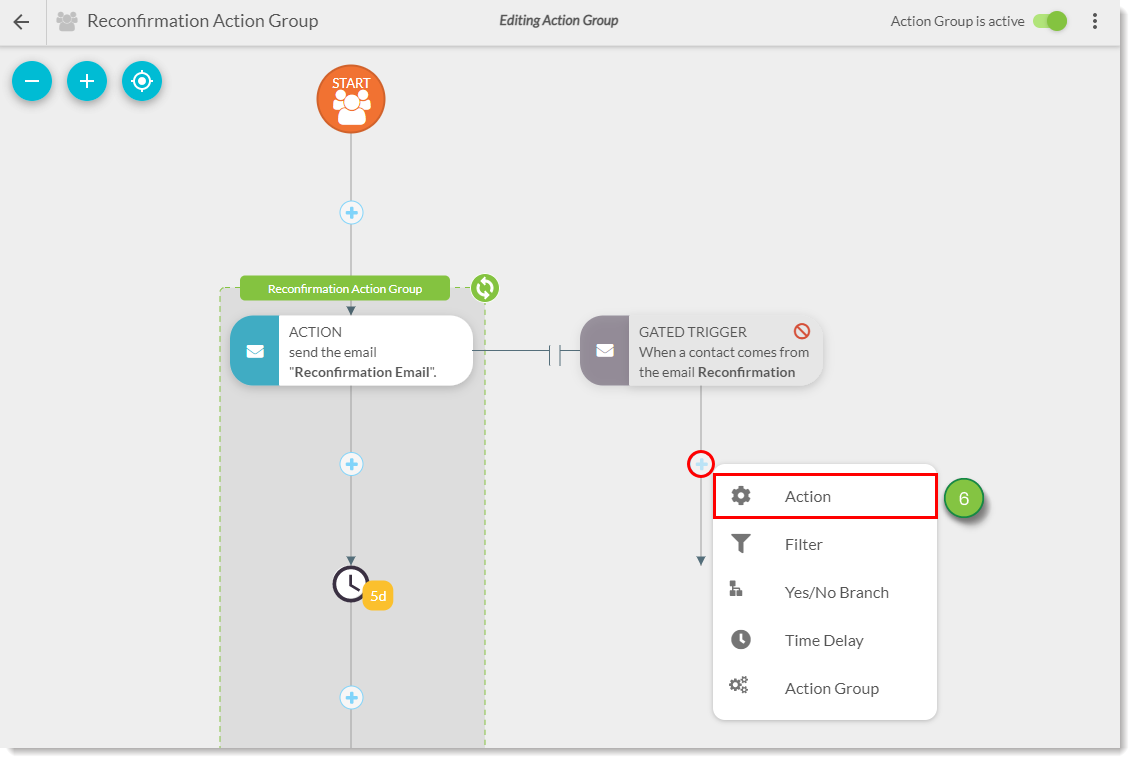
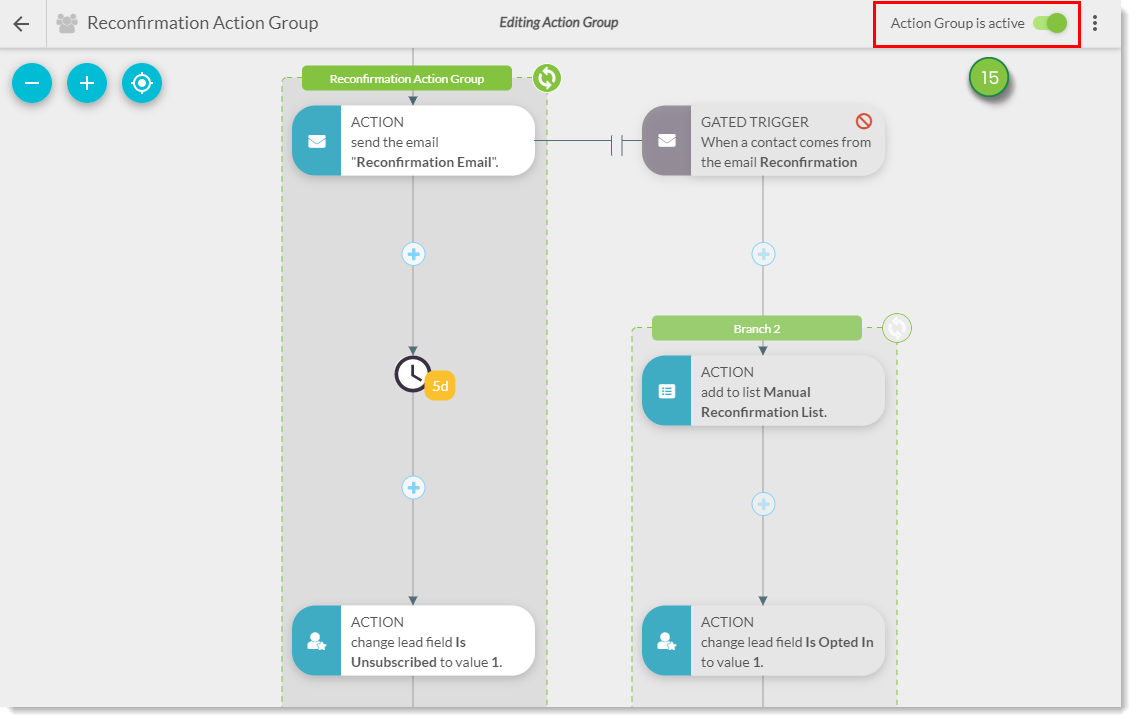
To reconfirm lists, you will need to create an automation with multiple branches. The automation requires that you send a reconfirmation email with a time delay for the available amount of time you want to give contacts or leads to click the link in the email. This reconfirmation process can be condensed into an action group.
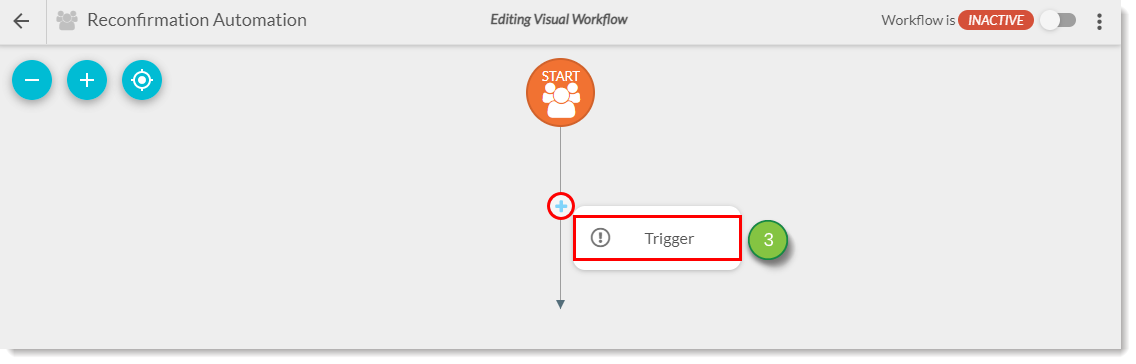
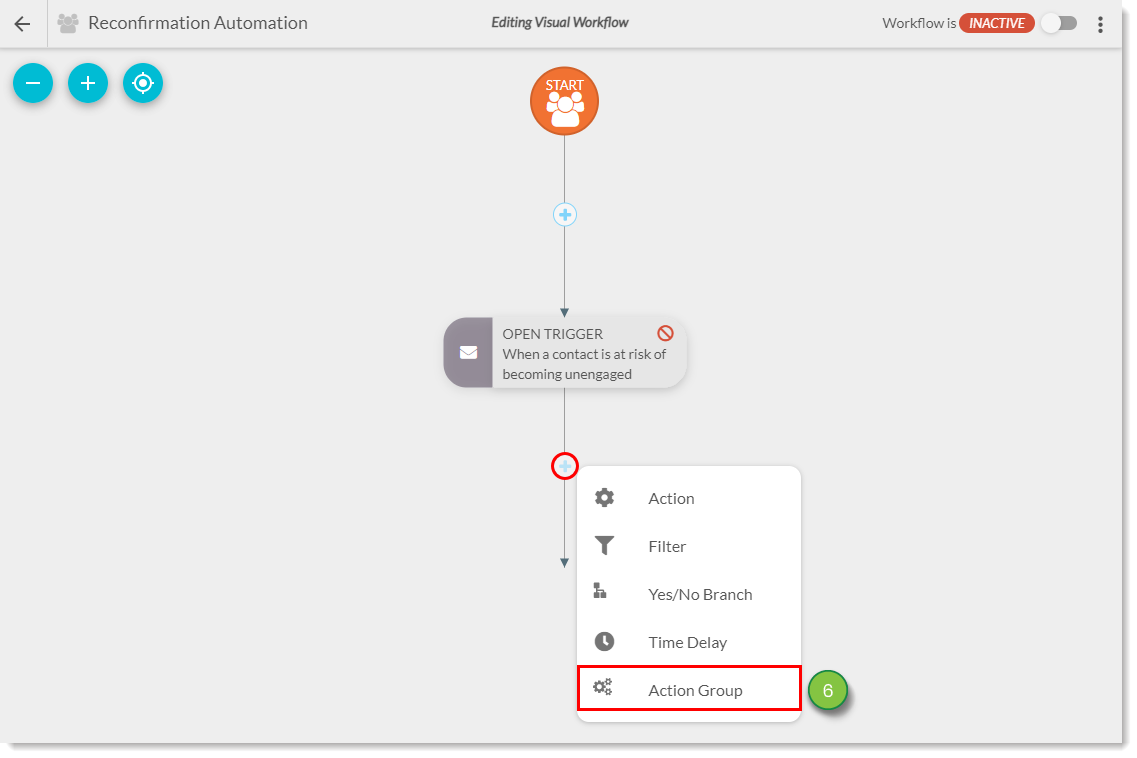
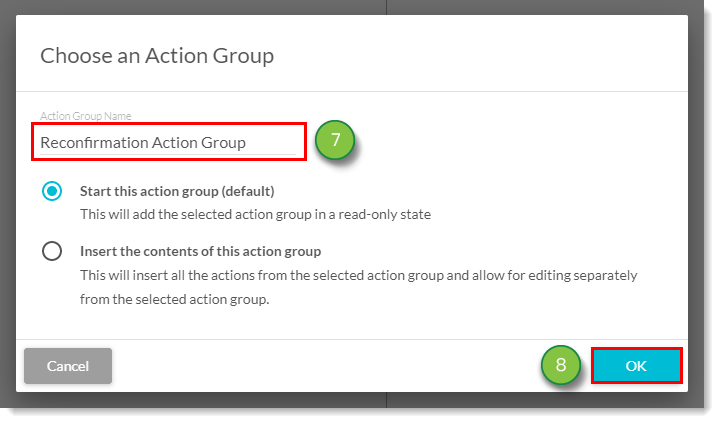
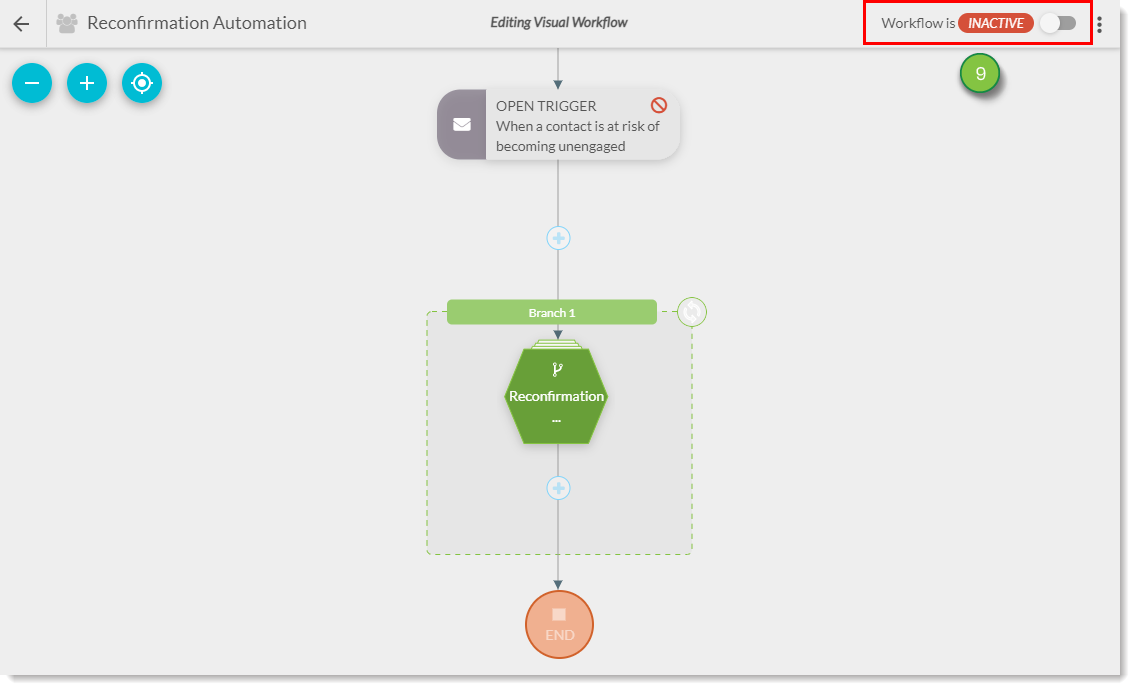
To create reconfirmation automation, do the following:
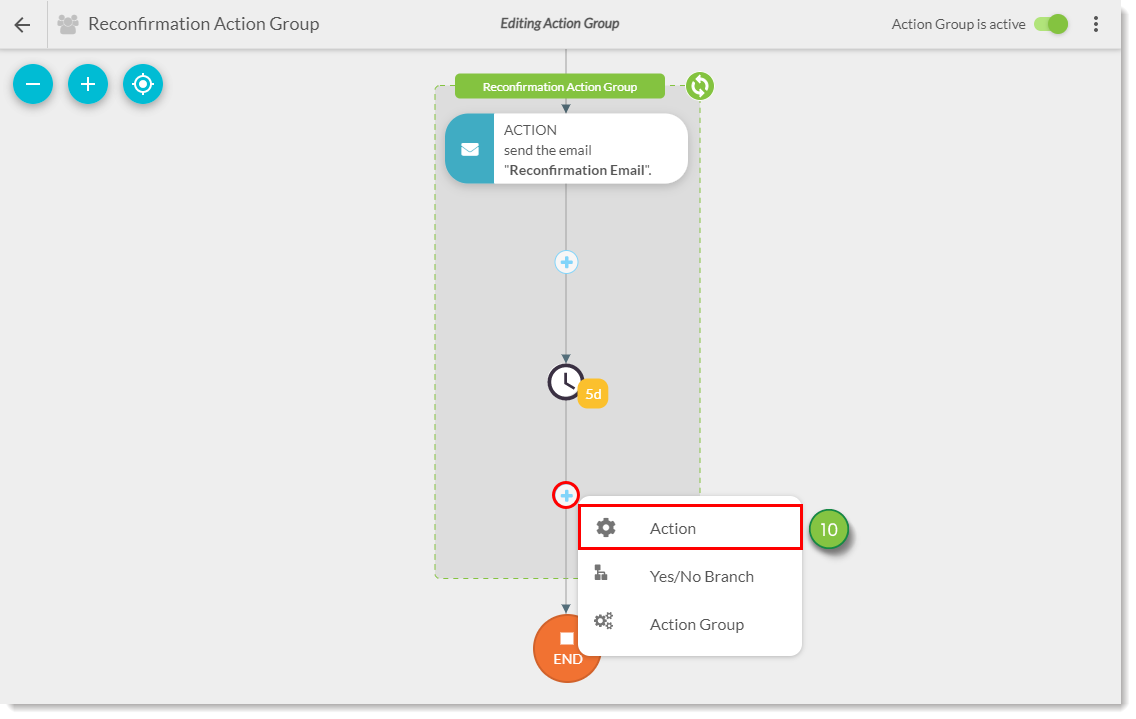
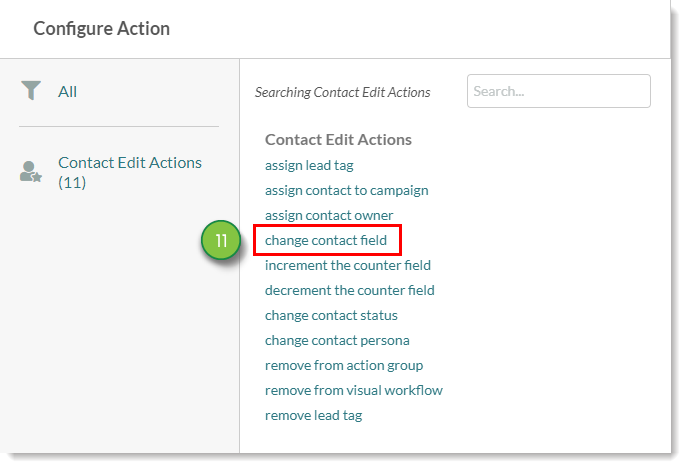
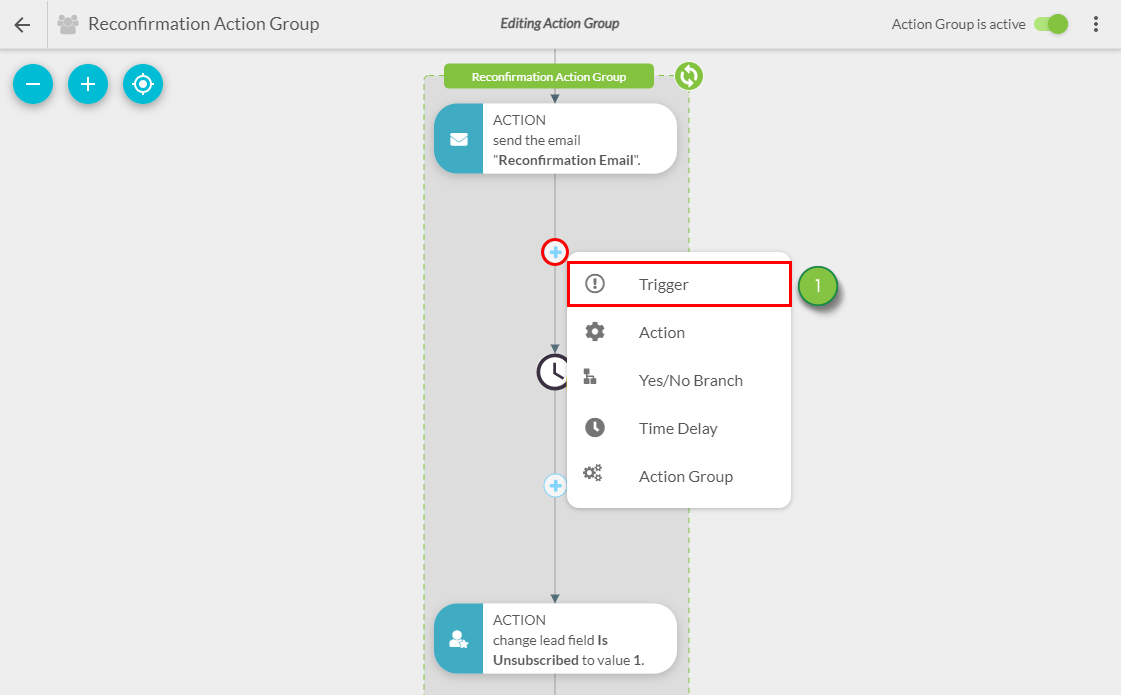
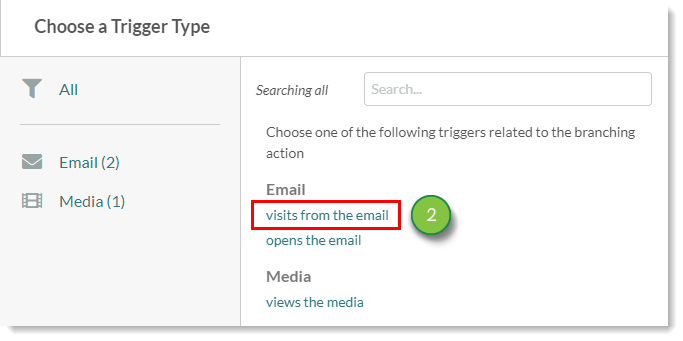
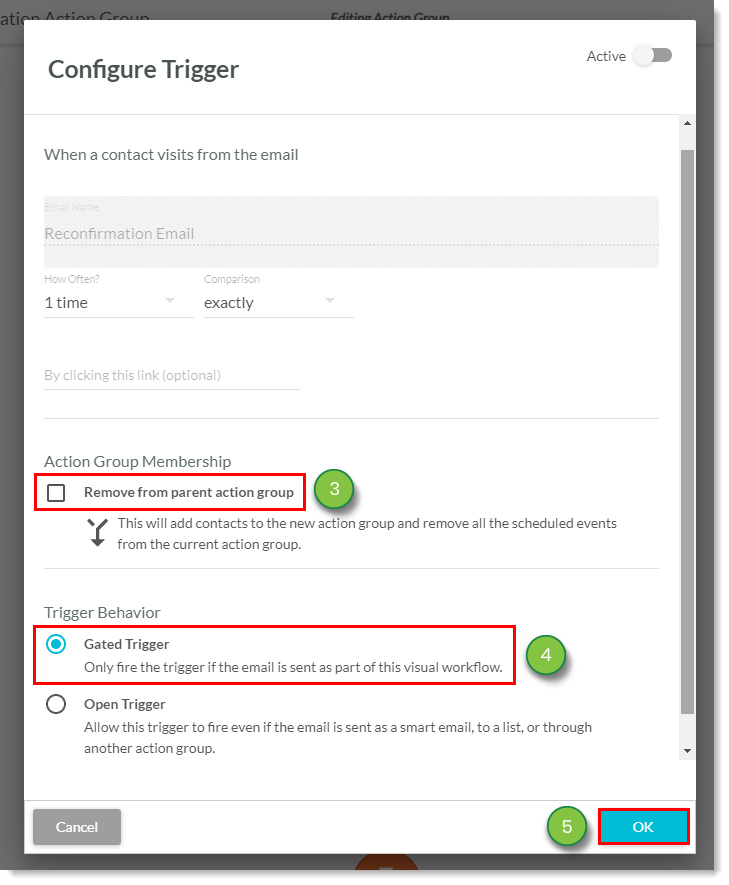
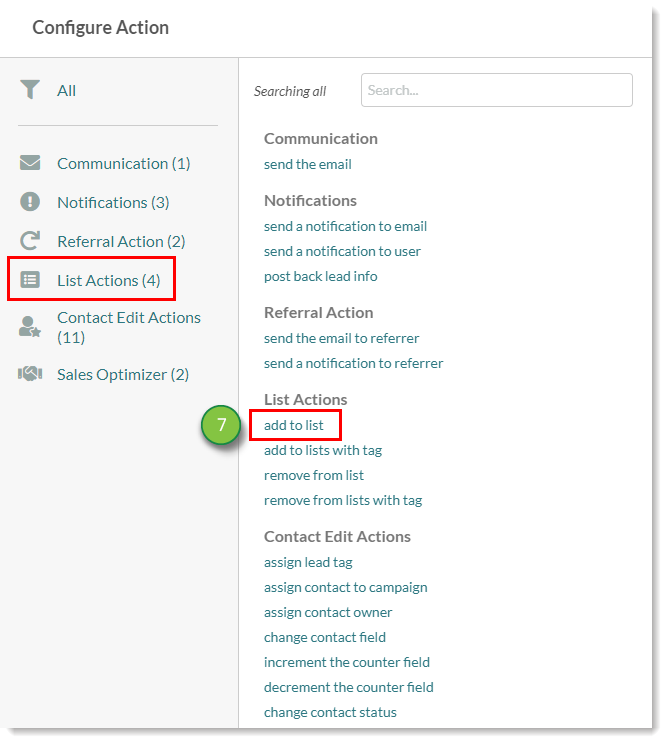
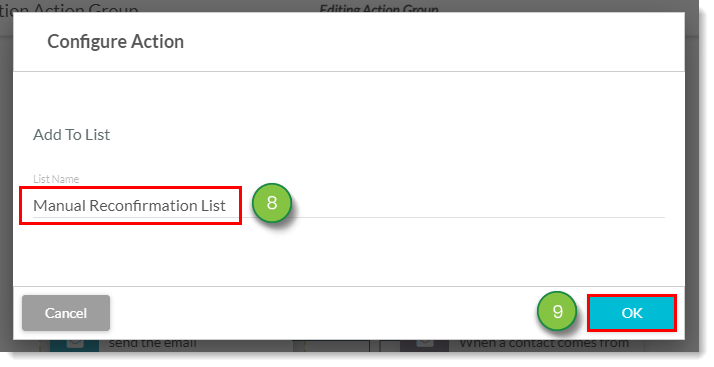
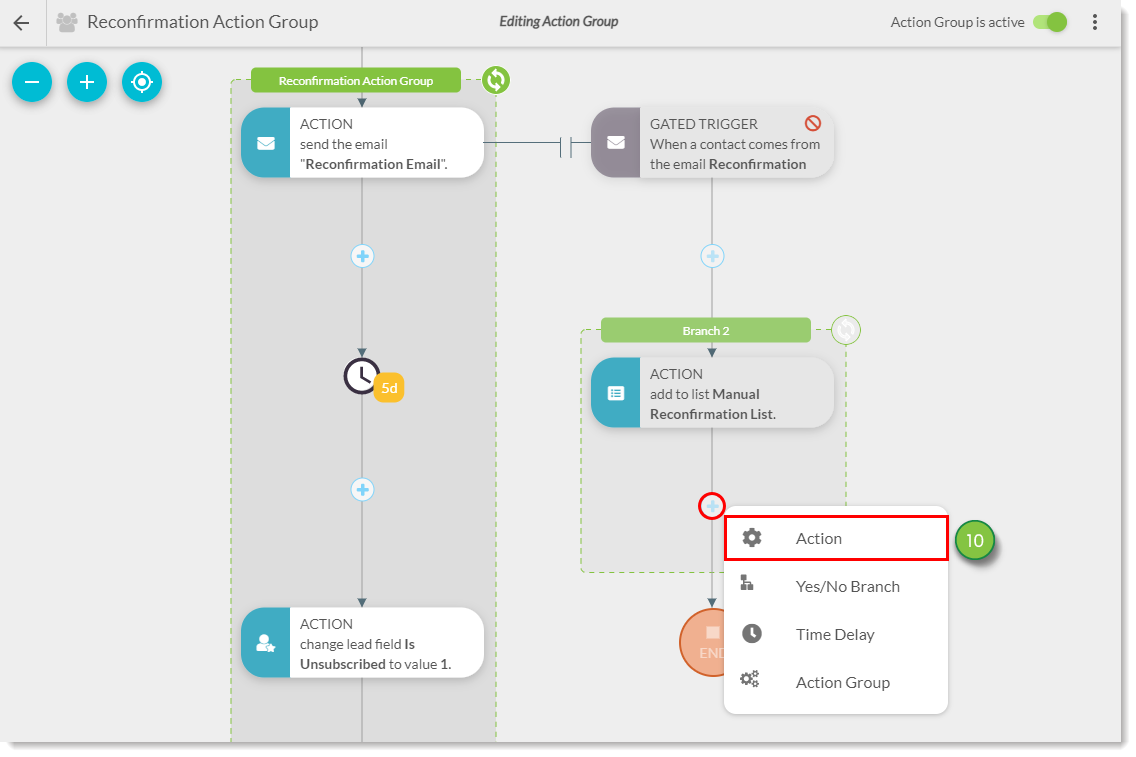
The next part of the automation is to configure a trigger for when a contact visits from the reconfirmation email. This trigger will remove the contact from the parent action group and add the contacts or leads who visited from the reconfirmation email to a list.
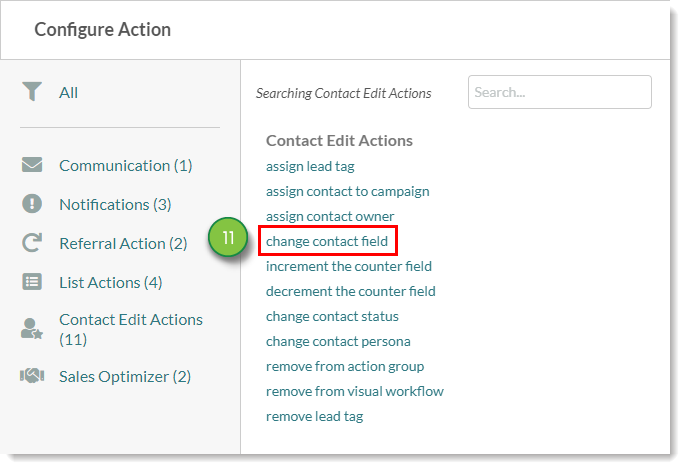
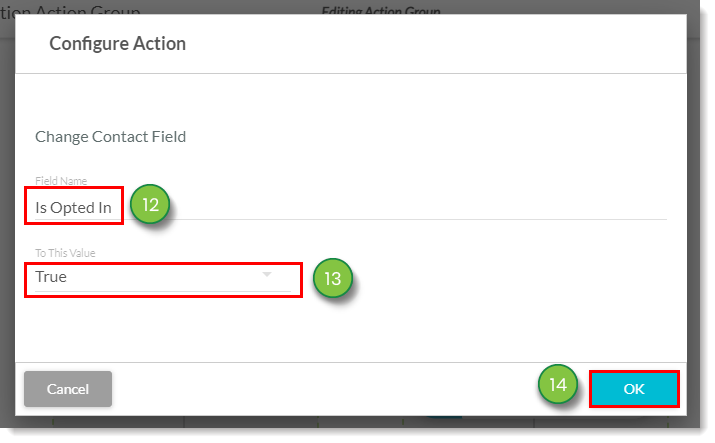
To create the list trigger and action, do the following:
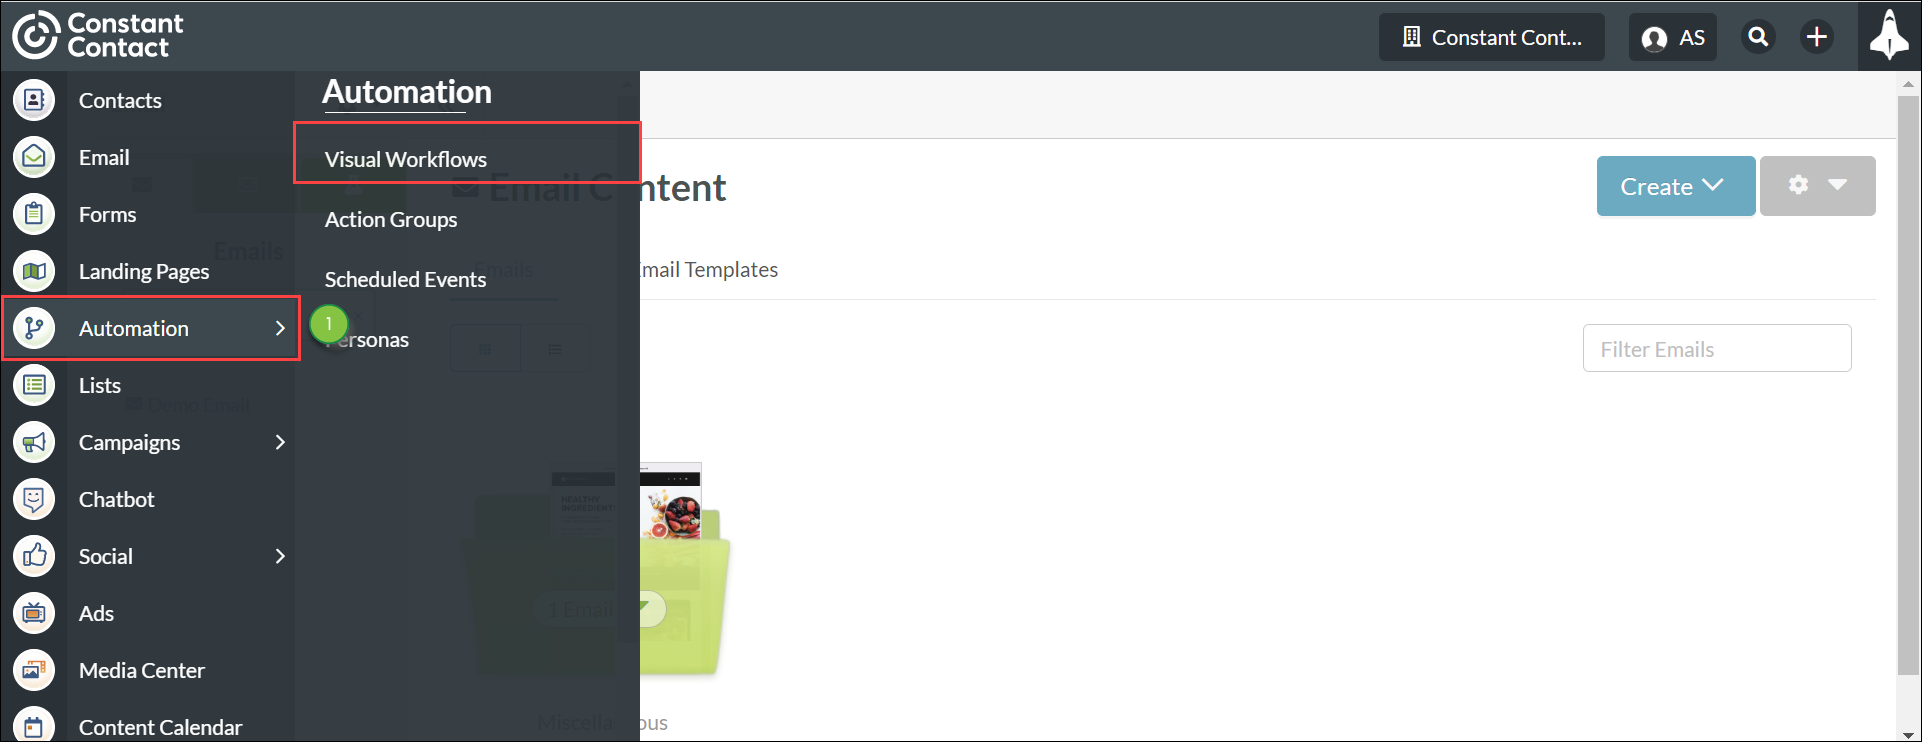
Once you have completed this reconfirmation action group, you may want to make this process more automated. This is optional, but it is recommended. This will require a workflow.
To automate reconfirmation, do the following:
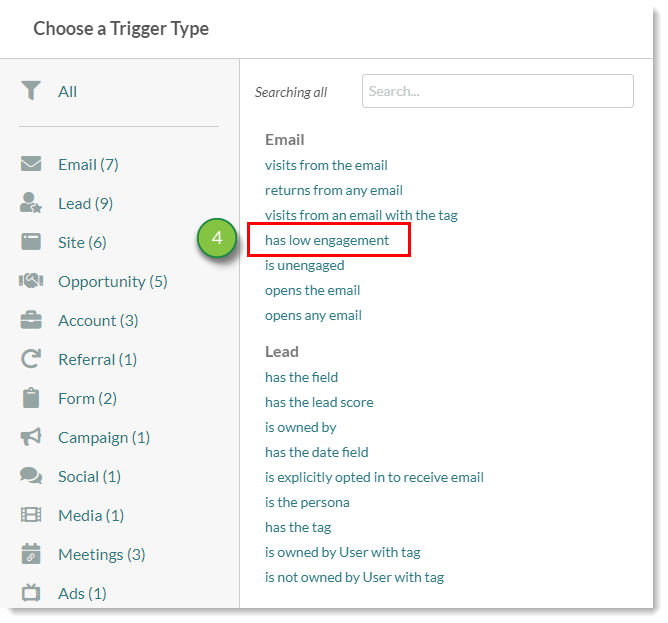 Note: Because the threshold for low engagement is an engagement score of 4, you may want to alter the time delay in the action group depending on the account’s sending habits. For example, if you only send emails to contacts once a week, you may want to increase the time delay by a few days to compensate.
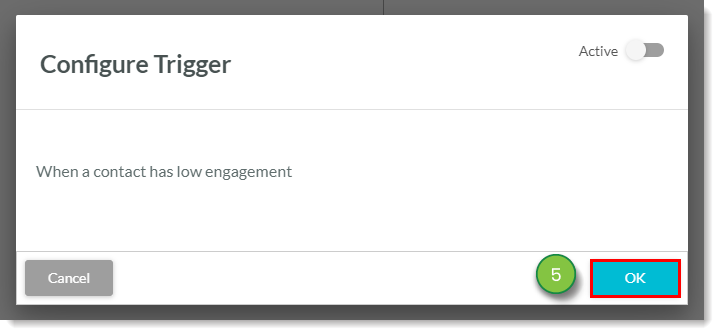
Once completed, you can then schedule this automation to lists that you would like to reconfirm.
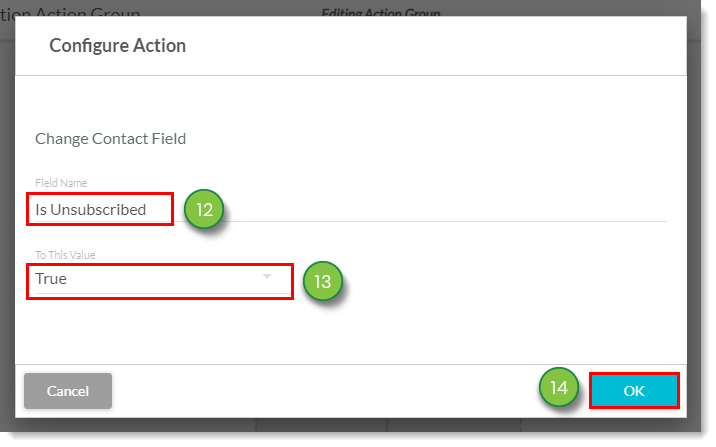
Any contact or lead that does not click the link in the email will be unsubscribed after the time frame specified in the time delay. Those that do click the link will be added to a list and will not be unsubscribed.
Once the automation is created, any time someone clicks the resubscribe button in your reconfirmation email, they will be explicitly opted in. These contacts will have a ![]() opt-in icon on their profile, as well as an indication that they have explicitly opted in to receive email.
opt-in icon on their profile, as well as an indication that they have explicitly opted in to receive email.
From there, you can build a rules-based list of these contacts by using the is explicitly opted in to receive email trigger. Consider also creating a Visual Workflow that segments contacts, such as placing the contacts on a different marketing campaign.
Copyright © 2026 · All Rights Reserved · Constant Contact · Privacy Center