Lead Gen & CRM
How can we help you?
Search our help articles, video tutorials, and quickstart guides

You've got this. You've got us. Search our Knowledge Base to quickly find answers to your questions.

Creating Rules-Based Lists

Article: 000050333
Updated: October 31, 2025

Lead Gen & CRM allows you to save multiple leads to individual lists. Rules-based lists will automatically set leads as members of those lists when they meet specific preset criteria.

 
Users:
Administrators 
Company Managers 
Marketing Managers 
Sales Managers  
Salespersons  
Jr. Salespersons  

Light Bulb IconTip: Are you looking for information about Constant Contact’s Email and Digital Marketing product? This article is for Constant Contact’s Lead Gen & CRM product. Head on over to the Email and Digital Marketing articles by clicking here. Not sure what the difference is? Read this article.


Creating Rules-Based Lists

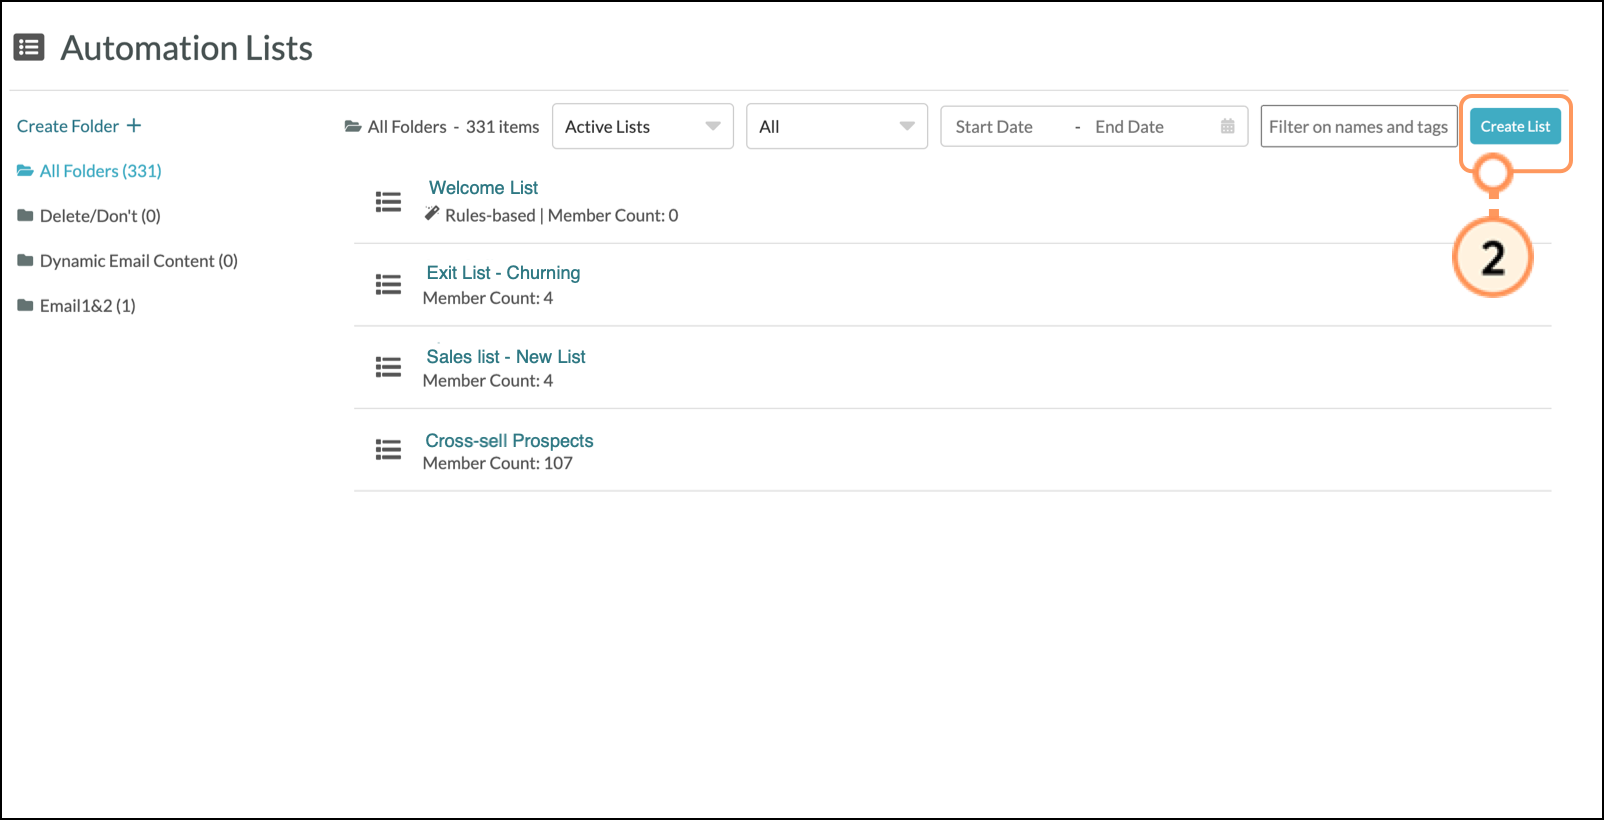
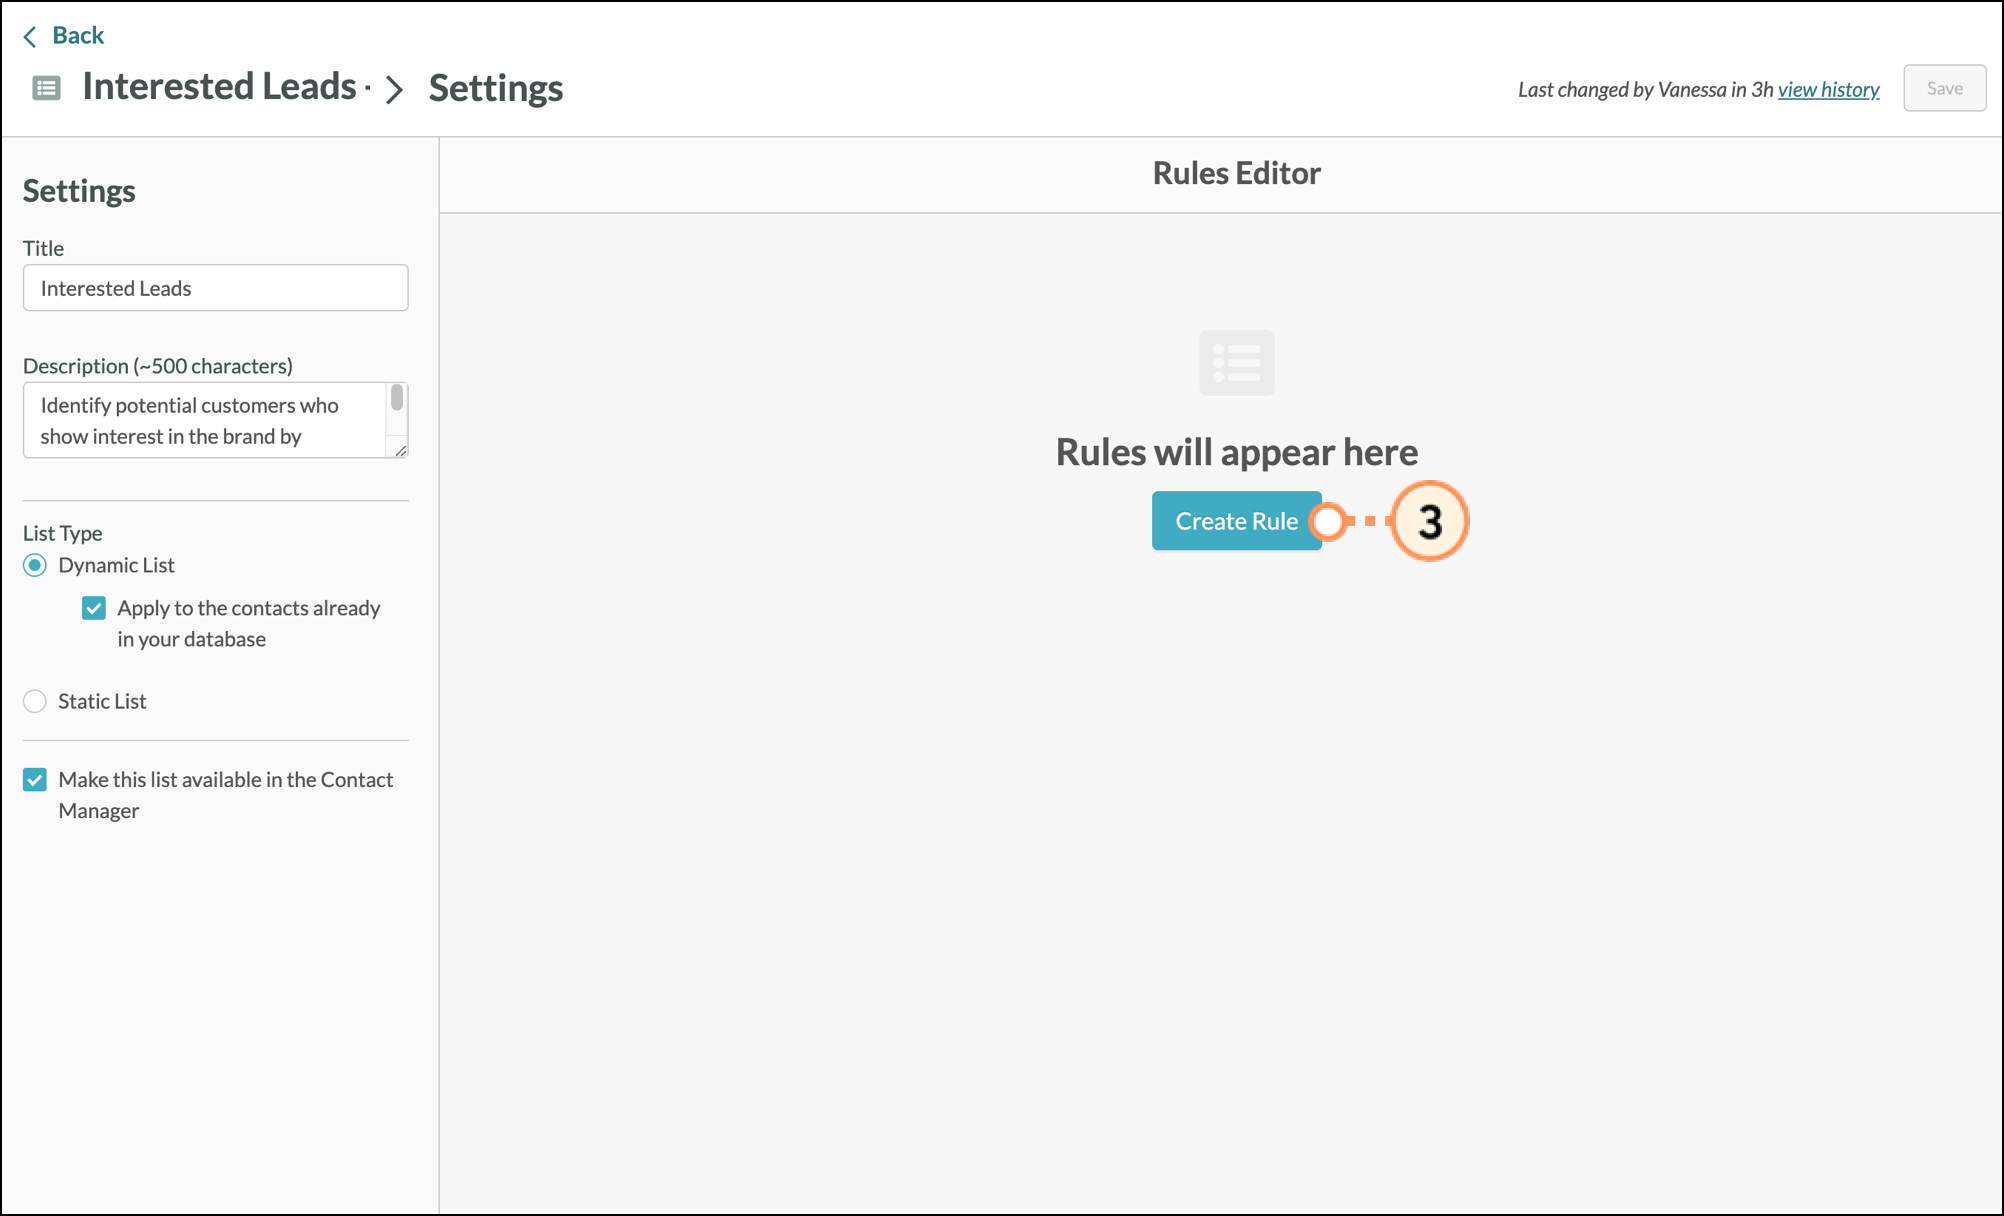
You can create lists to house different leads or contacts. Rules-based lists will add contacts when they meet certain rule criteria. To create a rules-based list in Lead Gen & CRM, do the following: 

  1. Click Lists in the left toolbar.
  2. Click Create List at the top of the page.


  3. Fill out the details for your new list. 
    1. Enter a name for the list.
    2. Optionally, enter a list description.
    3. Select the folder to add the list to.
    4. Optionally, click the Make this list available in the Contact Manager checkbox.
    5. Click the Rules-Based toggle.
  4. Click Create List.


  5. Click Create Rule.


  6. Select the desired rule from the list of available rules.

    Note
    : When creating lists, be aware that building lists based on Site or Email Actions may have the list contain fewer members than a corresponding email report due to users with cookies or JavaScript disabled.


  7. Configure rule parameters as necessary.
  8. Click Save.

    Note: Hover over the rule and click  trash.png  Remove to remove rules or groups.


Editing an Existing List

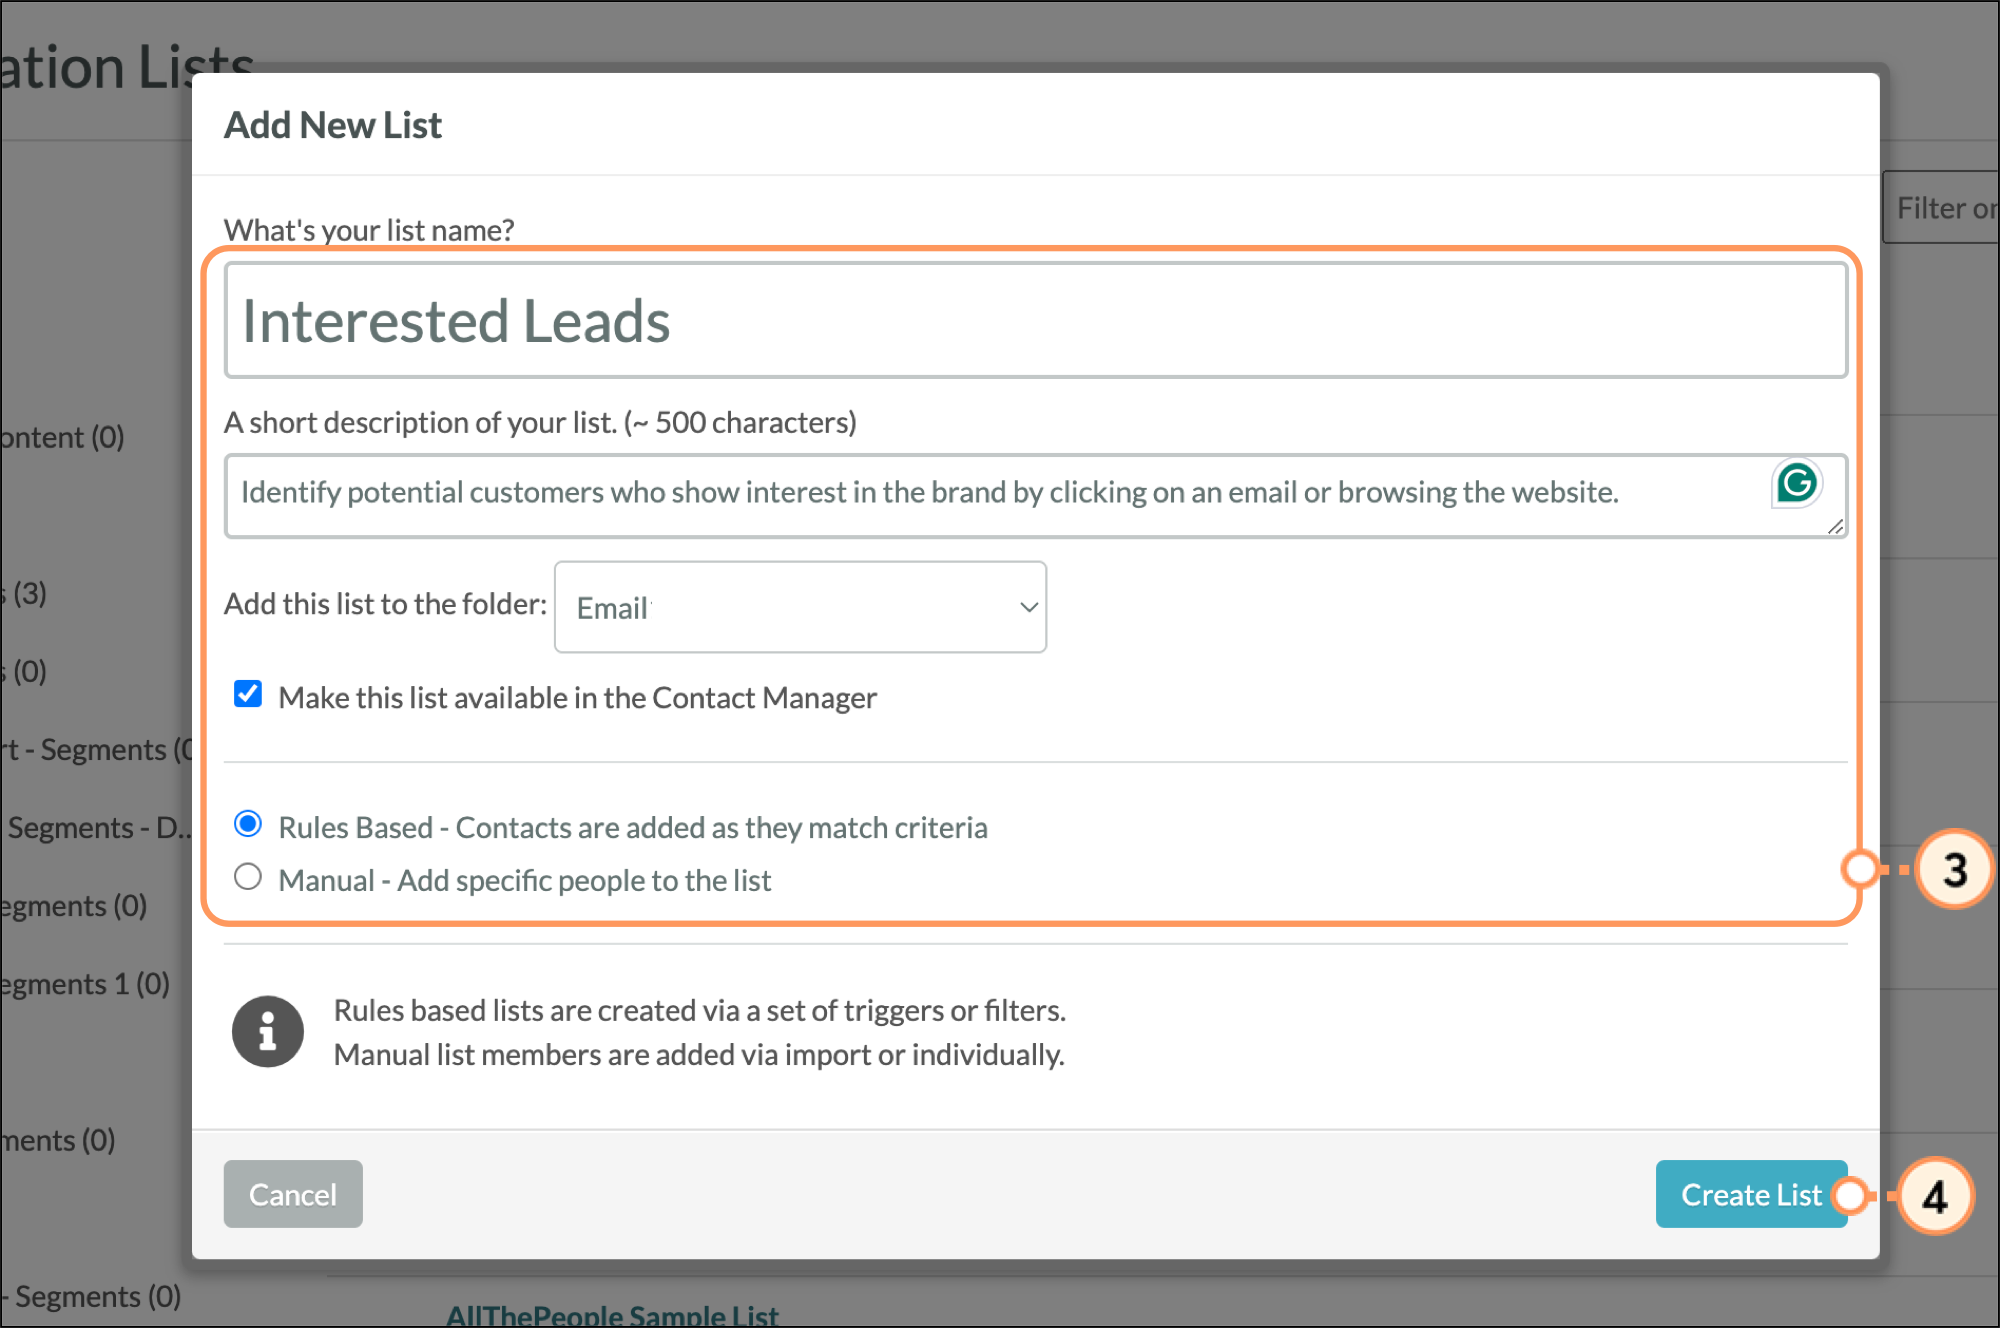
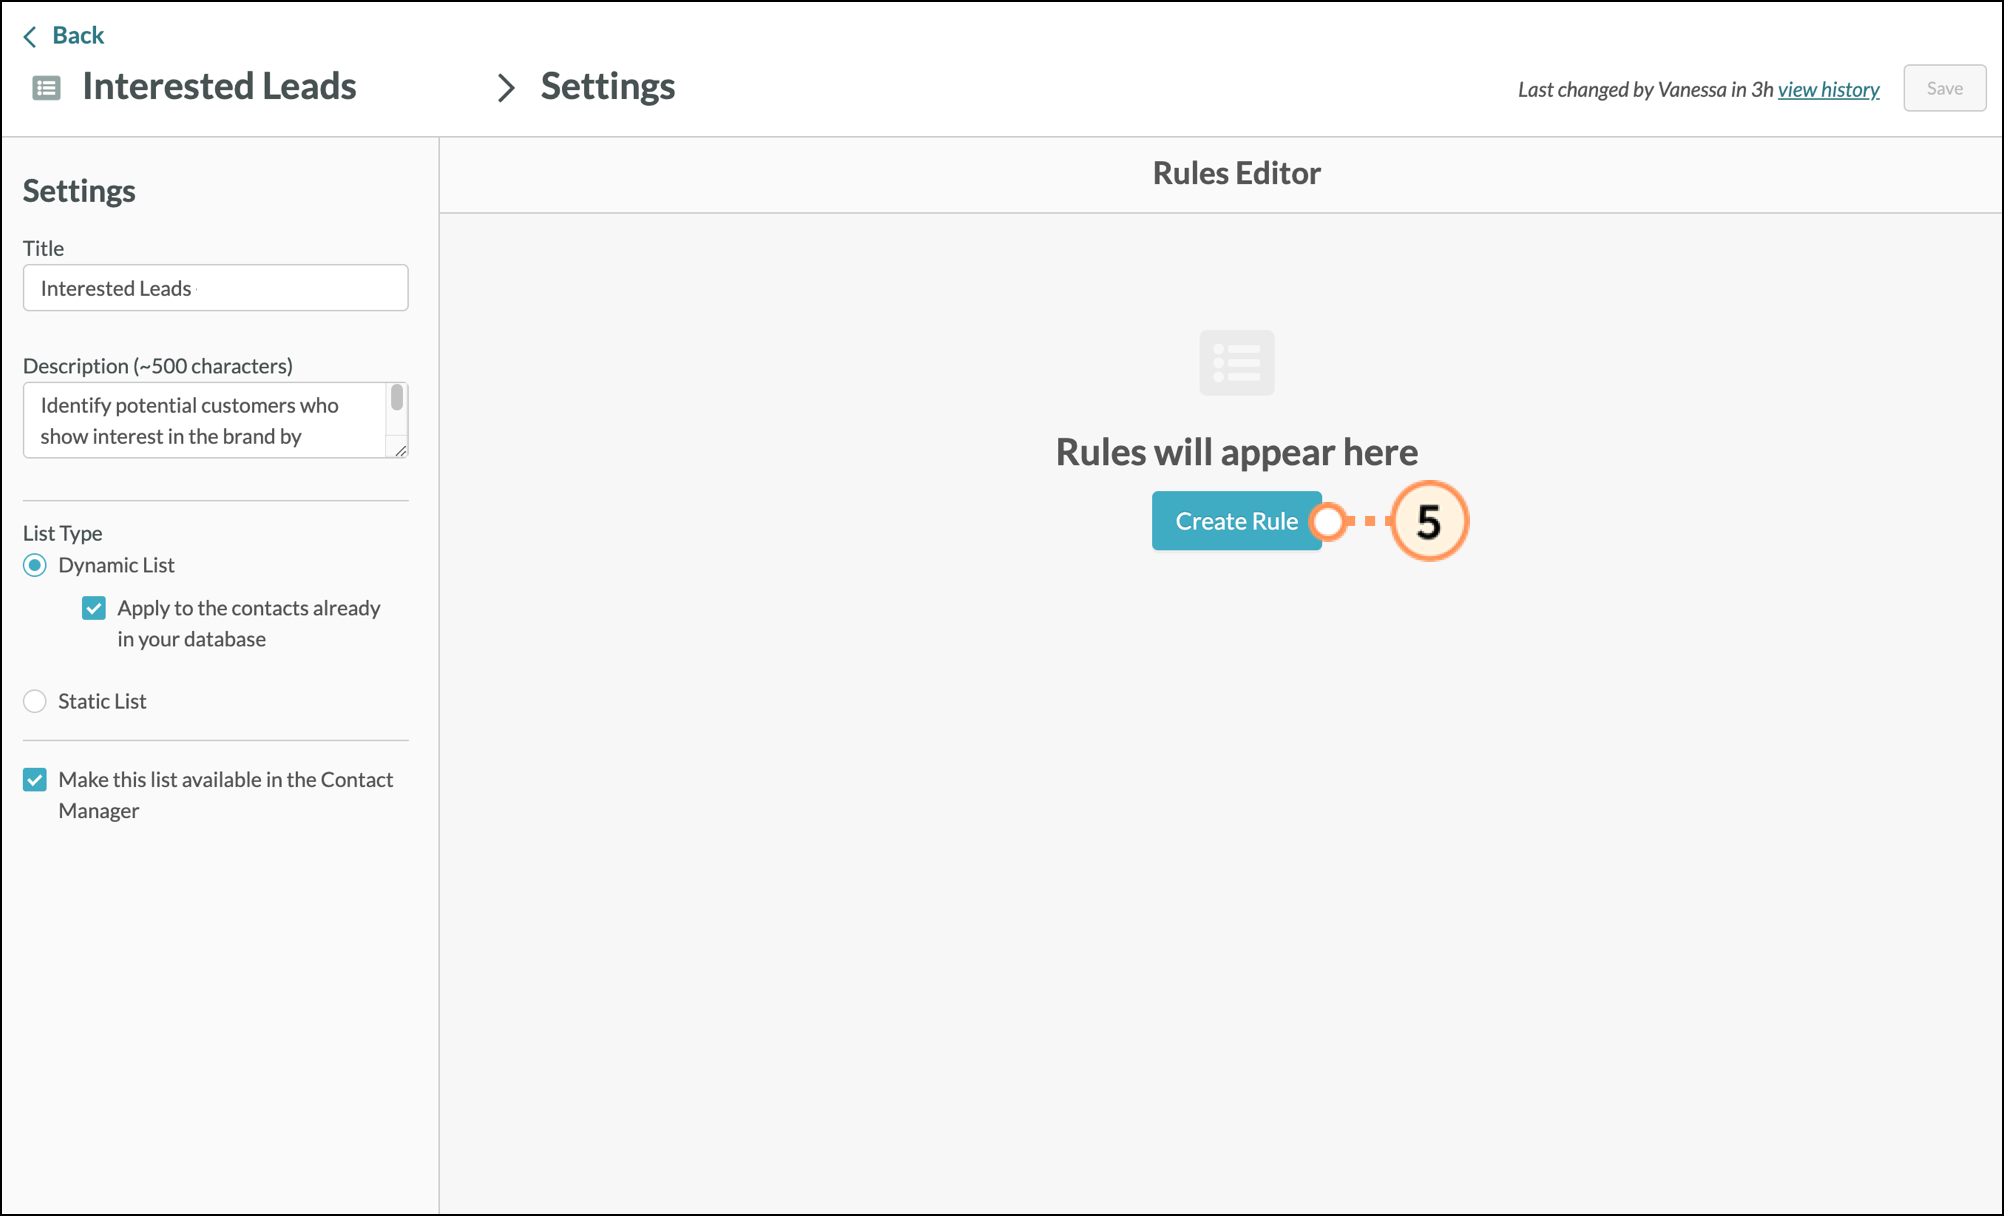
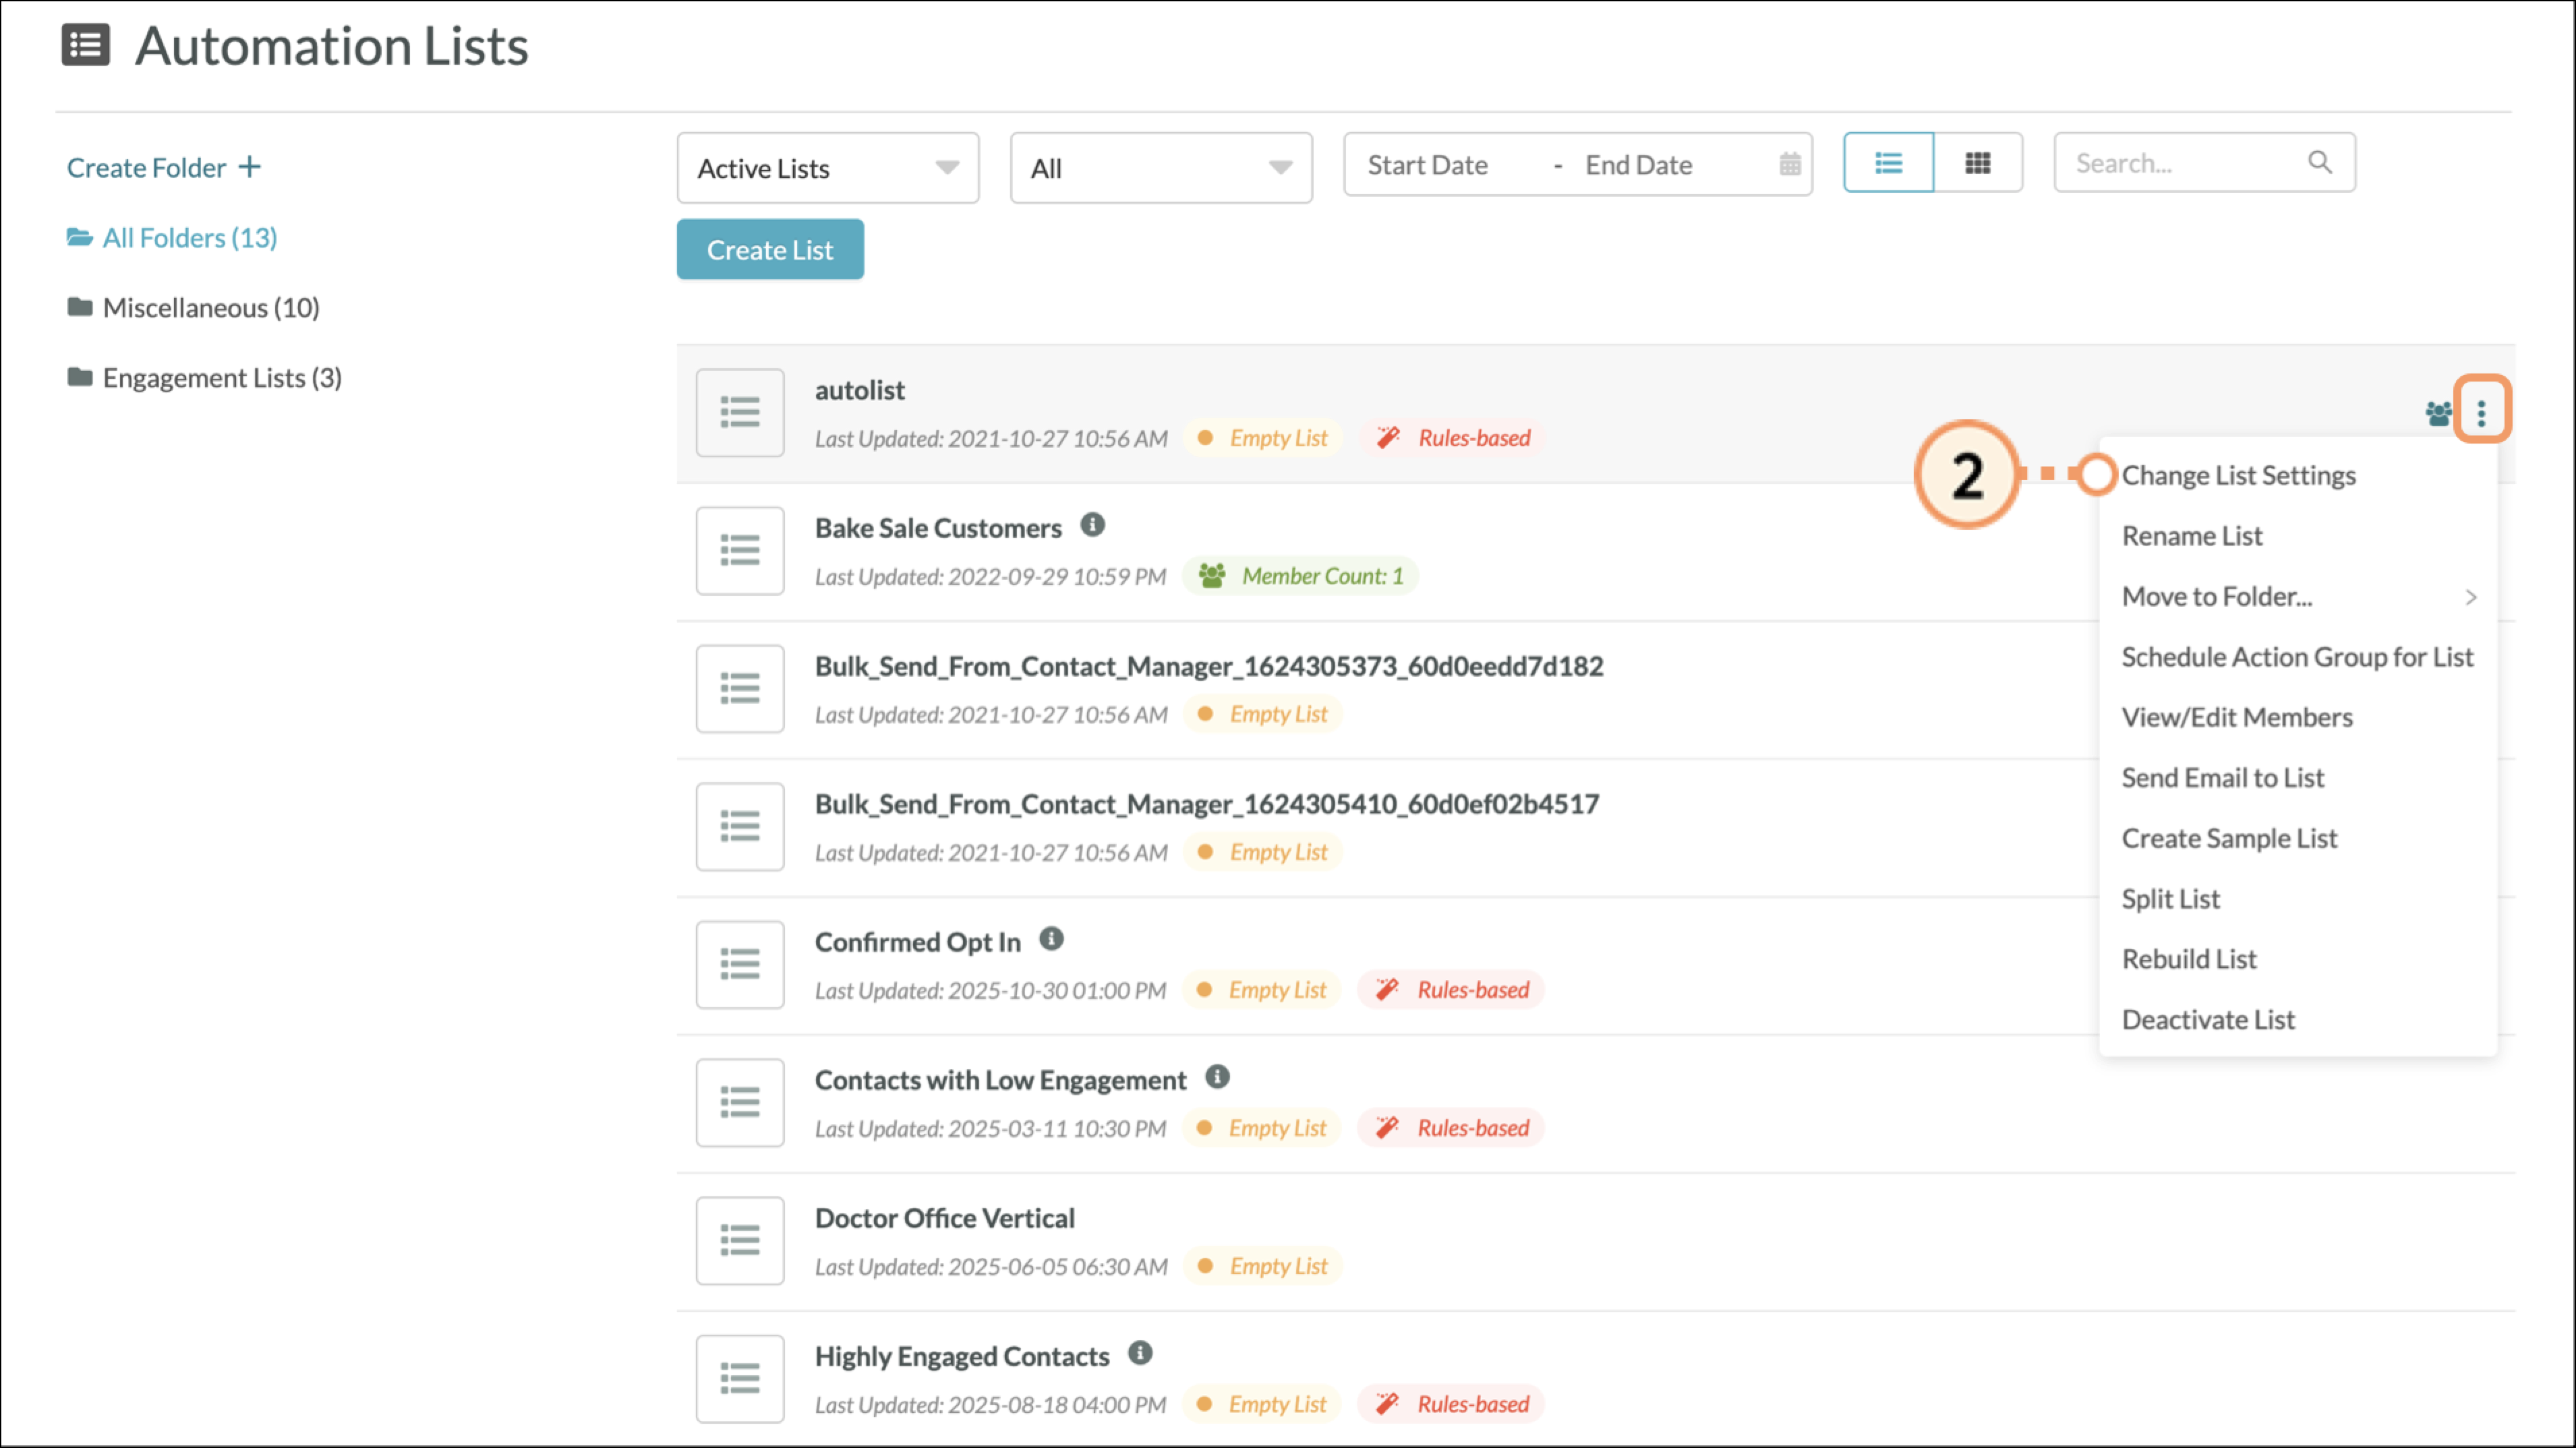
To edit the triggers and rules for a list that already exists, click on your list. Editing your list can modify the list contents, removing previously included members.  

  1. Hover over the list you want to edit, then click the Settings menu > Change List Settings.


  2. Modify your list as necessary.
  3. Click Save.  


Creating Custom Field Rules-Based Lists

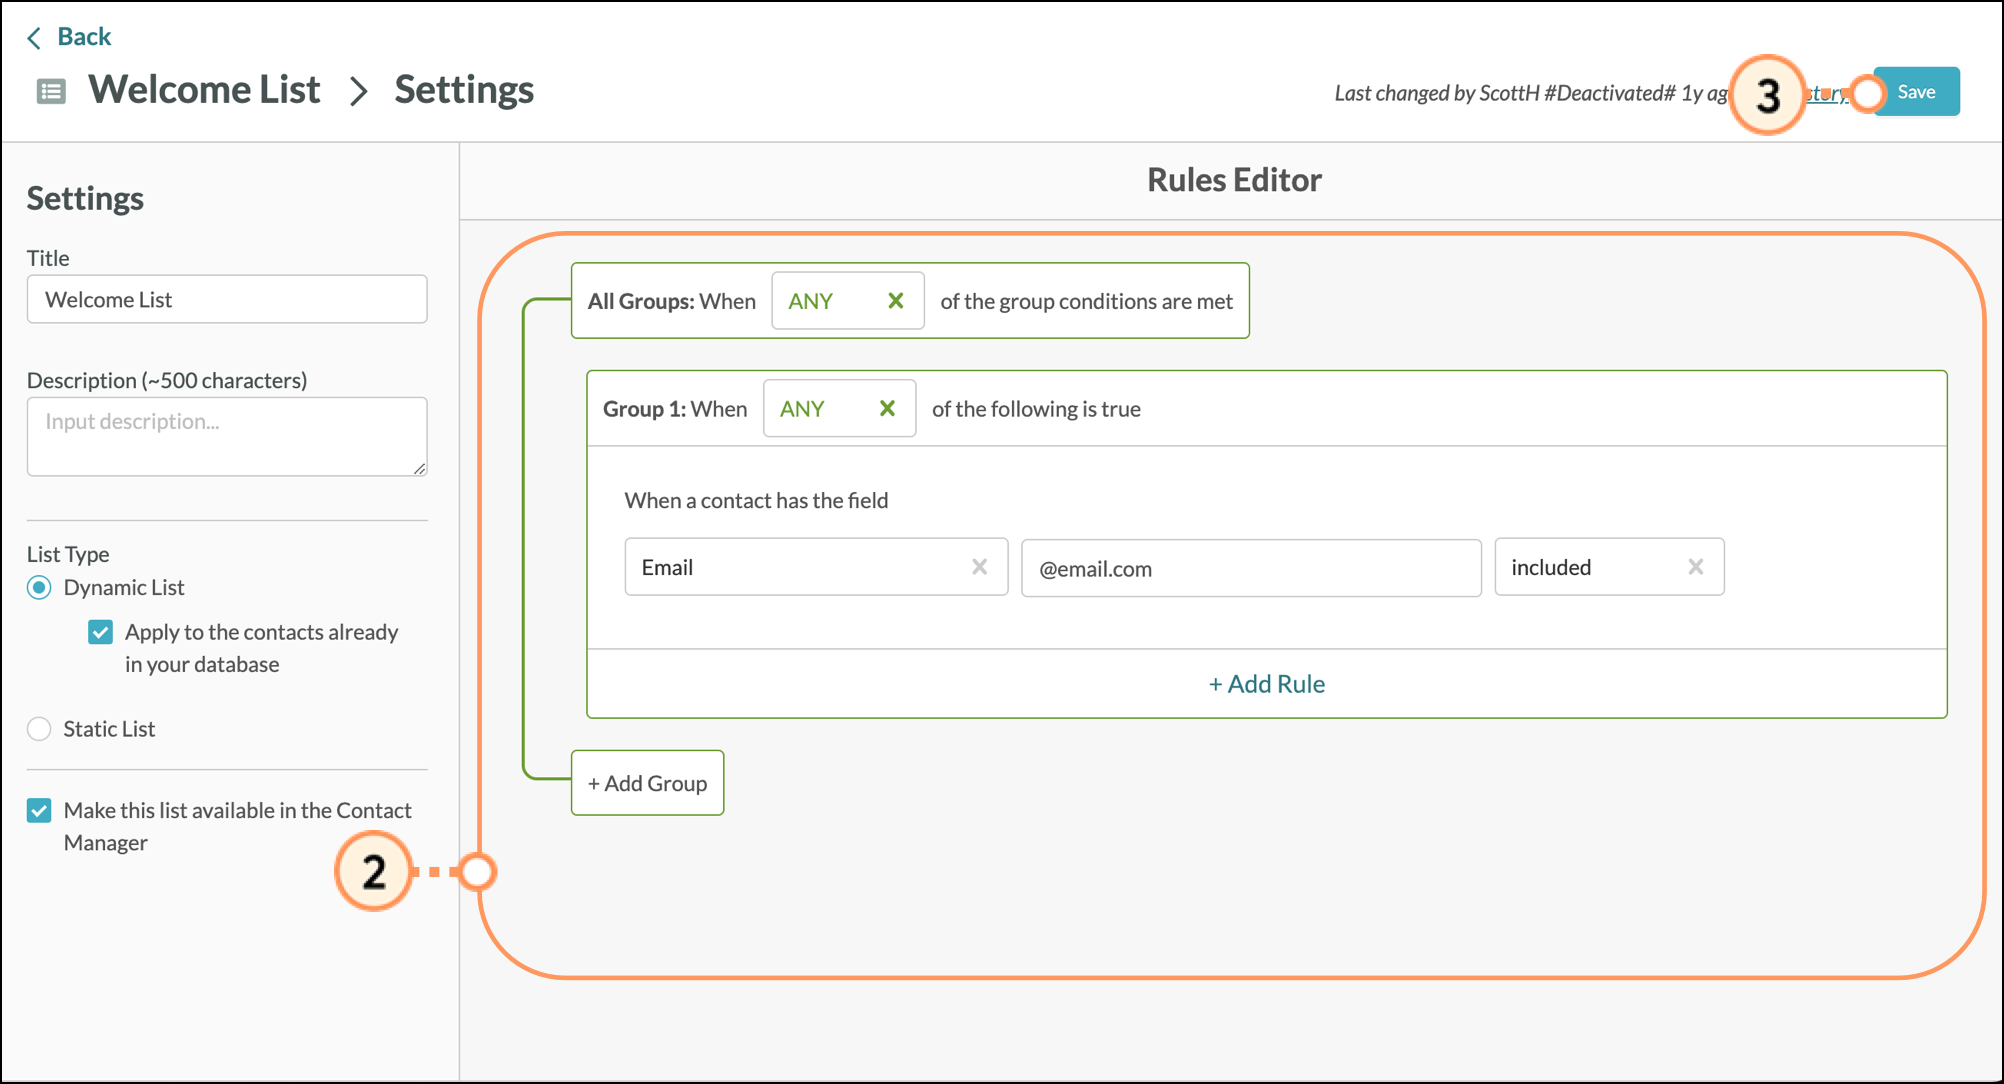
You can create rules-based lists that operate on logic from custom fields. Custom fields are fields that you built in your Lead Gen & CRM instance that are specific to your organisation. Standard fields include "name", "email", "address", etc. But you can build your own custom fields and then use them in your rules-based lists. 

To create a custom list, do the following:

  1. Click Lists in the left toolbar.


  2. Create a new list or edit an existing rules-based list.


  3. Configure an initial or add an additional rule.


  4. Select has the field, located under Lead.


  5. Select the desired custom field from the Select Field drop-down menu. Configure custom field parameters as necessary.
  6. Select exactly from the variable drop-down menu.

    • Note: Rules-based lists will dynamically remove a member when the lead no longer meets the trigger criteria.

  7. Click Save.


Adding Additional Rules

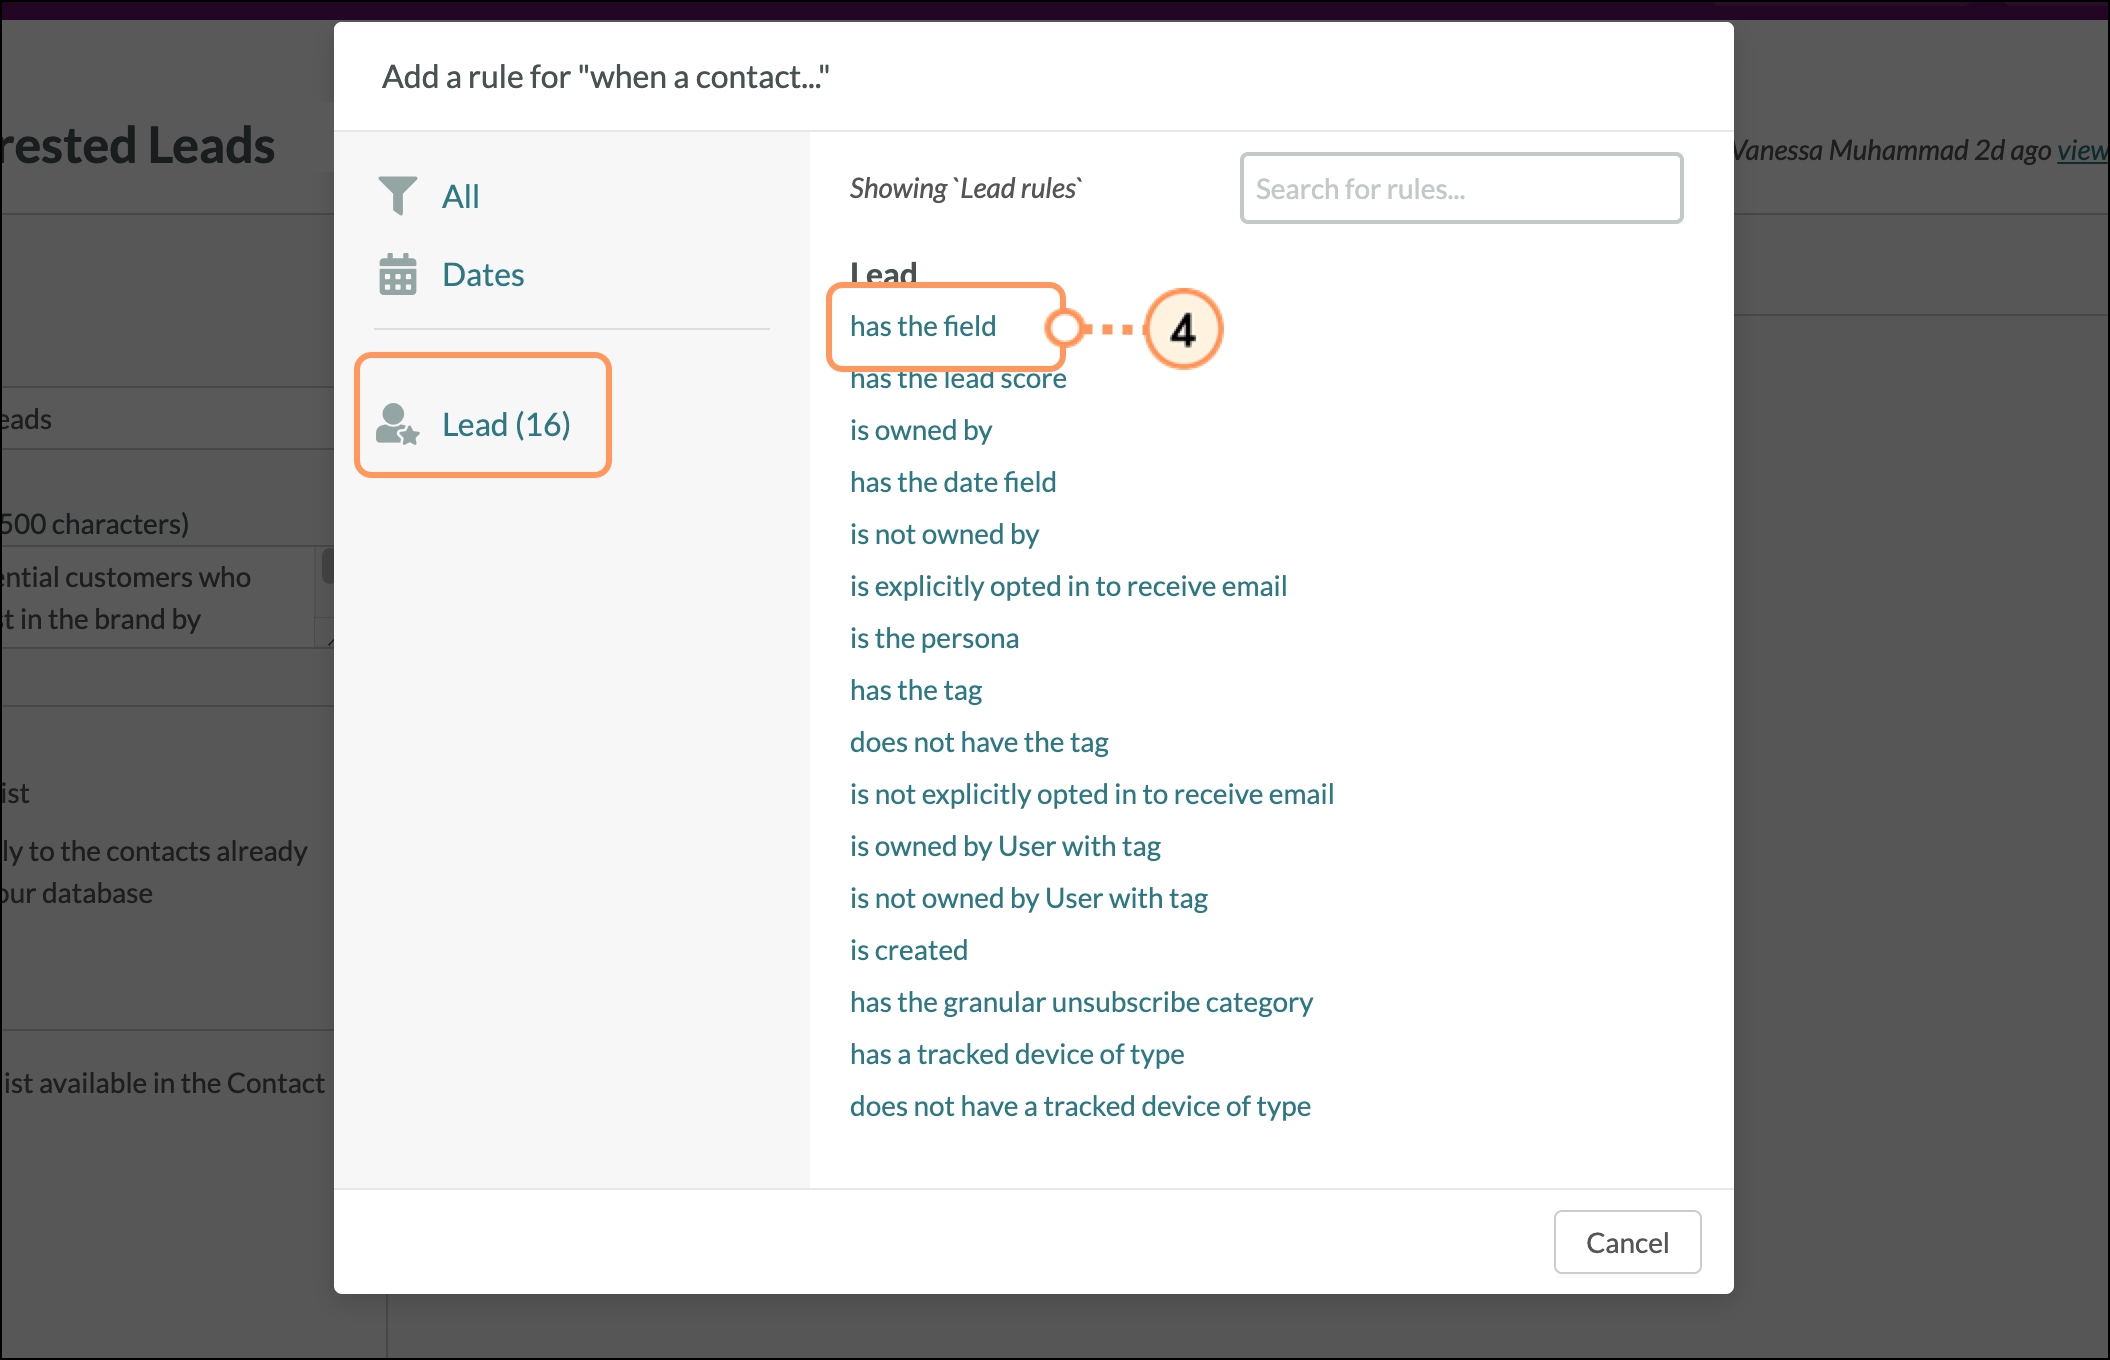
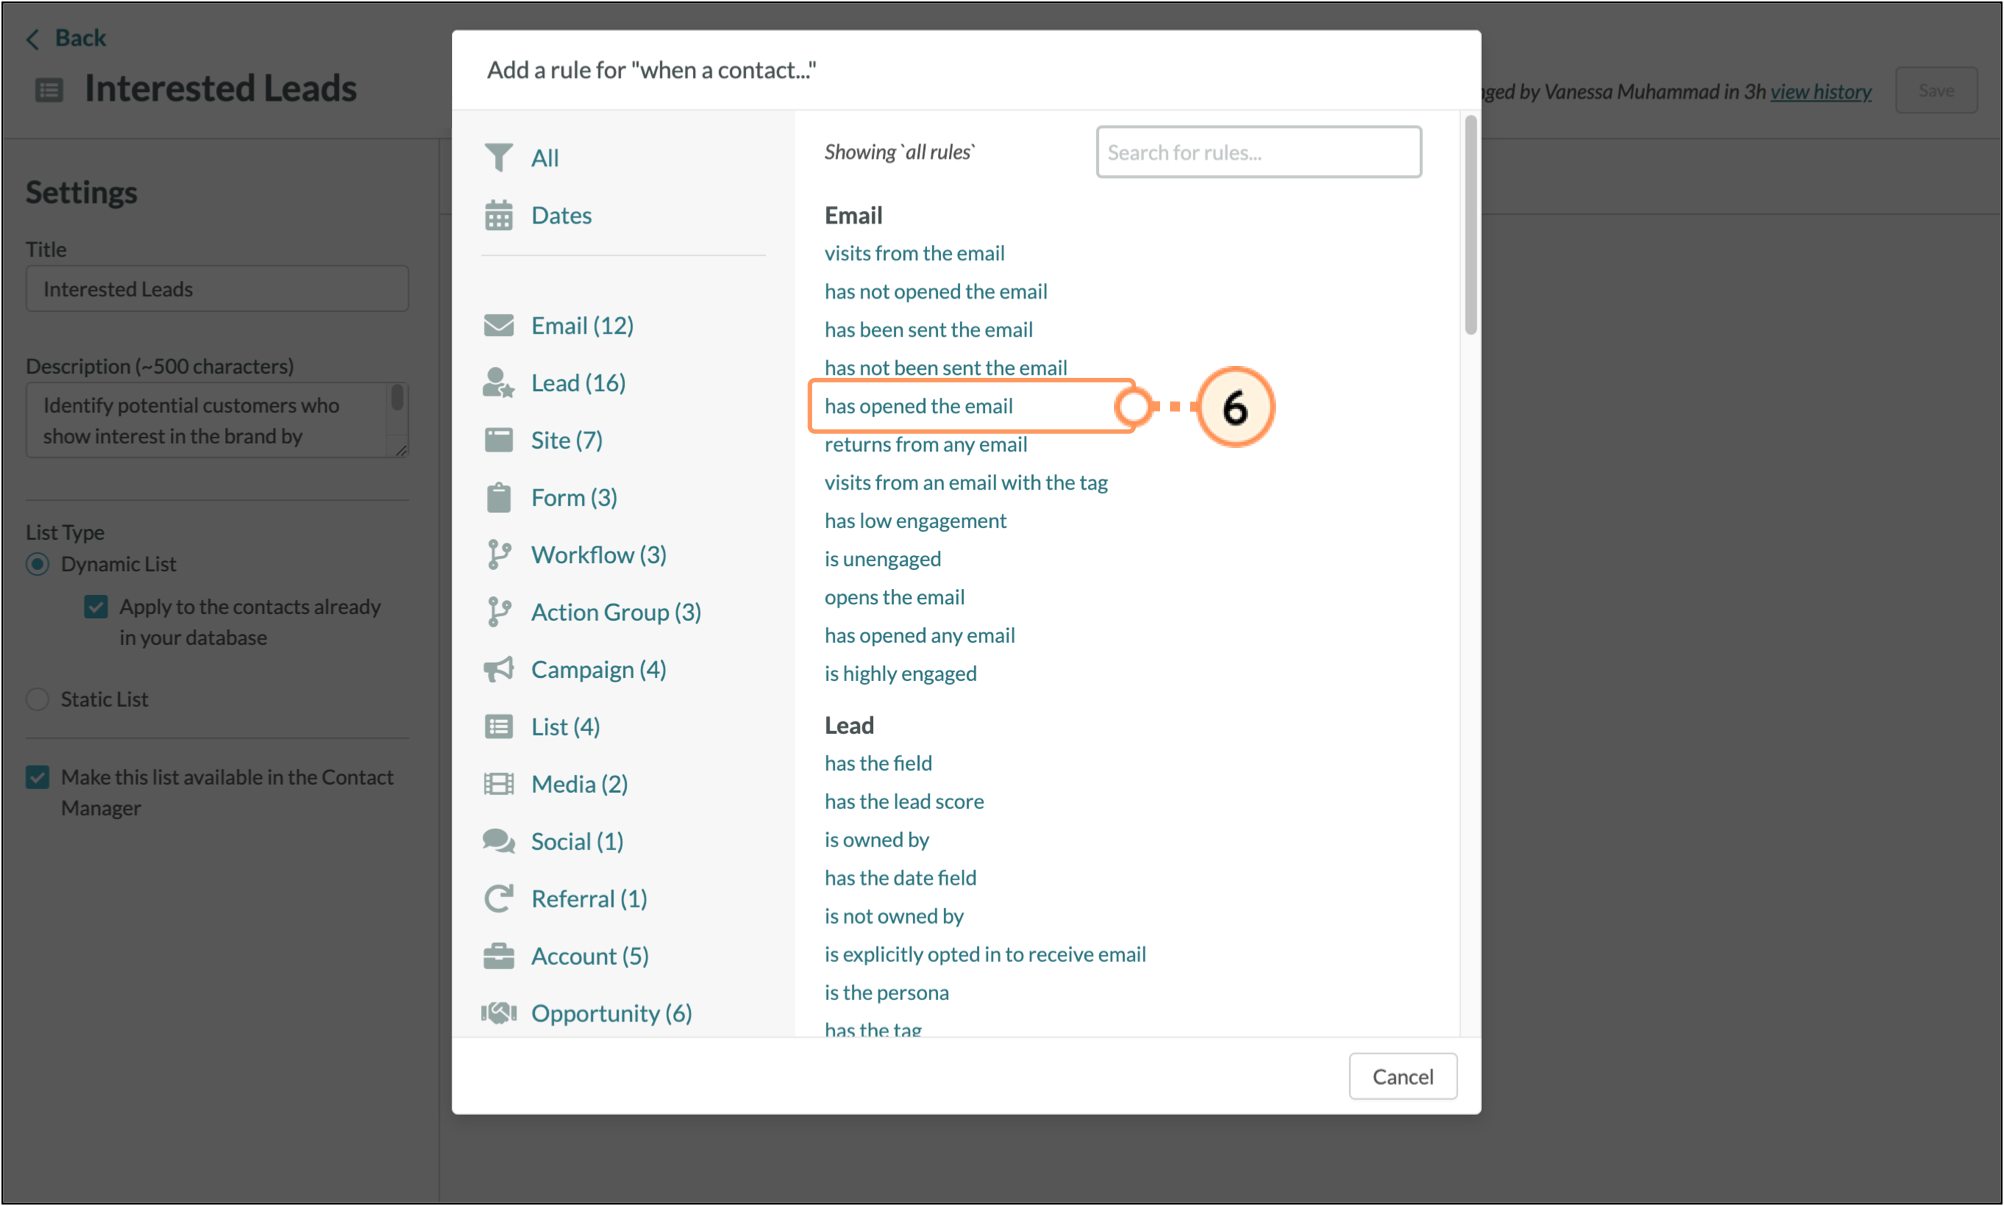
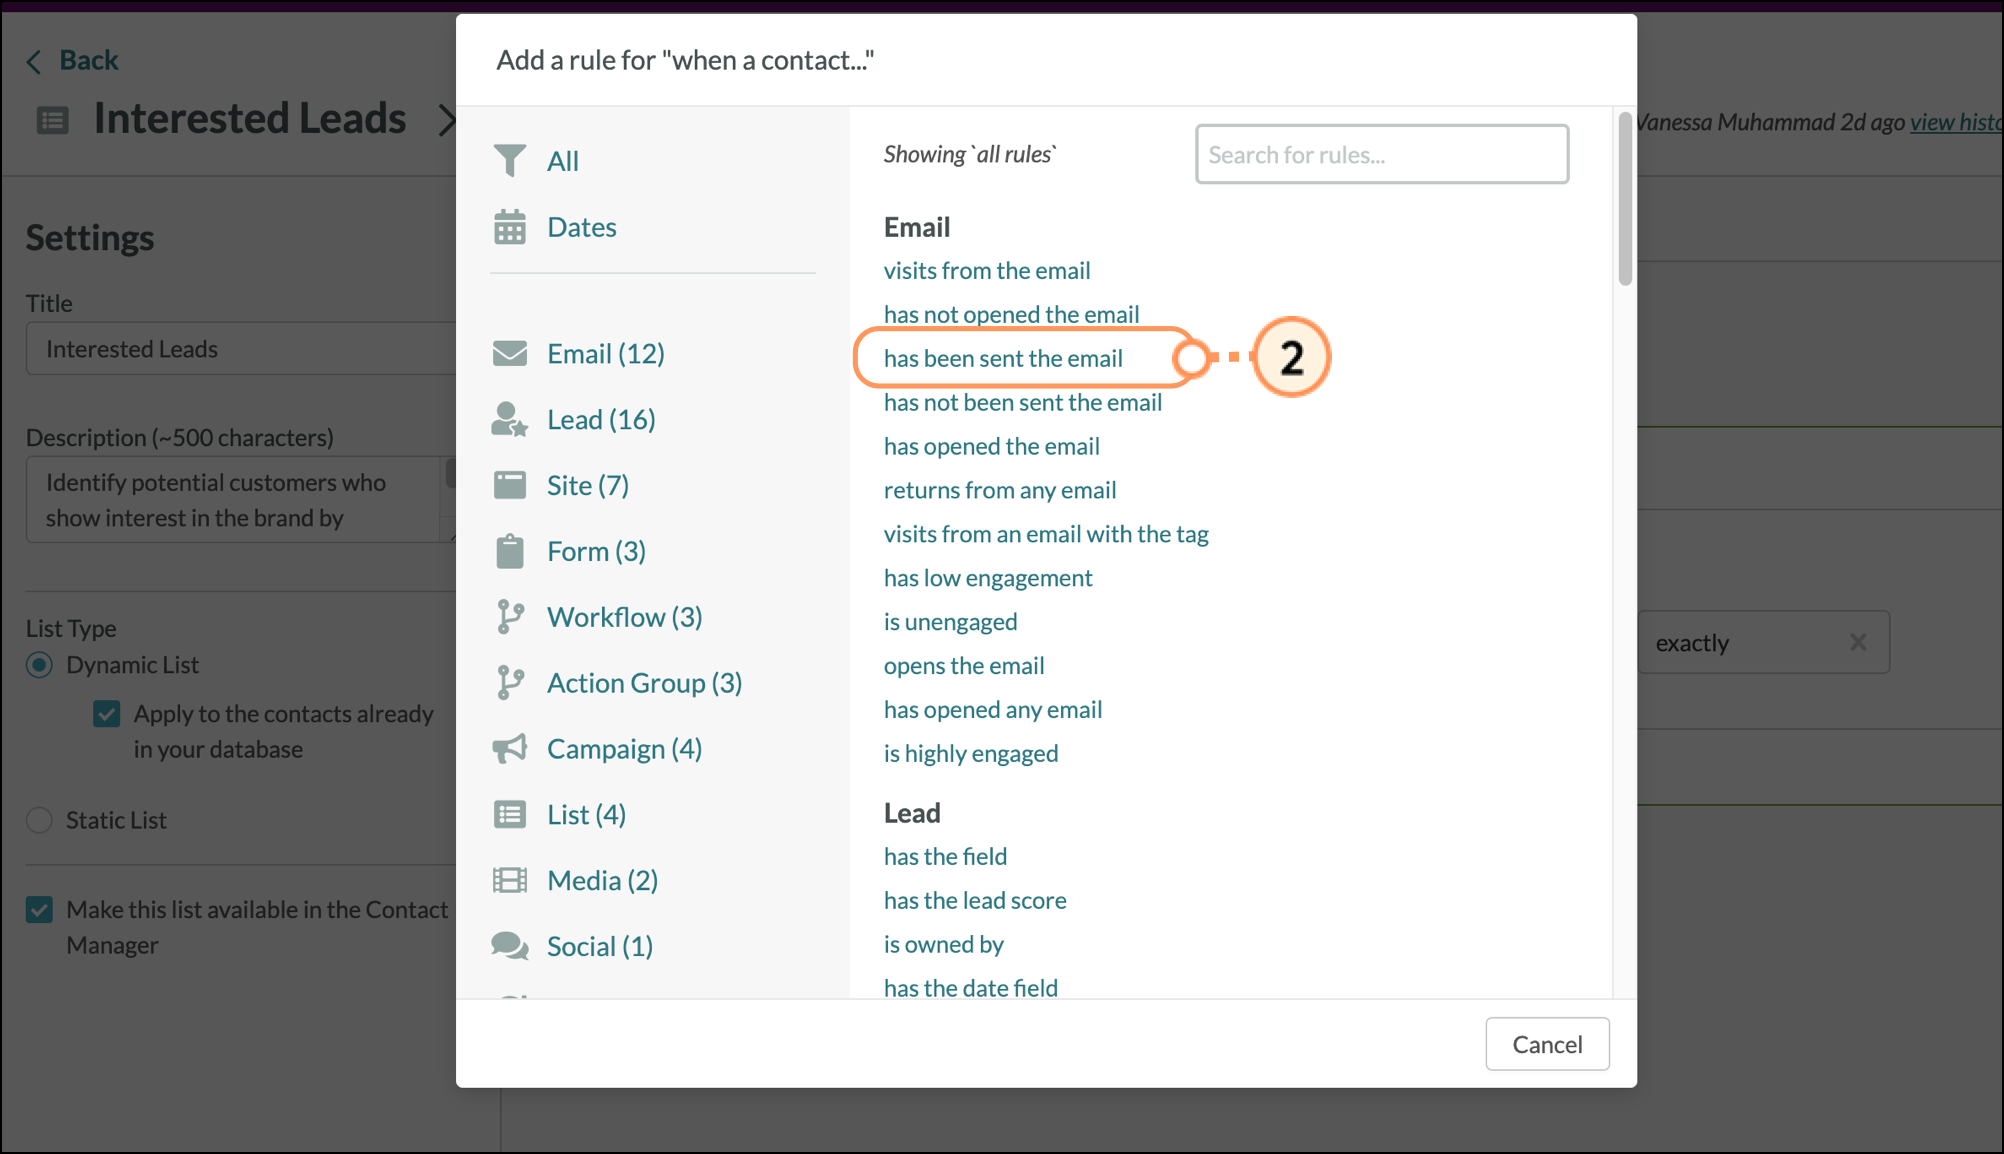
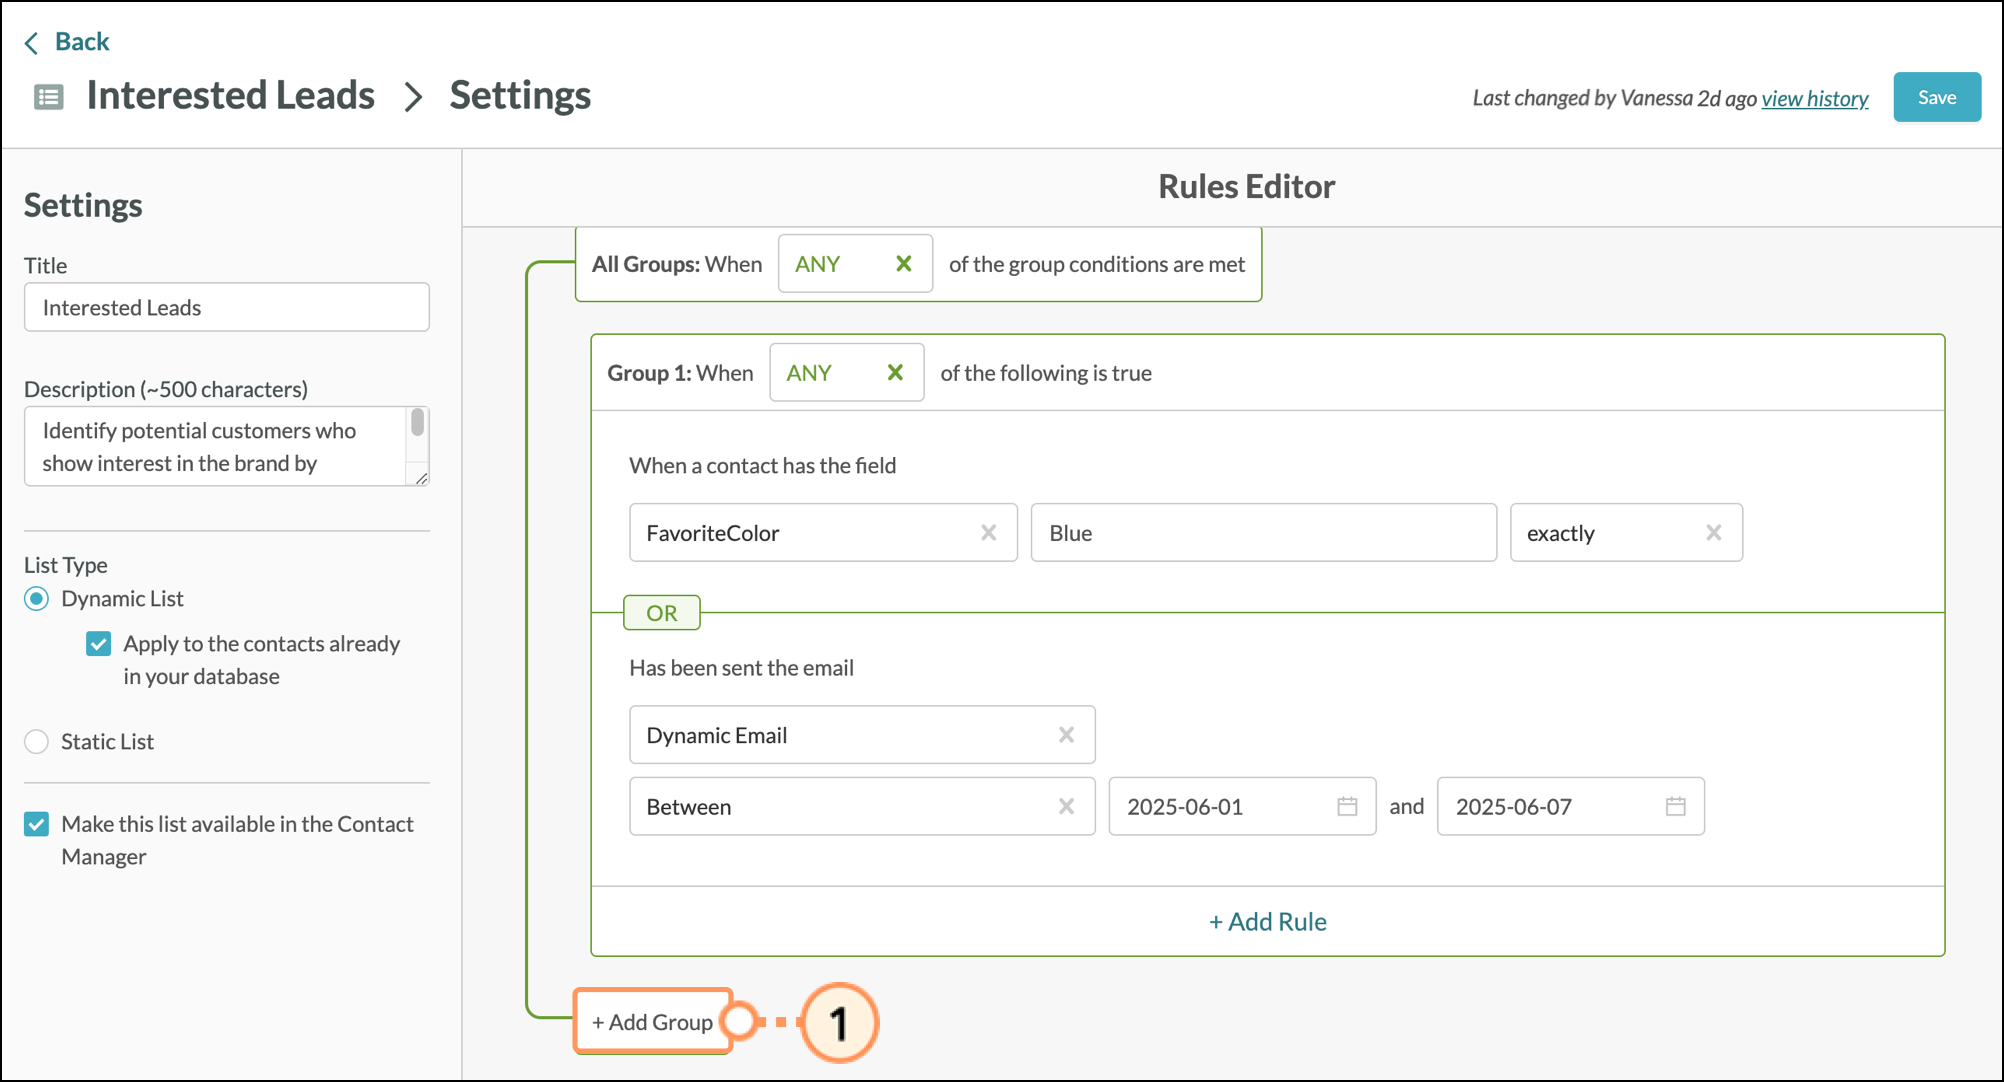
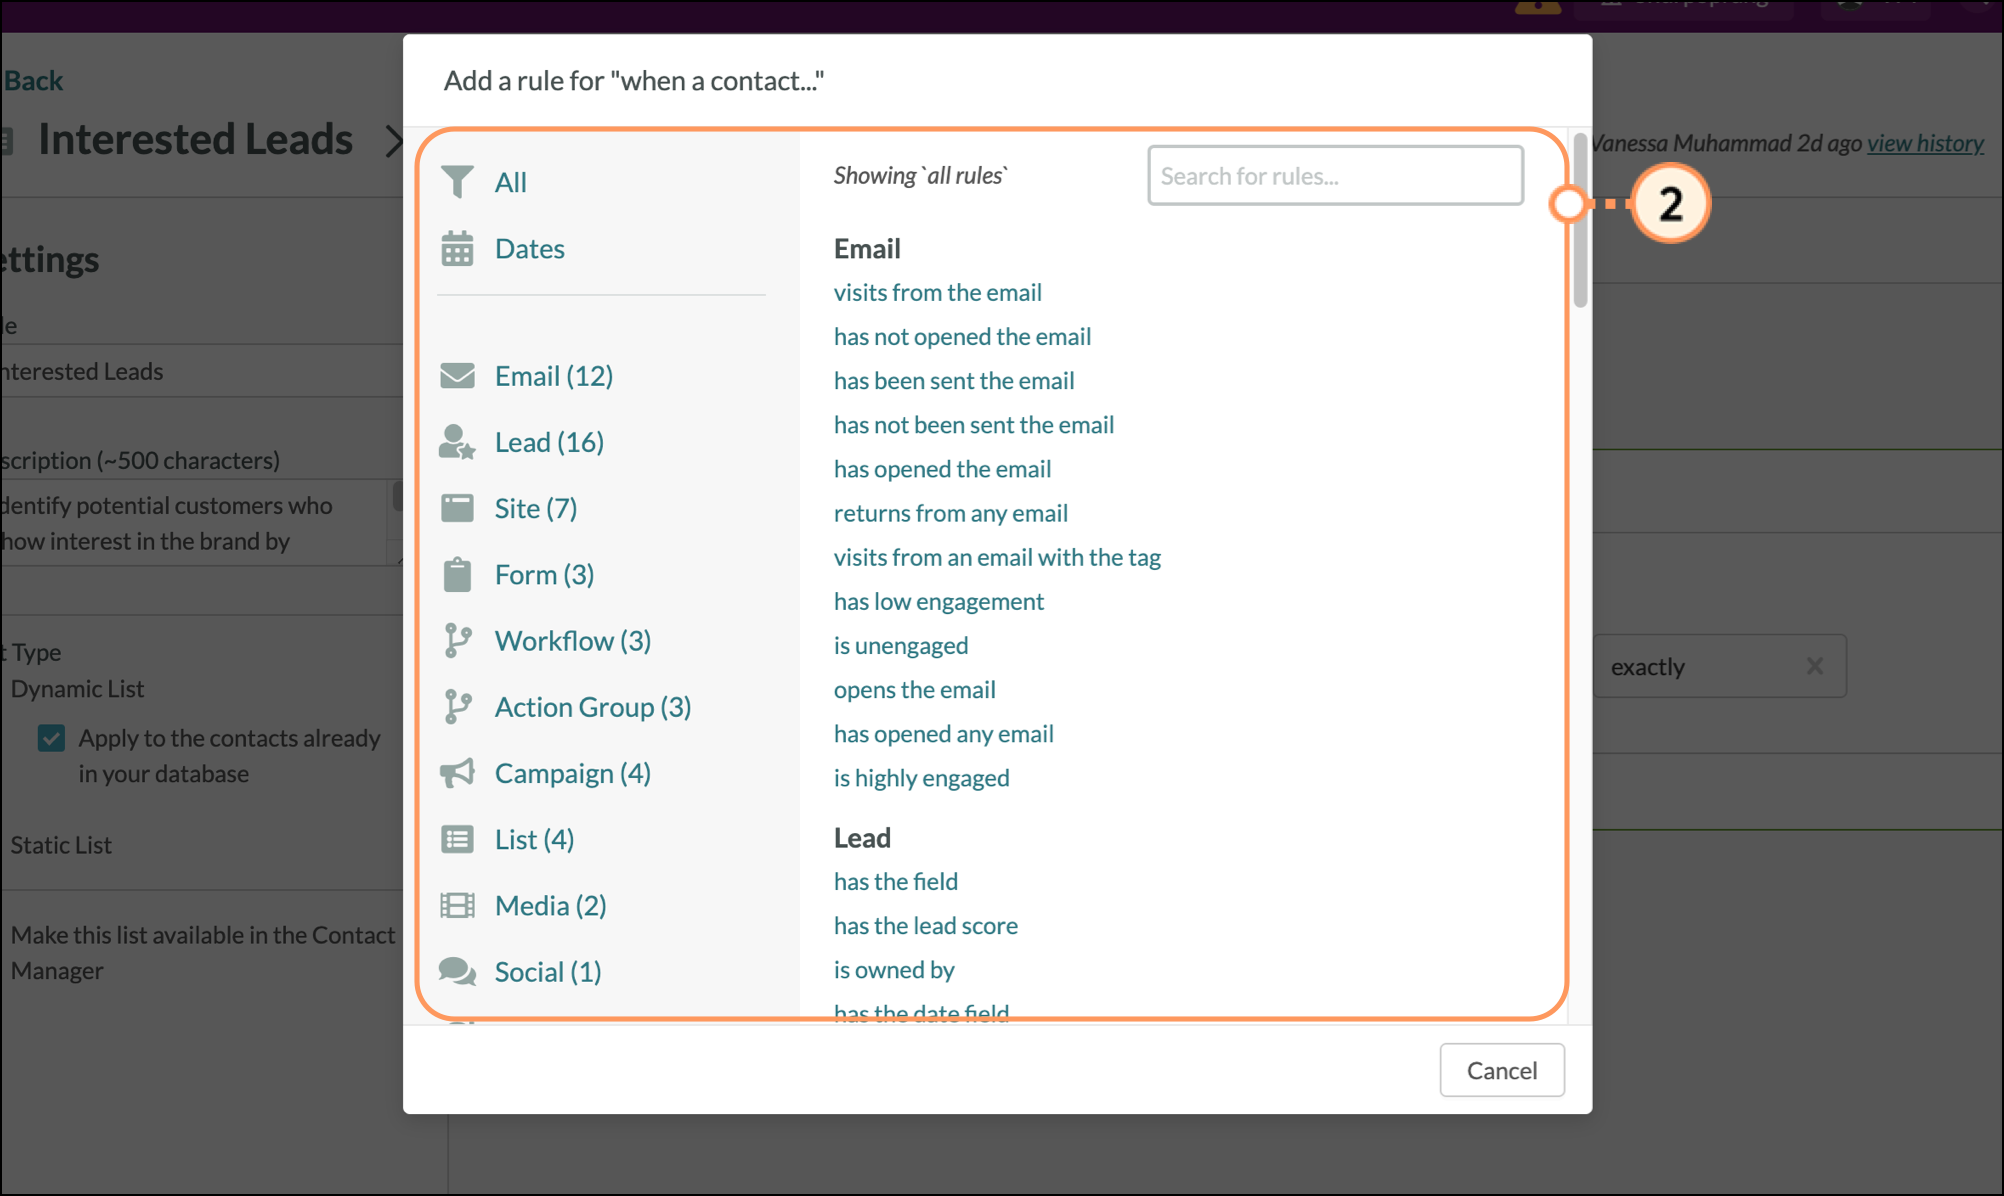
Rules-based lists can have several rules. To add additional rules to rules-based lists, do the following: 


  1. Click Add Rule.


  2. Select the desired rule from the list of available rules.


  3. Configure rule parameters as necessary.

    • Note: Click  trash.png  Remove to remove rules or groups.

  4. Click Save.


Adding Rule Groups

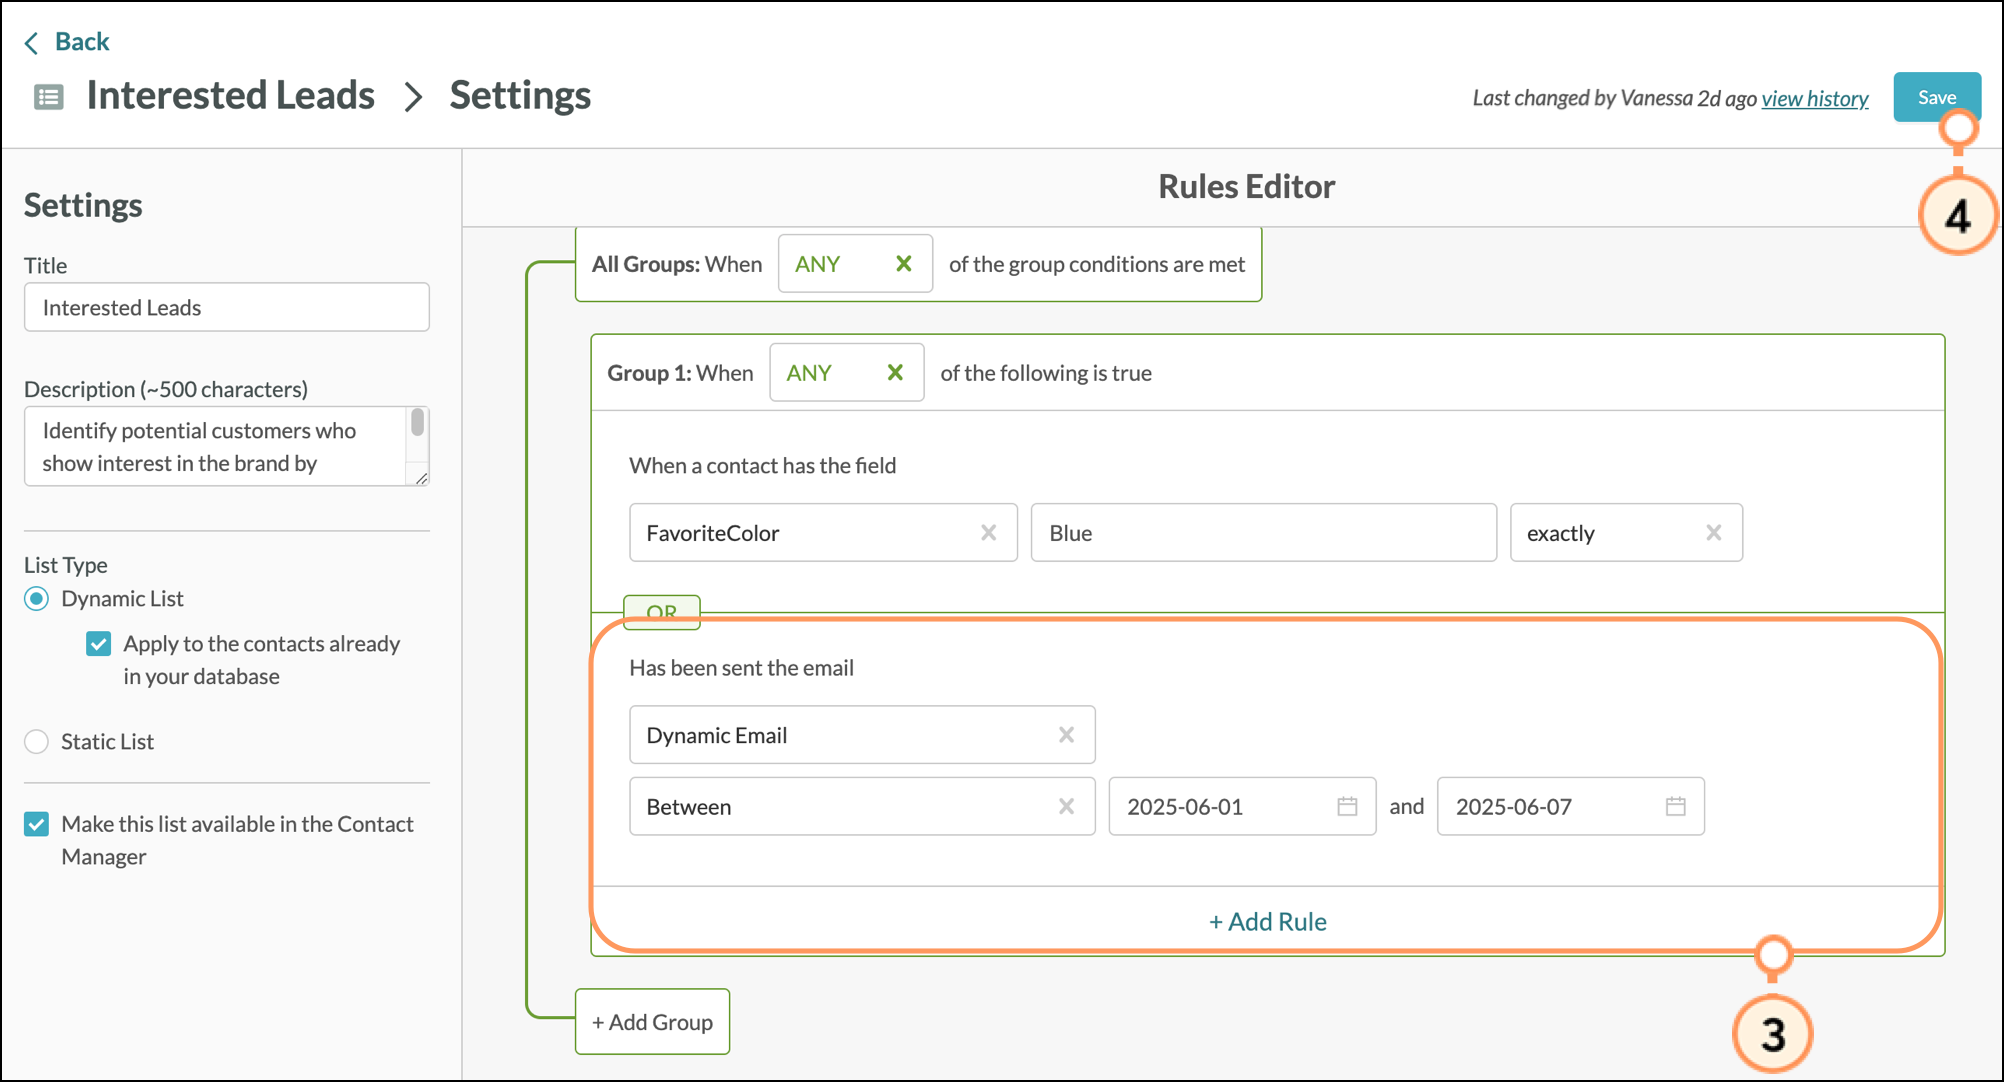
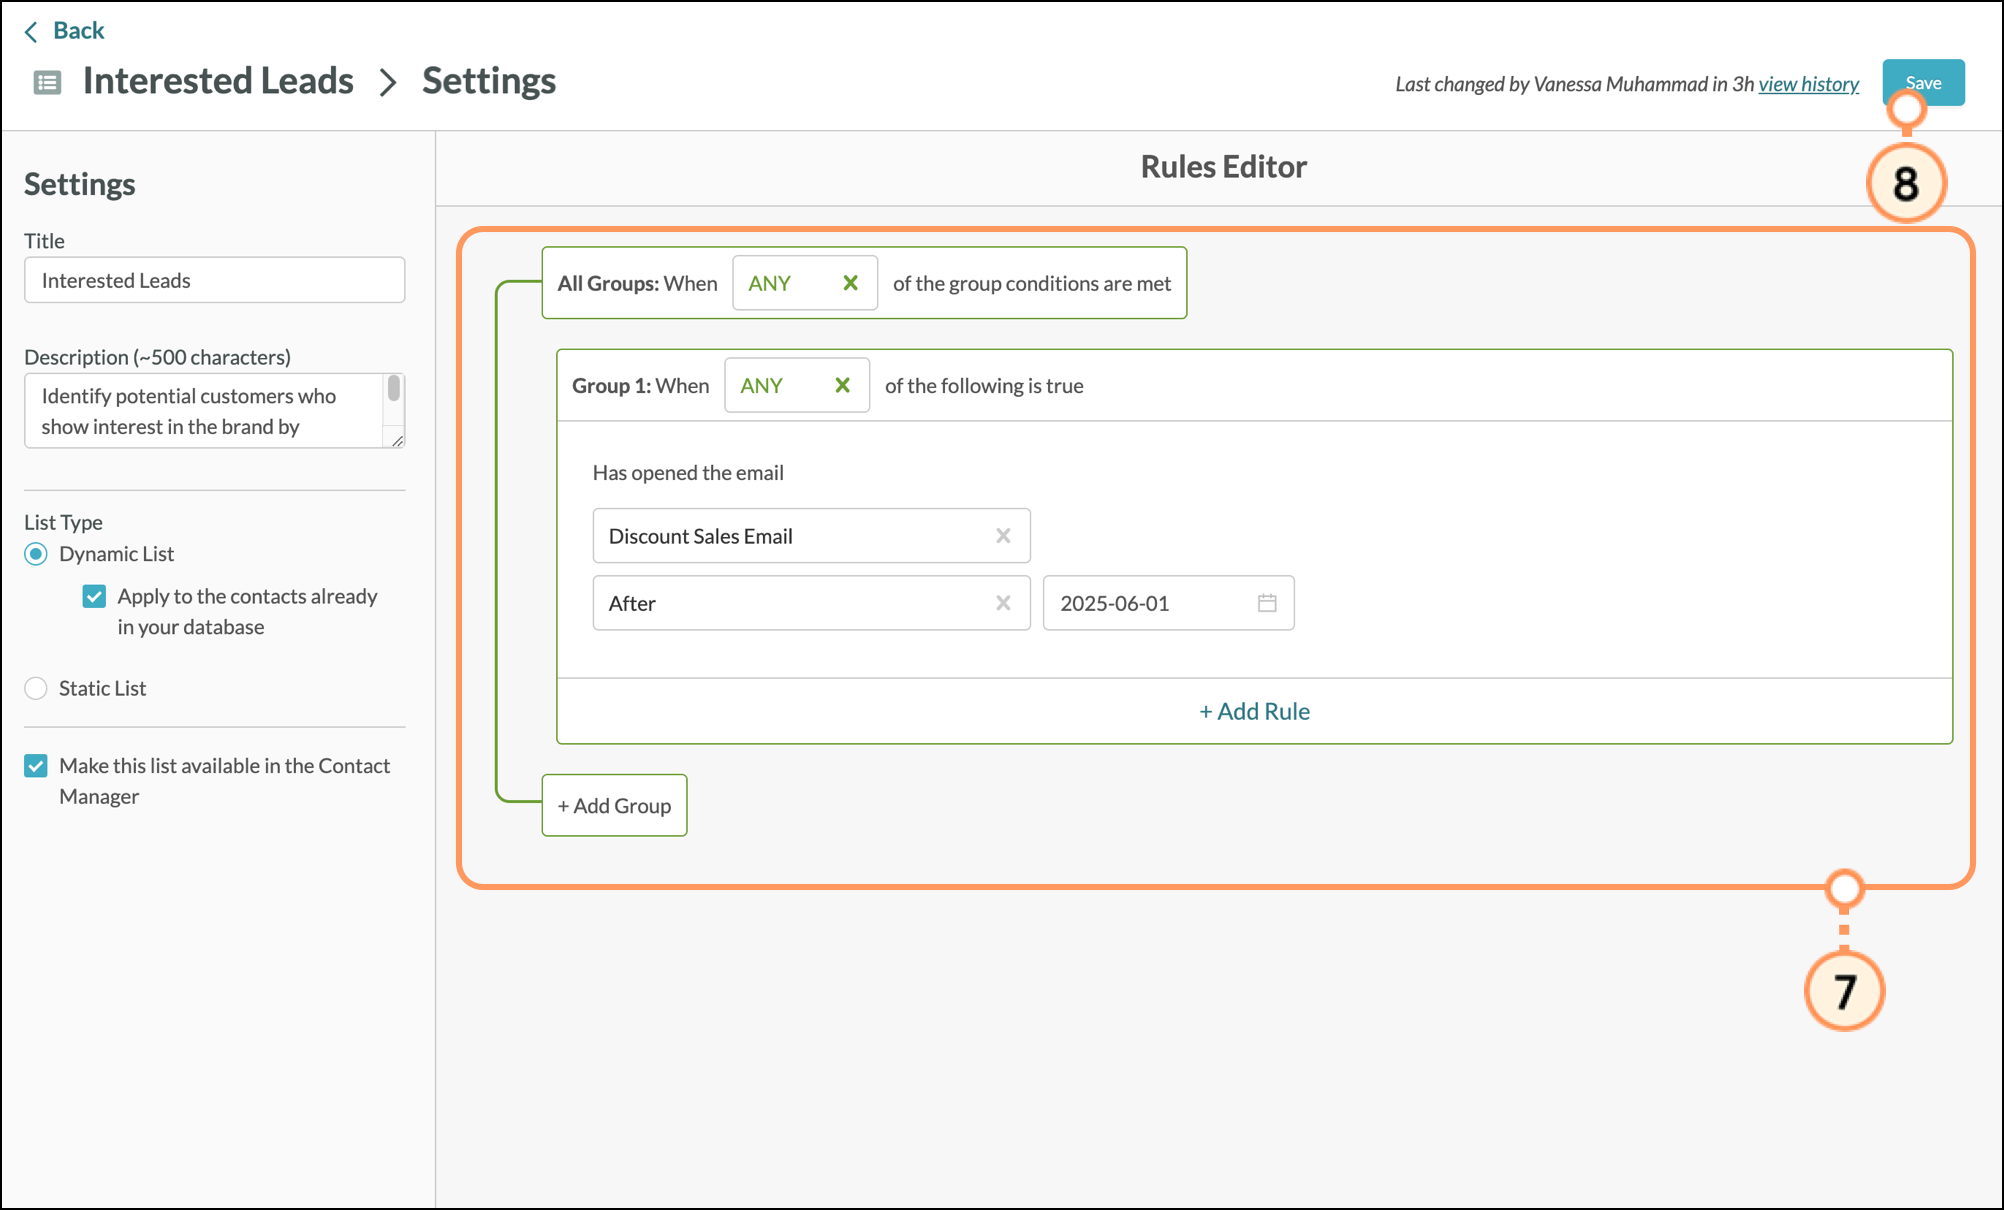
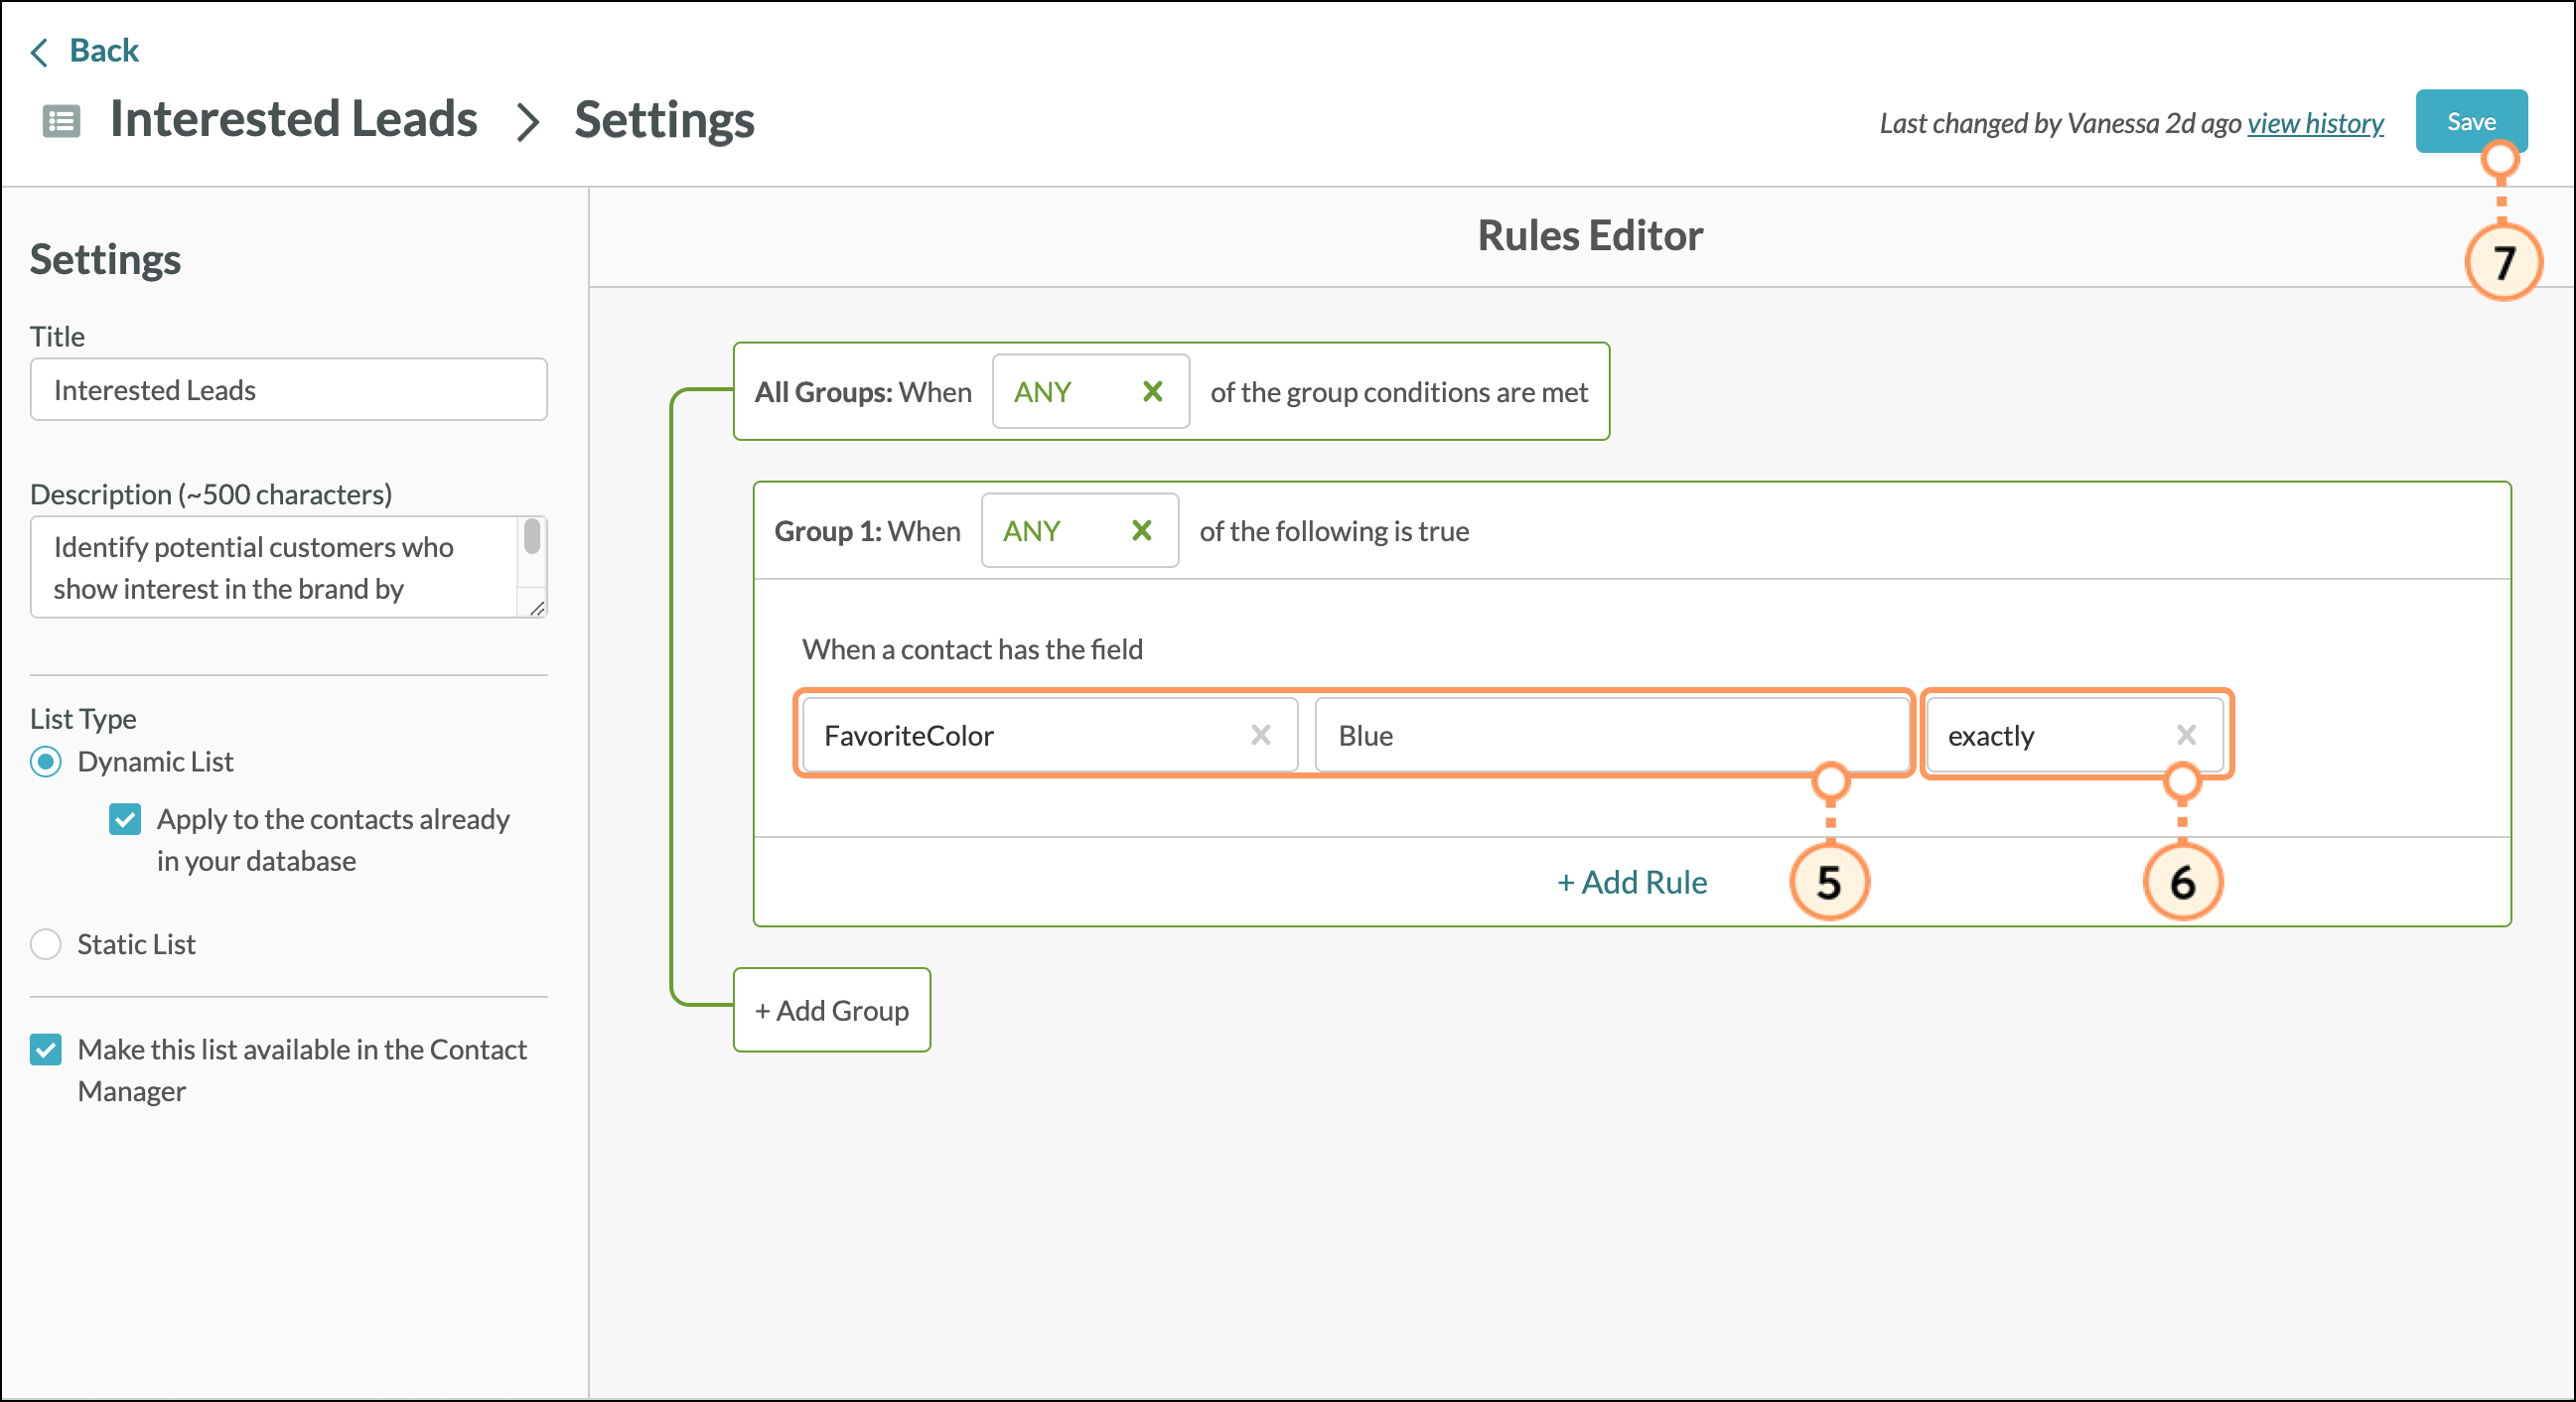
Individual rules can be placed together in rule groups.  This makes it easier to set a condition that all of the rules within the group must apply to, for more detailed organization. 

To add rule groups to lists, do the following:

  1. In your List's Settings, click Add Group.

    • Important: Lists have a limit of 100 rules per rule group.


  2. Select the desired rule from the list of available rules.


  3. Modify Group conditions as necessary. 

    1. Select When ANY of the following is true, to generate a list of contacts that meet any one of the included rules, or 
    2. Select When ALL of the following is true to generate a list of contacts that meet each of the included rules. 

  4. Configure rule parameters as necessary.

    • Note: Click  trash.png  Remove to remove rules or groups.
       
  5. Click Save.


Configuring Rule Logic

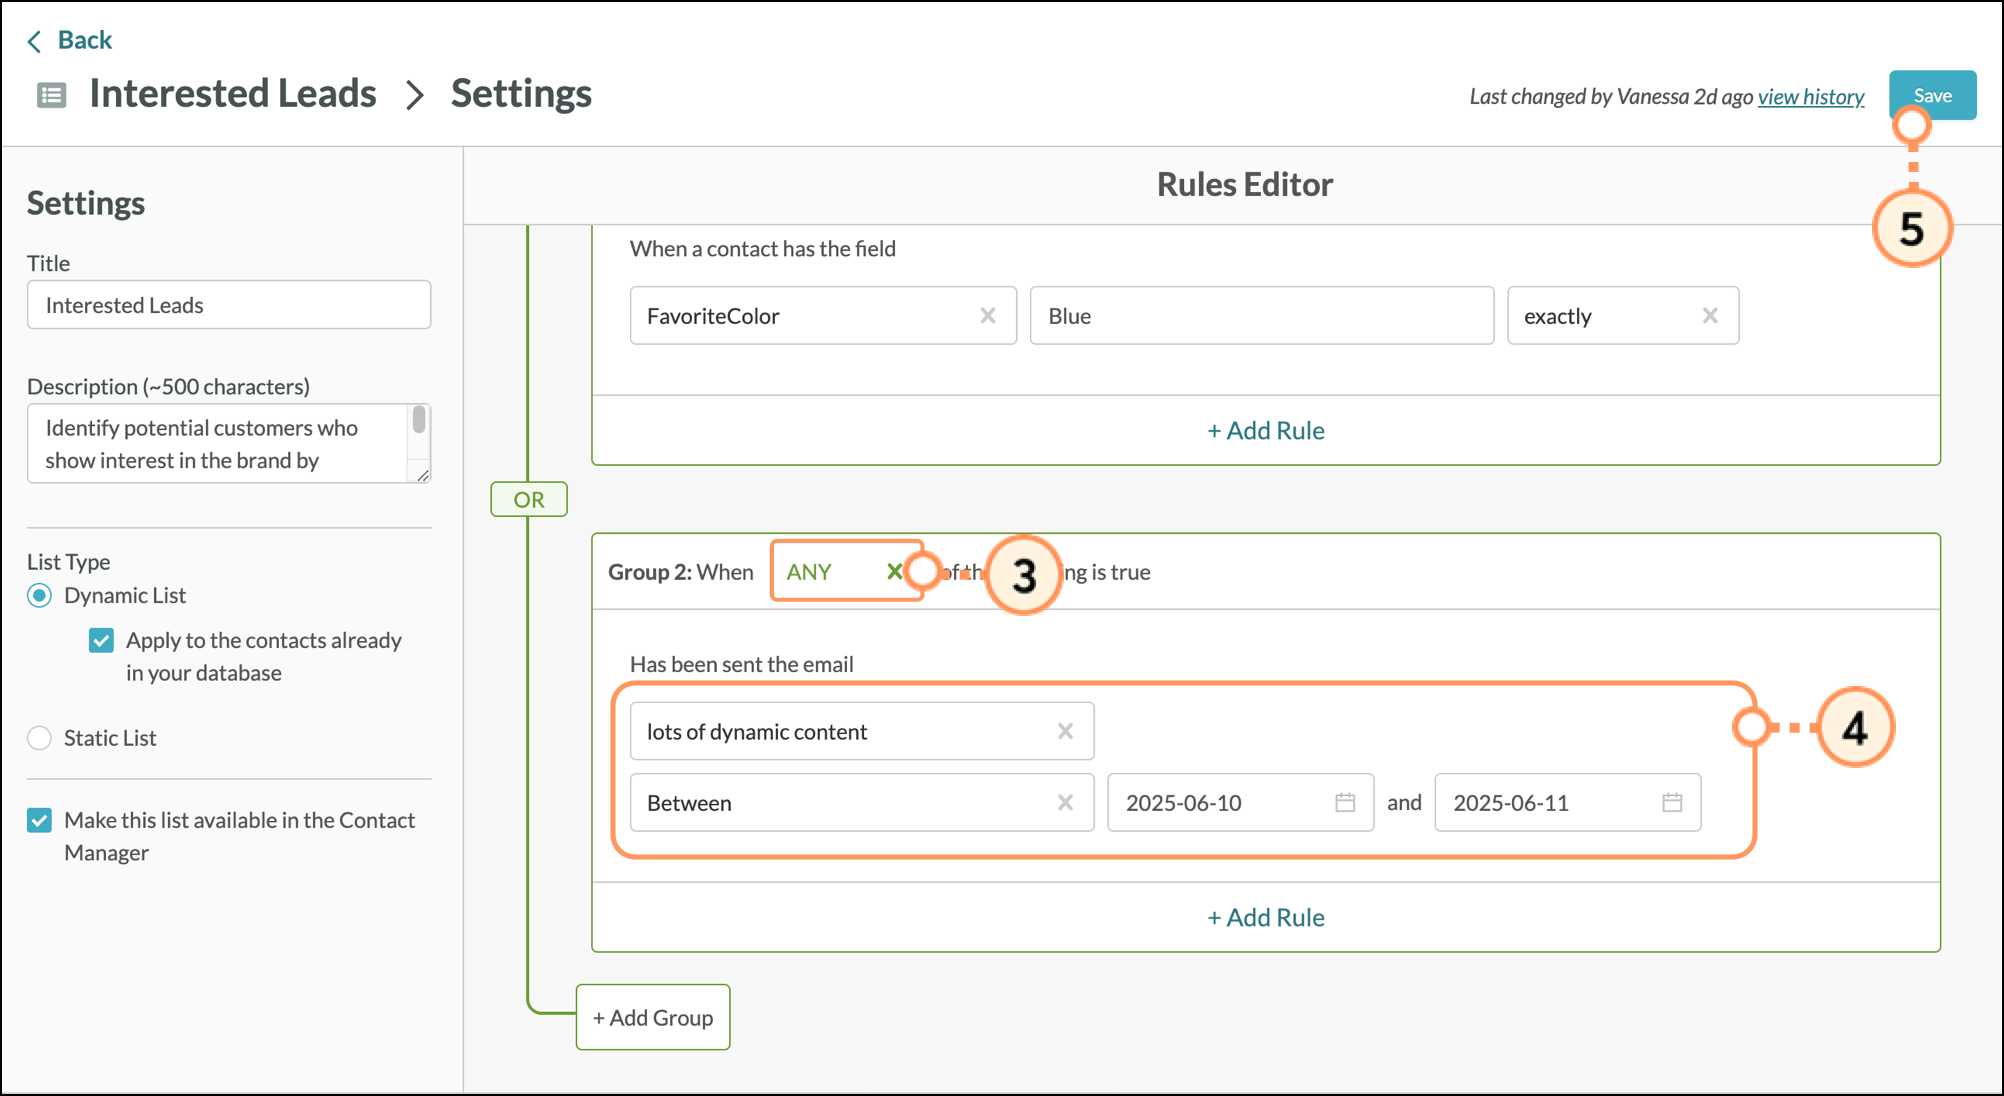
You can configure how rules work together in lists by using basic logic operators. Lists can be set to operate if a single rule is true, if a collection of different rules are true, or if all rules are true. This logic can be applied to individual rules or across entire rule groups.

To configure rule logic in rules-based lists, do the following: 

  1. In your rule group, select All or Any from the All Groups: When...of the following is true drop-down menu.
  2. Select All or Any from the Group #: When...of the following is true drop-down menu for each individual group.
  3. Click Save.


Additional List Features

There are other features and options available to lists. Refer to the following articles for more information on options available to rules-based lists:


Did this article answer your question?


Constant Contact Logo

Copyright © 2025 · All Rights Reserved · Constant Contact · Privacy Center