Lead Gen & CRM
How can we help you?
Search our help articles, video tutorials, and quickstart guides

You've got this. You've got us. Search our Knowledge Base to quickly find answers to your questions.

Editing Rules-Based Lists

Article: 000050653
Updated: July 26, 2024

Lead Gen & CRM allows you to edit Rules-based lists at any time. This article explains how to manually add members to lists, as well as renaming lists, editing list settings, and setting a rule-based list to dynamic or static.


Users:
Administrators 
Company Managers 
Marketing Managers 
Sales Managers  
Salespersons  
Jr. Salespersons  

Light Bulb IconTip: Are you looking for information about Constant Contact’s Email and Digital Marketing product? This article is for Constant Contact’s Lead Gen & CRM product. Head on over to the Email and Digital Marketing articles by clicking here. Not sure what the difference is? Read this article.


Manually Adding Members to Rules-Based Lists

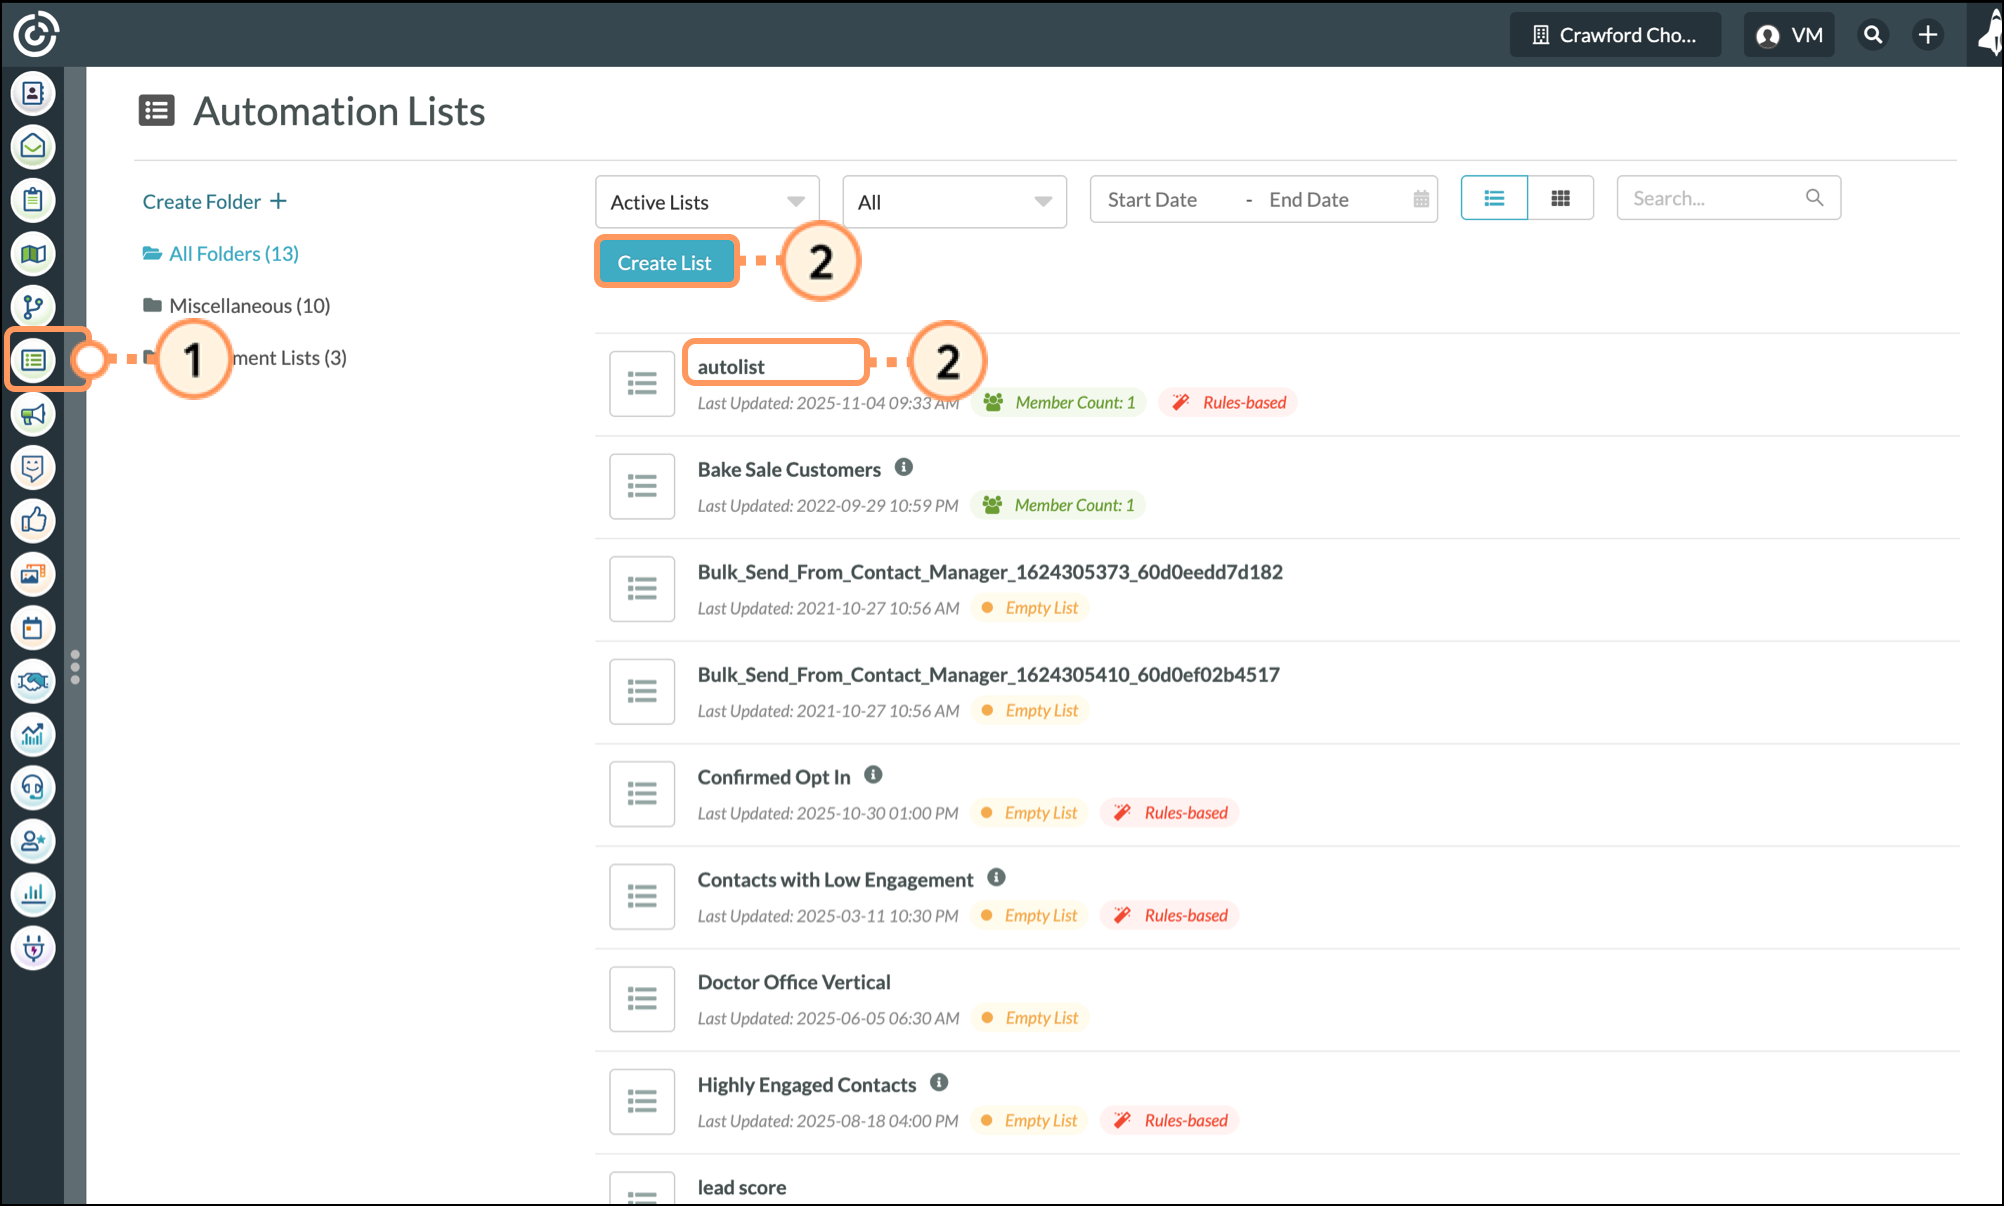
There may come a time when you need to manually add a lead into a list that, because they did not meet rule criteria, they otherwise were not brought into.

To manually add leads to rules-based lists, do the following:

  1. Click Lists in the left toolbar.
  2. Select an existing list or create a new list.

    Select Lists in the left toolbar then click the list title
     
  3. Enter the desired contact's name into the Add a New Member field.
  4. Select the desired contact from the list that appears.

    Search contact list in search bar in the top right corner

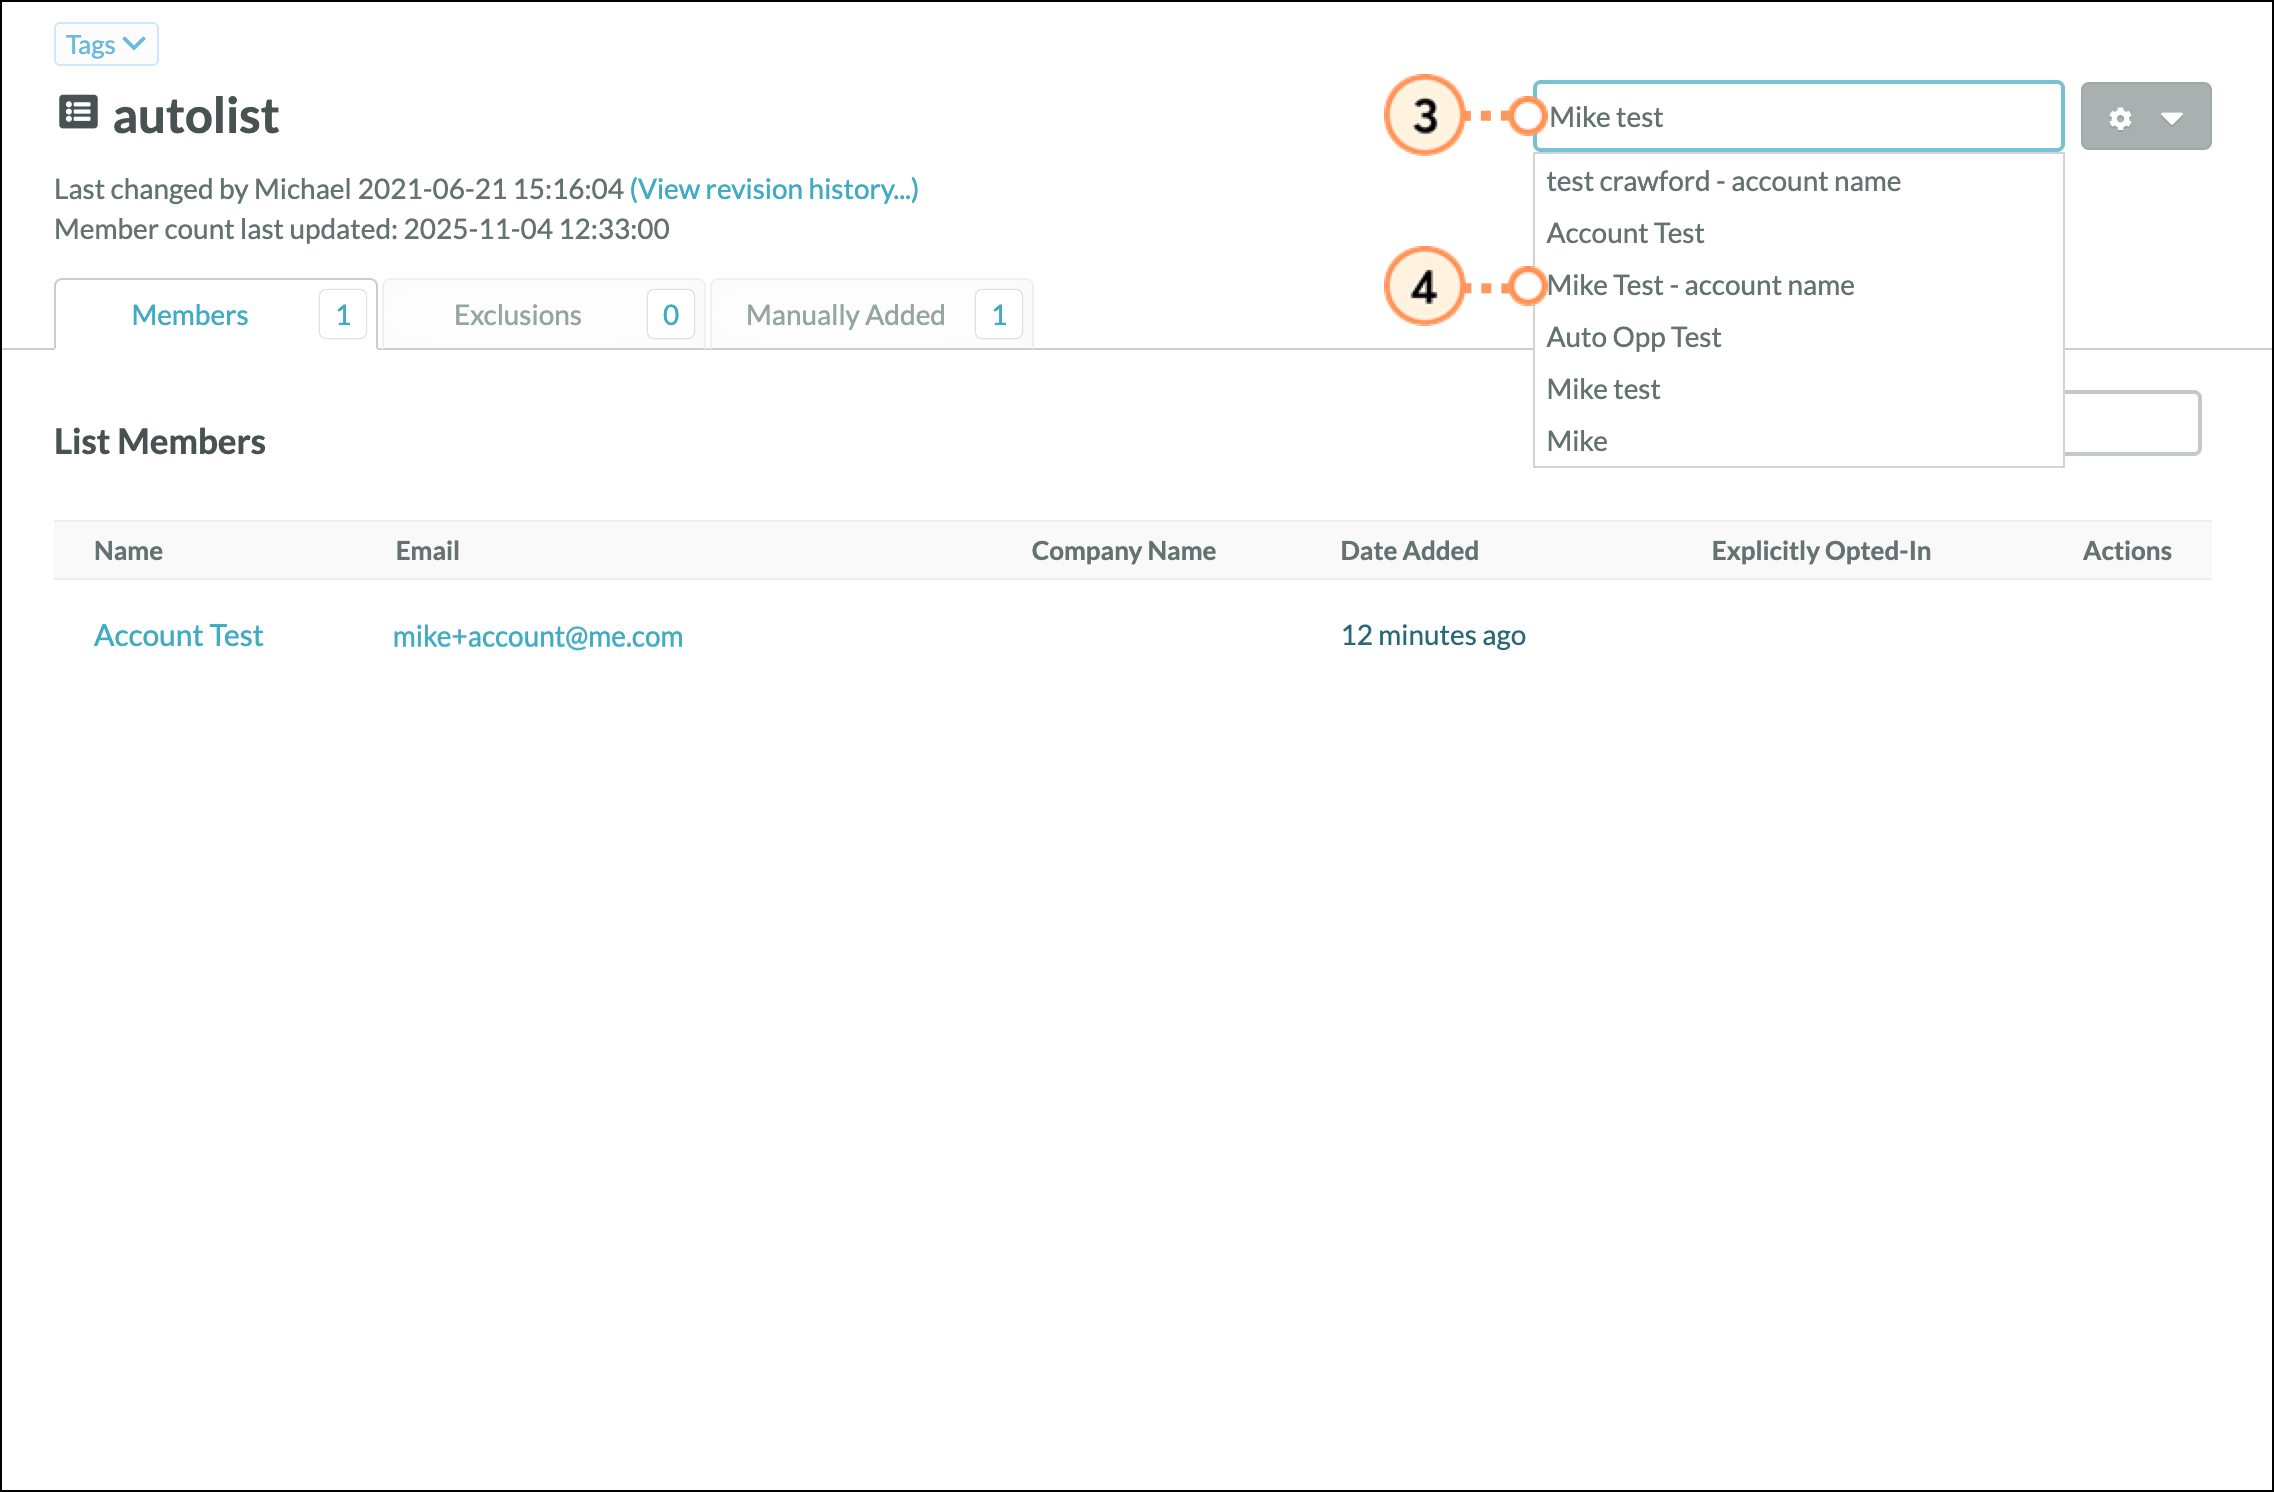
List members that are manually added will appear in the Manually Added tab.


Editing Settings for Rules-Based Lists

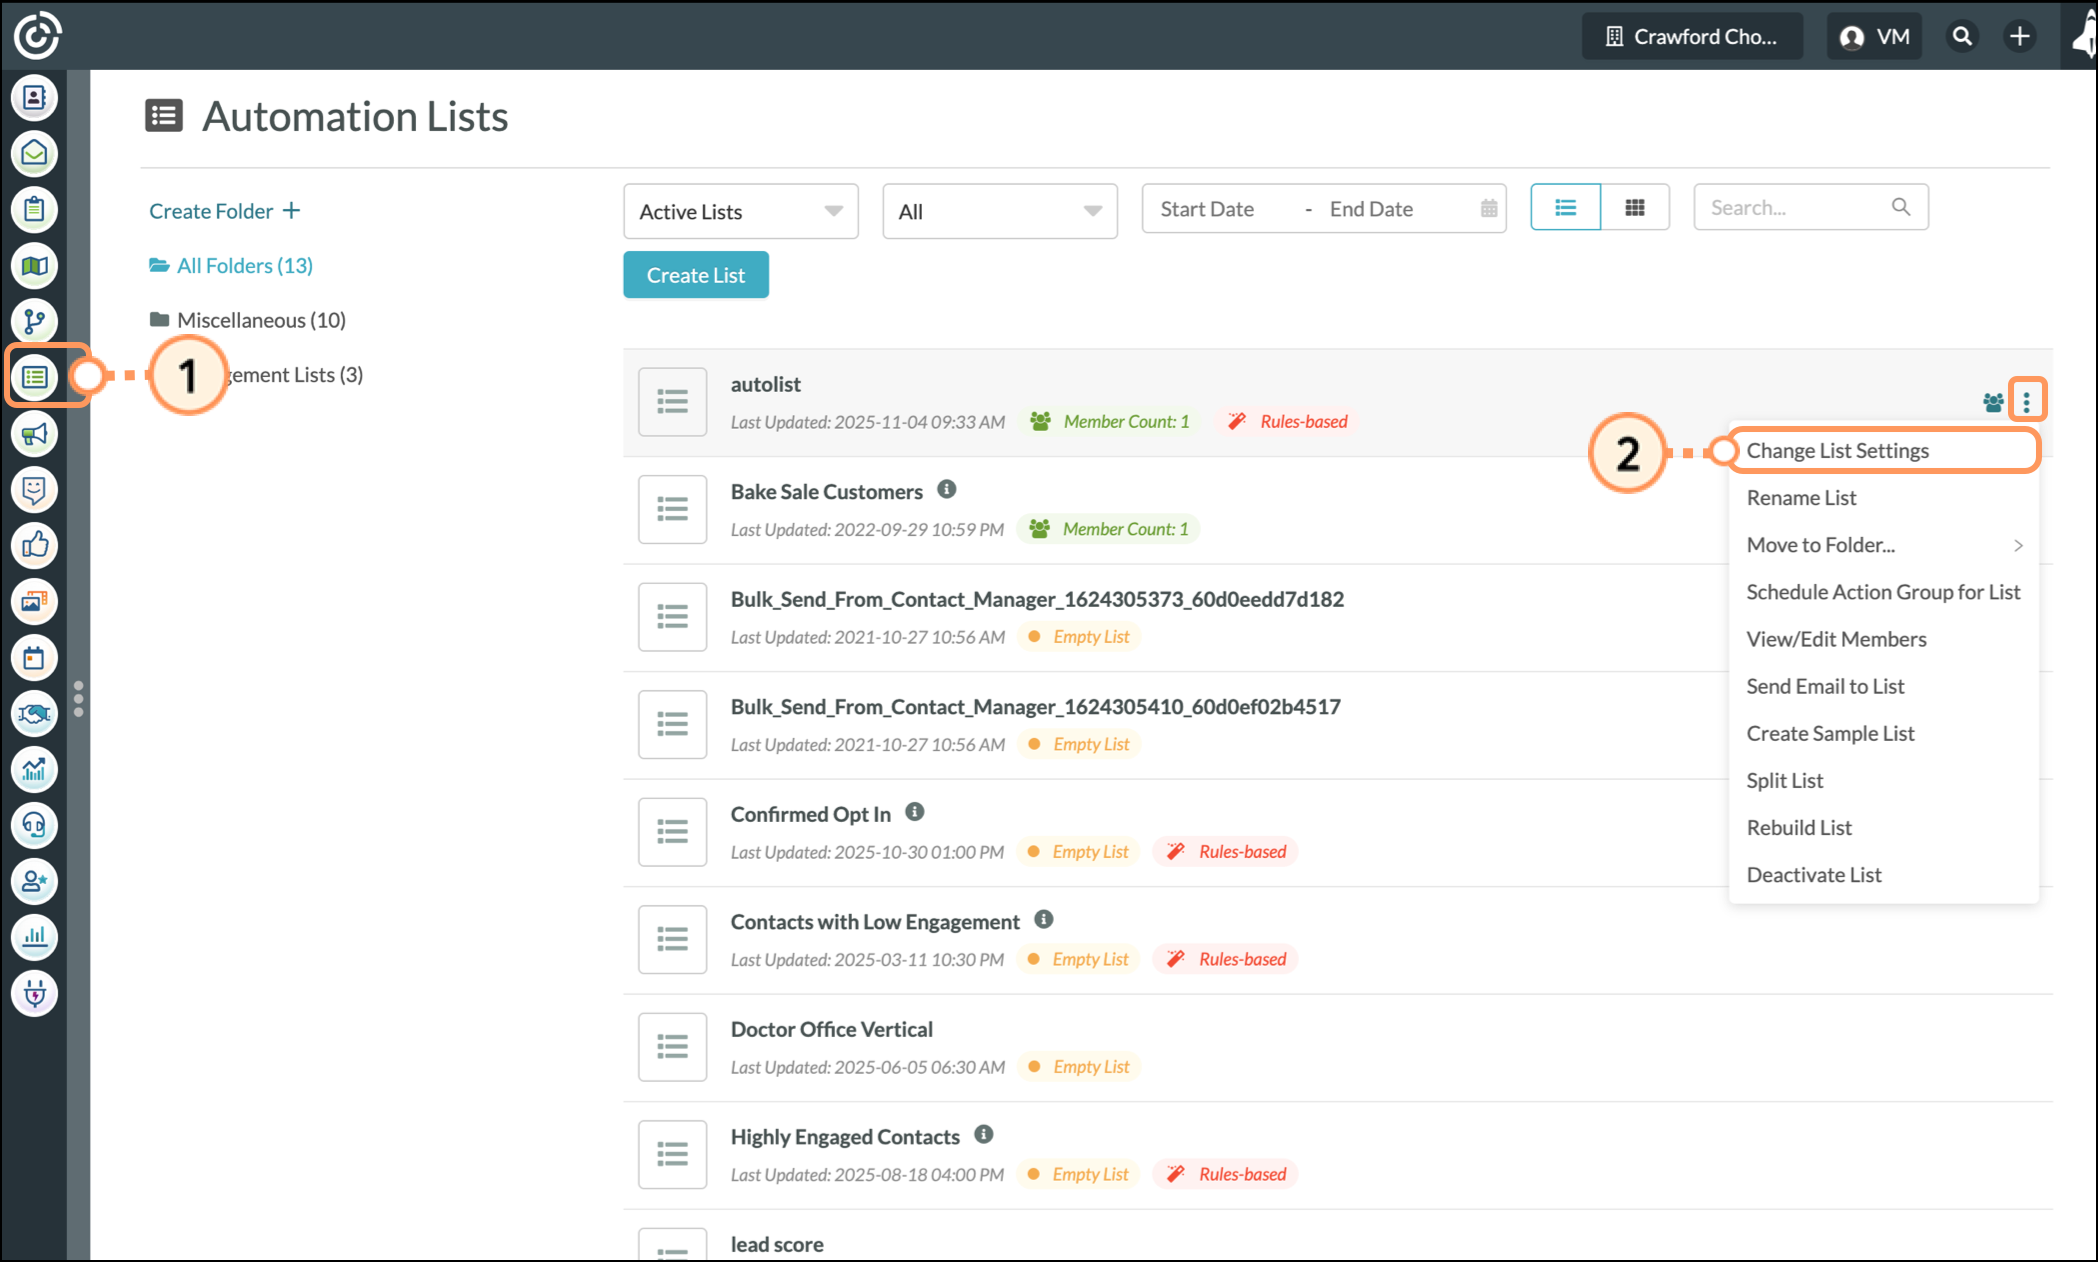
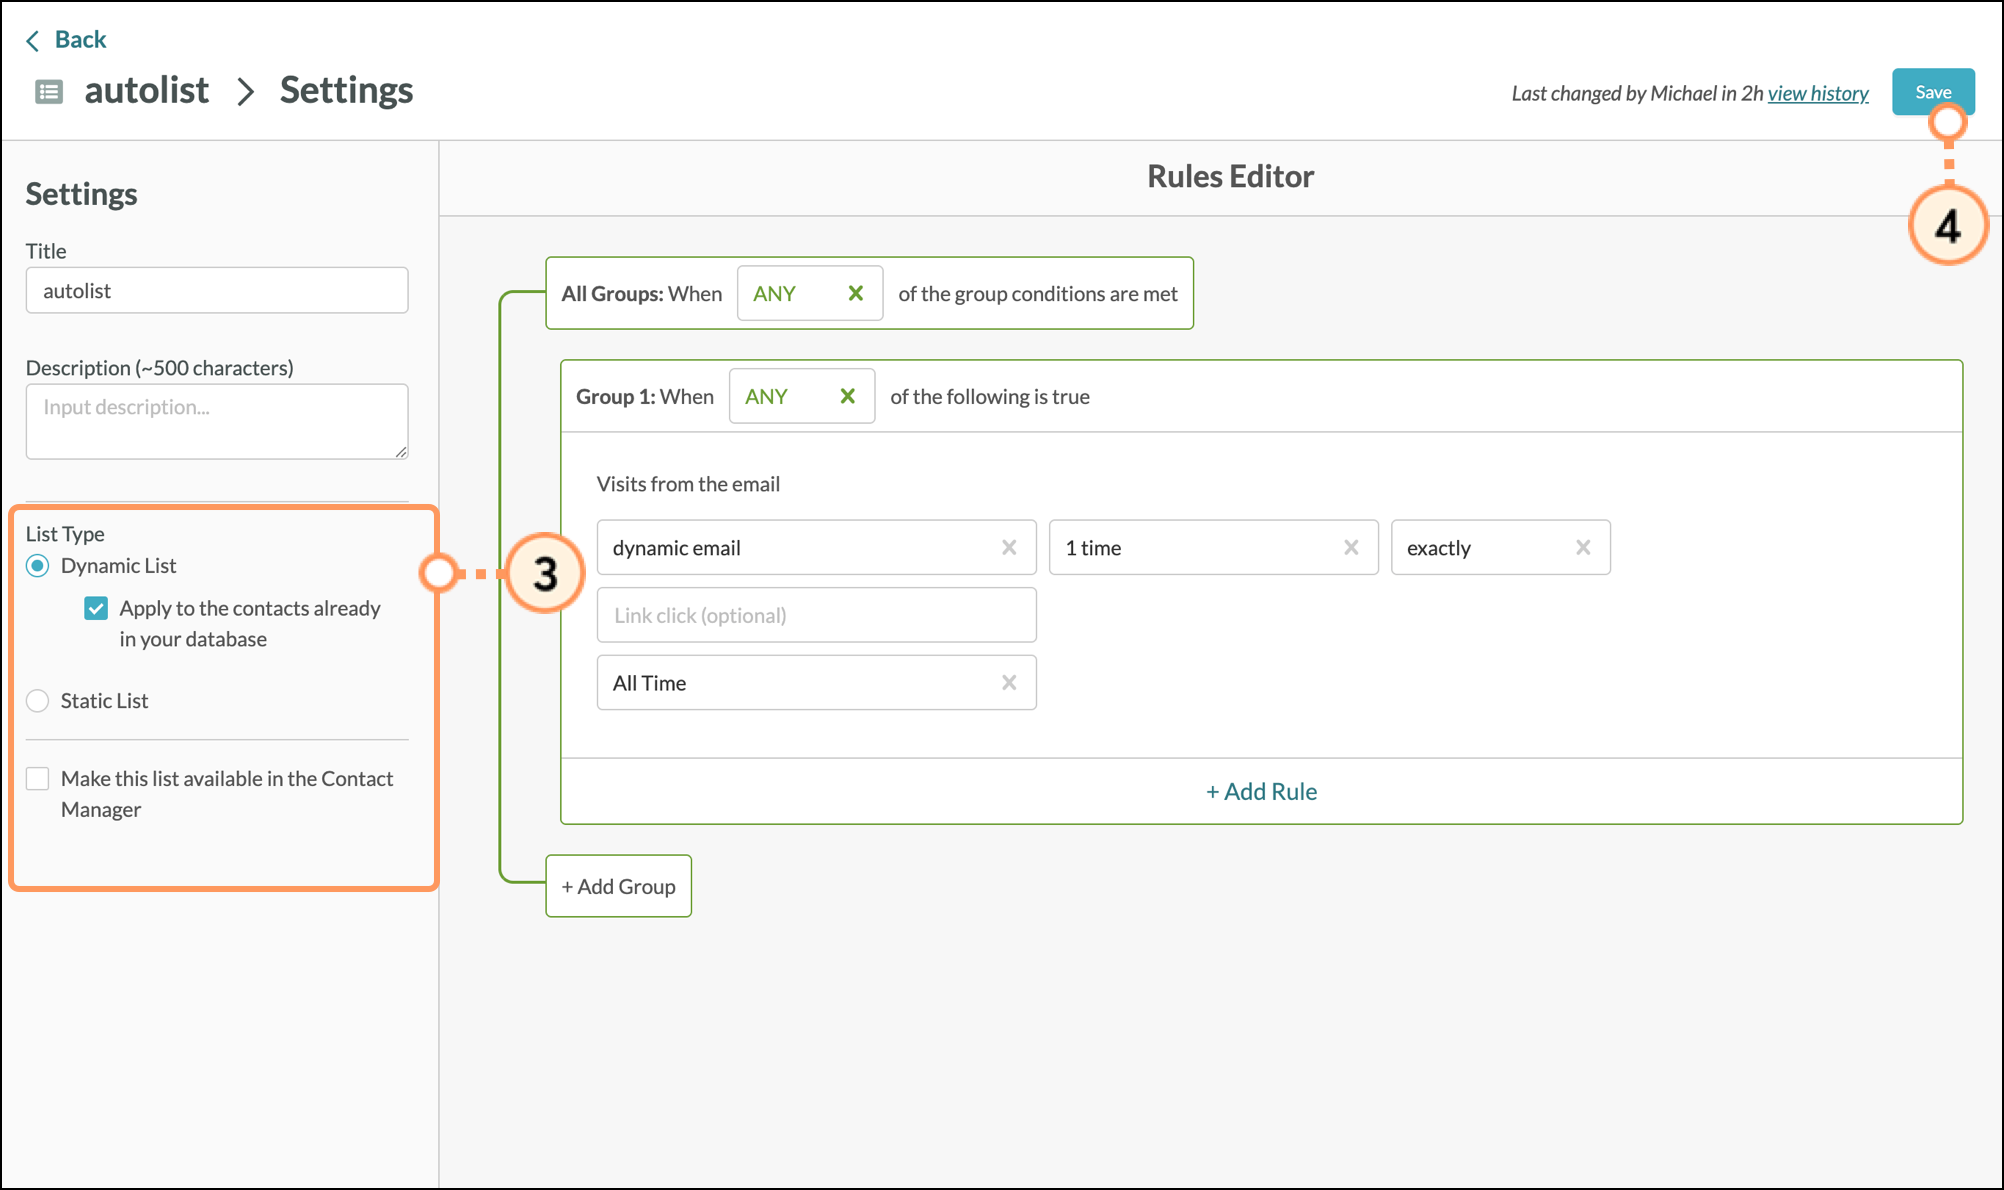
You can modify rules-based list settings at any time after a list is created. To modify rules-based list parameters, do the following:

  1. Click Lists in the left toolbar. 
  2. Locate the desired rules-based list and click Options > Change List Settings.


    Click on lists in the left corner of the app
     
  3. Add groups and rules as necessary.
    • Note: Click  trash.png  Remove to remove rules or groups.
  4. Configure group and rule logic as necessary.
  5. Configure list settings as necessary in the Settings panel.
  6. Click Save. 

    Modify your list


Setting Existing Rules-Based Lists as Dynamic or Static

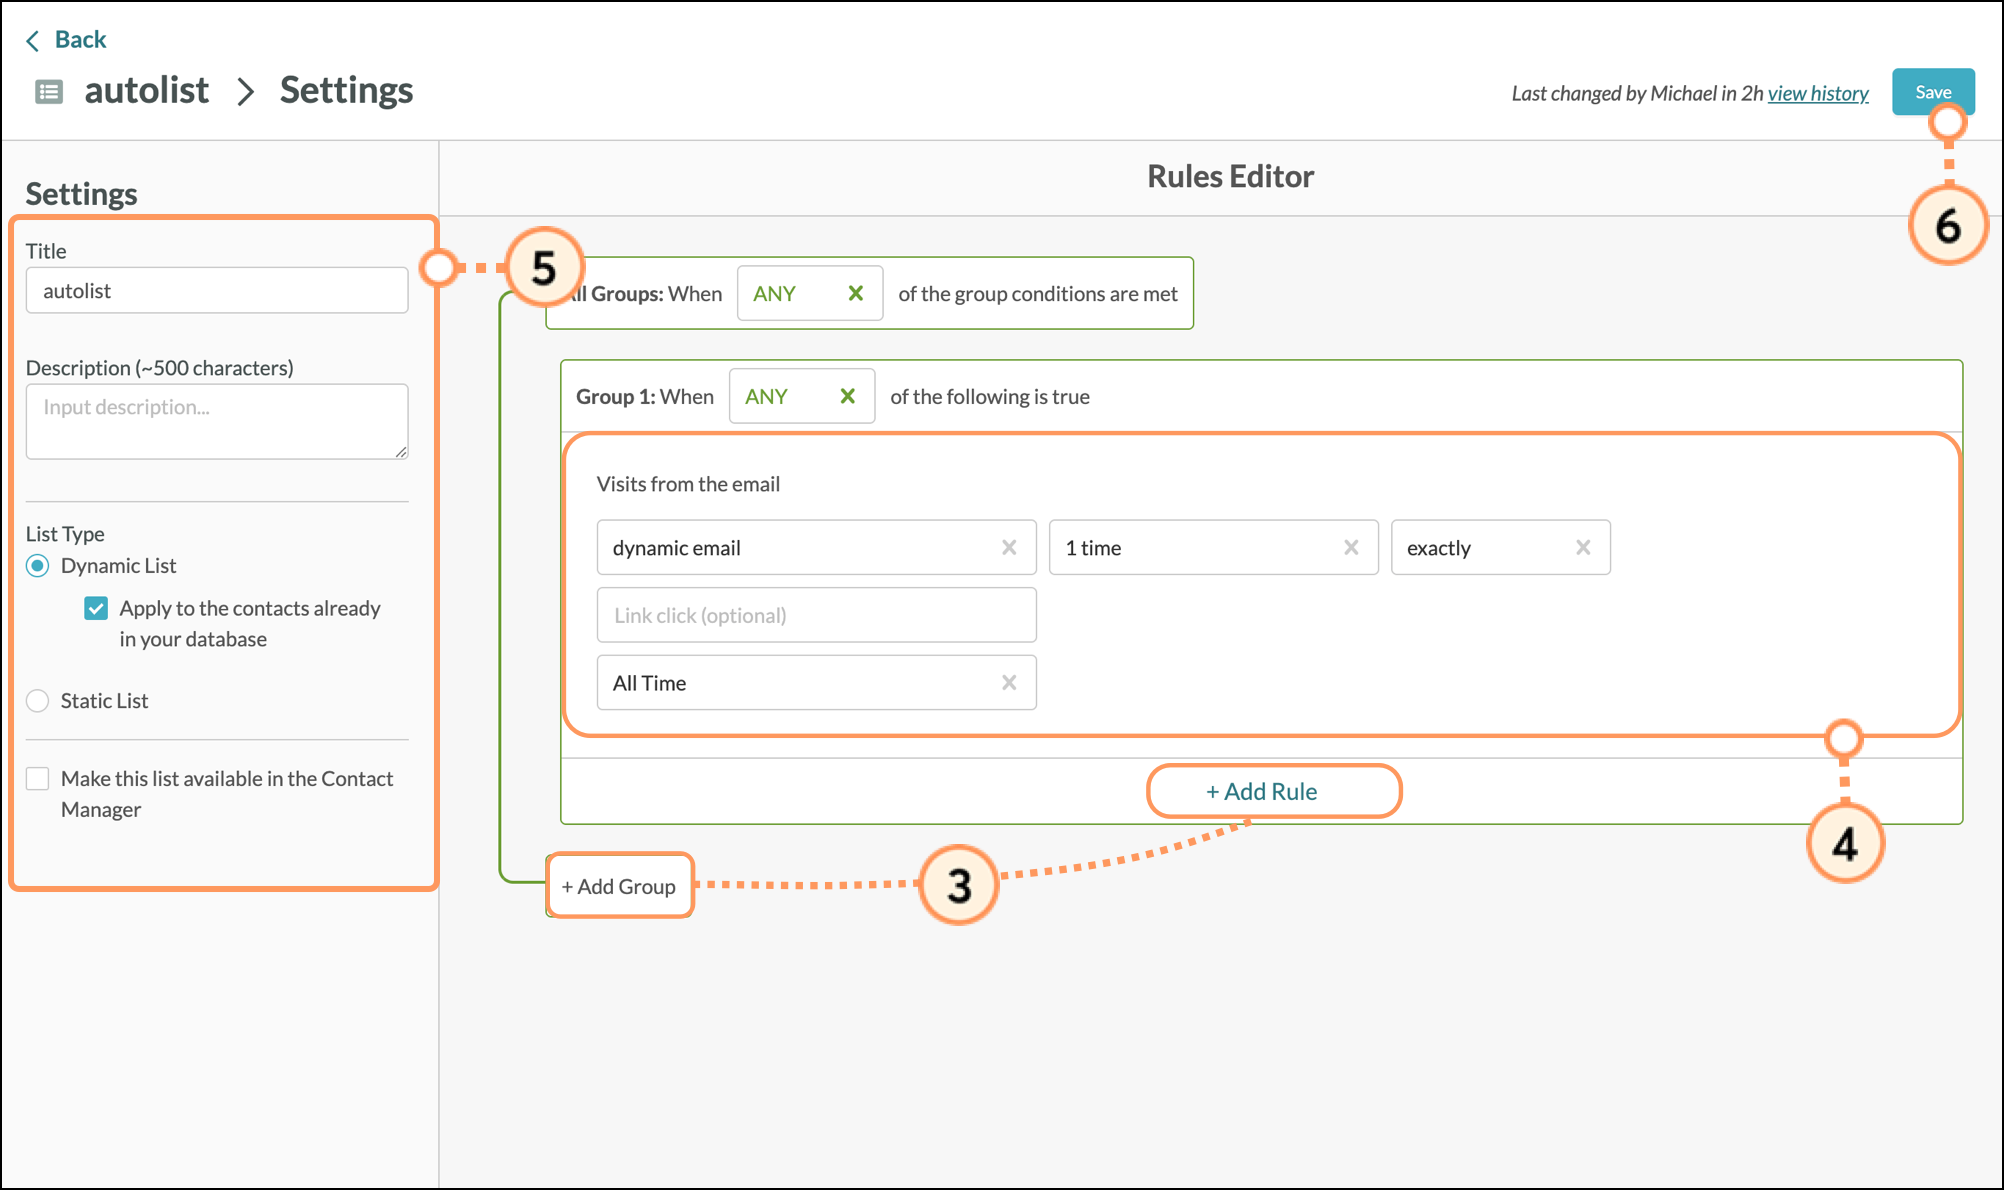
There are two types of lists: dynamic and static.

Dynamic lists build over time. Dynamic lists are lists that will keep adding leads as they fulfill the criteria you have specified. Additionally, there is a toggle to apply changes to the contacts already in your database. If this toggle is off, dynamic lists will start empty and only apply leads as they meet your criteria going forward. If this toggle is on, it will apply the rules to existing contacts as well as those in the future. Dynamic lists can be started from scratch, or they can pull in all the leads who qualify for the list based on the criteria at the time of build.

In contrast, static lists do not build over time. Static lists are lists you can apply rules to, but build only one time. They do not proactively listen for further changes and apply leads as they meet your criteria. Static lists will essentially take a snapshot of your database and pull in all leads that meet the requirements at the time of list build.

Be aware that engagement lists cannot be modified, as they are system lists. Similarly, manual lists do not have list settings, since they are not rules-based.

To set an existing list as either dynamic or static, do the following

  1. Click Lists in the left toolbar.
  2. Locate the desired rules-based list and click Options > Change List Settings.

    Click Options then Edit List Settings 
  3. Click either the Dynamic or Static radio button in the Settings panel.
  4. Click Save.

    Select list type dynamic or status


Renaming Lists

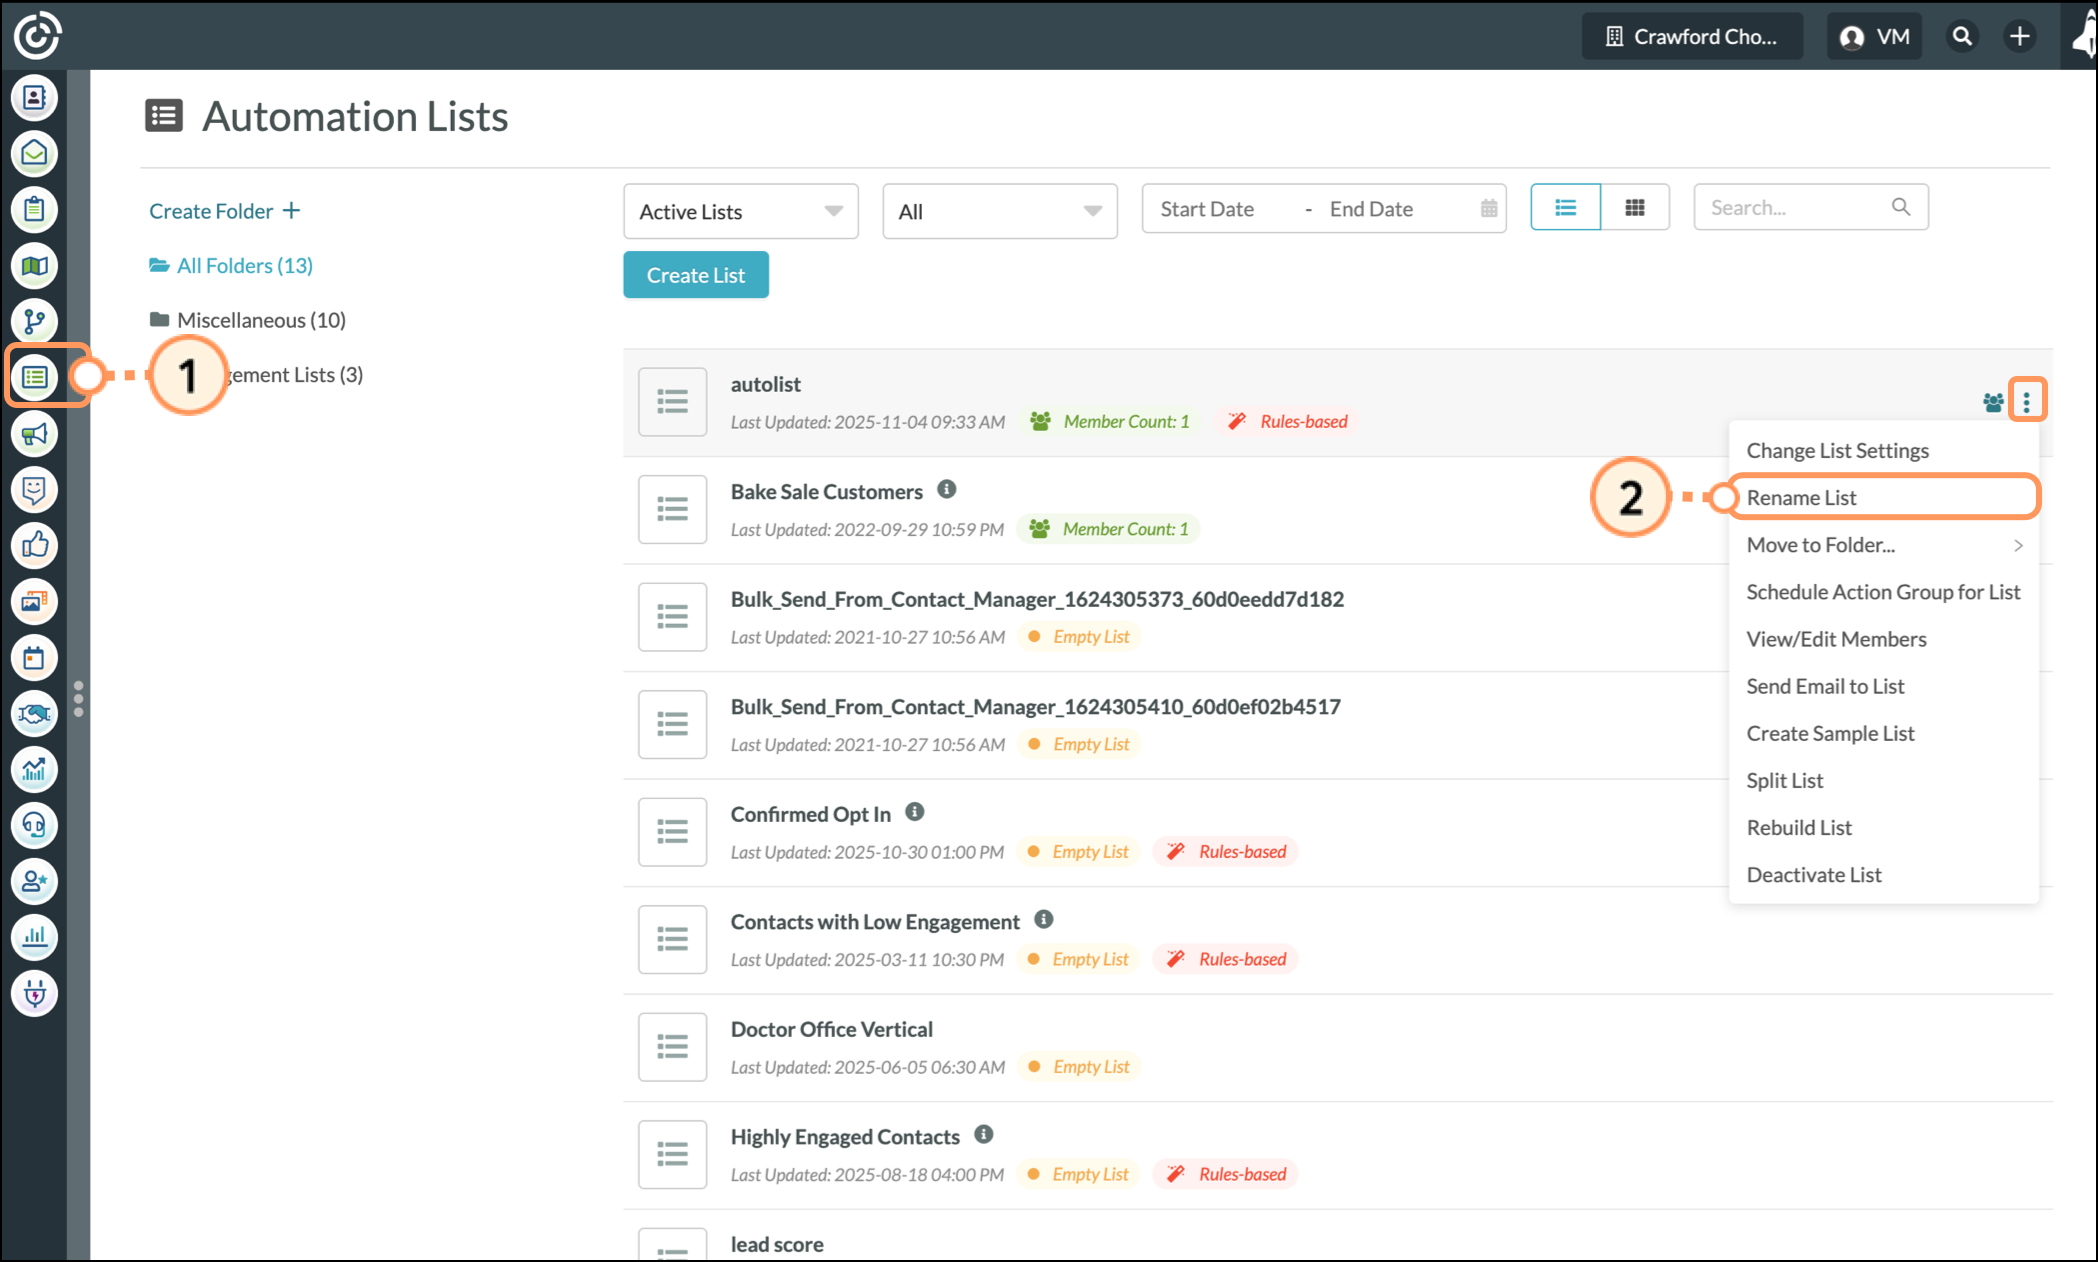
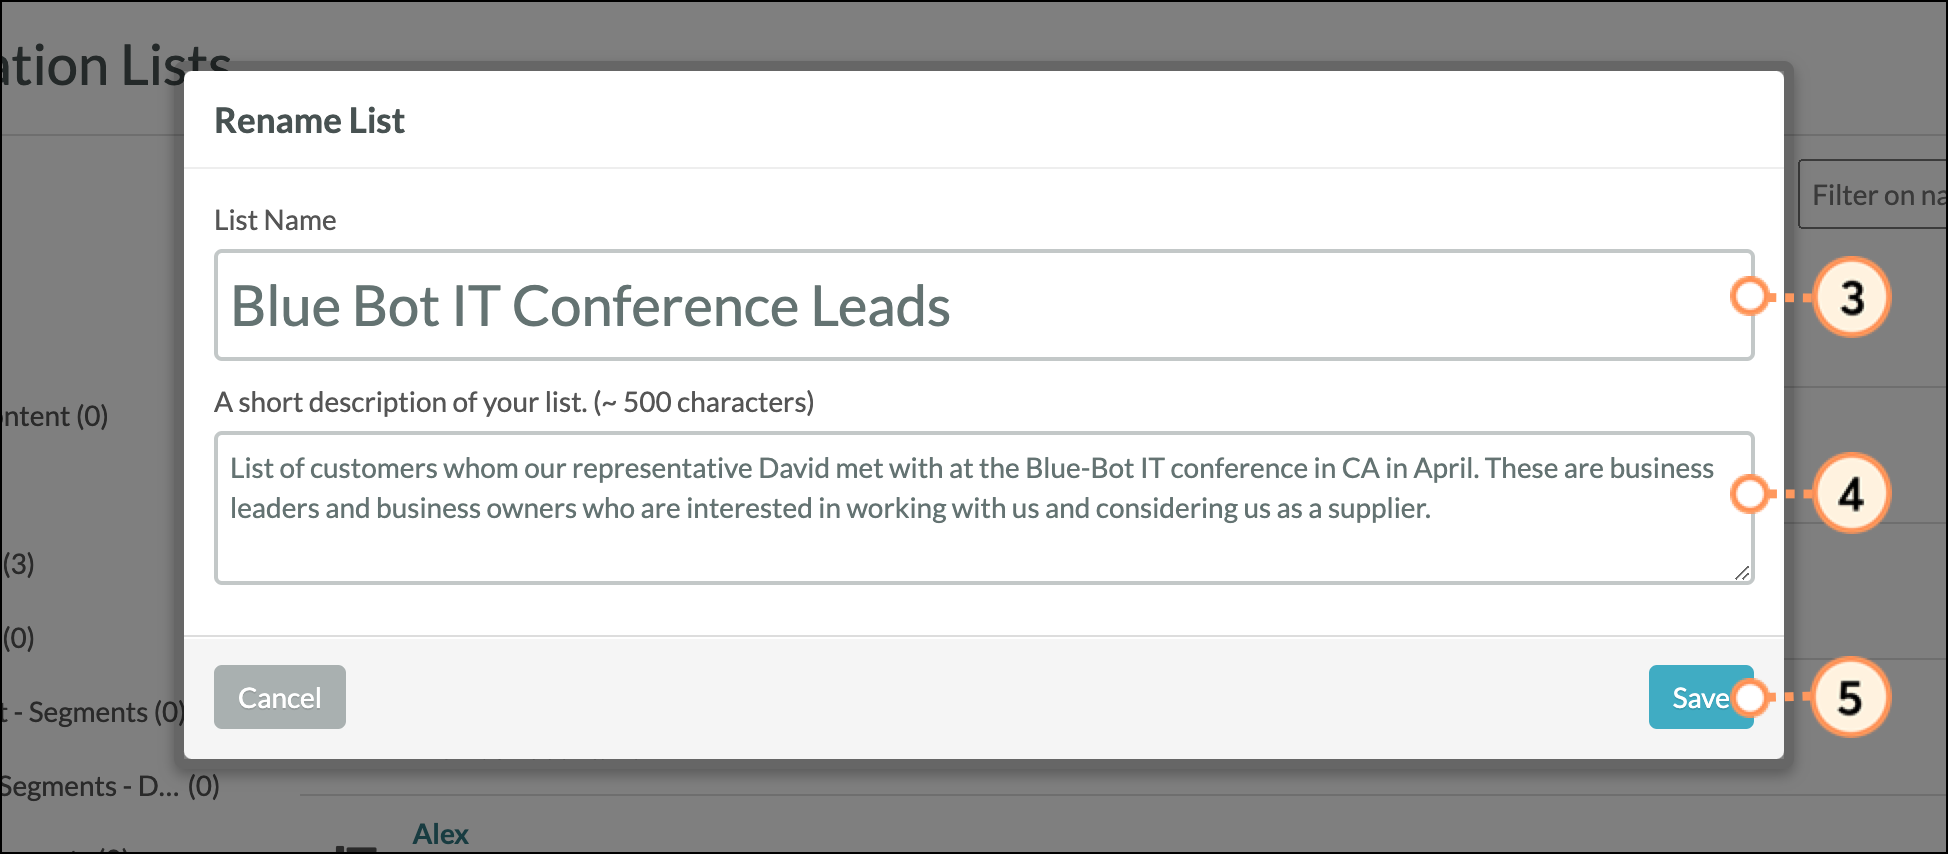
You can rename lists as necessary. To rename lists, do the following:

  1. Click Lists in the left toolbar.
  2. Locate the desired rules-based list and click Options > Rename List.

    Click Lists in the left corner, then click the Settings icon and select Rename 
  3. Enter a name for the list in the List Name field.
  4. Optionally, enter a description for the list in the A short description field.
  5. Click Save.

    Enter a new list name and description then click the blue save button


Did this article answer your question?


Constant Contact Logo

Copyright © 2025 · All Rights Reserved · Constant Contact · Privacy Center