Lead Gen & CRM
How can we help you?
Search our help articles, video tutorials, and quickstart guides

You've got this. You've got us. Search our Knowledge Base to quickly find answers to your questions.

Setting Email Tags

Article: 000050233
Updated: July 17, 2024

Tag your emails to organize and sort them. With tags, it's easy to organize your emails and target specific emails for use in other areas of the Lead Gen & CRM product.

Adding tags to your emails makes it easy to group and report on your emails. Lead Gen & CRM enables you to add tags to emails and to add tags to lists.

Note: The new email editor focuses on rendering and ease of use. Email tags are available in the older editor. To learn more about the new email editor, read Overview of the New Email Editor. Edit or clone a classic email template to access the older email editor. 

In this article, you'll learn how to tag your emails.


Users:
Administrators 
Company Managers 
Marketing Managers 
Sales Managers  
Salespersons  
Jr. Salespersons  


Setting Tags On Emails

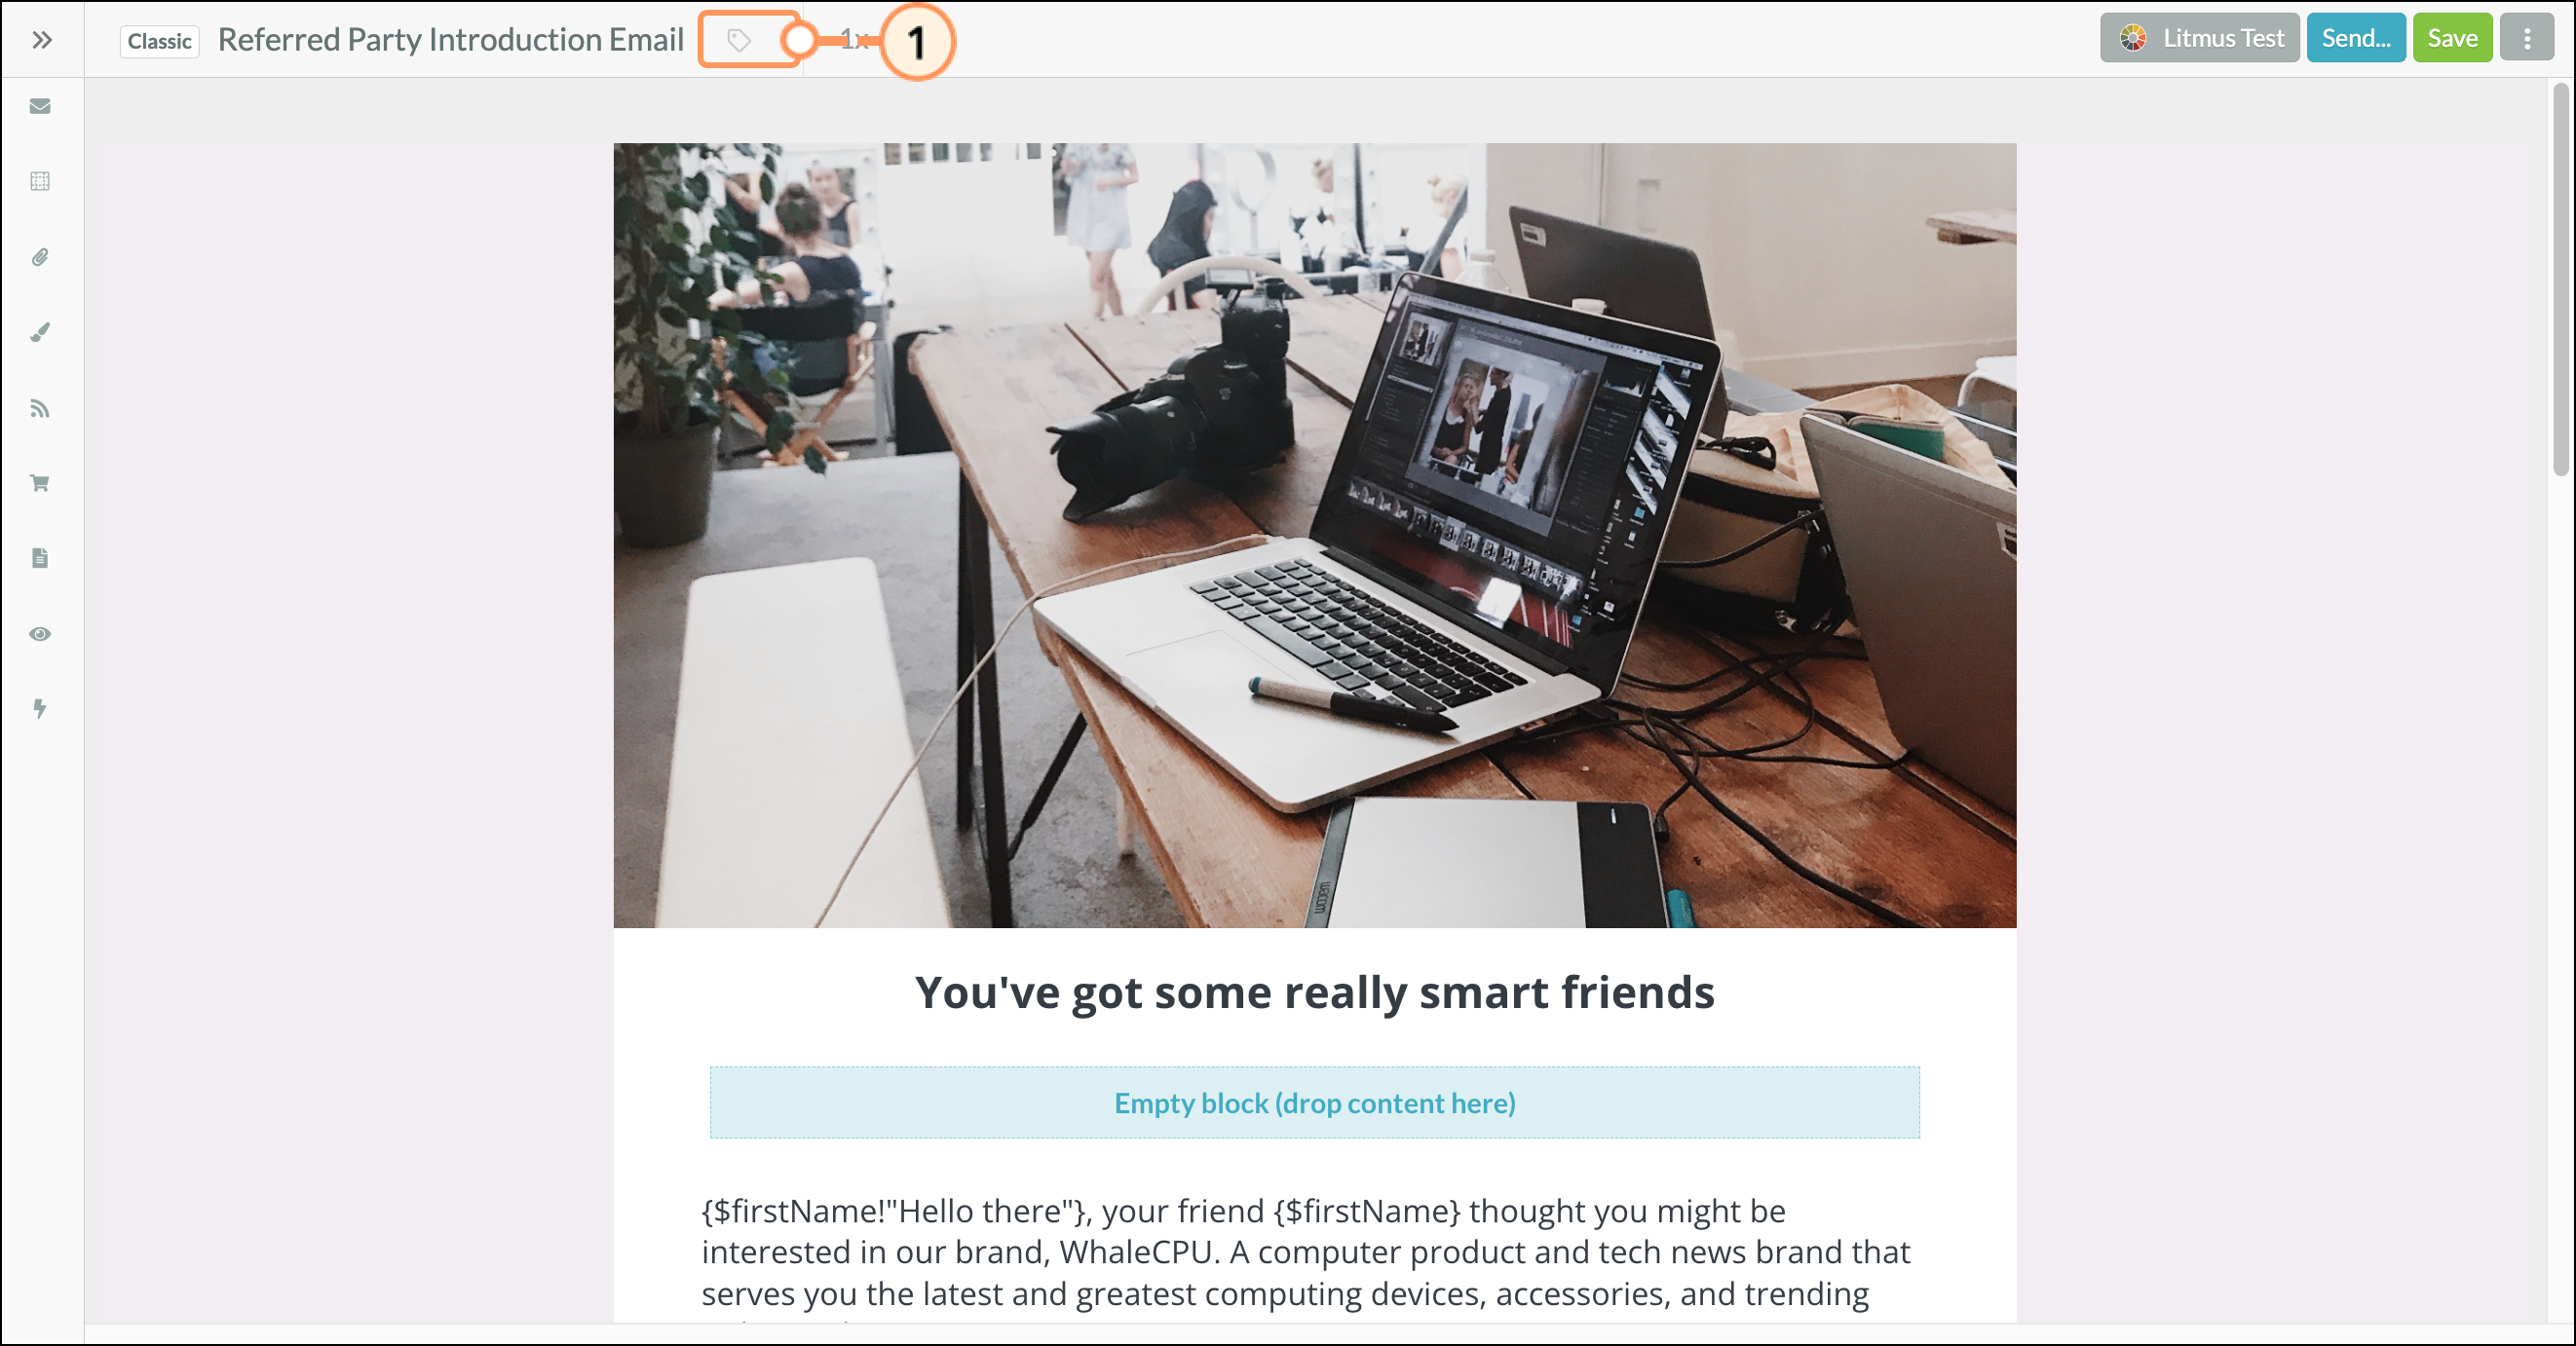
To set tags, click on Email in the Lead Gen & CRM platform's left toolbar. Before you can add tags to emails and begin tracking them, you must create or edit an email

Note: The new email editor focuses on rendering and ease of use. Email tags are available in the older editor. To learn more about the new email editor, read Overview of the New Email Editor. Edit or clone a classic email template to access the older email editor. 

  1. In the Email Designer, click on   Email Tag  Email Tags, next to the title of your email.


  2. A popup may appear if your email does not have any tags already set. Search for an existing tag or enter a new tag in the popup to add it. Press enter after you've typed in your new tag.


  3. Click on the Tags dropdown, then click   Edit Icon Edit Email's Tags.


  4. In the popup that appears, search for existing Tags or create new Tags
  5. When finished, click Close.


  6. Be sure to Save your changes to the email.


Note: After setting tags, click  Email Tag  Email Tags again to hide the tag bar if needed. 

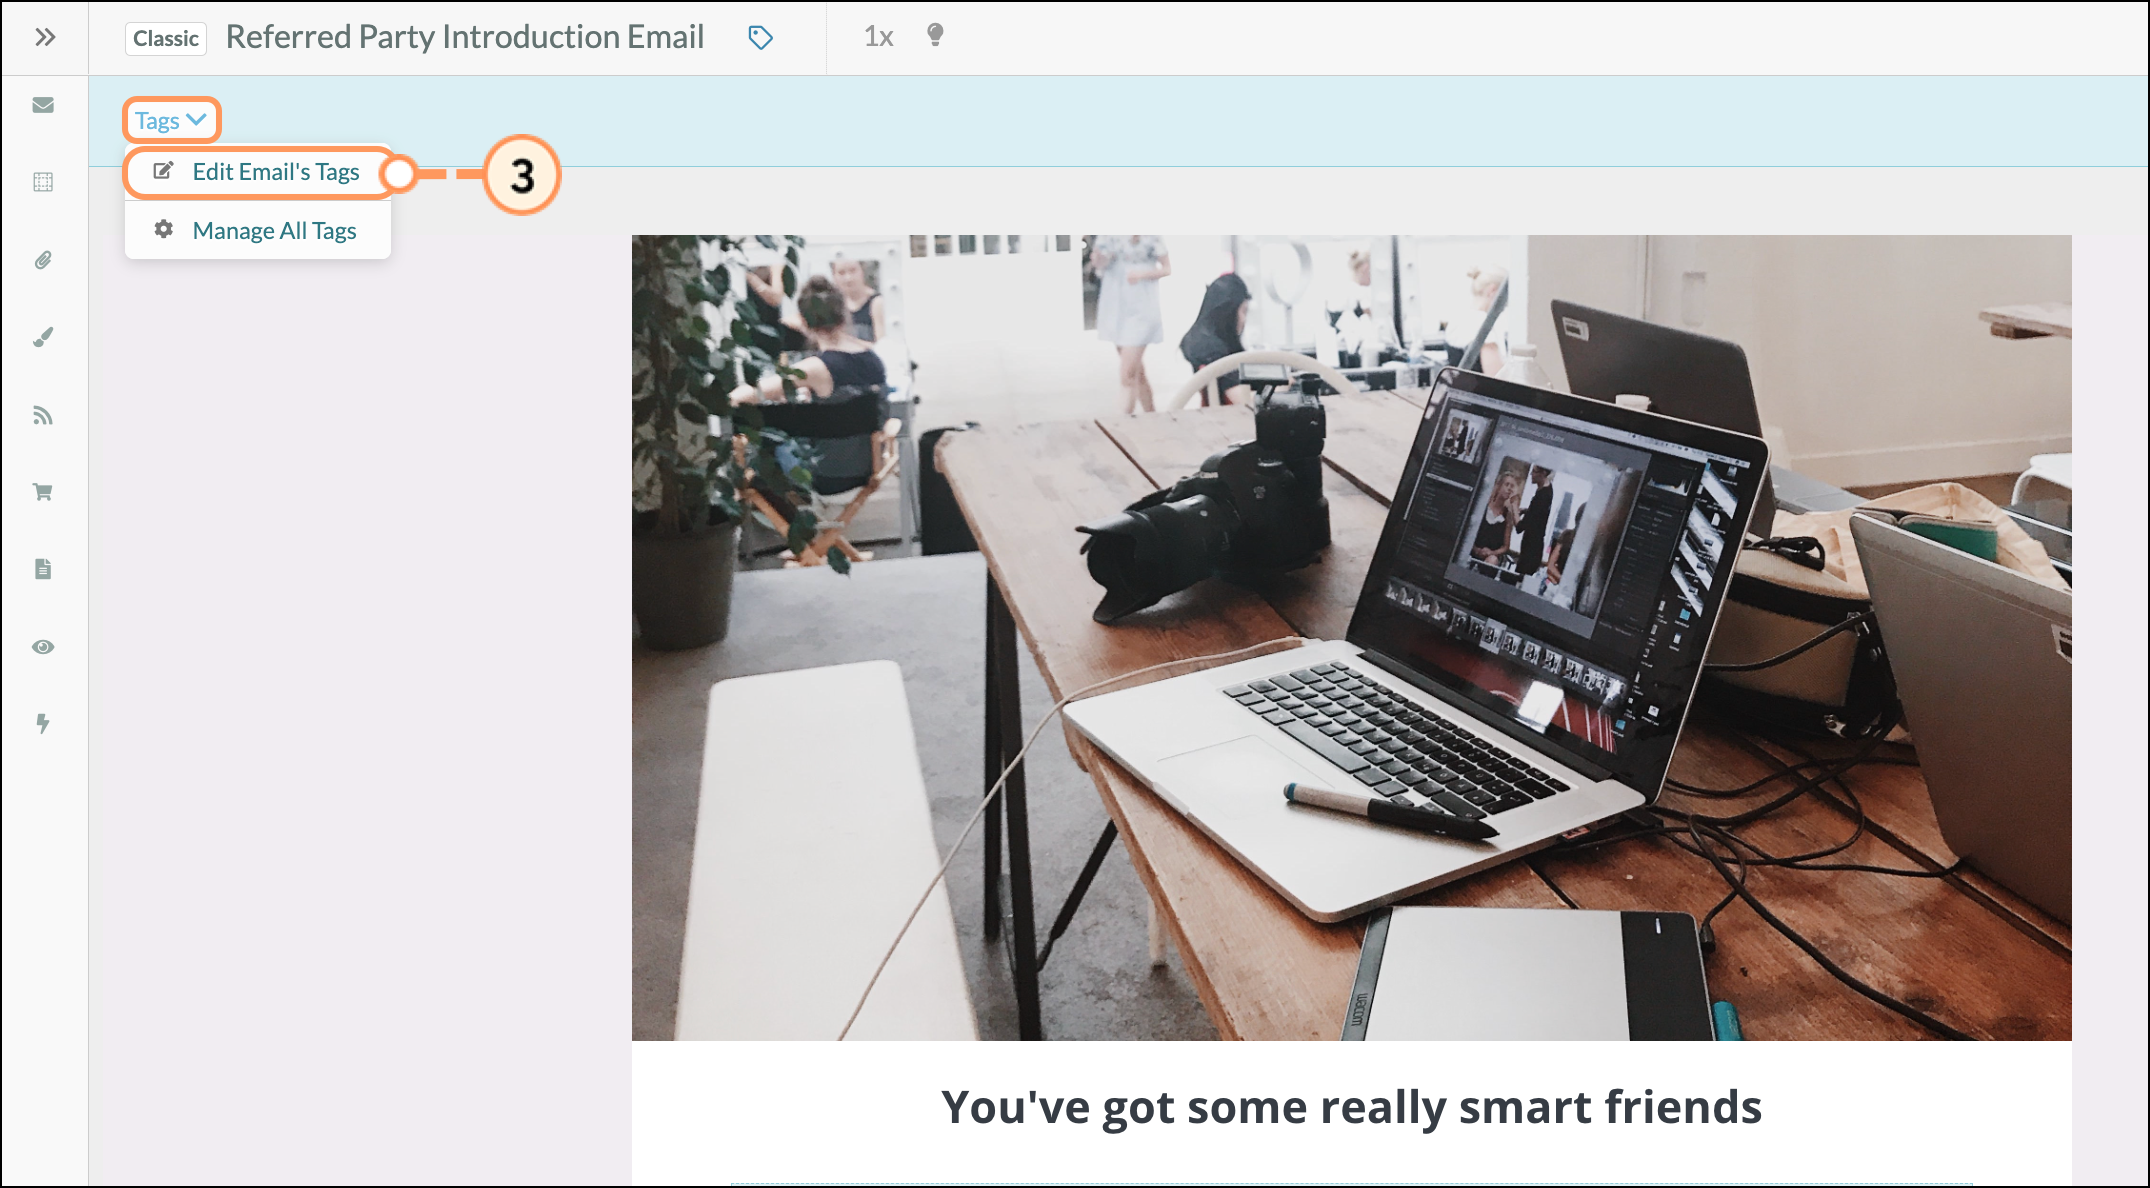
When adding or editing email tags, be aware of the following:

  • Clicking   Edit Icon  Edit Email's Tags will display all tags currently attributed to the email.
  • To remove any unneeded tags, click   Close Icon  Remove next to the tag.
  • Clicking the Select a group text box when it does not have text in it will display all tags across all emails.
  • Once the email has been tagged, the email tag(s) will appear next to the Edit Tags button. 

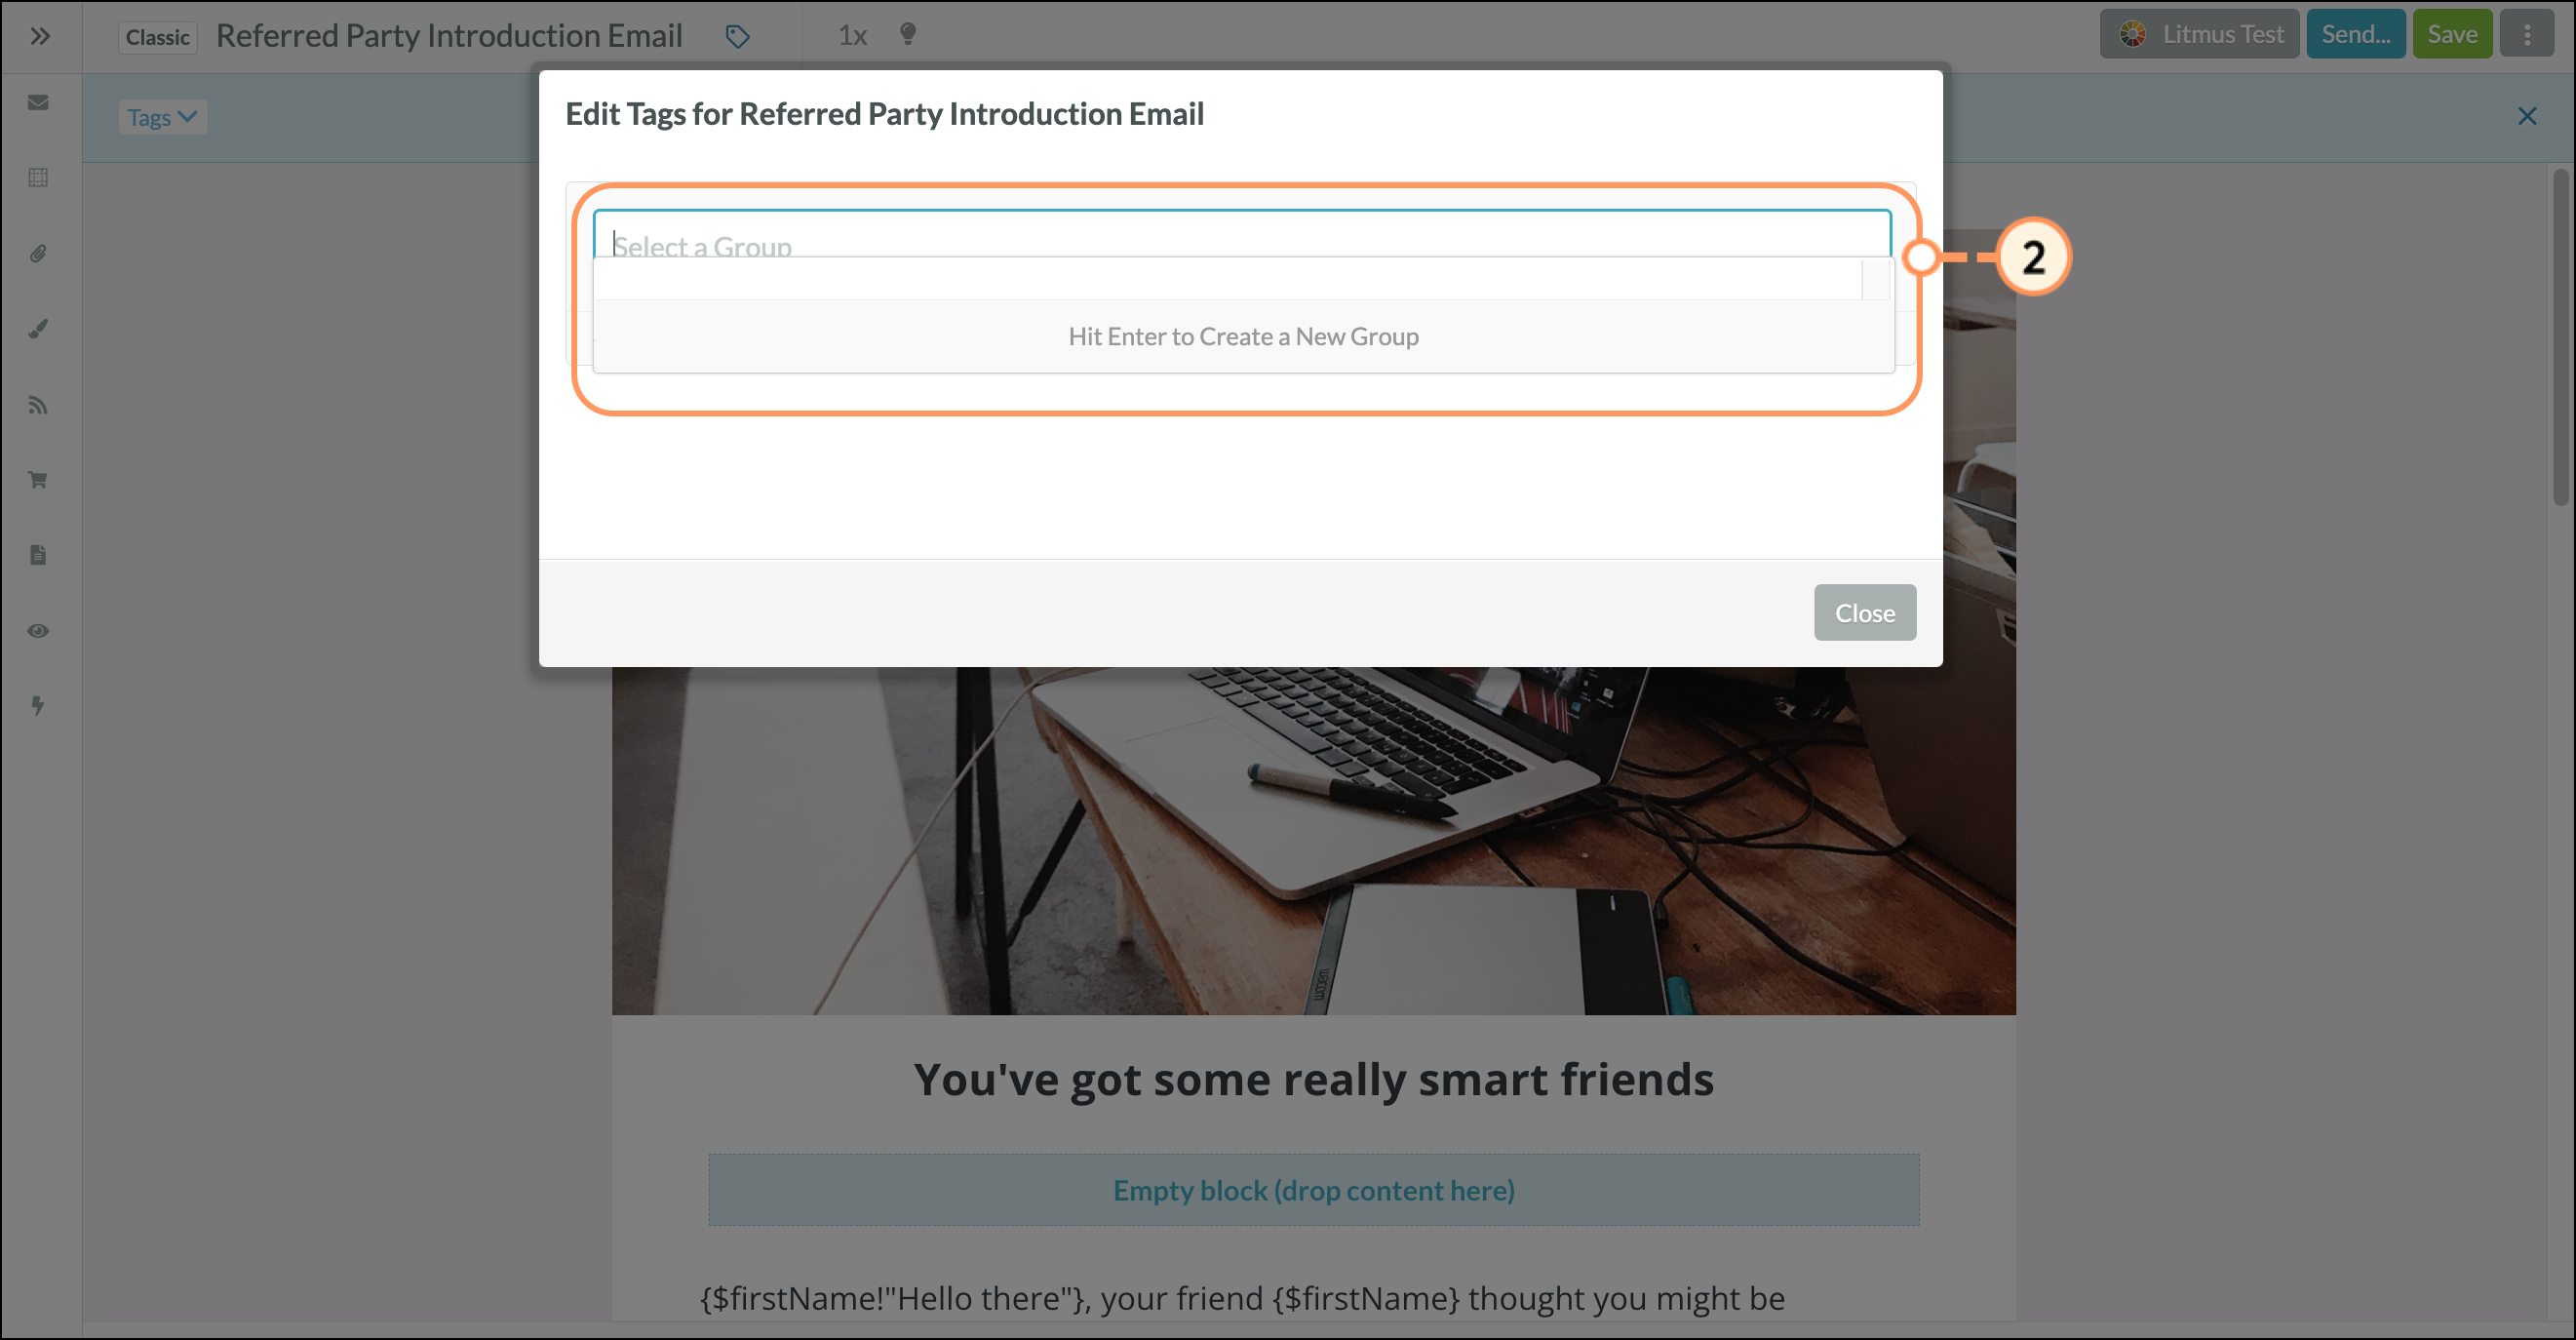
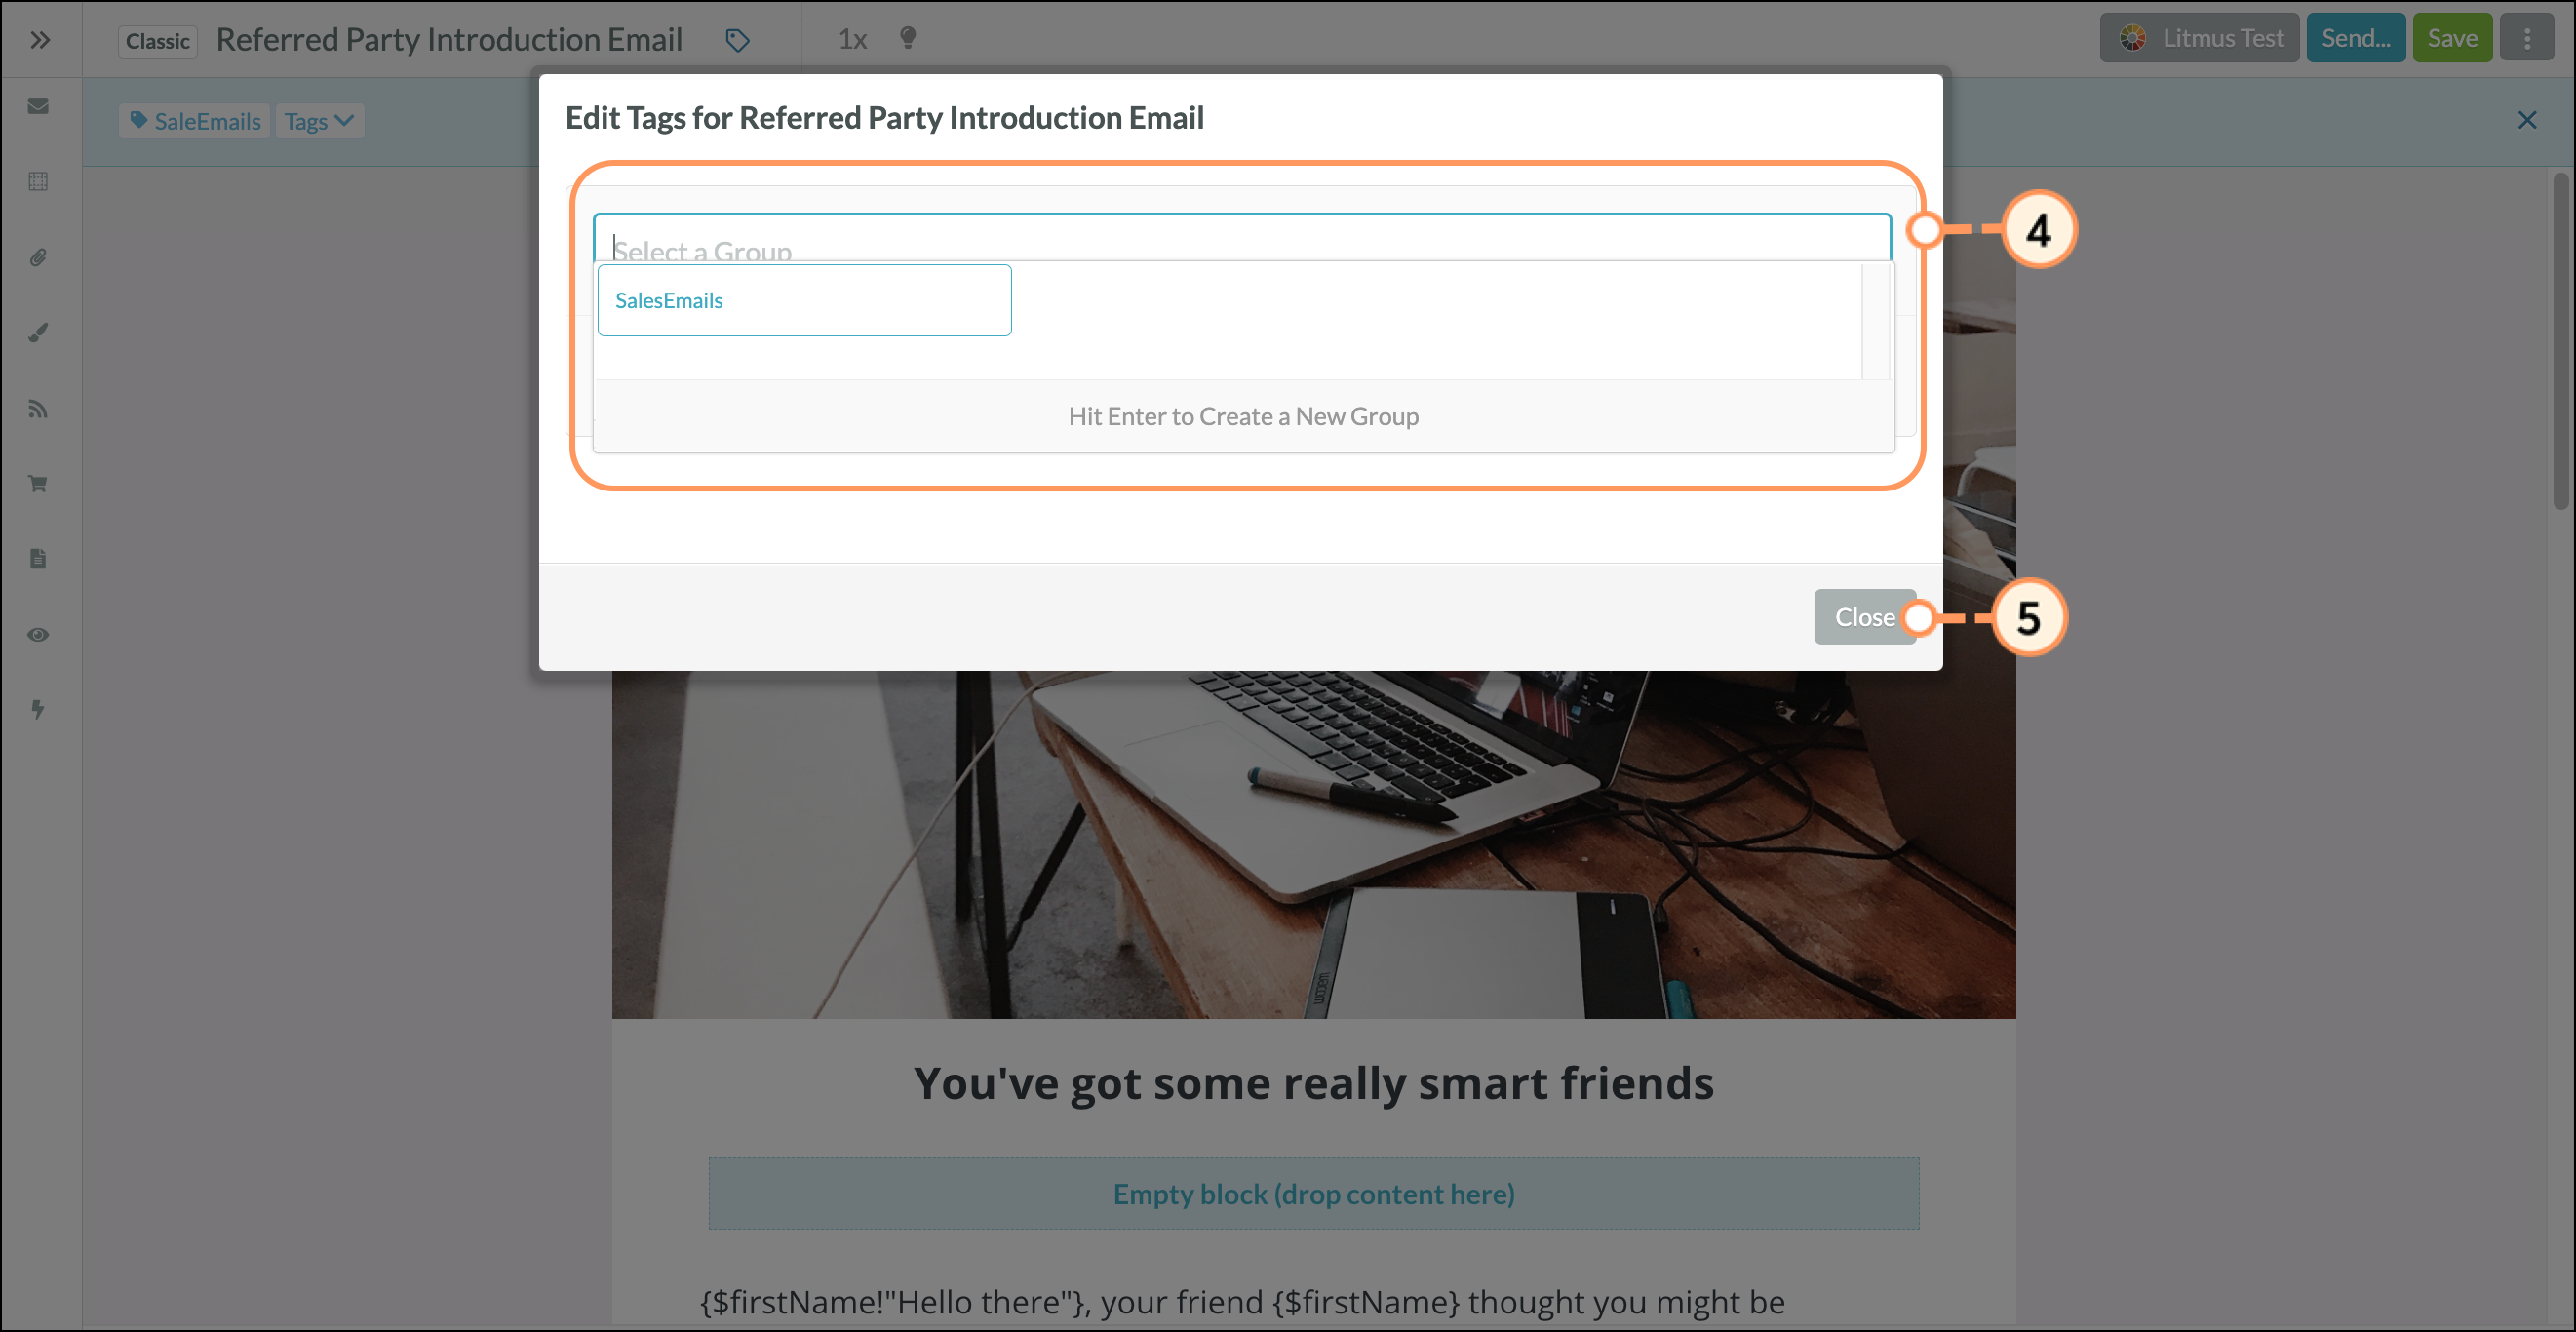
Refer to Using the Tag Manager for more information on creating or editing email tags.


Did this article answer your question?


Constant Contact Logo

Copyright © 2025 · All Rights Reserved · Constant Contact · Privacy Center