| Important: If a DKIM-authenticated domain is not configured properly, all account admins will receive an email notification letting them know they have 14 days to correct the problem. After 14 days, sending for that domain will be blocked. |
As email continues to evolve as a major method of communication, ISPs are looking to see if the emails you are sending are actually coming from you. ISPs reward DKIM-authenticated email with better inboxing—meaning you get better open rates and more conversions because more people will see your message.
This article will provide an overview on DKIM authentication.
| Administrators | ✓ | |
| Company Managers | ||
| Marketing Managers | ||
| Sales Managers | ||
| Salespersons | ||
| Jr. Salespersons |
DKIM gives Google, Microsoft, and other Internet service providers (ISPs) the information they need to recognize you and your clients as trusted senders. That means more of your emails will get into the inbox instead of promotional or spam folders. DKIM goes a long way in both ensuring your domain and brand are protected from unauthorized use. DKIM also serves to better your overall deliverability, as email providers can see you are taking steps to secure your email stream. However, DKIM by itself is not a surefire way to stop spoofing and completely authenticate an email.
DKIM, at its core, allows mailboxes and recipients to verify that a received message is truly from the domain identified as the sender and has not been altered during its transmission. The verification is done through cryptographic authentication to ensure that receiving inboxes can ensure that no spoofing has taken place. ISPs are now looking to see if DKIM is in place, and they are actively inboxing emails from clients that have it set up—so it is very important that any email sent from the Lead Gen & CRM platform has been sent from a domain that is authenticated.
The most common example of how domains can be spoofed is the infamous PayPal phishing scam. A phisher creates an email sending from a @paypal.com address that mirrors the normal look of a PayPal email. Normally, there is some type of fake alert in the email's subject line saying that your account has been compromised and that you need to sign into your PayPal account and provide some personal info. A link is included at the bottom of the email that pushes the recipient to a fake PayPal site where the phisher can collect any data that is shared on the site.
DKIM indicates to the receiving email box that these fake PayPal addresses are not actually from PayPal. From there, the inbox can quarantine the email to spam or bounce it away to protect the recipient from a potential phishing attack. In essence, DKIM is essential for you to protect your domain from people who may be trying to use your domain for nefarious purposes.
When setting up DKIM in your Lead Gen & CRM platform, cryptographic keys are created. You, the sender, add the public keys to your DNS settings via CNAME records. When you create an email, the entire email is hashed and then signed into a unique text string using a private key available only to your domain. Then the email is transmitted to its intended destination.
During the email’s journey to its final destination, it may be picked up by various sources. Perhaps the recipient uses a webmail service that pushes the email to their desktop email app or a recipient receives the email and then forwards it to a colleague. Regardless of where it stops during its transmission path, any email box may query the domain’s DNS to gather their public key. The public key you add to your DNS is only a match to your private key, so the recipient’s email can decrypt the DKIM signature back to its original hash string.
Finally, the email provider recreates the hash and sees if it matches with the decrypted signature from the public key. If the two match, then email passes DKIM verification. This confirms to the provider that the domain in the email is truly owned from the sender, and that the message has not been changed in transit. This helps separate you from the spammers and phishers of the world who do not authenticate their emails.
As an example, a phisher receives an email from PayPal and attempts to forward it to a recipient after changing the PayPal link to their fake PayPal website that will attempt to harvest the recipient’s information. Since the message (including the link) is signed by DKIM, when the recipient’s email provider creates their own hash using PayPal’s public key, the hashes will not match, as there has been a change in the email. Conversely, if a recipient receives an email from PayPal and forwards it to a friend without changing anything in the email, DKIM will still pass as the hashes will match.
In order to set up DKIM, you will need to have access to your DNS settings, which are located outside of Lead Gen & CRM. Currently, nearly every major ISP has some method of email authentication. Contact your ISP for more information on what kind of email authentication they provide.
In certain cases, you may have to contact your administrator or IT specialist to get DKIM fully set up and configured.
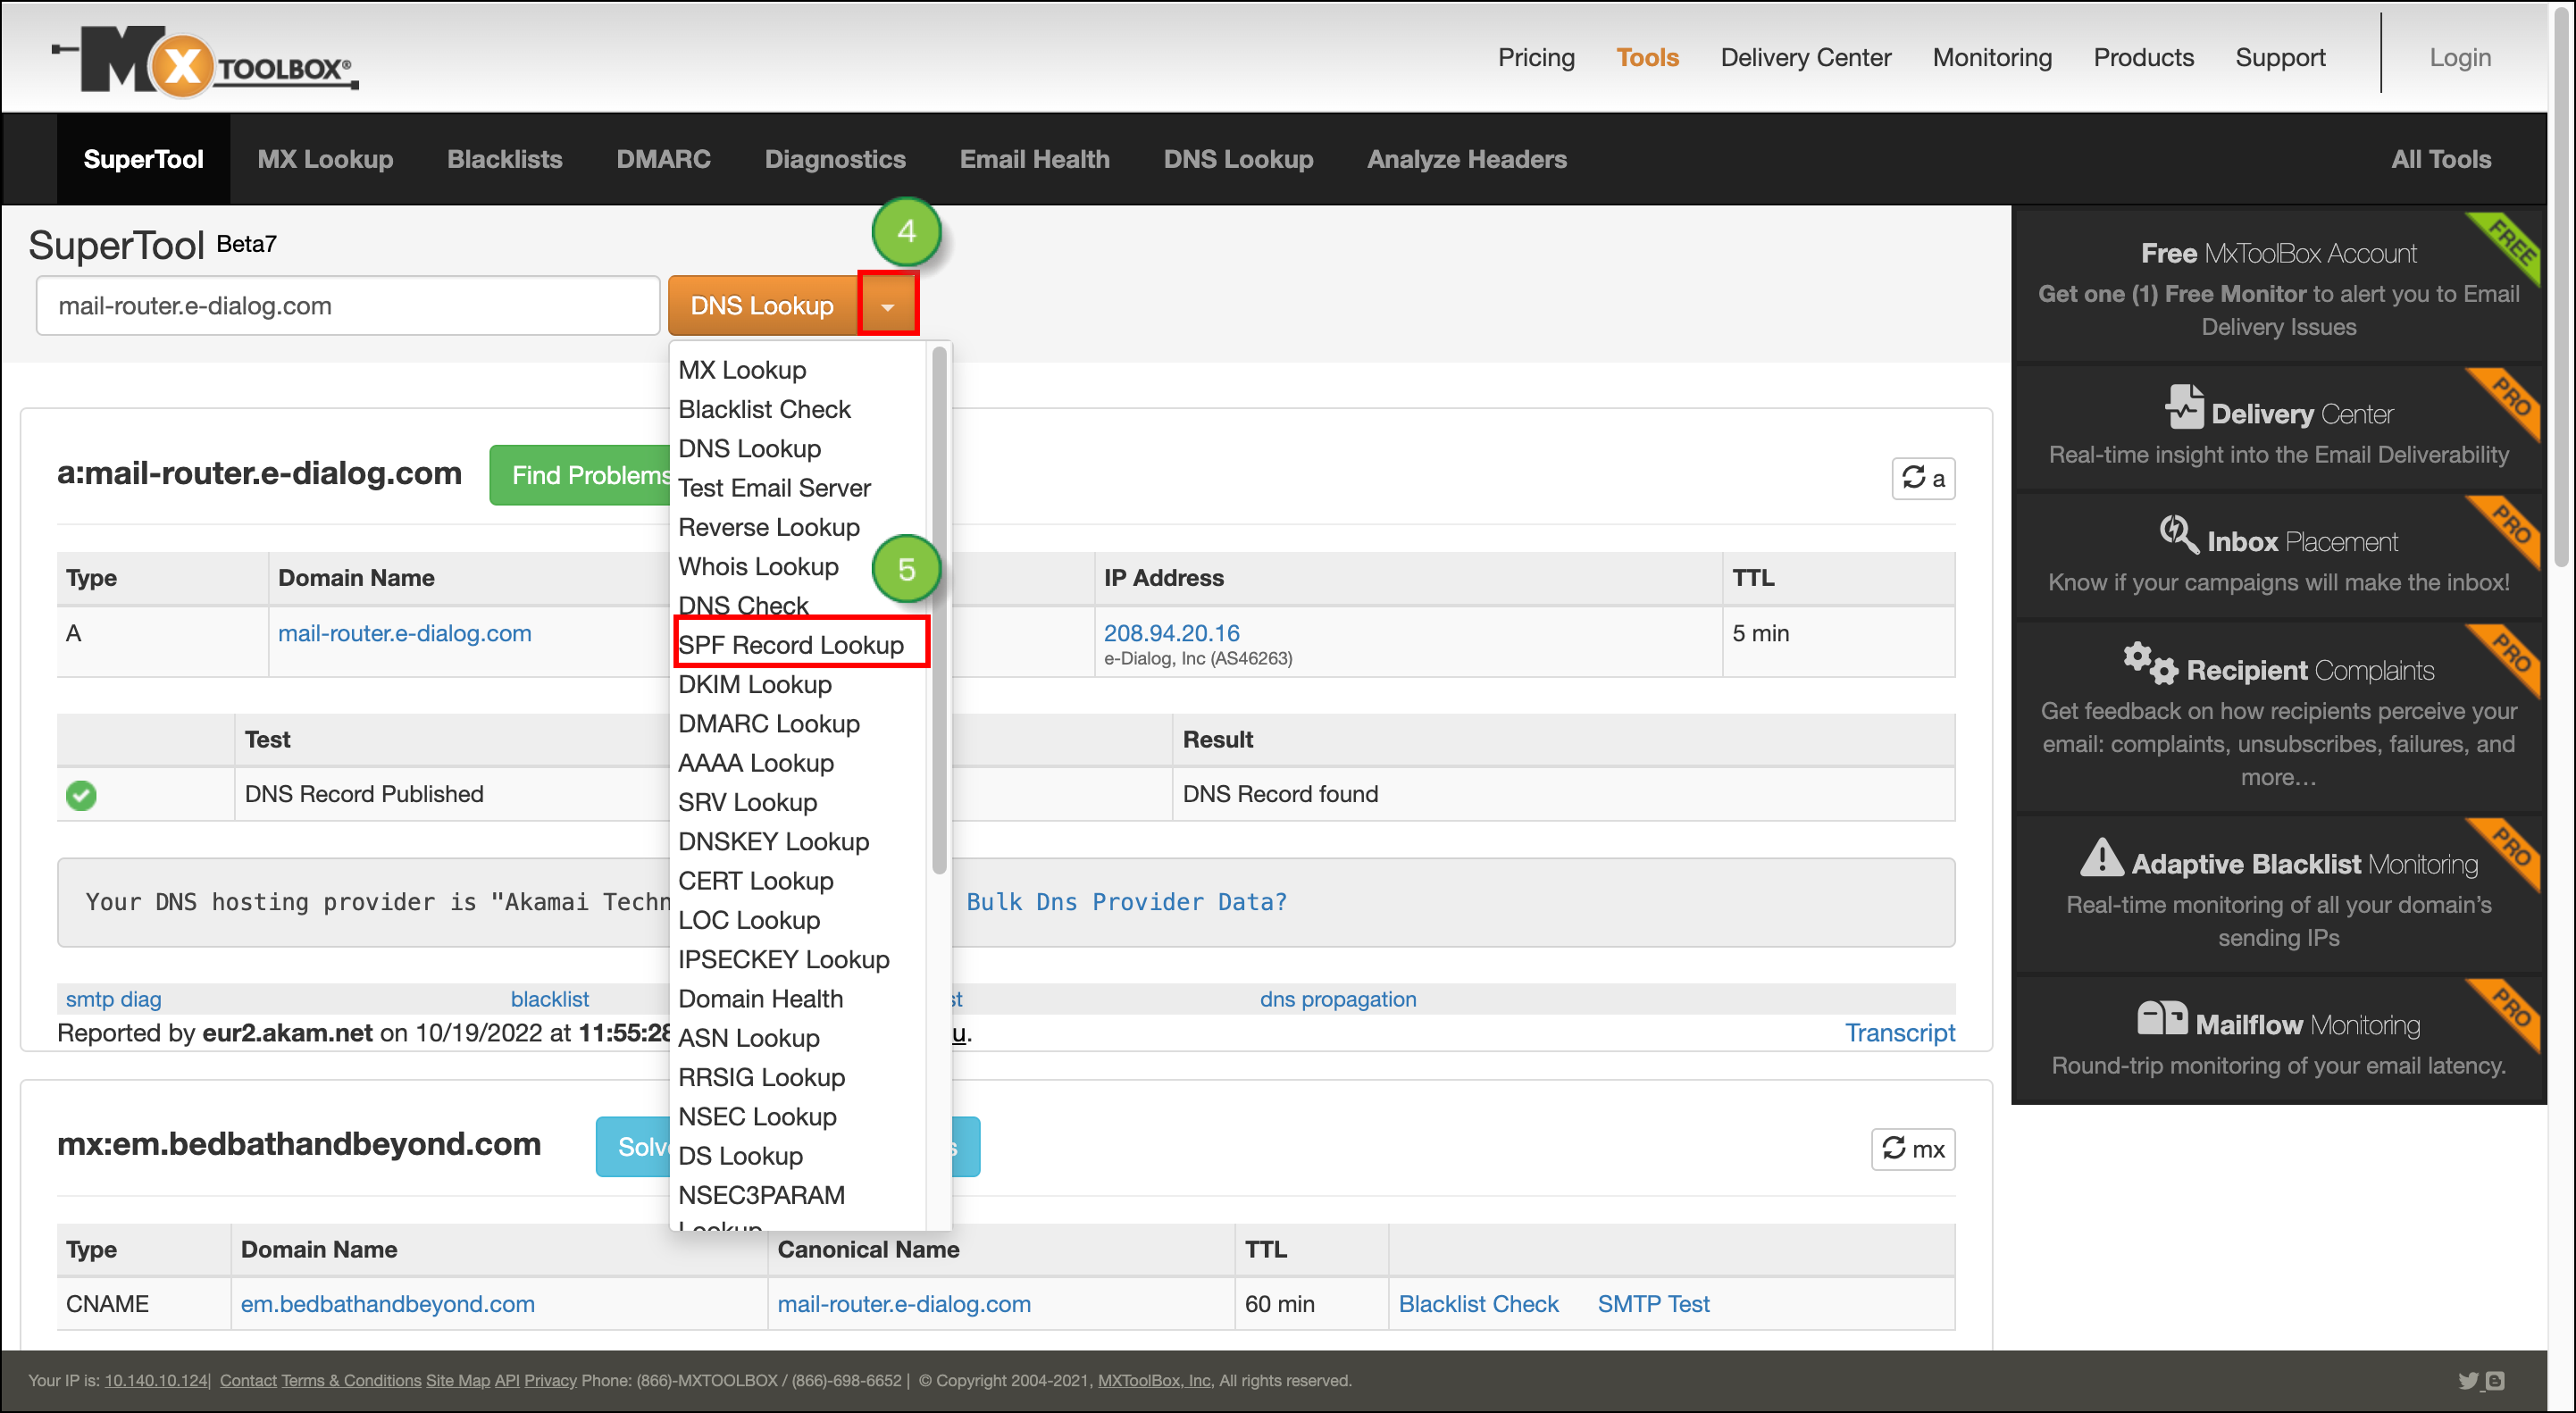
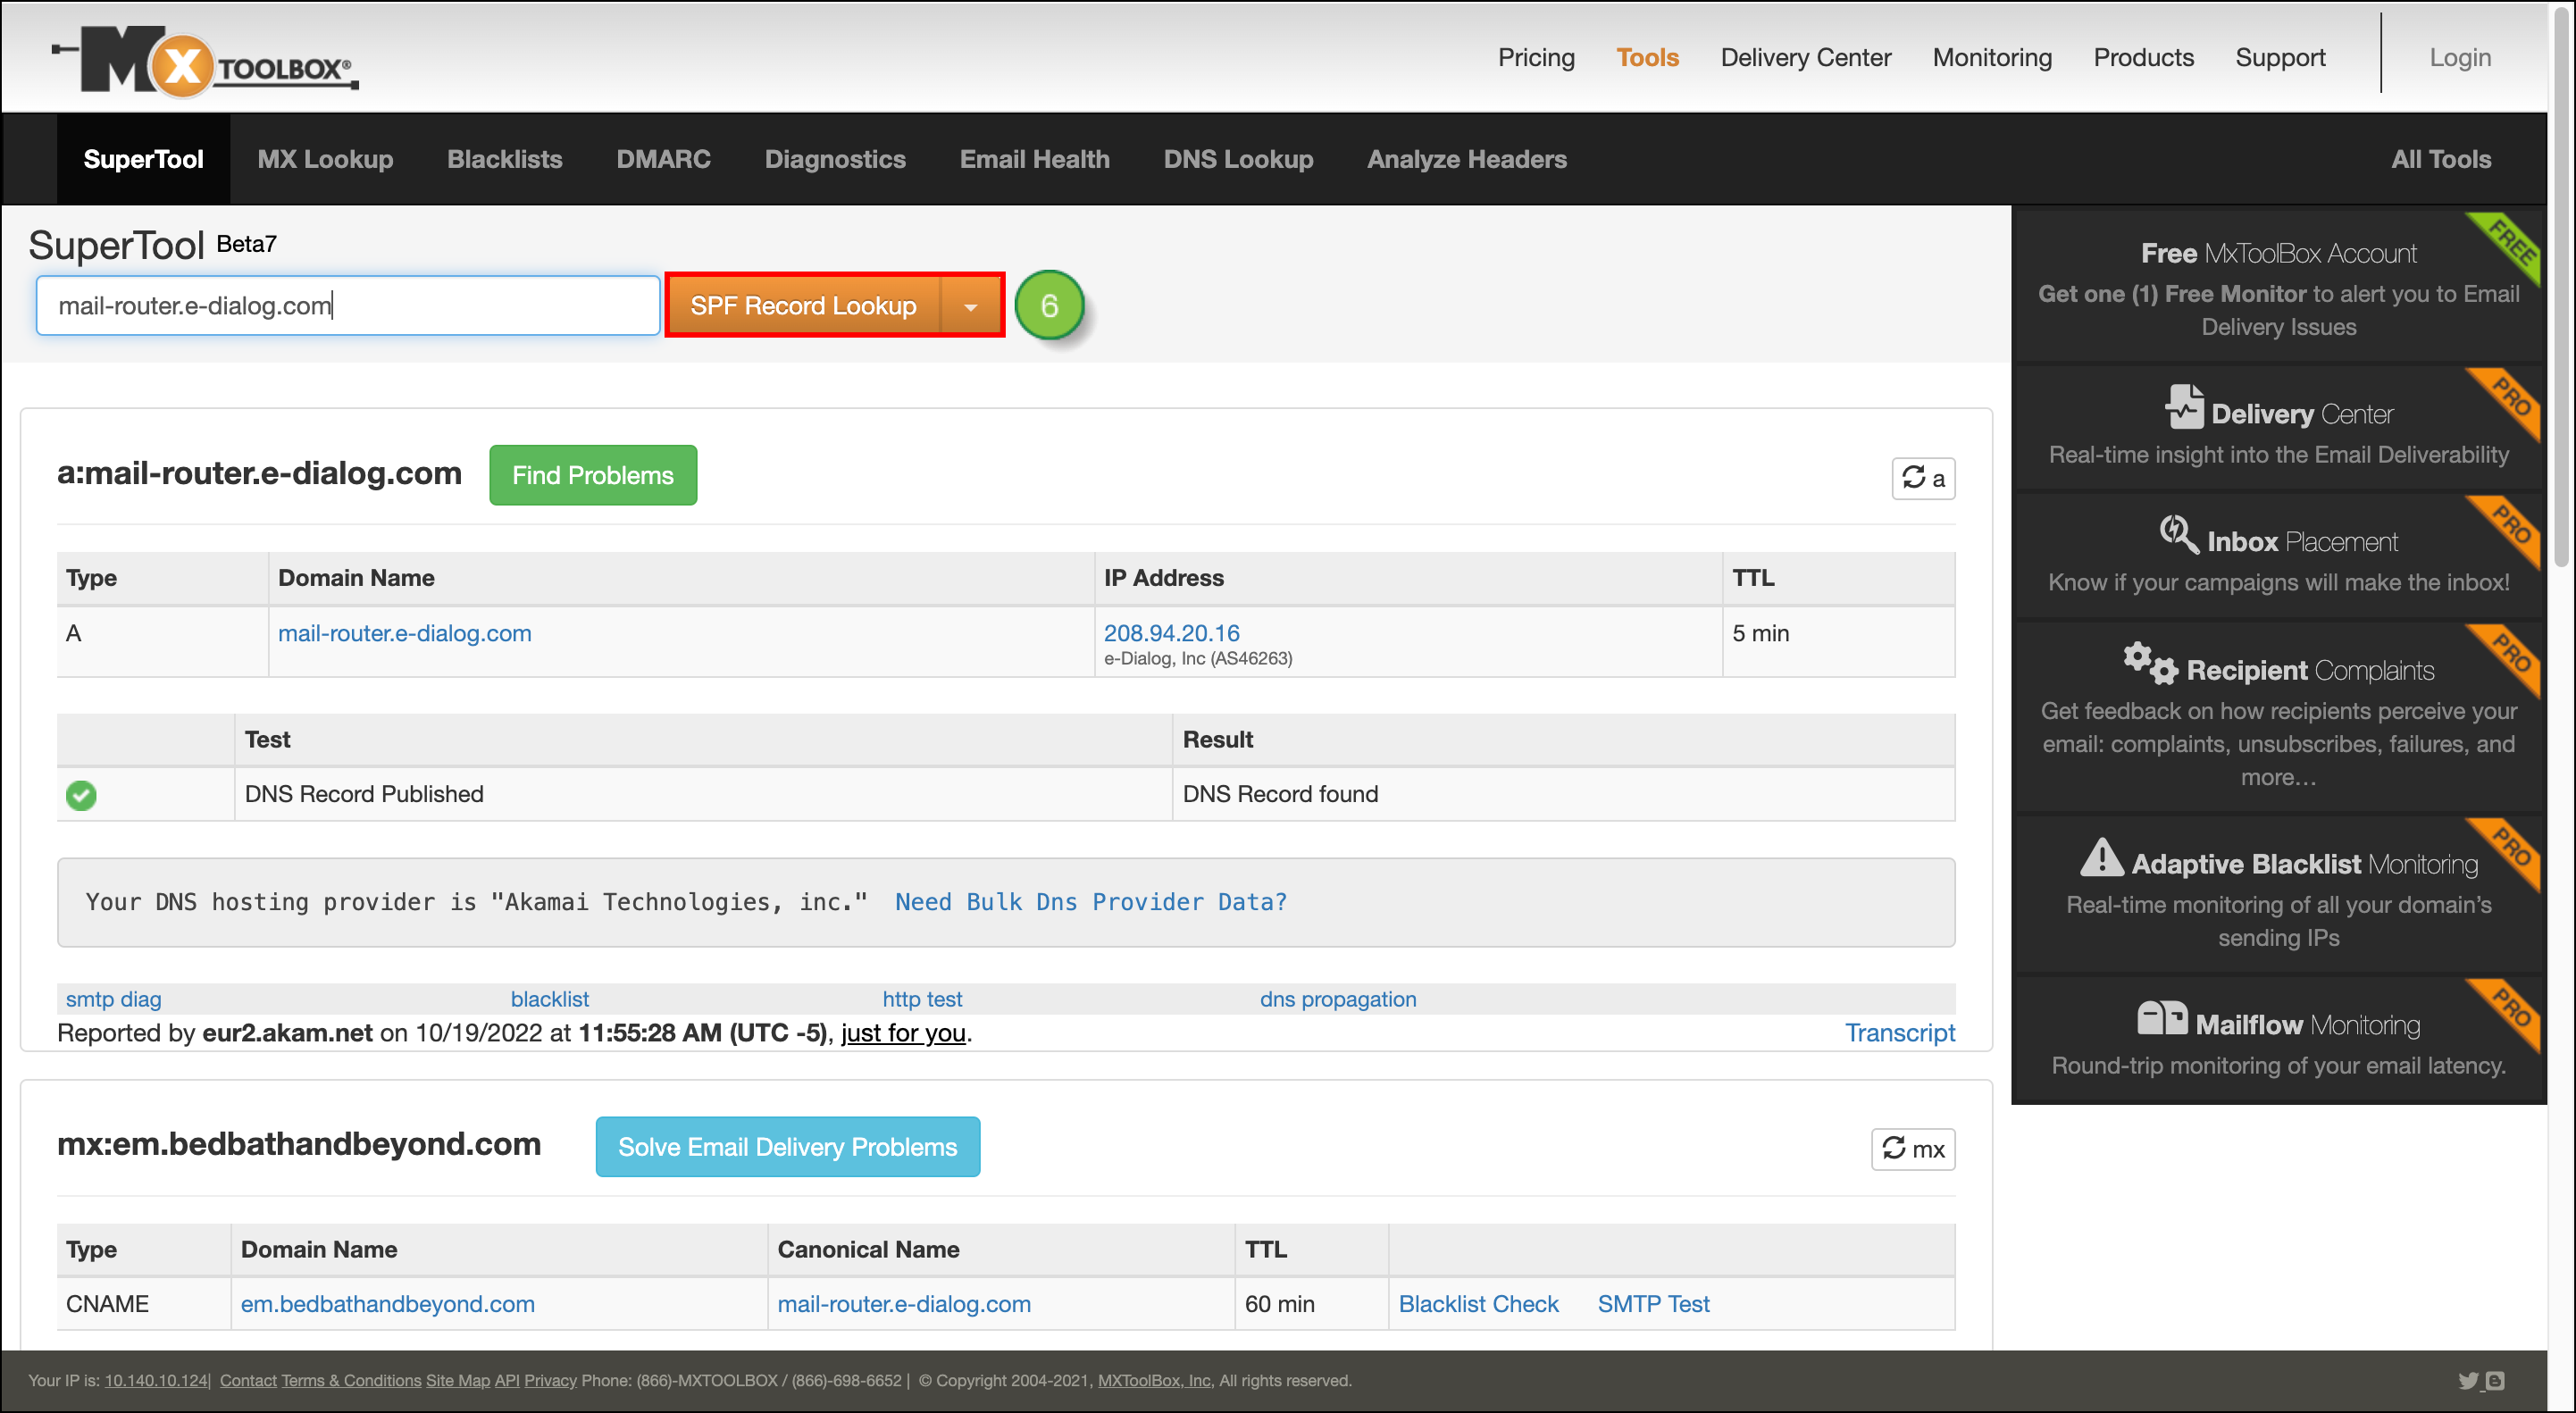
You can check to see if you correctly set up CNAME records with MxToolBox. This website features a tool that can help. With it, insert the full key name from your Lead Gen & CRM platform, and search as a CNAME Lookup. If successful, you should see the data from Lead Gen & CRM under the Canonical Name column in MxToolBox. In fact, you can use MxToolBox to locate your SPF records.
To locate your SPF records, Open a new tab in your web browser, navigate to MxToolbox, and click the MX Lookup tab.
em.https:// and www. with the em. prefix. Make sure there are no characters, such as/, after the web address either.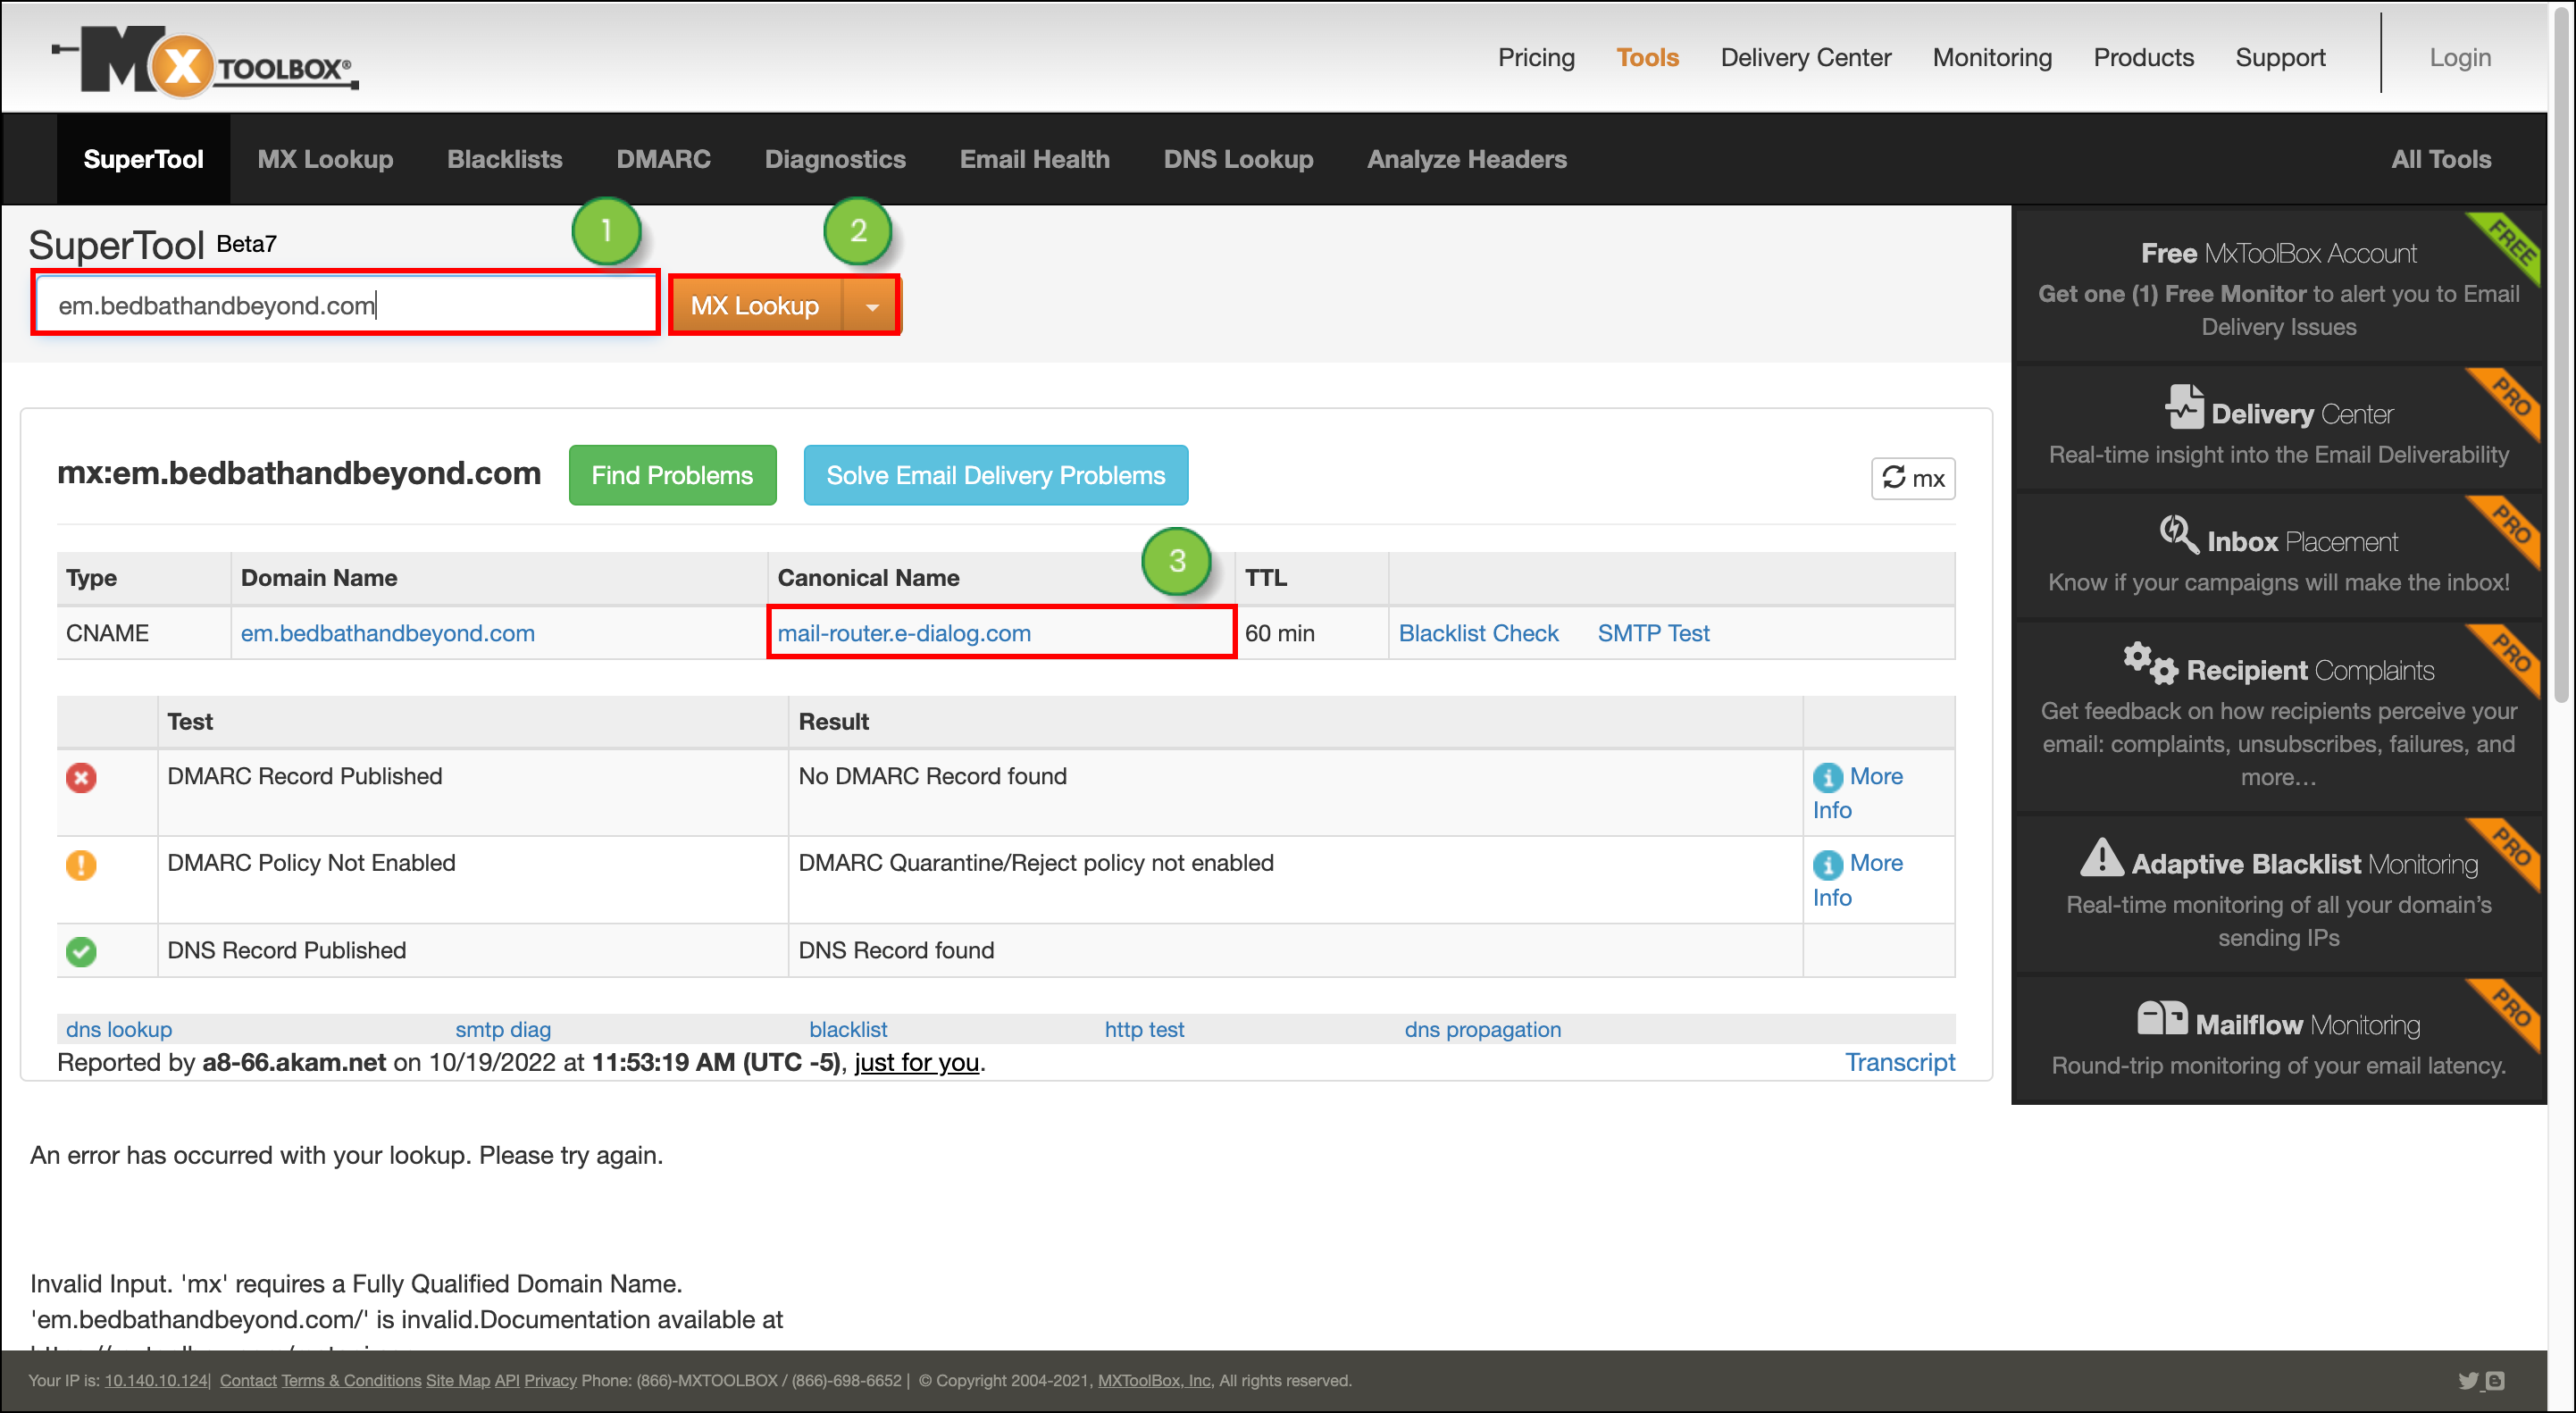
Be aware that when you add your CNAME records for the Lead Gen & CRM platform, you are adding both SPF and DKIM. No additional steps are necessary for email authentication.
Copyright © 2026 · All Rights Reserved · Constant Contact · Privacy Center