DomainKey Identified Mail (DKIM) and Sender Policy Framework (SPF) work in tandem to authenticate Lead Gen & CRM's emails.
That way, even though emails are being sent from a Lead Gen & CRM-owned server, the receiving server knows that email is coming from you. This is an incredibly important step you must take before sending emails out of Lead Gen & CRM.
This article will detail how to set up DKIM and SPF if you are using Host Gator.
| Administrators | ✓ | |
| Company Managers | ||
| Marketing Managers | ||
| Sales Managers | ||
| Salespersons | ||
| Jr. Salespersons |
| Tip: Are you looking for information about Constant Contact’s Email and Digital Marketing product? This article is for Constant Contact’s Lead Gen & CRM product. Head on over to the Email and Digital Marketing articles by clicking here. Not sure what the difference is? Read this article. |
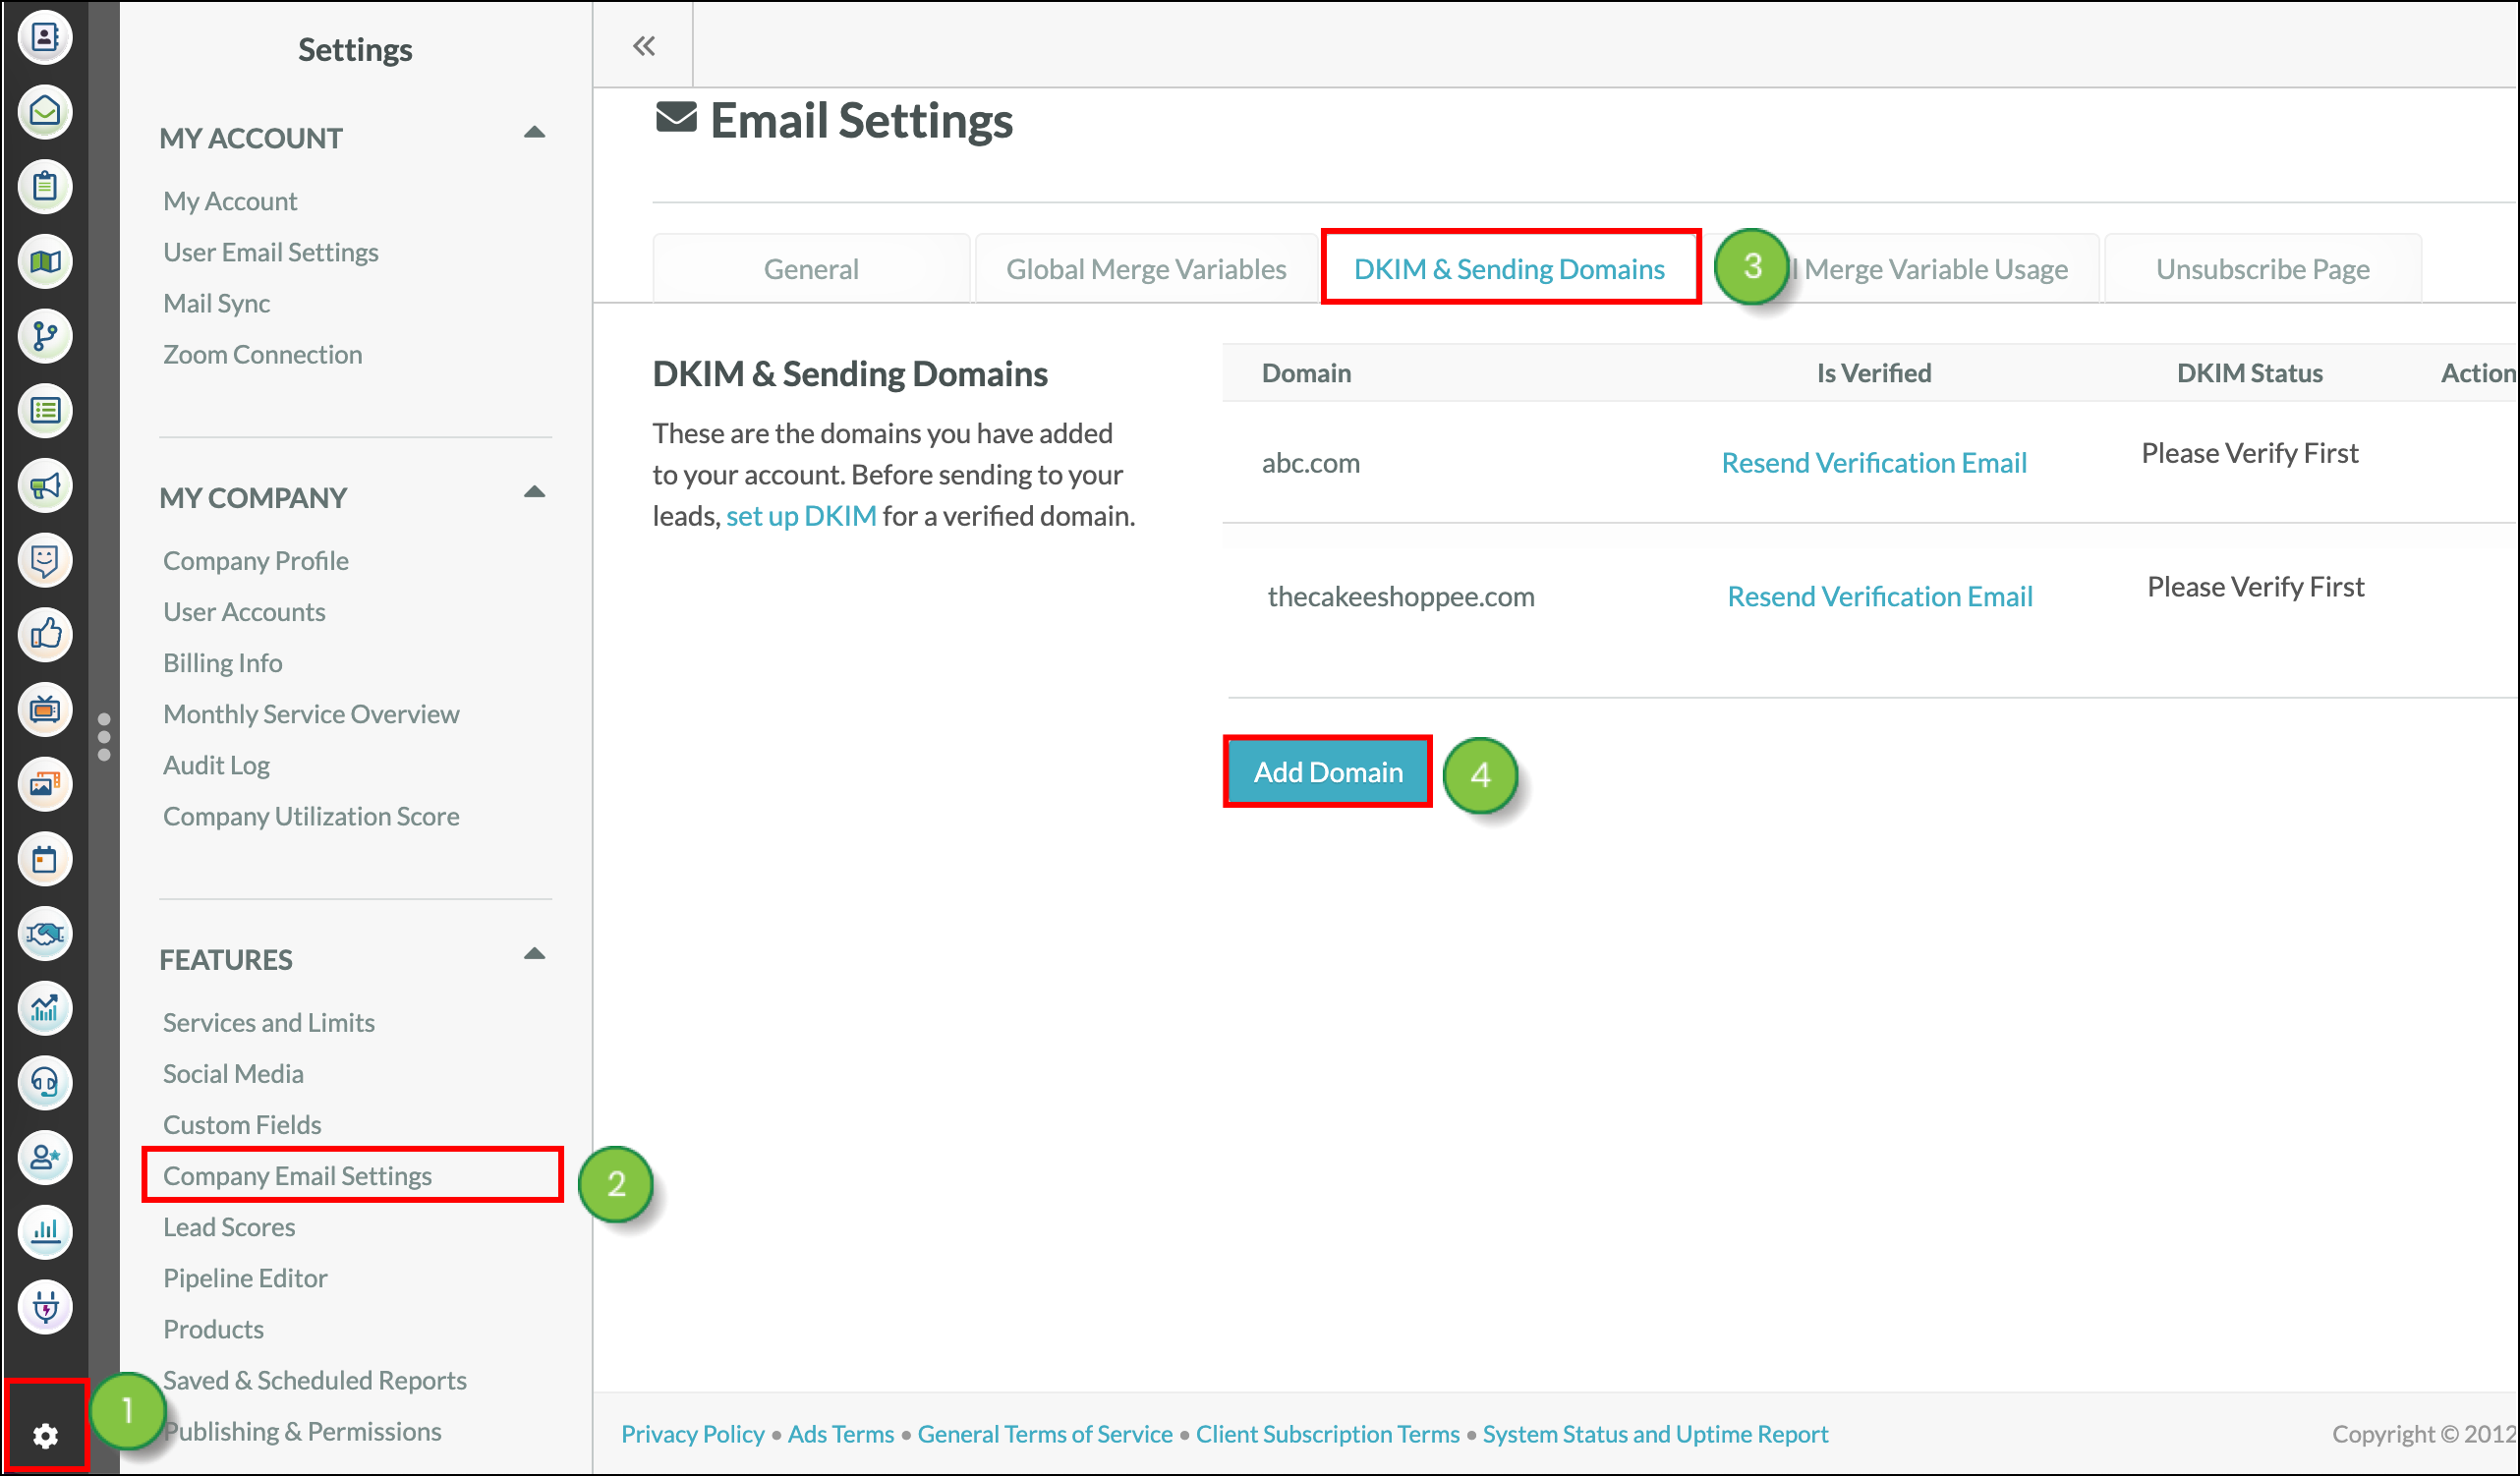
You will need to verify the domain that you want to send from before setting up DKIM.
To verify domains, do the following:
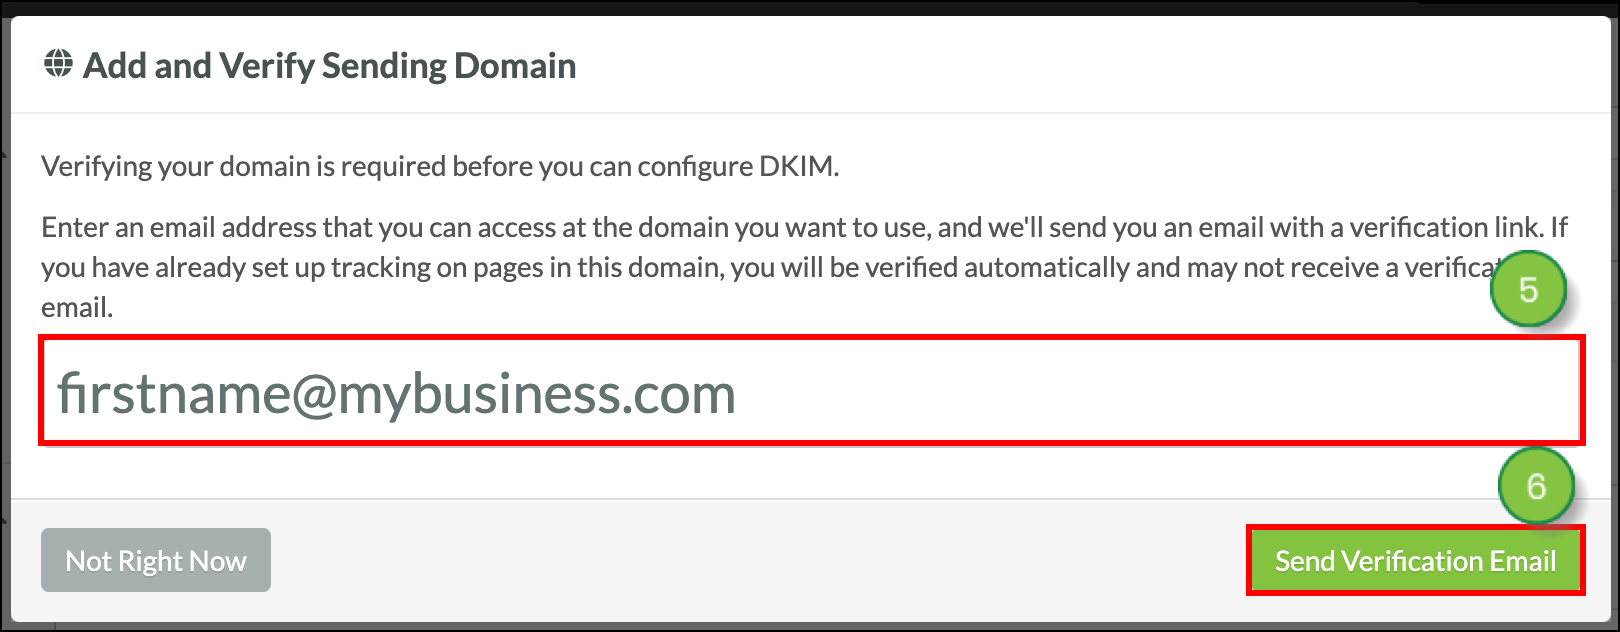
In another browser tab, open the email client for the sending domain that was just entered and click the email asking to confirm the verification process. Within the email, click the Yes, Verify This Domain link.
Return to the Lead Gen & CRM browser tab and locate the domain you have just verified in the DKIM and Sending Domains section to confirm that there is a checkmark.

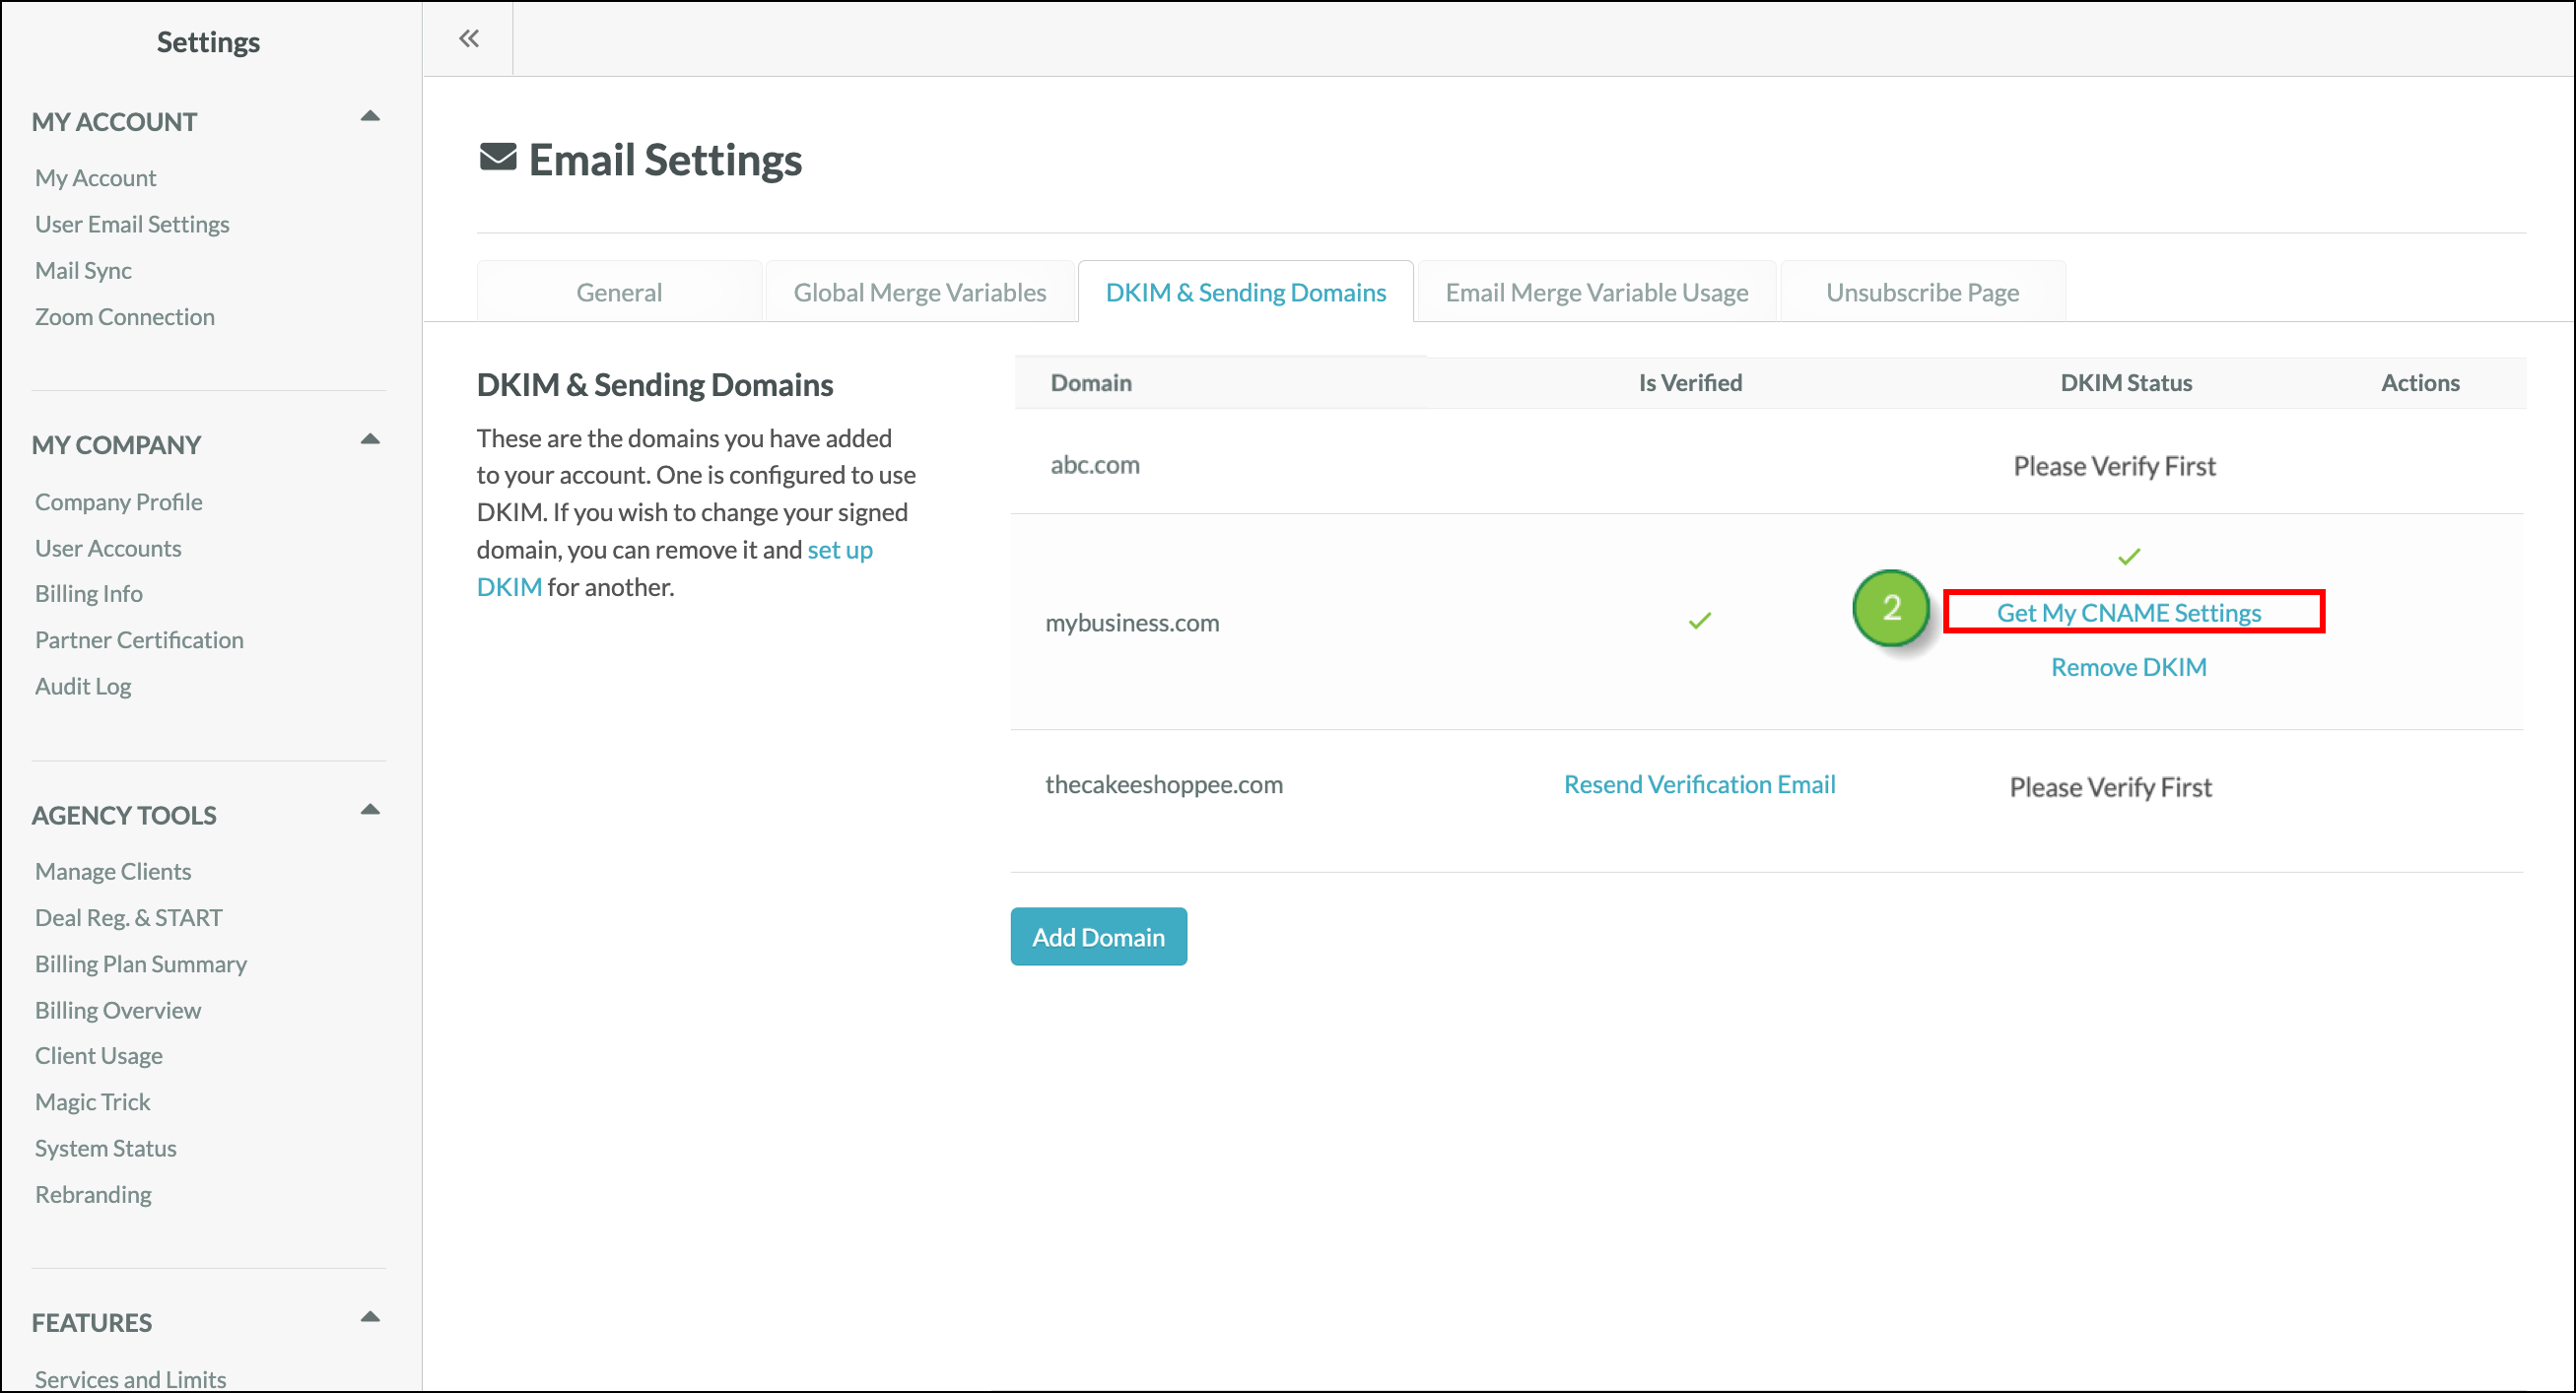
You will need to add CNAME records in Host Gator’s DNS Settings.
To add CNAME records, do the following:
Refer to Host Gator's CNAME help article for more information. Contact your IT specialist if you need further assistance with adding CNAME records.
Q: Do I need to add SPF TXT records?
A: No. The em.makeyourmarketing.us CNAME record is the SPF record for Lead Gen & CRM.
Q: How can I check to see if I correctly set up the CNAME records?
A: MxToolBox is a tool that can help. With it, insert the full key name from Lead Gen & CRM, change the search to CNAME Lookup, and search. If successful, you should see the data from Lead Gen & CRM under the Canonical Name column in MxToolbox.
Q: How does this impact what my email looks like in the inbox?
A: The email will show the sending domain as the domain you have configured with DKIM (signed-by), and a return path (mailed-by), including that same domain.
Copyright © 2026 · All Rights Reserved · Constant Contact · Privacy Center