Our Sign-up Landing Pages help you capture new contacts online, through a standalone webpage that we host for you. Each landing page can have a single list or multiple lists selected to add your new contacts to, but your contacts don't see the list options when they opt in. Create as many landing pages as you need to share with targeted segments of your audience around the web. Use it to grow your email list, your SMS list, or both at the same time!
Create a new sign-up landing page and give it a name
You can create multiple Sign-up Landing Pages for different audiences, but each one must have a unique name.
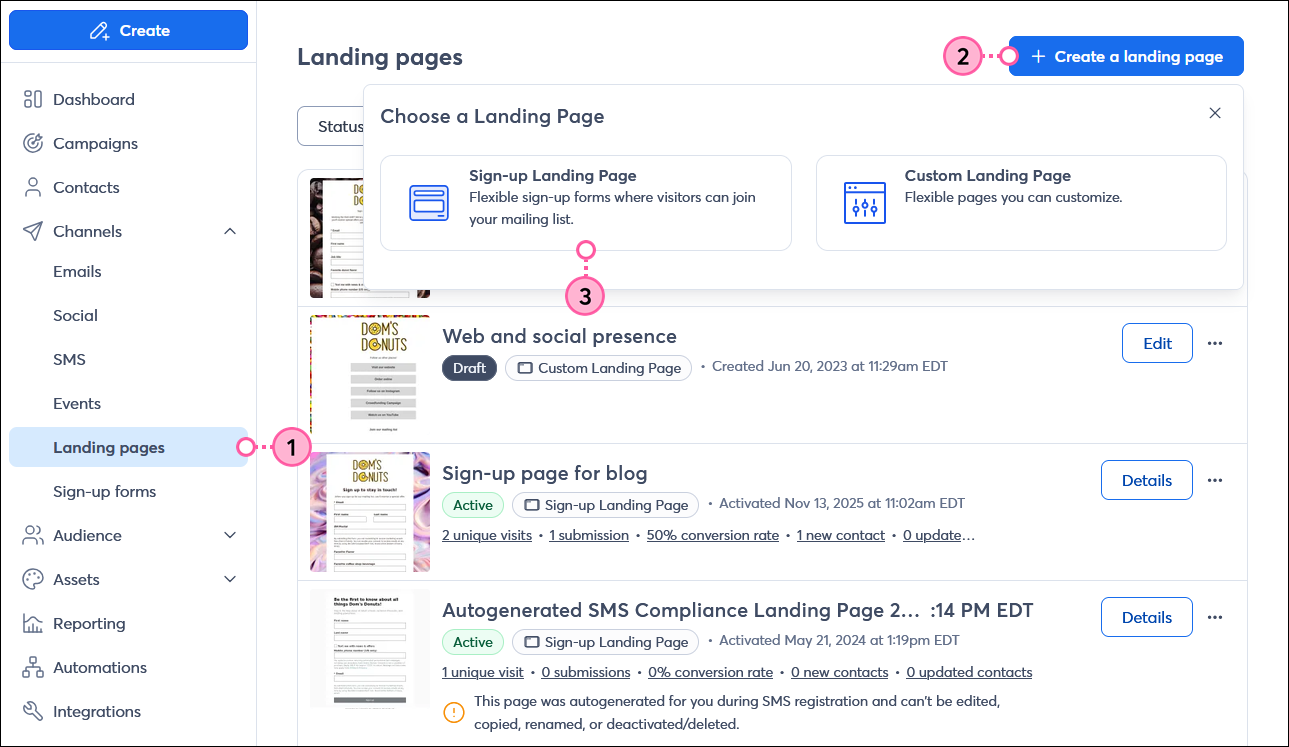
- In the menu on the left-hand side, click Channels > Landing pages.
- Click the + Create a landing page button.
- Click the Sign-up Landing Page option.
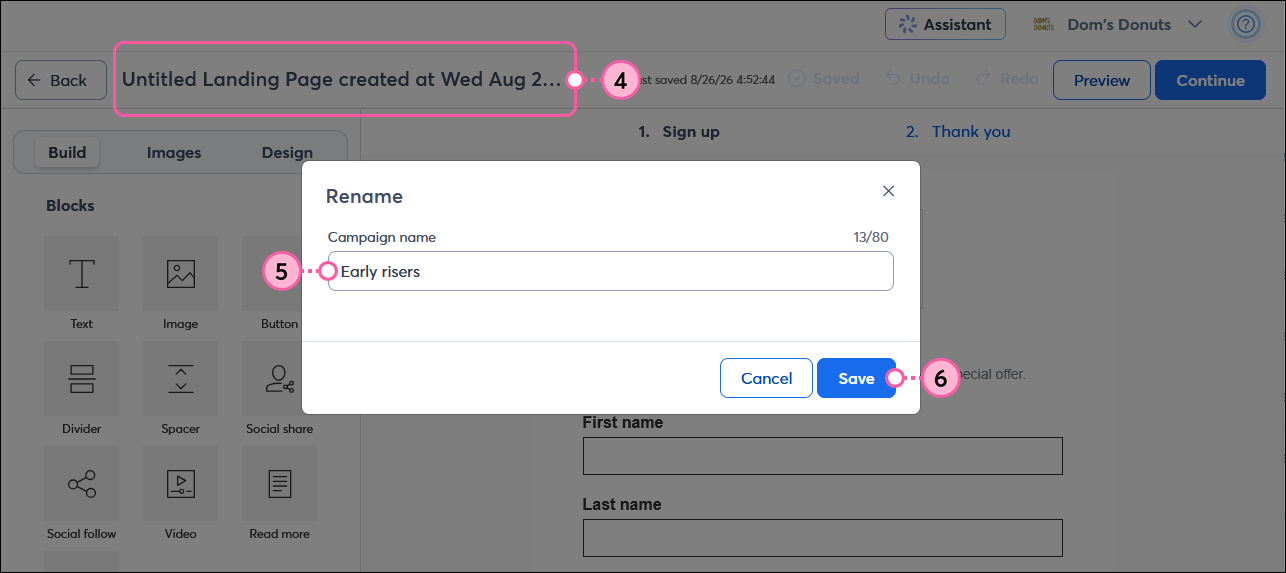
- Click anywhere in the landing page name in the upper left-hand corner.
- Enter a name for your landing page into the Campaign name field. The name must be unique and can have a maximum of 80 characters. This name helps you recognize the landing page within your account, and your contacts never see it.
- Click the Save button.
Customize the Sign-up block with contact information fields
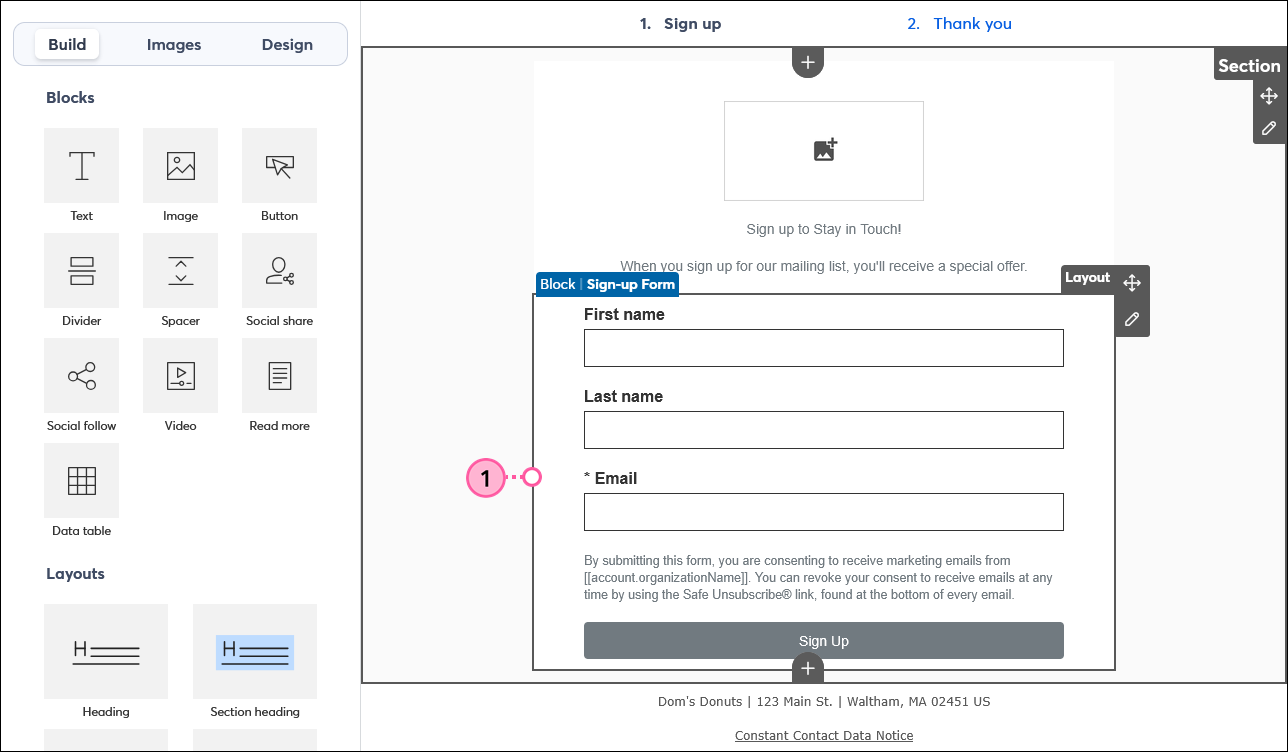
The Sign-up block is the heart of your Sign-up Landing Page! You can choose each field you want your contacts to fill in and even make them required before the form can be submitted.
- Click anywhere on the Form block or Sign Up button to edit the form fields.
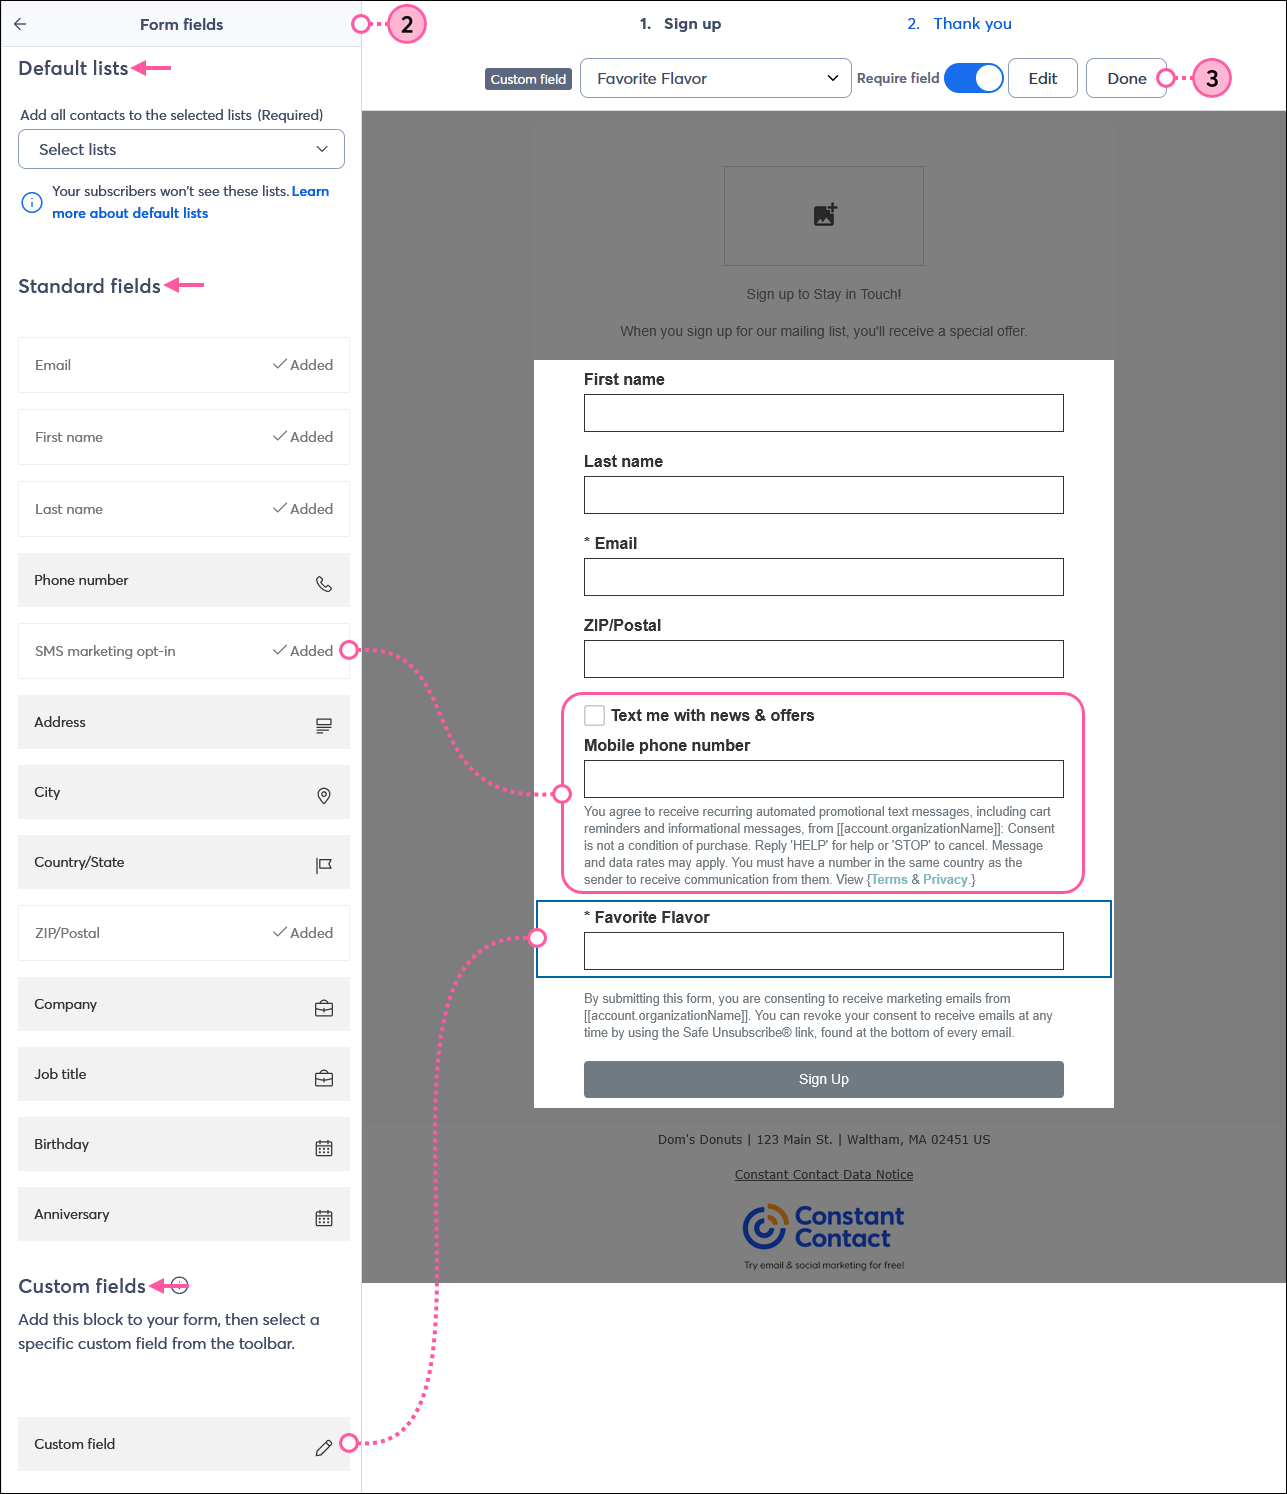
- From the Form fields menu on the left-hand side of the editor, there are several options:
- Default lists - Select the list or lists you want to add new contacts to, or select "Create list" if you need a new one. You can select up to 50 lists and your contacts are added to each list you select. Your contacts don't see the list options when they opt in.
- Standard fields - Drag the standard contact fields you want to include on your form into your template. The fields can be stacked or sit side-by-side.
- SMS Opt-in - Add the SMS marketing opt-in field by dragging it into your template. Leaving this field out of your form lets you collect email-only opt-ins.
Note: Adding the Phone number field (one of the standard fields) lets you collect cell phone and landline numbers for your records, but does not opt your contacts in to SMS marketing. - Custom fields - Select an existing custom field or create a new custom field by dragging a Custom field into your template, then selecting the field from the toolbar at the top of the template. Custom fields can be anything you want based on the needs of your organization. For example, the sign-up form in the image below is for a donut shop and includes a custom field for favorite flavor.
- Required fields - Make fields required so your new contacts have to fill them out before they can submit your form. Click on the field within your template and then click the Required field toggle in the toolbar at the top of the template. Repeat for each field you want to require.
Important: You can have both the Email and SMS marketing opt-in fields in your landing page, but only one can be a required field. Your new contacts must opt into the required field, but they also have the choice to opt into both Email and SMS marketing. If your form only has the Email field or only has the SMS marketing opt-in field, it is a required field by default and you can't remove the requirement.
Note: If a contact has already signed up for email marketing and later opts into SMS marketing without an email address, the contact information won't be automatically merged. Because many people can have the same name, we use the email address to tell us when to make an update to an existing contact or create a new contact.
Design tip: Keep required fields to a minimum because the more required fields you have, the less likely a person is to complete your form. You can always ask for more information later!
- Click the Done button.
Add custom content and branding
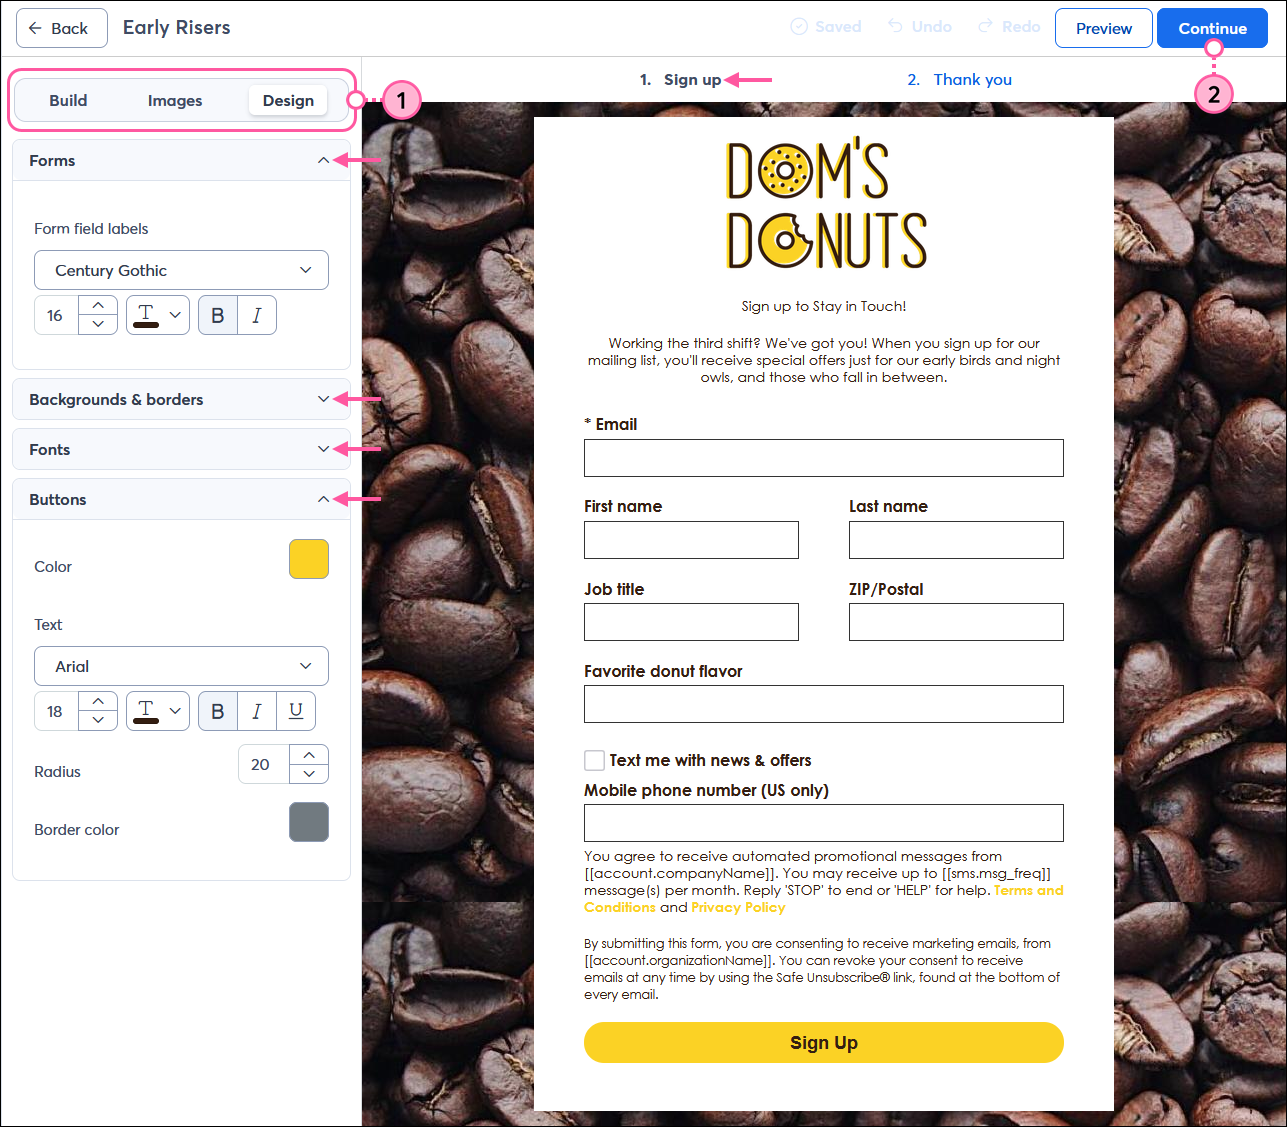
Once you've selected the fields for your form, it's time to add text and images, choose colors and fonts, and add other design details that makes the form unique to your organization.
- Use the Build, Images, and Design tabs to customize the branding and content for your landing page.
- Click the Continue button.
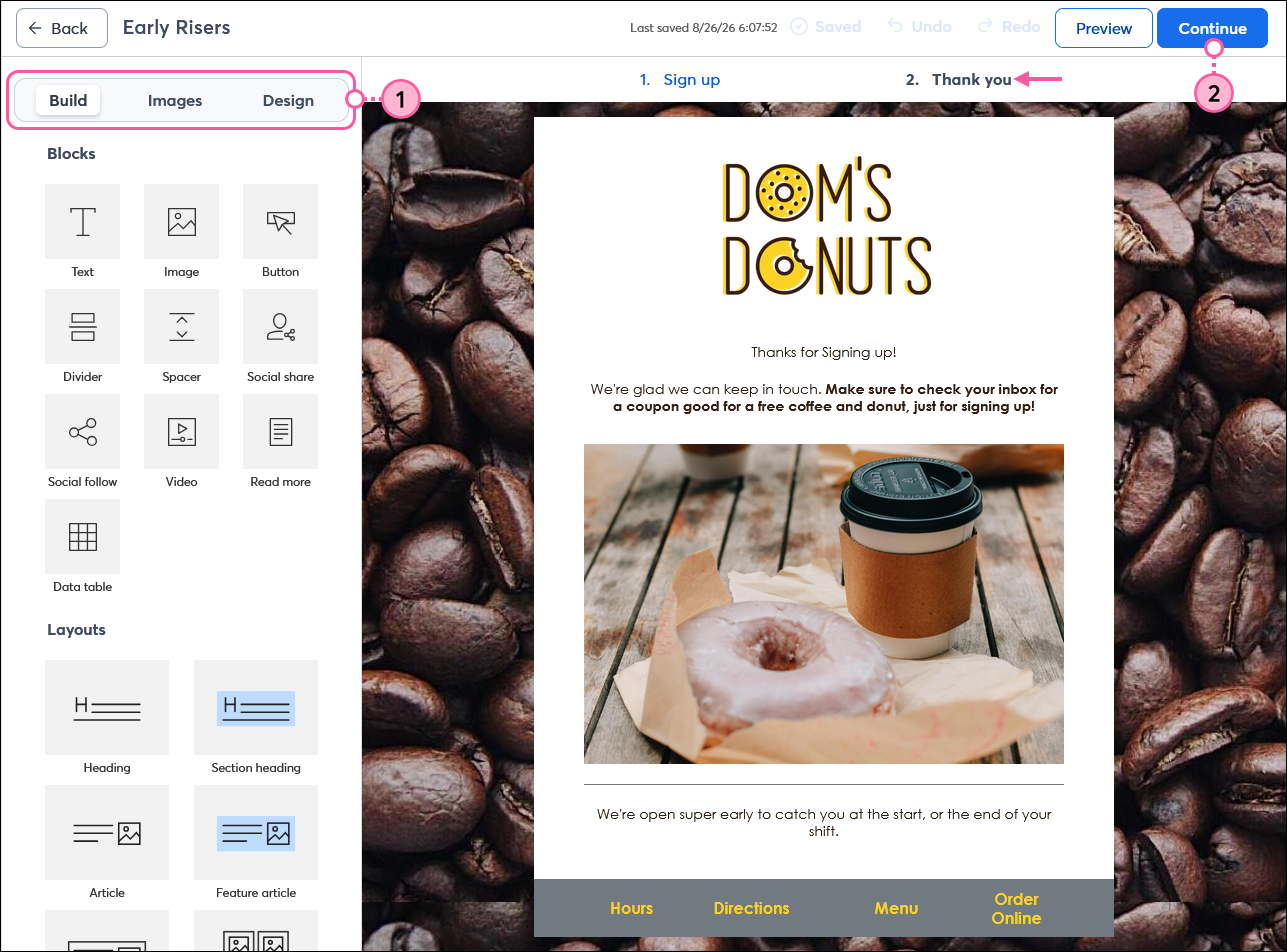
Design the "Thank you" page
The "Thank you" page gives you an opportunity to express a simple thank you, or you can give some kind of reward; it doesn't have to be monetary and can be something like information or early access!
- Use the Build, Images, and Design tabs to customize the "Thank You" page that your new contacts see after they successfully submit their information through your landing page.
Note: You can get creative with images, blocks like the Navigation Bar block, the Coupon block, and the Read More block, and you can also insert documents hosted in your Library or link a Nift gift card. - Click the Continue button.
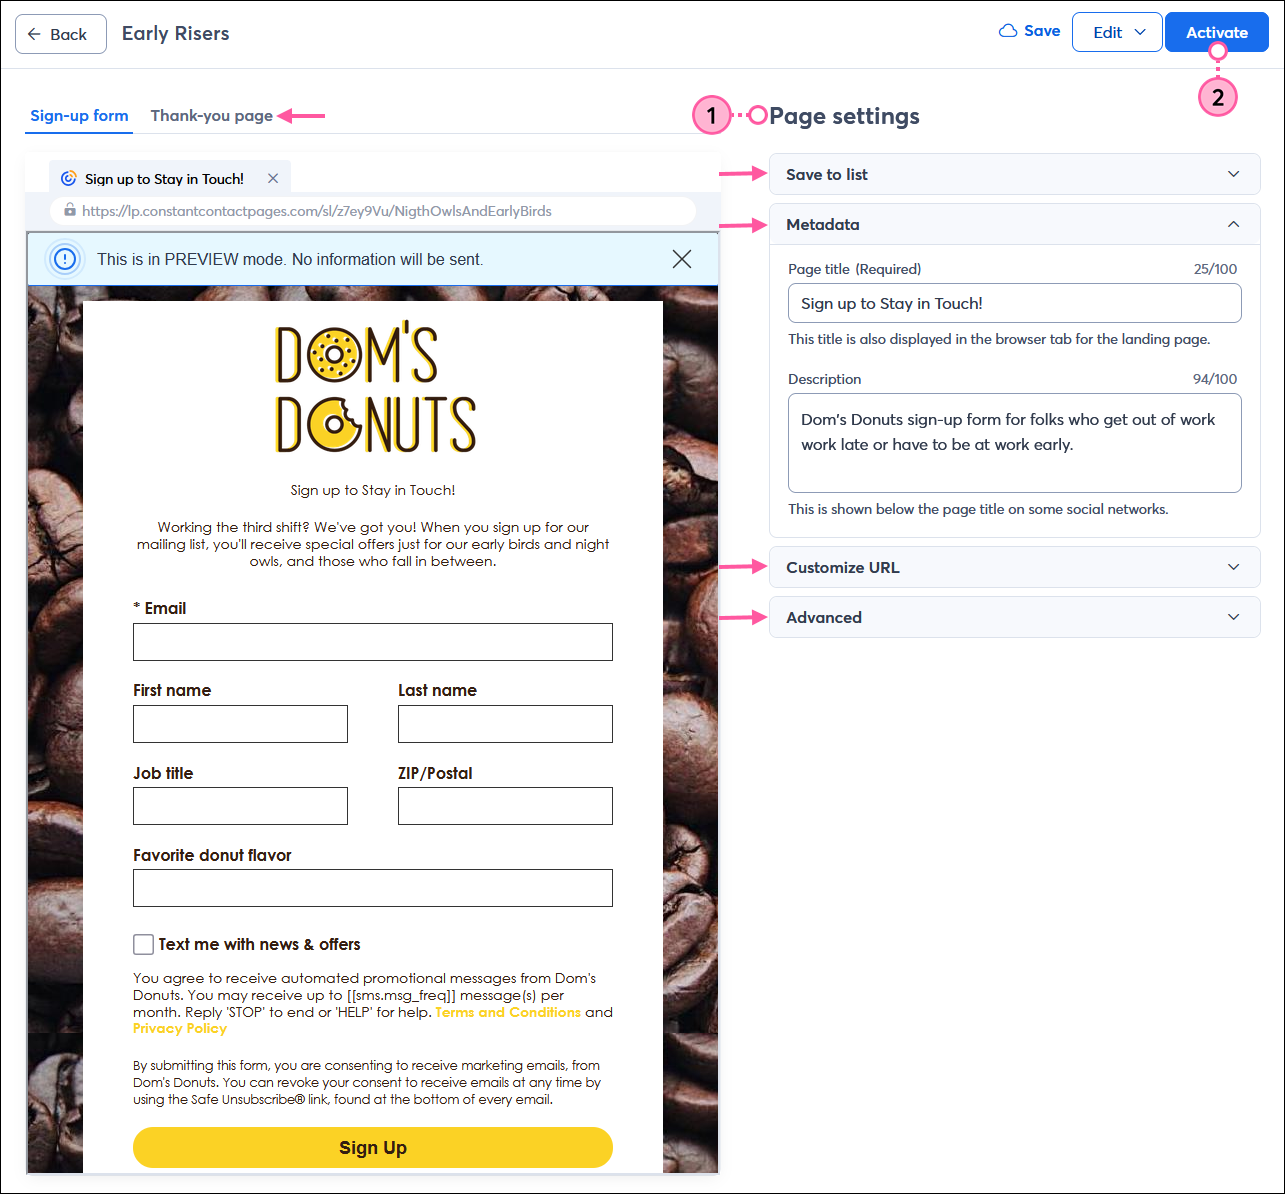
Customize the form settings and activate your landing page
- Update the settings for your landing page:
Note: The privacy policy link in the sign-up page footer can be updated through your account settings.
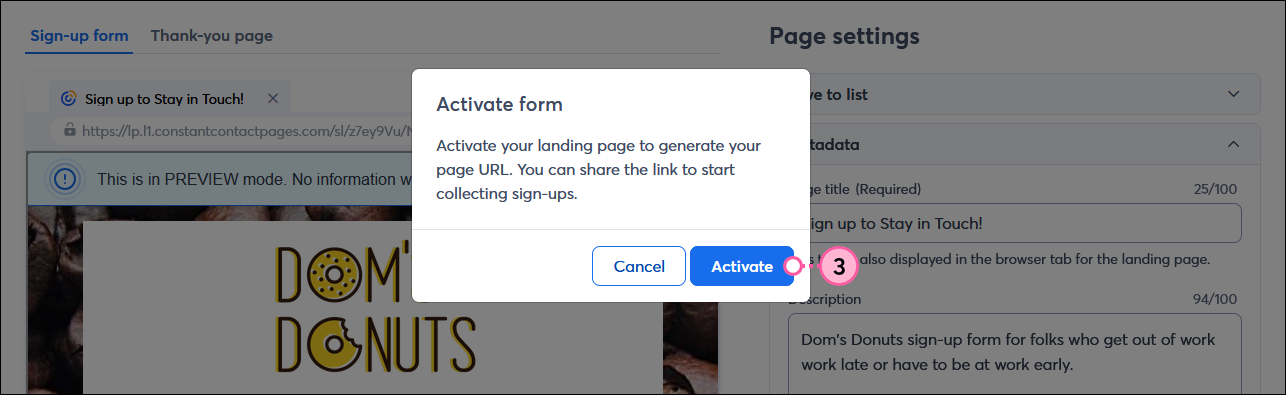
- When finished, click the Activate button in the upper right-hand corner.
- From the Activate form overlay, click the Activate button so you can start sharing your landing page around the web. The URL for your landing page doesn't work until your form is activated.
Now that your Sign-up Landing Page is created and activated, all you have to do is share it to start collecting new sign-ups. A great place to get started is by sharing it in your social media profiles. Then you can share it in your emails, in your social media posts, in a Facebook Lead Ad, as a link on your website, and even in the footer of your personal email!
Give your form a little time, and then you can start checking the reporting to see how well it's performing, too.
 | Design tip: Want to engage with your new contacts immediately after they opt-in to your list? Make sure to create a welcome path to send a welcome email while your contacts' engagement is at its highest. |

