We're making it easier to get around Constant Contact with a brand new left navigation. Not all accounts have that change yet, so if your navigation looks different from our articles, that's why–but everything from the top can now be found on the left!

Email and Digital Marketing
How can we help you?
Search our help articles, video tutorials, and quickstart guides

You've got this. You've got us. Search our Knowledge Base to quickly find answers to your questions.

Add standard fields or custom fields to a Sign-up Landing Page

Article: 000049491
Updated: June 11, 2025

Choose the standard or custom contact fields you want your new contacts to fill out and submit on through your Sign-up Landing Page, arrange them, and make fields required

Your Sign-up Landing page can be customized for your target audience. This way you can add only the fields that are necessary for your organization, keeping your form shorter.

  1. While creating or editing a Sign-up Landing page, click anywhere on the Form block.

    Landing page editor with Form Fields block
     
  2. Select the default list that new contacts are added to when they complete the sign-up form.
  3. Create your sign-up form:
  1. Click the back arrow to finish adding branding and content to your landing page.

    Sign-up Landing Page with Form fields menu expanded and Form block with fields in dual-column layout and required fields, and back arrow


Add standard fields

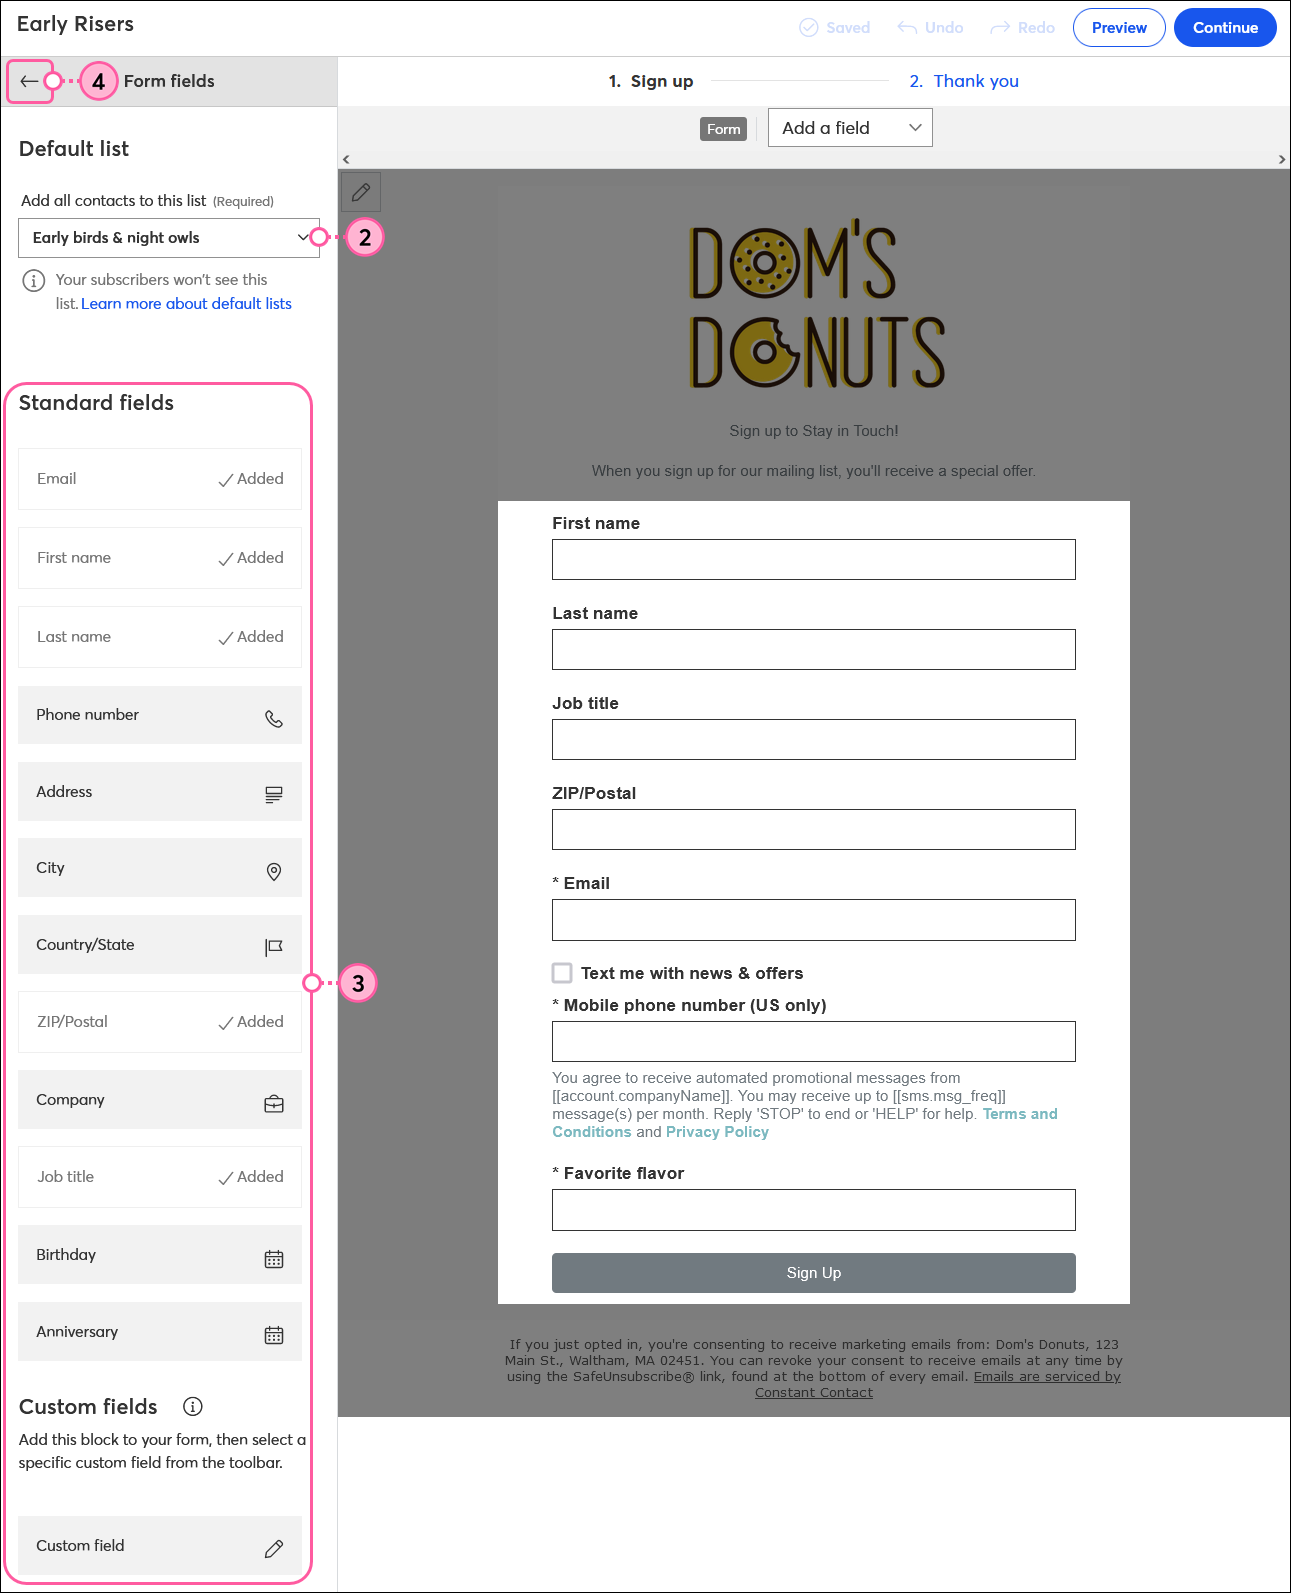
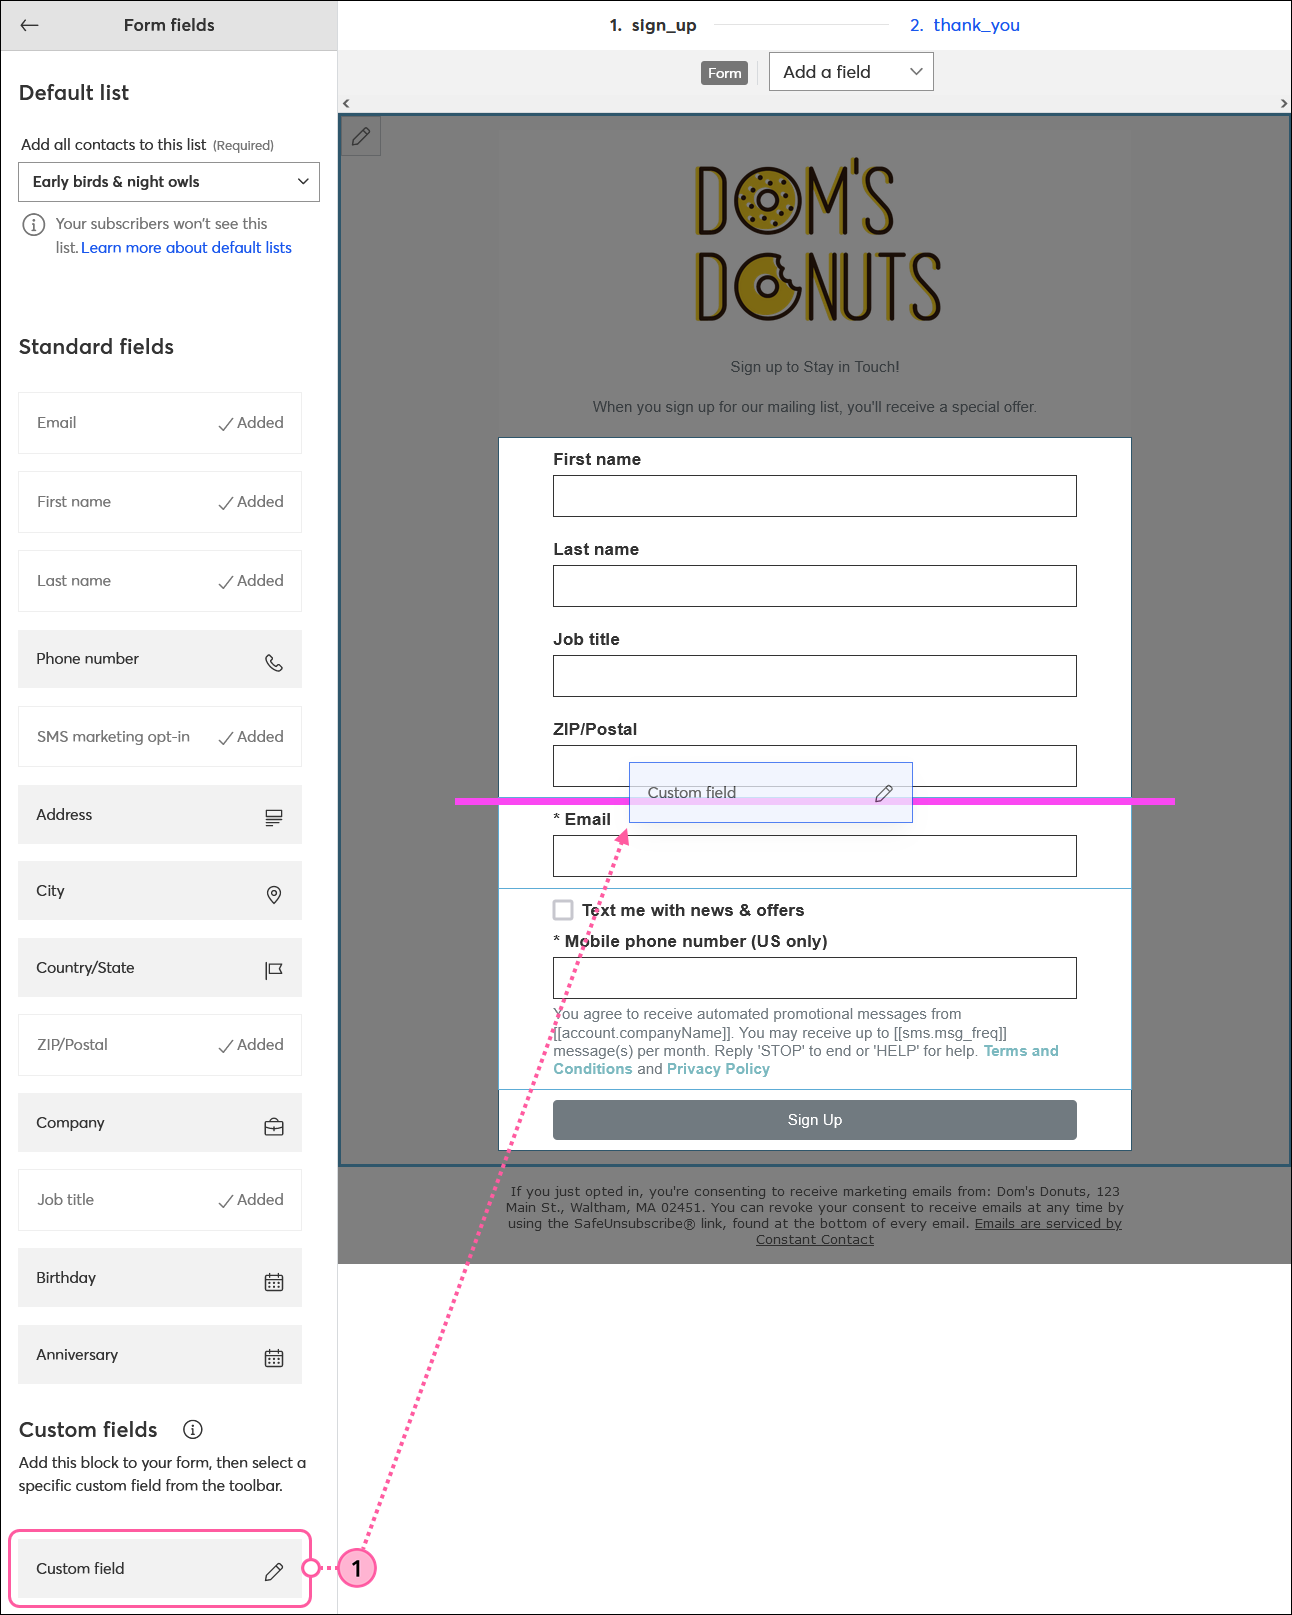
Standard fields are the bits of contact information that are common to most contacts and that Constant Contact automatically accommodates when you add or import contacts into your account. There are three ways you can add them to your form:

  • Drag a field from the Standard fields menu into the form. The field can be on its own line, or you can put it next to another field to make dual columns.
  • Double-click a field in the Standard fields menu. This adds the field to the bottom of the form, and you can drag it into a higher position or put it next to another field to make dual columns.
  • Use the drop-down menu in the Form toolbar. This adds the field to the bottom of the form, and you can drag it into a higher position or put it next to another field to make dual columns.

    Sign-up Landing Page with Form fields menu and Standard field options, and Form fields block with Form toolbar Add a field menu expanded
     

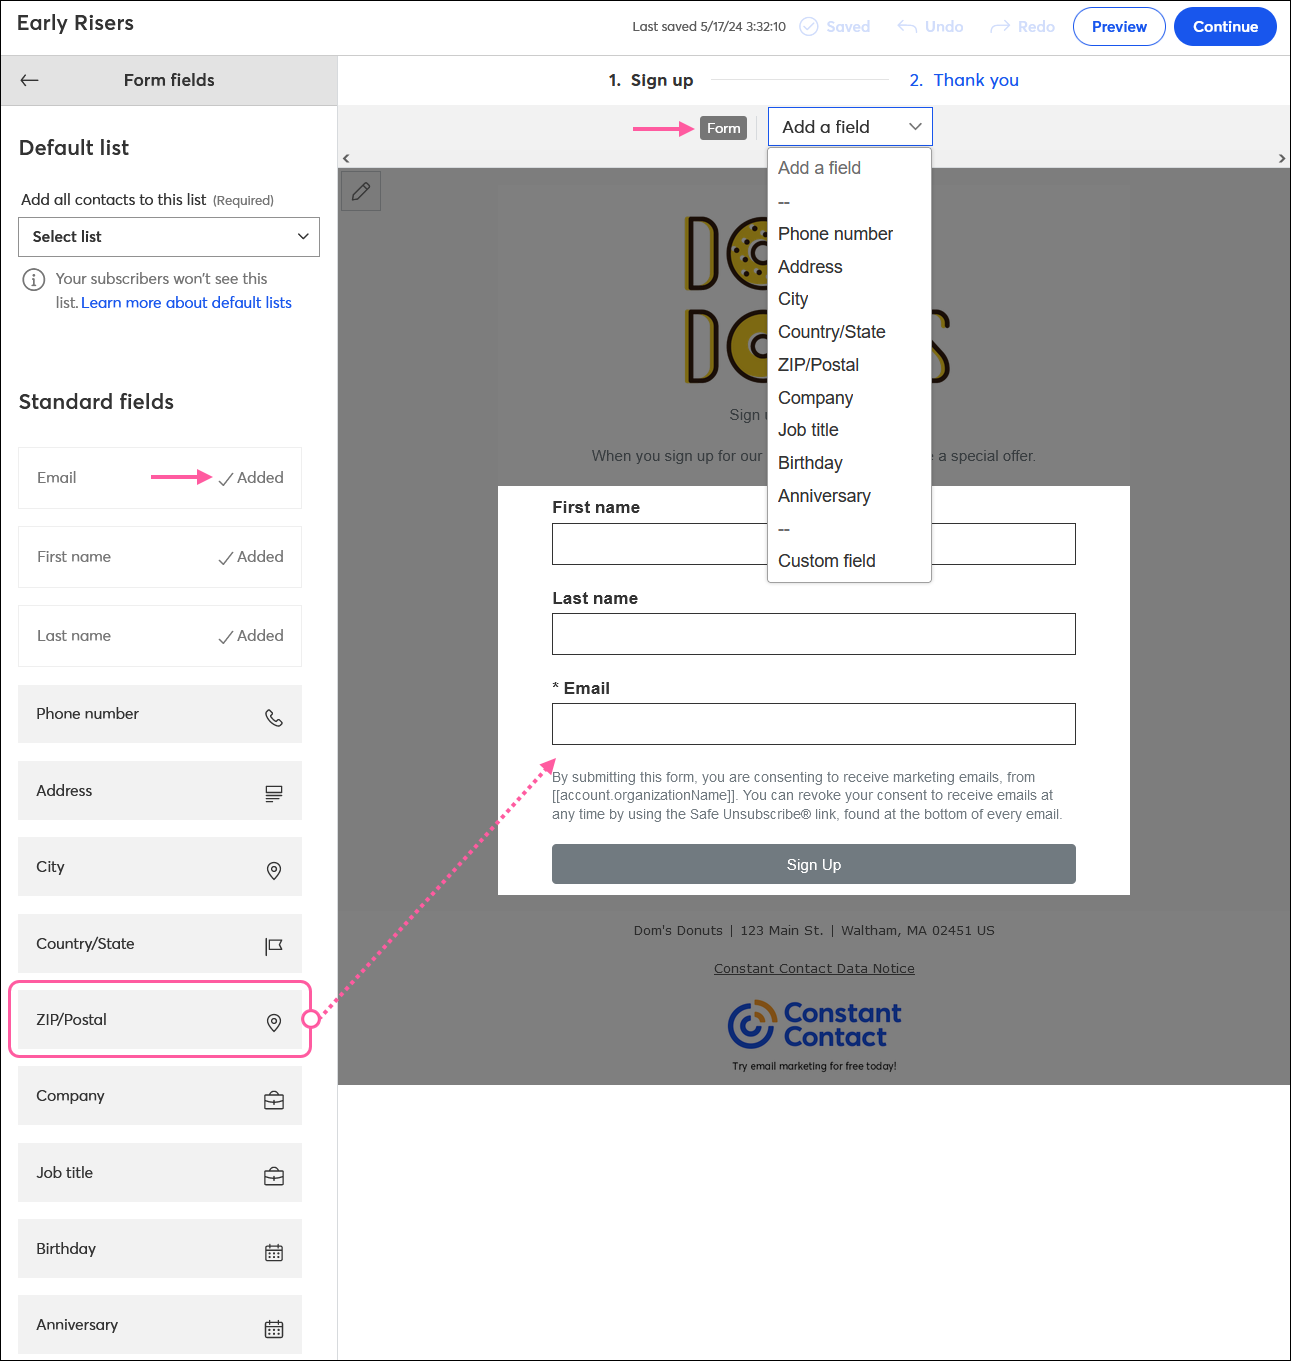
Each field can only appear in your form once. Once it's in the form, it's noted with the "Added" label in the in the Form fields menu, and removed from the drop-down menu in the Form toolbar. If a field is deleted from the form, the "Added" label is removed and the field is available in the Form fields menu to add back into your form, if you want to.


Add the SMS marketing opt-in field

Exclamation Point Icon
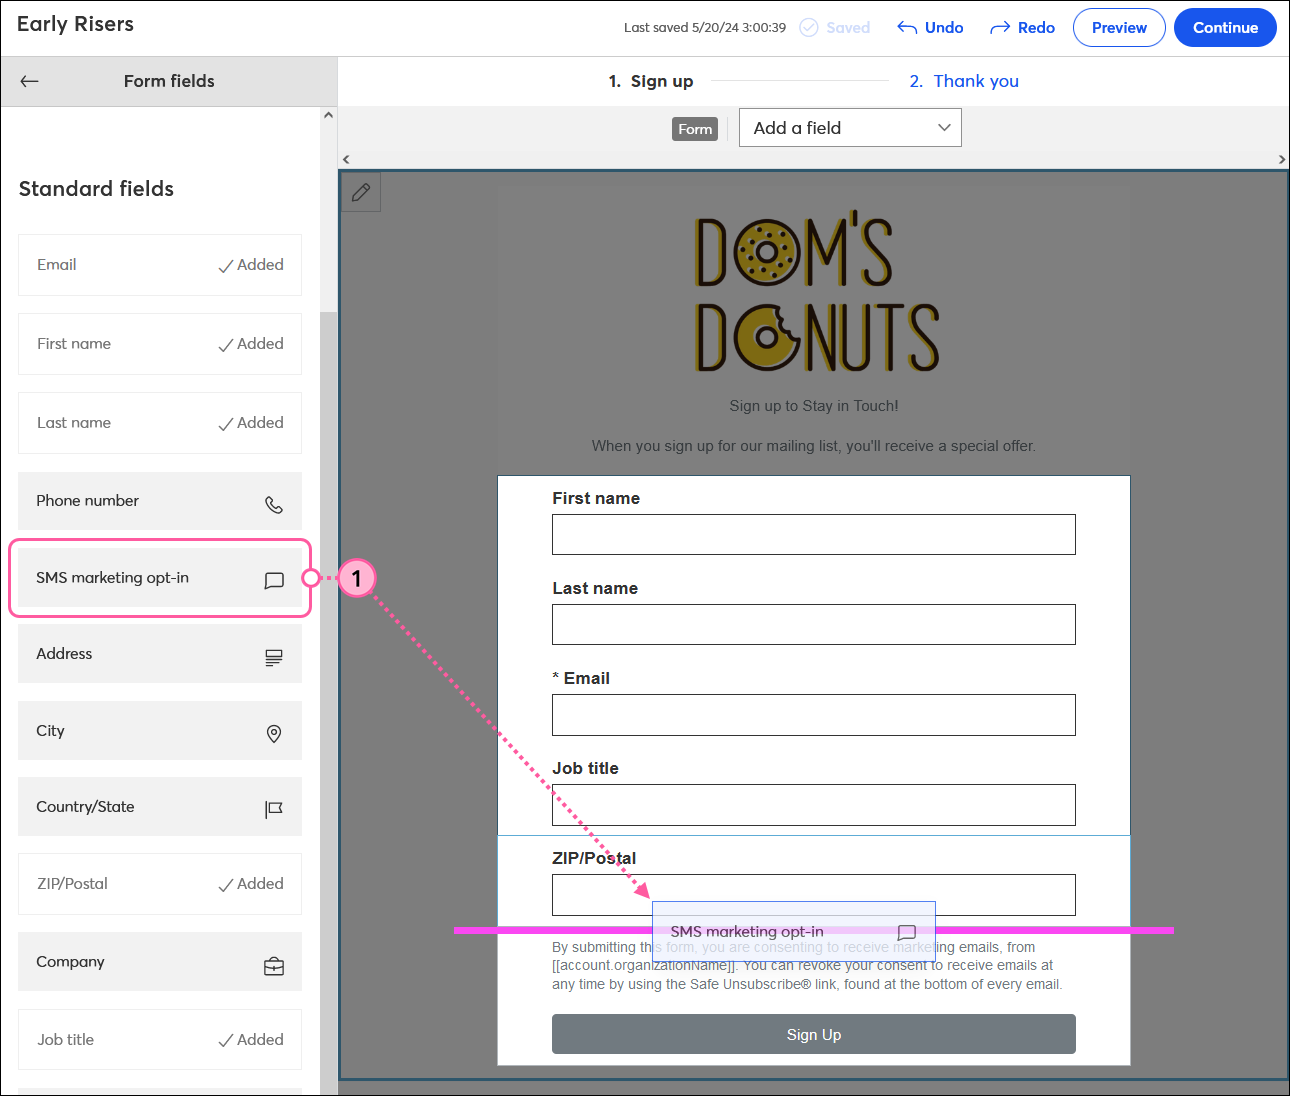
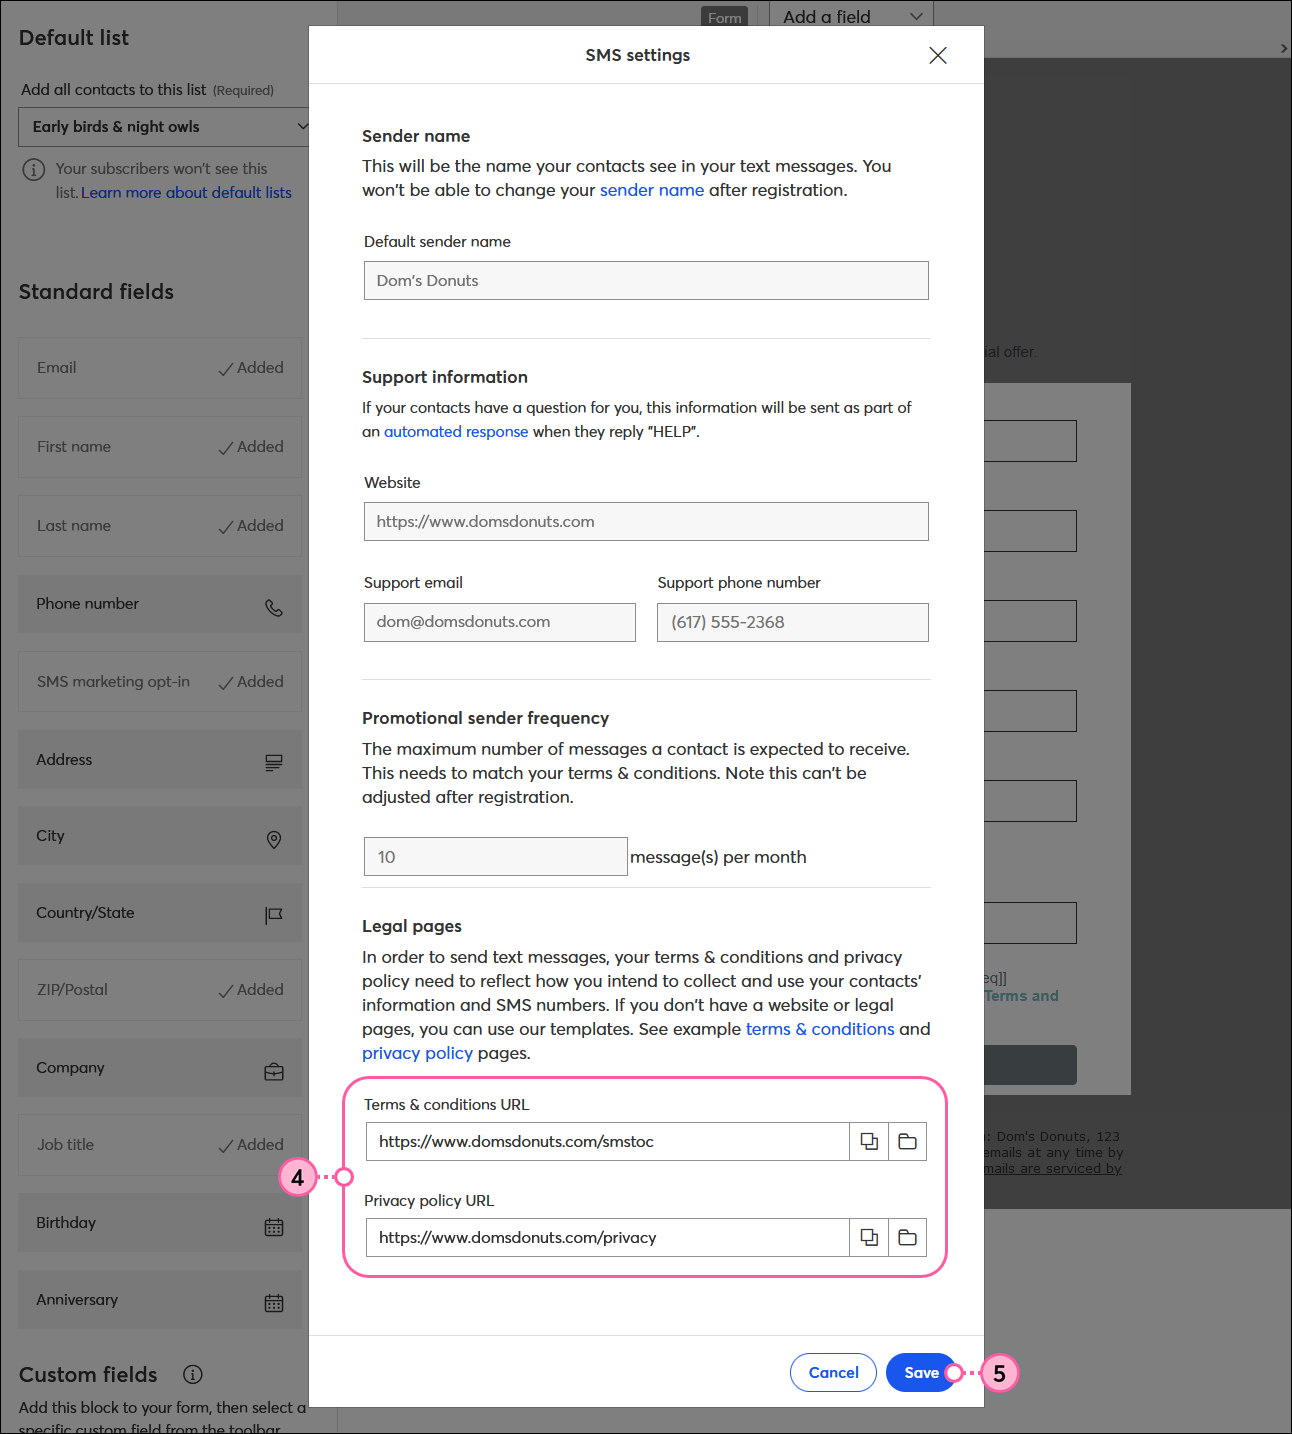
Important: In order to collect SMS contacts you have to add SMS marketing to your email plan and successfully complete the SMS registration. Contacts can only be messaged through an SMS message if they provide consent for SMS marketing and provide a valid phone number. Learn more.


You have the choice to collect email and SMS contacts or just email contacts through your Sign-up Landing Page. Here's how to enable it in your form:
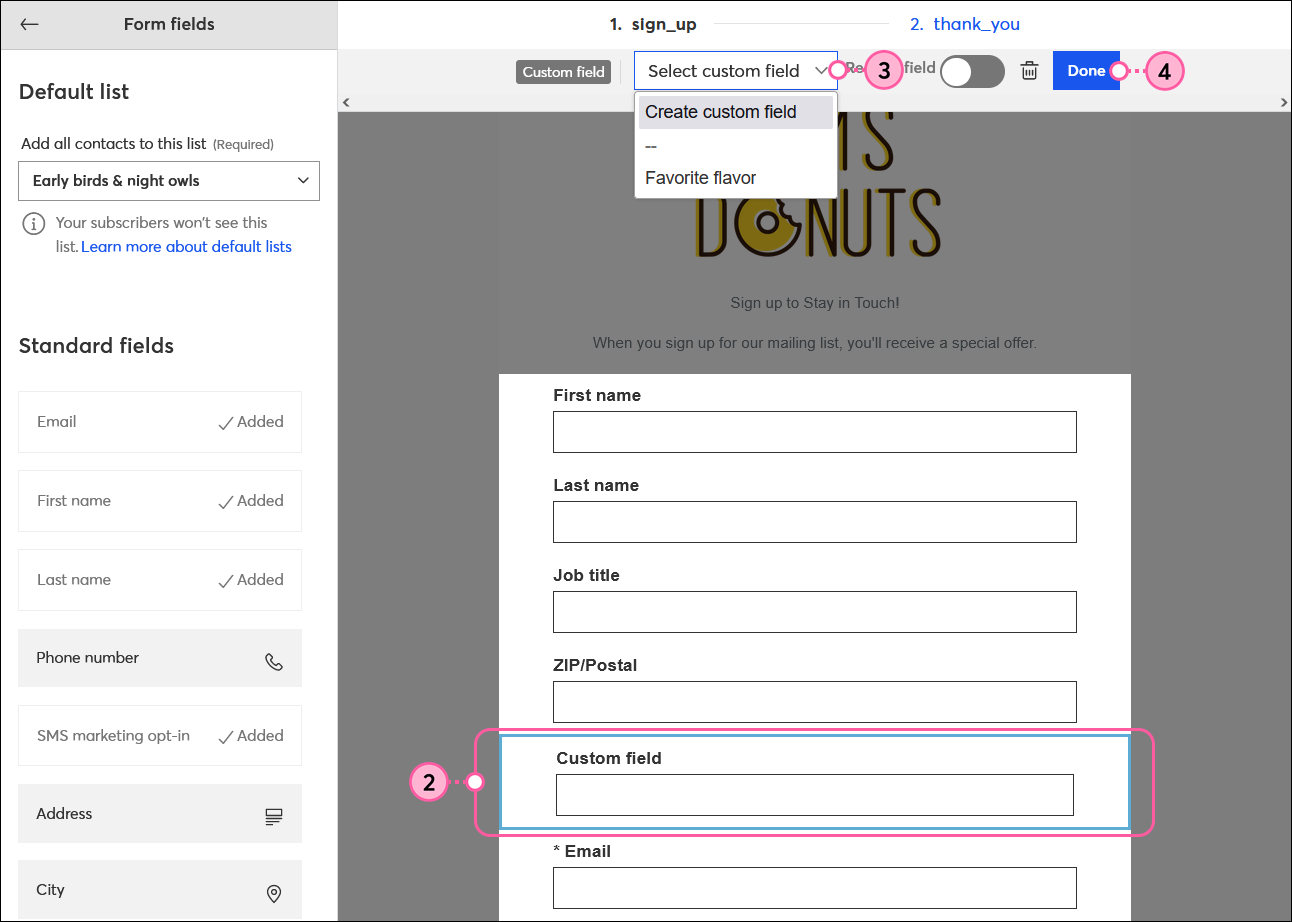
  1. Add the SMS marketing opt-in field into the form from the list of Standard fields.
    Note: If you haven't registered for SMS marketing, this field isn't available to you.

    Sign-up Landing Page editor with Form fields menu expanded, Standard fields section with SMS marketing opt-in field drag-and-dropped into the Form Fields block
     
  2. (Optional) Click on the SMS marketing opt-in field to expand its toolbar.
  3. Click the Settings icon.

    Sign-up Landing Page Form block with SMS marketing opt-in field toolbar and Settings button
     
  4. You can review your settings information and add or change document or link for your terms and conditions and privacy policy.
  5. Click the Save button.

    Sign-up Landing Page SMS settings overlay with Terms and Conditions URL and Privacy Policy URL fields, and Save button


Add or create custom fields

Custom fields are the fields that you create yourself based on the unique needs of your organization. Here's how to create them for your form:

  1. Add a custom field to your form. This can be done in the same ways that a Standard field can be added.

    Sign-up Landing Page editor with Form fields menu expanded and Custom fields section with Custom field field drag-and-dropped into Form block
     
  2. Click on the Custom field
  3. Select a custom field from the drop-down menu or click the "Create custom field" option to make a new one.
  4. Click Done.

    Sign-up Landing Page Form block with Custom field toolbar, Custom field drop-down menu, and Done button


Make a field required

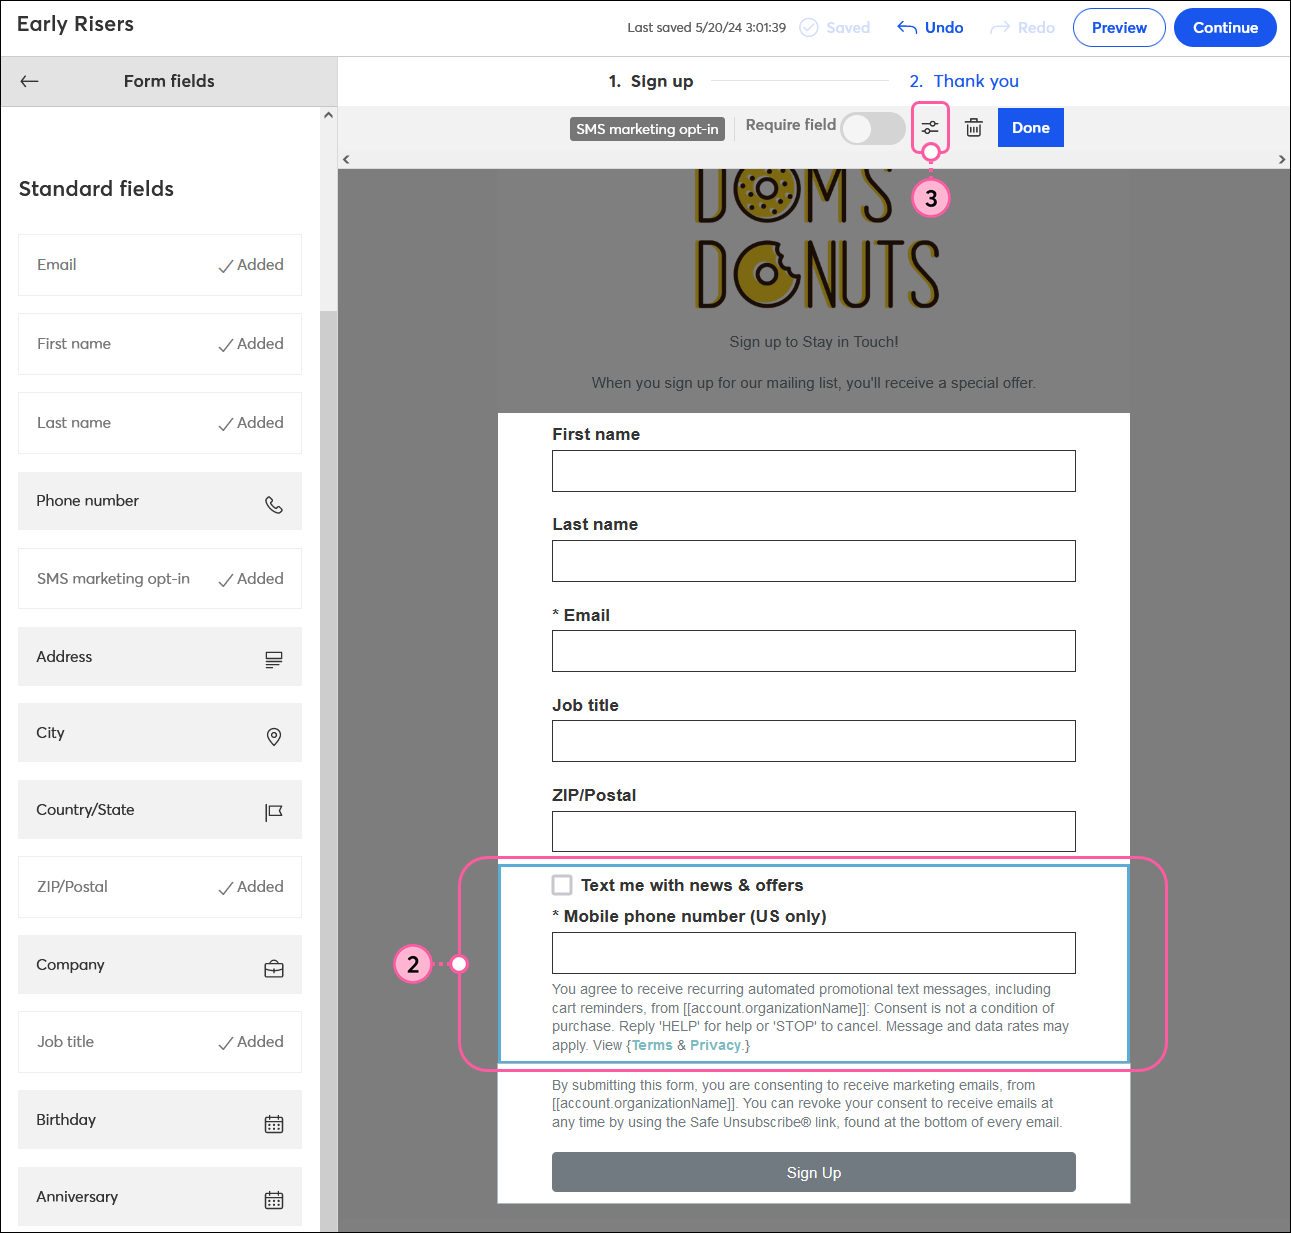
Required fields are the fields that a contact has to answer or they won't be able to submit the sign-up form. Here's how to set them as required after they've been added to your form:

  1. Click on the standard or custom field you want to make required.
    Note: The email address field and SMS marketing opt-in field are always required and can't be changed. 
  2. Click the Require Field toggle to turn it on.
  3. Click the Done button.

    Sign-up Landing Page with Custom field toolbar with Require Field toggle enabled and Done button
     

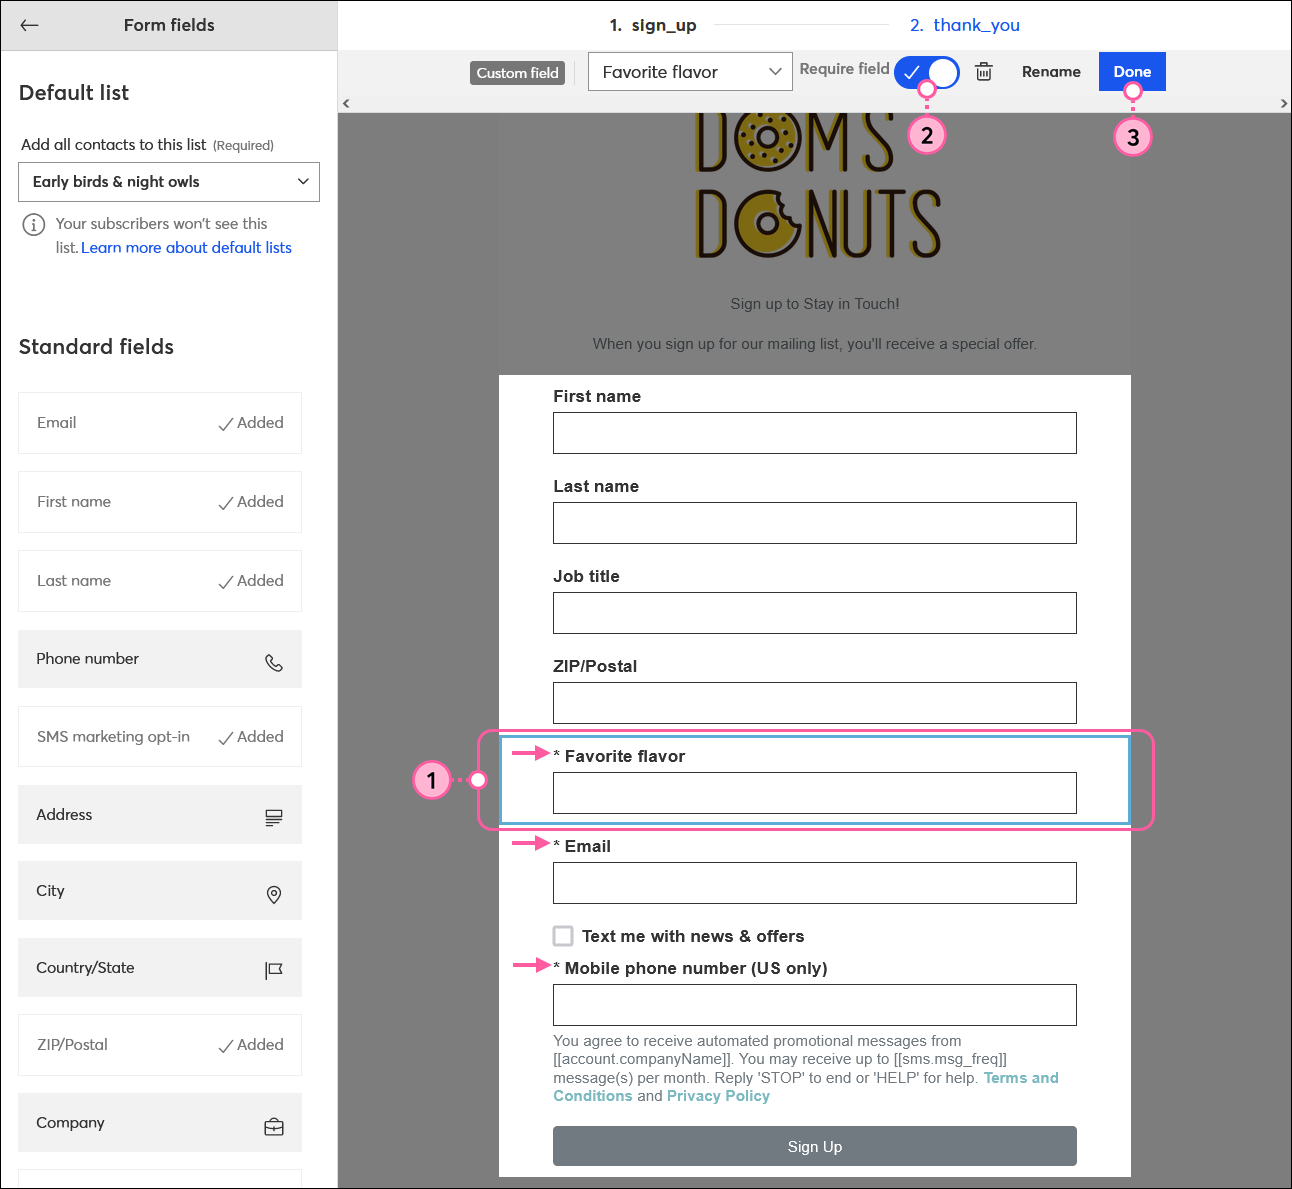
Required fields are marked with an asterisk. Repeat for each field you want to require.


Light Bulb IconDesign tip: Making too many fields required can scare off potential contacts from providing their information. Only making fields required when they're essential for your marketing is a better practice.


Reorder the form fields

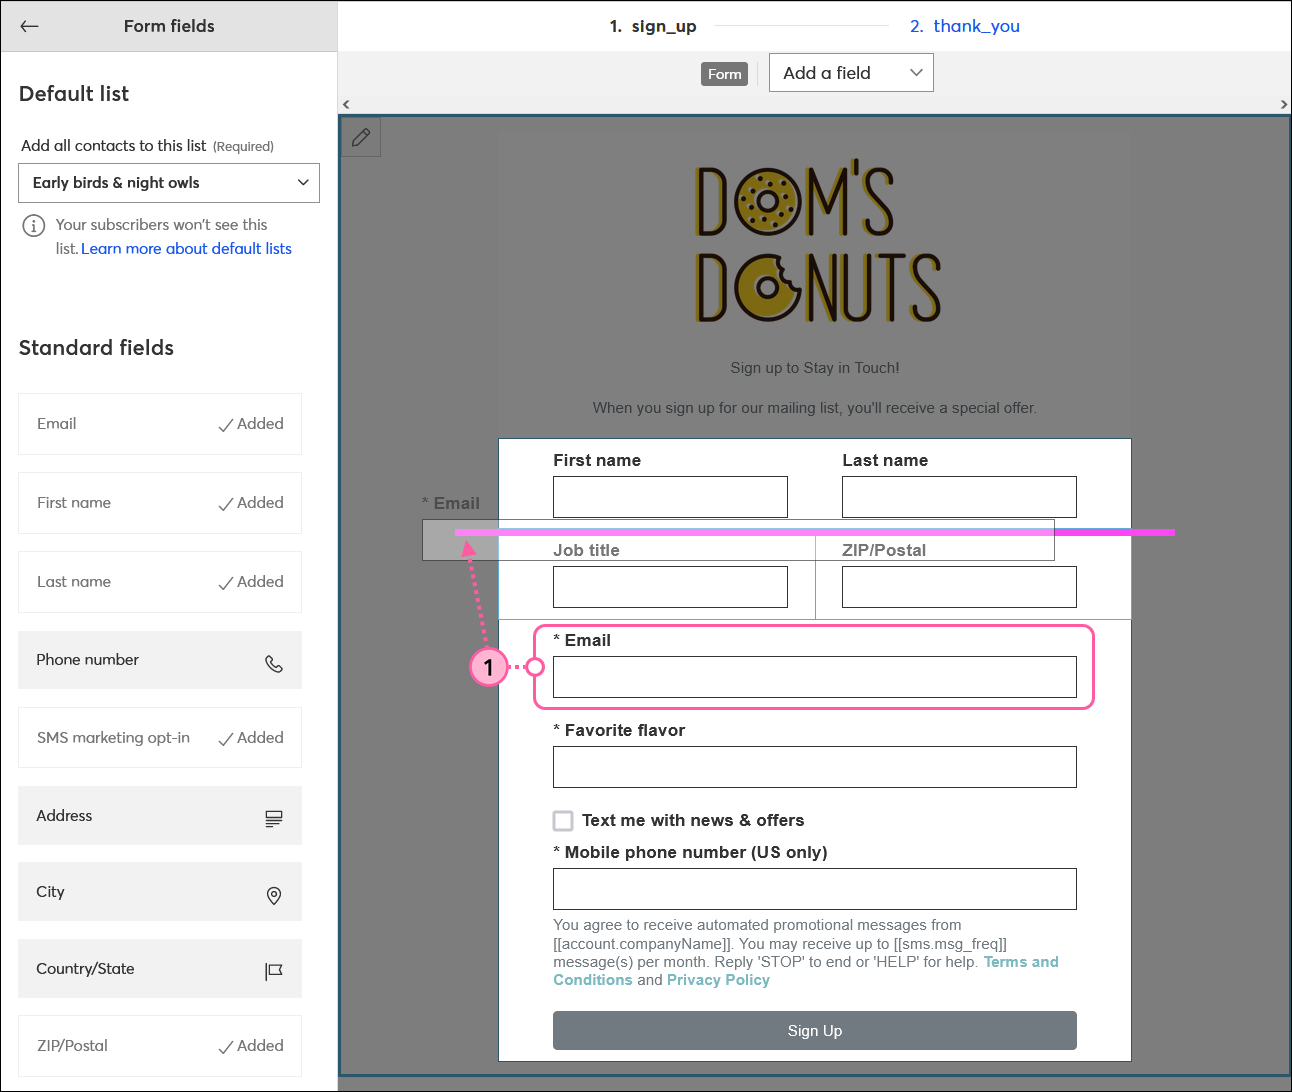
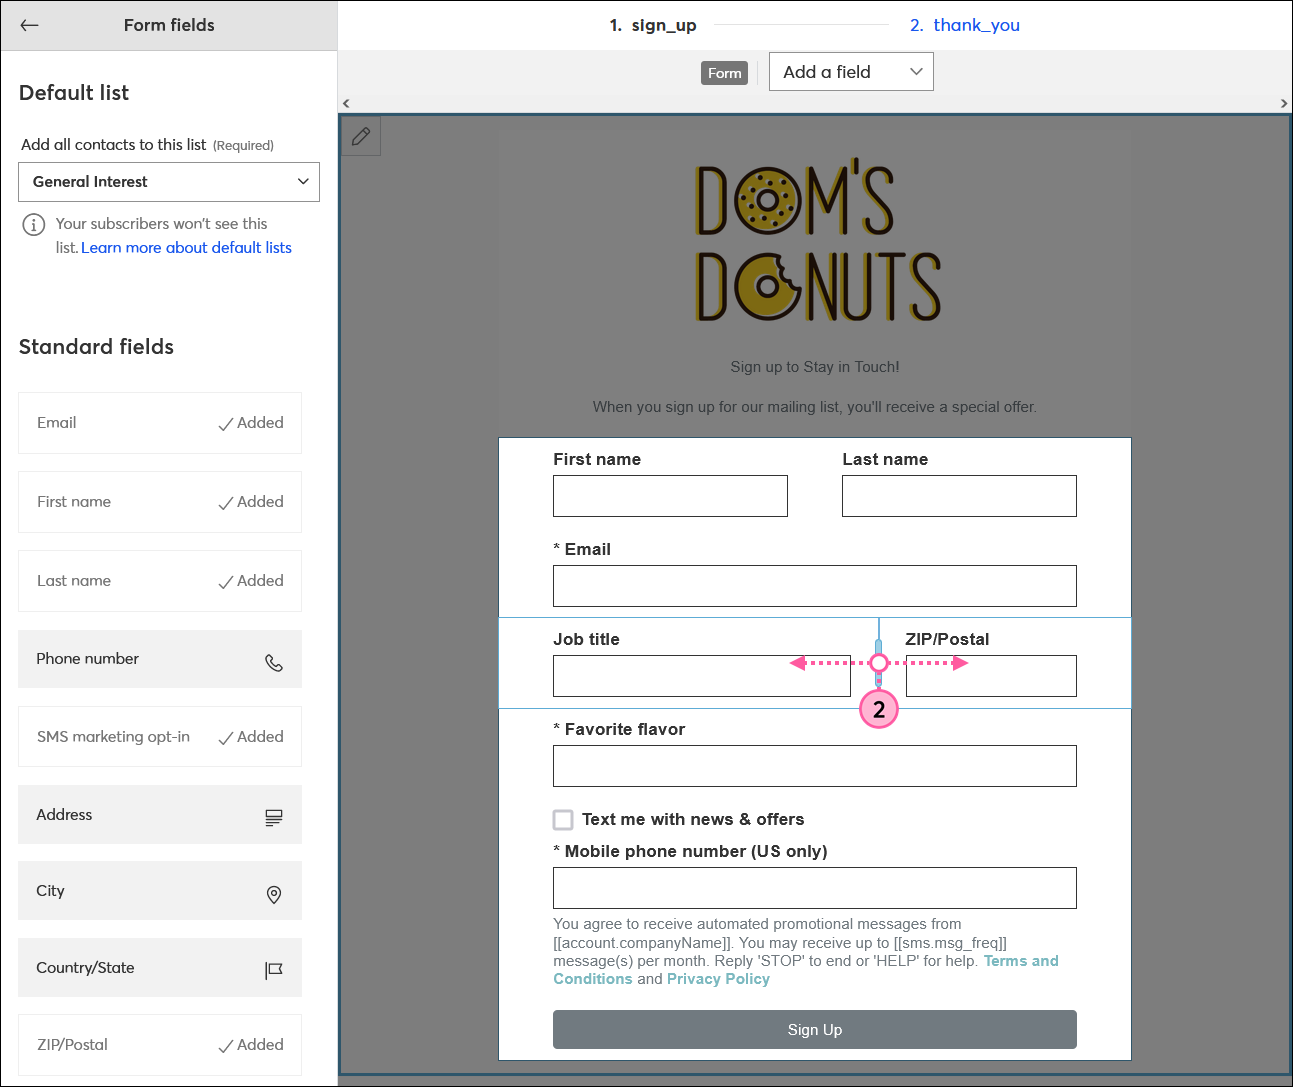
The form fields aren't set in stone. You can change them and move them around to customize the order any time you want, even after the form has been activated. The guideline is there to help you find the right placement, as long as it's above the Sign Up button:

  1. Drag-and-drop a form field to a new location and use the guideline to help you find the right placement. Fields can be placed above or below any other field, and can also be placed next to another field to create a dual-column layout.

    Sign-up Landing Page editor with Form fields menu expanded and Form block with custom field drag-and-dropped into new location, with guideline visible
     
  2. (Optional) If you have fields that sit next to each other, use the vertical divider to change the length of the fields that are in a dual column layout.

    Sign-up Landing Page editor with Form fields menu expanded, and Form block with First name and Last name fields next to eachother with vertical divider drag handle visible


Exclamation Point IconImportant: The size of the form fields is only visual. Each field has its own maximum character count no matter if it's on its own line or in a dual-column layout. Learn more.


Constant Contact Logo

Copyright © 2025 · All Rights Reserved · Constant Contact · Privacy Center