Managing your social media channels right in Constant Contact is a time-saver! We make it super easy to connect your Facebook, Instagram, LinkedIn, and TikTok accounts and then create and share customized posts to them. Here's how:
Desktop instructions
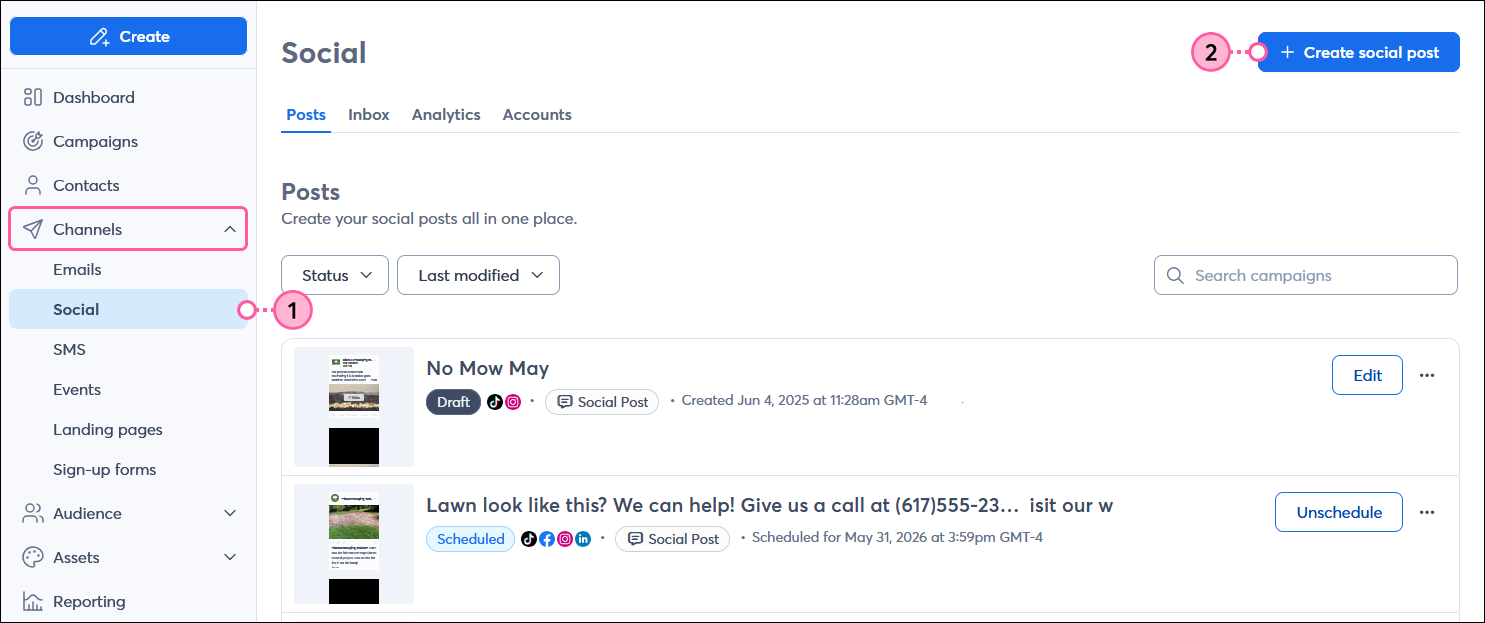
- In the left-hand menu, click Channels > Social.
- Click the + Create social post button in the upper-right.
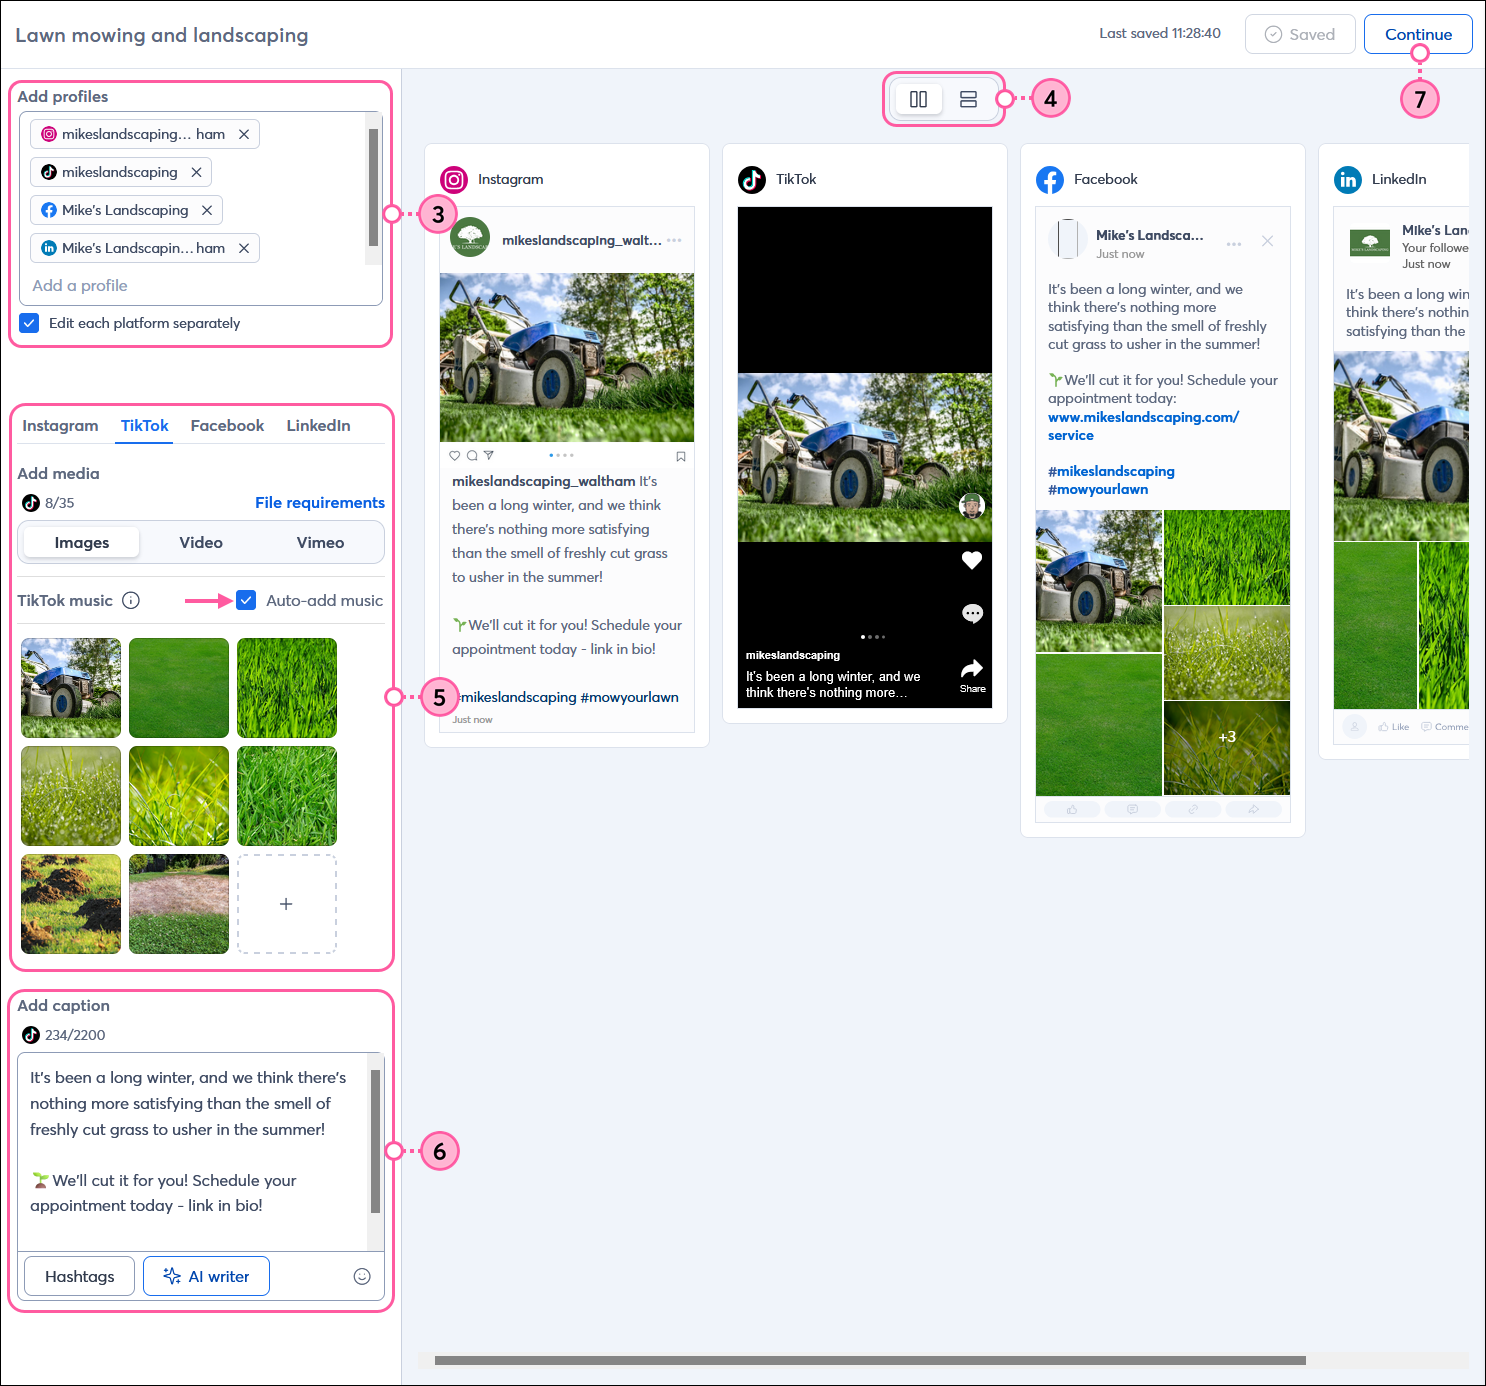
- Select the social profiles you want to post to.
Note: Checking the "Edit each platform separately" box lets you customize a post for each social profile with unique text, images, videos, emojis, hashtags, and links. If you want to save time, add as much shared content as possible before checking the box to add the content to each post. Then click the tab for each social platform to further customize the post.
Design tip: Facebook, Instagram, LinkedIn, and TikTok are all social media platforms, but they aren't the same. Check out our best practices for creating posts for each social profile. - (Optional) Use the toggle to view your posts with vertical or horizontal orientation for better editing on your computer or mobile device.
- In the Add media section, select the type of media you want to include in your post, click the + (plus icon) button to:
- Add images - Images can be selected from your Library, chosen from the stock image gallery, or imported from Canva. You can import new images or use our image editing tools to further customize them with text, borders, stickers, etc. Facebook posts have a maximum of 30 images; Instagram, 10; LinkedIn, 20; and TikTok, 35, and images must be JPEGs. Each platform handles displaying multiple images in a single post differently, depending on the image size, shape, and orientation. When sharing images on TikTok, you can add music to your post. The music is auto-selected, but you can change it later from within your TikTok account.
- Add a short-form video: Each post can include a single video, but each post variation can use a different video. Videos can be both vertical and horizontal, but vertical looks best for Instagram Reels and on TikTok.
- Add a Vimeo video - Once your Vimeo account is connected, you can add videos to your social posts from your Library and even create new videos. Each post can include a single video, but each post variation can consist of a different video.
- In the Add caption section, enter the text portion of your post, including any URLs, hashtags, and emojis. As you type, you can see a preview of what your post looks like on your selected profile. The previews of each post are updated in real time as you make updates and accurately reflect what users see on each platform, including the post layout and image cropping. Facebook has a maximum of 63,206 characters, Instagram and TikTok each have a maximum of 2,200 characters, and LinkedIn has a maximum of 3,000 characters.
- Write with AI - If you're not sure what to write and need some help getting started, click the AI writer button. With a bit of prompt information, we'll create a post for you that you can edit and further customize.
- Add hashtags - You can type in any hashtags you want, but if you find yourself using the same hashtags over and over again, you can save yourself some time by adding them to a hashtag group. The group can be added to a post with a couple of clicks, saving you time! Just click the Hashtags button underneath the caption field to get started!
- Add emoji - Choose emoji to add to your post by clicking the smiley face icon below the caption. The emojis available in the menu display the most consistently across all social platforms, but you can paste in other emojis.
- Add URLs - Both Facebook and LinkedIn allow clickable URLs within posts and generate a link preview from the URL. You can override the link preview by adding images or videos. Instagram allows URLs in post content, but they're not clickable. TikTok doesn't allow URLs in post content; it's best to point to the link in your bio for both platforms.
- When your content is ready, click the Continue button.
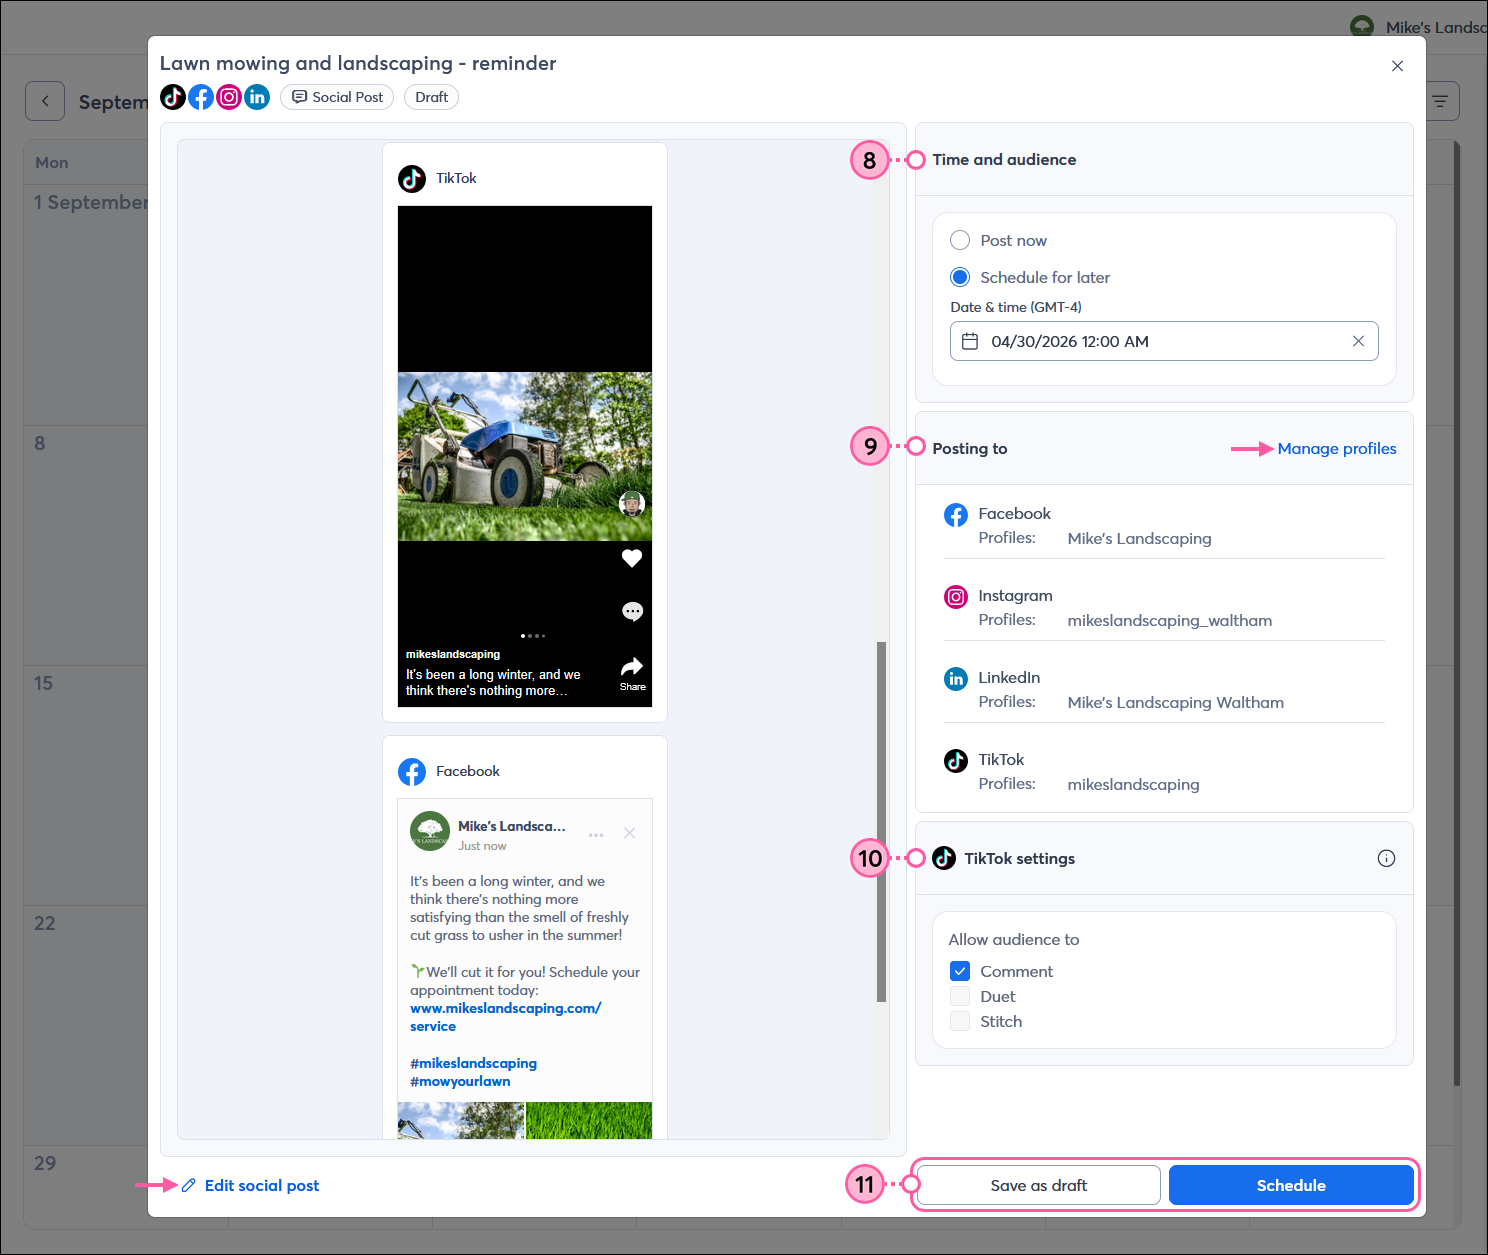
- In the Time and audience section, select how you want to share your post:
- Publish now - Choose this option to share your post immediately.
- Schedule for later - Choose this option to schedule your post up to 2 years in advance. Select a date and time to publish your post. The time zone defaults to the time zone you selected in your account settings.
- (Optional) In the Posting to section, review the profiles you want to share the post on. Click "Manage profiles" to add or remove profiles.
- (Optional) If you are posting to TikTok, select your TikTok settings to enable or disable comments, duets, or stitching for your post.
- Click the Schedule or Post now button. If you're not ready to publish, click the Save as draft button to finish editing your post later.
Note: The ability to schedule posts for later is not available in all Constant Contact plans. If you don’t have full access, you may need to upgrade your plan.
Once your post is published, you can check the reporting to see how it's performing. Your post is also visible on your campaign calendar—you can even create and schedule a series of posts from the calendar, or plan and create a series of posts in combination with other campaign types, like emails, events, and surveys, using our Campaign Builder.
Mobile web instructions
If you are using Constant Contact on your mobile device's web browser (versus your desktop computer or Constant Contact's mobile app), the flow for creating an event is more streamlined; with a sentence or two, it drafts 3 post variations using AI that you can further customize to get your post published quickly.
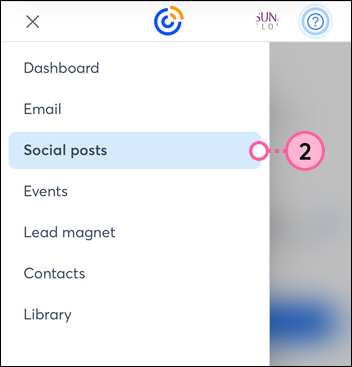
- Click the menu icon in the upper-left of the screen.
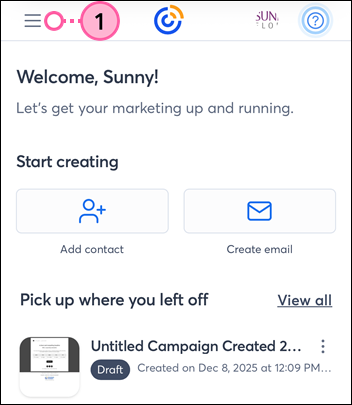
- Select the "Social posts" option.
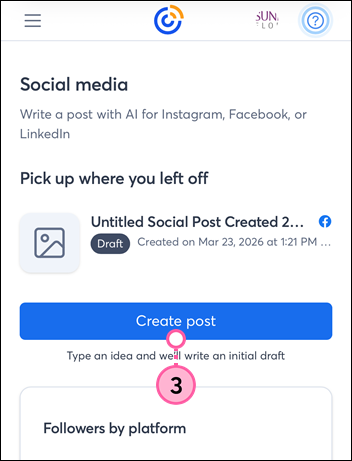
- Click the Create post button.
Note: If you haven't yet connected a social profile, you can do so by scrolling a little below the Create post button, or you can wait and connect your profile when you're ready to publish your post.
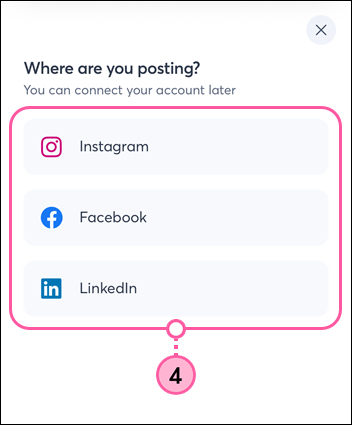
- Select a social media platform for your post. You can't select more than one platform at a time. However, if you have more than one profile for the platform you choose, you can select multiple profiles in step 12.
Note: TikTok isn't available yet, but you can log in to your account on your laptop or tablet to create TikTok posts.
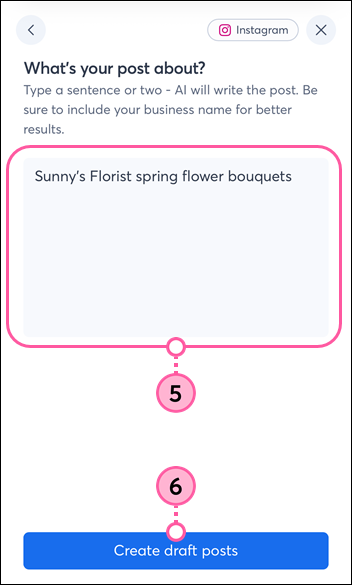
- Enter a sentence or two that summarizes what you want to include in your post.
- Click the Create draft posts button.
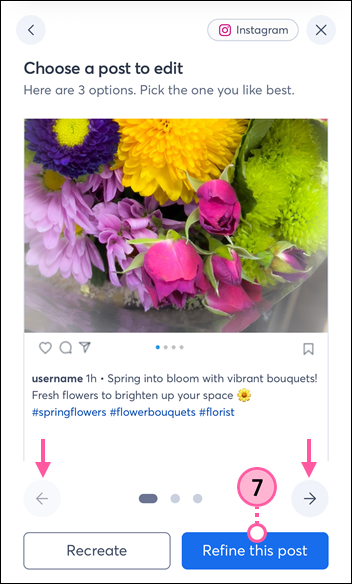
- Use the arrows to scroll through your three post options and click the Refine this post button to further edit the text, image, and hashtag content of your chosen post.
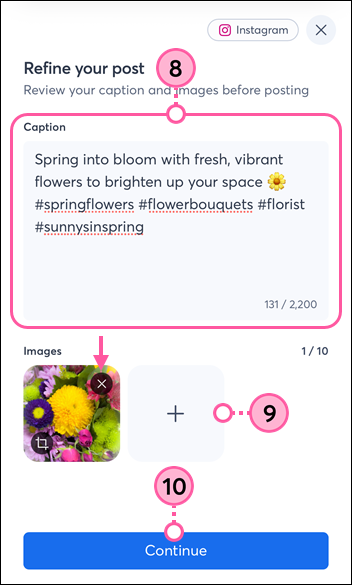
- Update the content of your post. You can add emoji, hashtags, and even a URL.
Note: URLs aren't clickable in an Instagram post, so it's better to point readers to the link in your bio. - (Optional) Click the + button to select an image from your Library. You can delete an image by clicking the X button in the upper-right corner of its thumbnail.
Note: The AI-generated image is added to your Library for future use. - Click the Continue button.
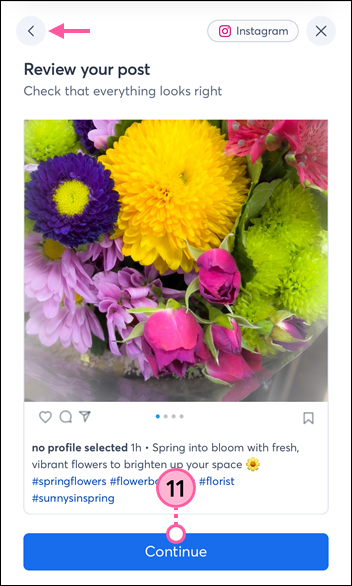
- Review your post, then click the Continue button when you're ready to share it. If you need to edit the post further, click the back arrow in the upper-left.
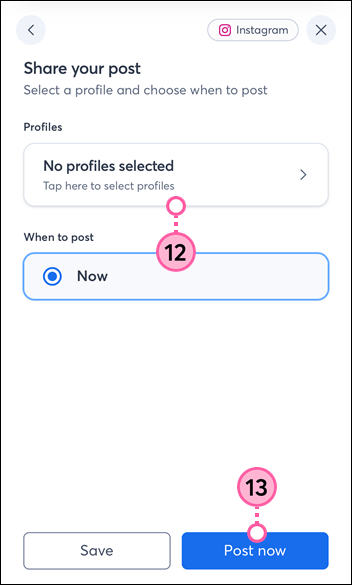
- (Optional) Review the profiles you want to share your post on.
- Click the Post now button.
 | Design tip: If mobile is your preferred way to work, install the Constant Contact mobile app. You can create posts for social media, create emails, and manage your contacts, too! |
Any links we provide from non-Constant Contact sites or information about non-Constant Contact products or services are provided as a courtesy and should not be construed as an endorsement by Constant Contact.
Want to learn more about managing your social media marketing? Watch our webinar:
Learn more about marketing and Constant Contact through our free, live webinars.