The information displayed in the Opportunity Manager can be customized to suit your needs. You can save this information in individual viewable displays—or views, for short.
In this article, you'll learn how to modify the columns in your saved views, within the Opportunity Manager.
| Administrators | ✓ | |
| Company Managers | ✓ | |
| Marketing Managers | ||
| Sales Managers | ✓ | |
| Salespersons | ✓ | |
| Jr. Salespersons |
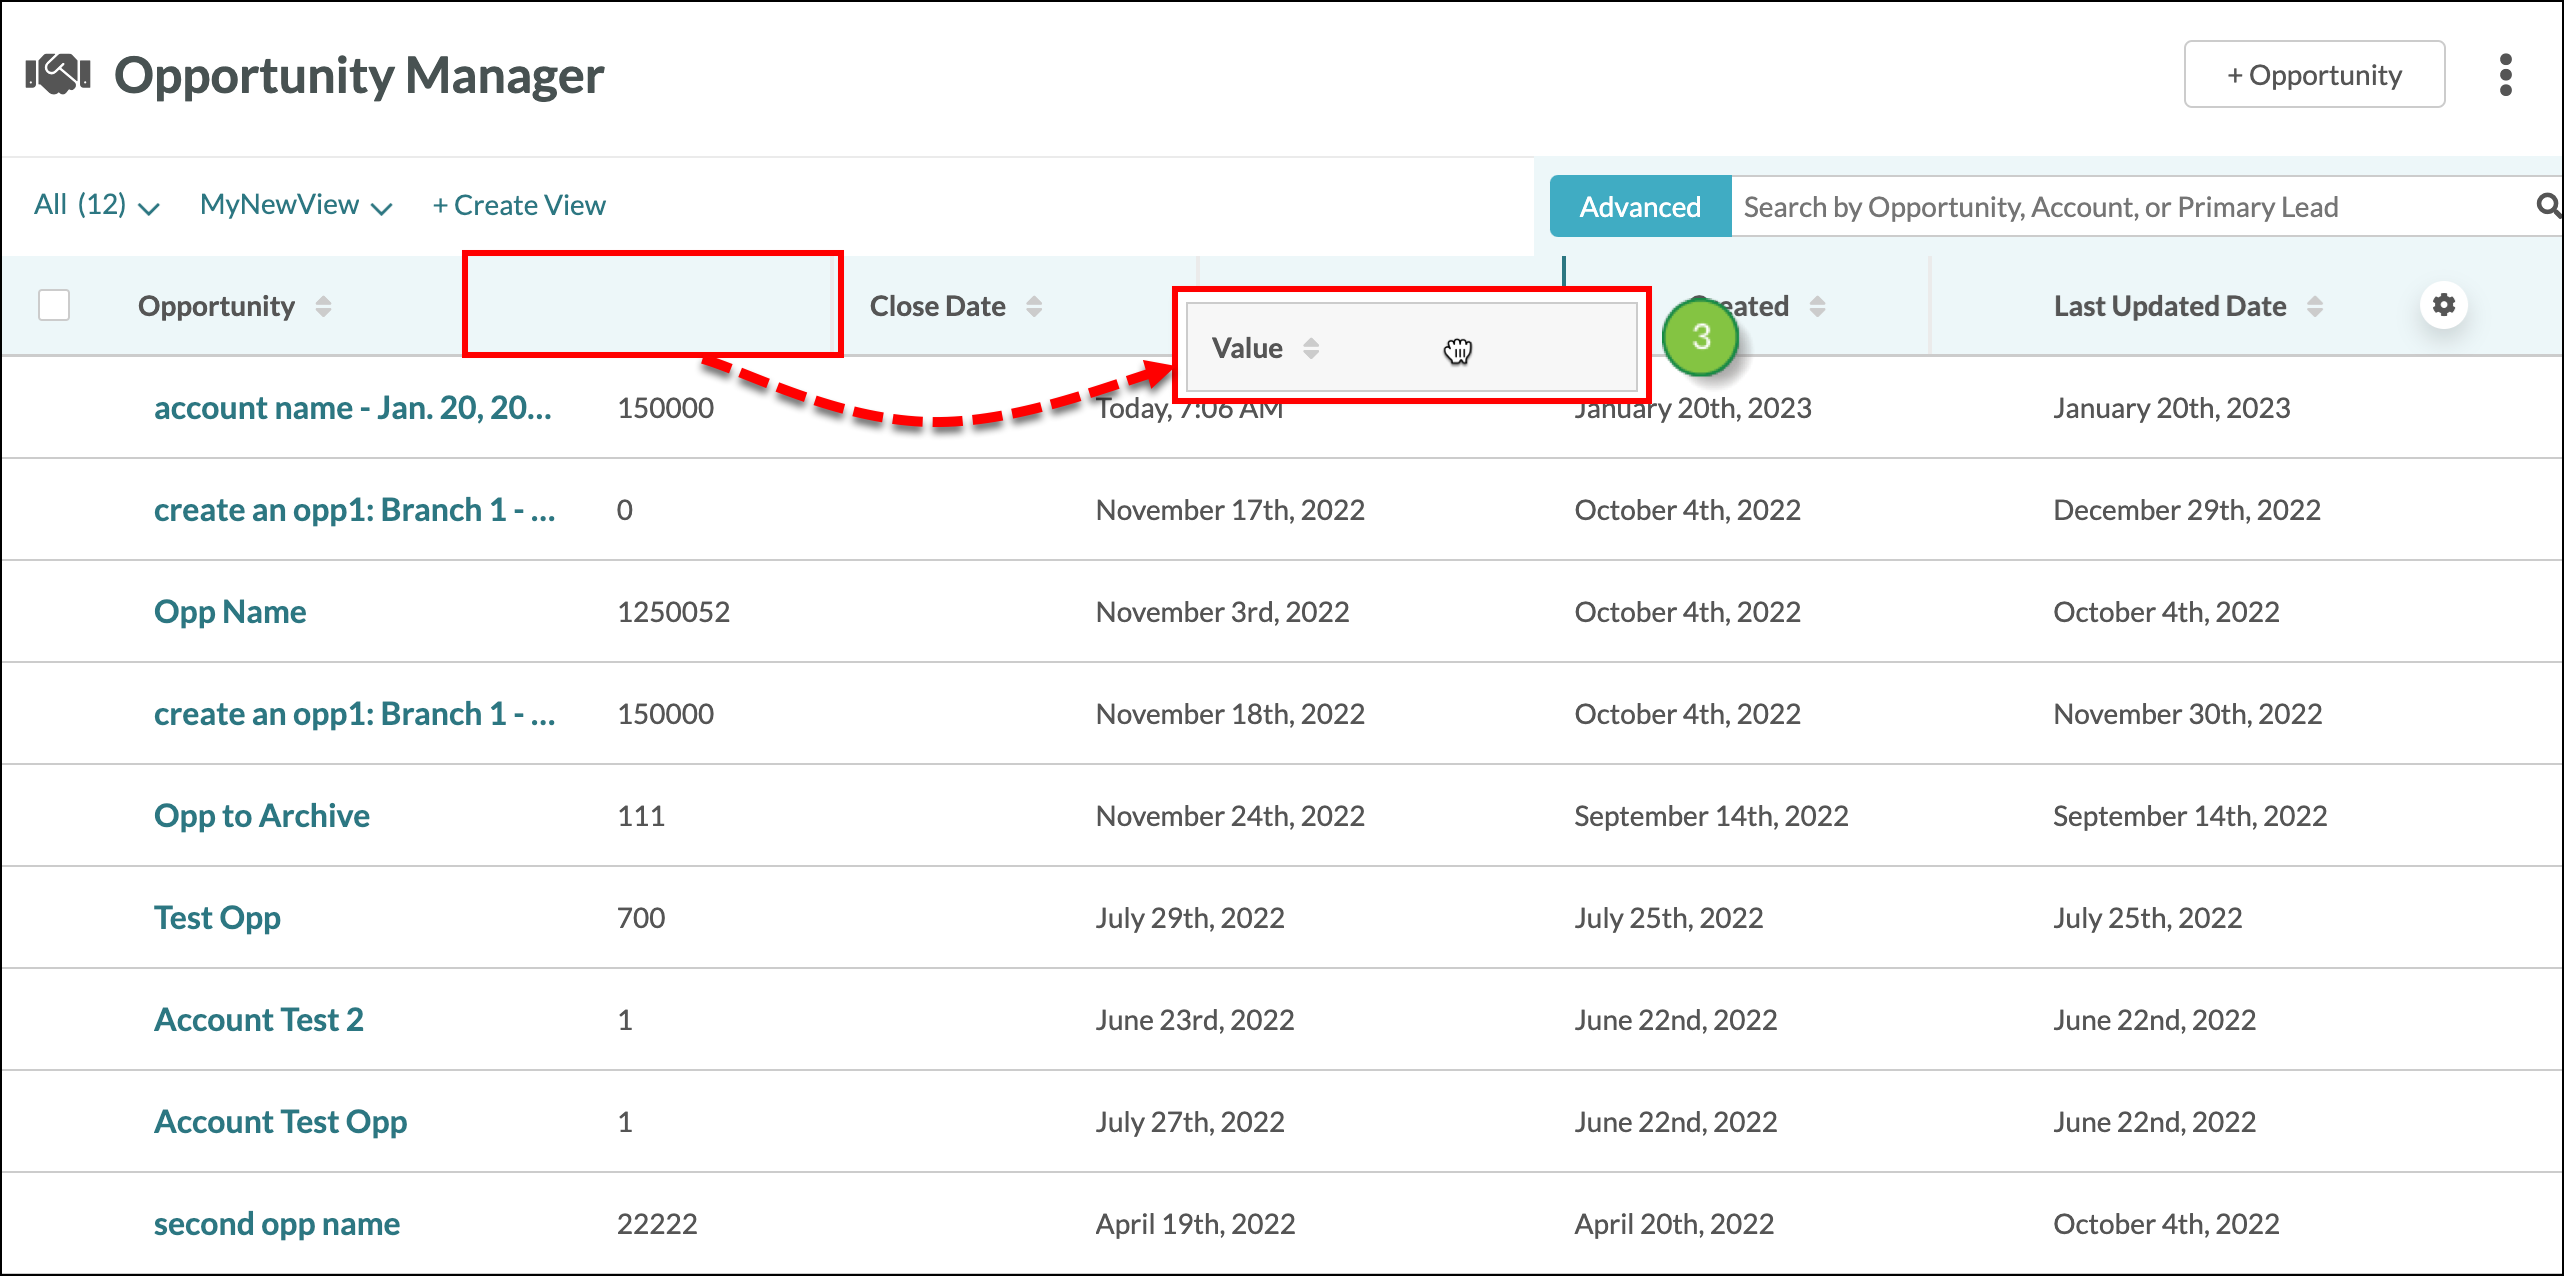
While the Opportunity Manager comes with a default view -- which displays information relevant to important system fields -- you may find that you want a different view that contains different information. Select the columns you want to display and save them as a view.
Searches help to further segment the data in your Opportunity Manager. Create an Advanced Search, and filter by Created Date, Updated Date, Status, Assigned To, Stage, Value, and more! Select the data you want to filter in your Advanced search and save that search for future use.
Mix and match views and searches to get the Opportunity Manager you need. To learn more about Advanced searches read Using Advanced Search in the Opportunity Manager.
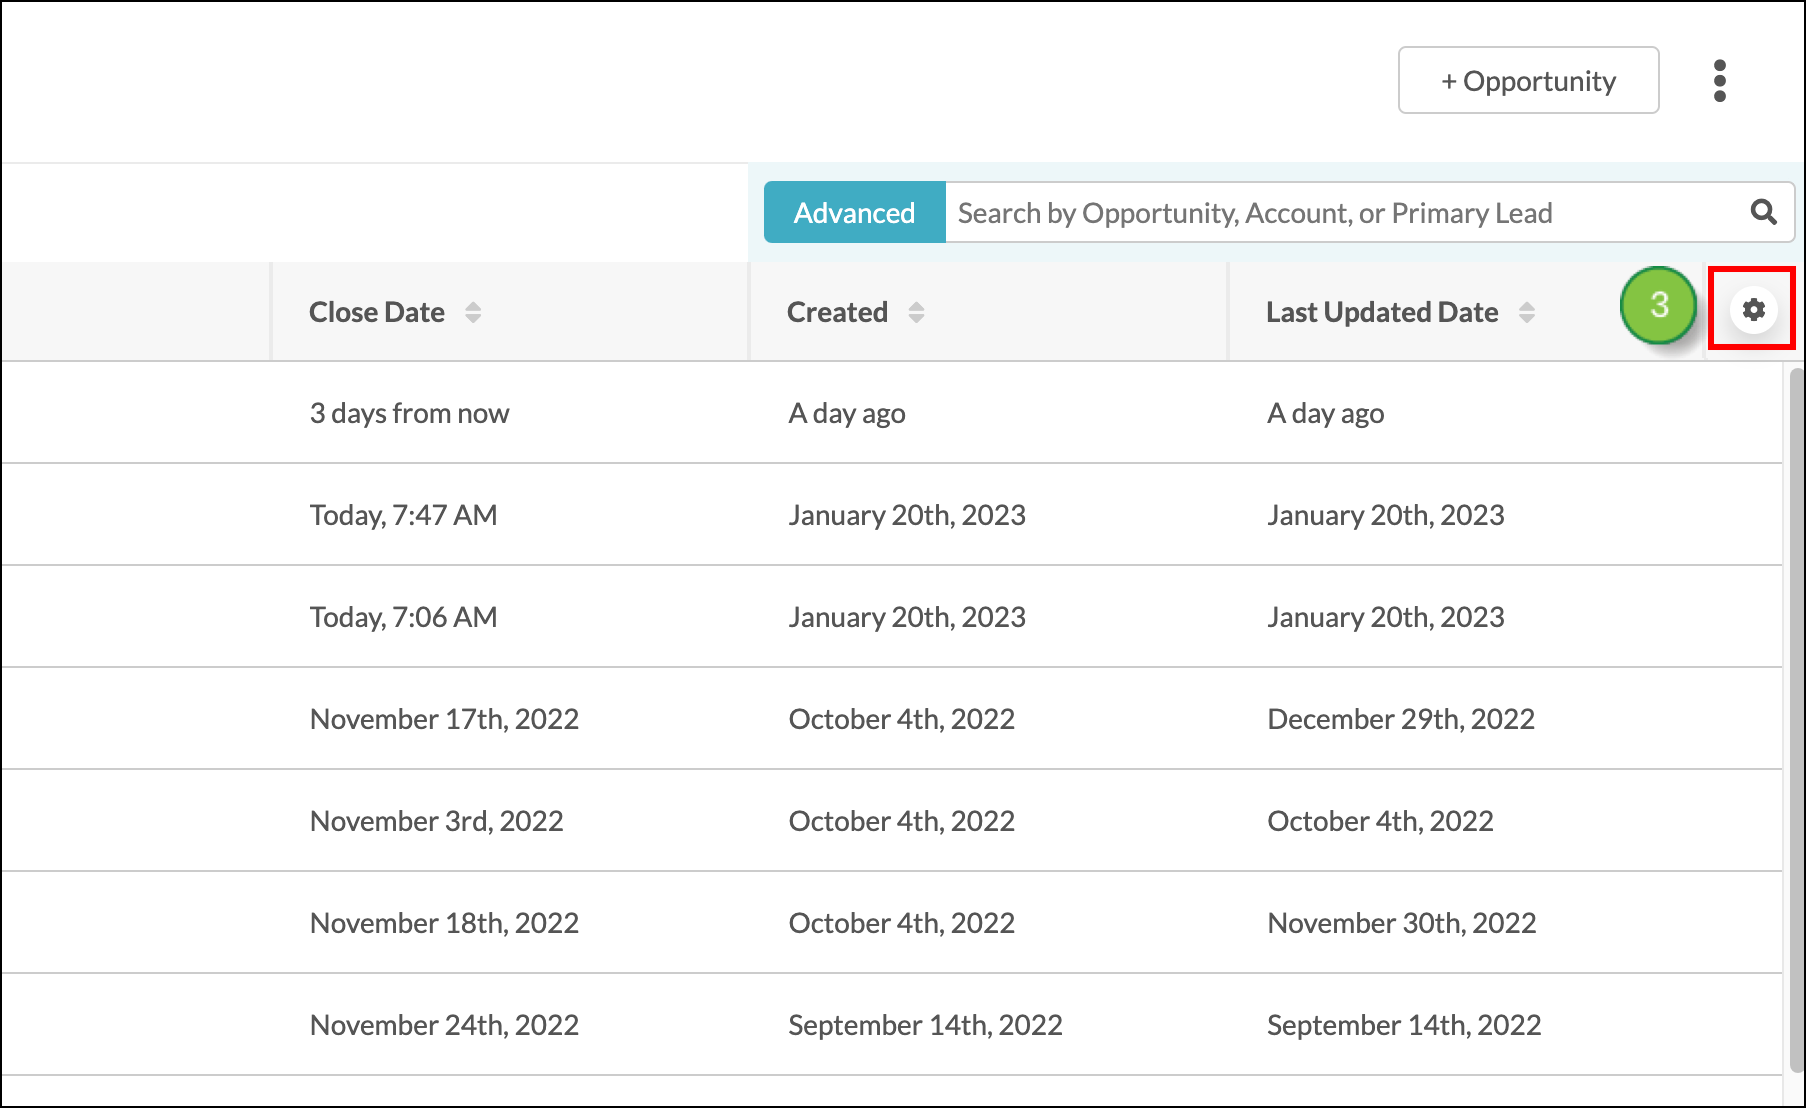
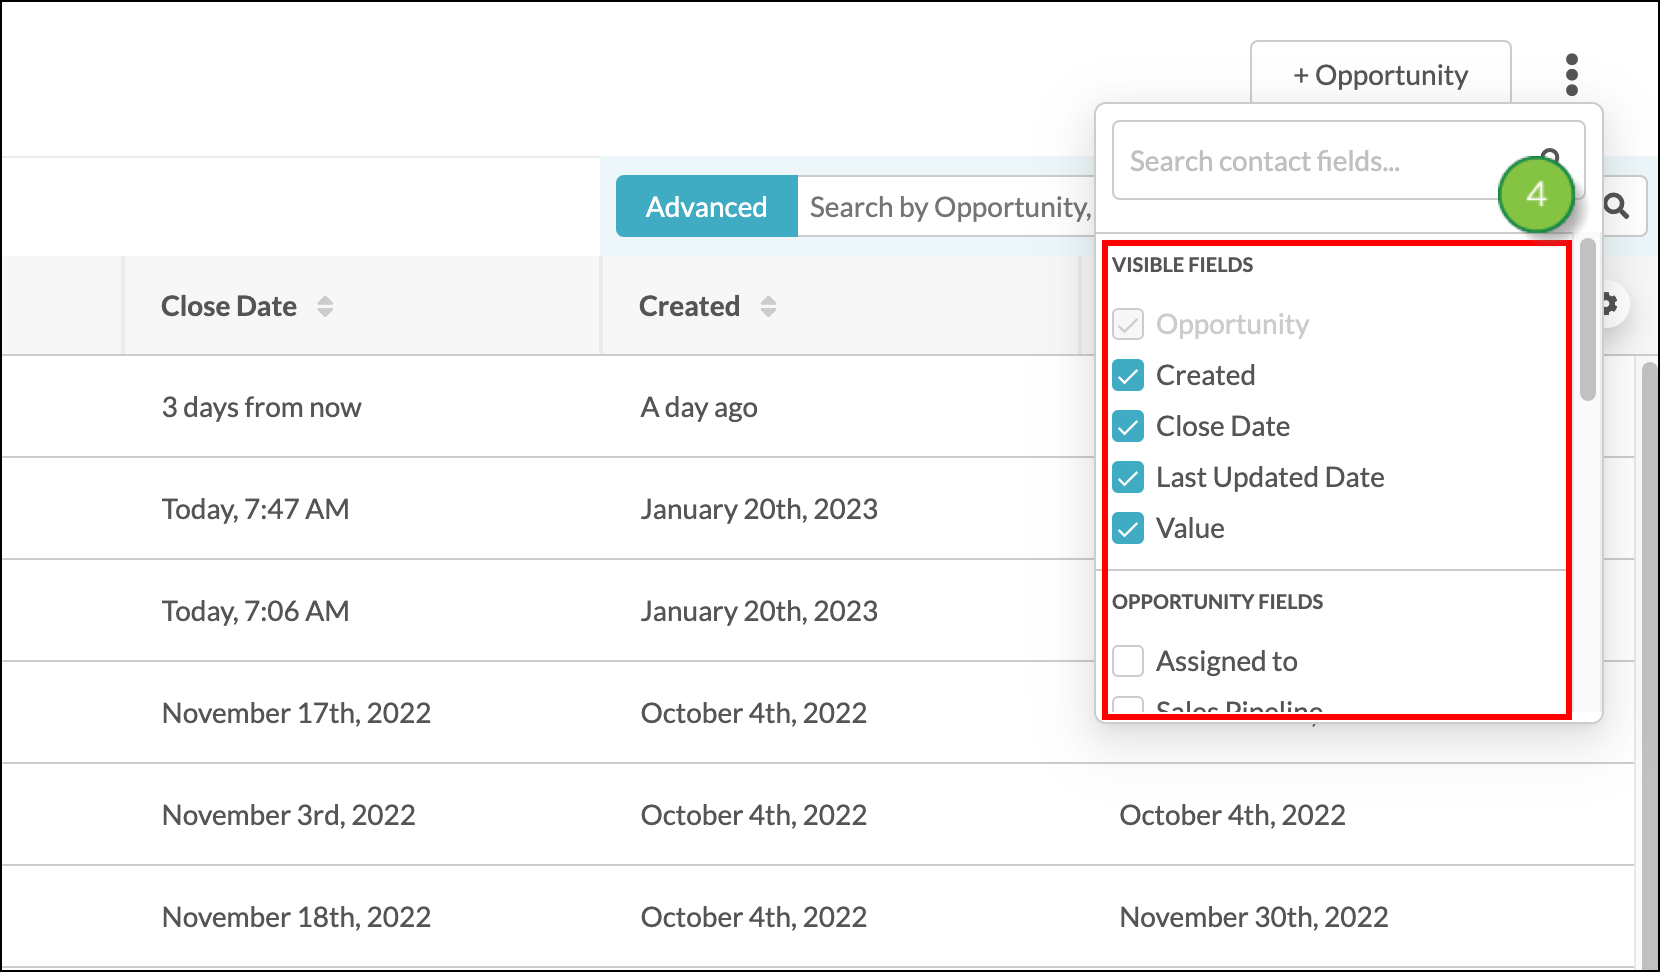
Information in views is displayed in individual columns. The information in these columns comes from available fields, including custom fields. You can choose to display certain columns—or remove them from a view—as you see fit.
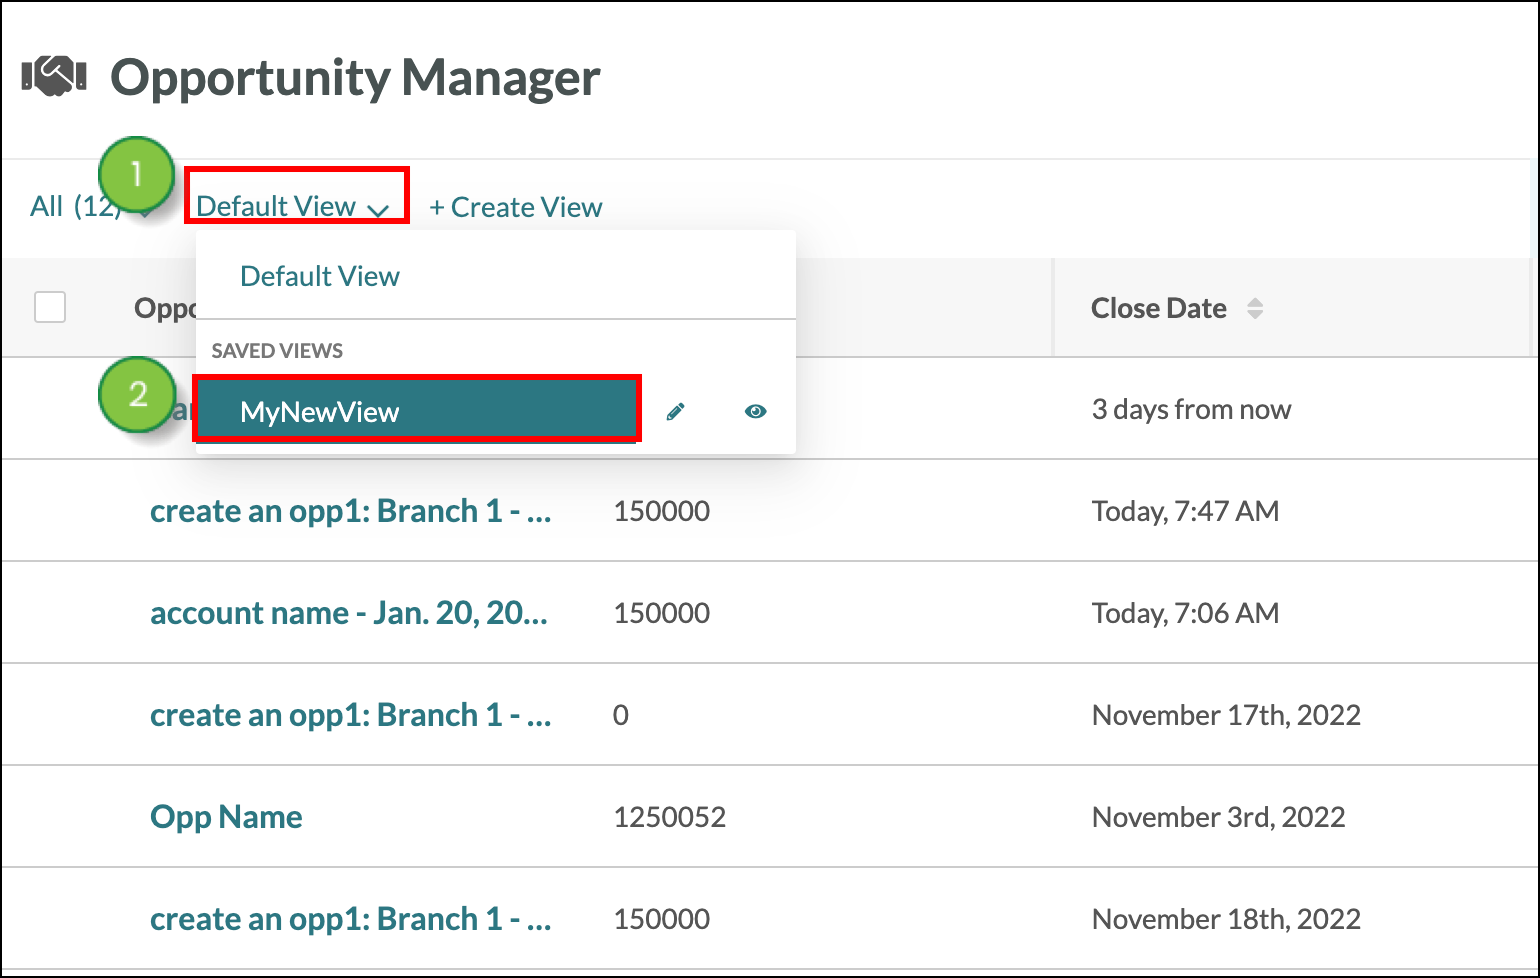
To select which columns to display in a view, start from the Sales > Opportunity Manager in the left toolbar.
| Setting | Description | |||
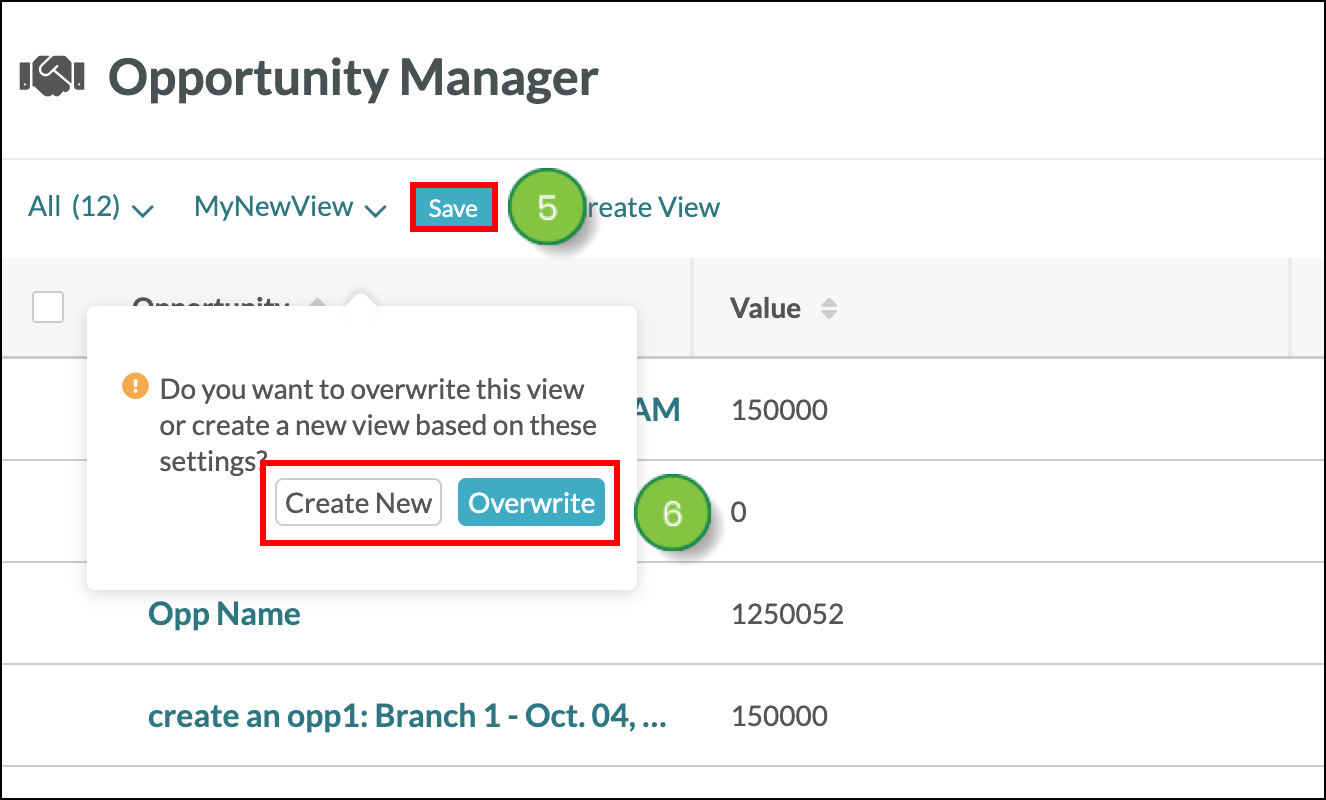
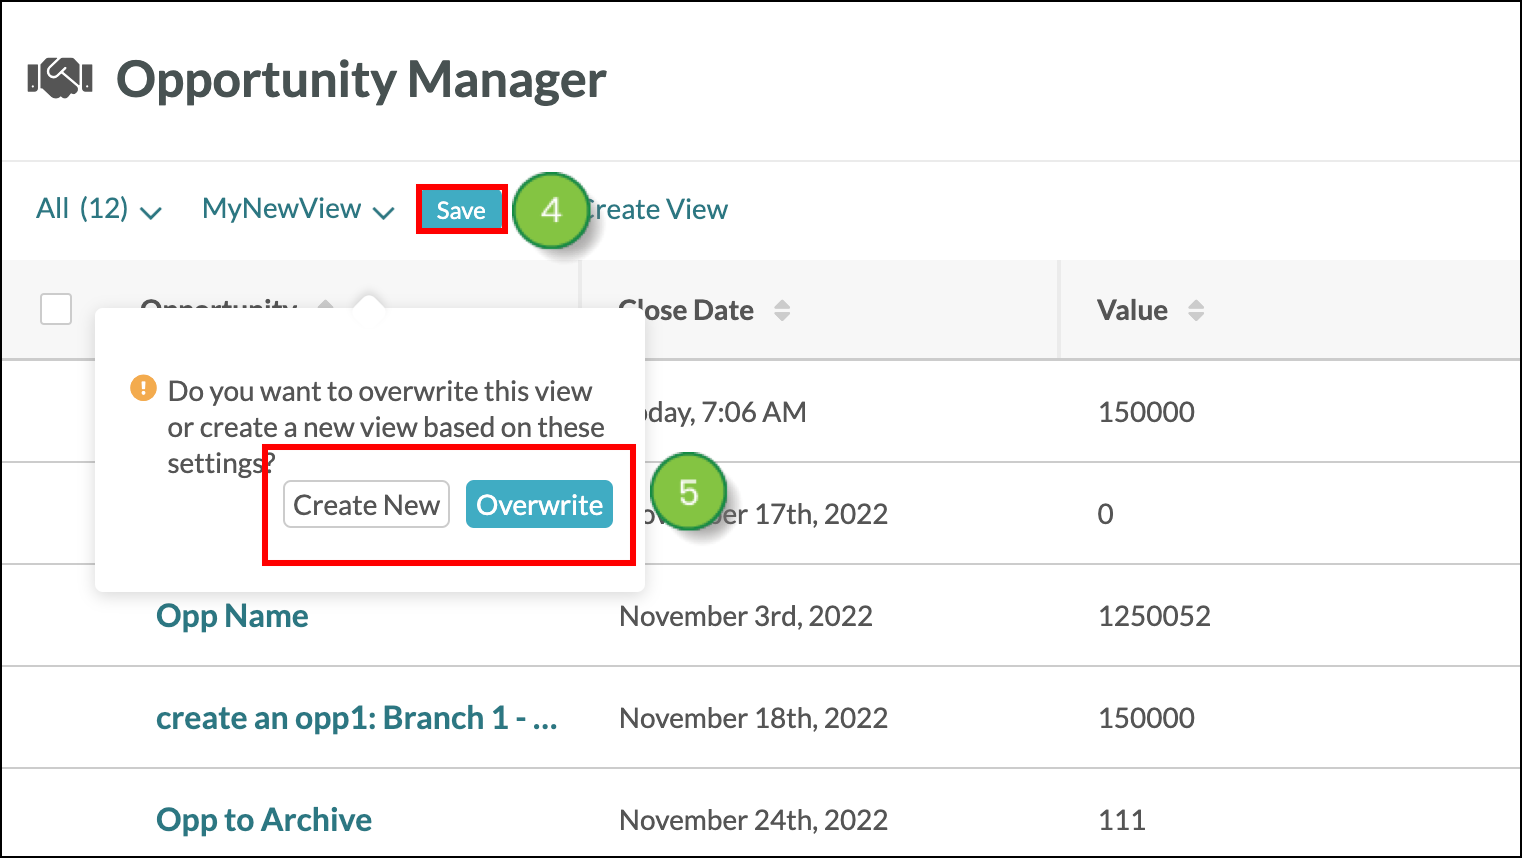
| Create New | Saves this view as a new view. | |||
| Overwrite | Overwrites the existing view. | |||
The Leads and Opportunities columns display information in a slightly different manner than the other columns.
These columns will display the most recently updated contact or opportunity will be listed in the column. Other associated contacts or opportunities will be attached as a number.
You can click on any of the contacts or opportunities in the columns. You will be redirected to the contact or opportunity in a new browser tab.
You can rearrange how columns are displayed in views. This is done by dragging and dropping the columns in the order that you choose.
To rearrange columns, start from the Sales > Opportunity Manager in the left toolbar.
| Setting | Description | |||
| Create New | Saves this view as a new view. | |||
| Overwrite | Overwrites the existing view. | |||
Copyright © 2026 · All Rights Reserved · Constant Contact · Privacy Center