By default, emails sent from the Lead Gen & CRM platform will contain the unsubscribe address and unsubscribe link in the footer section of the email. However, by using unsubscribe merge variables, the unsubscribe link can be set to appear anywhere in the email.
This article will detail how to insert and move the unsubscribe link around in emails.
| Administrators | ✓ | |
| Company Managers | ✓ | |
| Marketing Managers | ✓ | |
| Sales Managers | ||
| Salespersons | ||
| Jr. Salespersons |
| Tip: Are you looking for information about Constant Contact’s Email and Digital Marketing product? This article is for Constant Contact’s Lead Gen & CRM product. Head on over to the Email and Digital Marketing articles by clicking here. Not sure what the difference is? Read this article. |
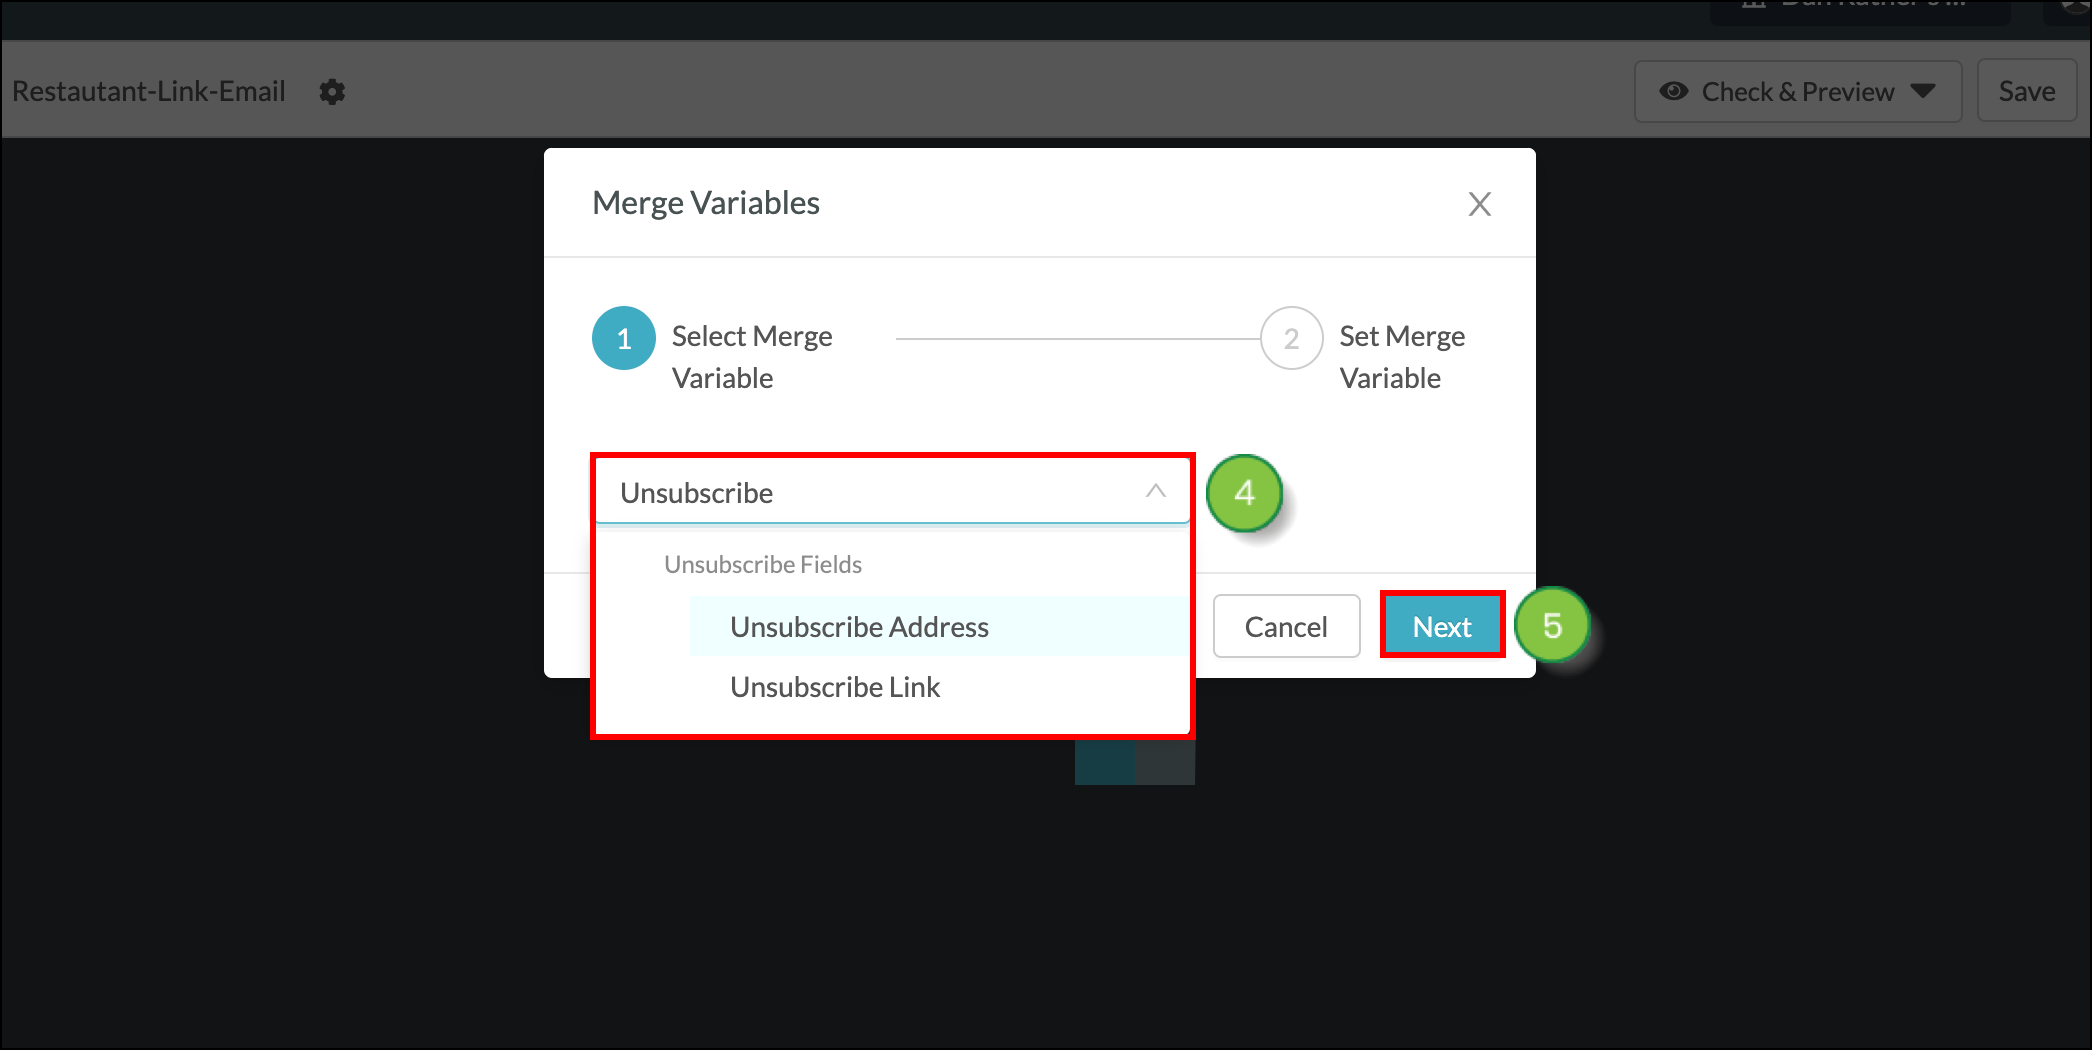
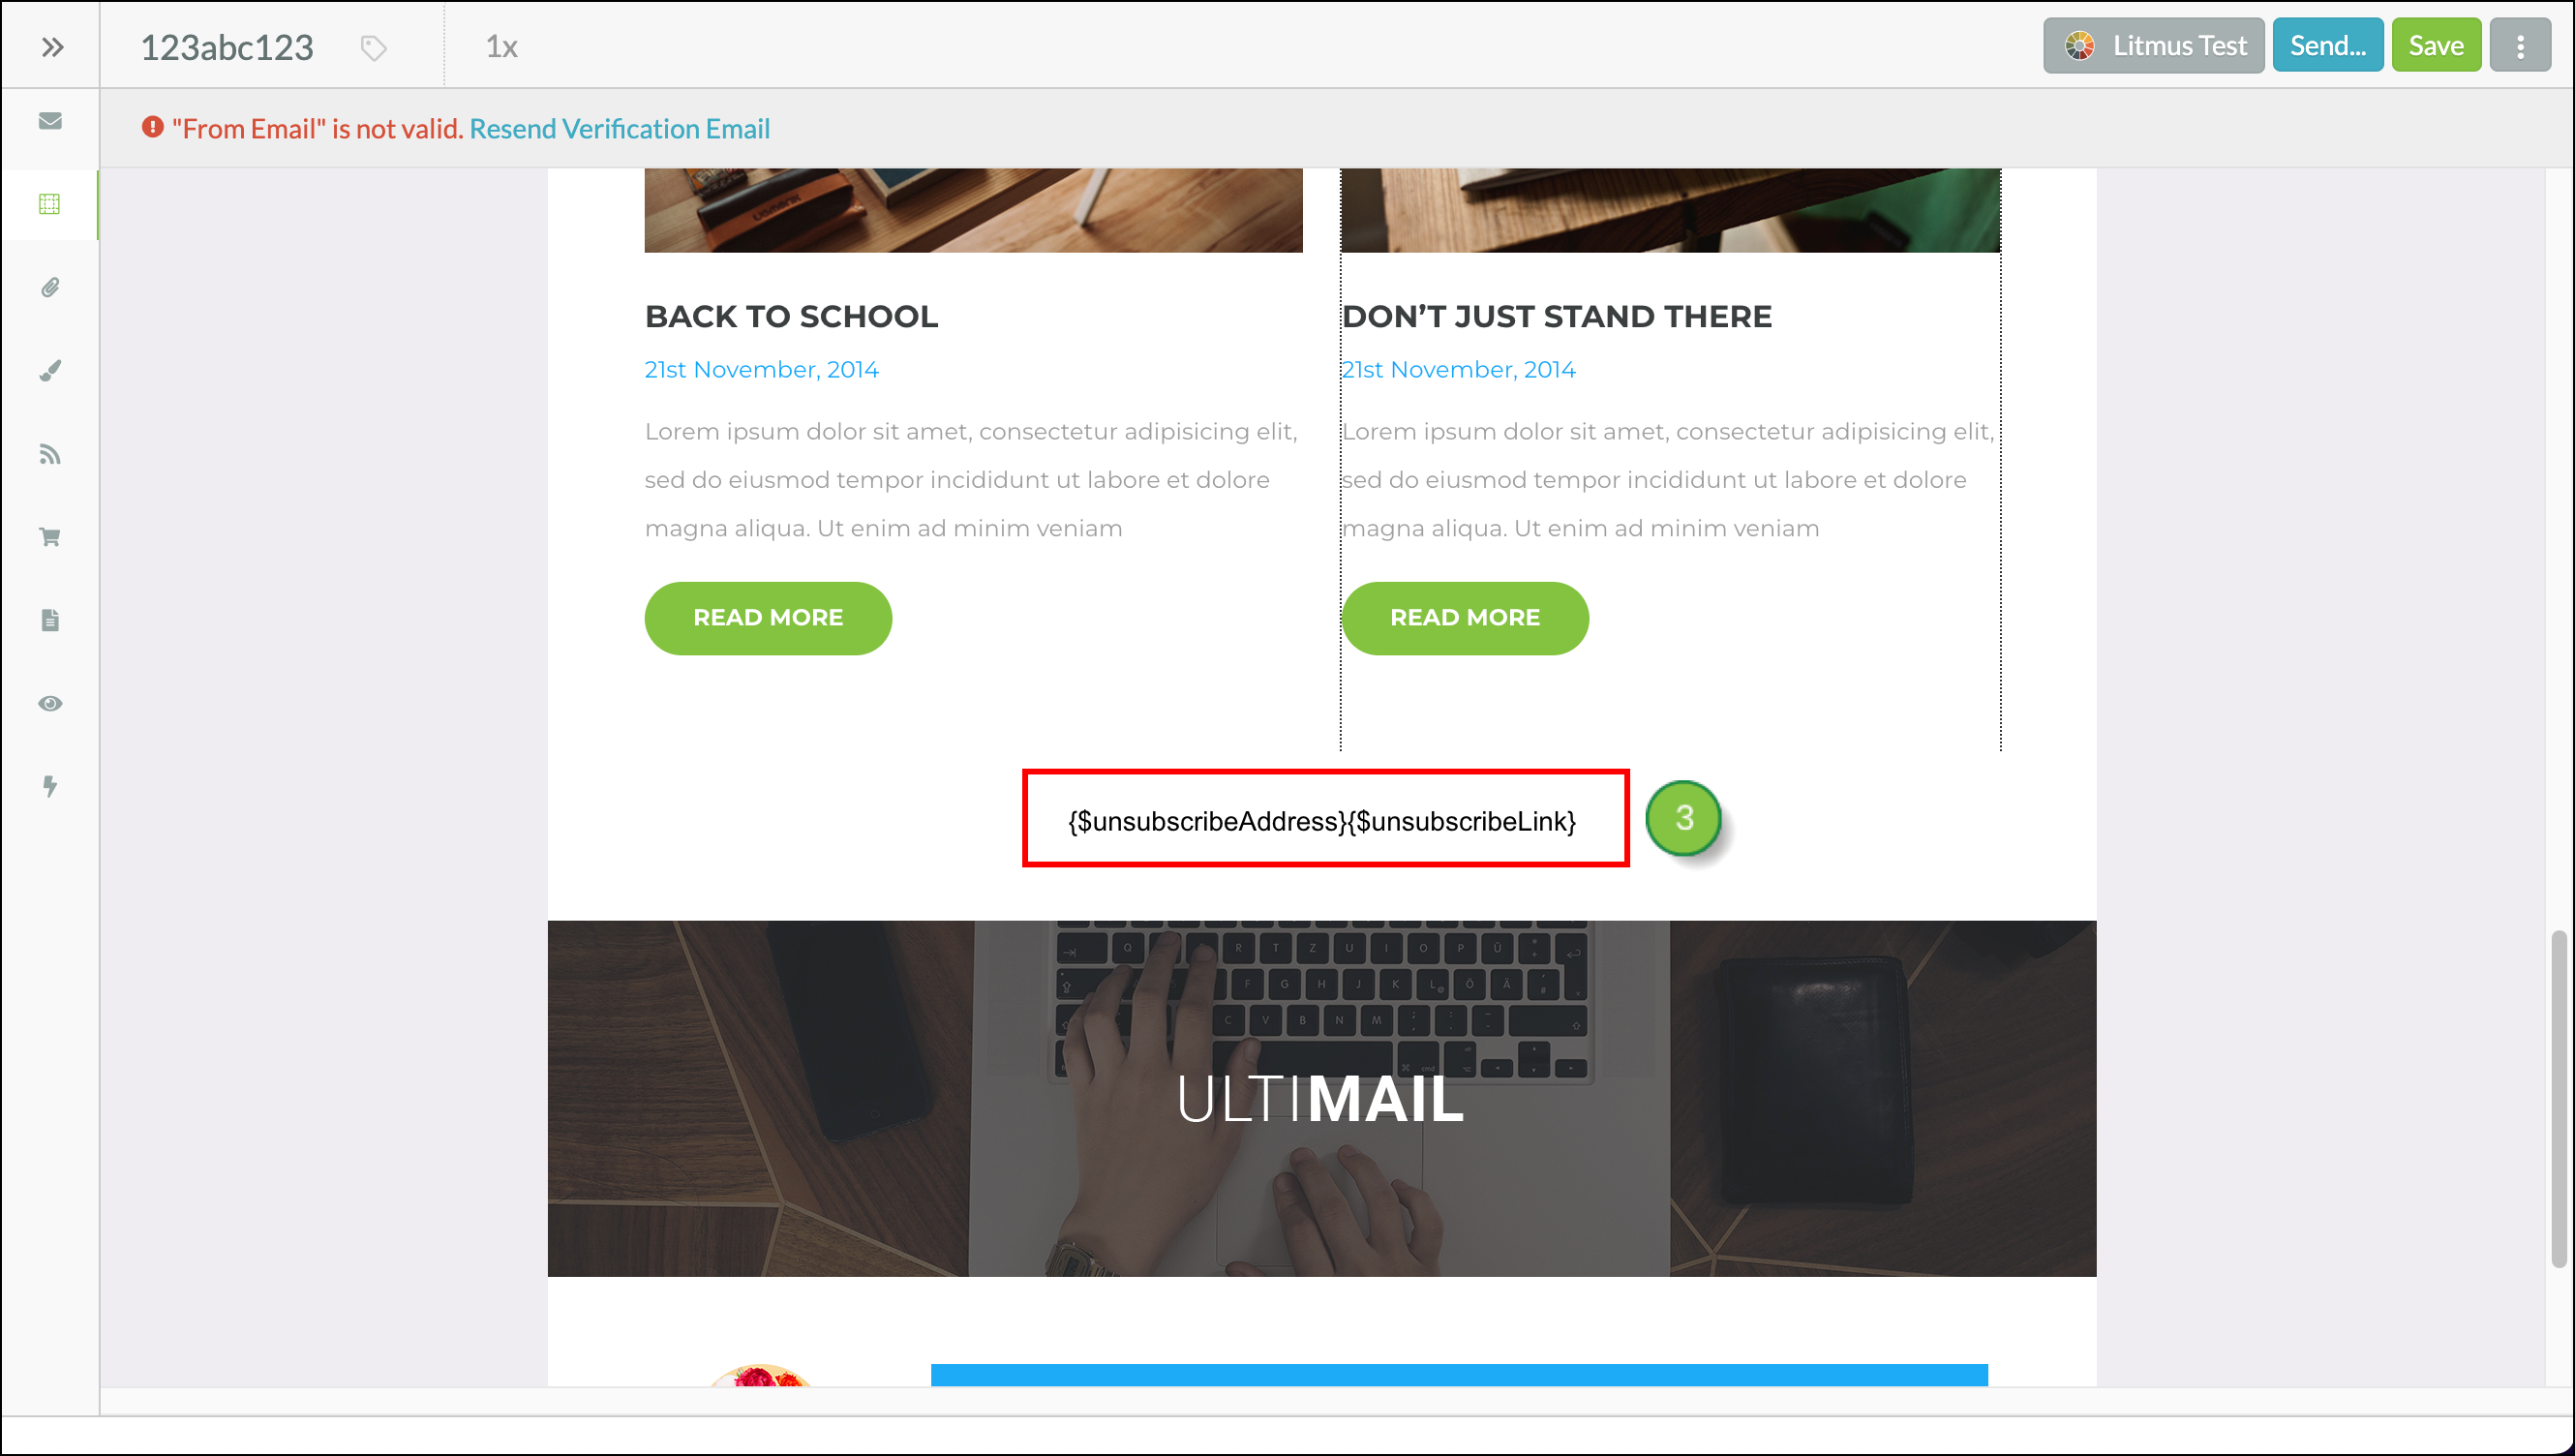
If you're using the older editor, things look a little different. Lead Gen & CRM offers unsubscribe links and addresses as merge variables, and these merge variables can be placed anywhere within the email.
To move the unsubscribe link and address, create or edit an email from the Email page in the left toolbar.
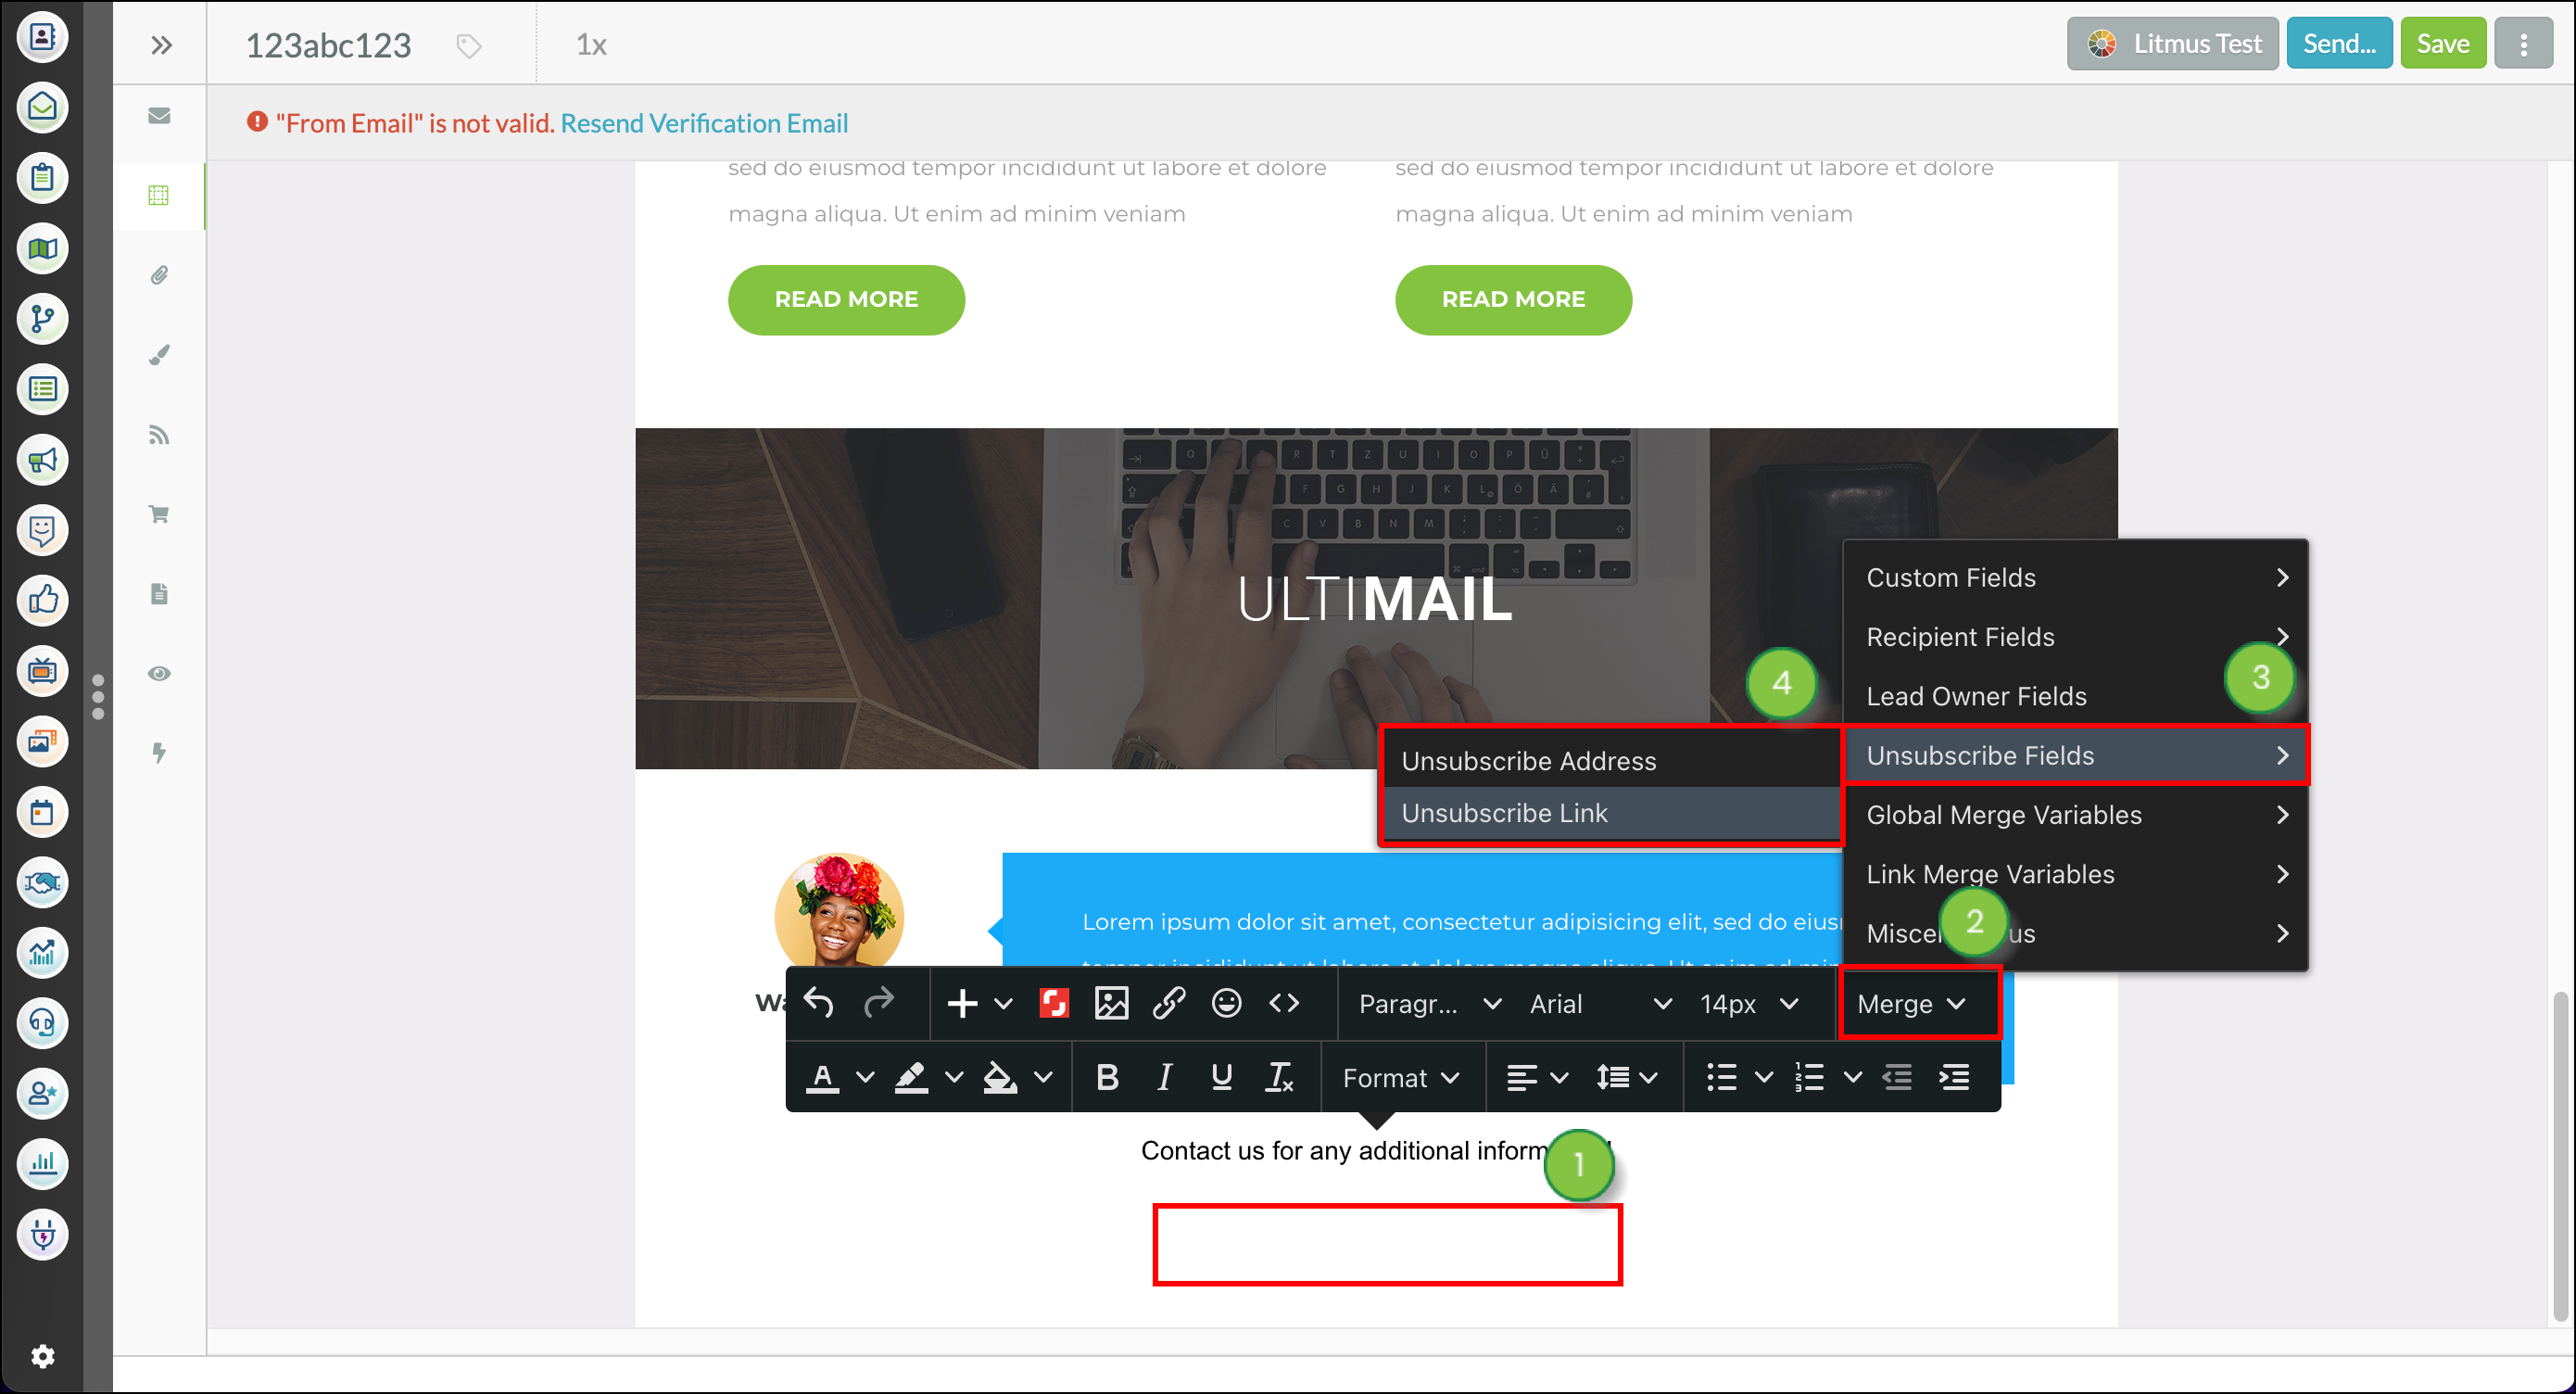
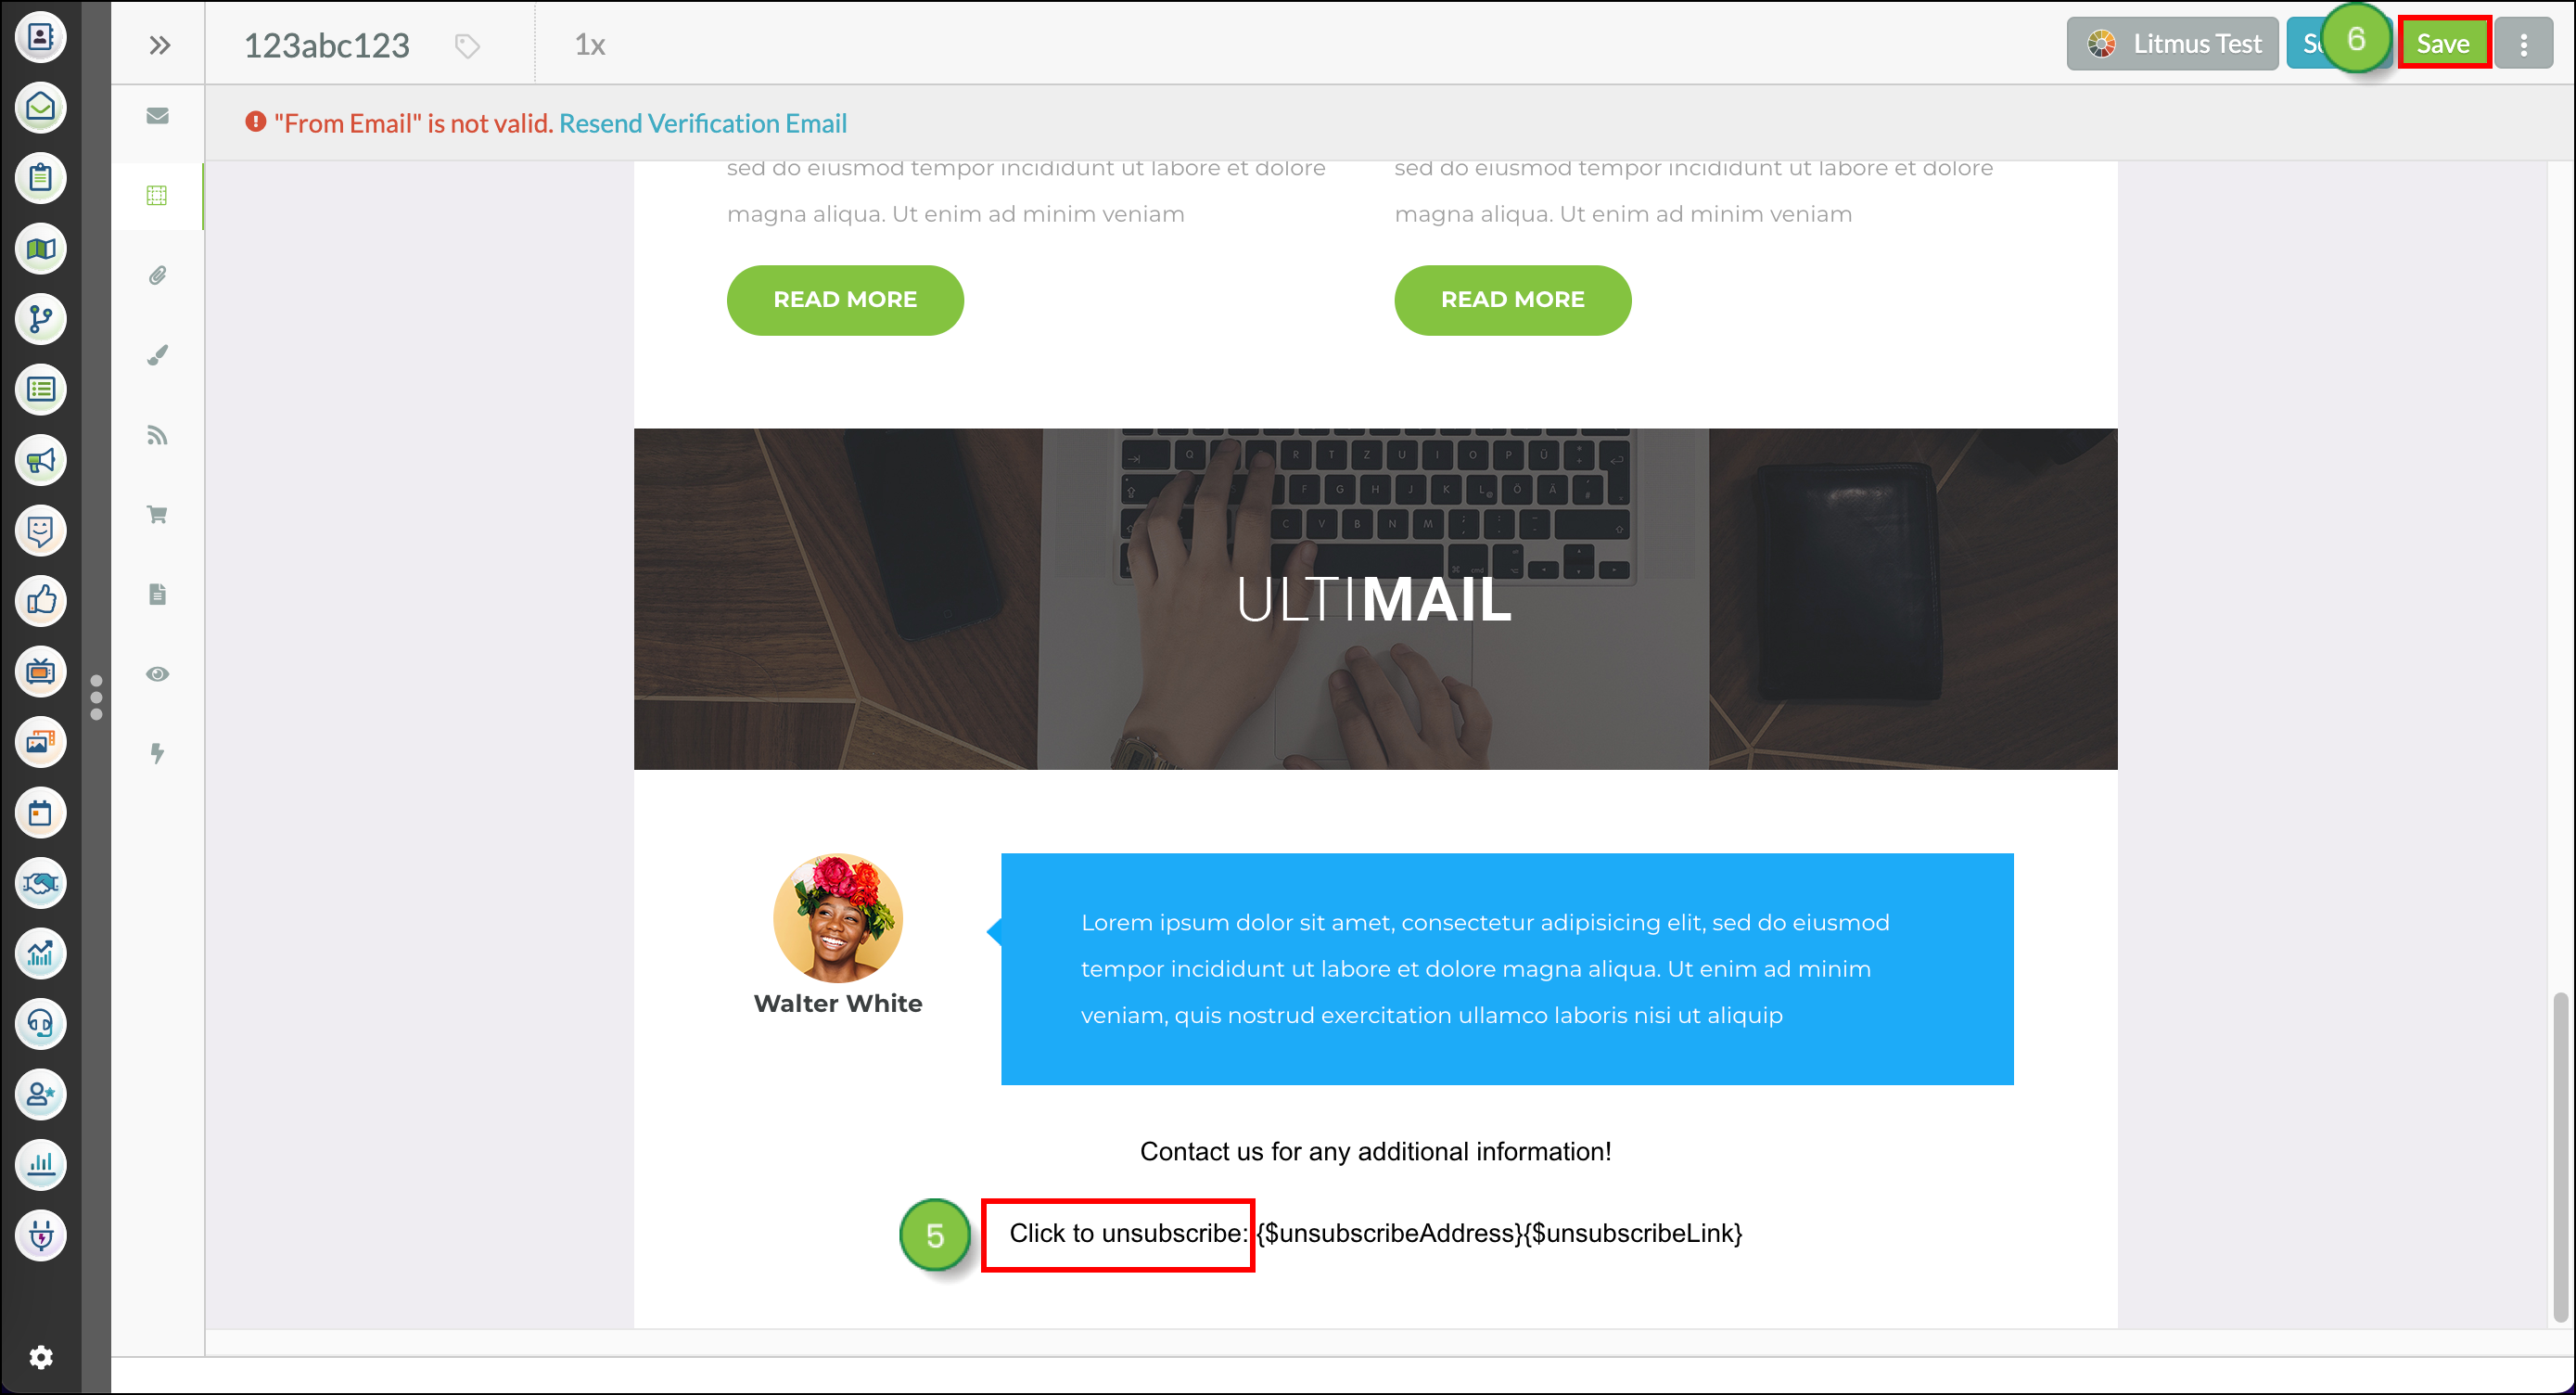
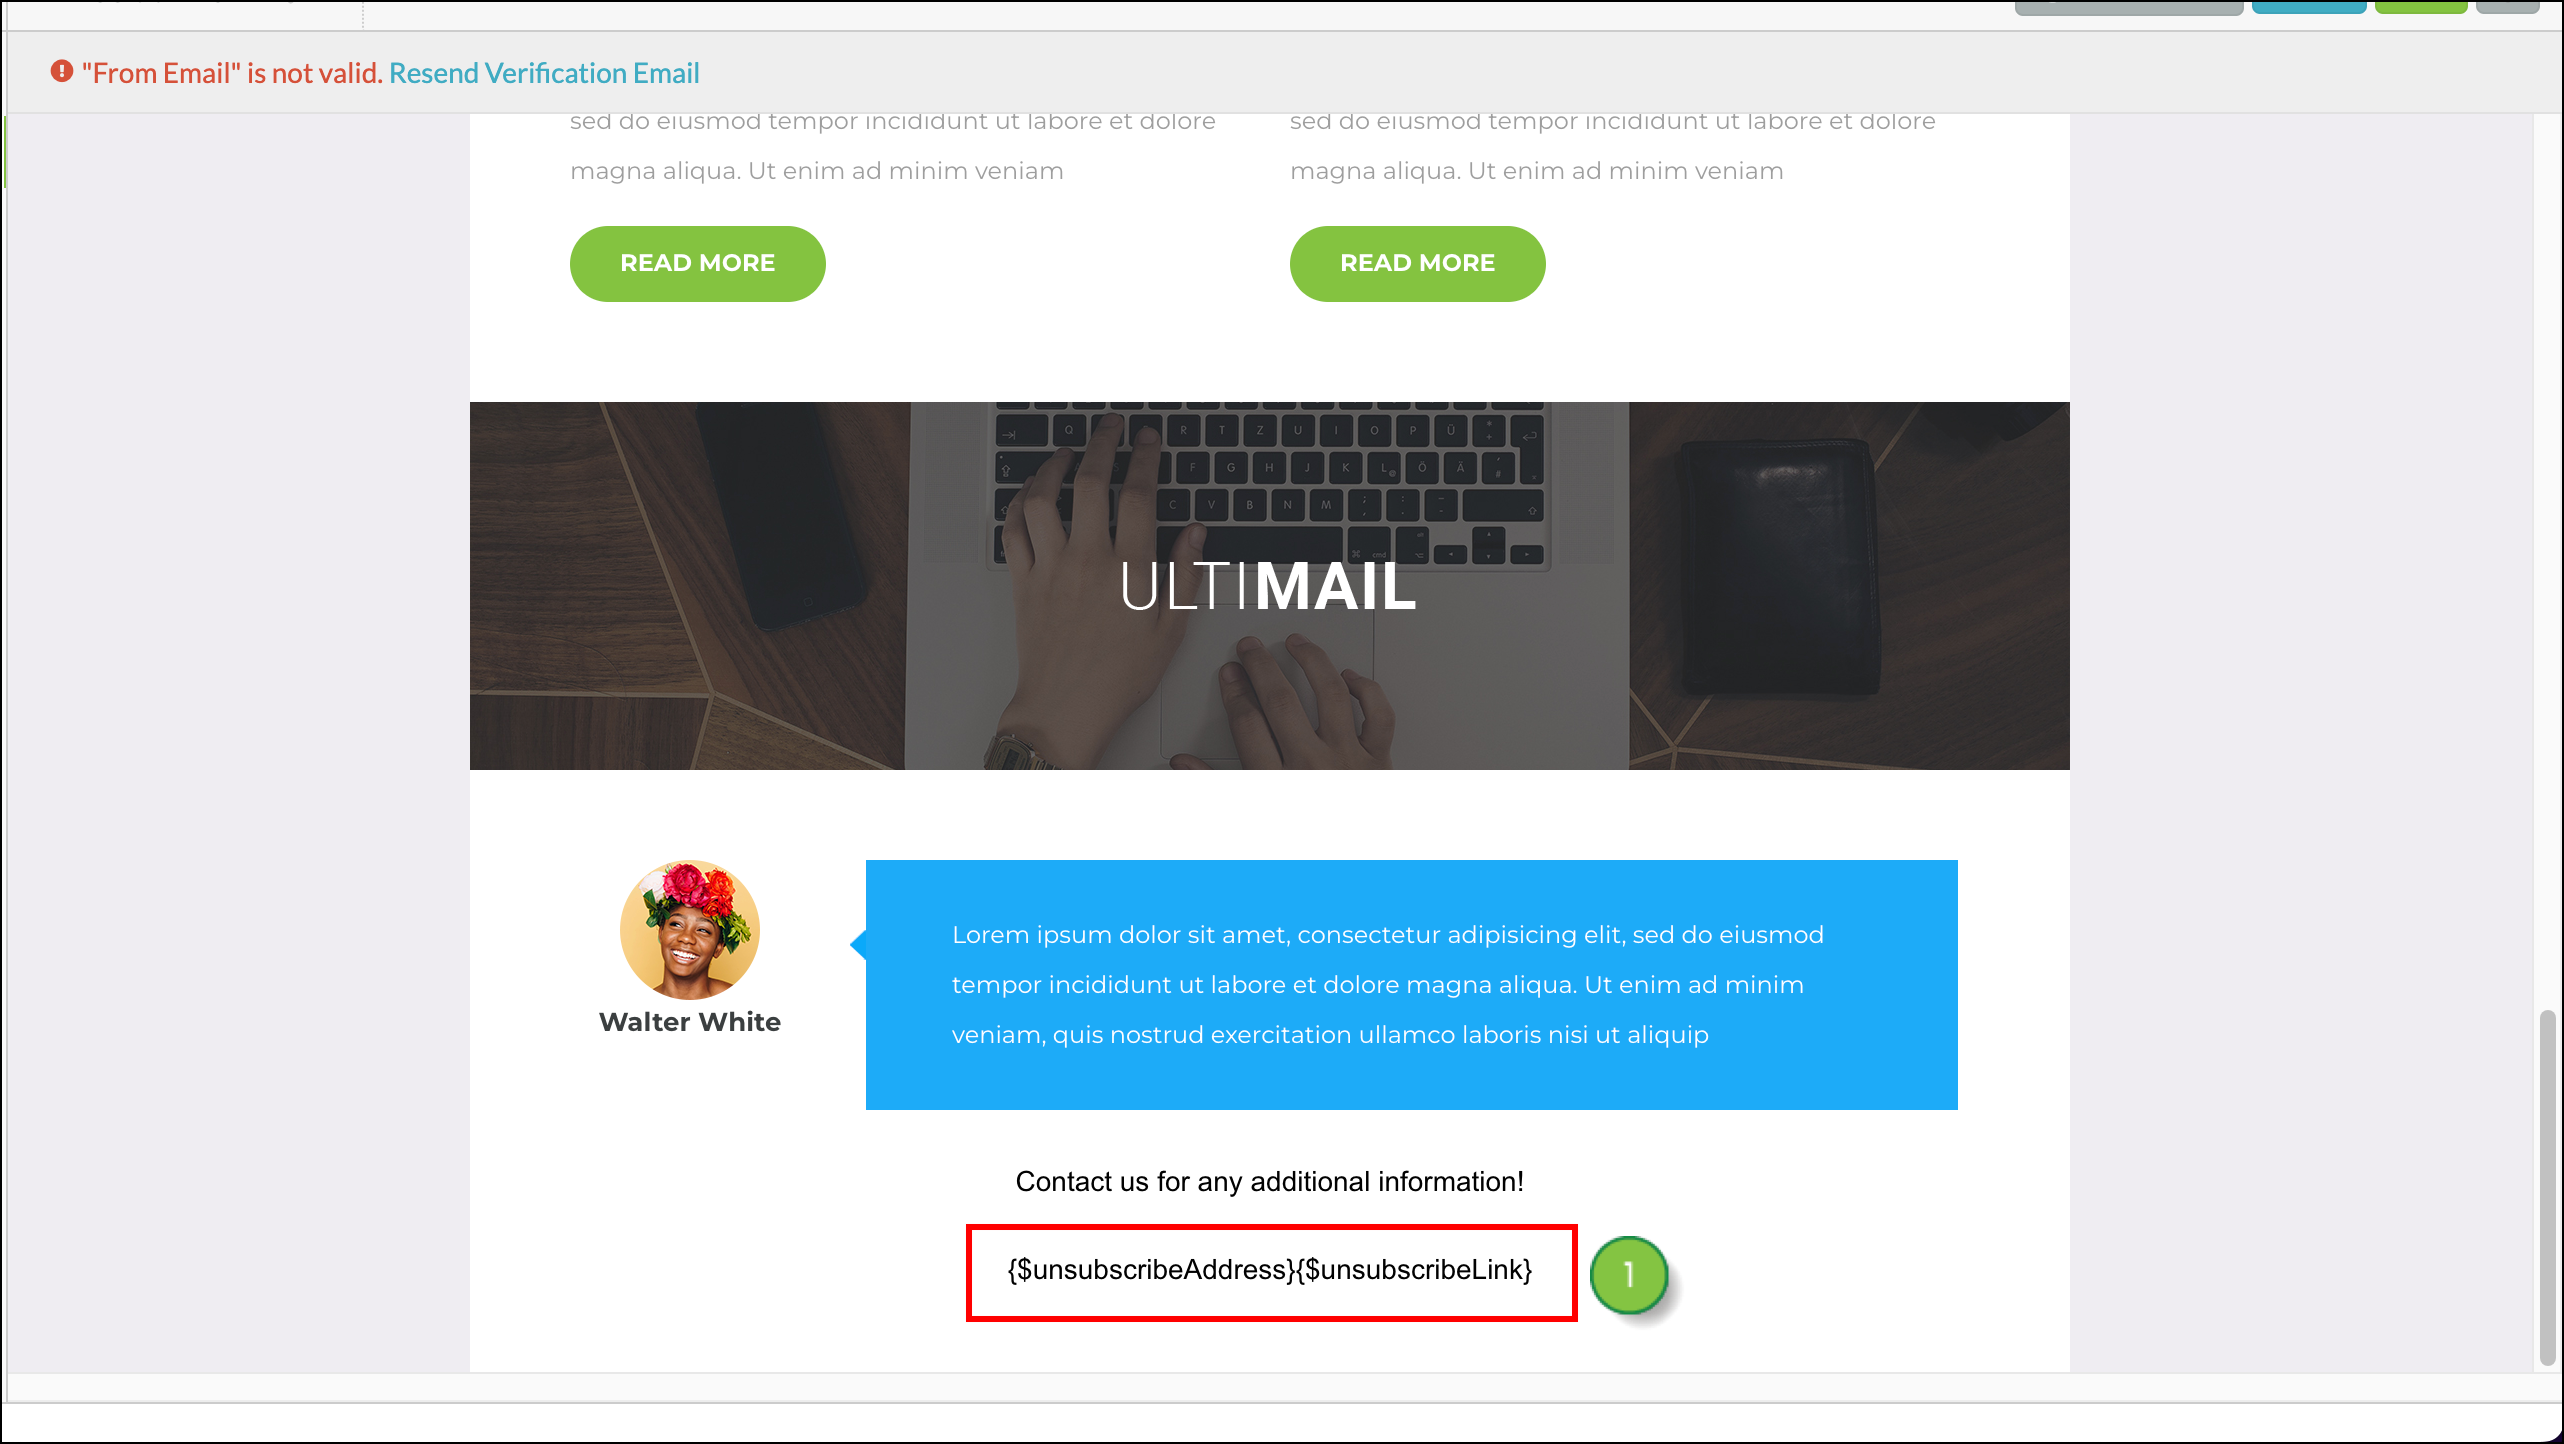
Important: Both of the {$unsubscribeAddress} and {$unsubscribeLink} merge variables need to be added in order for the unsubscribe feature to work.
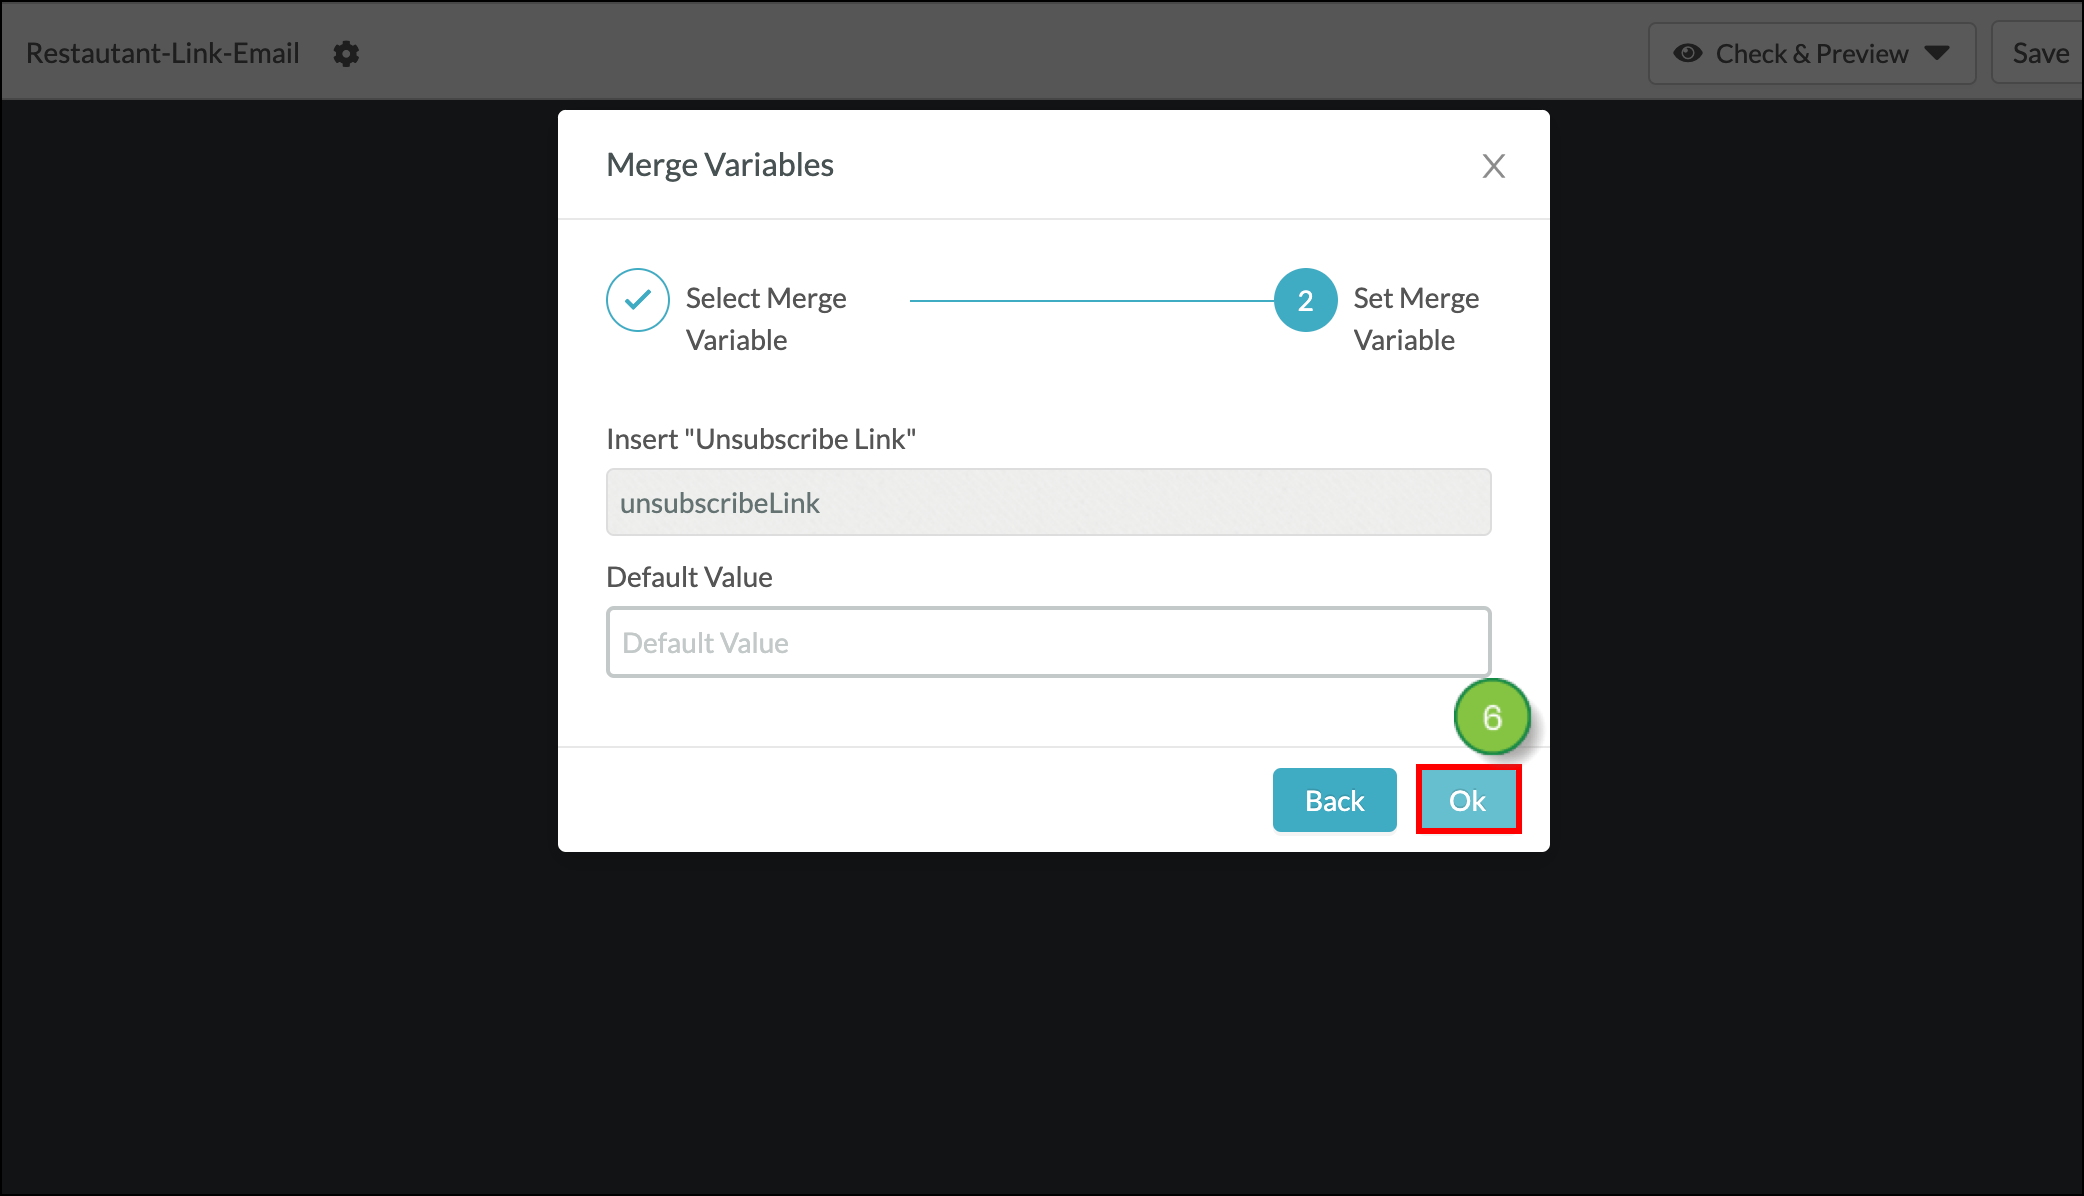
After adding the unsubscribe link and address, you can review them in the finalized email by sending the email to a test list that includes your email address.
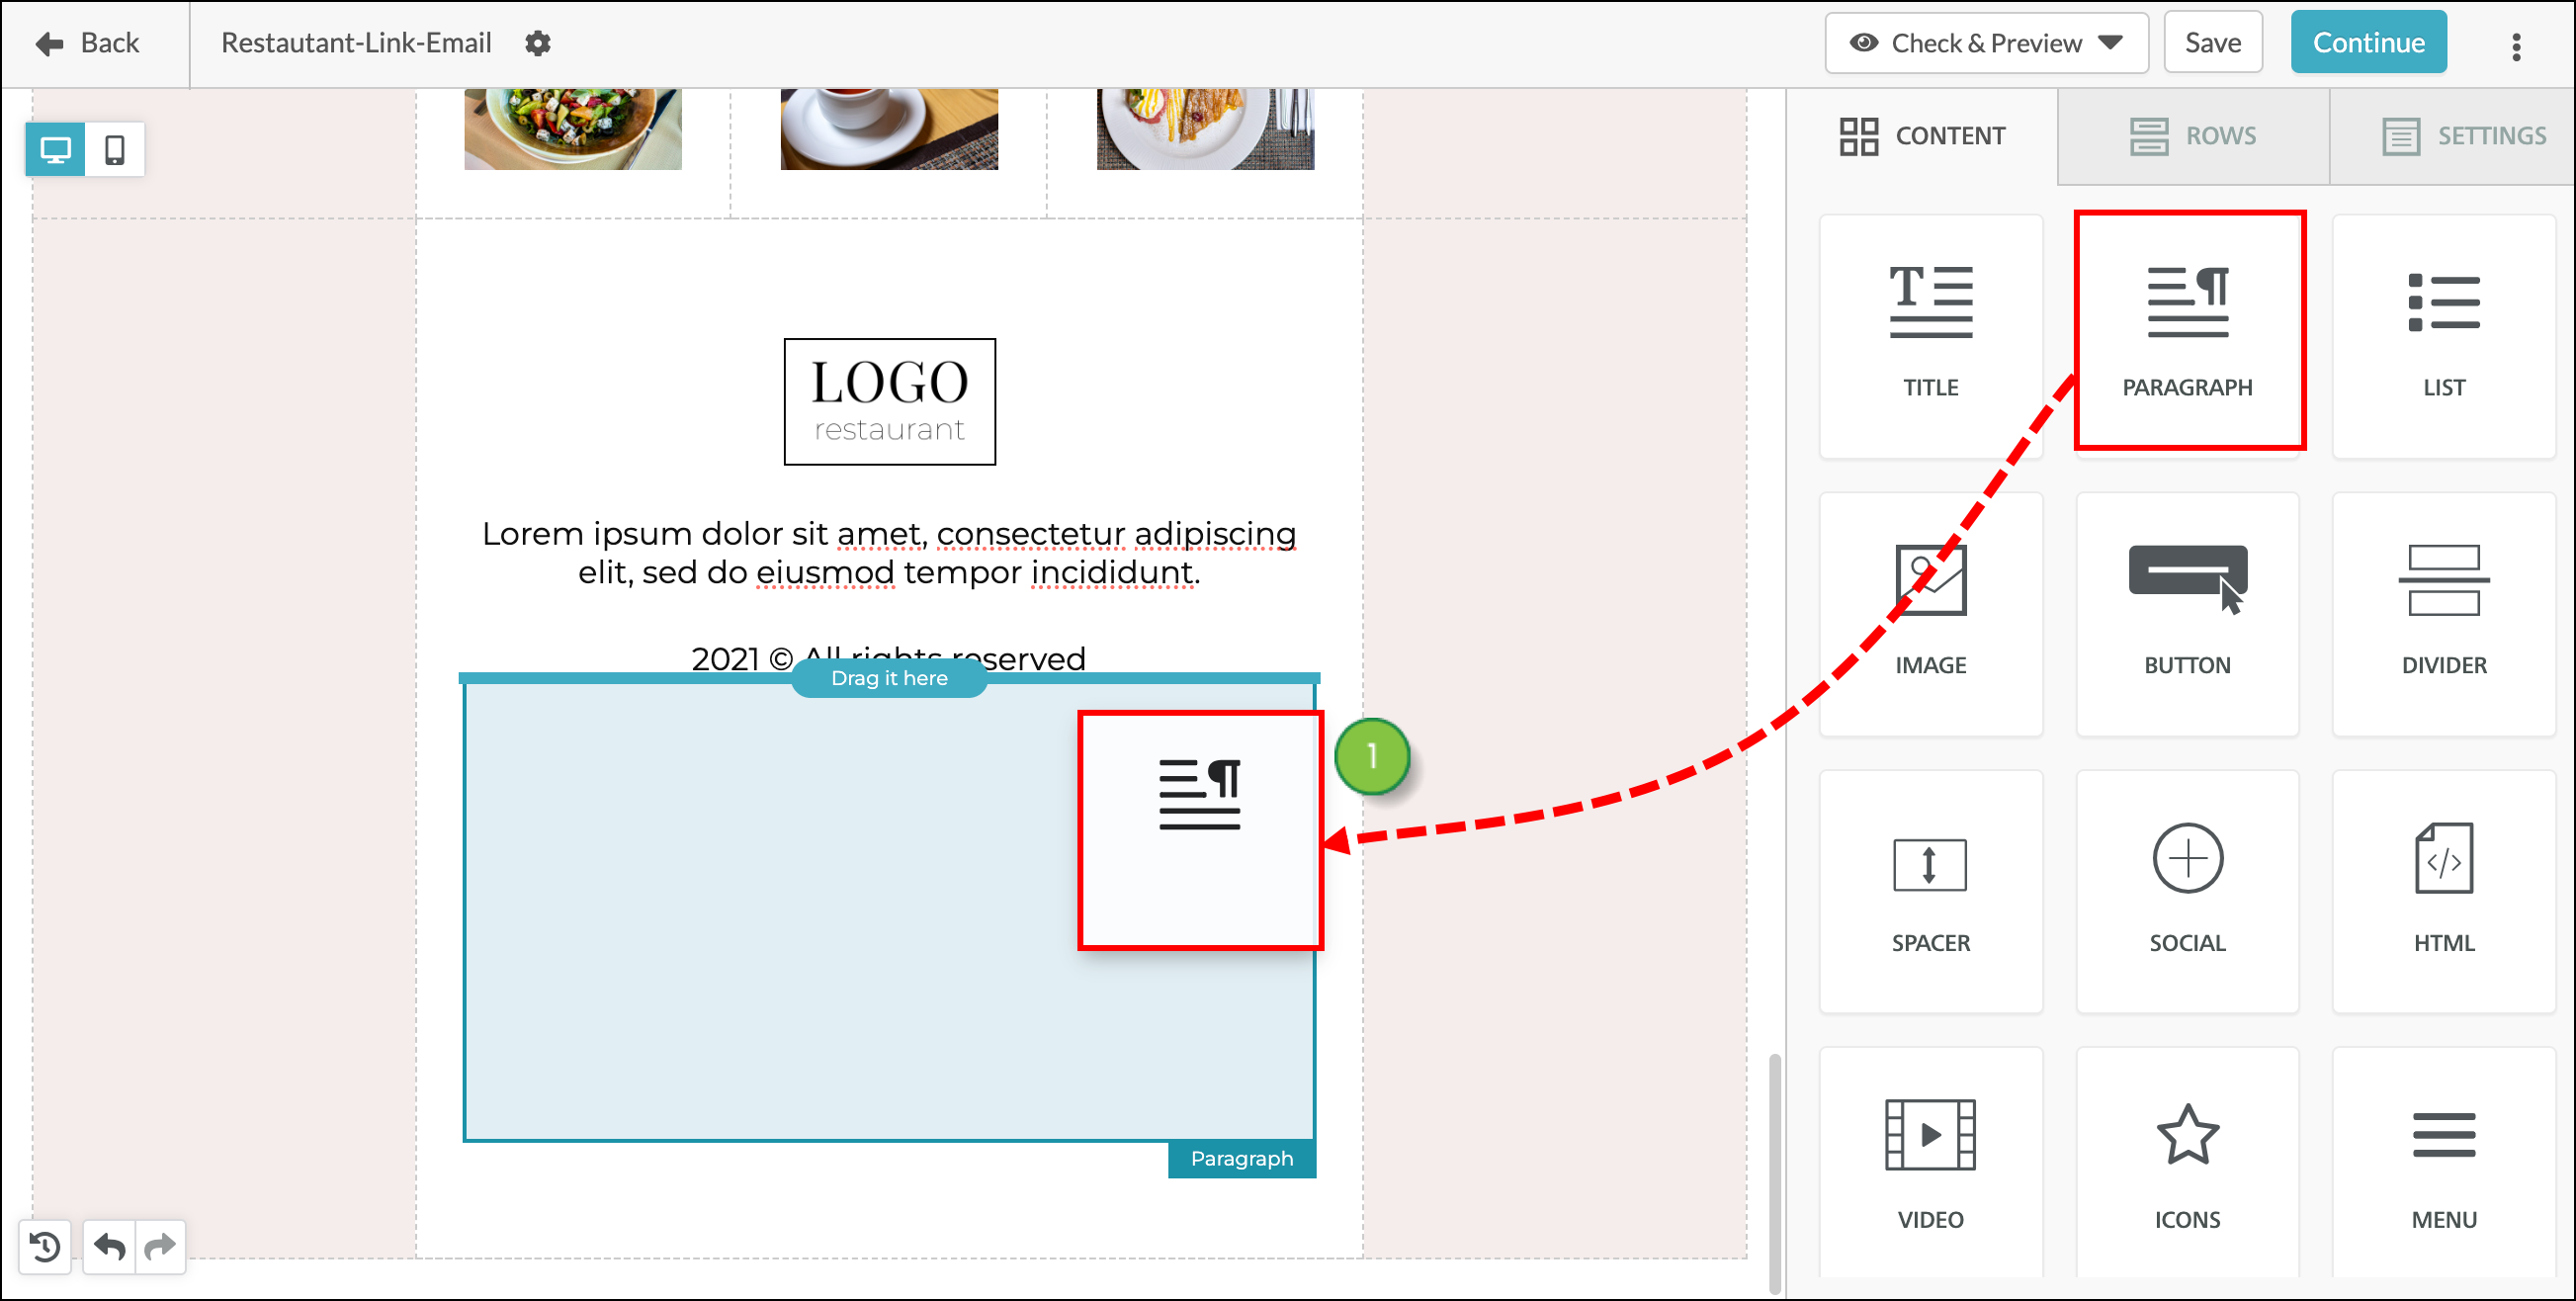
You can move unsubscribe links around in emails.
To move unsubscribe links in emails, create or edit an email from the Email page in the left toolbar.
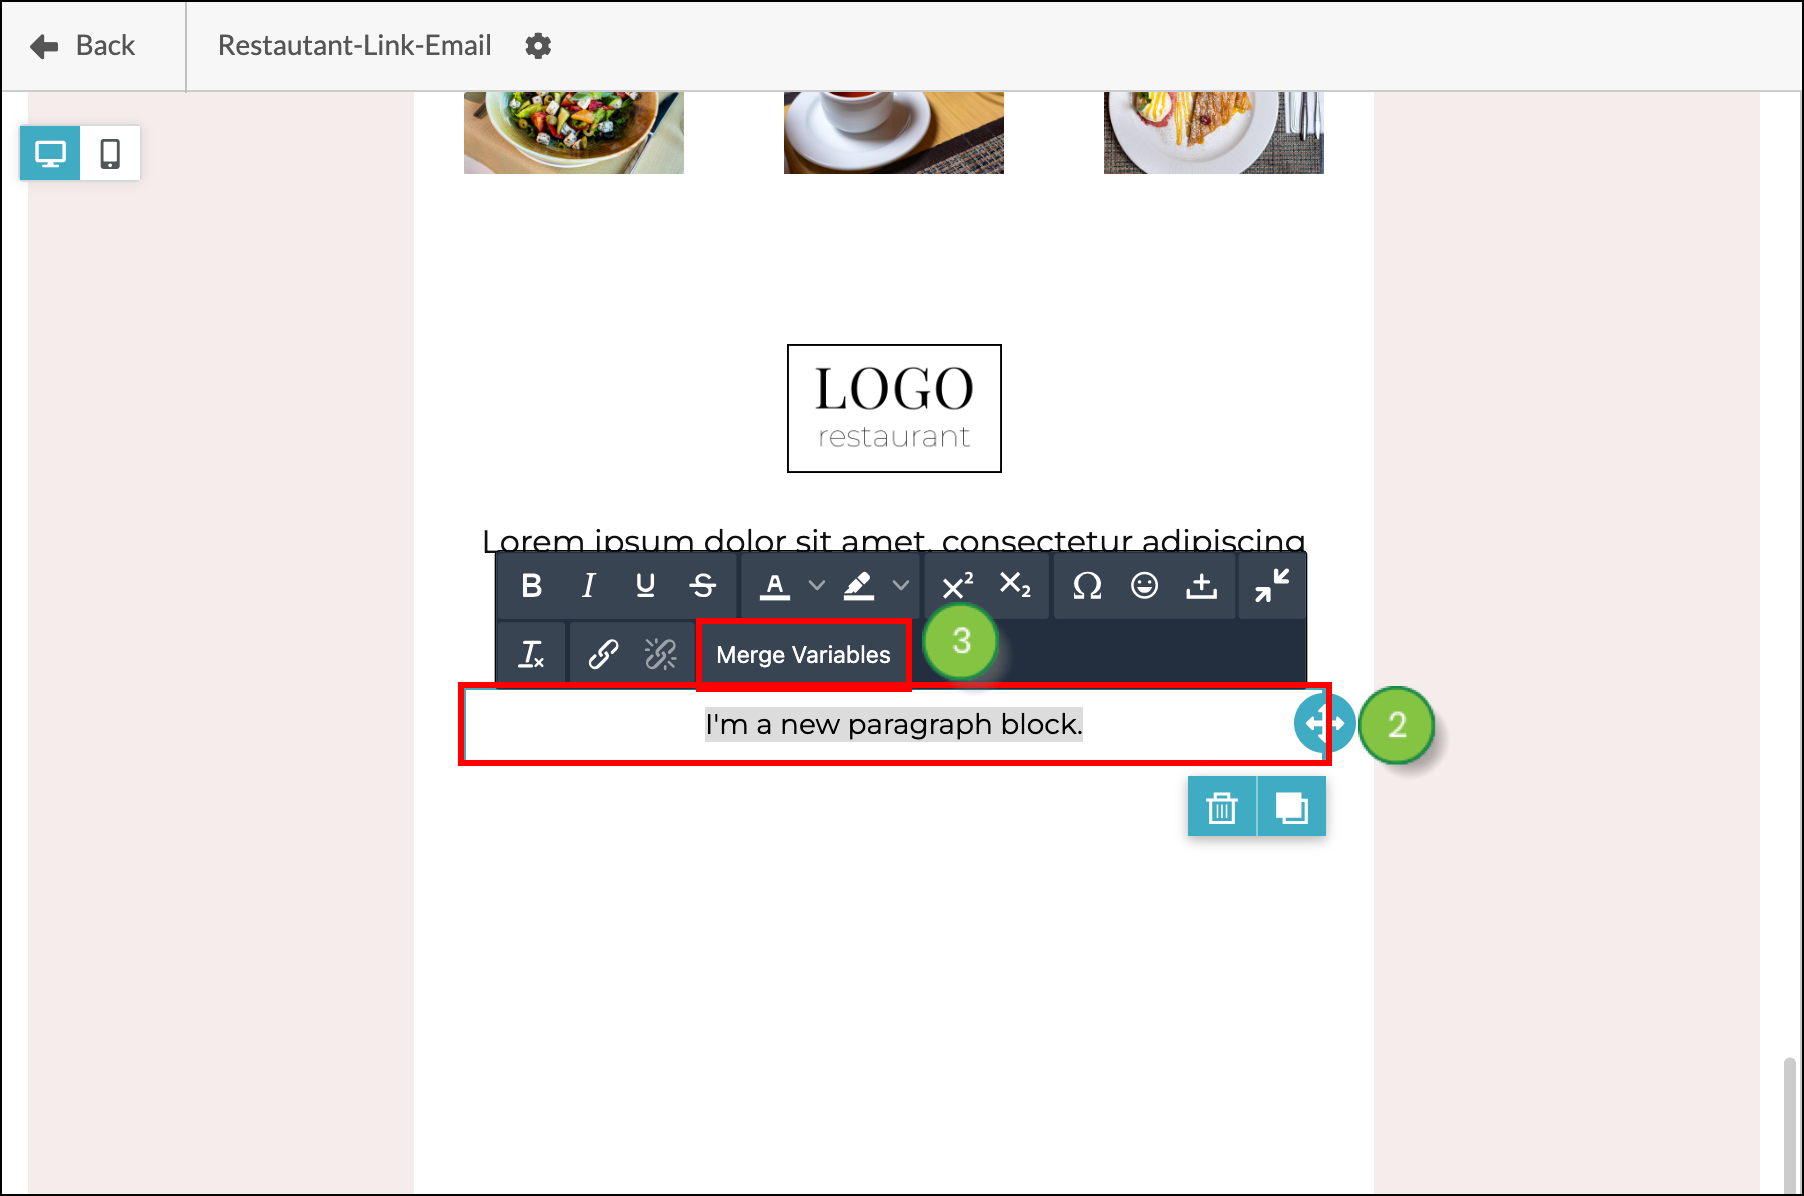
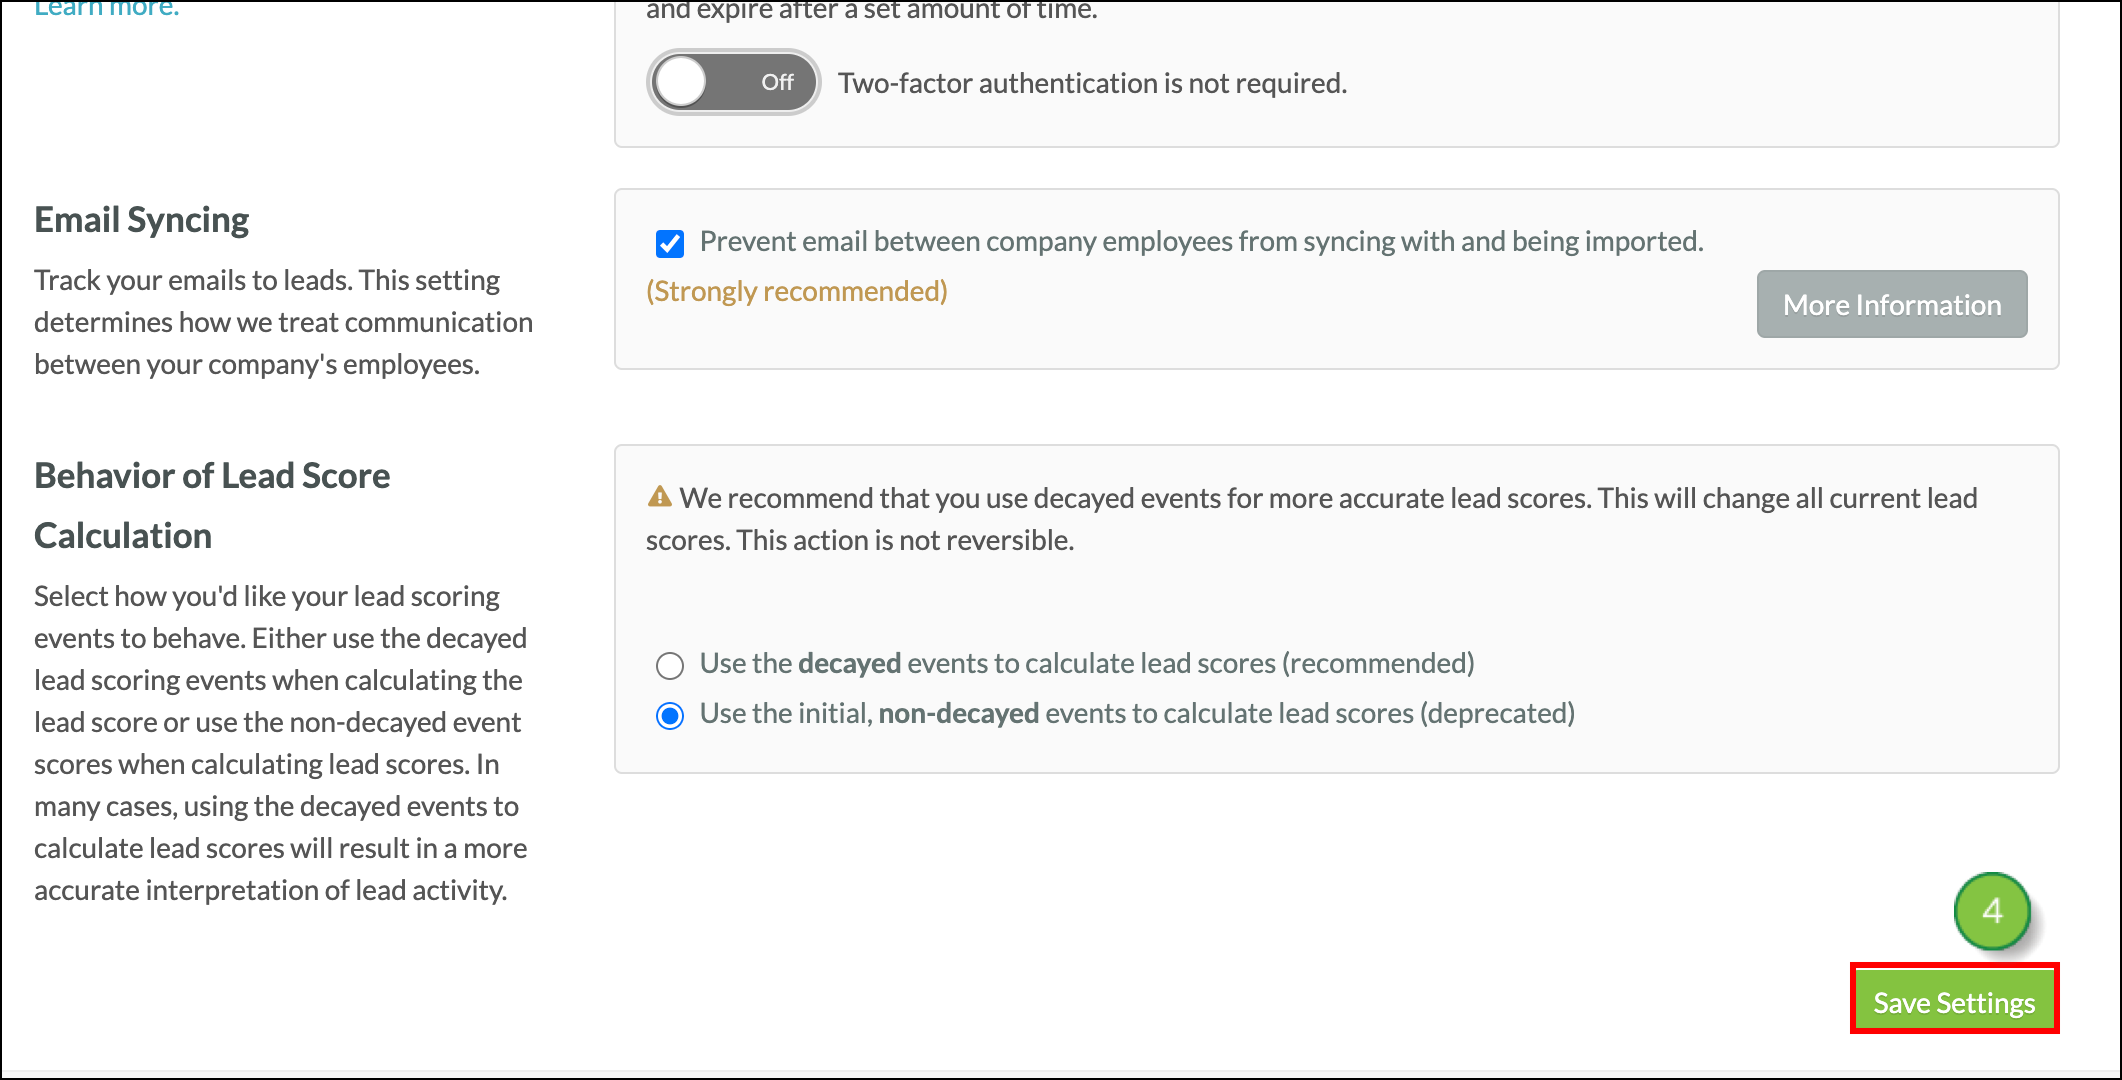
Before moving an unsubscribe link, you must first confirm your unsubscribe address.
To confirm your unsubscribe address, do the following:

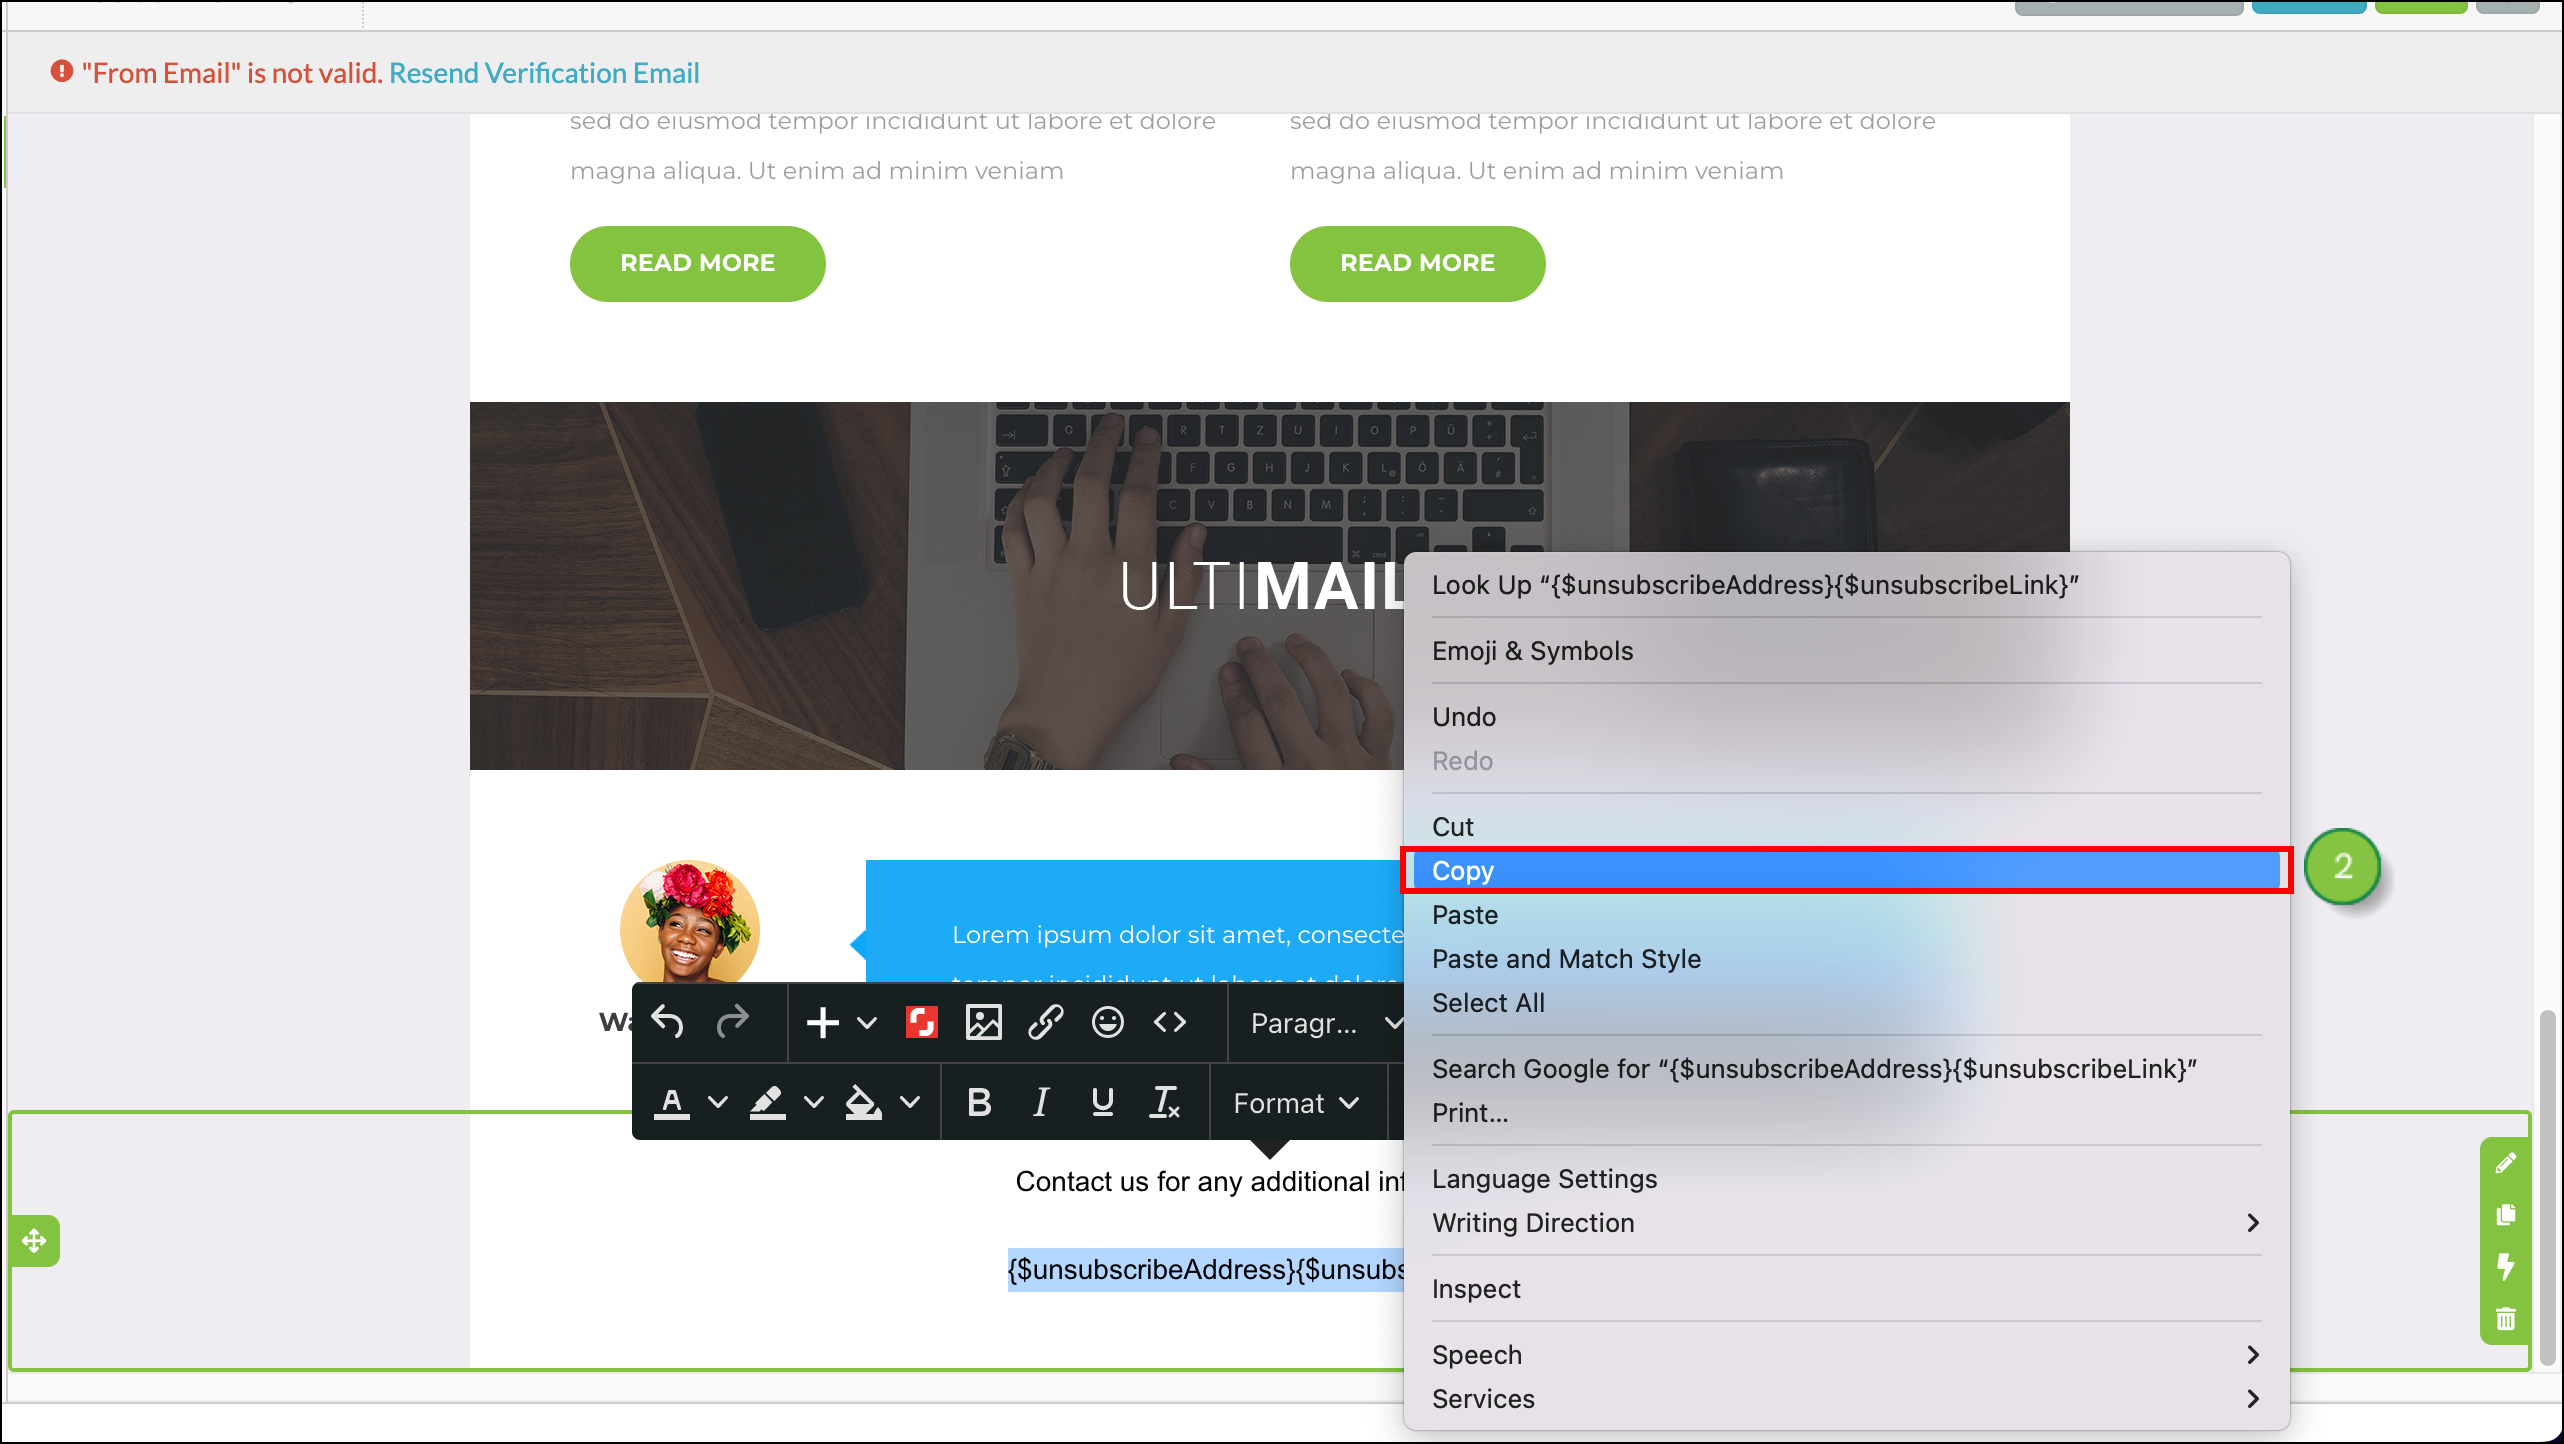
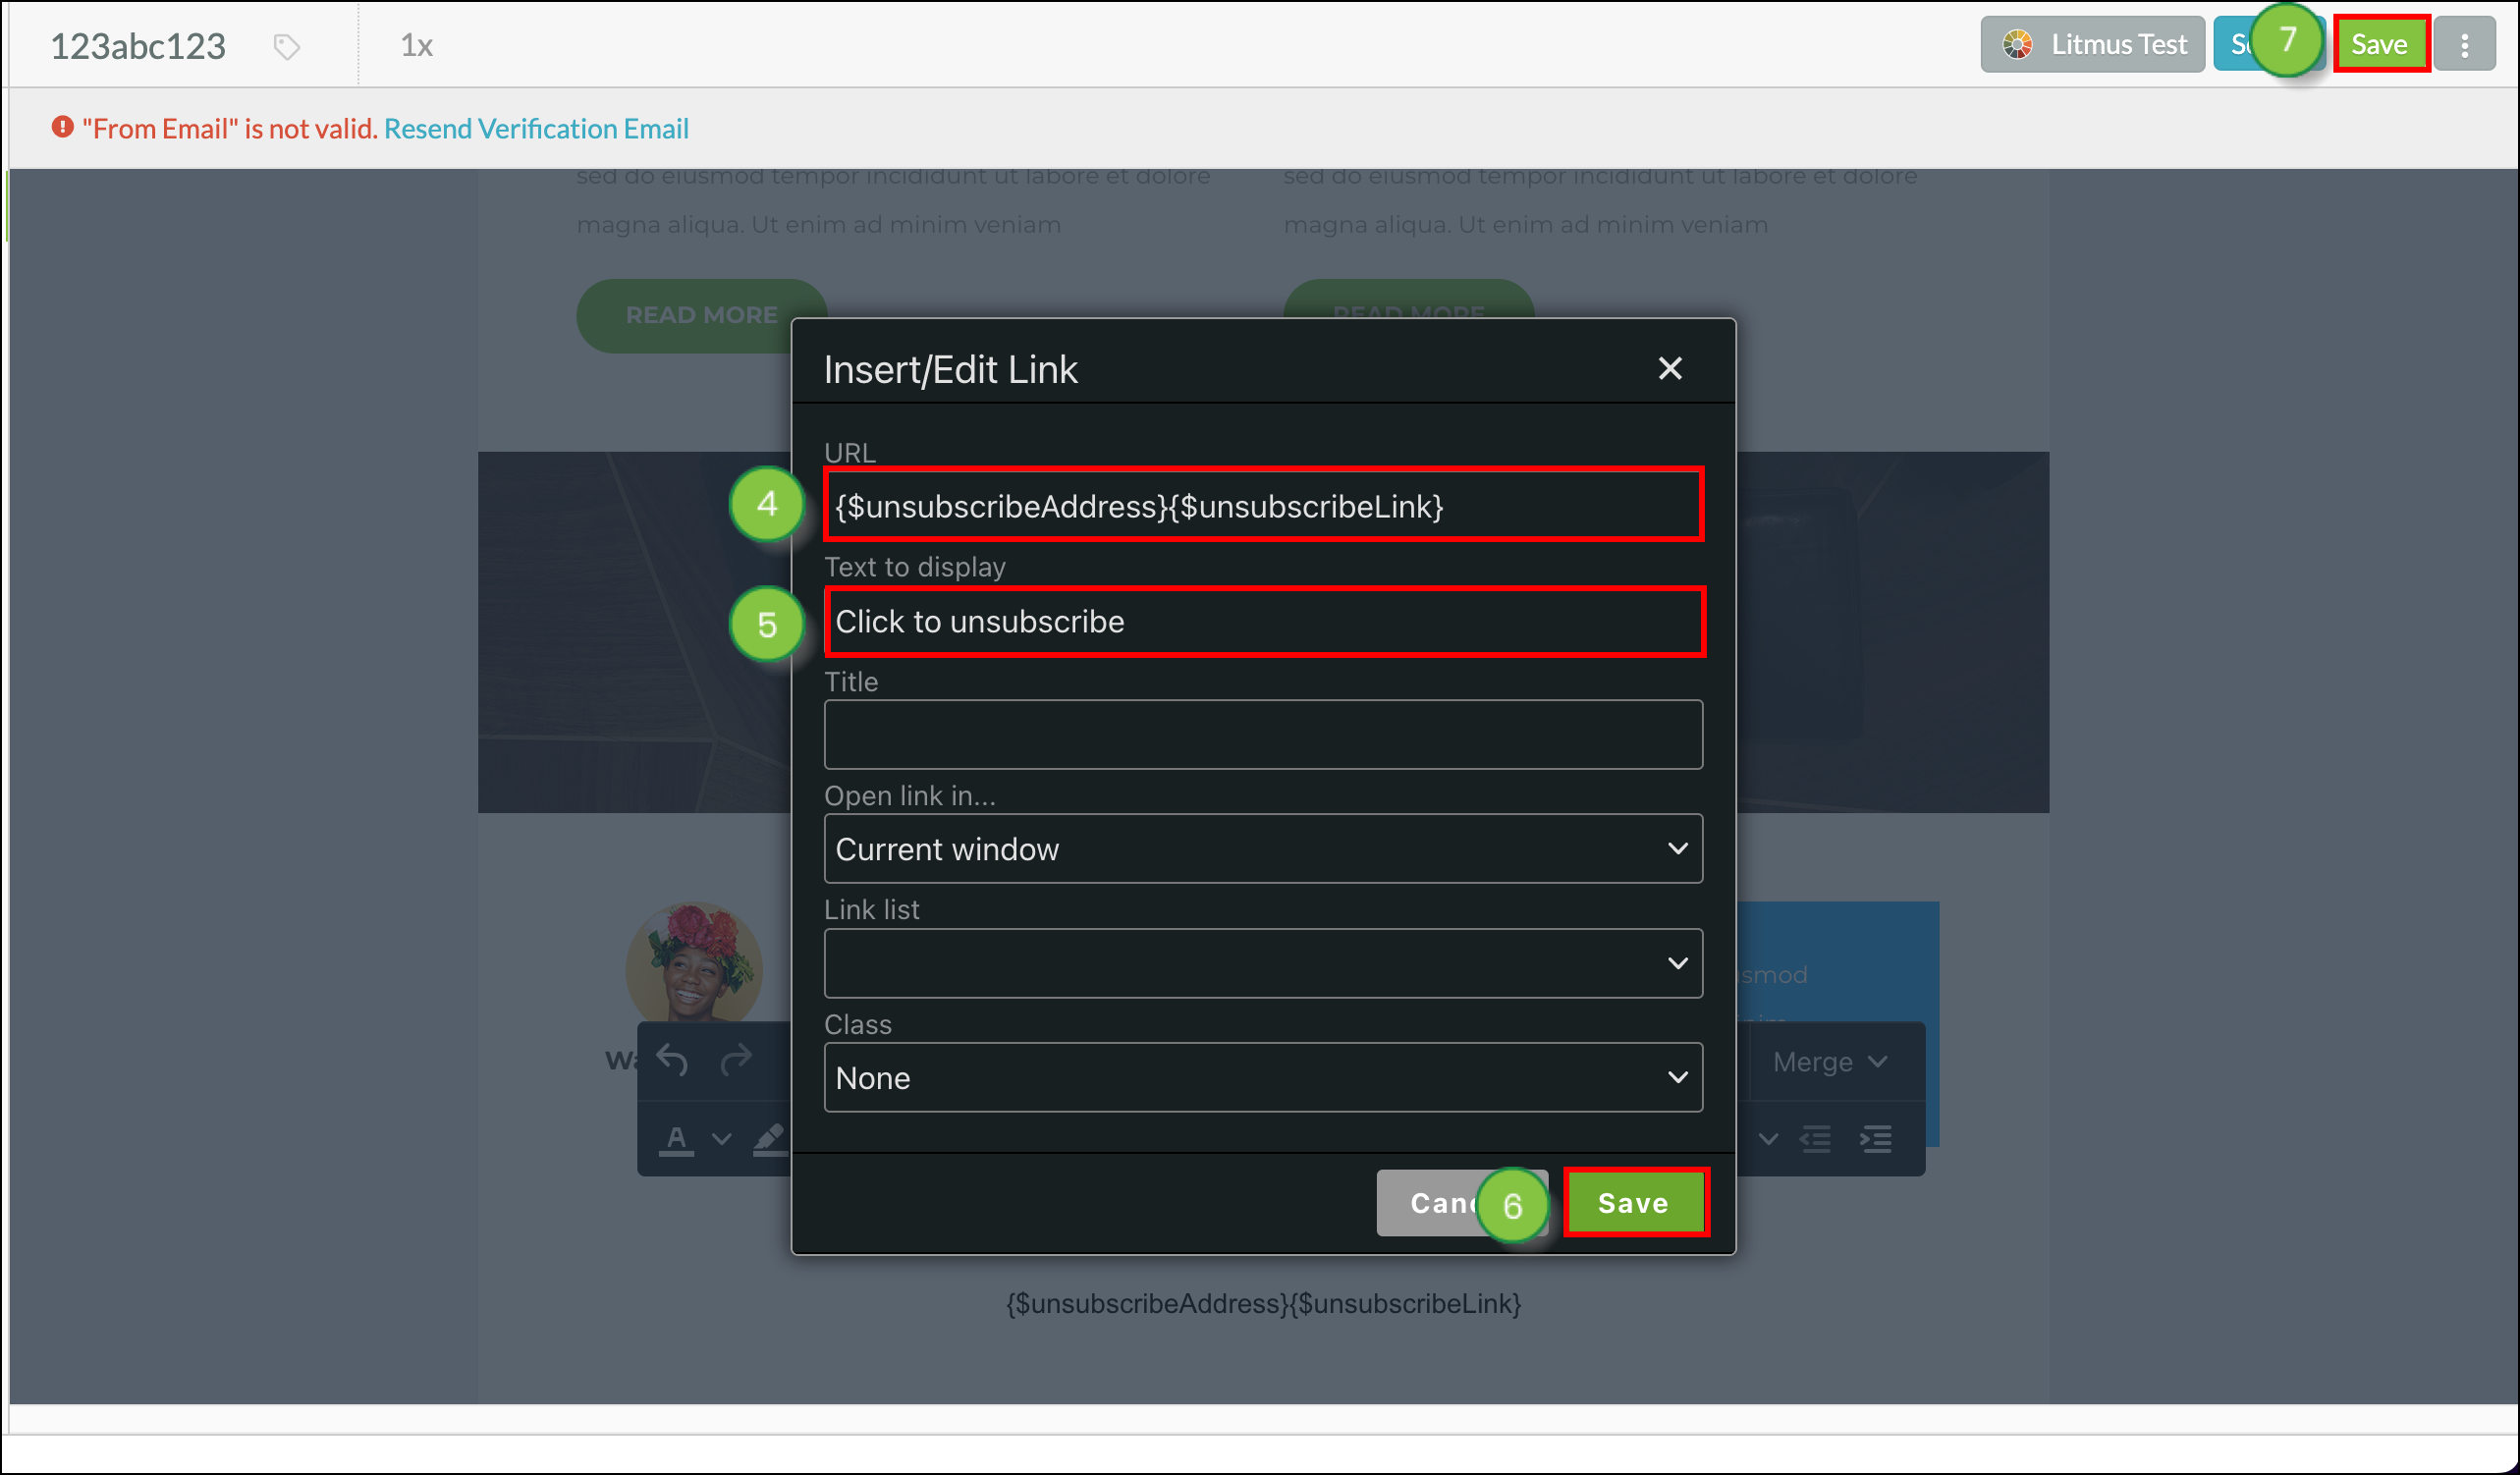
You can customize unsubscribe link text for a more personalized touch.
To customize unsubscribe link text, create or edit an email from the Email page in the left toolbar.
Copyright © 2026 · All Rights Reserved · Constant Contact · Privacy Center