Constant Contact's Lead Gen & CRM Visual Workflow Builder provides you with the means to create powerful automations. They remove the need to manually move opportunities from one stage in a pipeline to another, saving you considerable time, and letting you secure even more sales.
Article Contents
Users:
| Administrators | ✓ | |
| Company Managers | ✓ | |
| Marketing Managers | ✓ | |
| Sales Managers | | |
| Salespersons | | |
| Jr. Salespersons | | |
Creating Opportunity Workflows
The Sales Optimizer has several actions directly related to opportunities that allow you to automate how opportunities move across pipelines and stages, as well as automate tasks for users or lead owners assigned to the opportunities. For optimized workflows, consider using the available triggers for opportunities, such as has the stage.
Note: Opportunity workflows are available whether or not Sales Optimizer is enabled.
To create pipeline automation using a visual workflow that is based on when a stage changes, do the following:
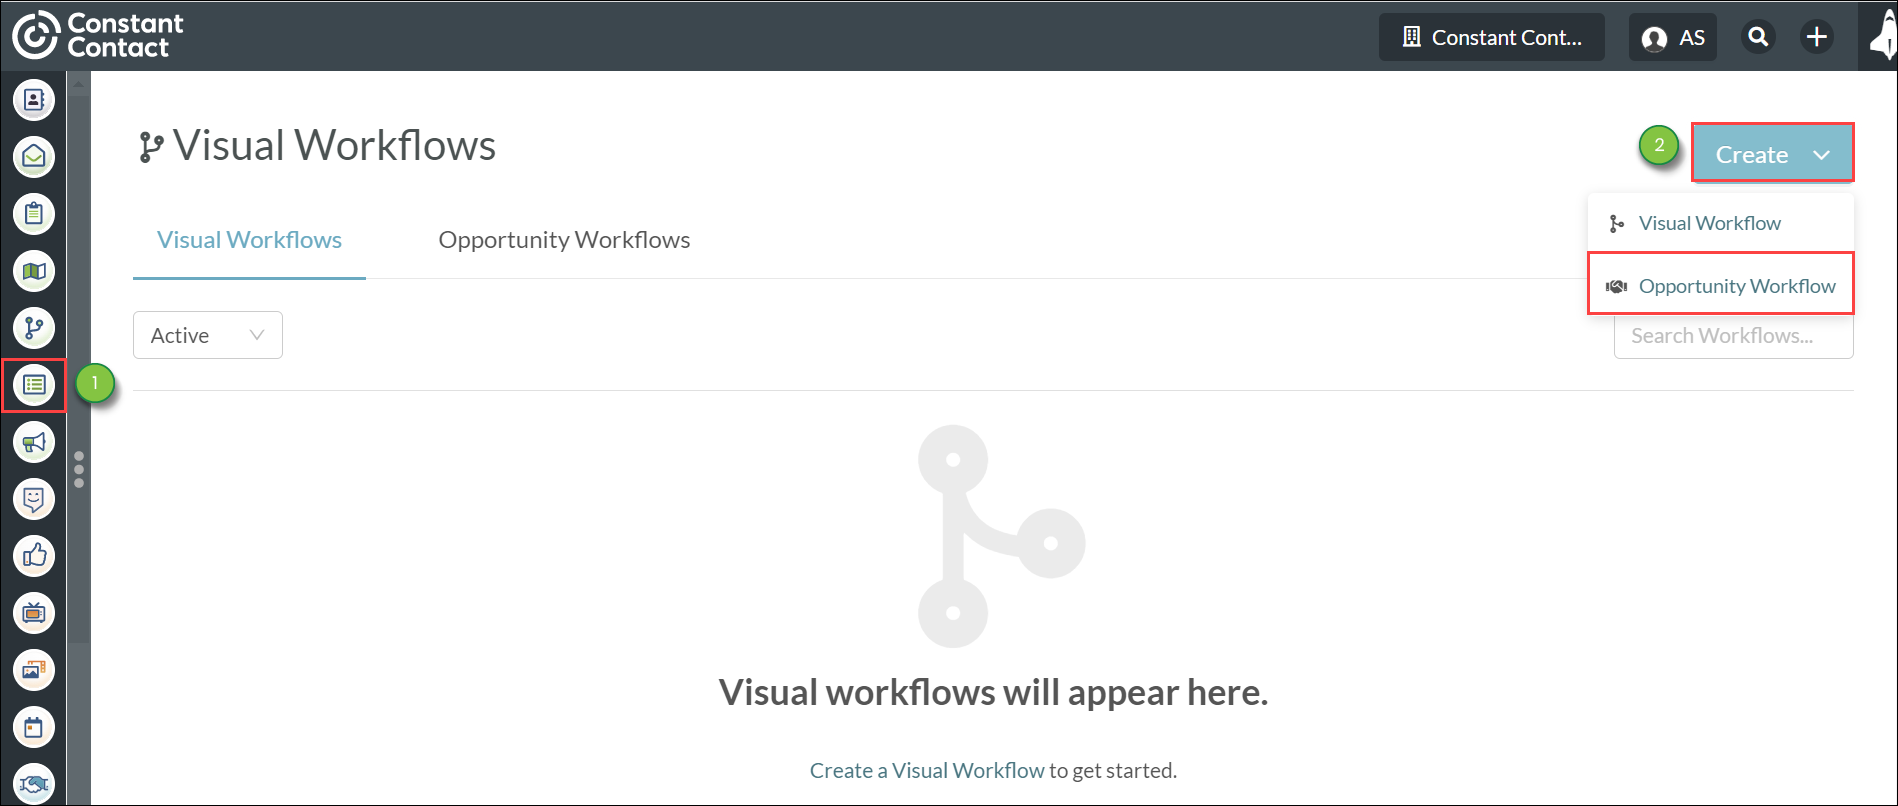
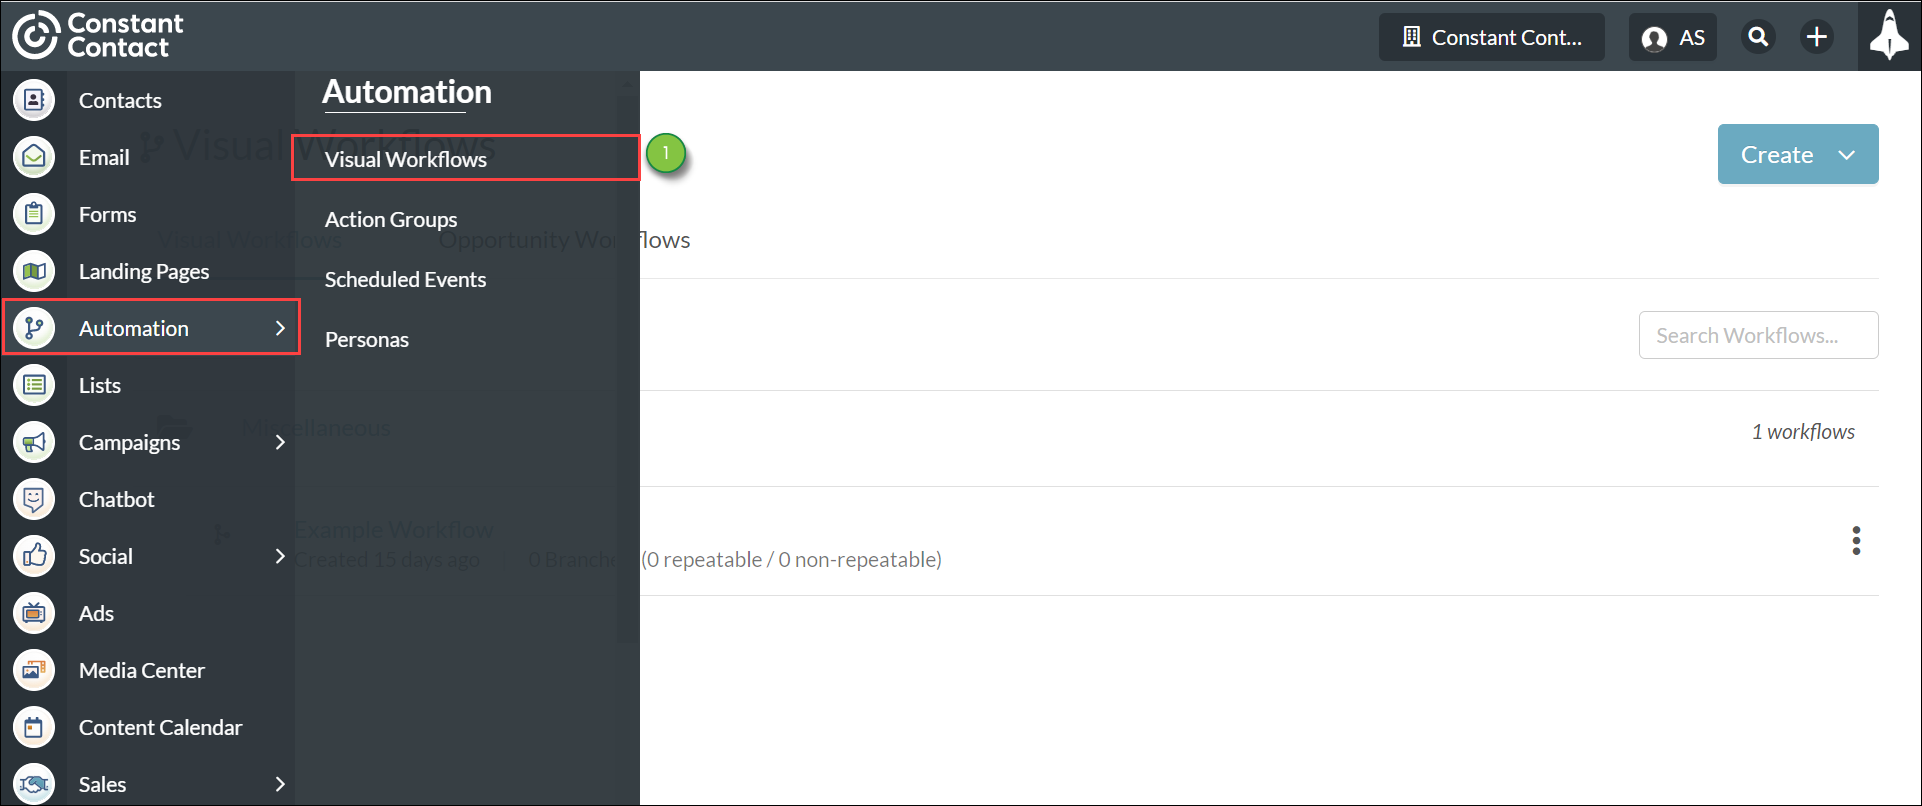
- Click Automation > Visual Workflows in the left toolbar.
- Click Create > Opportunity Workflow.
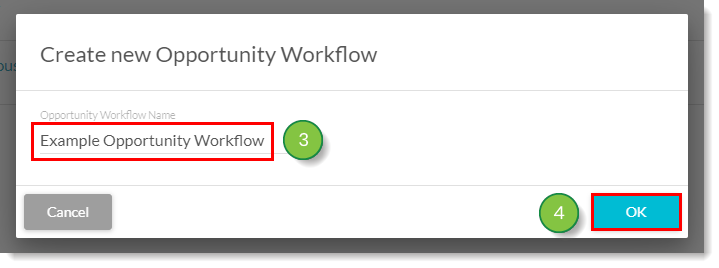
- Enter a name for the workflow.
- Click OK.
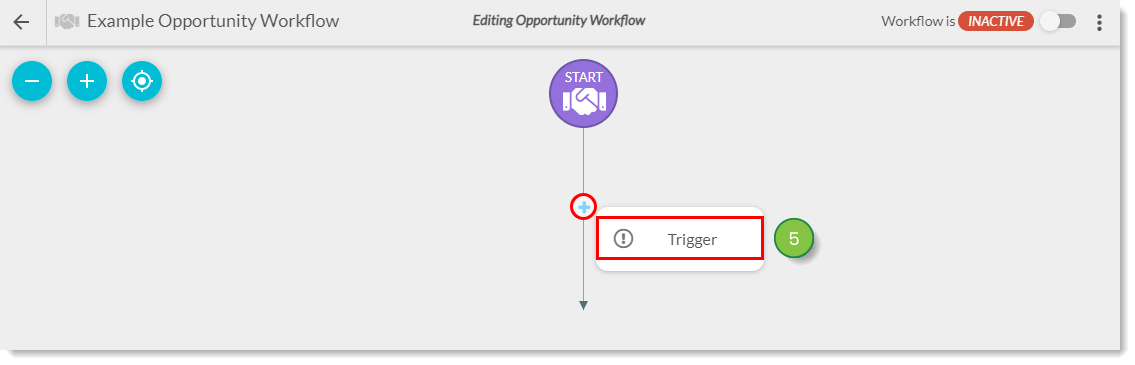
- Click + Add > Trigger under Start or an applicable workflow branch.
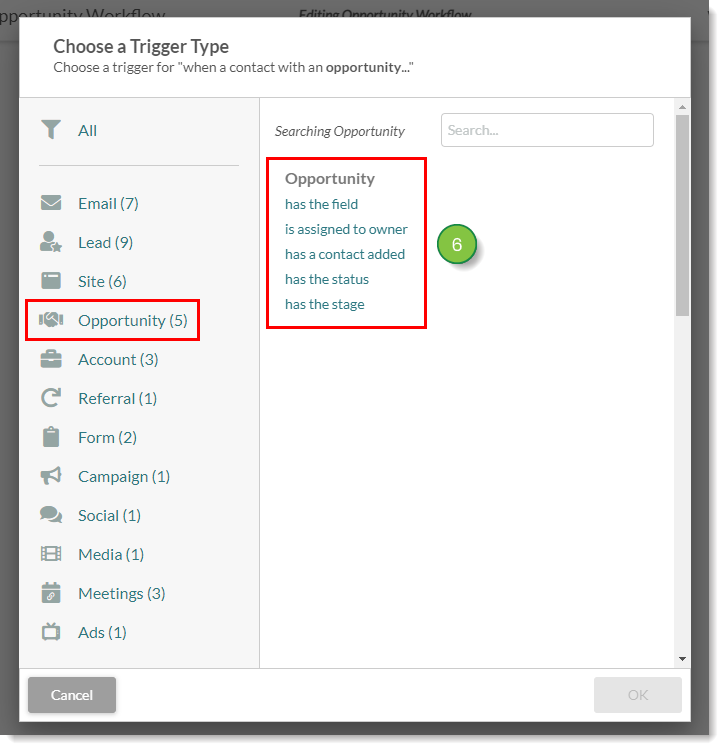
- Select the desired trigger under Opportunity and configure it as necessary.
Editing Opportunity Workflows
You can edit opportunity workflows as necessary.
To edit previously created opportunity workflows, do the following:
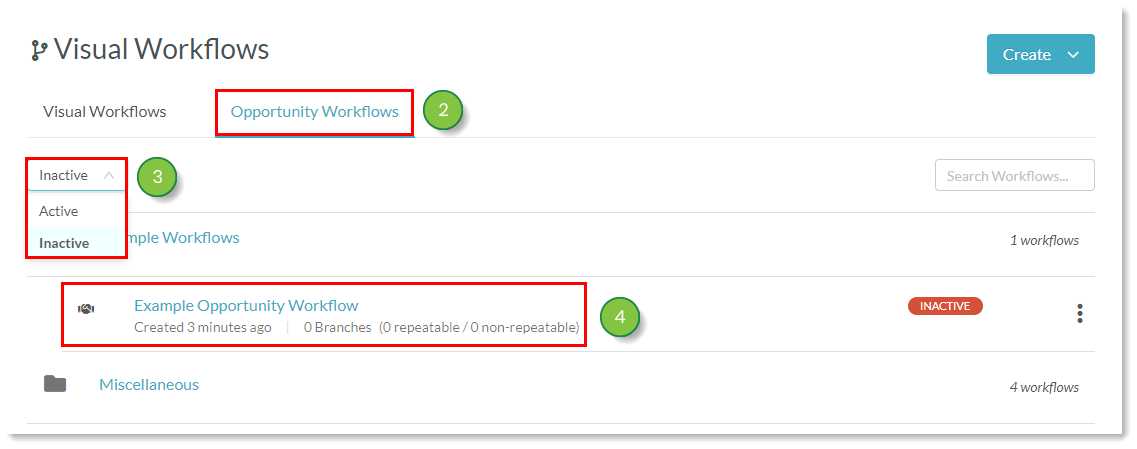
- Click Automation > Visual Workflows in the left toolbar.
- Click the Opportunity Workflows tab.
- Click the Activity drop-down menu and select either Active or Inactive.
- Click the name of the desired opportunity workflow.
Adding Opportunity Rules
Opportunity automation can be refined through the use of opportunity filters. These filters work in tandem with triggers to tell triggers to fire when something does or does not happen.
Important: If a lead has two open opportunities that match the exact criteria of the workflow, the workflow will not go through with any of the opportunity actions. Lead Gen & CRM cannot choose which to act on and will therefore act on neither.
Opportunity workflows will fire for contacts that are attached to any number of closed or archived opportunities, but only so long as they are attached to one open opportunity.
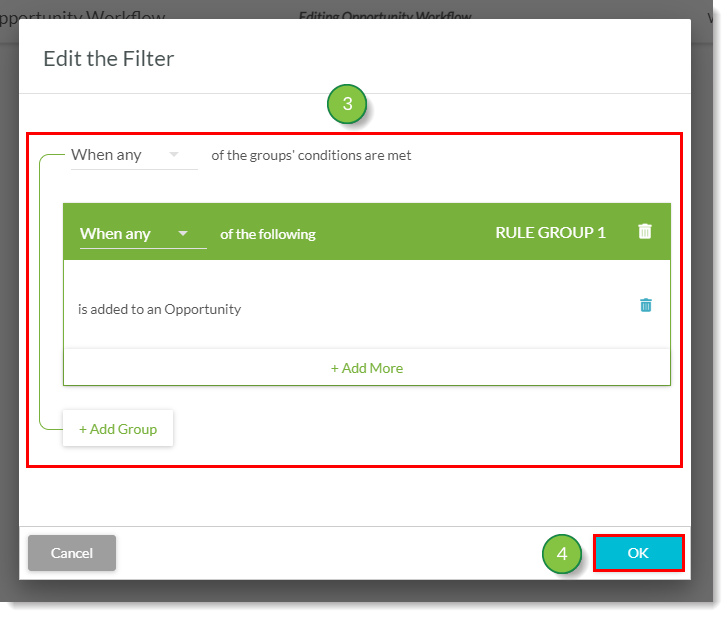
To use an opportunity trigger, create or edit an opportunity workflow
- Click + Add > Filter under an applicable trigger.
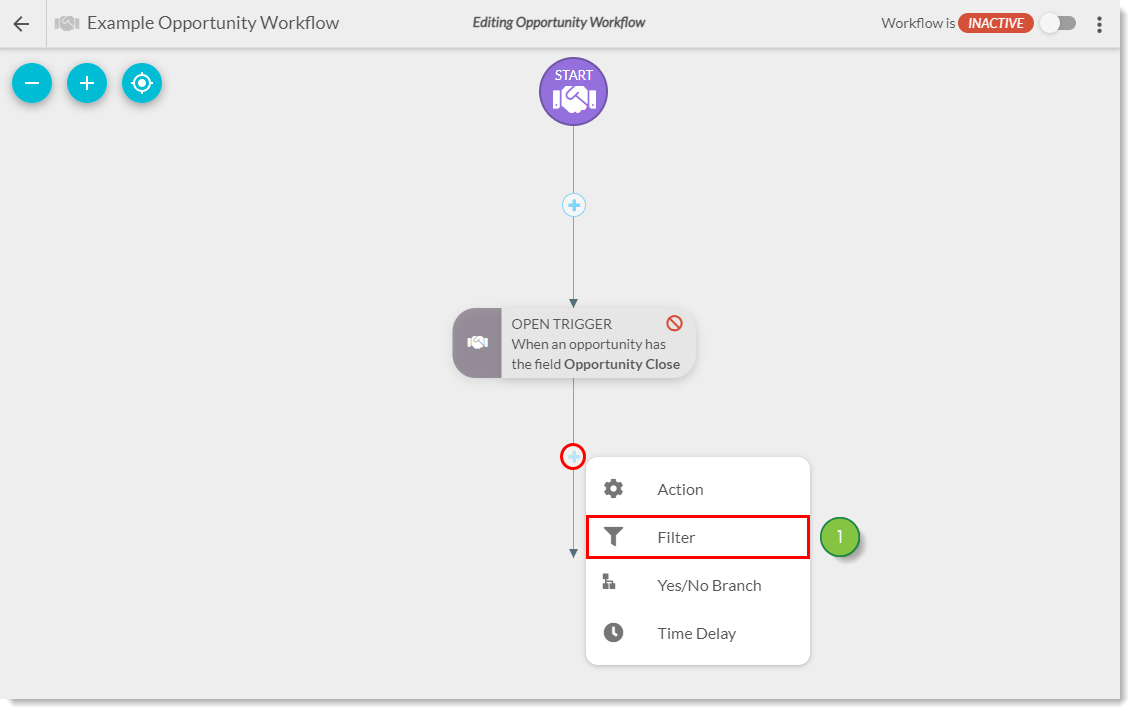
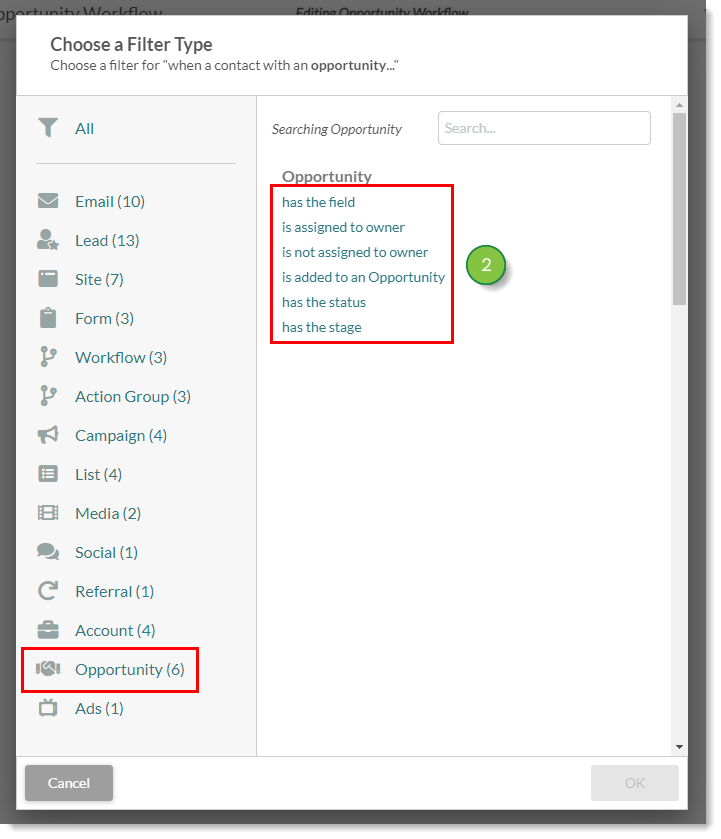
- Select the desired filter under Opportunity.
- Configure the filter as necessary.
- Click OK.
Refer to the following help articles for more information on triggers and filters:
Creating Sales Tasks
While you can manually assign tasks through Lead Gen & CRM's Task Manager, consider assigning sales tasks with specially configured automation. Automated sales tasks ensure that there is no downtime between when a lead triggers your created automation and a user or lead owner being alerted to continuing the sales process.
To assign tasks and schedule reminders with sales task actions in workflows:
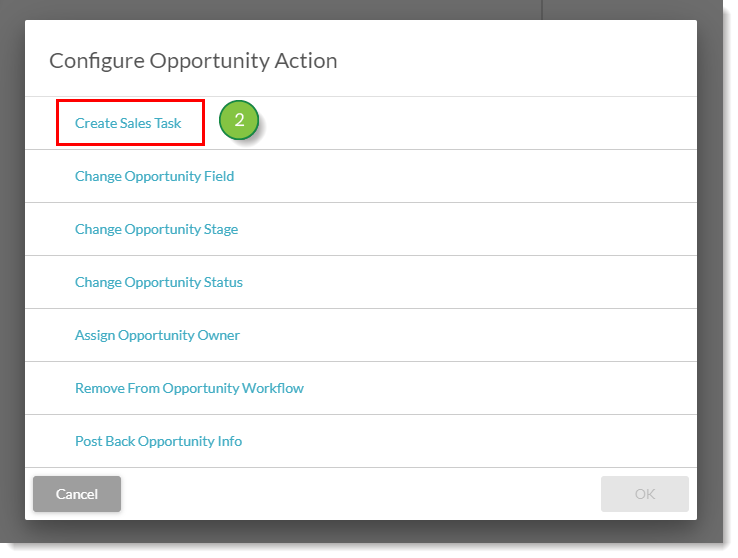
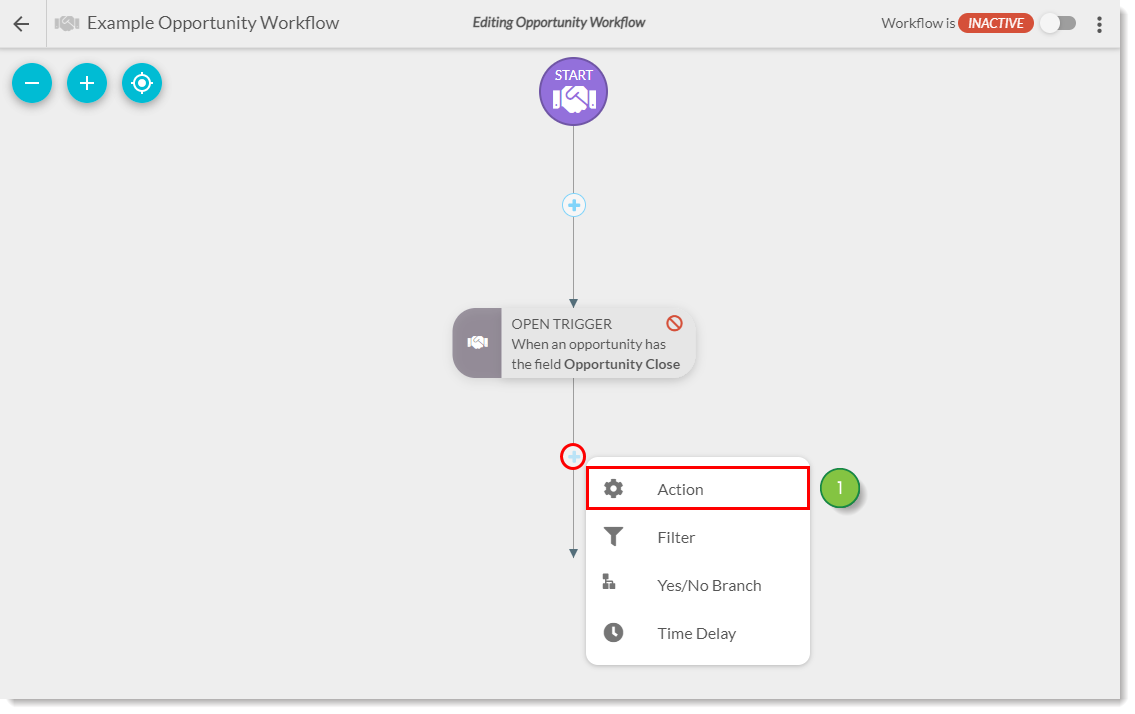
- Click + Add > Action under the workflow's trigger.

- Click Create Sales Task.
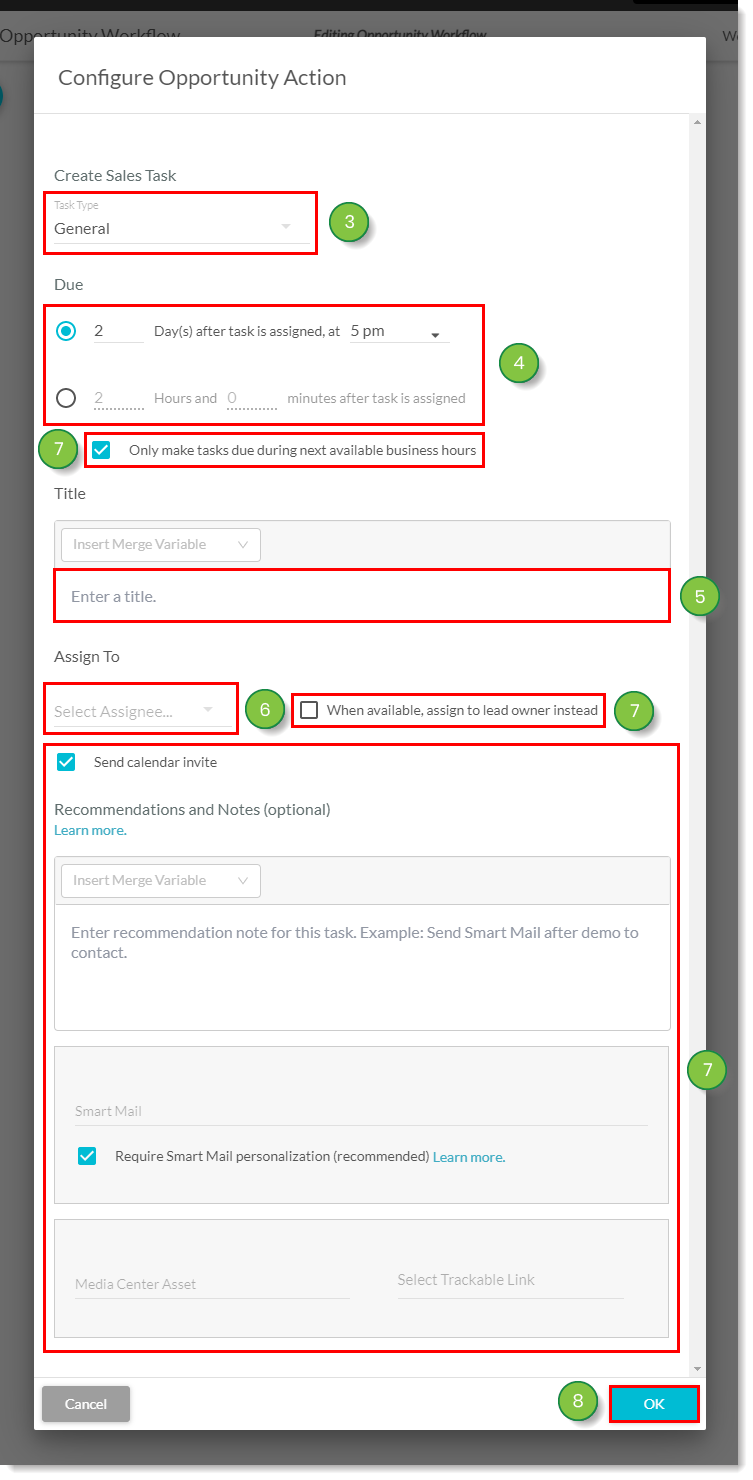
- Select the desired task type from the Task Type drop-down menu:
- Select one of the following Due Date options:
- Days after task is assigned
- Hours and minutes after task is assigned
- Note: Reminders are scheduled according to the assigned user's time zone
- Enter a title for the task in the Title text field.
- Select the user to assign the task to in the Select Assignee drop-down menu.
- Optionally, do any or all of the following:
- Click the Only make tasks due during business hours checkbox
- Note: When Only make tasks due during business hours is checked, sales tasks will only be assigned during business hours.
- Click the When available, assign to lead owner instead checkbox
- Enter task notes in the Note section
- Click the Send calendar invite checkbox
- Enter a Smart Mail name in the Select Smart Mail text box
- Click the Require Smart Mail personalization checkbox
- Enter a Media Center asset name in the Select Media Center Asset text box
- Attach a trackable link to a Media Center asset in the Select Trackable Link drop-down menu
- Click OK.
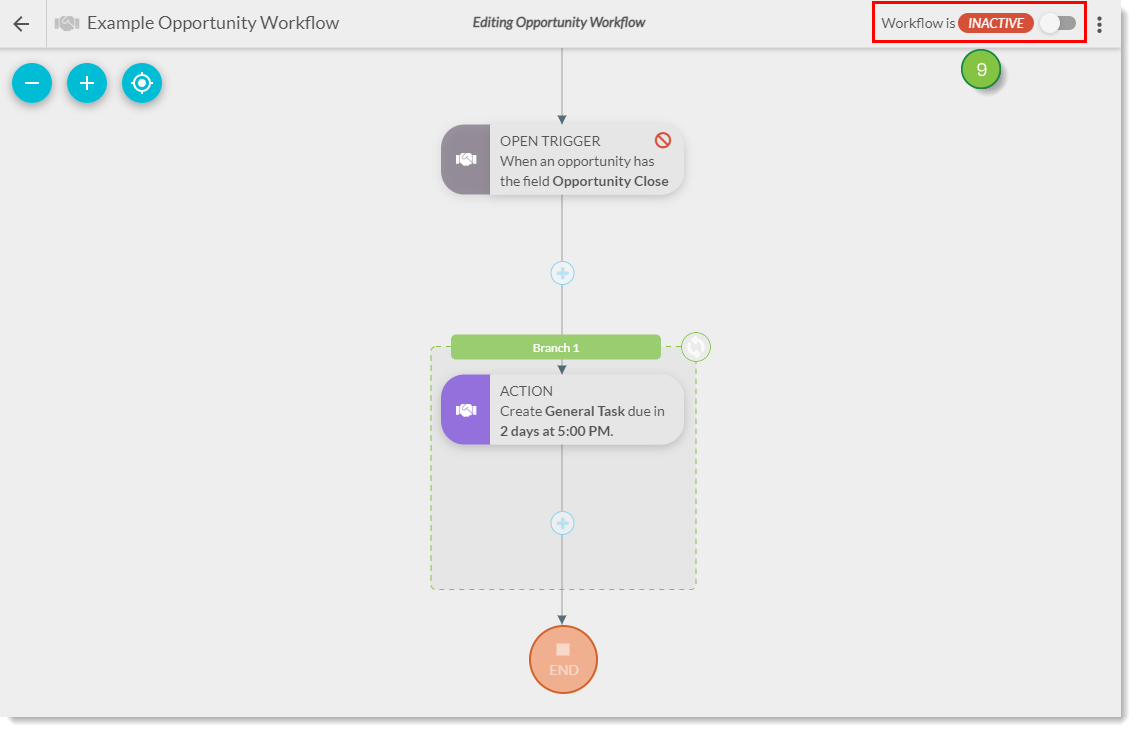
- Complete the workflow with other triggers, filters, delays, or actions. When the workflow is complete, set the Activity toggle to Active.
Changing Opportunity Fields
You can determine how opportunities change fields based on individual interactions. These automations can track and change content based on who interacts with it in a specific manner.
To set opportunity fields to change through visual workflows:
- Click + Add > Action under the trigger in the created workflow.
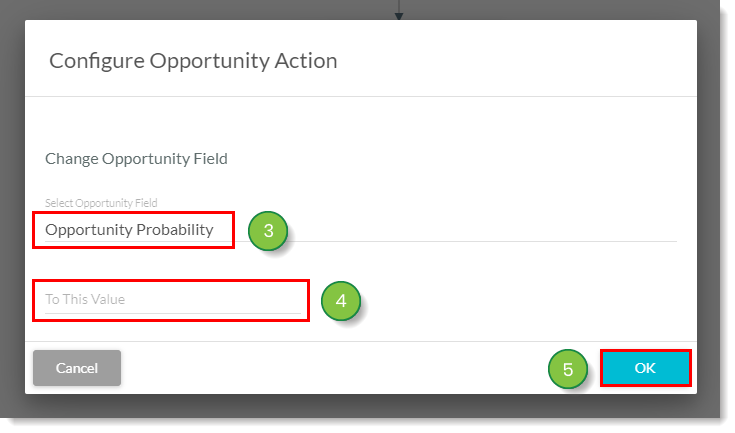
- Click Change Opportunity Field.

- Select the desired field in the Select Opportunity Field text field.
- Enter the necessary values, depending on the selected field.
- Click OK.
- Complete the workflow with other triggers, filters, delays, or actions. When the workflow is complete, set the Activity toggle to Active.

Changing Opportunity Stages
You can automate how opportunities can move across stages within a pipeline. Based on your configured triggers and filters, opportunities can move from one stage to another based on any number of different interactions.
Important: This action will not switch a lead from one pipeline to another. If a lead enters this automation and is in a different pipeline than the one specified in the action, then the action will not execute and nothing will happen.
To change an opportunity's stage through visual workflows:
- Click + Add > Action under the trigger in the created workflow.

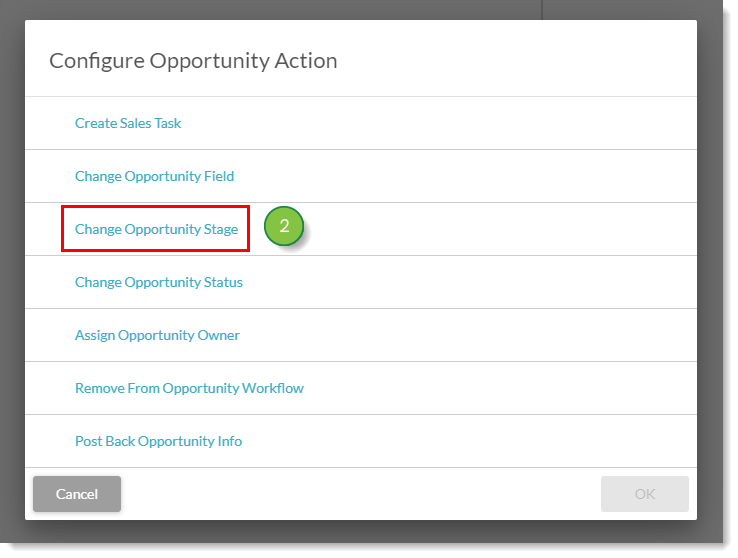
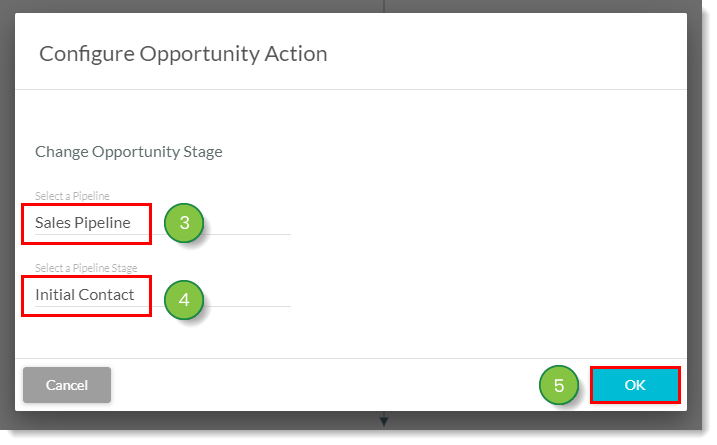
- Click Change Opportunity Stage.
- Select the desired pipeline in the Select a Pipeline
text field. - Select the desired stage in the Select a Pipeline Stage text field.
- Click OK.
- Complete the workflow with other triggers, filters, delays, or actions. When the workflow is complete, set the Activity toggle to Active.
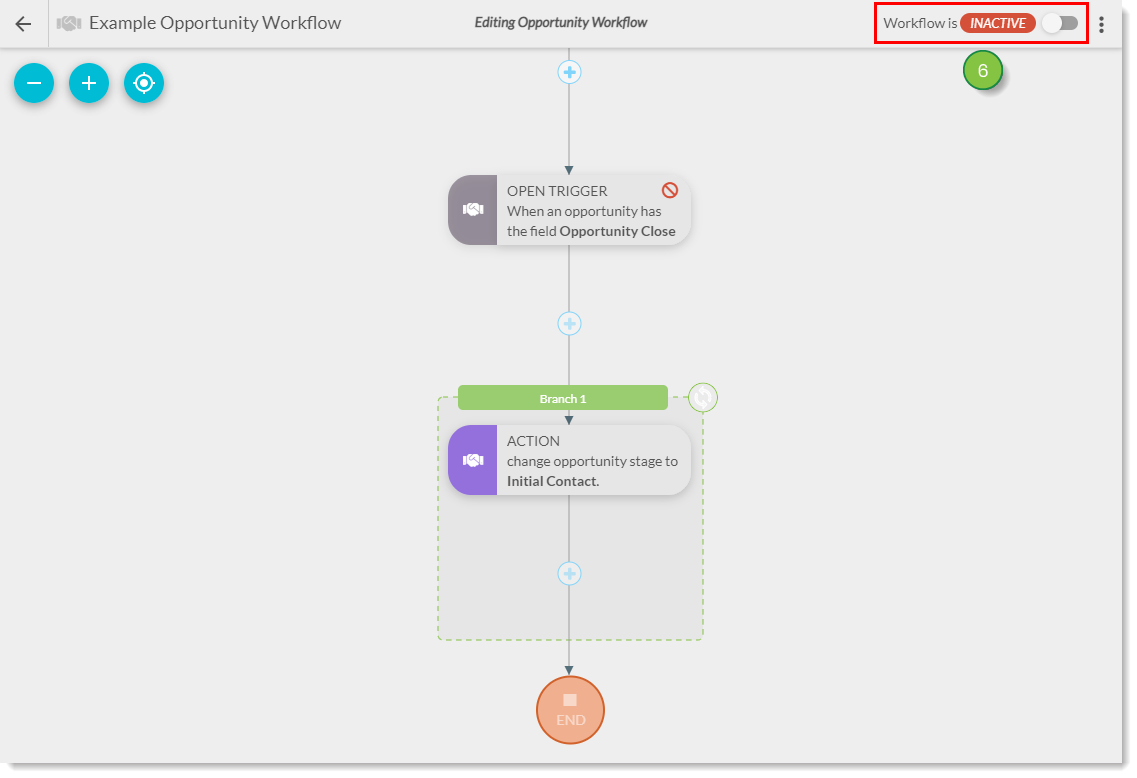
Changing Opportunity Statuses
You can automate an opportunity's given status based on certain interactions. Based on how you configure a workflow, opportunities can be automated to be set as won or lost.
To change opportunity statues through visual workflows:
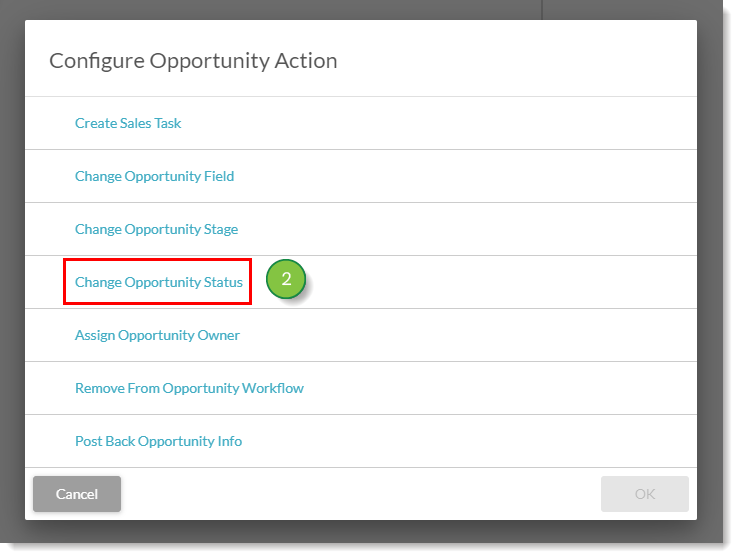
- Click + Add > Action under the trigger in the created workflow.

- Click Change Opportunity Status.
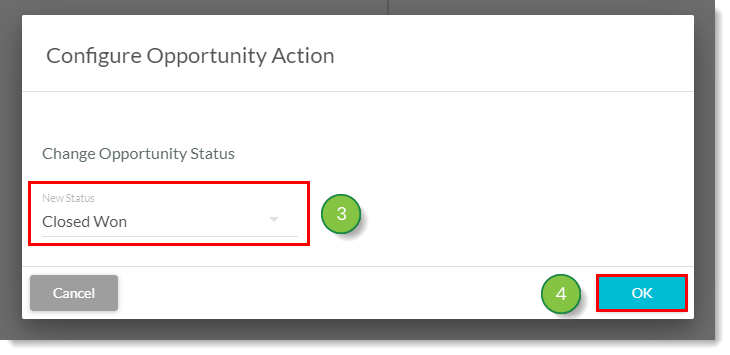
- Select either Closed Won or Closed Lost in the New Status drop-down menu.
- Click OK.
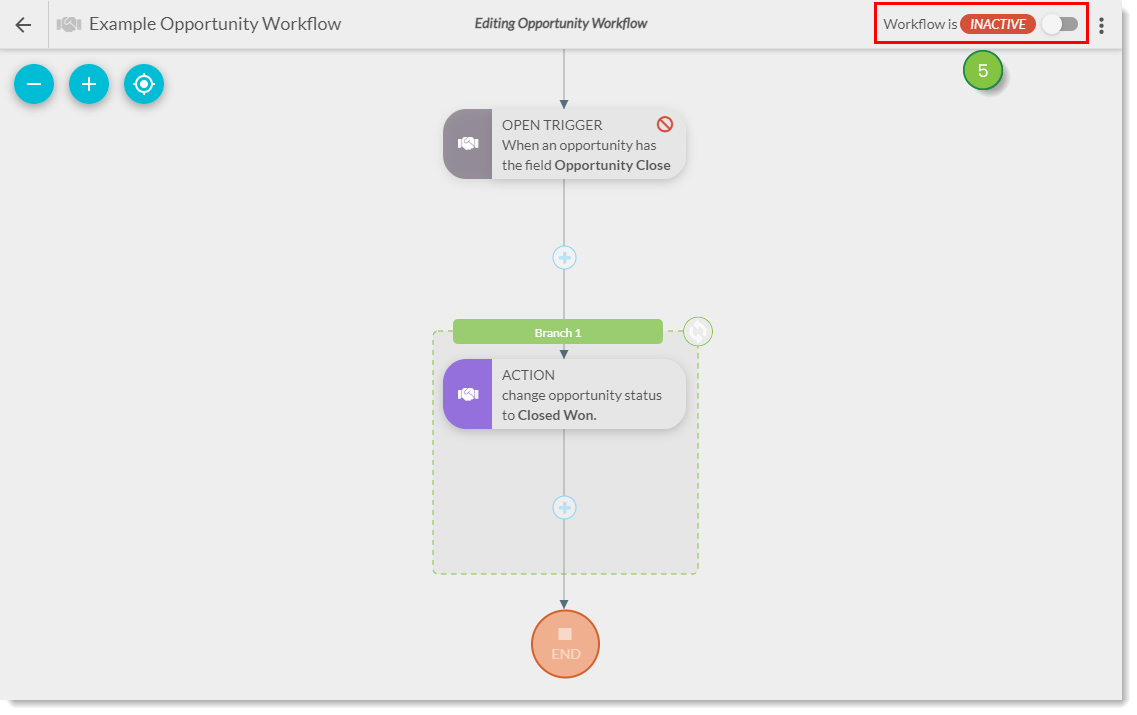
- Complete the workflow with other triggers, filters, delays, or actions. When the workflow is complete, set the Activity toggle to Active.
Assigning Opportunity Owners
You can automate how opportunities are assigned their owners.
To create automation that assigns opportunity owners:
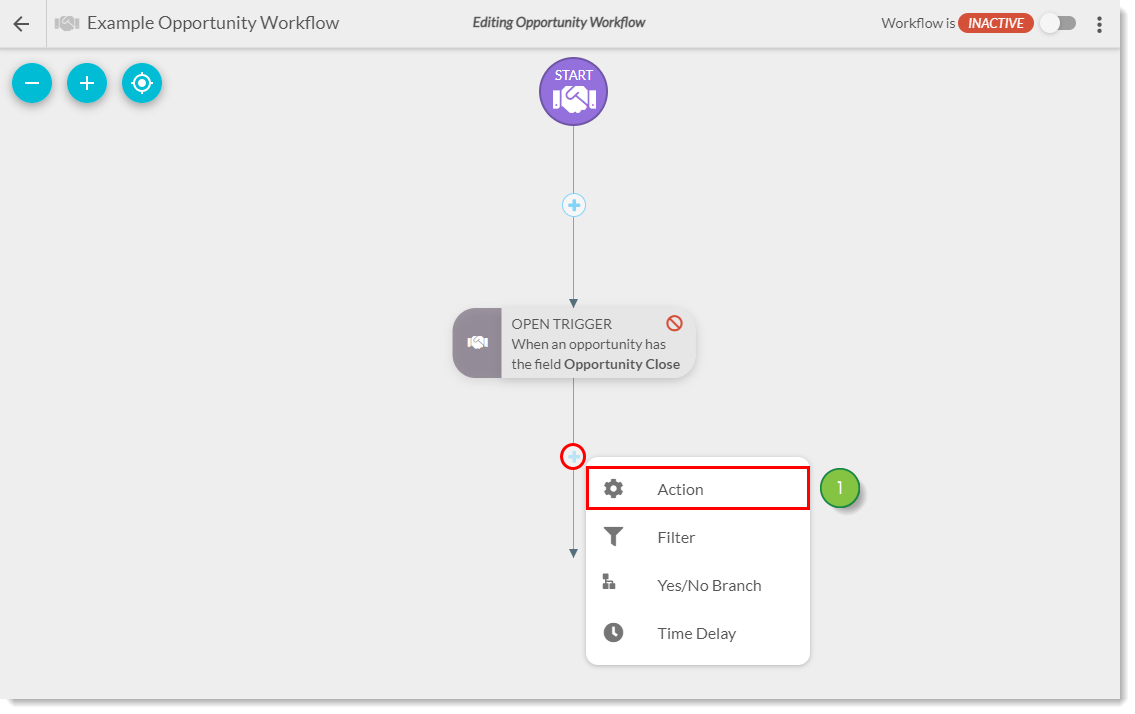
- Click + Add > Action under the trigger in the created workflow.

- Click Assign Opportunity Owner.
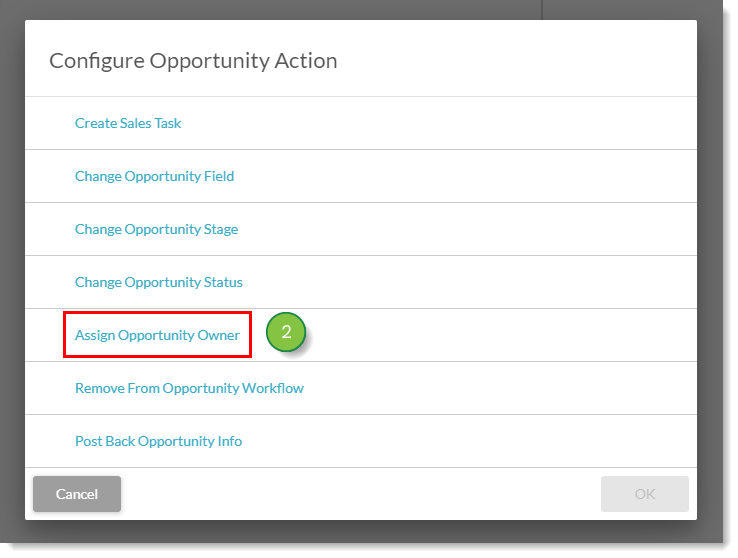
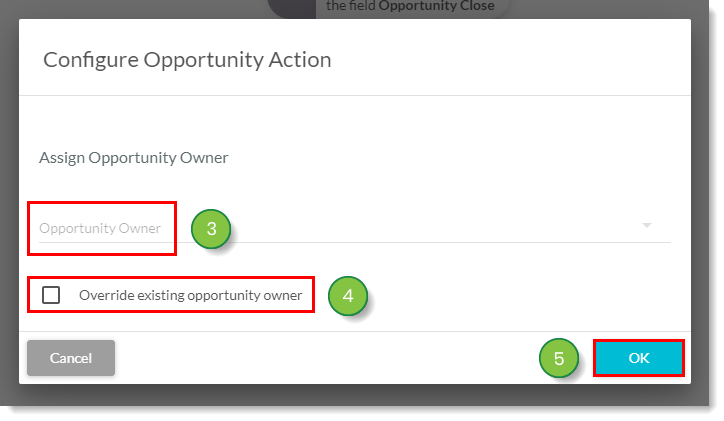
- Select the desired opportunity owner from the Opportunity Owner drop-down menu.
- Optionally, click the Override existing opportunity owner checkbox.
- Click OK.
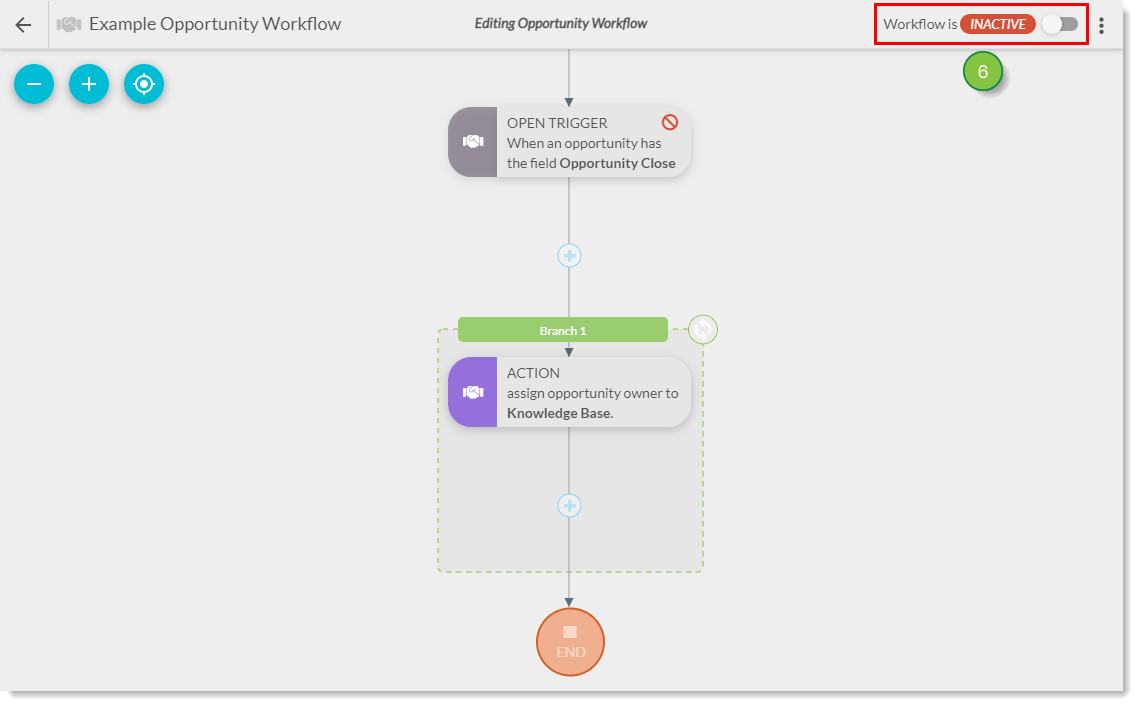
- Complete the workflow with other triggers, filters, delays, or actions. When the workflow is complete, set the Activity toggle to Active.
Removing from Opportunity Workflows
You can set automation to remove sales tasks from leads that have already been processed.
To create removal automation:
- Click + Add > Action under the trigger in the created workflow.
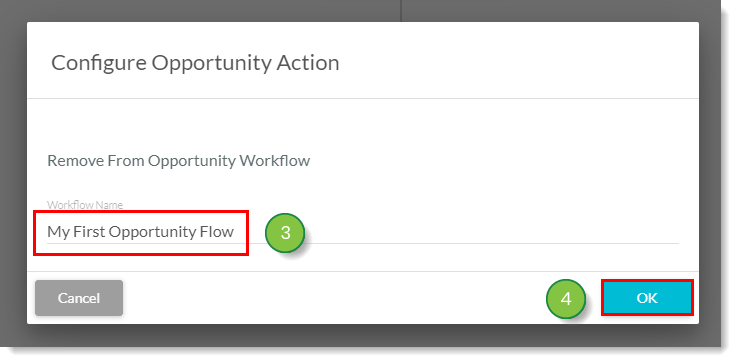
- Click Remove from Opportunity Workflow.

- Enter the name of the desired workflow in the Workflow Name text field.
- Note: You can only select from active workflows.
- Click OK.
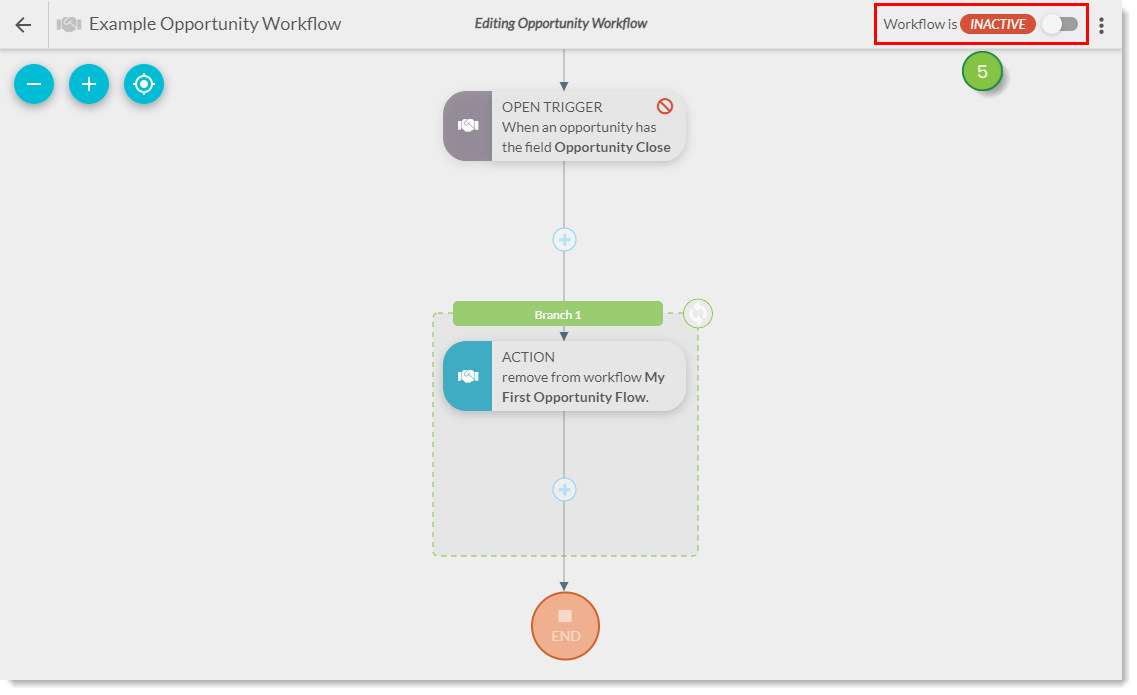
- Complete the workflow with other triggers, filters, delays, or actions. When the workflow is complete, set the Activity toggle to Active.
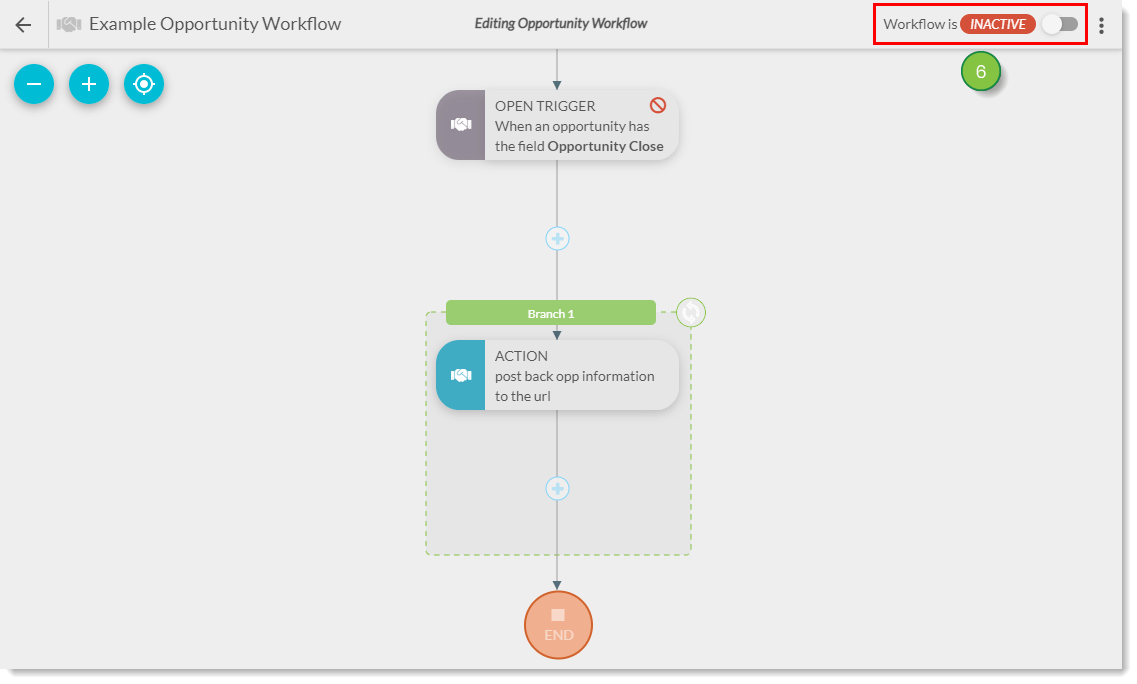
Post Back Opportunity Info
You can post back Opportunity data to a supplied URL of choice in an Opportunity workflow.
To create automation that posts back:
- Click + Add > Action under the trigger in the created workflow.

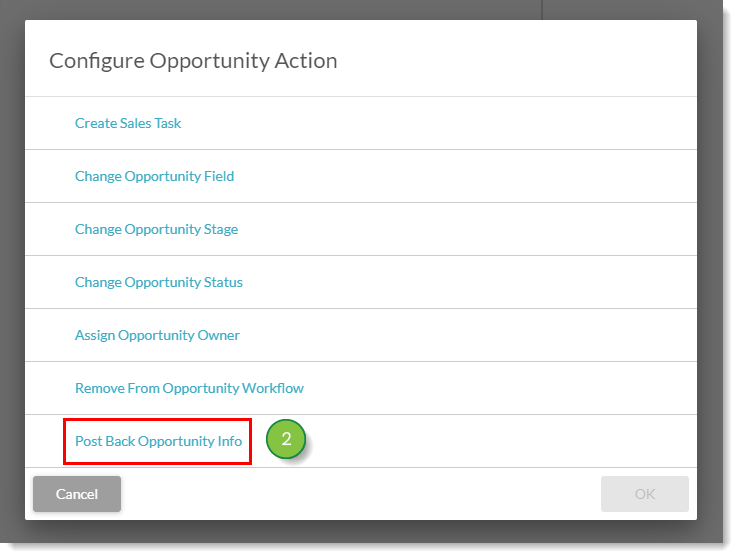
- Click Post Back Opportunity Info.
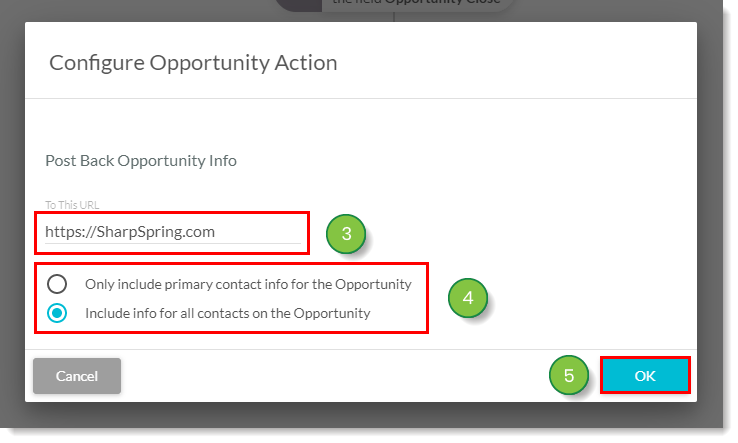
- Enter the desired URL location in the To This URL text field.
- Select either Only include primary contact info for the Opportunity or Include info for all contacts on the Opportunity.
- Click OK.
- Complete the workflow with other triggers, filters, delays, or actions. When the workflow is complete, set the Activity toggle to Active.
Regarding Time Delays
If you want to schedule an event to occur a certain amount of time after the automation is triggered, you will need to add time delays to your reminder automation.
If there are no time delays attached to the relevant action, the action will be scheduled the same day the automation was triggered.
If there is a time delay attached to the action, the action will be scheduled a specified amount of time in the future from the time when the automation was triggered.