Once set, you can set it to be automatically attached to any email that includes the custom signature merge variable.
This article will detail how to create, add, and preview custom signatures in emails.
| Administrators | ✓ | |
| Company Managers | ✓ | |
| Marketing Managers | ✓ | |
| Sales Managers | ✓ | |
| Salespersons | ✓ | |
| Jr. Salespersons | ✓ |
| Tip: Are you looking for information about Constant Contact’s Email and Digital Marketing product? This article is for Constant Contact’s Lead Gen & CRM product. Head on over to the Email and Digital Marketing articles by clicking here. Not sure what the difference is? Read this article. |
Certain external websites offer free services that generate HTML for use with custom email signatures.
Be aware that Constant Contact is not responsible for the content of these websites. Use their services at your discretion.
You can utilize the Lead Gen & CRM platform's Signature Designer to create custom signatures that appear at the end of your sent emails.
The Signature Designer is a what-you-see-is-what-you-get text editor, and it provides a simple, effective way of producing signatures.
To create custom signatures using the Signature Designer, start from Settings in the left toolbar.
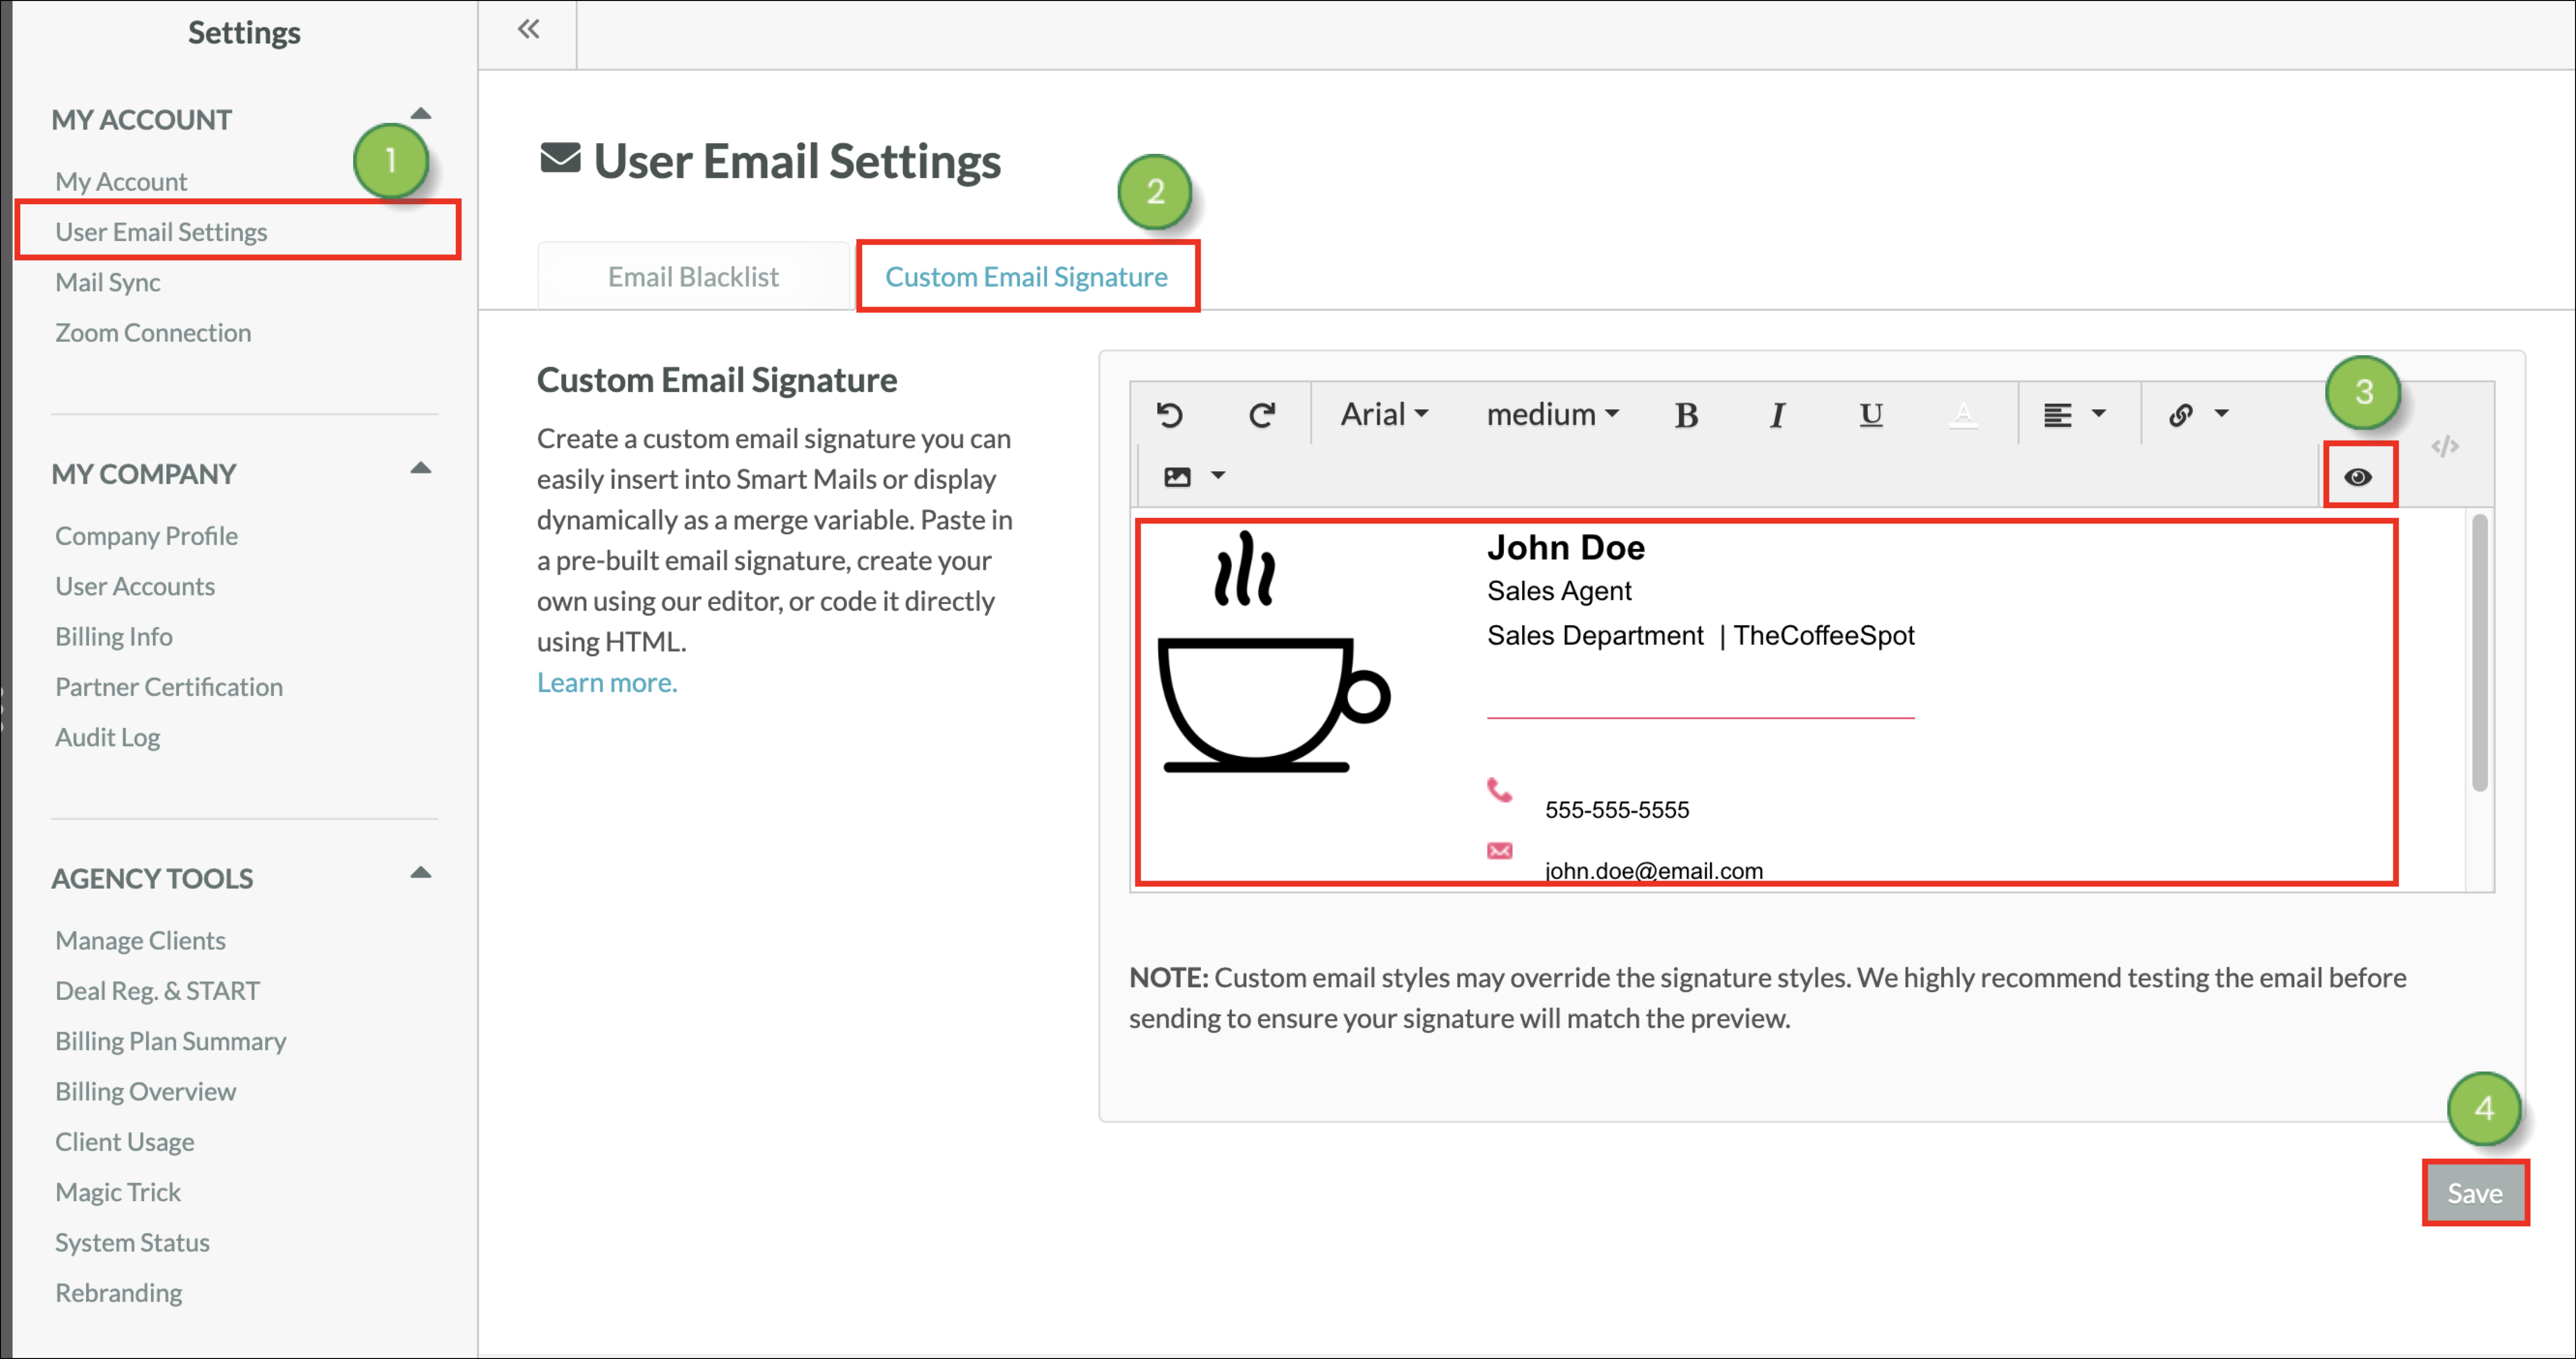
The available features in the Signature Designer toolbar are as follows:
| Available Settings | Description | |||
| Undo |
Reverses the last action. |
| ||
| Redo |
Restores an undone action. |
| ||
| Font |
The available list of fonts that text can be set as. |
| ||
| Font Size |
The available list of font sizes that text can be set as. |
| ||
| Bold |
Bolds selected text or text entered after the cursor. |
| ||
| Italics |
Italicizes selected text or text entered after the cursor. |
| ||
| Underline |
Underlines selected text or text entered after the cursor. |
| ||
| Text Color |
Modifies the selected text to appear as a specified color. |
| ||
| Justification |
Sets the justification of the specified content. Justification determines how content appears on a given line. Content can be set to appear on the left, right, or center of a content block. |
| ||
| Link |
Adds a clickable link. When added to selected text, the text |
| ||
| Image |
Adds an image from a hosted URL at the cursor. |
|
You can use the Signature Designer if you would prefer to create a custom signature by coding it with HTML.
To create custom email signatures in the Signature Designer using HTML, start from Settings in the top toolbar.
<br> and <p> tags.
The custom signature will be displayed in the Text Editor. It will update as content is modified.
When using custom signatures, use <id> and <class> tags, and not just <element> tags. This is due to that, when customizing a signature, using tag names in the styling will affect any elements below the signature if those elements do not have their own inline styling to overwrite it.
Once you have created a custom signature, you can add it into emails to send to contacts. Read the Adding Custom Signatures to Emails article to learn how to add your custom signature to your emails.
Once you have created a custom signature, you can add it into Smartmail. Read the Adding Custom Signatures to Emails article to learn how to add your custom signature to your Smart Mail.
Once clicked, the Insert Your Email Signature tool will add your custom email signature to the bottom of your Smart Mail.
Before sending Smart Mail, you can preview the email to see if the custom signature looks the way you want it to.
Read Adding Custom Signatures to Emails to learn how to preview your custom signature in Smart Mail.
Copyright © 2026 · All Rights Reserved · Constant Contact · Privacy Center