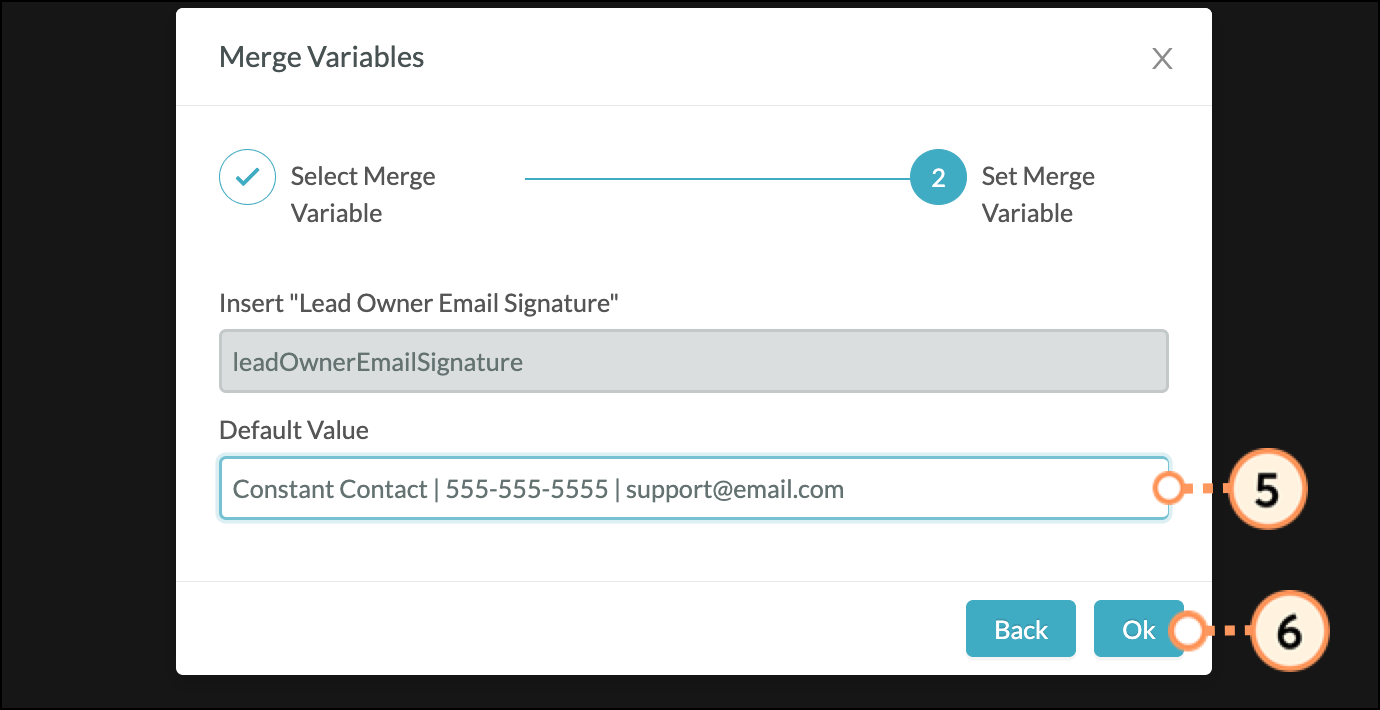
Once set, you can set it to be automatically attached to any email that includes the custom signature merge variable. First, you'll need to create a custom signature from Settings in the Lead Gen & CRM platform. Click here to learn more about creating a custom signature.
In this article, you'll learn how to add and preview custom signatures in emails and Smartmail.
| Tip: Are you looking for information about Constant Contact’s Email and Digital Marketing product? This article is for Constant Contact’s Lead Gen & CRM product. Head on over to the Email and Digital Marketing articles by clicking here. Not sure what the difference is? Read this article. |
| Administrators | ✓ | |
| Company Managers | ✓ | |
| Marketing Managers | ✓ | |
| Sales Managers | ✓ | |
| Salespersons | ✓ | |
| Jr. Salespersons | ✓ |
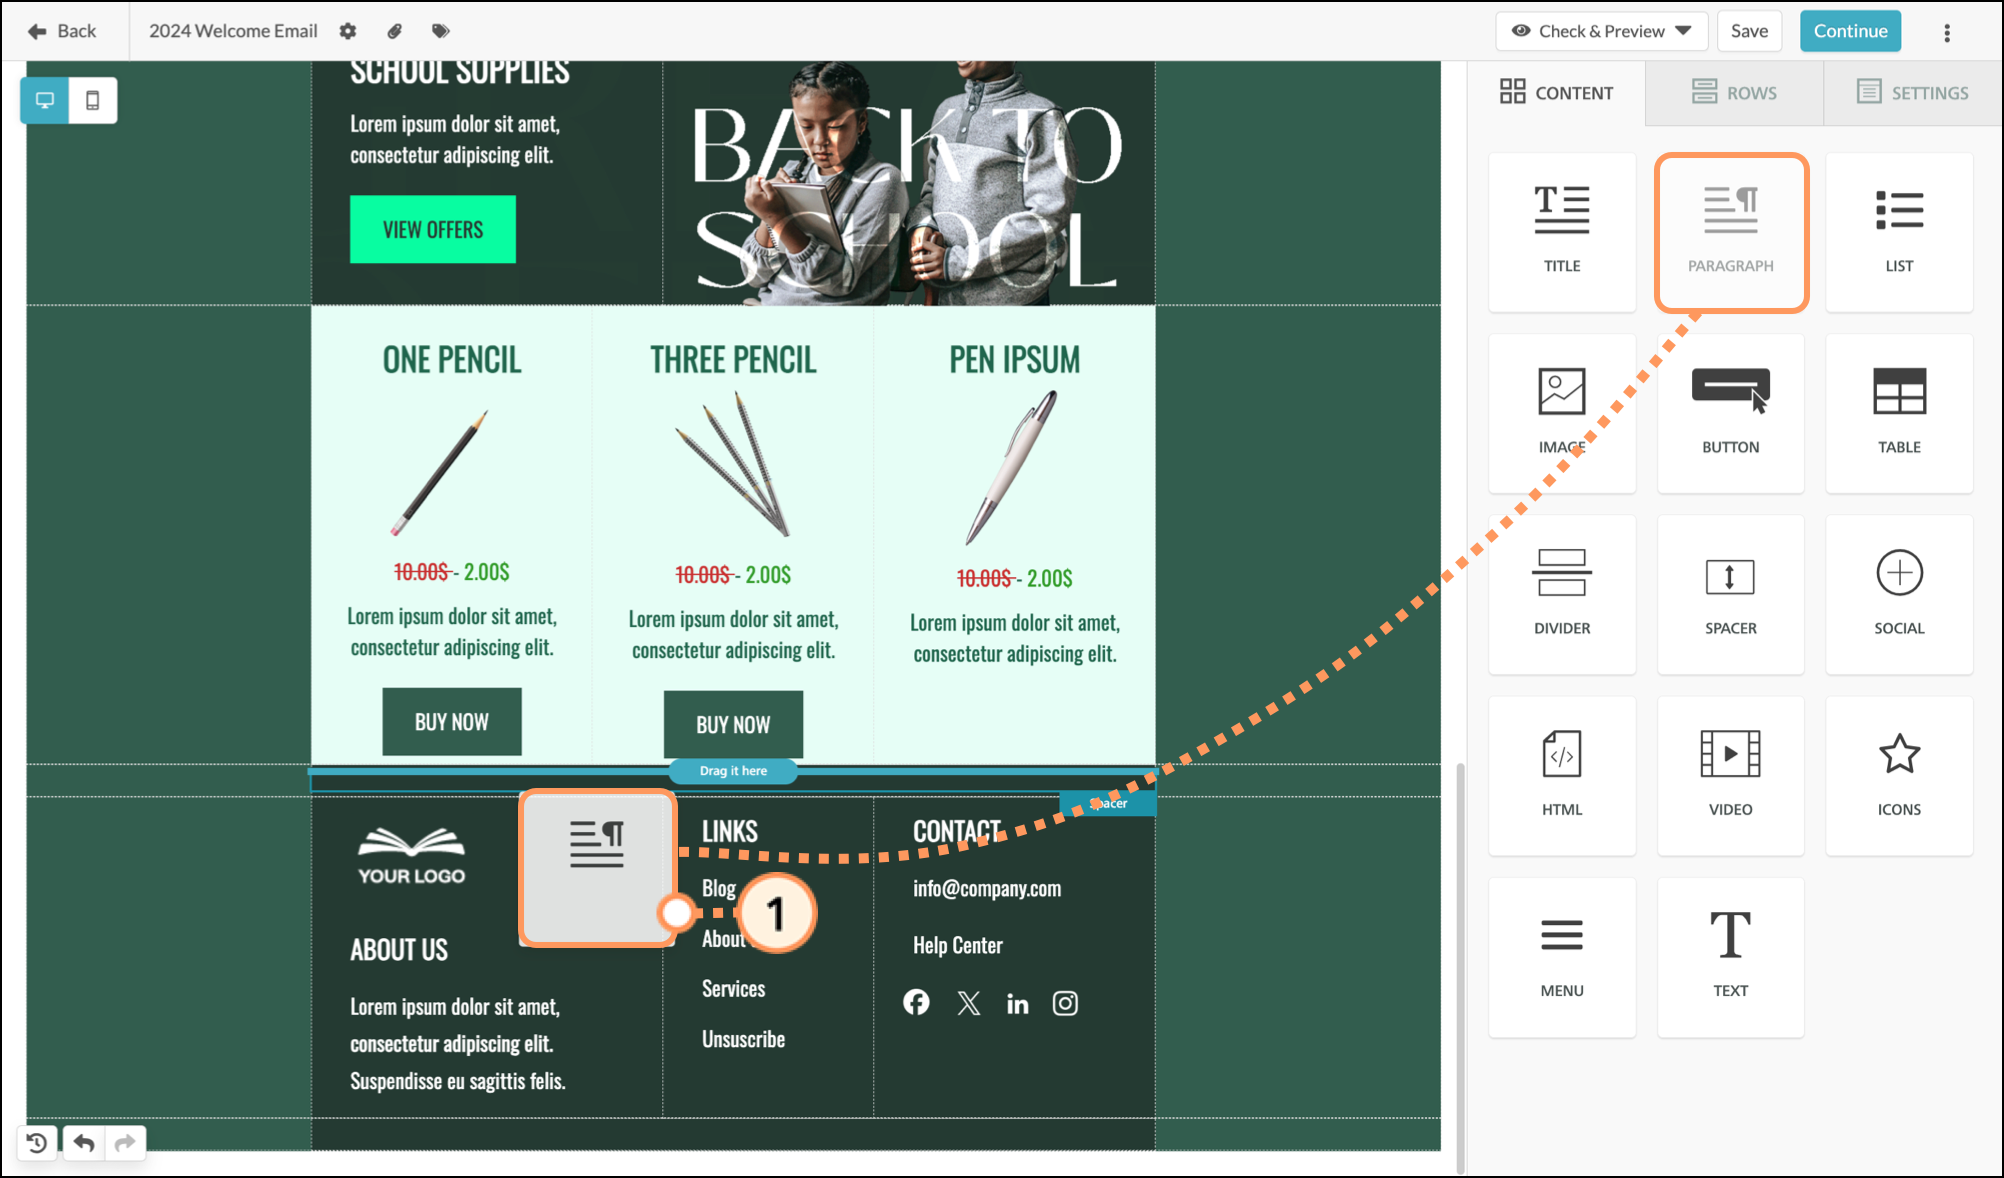
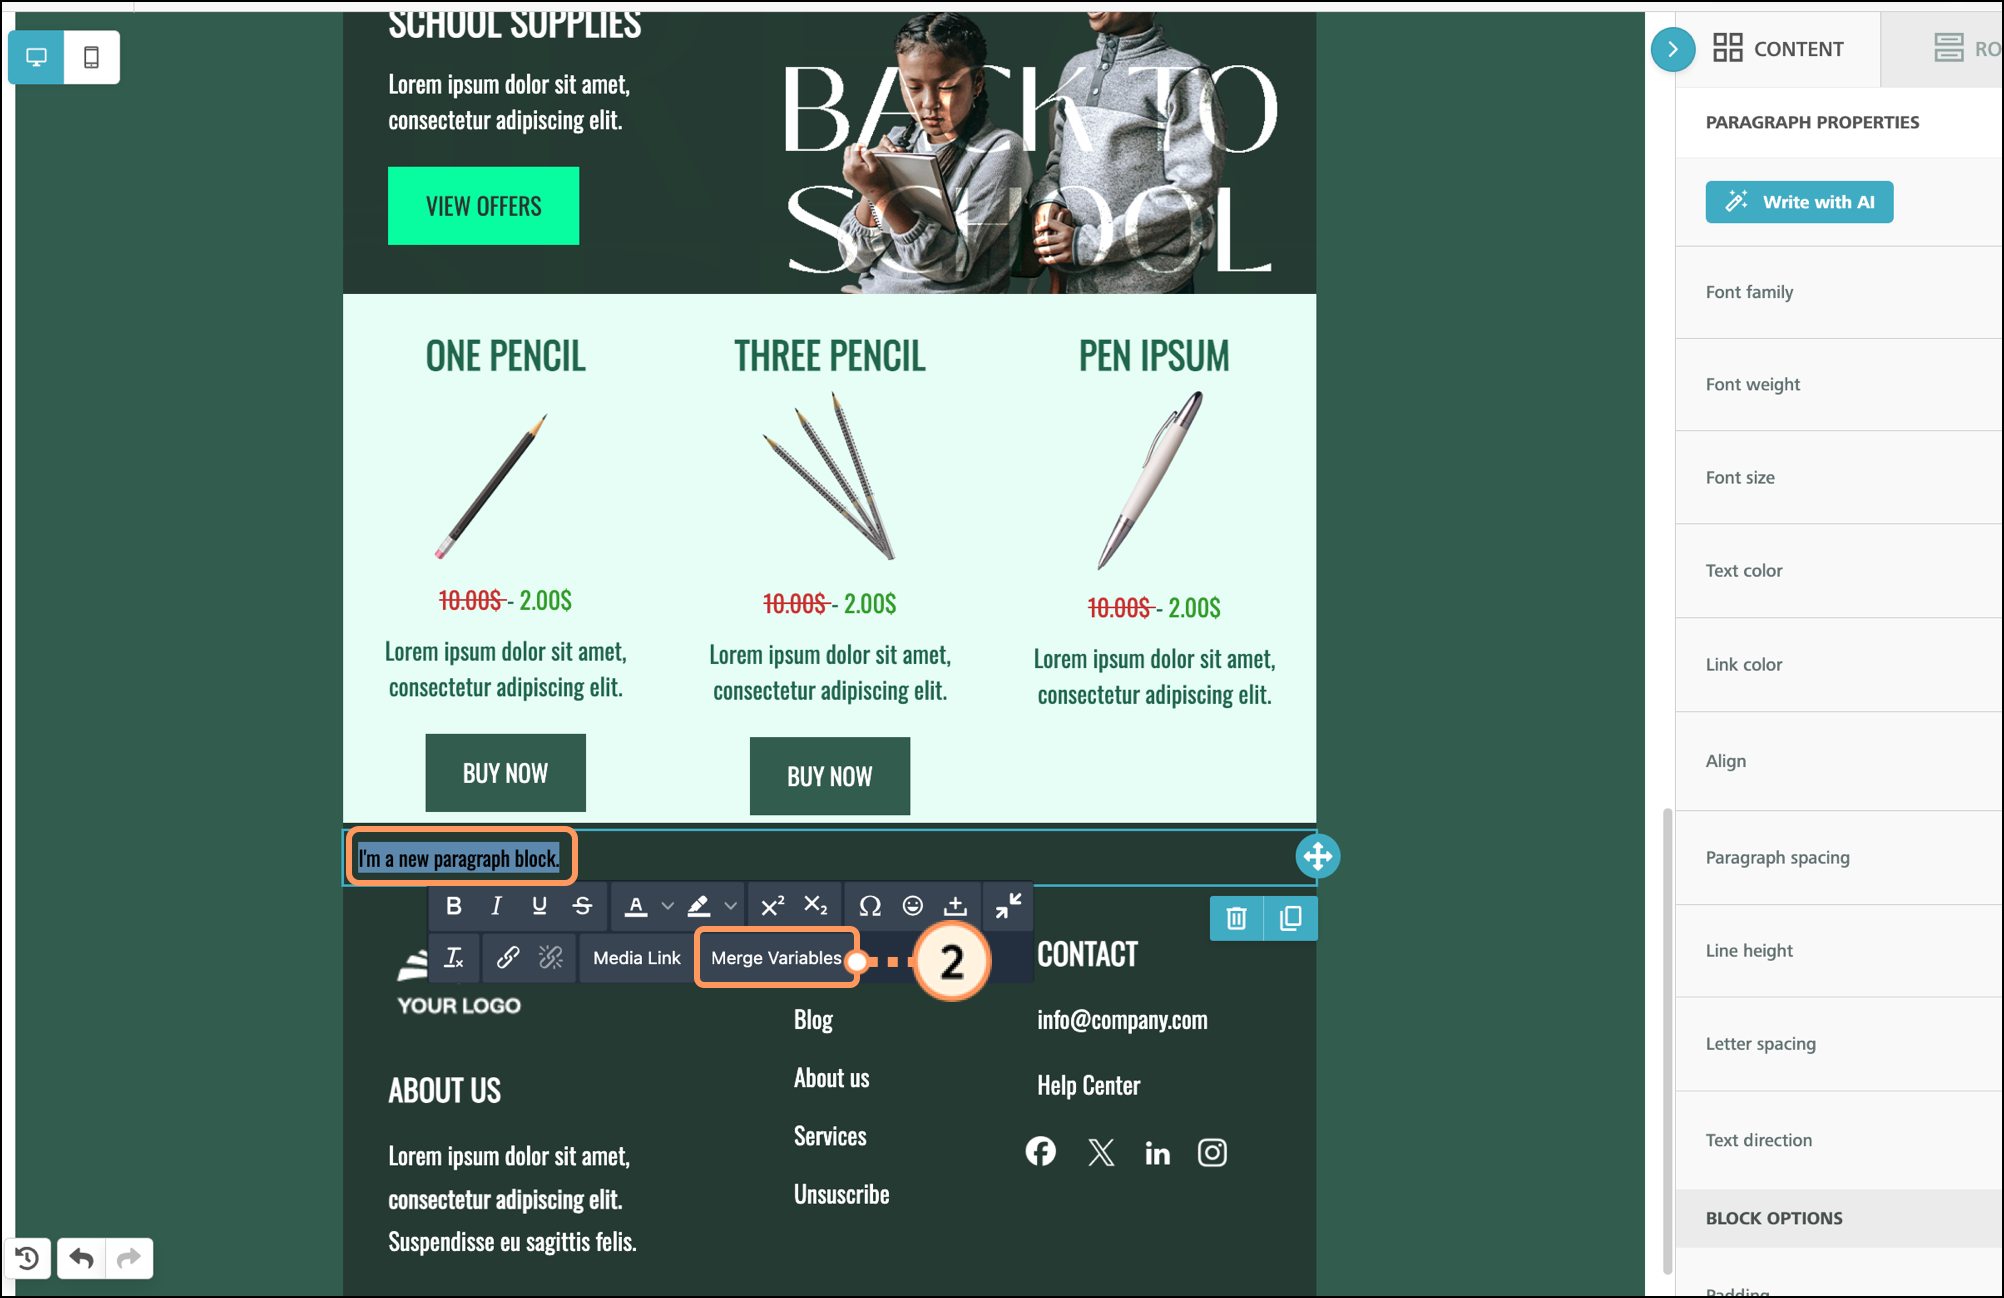
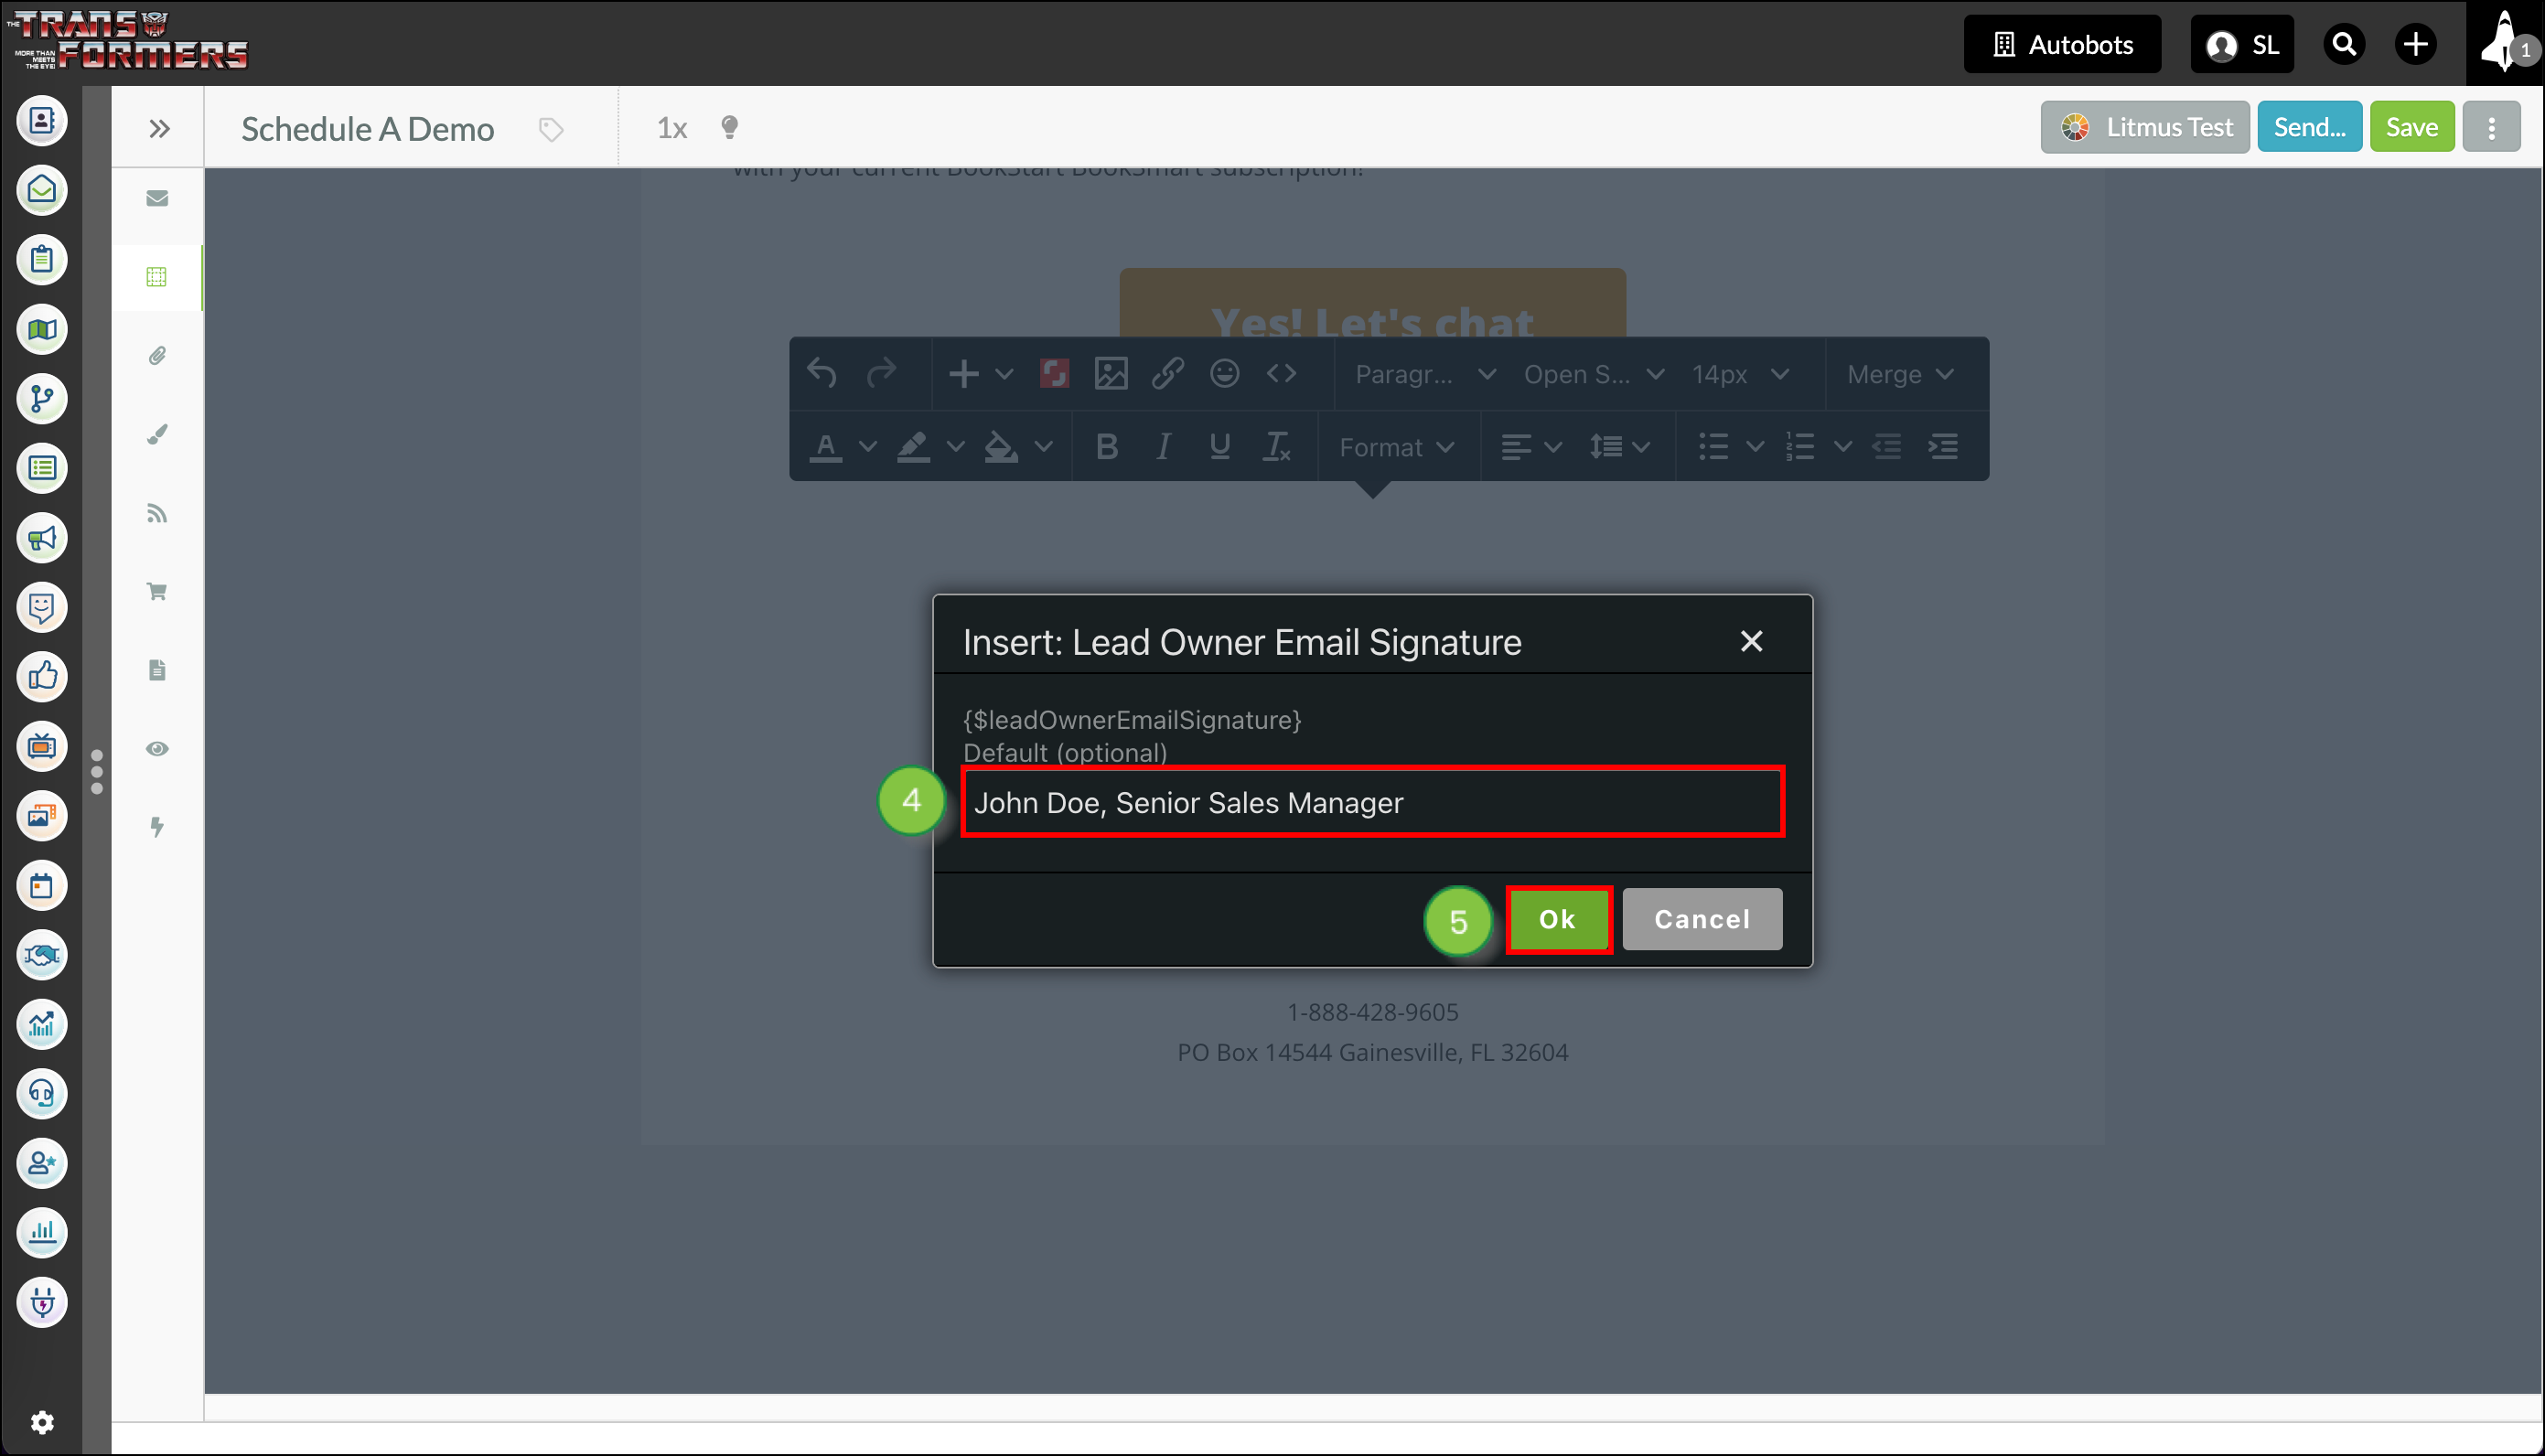
Custom signatures can be added to simple, designer, and legacy emails. These signatures can be created in your Settings and inserted into your emails using merge variables.
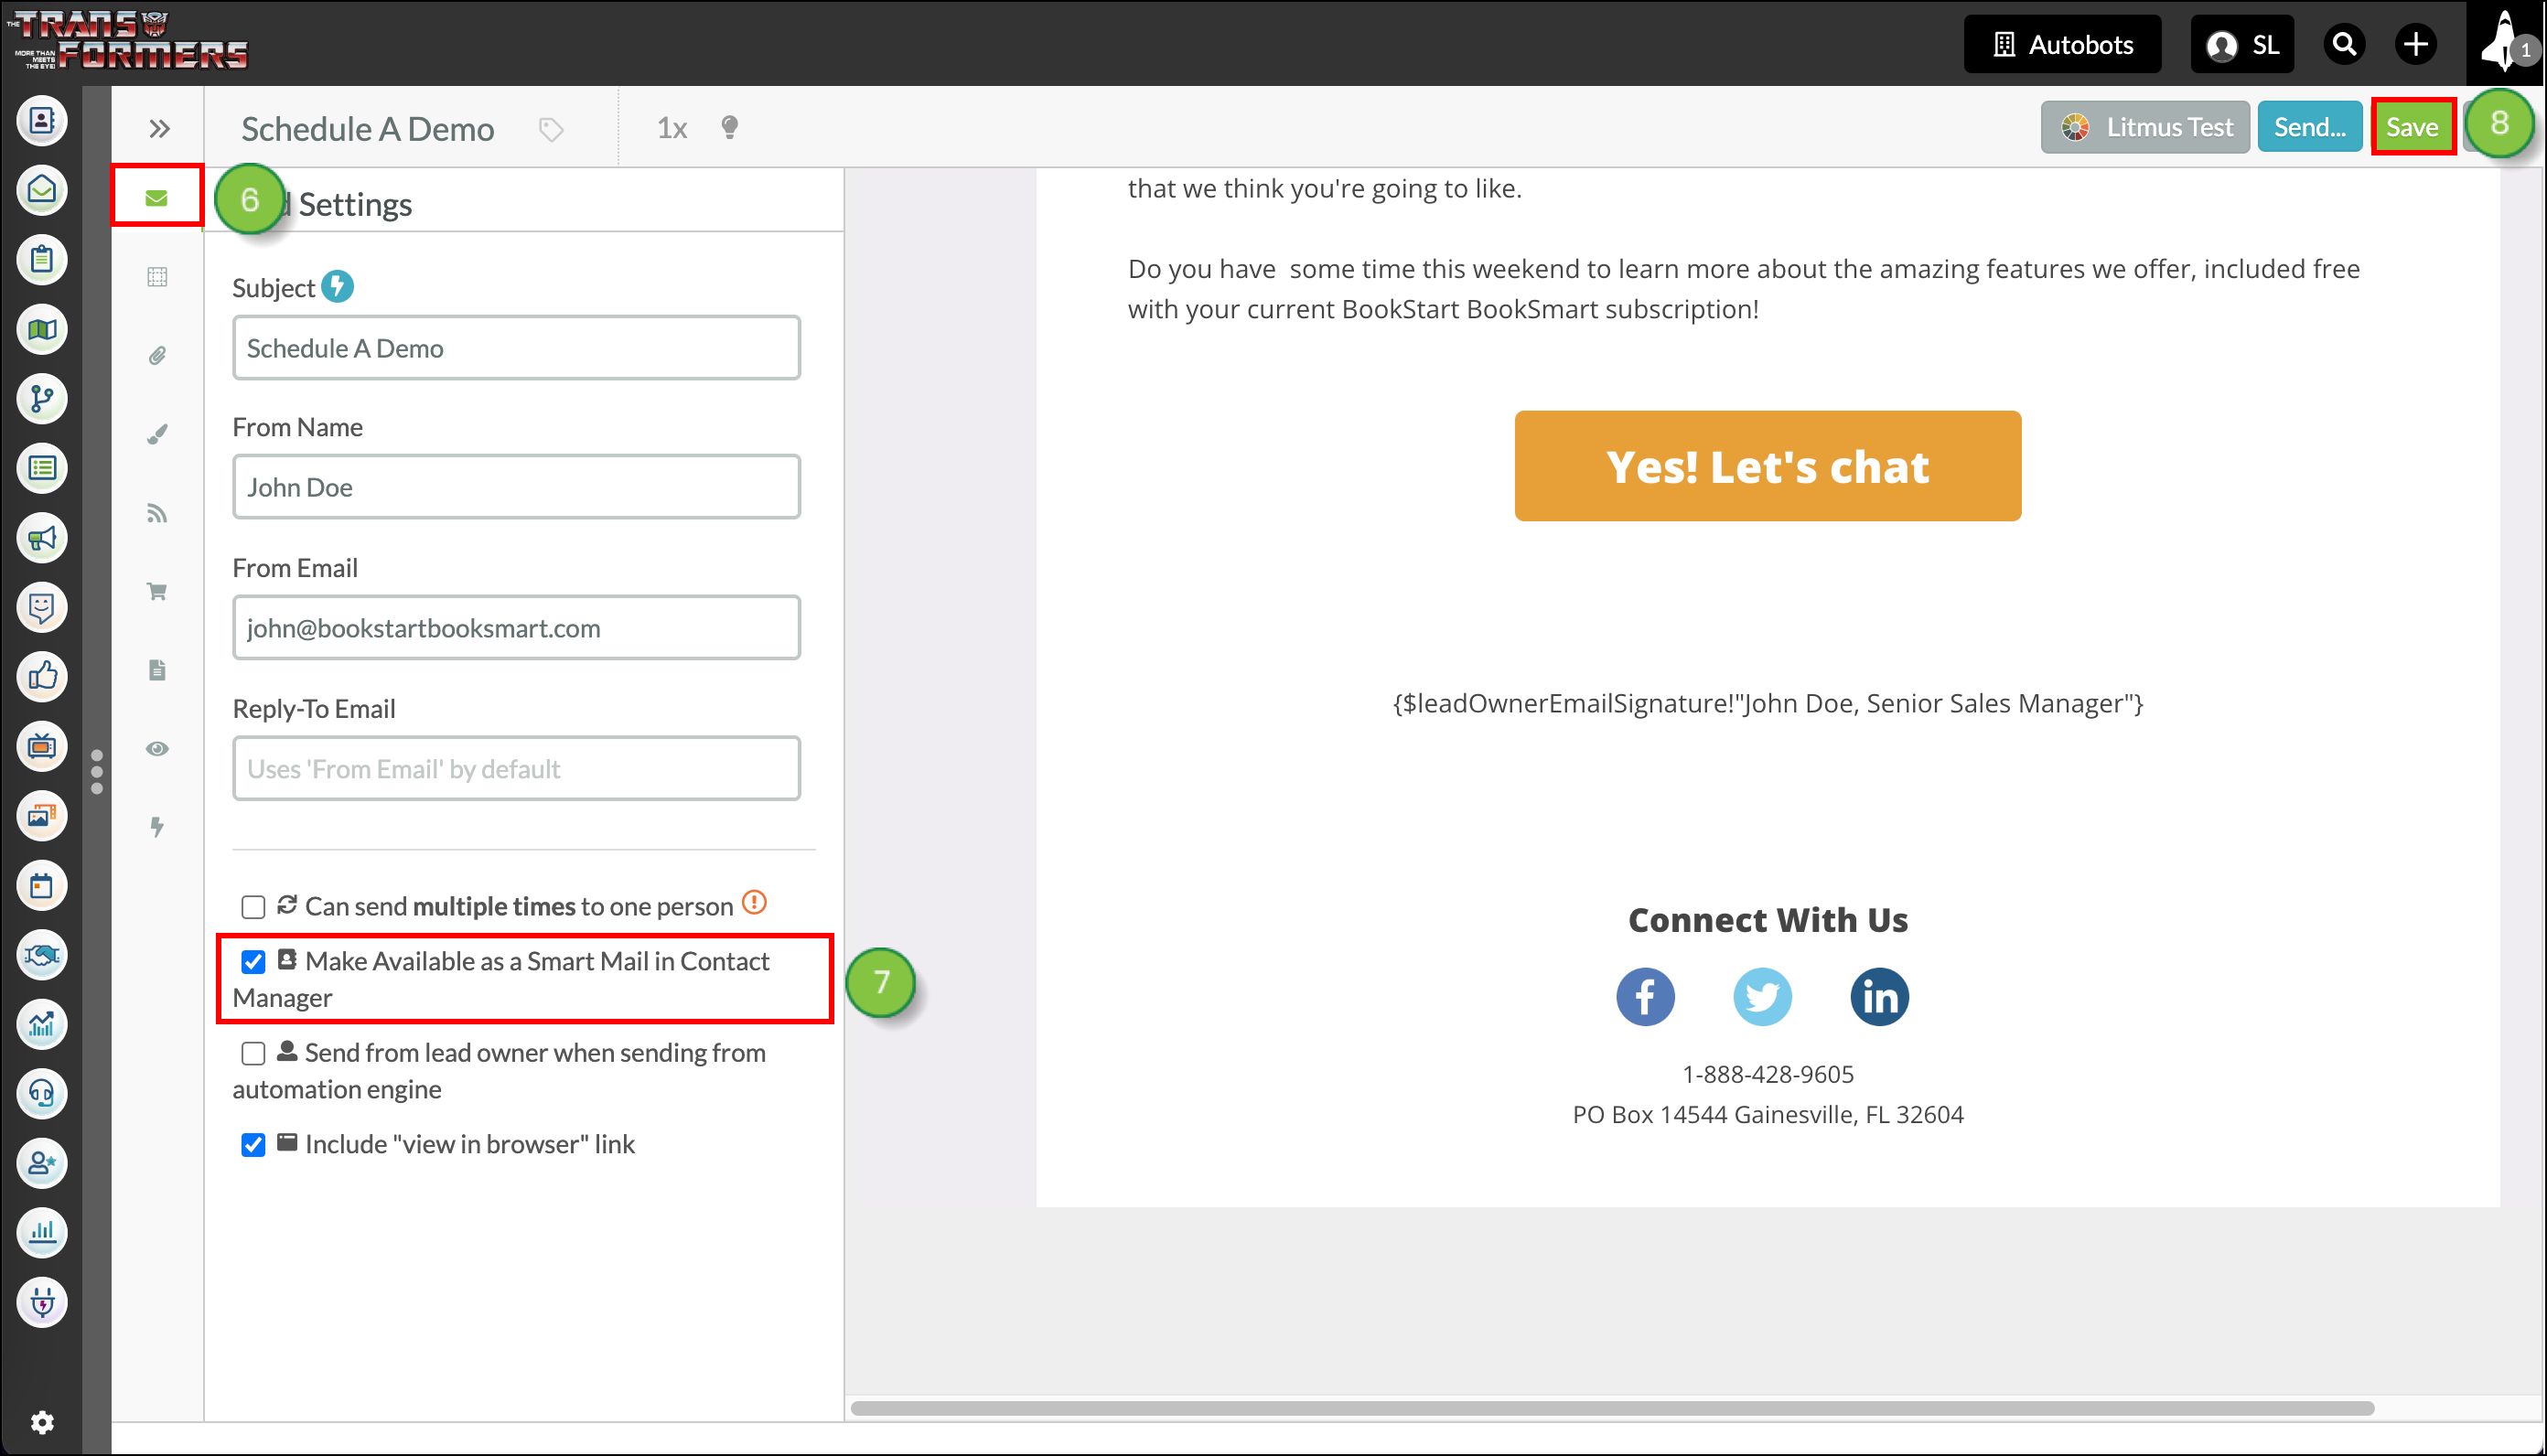
To add custom signatures to emails in the new email editor, create or edit an email from the Email page in the left toolbar.

Important: Custom email styles may override the signature styles. We recommend testing emails before sending to ensure your signature will match the preview.
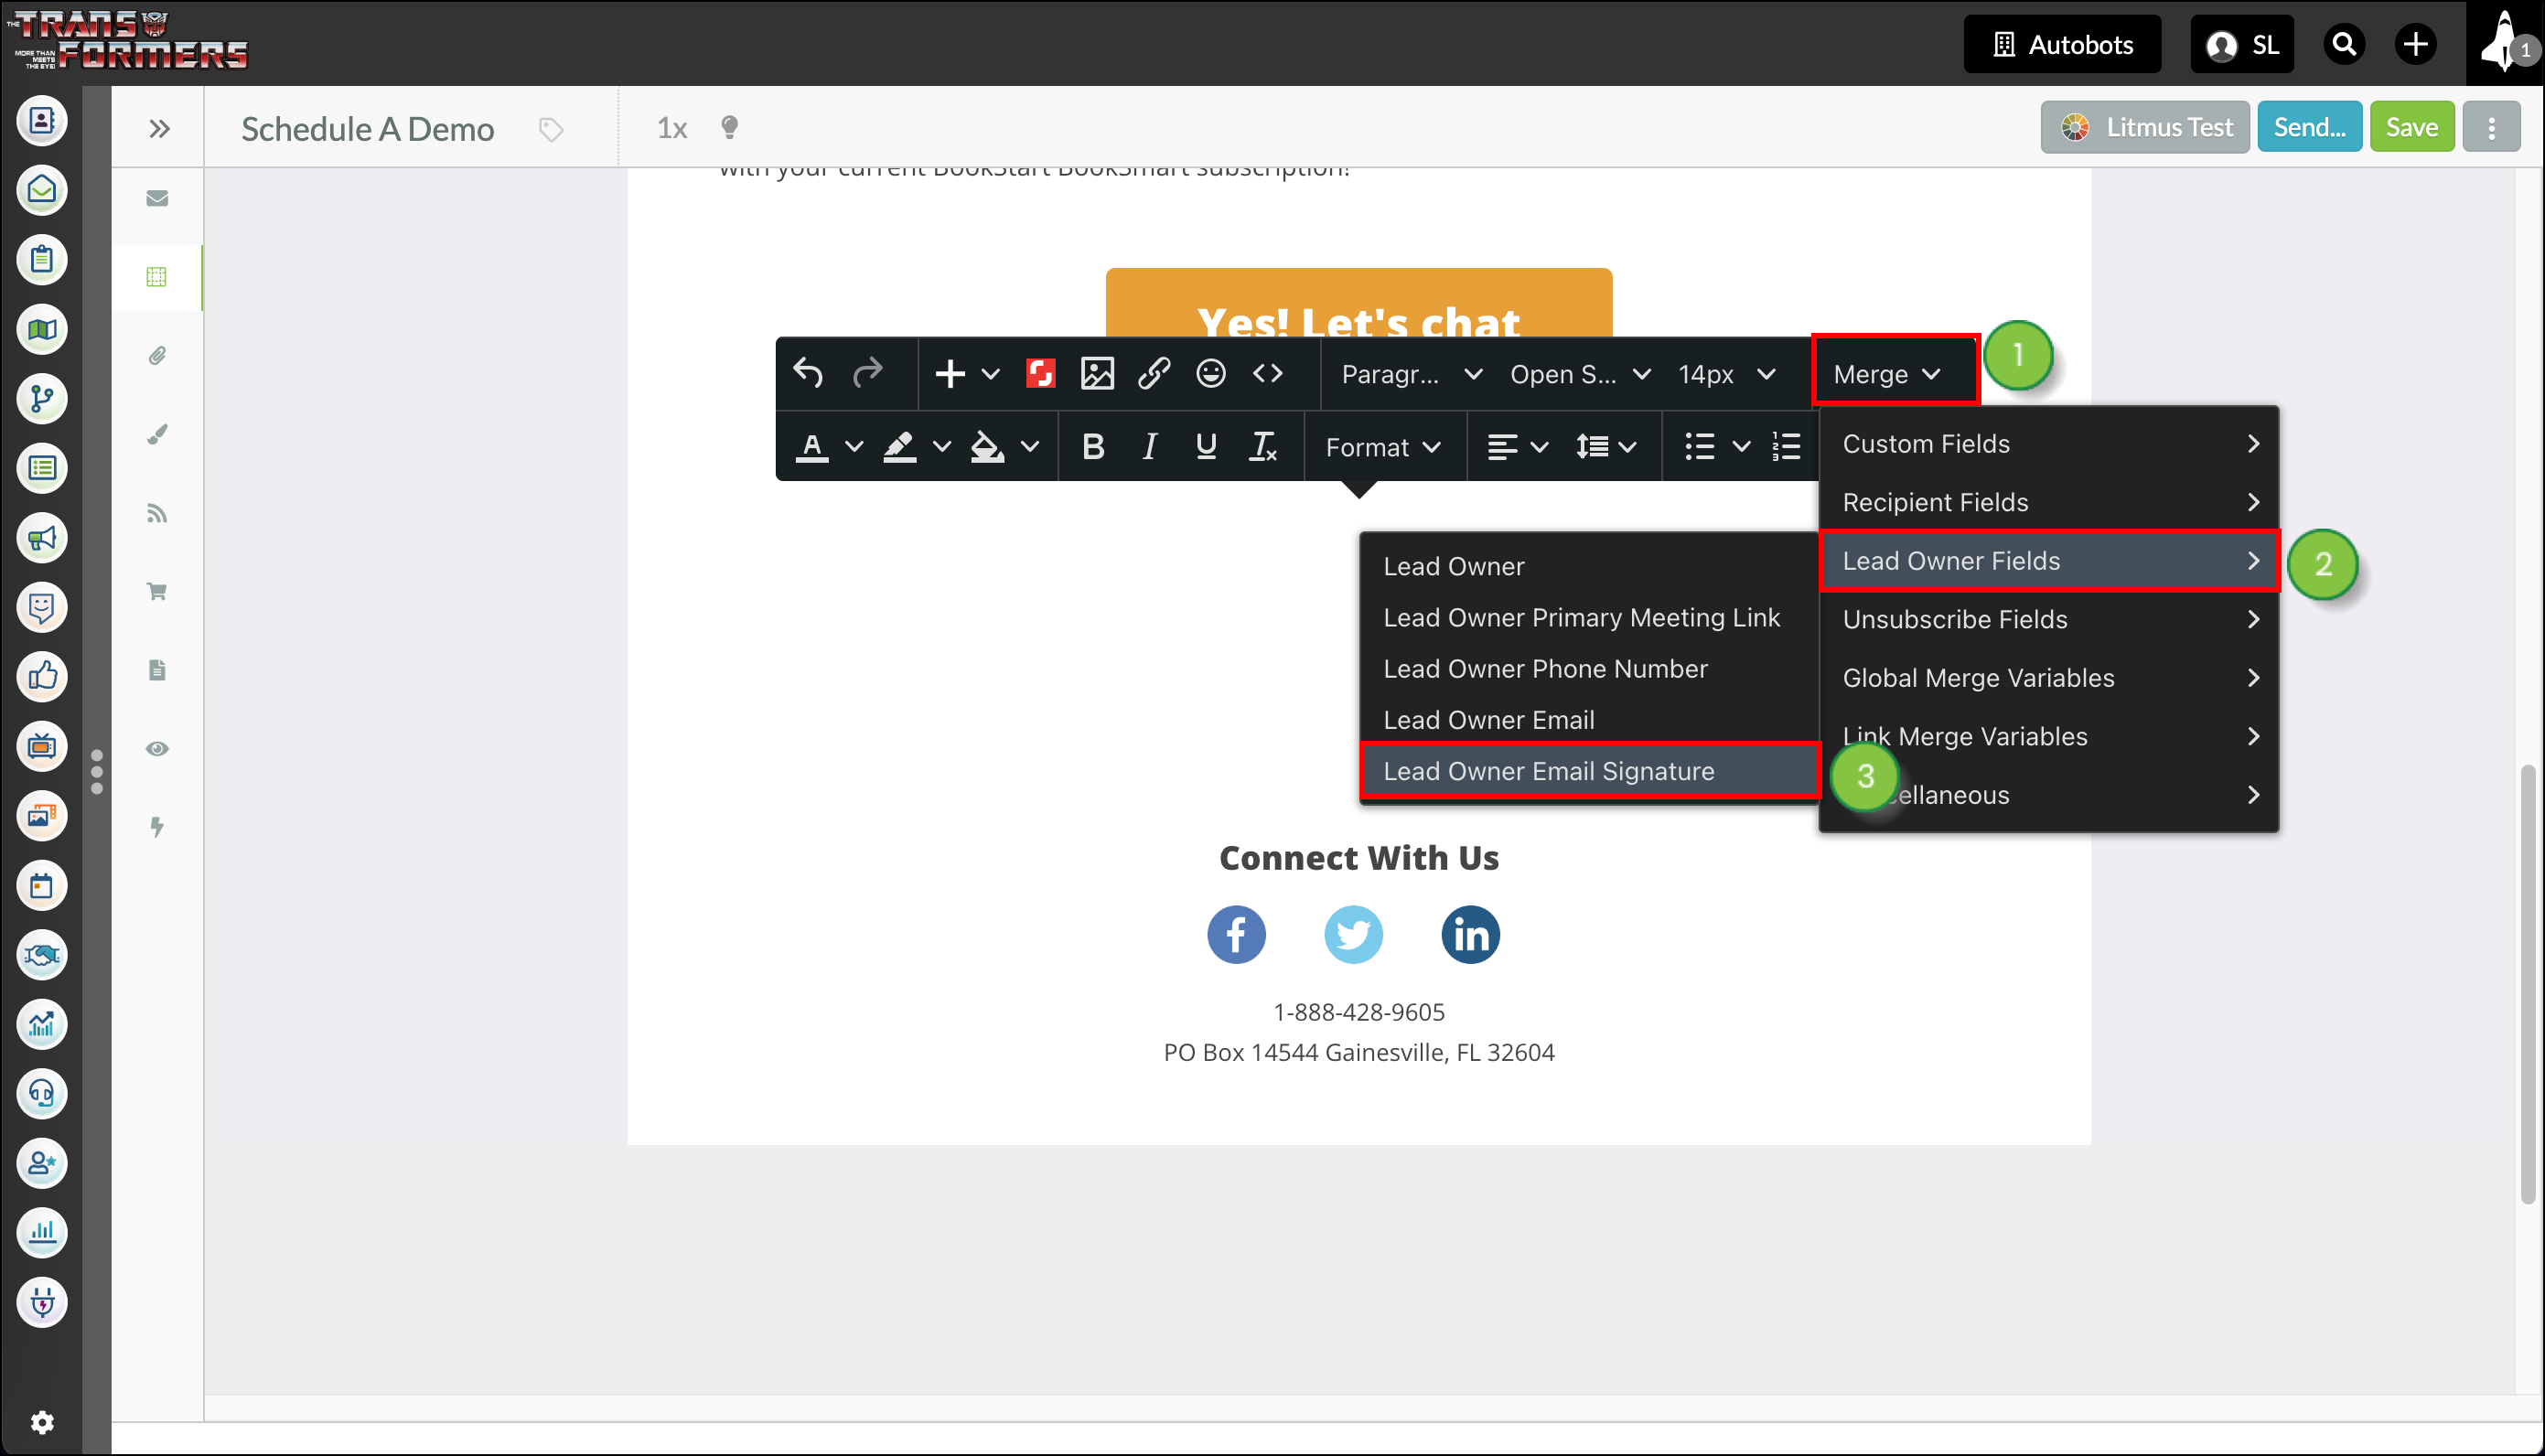
To add custom signatures to emails using the Classic email editor, navigate to the Email page in the left toolbar. Open an existing Classic email template from one of your older emails.
Note: All newly created emails will use the new email editor.
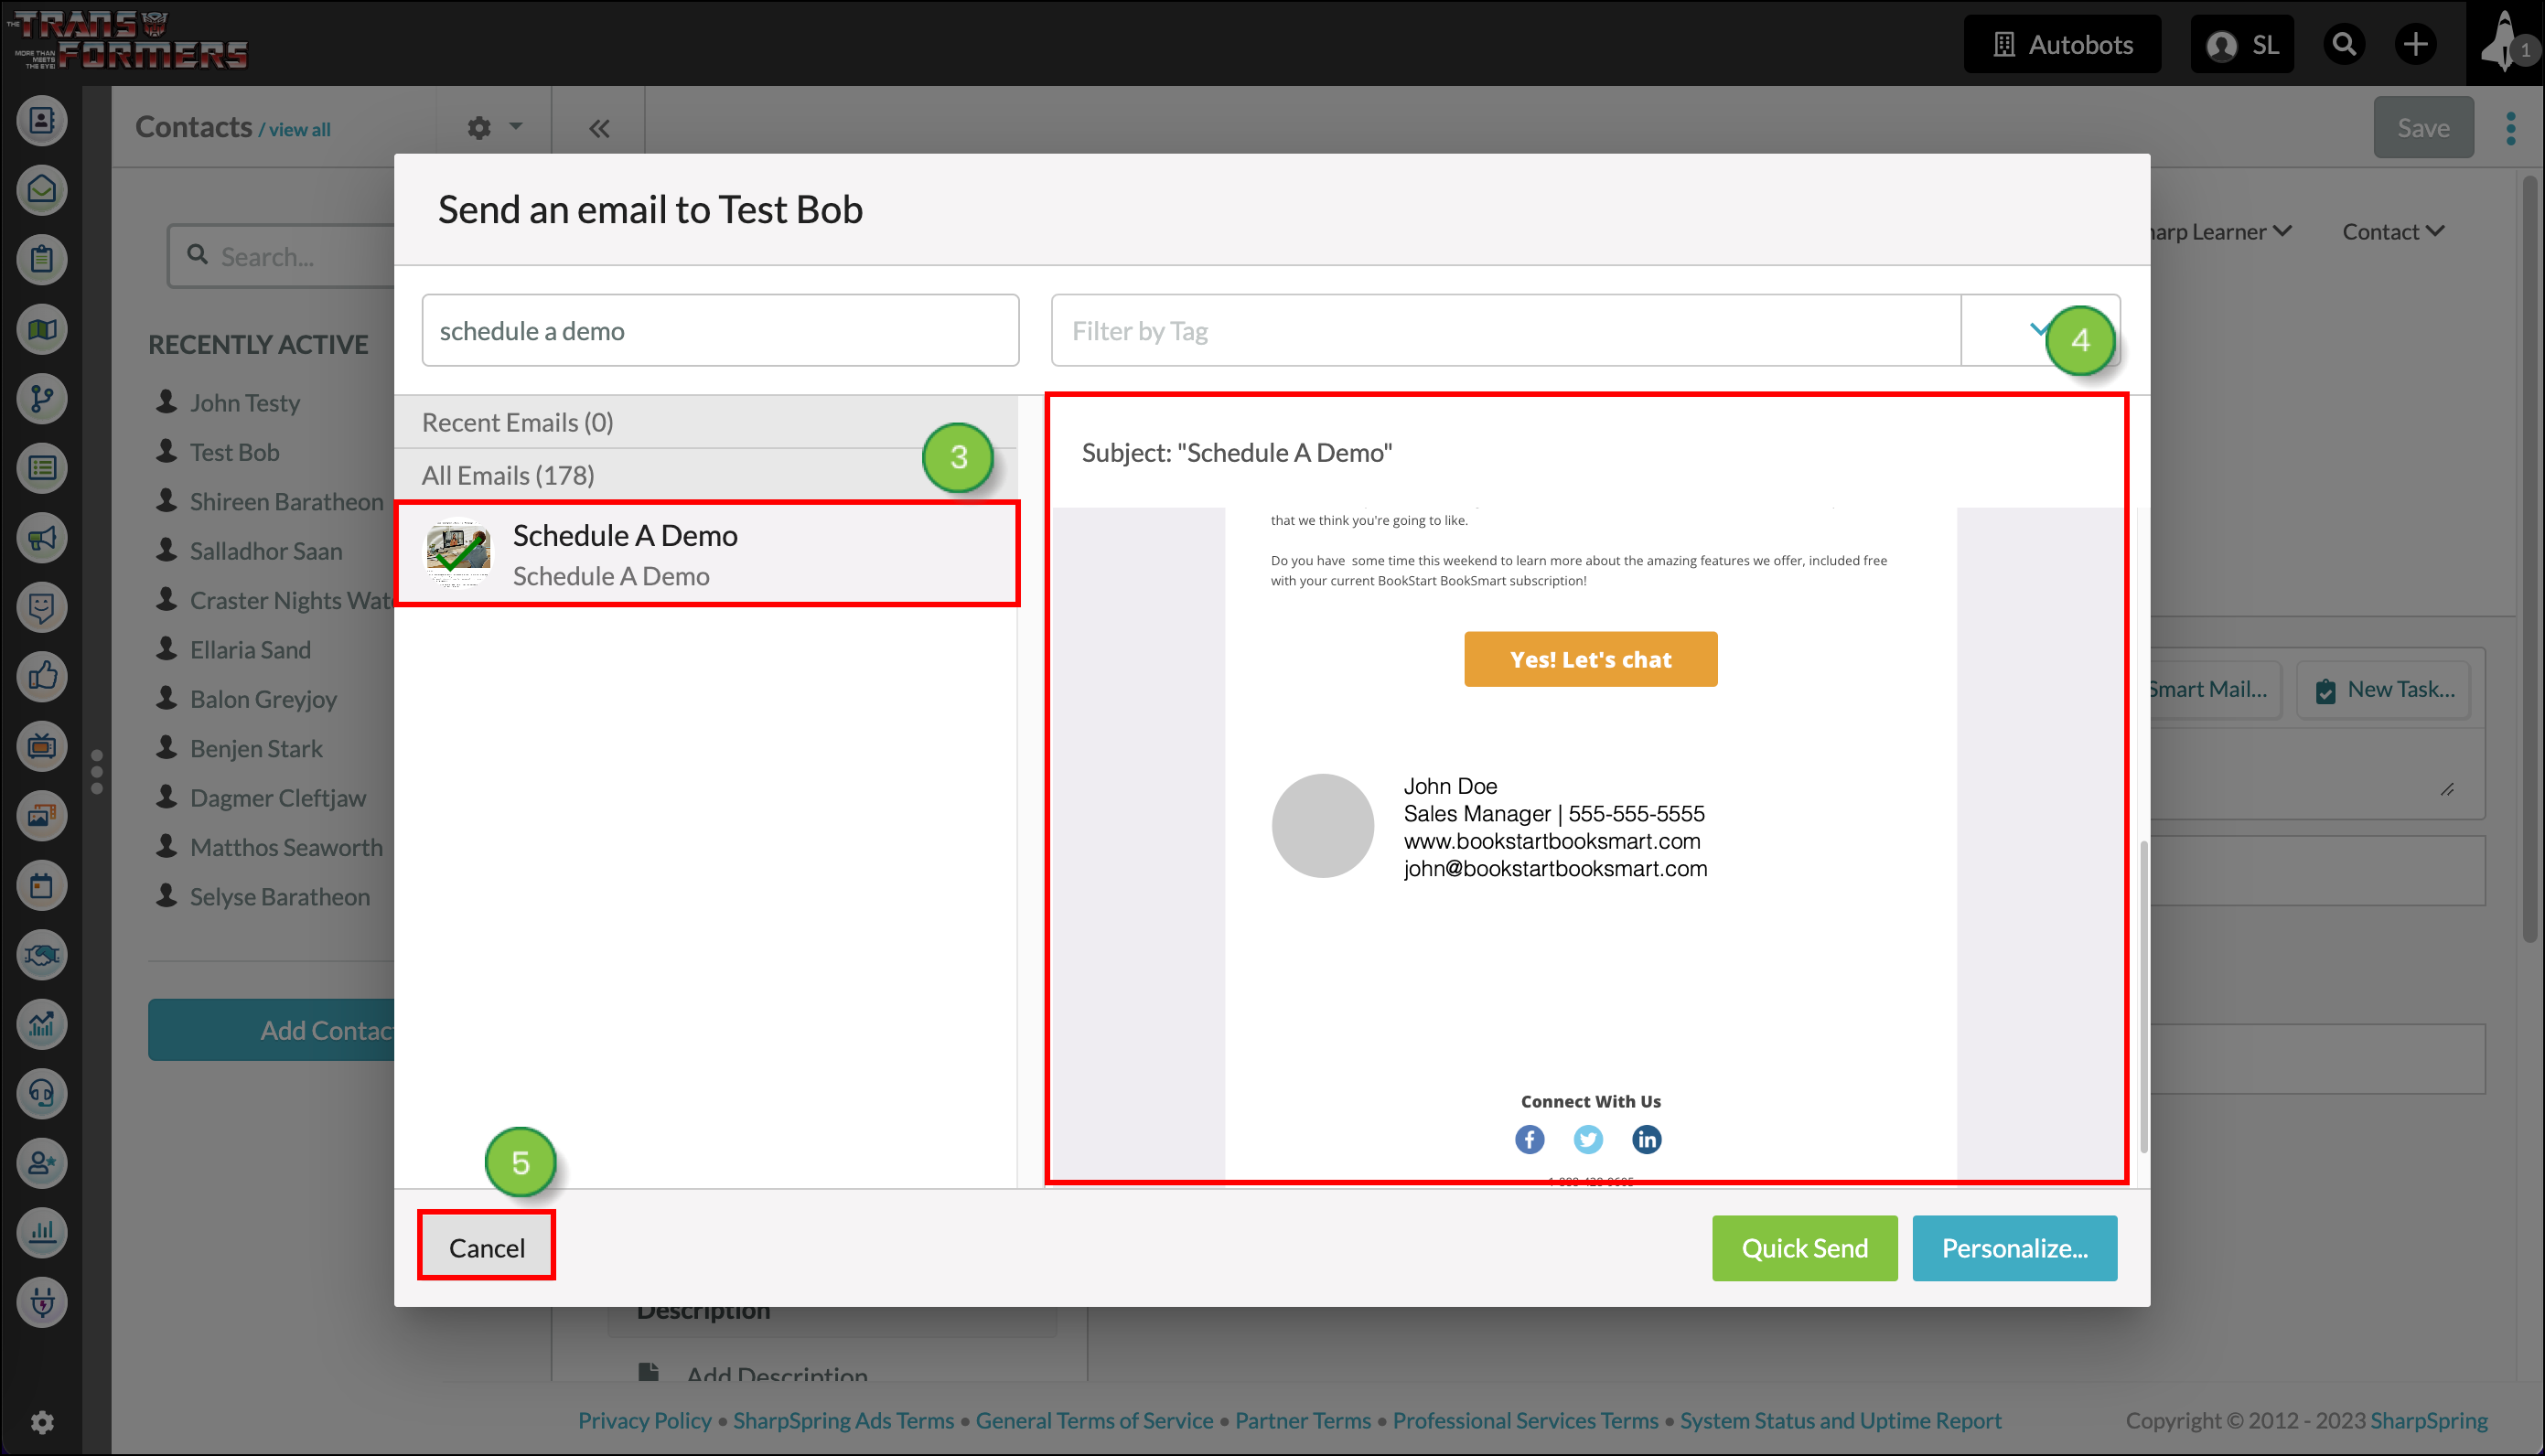
You can add custom email signatures to Smart Mails that do not already have the signature merge variable.
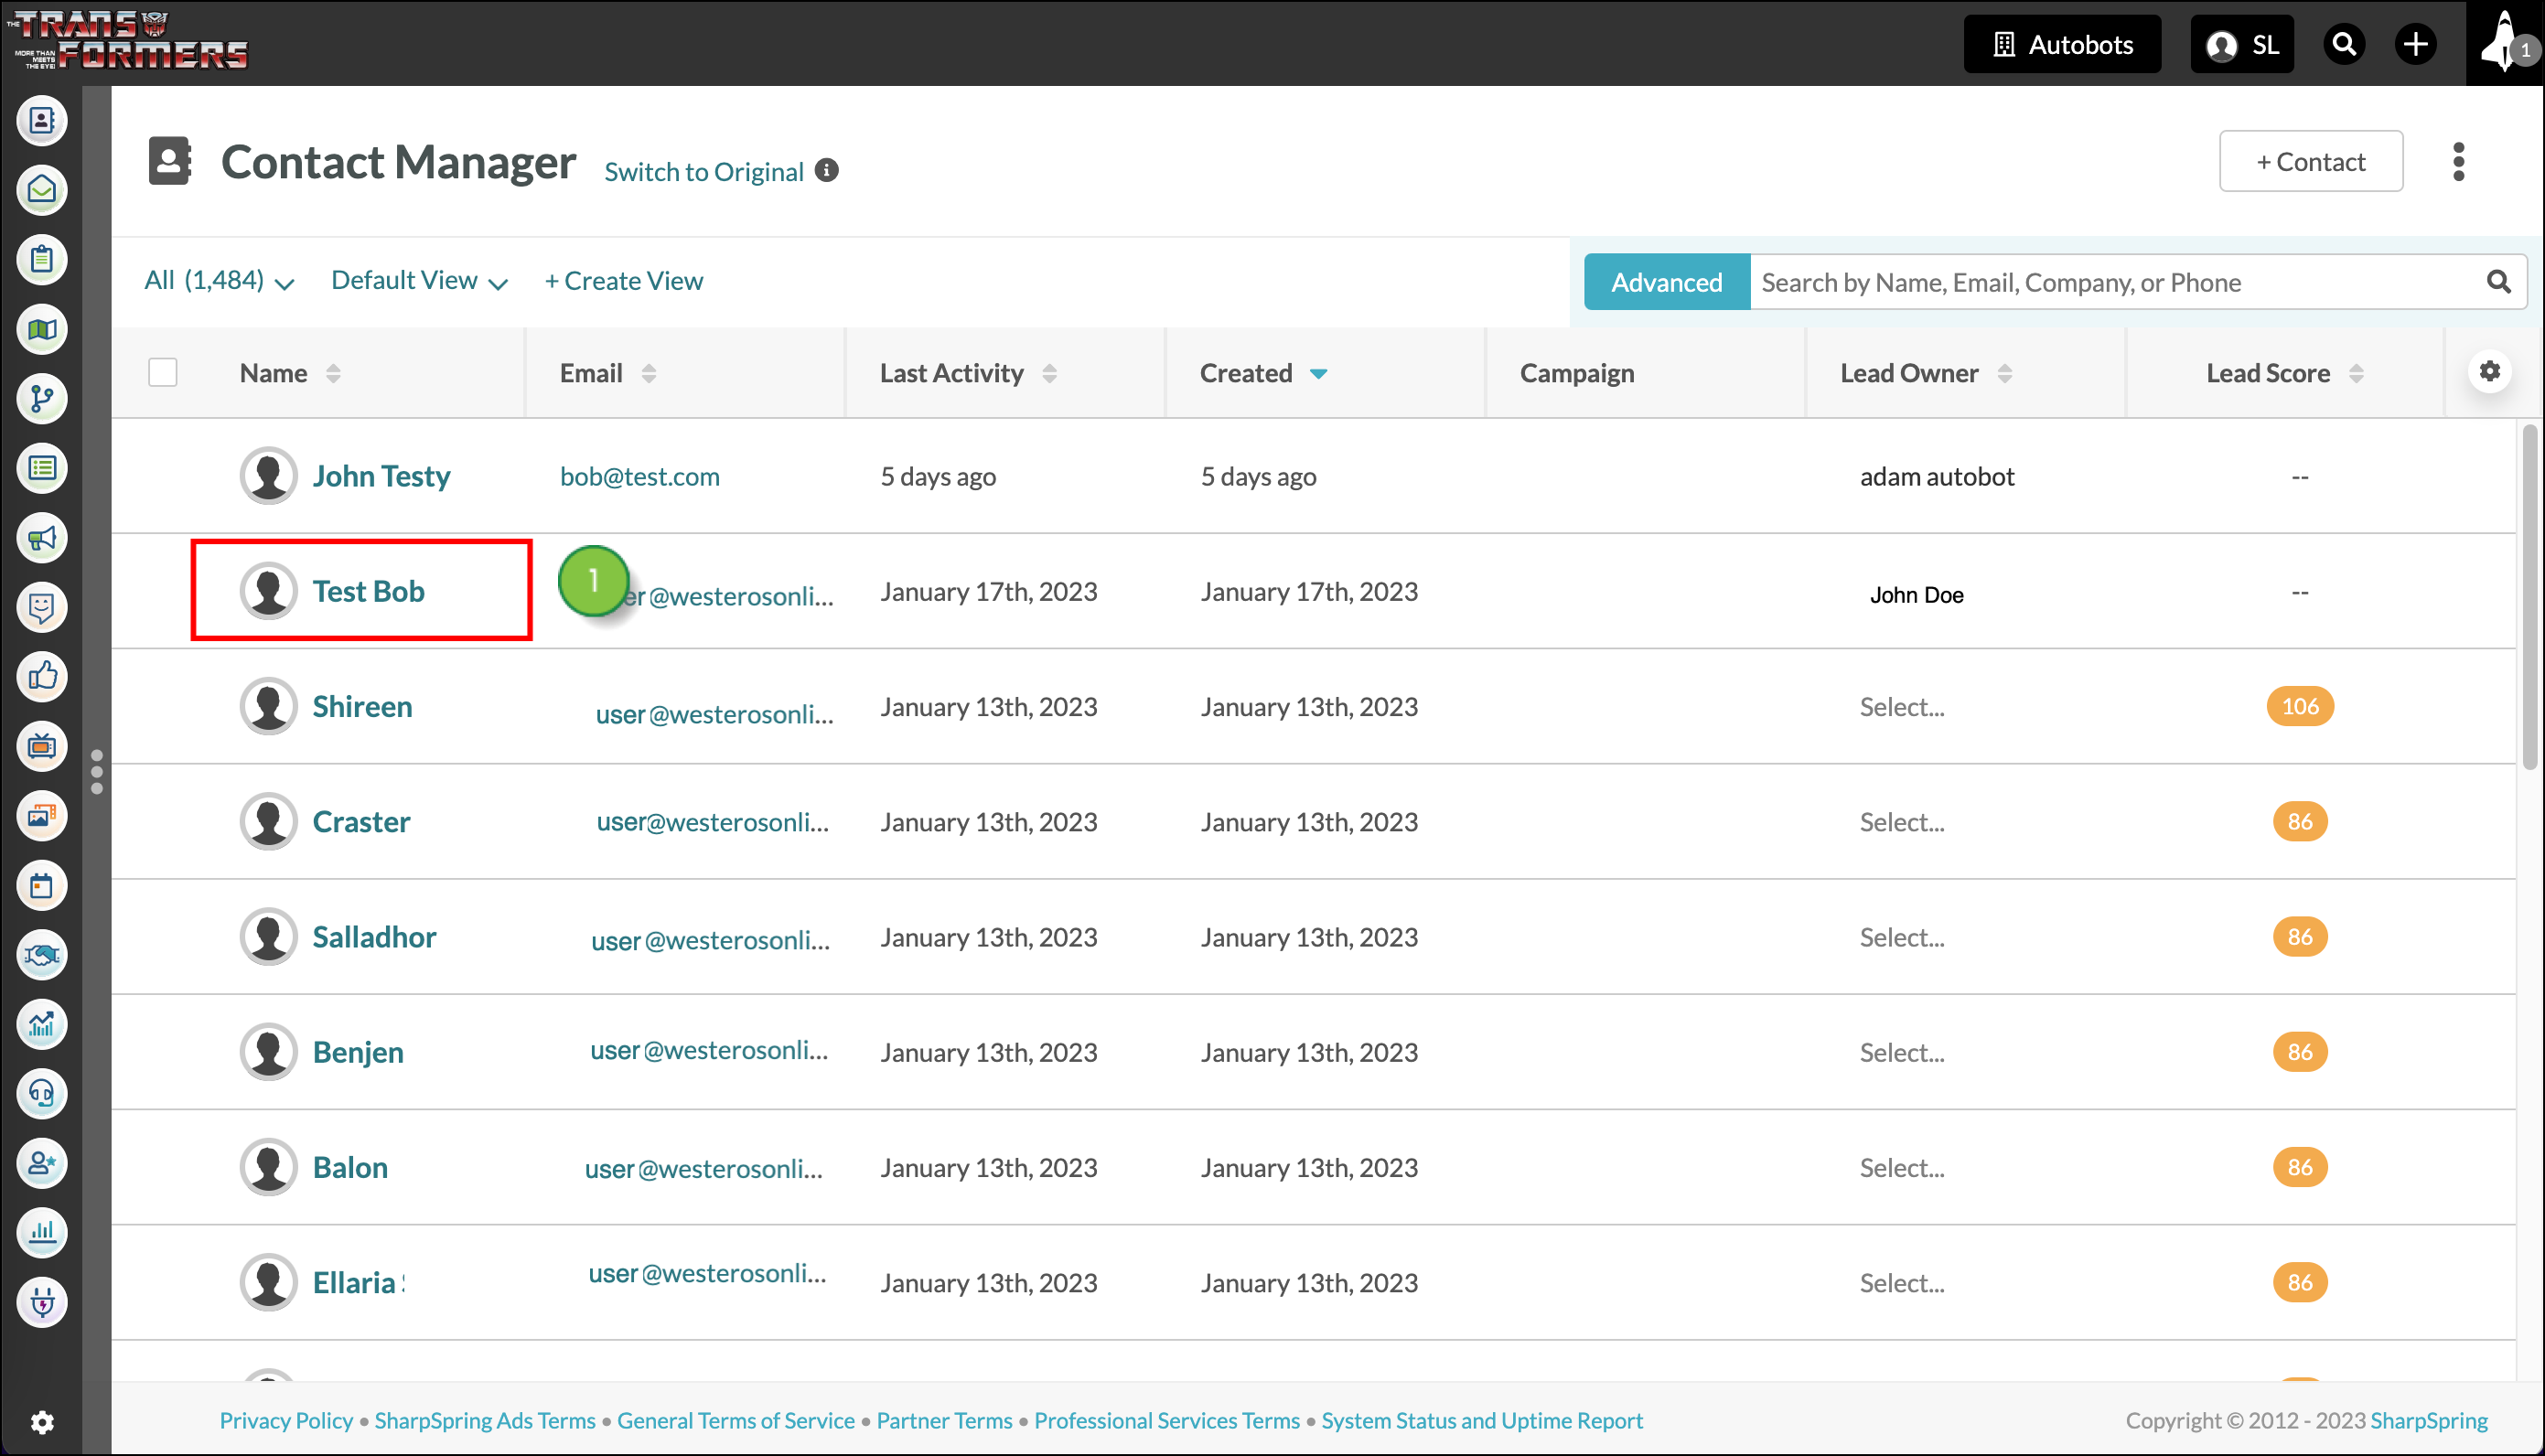
To add a signature to your Smart Mail, start from Contacts in the left toolbar.

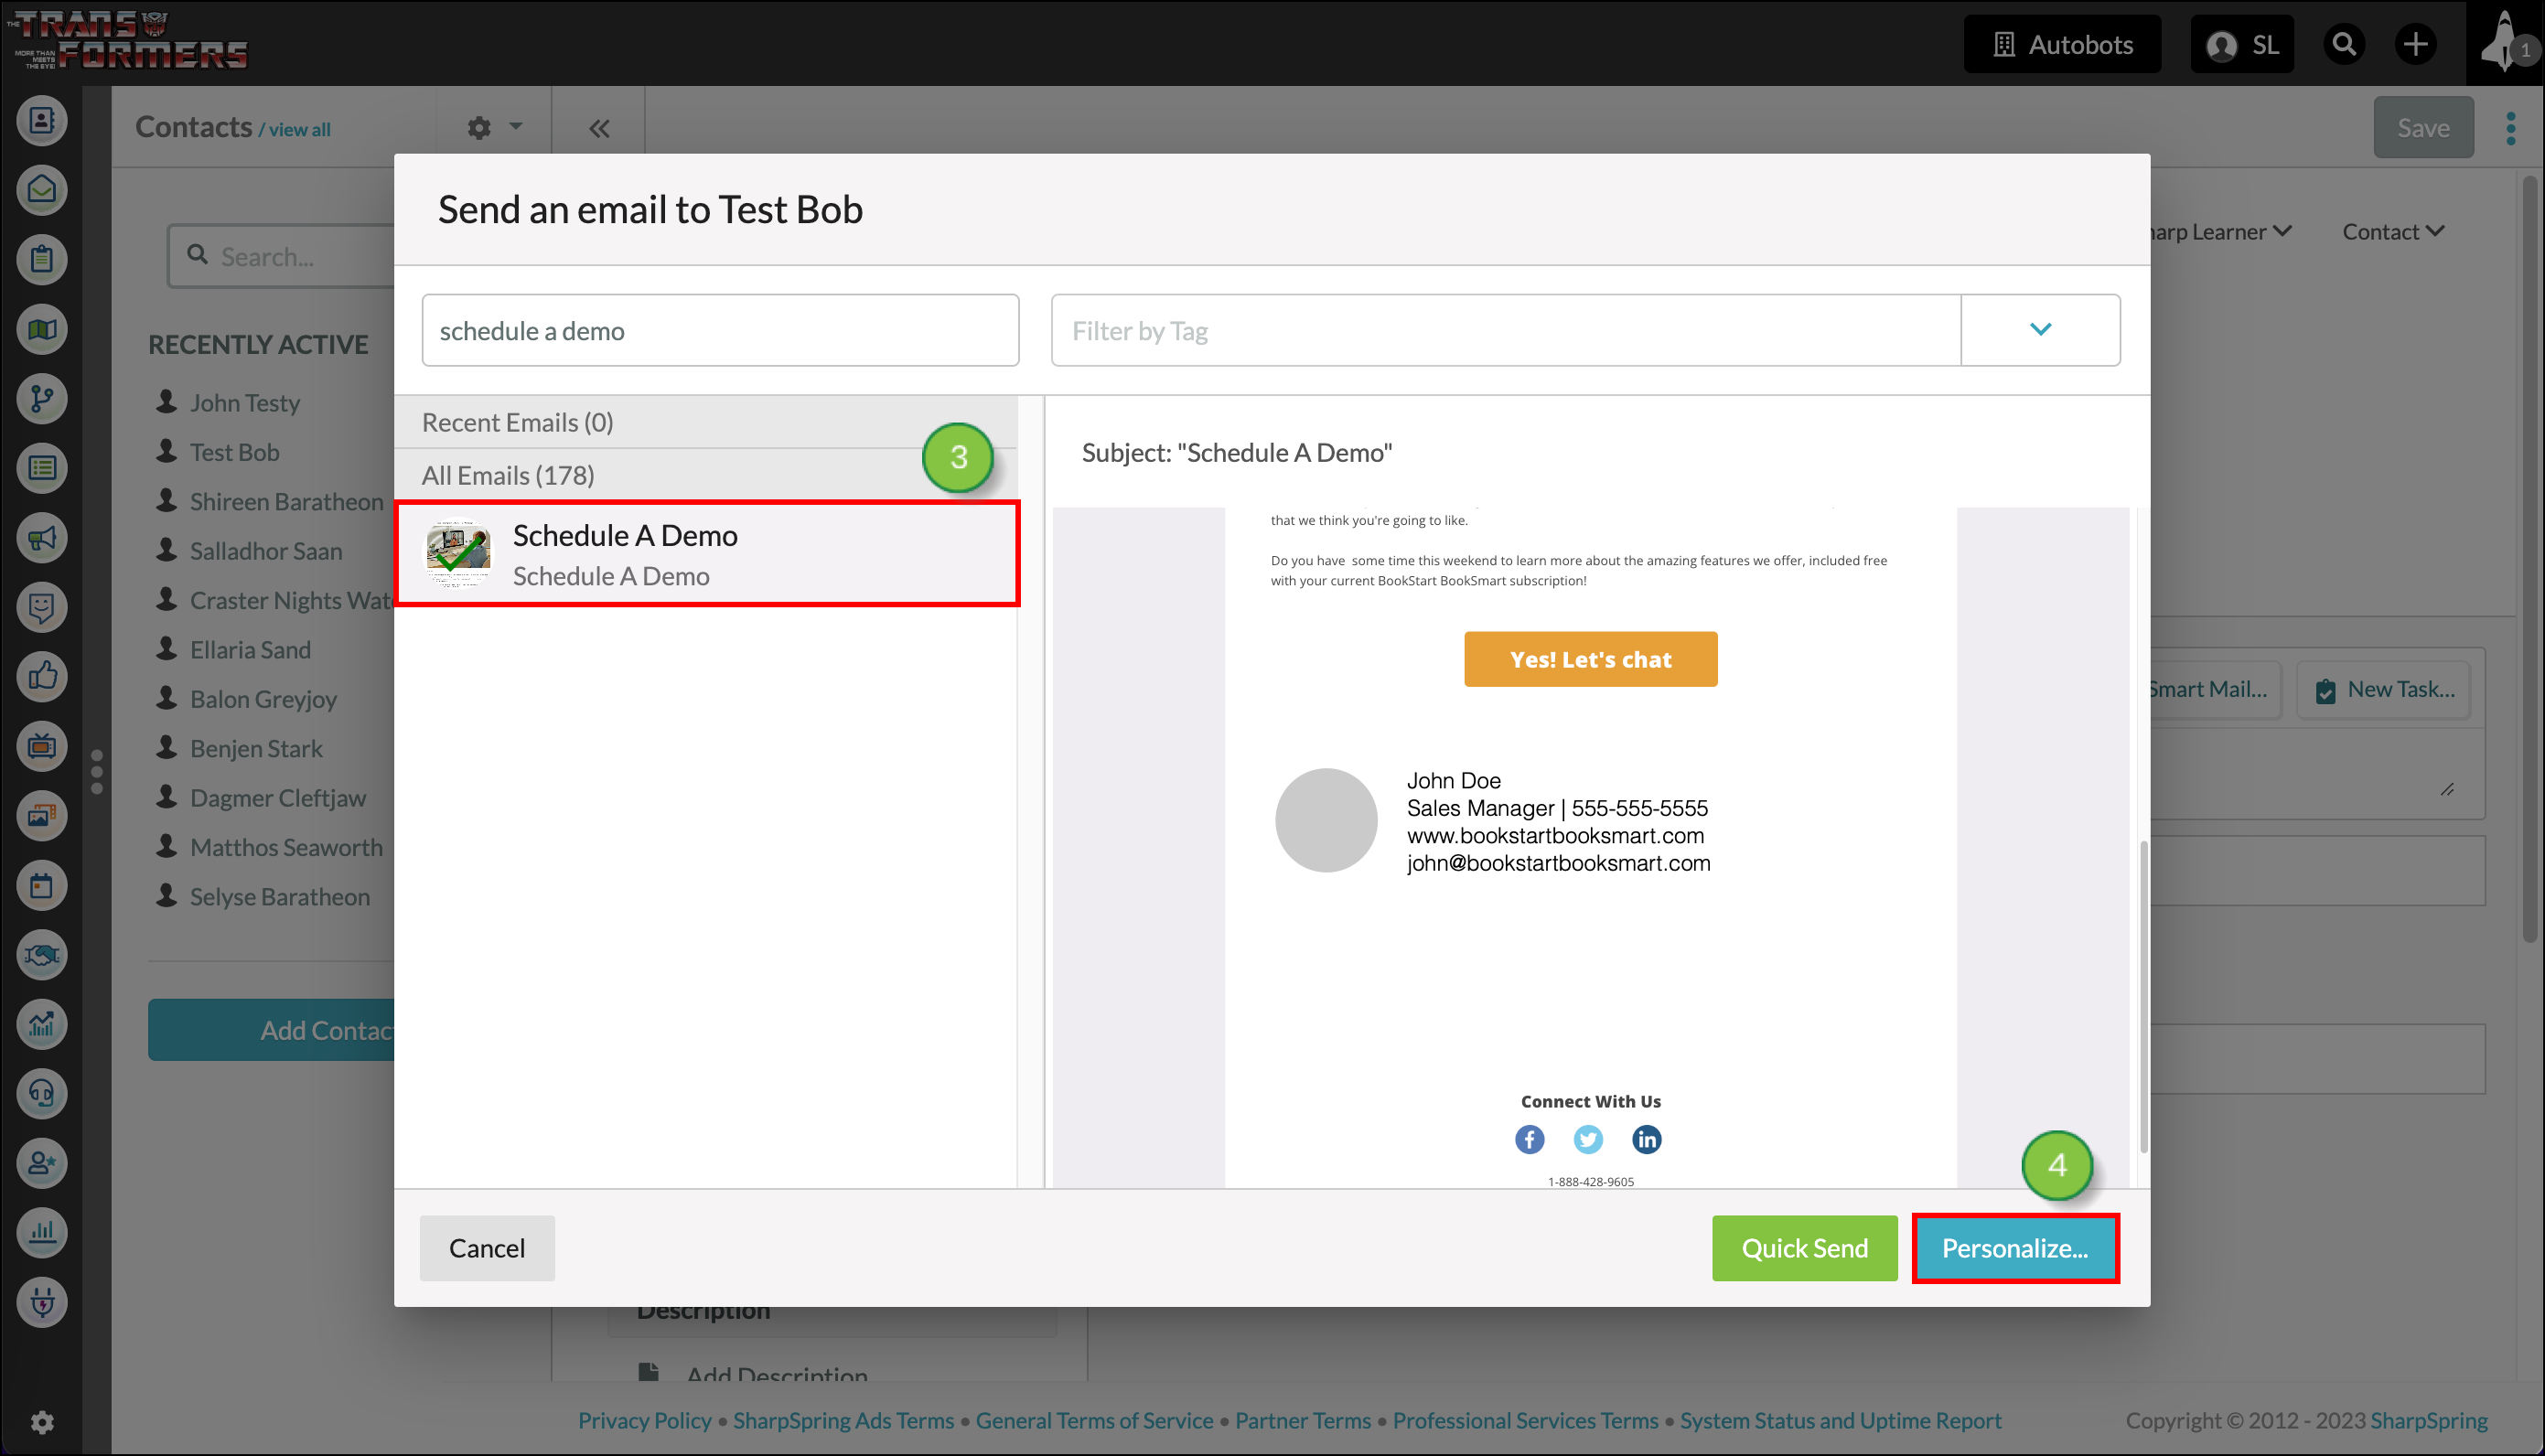
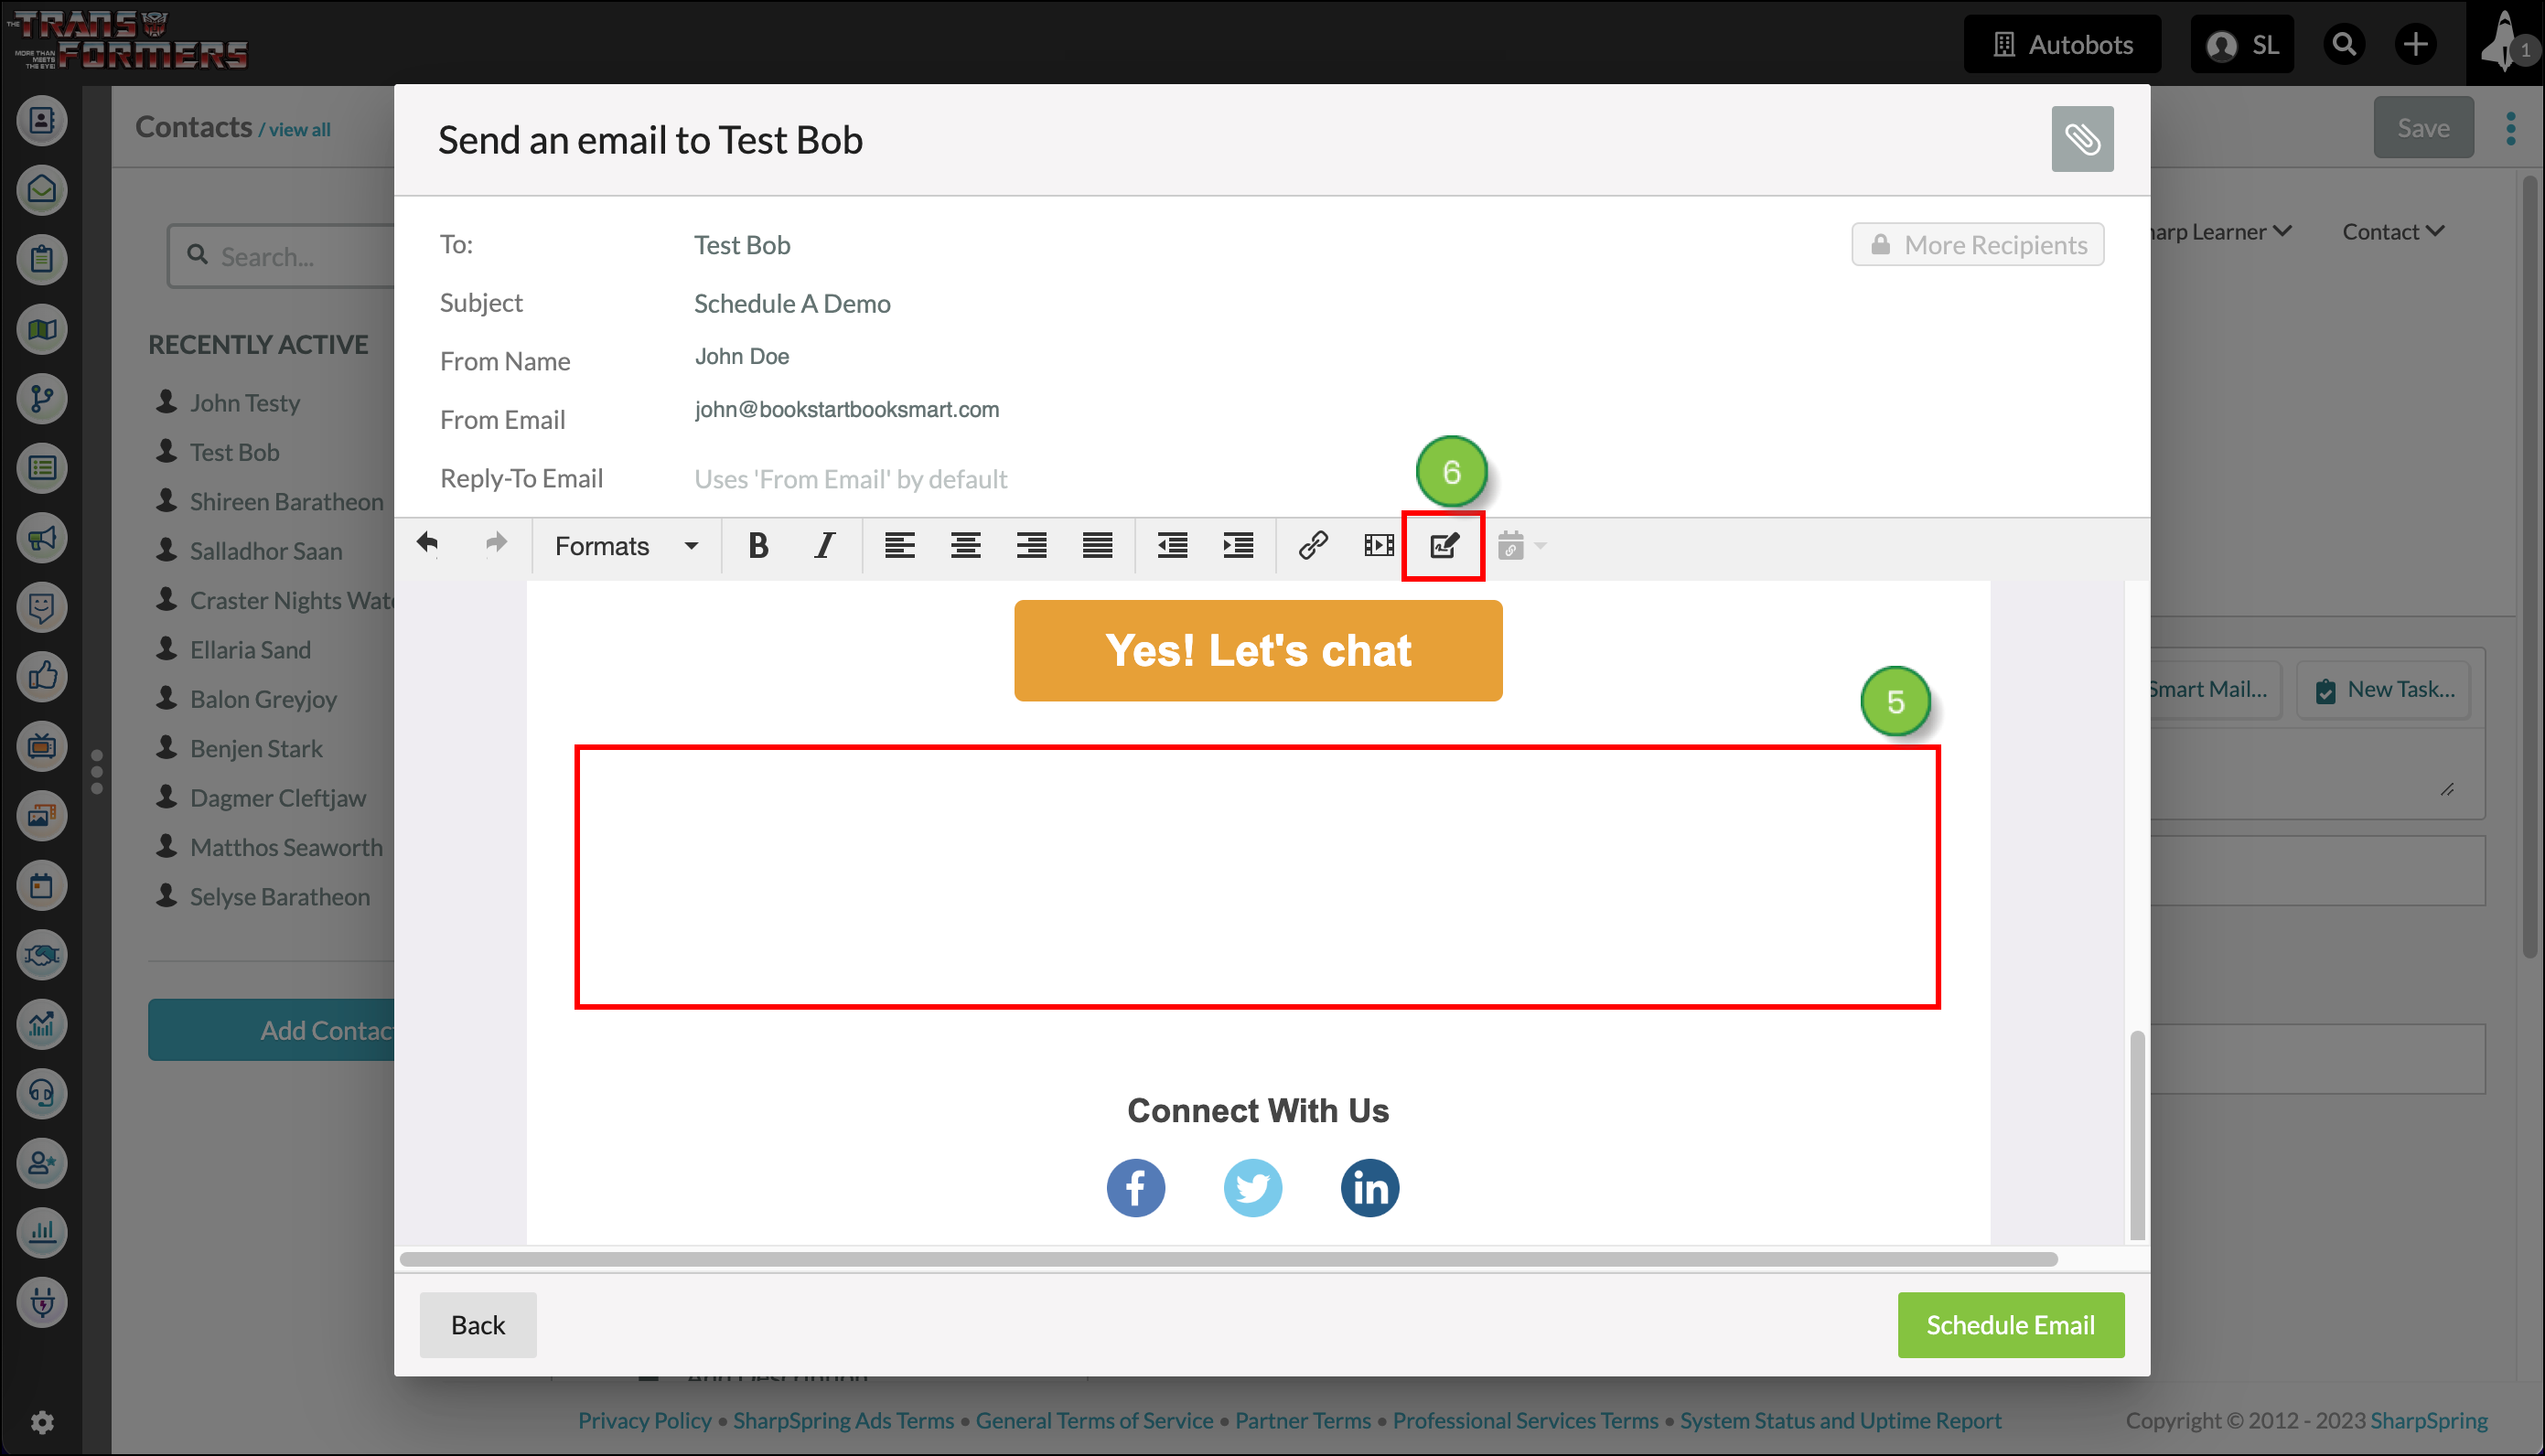
Once a custom signature has been added to an email, you can preview it in a Smart Mail.
To preview custom signatures in an email, start from Contacts in the left toolbar.
The custom email signature will show the signature of the lead owner associated with the recipient. If you are not the lead owner for that lead, then your signature will not display in the email.
Copyright © 2026 · All Rights Reserved · Constant Contact · Privacy Center